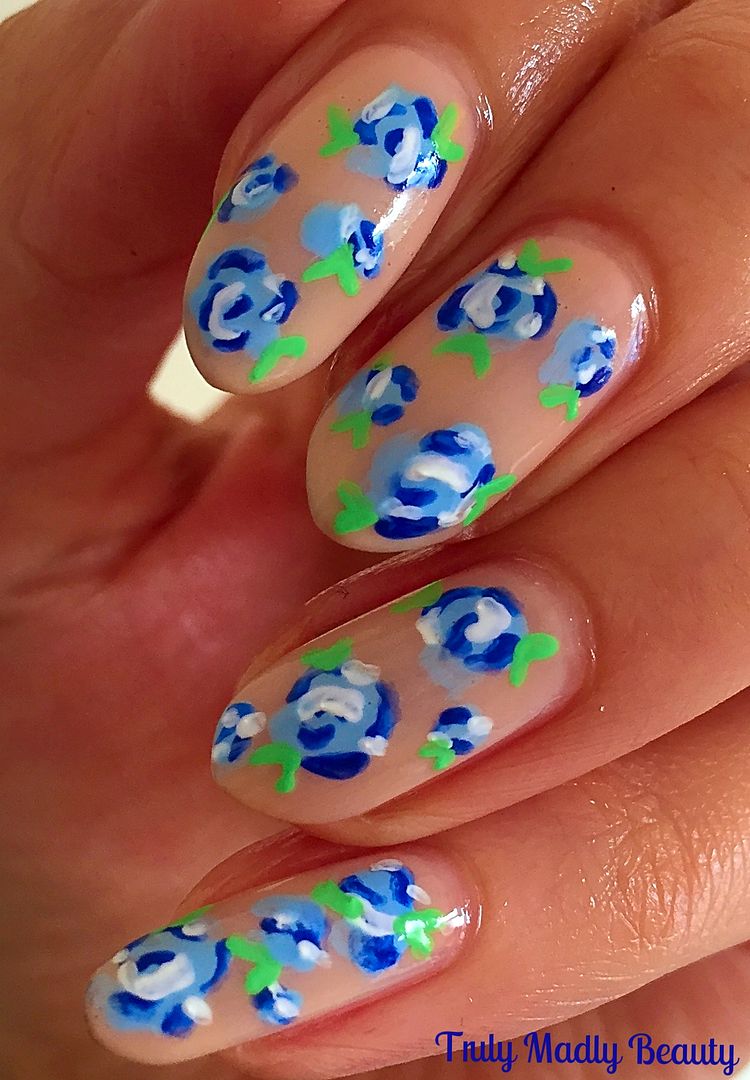
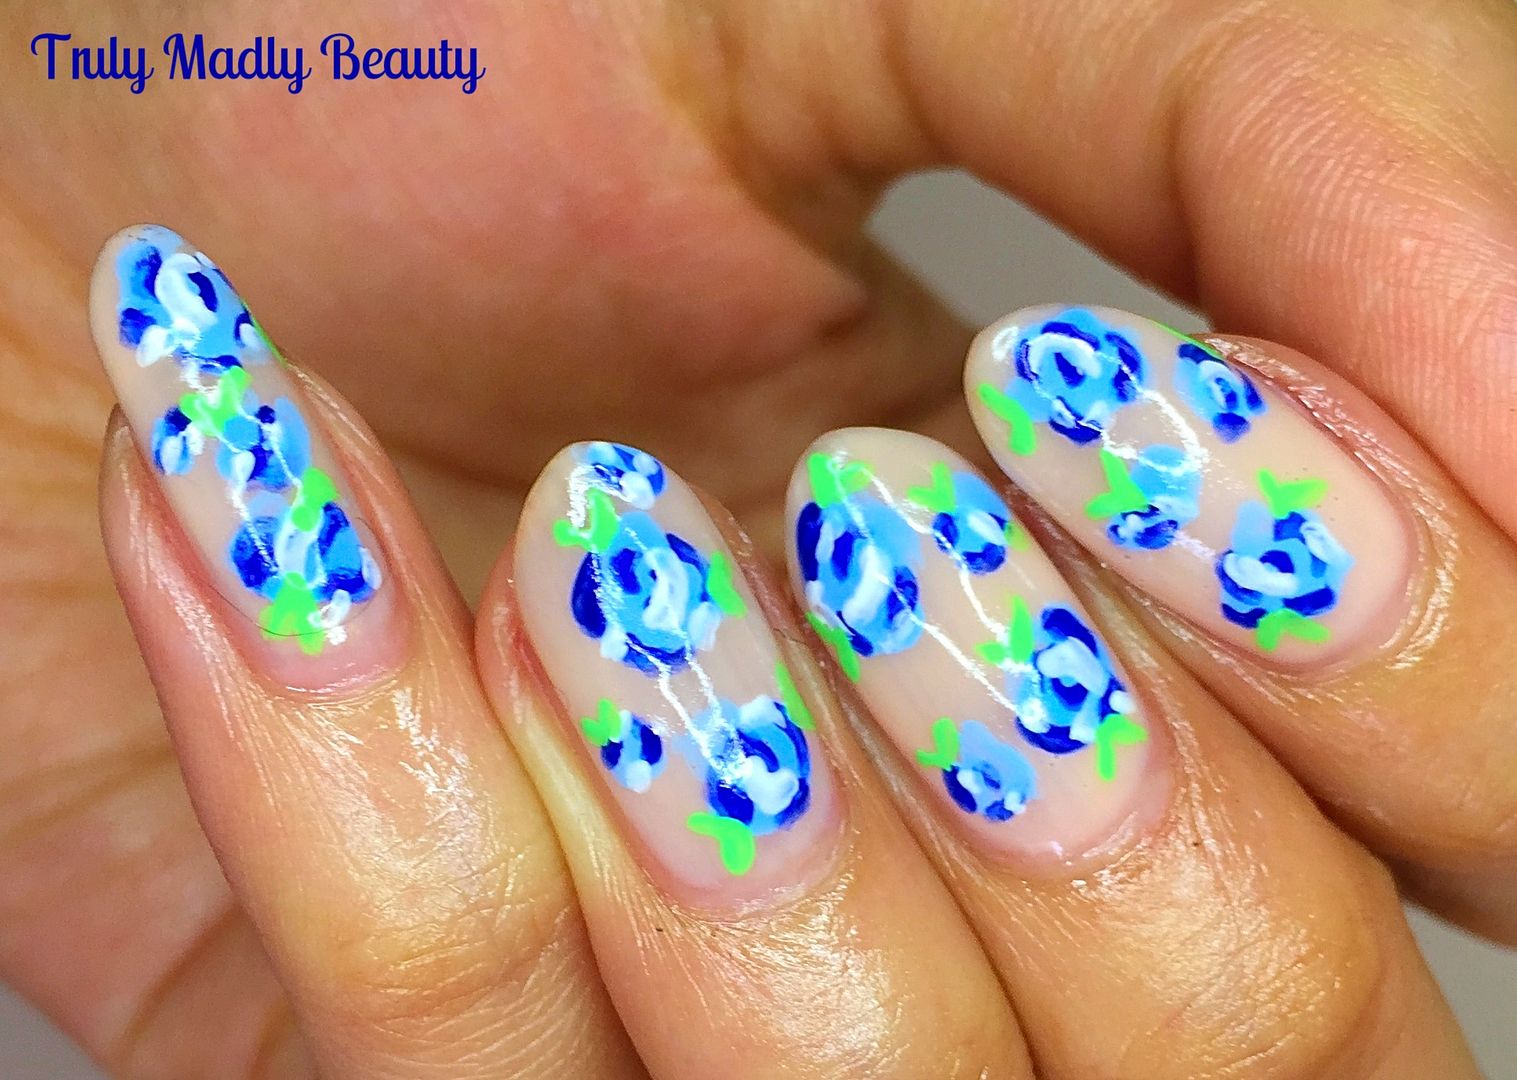
Another day another floral look! I think its obvious florals are LIFE for me when it comes to nail art, ooooh they just make me swoon with happiness & this particular nail art design is no exception, I think this may be my most favorite floral look for a while!
Showing posts with label Loreal. Show all posts
7.24.2018
NOTD - Anna Sui Inspired Florals!
Hello there lovely readers!
Another day another floral look! I think its obvious florals are LIFE for me when it comes to nail art, ooooh they just make me swoon with happiness & this particular nail art design is no exception, I think this may be my most favorite floral look for a while!
Labels:
Anna Sui,
Fashion,
Floral,
Loreal,
Model's Own,
nail art,
Negative Space,
NOTD,
SoNailicious,
Spring,
Summer
4.30.2018
NOTD - Floral Bouquets
Hey there lovely readers!
I'm sure you know by now my absolute LOVE for all things floral, especially on my nails of course! Florals for Spring are a necessity however I'm happy to rock blooms all year round. This is probably the most detailed design I have ever done, yet I do love a challenge & I am so so happy with how it came out!
5.31.2017
NOTD - Blue Spring Blooms
Hi
there lovely readers!
Yes
I know...Florals for Spring...groundbreaking ;) But nope not just
Spring in my world, why I'm more than happy to rock florals all year
round as I just adore them. I have a serious obsession for floral
embroidered EVERYTHING at the moment, recently succumbing to the
current blogger favourite EGO & picking me up a pair of the super
pretty Cheska Floral Nude Mules. I never thought I would fall for this trend but
the moment I saw them...I knew I needed such floral goodness in
my life. And FYI they not only look fab, but are super comfy
too...WIN.
Anyway
I digress, but basically yes, florals make me sigh in
contentment...especially when they are on my nails. I do dig me a
good floral design...err did I mention that? Wanting to venture down
a slightly different path of my usual dotticure and dry marbling
style that I love because heck its just so darn easy to do yet looks
awesome, I wanted to play around with some of my acrylic paints.
4.04.2016
Loreal Color Riche Nail Wraps Review
Hey there lovely readers!
In
this day & age we all love to find quick solutions to certain
beautifying steps, nails included! Nail wraps are the perfect answer
to this, straightforward & no fuss waiting for polish to dry. I
found myself drifting away from the nail wrap world of late, I'll put
it down to experiences with a few dud ones that I didn't get on with
& were just too fiddly when it came to application! However I
have rediscovered my love for nail wraps thanks to these lovely
offerings from Loreal!
I
wasn't actually planning on blogging about these, but they are so
good I had to share with you my lovelies. I literally picked these up
in a rush when I saw them in the Poundshop across the street from
where I work as I had a serious chip situation going on with plans in
the evening which left me little time for refreshing the mani!
However
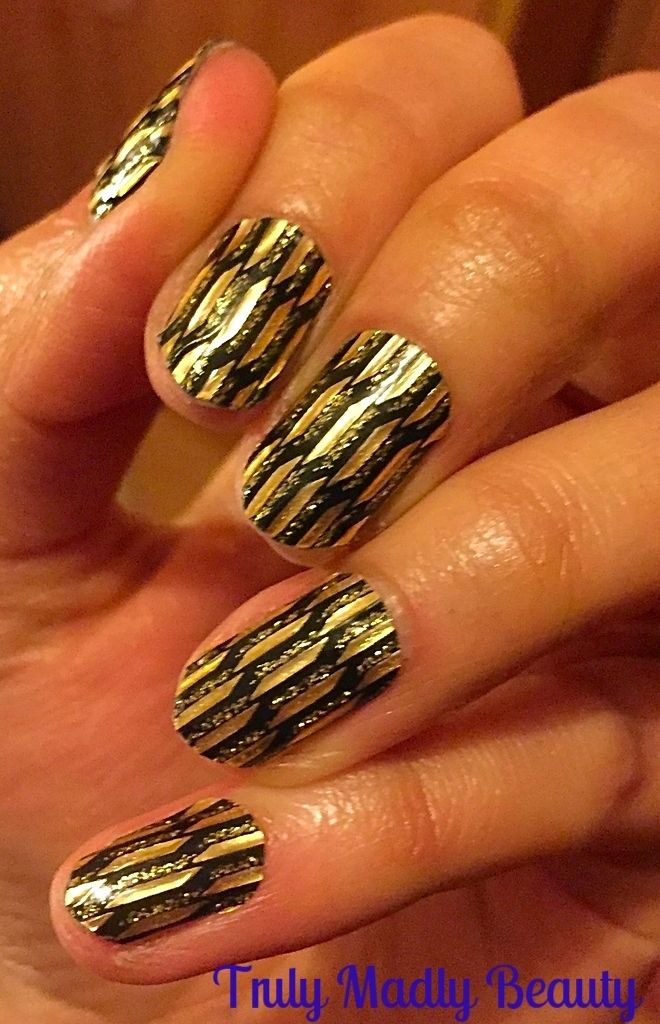
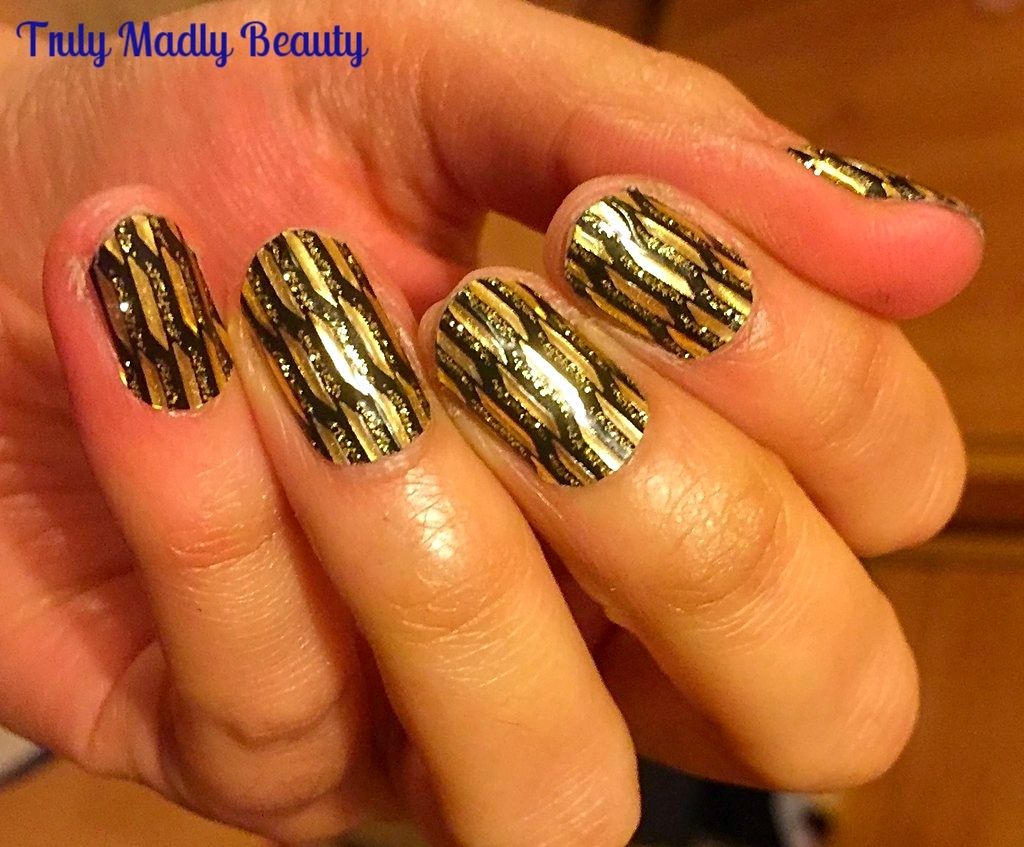
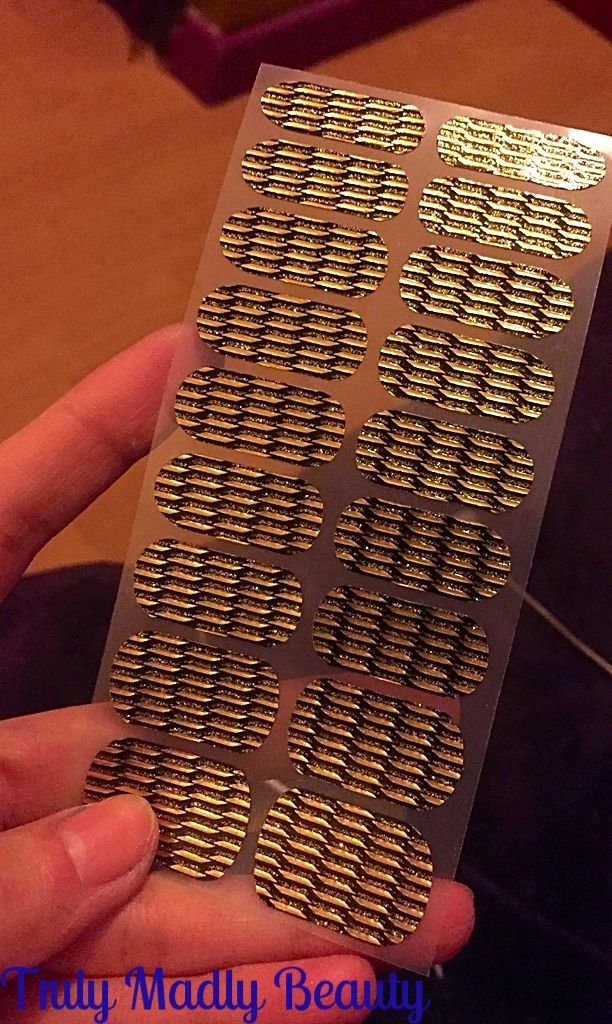
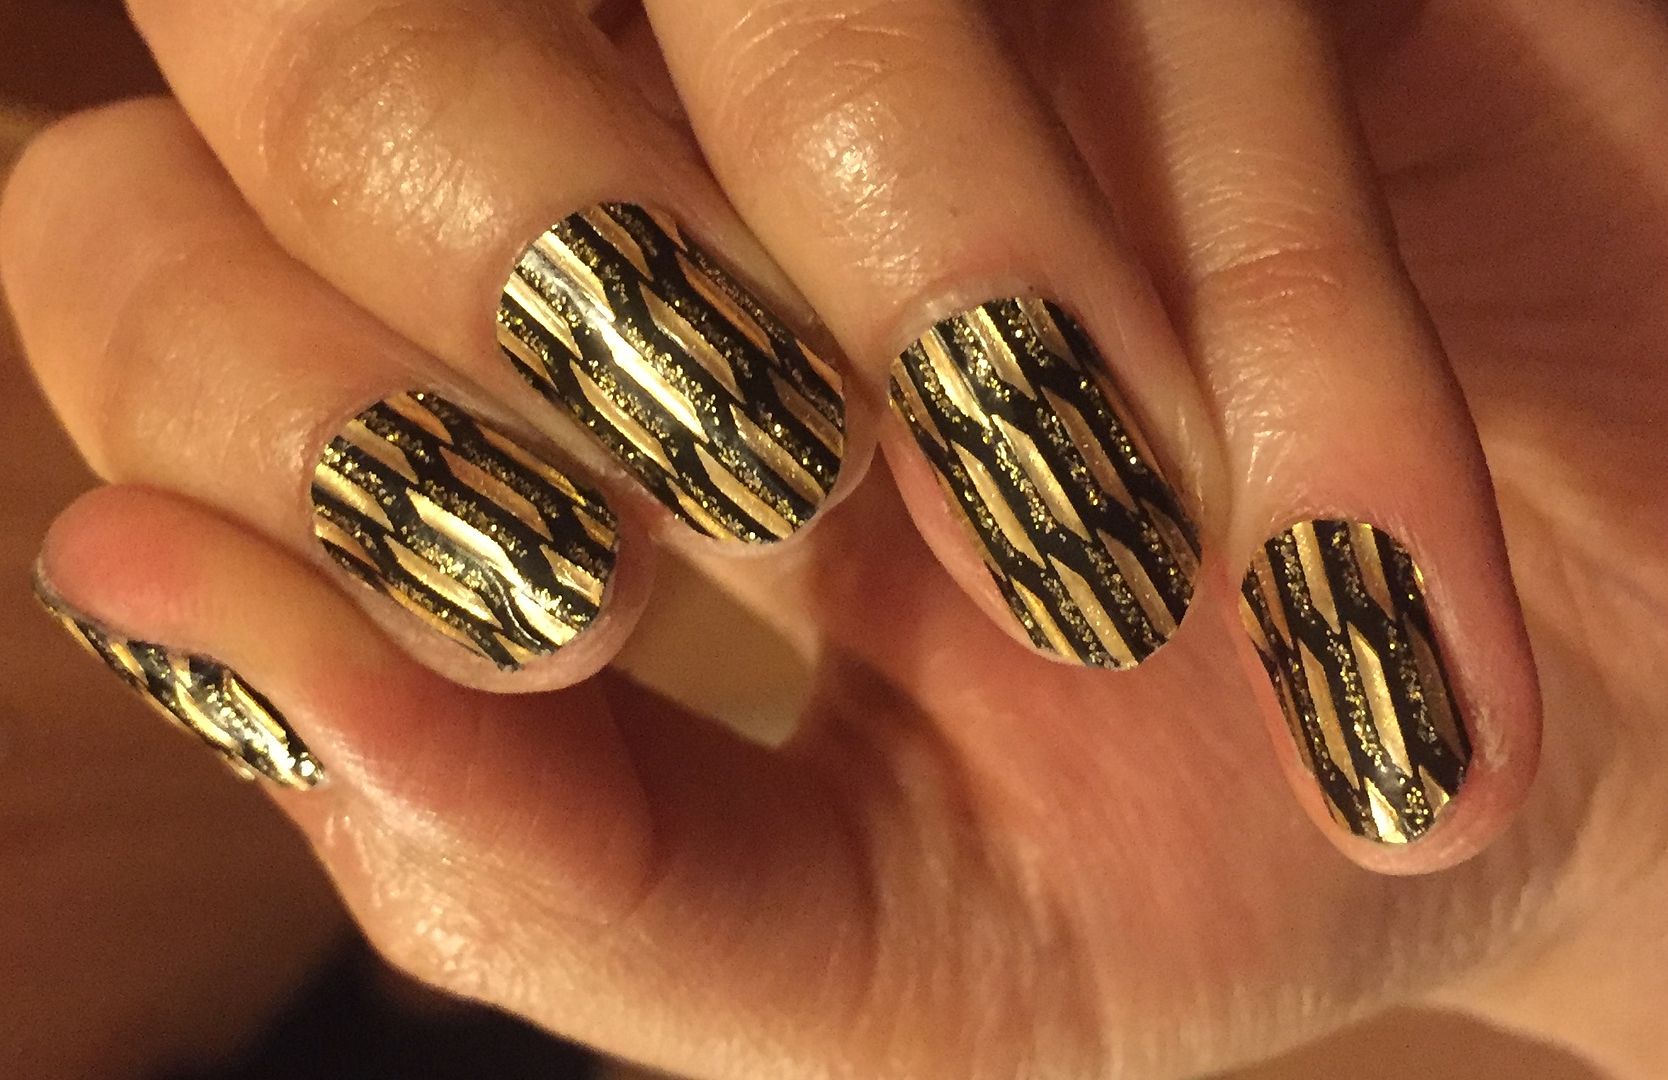
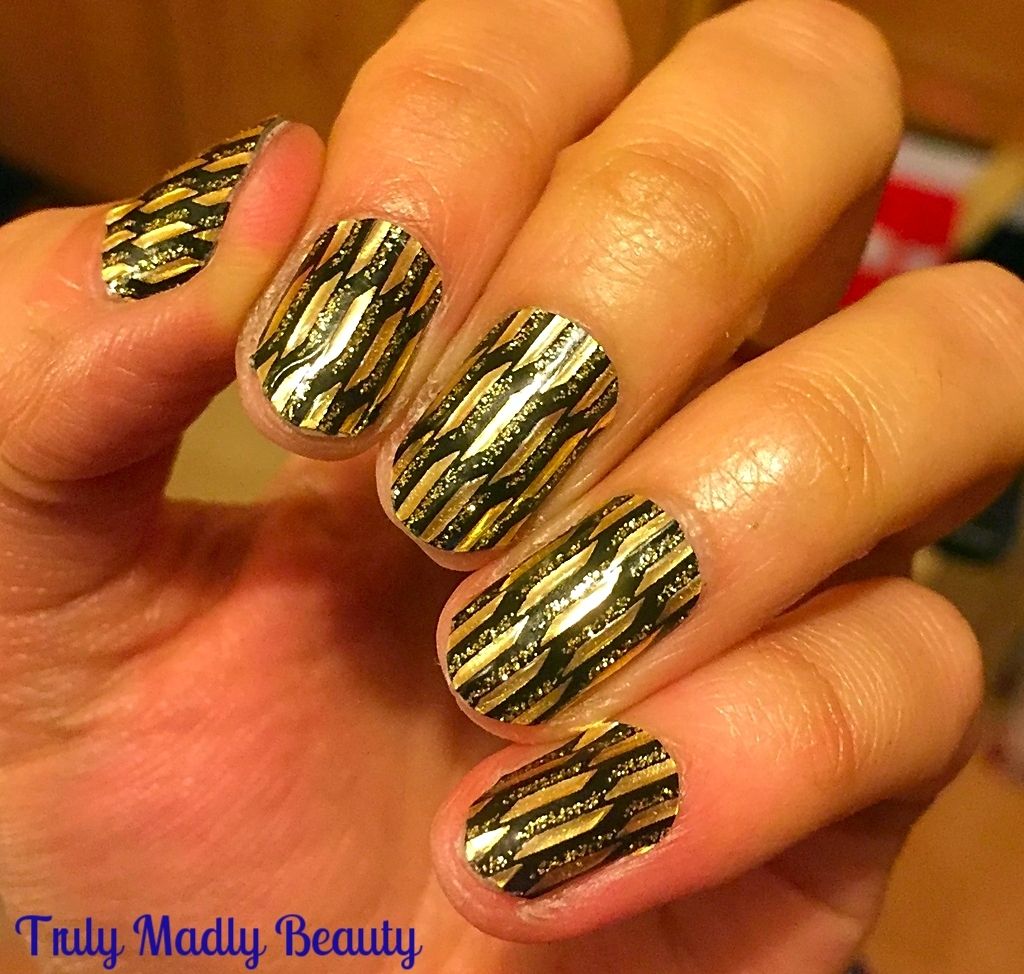
these blingy Loreal Color Riche nail wraps in design “Or Lame”
caught my eye so I decided to pick them up on a whim & boy did
they succeed in saving the day!
Once
home I quickly removed the traitorous chipped polish with my new
favourite, the delicious scented nail polish removers from True Brit
London which I've blogged about in detail HERE & then got to work
with applying the wraps, a task which was completely literally within
minutes.
Applying
the wraps could not be easier, starting with a clean bare nail. Nail
wraps adhere better to a dry surface so its important to ensure that
the nail doesn't have any oils or moisture, of course the polish
remover helps remove any excess moisture as well.
Select
the nail wrap which fits the size of your nail best, the Loreal ones
have a nice selection of various sizes so finding a match shouldn't
be problematic.
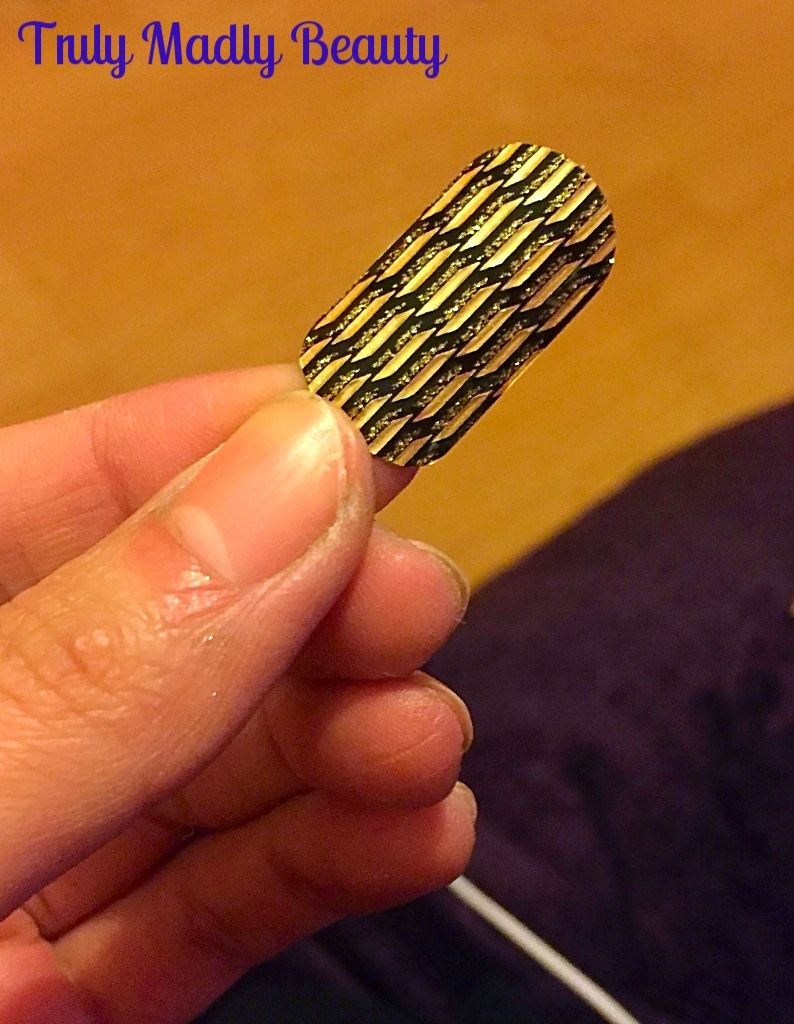
Peel
off the nail wrap, which comes away very easily like a sticker, then
place on to the nail starting at the cuticle first, then slowly
pressing down the length of the nail to the tips. Despite being thin,
the Loreal wraps were very easy to place, if you are not happy with
your positioning then you can easily lift the wrap off & try
again which is great.
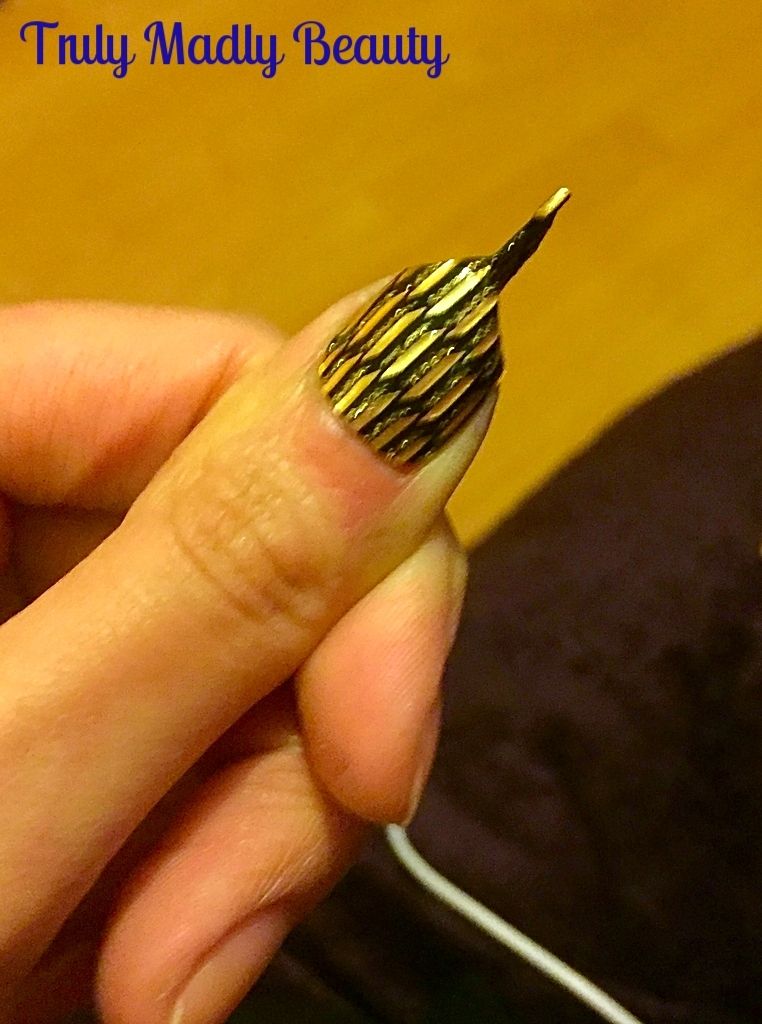
Once
happy you the need to file off the additional nail wrap that you
don't need. In the past when filing, I've often had half the wrap
come away with the file which was quite frustrating! I find the
easiest way to file off is by sticking the remaining wrap together
(as pictured above) at the edge of the nail, then filing downwards until
the excess wrap comes away completely.
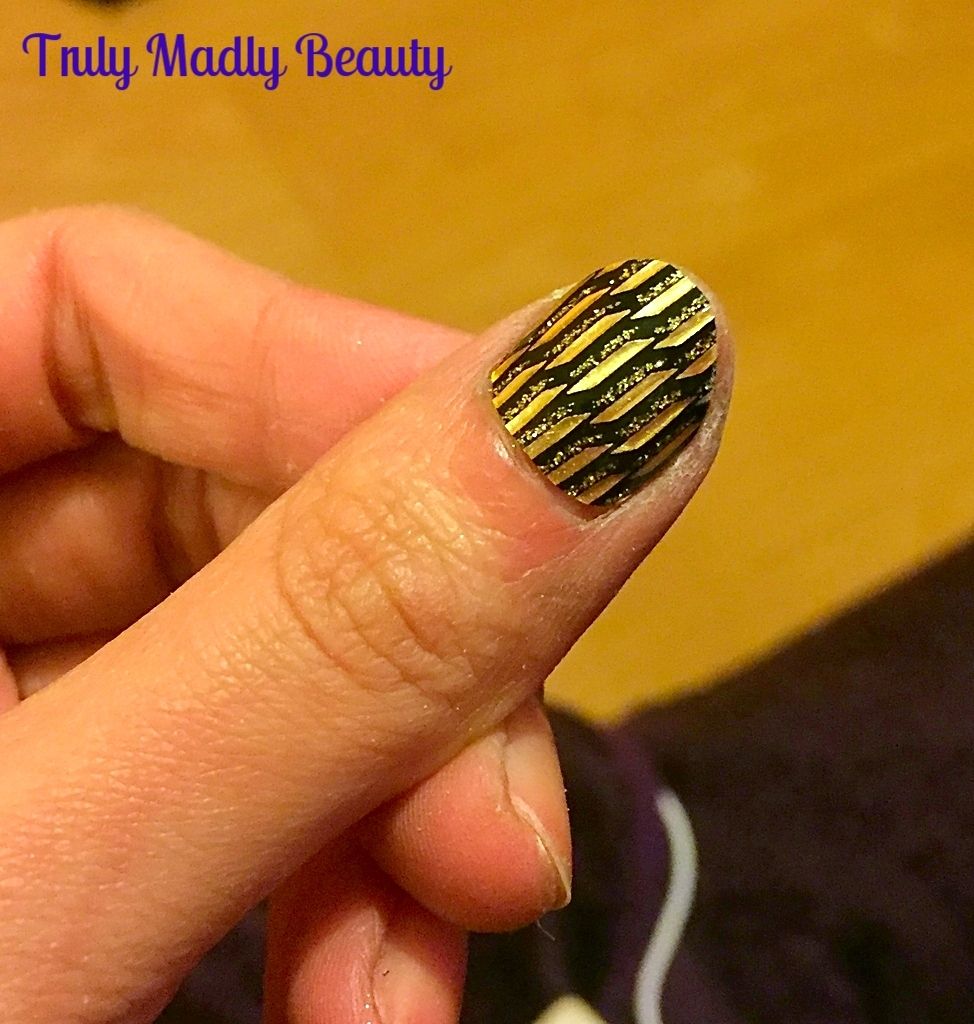
Neaten
up the edges of the nail to get rid of any little bits of wrap that
might be sticking out & voila! Beautiful blingy nails ready to
go!
I
also absolutely love the gold and black art deco style design of
these nail wraps as they will pretty much go with anything &
would be fantastic for last minute nights out when your in a rush but
don't want bare nails.
Removal
is also super quick, simply lift up the edge of the wrap using an
orange stick & then using your finger, the wrap will peel off
completely leaving no sticky residue at all, another bonus! I can't
comment on longevity as I removed these the next day, however they
were all still firmly in place!
I
will most definitely be picking up more of these to have as back ups
in case of mani emergencies! If you can't find the wraps in stores then they can also be found online on Amazon HERE.
Are you a fan of nail wraps? Thanks
for reading beauts!
Lotsa love to ya!
Labels:
gold,
Loreal,
nail art,
Nail Art Tips,
nail wraps,
NOTD,
Poundland,
Review
2.25.2016
Loreal Paris Superstar Mascara Review
Hello
there lovely readers!
Lately
I've been having a play around with the mascaras I have in my
possession & not succumbed to any of the new temptations on the
market *pats self on the back* Though I do have one little bad boy on
my wishlist & that's the Maxfactor 2000 calorie mascara which
I've heard nothing but rave reviews! So I may have to go through a
wee relapse so I can see its wonders for myself...for blogging
purposes of course.
One
mascara in particular that I've stumbled across in my stash &
have slowly fallen for big time is this offering from Loreal Paris,
the Superstar Mascara. With a name like that I was certainly hoping
for super results & I was not disappointed!
The
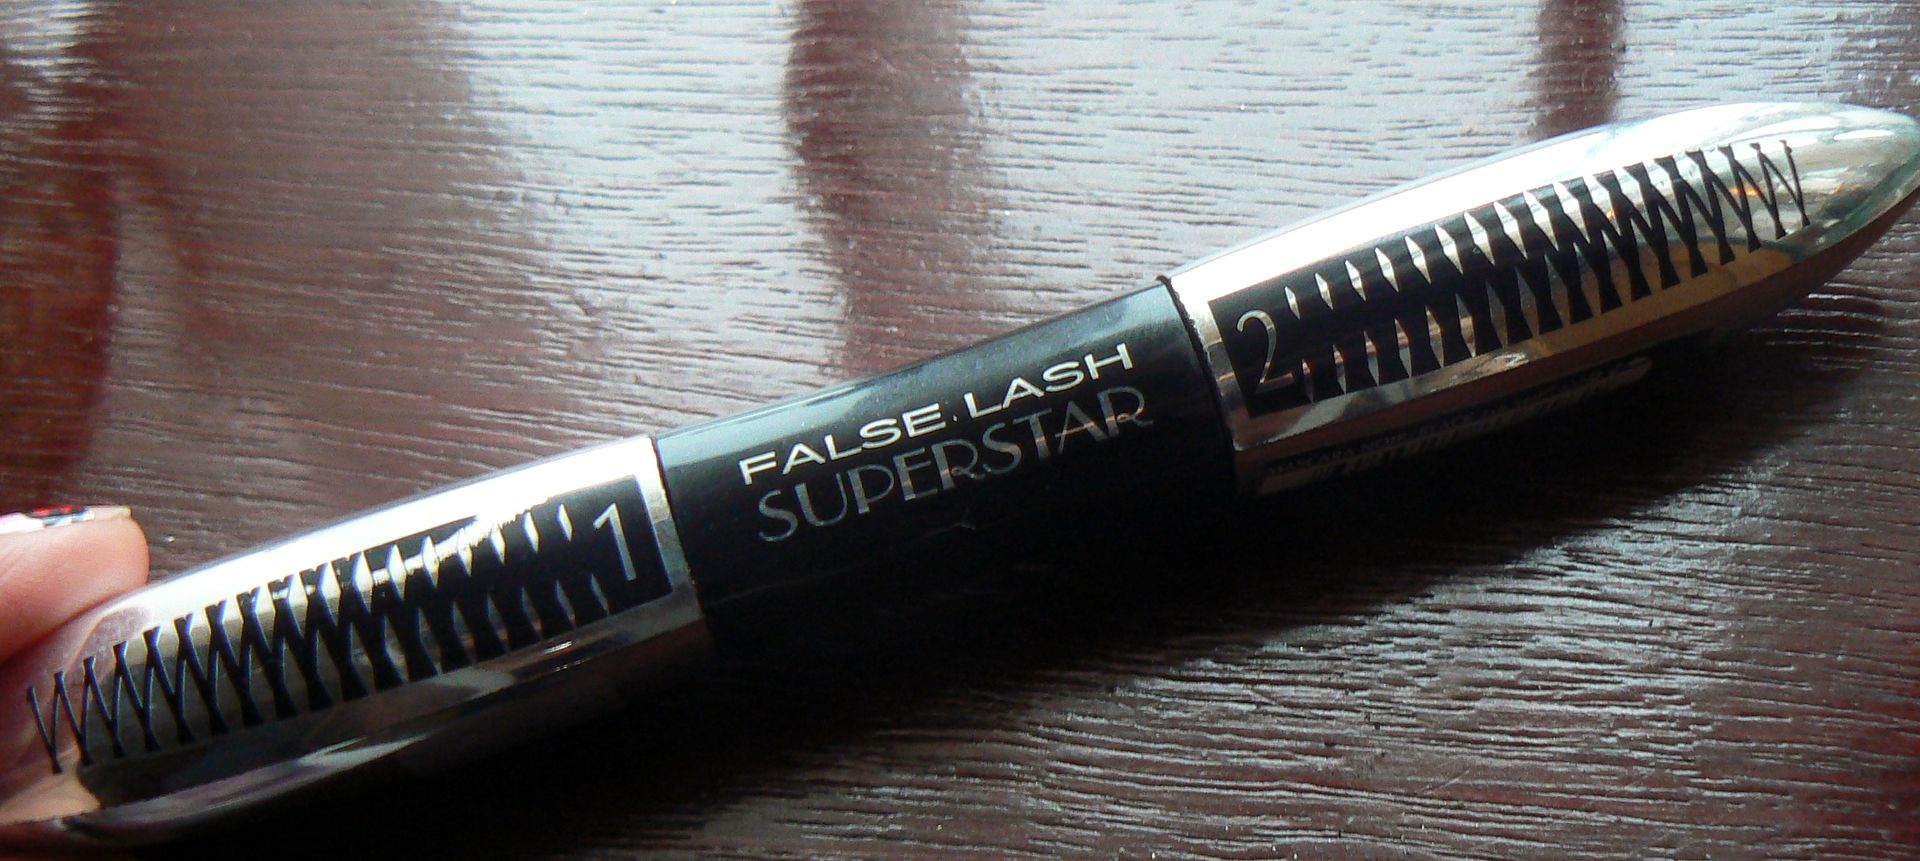
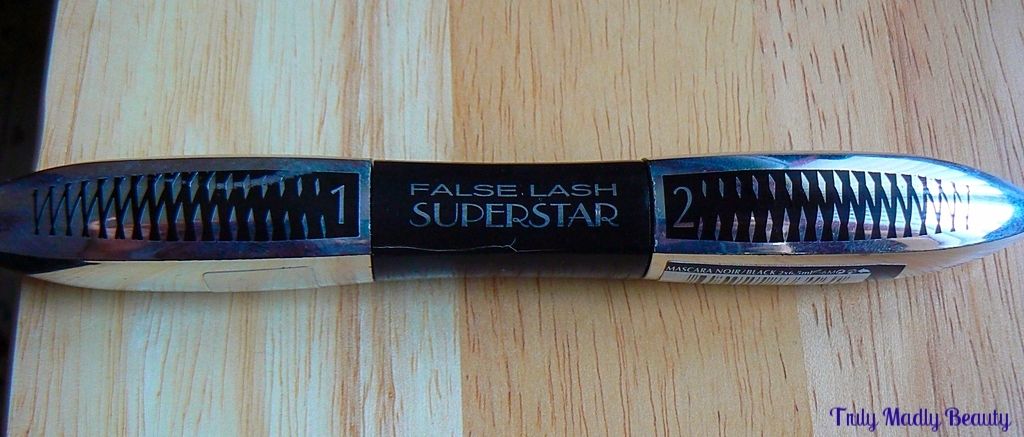
Superstar Mascara is a double ended, 2 step type job here. Normally
something like this would put me off as I would presume that it would
just lengthen the whole process but this wasn't the case at all.
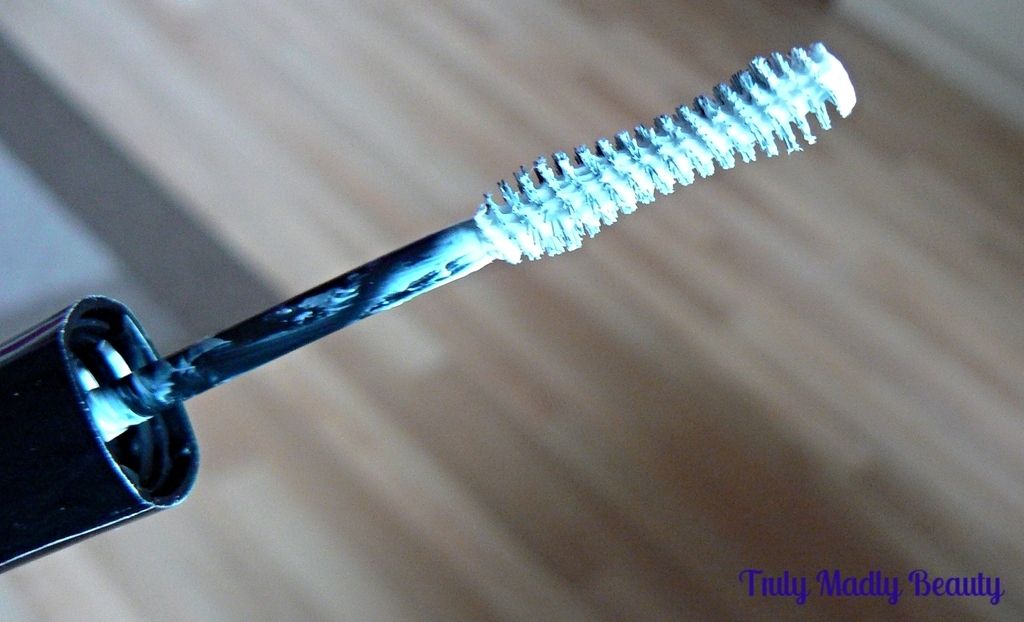
On
one end you have what is described as a super sizing white primer
which you apply first as your step 1 to promised super size lashes.
The wand for the primer is a corset shaped brush which I love as it
really captures & coats each lash very well.
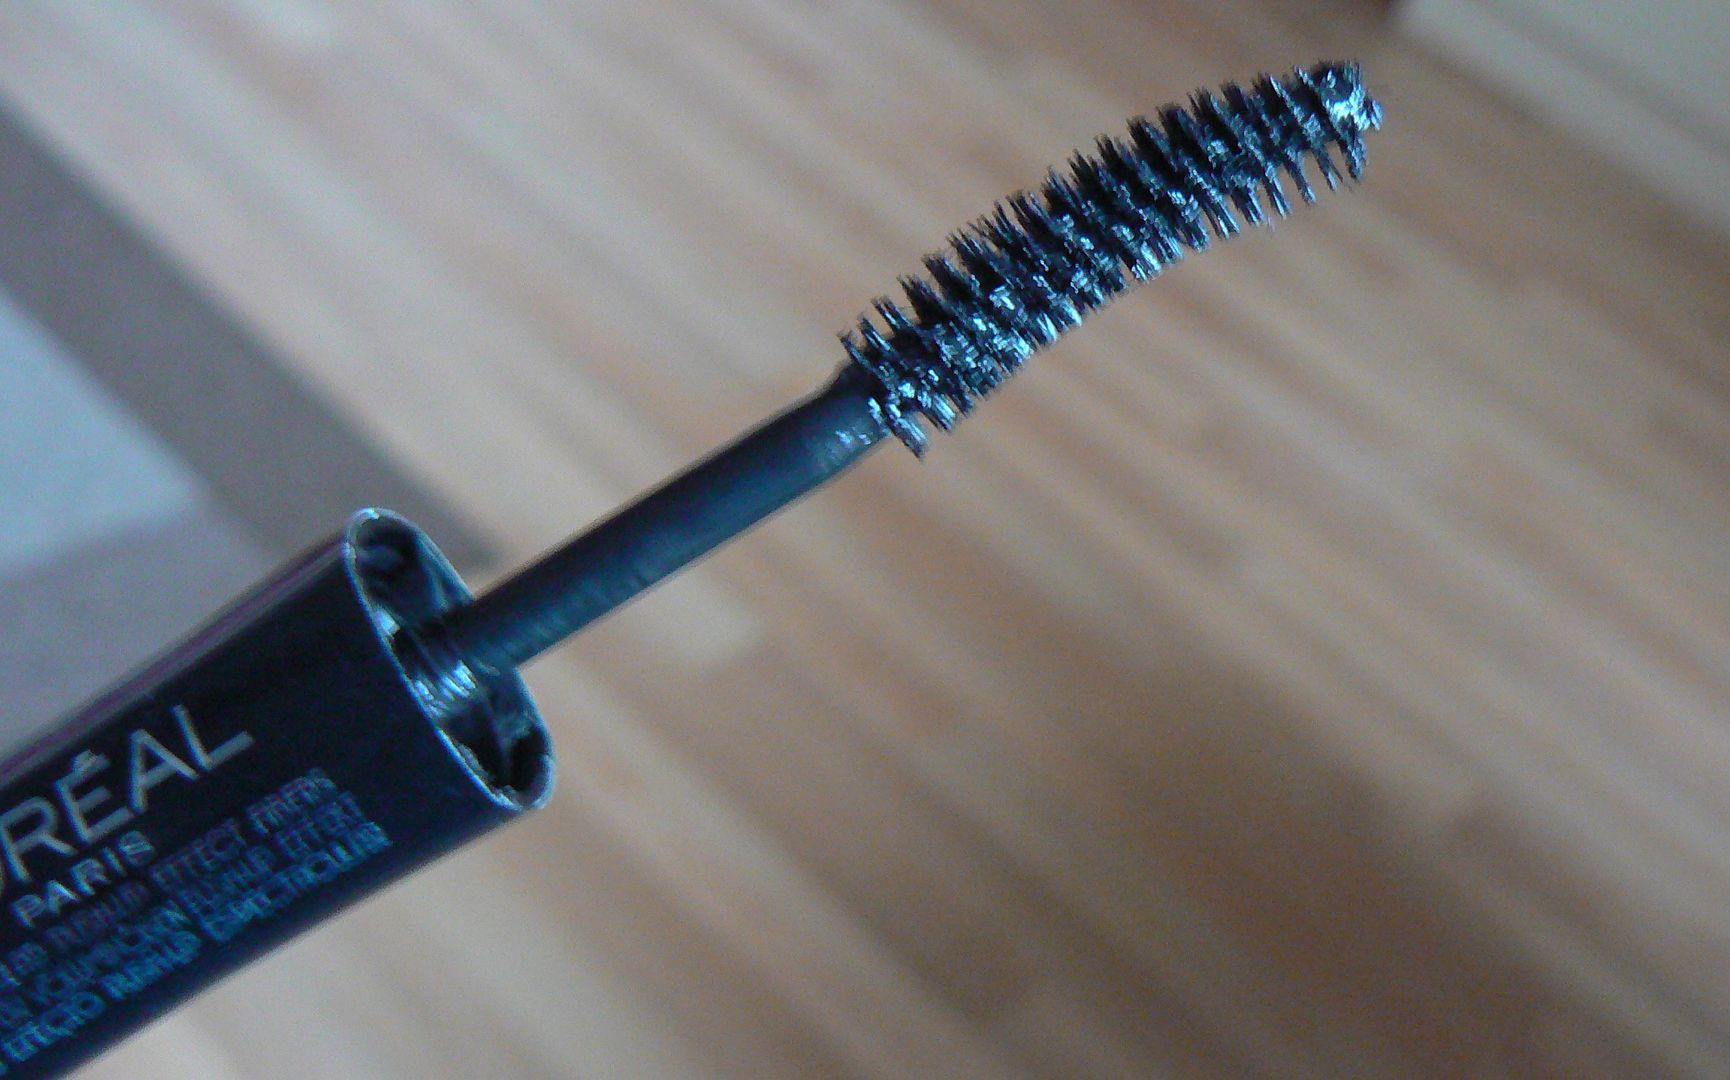
The
other end of the mascara contains of course the black shade as no one
wants to be rocking white eyelashes! Well I don't know...maybe some
would, but not on this occasion. The top coat is a black fibre
enriched formula that coats the lashes, adding volume, length &
an intense black finish. The wand for this end is a curved shape
which is perfect for scooping up under the lashes & really
lifting them up.
So
of course the truth is in the testing eh? Here is a before shot of my
bare nekkid lashes which I always curl a wee bit before mascara
application...
I
then applied one coat of the primer. As mentioned the wand works well
in capturing each lash & I really noticed a visible lengthening
after applying the primer.
Next
for step 2, the topcoat. I start with applying the mascara on the top
of the lashes combing downwards, before going underneath &
lifting up to really get the full benefit of the mascara. The topcoat
applied really well, going over all of the now white lashes until
each lash was coated evenly. Not forgetting those bottom lashes too!
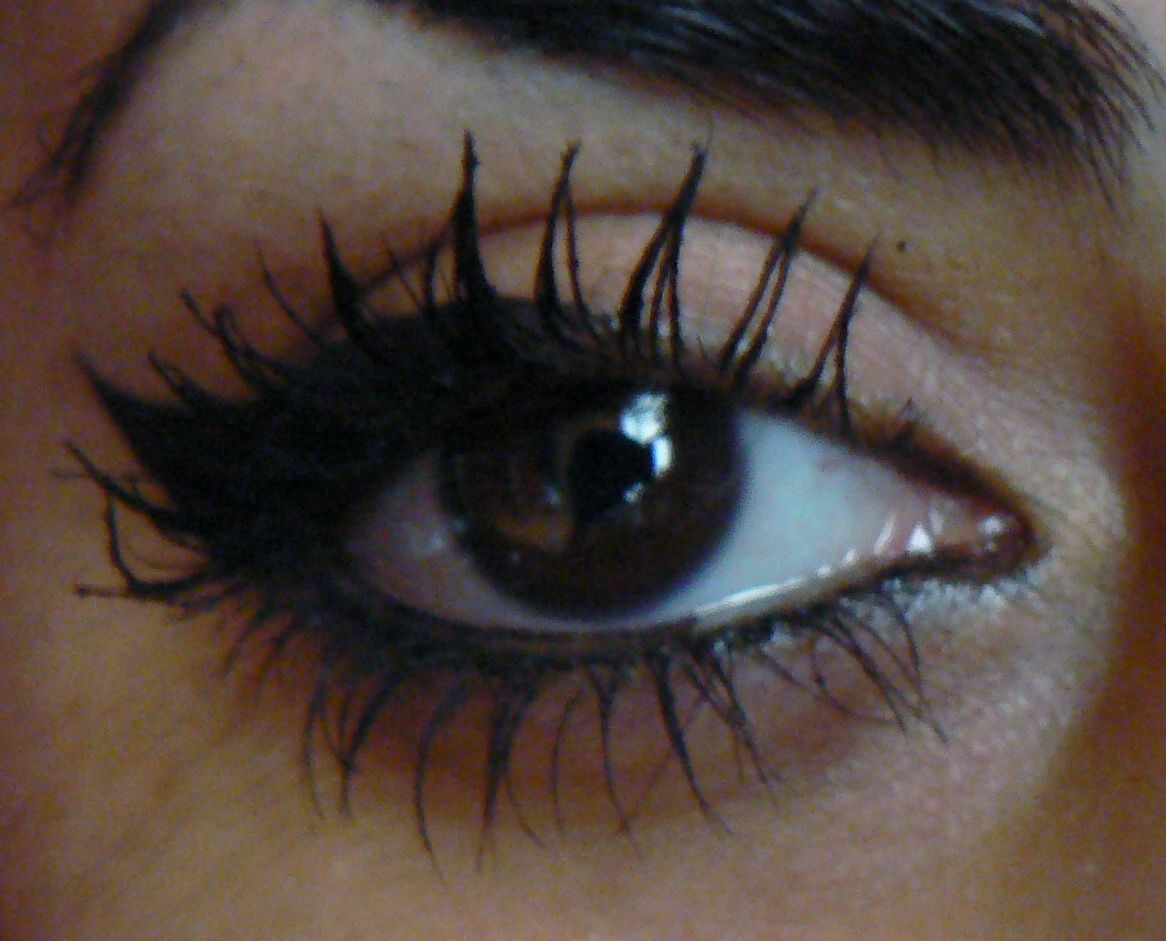
Et
voila, the finished look. Overall verdict, I LOVE the effect the
Superstar mascara gives, a glamourous, pigmented & all round
beautiful finish, no gloopiness, or spidery lashes in sight. The
Loreal Paris Superstar mascara retails for £10.99 & can be found
on most Loreal counters & online.
Thanks
as always for reading lovelies!
Lotsa love to ya!
9.09.2015
NOTD - Two Tone Geometric Nails
Hello there lovely readers!
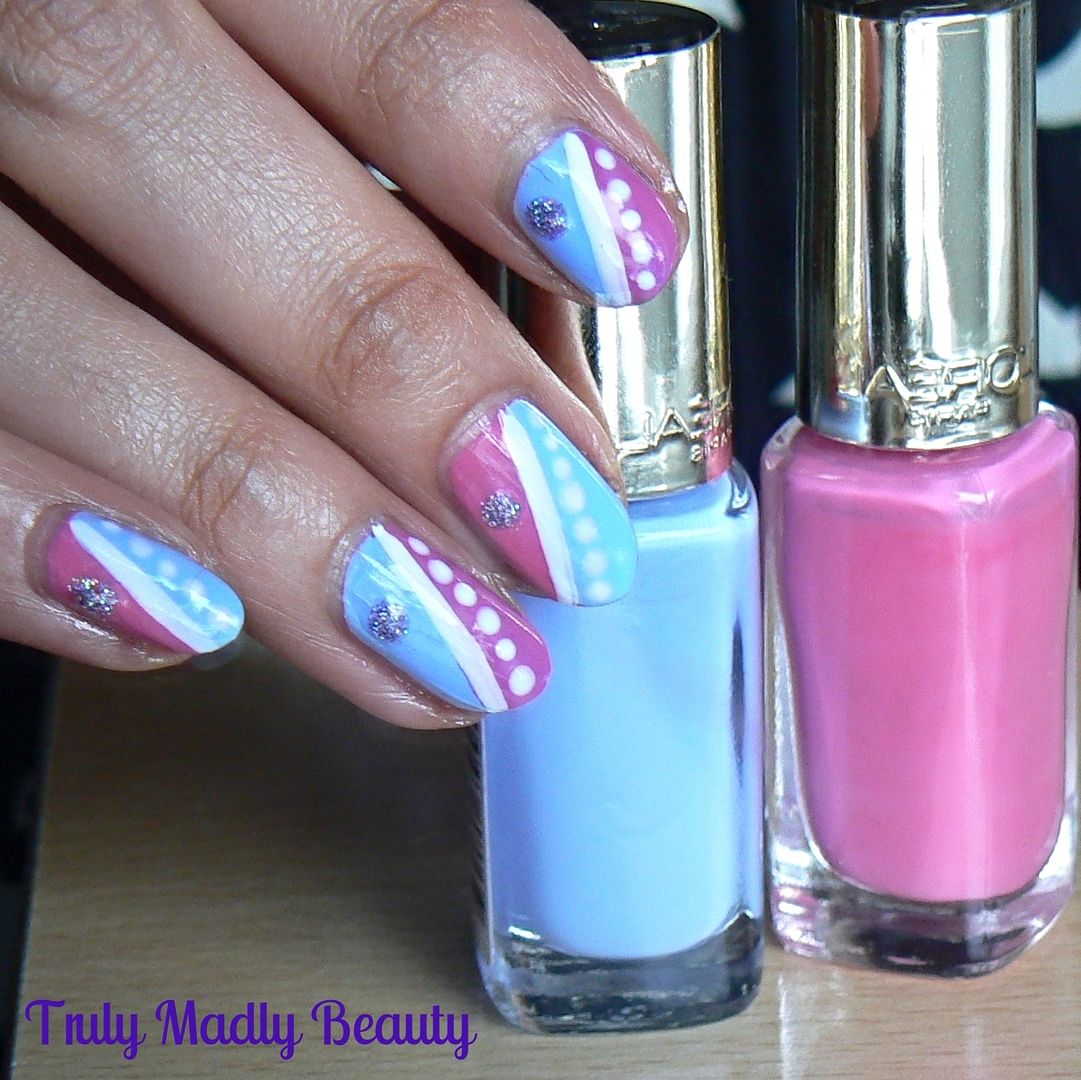
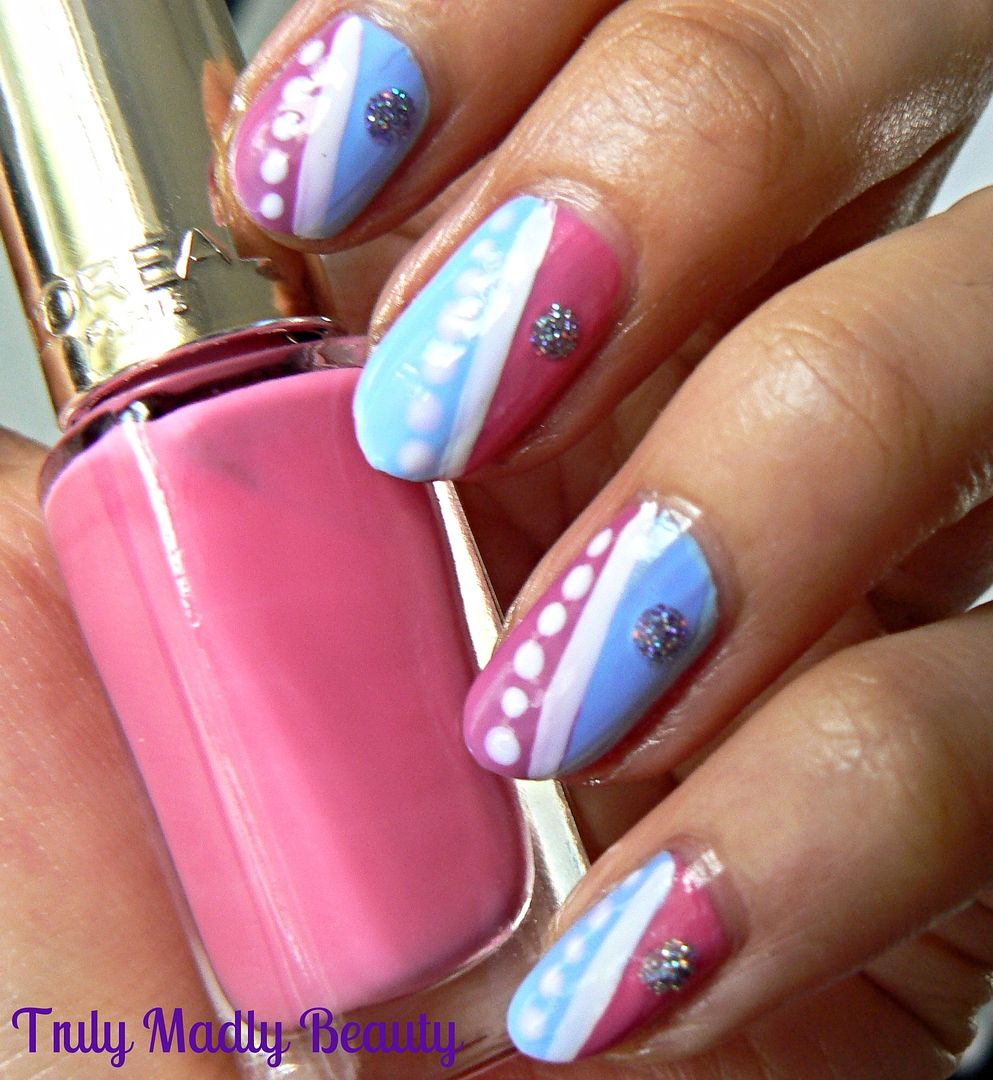
Today I have for you lovelies a quick & simple two tone geometric design using two polishes from Loreal's Color Riche range that the lovely Safiyah also known as the fabulously talented FrootiBeauty, kindly sent my way, because she's an absolute doll & knows that all orphan polishes wanting a happy home will be welcomed into my domain with open arms!
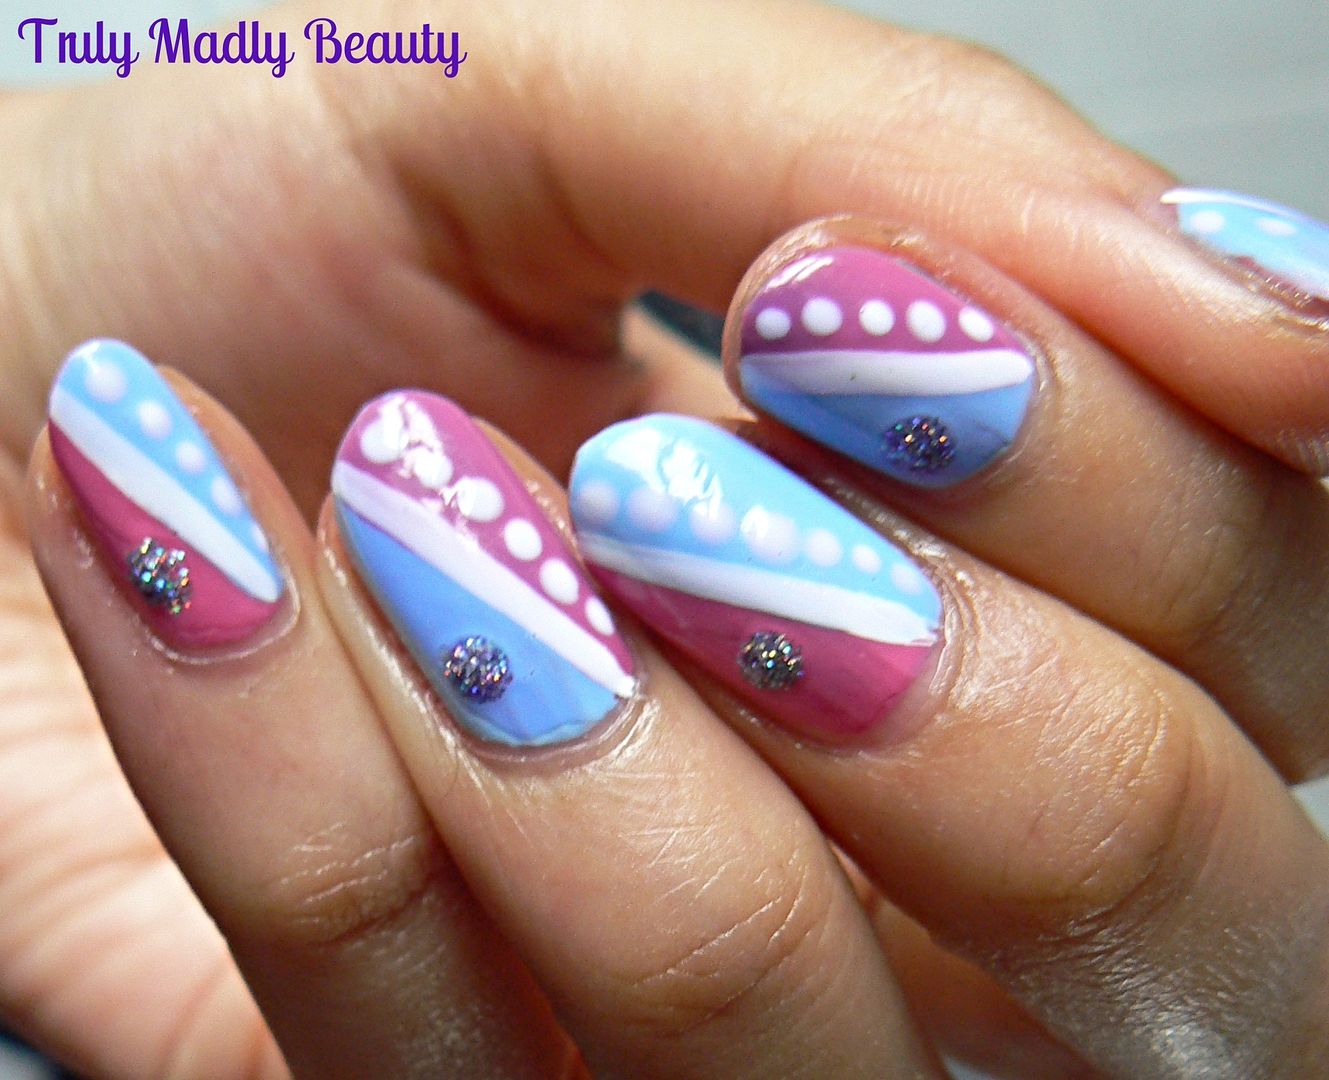
The shades I've used here are 242 Pink Pop, a yummy bright pink creme & 241 Cloud Wow, a pretty pale blue lavender creme. Both polishes were great to work with, smooth formula & quick drying & I love the brush that comes with these. Definitely helps with easy application. They're also contained in such cute dinky bottle packaging that they would be perfect to pop in the bag or take on holiday. This geometric design could not be more straightforward to create so here's a breakdown of the steps for you.
Then using the alternate polish shade, apply a coat at a diagonal across just half of the nail. I use the brush that comes with the polish & apply free hand but you can use a thinner brush & fill in the rest if you find that easier!
Don't worry if your line is a tad wonky as the next step is to apply a thin white line across the diagonal where the two colours meet. I use the Models Own nail art pen in White as it has a thin striper brush end which is perfect for this & makes applying thin straight lines very easy.
Next grabbing a dotting tool, or if you don't have one then a simple bobby pin will suffice! Remember dolls nail art tools are NOT compulsory to create fun nail art! Use whatever is at your disposal! Dip the dotting tool/pin into some white polish & apply a row of dots along the edge of the white line.
The inner magpie in me loves adding a touch of sparkle to the nails so to finish the design I quickly added a dot of Models Own Southern Lights which is a disco of lilac tinted holographic glitter, super satisfying sparkles!
Finally after a bit of clean up if you have any polish spillages on the skin areas with a bit of acetone & a brush, apply a nice thick coat of topcoat to seal your design, I use CND Air Dry, quite possibly the best topcoat on the PLANET in my opinion & that's it!
Hope you liked the mani my lovelies! Do let me know if you give this design a try! Thanks as always for reading, till next time!
Lots love to ya!
Hows you? Again life has taken a mad turn of late with work & weddings & more work! Some down time is muchly needed & I'm currently working on that right now having come back from a blissful massage to start things off for birthday celebrations! Yup, turning another year older tomorrow, still none the wiser & content to continue on my search for Neverland! Looking forward to heading to London for a few days of fun with my favourite humans & non humans too with a visit to a cat cafe for afternoon tea...my two favourite things...cake & kitties! The exciting is hard to contain :)
Today I have for you lovelies a quick & simple two tone geometric design using two polishes from Loreal's Color Riche range that the lovely Safiyah also known as the fabulously talented FrootiBeauty, kindly sent my way, because she's an absolute doll & knows that all orphan polishes wanting a happy home will be welcomed into my domain with open arms!
The shades I've used here are 242 Pink Pop, a yummy bright pink creme & 241 Cloud Wow, a pretty pale blue lavender creme. Both polishes were great to work with, smooth formula & quick drying & I love the brush that comes with these. Definitely helps with easy application. They're also contained in such cute dinky bottle packaging that they would be perfect to pop in the bag or take on holiday. This geometric design could not be more straightforward to create so here's a breakdown of the steps for you.
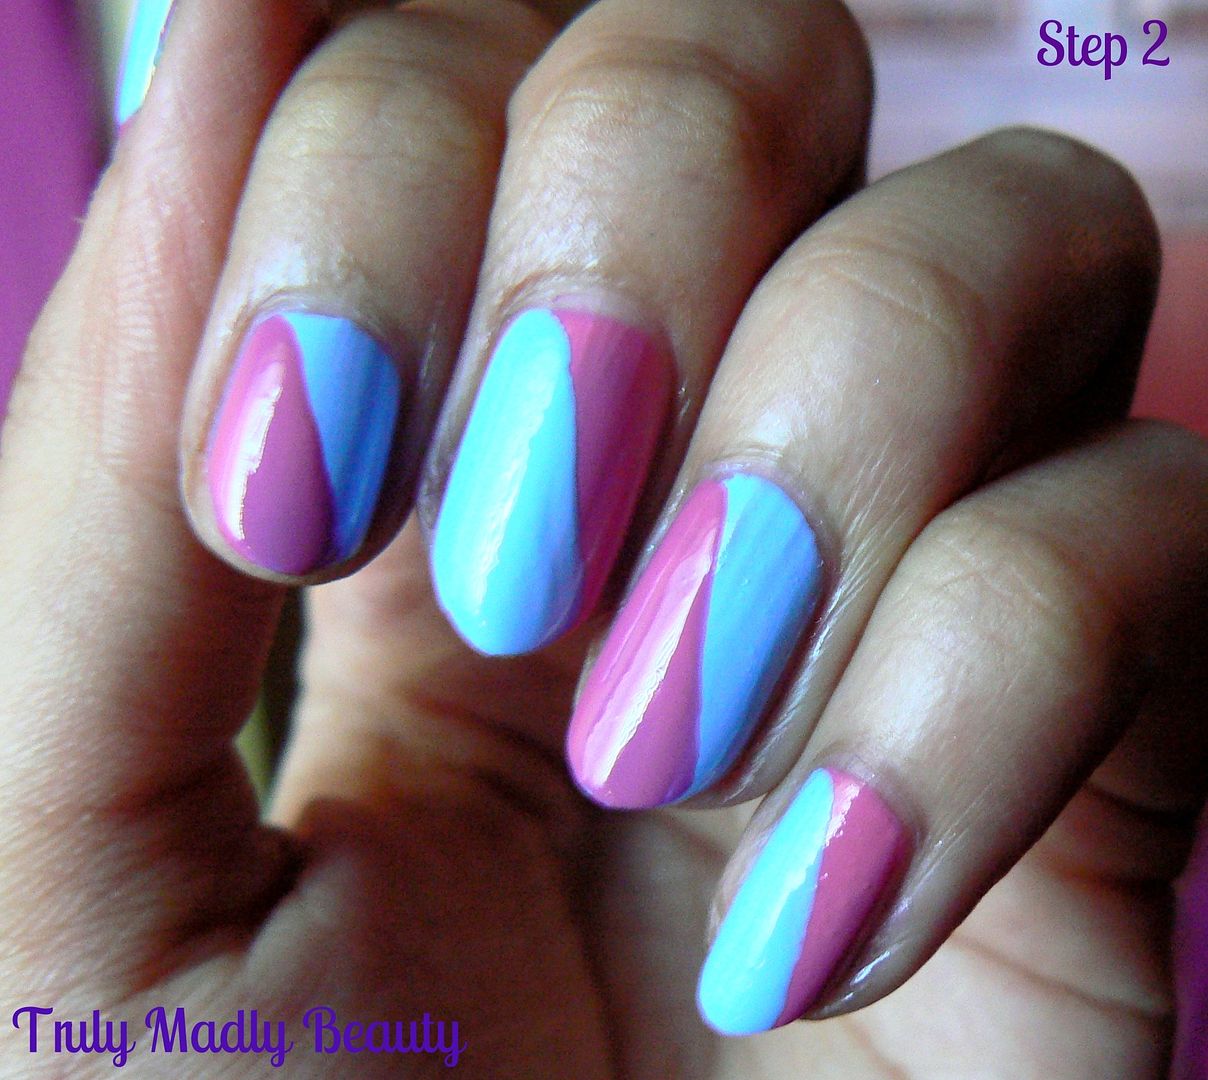
Grabbing your polish, apply one coat to the whole nail, I decided to alternate both shades.
Then using the alternate polish shade, apply a coat at a diagonal across just half of the nail. I use the brush that comes with the polish & apply free hand but you can use a thinner brush & fill in the rest if you find that easier!
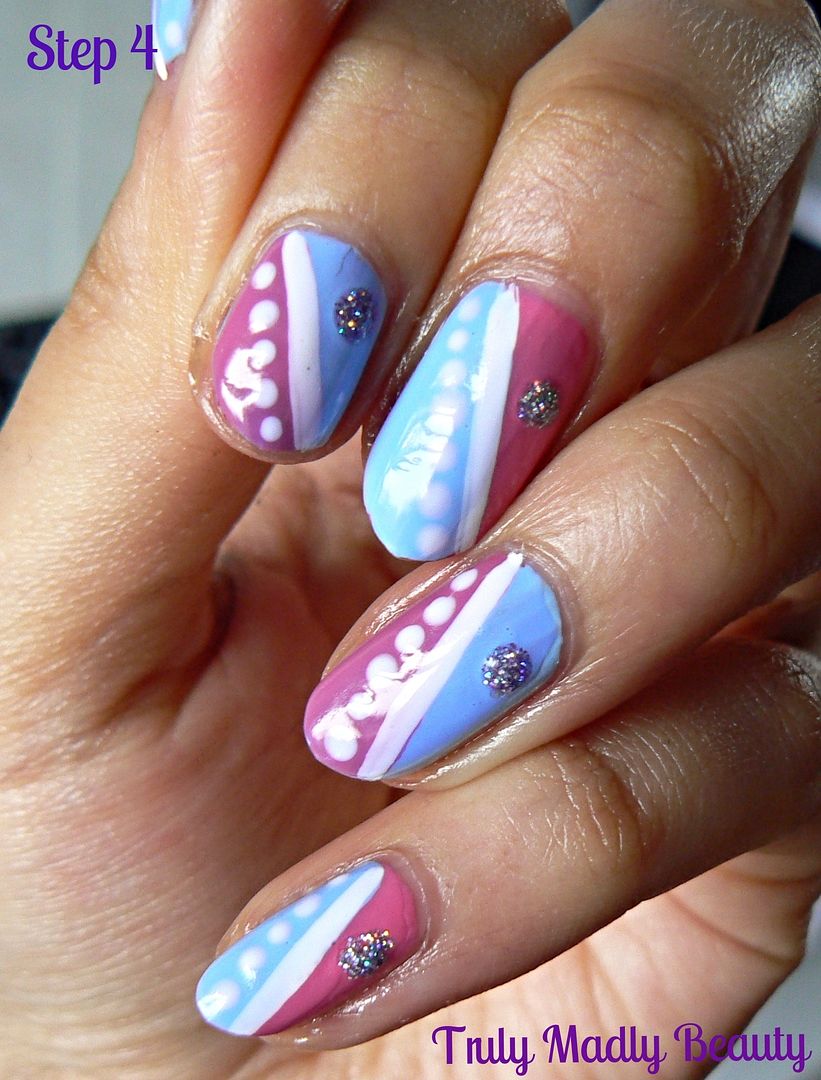
Don't worry if your line is a tad wonky as the next step is to apply a thin white line across the diagonal where the two colours meet. I use the Models Own nail art pen in White as it has a thin striper brush end which is perfect for this & makes applying thin straight lines very easy.
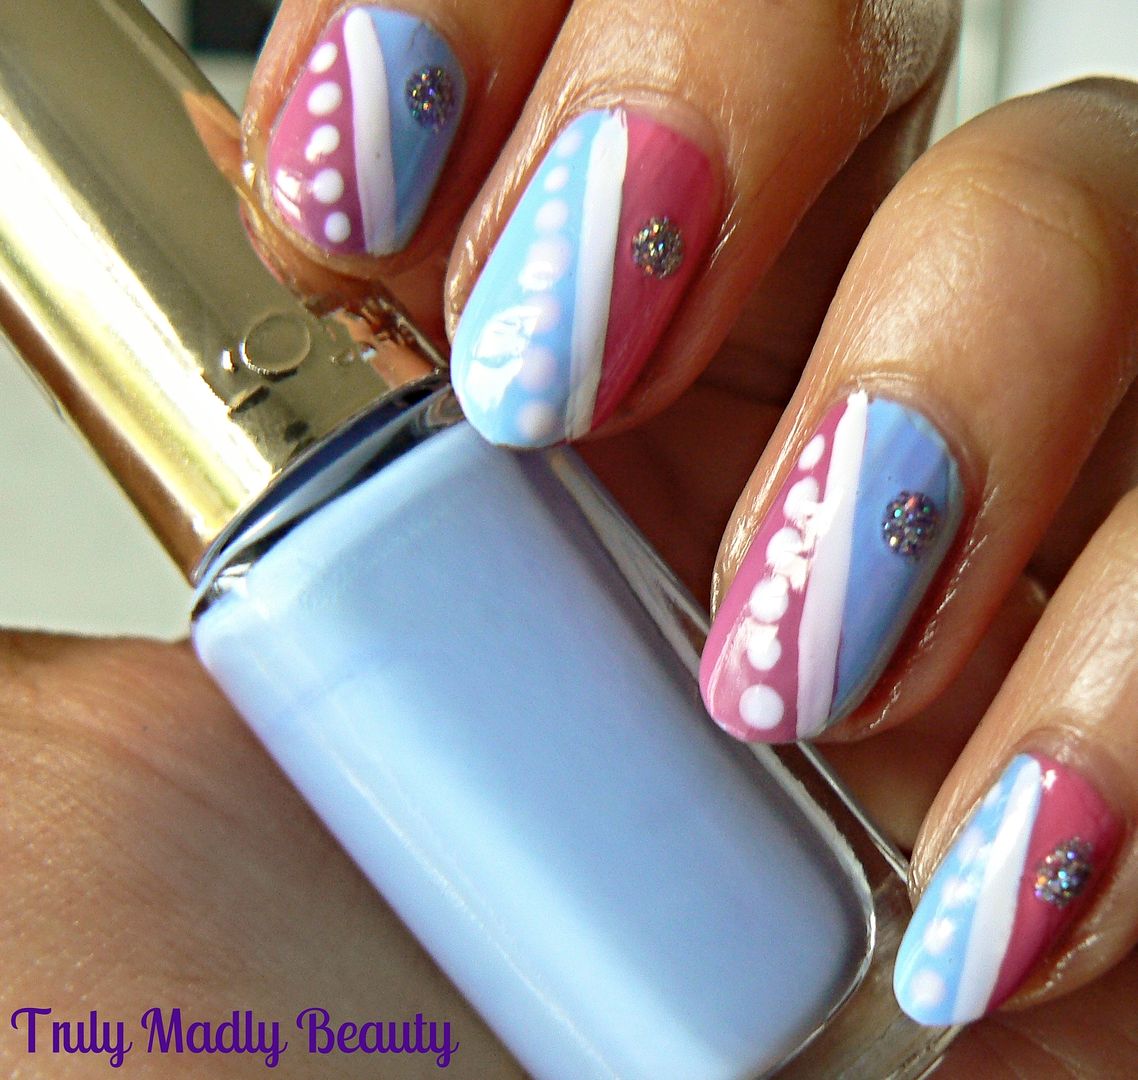
Next grabbing a dotting tool, or if you don't have one then a simple bobby pin will suffice! Remember dolls nail art tools are NOT compulsory to create fun nail art! Use whatever is at your disposal! Dip the dotting tool/pin into some white polish & apply a row of dots along the edge of the white line.
The inner magpie in me loves adding a touch of sparkle to the nails so to finish the design I quickly added a dot of Models Own Southern Lights which is a disco of lilac tinted holographic glitter, super satisfying sparkles!
Finally after a bit of clean up if you have any polish spillages on the skin areas with a bit of acetone & a brush, apply a nice thick coat of topcoat to seal your design, I use CND Air Dry, quite possibly the best topcoat on the PLANET in my opinion & that's it!
Hope you liked the mani my lovelies! Do let me know if you give this design a try! Thanks as always for reading, till next time!
Lots love to ya!
12.24.2014
Xmas NOTD - Snowflakes!
Hey lovely readers!
Before signing off for the holiday I
thought I'd sneak in one last Xmas manicure! I hope you liked the
ones that have been rolled out this year including a FestiveDotticure, Christmas Wreaths, Santa Claus Nails, Christmas Trees &
Peek-a-boo Polar Bears. For my last Xmas mani I decided to go for
some Snowflakes :)
5.27.2013
Getting Lippy - Loreal Rouge Caresse Lipstick in Tempting Lilac
Hello there lovely readers!
Today I have a BEAUT of a lippie to
share with you, Loreal's Rouge Caresse in Tempting Lilac which has
become a firm favorite of mine & was actually bought to my
attention by the lovely Helen from Just Nice Things. You see I was
having a debate with myself on Twitter whether to purchase the
much hyped Clinique Chubby Sticks but I'd heard they can be muchos
drying, not to mention the hefty pricetag! Helen recommended the
Rouge Caresse range of which I'd heard fab things but the shade I
wanted was constantly out of stock! But again Helen kindly came to
the rescue & offered to send me the shade I wanted, what a doll!
Subscribe to:
Posts (Atom)