Showing posts with label Nude. Show all posts

2.10.2019

NOTD - Poppies & Gold for Galentines!

Hey there lovely readers!

Florals you'll know if you're a regular reader, are my jam & I don't see this love going anywhere anytime soon! Speaking of love it is of course Valentines season, but moi? I'm celebrating Galentines with my gals! Today's nail art is for Galentines Day babes & features one of my favourite red polishes which was sent to me by one of my darling friends Chelle all the way from Australia! Which I thought perfect for the occasion.


6.12.2018

NOTD - Rose Quartz Semi Precious Stone Nails!

Hey there lovely readers!

If you caught my post a while back on my Jade Nails, you'll know that I'm going through a bit of an obsession at attempting to recreate some of my favourite semi precious stones on to my nails! Girl be on a mission!

There really is SO much nail-spiration to be found in stones, each with their own unique eye catching formulation & pattern. I was so happy with how the Jade nails turned out that I was eager to continue on my journey, so today I've given a go at some Rose Quartz!


5.08.2018

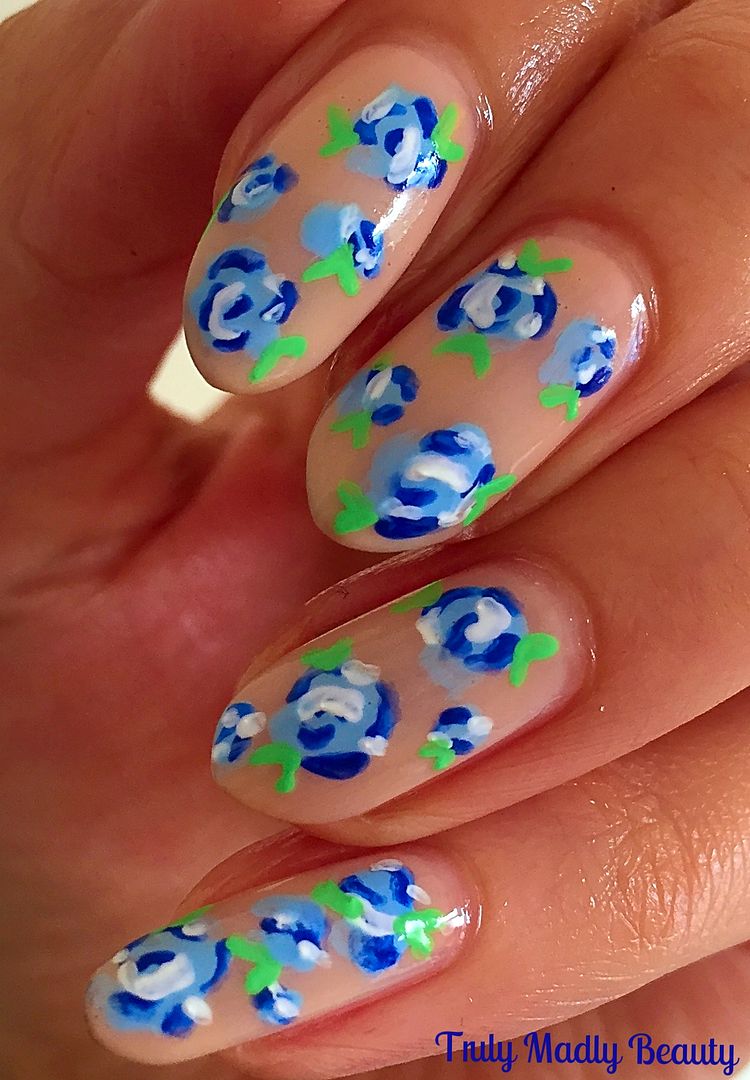
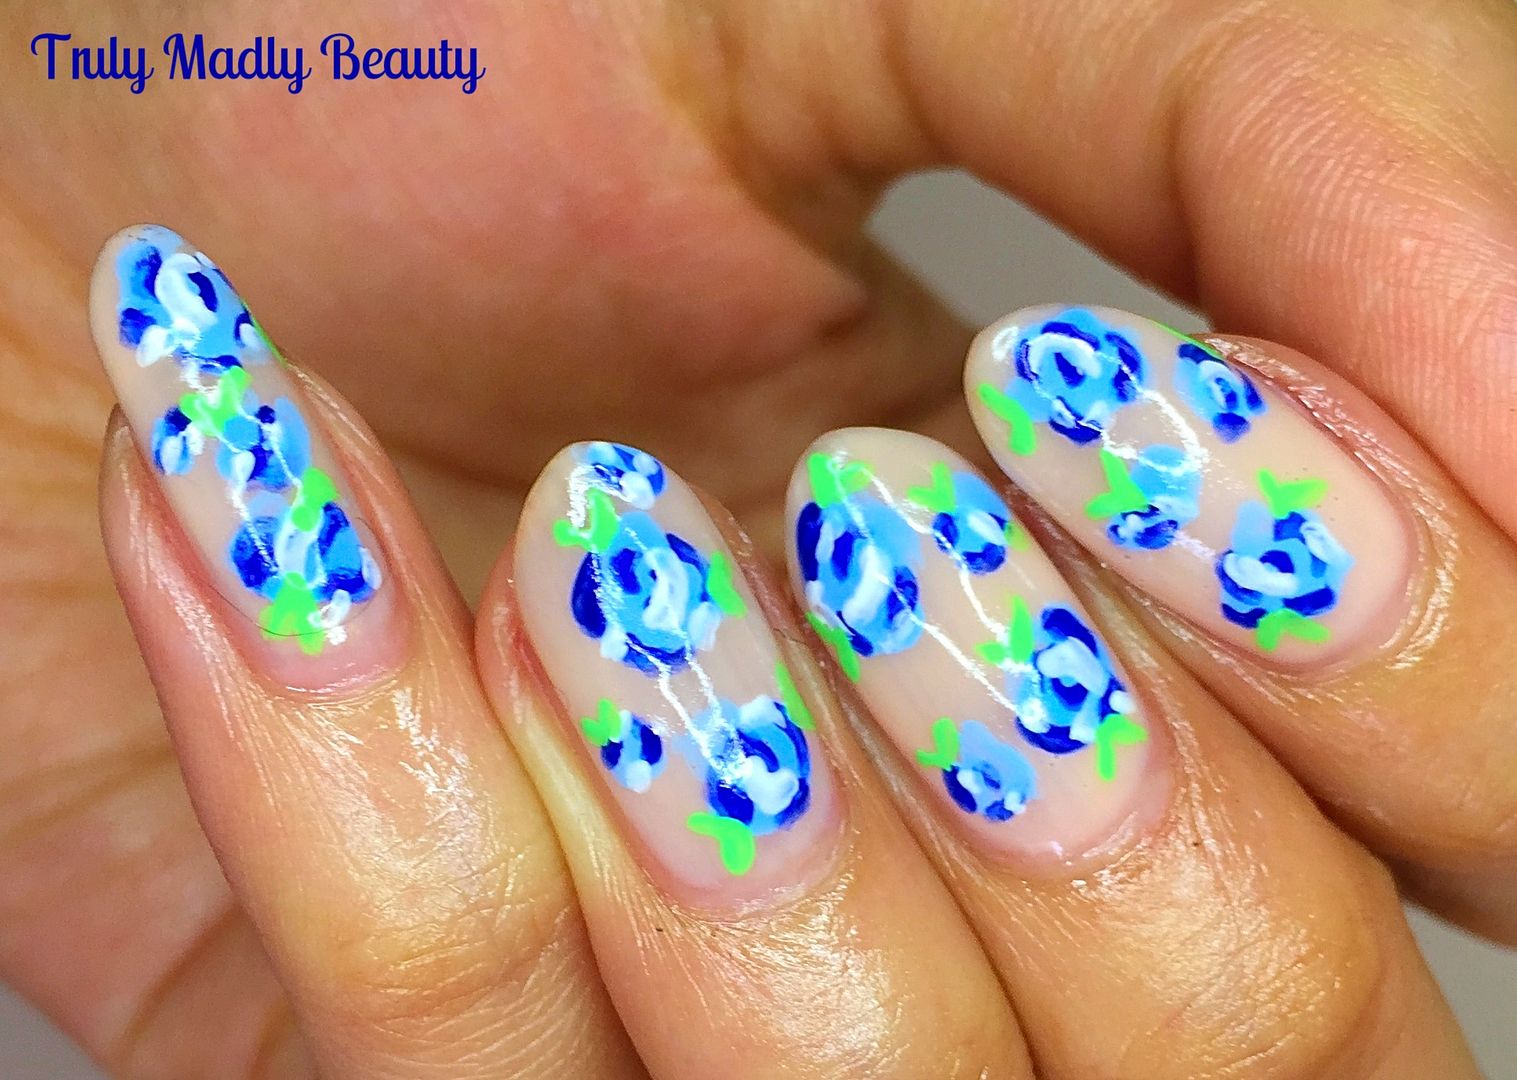
NOTD - Blue China Rose Nails

Hey there my lovely readers!

If you caught a few of my recent posts you will know that yours truly has officially dipped her toe into the world of nail art stamping.

Now whilst freehand nail art will forever remain my first true joy, I do confess I am rather enjoying my venture into the stamping way of life....when said stamping is a success that is!


4.30.2018

NOTD - Floral Bouquets

Hey there lovely readers!

I'm sure you know by now my absolute LOVE for all things floral, especially on my nails of course! Florals for Spring are a necessity however I'm happy to rock blooms all year round. This is probably the most detailed design I have ever done, yet I do love a challenge & I am so so happy with how it came out! 


2.24.2018

NOTD - Coffee Time!

Hello there lovely readers!

My fellow coffee addicts, where you at? Pour yourself a steaming mug of java & why not adorn your nails with some caffeine while you're at it?

I'm a bit of an odd one (though I'm sure this comes as no surprise to anyone) in that I actually cannot stand anything coffee flavoured...coffee cake, coffee chocolates, coffee ice cream etc, however I AM one of those beings who cannot fully function & mingle with the humans until a cup of java is downed & a suitable level of caffeine has been absorbed within the bloodstream.


9.19.2017

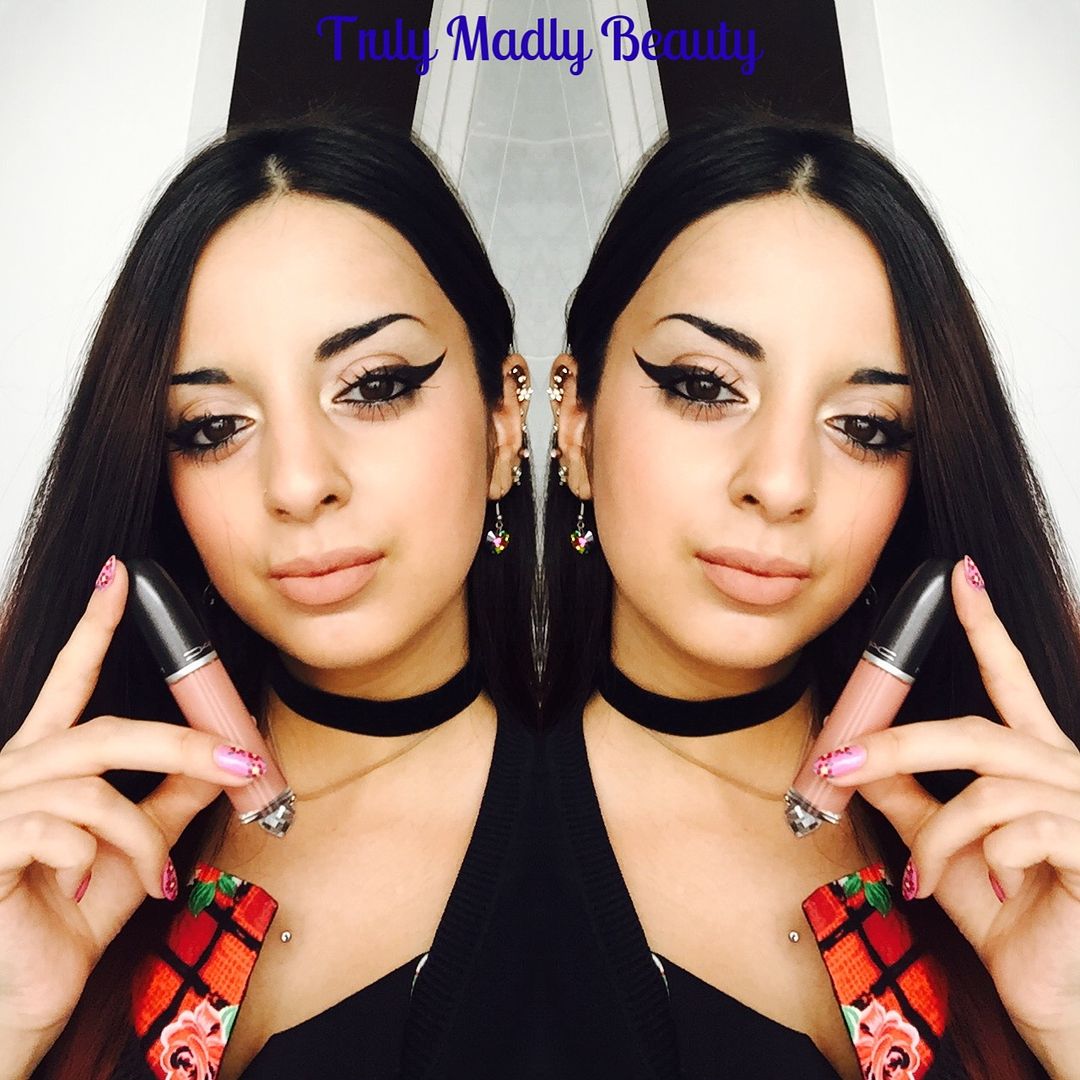
Getting Lippy - Kat Von D Everlasting Liquid Lipstick in Bow N Arrow

Hey there lovely readers!

So every girl needs her Holy Grail nude lipstick in her arsenal right? When hunting for a good lip product, its not just the shade itself that's important, though of course this factors greatly, but also the formulation. Smooth application & non drying finish is a MUST for this gal with lips drier than the Sahara!

Not as easy a task as it may seem my friends, hunting for one that ticks all the boxes! After trying & testing many a lippie I'm happy to say I've finally found my HG nude & tis an offering from Kat Von D no less, one of her Everlasting Liquid Lipsticks to be precise, in the shade Bow N Arrow.  


When I heard that Kat Von D was opening up a counter in Oxford Street Debenhams store, I naturally, like many other beauty obsessed humans made note to pop in & peruse at the earliest convenience!

7.12.2017

Getting Lippie - MAC Retro Matte Liquid Lippie in Burnt Spice Review

Hey there my lovely readers!

If you follow me on Instagram (@aysh_xox) you may have noticed that amongst the usual, nail, kitty & outfit posts that make up the majority of my feed, I've recently started sharing some of my favourite lippie products as well. I figured that seeing as this is a beauty blog also, why the heck not share some of my top choices on here as well, thus mixing things up a tad in between all the nail art :)

A late starter to the lippie game, for many a year I had been a simple slick of balm & go girl as I suffer from horrendous dry lips, making lipstick wearing just a nightmare. I alone probably kept Chapstick in business. However a few years down the line after discovering the wonders of lip scrubs & moisturisers I decided enough was enough & I wouldn't let the condition of my lips deprive me on all the lippie fun!


5.31.2017

NOTD - Blue Spring Blooms

Hi there lovely readers!

Yes I know...Florals for Spring...groundbreaking ;) But nope not just Spring in my world, why I'm more than happy to rock florals all year round as I just adore them. I have a serious obsession for floral embroidered EVERYTHING at the moment, recently succumbing to the current blogger favourite EGO & picking me up a pair of the super pretty Cheska Floral Nude Mules. I never thought I would fall for this trend but the moment I saw them...I knew I needed such floral goodness in my life. And FYI they not only look fab, but are super comfy too...WIN.


Anyway I digress, but basically yes, florals make me sigh in contentment...especially when they are on my nails. I do dig me a good floral design...err did I mention that? Wanting to venture down a slightly different path of my usual dotticure and dry marbling style that I love because heck its just so darn easy to do yet looks awesome, I wanted to play around with some of my acrylic paints. 


3.28.2017

NOTD - Pointed Angles & Polka Dots!

Hello there lovely readers!

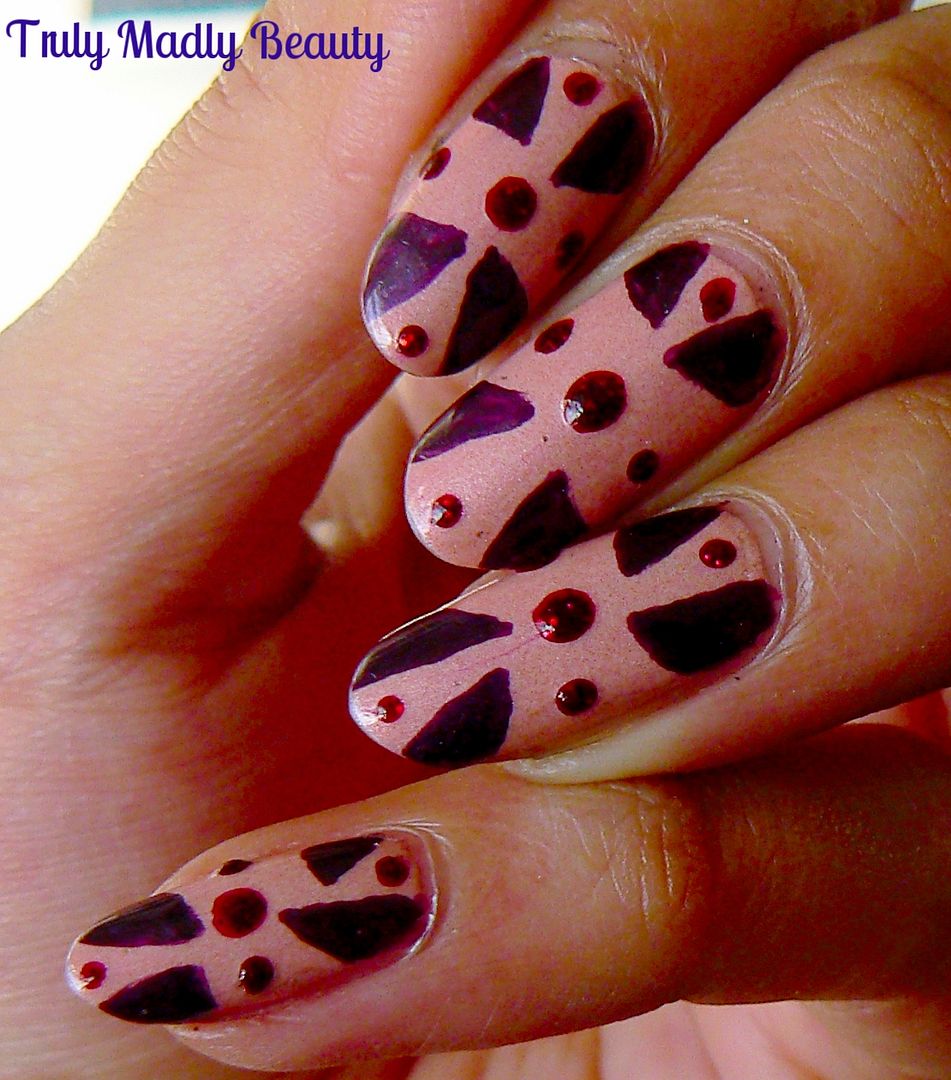
Today's nail art was one of my "extreme acts of randomness....just go in with a few magic spells and hope for the best" type designs & features a simple geometric style with pointed triangles & a few polka dots thrown in for luck. I find the combination of sharp pointy edges mingled with with soft round circles strangely satisfying 

3.10.2017

NOTD - Jewel Bloom Nail Art Tutorial

Hello my lovely readers!

A wee tutorial for you today, I want to try & do more step by step pictorials for you to show just how easy it can be to create fun & fabulous designs on your nails! My favourites this year so far have to be my Flamingo Nails, they just make me smile so much & I'm itching to do them again. But of course Mother Nature will play a big part in allowing this to happen & whenever she doth bestow upon me decent lighting & time for photos I will make sure to take advantage!


2.27.2017

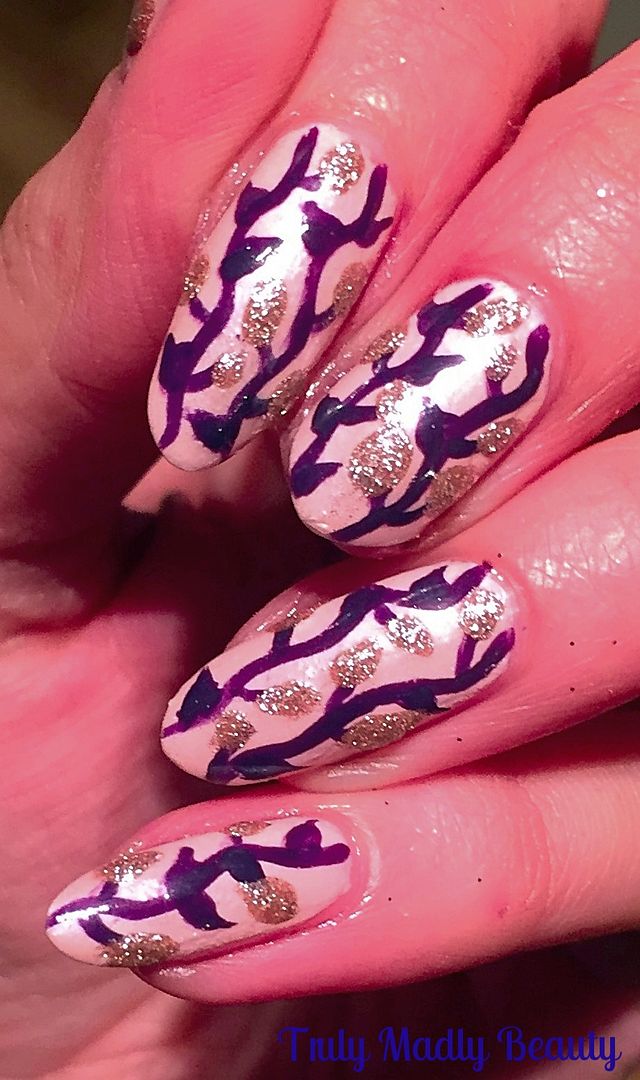
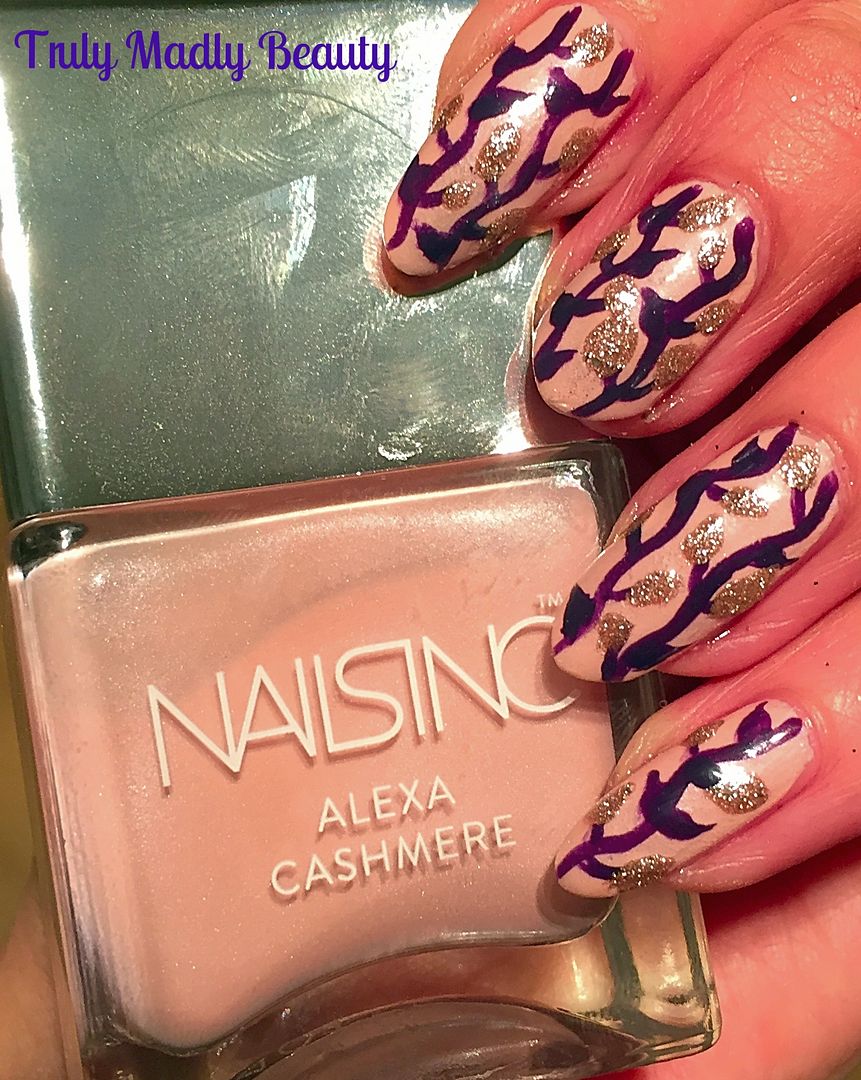
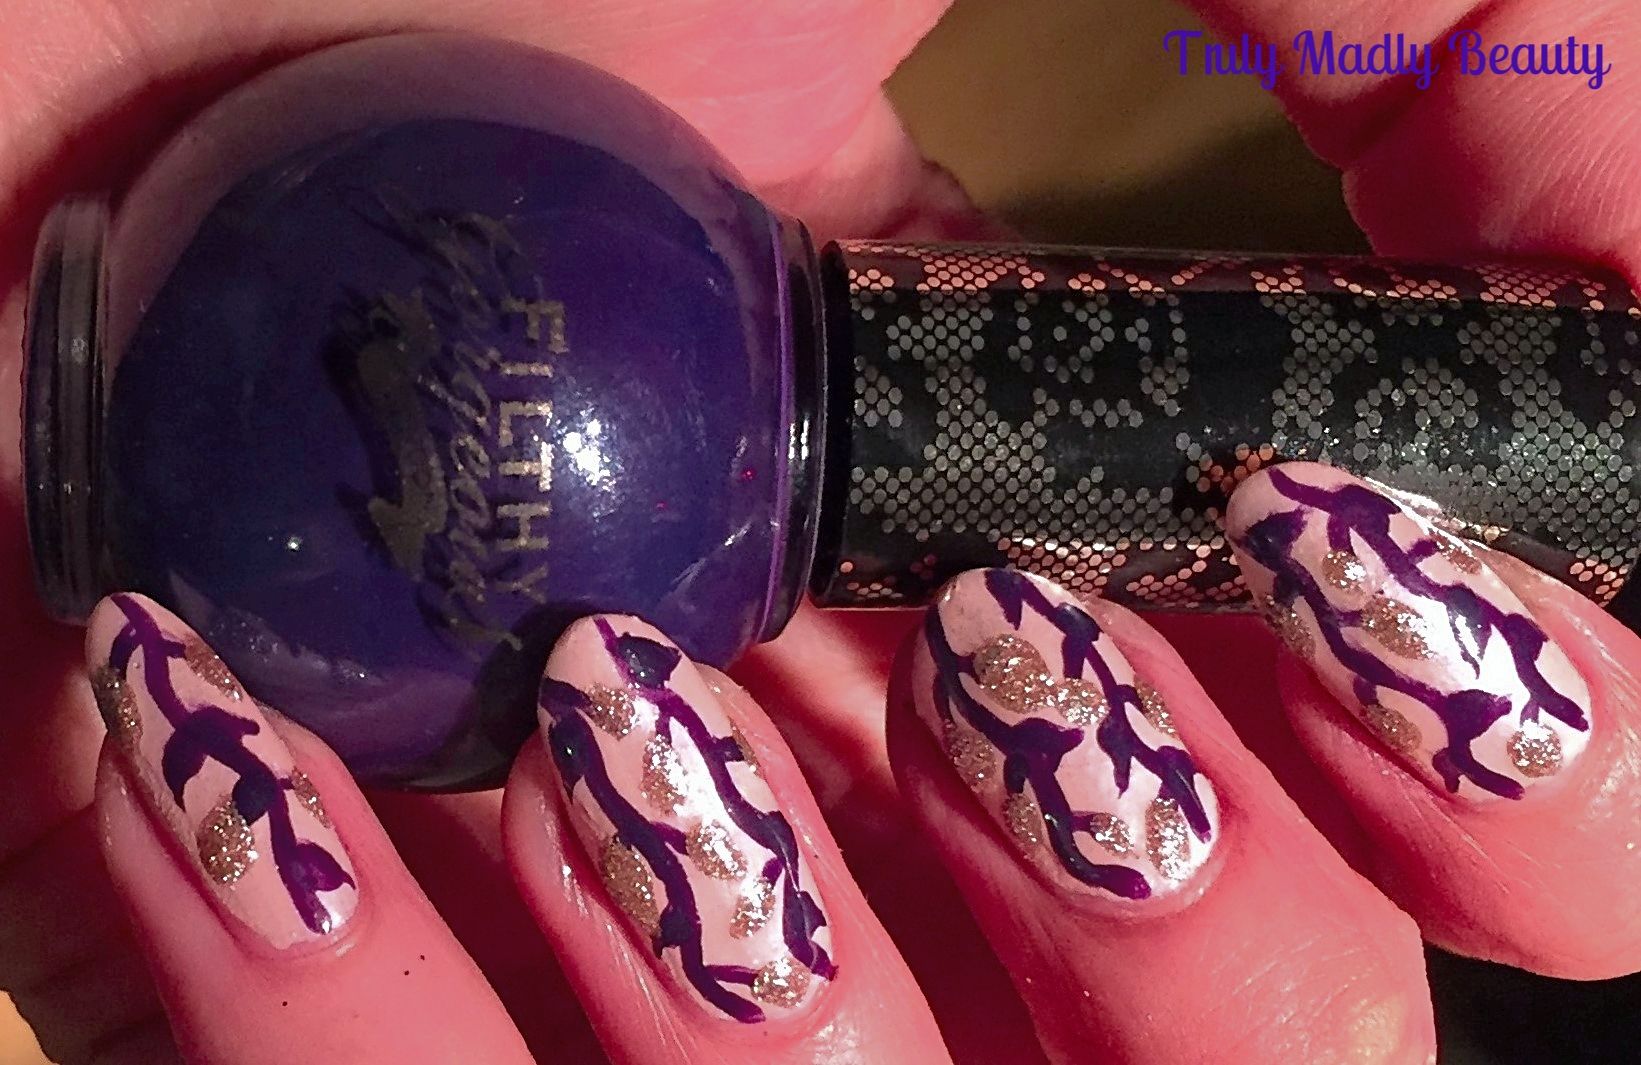
NOTD - Gothic Vines

Hello there lovely readers!

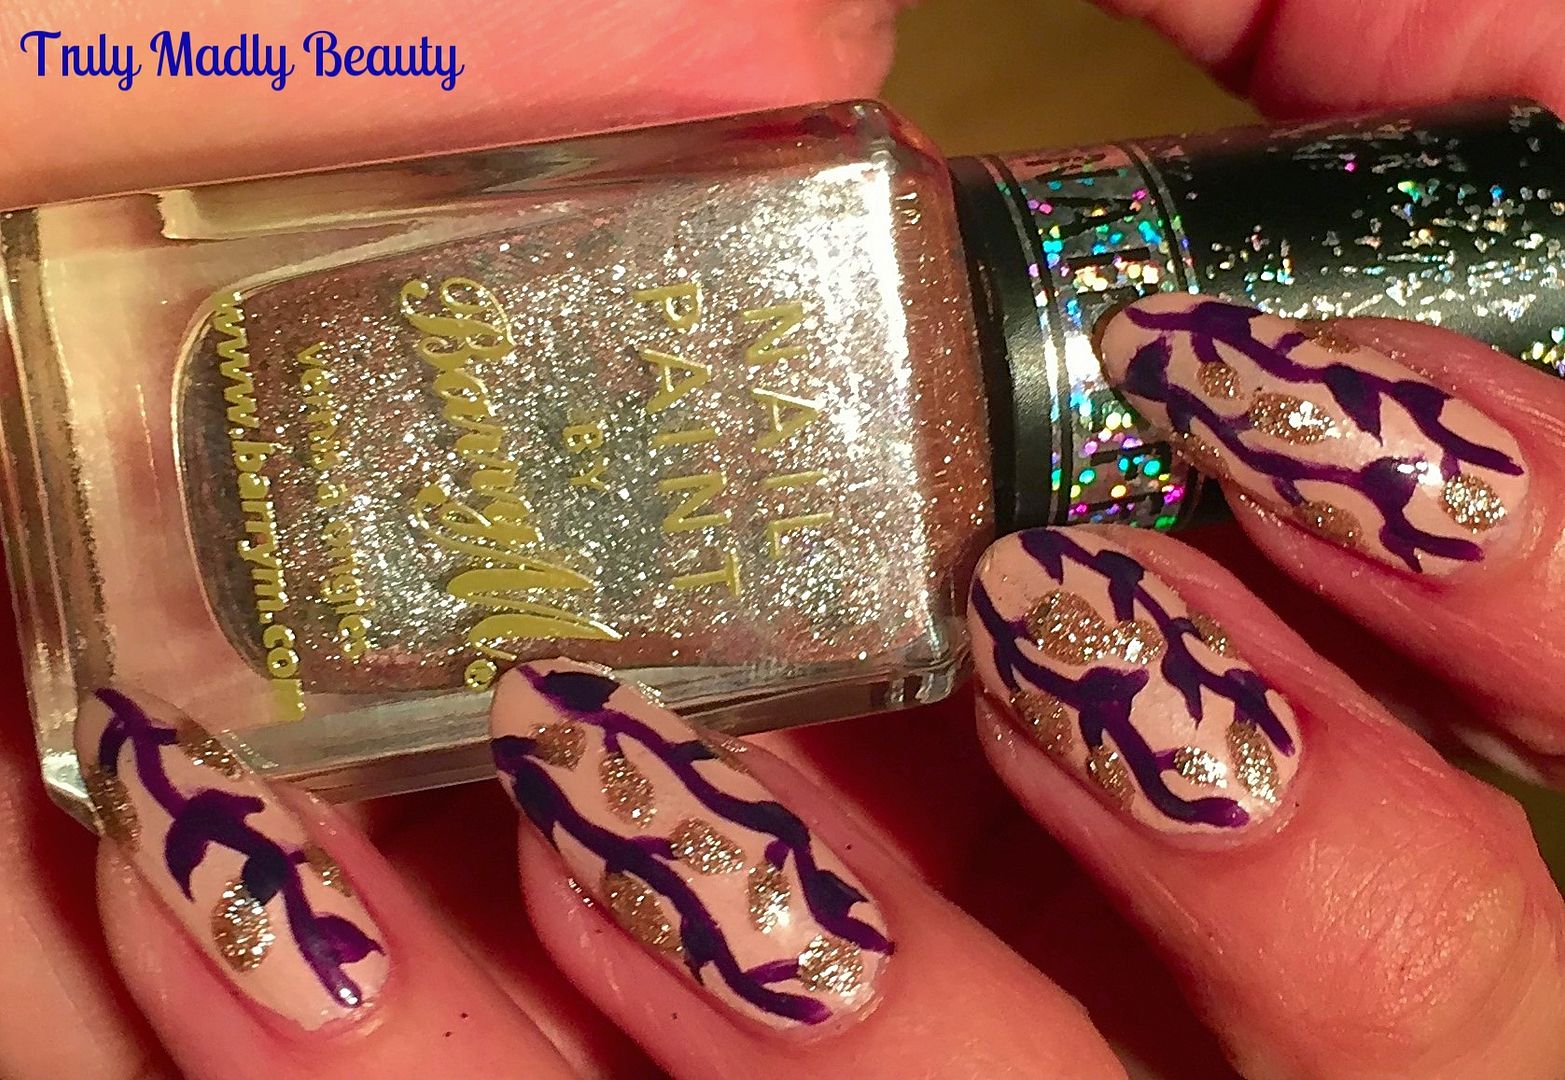
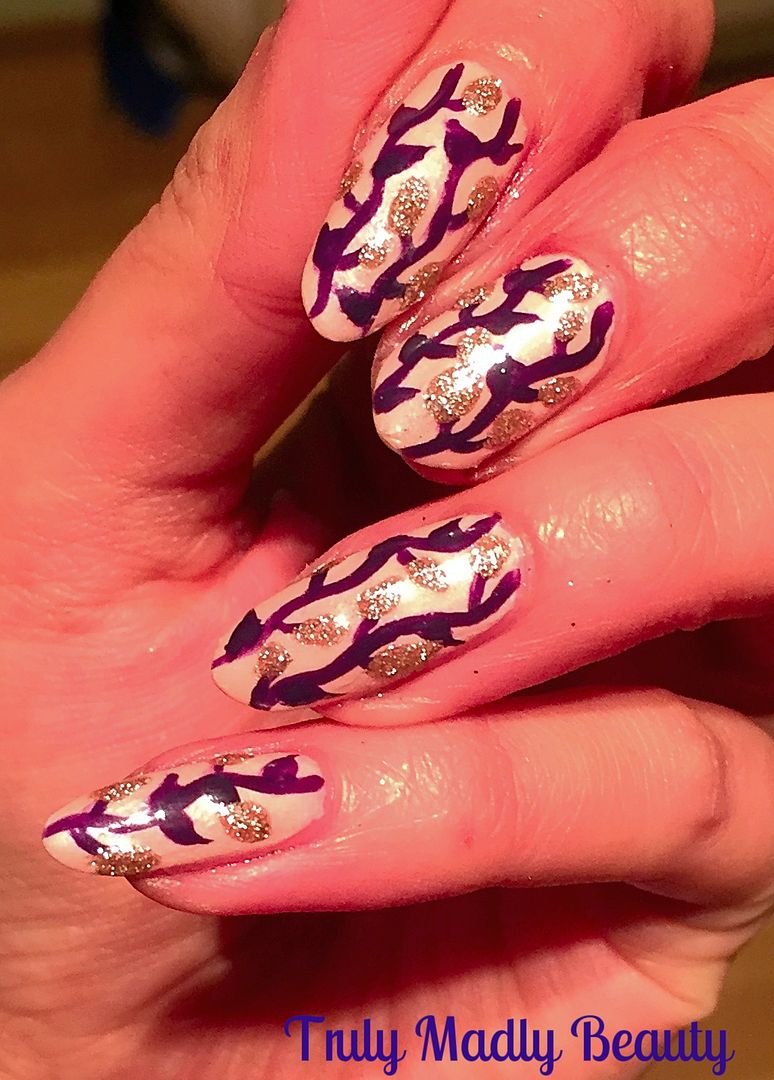
I was wearing a neutral manicure not too long ago as I had an event to go to & something low key was order of the day. As much as I do love a sleek & chic simple nude mani, I probably lasted about a day after said event before I was already itching to add something to it haha!


So to jazz up my nude pink manicure, which was pretty while it lasted by its onesie & came courtesy of Nails Inc Alexa Chung's collection polish in Pink Cashmere, a delicate & feminine shimmery pink, I decided to freehand on a simple vine design.


For my vines I opted to go for a dark gothic purple creme polish from brand Filthy Gorgeous in the shade Pulp.


To create your vines is super simple. Using a fine nail art brush, I first applied two swirly lines vertically down the whole nail.


Then using the same brush I just added on some teardrop like shapes for the leaves to my vines.


Still feeling like something a bit more was required I dug out one of my favourite textured polishes from Barry M in the shade Duchess which is an almost rose gold chunky glitter, so pretty! I added on a few sparkly rose gold leaves in between the purple.


Don't forget a slick of topcoat to finish. Hope you liked this quick & easy design to jazz up a plain mani! Thanks for reading!

Lots of love to ya!


2.24.2017

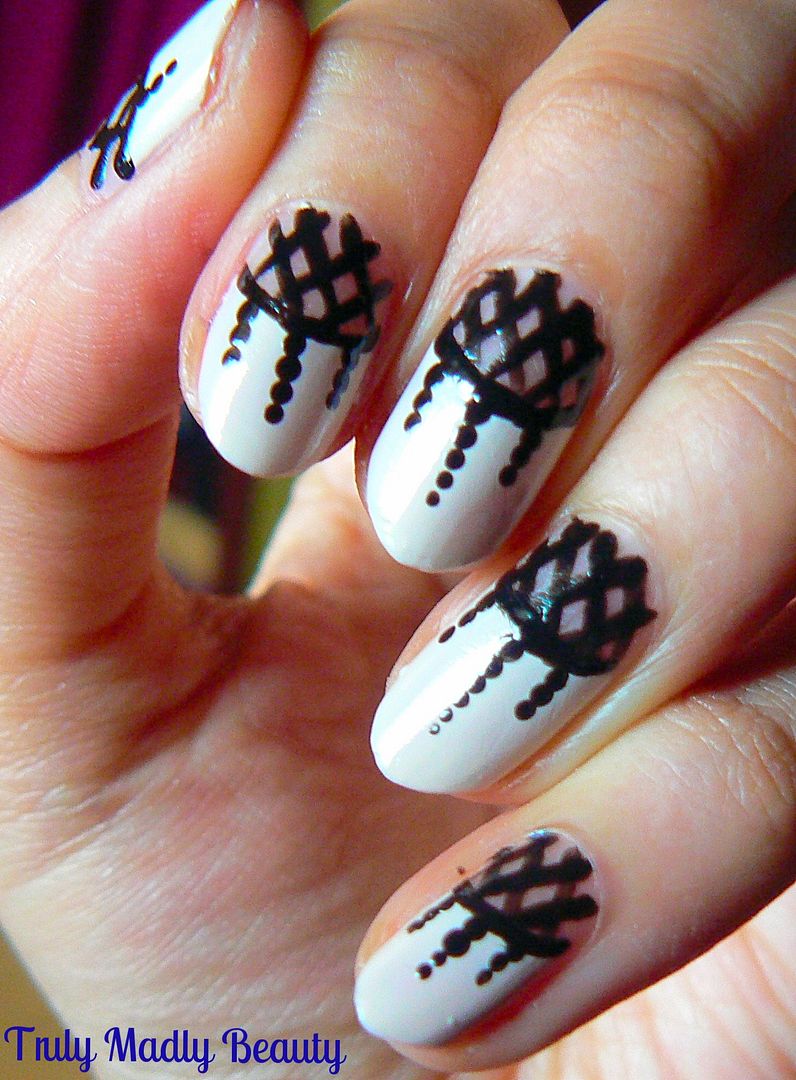
NOTD - Dream Catcher Nails Tutorial

Hi there my lovely readers!

Long time no speak! If you follow me on social media you'll know I've been off having adventures on the other side of the world, Koh Samui to be exact. 10 days in glorious weather on a beautiful island was just what this girl needed, though the journey sure is a killer, 20 hours travelling through 3 different time zones really does a number on you! Only just starting to resemble some form of sanity, I can also get back to blogging with some new nail art!


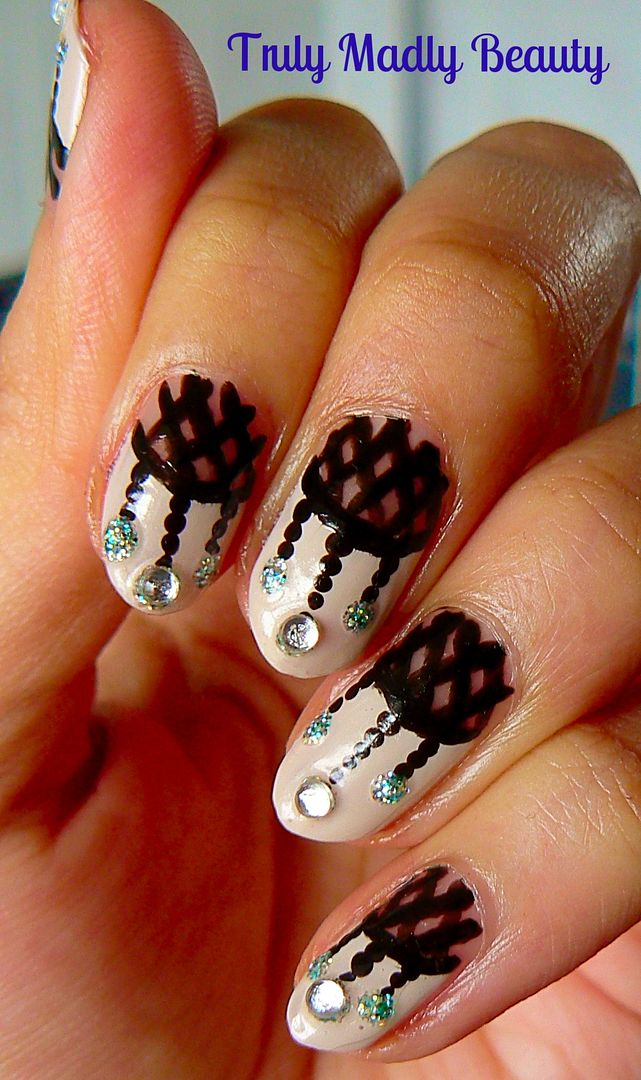
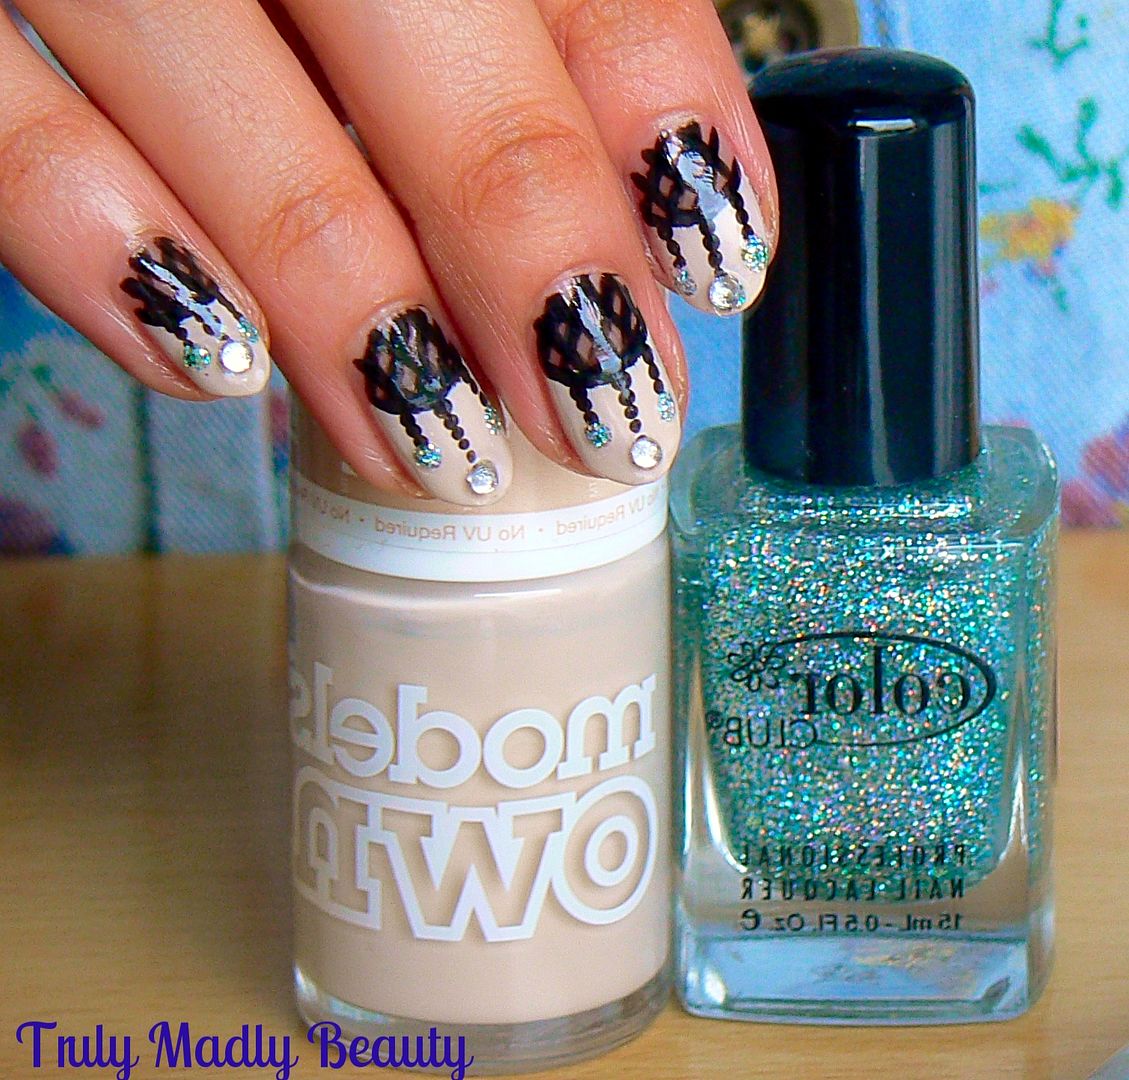
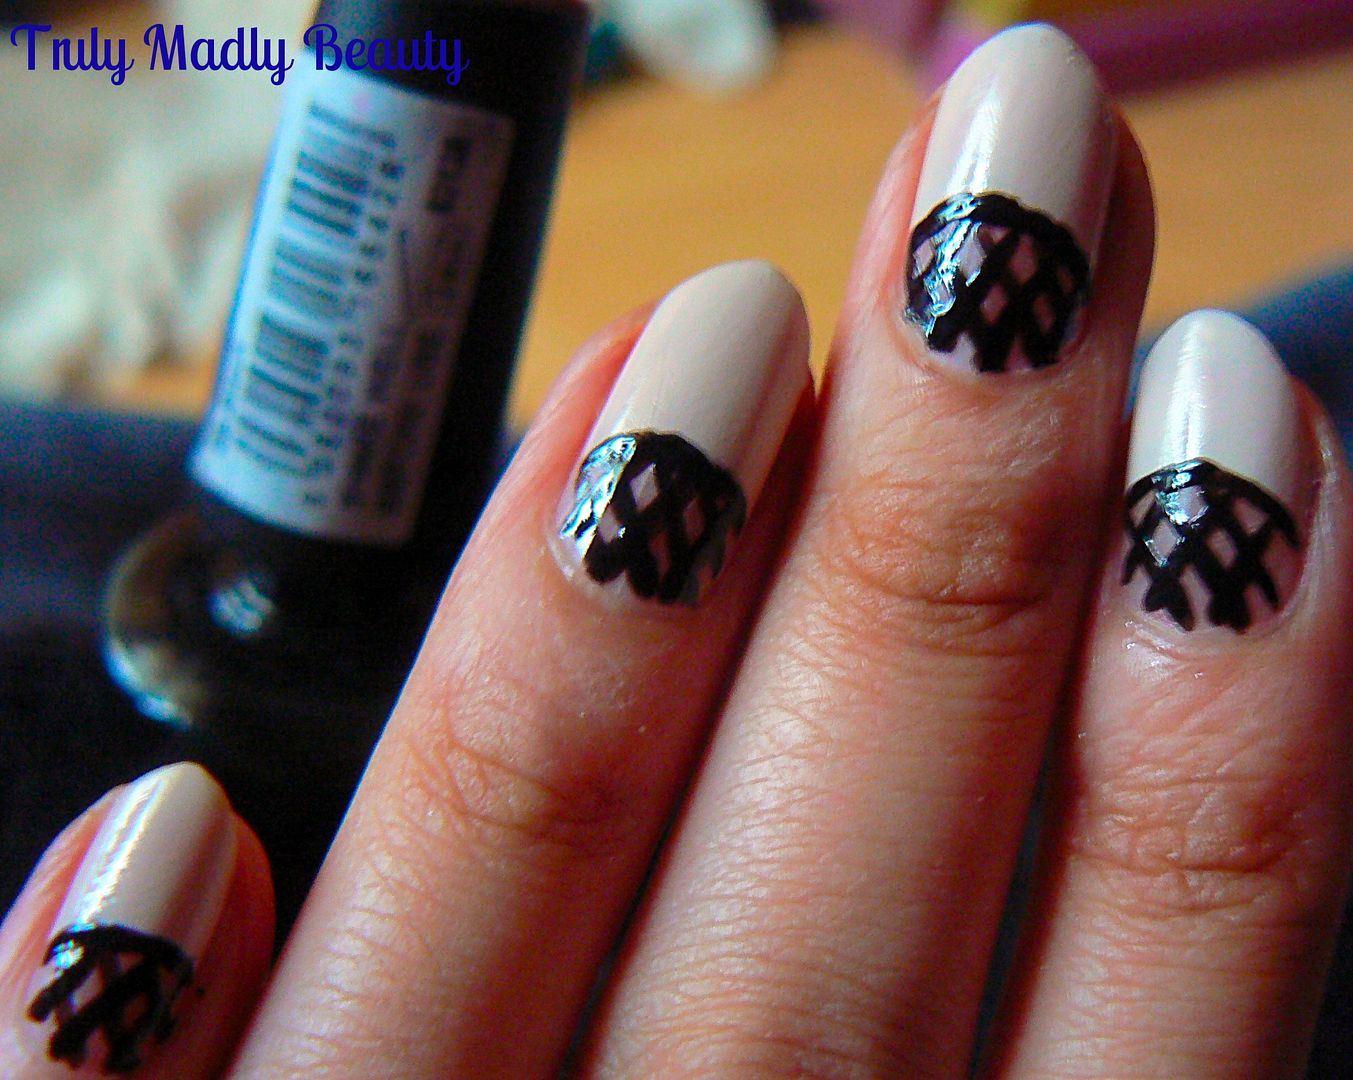
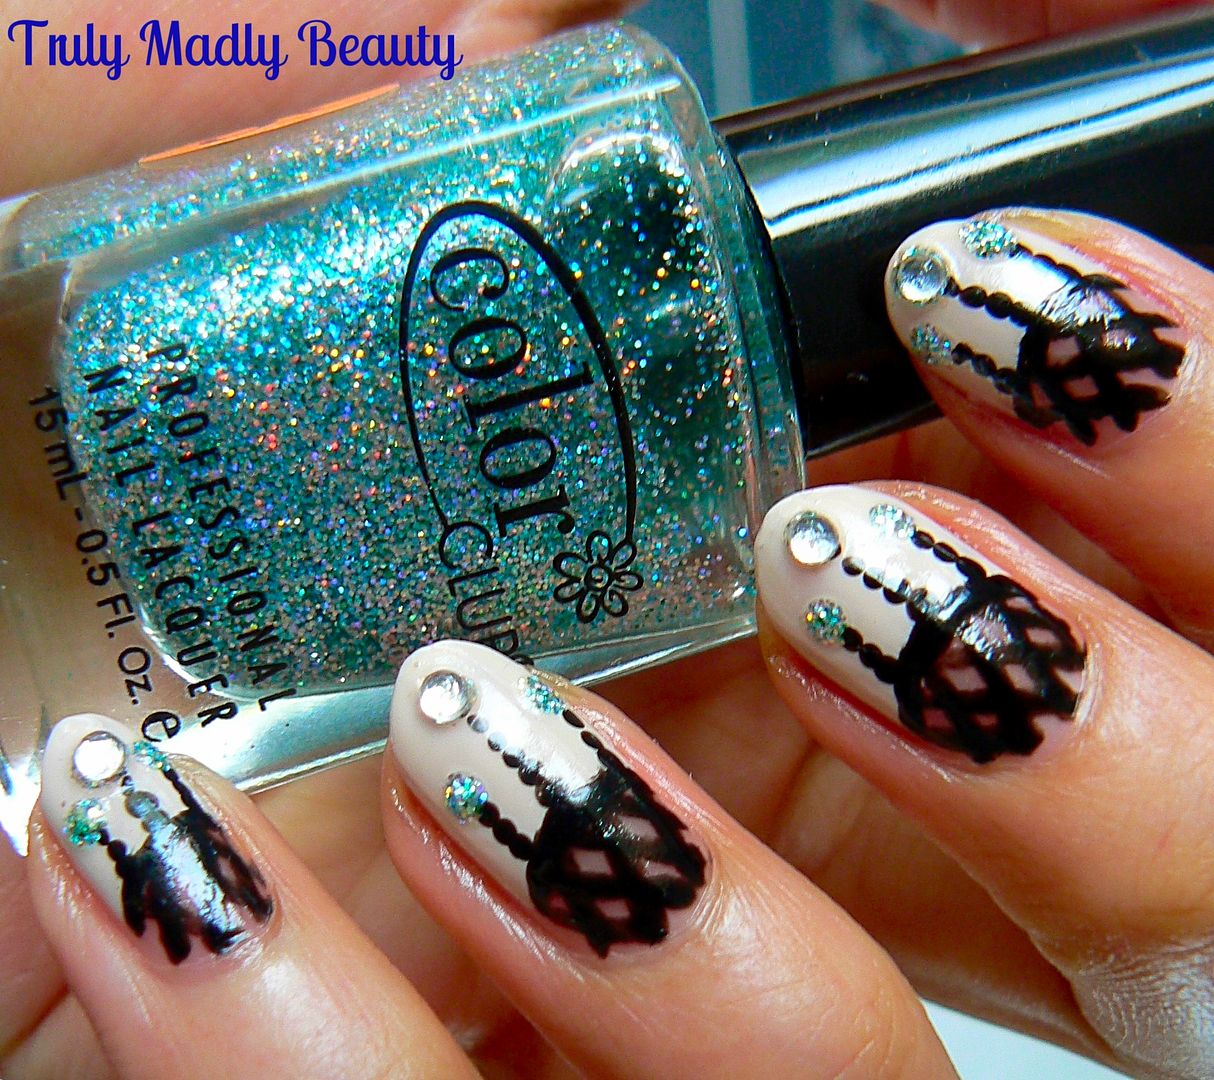
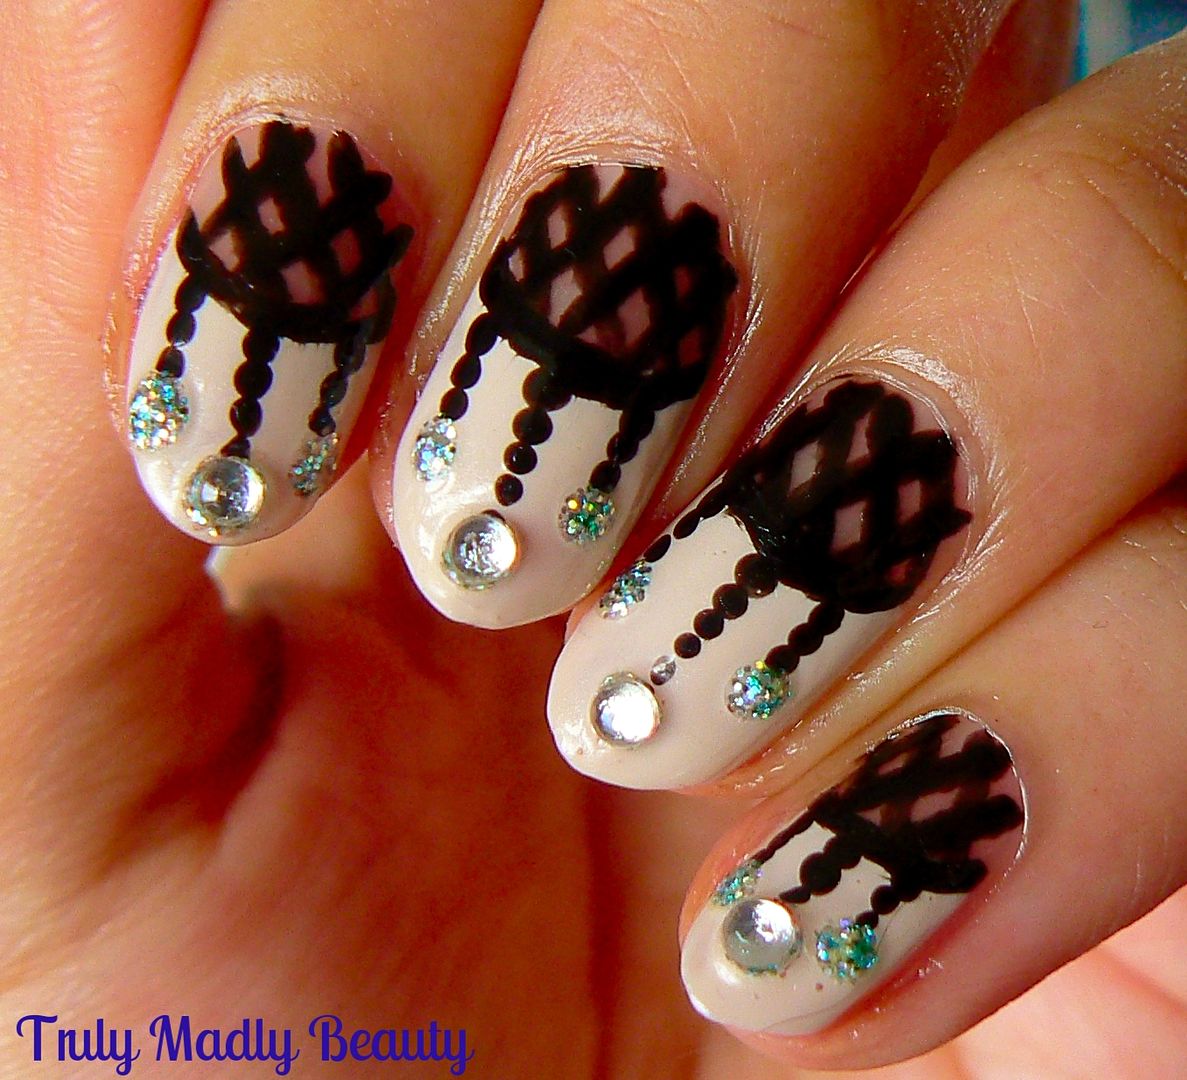
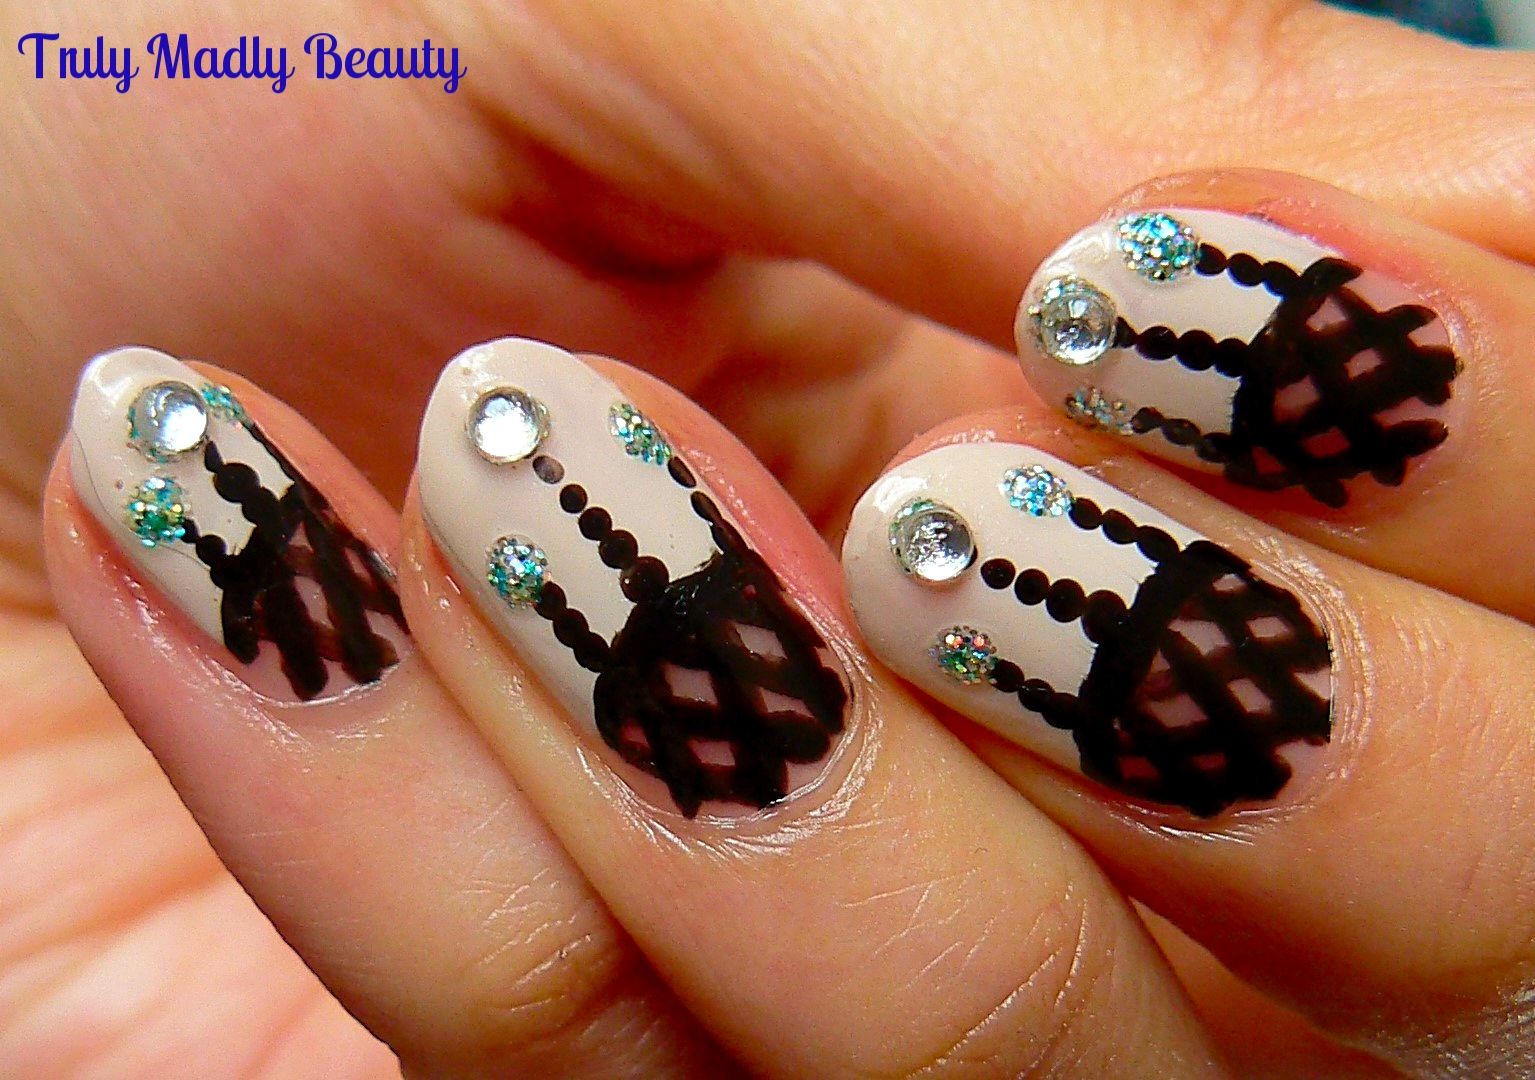
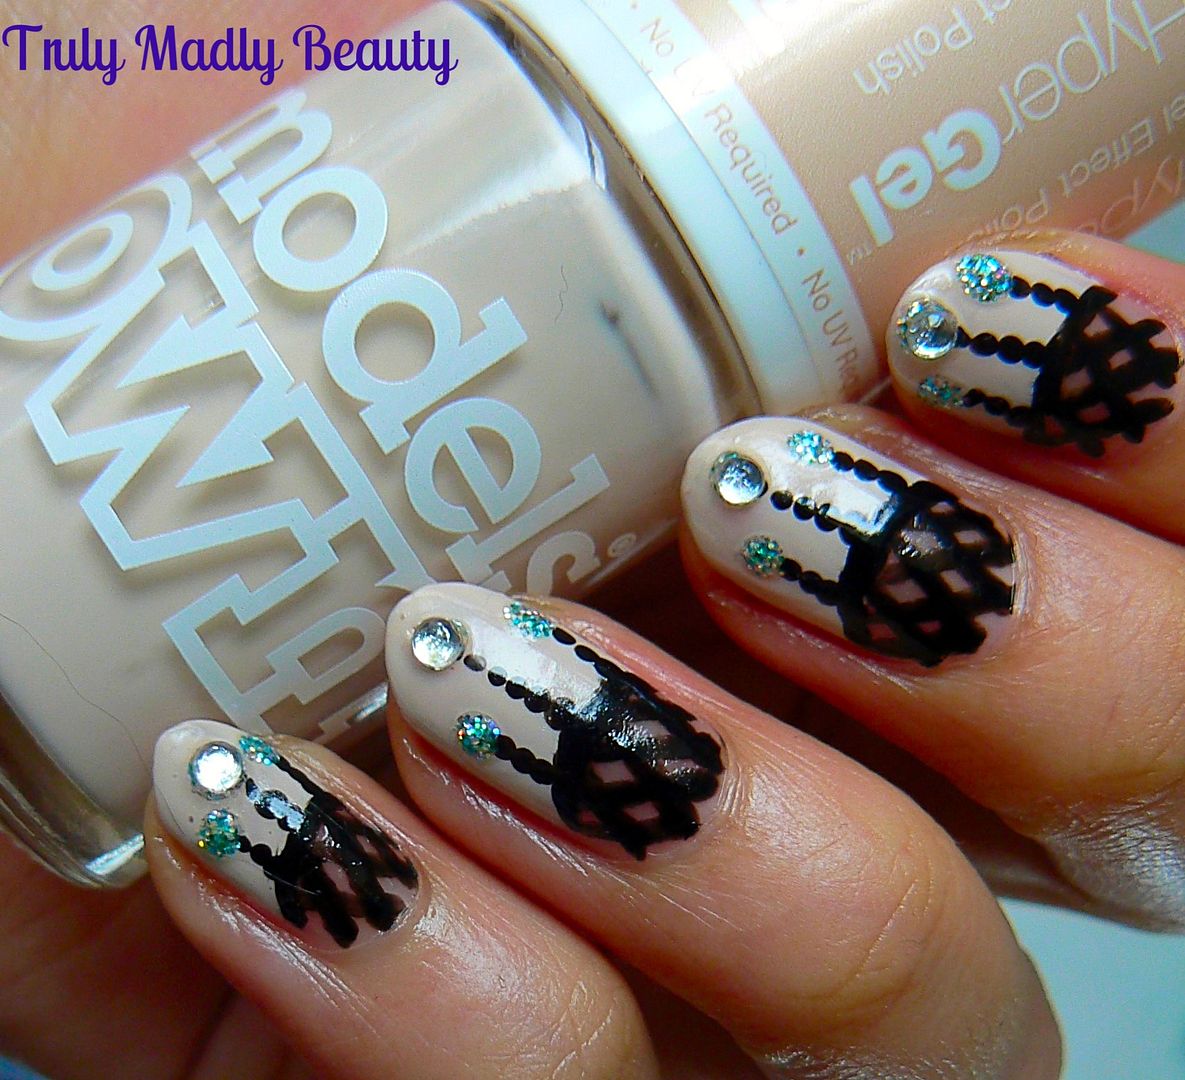
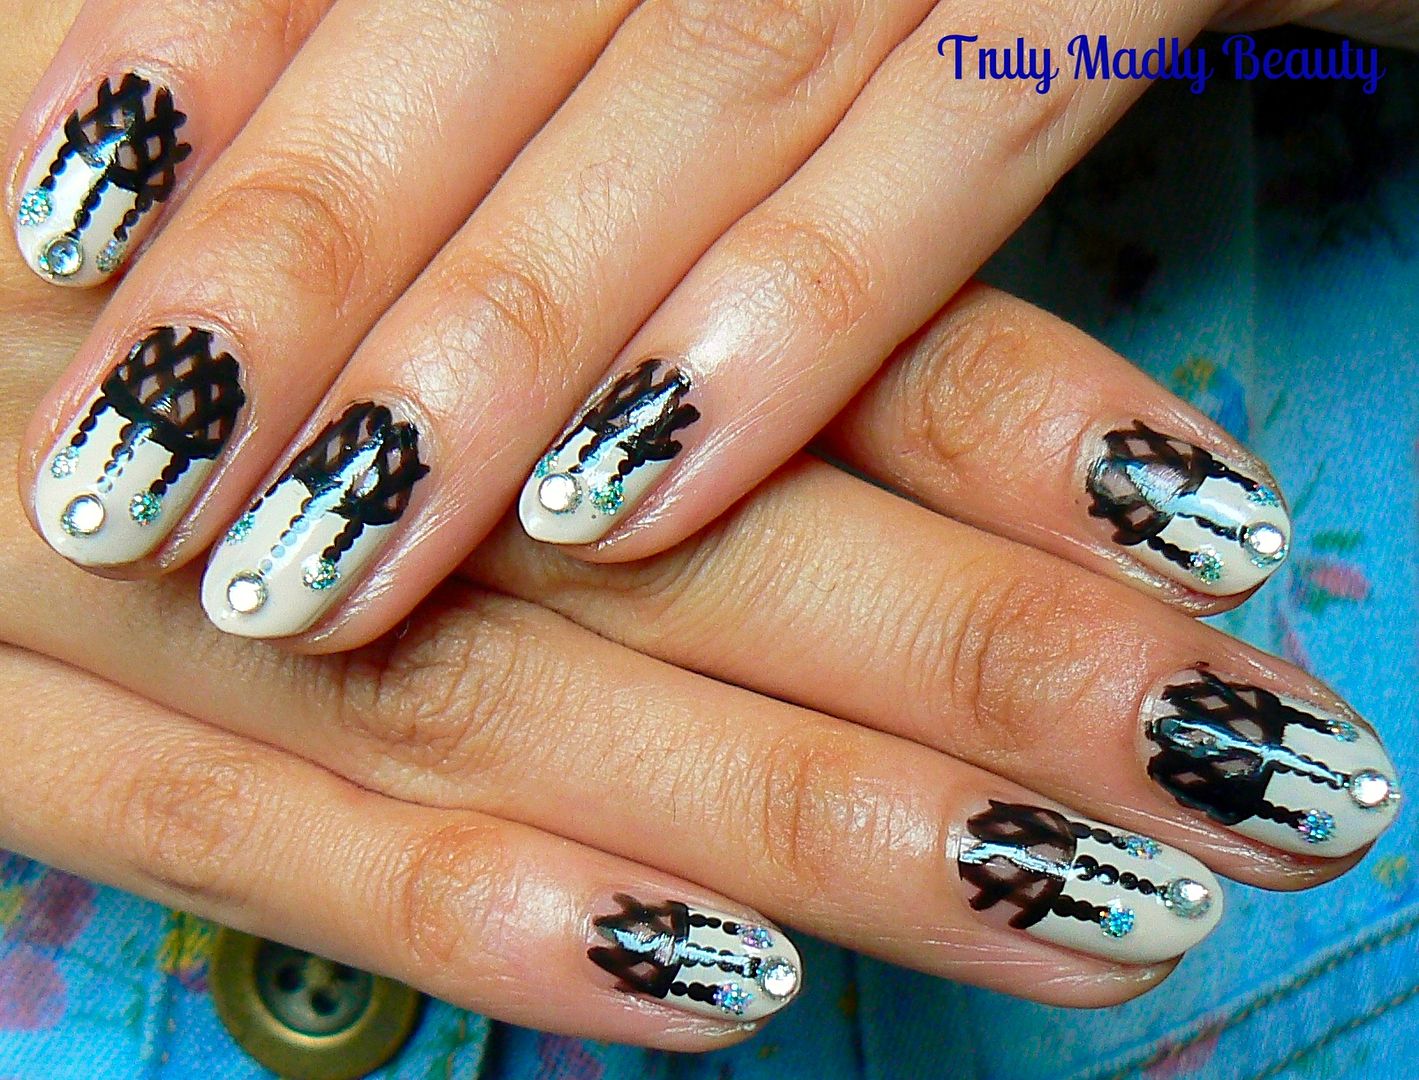
Today's design is Dream Catcher or Chandelier nails if you like! These pretty ornaments looks as lovely decorated on the nails as they do hung up on your walls & you can totally play around with different colours & glitters ;) I've gone for a black & nude look with silvery blue sparkles!


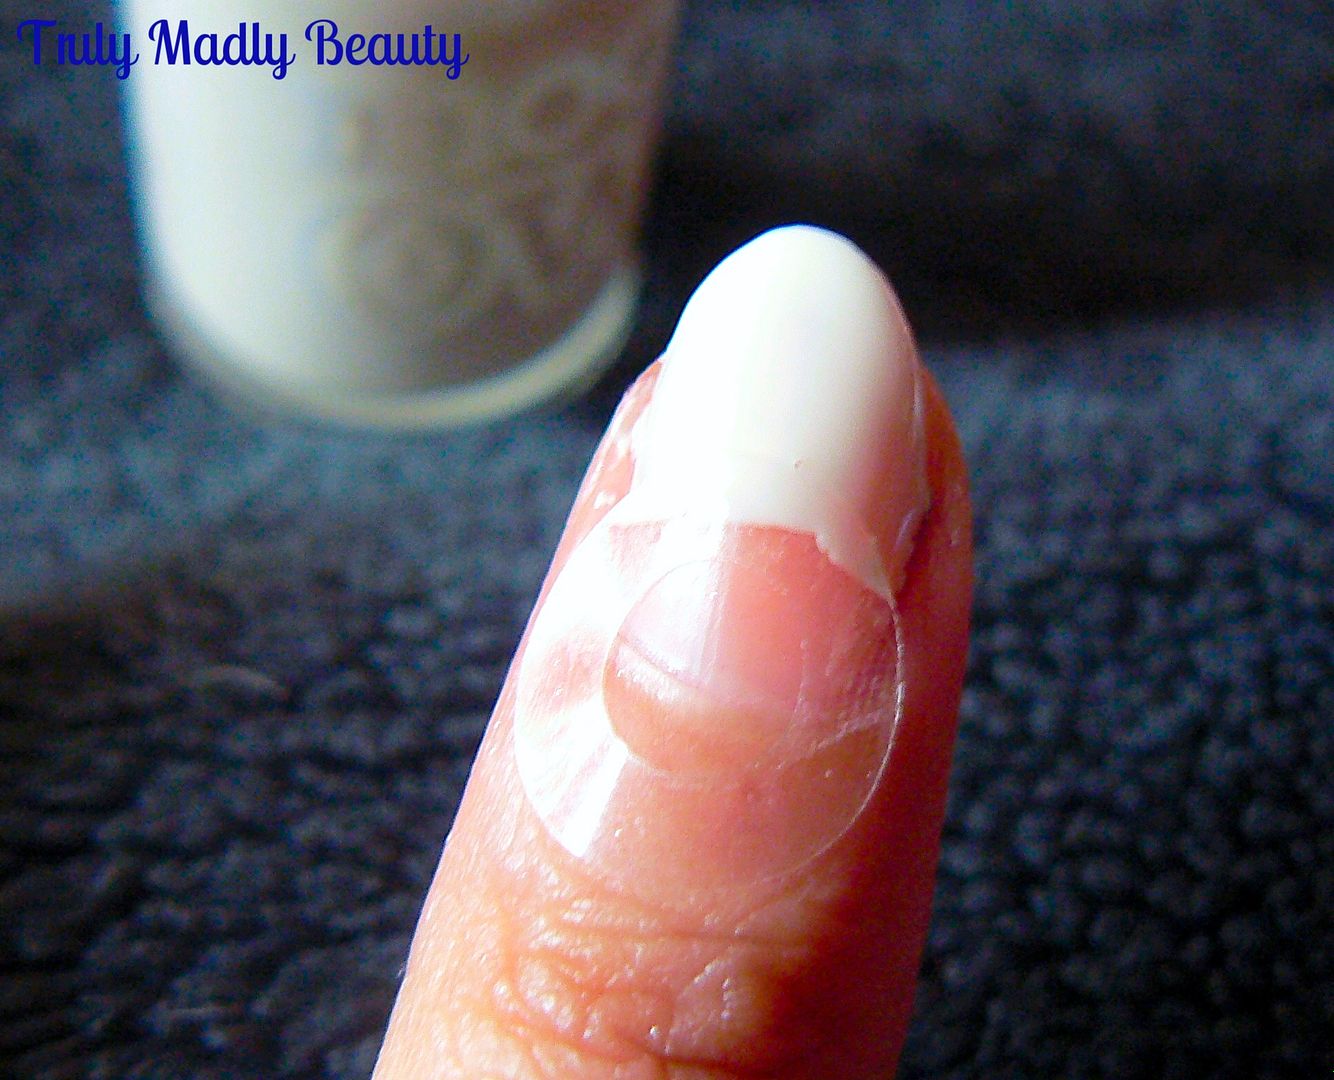
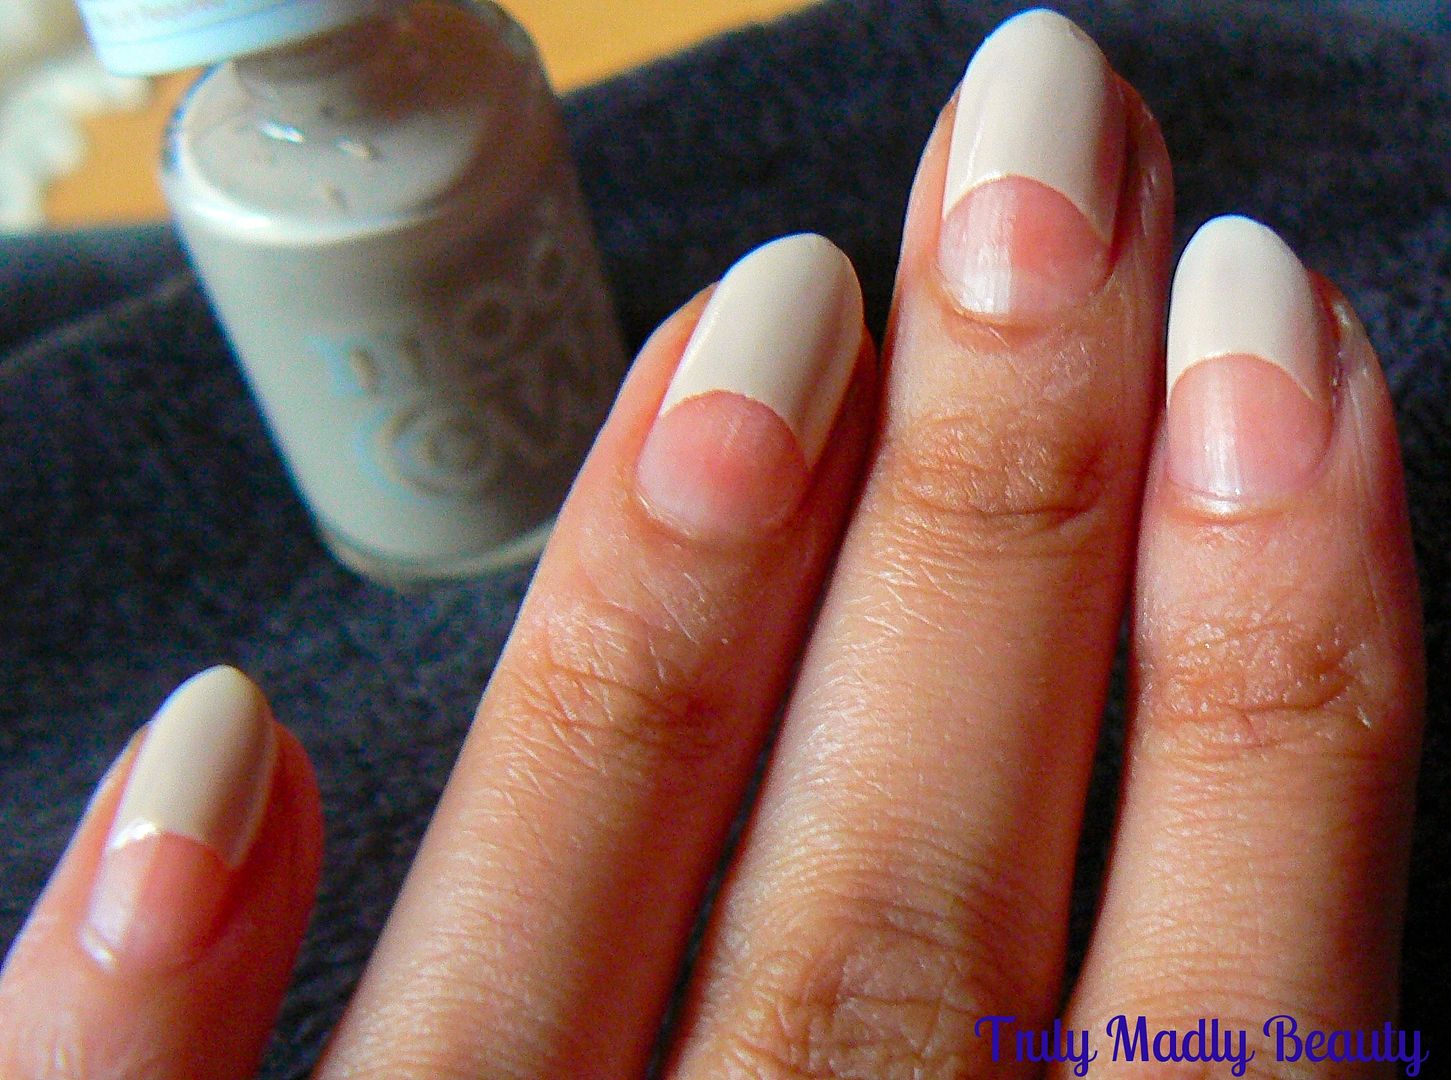
First you need to apply your polish whilst leaving a semi-circle gap for your Dream Catcher. I went for a lovely cream nude courtesy of Models Own HyperGel in Naked Glow.


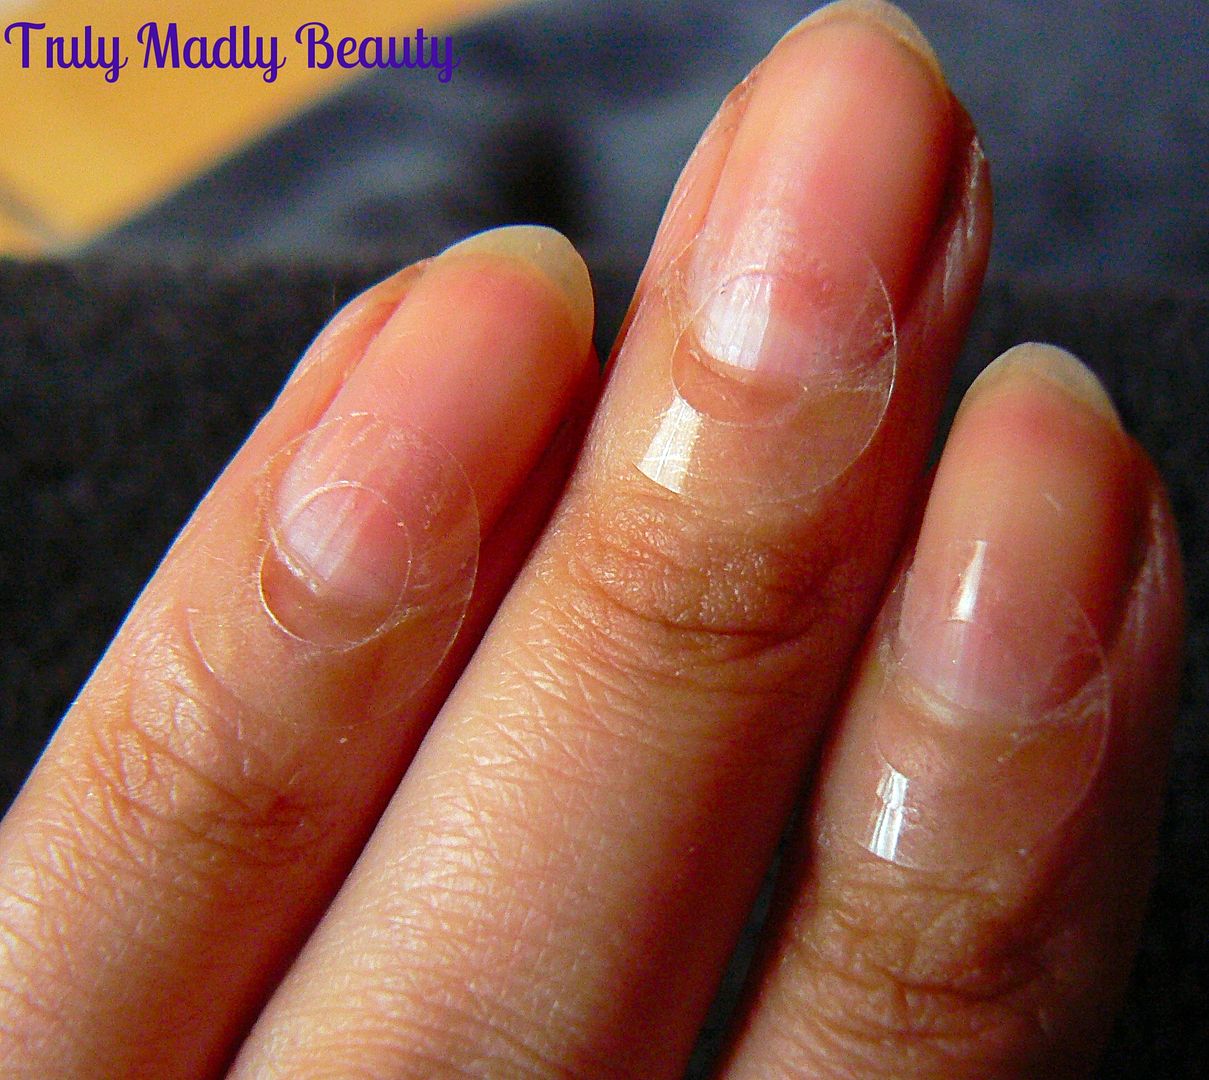
To help create the curved space I simply used some hole punch reinforcer stickers which are perfect for this. Just stick these onto the bottom half of the nail as shown.


As the formula of the HyperGel polishes is quite thick I got away with applying just a coat for a nice opaque finish. Once applied remove the hole punch sticker whilst the polish is still wet (using a tweezer makes this task easier) & clean up any smudges with a fine brush & acetone.


Now to get to drawing your design. Grab your black polish, or whichever colour you like, & a fine nail art brush. In to the bare nail space apply a criss cross net pattern by drawing 3 diagonal lines & 3 more on top of those in the opposite direction. Apply a thin line of the black polish around the curved edge of the nude polish.


Then using a dotting tool, apply 3 dotted lines coming down from the net, gradually reducing the size of the dot & making the centre line slightly longer than the others. And hey presto you have your Dream Catcher!


And now time for the glitter! Here I've used a holo glitter from ColorClub. Using whichever shade you like, grab your dotting tool again & apply a blob of the glitter at the bottom of the two outer streams. 


At the bottom of the centre stream I applied a pretty rhinestone, but you can stick with the glitter if you prefer!


Wait for your polish to dry for a wee bit before sealing your design with topcoat. And thats it!


Hope you liked this design my lovelies, do let me know if you give it a try! Thanks for reading!

Lotsa love to ya!


1.26.2017

NOTD - Flamingo Nail Art Tutorial!

Hello there lovely readers!

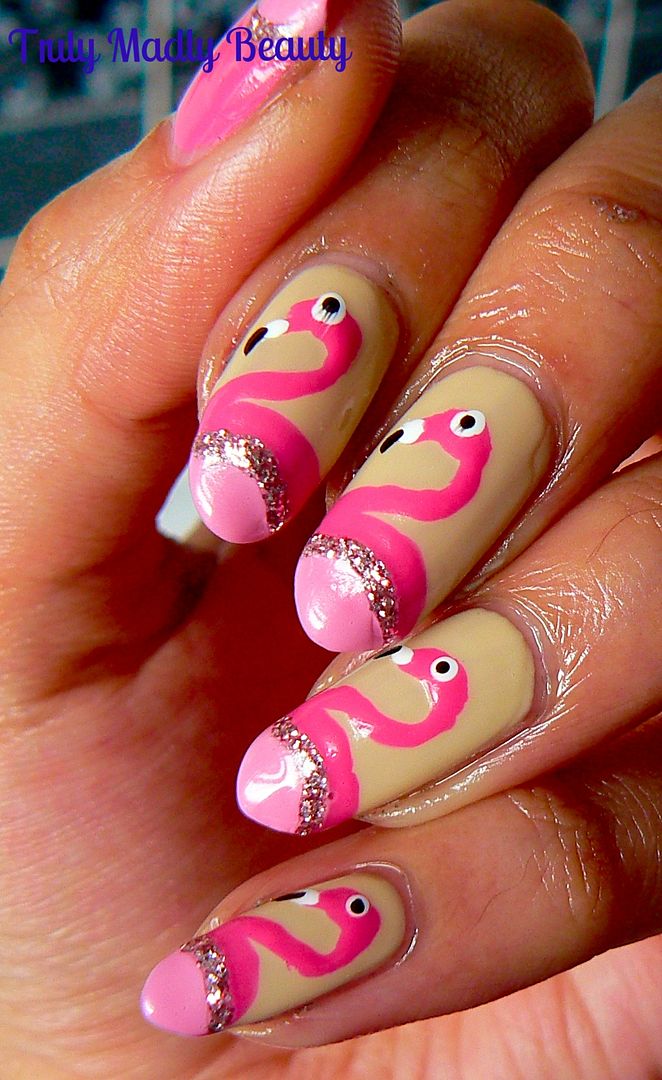
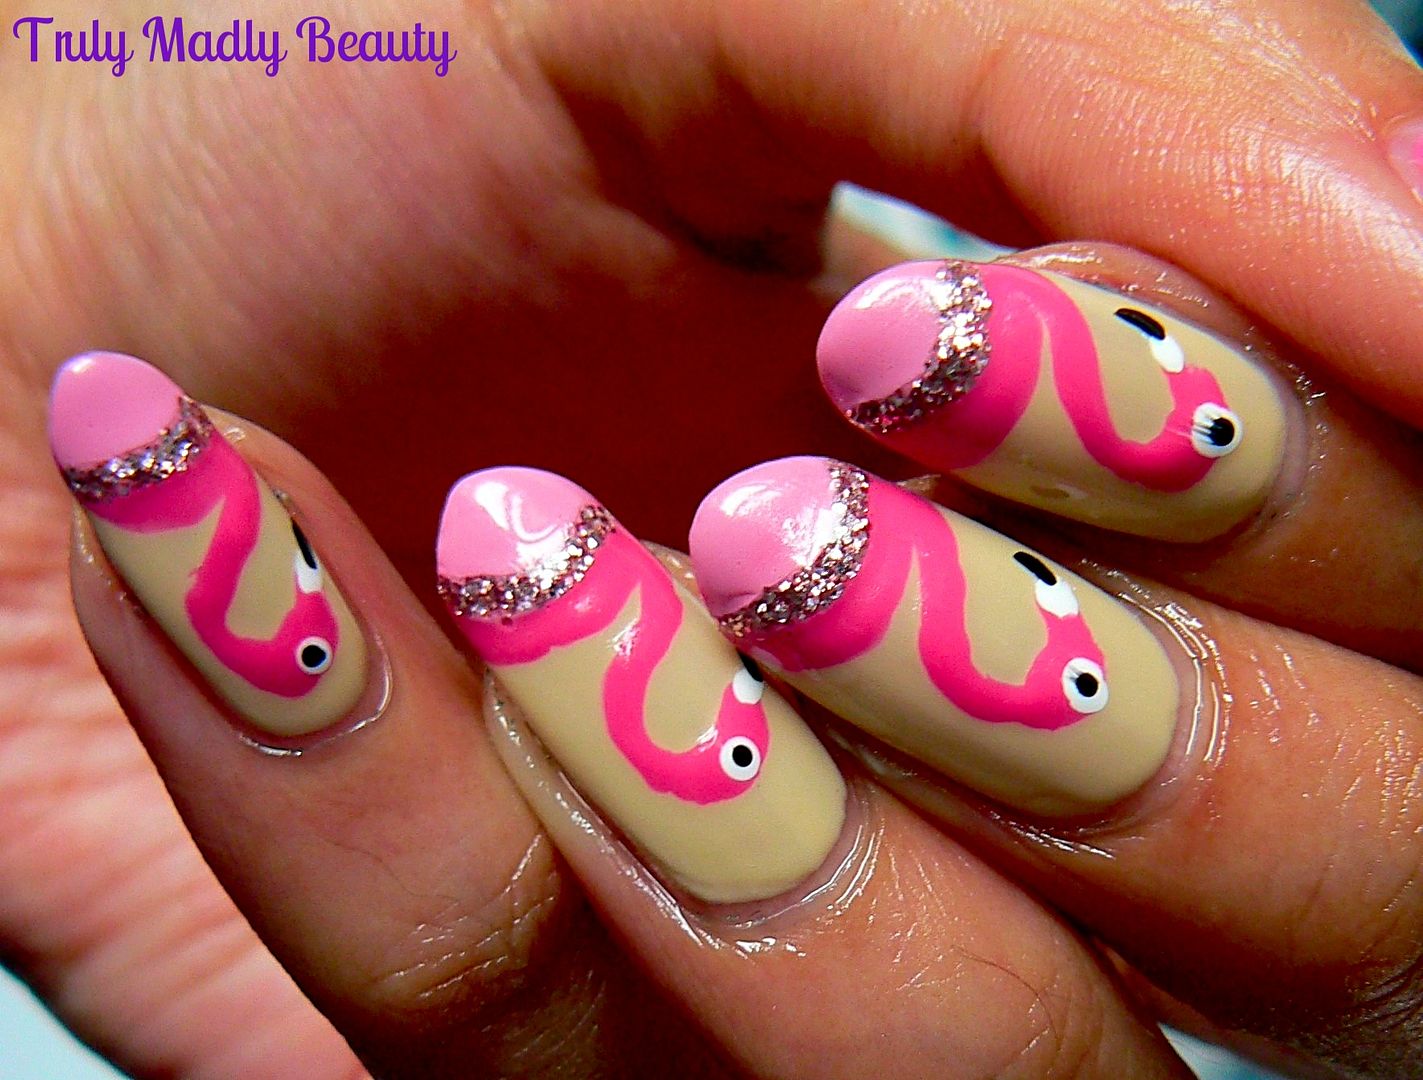
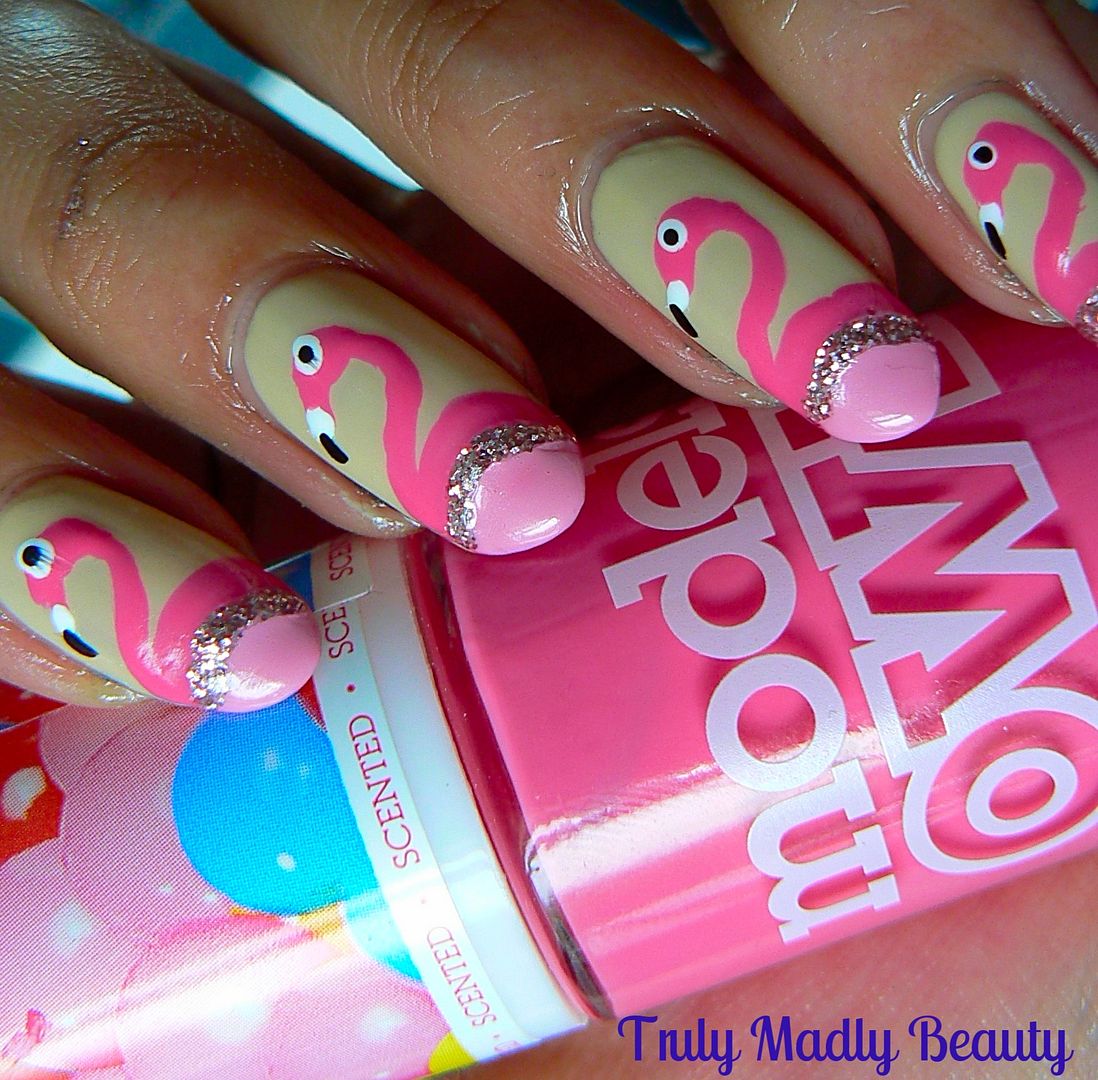
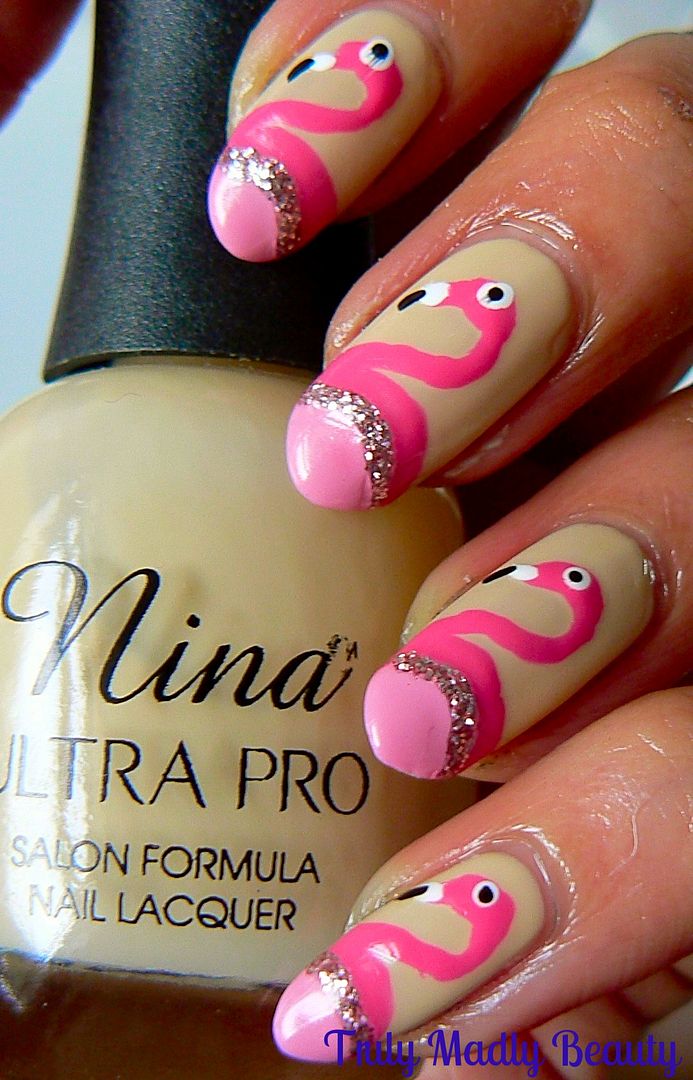
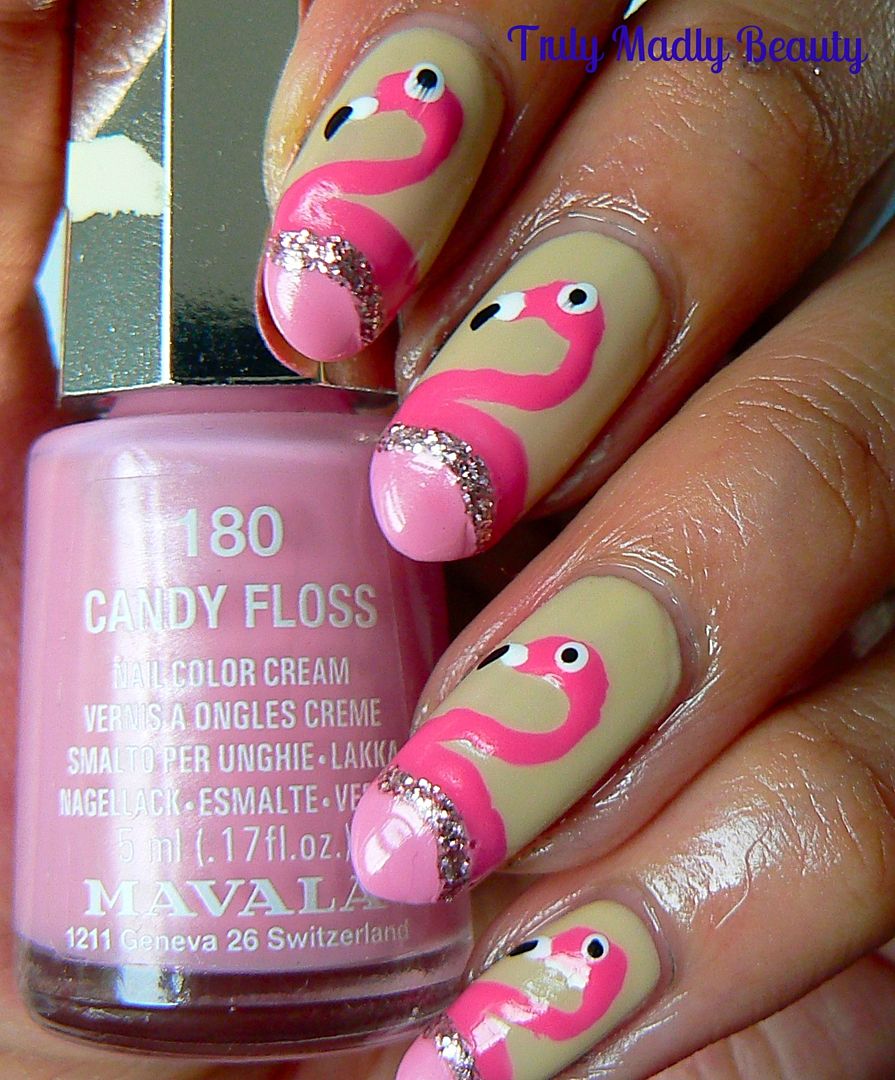
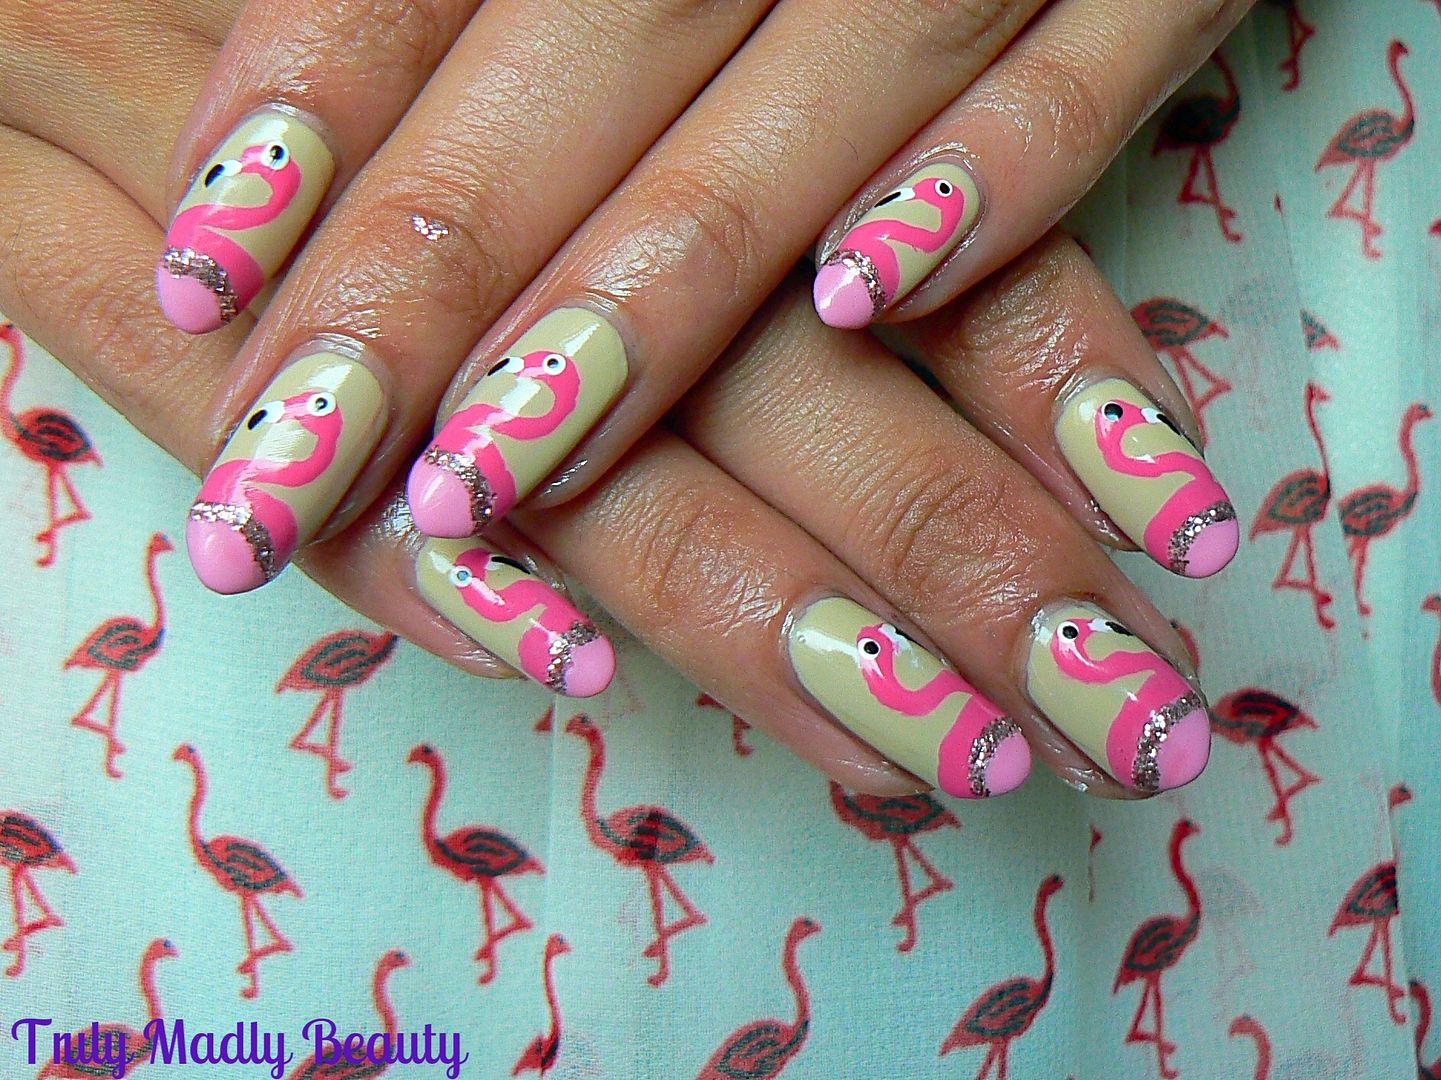
To celebrate almost making it through the first month of 2017 intact I have a quirky Friday Funday (okay its technically still Thursday but who's counting?) manicure for you that succeeded in putting a smile on my face with its featuring that most delightful of bird species...flamingos! 


Inspiration for this actually came from a darling flamingo print dress I picked up in an independent boutique in London. Once I had that on...I knew I had to have me some flamingo nails to match :)


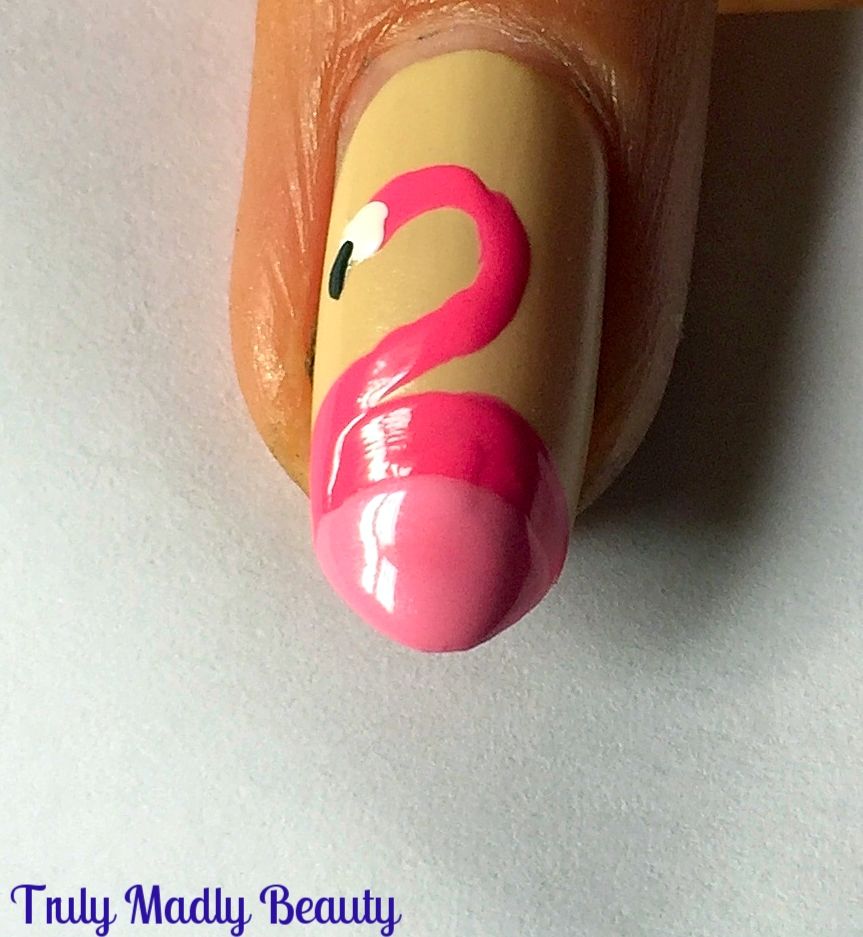
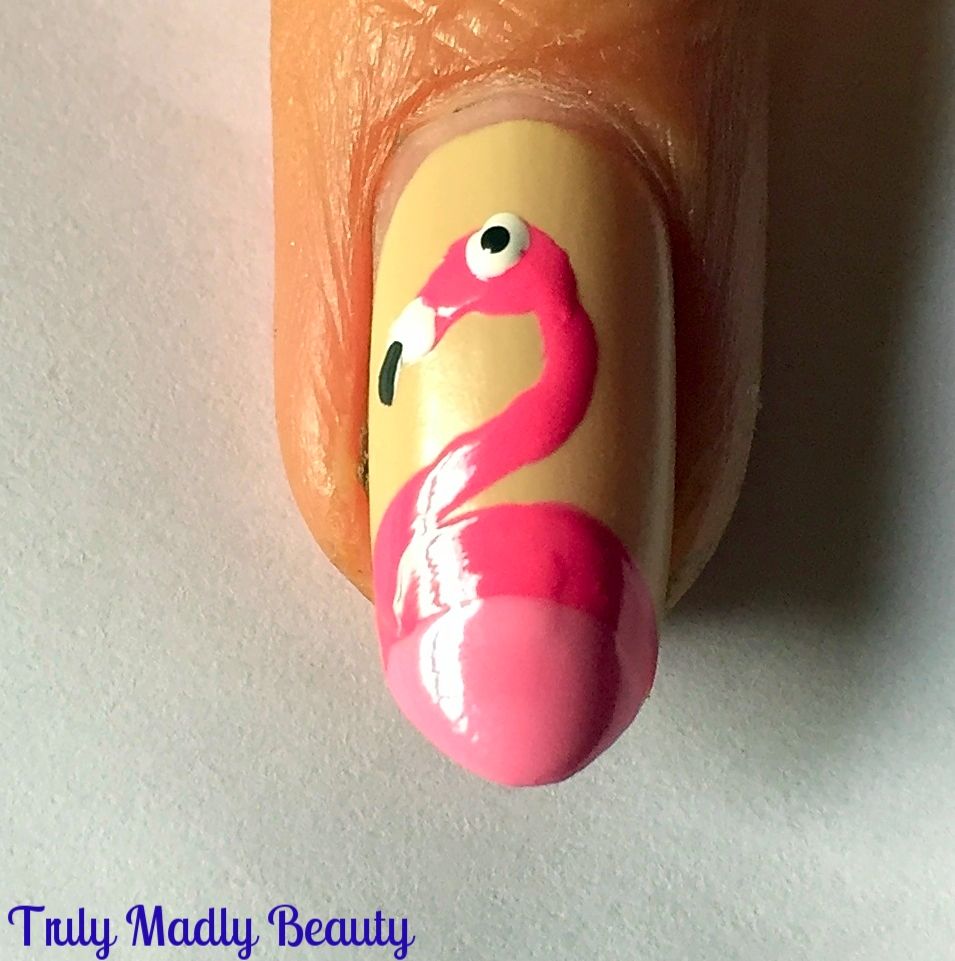
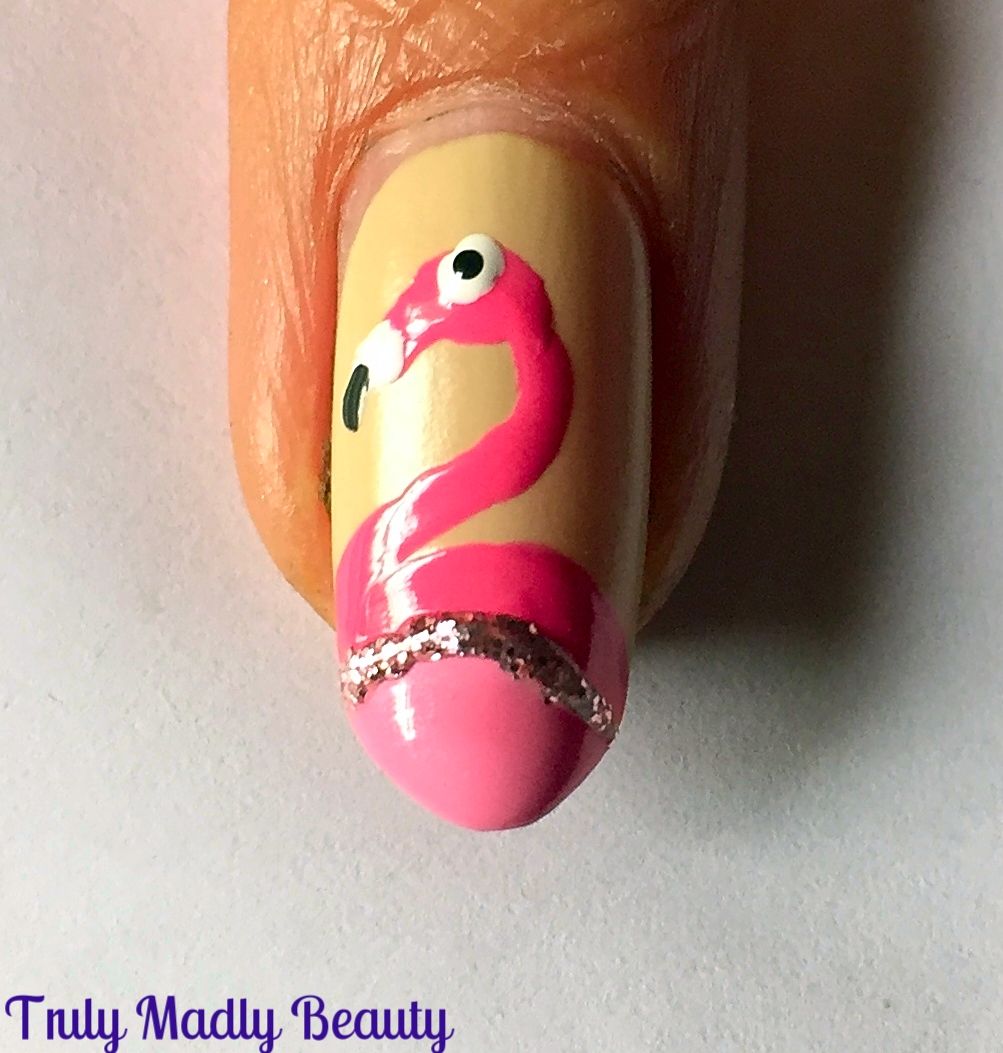
And creating these flirty flamingos is easier than you might think, to show you just how easy, I've done a step by step pictorial showing you each stage so that you can rock these funky birds too! Just keep on reading beauts...


Start with a nice neutral tone base to make those flamingos stand out, I've used one of my favourites, Rum & Reggae by Nina Pro Ultra. You can also choose to leave the nail bare with just clear base coat if you wish!


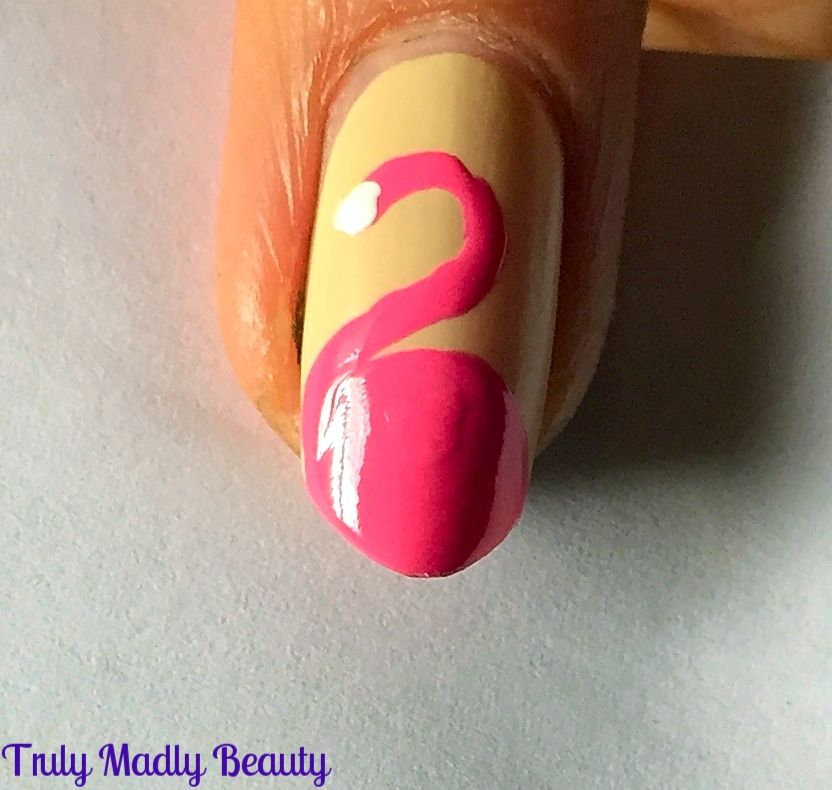
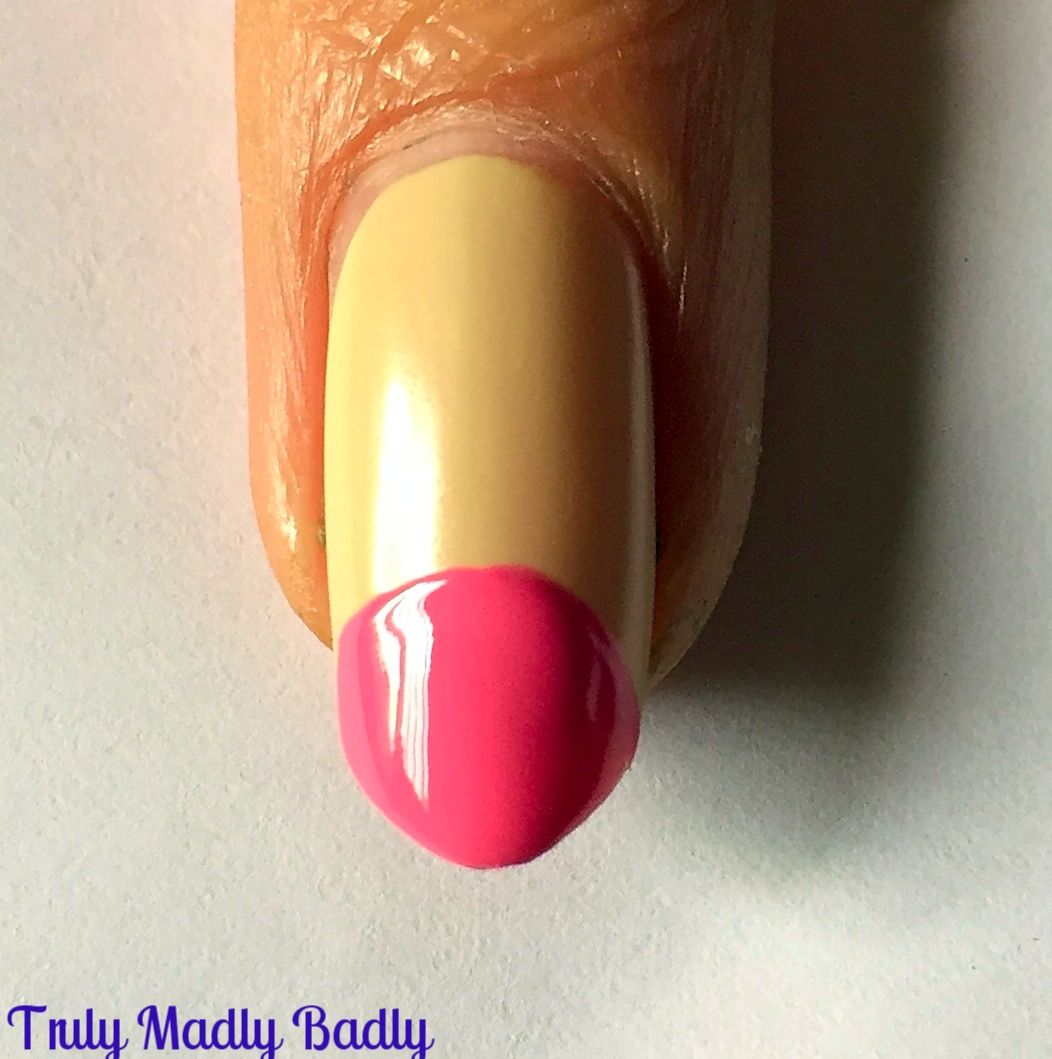
Now to begin creating your flamingos, start by applying a half moon/ semi circle of pink on to the tip of your nail as shown below, here I've opted for Models Own Gumballs from their sweet shop collection & yes it smells like bubblegum!


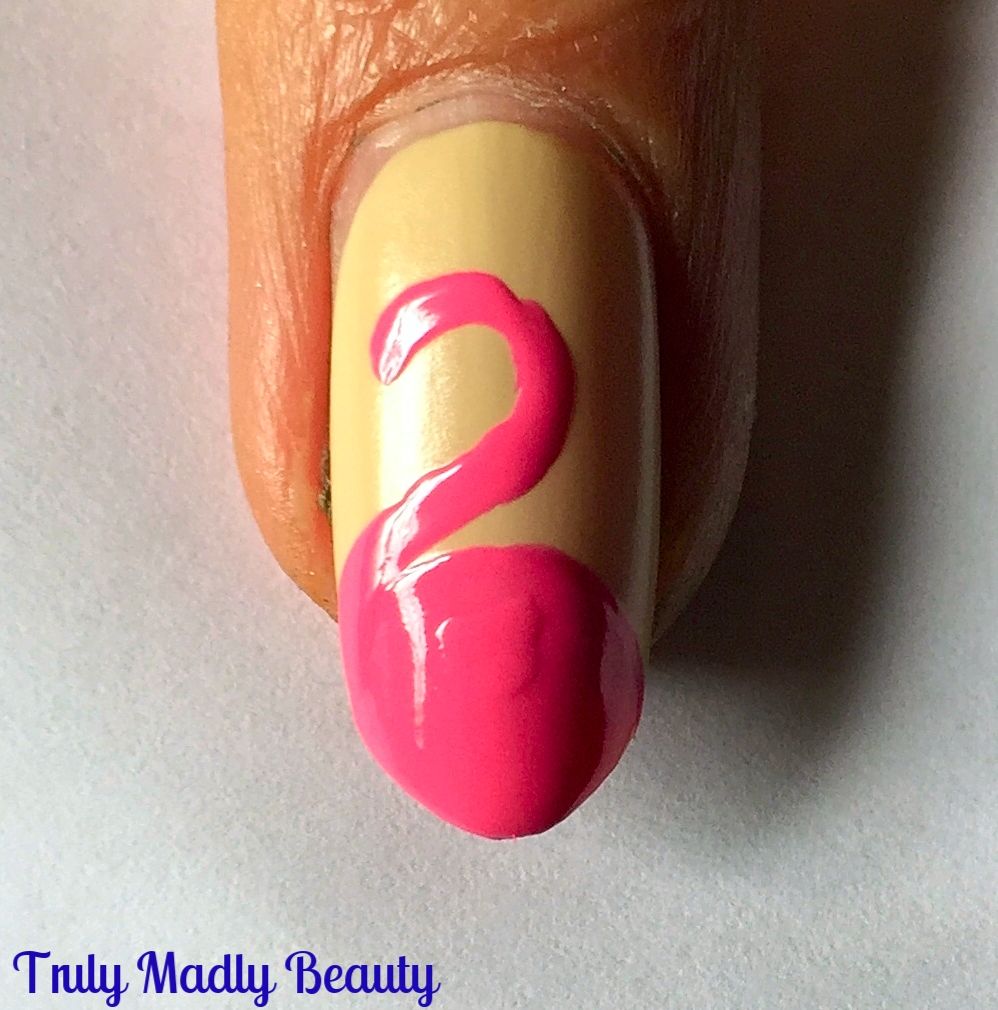
Next, using the same pink & a fine nail art brush, draw on a curved hook from the top of your half moon for the neck of the flamingo like so


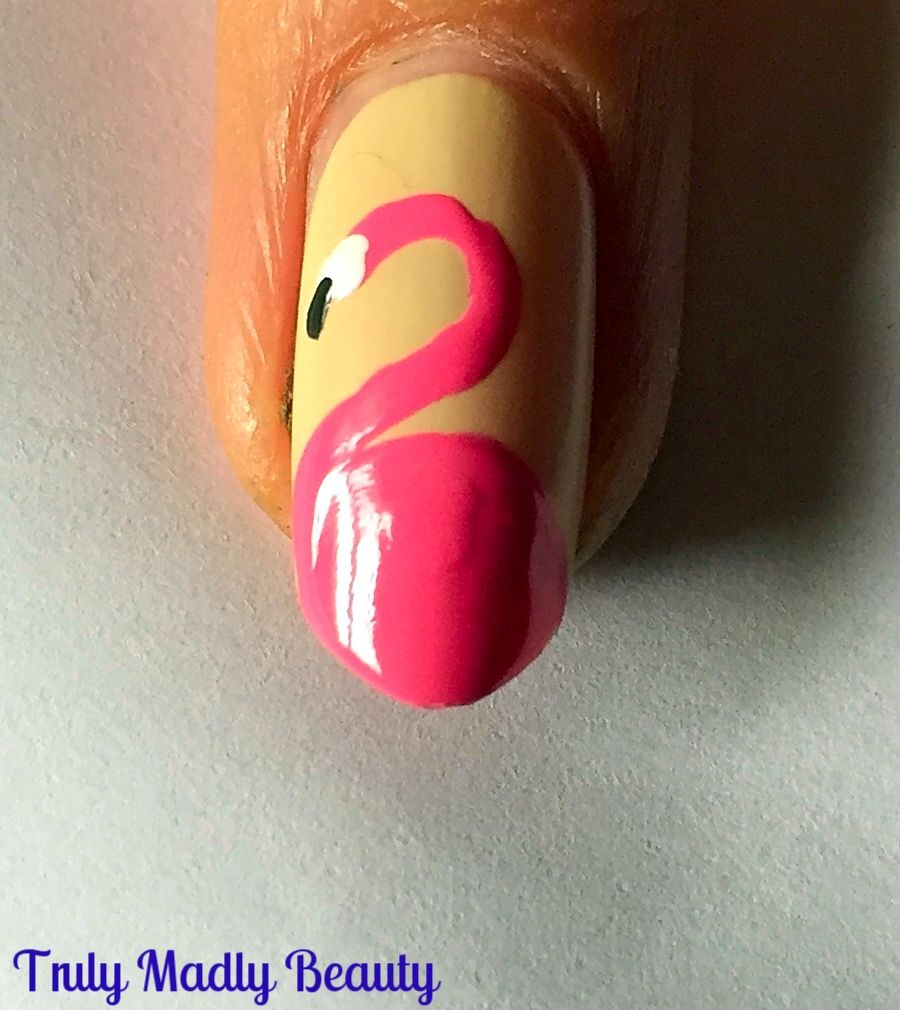
Then grabbing a little bit of white polish, using another fine nail art brush or a dotting tool/toothpick/bobby pin apply a small blob of white at the tip of your pink hook


Now using some black polish & the fine nail art brush again, add on a small curved black beak to the edge of the white as shown, you can slowly see your flamingos coming together!


Next its time to grab a lighter shade of pink to what you've already used to add definition to the body, here I've used Mavala Candy Floss & applied a smaller little semicircle on top of the darker pink.


The eyes come next & are simply a dot of white with a finer dot of black in the centre, you can add a bit more pink for the head if you need to


And finally for a finishing touch I added on a curve of sparkly glitter courtesy of Models Own Pink Fizz which is optional of course but who can resist a bit of sparkle?


Cover your design in a a nice thick slick of topcoat & you have your flamingo's!


So easy right? I do love a quirky mani, its been a while since I've done a design like this & I've missed them! For me mani's are therapeutic in a way, having fun & vibrant nails always helps make me feel more content & positive & this definitely delivered on that :)


Do let me know if you give this a try, would love to see! Thanks as always for reading, till next time!

Lotsa love to ya!


10.25.2016

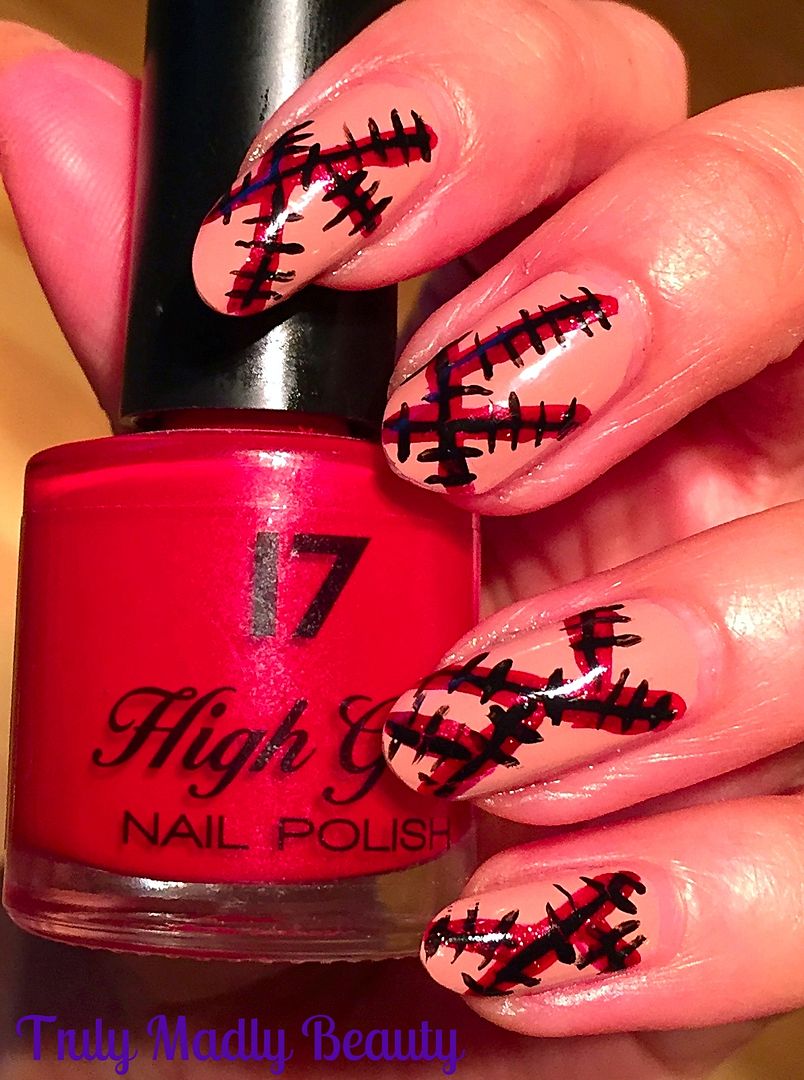
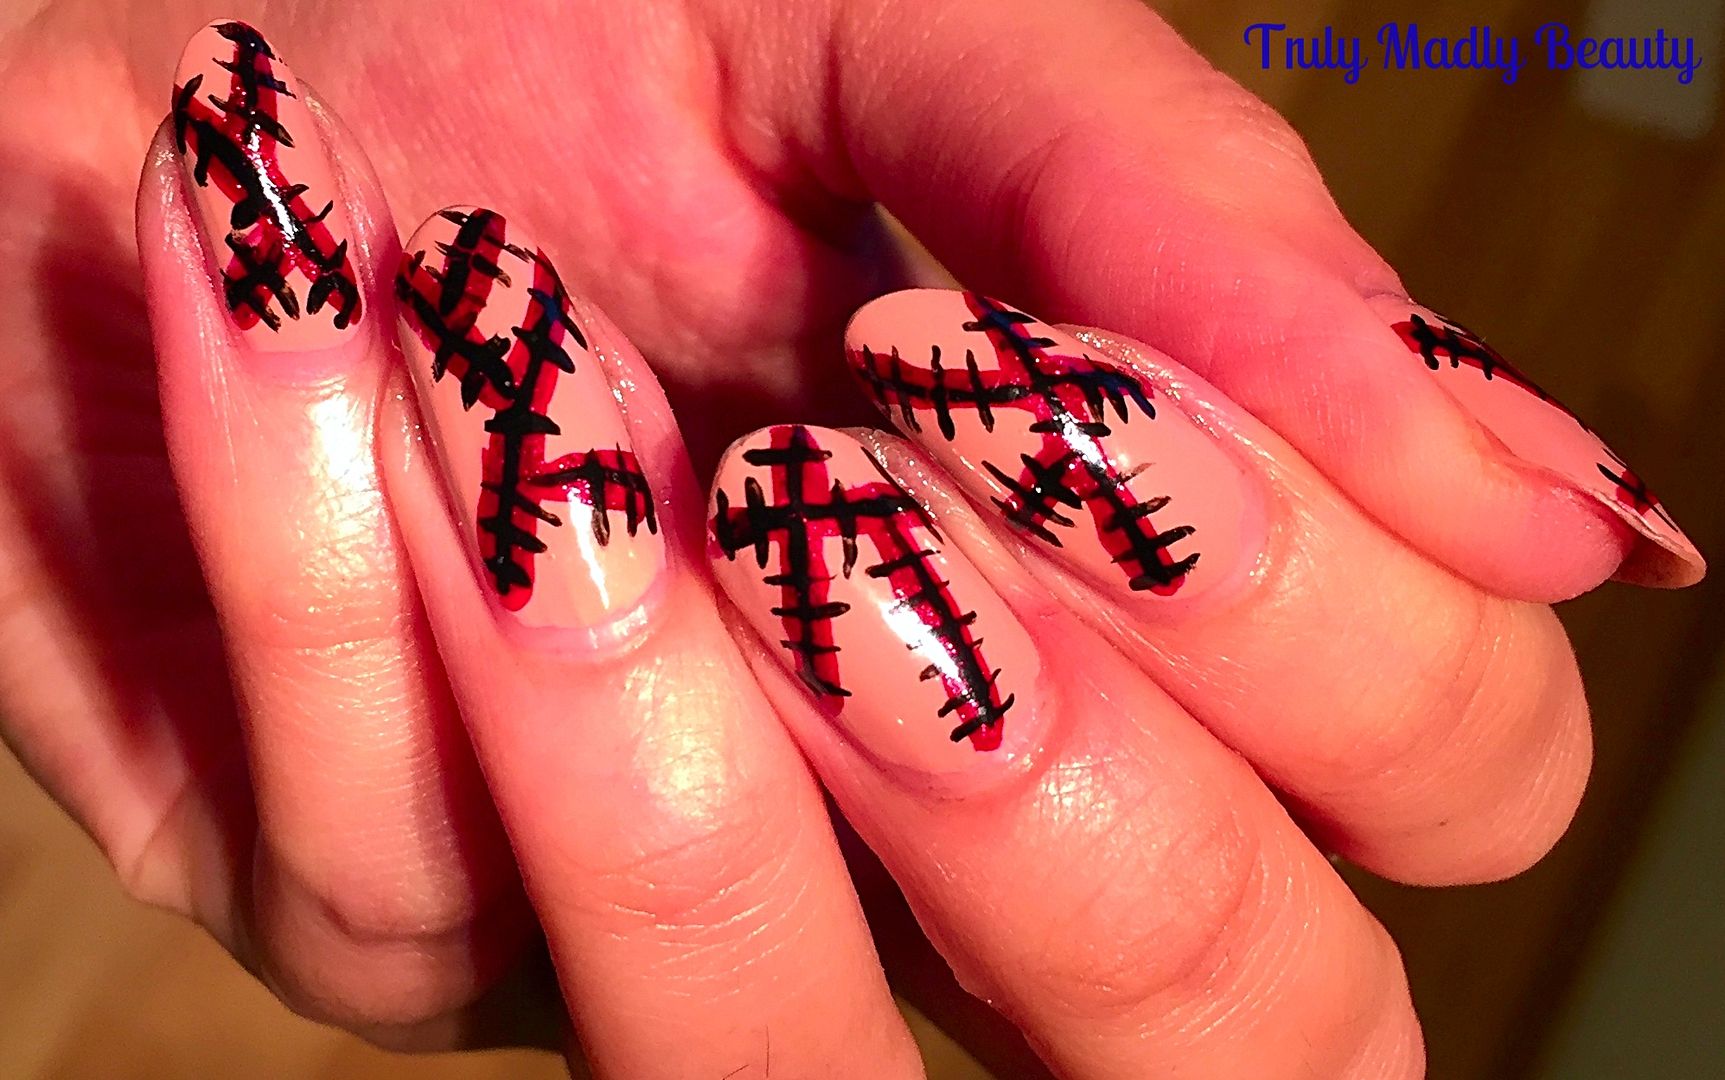
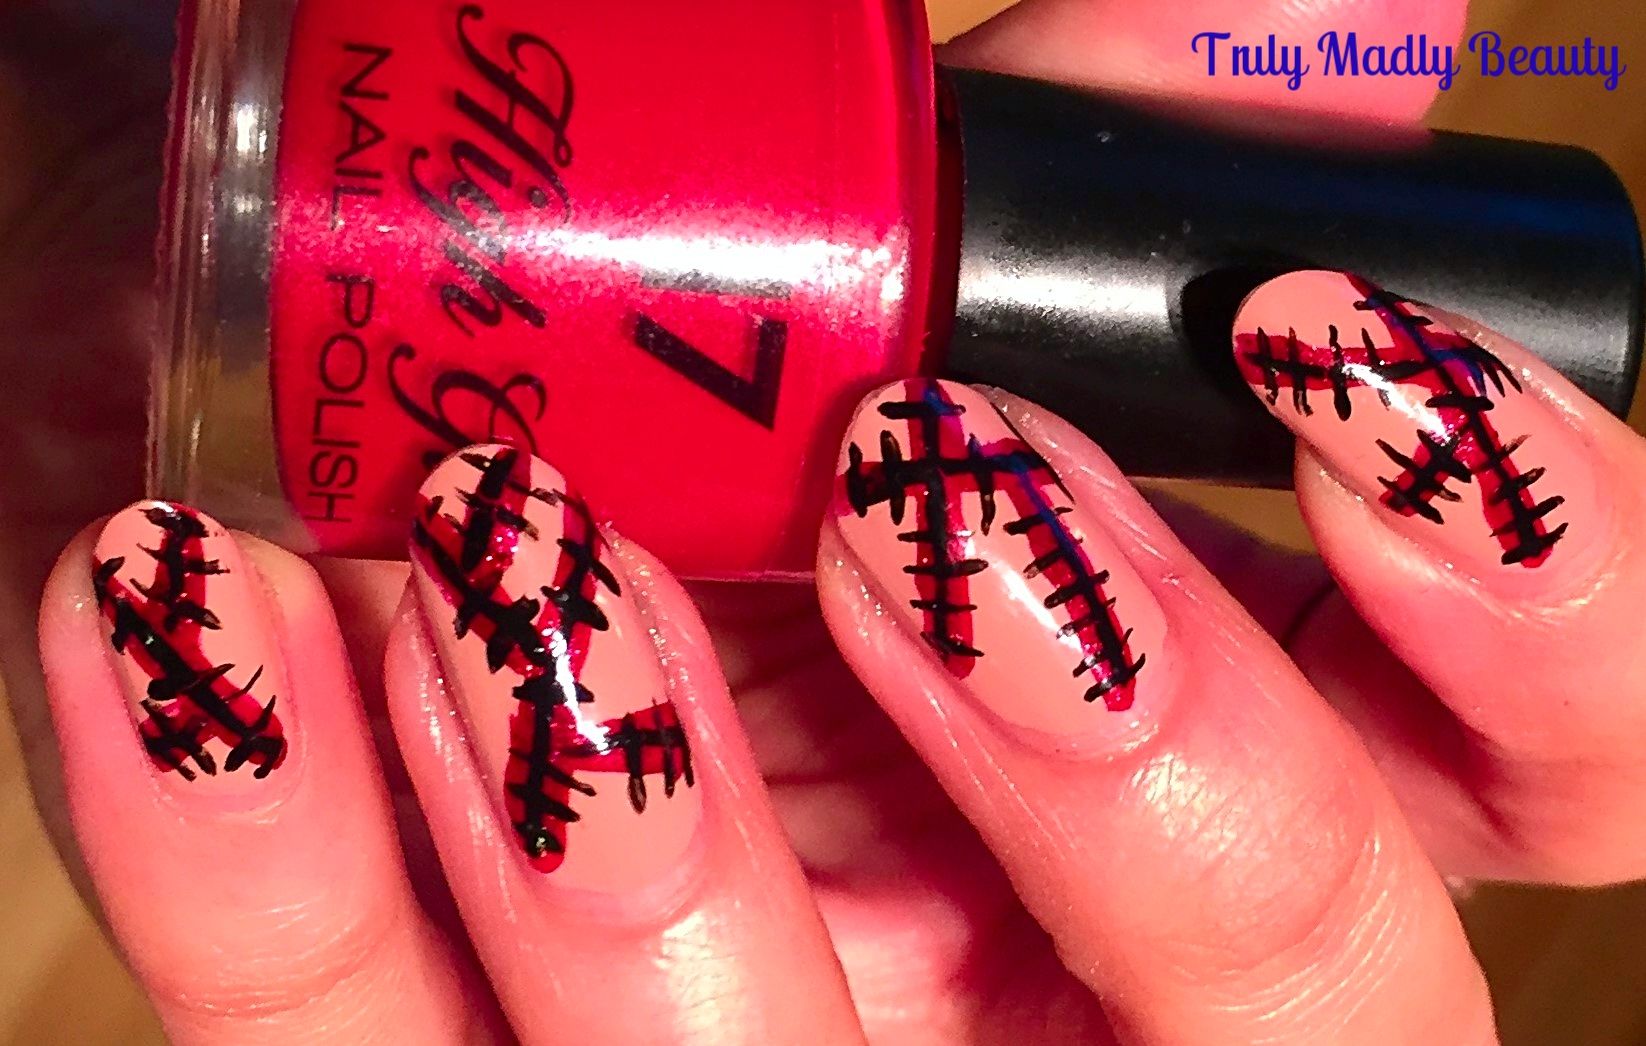
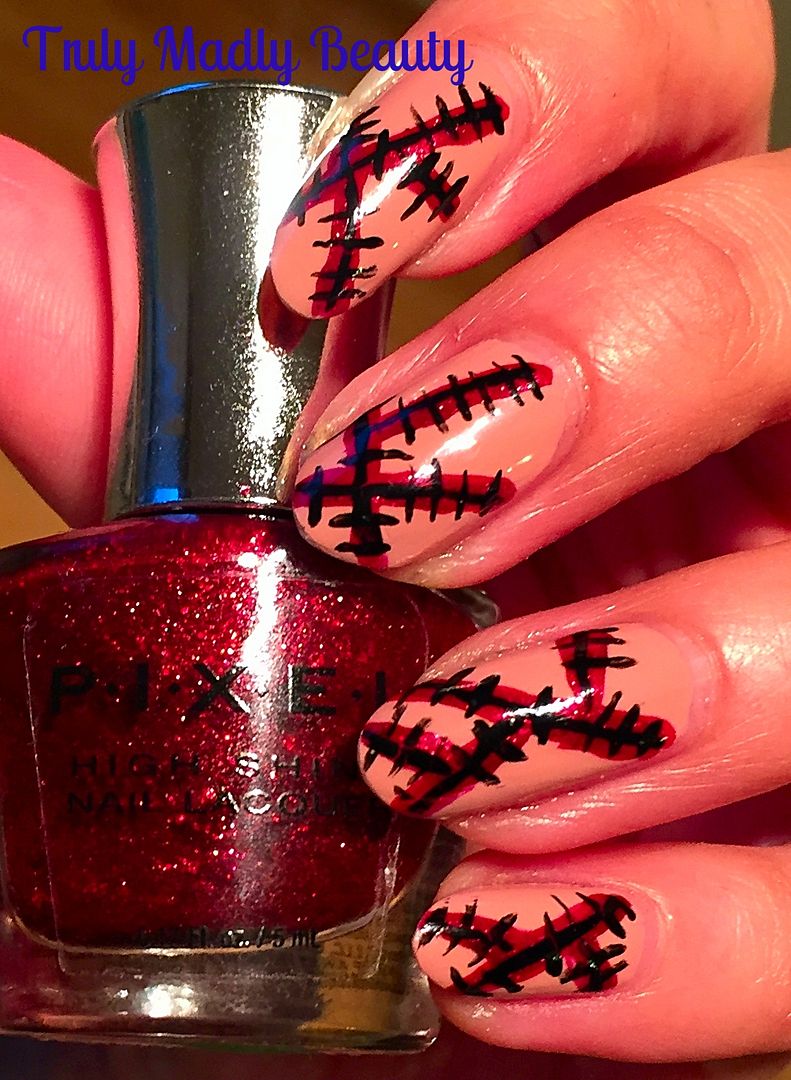
Halloween NOTD - Stitched Skin Nails!

Hello there my lovely readers!

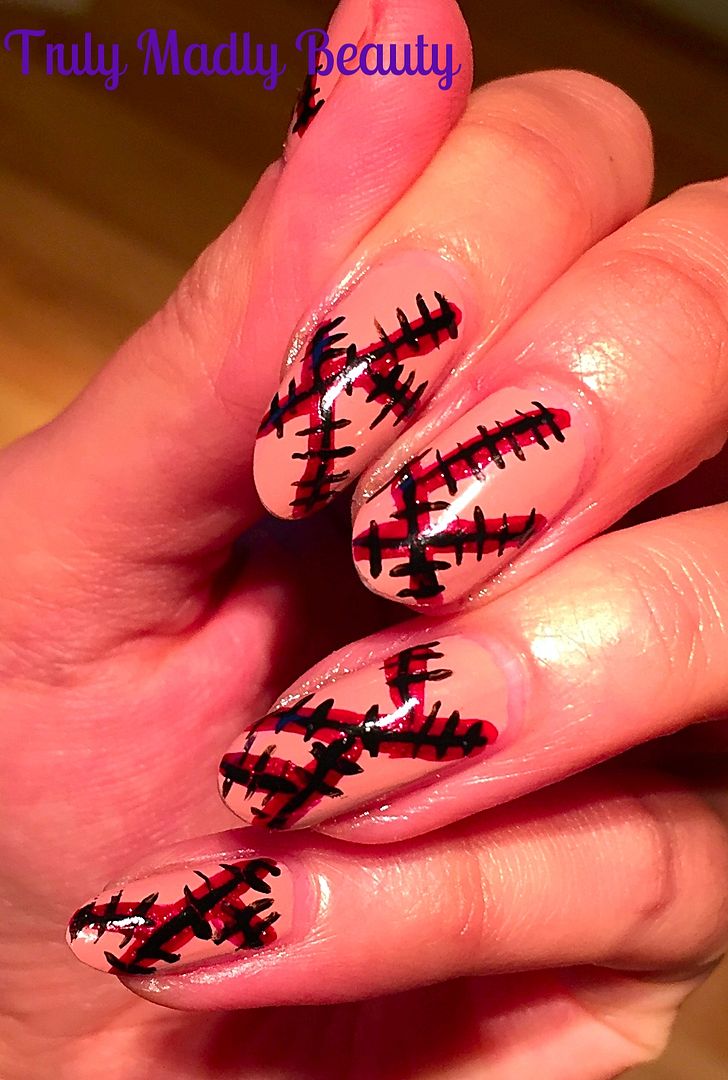
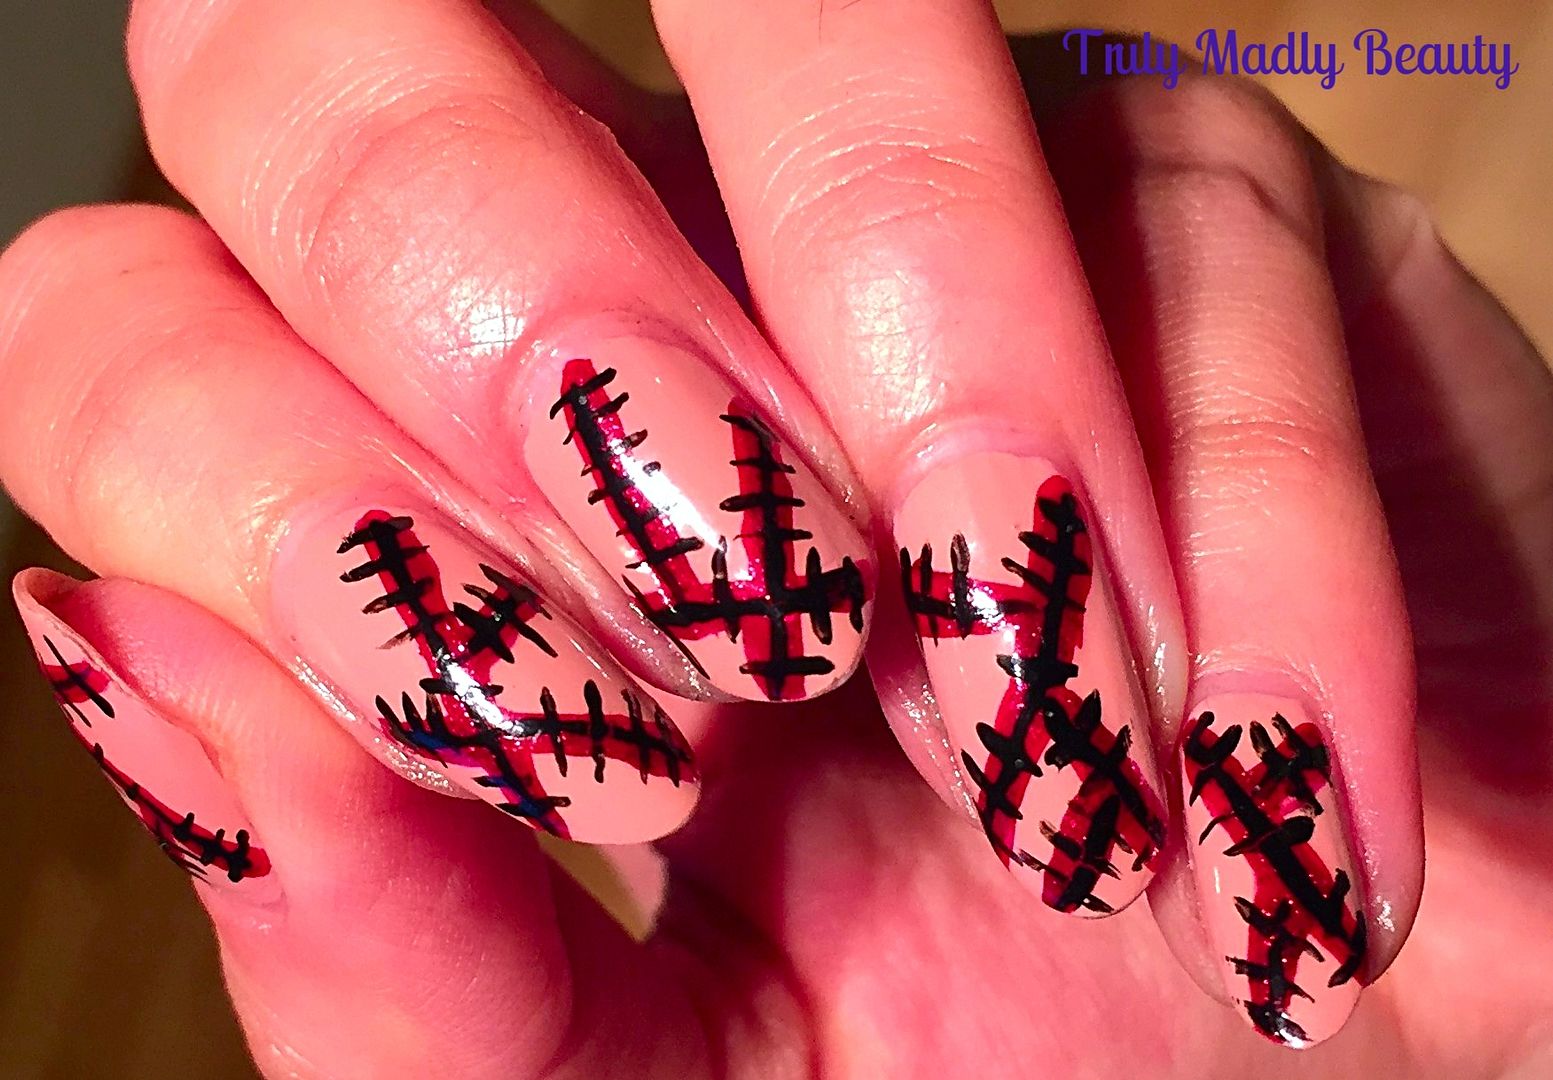
Time for the next Halloween mani my fellow dark ones & I think this one is my favourite of the bunch. So far this year we've had Holo Cobwebs & Bat French Tips. This time I thought I'd go down a more gory route with some Stitched Skin nails...but me being me I still managed to throw in some glitter action too haha! Can't keep magpie me from the sparkles!

I was so chuffed with how these came out & the best part is that they're probably the EASIEST of the designs so far to do! All you need is a nude/skin toned polish, a red polish, a black polish & a couple of nail art brushes.


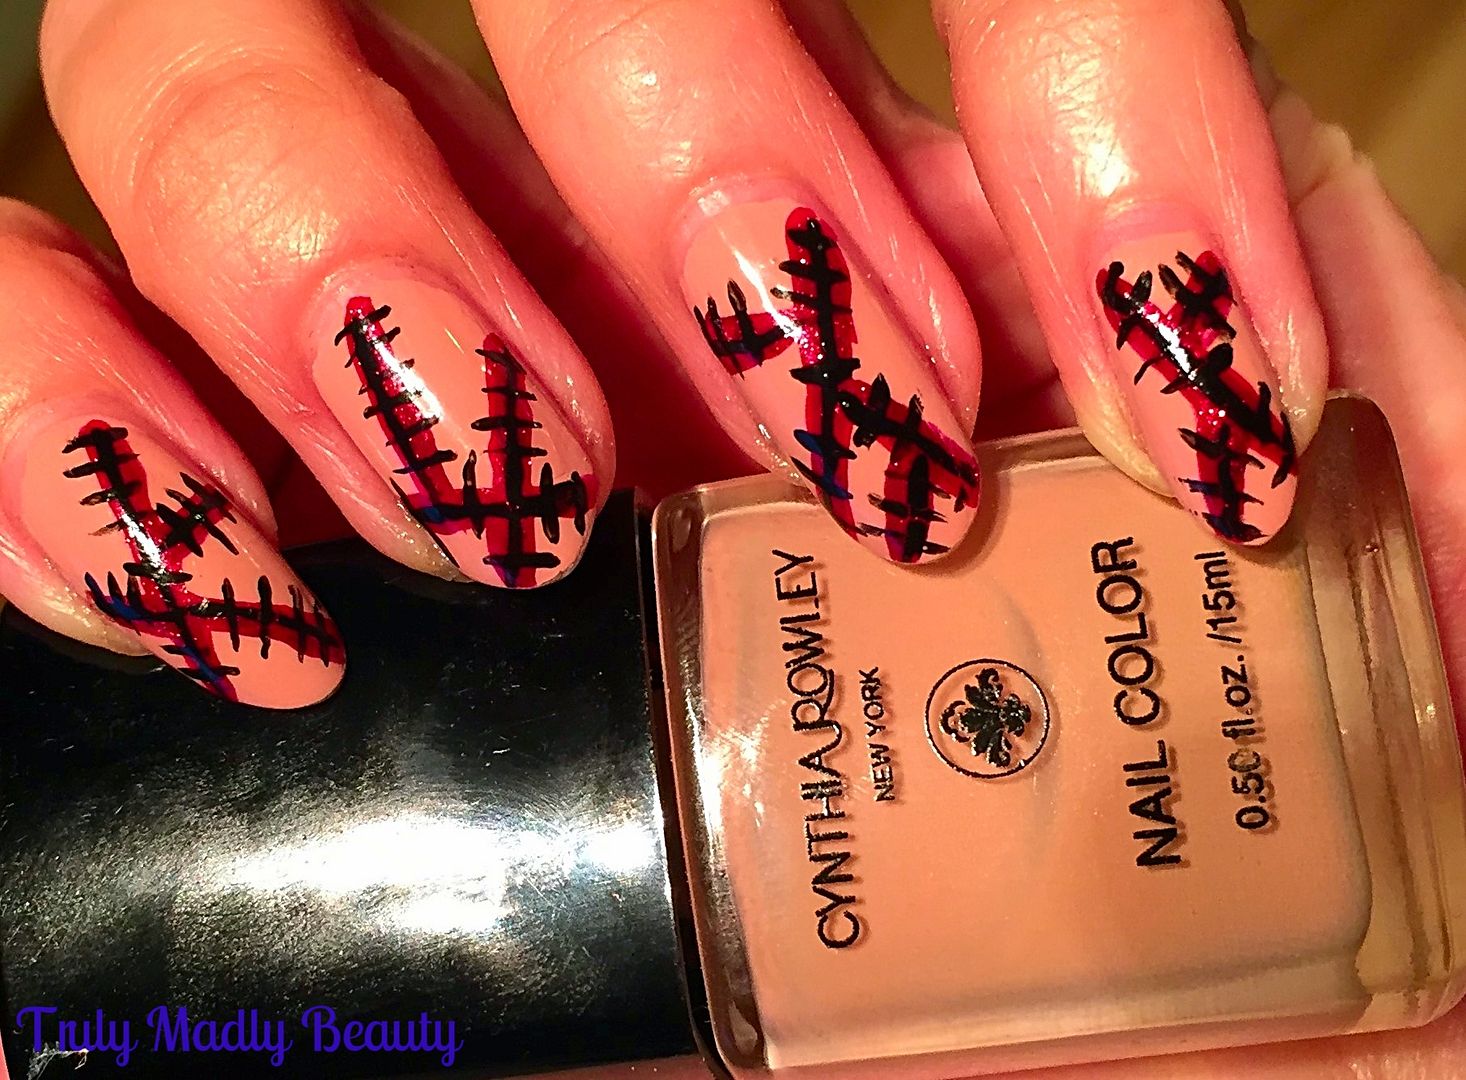
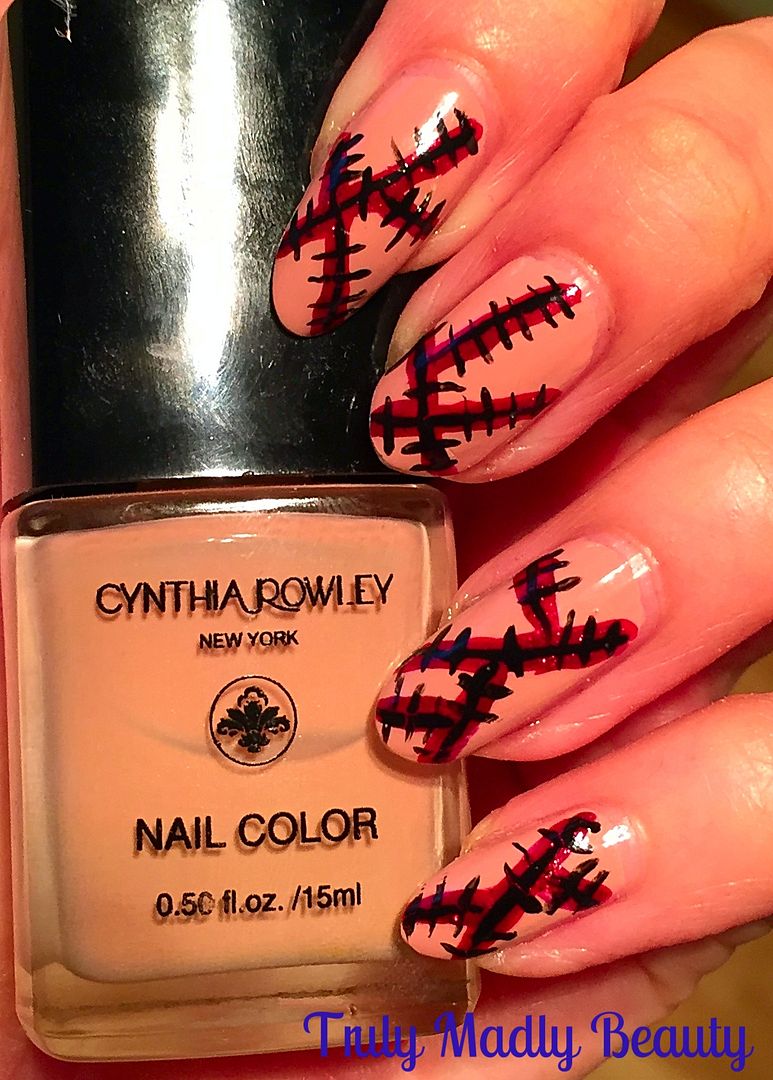
I started with applying my base colour, here I've used this nameless Cynthia Rowley polish I picked up whilst browsing in TK Maxx. A dangerous ground for succumbing easily to many polish temptations let me tell you...


A perfect beige nude shade, its the type that would suit literally every skin tone! I applied two coats for a nice opaque finish.


Now for the stitches! Grabbing your nail art brush & red polish of choice, here I've used 17 Risky Red which was simply the first red polish my eyes just so happened to land on, start drawing on your cuts.


For this simply apply straight lines haphazardly across the nail in various directions, the beauty of it is that they don't have to be neat so don't stress about getting perfectly straight lines!


It was at this point I couldn't resist adding a touch of glitter, for my sparkle I just applied some of this pretty red glitter from PIXEL across the top of my red lines.


Now to create the stitches, grabbing a finer brush & some black polish, apply a thin black line along the middle of your cuts. Then, still using the brush & polish, apply your row of little black stitches all the way along your cuts, as many as you can fit on.


And that is it! Finish with your obligatory topcoat for that super glossy finish, or you can even mattify if you wish for a more natural skin look...actually now that I think about it this would've looked really interesting with the skin matte & the blood/cuts glossy...hmm next time! Thanks as always for reading witches!

Lotsa love to ya