Hey there lovely readers!
I completely forgot to post the nail art looks I rustled up this (or last now I guess) Christmas! I guess I've gotten so used to just posting on Instagram these days (@aysh_xox) that the blog takes more of back seat which saddens me! However I would like to have an online portfolio of my designs to look back on hence why I persevere with posting on here :)
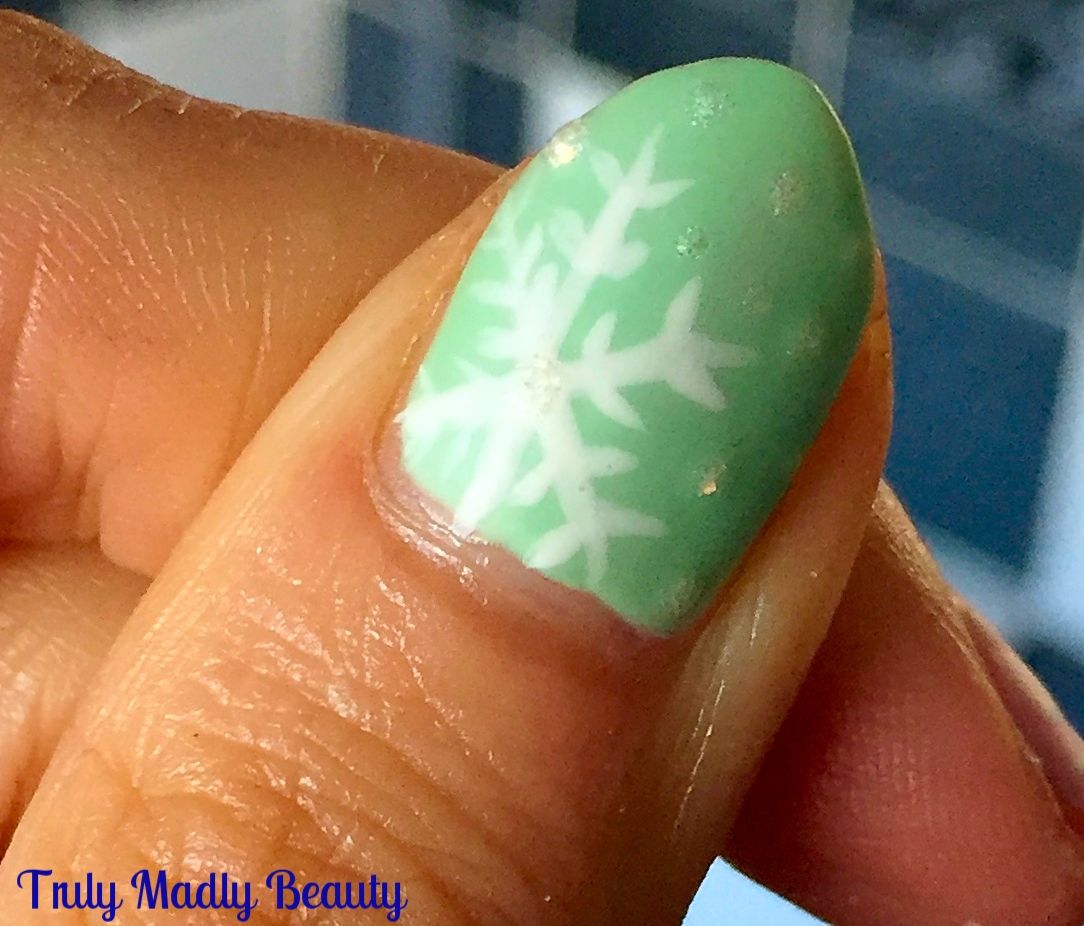
I did 4 different looks for the festive season starting with some Snowflakes! I love doing this design because all snowflakes are different so you can do so many variations! I have actually done a step by step Snowflake tutorial HERE. After applying a pretty baby blue base, I used white polish to draw a cross with a vertical line through it. This is our snowflake! And for the details I just added some small dots & angled lines to make it resemble a snowflake. Finishing off with a pretty clear crystal in the centre.
Showing posts with label Christmas. Show all posts
1.16.2020
12.24.2018
Festive NOTD - Sweet Sparkly Layered Snowflakes
Hello there lovely readers!
As Christmas is now on our doorstep I thought I'd squeeze in one last festive nail art look for the year! I've actually done better than I anticipated, rolling out 4 different designs: Vintage Gold Festive Roses, Minty Snowflakes, Winter Wonderland Christmas Trees & also a Disney special with some Frozen nails. A little life update also, I handed in my notice this month so I will be starting a new job in the new year which I am very excited about! How that will leave me for time to blog...I don't know yet, but lets see! Blogging has always been so therapeutic for me hence why I've continued at it after so long & its something I definitely strive to continue with!
For my last look I've done another Snowflakes design. However I've gone a different route this time & thus doing so I think I may have discovered my new favourite thing...LAYERED jelly stamping! What on earth is this you ask? Do you happen to have any of those sheer tinted polishes in your stash but no clue how to use or what to do with them? OPI Color Paints were the first of these kind (according to my knowledge anyhoo) & a few brands jumped on the bandwagon shortly after including Barry M with their Lolly Gloss Range which I blogged about HERE.
I decided to use these & my trusty stamper to create this sweet snowflake look & I think this may be my favourite festive design of the lot this year! I got the idea of layering from the fab Kate aka @Alterego_nails on IG. It was she who also inspired me for the Sharpie Nails I did HERE...what can I say, the girls got mad skills & ideas!
To start I needed an opaque base to work on first...as the two Lolly Gloss polishes I have were pink & purple, then those were the base shades I went for as well. For my purple nails I applied one coat of Models Own Roxy & for the pink nails I applied one coat of a fuchsia pink European brand polish I picked up on my travels.
Now for the first round of stamping. I have a few festive stamping plates from Born Pretty Store which also have single snowflake patterns, perfect for this. Using white polish I stamped about 3 snowflakes to each nail.
I then reached for the tinted Lolly Gloss polishes & applied one coat over the snowflakes which gives that awesome "submerged in jelly" like look! Obviously using the purple tint on the purple nails & pink tint on the pink nails. Once this was dry I then went in again & stamped on 2 more snowflakes on top.
You can keep on going with the layering if you wish but I stopped here. For a final touch I added a pretty pink rhinestone to the center of my 2 top snowflakes & though you can't really see I also added a coat of glitter topcoat for some extra powow SPARKLESSSSS.
A final coat of topcoat to seal those stones & add shine & you're done! Thanks again to the fab Kate for this awesome idea. I now need to get hold of more tinted sheer polishes so I can do ALL the layered stamping! Thanks as always for reading darling ones & I wish you the merriest of Christmases whatever you may be doing! See you in 2019!
Lotsa love to ya!
As Christmas is now on our doorstep I thought I'd squeeze in one last festive nail art look for the year! I've actually done better than I anticipated, rolling out 4 different designs: Vintage Gold Festive Roses, Minty Snowflakes, Winter Wonderland Christmas Trees & also a Disney special with some Frozen nails. A little life update also, I handed in my notice this month so I will be starting a new job in the new year which I am very excited about! How that will leave me for time to blog...I don't know yet, but lets see! Blogging has always been so therapeutic for me hence why I've continued at it after so long & its something I definitely strive to continue with!
For my last look I've done another Snowflakes design. However I've gone a different route this time & thus doing so I think I may have discovered my new favourite thing...LAYERED jelly stamping! What on earth is this you ask? Do you happen to have any of those sheer tinted polishes in your stash but no clue how to use or what to do with them? OPI Color Paints were the first of these kind (according to my knowledge anyhoo) & a few brands jumped on the bandwagon shortly after including Barry M with their Lolly Gloss Range which I blogged about HERE.
I decided to use these & my trusty stamper to create this sweet snowflake look & I think this may be my favourite festive design of the lot this year! I got the idea of layering from the fab Kate aka @Alterego_nails on IG. It was she who also inspired me for the Sharpie Nails I did HERE...what can I say, the girls got mad skills & ideas!
To start I needed an opaque base to work on first...as the two Lolly Gloss polishes I have were pink & purple, then those were the base shades I went for as well. For my purple nails I applied one coat of Models Own Roxy & for the pink nails I applied one coat of a fuchsia pink European brand polish I picked up on my travels.
Now for the first round of stamping. I have a few festive stamping plates from Born Pretty Store which also have single snowflake patterns, perfect for this. Using white polish I stamped about 3 snowflakes to each nail.
I then reached for the tinted Lolly Gloss polishes & applied one coat over the snowflakes which gives that awesome "submerged in jelly" like look! Obviously using the purple tint on the purple nails & pink tint on the pink nails. Once this was dry I then went in again & stamped on 2 more snowflakes on top.
You can keep on going with the layering if you wish but I stopped here. For a final touch I added a pretty pink rhinestone to the center of my 2 top snowflakes & though you can't really see I also added a coat of glitter topcoat for some extra powow SPARKLESSSSS.
A final coat of topcoat to seal those stones & add shine & you're done! Thanks again to the fab Kate for this awesome idea. I now need to get hold of more tinted sheer polishes so I can do ALL the layered stamping! Thanks as always for reading darling ones & I wish you the merriest of Christmases whatever you may be doing! See you in 2019!
Lotsa love to ya!
Labels:
Barry M,
Christmas,
Festive,
Glitter,
Jelly,
Model's Own,
nail art,
NOTD,
Pink,
Purple,
Rhinestone,
sheer tint,
Snowflake,
Sparkle,
Xmas
12.17.2018
Disney Nail Art Series - Festive Edition - Frozen Nails!
Hi there lovely readers!
I've been wanting to revisit my Disney Nail Art Series for some time as yet again its been a while! You can see all my Disney recreations on the nails HERE, including classics such Beauty & The Beast, The Little Mermaid, The Lion King & more!
Frozen became a bit of a sensation with Disney for this generation of youngsters & the source of many parents loss of sanity at the thought of hearing Let It Go for the 3496th time....I myself waited a long time before watching as I am a hardcore CLASSIC Disney fan & was somewhat cynical at these newbies. However I confess, whilst I didn't understand the obsession, I STILL enjoyed the film immensely & seeing as its that time of year that ice likes to make its frosty appearance...what better for my next Festive look than some Disney Frozen Nails!
I've been wanting to revisit my Disney Nail Art Series for some time as yet again its been a while! You can see all my Disney recreations on the nails HERE, including classics such Beauty & The Beast, The Little Mermaid, The Lion King & more!
Frozen became a bit of a sensation with Disney for this generation of youngsters & the source of many parents loss of sanity at the thought of hearing Let It Go for the 3496th time....I myself waited a long time before watching as I am a hardcore CLASSIC Disney fan & was somewhat cynical at these newbies. However I confess, whilst I didn't understand the obsession, I STILL enjoyed the film immensely & seeing as its that time of year that ice likes to make its frosty appearance...what better for my next Festive look than some Disney Frozen Nails!
Labels:
Blue,
China Glaze,
Christmas,
Disney,
Disney Nail Art Series,
Festive,
Glitter,
Leighton Denny,
Meebox,
Model's Own,
nail art,
NOTD,
Sparkle,
Winter,
Xmas
12.10.2018
Festive NOTD - Winter Wonderland
Hey there lovely readers!
I'll be honest with you, this year I have been struggling with Christmas nail art inspiration...not sure what the cause is but every design I attempt never goes according to plan resulting in a fail of epic proportions thus causing mini psychotic episodes to ensue...most frustrating & not good for ones mental health
But I am not one to give up, especially because getting creative & challenging myself when it comes to nail art is what I love the most...masochistic tendencies much? :) Every year I like to do some type of Christmas Trees design so this year is no exception. This time I've gone for a more natural vibe with a Winter Wonderland forest setting...
I'll be honest with you, this year I have been struggling with Christmas nail art inspiration...not sure what the cause is but every design I attempt never goes according to plan resulting in a fail of epic proportions thus causing mini psychotic episodes to ensue...most frustrating & not good for ones mental health
But I am not one to give up, especially because getting creative & challenging myself when it comes to nail art is what I love the most...masochistic tendencies much? :) Every year I like to do some type of Christmas Trees design so this year is no exception. This time I've gone for a more natural vibe with a Winter Wonderland forest setting...
Labels:
Christmas,
Christmas Trees,
Essence,
Festive,
Glitter,
Grey,
Model's Own,
nail art,
NOTD,
Poundland,
Primark,
Sally Hansen,
Xmas
12.05.2018
Festive NOTD - Mint Sparkle Snowflakes
Hi there lovely readers!
I was in two minds about whether to share this nail art...Even though I loved the frosty mint colour, I think the pale base made my snowflakes & holo glitter stickers get a tad lost amongst the background so I kinda class this as a mani fail haha! But hey you win some you lose some right?
Labels:
Christmas,
Deborah Lippmann,
Essie,
Festive,
holographic,
Kiko,
Mint,
nail art,
nail stickers,
NOTD,
Snowflake,
SoNailicious,
Sparkle,
Unicorns,
Xmas
11.28.2018
Festive NOTD - Xmas Vintage Roses & Gold Glitter
Hey there lovely readers!
So Fall has passed us by far too quickly in my opinion & it seems that the natural way of things to go moving forwards is Christmas! Yup tis the season to be jolly which means nail art will be getting suitably sparkly around these parts, or I hope anyway! As usual it all depends on time but I do hope to roll out some fun festive goodness for the nails this year!
12.23.2017
Festive NOTD - Christmas Wreath French Tips!
Hey there lovely readers!
I have seriously slacked with the Christmas nail art this year...bah humbug Aysh! But on account of being away in sunnier climates for part of the month (where, lets be honest, festive inspiration is harder to come by right?) I think I'll let myself off whilst at the same time pat myself on the back for managing to do any at all haha! But here we are with a fourth & final Festive mani for the year...Christmas Wreaths!
Labels:
Bling,
Christmas,
Festive,
French Manicure,
Glitter,
gold,
holographic,
Model's Own,
nail art,
NOTD,
Shimmer,
Sparkle
12.21.2017
Festive NOTD - Snowflakes plus Step by Step Tutorial
Hey there lovely readers!
If you caught my previous post HERE you'll recall the gorgeous polish I shared with you all, in all its chameleon chrome goodness, the super pretty Zealous by For Your Nails Only.
As I was utterly obsessed with this polish & had no desire to remove it from my nails I decided to use it as a base for my next festive mani & I think it worked out really well!
Labels:
Chameleon,
Christmas,
Chrome,
Duochrome,
Festive,
For Your Nails Only,
Monochrome,
nail art,
NOTD,
Snowflake,
SoNailicious,
Tutorial
12.18.2017
Festive NOTD - Lilac Pastel Starry Night Sky
Hello there lovely readers!
So I'm back from my holiday in the beautiful Dubai, which has completely captured my heart & then some, I already cannot wait to return next year! But for now lets get back to continuing all things FESTIVE with some suitably Christmas-y nail art shall we?
12.06.2017
Festive NOTD - Red, Green & Gold Smoky Ombre
Hello there lovely readers!
Tis the season to be jolly & thus one is finally getting up my first nail art for the season!
1.02.2017
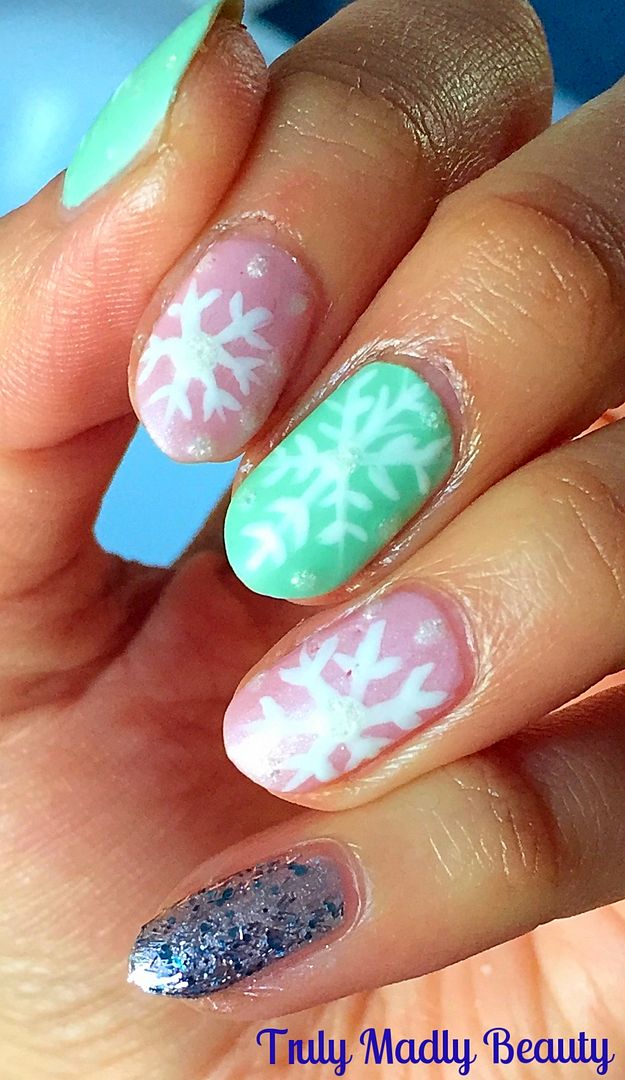
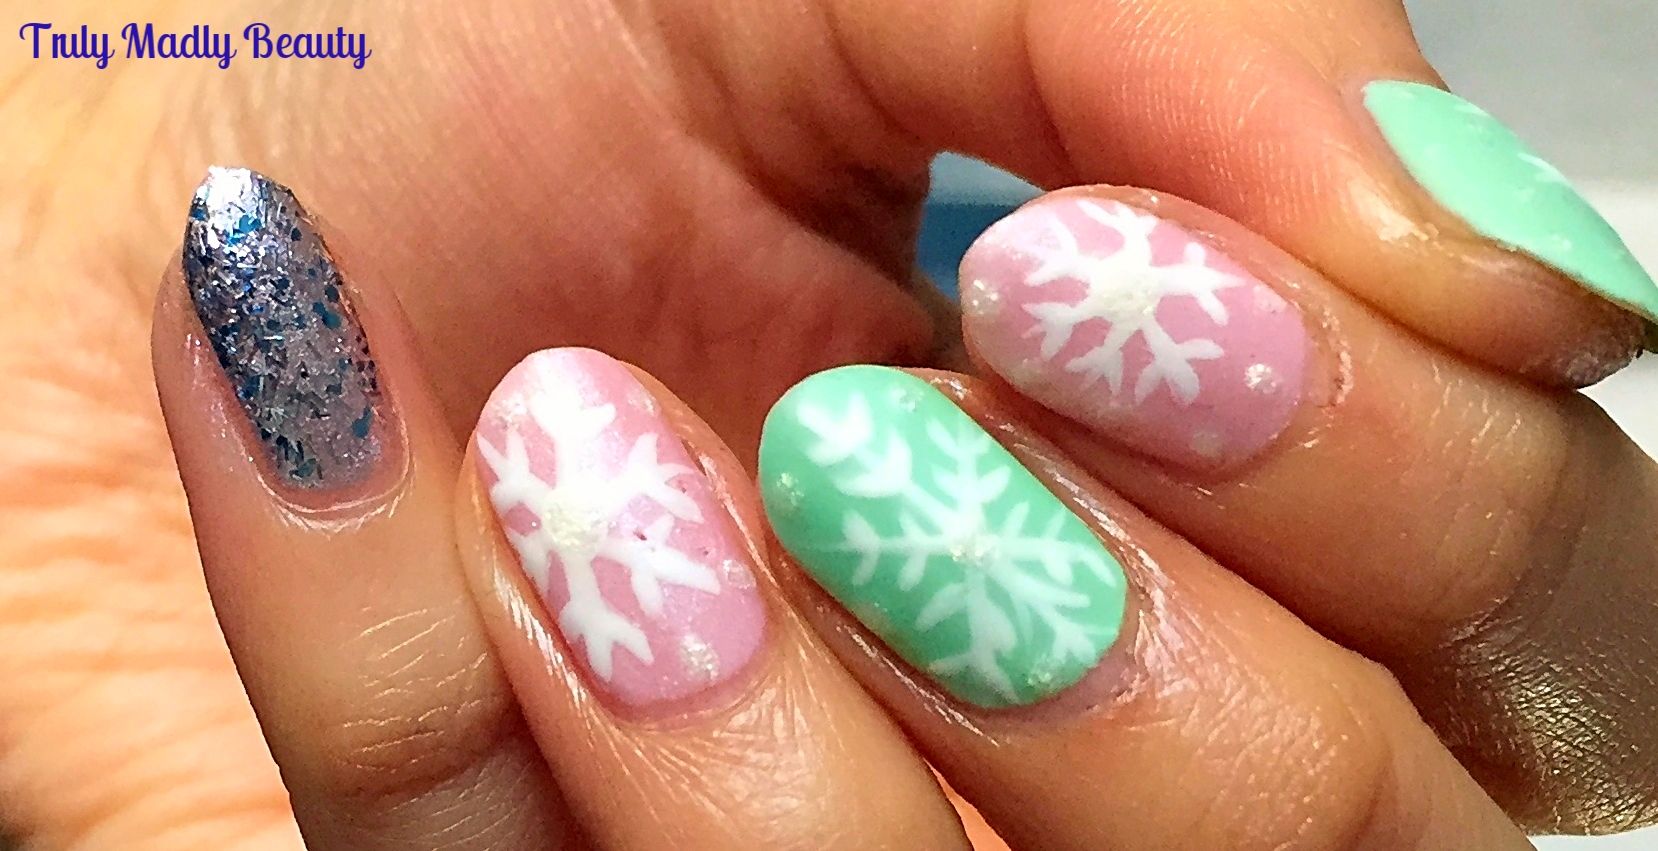
NOTD - Pastel Winter Wonderland Nails
Hello
there my lovely readers!
Happy
new year to you all my beauts! I hope you all had a wonderful Xmas
break & new years however you spent it. I'm certain my spirit
animal is a bear as I've pretty much spent the holidays in
hibernation which has been utter bliss! Like many I'm sure I'm now
currently going through the “oh god no” motions at the thought of
going back to work!
Not
feeling QUITE so ready to part from the festive feels just yet here's
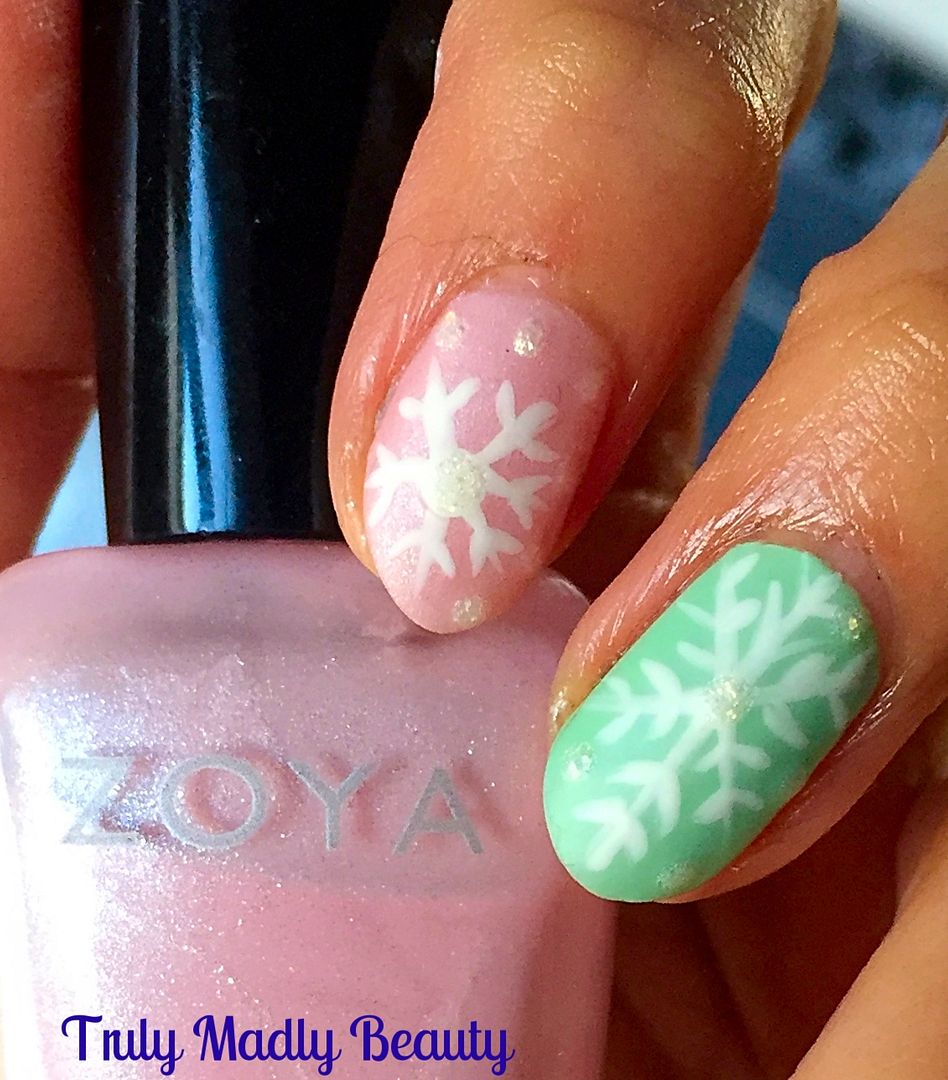
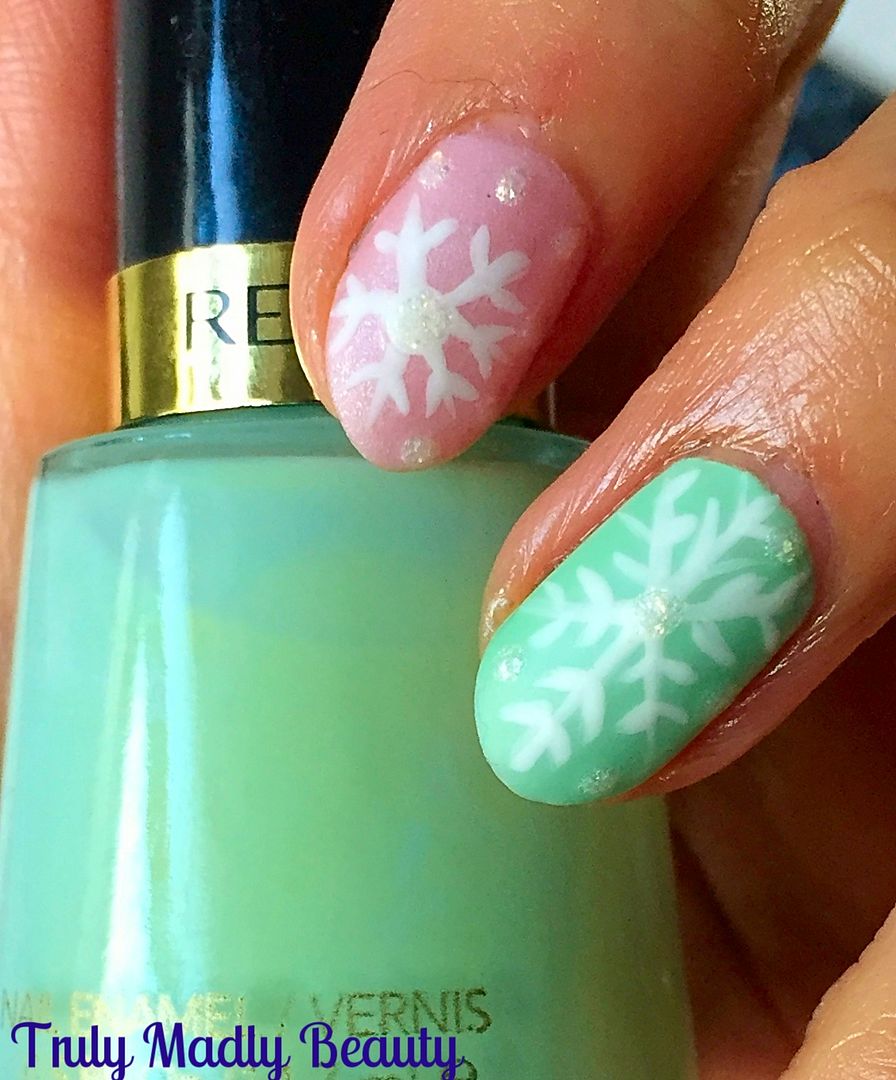
a frosty Pastel Winter Wonderland mani using sugary soft tones,
snowflakes & a bit of glitter thrown in! Normally I'm a glossy
girl all the way, however for this mani I decided to mattify the
finish & I must confess I dig it!
I
wanted some pretty pastels for my base, not able to decide I went for
a two tone using pale pink & mint.
For
the pink I've used two coats of Zoya Bailey, a gorgeous soft pink
with a pretty pale silver shimmer running through it.
For
my mint green nails I went for one of my vintage Revlon polishes,
this is the aptly named Minted of which two coats were also applied.
Creating
the snowflakes is easy peasy, using a fine nail art brush & some
white polish simply draw an X on to your nail wherever you'd like
your snowflakes placed, then draw a vertical or horizontal line on
top.
Now
add on your snowflake details by placing smaller angled lines along
the cross, playing around with different styles, sizes & designs!
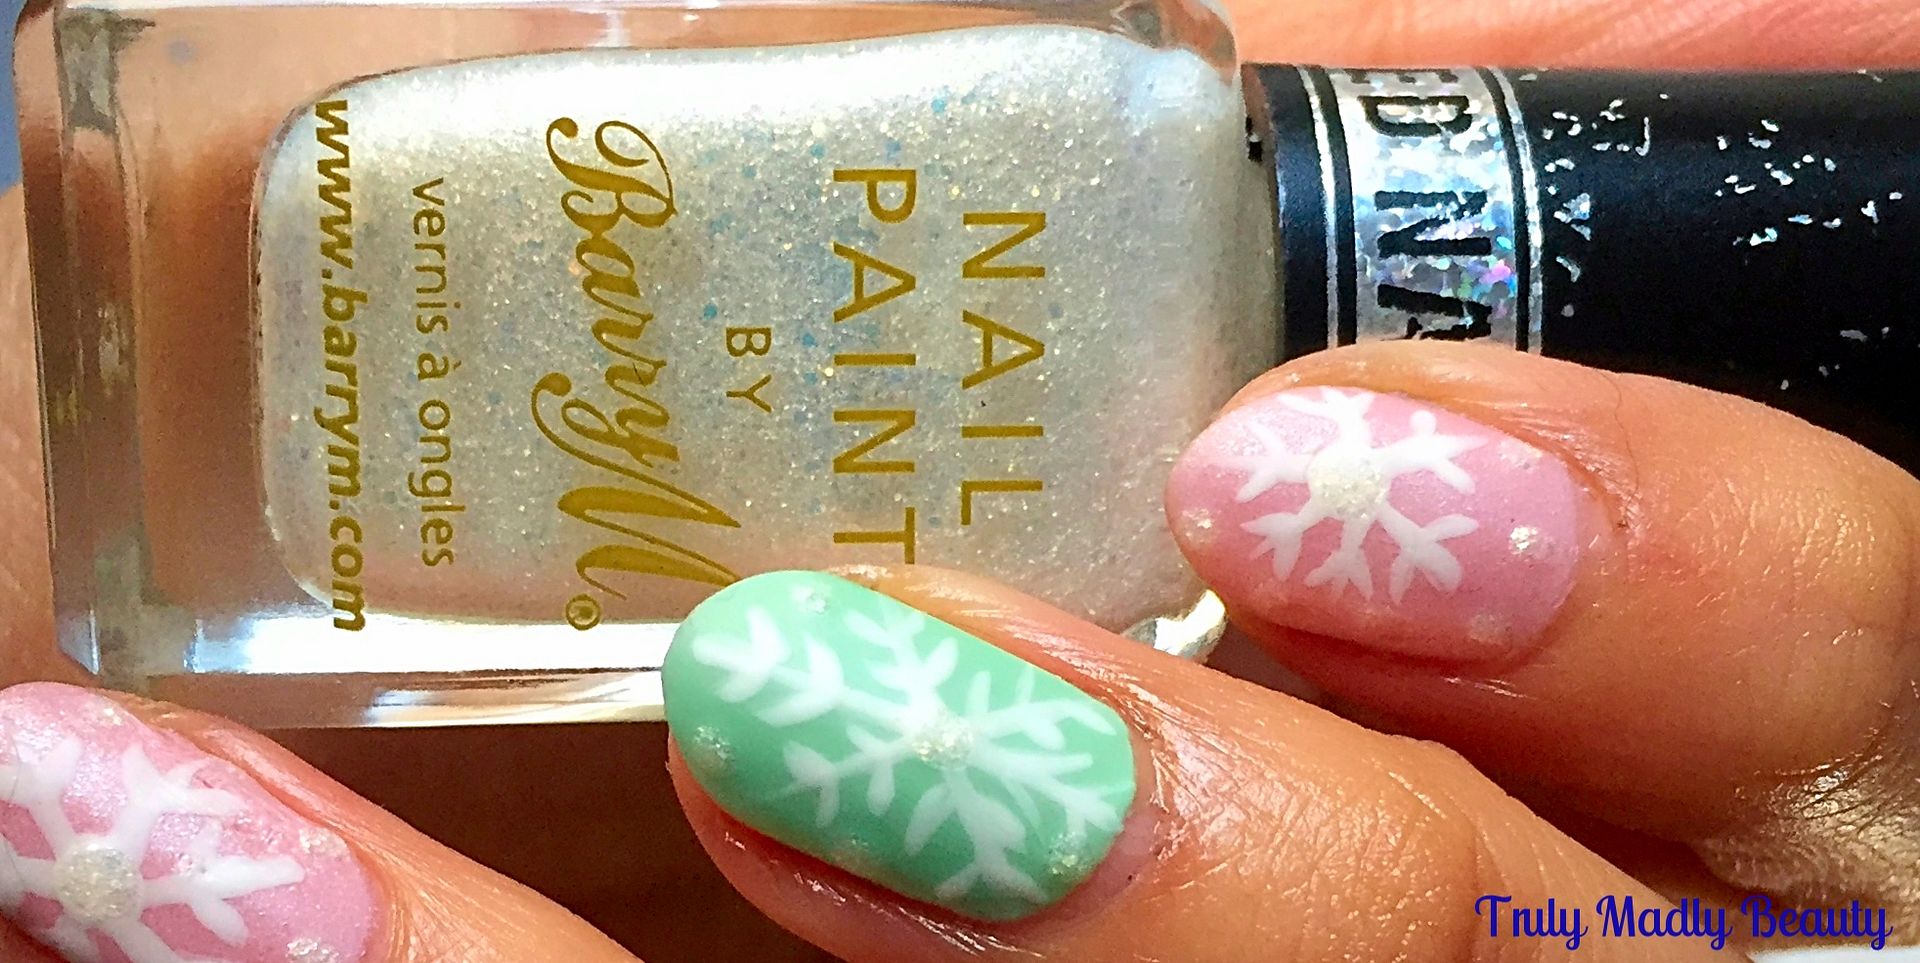
To
add a bit of dimension to the pastel nails I dotted on a bit of Barry
M textured polish in Lady which is a really unusual & pretty
frost white shimmer.
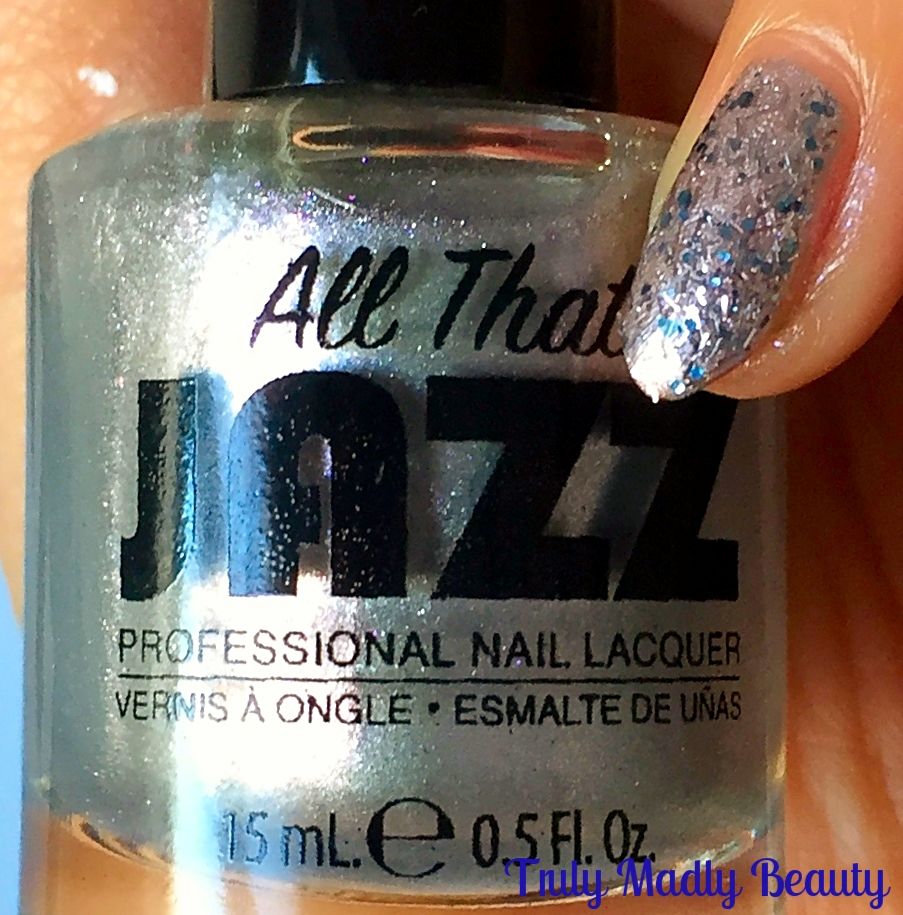
Then
for the accent nail I applied two coats of this pretty silvery All
That Jazz polish. I couldn't for the life of me find the name of the
shade on my bottle, unless I was having a dunce moment which, lets be honest, is most likely, but it could be the shade Glam Squad
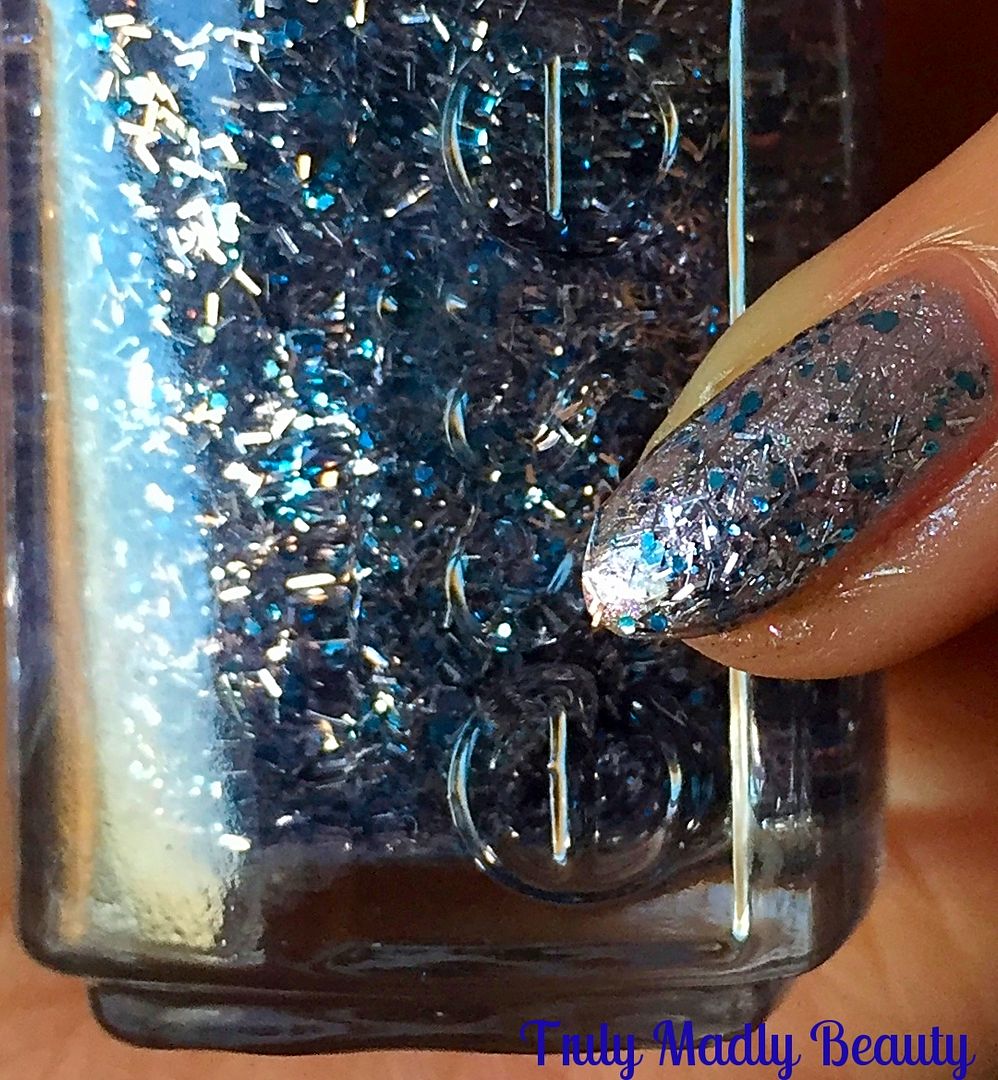
For
the final touch I coated the silver pinkie with this beautiful silver & frosty blue bar & hexagon glitter mix courtesy of Essie Luxe Effects in Frilling Me Softly.
As
mentioned before I decided to go for a matte look so to finish I
applied a Rimmel matte topcoat to the pastel nails. Matte pastel
manicures may just be my new favourite thing! I don't know if its the sweet tooth but this finish reminds me of cake frosting!
First
post of 2017 done! Now I'm off to hunt down that Fondant Fancy that I know is in the cupboard begging to be eaten to satisfy the sugary sweet craving this mani has enabled. Thanks as always for sticking by to read my rambles, here's to a fab year!
Lotsa
love to ya!
12.22.2016
Festive NOTD - Candy Cane French Tips!
Hello
there my lovely readers!
All
ready for the Xmas weekend? I'm literally counting down the hours, for
the first time since I left school (all those aeons ago in ye old
ancient times) I'll be embracing a full festive break from next week
up until the new year as my work shuts downs during this period. To
be honest I've never been too fussed with working right up until &
straight after Xmas but I'm actually looking forward to the treat of
complete hibernation time haha!
I've
managed to roll out a few festive mani's this year starting with an
obligatory Red Sparkle, the annual favourite that is Christmas Trees
& my most popular one to date after the most lovely response on
social media for The Christmas Puddings from a few days ago. Today
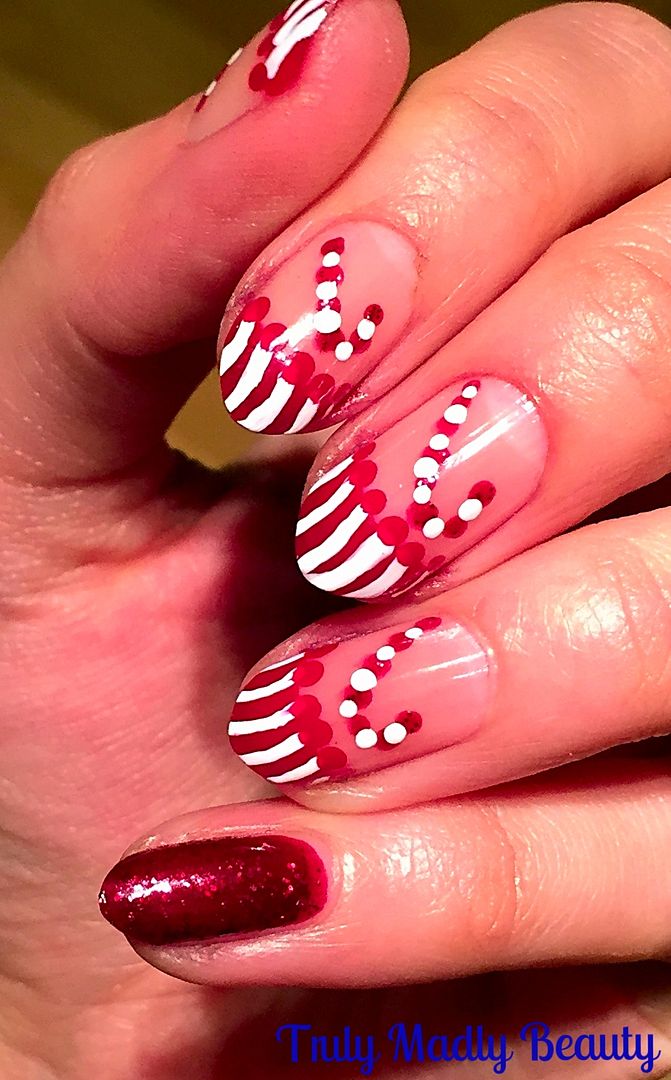
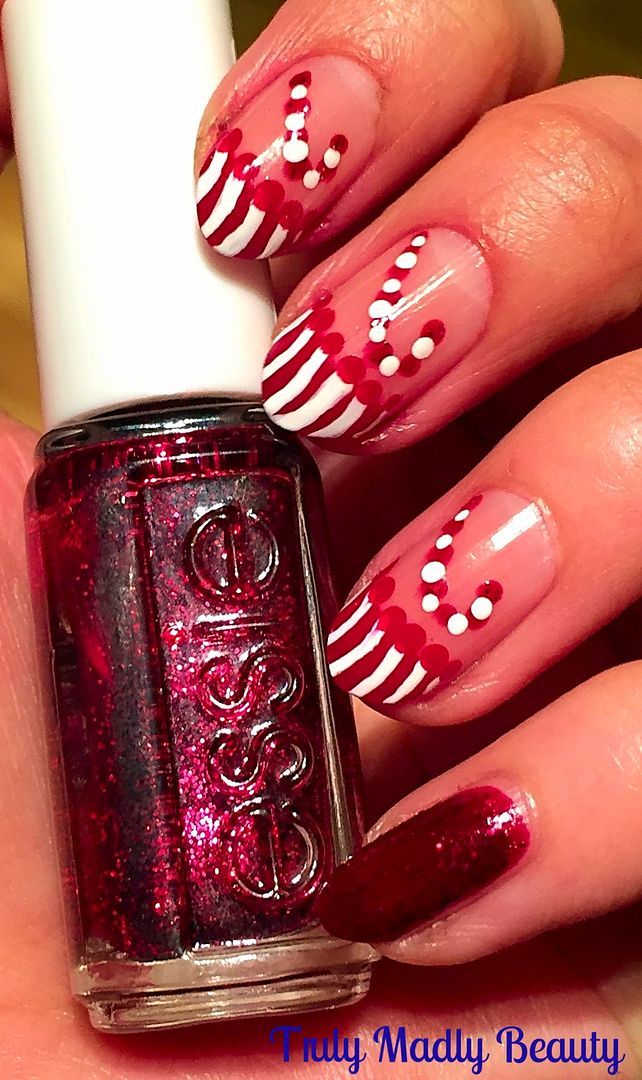
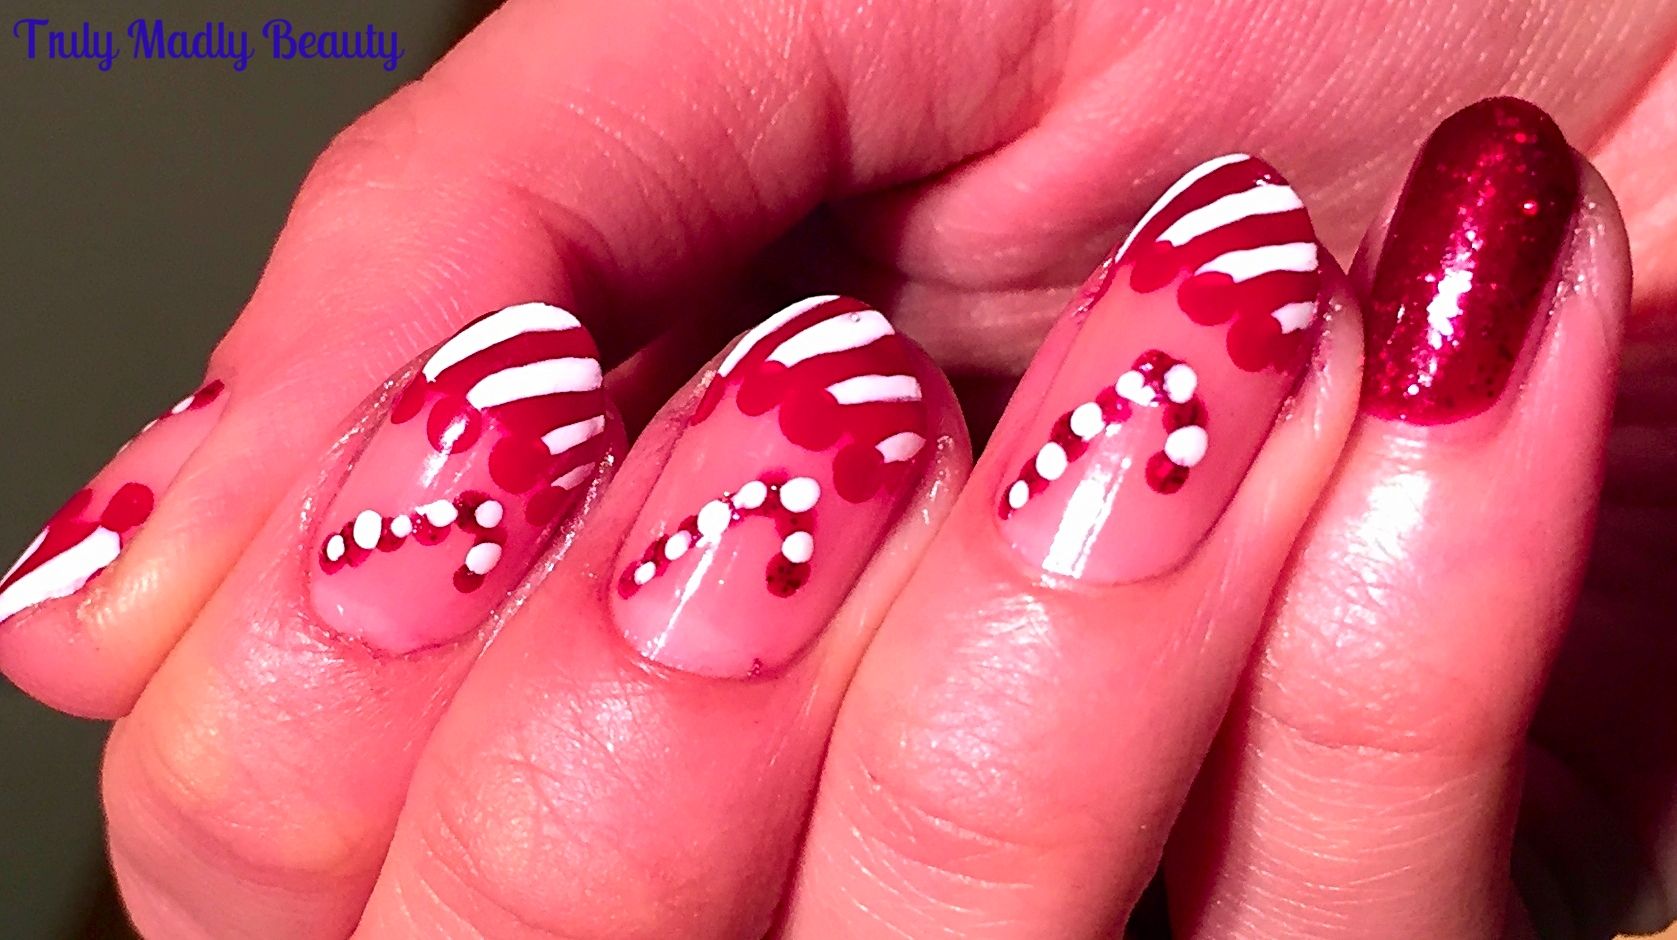
I've decided to show you how you can Christmas up a standard French
manicure with some Candy Cane tips!
If
you want to feel festive on your nails but don't want to go all out
seizure inducing sparkle then this is the perfect alternative! All
you need is some red, white & sparkle to transform your french
mani into something suitable for the season :)
To
help create a neat smile line on my tips I use french manicure guides
which you can pick up super cheaply off of Ebay or Born Pretty Store.
If you don't have these then hole punch reinforcers work just as
good!
Using
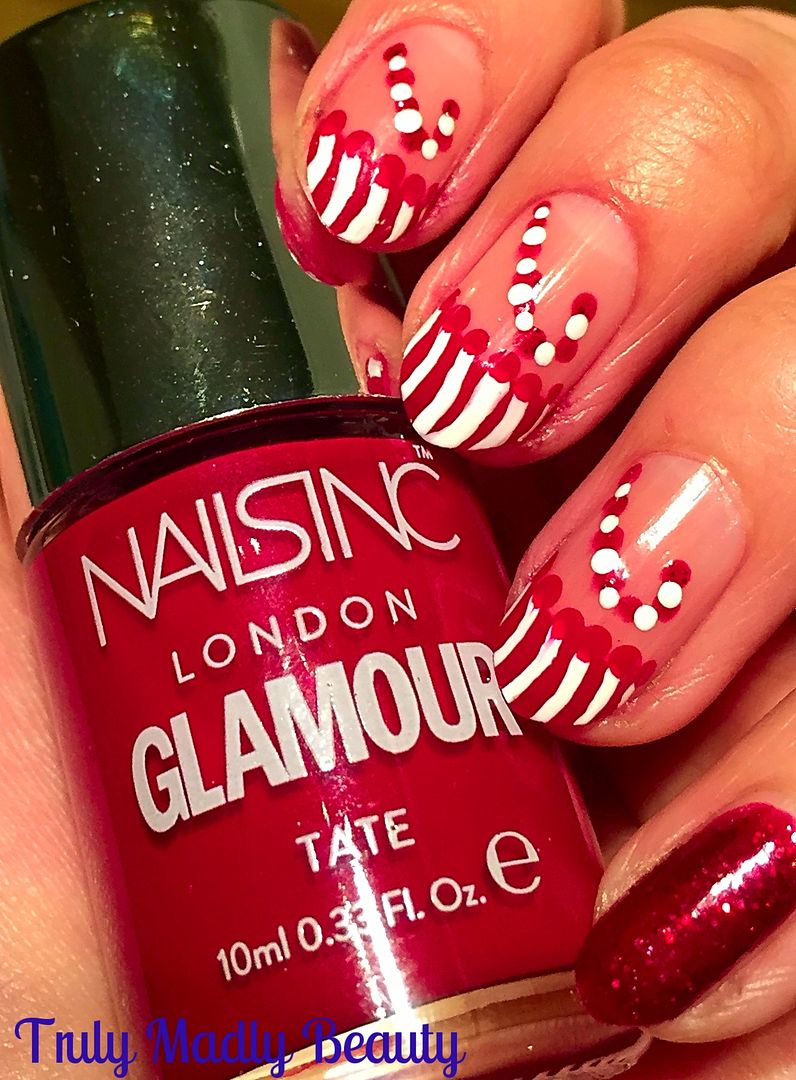
these & my red polish of choice, on this occasion a lovely deep
red by Nails Inc called Tate, which was one of those fab magazine
freebies they do on occasion, I painted on my red tips to all my
nails bar my pinkie.
Next
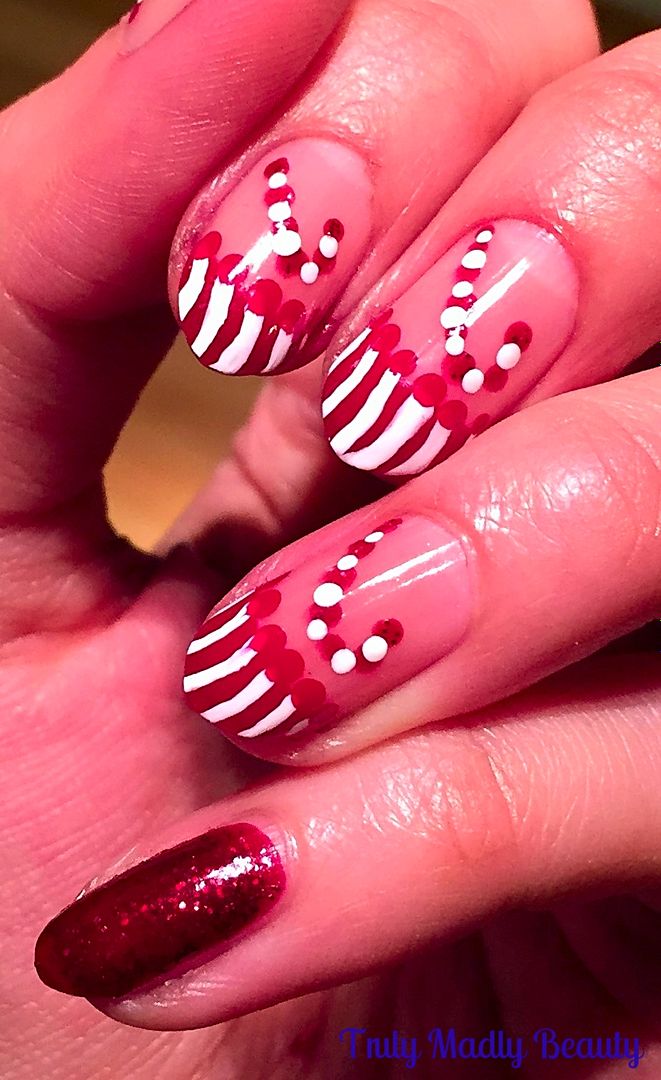
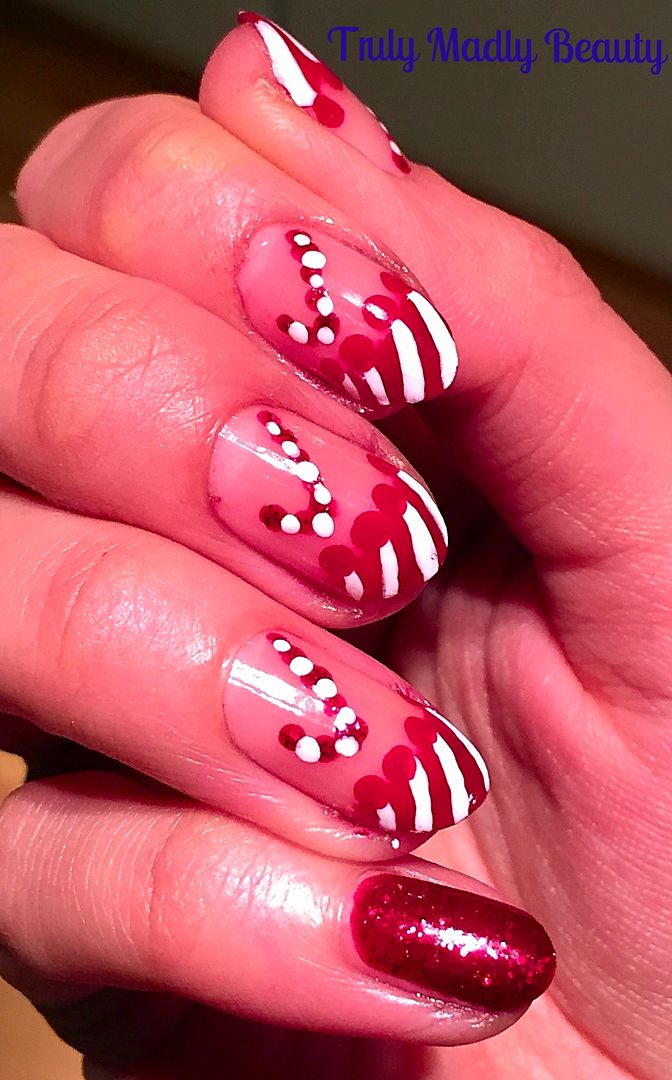
to create your candy cane stripes just grab a nail art pen in white,
the Barry M ones are really good, or of course a fine nail art brush
& white polish & apply a row of curved lines along your red
tip. Of course you can also do this vice versa! Starting with white
tips instead & adding red stripes...whatever you fancy :)
You
can then neaten up your smile line if there is some smudging with a
brush & acetone or you can do what i did & add an additional
detail of red dots along the smile line to sneakily cover up any
white that gone over...hehe ;)
My
pinkie was feeling a tad neglected so I rectified this by applying
two coats of the gorgeous Essie Leading Lady, you can't beat a
satisfying red sparkle can you & this is the most beautiful shade
of wine red. Screams Christmas vibes!
Then
for the candy canes, I just grabbed my dotting tool & using some
more white & the red Essie glitter, applied some dots in the
shape of a candy cane alternating the red & white.
Finish
it all with topcoat of course. In a most odd turn of events my dears
you are actually getting a rare shot of my right hand here! By some
strange sorcery I actually ended up preferring how the right one came
out using my non dominant hand...weird O_o
Hope
you liked this festive take on a French manicure beauts! If I don't
get a chance to blog before the big day, wishing you all the most
merriest of Christmas's however you spend it. Thanks as always for
reading!
Lotsa love to ya!
12.19.2016
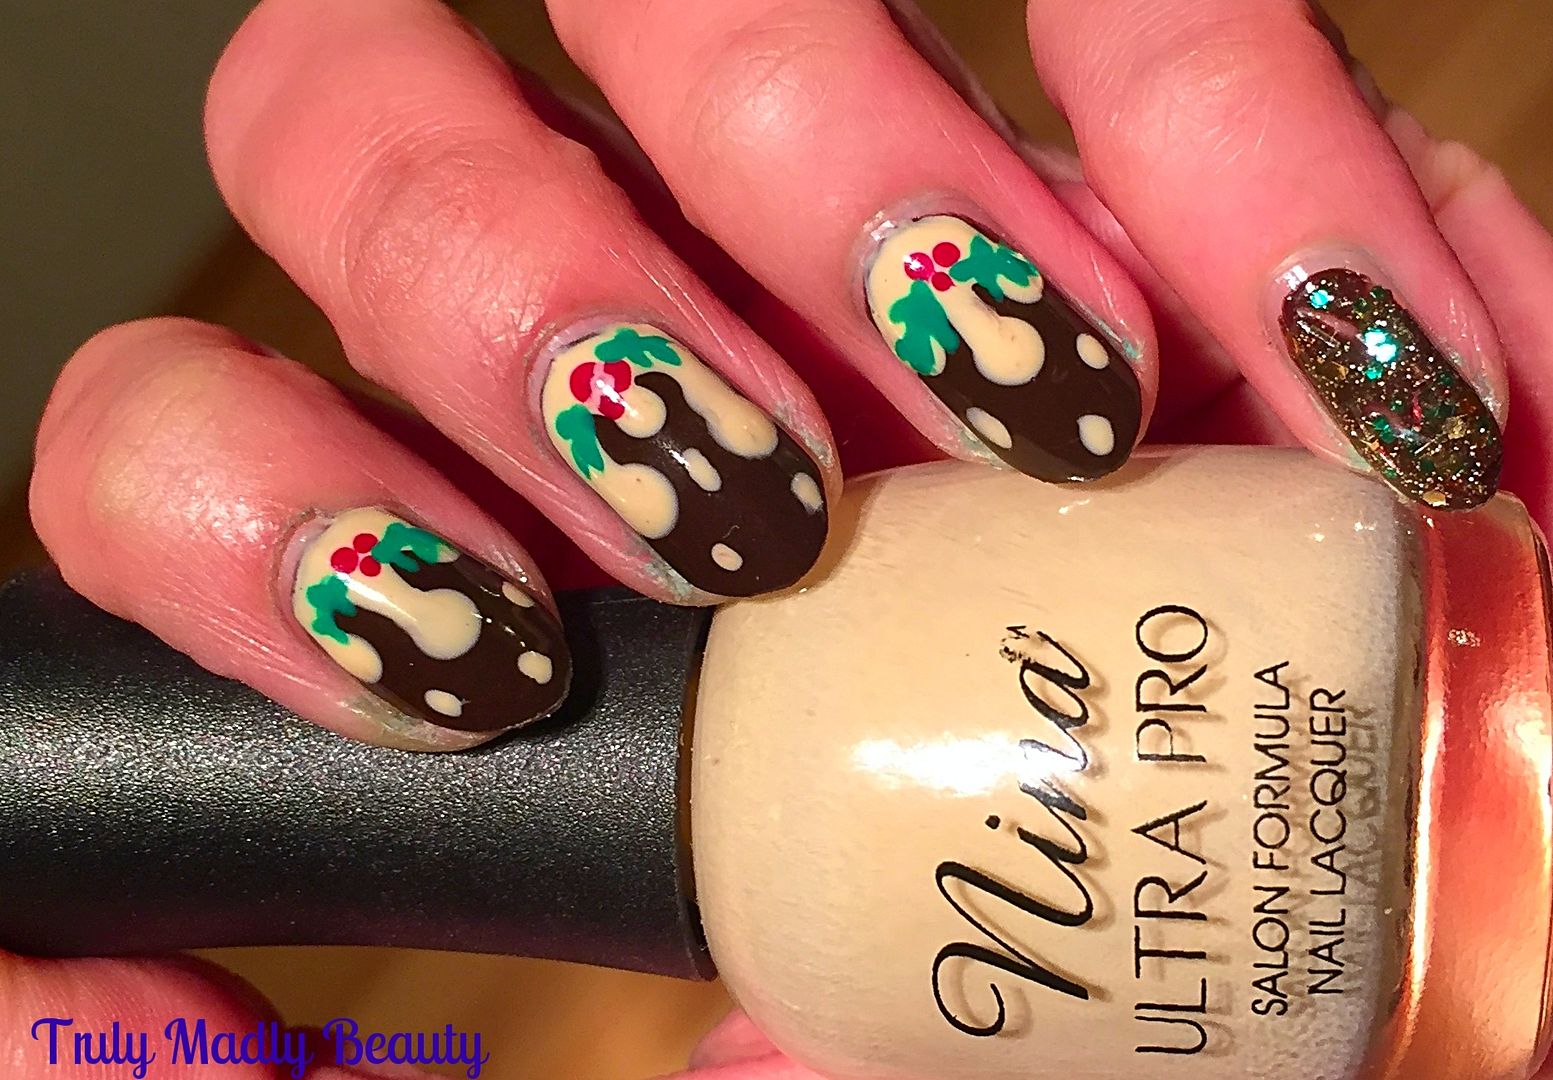
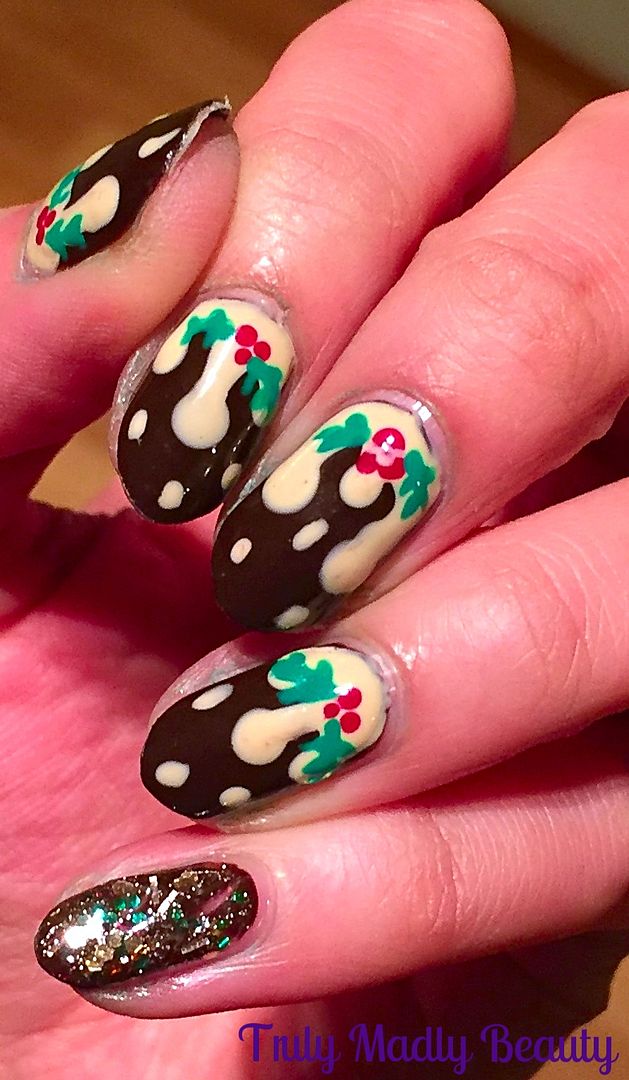
Festive NOTD - Christmas Puddings with Dripping Brandy Butter!
Hello
there my lovely readers!
If
there is one thing I'm as passionate about just as much if not
more as I am for nail art...its food. Combine the two & yours
truly is bonny wee bunny. Which brings us on to today's festive
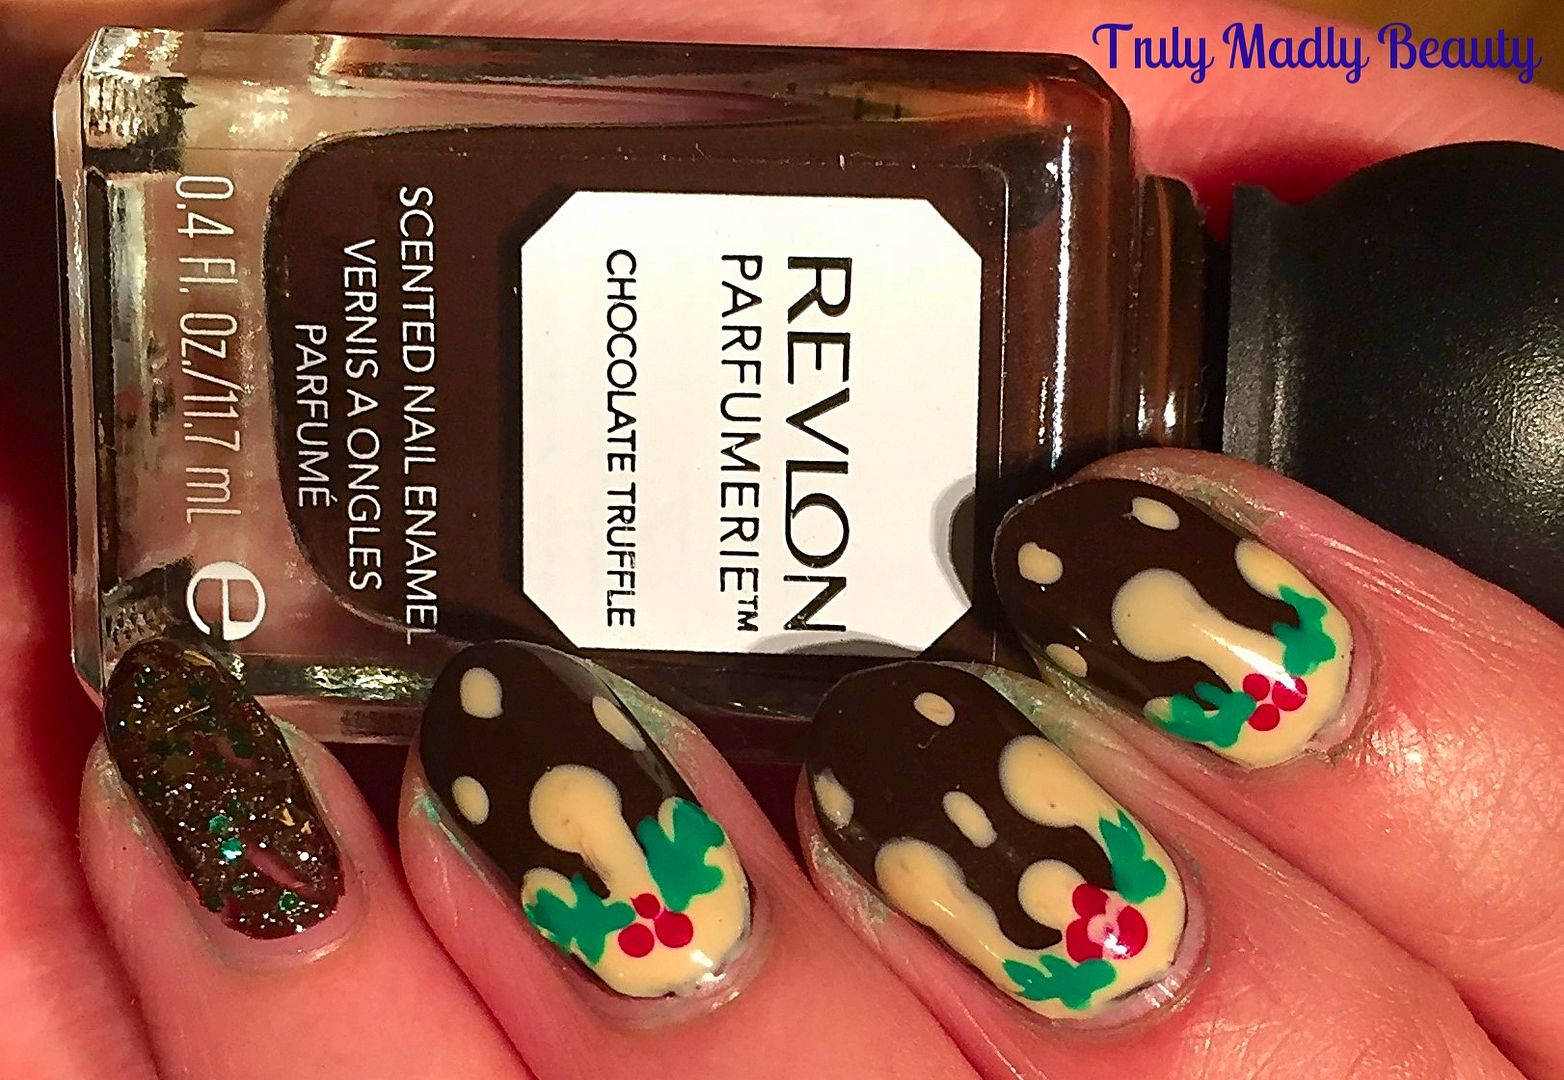
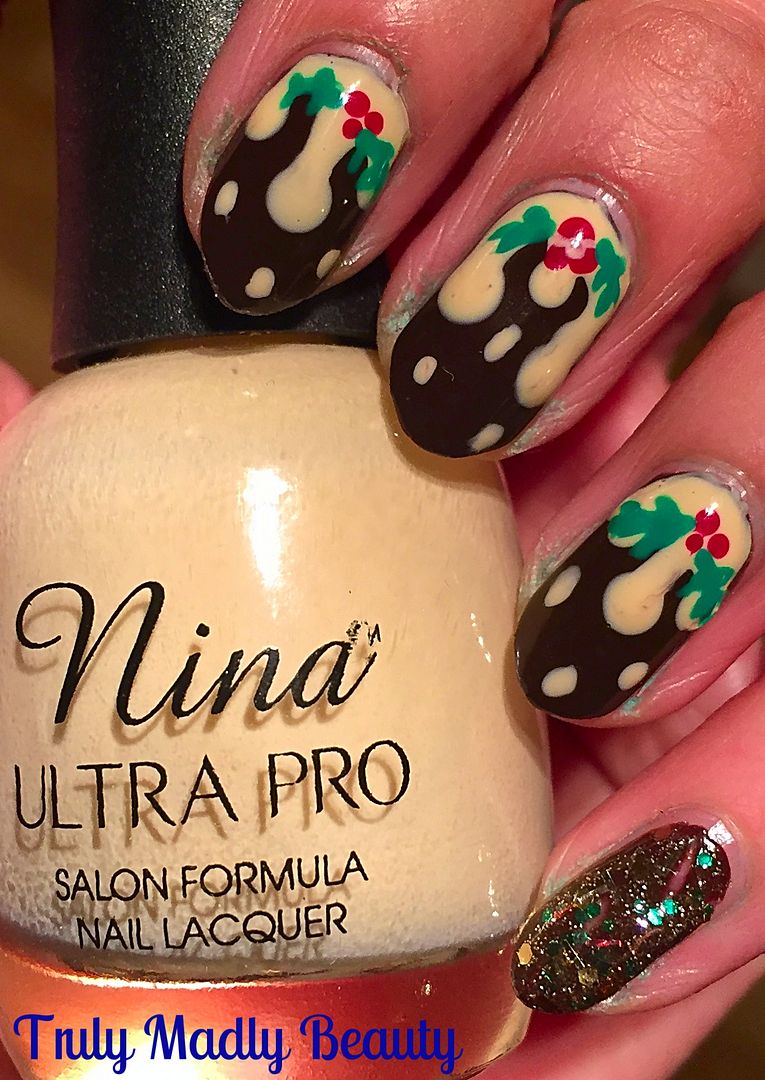
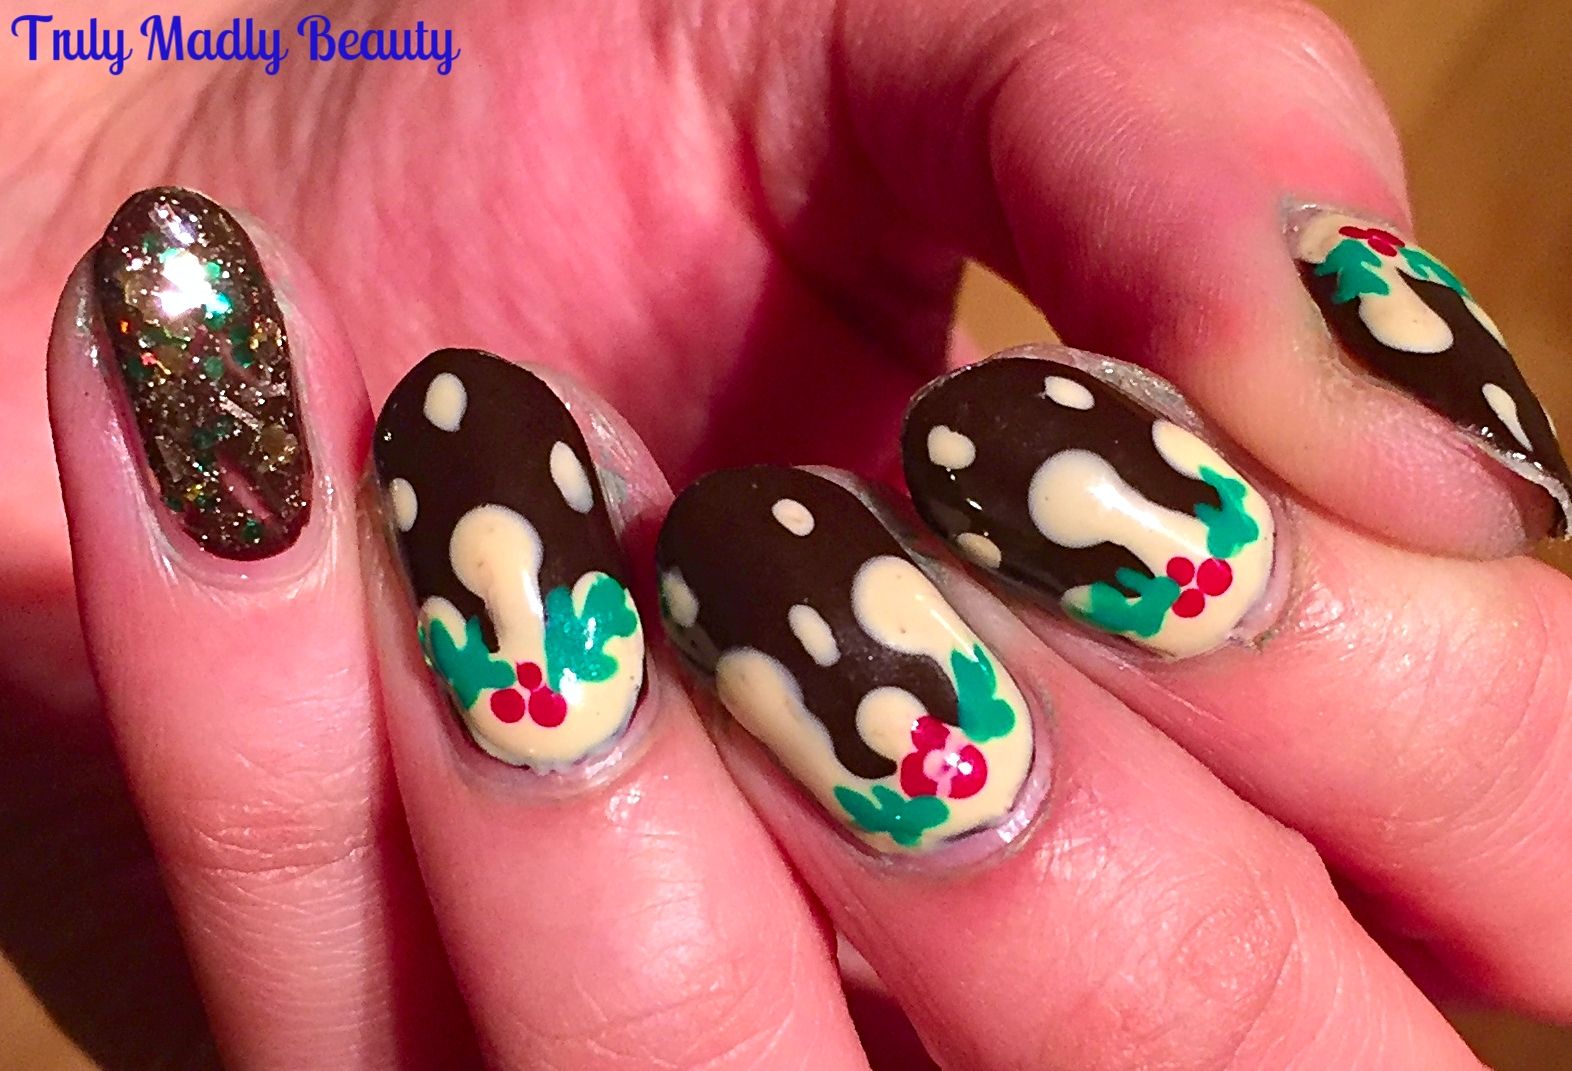
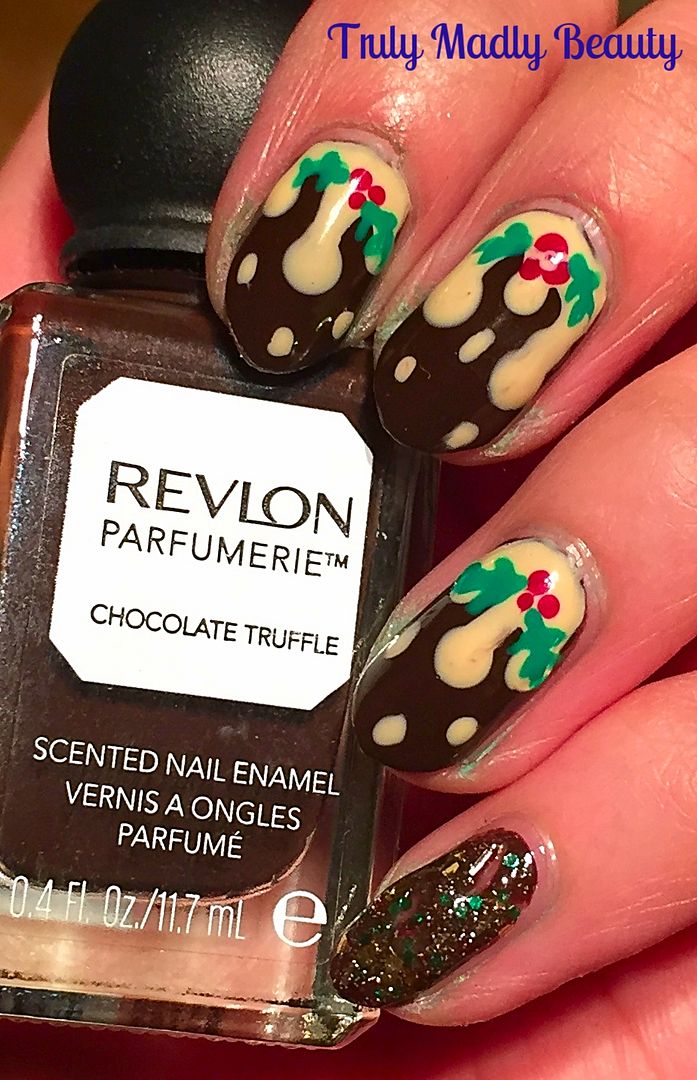
manicure my dears...Christmas Puddings!
Now
I must confess... I'm not the biggest fan of the old Christmas pud,
(SSSHHH!) but that doesn't mean I can't enjoy them on my nails eh?
And for this design I actually used a scented polish so my mani smelt
super sweet scrumdiddlyumptous too!
To
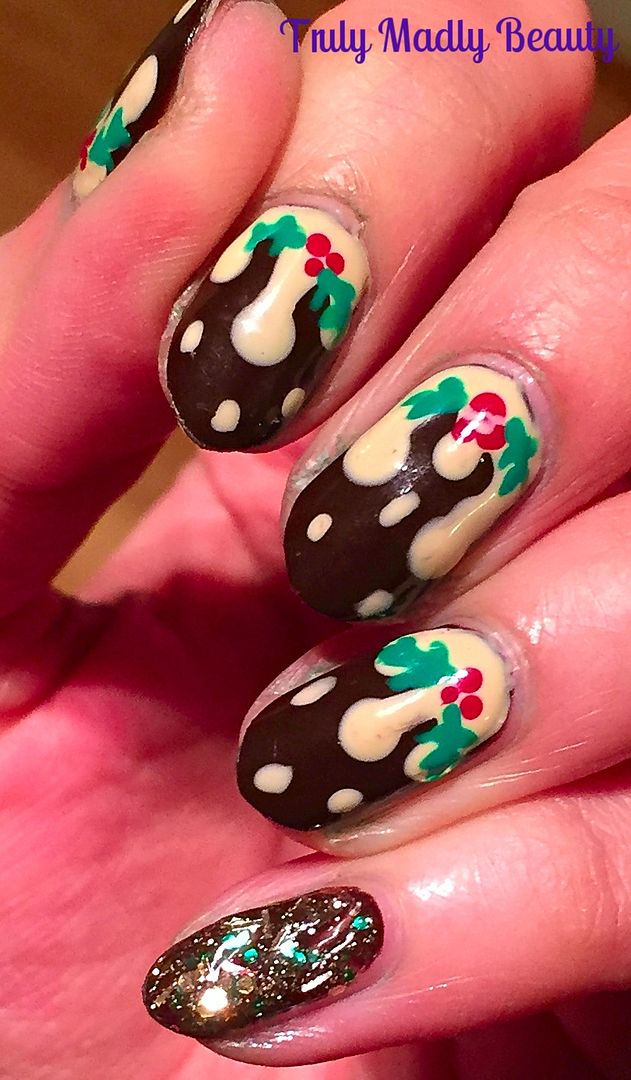
create your Christmas pudding nails you need to start with a dark
brown base. As mentioned, for this I used one of my Revlon Parfumerie
scented polishes in Chocolate Truffle which smells like...yup
chocolate! Apply two coats for a nice opaque finish.
Now
for the brandy butter! As you can see for this part you just need to
create some drip nail art. I've done this a few times on here with
various different looks, you may recall on Halloween? I've done a
step by step tutorial on how to create drips on your nails HERE.
I
spent a while debating on which end to create my drips, I'm usually a
fan of applying them on my tips, if you cast your eyes to the left of
this page you can see I've done so on my Mint Choc Chip manicure.
However this time I was feeling the mood for the cuticle end...I
know, I'm such a rebel.
For
my brandy butter drips I've used gorgeous Nina Ultra Pro polish in Rum
& Reggae, which is a lovely beige cream shade. I found this delightful brand in Sally's.
Next
our puddings need some decoration in the form of a sprig of holly. To
create these I just used a fine nail art brush & applied three
fine dots using the nearest red polish I had to hand, then using the
same brush & this time some green polish, free-handed a couple of
spiky leaves either side.
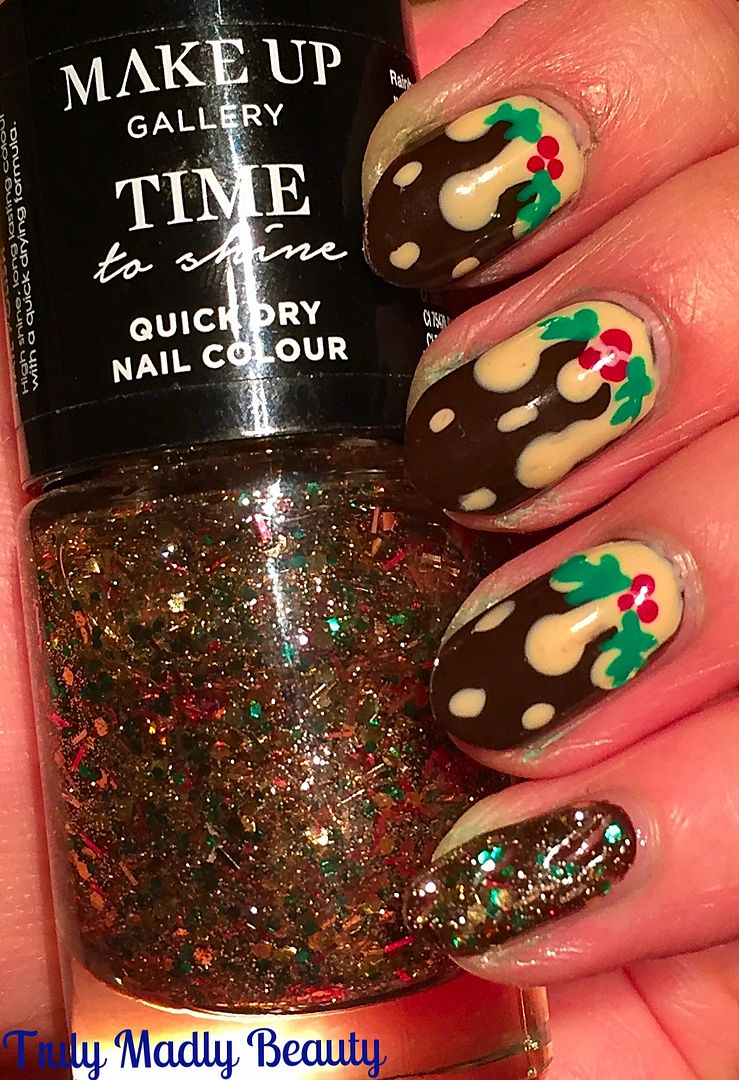
As
you can see I decided to rock some glitter on my little finger as an
accent & for this I used a polish I picked up in Poundland called
Rainbow Sparkle! Filled with gold, green & red glitters of
various shapes & sizes, you really can't get more festive! A
couple of coats of this on top of the brown created some satisfying
sparkles. Not bad at all for a pound.
Finish
it all with a nice thick coat of topcoat & you have your
Christmas Pudding Nails good enough to eat! You can see all of my
previous Christmas Nail Art ideas HERE. Thanks for reading!
Lotsa
love to ya!
12.14.2016
Festive NOTD - Swirly Chrome Christmas Trees!
Hello
there my lovely readers!
Gosh
can you believe that it'll be Xmas next week already?! How in the
hoohaa did that happen? This month has had me all over the shop floor thus I haven't been able to get my nail art on as much as I
would have liked for the festive season, bad nail blogger! But I can
rectify that now as I finally managed to grab some free time to have
a play! Better late than never eh?
Every
year I like to rustle up some Christmas Tree nails, as they are my
absolute favourite for the festive period, each time mixing up the design
slightly. You can check out my previous Christmas Tree nail art
designs HERE, HERE and HERE.
That's
what I love about them, the fact that you can have fun playing around
creating different styles and designs. This year I decided to go down
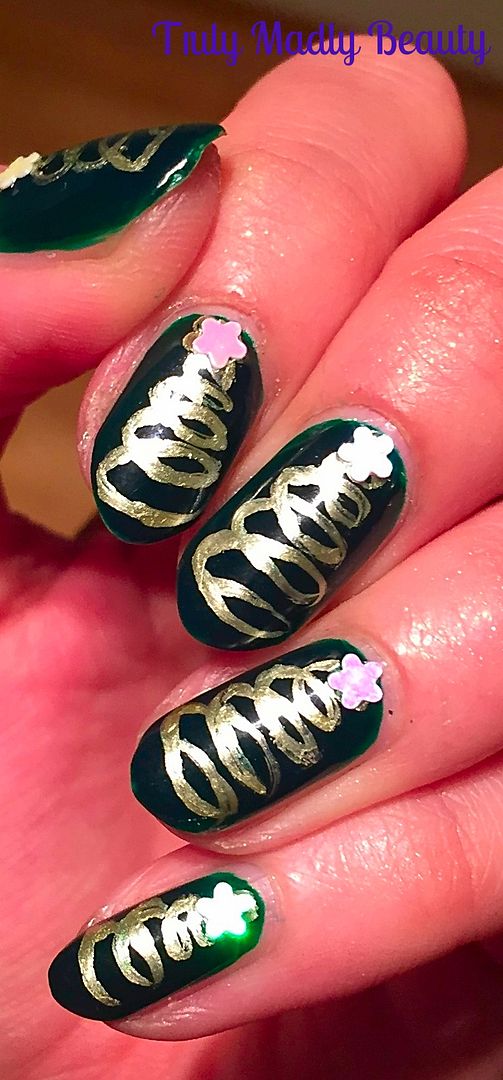
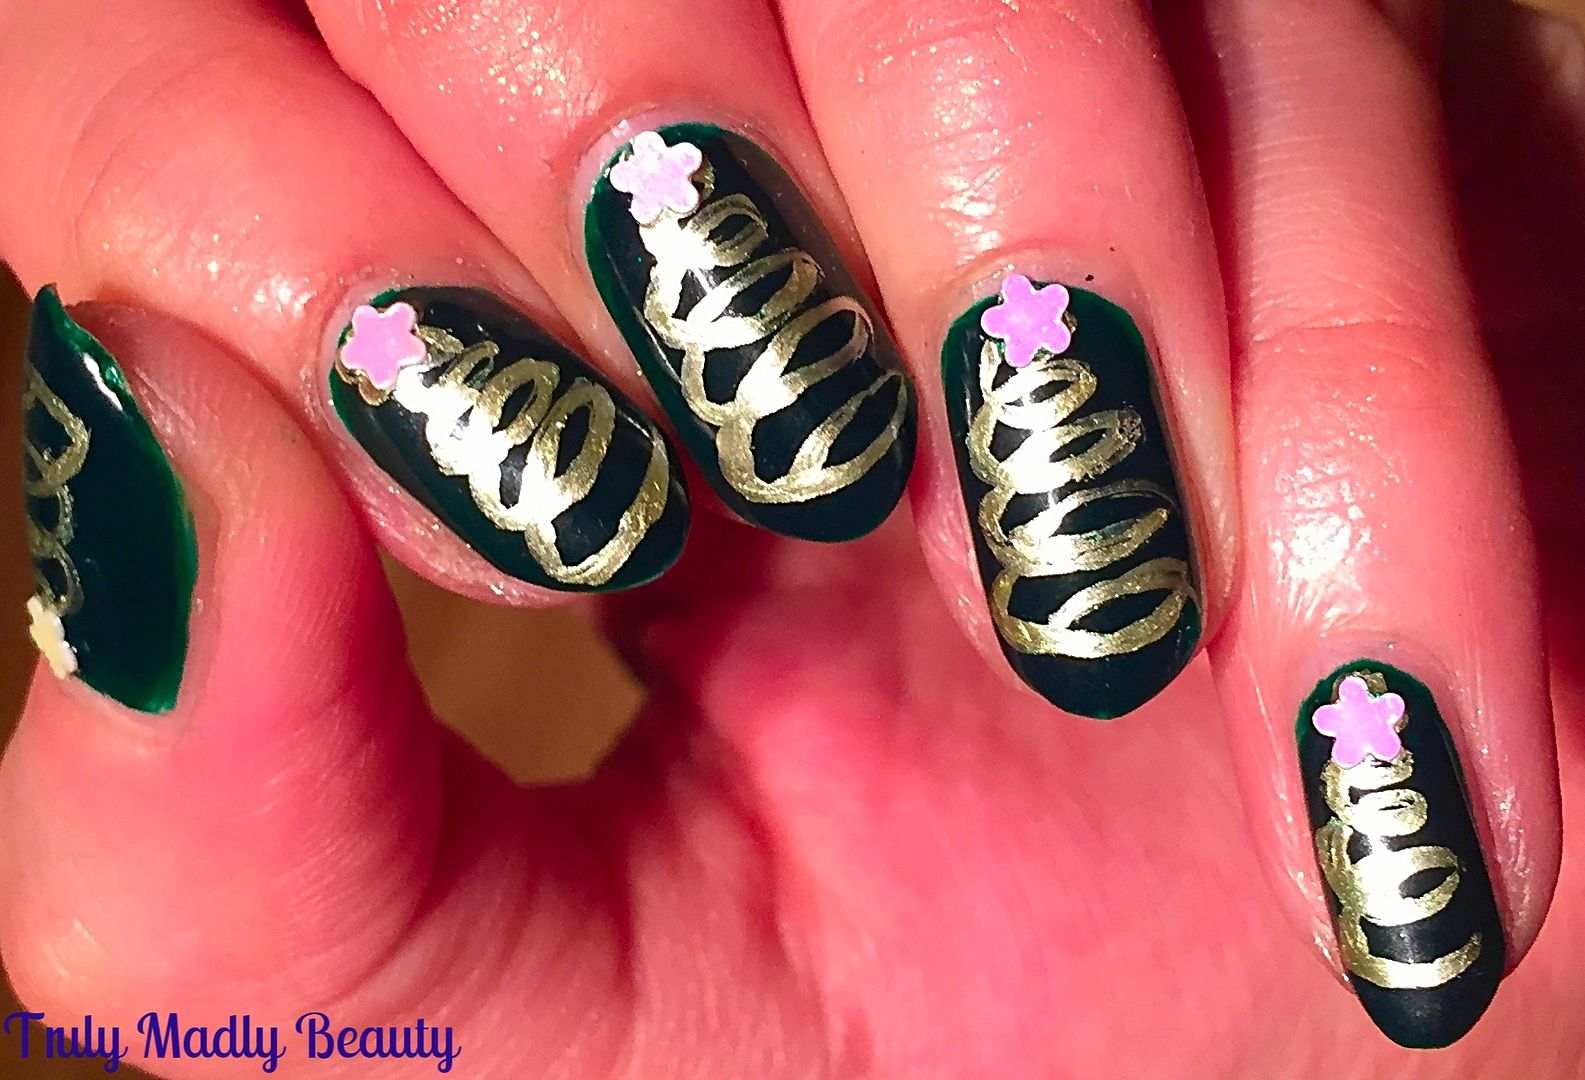
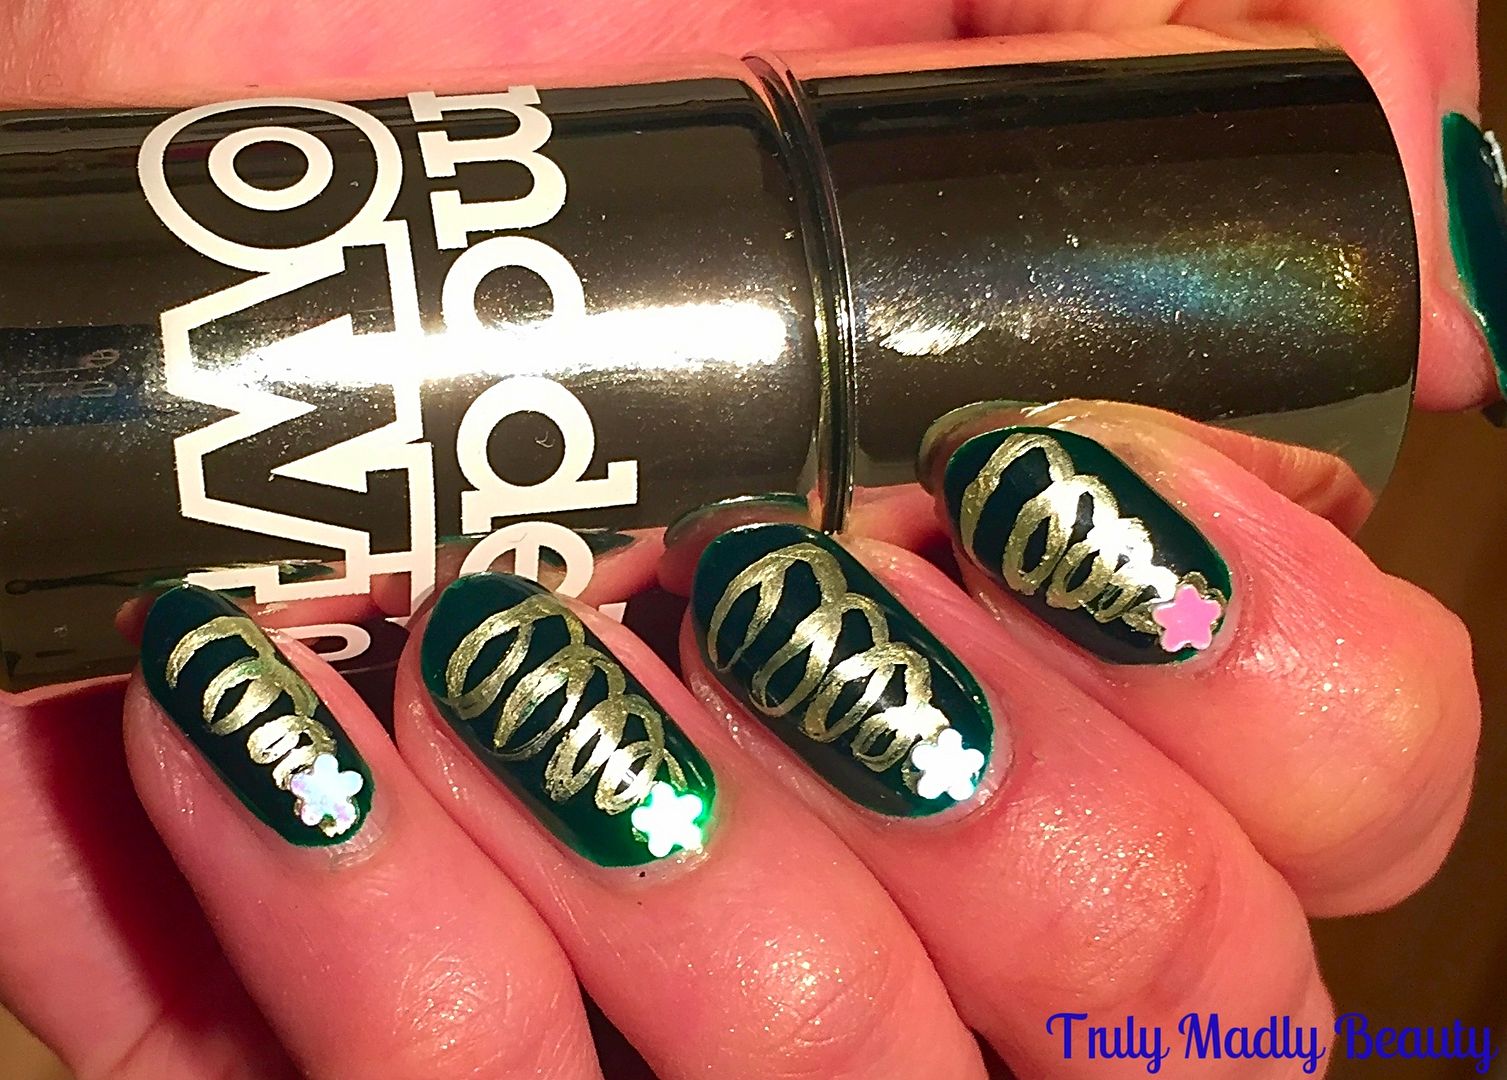
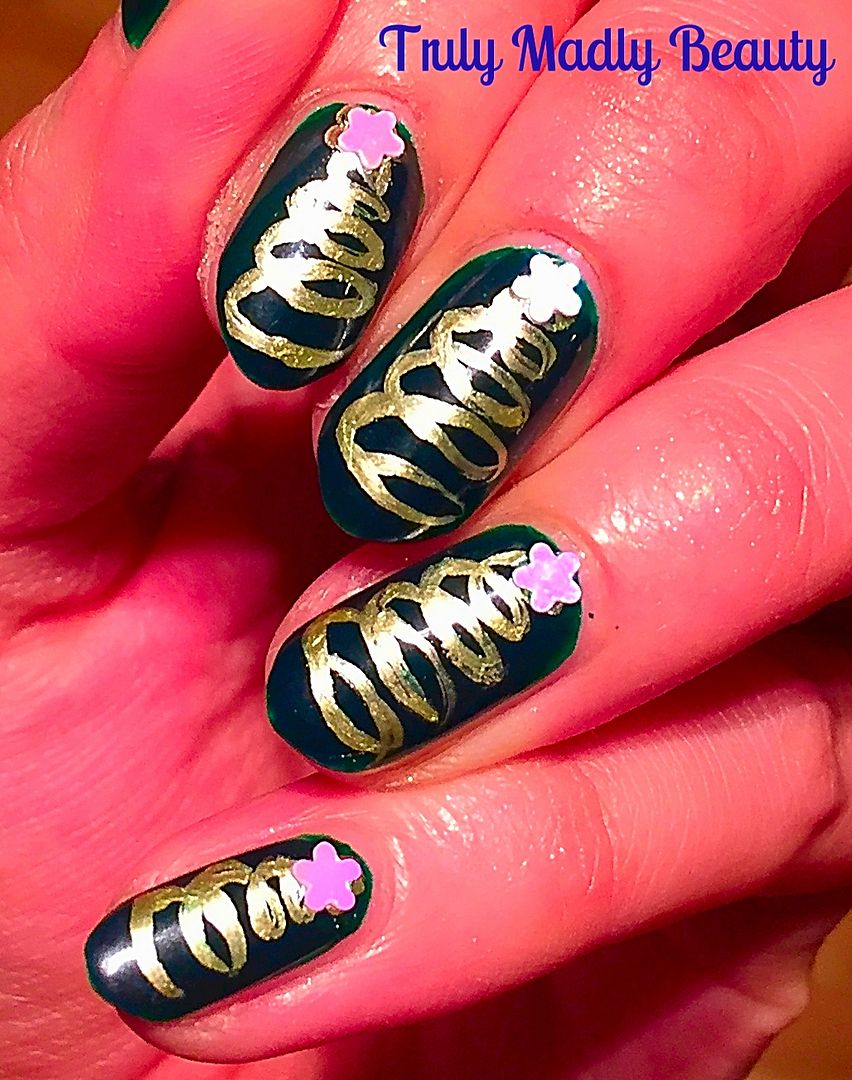
a more arty route & created these golden swirl Christmas Trees.
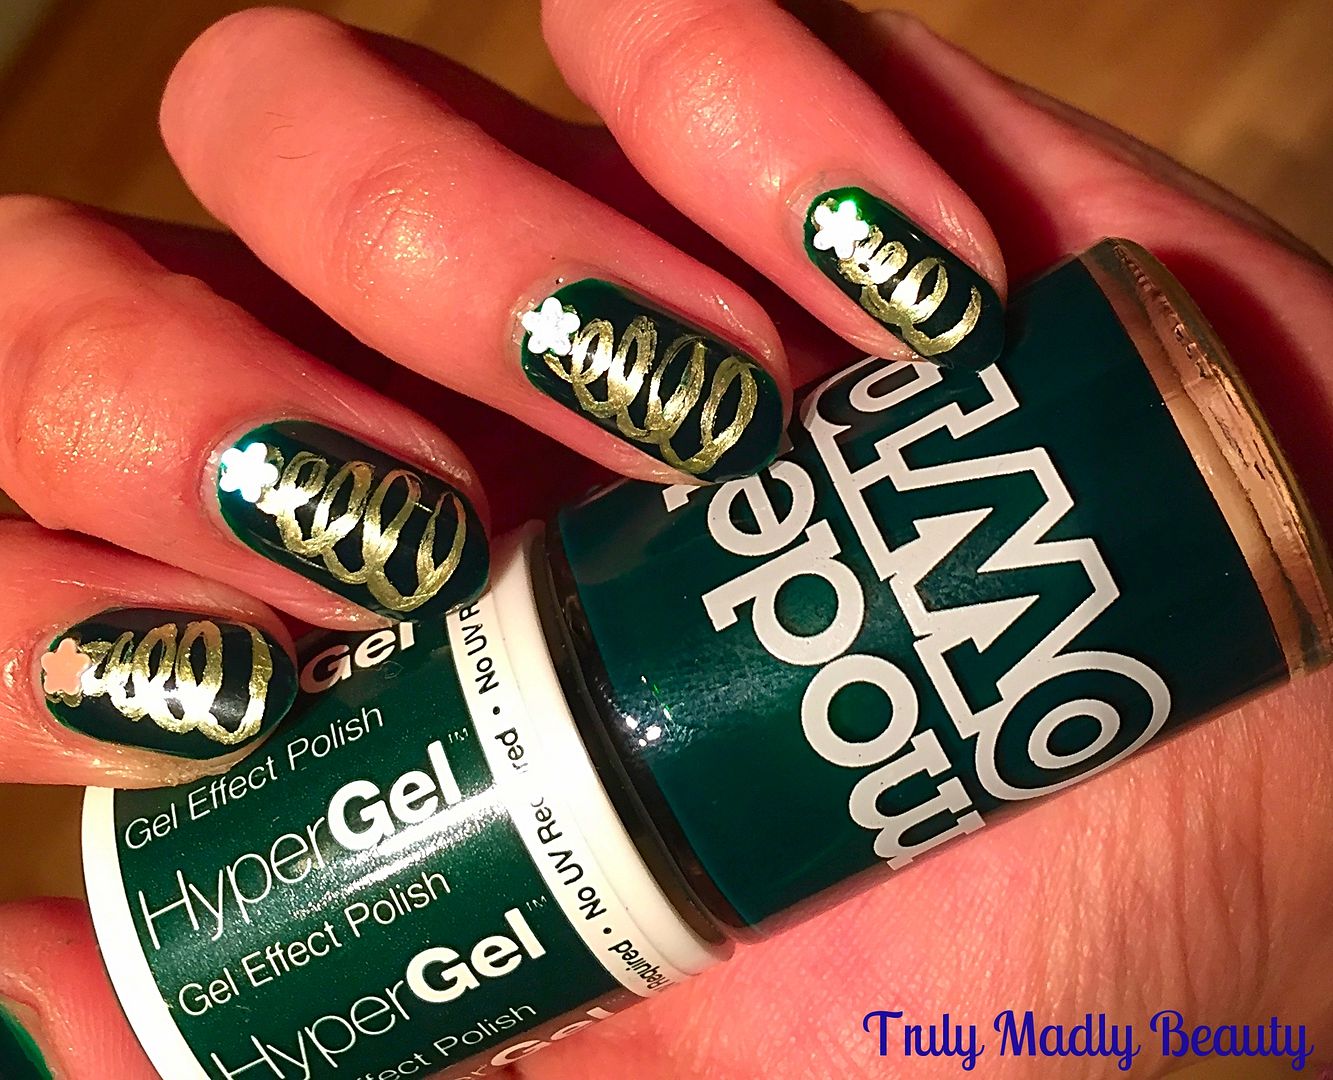
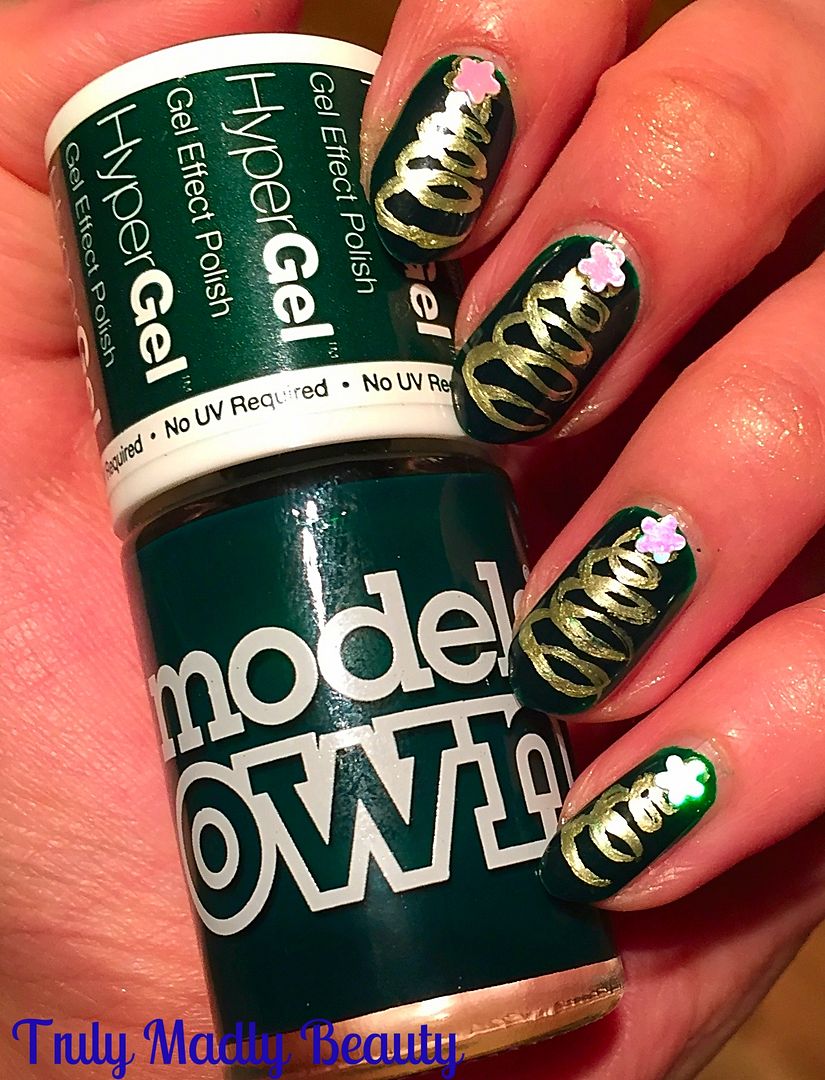
Instead
of painting green trees I went for a lovely deep dark green for my base &
Models Own HyperGel in Ebony Green was perfect for this.
This
is two coats of the gorgeous green goodness, isn't it just divine?
I'd forgotten how much I adore this Gothic green!
Then
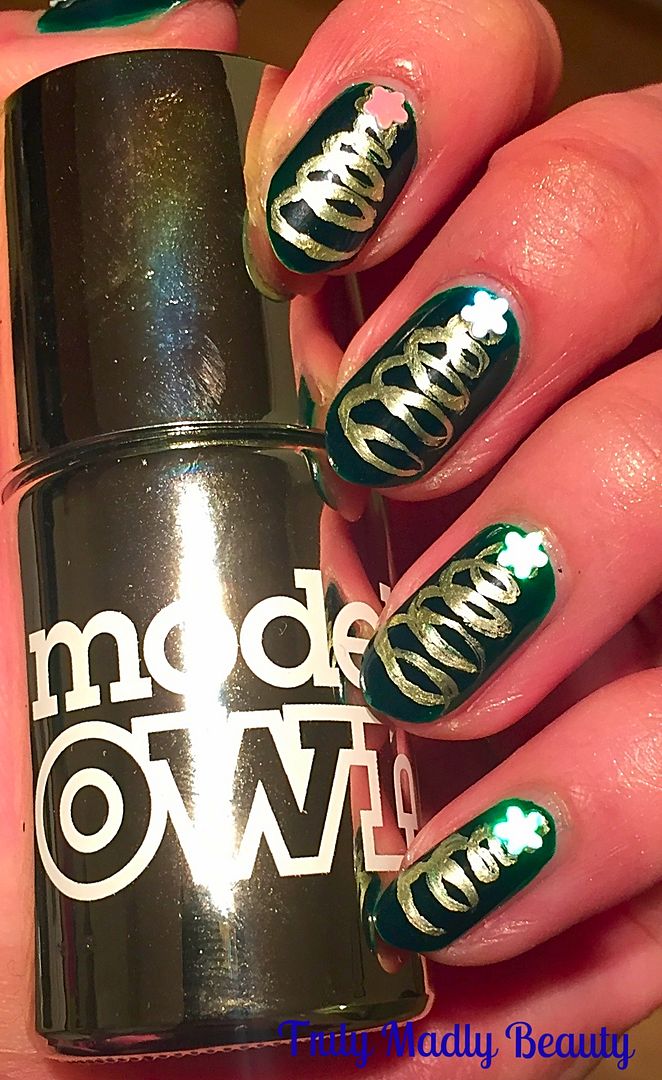
for my Xmas trees I found myself reaching for Models Own again, this
time Chrome Olive from the Colour Chrome collection. I was originally
going to use a gold polish but I'm so glad I changed my mind as the
metallic formula really pops against the dark base!
To
create the trees I grabbed my extra small Nailbees nail art brush
& with the Chrome Olive polish, free handed the swirls, starting
with a tiny swirl for the top of the tree, slowly making my way down
the nail, gradually making the loops bigger as I went.
A
little tip is to rest your elbow on a surface when doing this, this
helps steady your hand a great deal, enabling you to create your
swirls without a shaky hand!
Of
course every tree needs a star, so to finish I simply added a little
star shaped holographic sequin at the top of my trees. Finish with
topcoat & you're done!
Thanks
for reading my lovelies, keep posted as I hope to squeeze in a couple
more designs this year. But do have a peek at some of previous
designs HERE for some festive inspiration.
Lotsa
love to ya!
Subscribe to:
Posts (Atom)