Showing posts with label Wet n Wild. Show all posts

5.19.2016

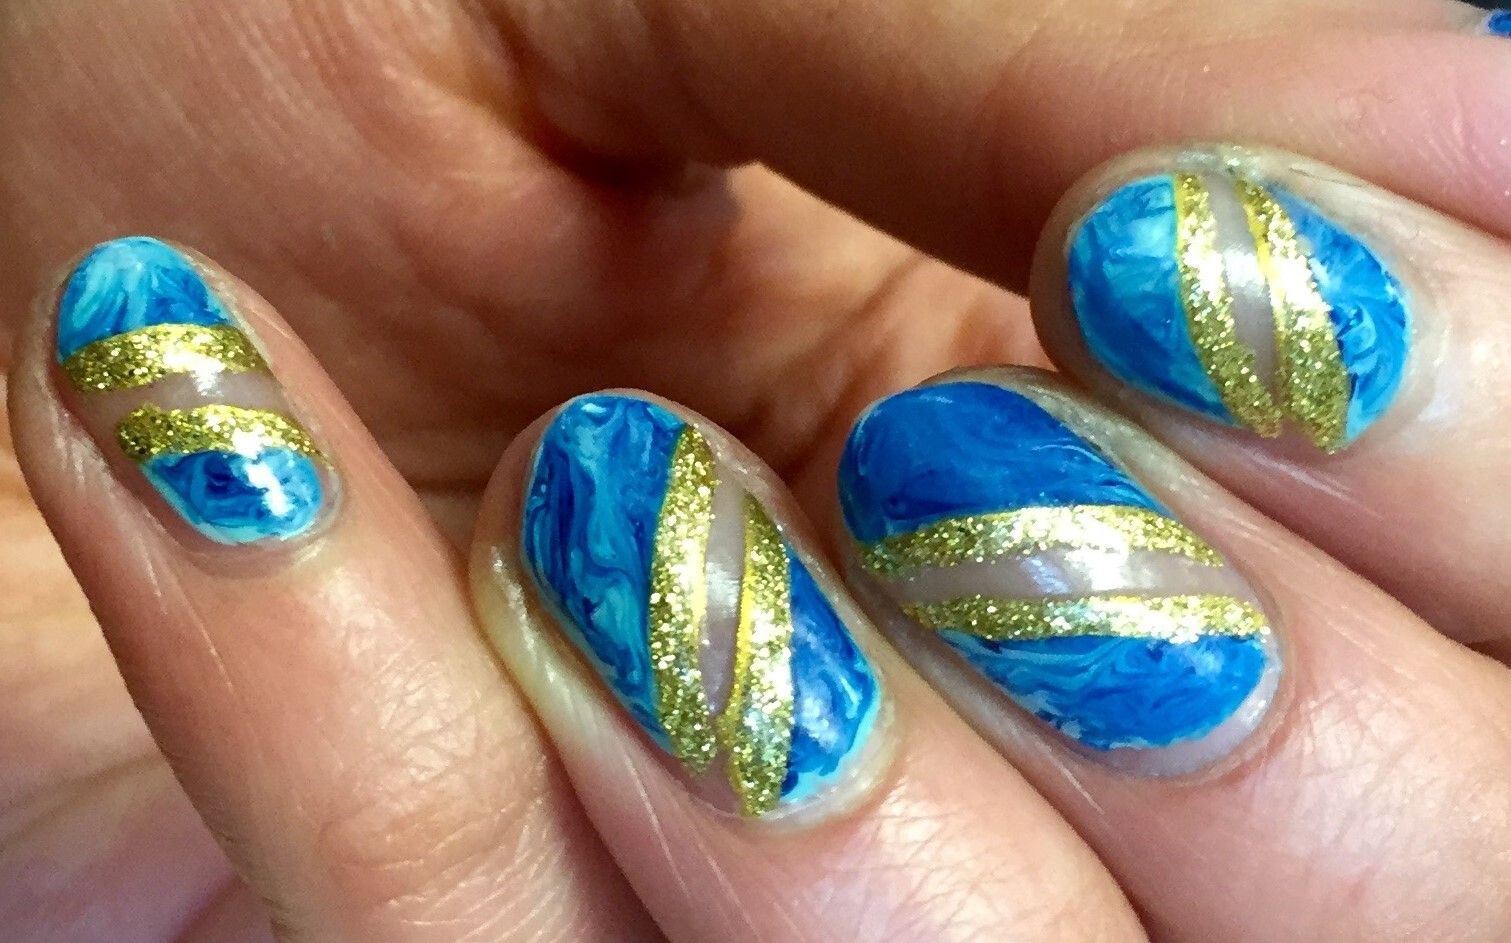
NOTD - Negative Space Marble Eclipse Nails & Tutorial!

Hello there lovely readers!

Hope you're all well! Things have been a tad hectic of late, hence the lack of posts, but I'm currently settling into a new job, which is going really well I'm thankful to say, SO glad I made the change, but I'm happy to get back a bit of normality with the blogging & another marble mani tutorial for you beauts today.
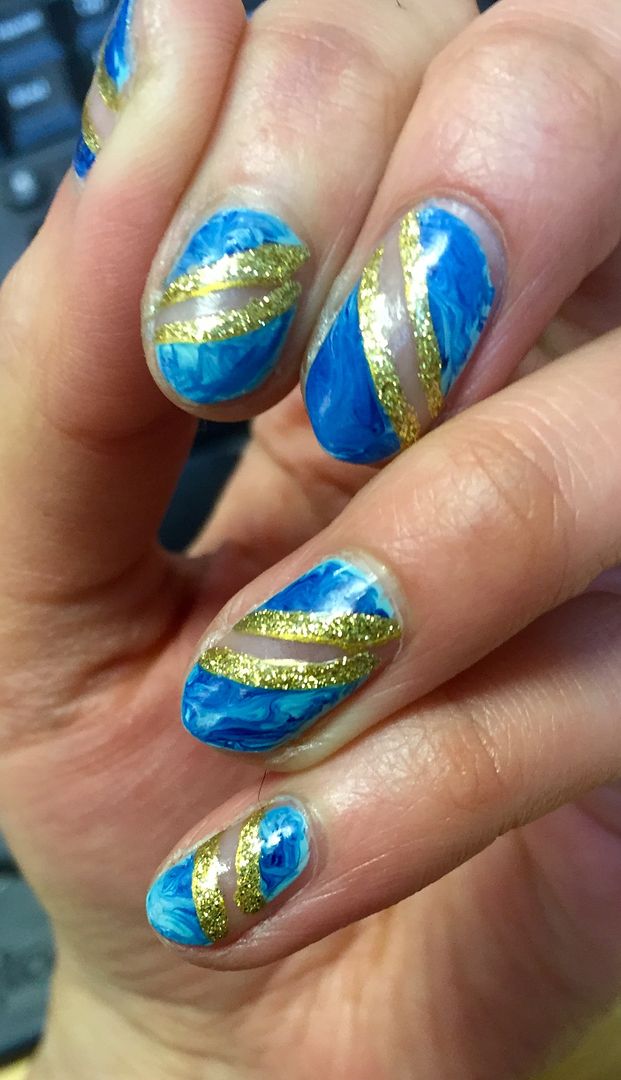

I hope you're not getting tired of these as I'm still very much obsessed with dry marbling & I love sharing how easy they are to do with you. You can catch some of my previous designs HERE and HEREas well as an actual marble stone effect look I did recently HERE. I've mixed things up a tad with this manicure incorporating a little bit of negative space action too!

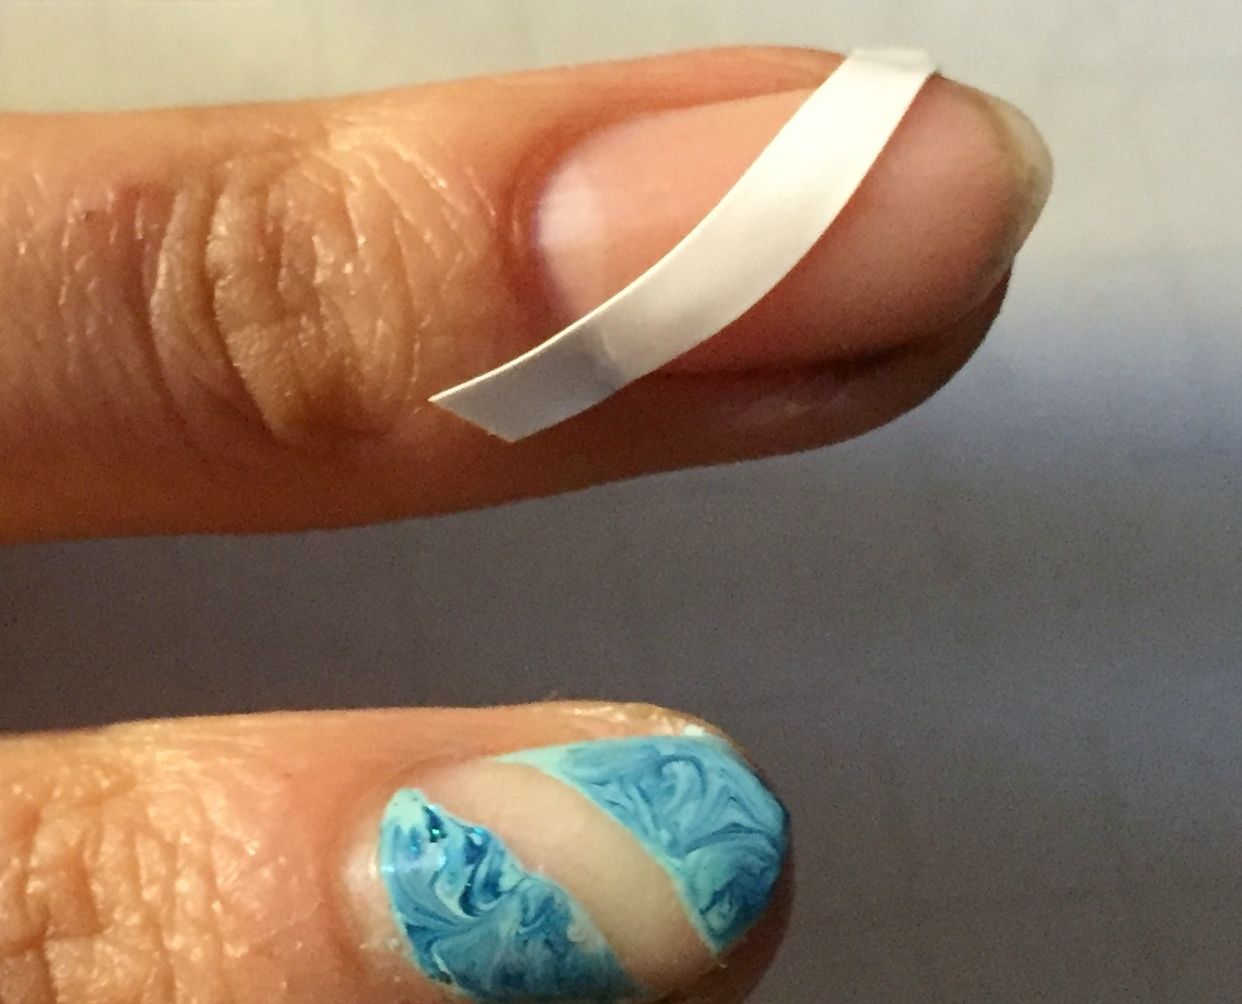
All you need to create the negative space through the centre of the mani is some french mani guides, I purchased a bunch of these super cheaply off of ebay. Starting with a bare nail, position your mani guide across the nail at whichever angle you like until you are happy.

Then apply your polish shades, for this mani I've used this yummy Wet n Wild creme I Need A Refresh Mint & American Apparel Eclipse which is a veritable DISCO of a polish with its vibrant turquoise shade filled to the max with multi tone holo glitters!
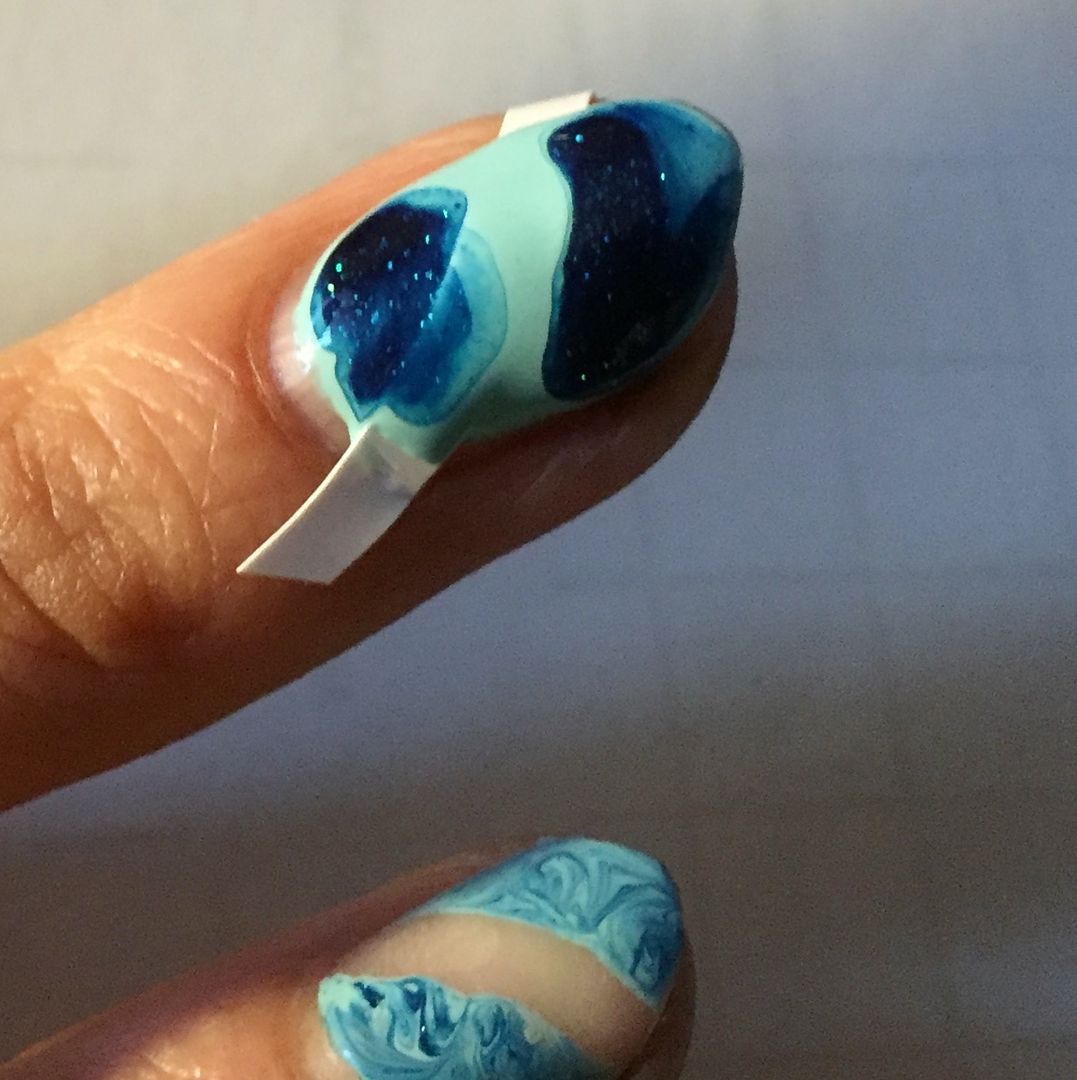

I applied one coat of the Wet n Wild polish first, then immediately dotted on a drop or two of the American Apparel.
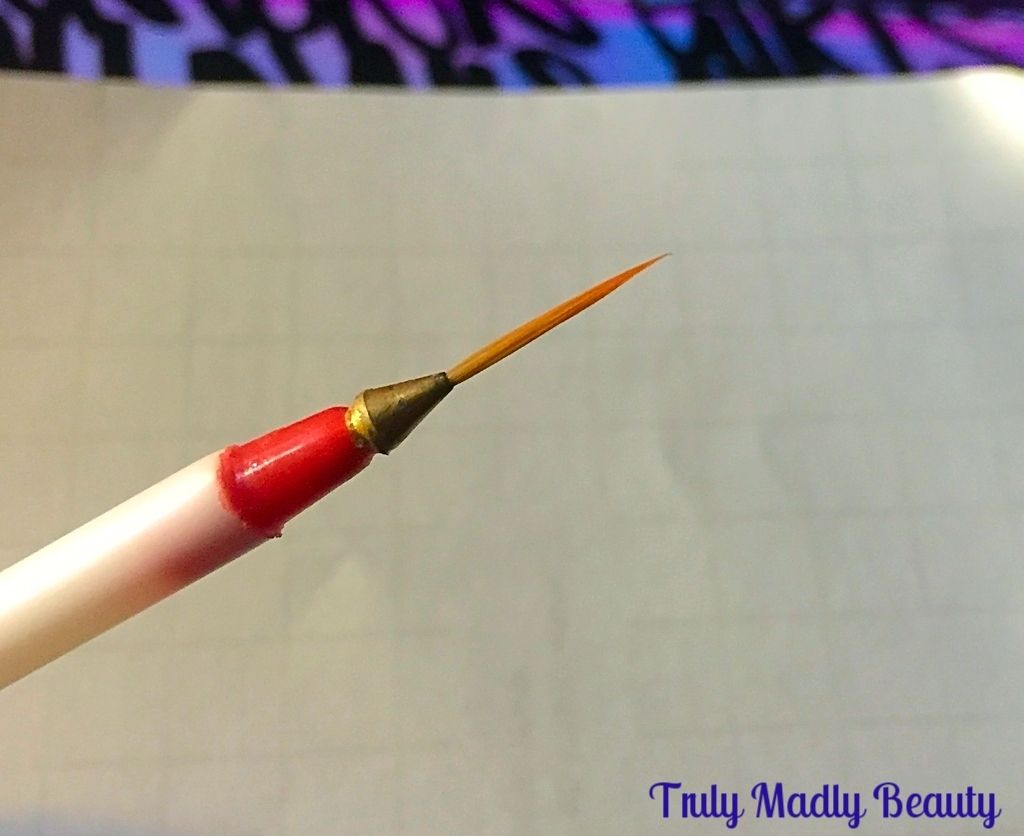

Grabbing your tool of choice, here I've used my trusty nail art brush again as this works best for me, swirl the two colours together to create a marble effect you are happy with. 
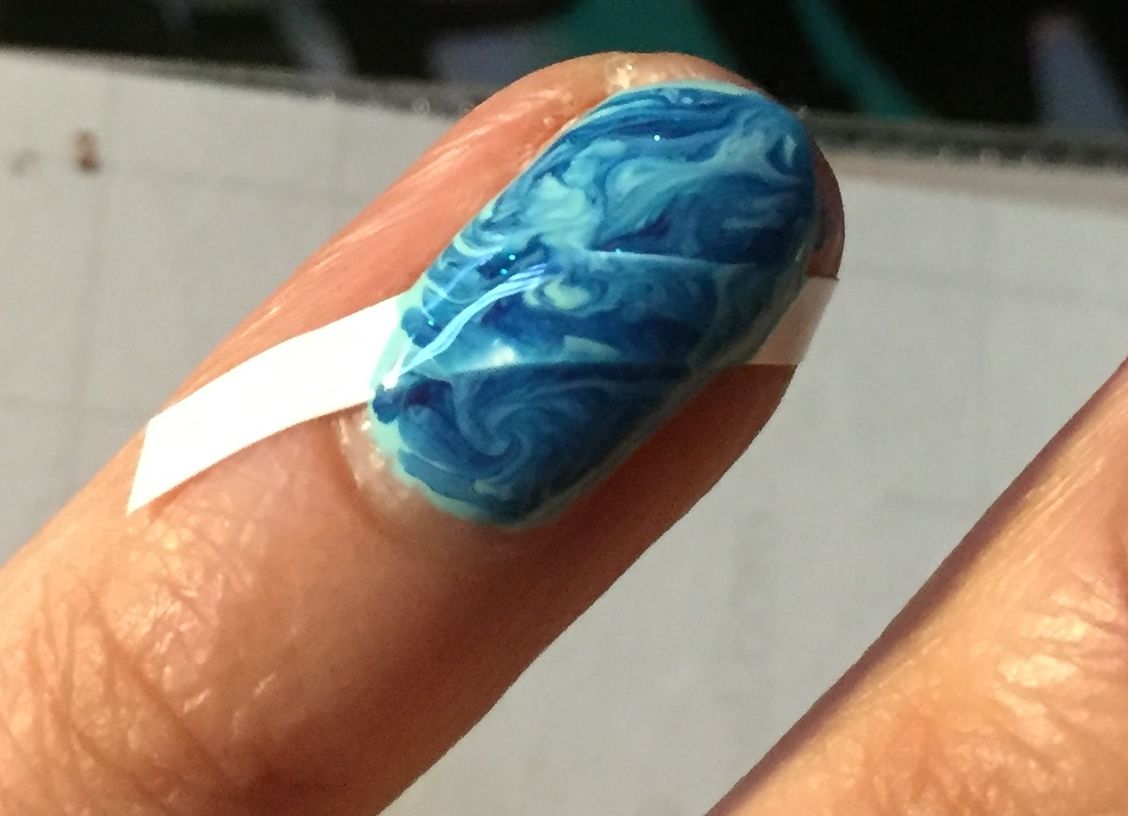

A couple of tips I've learnt along the way, more polish is definitely NOT better necessarily! I've had many nails which ended up a big puddle of polish mess from being a tad too heavy handed.
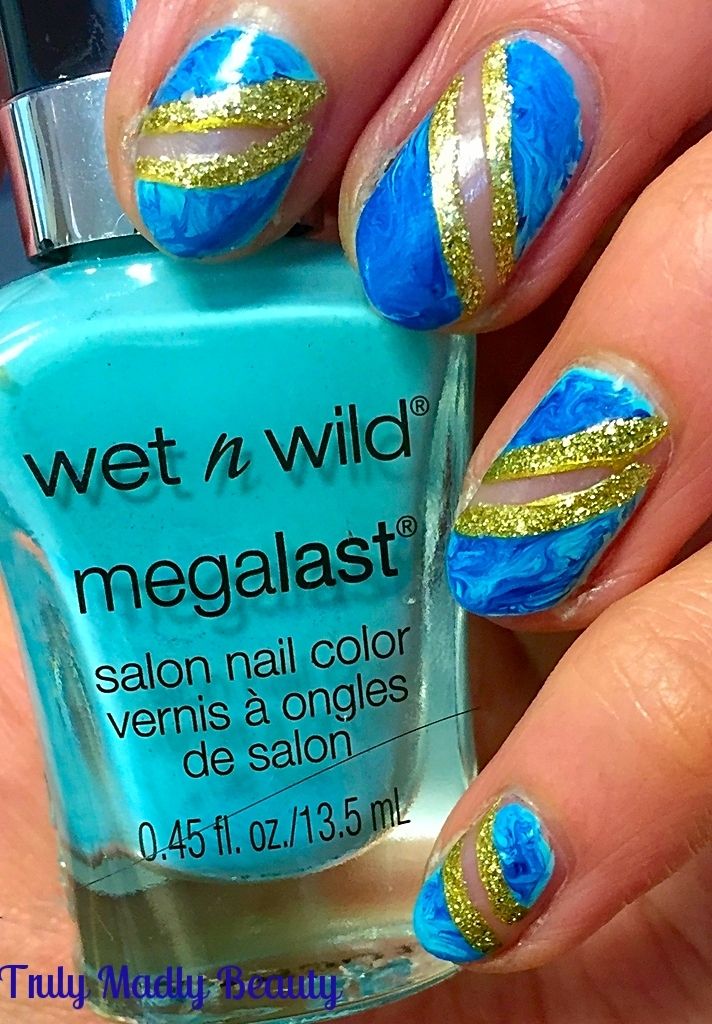

Another tip is to use a light touch, hence why I find the brush better for marbling, as with a toothpick I'd find myself going through all the polish layers directly to the nail bed. But everybody is different, use whatever you're comfortable with!
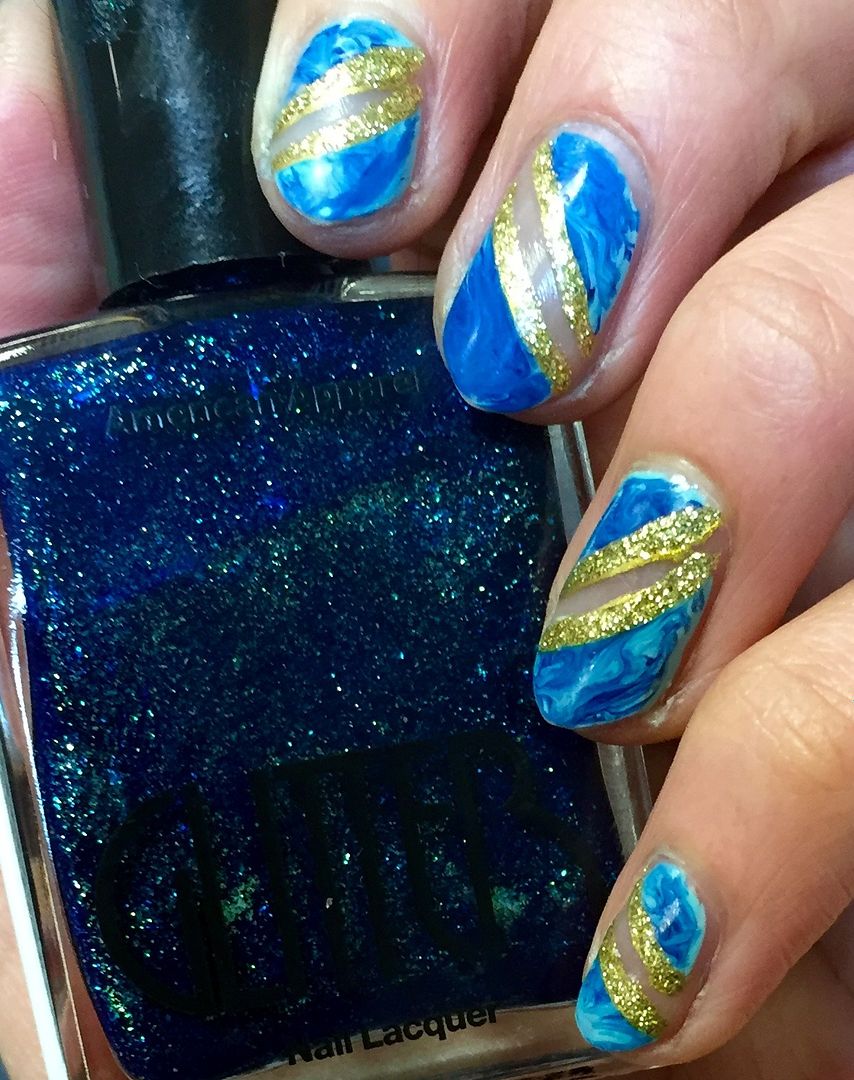

You then need to remove your mani guide whilst the polish is till wet. Clean up any smudges with a brush & acetone.
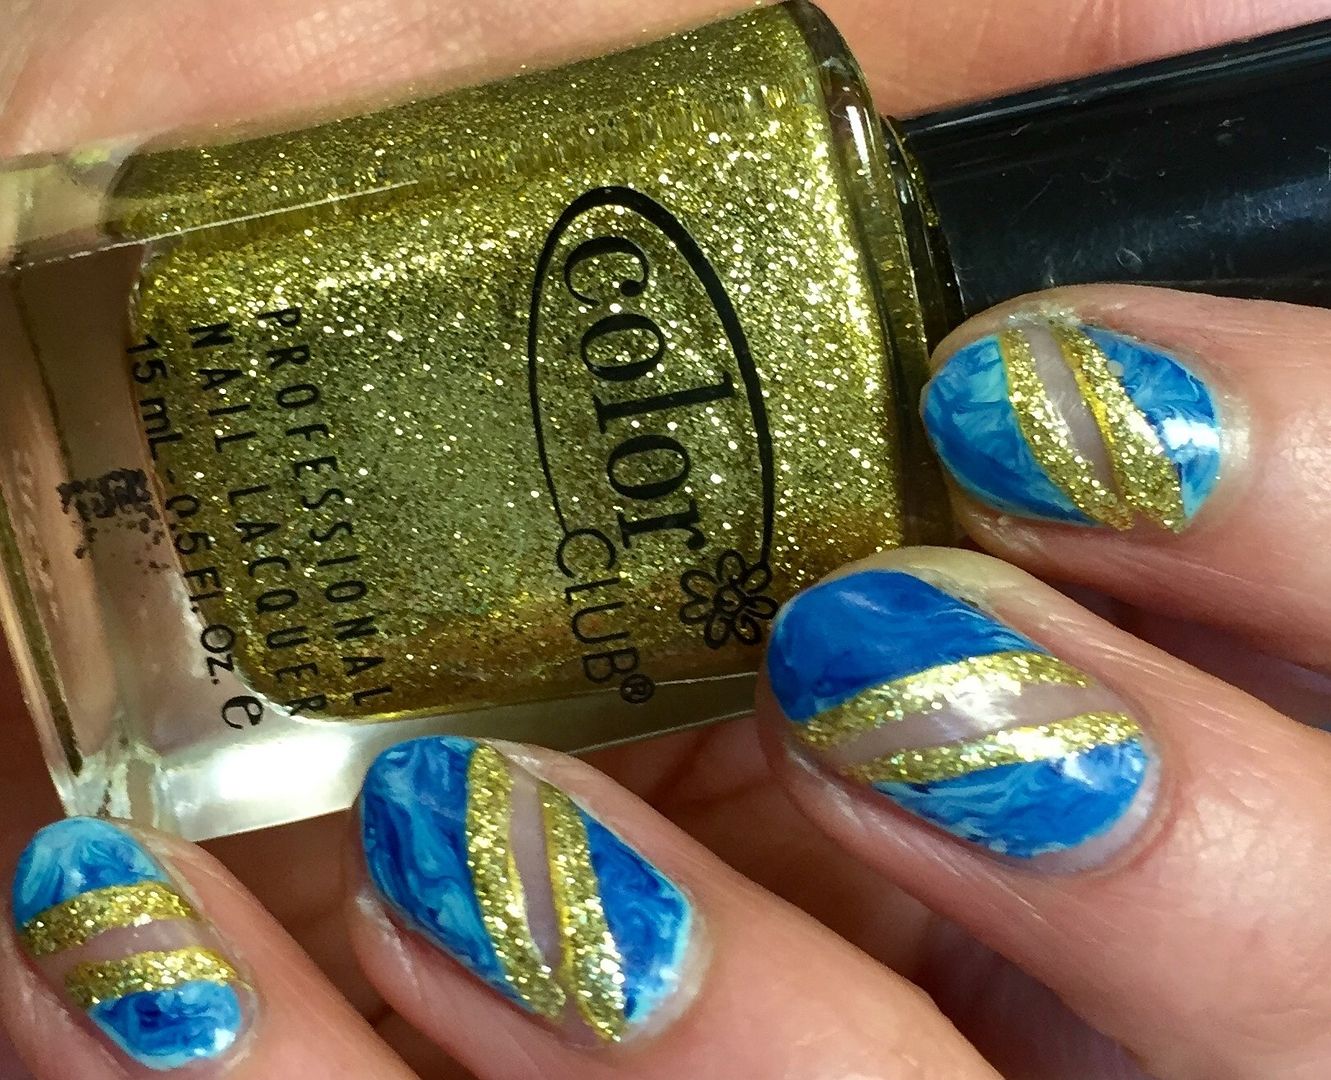

Then using a fine nail art brush & some pretty gold glitter, simply apply your sparkle along the curved outer edge of your negative space.

Finish with topcoat & you're done! Thanks for reading lovelies! Let me know if you give dry marbling a go, I'd love to see!

Lotsa love to ya!


7.18.2015

NOTD - Cuticle Tattoo Henna Style Nails

Hey there lovely readers! Hope you're enjoying this glorious weekend & a happy Eid to all who have been celebrating these past two days.

There's a trend on the nail scene that's recently caught my radar of late & tis one I am LOOOOVING muchly! What is it I hear you ask? Cuticle Tattoos!


I'm sure you're familiar with the pretty metallic tattoos that have been hitting the festival scene, which has had everyone go ga ga over. A fun way of adding a bit of glam to any ensemble, well why not add a bit of glam to the nails too?!


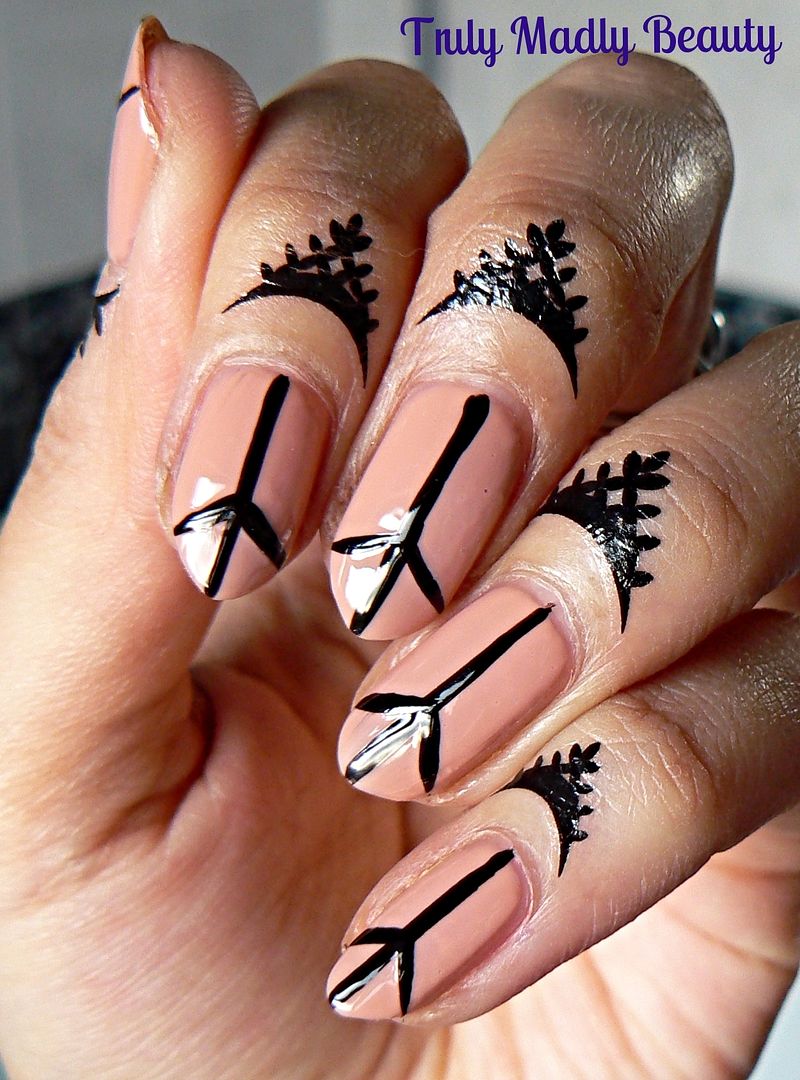
I adore henna body art, growing up in an Asian household, henna is something I'm pretty familiar with, always loving some sort of pretty design for weddings, events etc. One of the things about henna though, despite the pungent smell that puts a lot of people off, once the design starts fading on your skin, it definitely loses some of its prettiness! When I go for designs, I always prefer something simple yet elegant which is why I heart these cuticle tattoos from Charlies Nail Art store with their black henna like vibe.


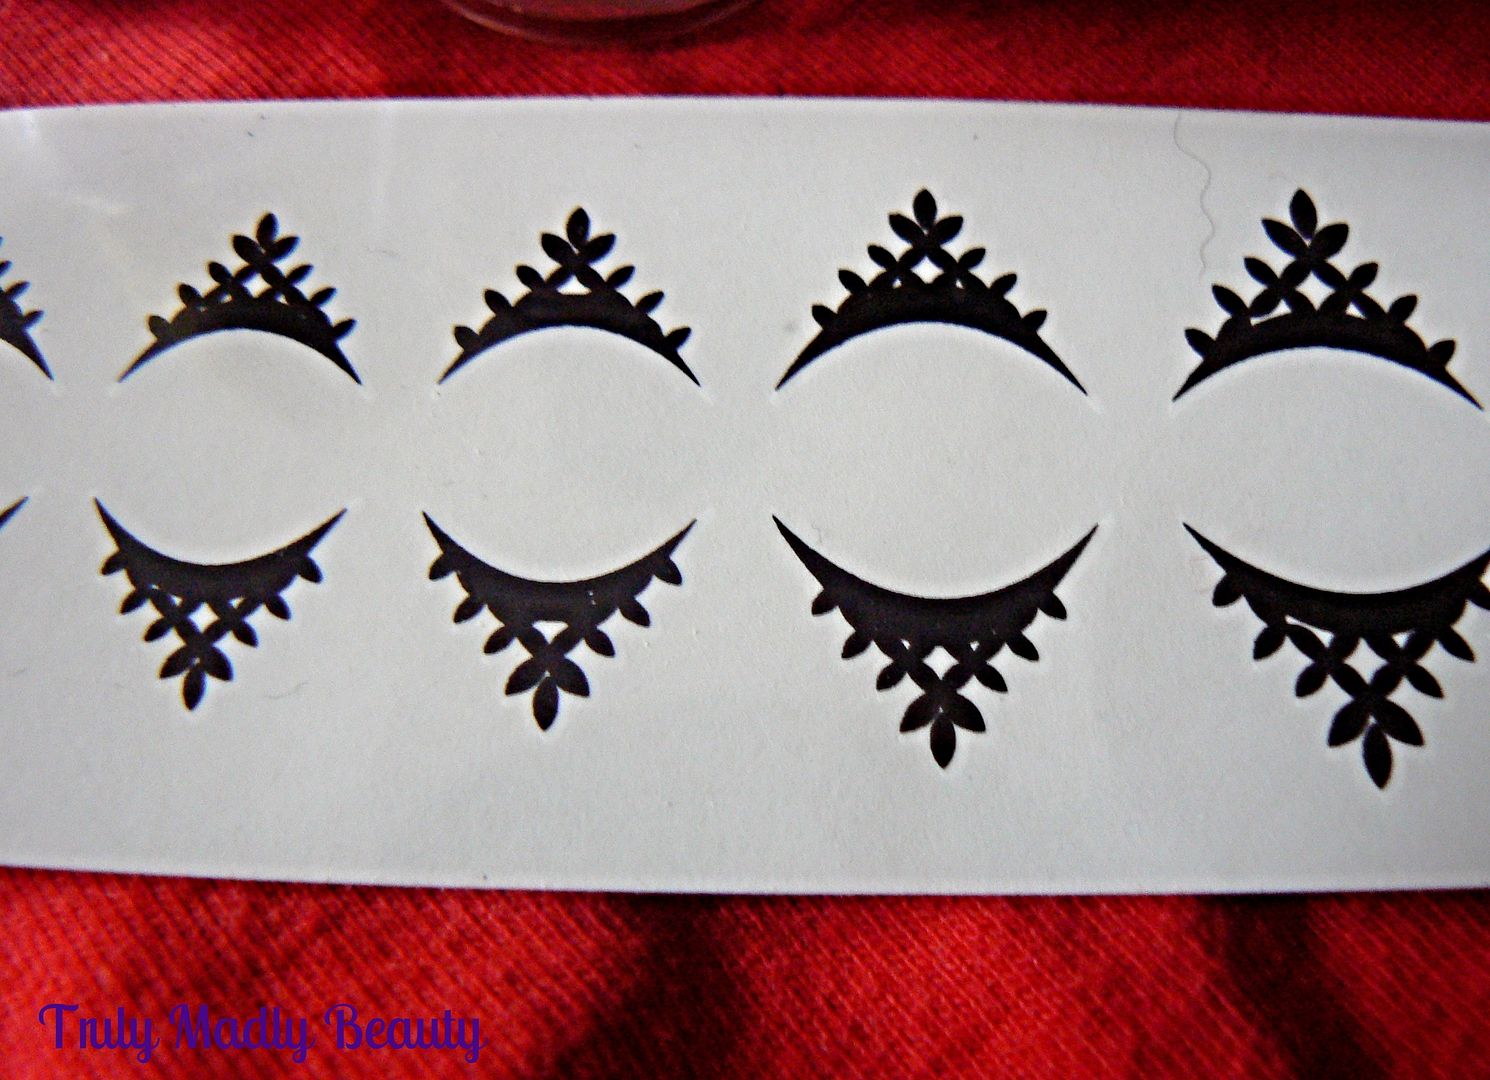
You may recall me mention Charlies NailArt store a few times on here already, lets just say I am thoroughly addicted to this online store for bargain nail art supplies, the cuticle tattoos being one of them. There are a variety of different designs to choose from, each as pretty as the other & they really are a unique way of adding a bit of extra wow factor to your nails, making the mani look so much more interesting. Not to mention they're super simple & straightforward to use!


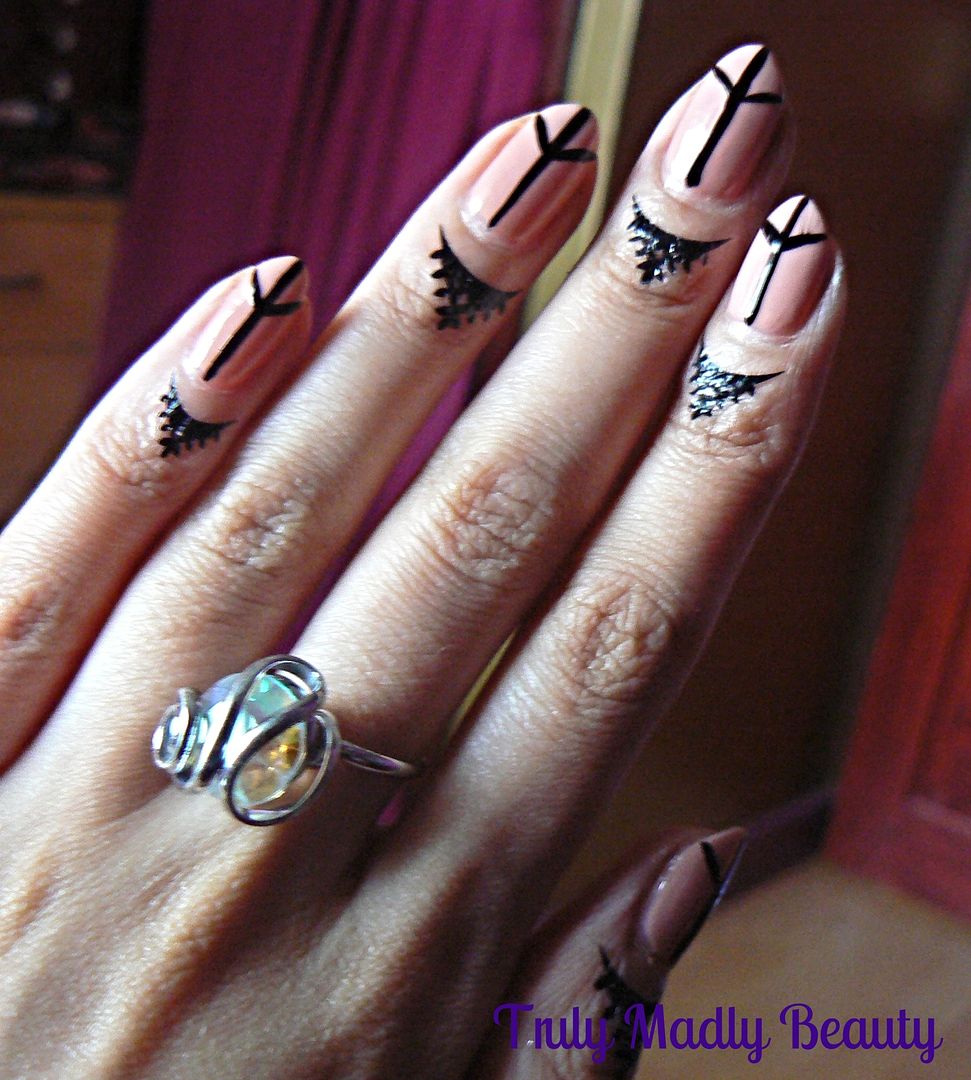
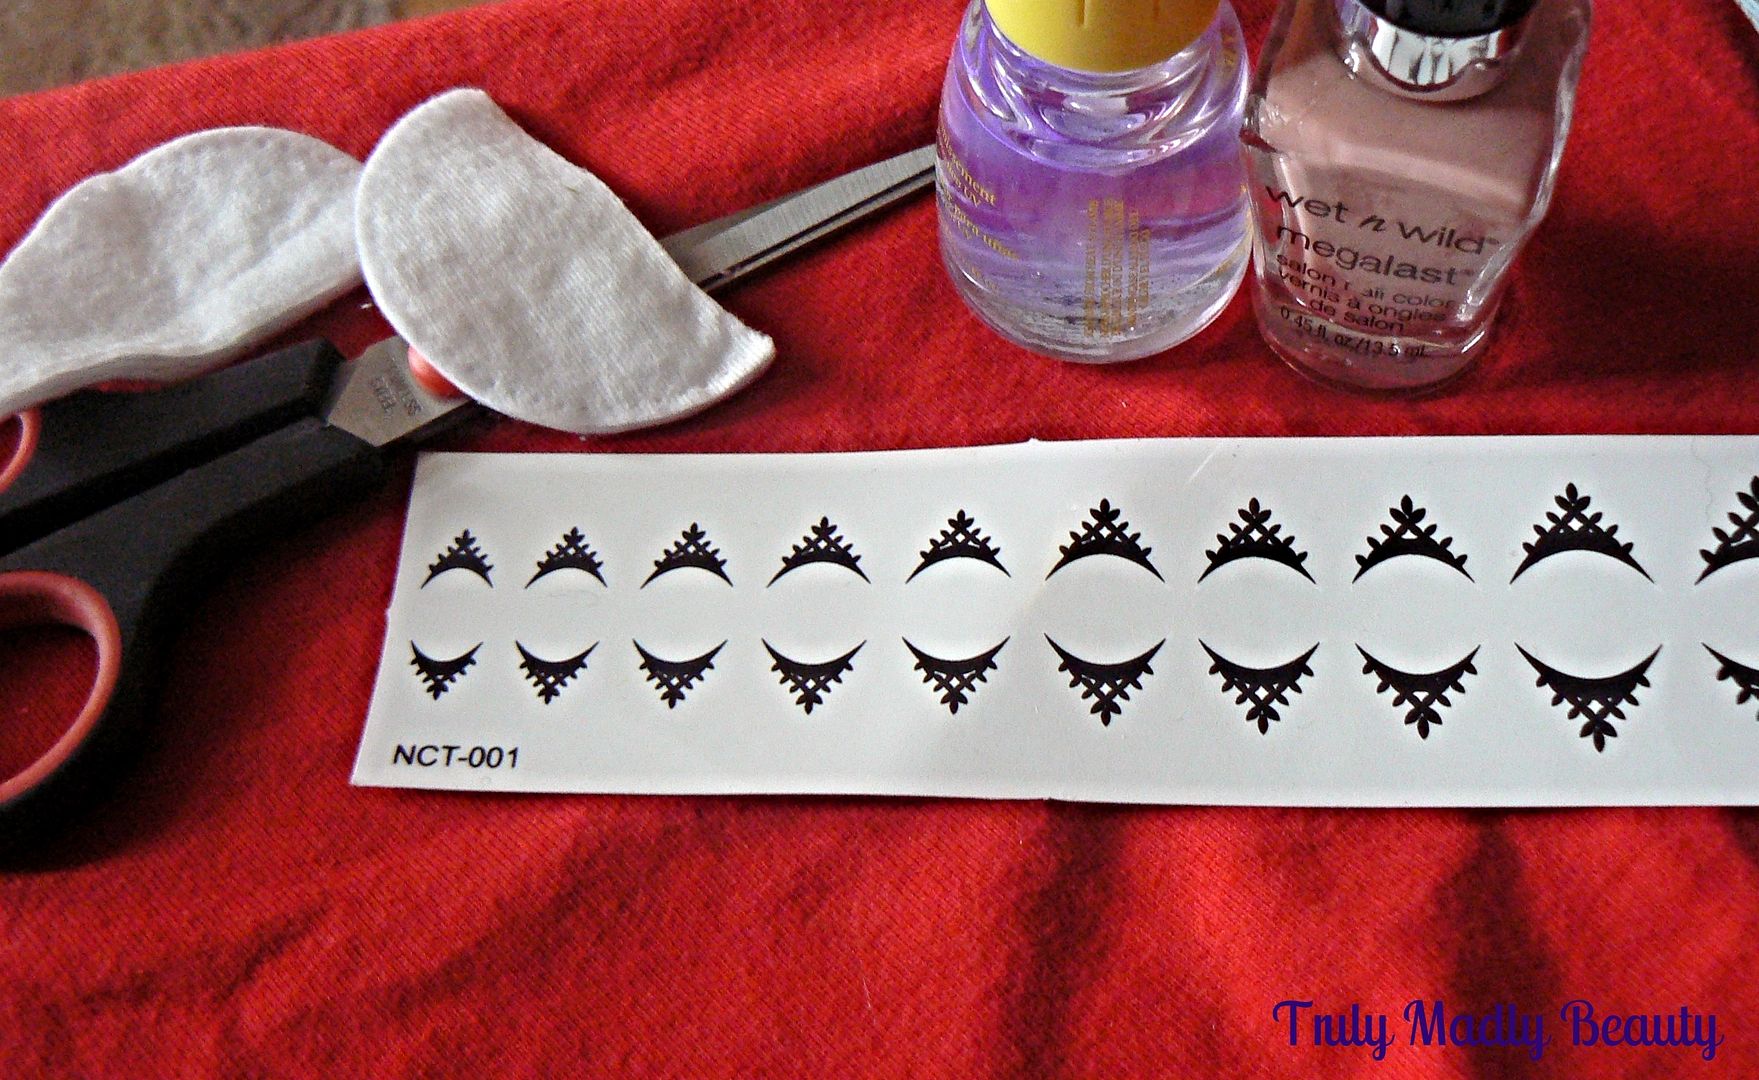
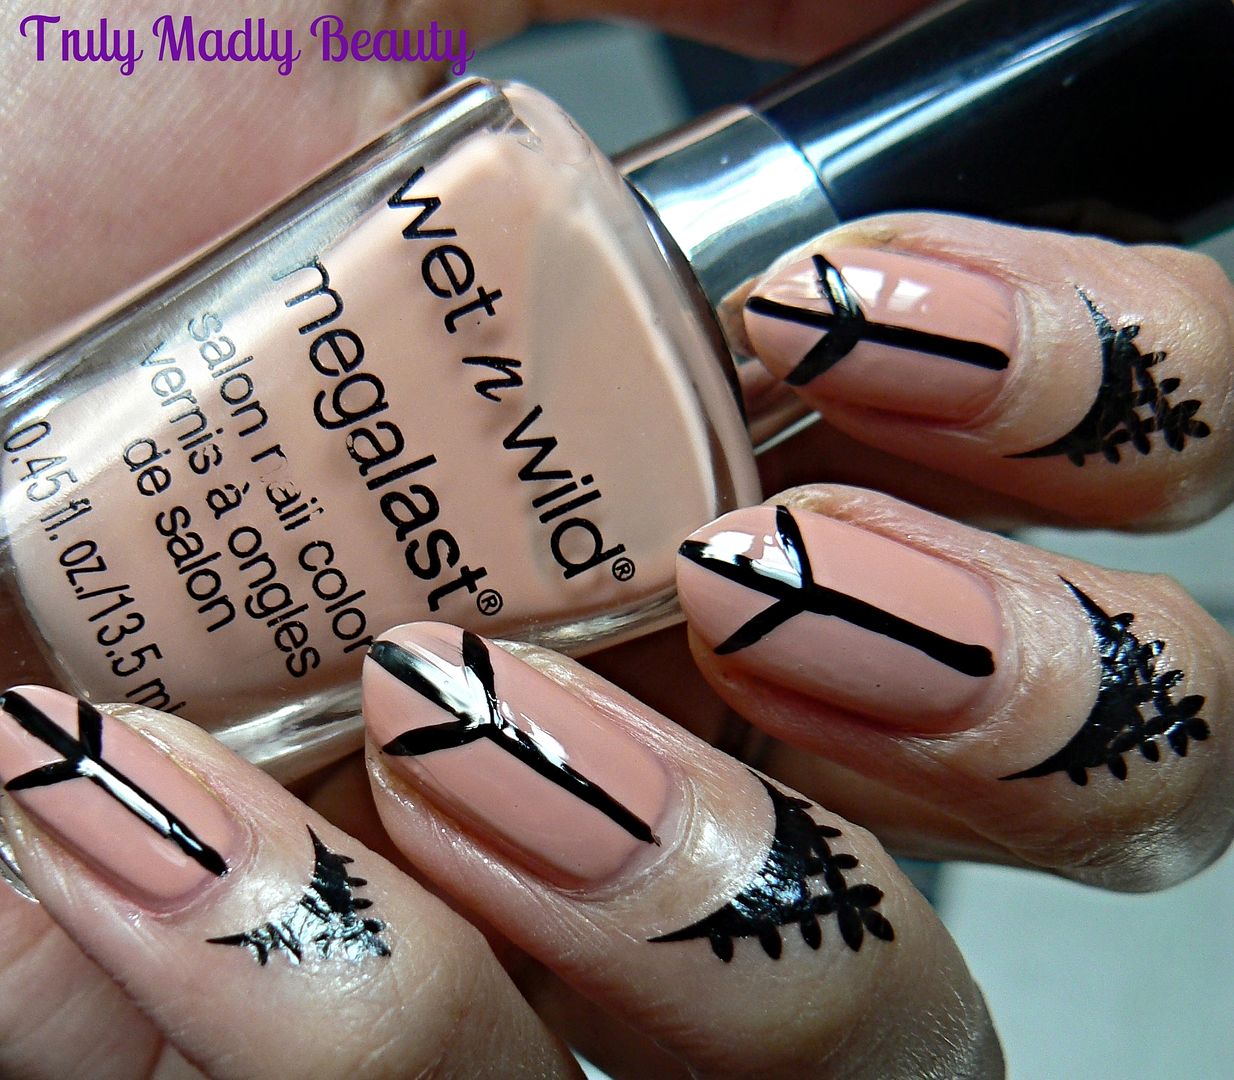
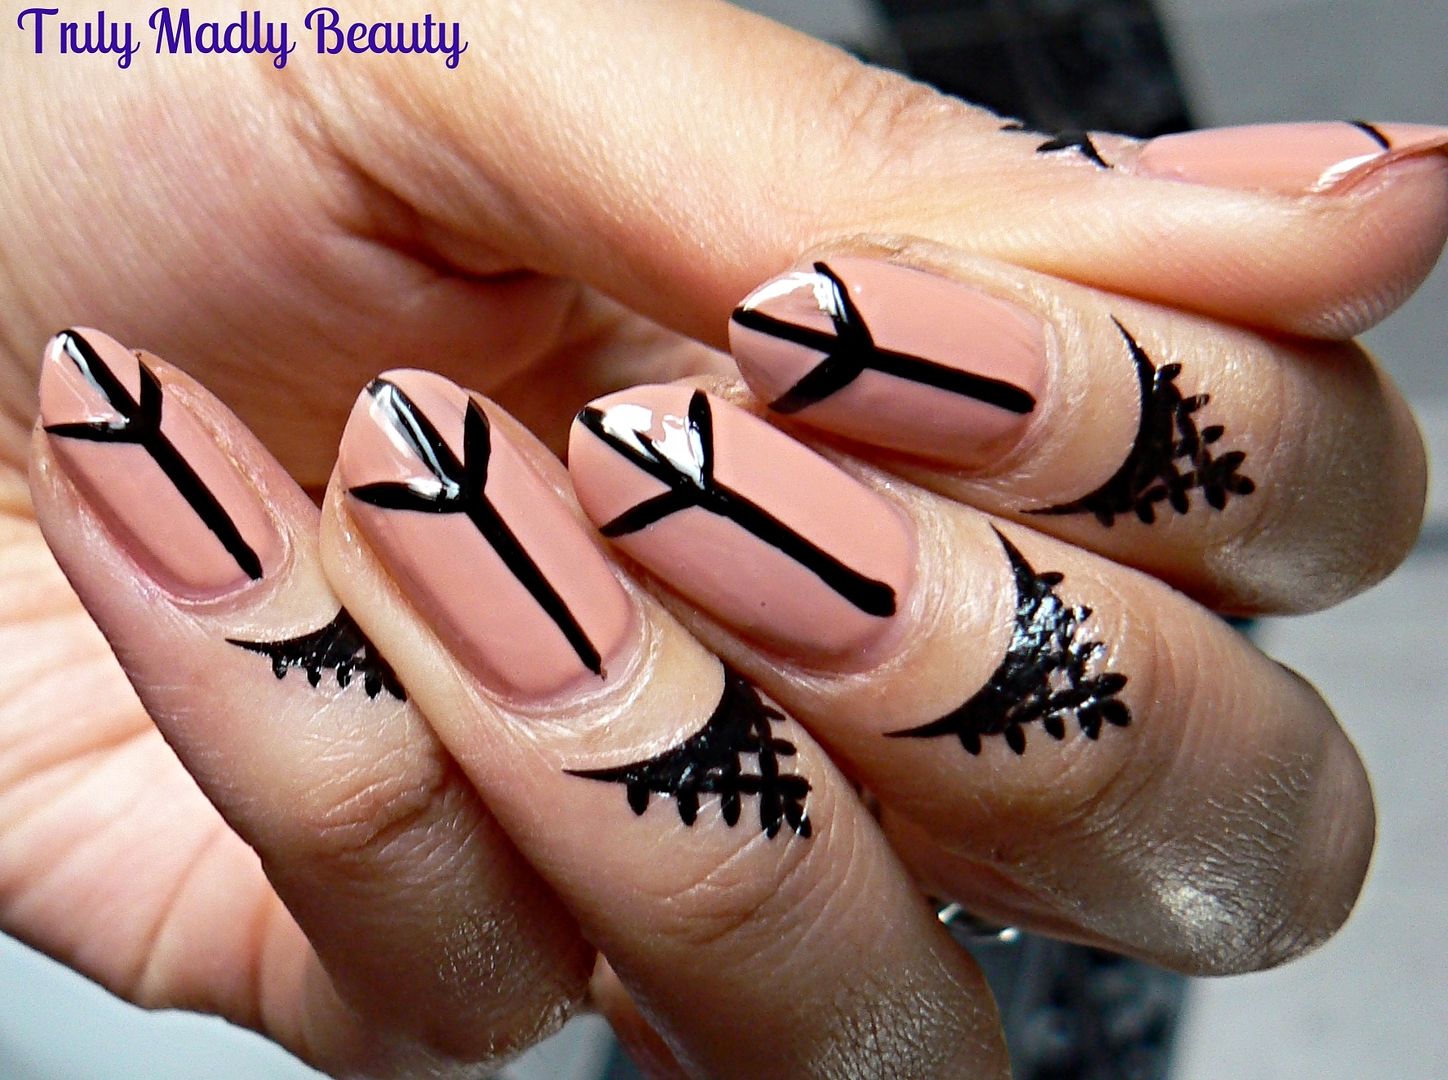
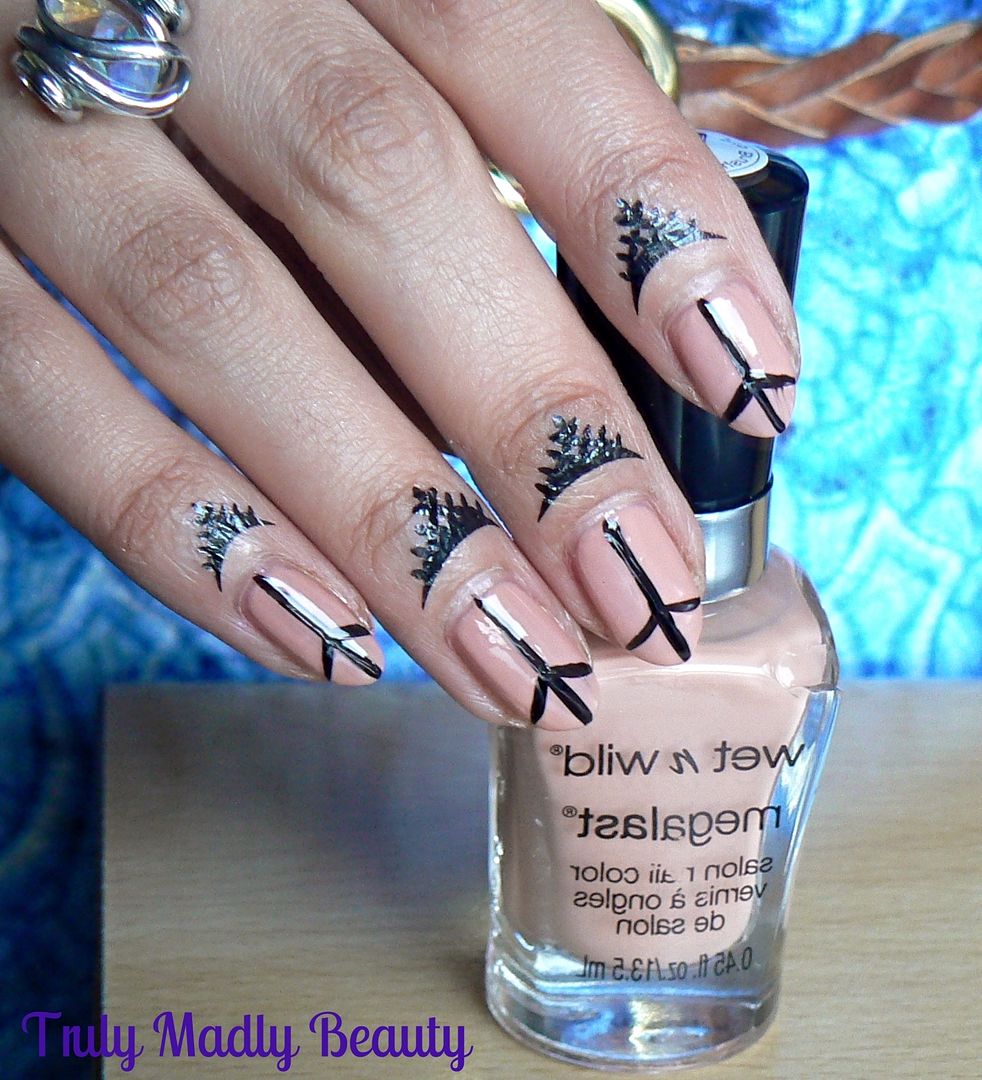
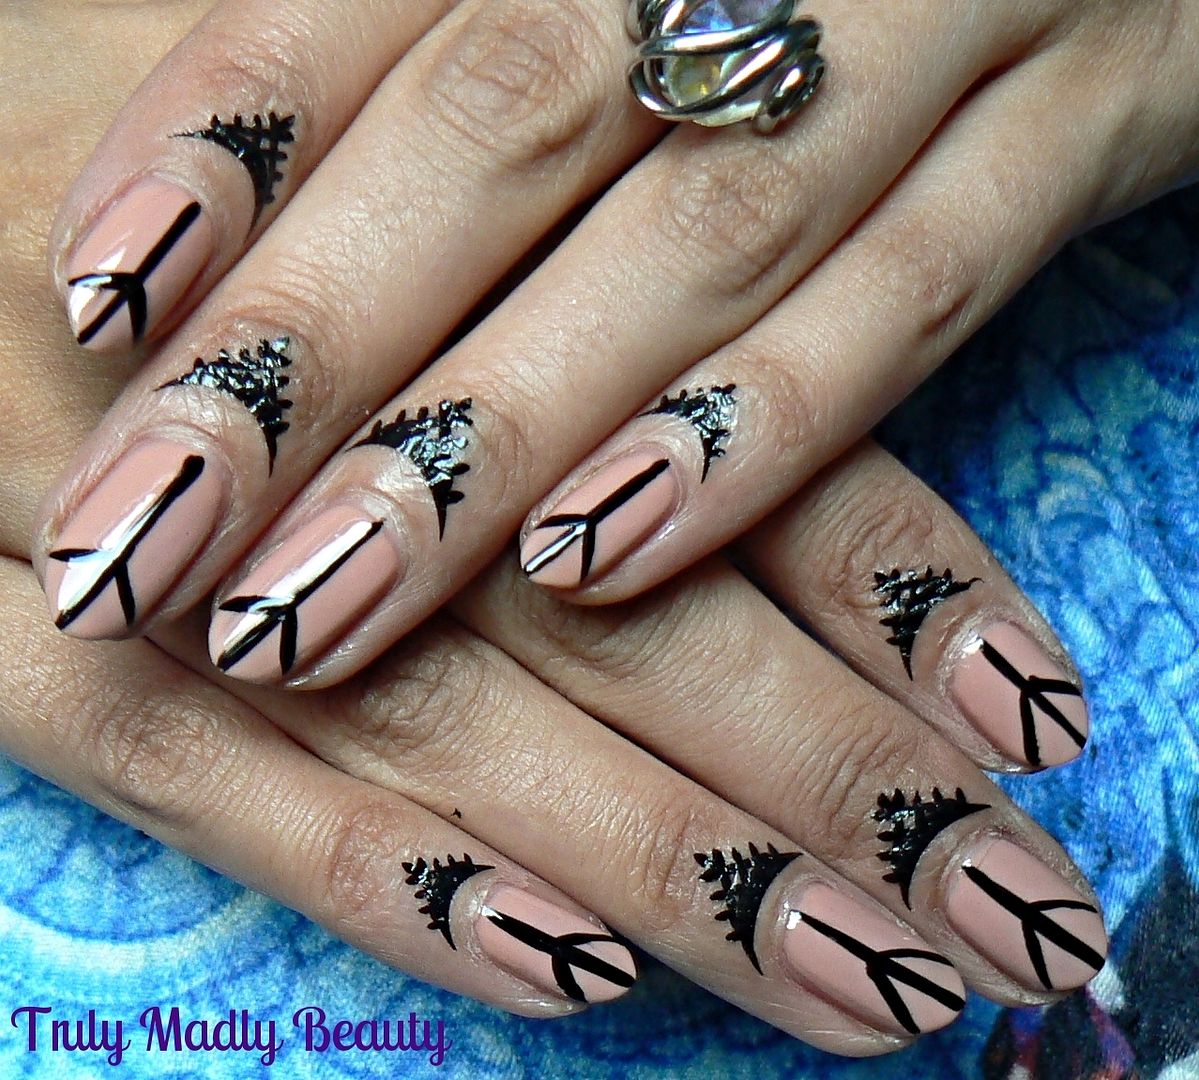
I wanted the focus to be on the cuticle tattoos so decided to go for a nude pink mani using Wet N Wild Private Viewing which I picked up in NYC earlier this year. I adore this, its like the PERFECT nude! The formula was a tad runny, however the brushes on these are fab, making application a piece of cake. I applied two coats before doing a straightforward design by applying a few strategically placed lines with my Models Own nail art pen in Black.


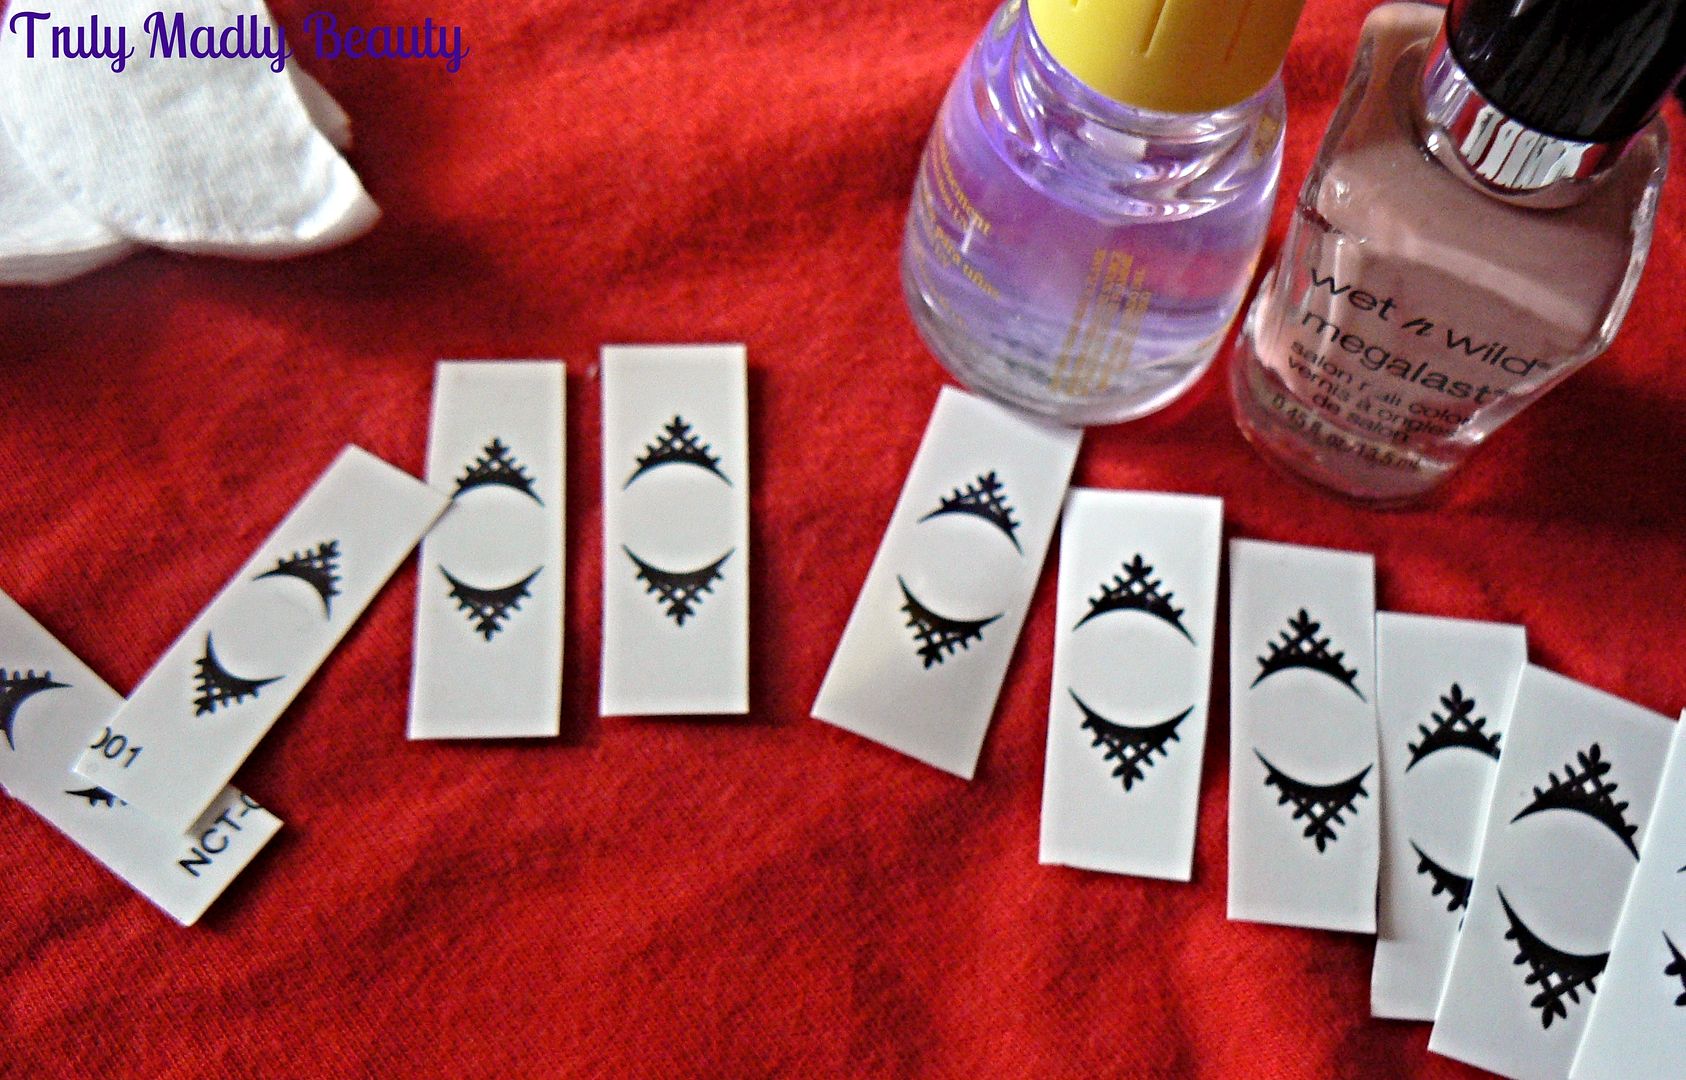
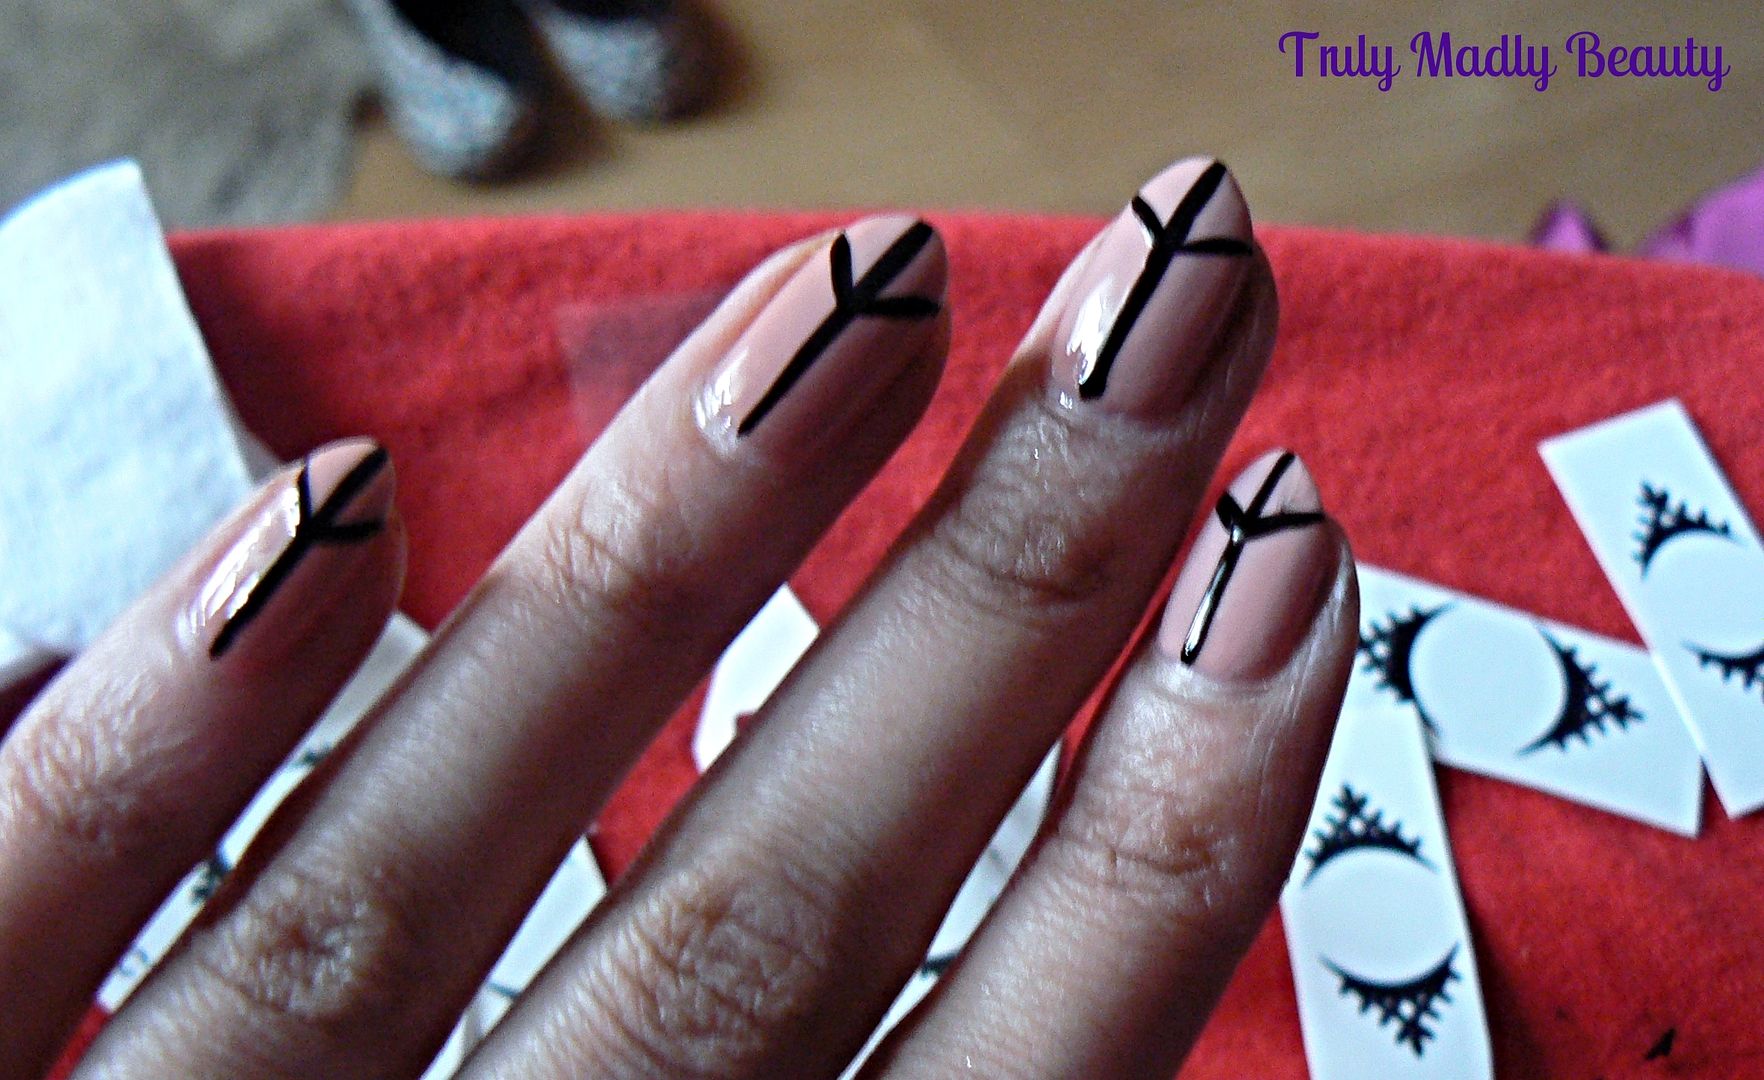
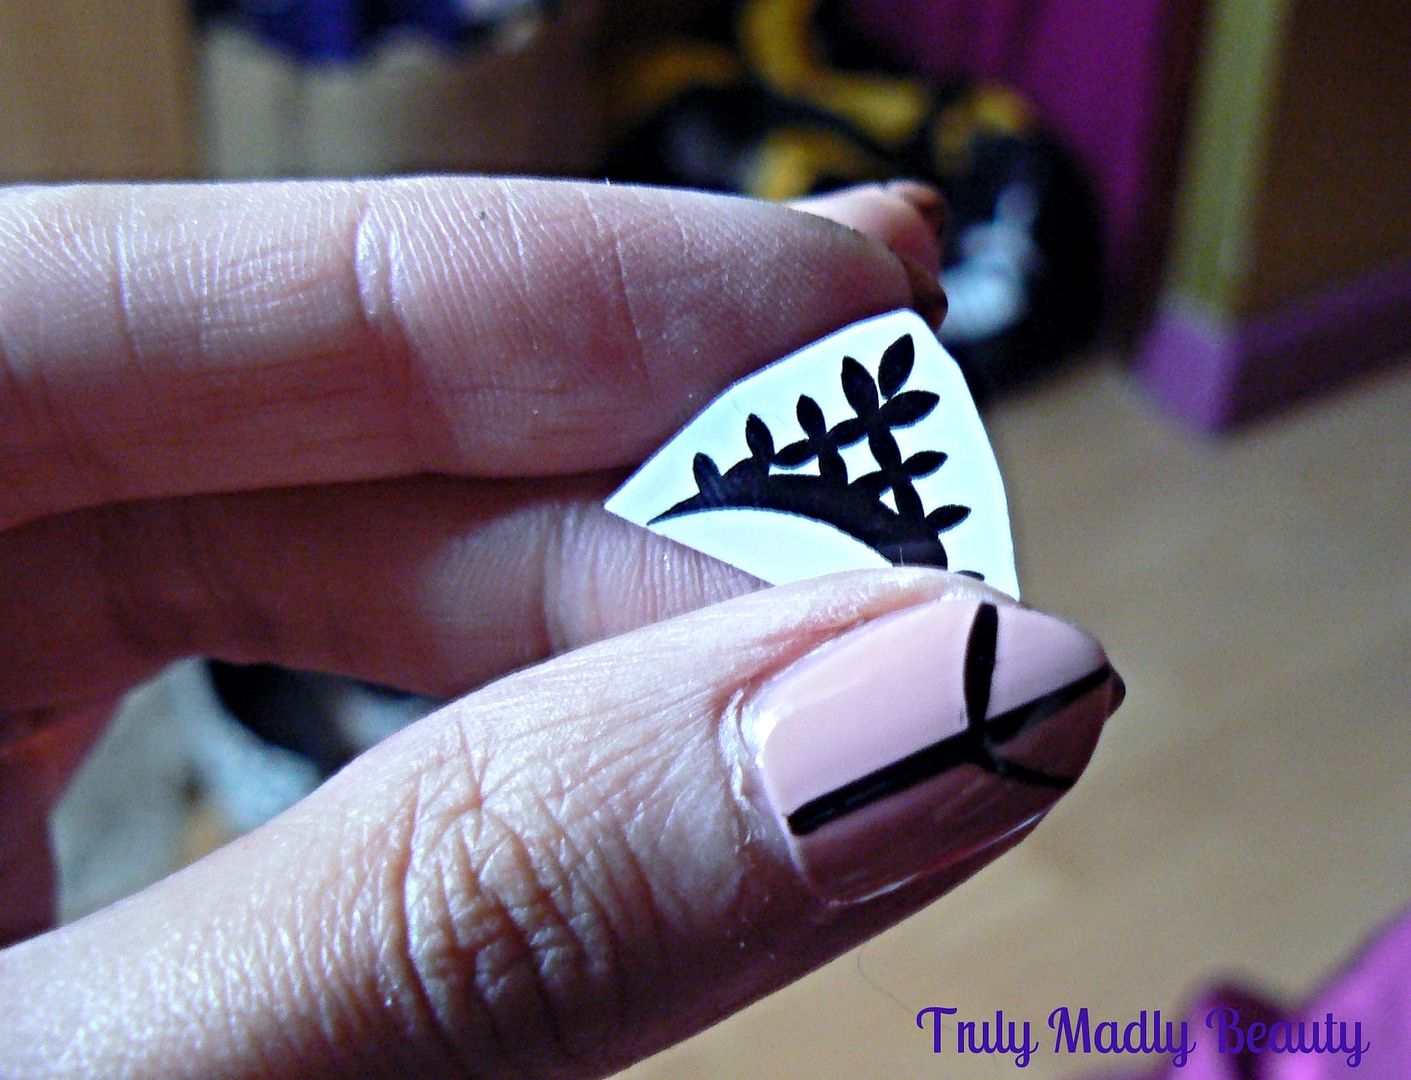
Once my mani was dry, it was time to apply the tats! You get a sheet of twenty cuticle tattoos of various sizes, so its easy to match up against your nail. Remember those temporary tattoos you used to wear as a wee one making you feel like the coolest kid on the block? Well these work in the exact same way. Simply cut around the tattoo you will be using, peel of the clear film & place tattoo facing down just below the cuticle.


Then using a wet cotton pad, press down firmly for about 20-30 seconds & the paper should slide right off & away leaving the pretty design on the skin.


I discovered as I went along that its much better to cut as close to the design as you can as this makes placement much easier! Lets just say that the positioning on the first hand was way off as you can see haha! But practice makes perfect & even if you don't get it directly by the cuticle, it still looks great!


Now these really are temporary, you can get a good days wear before they start to noticeably peel away from the skin & when they do, just simply peel off the remainder, which comes away very easily.


Charlies Nail Art store have a variety of lovely designs to choose from & for the absolute bargainous price of just £1.25 how can you resist? I definitely can't & I predict another nail art haul happening in the not too distant future!


Hope you liked the mani dolls! Thanks as always for reading! 

Lotsa love to ya!