I threw together a Little Mermaid design for my Disney Nail Art Series recently & I'm clearly still feeling all the mermaid vibes with today's mani that I have for you!
Showing posts with label Nina. Show all posts
3.19.2018
NOTD - Scales & Seas
Hey there lovely readers!
Labels:
Beauty Big Bang,
Blue,
Born Pretty Store,
Magical,
Mermaid,
mystical,
Mythical,
nail art,
Nail Decals,
Nina,
NOTD
11.27.2017
NOTD - Autumn/Fall Tree Dotticure
Hello there lovely readers!
Before we wave a fond farewell to Autumn this year I wanted to share with you one of my favourite Fall Nail Art designs I did but totally forgot to put up on here! Plus I'm just not yet ready to get rid of all the comforting Autumn feels just yet!
10.30.2017
Disney Nail Art Series - Halloween Special - Snow White Poison Apple
Hello there lovely readers!
So All Hallows Eve is almost upon us dark ones thus I wanted to squeeze in one last mani. For my final Halloween nail art design this year I wished to incorporate it as another installment to my Disney Nail Art Series as this was an idea that was floating around in my head since the start of October that I really wanted to attempt & thought it would be perfect for Halloween...the Poison Apple from Snow White
1.26.2017
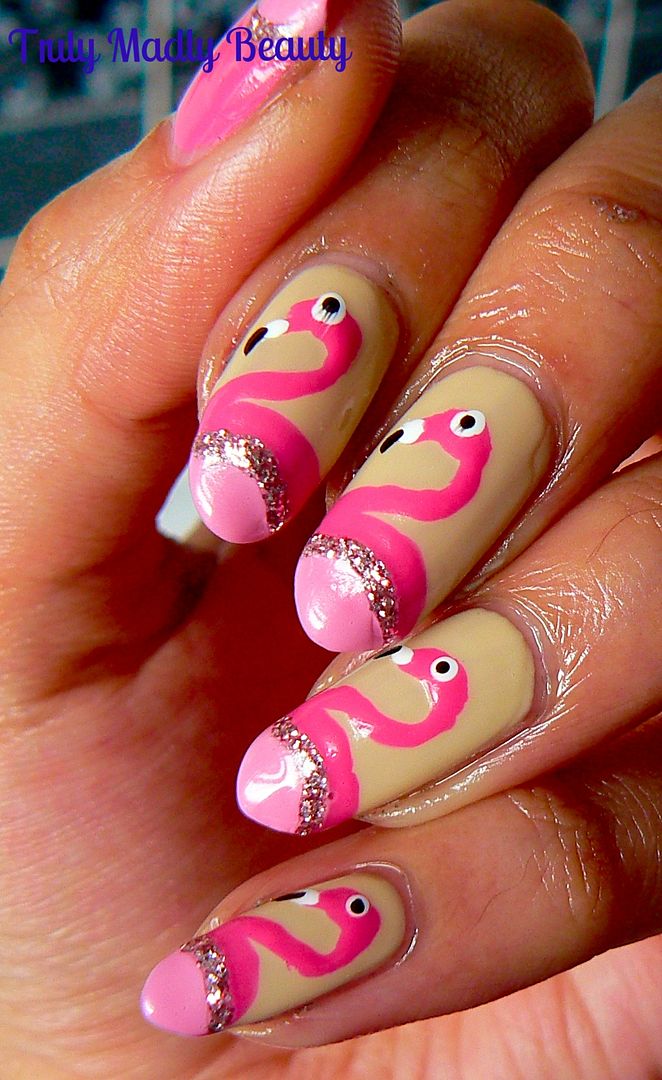
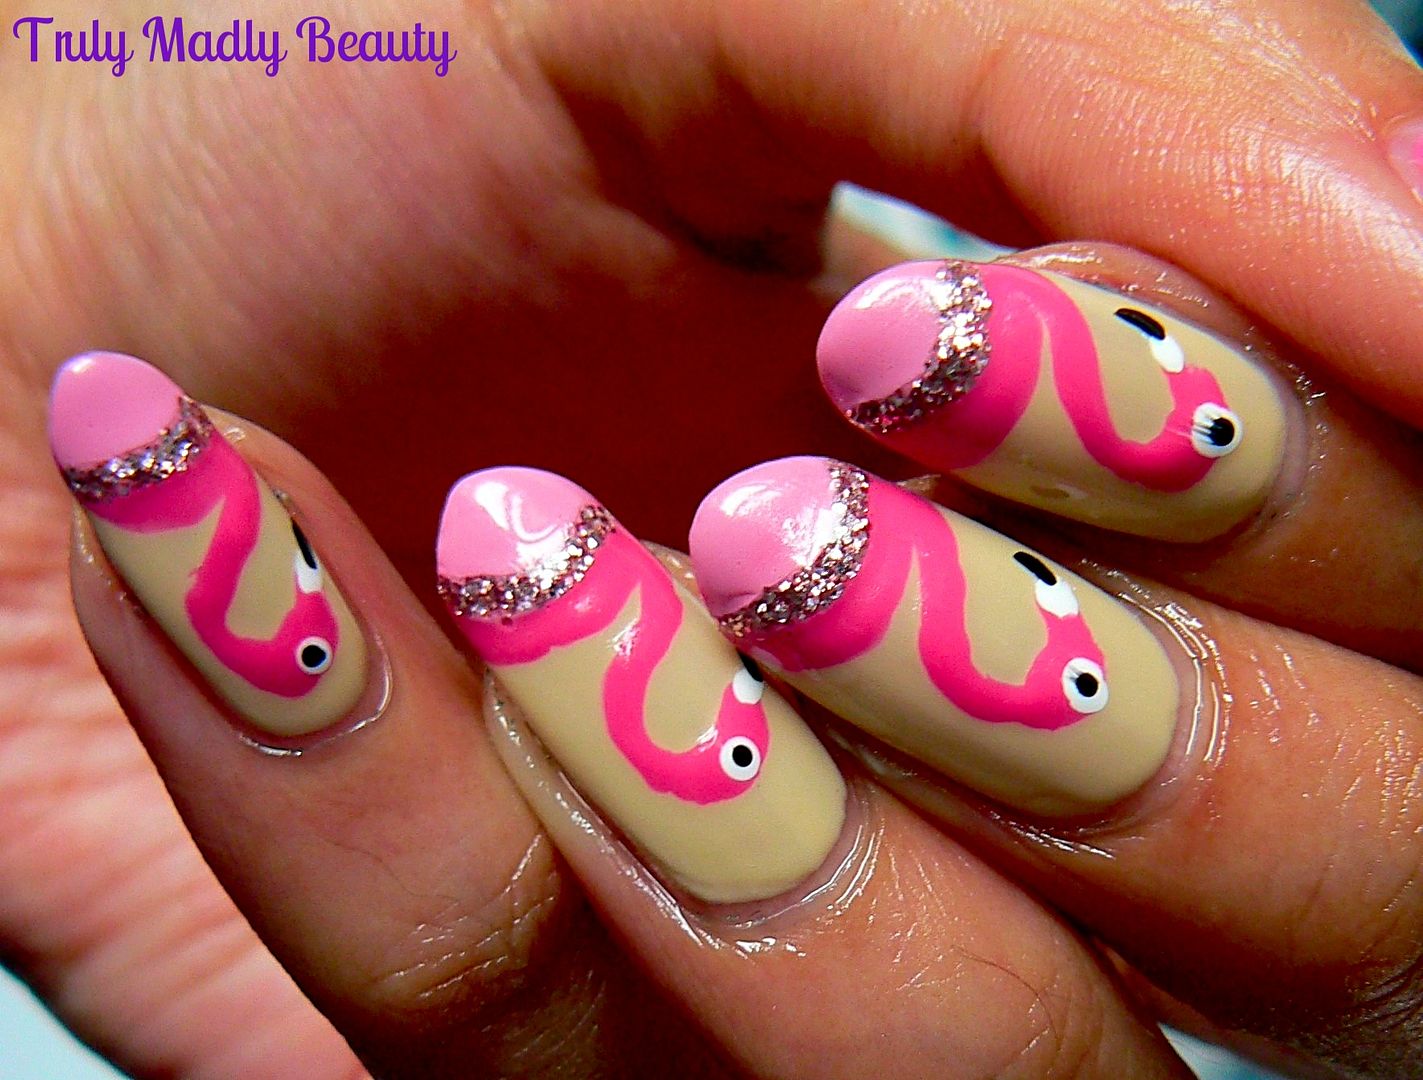
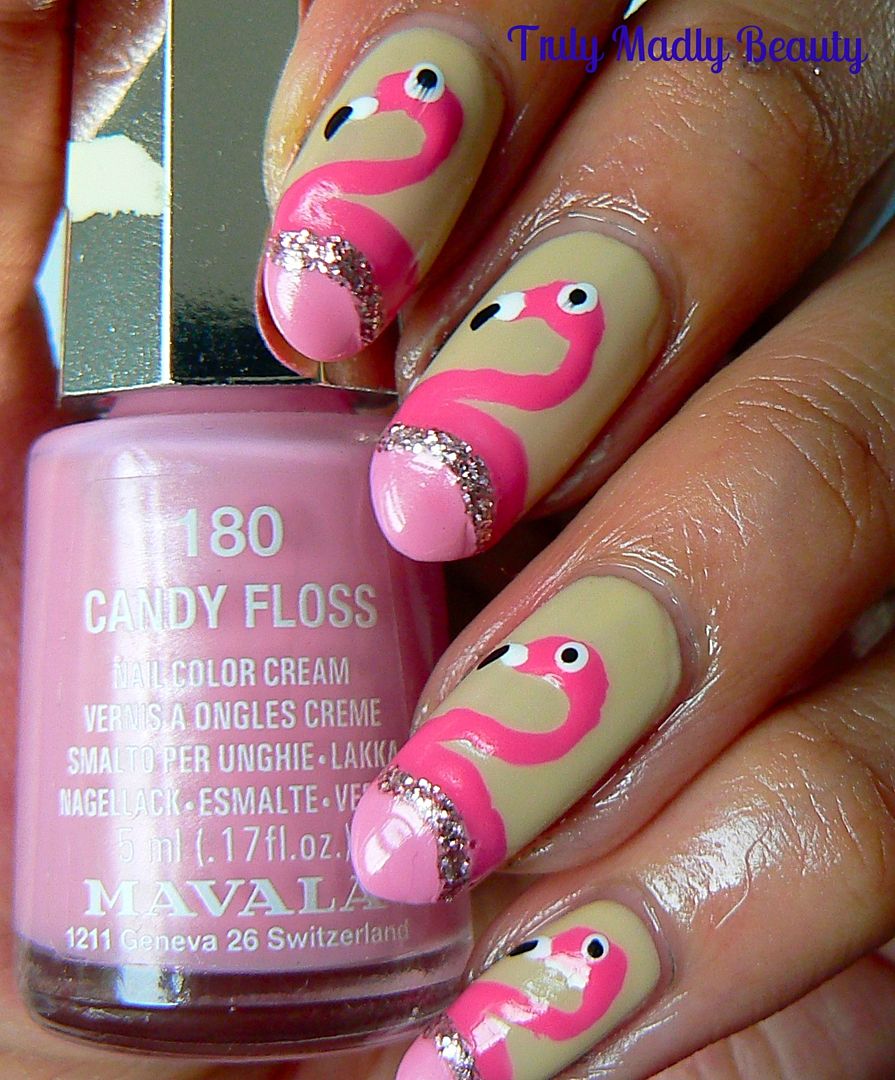
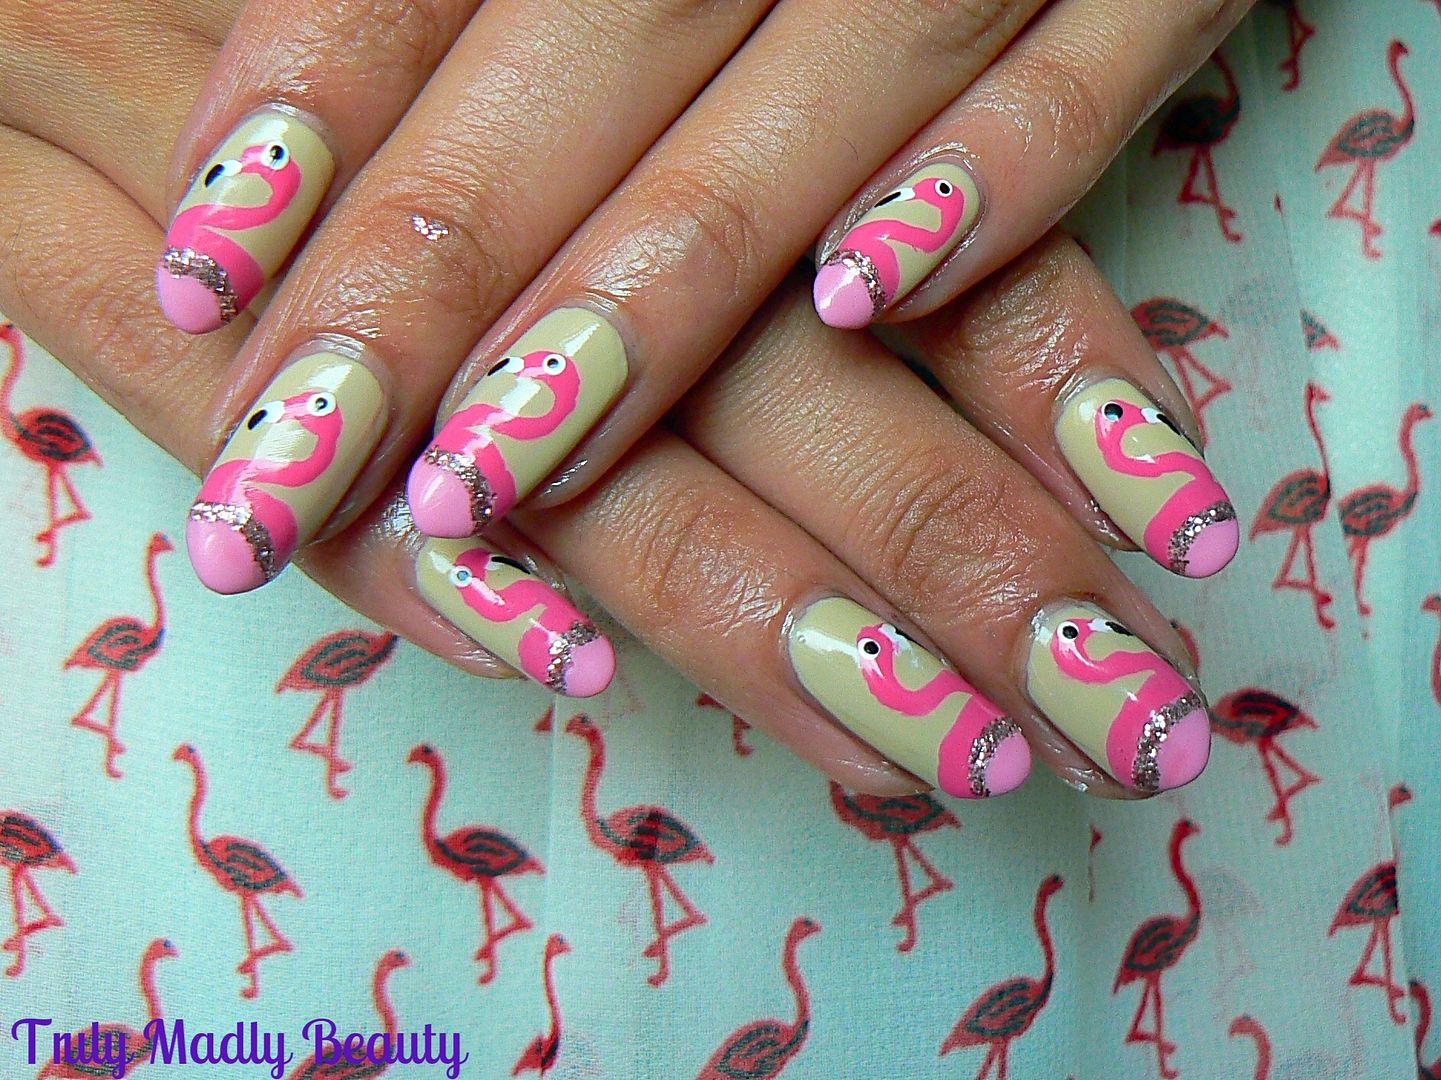
NOTD - Flamingo Nail Art Tutorial!
Hello
there lovely readers!
To
celebrate almost making it through the first month of 2017 intact I
have a quirky Friday Funday (okay its technically still Thursday but
who's counting?) manicure for you that succeeded in putting
a smile on my face with its featuring that most delightful of bird
species...flamingos!
Inspiration
for this actually came from a darling flamingo print dress I picked
up in an independent boutique in London. Once I had that on...I knew
I had to have me some flamingo nails to match :)
And
creating these flirty flamingos is easier than you might think, to
show you just how easy, I've done a step by step pictorial showing
you each stage so that you can rock these funky birds too! Just keep
on reading beauts...
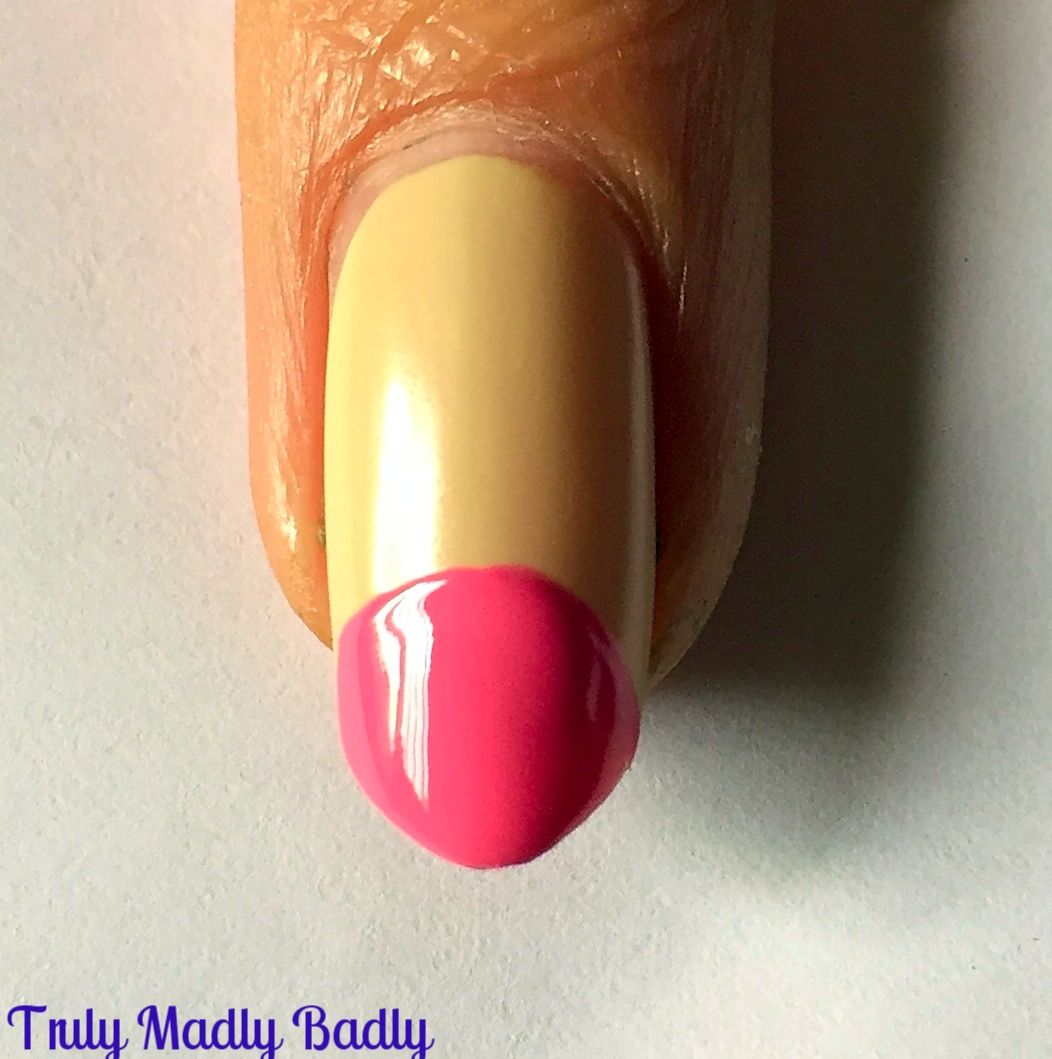
Start
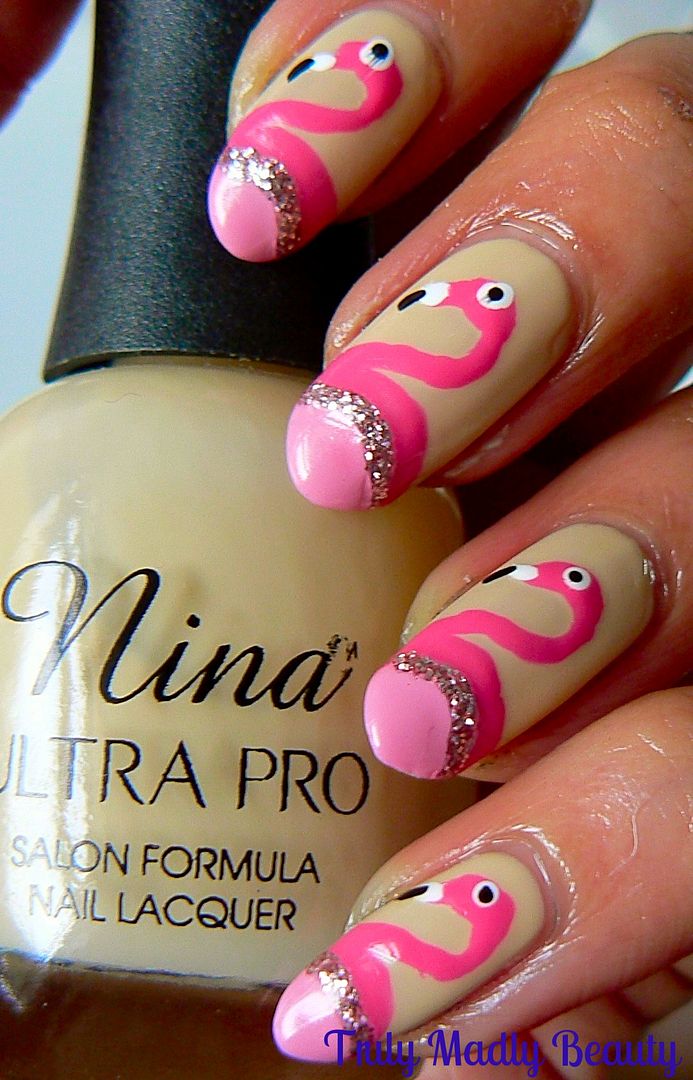
with a nice neutral tone base to make those flamingos stand out, I've
used one of my favourites, Rum & Reggae by Nina Pro Ultra. You
can also choose to leave the nail bare with just clear base coat if
you wish!
Now
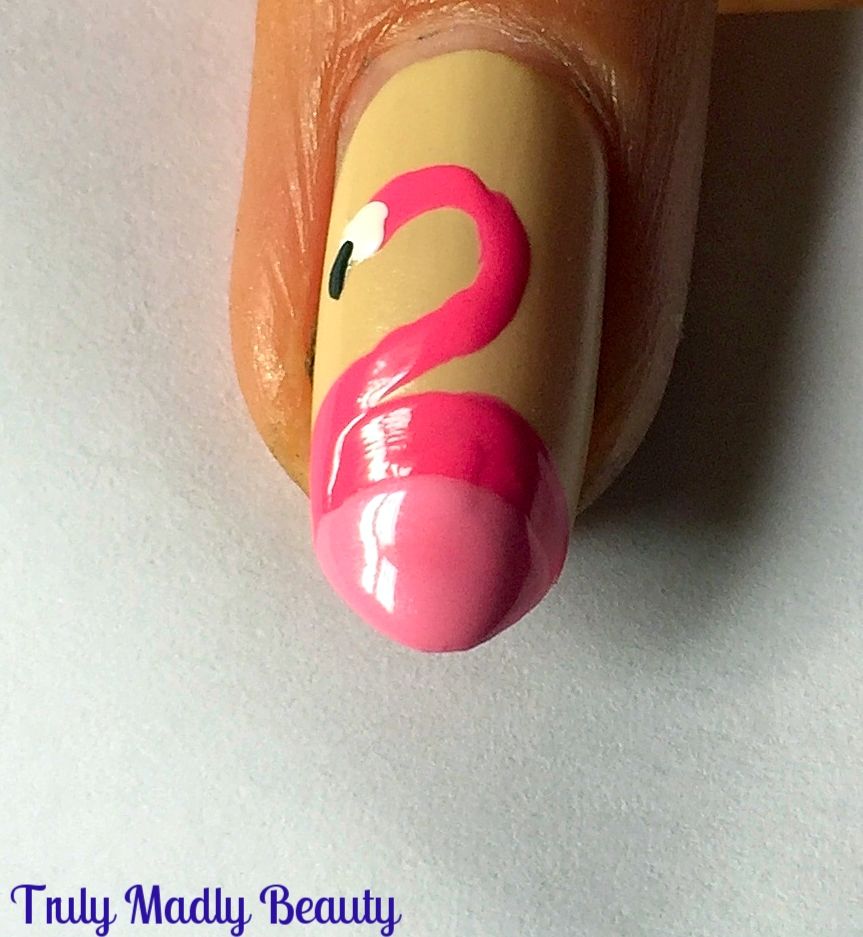
to begin creating your flamingos, start by applying a half
moon/ semi circle of pink on to the tip of your nail as shown below, here
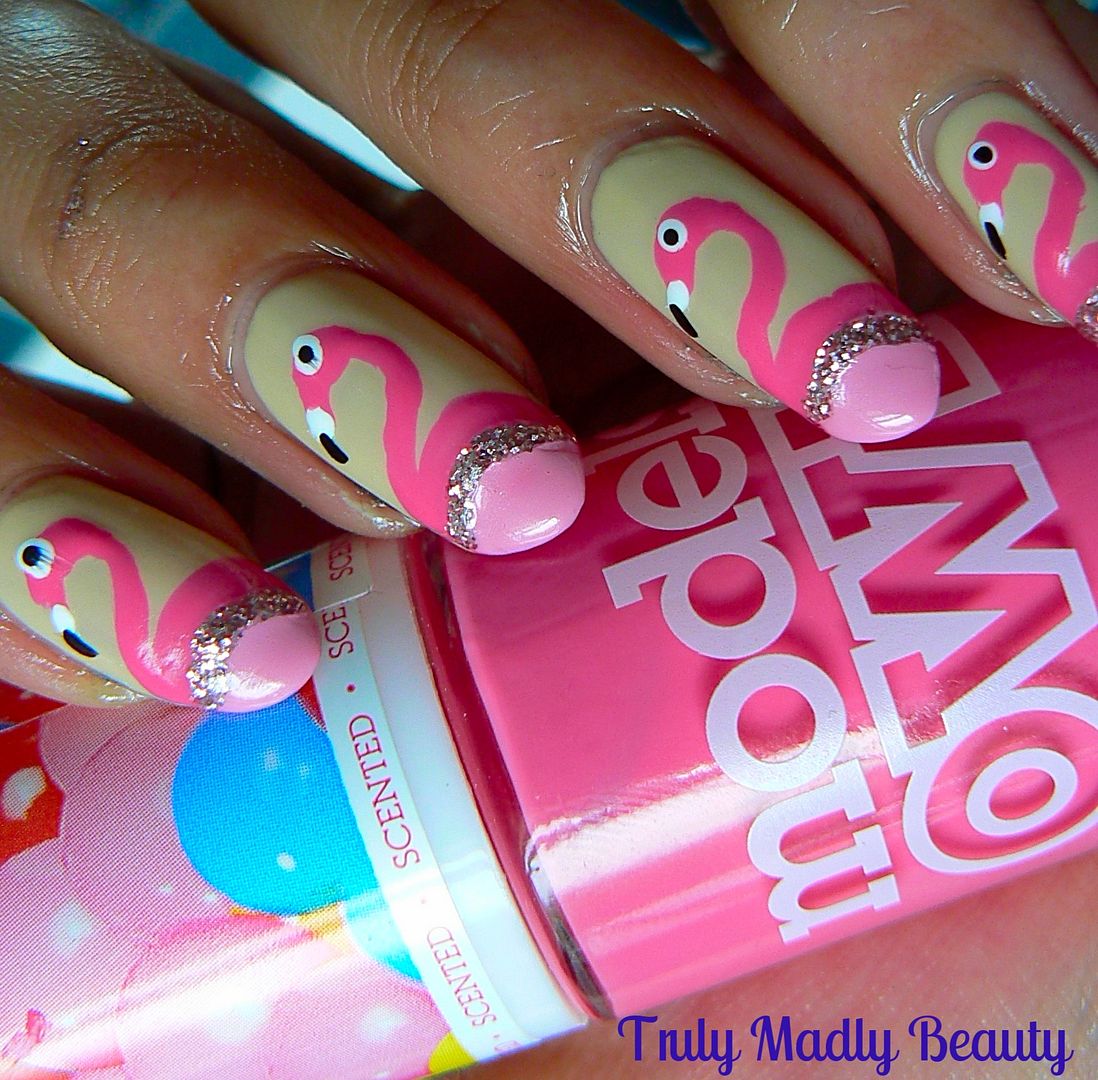
I've opted for Models Own Gumballs from their sweet shop collection &
yes it smells like bubblegum!
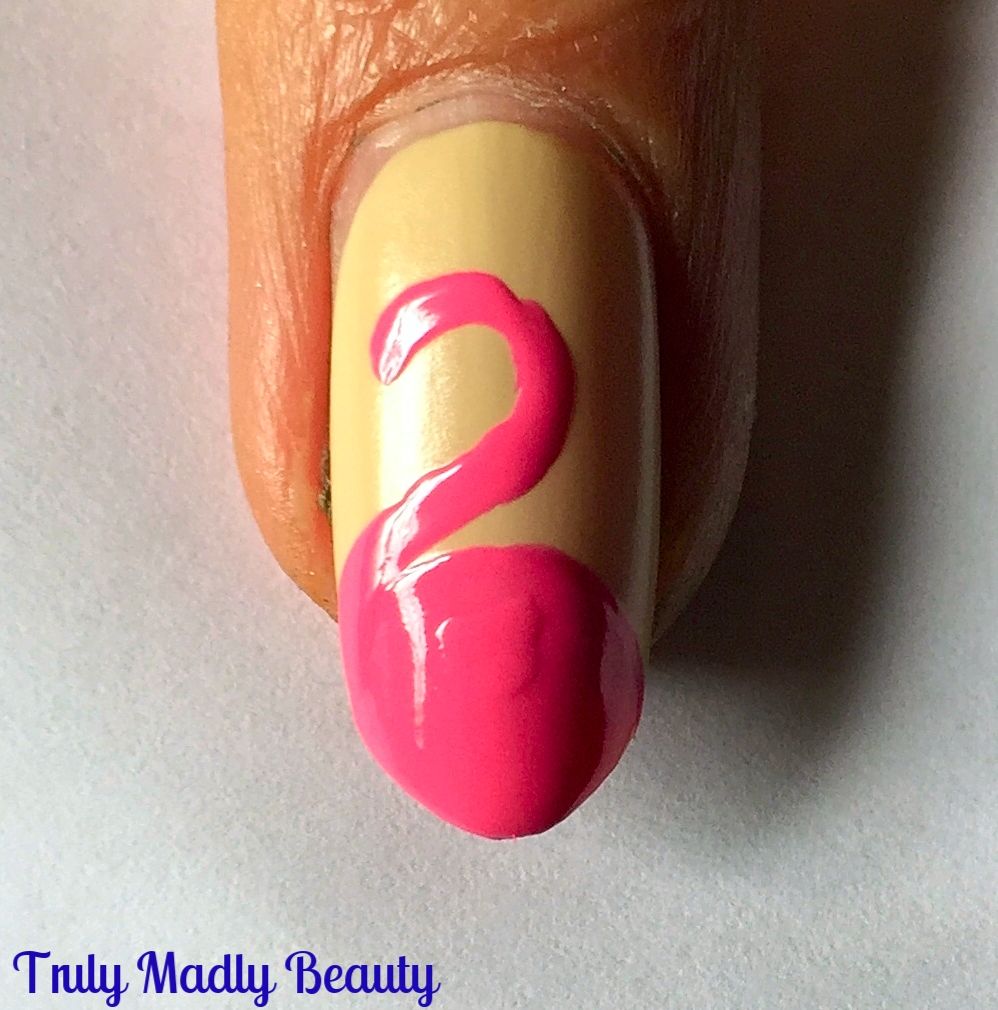
Next,
using the same pink & a fine nail art brush, draw on a curved
hook from the top of your half moon for the neck of the flamingo like so
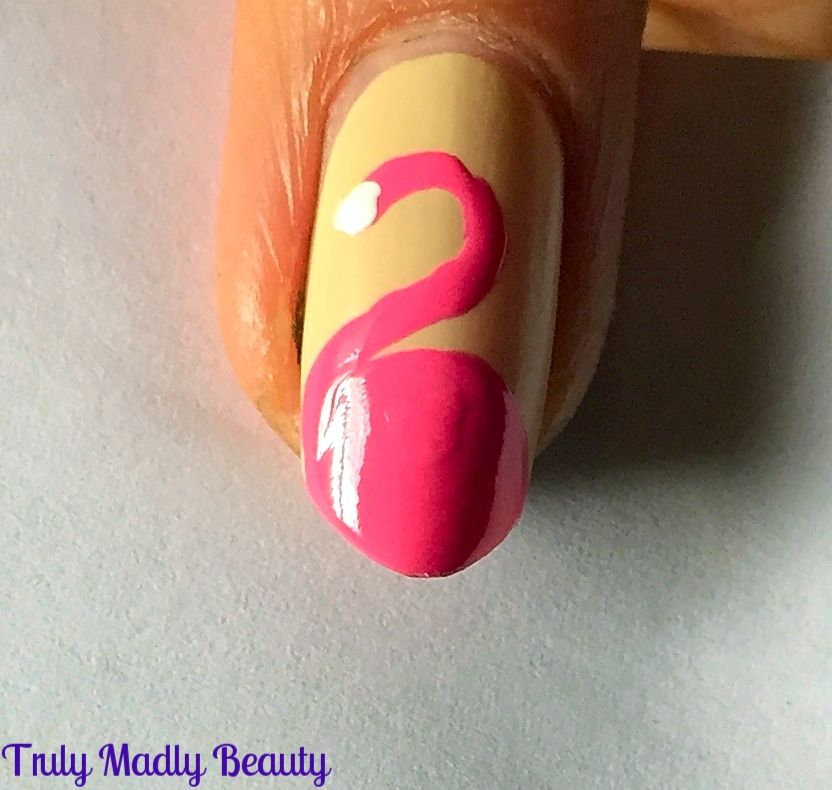
Then
grabbing a little bit of white polish, using another fine nail art
brush or a dotting tool/toothpick/bobby pin apply a small blob of
white at the tip of your pink hook
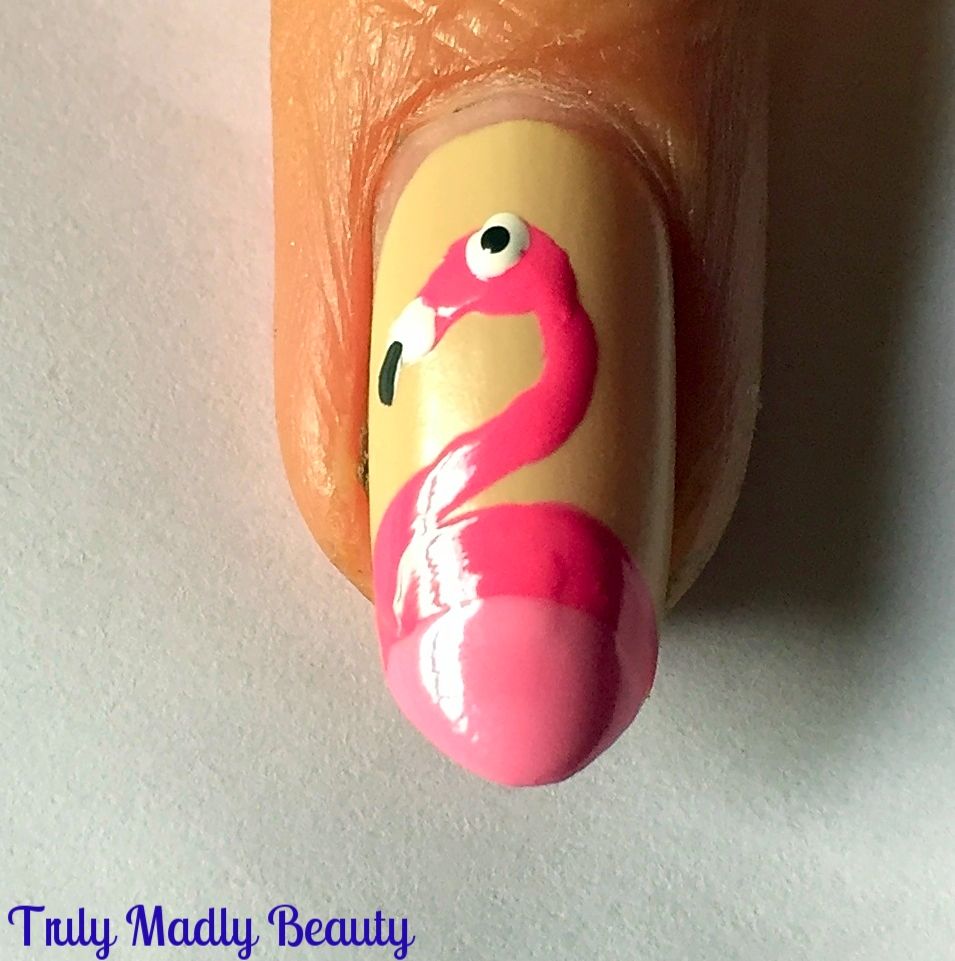
Now
using some black polish & the fine nail art brush again, add on a
small curved black beak to the edge of the white as shown, you can slowly see your flamingos coming together!
Next
its time to grab a lighter shade of pink to what you've already used
to add definition to the body, here I've used Mavala Candy Floss & applied a
smaller little semicircle on top of the darker pink.
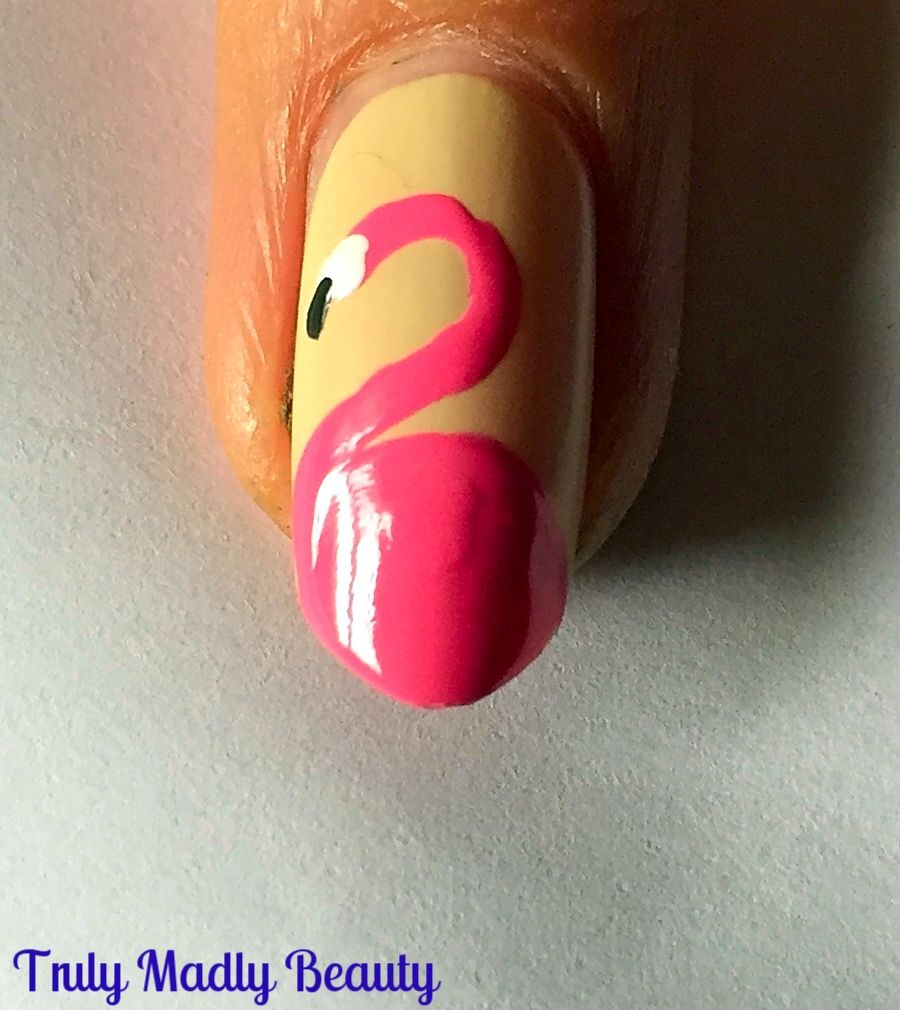
The
eyes come next & are simply a dot of white with a finer dot of
black in the centre, you can add a bit more pink for the head if you need to
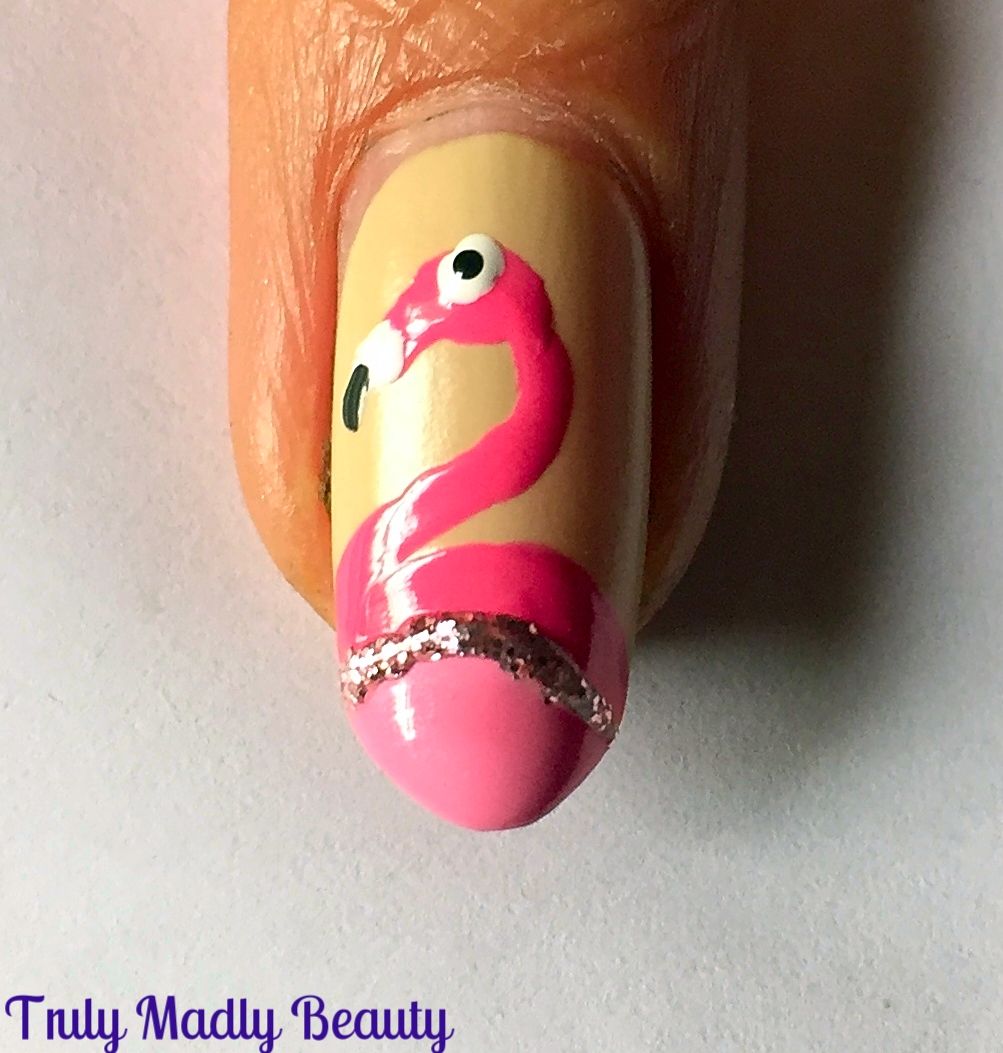
And
finally for a finishing touch I added on a curve of sparkly glitter courtesy of Models Own Pink Fizz which is optional of course but who can resist a bit of
sparkle?
Cover
your design in a a nice thick slick of topcoat & you have your
flamingo's!
So
easy right? I do love a quirky mani, its been a while since I've done
a design like this & I've missed them! For me mani's are
therapeutic in a way, having fun & vibrant nails always helps make me feel more content & positive & this definitely delivered on that :)
Do
let me know if you give this a try, would love to see! Thanks
as always for reading, till next time!
Lotsa love to ya!
12.19.2016
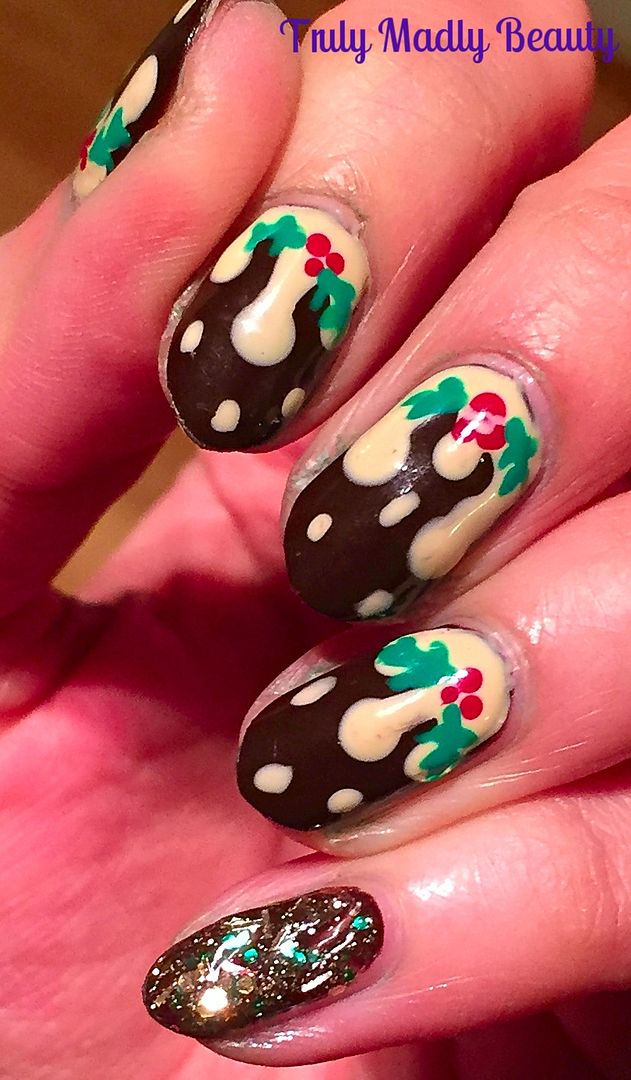
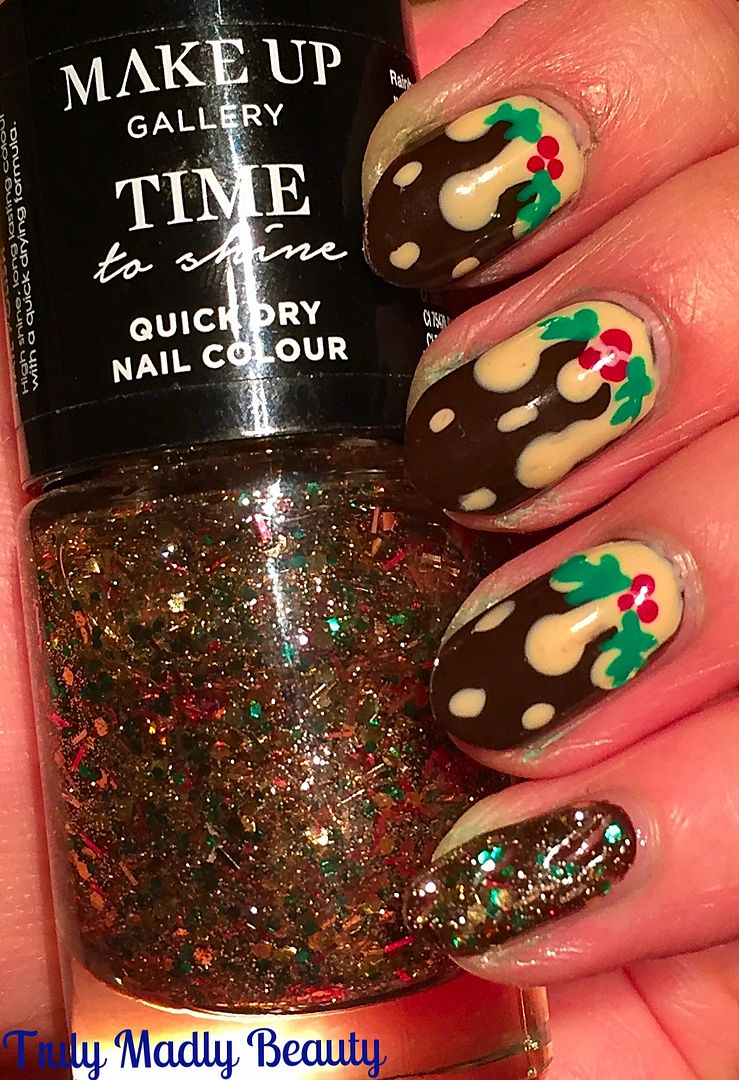
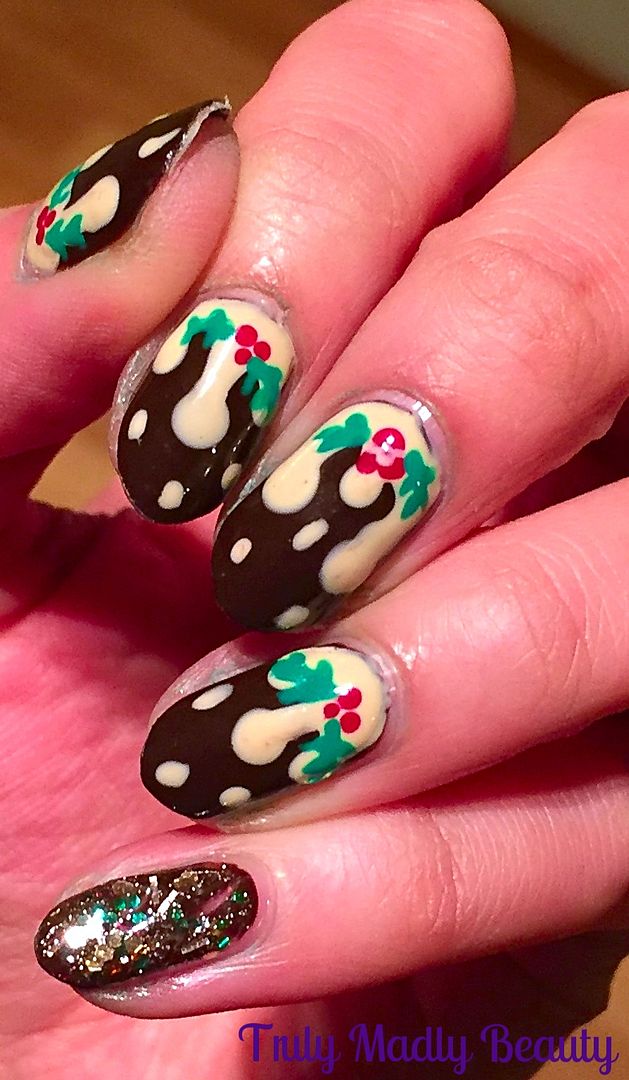
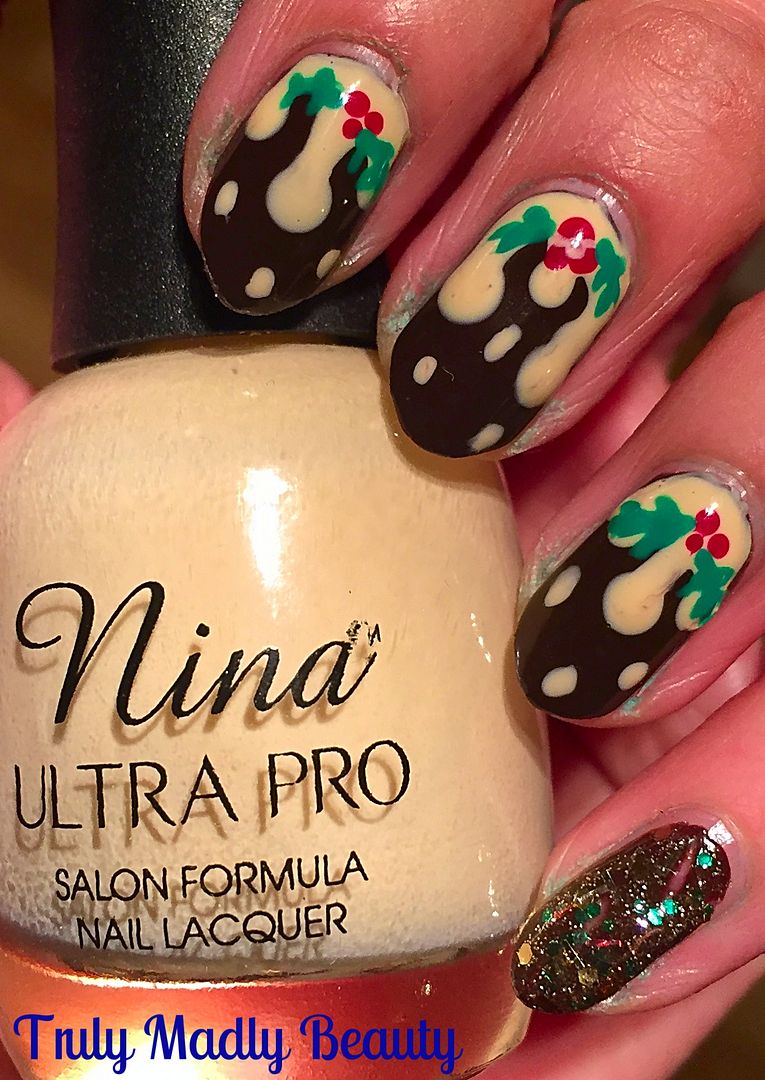
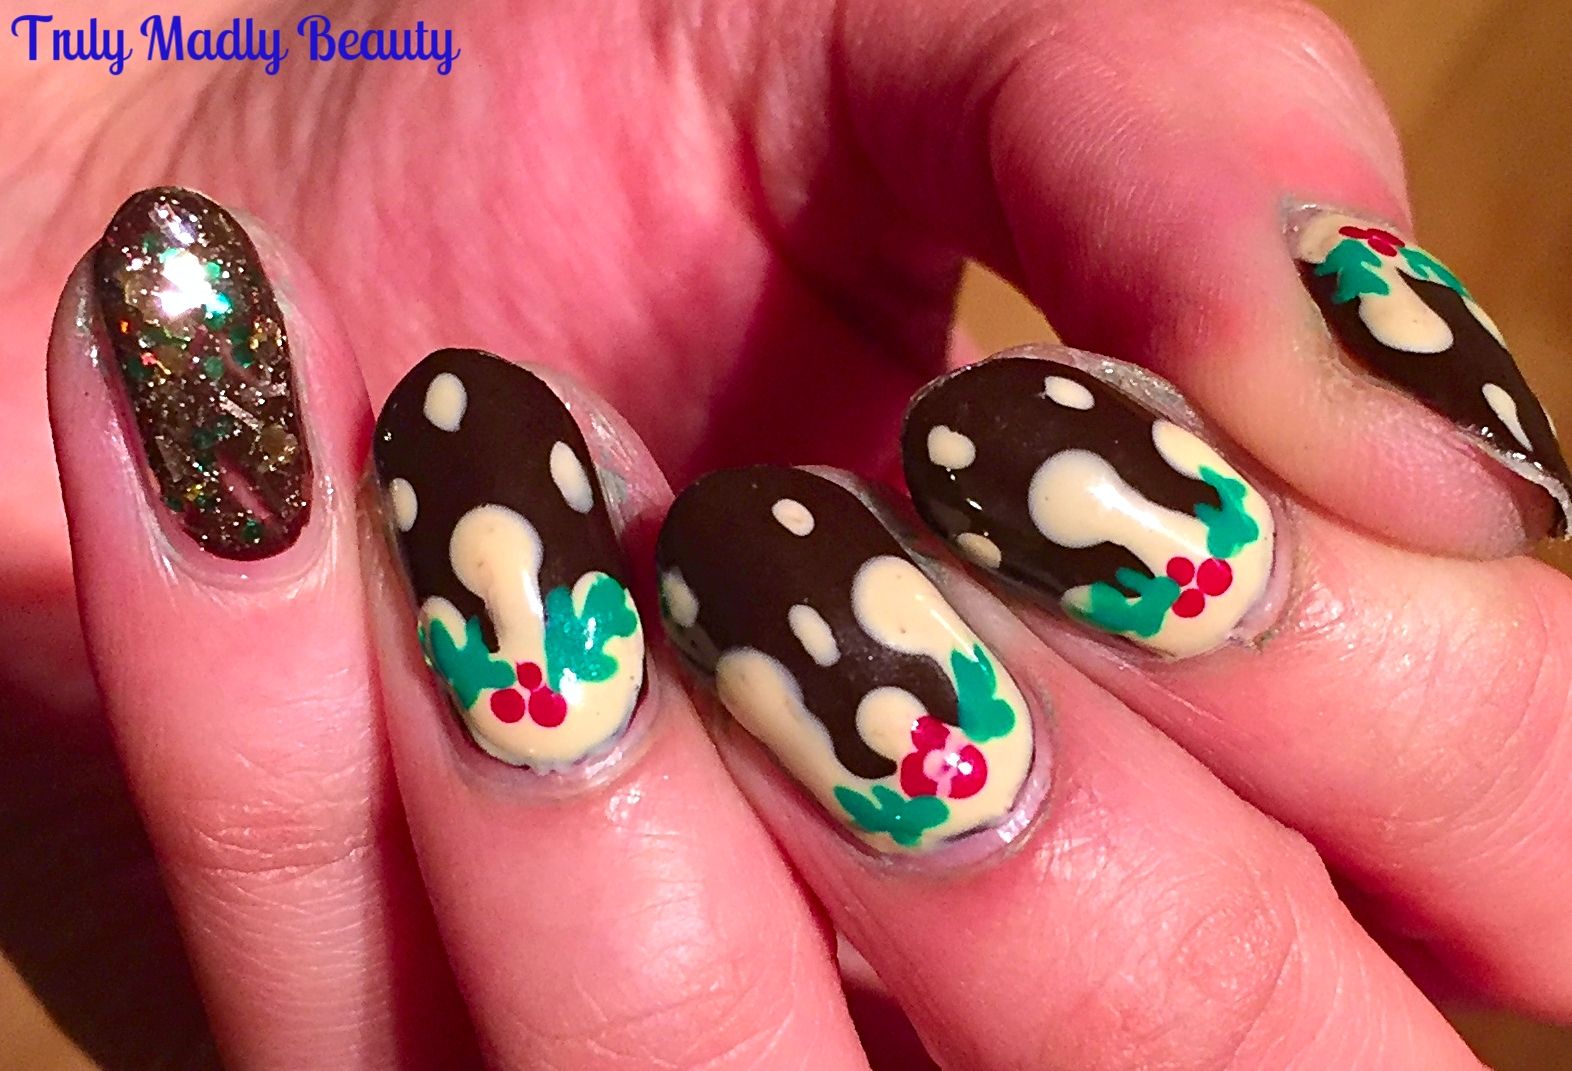
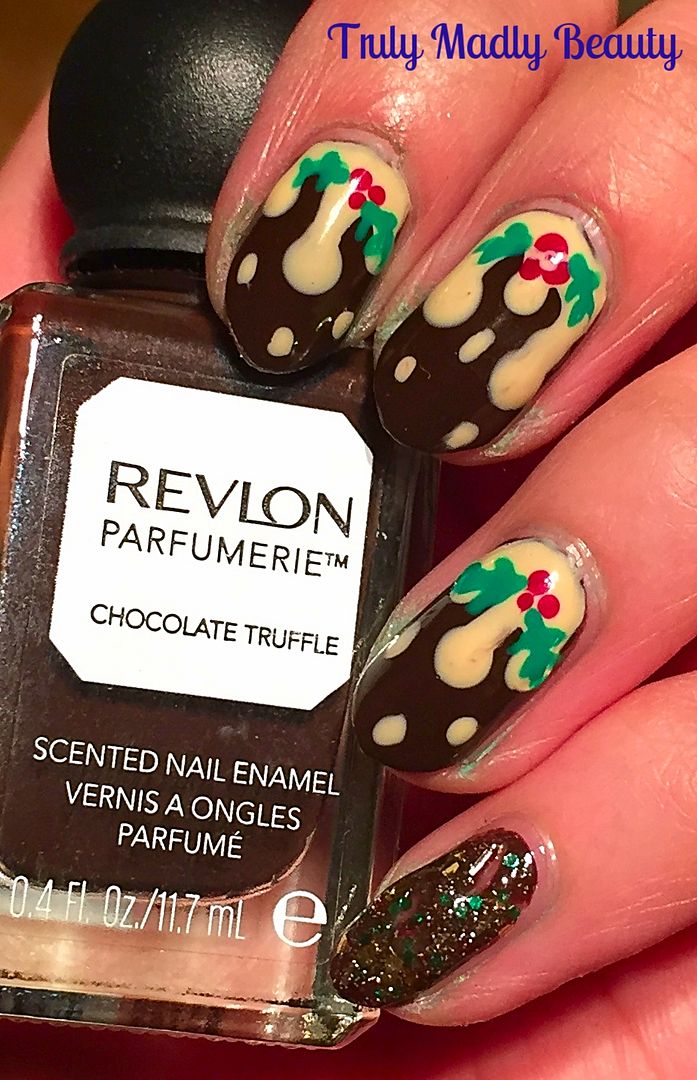
Festive NOTD - Christmas Puddings with Dripping Brandy Butter!
Hello
there my lovely readers!
If
there is one thing I'm as passionate about just as much if not
more as I am for nail art...its food. Combine the two & yours
truly is bonny wee bunny. Which brings us on to today's festive
manicure my dears...Christmas Puddings!
Now
I must confess... I'm not the biggest fan of the old Christmas pud,
(SSSHHH!) but that doesn't mean I can't enjoy them on my nails eh?
And for this design I actually used a scented polish so my mani smelt
super sweet scrumdiddlyumptous too!
To
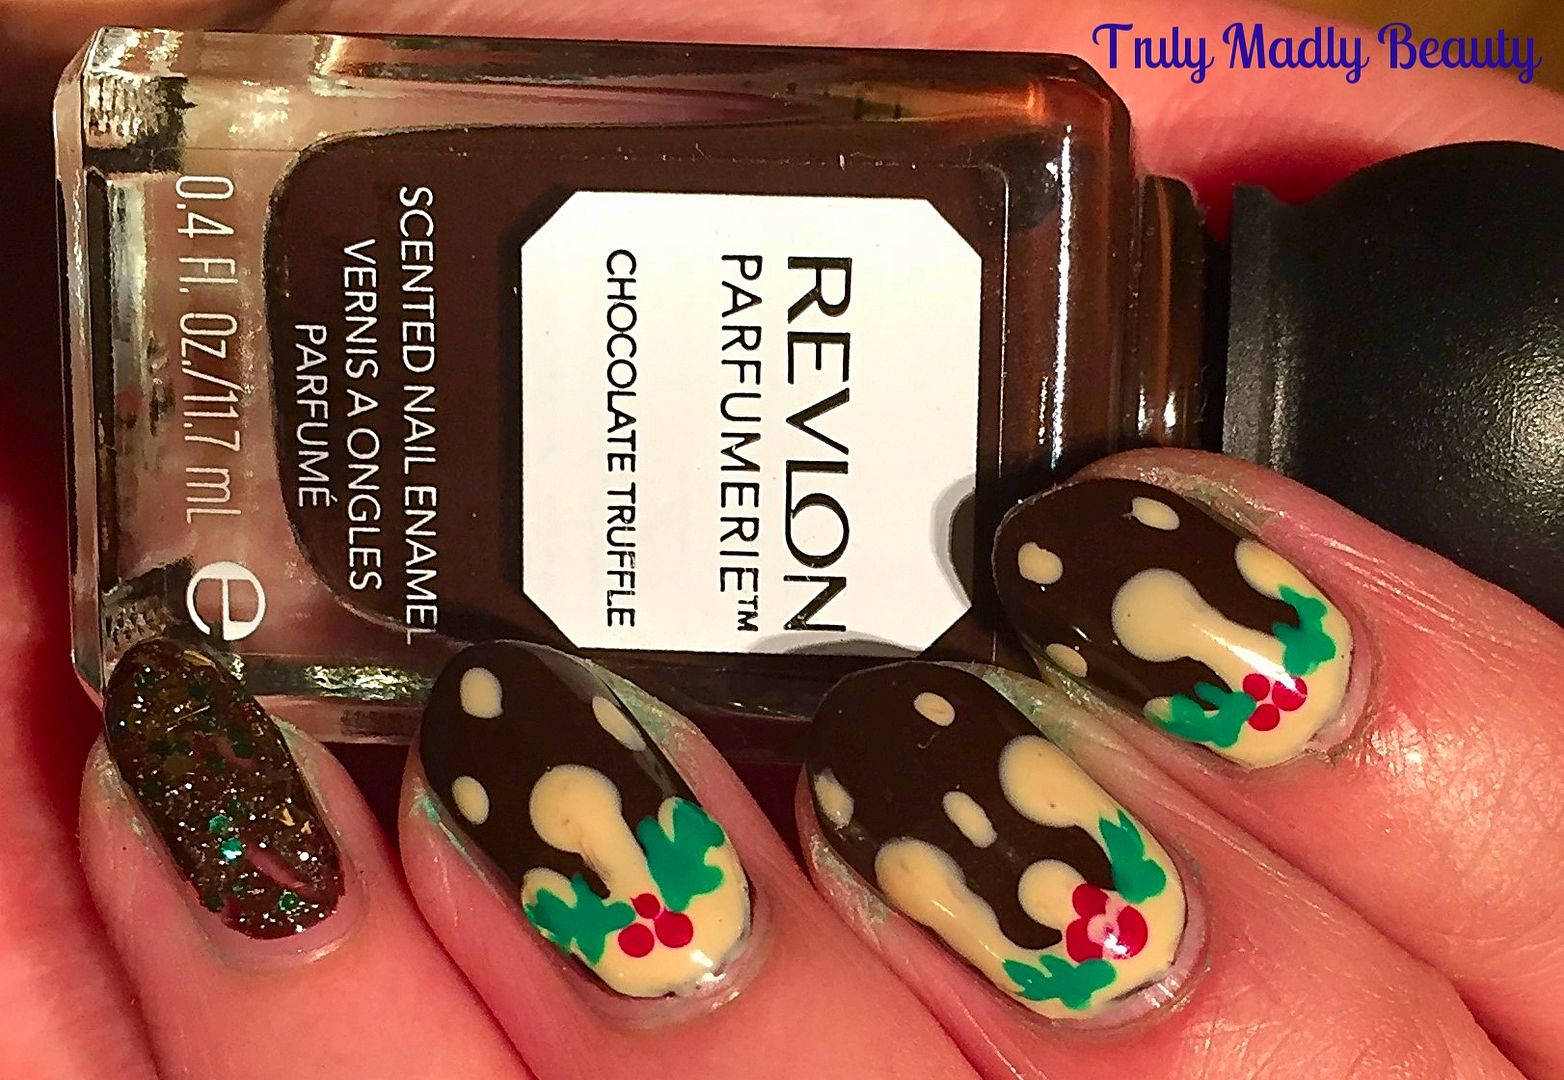
create your Christmas pudding nails you need to start with a dark
brown base. As mentioned, for this I used one of my Revlon Parfumerie
scented polishes in Chocolate Truffle which smells like...yup
chocolate! Apply two coats for a nice opaque finish.
Now
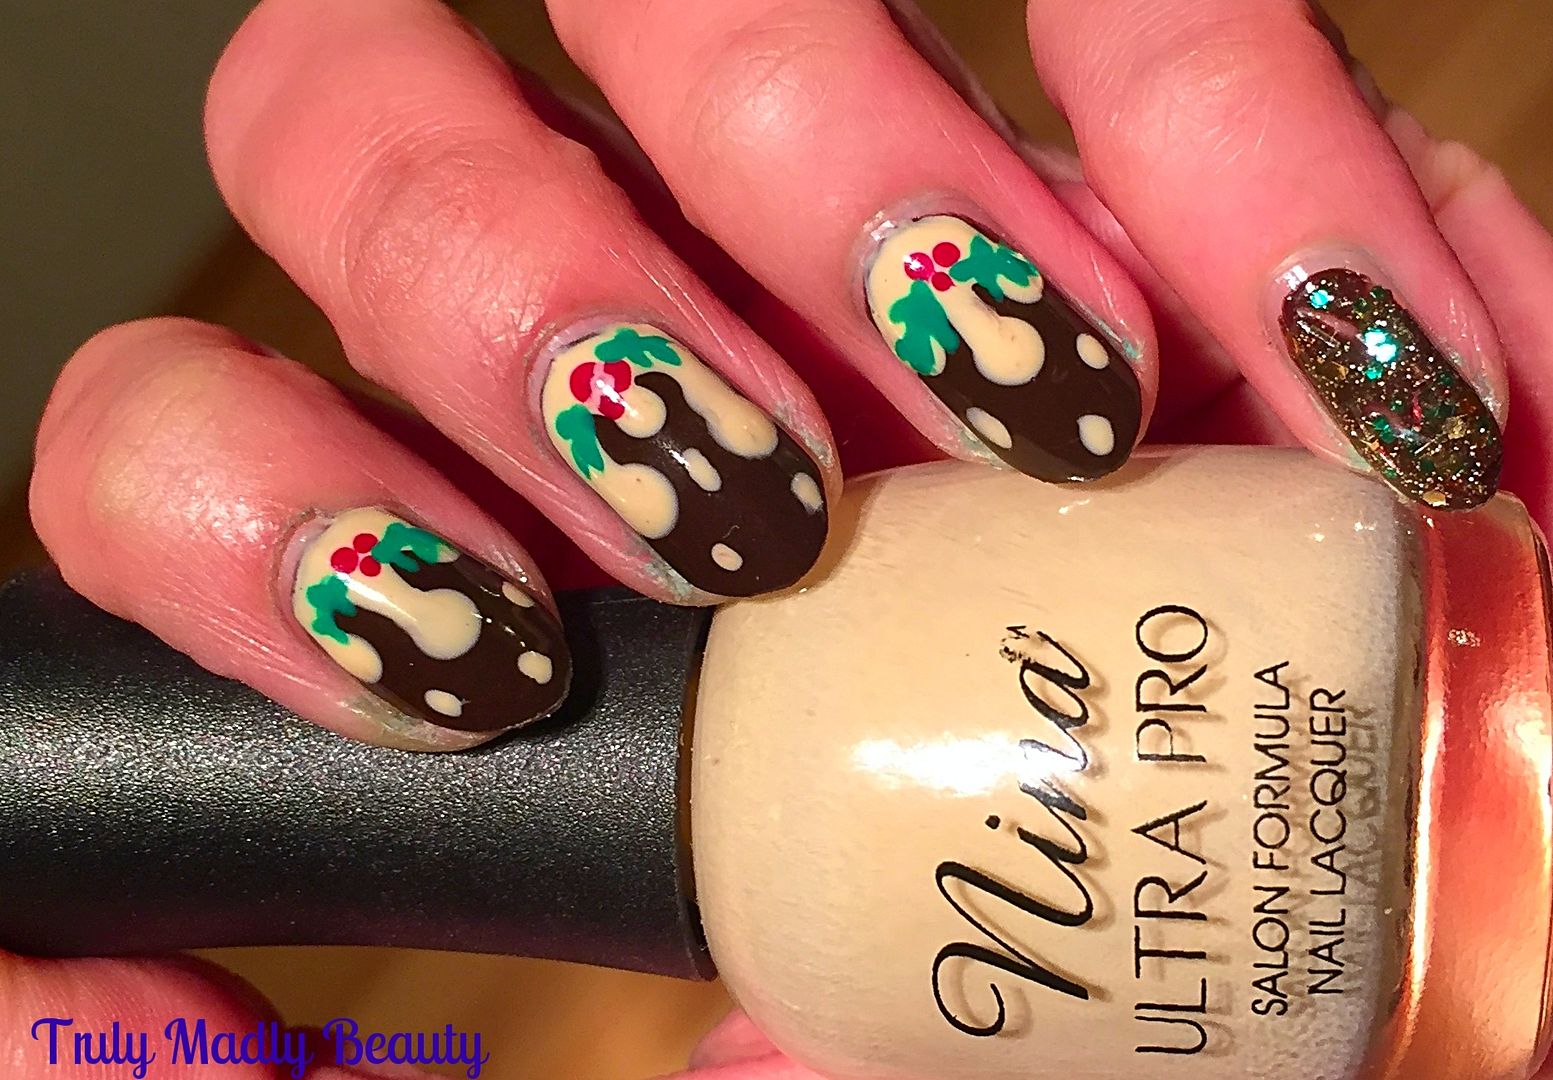
for the brandy butter! As you can see for this part you just need to
create some drip nail art. I've done this a few times on here with
various different looks, you may recall on Halloween? I've done a
step by step tutorial on how to create drips on your nails HERE.
I
spent a while debating on which end to create my drips, I'm usually a
fan of applying them on my tips, if you cast your eyes to the left of
this page you can see I've done so on my Mint Choc Chip manicure.
However this time I was feeling the mood for the cuticle end...I
know, I'm such a rebel.
For
my brandy butter drips I've used gorgeous Nina Ultra Pro polish in Rum
& Reggae, which is a lovely beige cream shade. I found this delightful brand in Sally's.
Next
our puddings need some decoration in the form of a sprig of holly. To
create these I just used a fine nail art brush & applied three
fine dots using the nearest red polish I had to hand, then using the
same brush & this time some green polish, free-handed a couple of
spiky leaves either side.
As
you can see I decided to rock some glitter on my little finger as an
accent & for this I used a polish I picked up in Poundland called
Rainbow Sparkle! Filled with gold, green & red glitters of
various shapes & sizes, you really can't get more festive! A
couple of coats of this on top of the brown created some satisfying
sparkles. Not bad at all for a pound.
Finish
it all with a nice thick coat of topcoat & you have your
Christmas Pudding Nails good enough to eat! You can see all of my
previous Christmas Nail Art ideas HERE. Thanks for reading!
Lotsa
love to ya!
8.09.2015
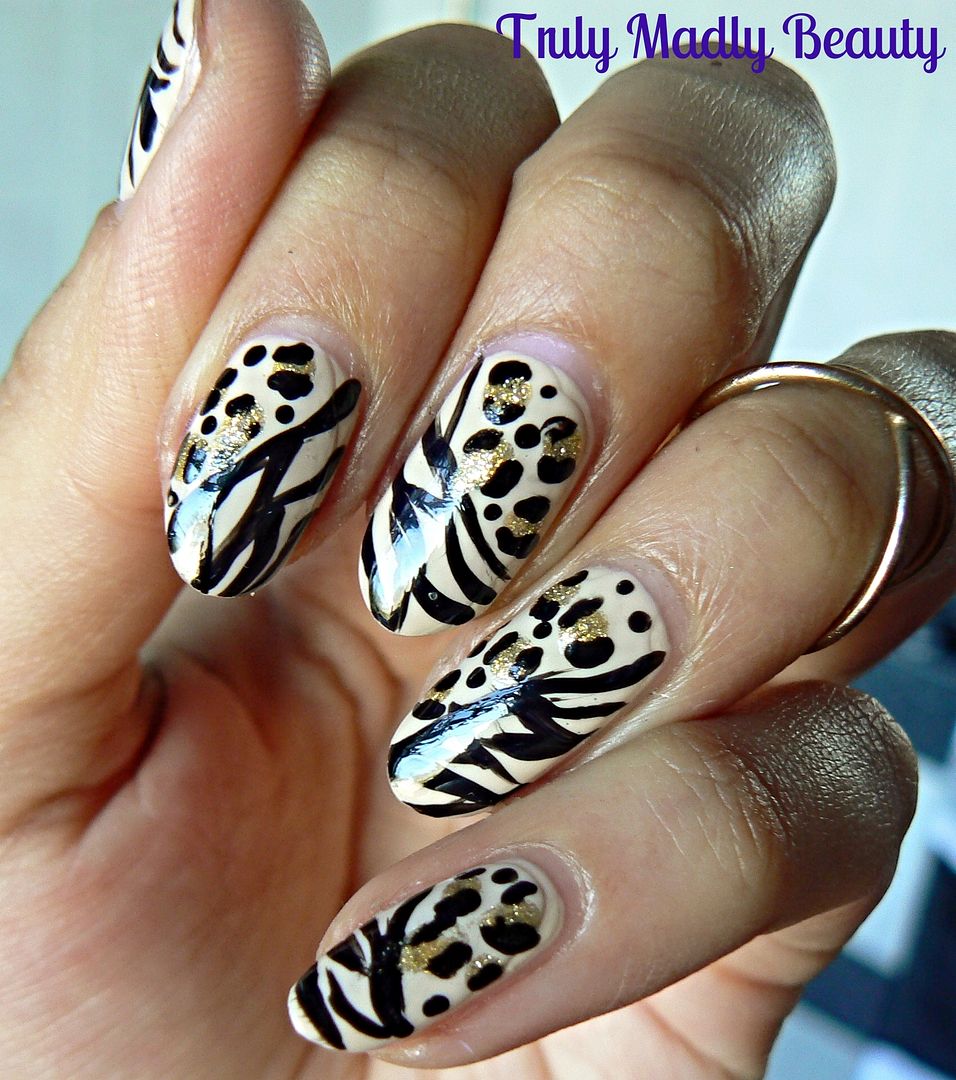
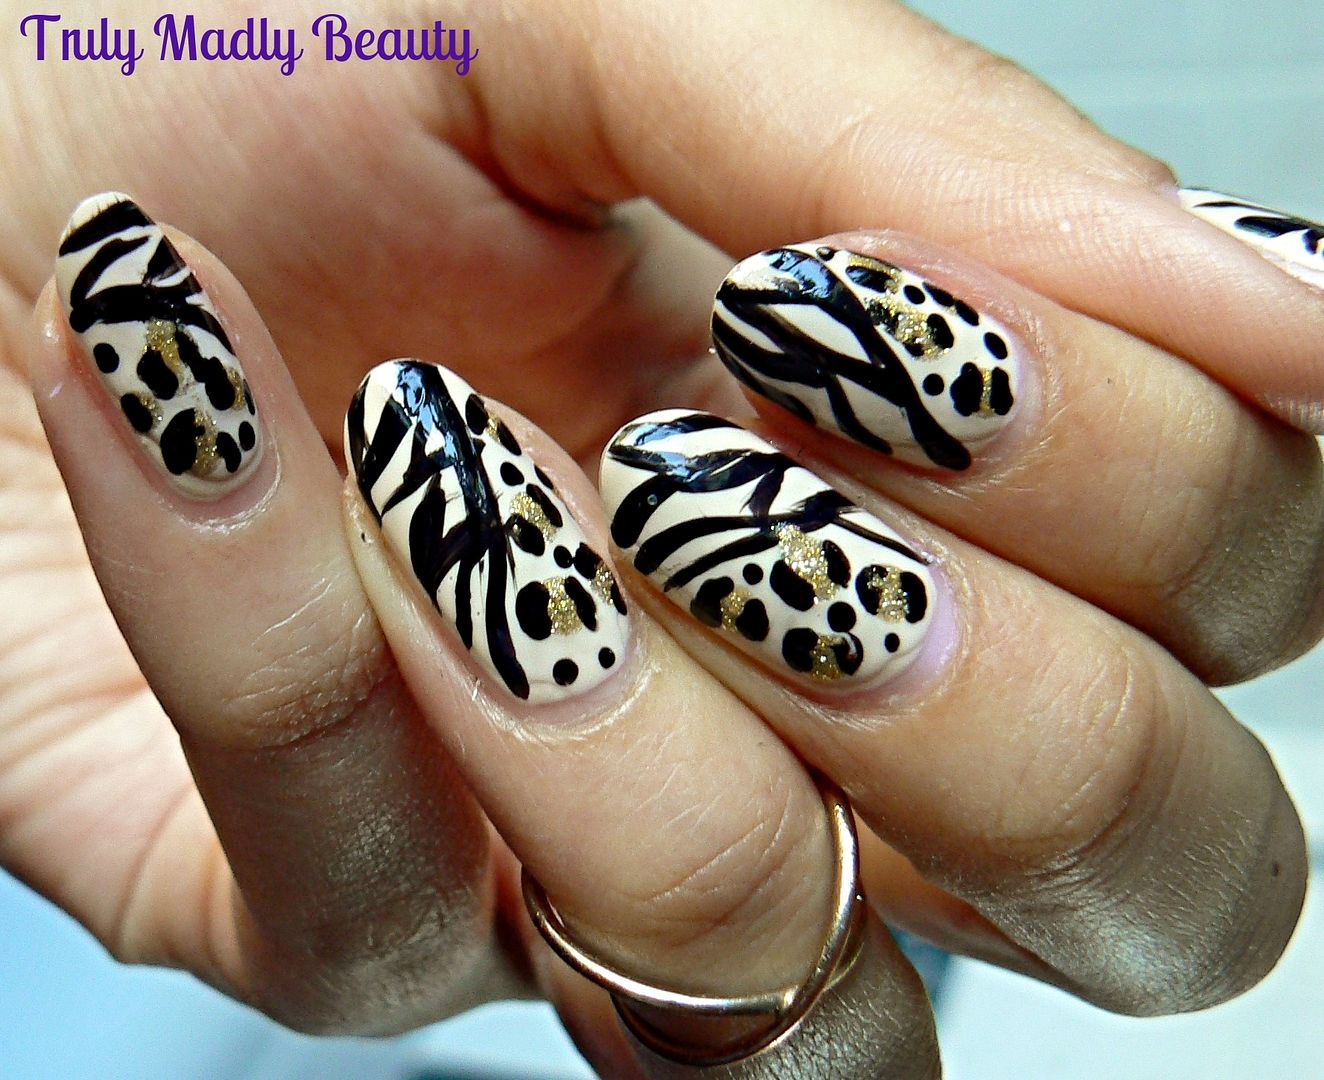
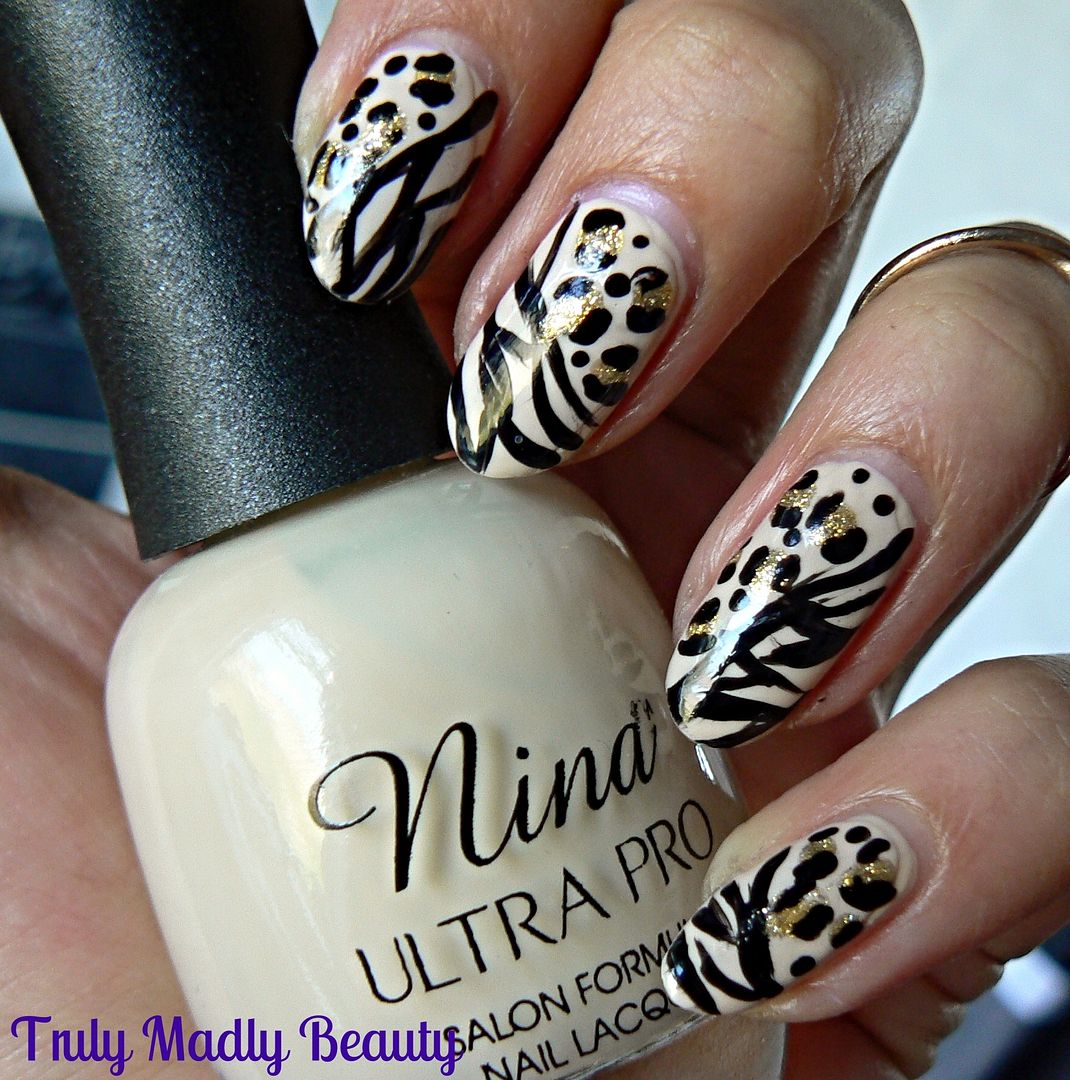
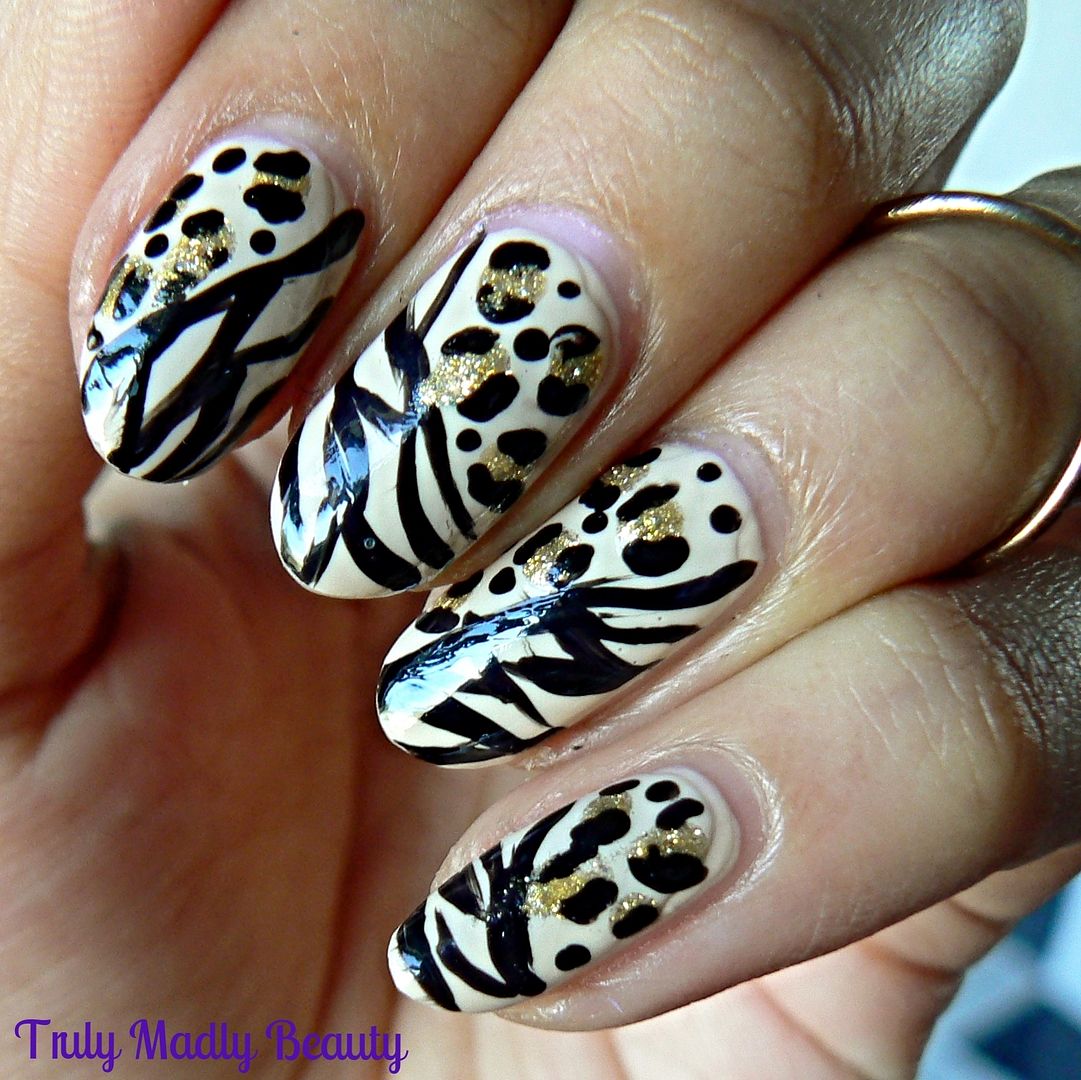
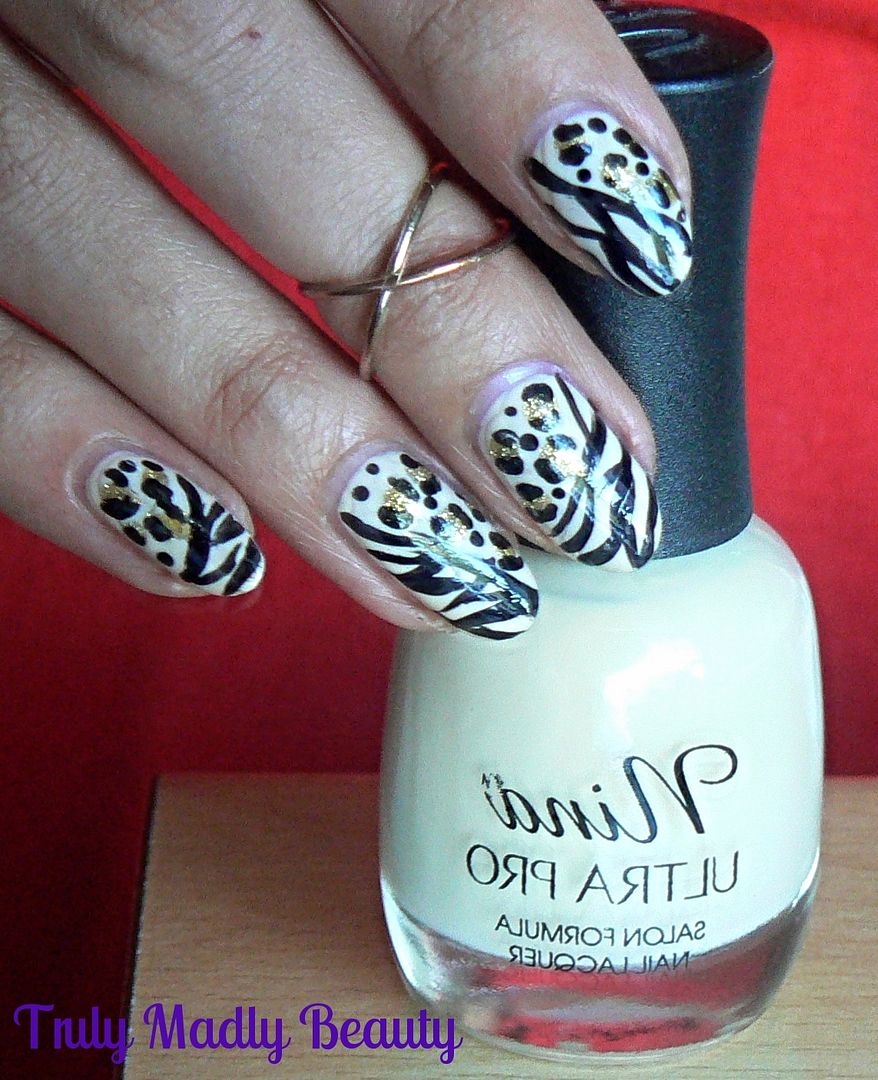
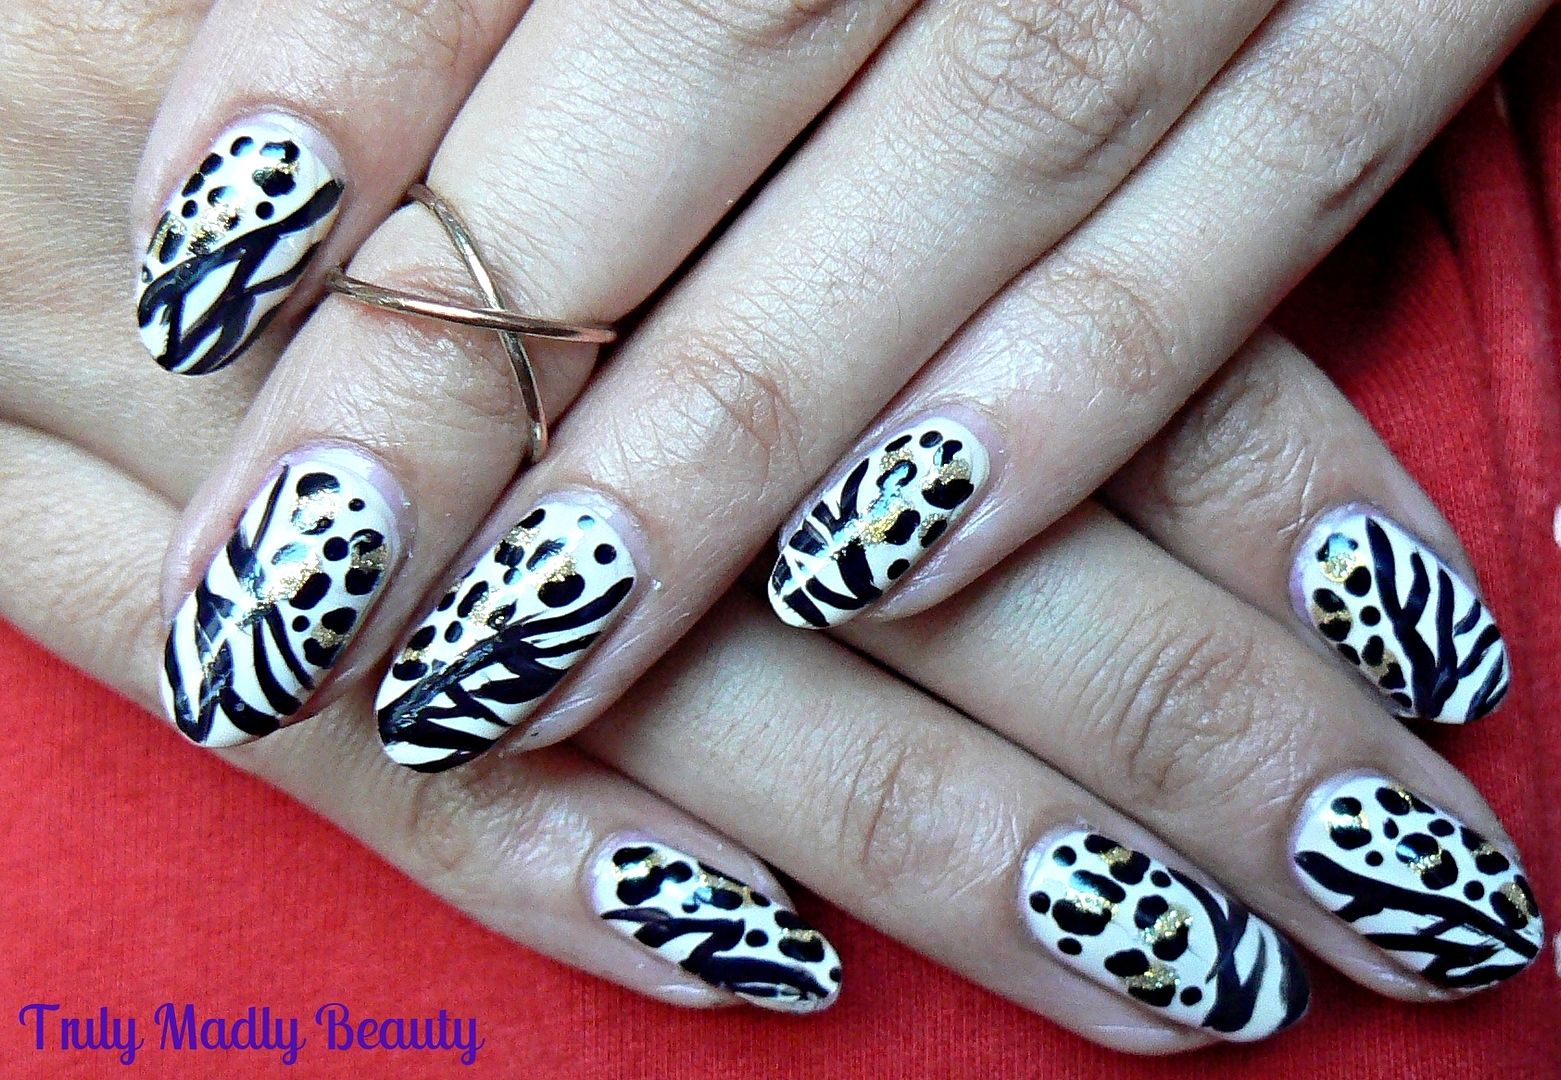
NOTD - Safari Theme Animal Print Nails!
Hello there
lovely readers!
Hope you've all
been well & enjoying the beautiful sunshine. Work was getting
seriously hectic of late so my buddy Saf & I escaped to the coast
for a few days of sun, sea & relaxation which was most welcome &
needed. A couple of days spent soaking up the rays & enjoying
good food definitely helped revive me again! :)
If you follow moi on social media you may know that for the past 3 weeks I've been rocking a Gelish mani on the nails. QUITE a feat for yours truly. I honestly didn't think I would last 3 days but I adored it SO much that I got as much wear as I could out of it. However the time came to eventually remove the gel & finally get back to polishing these nails! Huzzah! Girl was seriously starting to get withdrawal symptoms! O_o
So for my first
polish fix in 3 weeks I've decided to go a bit “wild” with some
funky Safari themed nail art incorporating both Zebra AND Leopard
print designs as I couldn't decide which one to go for haha!
For my base I've
used two coats of Nina Ultra Pro Rum & Reggae. Lets just take a
moment to appreciate the fabularse name of this polish, I love it!
Rum & Reggae is a cream beige nude, perfect as a base colour to
do nail art on as it really brings out the design whilst still being
a lovely neutral shade.
I then applied a
sort of rough (okay VERY rough) zebra like design to one half the
nail using a thin nail art brush & black polish. I personally
feel the err rustic...“roughness” sort of adds to the wild
wilderness theme going on here...okay I MAY have rushed it a tad O_o
On the remaining
half of the nail I applied a few gold glitter splodges before adding
the leopard detail by free-handing small C like curves around the gold
with a toothpick to create the leopard spots.
I
let the polish air dry a few minutes before going in with a coat
of CND Air Dry topcoat, this is important otherwise the nail art may
drag if top coat is applied straight away. And that's it! Hope you
like the “wild” Safari design nails my lovelies! Roar!
Thanks for
reading!
Lotsa love to
ya!
10.31.2014
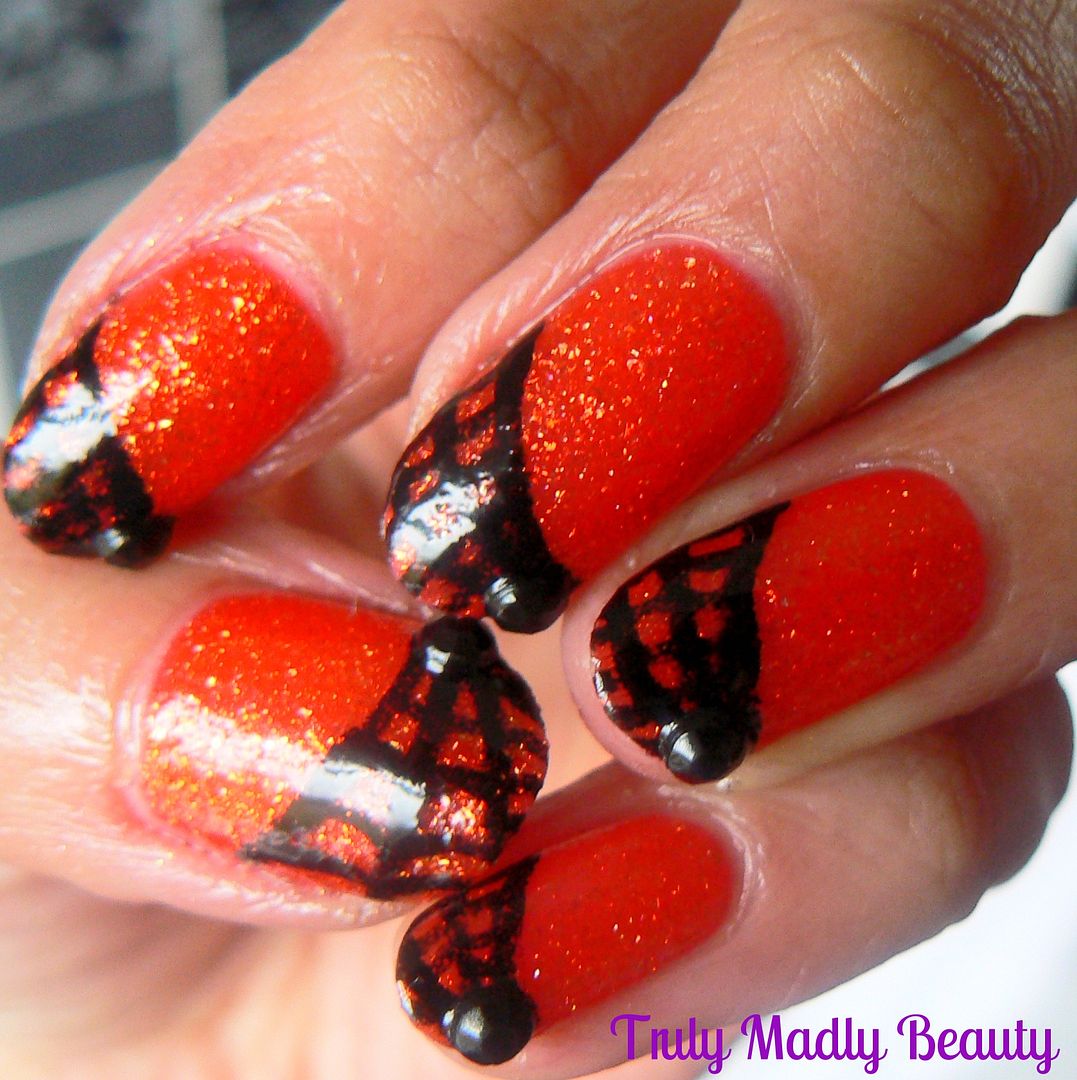
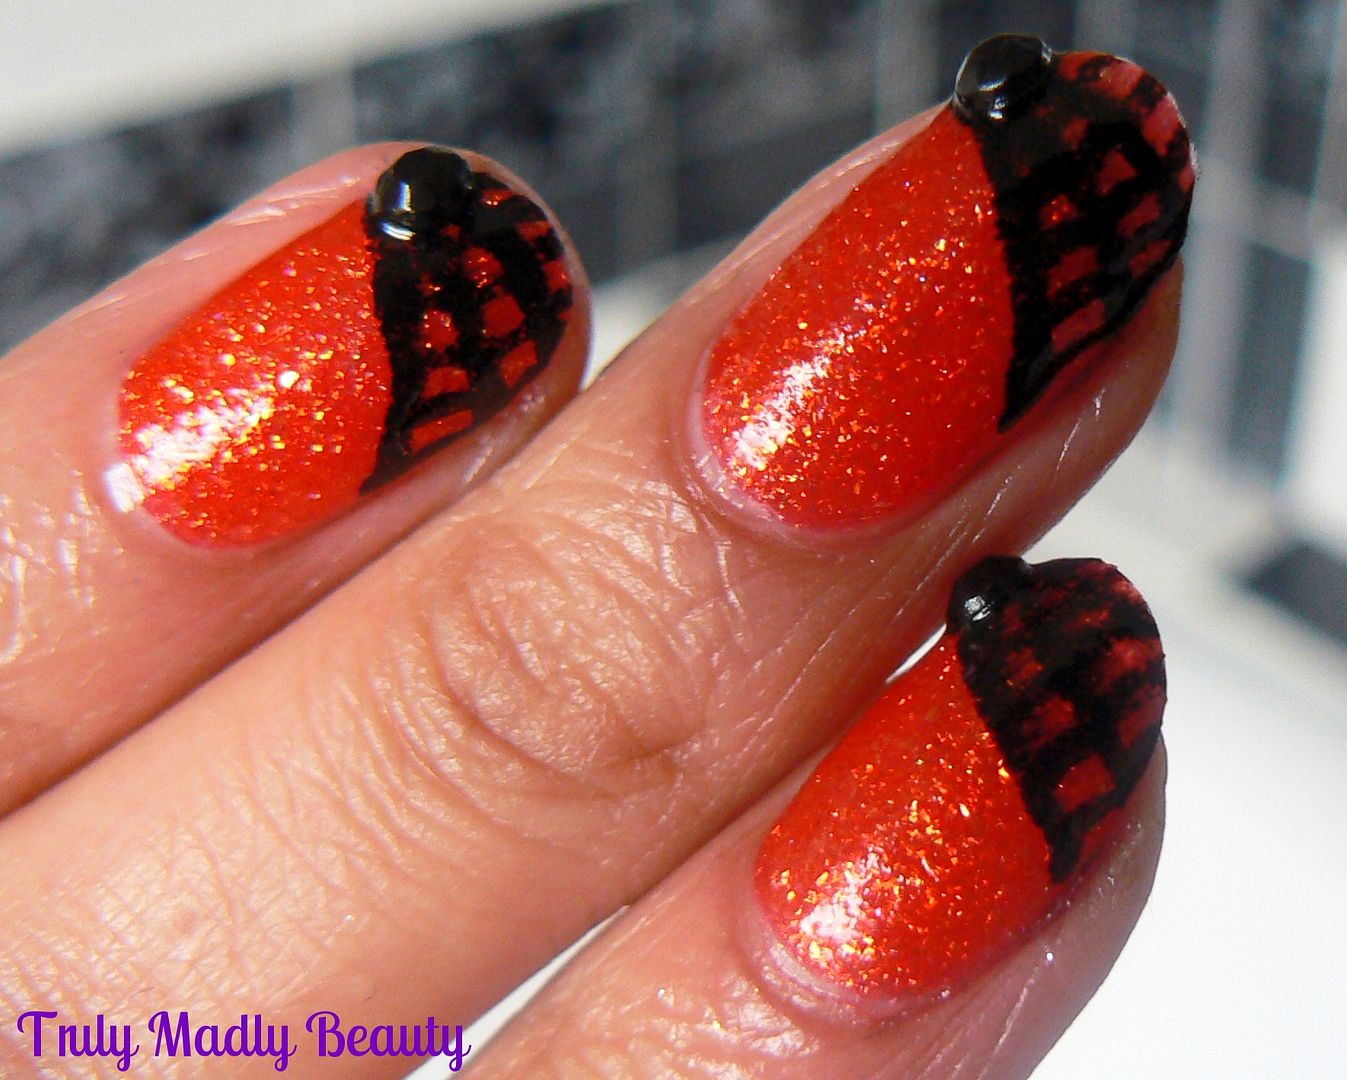
Halloween NOTD - Cobweb Tips!
Happy Halloween my fellow ghouls &
goblins! Hope you all have a good night however you may be
celebrating! Keeping it low key meself, as I'm just too exhausted
from Ram & I's Brussels adventure yesterday which FYI was amazing
& then some. Such a wonderful place to visit & the chocolate
covered waffles were as divine as everyone said they would be! ;)
I couldn't resist squeezing in one last
Halloween manicure, especially as this one is probably my favourite
out of the whole bunch! So coming last in my Halloween mani series
but most certainly not least...Cobweb Tips!
10.04.2014
Halloween NOTD - Chanel Dripping Blood Nails...
Hello there lovely readers!
So October is here at last in all its glory goodness which means one thing in my book...Halloween manicures! Amongst other stuff sure but yeah...its all about the Halloween nail funness to be had...until Xmas arrives that is! You can check out the Halloween manis I did last year HERE.
I thought for my first Halloween themed
mani I'd go down the dripping blood route which is always fun...with
a slight twist using an image I remember seeing on Instagram yonks
ago using the Chanel symbol. So here we have some Chanel-esque
dripping blood nails...
So my loves it turns out that free
handing two backwards C's is actually pretty darn hard didn't ya
know? So hopefully you can at least figure out that it was the Chanel
symbol I was attempting here haha!
First up let me mention this absolutely
scrummy nude base colour for my mani, Nina Ultro Pro in Rum &
Reggae. I found this brand in Sally’s recently, on sale for just a
few squids & there’s nothing I love more than trying a new
brand of polish! And this does not disappoint, smooth formula, great
brush & perfect application in two coats in the loveliest creamy
beige I think it may be my new favourite nude!
I then grabbed a nail art brush &
used OPI's I Sing In Color from the LE Gwen Stefani range. This also
happens to be another bargain sale buy from Sally's. Whenever I pass
one I always pop in to visit the sale section to hunt down any
prettys! I Sing In Color is a stunning vampy red black brown gloss,
perfect for blood tones...
After (rather abysmally) drawing my
Chanel C's I then just used a dotting tool & some more of the OPI
& added on 3 drips to each nails plus a few extra blood droplets.
Finish with a coat of topcoat for
shine. I definitely need to practice my free handing C's but overall
I'm still pretty chuffed! Can't wait to roll out some more Halloween
manis! Will you be going all ghoulish on your nails? Thanks for
reading!
Lotsa love to ya!
Subscribe to:
Posts (Atom)