Hello there lovely readers!
Very late posting this (a couple of months eeep!) but here are the nail art looks for Halloween I rustled up this year. Rather than post each individually I thought I'd just bunch them all together in one blog post for some easy to read inspo :)
So without further ado lets get spooky!
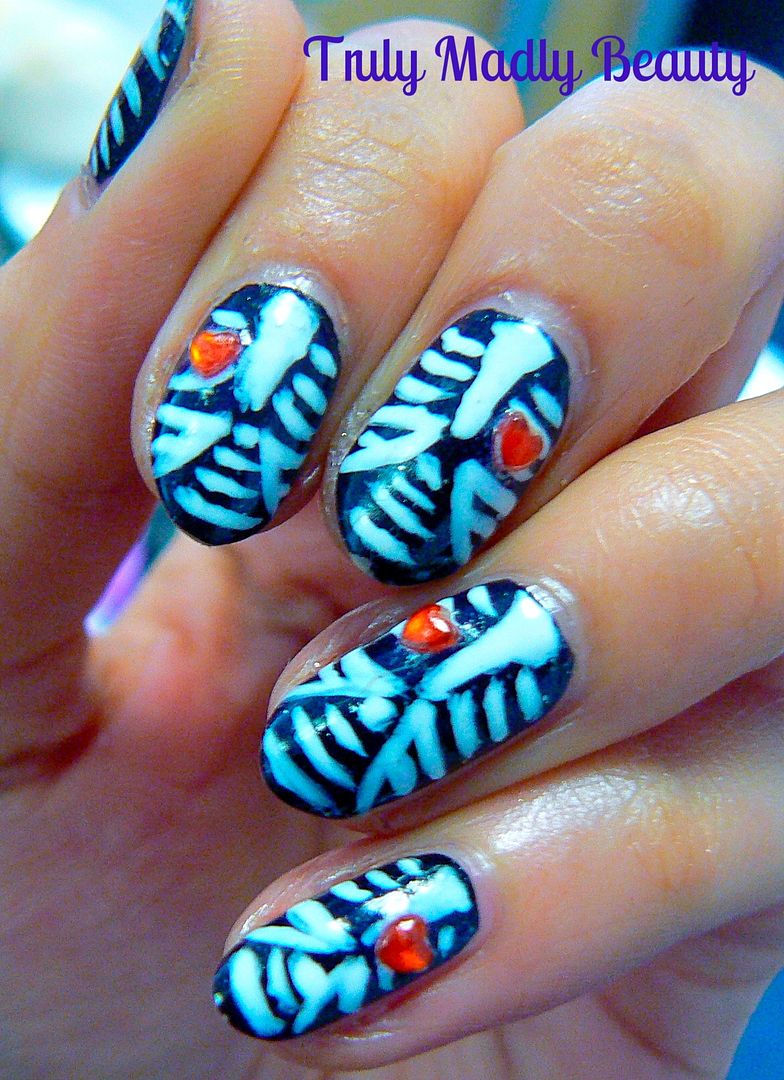
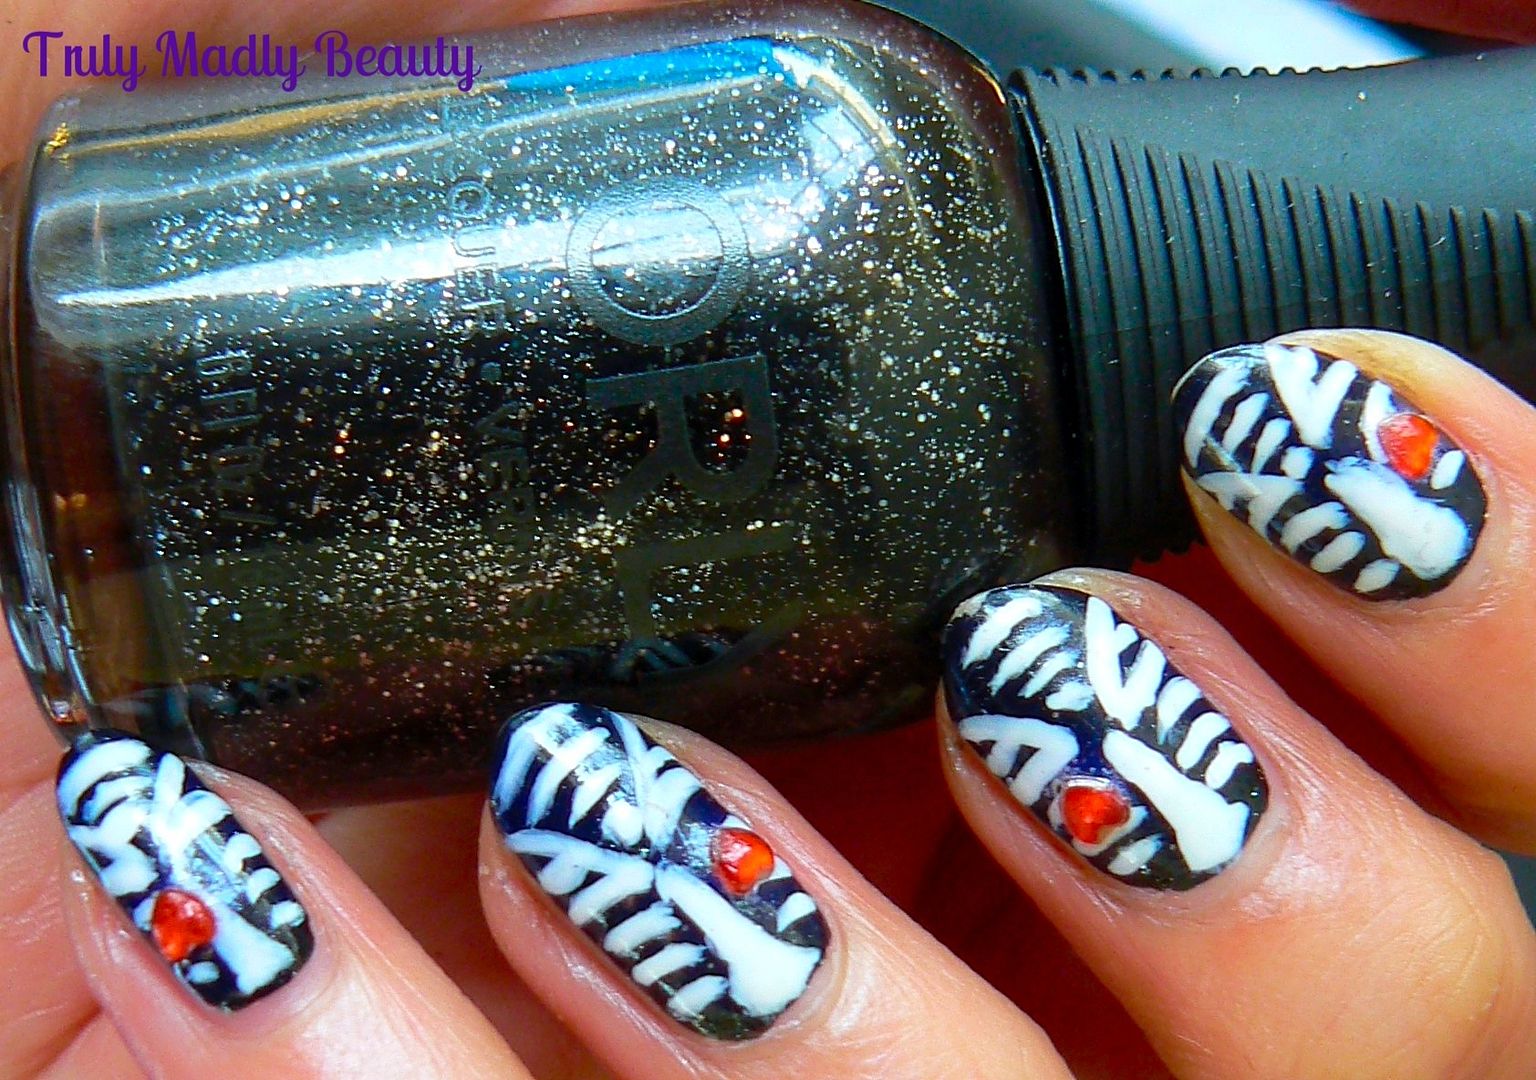
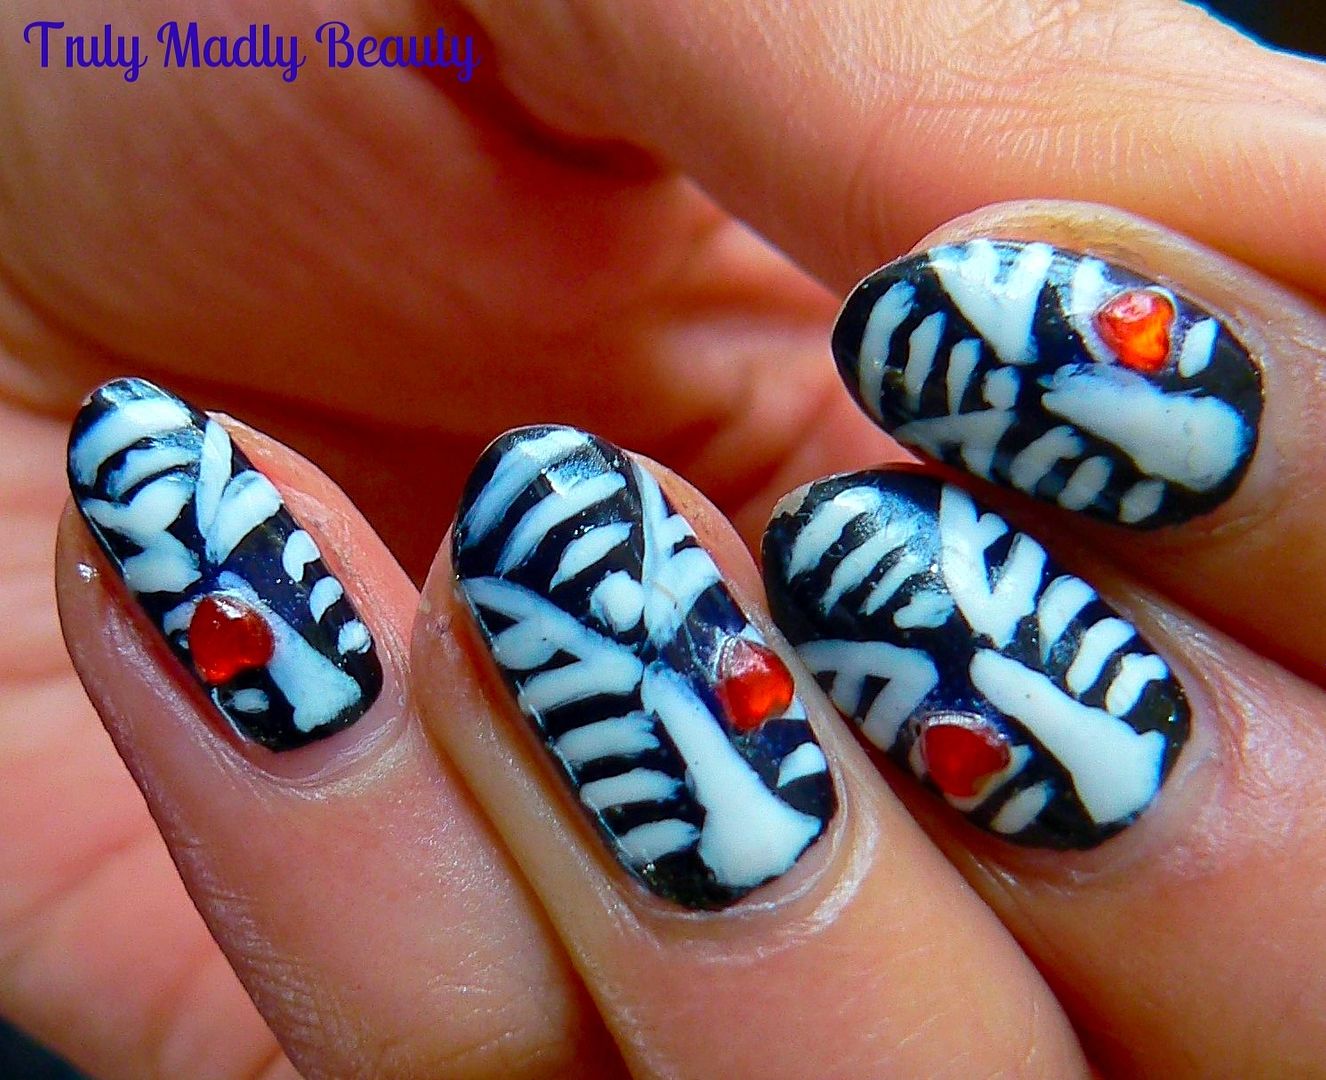
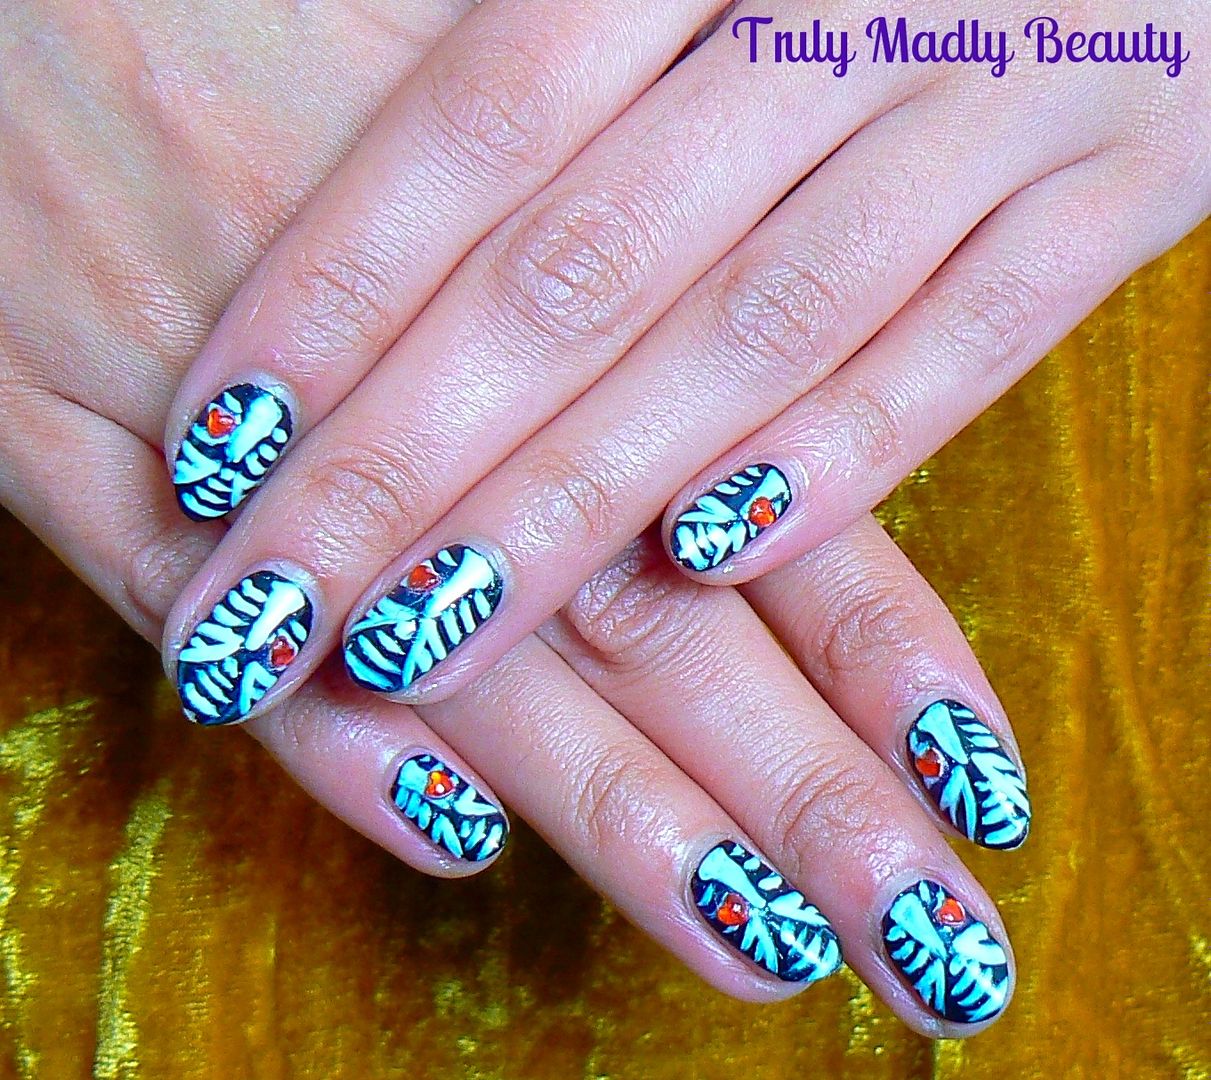
Look number 1 was actually a recreation of an old design of mine! I did skeleton bones a few years ago so I knew I wanted to recreate this fun look with the 3D jewel heart element & I love how it came out! I used a black polish as my base, this is Illamasqua Creator which also has teeny silver glitters in it making it a boujie black! I then used a fine brush & white polish to draw on my ribcage & pelvic bones before adding the red heart shaped rhinestone to finish!
Showing posts with label halloween. Show all posts
12.06.2019
10.22.2018
NOTD - Witchy Geo Symbol Nails!
Hello there lovely readers!
Going a bit mythical if you like with today's nail art look, what do you think?
Labels:
Born Pretty Store,
Chameleon,
Chrome Powder,
Dry Brush,
Ethereal,
Geometric,
halloween,
Mythical,
nail art,
NOTD,
Opal,
Spells,
TrueBritLondon,
Witch
10.19.2018
Halloween Dripping Blood Scream Nails!
Hey there lovely readers!
Holy moly its been a minute! I had hoped to get in the spirit of Halloween with my nail art but time it would seem has run away with me! I've just returned from a much needed & most amazing break in New York City, my most favourite place on earth! With that, work & also the fact that I had me some beautiful gel nails did whilst out there means any new nail art looks will be put on hold for a month or so...thankfully I have a backlog of looks & also managed to throw together one spooky look before I left so woohoo!
I always like to do some form of dripping blood nails every year so keeping in with tradition that's what I've done but this time with a spooky twist!
10.30.2017
Disney Nail Art Series - Halloween Special - Snow White Poison Apple
Hello there lovely readers!
So All Hallows Eve is almost upon us dark ones thus I wanted to squeeze in one last mani. For my final Halloween nail art design this year I wished to incorporate it as another installment to my Disney Nail Art Series as this was an idea that was floating around in my head since the start of October that I really wanted to attempt & thought it would be perfect for Halloween...the Poison Apple from Snow White
10.26.2017
Halloween Nails - Jack O Lantern Pumpkins
Hello there lovely readers!
Now I hadn't planned on
doing Pumpkin nails for Halloween this year, however the other day I
found myself doodling away whilst on hold on the phone, as you do, &
after my call was done I looked down to see I'd drawn me my very own
pumpkin patch filled with grinning Jack O' Lanterns...
Labels:
Face of Australia,
gothic,
halloween,
Maybelline,
Model's Own,
nail art,
NOTD,
Orange,
Pretty Serious
10.20.2017
Halloween Nails - Day Of The Dead Sugar Skulls!
Hello there lovely readers!
Time for another Halloween mani & I believe we are on number 4 now! The next prompt that came up in the Instagram nail art challenge I'm currently partaking in was Skulls. Well this gave me the perfect opportunity to create some Day Of The Dead Sugar Skulls, perfick for Halloween & a design I've been wanting to do for ages!
10.09.2017
Halloween Nails - Blood and Bats!
Hello there lovely readers!
Here we are at Halloween Mani number 3 already!
Every year I like to roll out a gory blood themed mani of some kind for Halloween, usually in the form of delightful drips. When this weeks theme in my nail art challenge came up as Vampire/Bats I decided to just put the two together & rustle up this Bats & Blood manicure, killing two birds (or bats in this case) with one stone....
10.05.2017
Halloween Nails - Spooky Cemetery Scene!
Hey there lovely readers!
Time for another Halloween mani! I've never done a Cemetery/Graveyard scene design before yet always loved seeing so many interpretations, so when this theme popped up as one of the prompts in an Instagram nail art challenge, I though it high time I give it a go!
Whilst I'm not entirely happy with my freehand Cemetery design itself, I'm still absolutely in love with this mani, especially that base!
10.02.2017
Halloween Nails - Ghoulish Yin Yang Ghosts!
Hello there lovely readers!
I have lots of ideas floating around, though how many of these will actually see the light of day remains to be seen. But lets start things of with a ghoulish vibe shall we with some spooky ghost nails with a Yin Yang twist! I saw this design on YouTube & absolutely LOVED the idea of incorporating two tone ghosts to form a Yin Yang symbol, easy to do on account of their curvy ghoulish shapes.
We are officially now in my favourite time of year, Autumn & October with its abundance of candles & cosy nights soothes my soul greatly & of course most importantly tis October which holds the best holiday of all...Halloween!
Not sure how one will be marking the occasion this year, every time plans are made I always seem to end up changing mind last minute & having a low key celebration...lets see how it pans out this year. In the run up to the big day, you know I like to get into the spirit of things in my favorite way of course!
I have lots of ideas floating around, though how many of these will actually see the light of day remains to be seen. But lets start things of with a ghoulish vibe shall we with some spooky ghost nails with a Yin Yang twist! I saw this design on YouTube & absolutely LOVED the idea of incorporating two tone ghosts to form a Yin Yang symbol, easy to do on account of their curvy ghoulish shapes.
10.27.2016
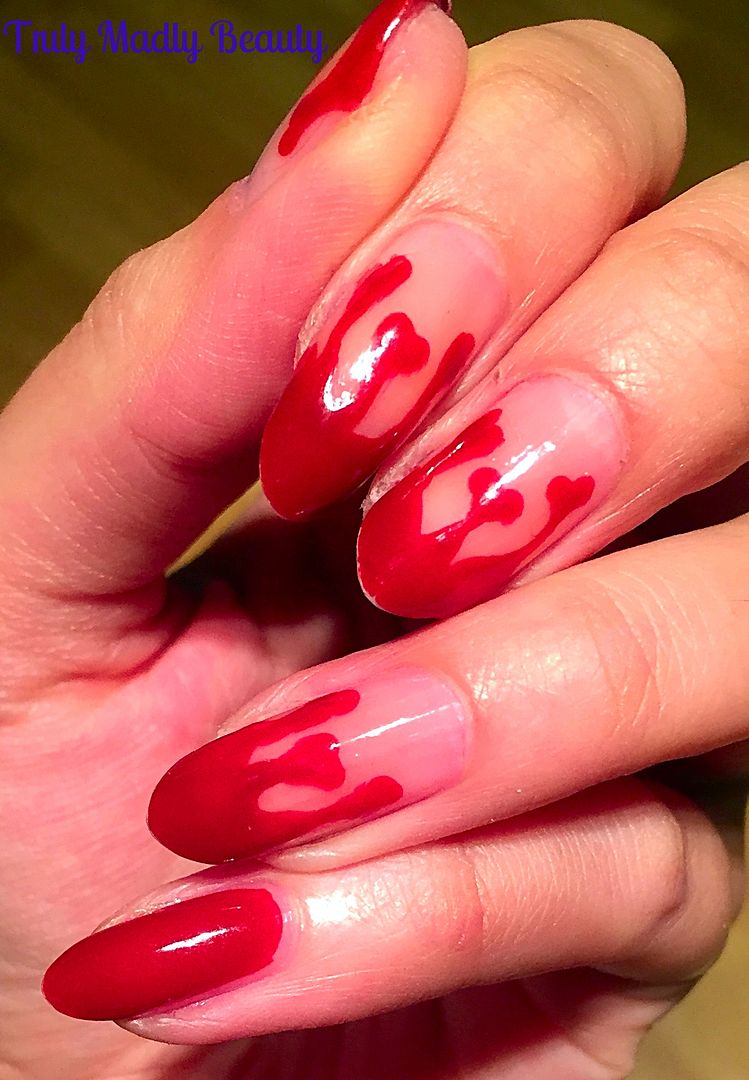
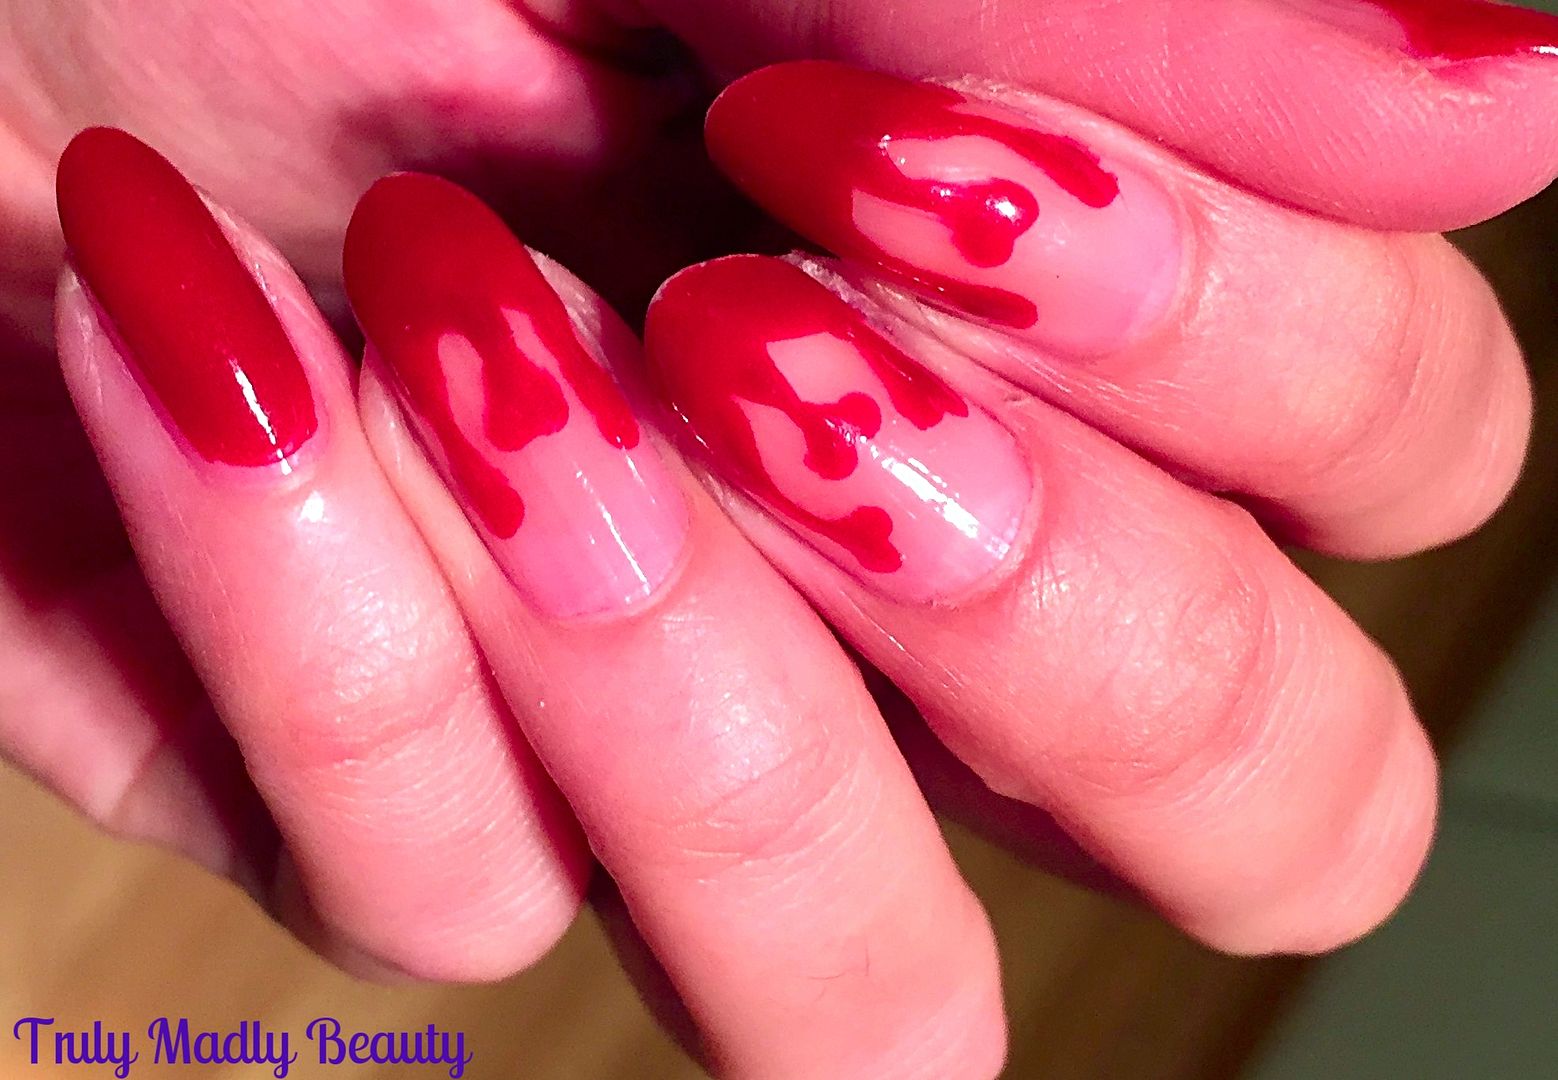
Halloween NOTD - Dripping Blood Hearts ft Joan Collins Timeless Beauty!
Hello lovely readers!
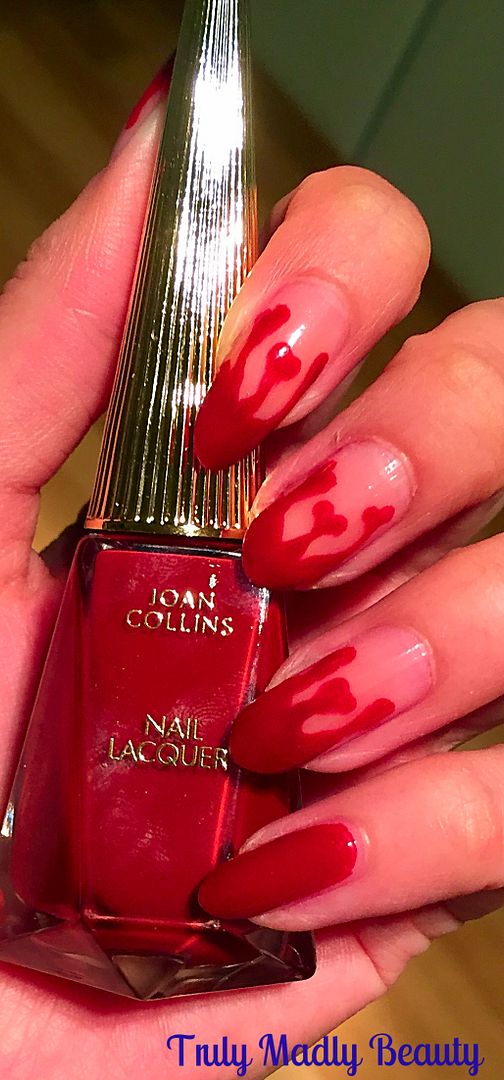
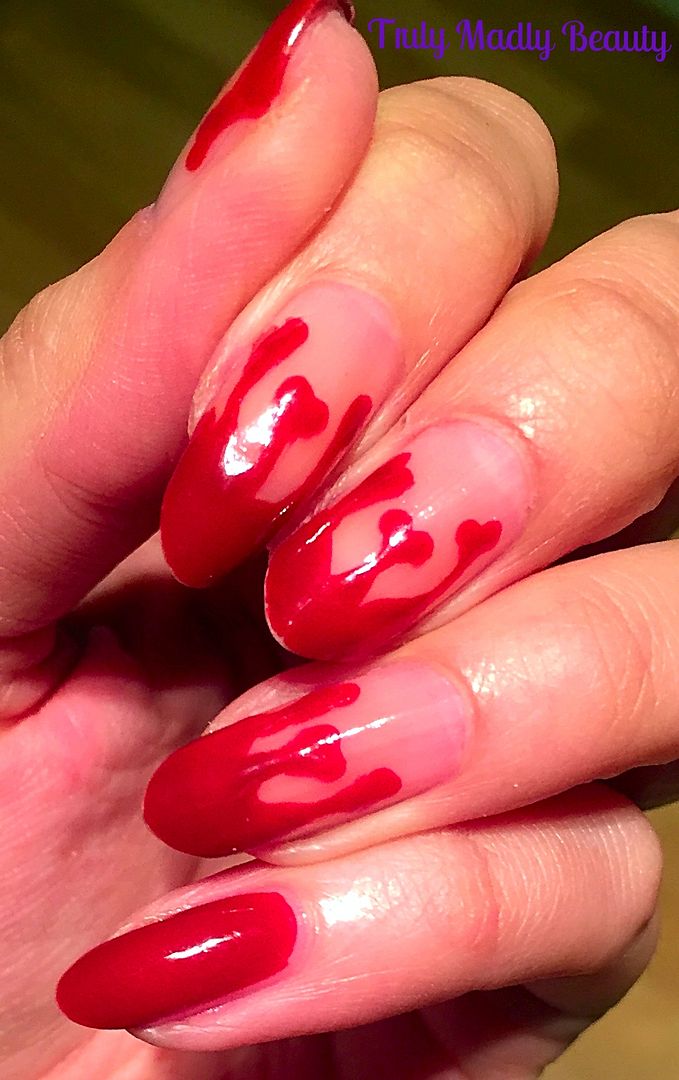
Every Halloween there is one design that I re-create every year in what now has become a tradition I suppose & that's some lovely dripping blood nails!
They look awesome, are fun to do & you can play around with how you
have your blood drips, either by the cuticles, on the tips of your nails or
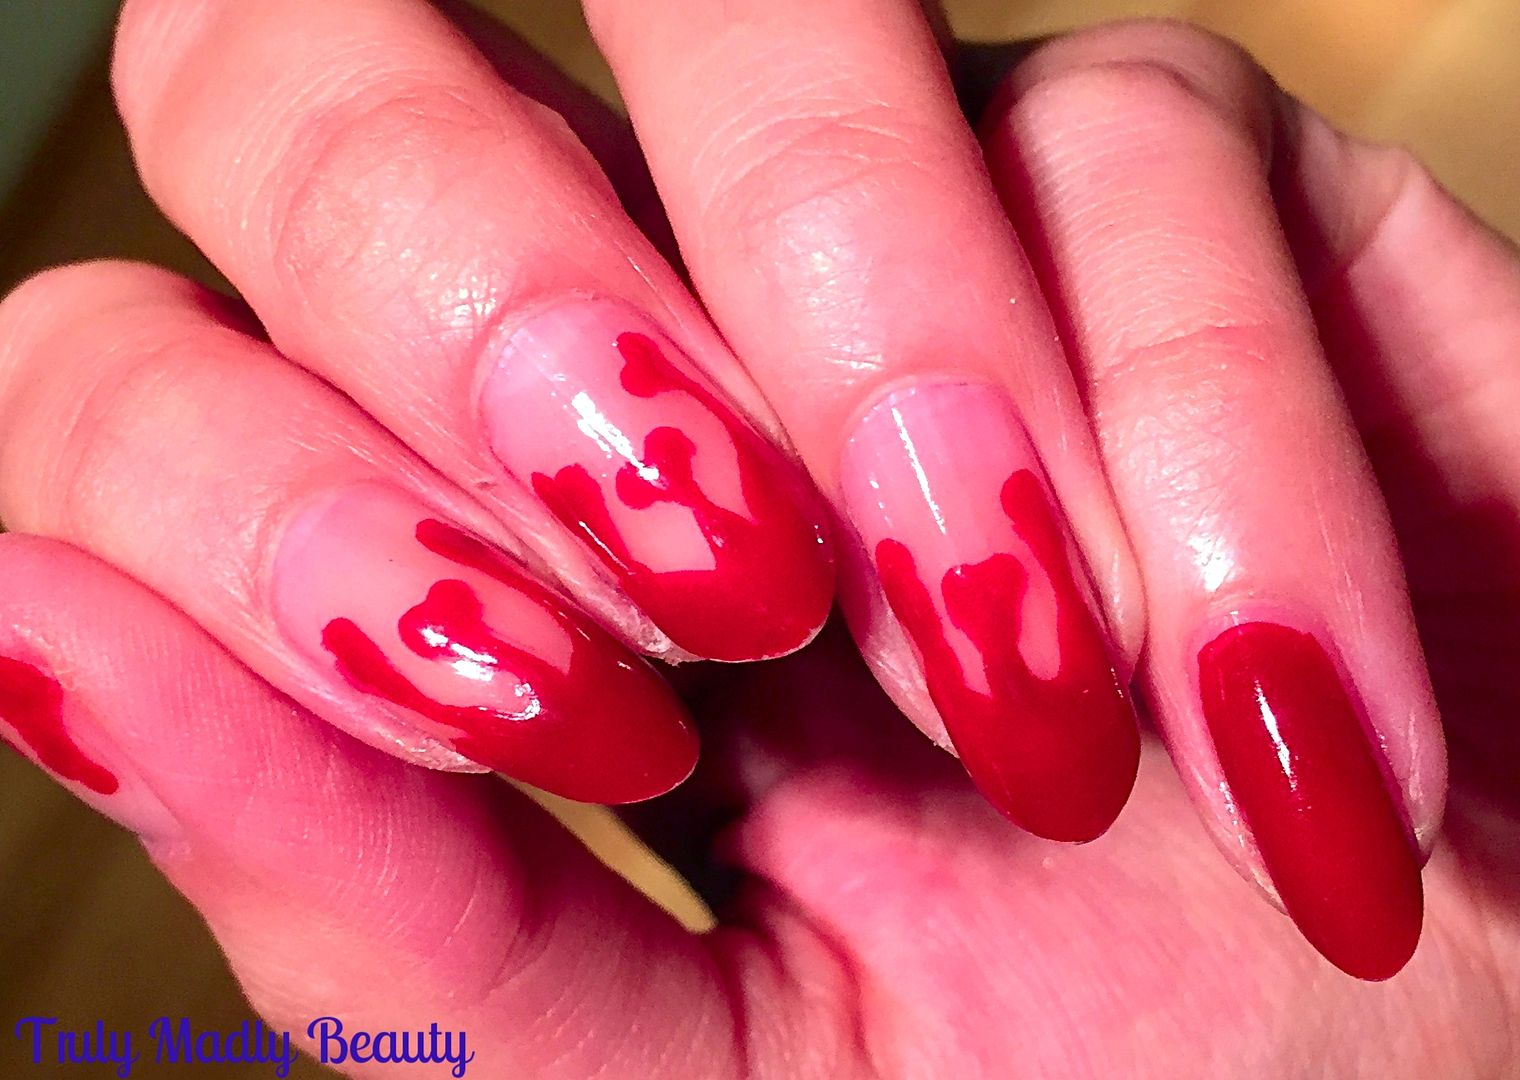
even both! This year I wanted to give my blood drips a slight twist, so instead
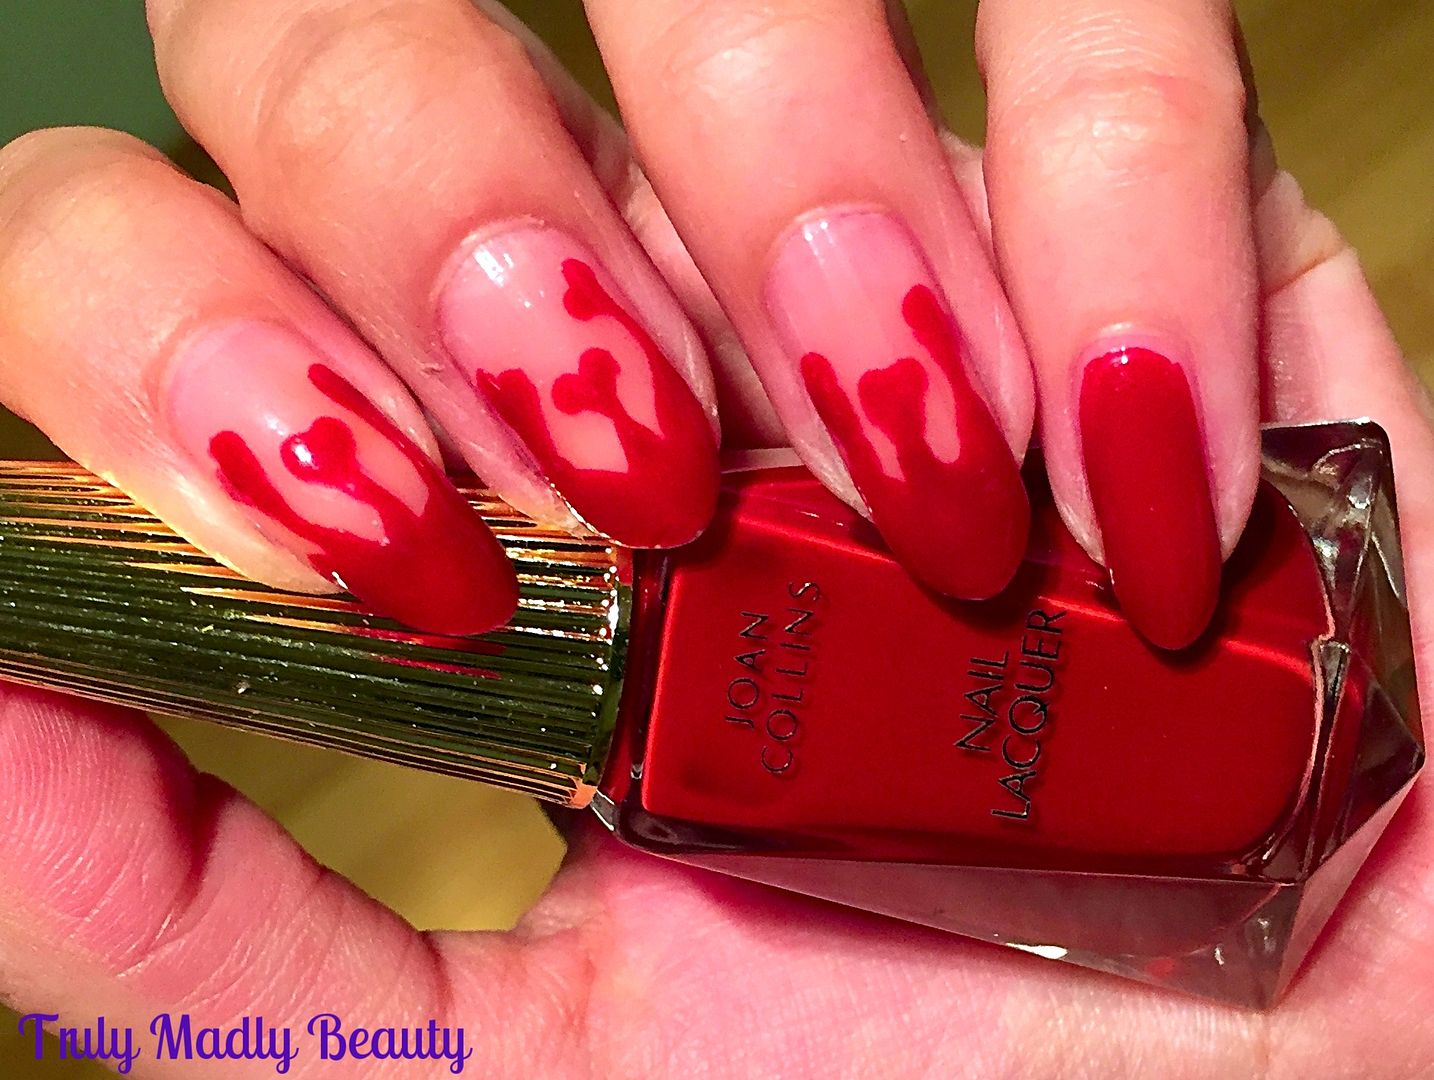
of normal drops...I went for some dripping heart shaped drops instead!
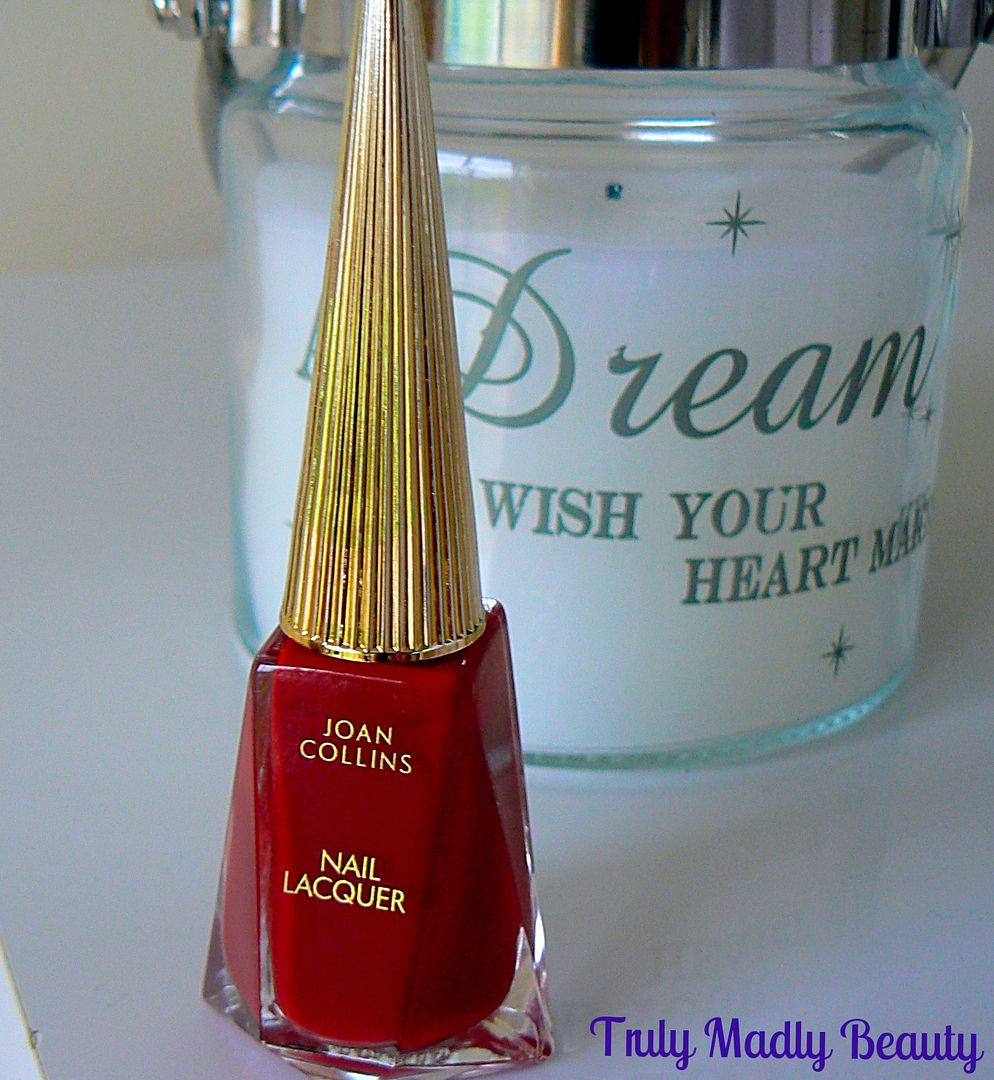
Of course for this you need a lovely blood red polish & I was
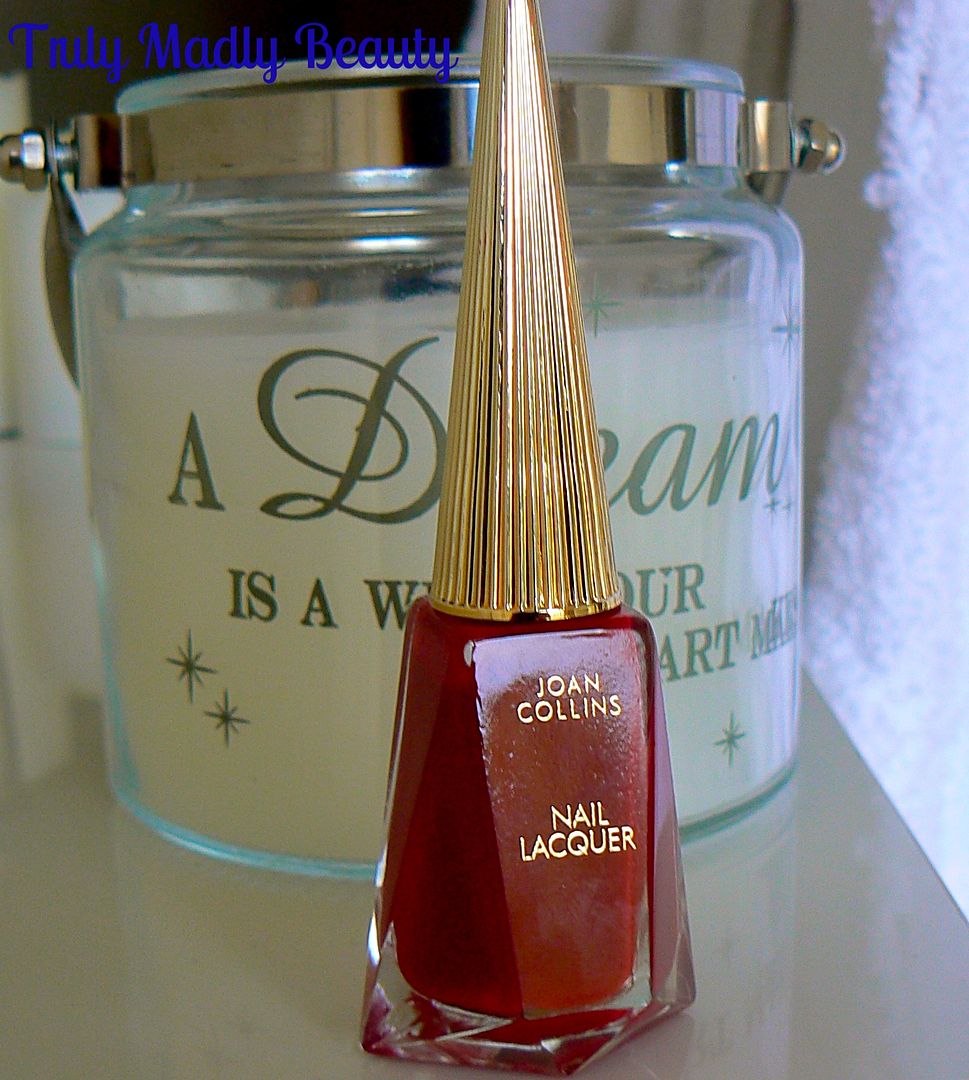
recently sent a pretty bottle from Joan Collins new beauty range
called Timeless Beauty which she has recently launched & features a lovely
range of chic beauty products which embody Hollywood Glamour & vintage Art
Deco vibes.
The range features a collection of nail lacquers including this divine
red which goes by the name Crystal* & just so happened to be the perfect
shade to recreate my blood!
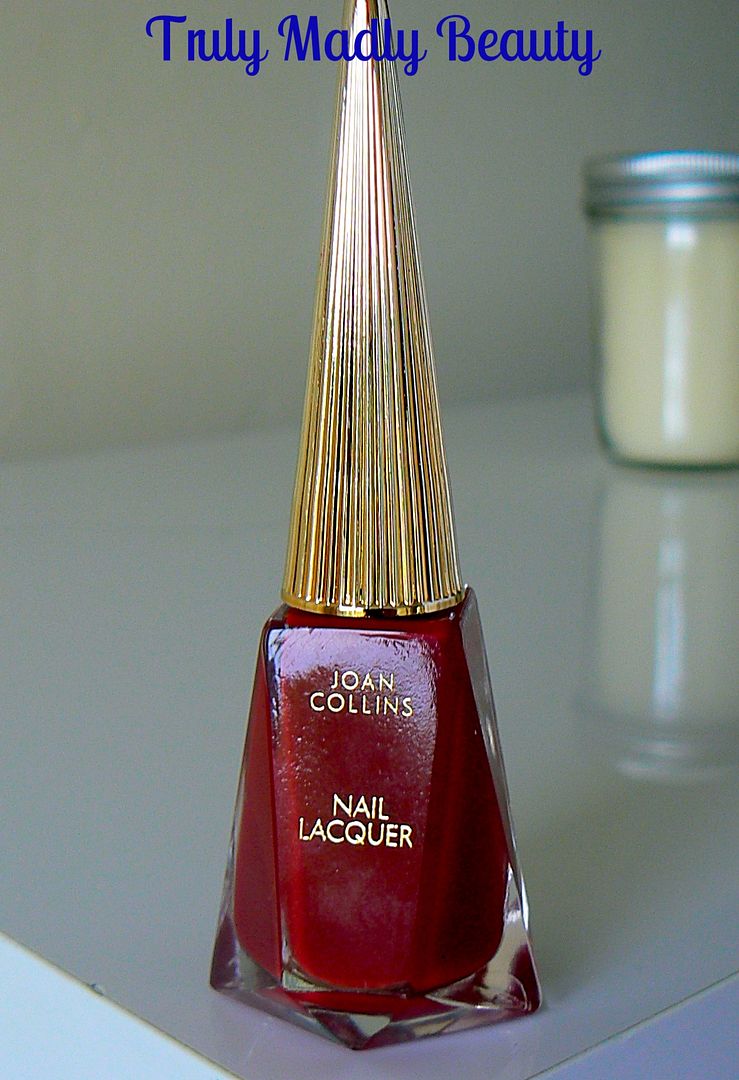
Can we just take a moment to admire the beautiful bottle this polish is
housed in? I absolutely LOVE the diamond edged bottle shape & pointed
long gold cap, it gives the polish a wonderful vintage look that immediately
made me reminisce of my mums signature bottles of polish that I used to always
admire from afar. Not only that but doesn't it also have a major Louboutin vibe
going on? LOVE
The polish itself is a lovely glossy formula & an intriguing brown
toned red, so classy & yet actually perfect for recreating some blood!
To create your blood drips first apply some of your red polish across
the tips of your nails using the brush, this doesn't have to be done neatly!
After all it IS meant to resemble a puddle of blood ;)
Then for your drops, instead of just applying one drop, apply two
smaller ones side by side, before joining the two together at the bottom to
create your heart drop! Add about 3 of these per nail.
Then draw a vertical line from the pointed bottom of your hearts up to
your red tips. Once you've done this you can then go back in to curve the edges
of your lines to make them resemble drips!
I coated the entire little finger nail with the pretty Joan Collins
polish as I just loved the shade so much & well because I'm just random.
Finish with topcoat & you’re done! Hope you liked this year’s
variation on blood drip nails! Sorry I haven't been able to do step by step
pictorials to go with the instructions for my Halloween designs, all of which
you can find HERE, lighting & time have not been in my favour lately!
You can find Joan Collins Timeless Beauty range which includes not just
nail polish at only £13 each, but a wide range of gorgeous looking products in
M&S stores as well as online. Thanks for reading!
Lotsa love to ya!
10.25.2016
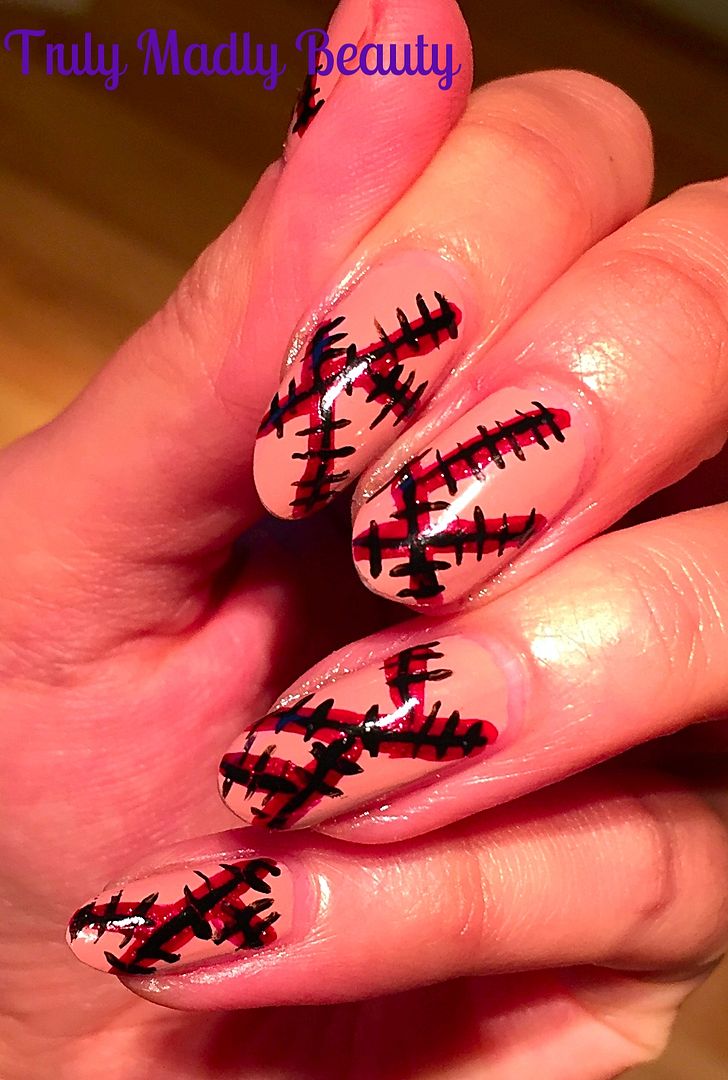
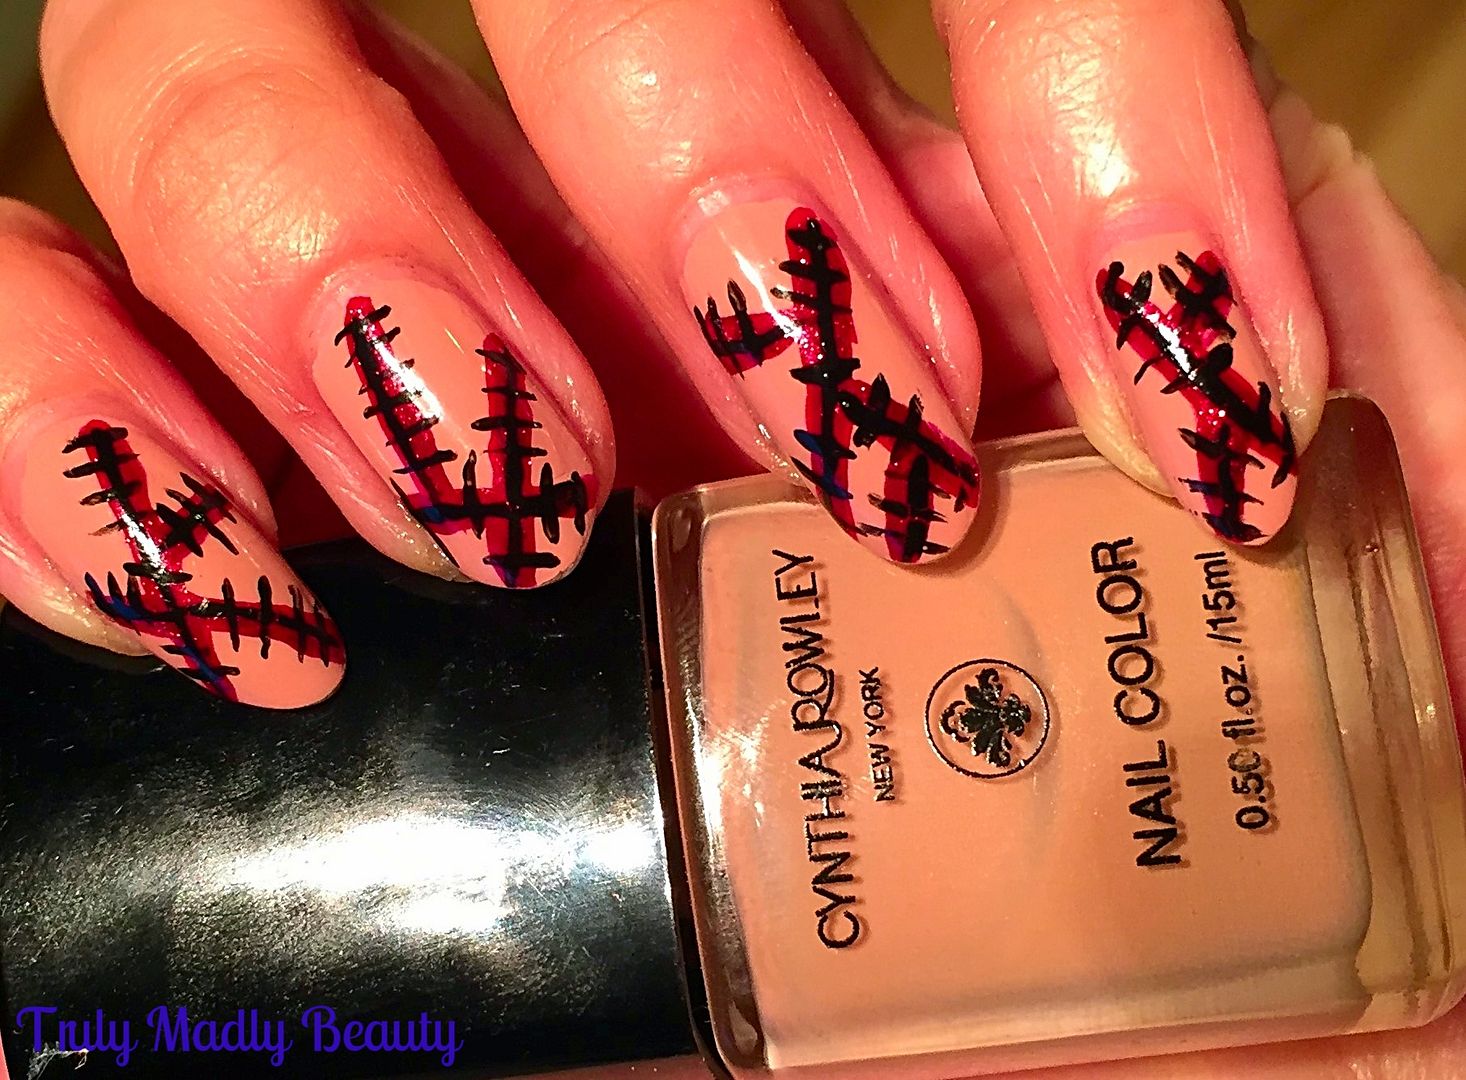
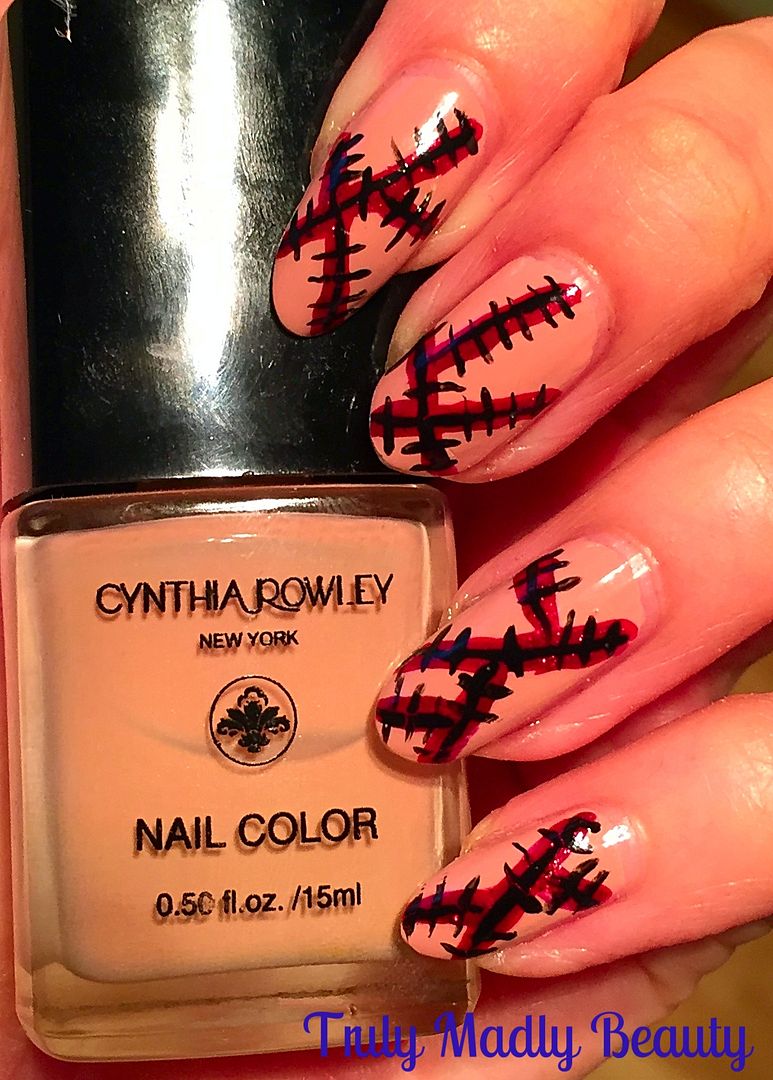
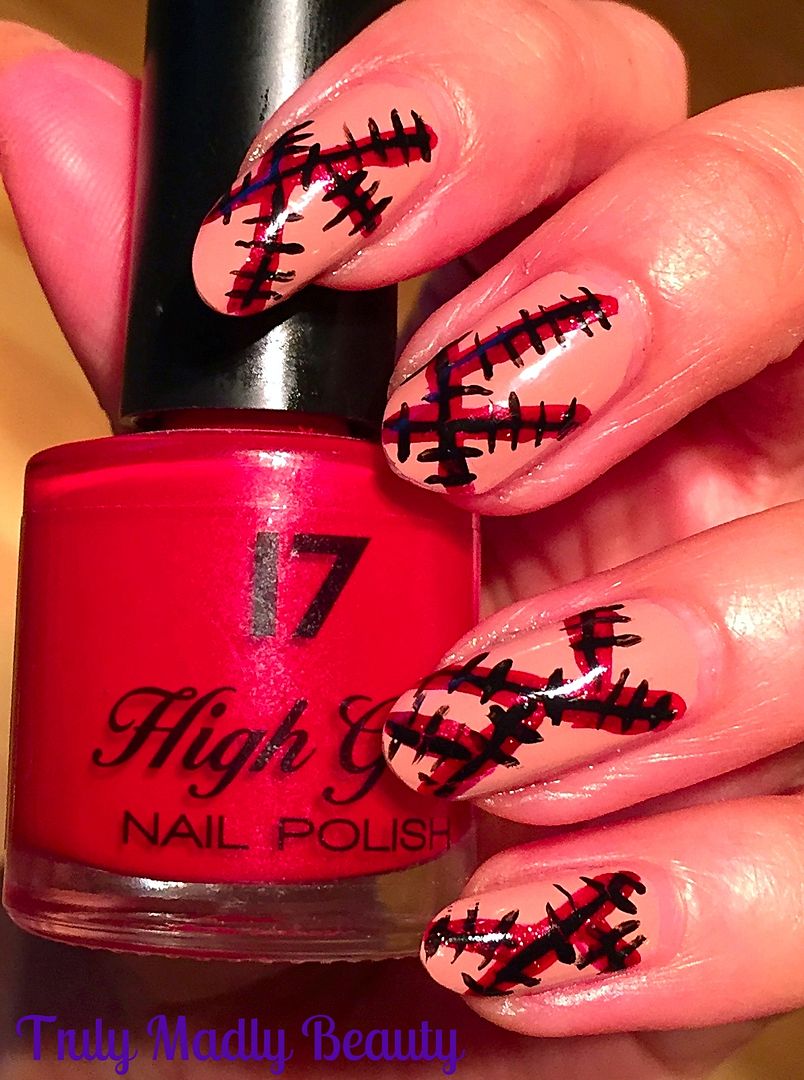
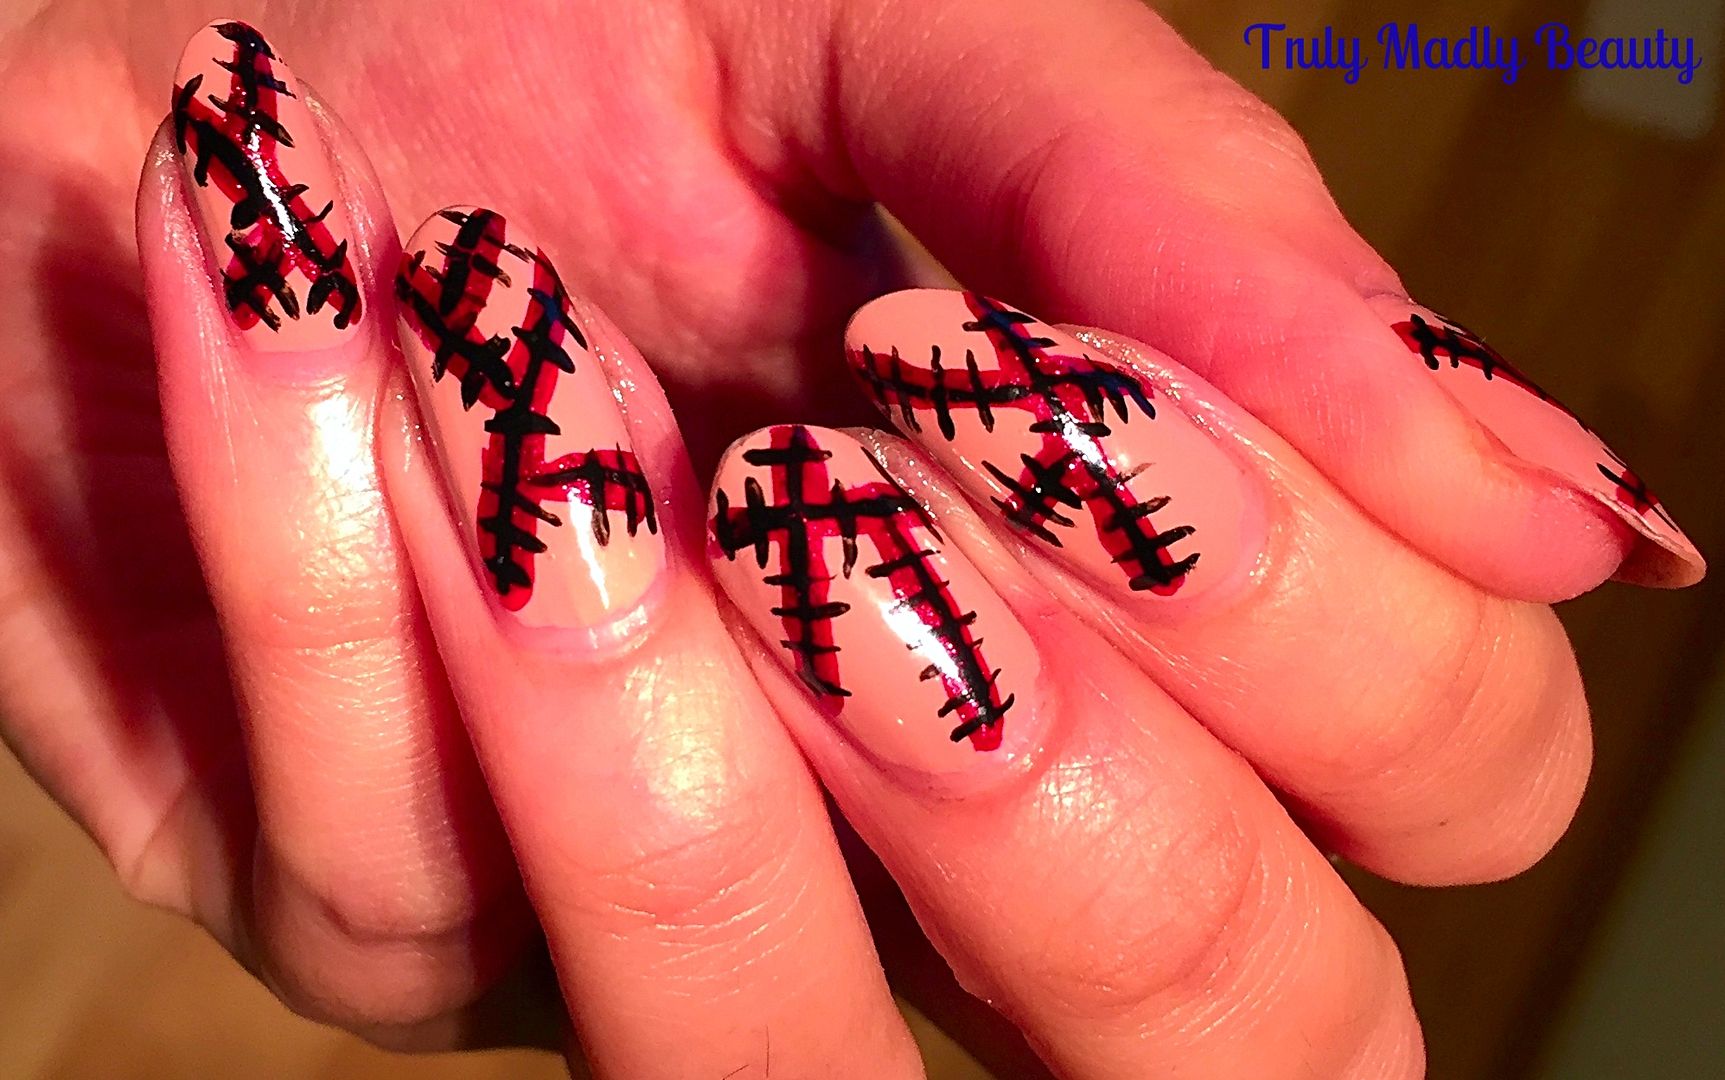
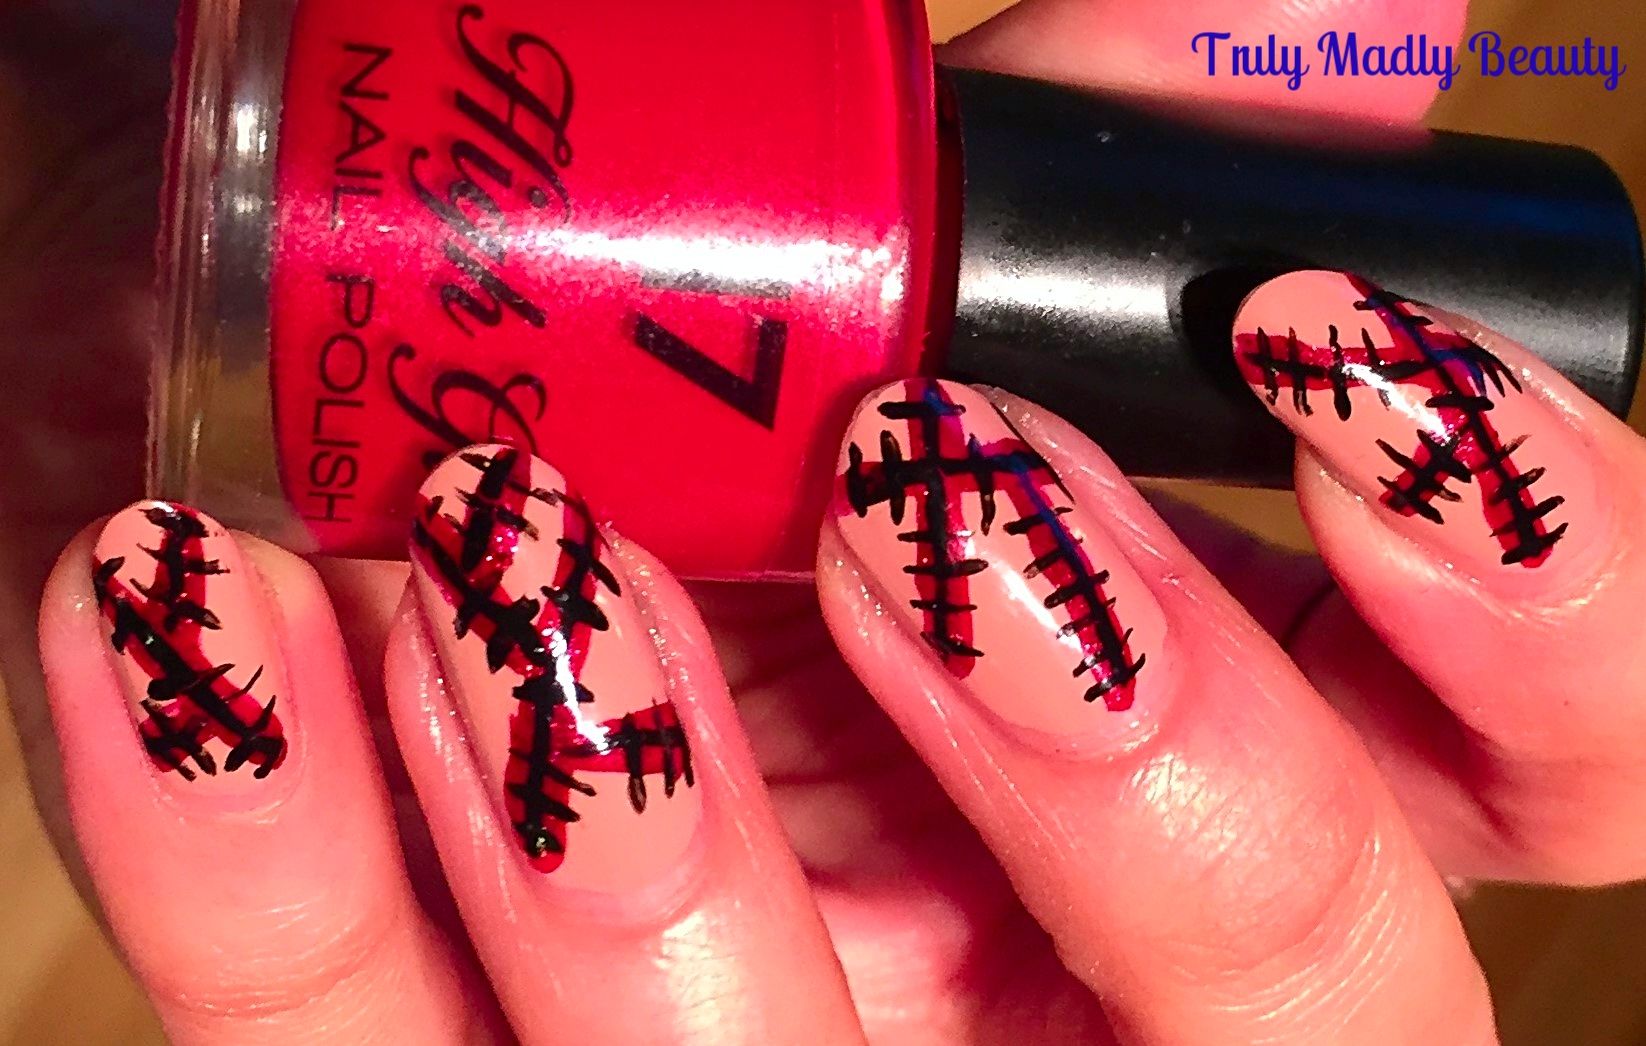
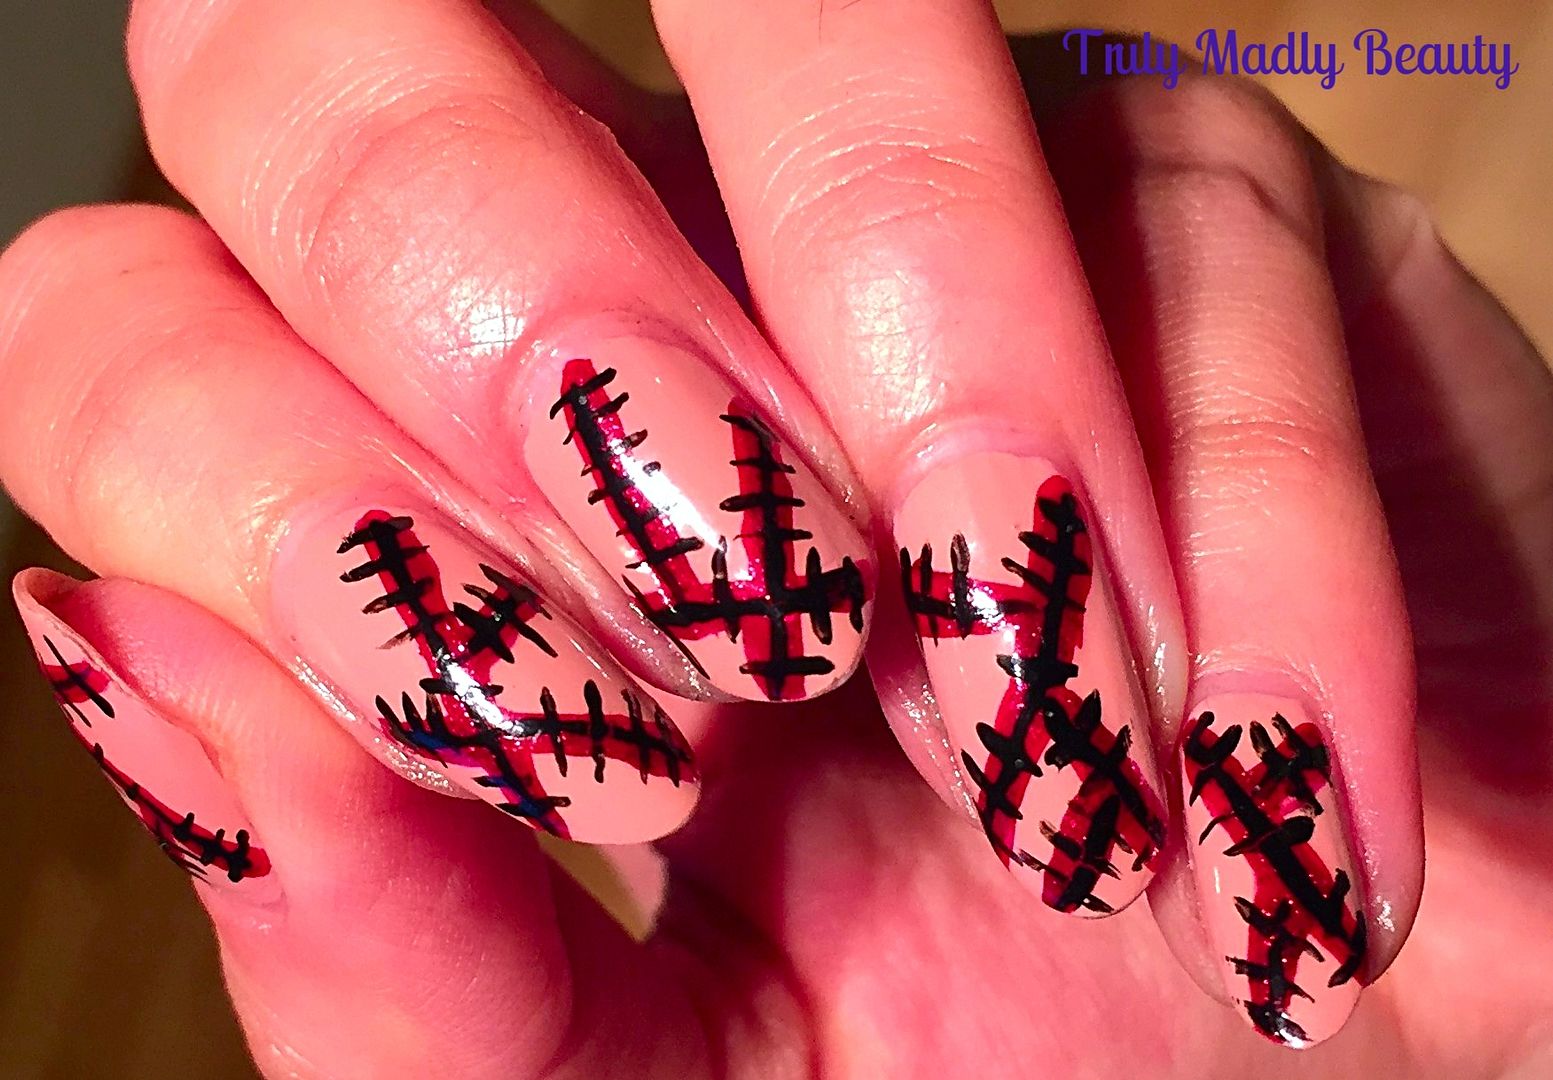
Halloween NOTD - Stitched Skin Nails!
Hello
there my lovely readers!
Time
for the next Halloween mani my fellow dark ones & I think this
one is my favourite of the bunch. So far this year we've had Holo Cobwebs & Bat French Tips. This time I thought I'd go down a more
gory route with some Stitched Skin nails...but me being me I still
managed to throw in some glitter action too haha! Can't keep magpie
me from the sparkles!
I
was so chuffed with how these came out & the best part is that
they're probably the EASIEST of the designs so far to do! All you
need is a nude/skin toned polish, a red polish, a black polish &
a couple of nail art brushes.
I
started with applying my base colour, here I've used this nameless Cynthia
Rowley polish I picked up whilst browsing in TK Maxx. A dangerous
ground for succumbing easily to many polish temptations let me tell
you...
A
perfect beige nude shade, its the type that would suit literally
every skin tone! I applied two coats for a nice opaque finish.
Now
for the stitches! Grabbing your nail art brush & red polish of
choice, here I've used 17 Risky Red which was simply the first red polish
my eyes just so happened to land on, start drawing on your cuts.
For
this simply apply straight lines haphazardly across the nail in
various directions, the beauty of it is that they don't have to be
neat so don't stress about getting perfectly straight lines!
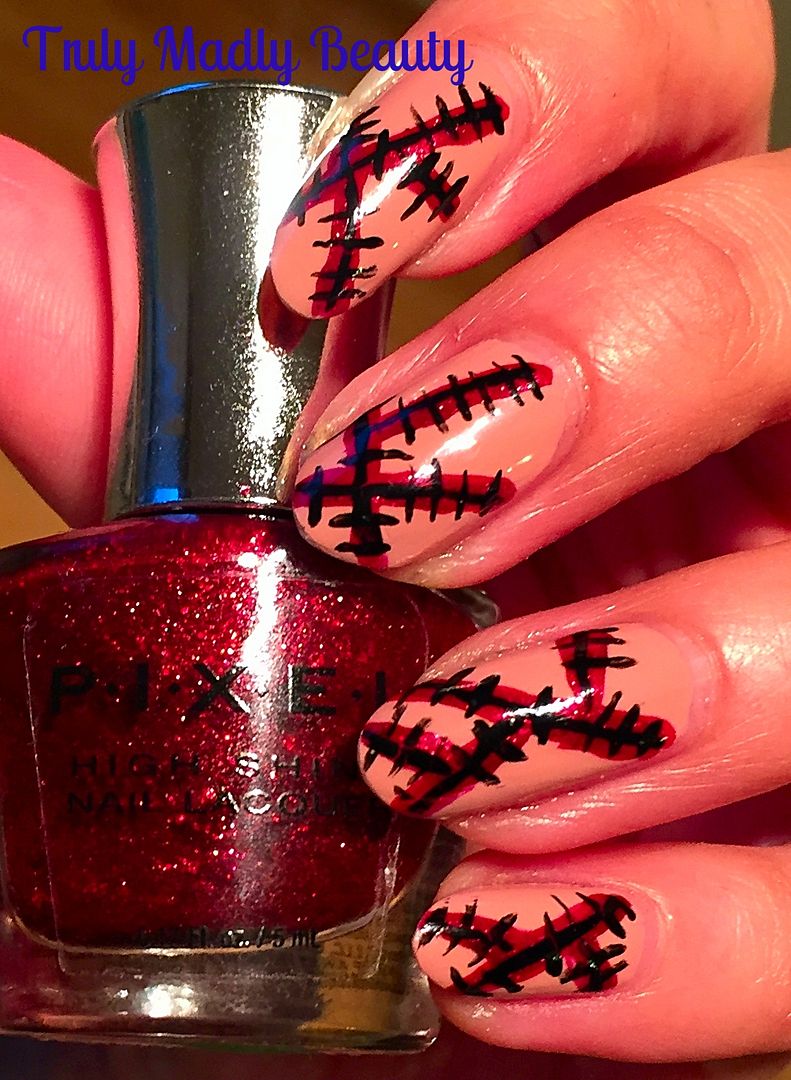
It
was at this point I couldn't resist adding a touch of glitter, for my
sparkle I just applied some of this pretty red glitter from PIXEL across the top of my red lines.
Now
to create the stitches, grabbing a finer brush & some black
polish, apply a thin black line along the middle of your cuts. Then,
still using the brush & polish, apply your row of little black stitches all the way along your cuts, as many as you can fit on.
And
that is it! Finish with your obligatory topcoat for that super glossy
finish, or you can even mattify if you wish for a more natural skin
look...actually now that I think about it this would've looked really
interesting with the skin matte & the blood/cuts glossy...hmm
next time! Thanks as always for reading witches!
Lotsa
love to ya
10.19.2016
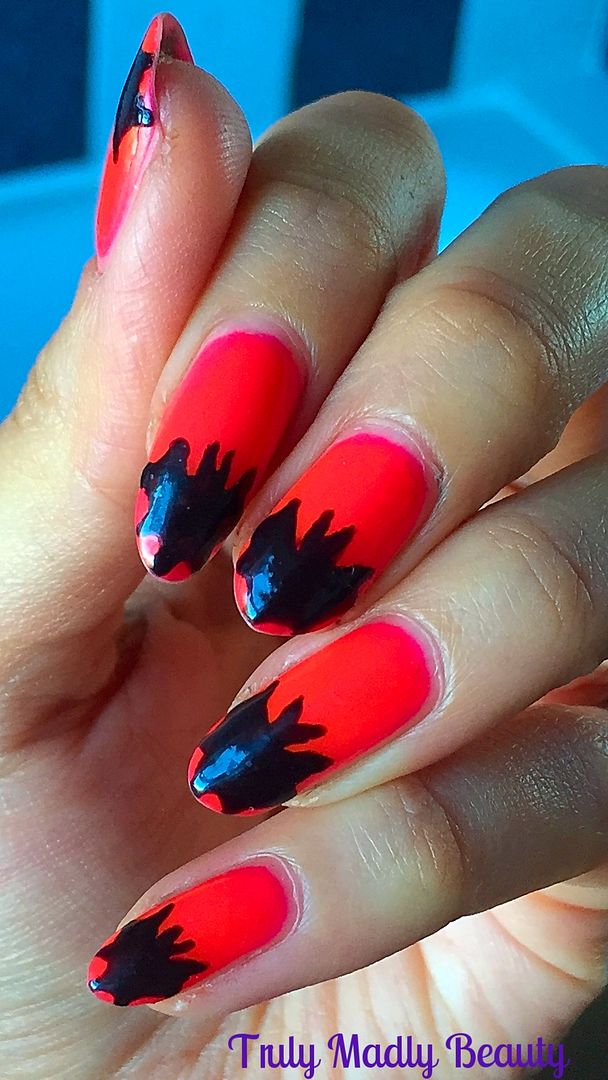
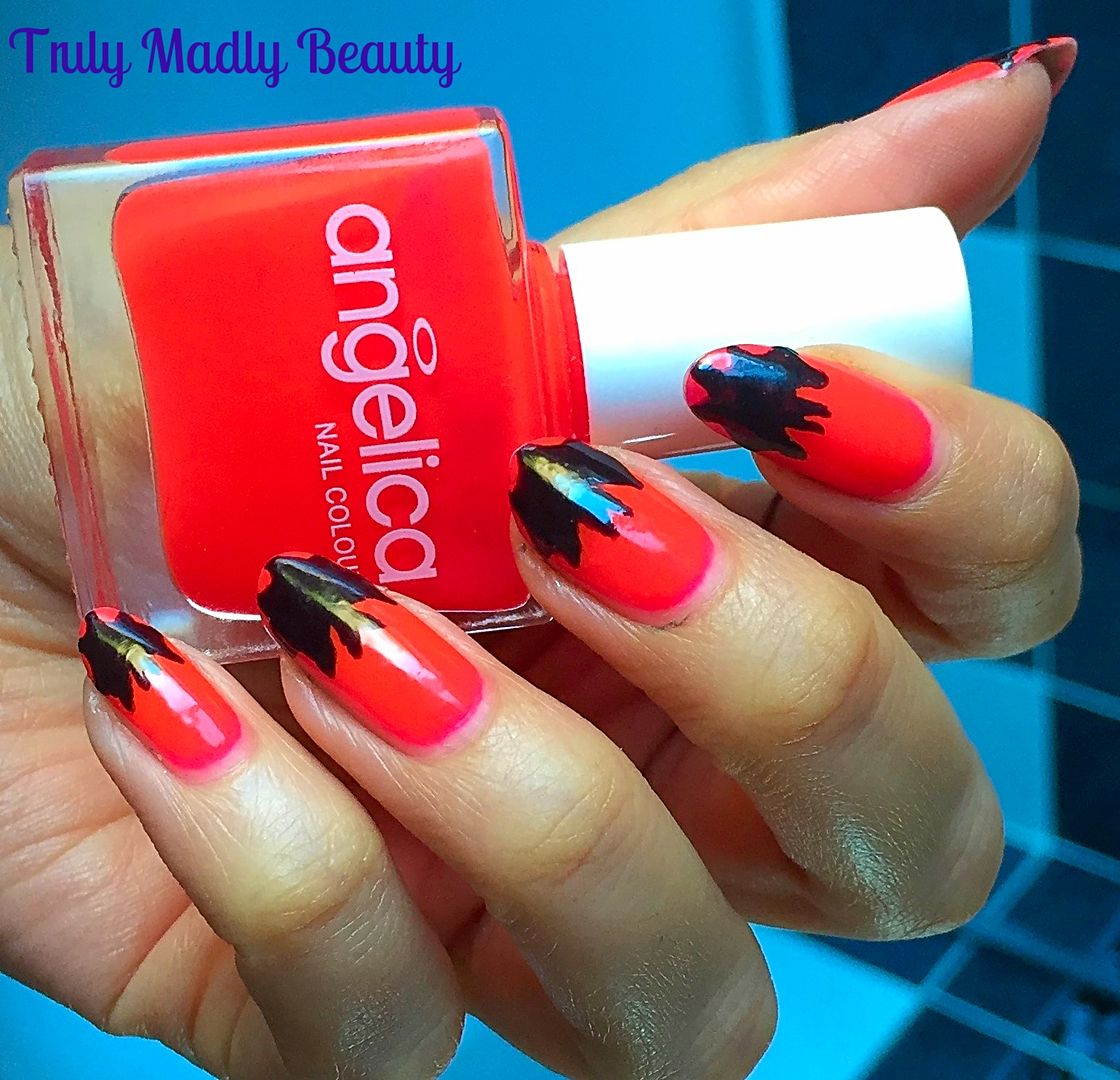
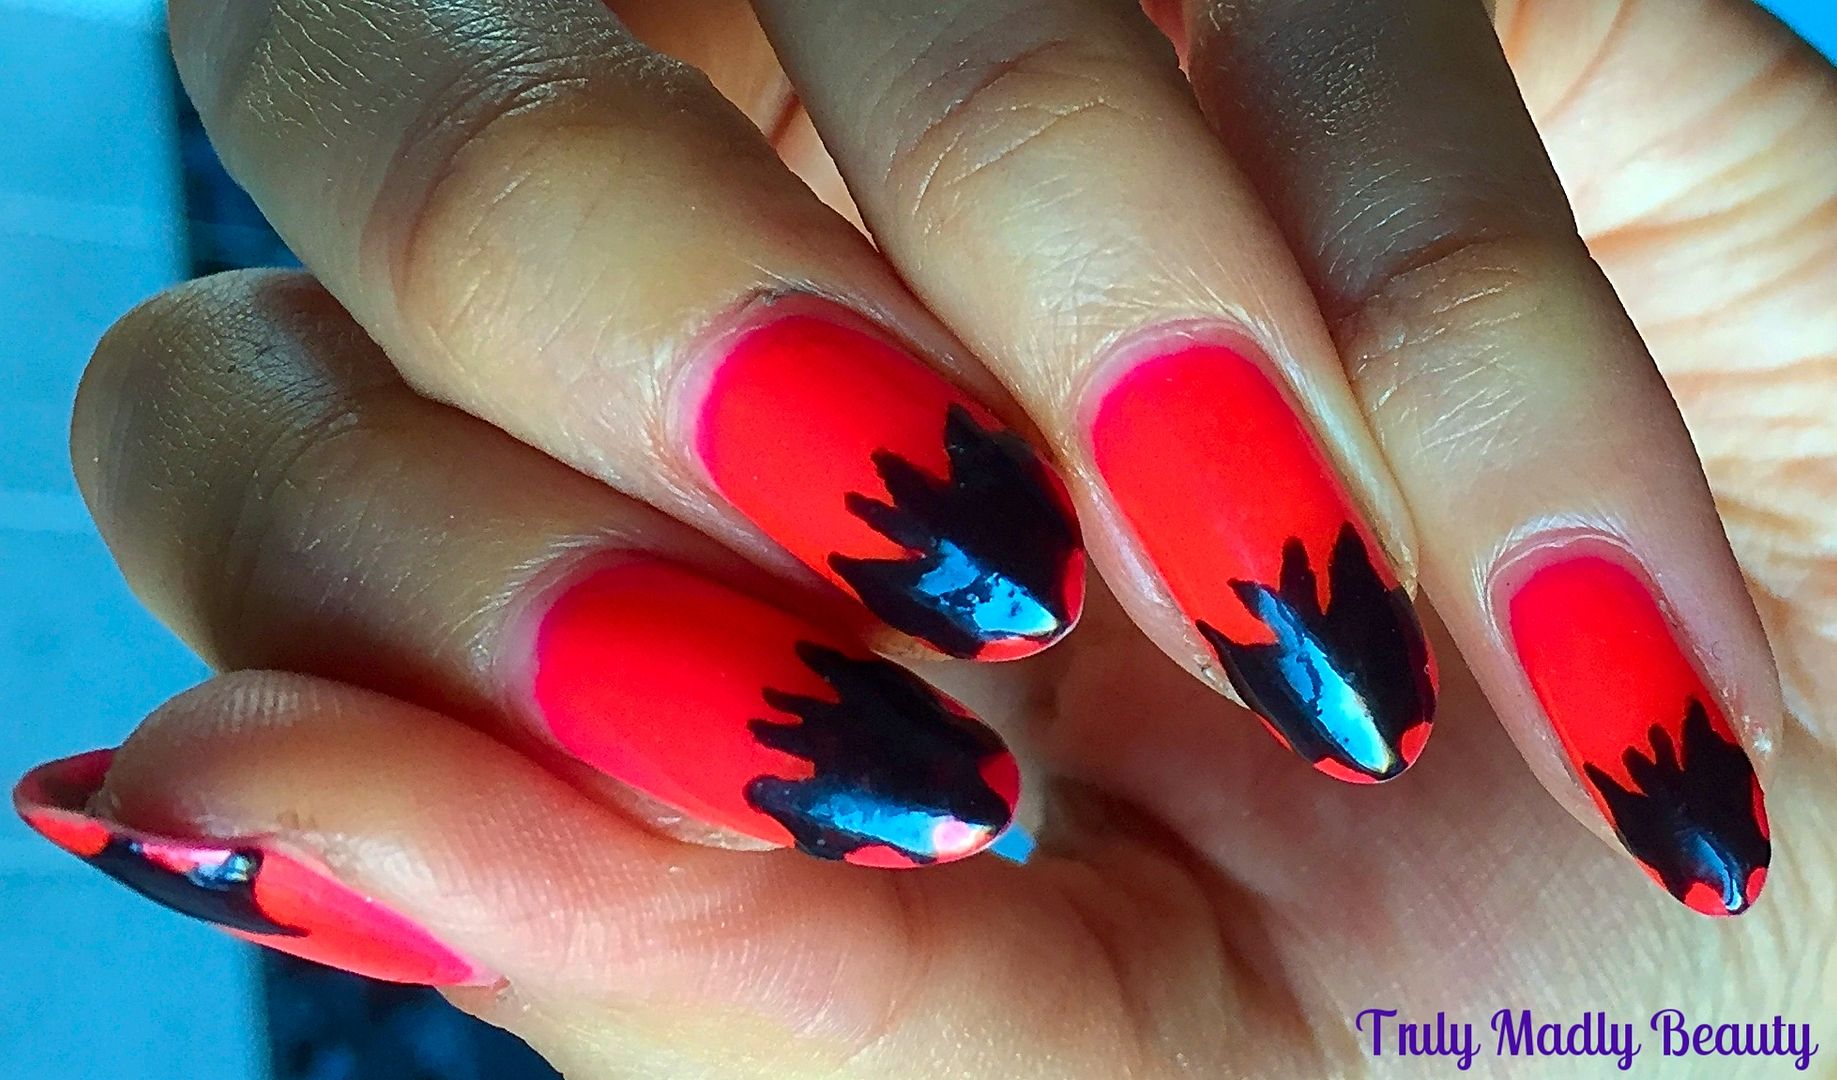
Halloween NOTD - Bat Tips!
Hello
lovely readers!
Halloween
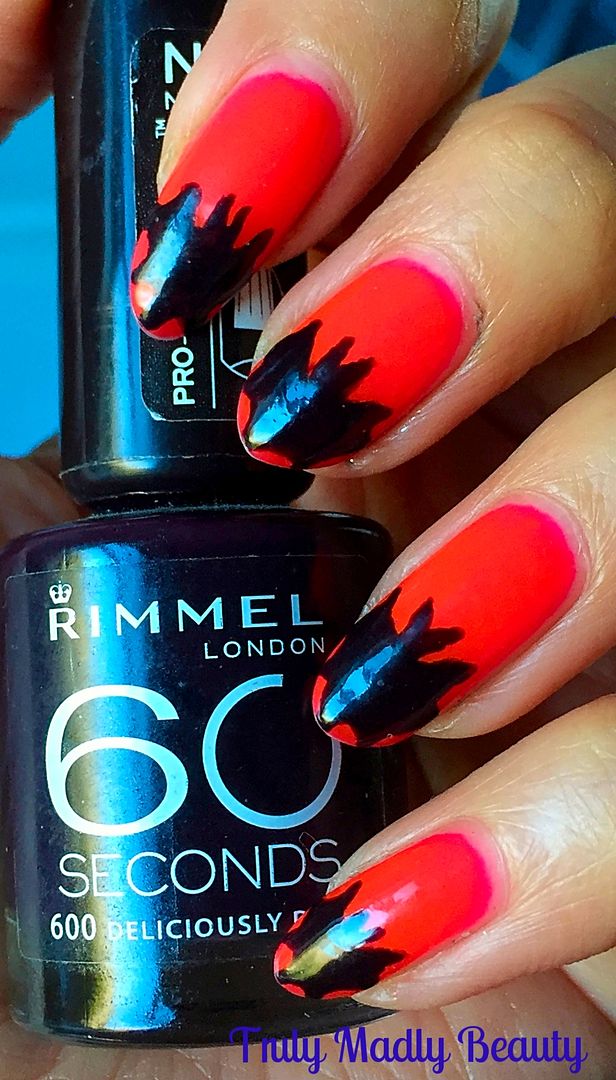
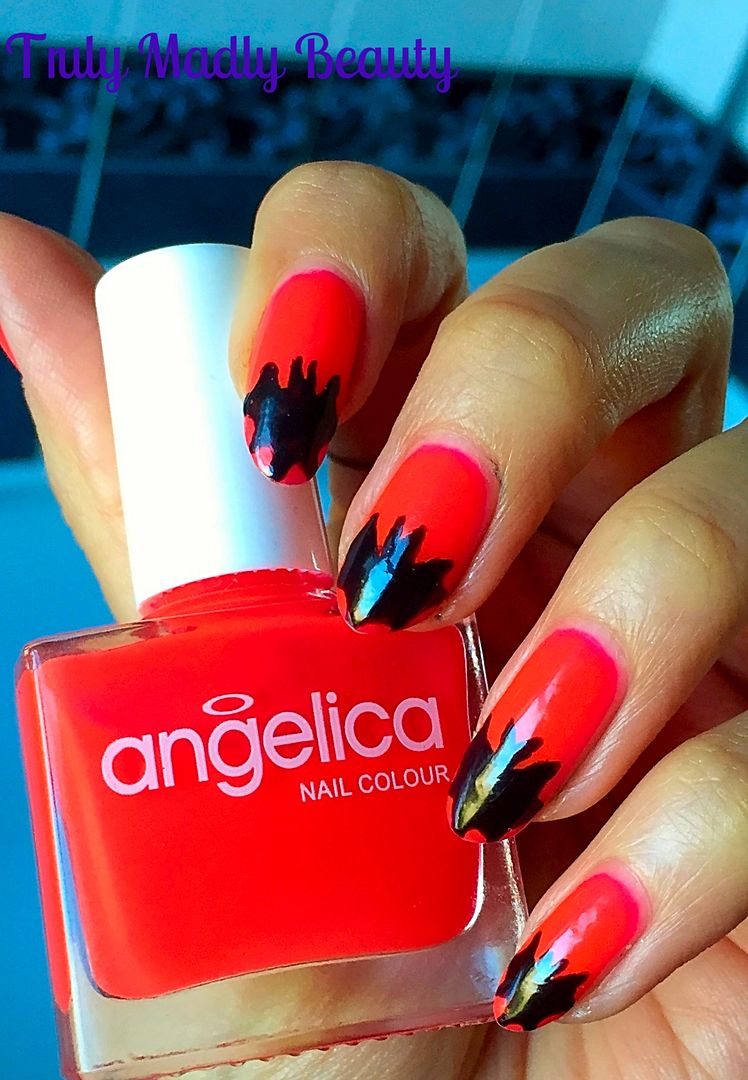
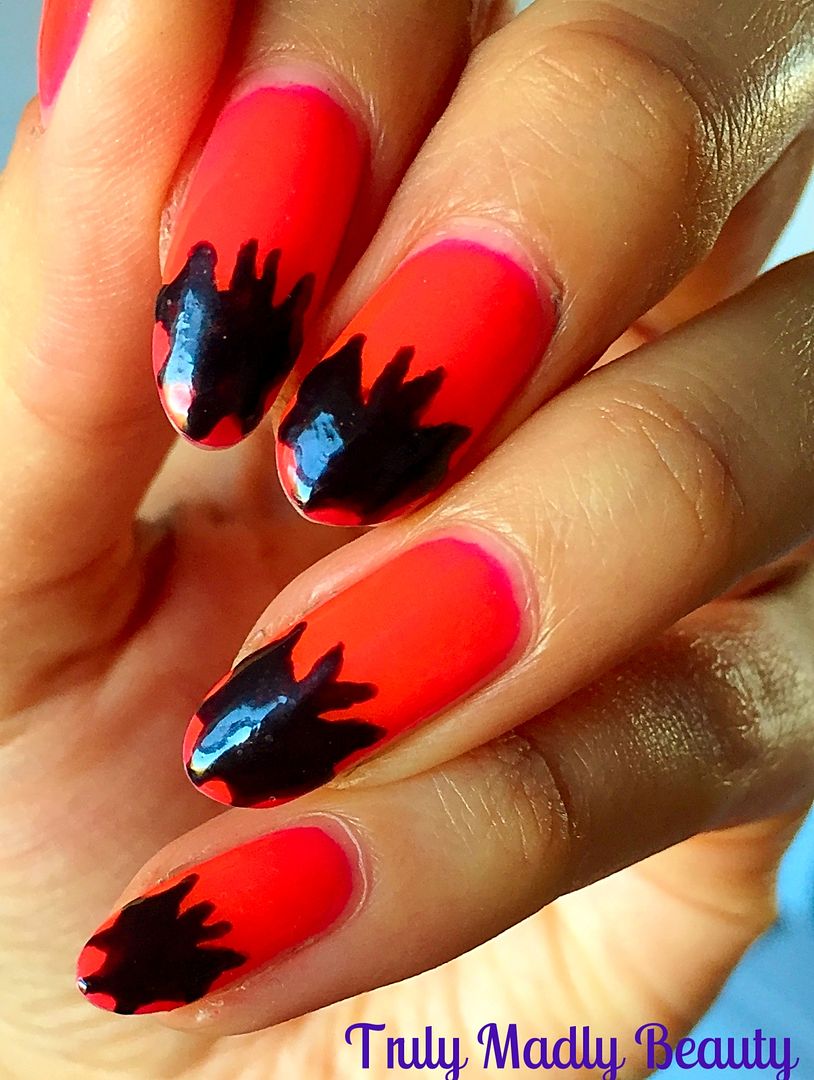
nail design number two for you today witches! A little spooky twist on
a French mani, instead of white tips...Black Bat Tips! With a bit of
psychedelic neon action too...why not?
For
my base colour I've used Angelica Hip Hop, a gorgeously vibrant neon
orange/pink jelly which I picked up from Primarni yonks ago. Not
entirely sure they still stock as I've not seen them since Primark
expanded their own cosmetics range? But you can still find them
online
I
wanted my bats to stand out but you can of course use any base colour
you like, yellow would've been awesome actually to achieve a cool
Batman vibe to the look...but of course me being me I only realised
this after...*face palm* O_O
After
applying two lovely coats of Hip Hop I waited a few minutes for it to
dry before grabbing my Nailbees nail art brush, my new favourite
brush to use & free handed my bats using a dark purple Rimmel
polish Deliciously Dark...definitely apt for Halloween.
I
drew these from scratch using an image I had in my head but there's a
few different quick hacks/techniques you can use to create bats, its
honestly not as hard as it may seem!
One
way is to apply a thick black curved line along the tip just like you
would for a normal French mani, then grabbing your base colour, apply
4 semicircles along the edge on top of the black to give the
appearance of the bottom of the bat wings. then just add two pointed
triangles in the centre of your curve for the head & hey presto!
Finish
it all with obligatory topcoat & your bat nails are good to go!
I've just finished my next Halloween mani for you guys & I think
this is my favourite so far, can't wait to share with you! Until then
witches you can find all the Halloween mani inspo from my previous
designs HERE!
Lotsa
love to ya!
10.11.2016
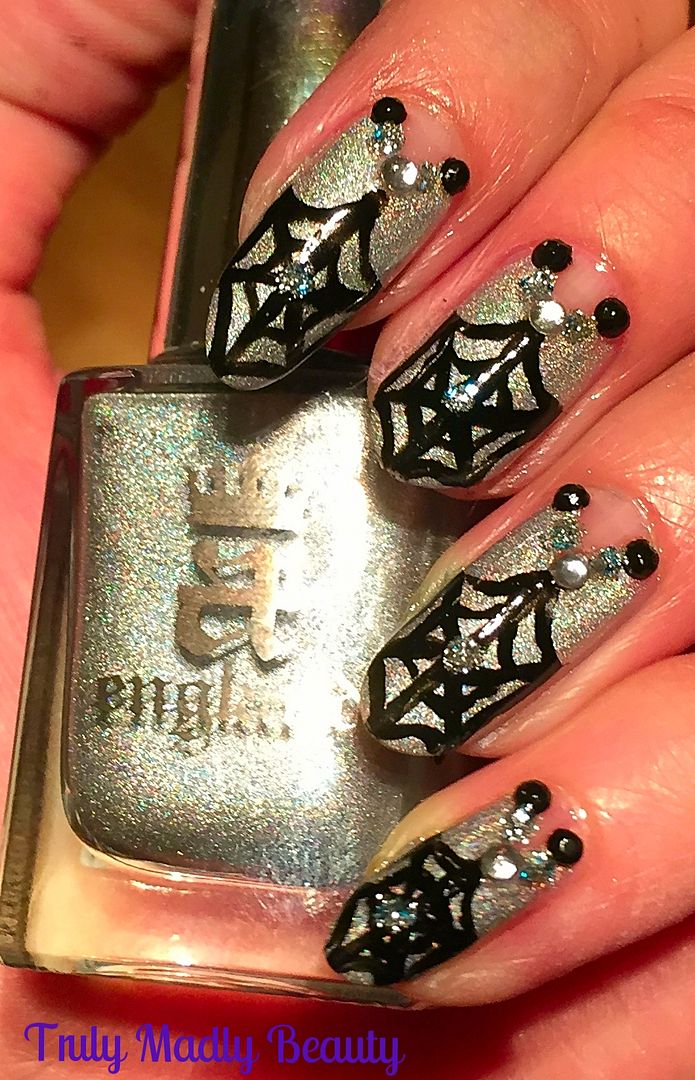
Halloween NOTD - Holo Cobwebs!
Hello
lovely readers!
So
the time hath come to start getting spooky on the nails my dears! My
goth side is so satisfied this time of year but then with me its all
365 days not just October with its main event of Halloween, I'm dark
souled pretty much all year round ;) But tis now especially my
oddness can come out in full force haha!
So
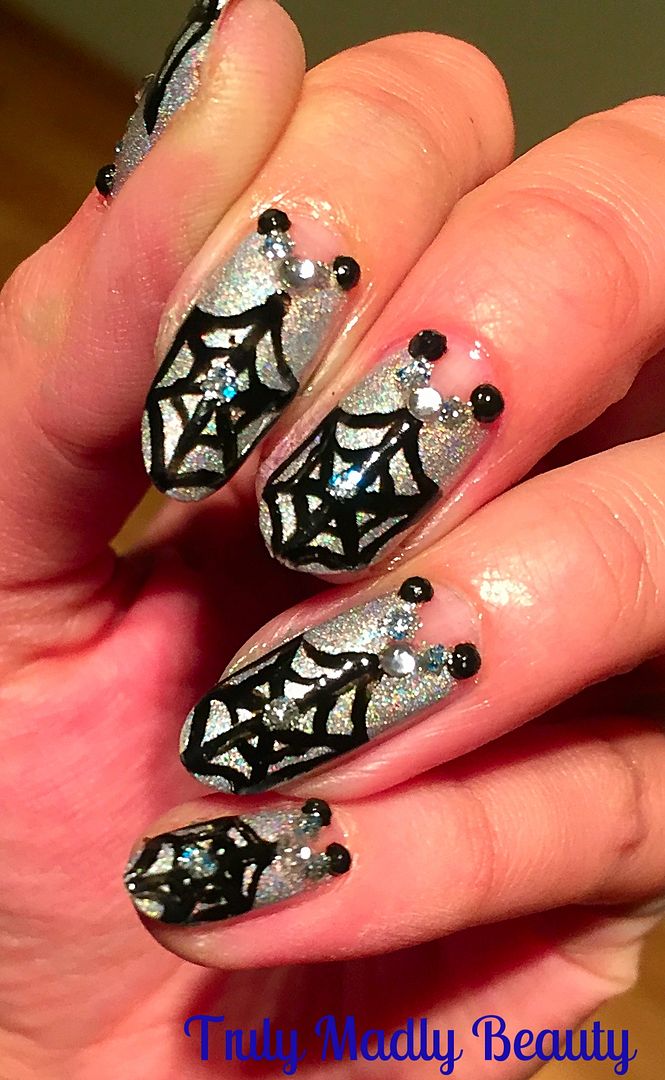
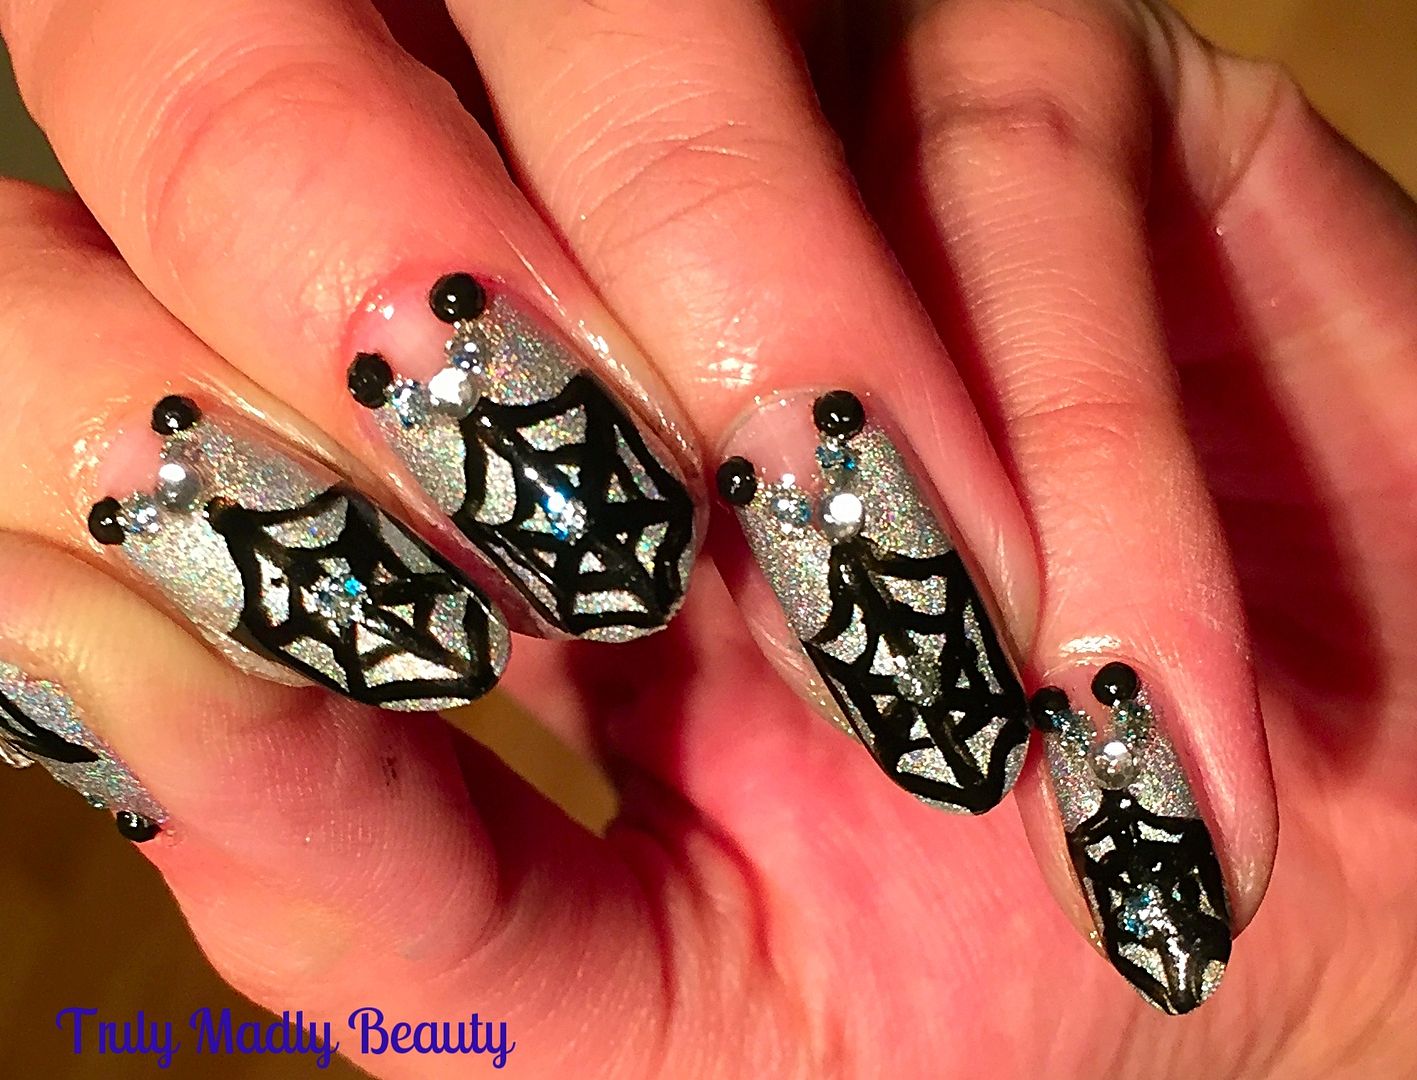
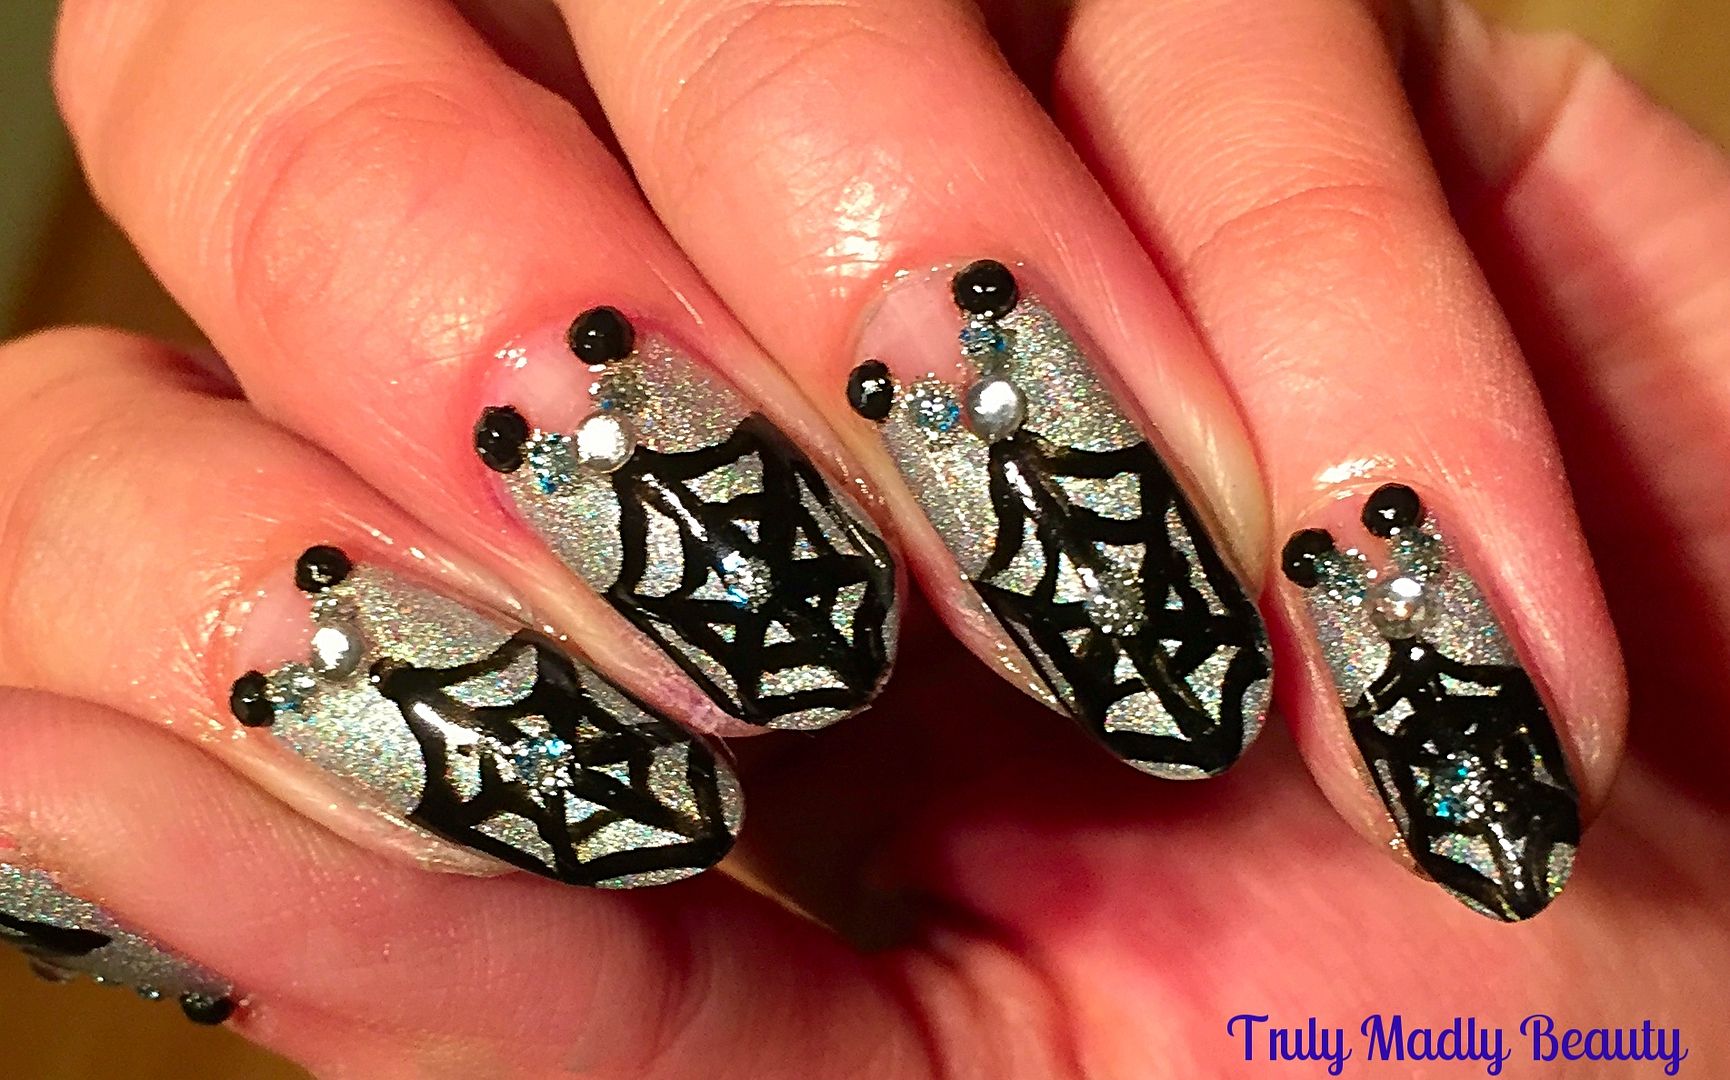
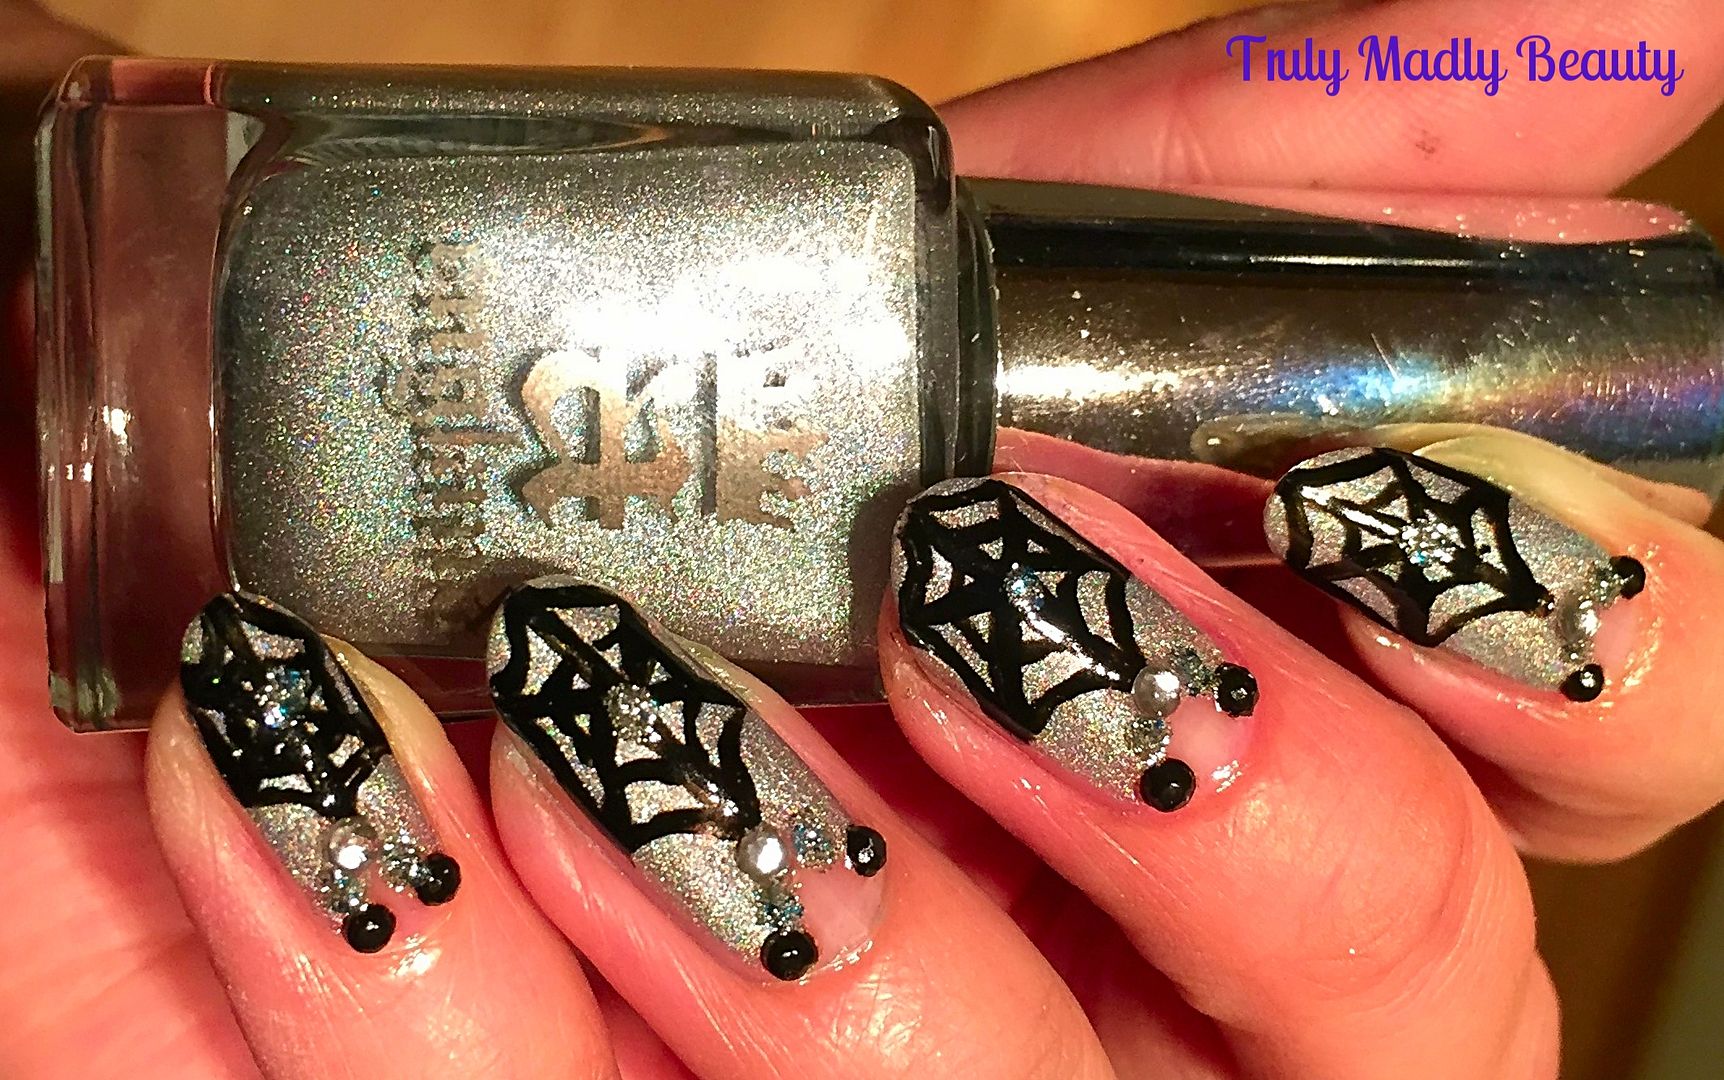
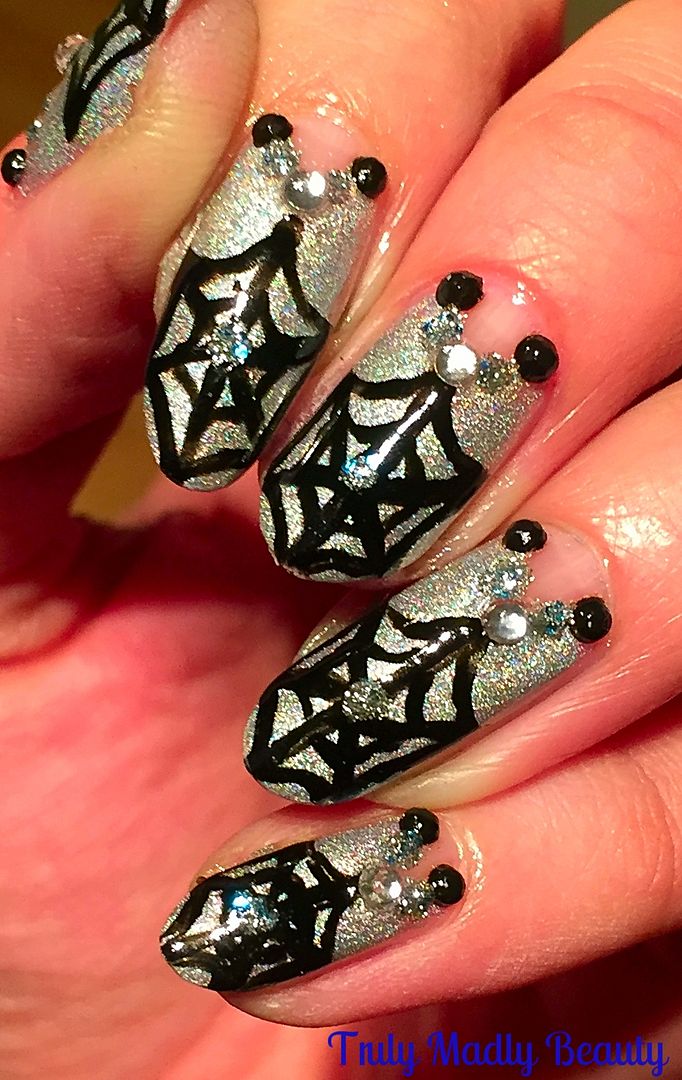
for my first Halloween mani I've decided to go for some creepy
cobwebs which I've glammed up with silver holo because life is always
brighter when there's holo dolls. Halloween doesn't always have to be
dark & spooky, though I totally dig that too
Please
excuse the quality of the pics beauts, I've never been over the moon
with my photo skills in the first place but I've recently moved &
struggling to find which areas have the best lighting, so far the
kitchen is winning... O_O Not to mention that the winter months means
early darkness which, as you know my fellow bloggers out there, is
our worst nightmare!
Anyhoo
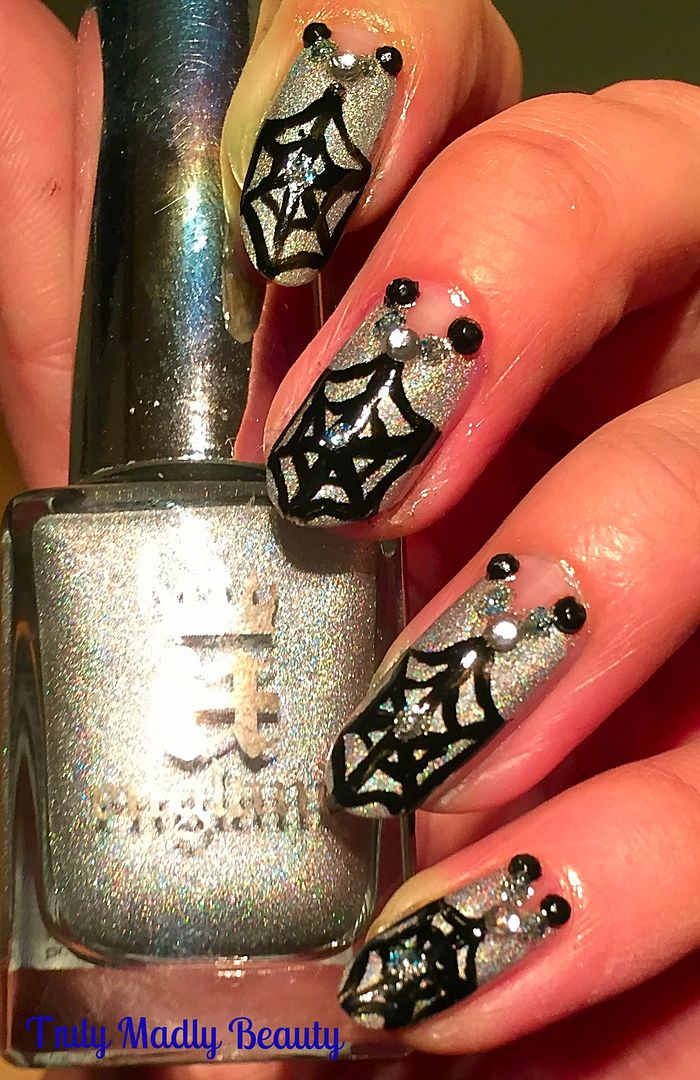
I digressed there with that mini rant, apologies. For my base polish
I've used the glorious A England shade Encore Margot. I ADORE the
lovely Adina's brand of polishes with their beautifully gothic &
medieval collections, I URGE you to check them out.
Encore
Margot is a dreamy blue toned silver holo which I've applied two
coats of on most of the nail, leaving a wee angled part by the
cuticle end bare...not sure why, just felt the mood for a bit of
random negative spaceage.
Once
dry I then grabbed my nail art brushes including my new Nailbees
brush which is so fine & perfect for details! The lovely Minnie also sent me a Freddo chocolate with my
order along with a cute little note, such a sweetie!
Using
some black polish I proceeded to add on my cobwebs. To create the
design begin by drawing two diagonal lines to create a cross on to
the nail before adding a horizontal line down the middle so that you
have the 6 triangle sections of your cobweb
Then
using the Nailbees brush & more black polish just add on the
final details of two small curved lines in between your triangles &
hey presto you have your cobwebs!
I
couldn't stop there so for some extra glam factor I applied one clear
& two black rhinestones on to the negative space as well as a
couple of dots of China Glaze Lorelai's Tiara which is one of my favourite
sparkly glitters with its silver & ice blue tones.
I
also added on a final dot of glitter on to the centre of my cobwebs
before coating it all with obligatory topcoat to seal.
And
thats Halloween mani number 1 for this year done! You can have a peek at all of my Halloween mani's HERE. Racking my brains
now on what to rustle up next...until then beauts! Thanks for
reading!
Lotsa
love to ya!
Labels:
A England,
China Glaze,
Glitter,
gothic,
halloween,
holographic,
nail art,
NOTD,
Rhinestone,
Silver,
Sparkle
10.28.2015
Halloween Nails - Skeleton Rib cages!
Hello
there my lovely readers!
Squeezing in one last Halloween manicure to complete the
series for this year! I hope you've enjoyed the Toxic Slime &Tombstones, Dripping Blood Tips, Jack O Lantern Pumpkins &
Cartoon Stitched Hearts to help inspire you to get ghoulish on your
talons! If you're looking for some gorgeously Gothic jewellery to rock
this Halloween with those nails as well then do check out my previous
post featuring The Rogue & Wolf. For my final Halloween mani I went for some skeleton rib cages with jewelled hearts.
To
start you need a black base, here I've used two coats of the Orly
Gothic again that HQ Hair kindly sent me recently & which I used
in my Jack O Lantern nails. With the name & shade such as it is
its just the perfect Halloween polish!
Then
to create your rib cages you need white polish & a thin brush.
I've used this fantastic KIKO french manicure polish, I've dug this
out so many times for nail art as it comes with a tiny brush, great
for detail! You can use a nail art pen as well.
To
start creating the rib cage first draw on a screw like shape in the
centre for the spinal cord...Then add on the hip bones by drawing two curved side V like shapes from the bottom of the spine...
Starting
small, draw on the pelvis bones (I think?) by applying curved lines
from the bottom of the spine right to the tips of the nails
Then
finally for the ribcage, draw on your curved lines either side of the
spine. I hope that all made sense! Whilst drawing these I totally had
that bones connecting song that we were all taught in school in my
head...which clearly was wasted on me... O_o
For
a final touch I couldn't resist sticking on a red heart rhinestone on
to each rib cage before sealing with topcoat!
Thanks
as always for reading dolls! Have you gone ghoulish on your nails this year?
Lotsa love to ya!
Subscribe to:
Posts (Atom)