Showing posts with label Green. Show all posts

10.04.2018

UK Based "Coloured Contacts" Lens Review

Hey there lovely readers!

Stepping away from nails today & talking about another feature ;) As you may know I'm rather fond of changing up my eye colour every now & again with the help of good old contacts. As happy as I am with my baby browns, I also love how simply switching up your eye colour can automatically alter your look & enhance your eyes.

Being the avid wearer I am, I've blogged about a few lenses already, you can catch all my reviews HERE. Over the years I've experimented with different types, styles & shades, in particular having a certain fondness for the kawaii style Korean lenses that REALLY enhance the irises. However of late I find myself being drawn to more natural effect lenses. Both Klenspop & TTDEYE are favourite brands of mine whom I've purchased lenses from time & again.


8.07.2018

A England "A Symphony In Green and Gold" and "Peaseblossom A Fairy" Polishes

Today I wanted to share two beautiful new additions to my polish collection from one of my all time favourite brands...A-England

A-England is an indie polish creation by the lovely Adina & the collections within her range seek inspiration from English history & myths...thus appealing to my aesthetic completely. Not only are the polishes themselves stunning with faultless formulas but the stories behind the collections are equally intriguing & magical. Collections such as "Tudoresque", which is dedicated to King Henry VIII & his 6 wives. "The Legend", which touches on the story of St George & the dragon and "To Emily Bronte", a collection inspired by the gothic novel Wuthering Heights...these are just a few of the magical collections...can you see why I am besotted?


5.29.2018

NOTD - Infinity Stone Nails!

Hey there lovely readers!

So I, like much of the world of late went to see the greatly anticipated Avengers Infinity War, & boy did it leave a mark & then some! I am a huge fan of this incredible universe which I'm sure comes as no surprise. Having said that I DID have to do a bit of catching up with a Marvel marathon or two before going to see this instalment (don't judge me...there ARE a lot of films & I kinda lost track!) & I definitely advise you do as well to avoid any gaps in the story! 


4.23.2018

NOTD - Earth Day Nails

Hello there my lovely readers!

Aaaah I am SO happy with how this finished design came out, so much so that it actually may be my most favourite nail art look of the month! Hurrah for nail art wins. I've had so many fails of late I was beginning to despair...


3.12.2018

NOTD - Aquamarine Semi Precious Stone Nails

Hi there lovely readers!

Often, when I am uncertain of what shade of polish to pick for my next manicure, because you know, there simply AREN'T enough colours in the world, I sometimes grab a couple of polishes & throwing caution to the winds, have a play around to see if I can make my own custom shade to suit my mood!

Sometimes, when the nail gods are on your side & you mix two shades together, a magical thing occurs & you find yourself with a stunning new shade which is why I really love doing this! Don't get me wrong though...there have been times when this method has been majorly UNSUCCESSFUL. 


2.26.2018

Disney Nail Art Series - The Little Mermaid!

Hello there lovely readers!

Ooooh I'm excited to share with you the latest addition to my Disney Nail Art Series as, closely following The Beauty and The Beast, this is definitely up there as one of my favourite Disney movies ever...it is of course...The Little Mermaid!


12.20.2017

NOTD - Zealous by For Your Nails Only

Hello there lovely readers!

Ooooh but do I have a beautiful polish to share with you today, I've actually used this in my next festive nail art design, but I wanted to share some swatches with you first of Zealous all by its onesie as I feel it deserves it on account of being just...so...darn...PURDY!

12.06.2017

Festive NOTD - Red, Green & Gold Smoky Ombre

Hello there lovely readers!

Tis the season to be jolly & thus one is finally getting up my first nail art for the season! 


8.31.2017

TTDEYE Polar Lights Yellow Green Contact Lens Review

Hello there lovely readers!

Along with my nails & afternoon tea reviews, I'm sure you're familiar by now of my fondness for switching up my eye colour & rocking a coloured contact lens on occasion. 

You can read all of my contact lens reviews HERE which predominantly feature the brand Klenspop, who in particular specialise in cute kawaii lenses that enhance the eyes beautifully.

As much as I adore these however, I wanted to try something a bit more different & natural looking so decided to have a browse in other places to see what I could find & stumbled across the brand TTD Eye on a friends Instagram account. The lens she wore looked so stunning yet really lovely & natural so inevitably I headed straight to the website to order me a pair which happened to be the Polar Lights Yellow Green Lens.

TTD Eye offer free worldwide shipping which is a bonus & these came to about $25 so around £20 as they were on sale at the time, double bonus! 

7.10.2017

Disney Nail Art Series - Maleficent

Hey there lovely readers!

So I felt it was about time to add another manicure into my Disney NailArt Series that I've started here on my blog. 

So far I've thrown together some Beauty and The Beast nails & a suitably fairy-tale perriwinkle blue Cinderella themed design as well. I thought the time had come to switch things up a tad & give one of the glorious villain diva's a turn in the nail art stakes. 

Alongside the Disney princesses there are also some utterly fabulous goddesses in Disney playing the role of villain whom you can't help but love & I look forward to experimenting & creating something fun for them too!


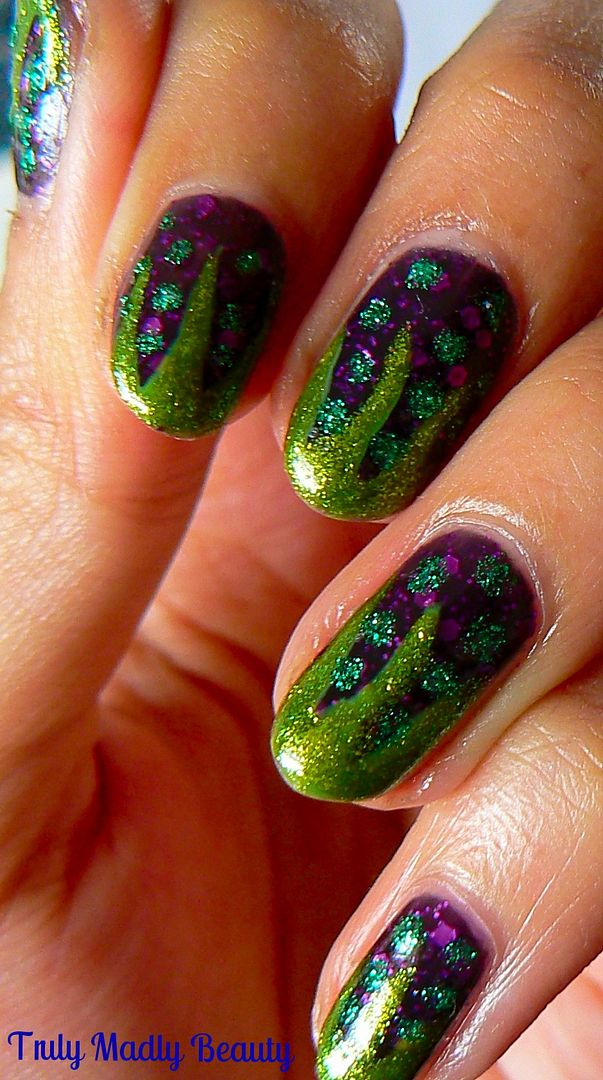
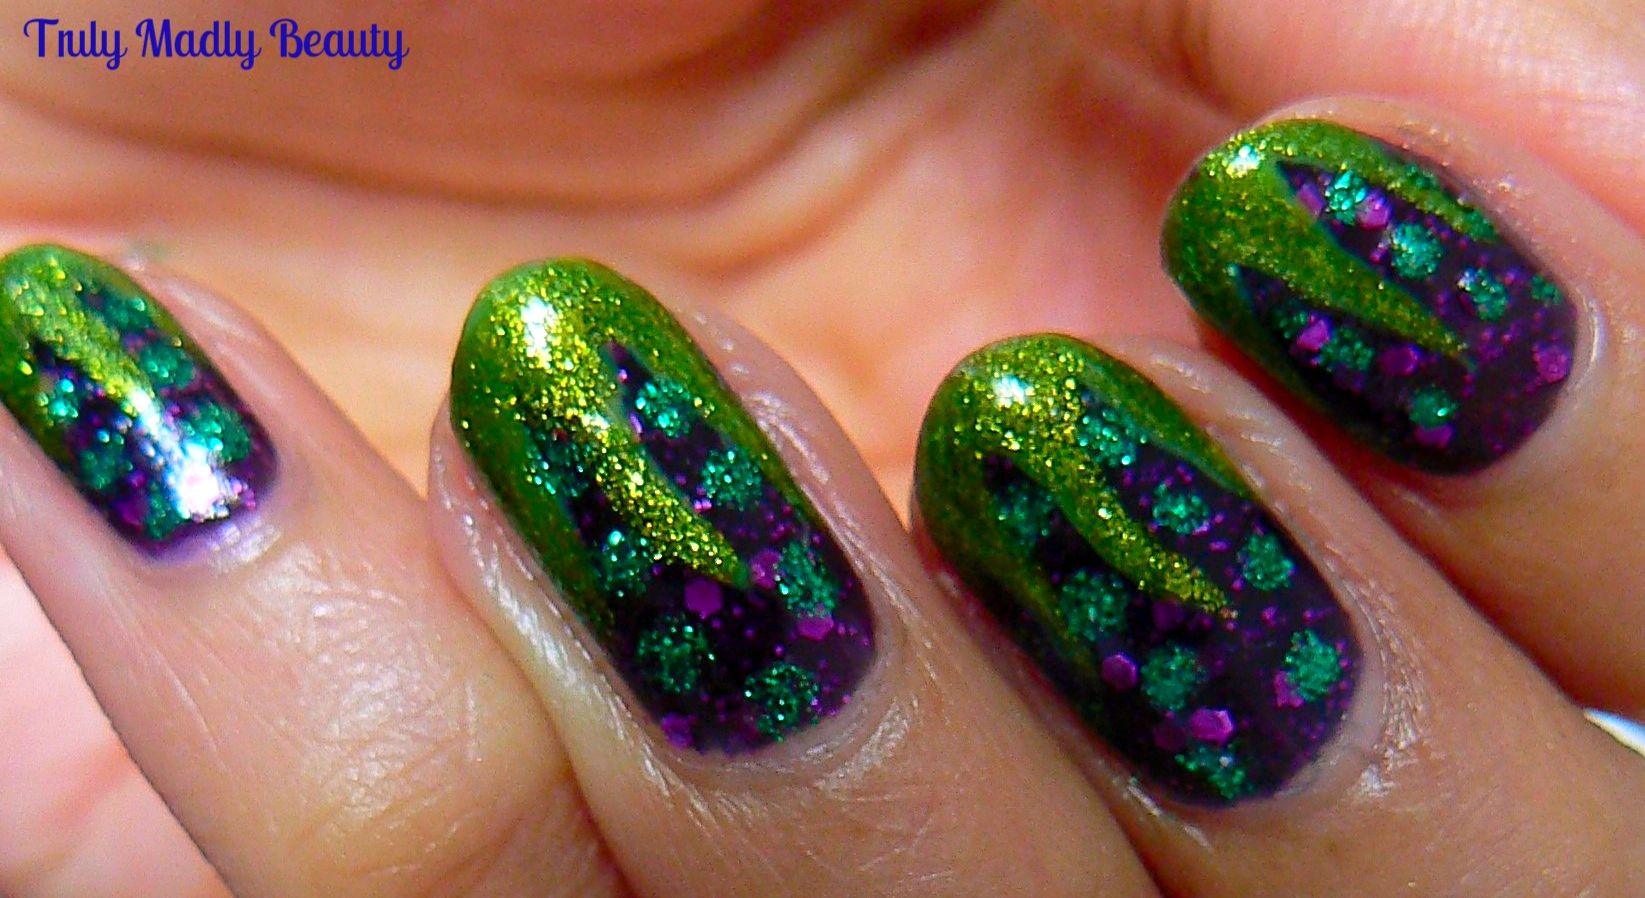
The first Disney villain I wanted to rustle up something for is one of my favourites Maleficent. Of course Sleeping Beauty is a vintage classic when it comes to Disney & a firm favourite of mine, but I also loved the live action adaptation retelling this intriguing villains story in a really wonderful way with Angelina Jolie in the lead role. 


12.14.2016

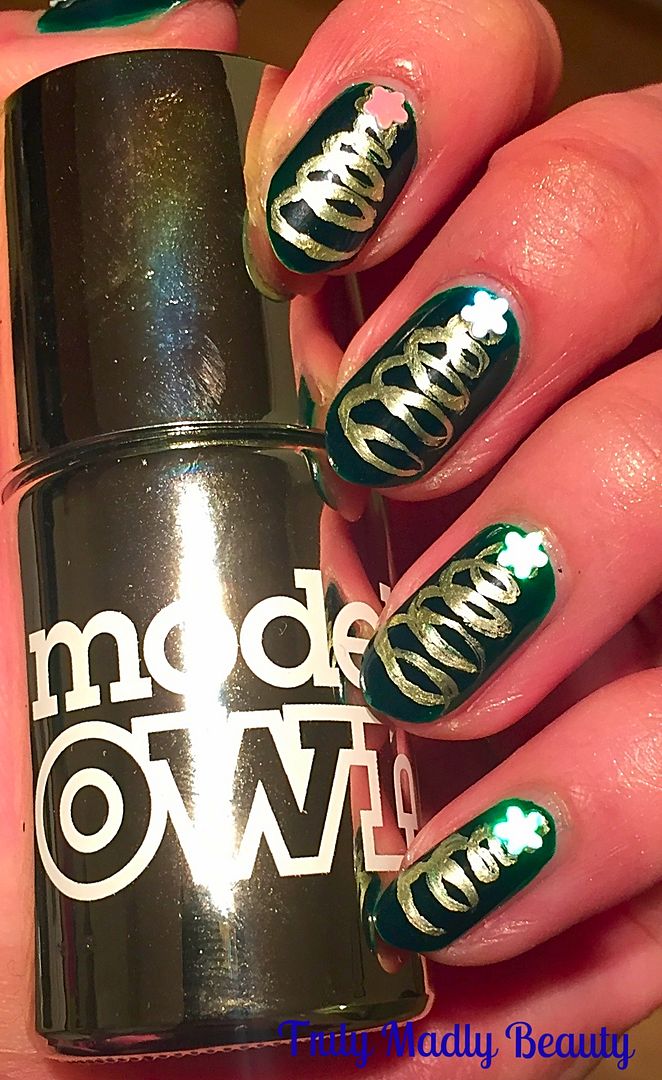
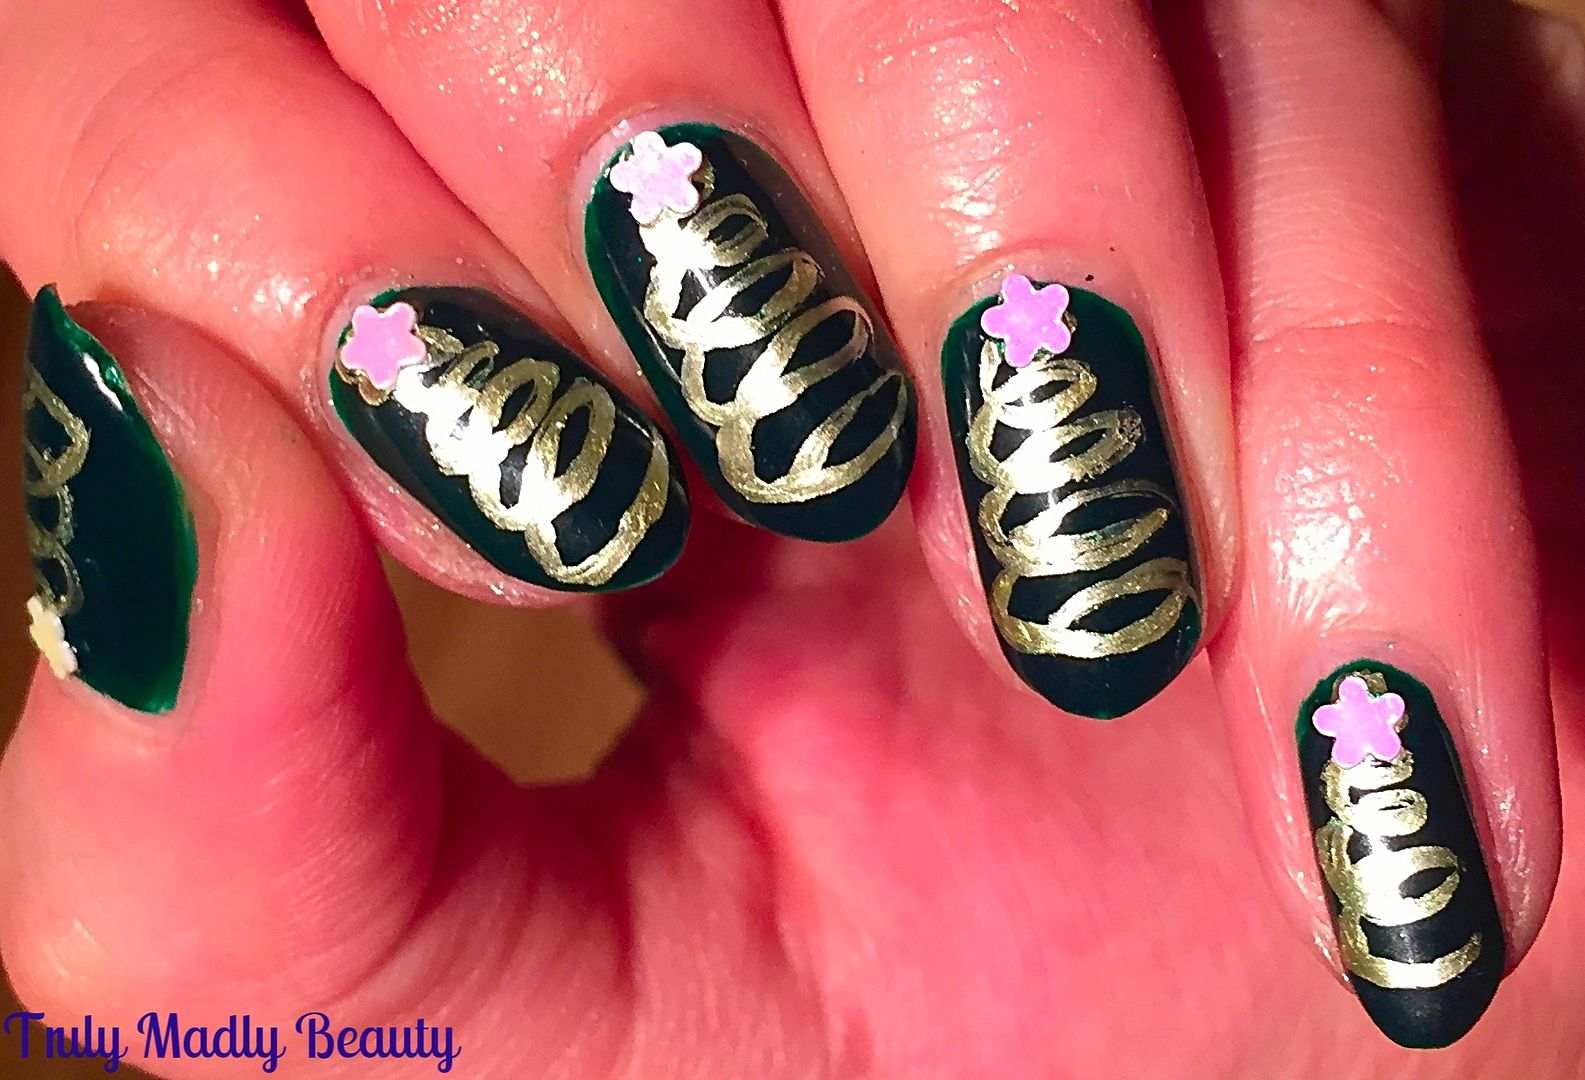
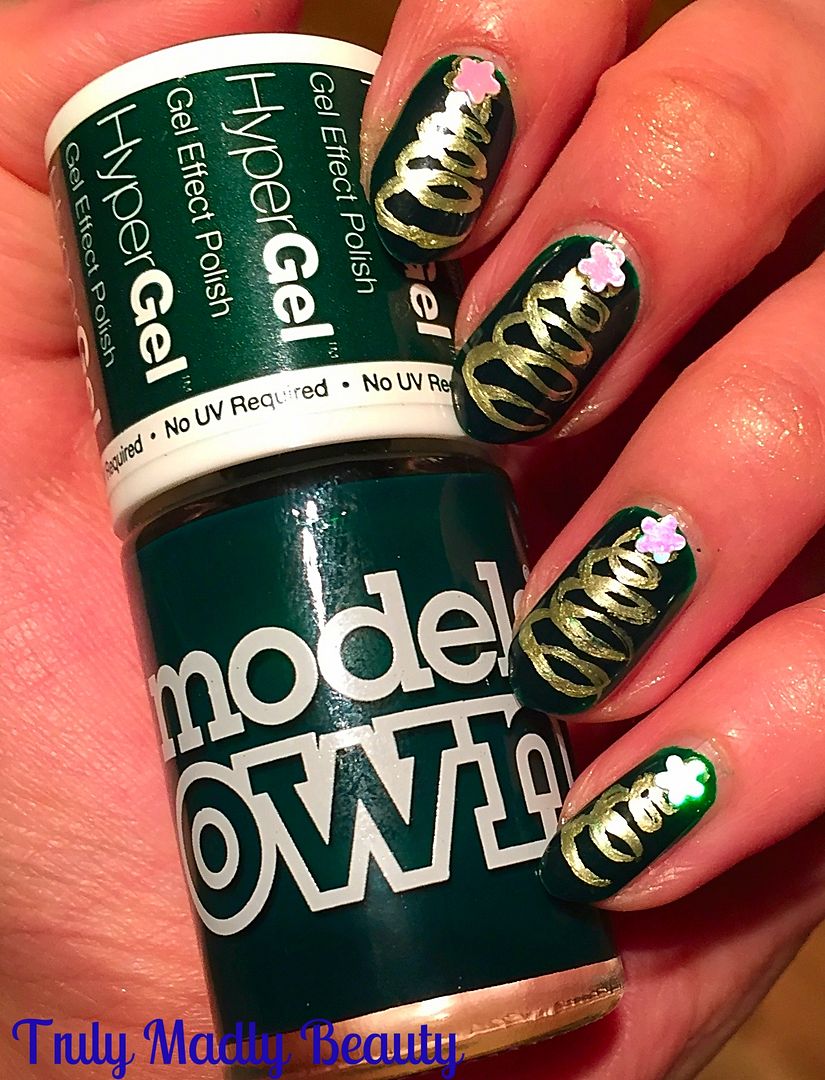
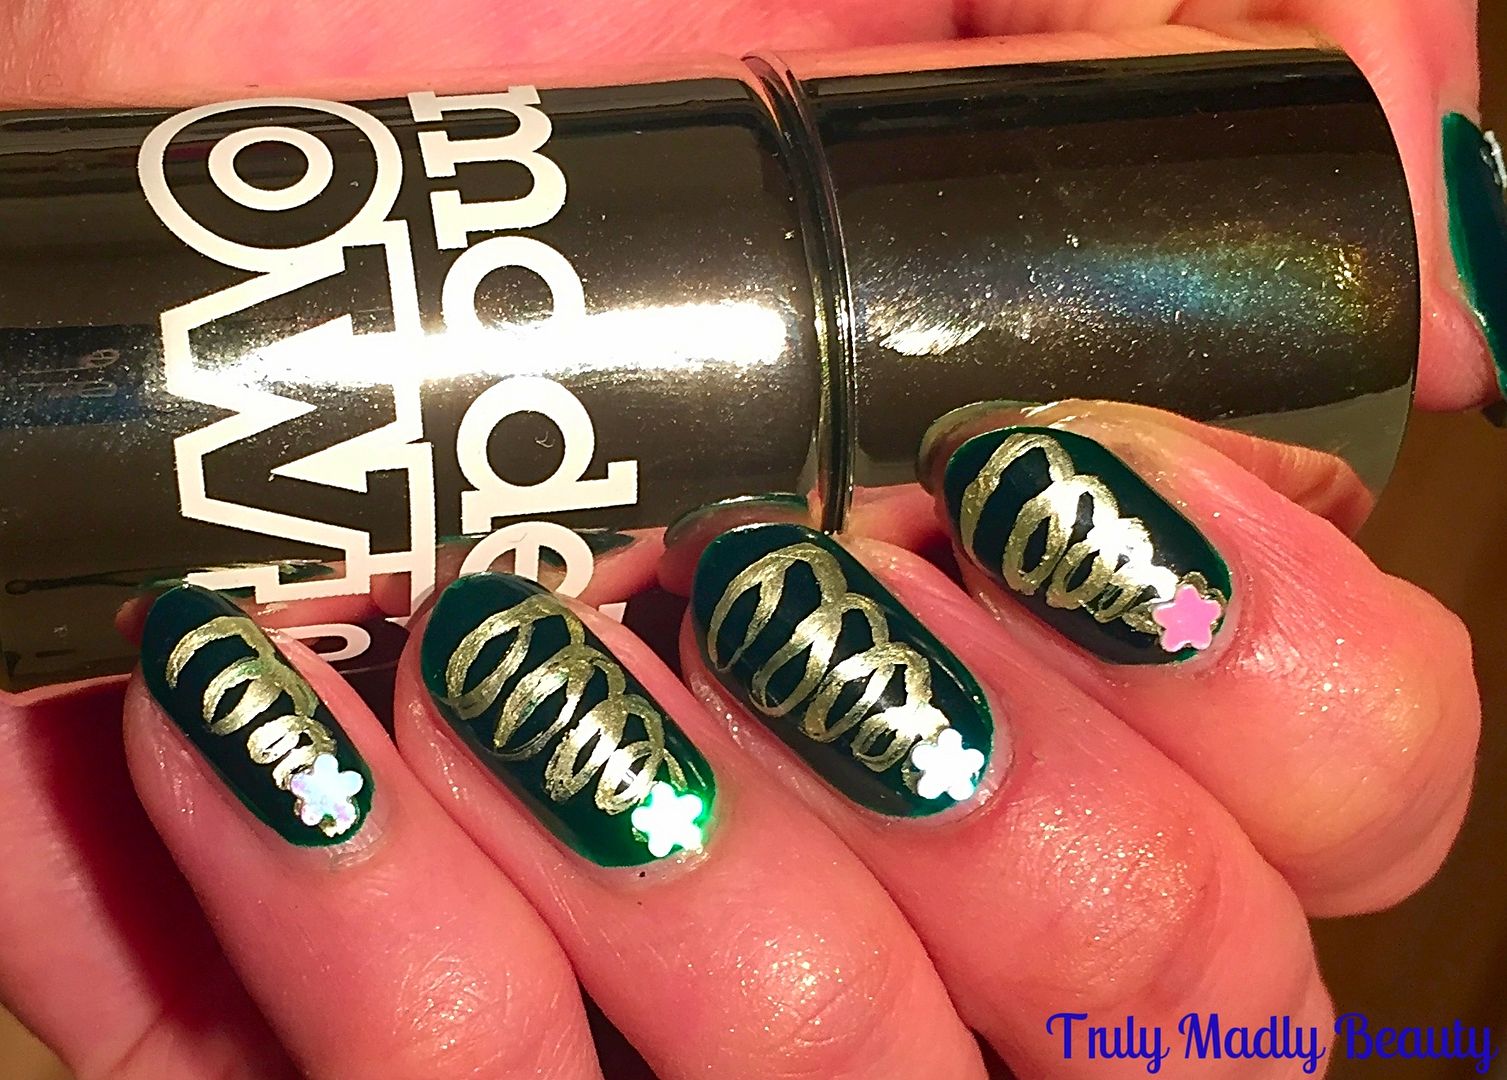
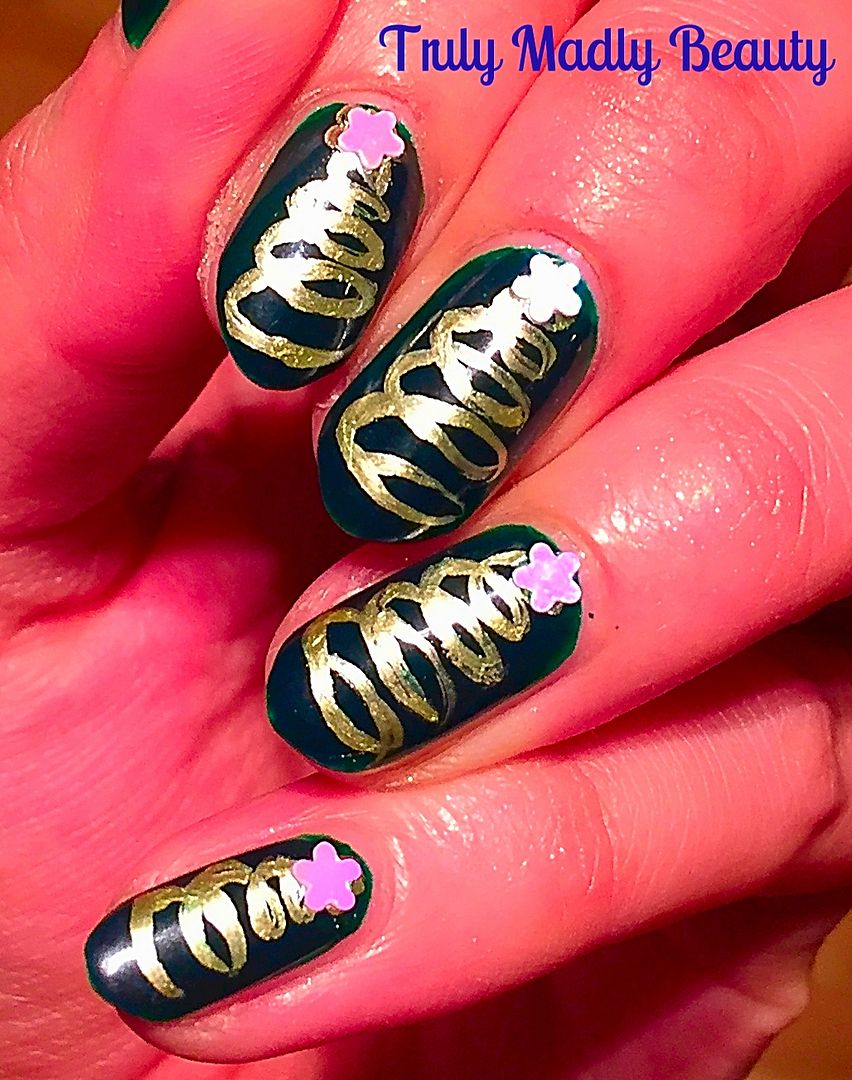
Festive NOTD - Swirly Chrome Christmas Trees!

Hello there my lovely readers!

Gosh can you believe that it'll be Xmas next week already?! How in the hoohaa did that happen? This month has had me all over the shop floor thus I haven't been able to get my nail art on as much as I would have liked for the festive season, bad nail blogger! But I can rectify that now as I finally managed to grab some free time to have a play! Better late than never eh?

Every year I like to rustle up some Christmas Tree nails, as they are my absolute favourite for the festive period, each time mixing up the design slightly. You can check out my previous Christmas Tree nail art designs HERE, HERE and HERE.


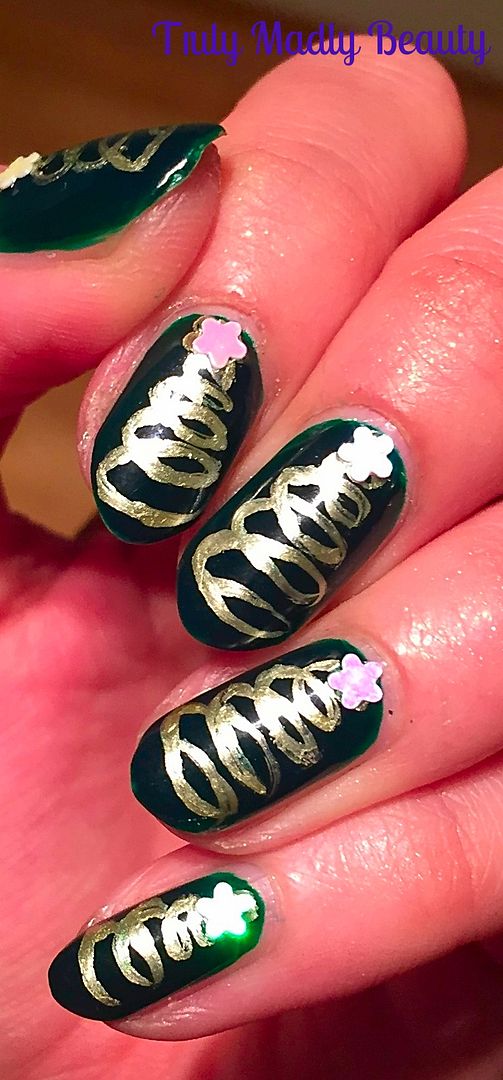
That's what I love about them, the fact that you can have fun playing around creating different styles and designs. This year I decided to go down a more arty route & created these golden swirl Christmas Trees.


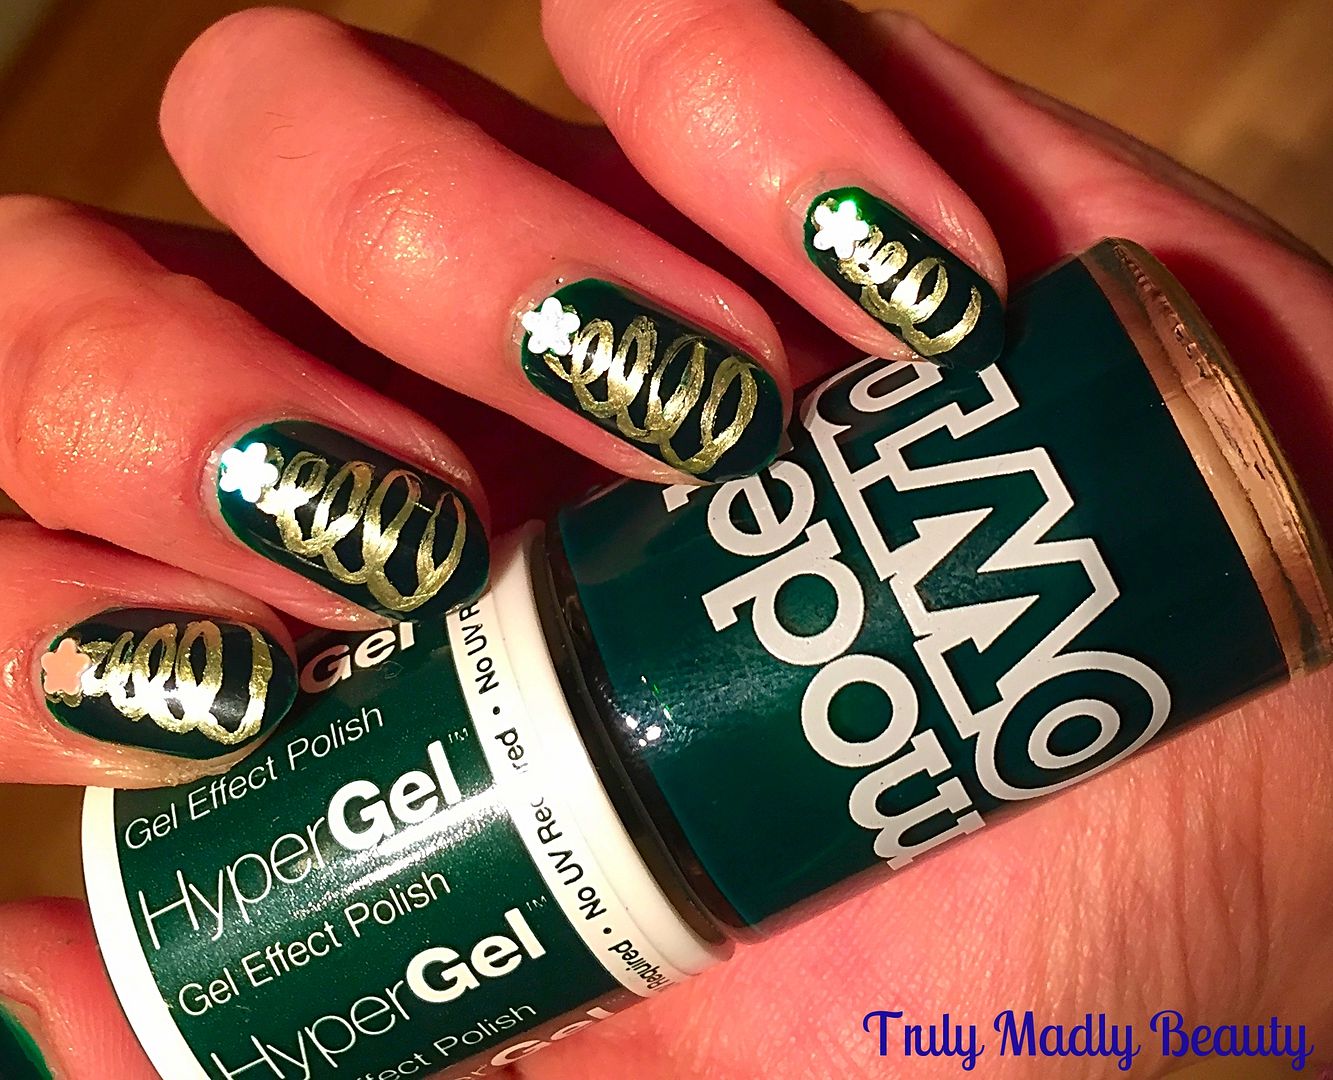
Instead of painting green trees I went for a lovely deep dark green for my base & Models Own HyperGel in Ebony Green was perfect for this.

This is two coats of the gorgeous green goodness, isn't it just divine? I'd forgotten how much I adore this Gothic green!


Then for my Xmas trees I found myself reaching for Models Own again, this time Chrome Olive from the Colour Chrome collection. I was originally going to use a gold polish but I'm so glad I changed my mind as the metallic formula really pops against the dark base!


To create the trees I grabbed my extra small Nailbees nail art brush & with the Chrome Olive polish, free handed the swirls, starting with a tiny swirl for the top of the tree, slowly making my way down the nail, gradually making the loops bigger as I went.


A little tip is to rest your elbow on a surface when doing this, this helps steady your hand a great deal, enabling you to create your swirls without a shaky hand!


Of course every tree needs a star, so to finish I simply added a little star shaped holographic sequin at the top of my trees. Finish with topcoat & you're done!


Thanks for reading my lovelies, keep posted as I hope to squeeze in a couple more designs this year. But do have a peek at some of previous designs HERE for some festive inspiration.


Lotsa love to ya!


7.08.2016

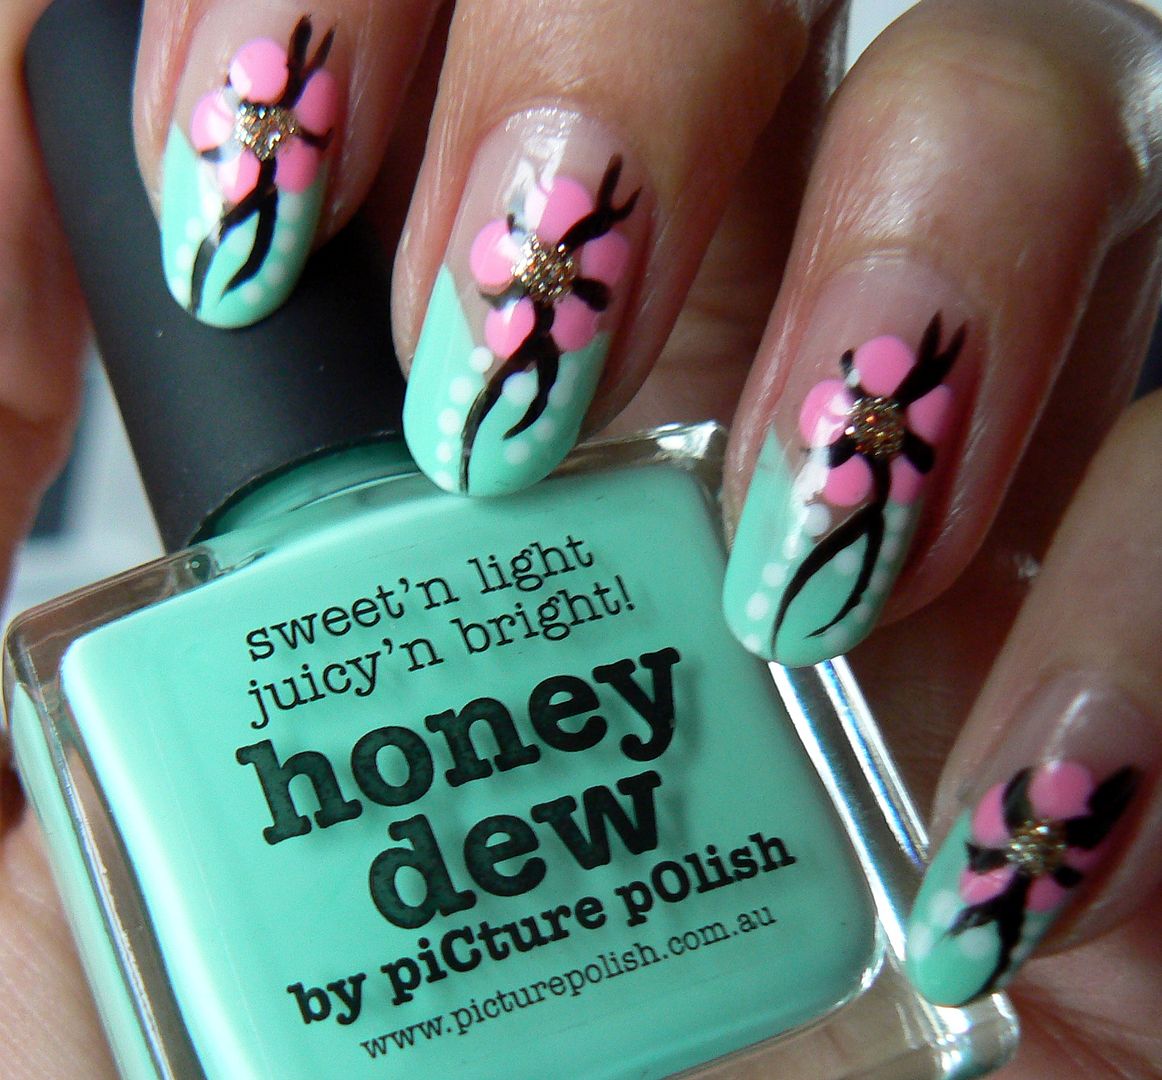
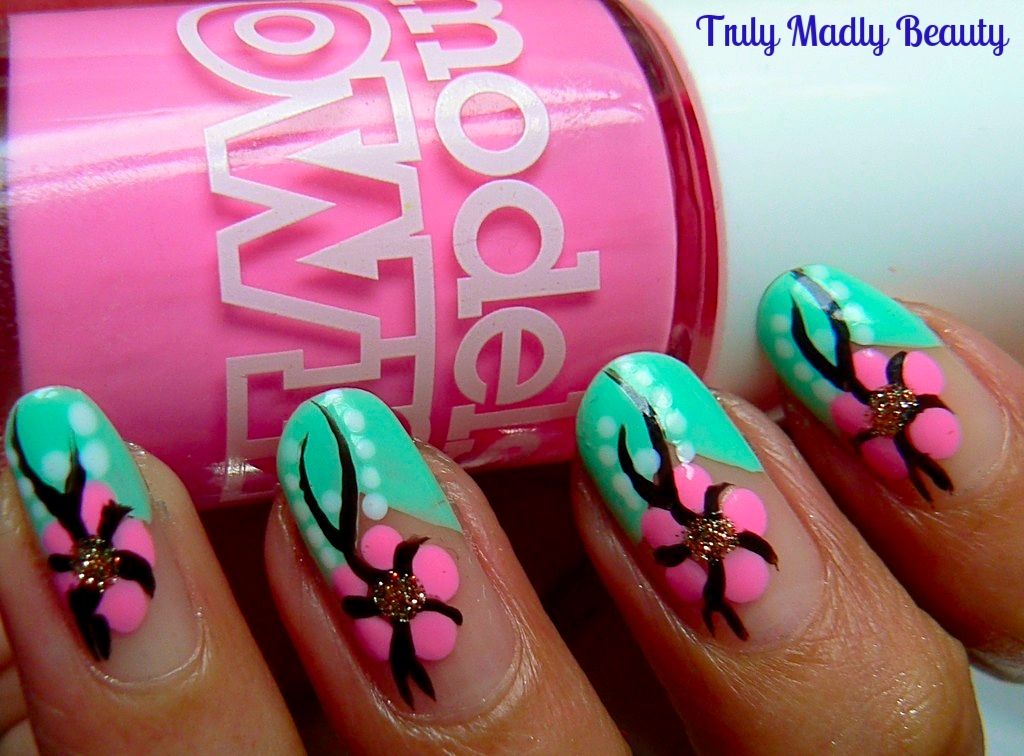
NOTD - Cherry Blossoms & Honey Dew!

Hello there lovely readers!

Though it would be wise not to get ones hope up judging by the recent forecasts, it does seem that Mother Nature may finally be allowing us a Summer. Better late than never & lets just hope that I haven't gone & jinxed it... O_o


One thing I always associate with this time of year & always look forward to is the beautiful abundance of cherry blossoms decorating both branches & pavements with their pretty pink blooms.


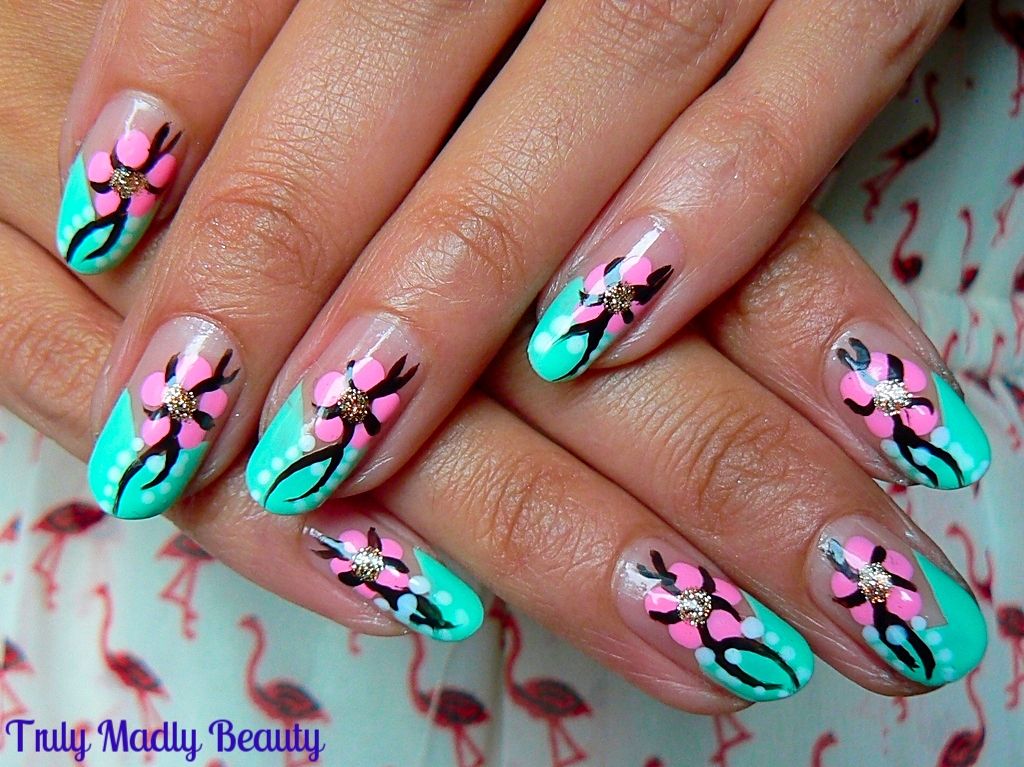
Florals are also one of my favourite forms of nail art & there are so many different ways to get creative! Here I've used the aforementioned flower as inspiration for today's Cherry Blossom nail art design...


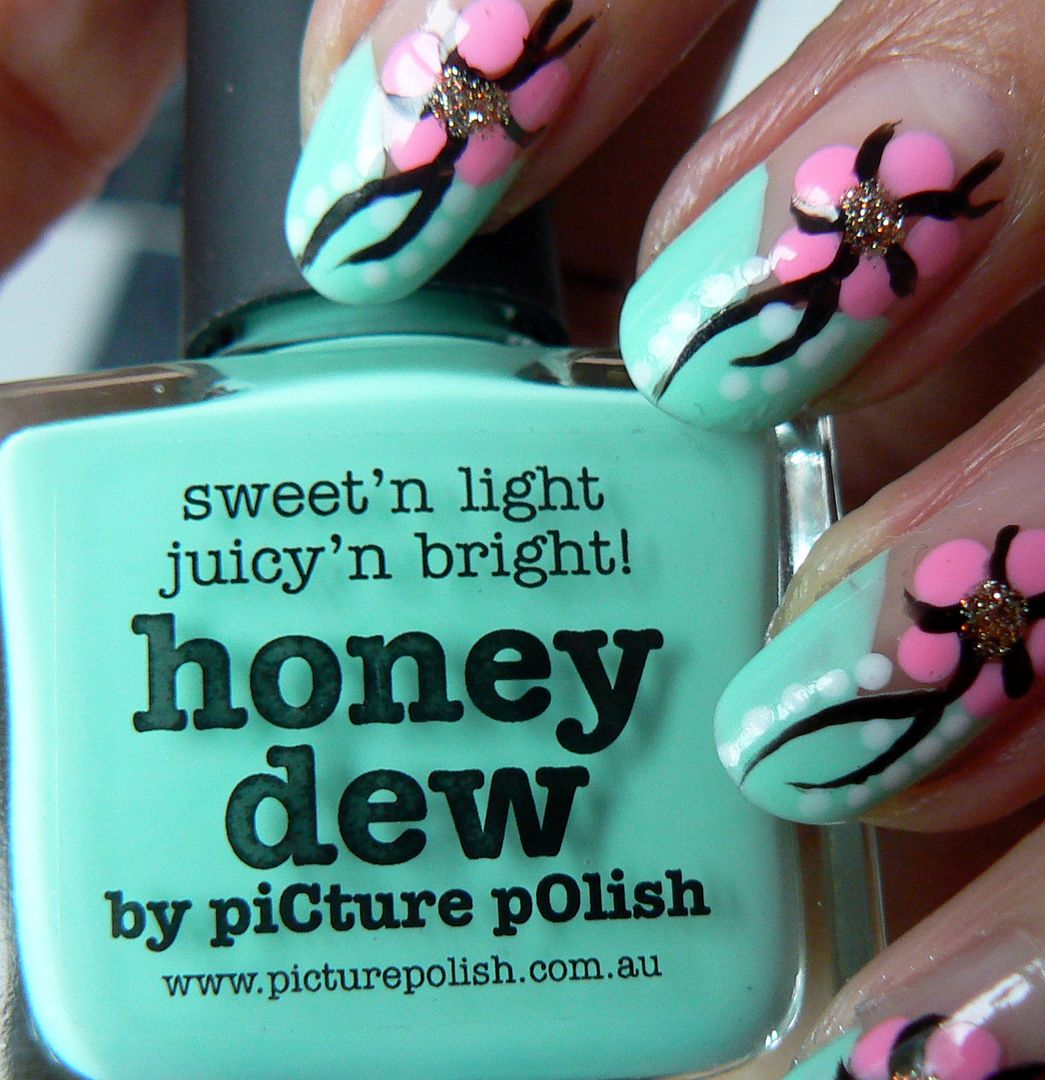
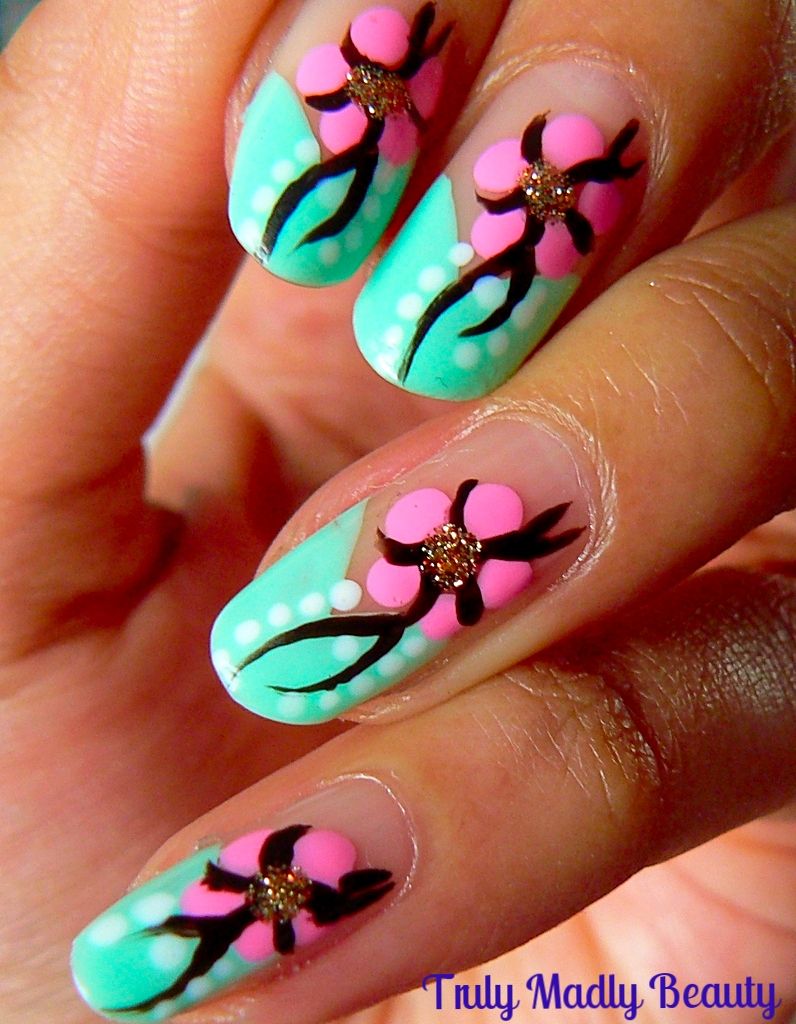
I wanted my mani to pop so picked a lovely lively pink for my blossoms, Models Own Sun Hat delivered on this nicely, & teamed it with some vibrant minty fresh green on the tips courtesy of the gorgeous Picture Polish Honey Dew


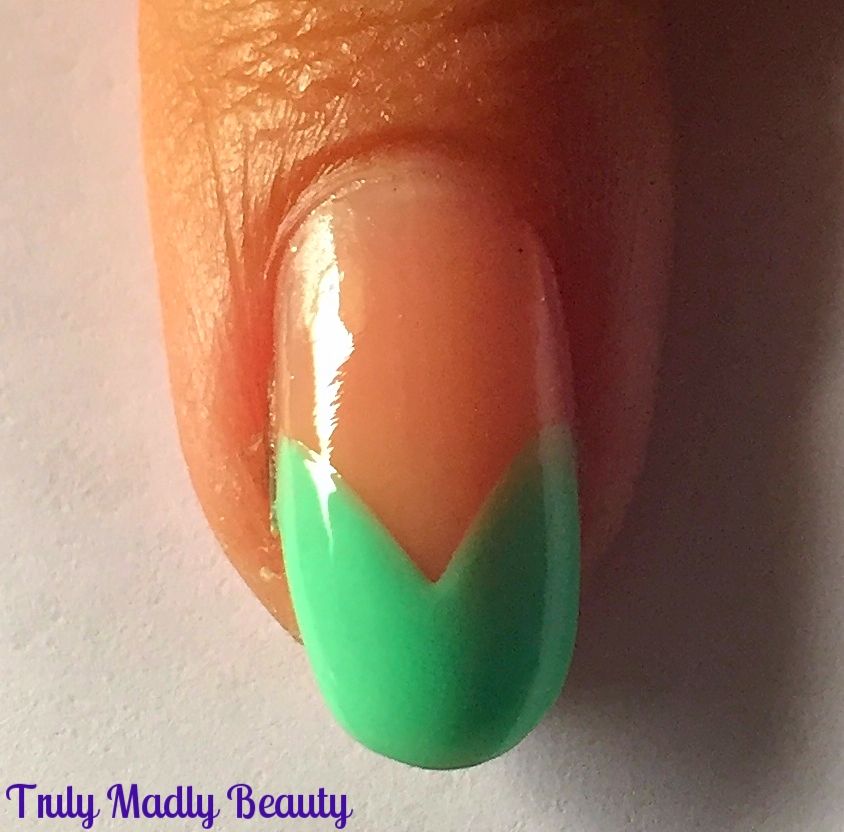
To create these first apply your green tips in a sort of pointed French mani which could not be easier to do, using your polish brush, swipe one side of the tip at a curved angle & do the same on the other side so that they meet in the middle & voila!


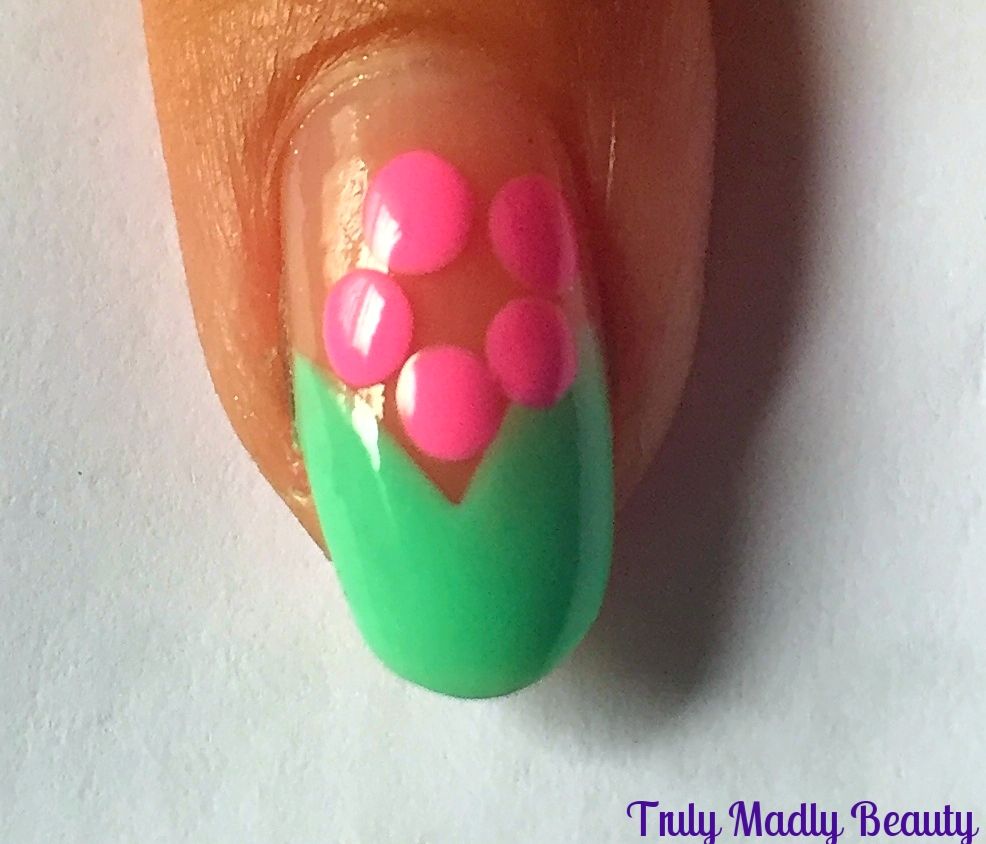
Then for your cherry blossom just grab a dotting tool or bobby pin & dipping in to your pink polish, place 5 dots in a circle just beneath the angled tip to create you flower


Now I have to apologise here...I was watching Game of Thrones at the time of doing this mani & got so distracted I completely forgot to continue photographing the rest of the design steps...NAIL BLOGGER FAIL *slaps wrist*


My bad...but as you can see, once you've done your tips & flower you can literally have free reign over the additional details you want to add. Using some gold polish & glitter, I added a dot of both to the centre of the blossoms & then using a thin nail art brush with some black polish, outlined my petals & added a few delicate stems either side.


For a final bit of detail I added on some wee white dots along the stems. You can continue adding more detail if you like, have fun playing around with different sized dots & stems but I left it there...perhaps if I hadn't been so engrossed in GoT I would've happily carried on!


Finish with your topcoat & thats it! Now lets hope some real cherry blossoms grace our streets with their pretty presence :) Thanks for reading!


Lotsa love to ya!


3.16.2016

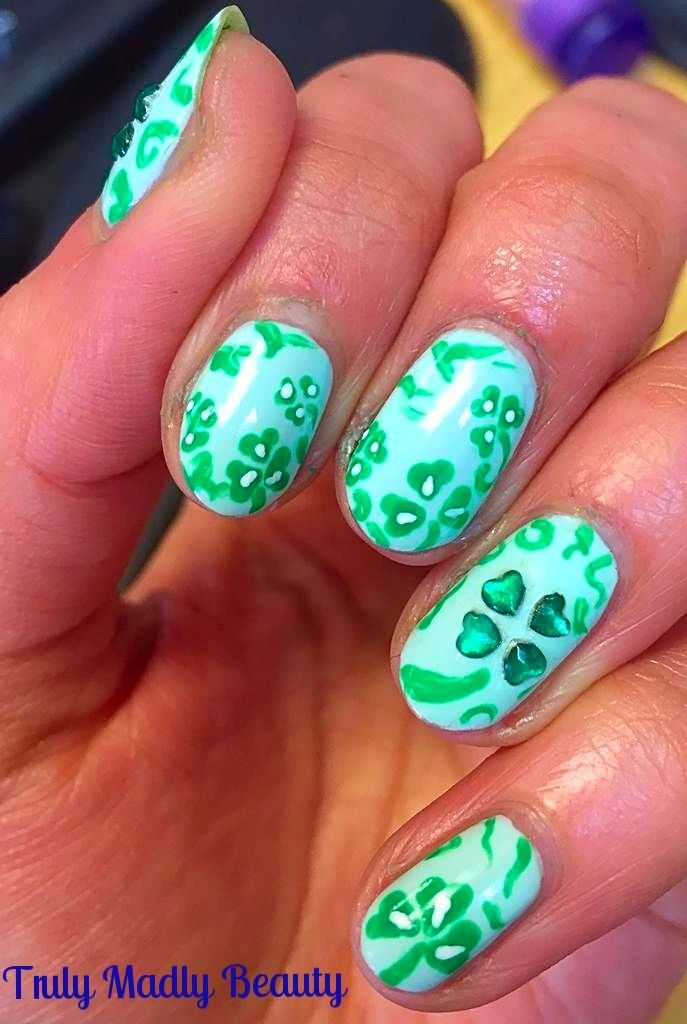
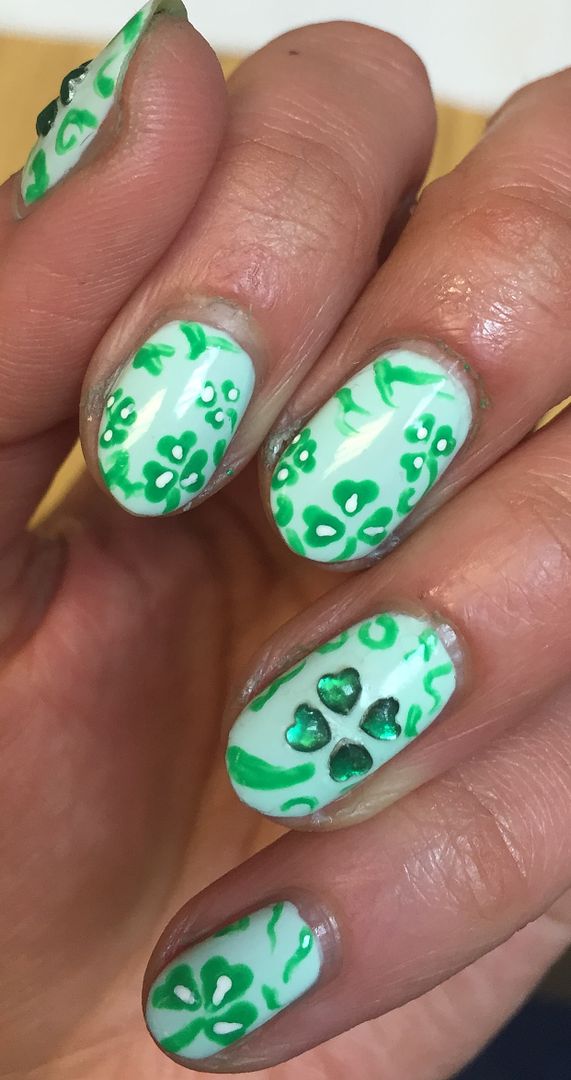
NOTD - St Patricks Day Shamrock Nails & Tutorial

Hello my lovely readers!

Grabbed a cheeky midweek reprieve from work today & what better way to spend it than a trip to Hogwarts! The matey & I paid visit to the Harry Potter studios & had a magical time going in to full on geek mode, prowling through Diagon Alley, popping by Number 4 Privet Drive & sampling Butterbeer. Which was actually a bit of a let down! I was expecting liquid Werthers or something but it definitely wasn't to my taste haha! I'll be Instagramming some memories from the day so do pop by! @Aysh_xox

As promised I've thrown together another St Patricks Day mani for you, this time with some Shamrocks! You can check out my previous post HERE in which I've shown you how to create some Gothic Celtic Love Knot nail art in honour of the Irish holiday also :)


However if that design feels a bit too complicated then these sweet & simple Shamrocks are much more easier to do!

Whereas with the Celtic Knot I went down the dark gothic vampy route, with a deep Ebony Green & Antique Copper, which you know I LOVE, this time I felt some refreshing pastel & bright tones were called for. 


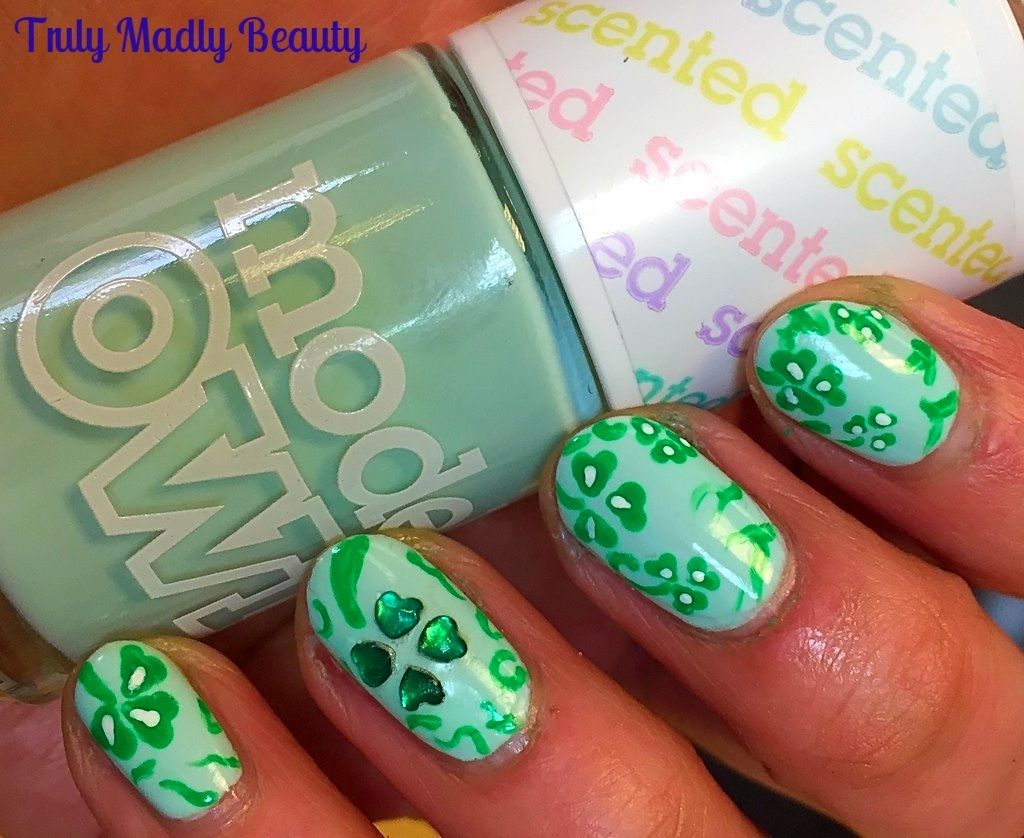
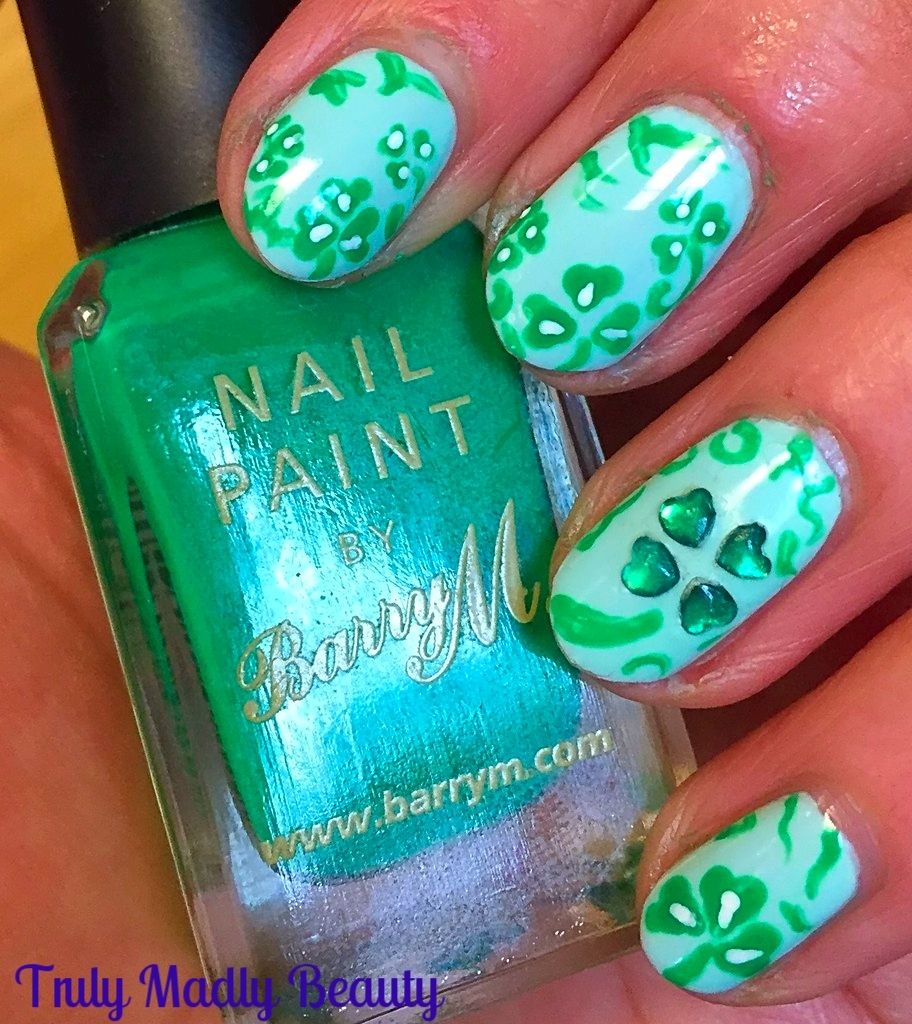
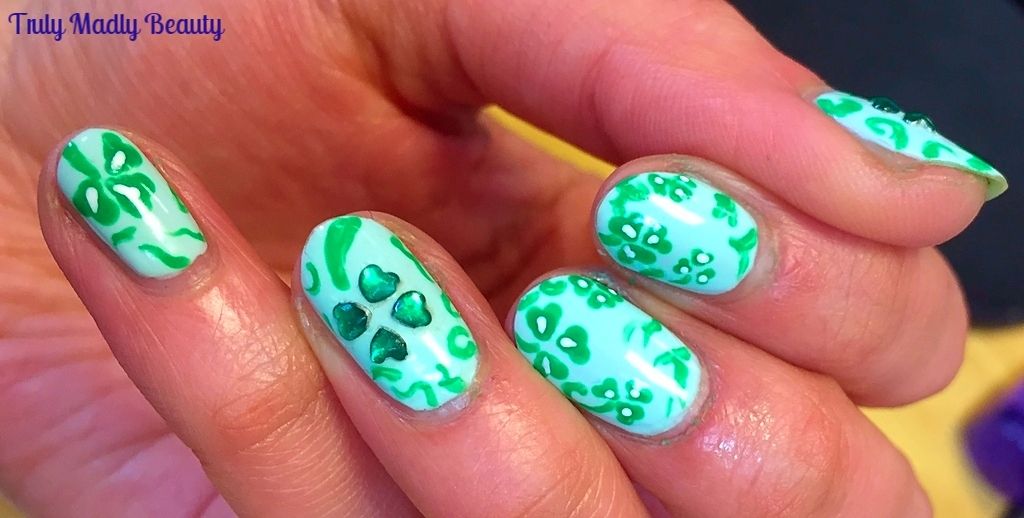
For my base shade I've used two coats of Models Own Apple Pie from their scented range, a beautiful creamy mint, so bright, cheerful & yes indeedy...delightfully apple scented! Yum!

Then for my Shamrocks I reached for an old favourite of mine Barry M Spring Green, a bright & almost fluorescent green that really pops!


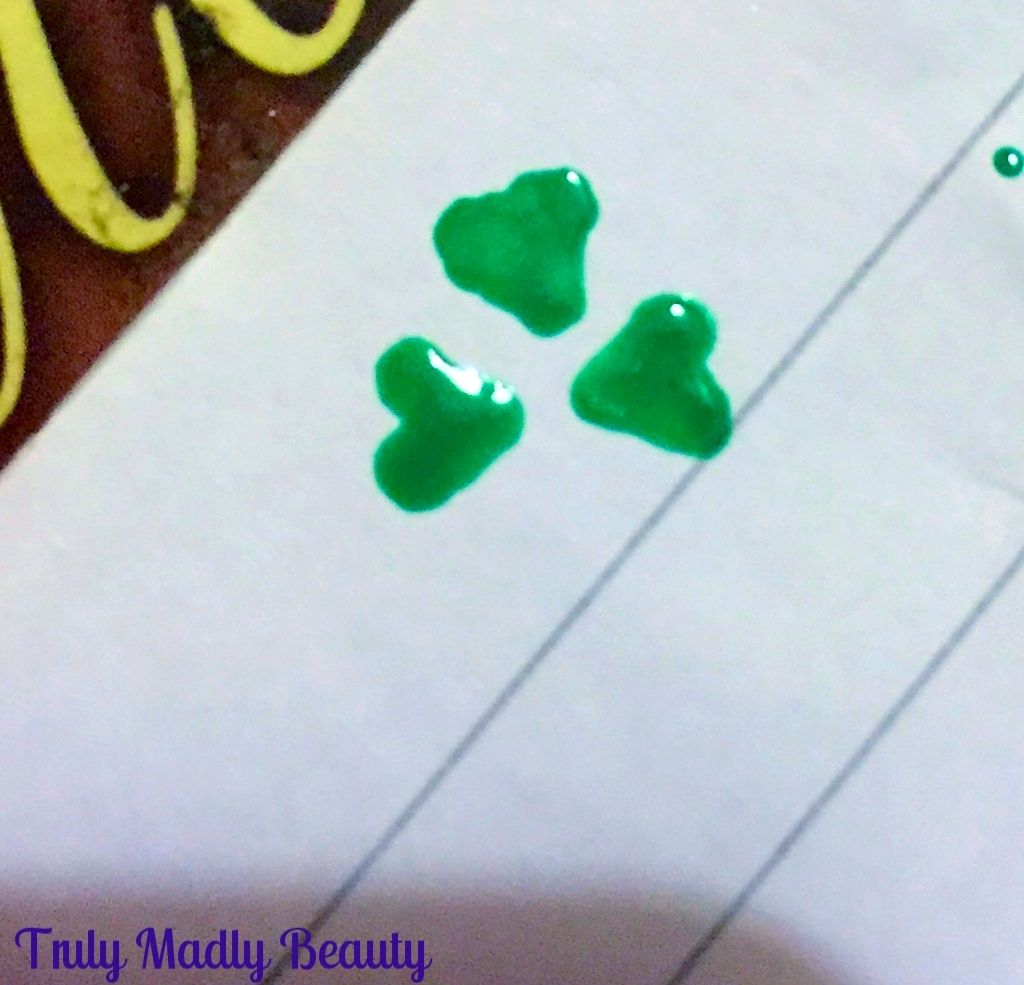
Using a dotting tool I managed to fit on about three shamrocks on my index & middle fingers around the border & one large one on my pinkie. To create your shamrock just follow these simple steps...


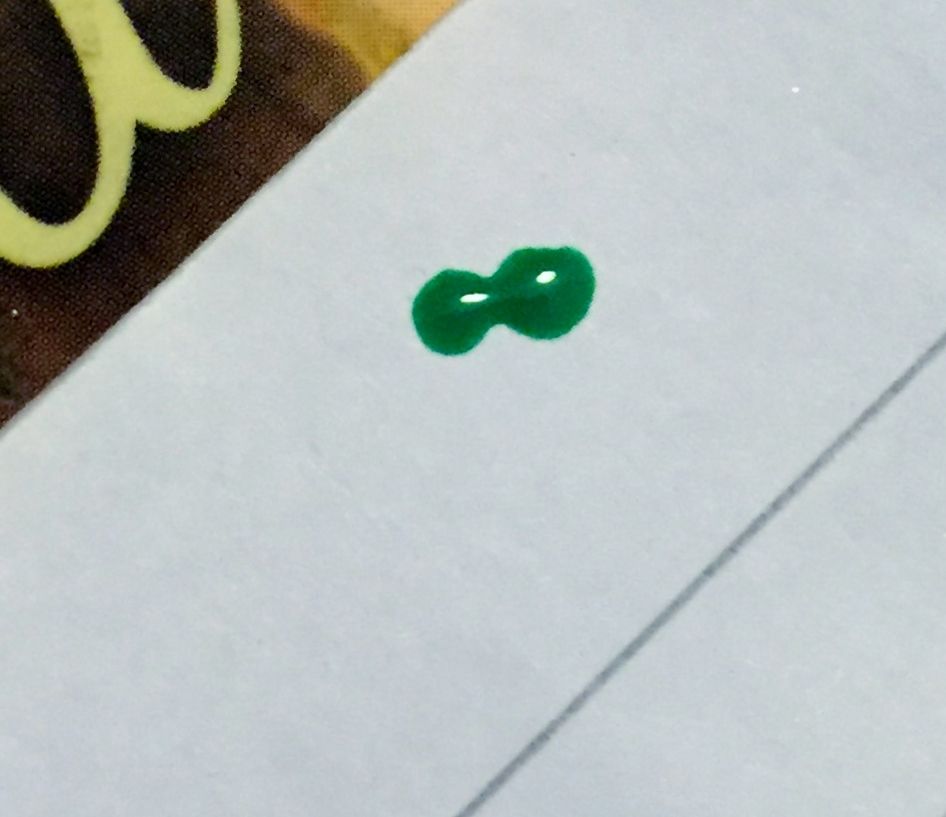
Using a dotting tool or toothpick place two dots of green polish side by side


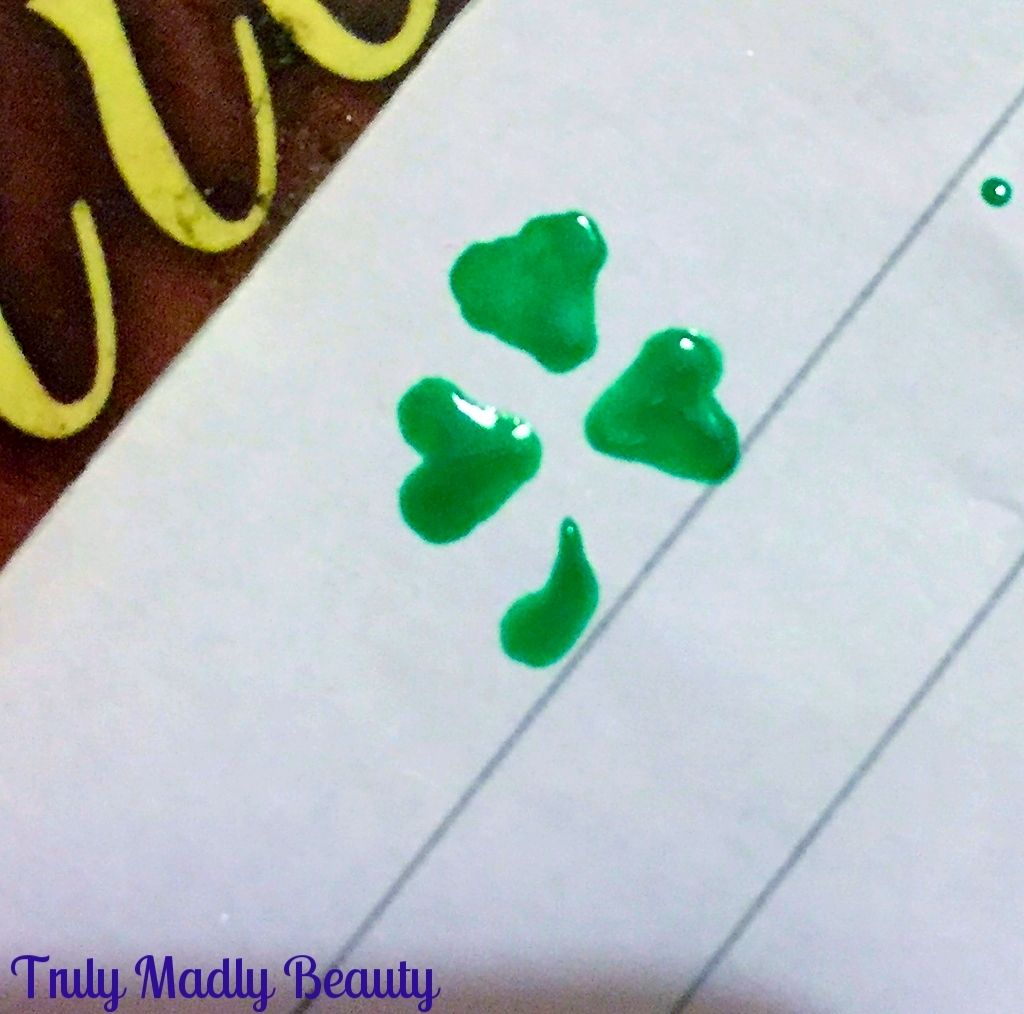
Then using the same tool, bring the two dots together at the bottom joining together to create a heart shape


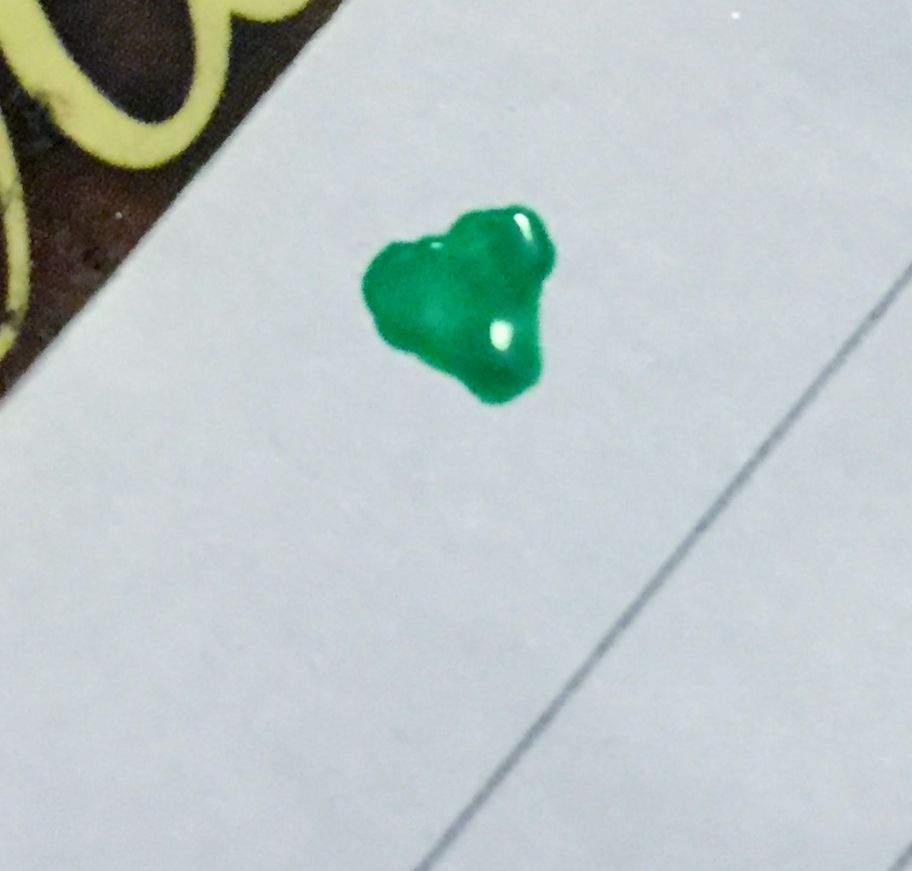
Do two more of these underneath, this time making these two leaves face each other


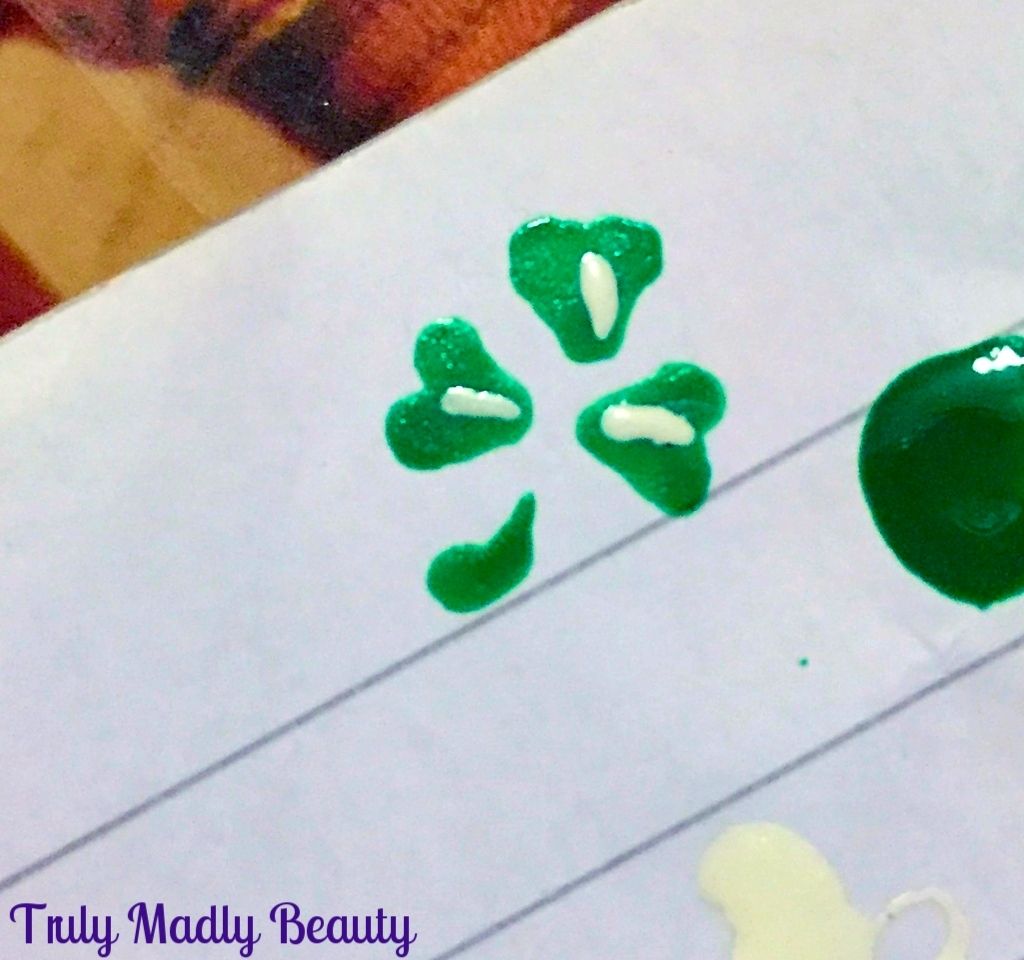
Apply your stem using a nail art brush


Finish with a thin line of white polish on top of the leaves in the centres for added detail.


To fill up the nail a bit more I simply added a few strokes of green around the border creating some additional fauna using a fine nail art brush.

On my thumb & ring fingers I decided to use some heart shaped green rhinestones instead of polish to create some 3D  four leaf clovers for luck :)


Finish it all with topcoat & you have your Shamrock nails ready for St Paddys day! Thanks as always for reading & I hope you have a lovely one if celebrating!

Lotsa love to ya!


3.14.2016

NOTD - Celtic Love Knot Nail Art Tutorial for St Patricks Day!

Already Easter is approaching! How do I know this? (apart from the abundance of bunny filled promos in every retail store) The arrival of Milkybar Mini Eggs of course! Whilst everyone goes crazy for those pretty pastel original mini eggs, I myself await eagerly for the white chocolate form, if you haven't tried these yet...RECTIFY.

Apologies, I digressed there, tends to happen when chocolate is involved. Before Easter however is St Patricks day! So prior to going all Easter obsessed with the nail art, I always love to do a mani or two to celebrate the Irish holiday, especially as green is one of my ultimate favs :) I've just remembered that I was in NYC for the St Patrick's day parade last year...sigh *reminisces* Twas a good day, the Irish sure do know how to put on a good show!


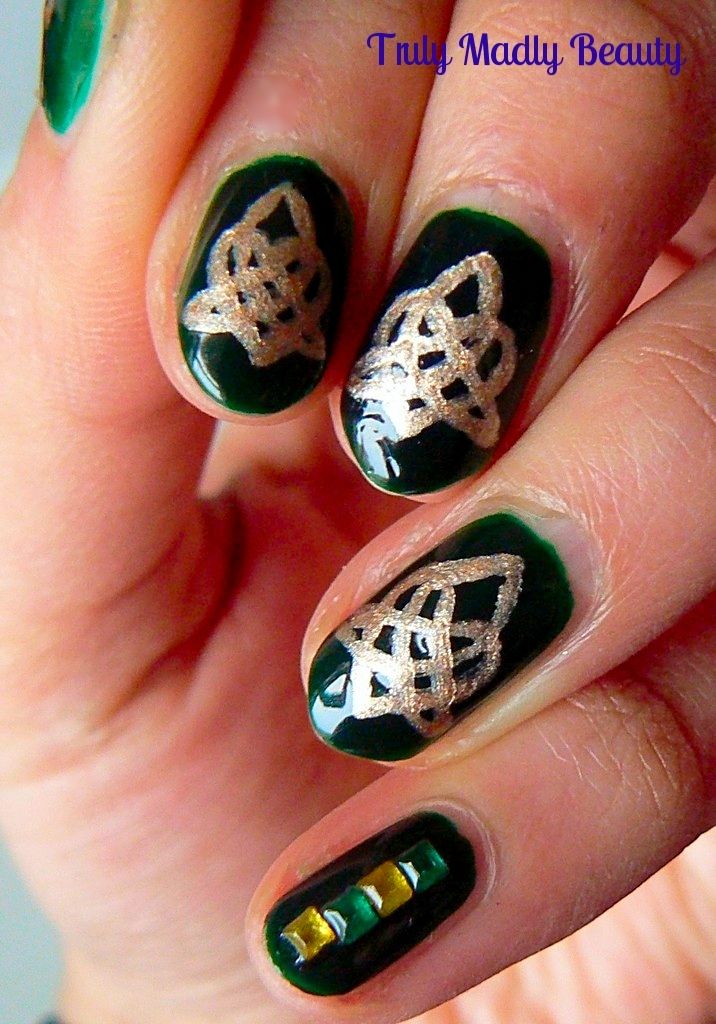
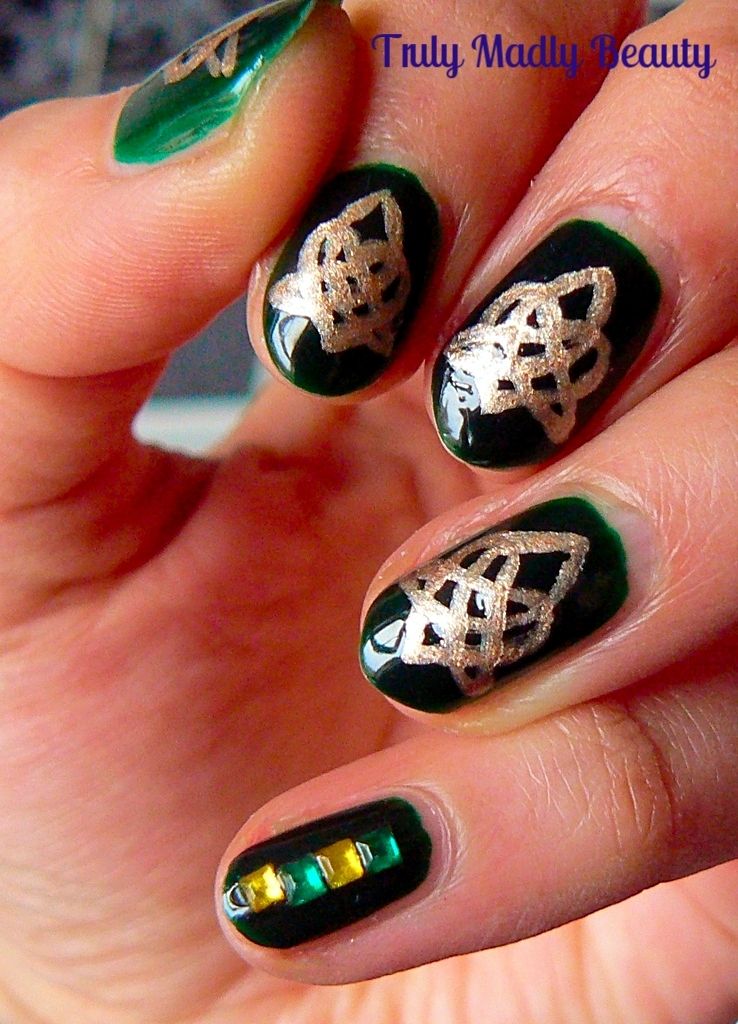
I wanted to challenge myself with doing something a wee bit different for my first St Patricks Day mani, so I decided to create this Celtic Love Knot design, which I'll show you how to do as well in 3 steps. Why I do this to myself I don't know. I must be a closet masochist!


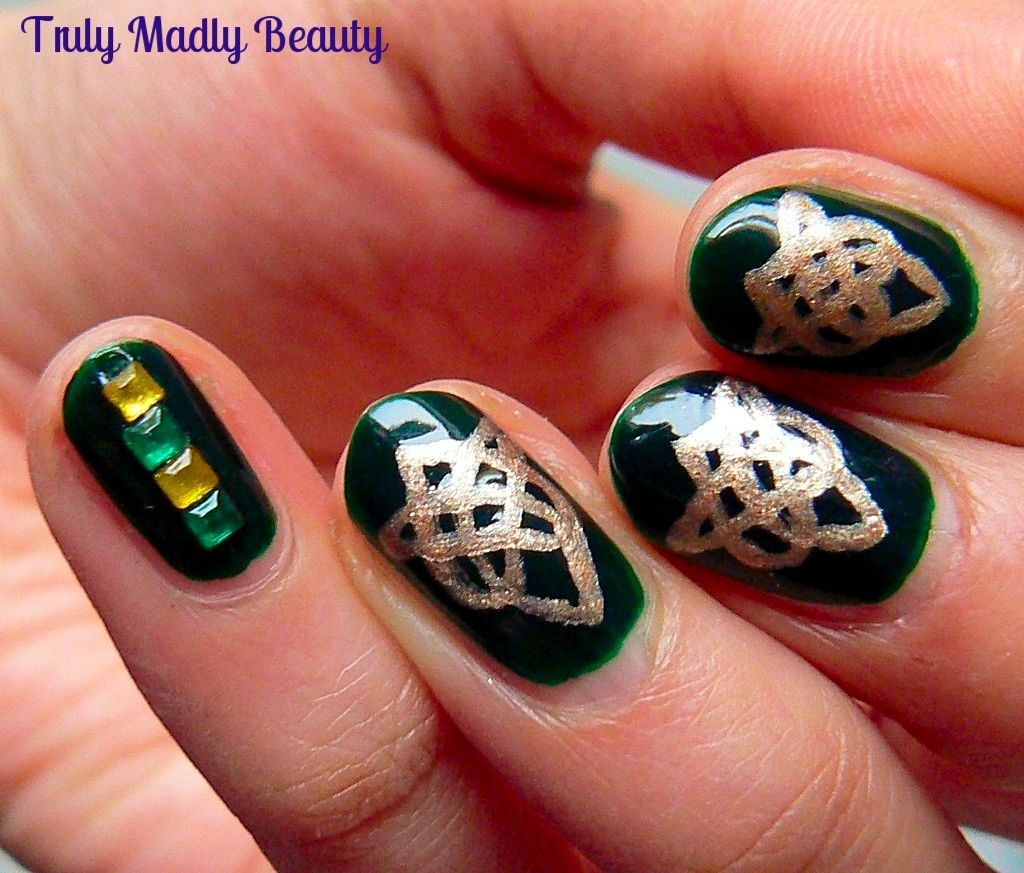
However I exaggerate, despite the intricacy of the design, once you get the hang of it, it really is straightforward I promise you! After one or two FAIL nails, I was pretty chuffed with the finish. I adore Celtic designs & jewellery with their Gothic vibes & I thought it would be quite fitting for the Irish occasion. 


To start with you of course needed a green base, for this I reached for Models Own in Ebony Green, an absolutely gorgeous Gothic vampy green. I don't know...can a green be vampy?! But this one somehow manages it, I just LOVE it. Two coats applied leaves a divine glossy finish.


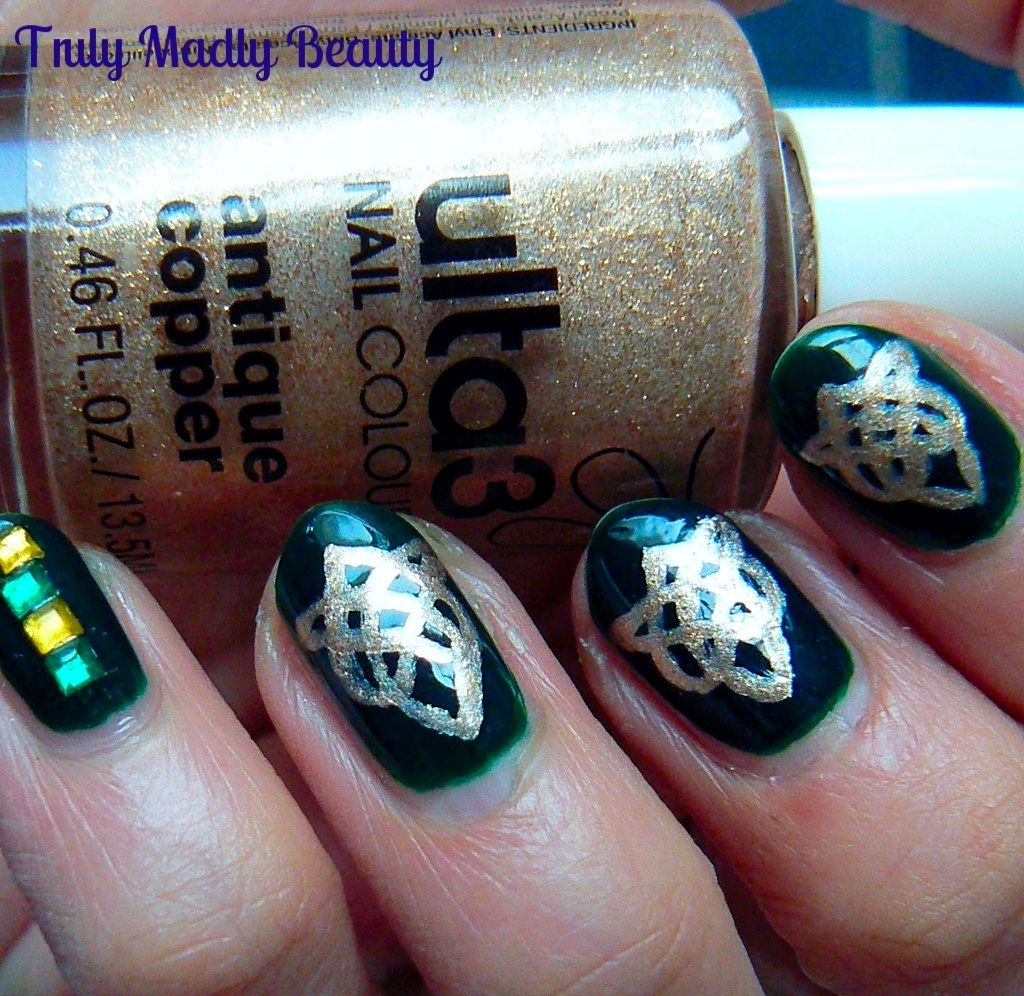
Now to create the Celtic Knot I wanted a pretty pale bronze gold for that Medieval feel & for this Ulta3 in Antique Copper was just perfect. Grabbing my Pure Color 10 nail art brush which is great for detailed nail art I got started with creating my knots...

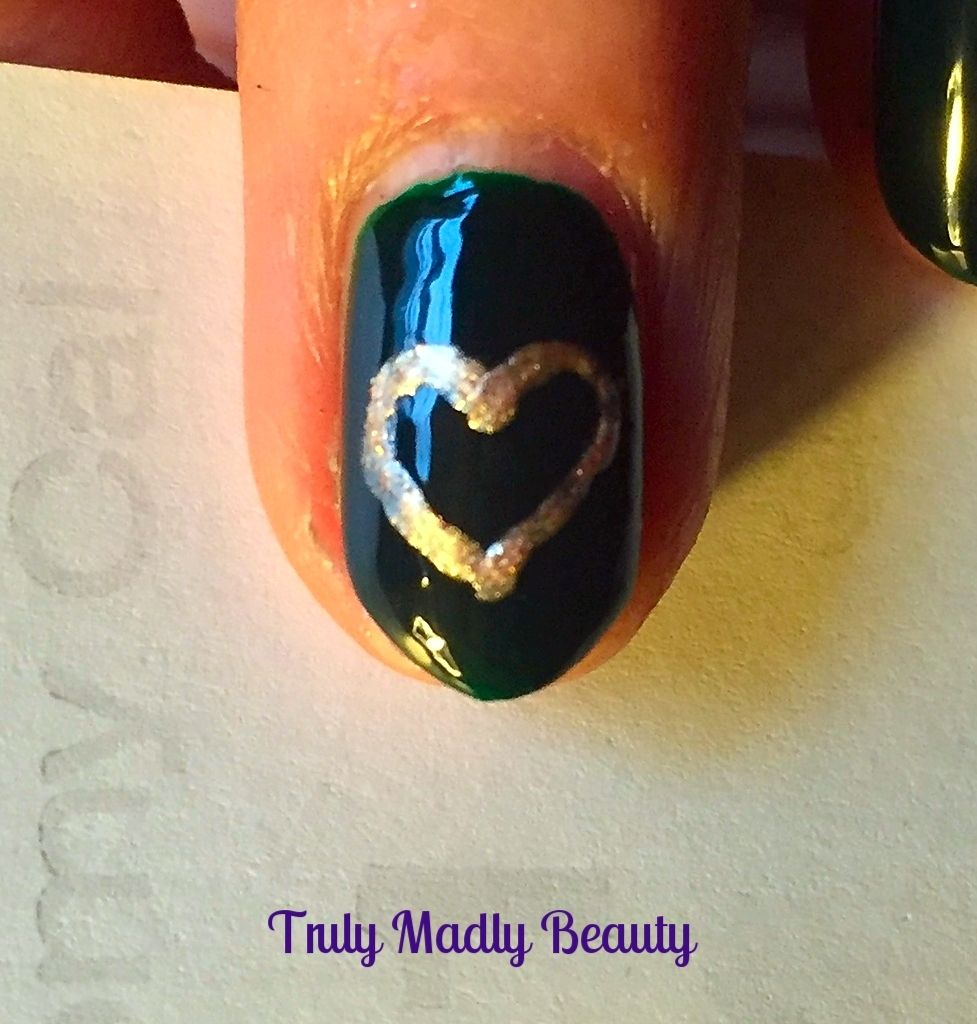
To begin, you first need to draw a heart shape on to the centre of the nail.


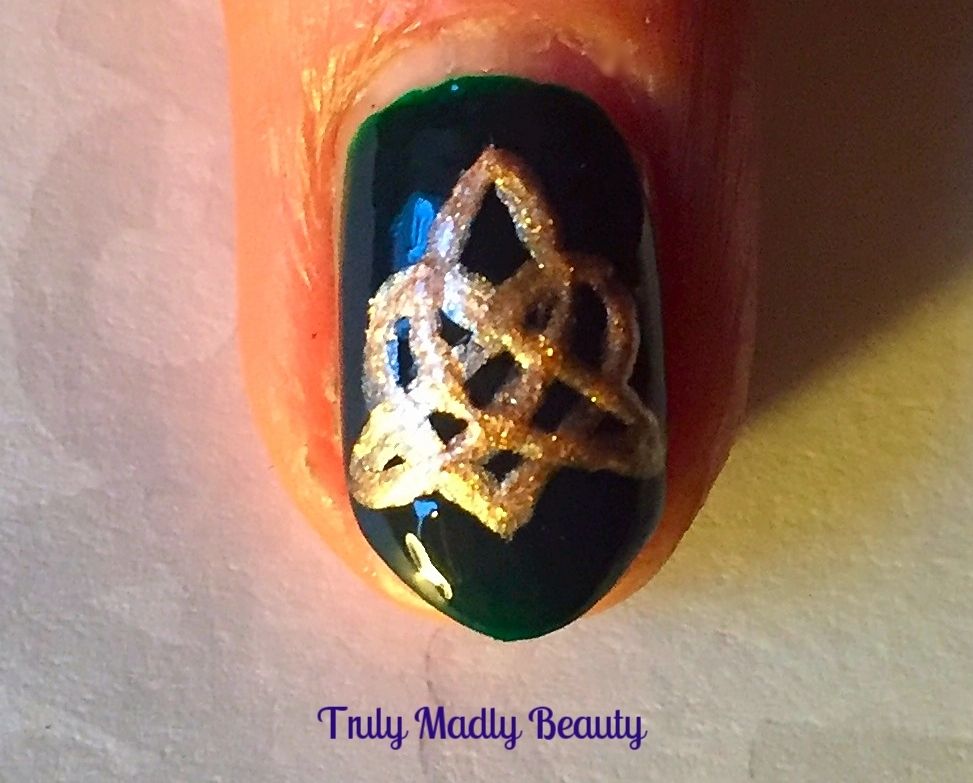
Then starting from the centre of the top of the heart (where the two curves meet) draw a straight line going to the left, at a 45 degree angle, down till you pass through the left side of the heart. Then continuing from this point slowly bring up a curved line that goes through the heart again & up past the right curve at the top, stopping just above the middle of the top of the heart.


Now do the exact same thing for the opposite side, this time drawing a line to the right, then bringing up another curved line, all the way to the centre of the top of the heart, joining the two lines together at the top. Hopefully that made sense & if not then at least the pics can show you each step in detail!


I couldn't fit a knot on to my pinkie finger so instead just applied some green & yellow square stones in a row down the centre.


Finish with topcoat & you're done :) Needless to say for this particular design my left hand looked a lot better than my right & my patience was most definitely tested but I'm so glad I persevered as I loved the finish look & will definitely attempt again!

Thanks as always for reading! I'll try & roll out another, more simple mani idea for St Paddys day later on in the week so keep posted! 

Lotsa love to ya!


1.02.2016

Green Freshlook Colourblends Contact Lens Review

Hello there lovely readers!

I've always loved the look achieved when wearing green tinted lenses, on Asian skin-tones I think the colour is flattering, making the eyes stand out in a natural way without looking too artificial.

Recently I tried & tested out the Green Colourblends* lenses from the brand Freshlook, whom I've had experience with in the past, I remember I was a big fan of their Pure Hazel Daily Disposable lenses & used to wear them all the time for special occasions, a really lovely colour!


The Freshlook brand have a diverse range of shades to choose from, ranging from blues, greens, greys & hazels. All of these can be found & purchased online from Coloured Lenses UK who are a special online retailer for cosmetic lenses. Its good to know of a site within the UK which sells coloured lenses that you know have been tested & are safe to use! Especially if you are a tad weary about purchasing internationally.


The lenses came with an accompanying lens storage case to keep them in. As well as your standard storage case, Coloured Lenses UK also has a range of cute & quirky cases, these CAT ones caught ones eye in particular, SO adorable (spoken like a true crazy cat lady naturally)

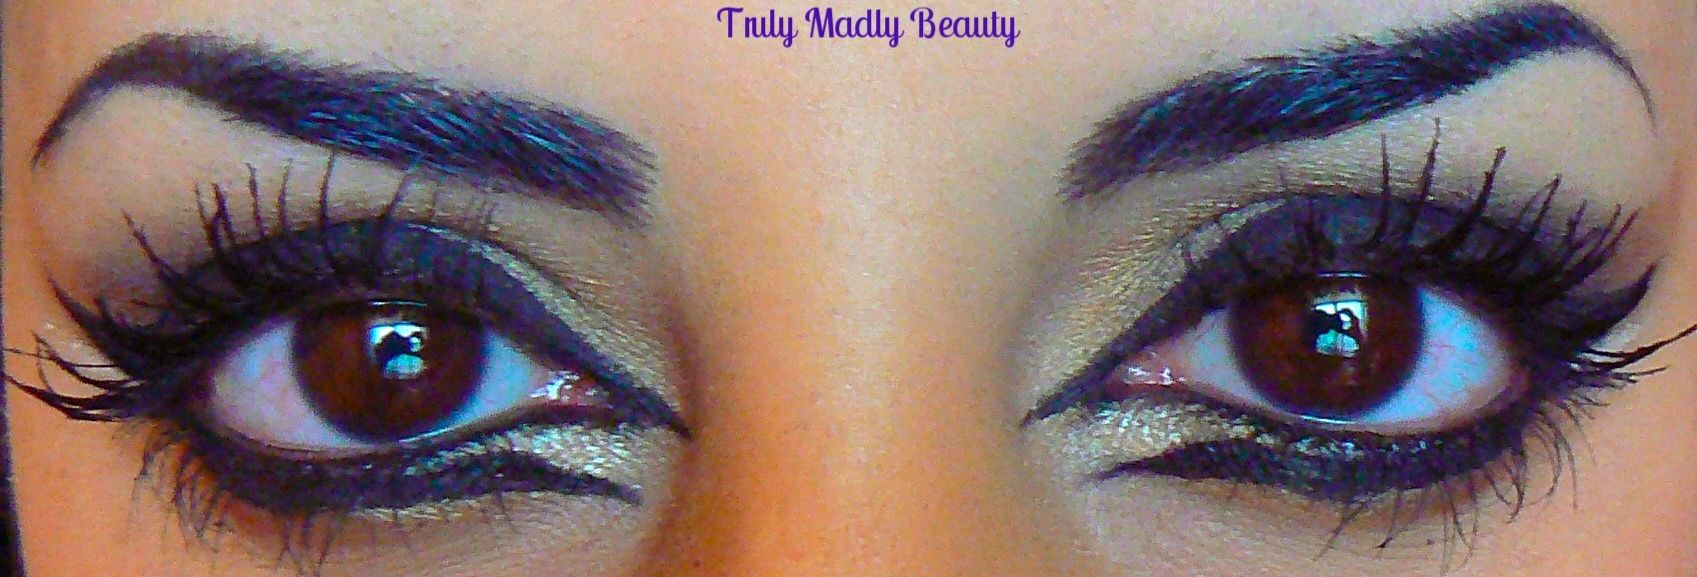
Okey dokes folks, so to give you a clear idea of the difference here's an obligatory before shot with my natural baby browns...


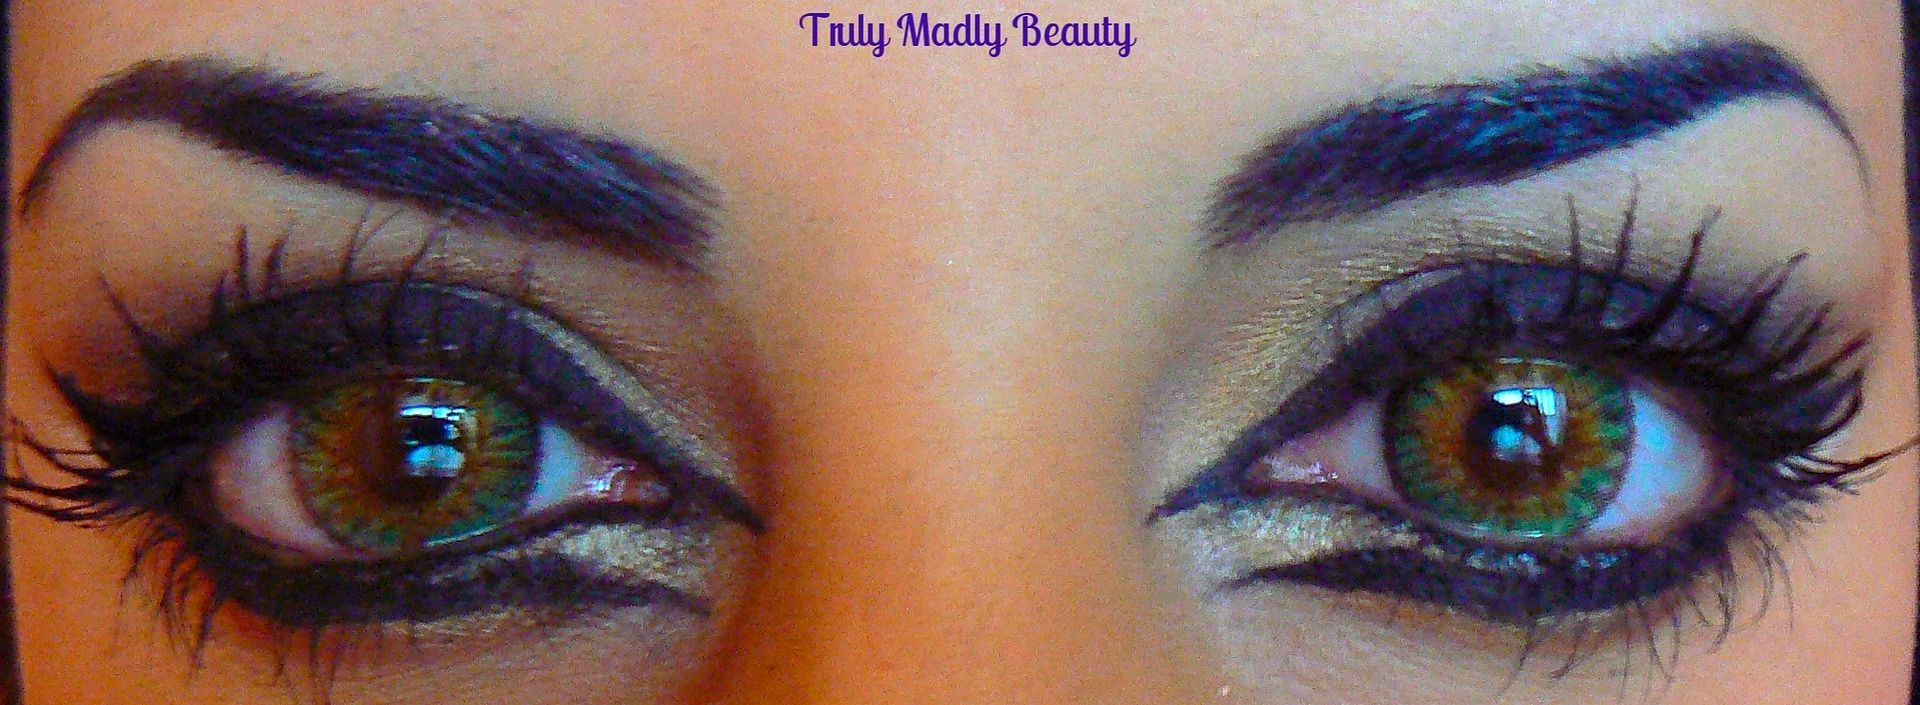
And here with the Freshlook Green Colourblends in...


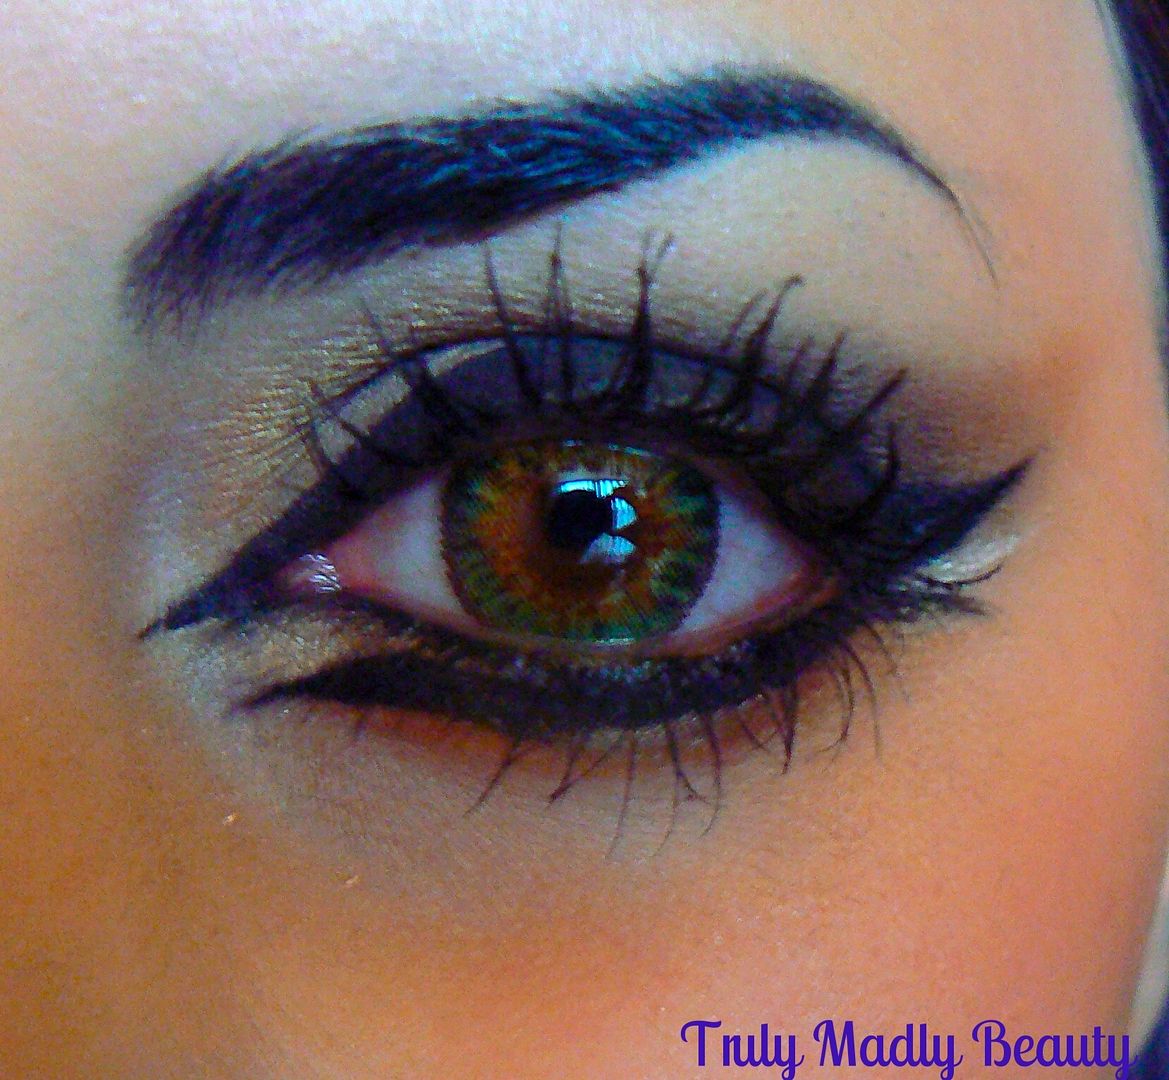
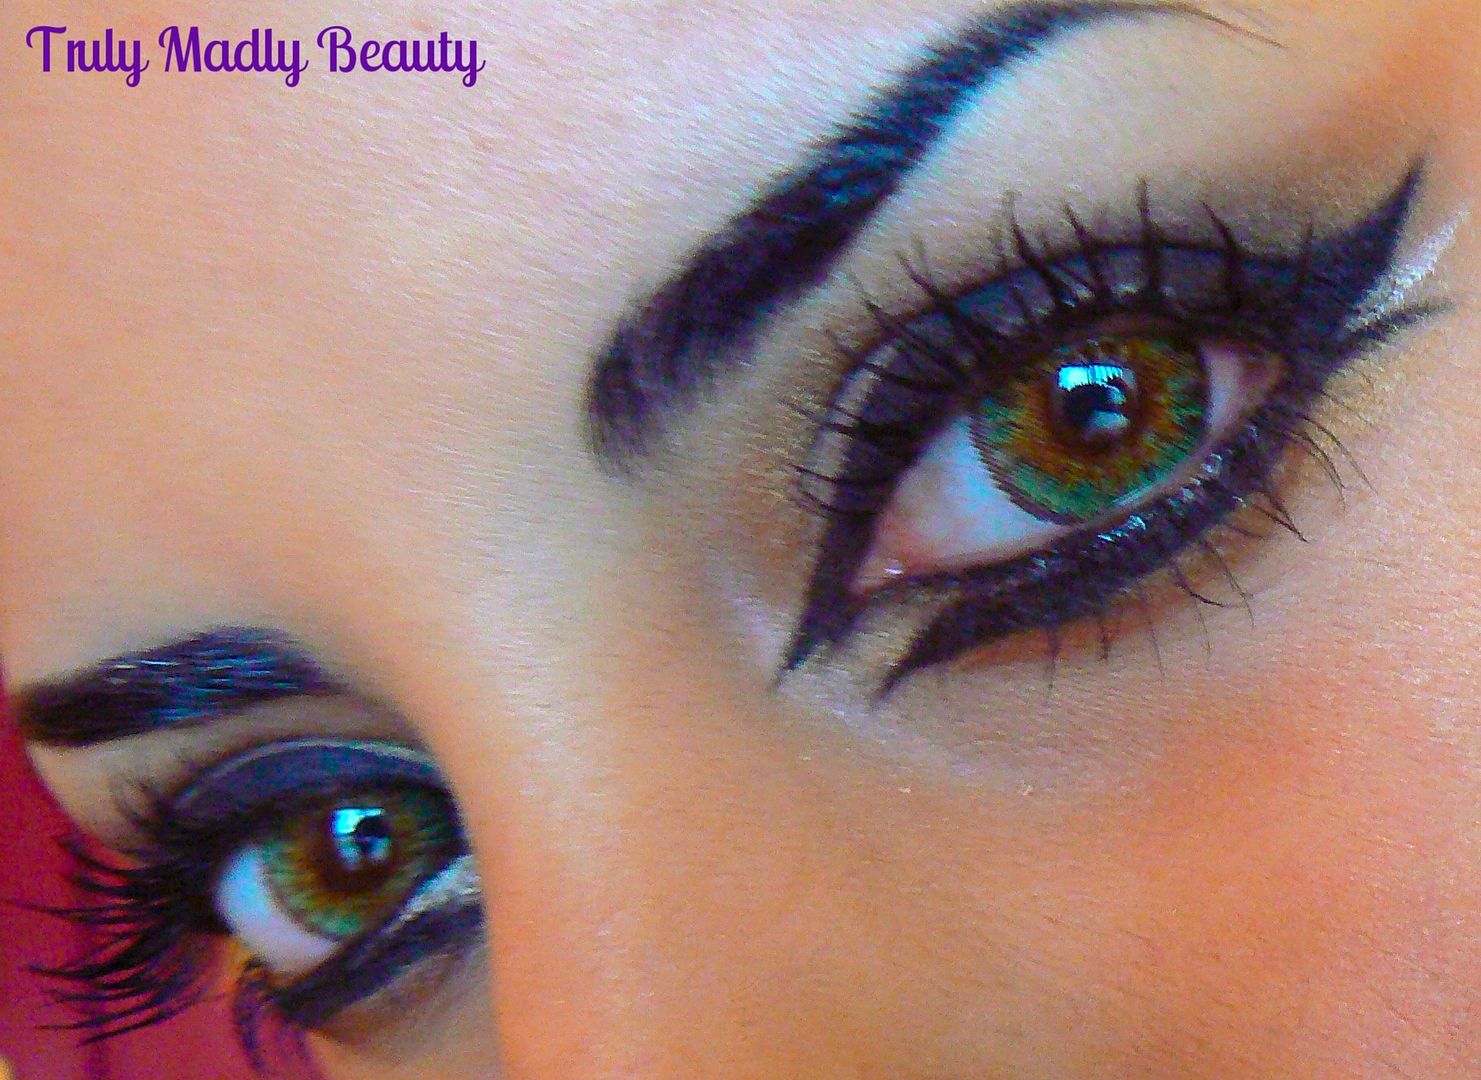
I absolutely LOVE the colour of these lenses, still natural but very eye catching, especially when teamed with an arabic style makeup look which I like to do on occasion, the eyes seriously pow wow! The green colour tone is subtle yet striking.


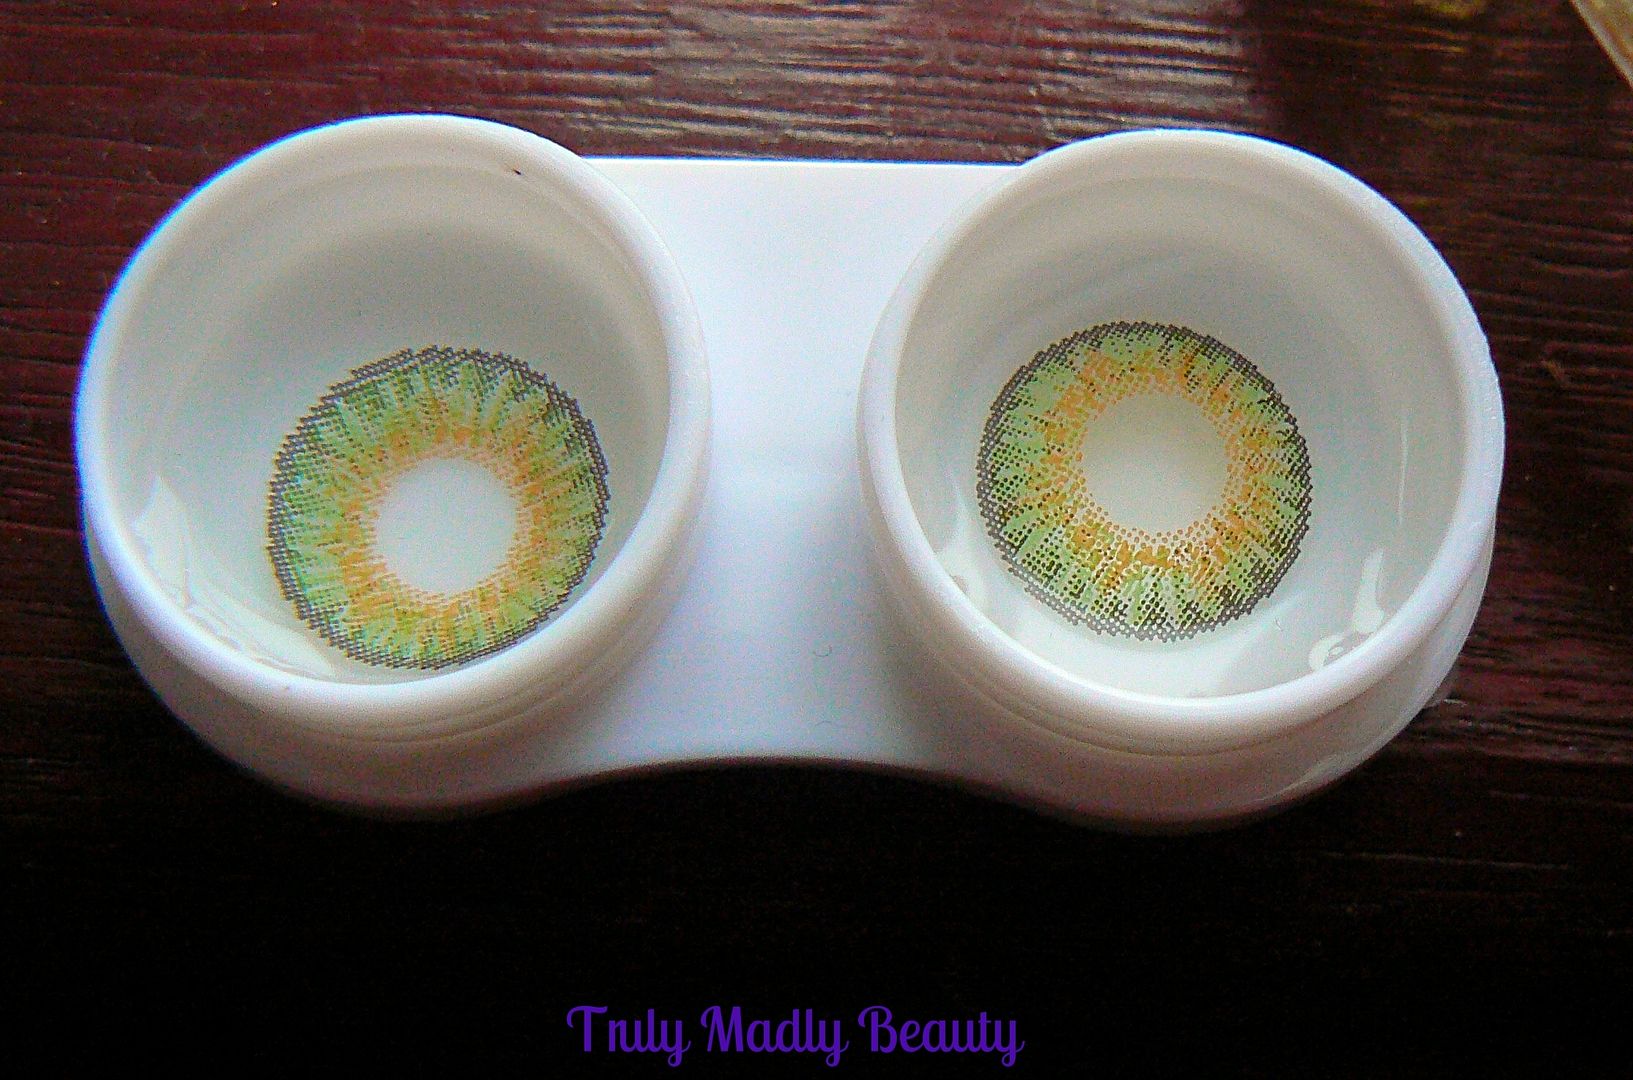
These lenses are 14.5mm in diameter & from the 3 tone shade range which gives the colour a more natural look, with a warm hazel brown  centre, blending into a pretty green outer edge. The lasting time is 1 year, so you would definitely get good usage out of these.


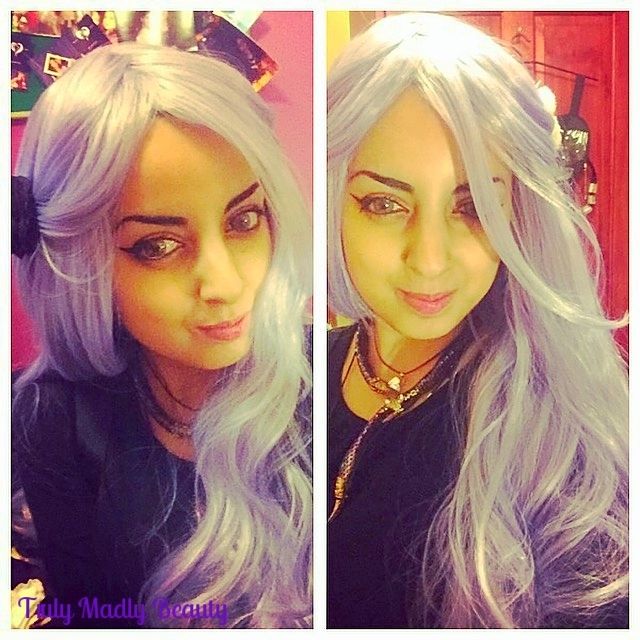
If you follow me on social media you'll know that recently I've been dabbling into the world of pastel hair thanks to the assistance of Black Candy Fashion wigs to help fulfill my unicorn/mermaid hair dreams as I simply cannot go down the long business of bleaching the hair! My locks will never forgive me & to be honest its far too much hard work/commitment than I can be asked with haha! Anyhoo I digress there but I recently teamed the green eyes with the lilac hair & a cat eye wing & absolutely loved it! (excuse the otherwise no make up face!)


So the green lenses gets a big high five from me. There sadly has been one little down factor with these Freshlook lenses in particular in that they made my eyes extremely dry. I mean I suffer from dry eyes anyway but I did feel like I had to reapply eye drops to keep the moisture a lot more than I would normally do.


Due to that I would say I get a good couple of hours wear of these before feeling the need to remove them, therefore I would simply keep these for evening occasions where I know I'll only have them in for a few hours, definitely not all day wear.

The Freshlook Colourblends contact lenses are available online for £16.99 pair & as mentioned before will have a longevity of about a year before discarding.

Thanks as always for reading lovelies, do you like to dabble in different eye colours?

Lotsa love to ya!
Disclaimer - * products featured were sent to me for my consideration. I am not affiliated with the brand nor paid for this post, this review has been as always my 100% honest opinion! :)