Hey there lovely readers!
I completely forgot to post the nail art looks I rustled up this (or last now I guess) Christmas! I guess I've gotten so used to just posting on Instagram these days (@aysh_xox) that the blog takes more of back seat which saddens me! However I would like to have an online portfolio of my designs to look back on hence why I persevere with posting on here :)
I did 4 different looks for the festive season starting with some Snowflakes! I love doing this design because all snowflakes are different so you can do so many variations! I have actually done a step by step Snowflake tutorial HERE. After applying a pretty baby blue base, I used white polish to draw a cross with a vertical line through it. This is our snowflake! And for the details I just added some small dots & angled lines to make it resemble a snowflake. Finishing off with a pretty clear crystal in the centre.
Showing posts with label Red Nails. Show all posts
1.16.2020
6.12.2017
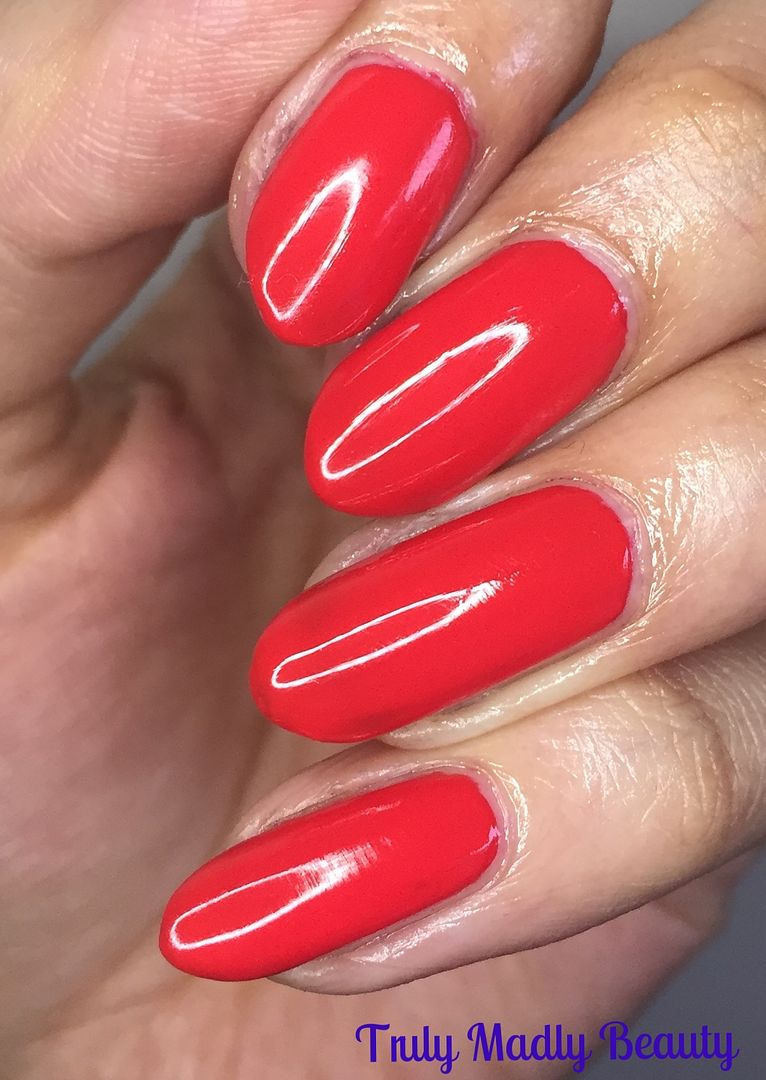
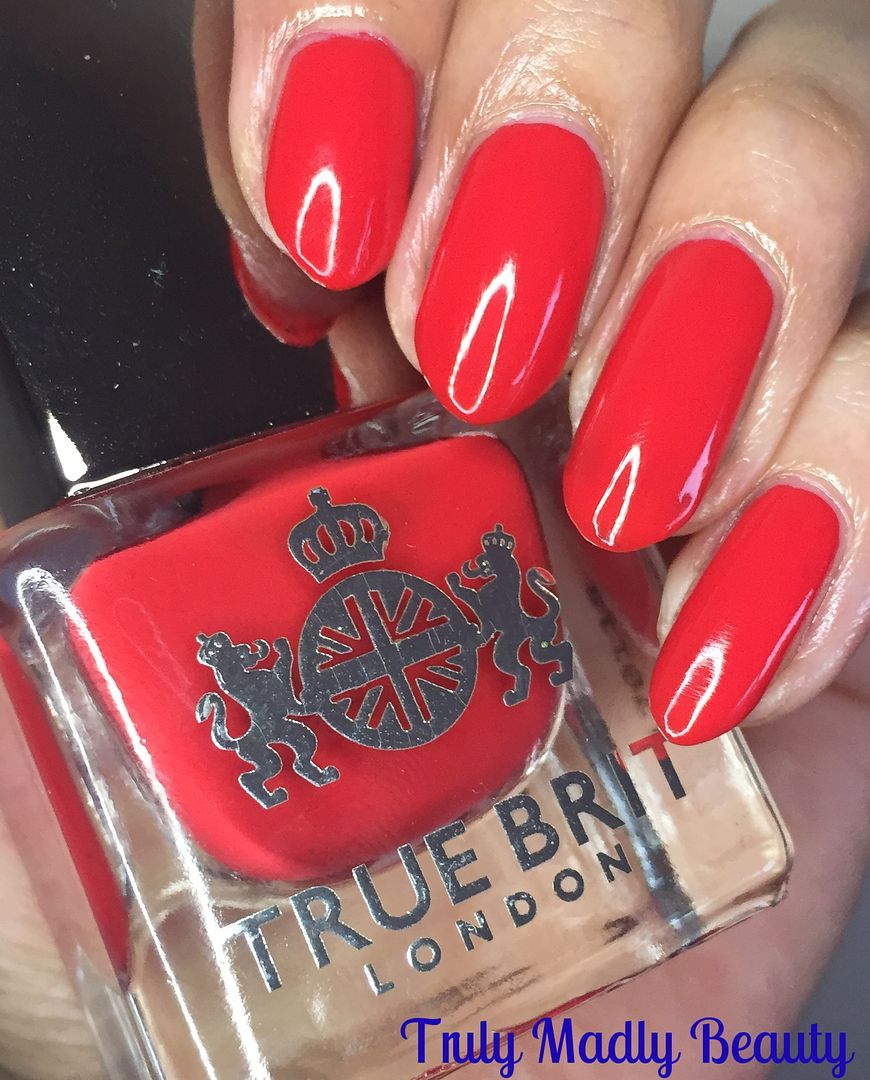
New Shade From True Brit London - Pillar Box & Royal Guard Nail Art Tutorial
Hello
there my lovely readers!
Every
girl needs a signature red polish in her stash. Although in my case
lets just say its more likely to be a few dozen, yet I assure you
that they are all unique & entirely different tones of red...o_O
But
if you are looking for a perfect Pillarbox red then look no further
because my friends at True Brit London have got you covered with one
of the new additions to their already outstanding nail lacquer
collection.
10.27.2016
Halloween NOTD - Dripping Blood Hearts ft Joan Collins Timeless Beauty!
Hello lovely readers!
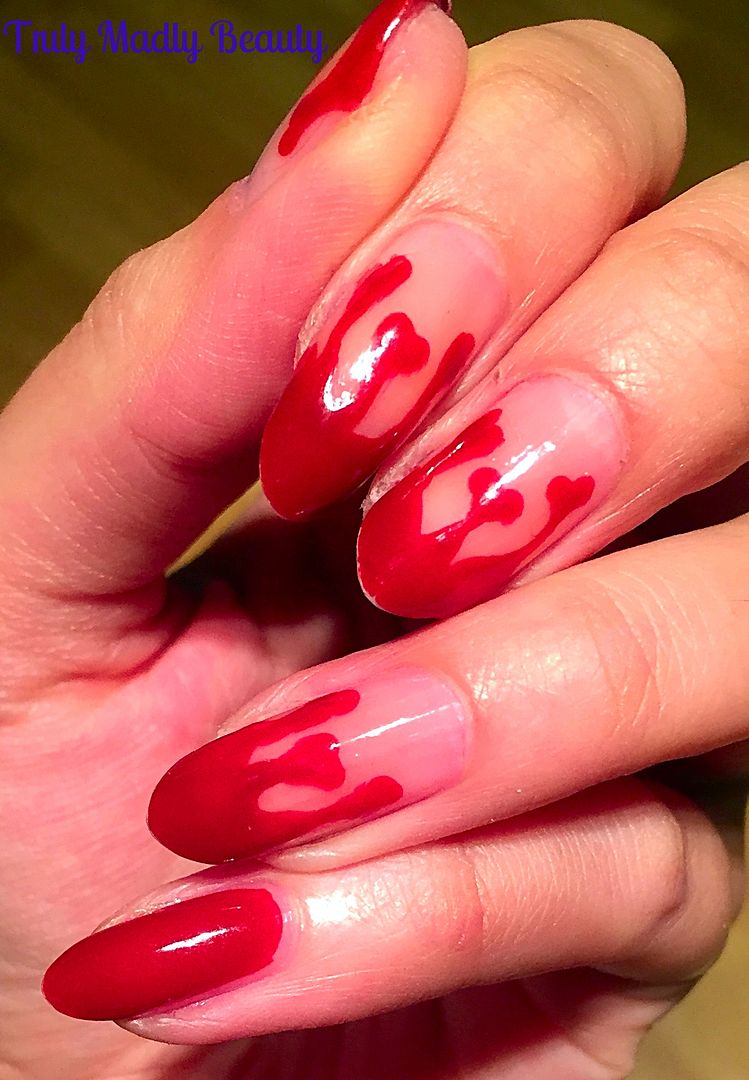
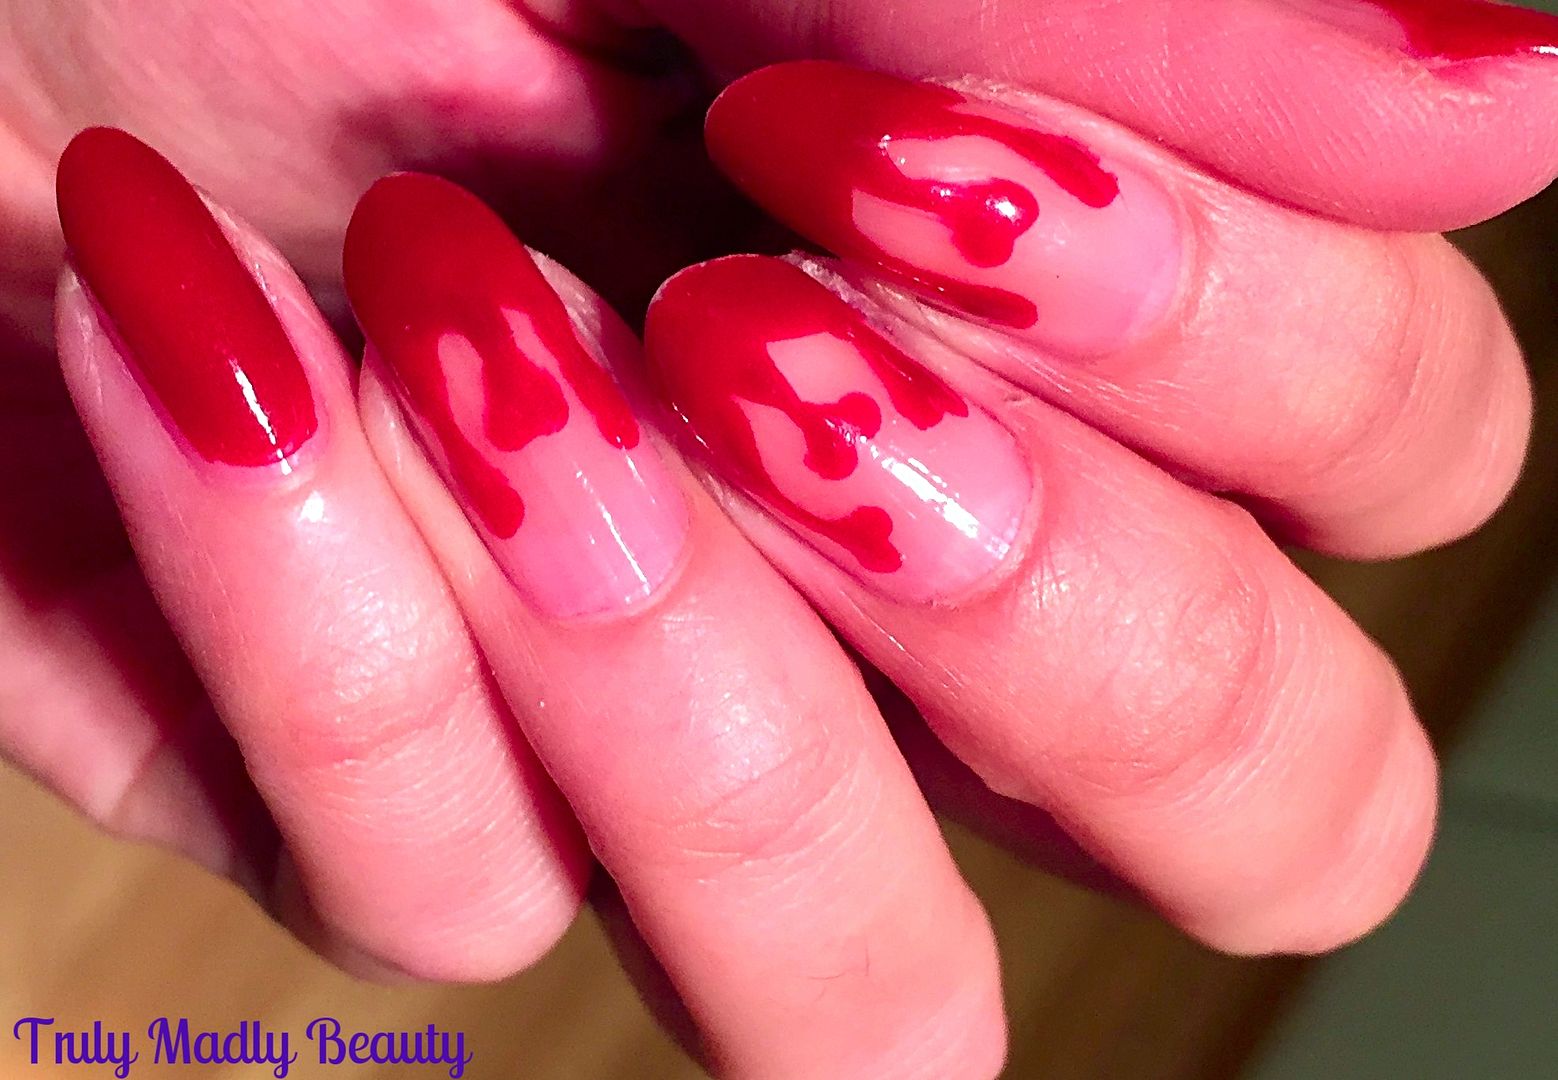
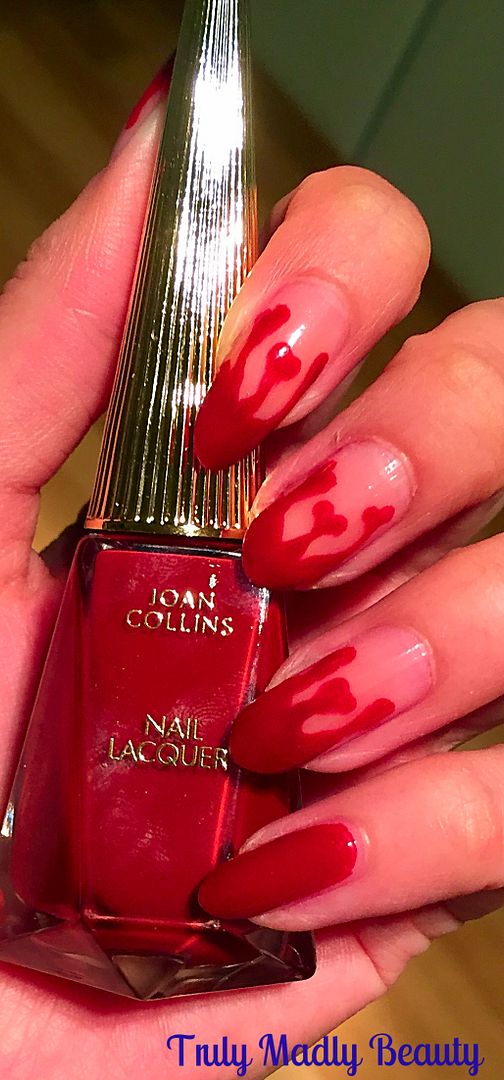
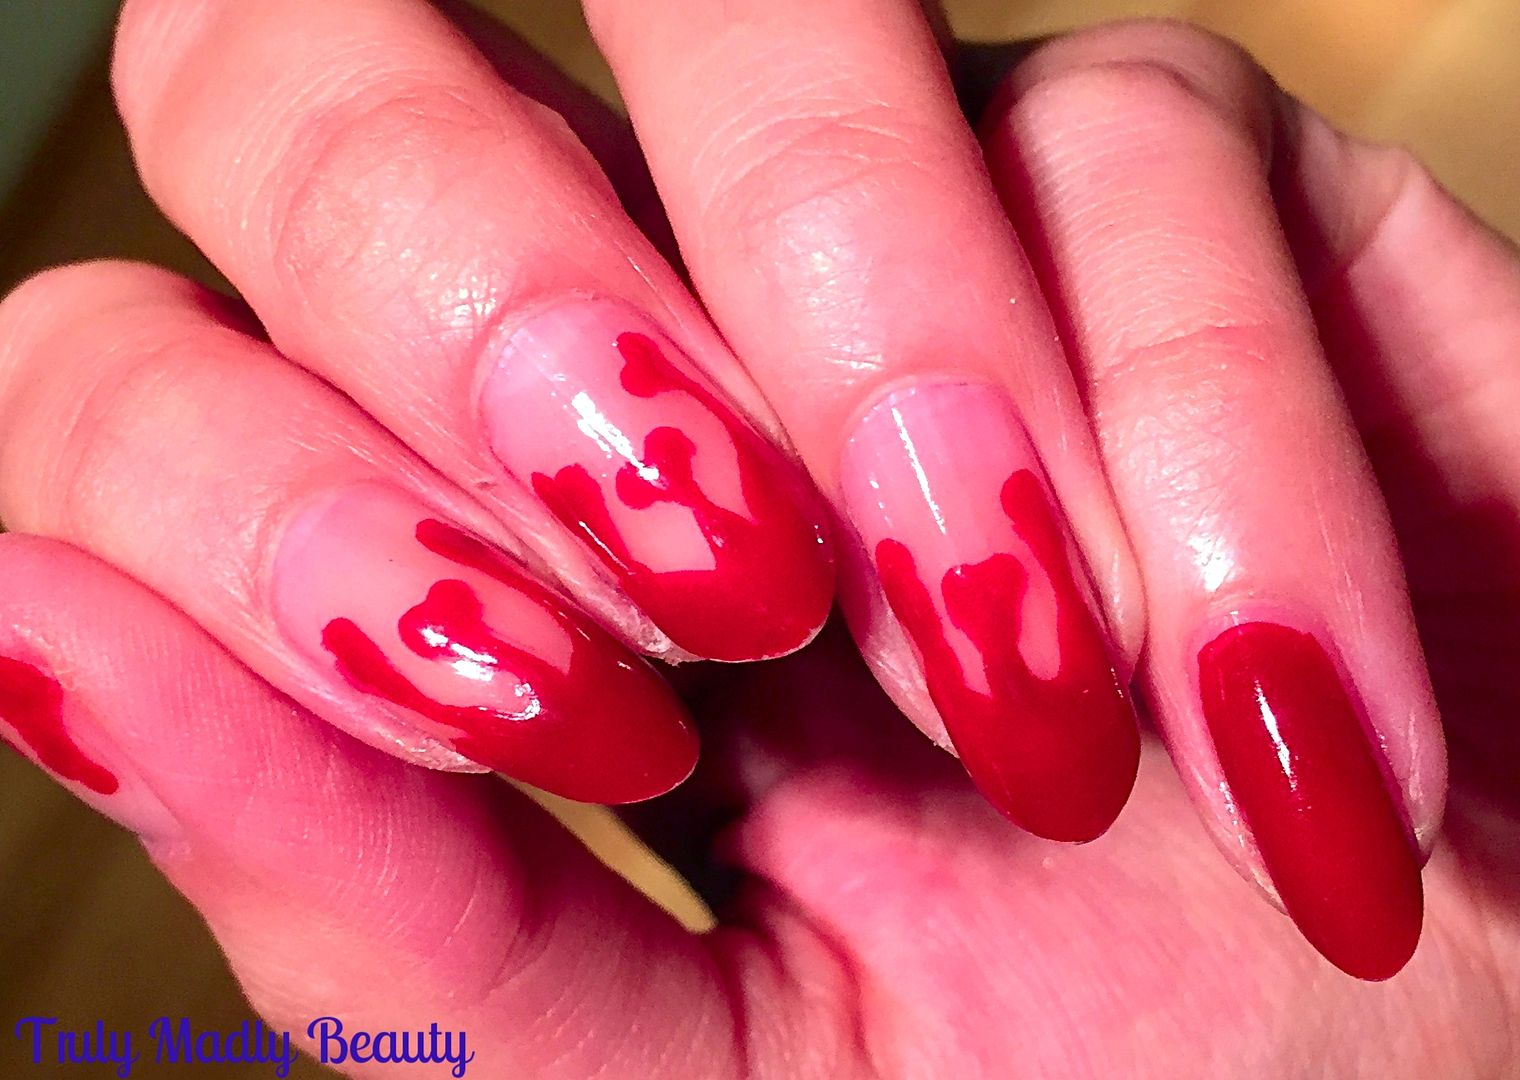
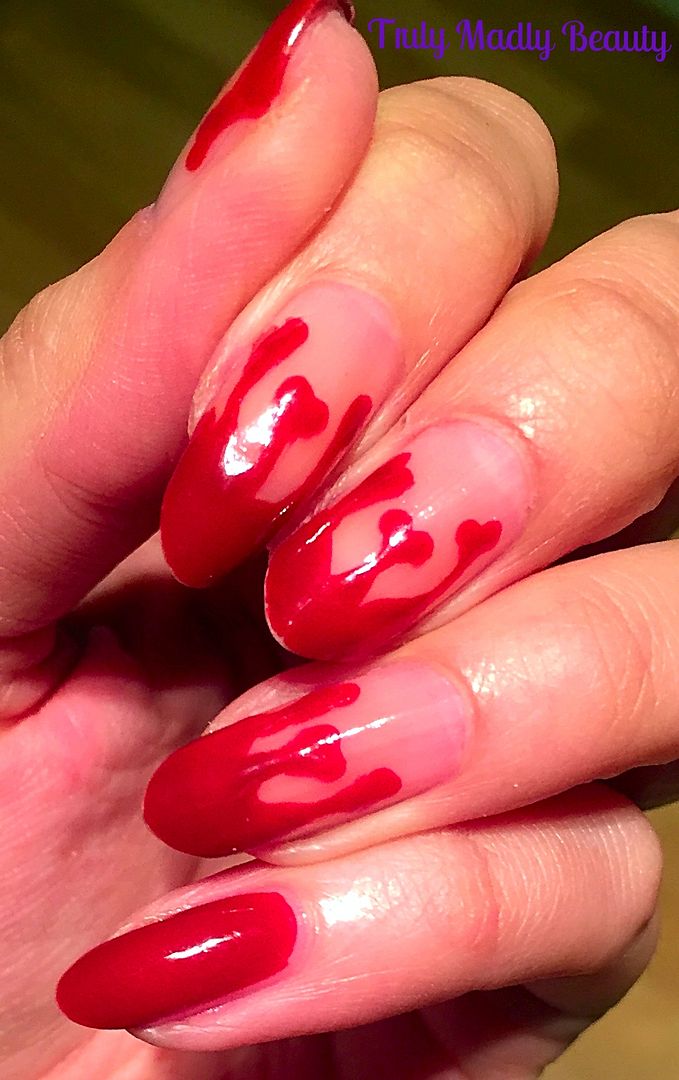
Every Halloween there is one design that I re-create every year in what now has become a tradition I suppose & that's some lovely dripping blood nails!
They look awesome, are fun to do & you can play around with how you
have your blood drips, either by the cuticles, on the tips of your nails or
even both! This year I wanted to give my blood drips a slight twist, so instead
of normal drops...I went for some dripping heart shaped drops instead!
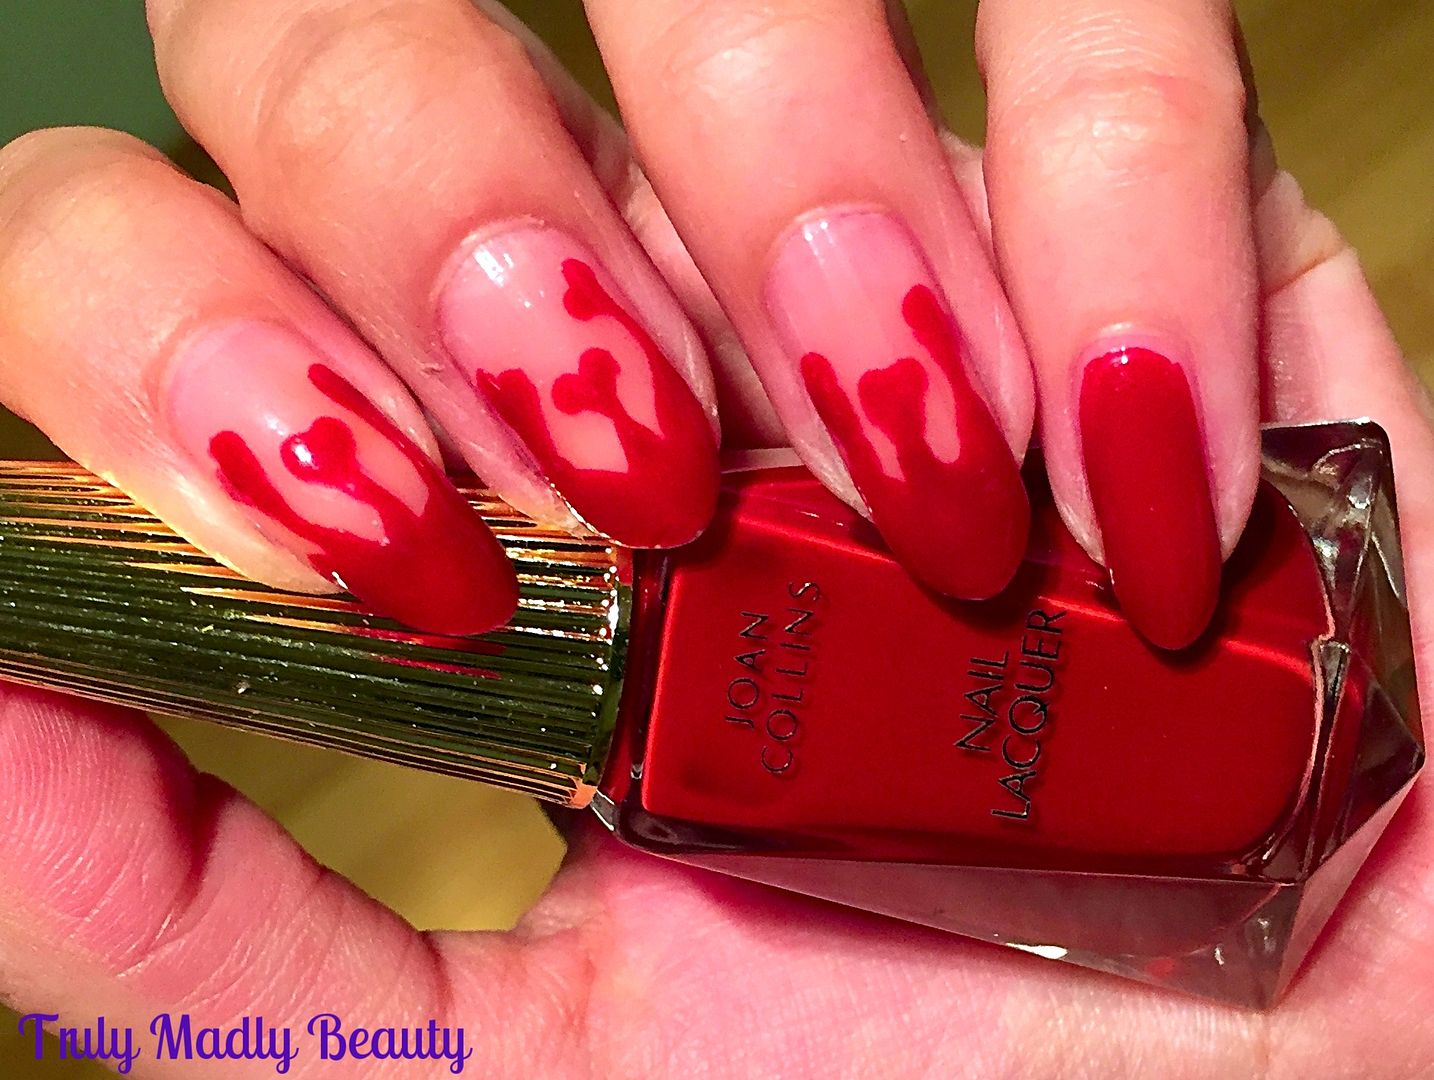
Of course for this you need a lovely blood red polish & I was
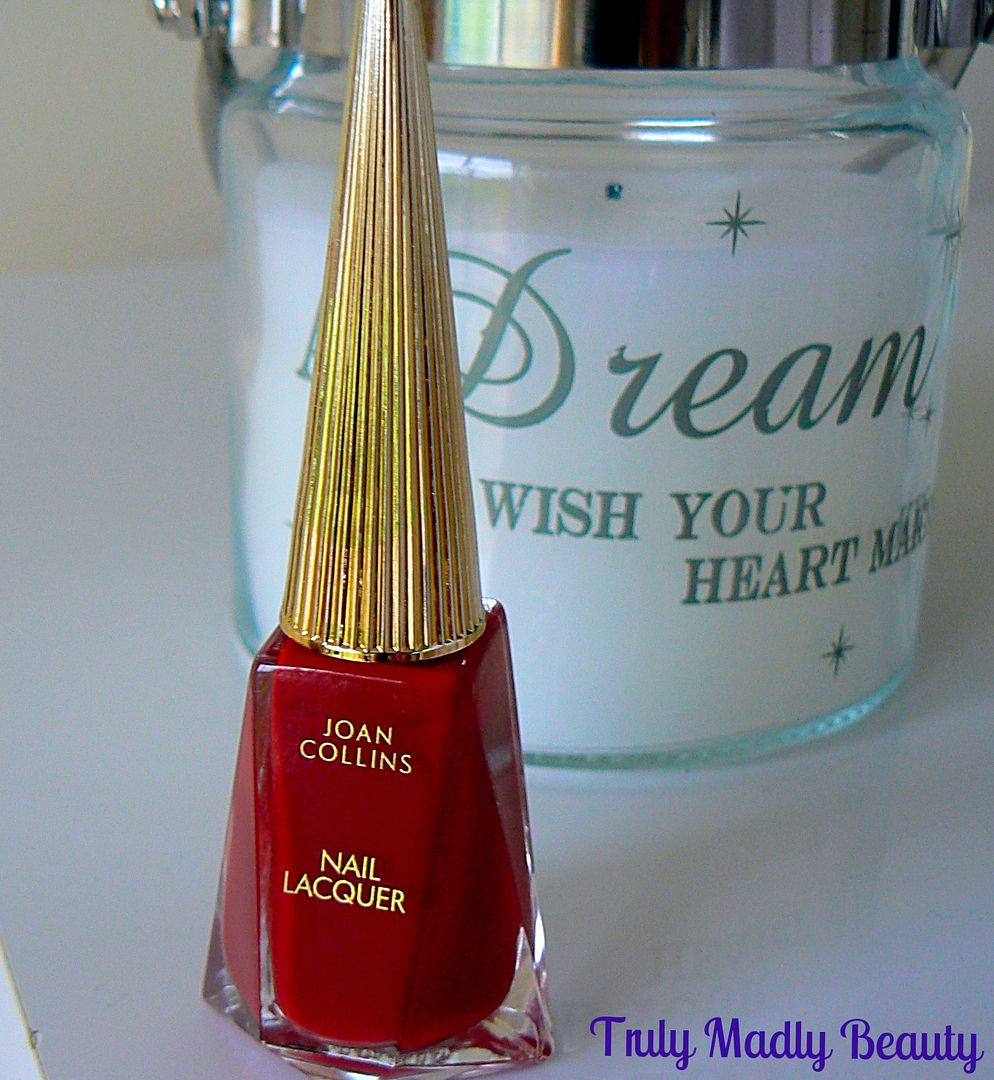
recently sent a pretty bottle from Joan Collins new beauty range
called Timeless Beauty which she has recently launched & features a lovely
range of chic beauty products which embody Hollywood Glamour & vintage Art
Deco vibes.
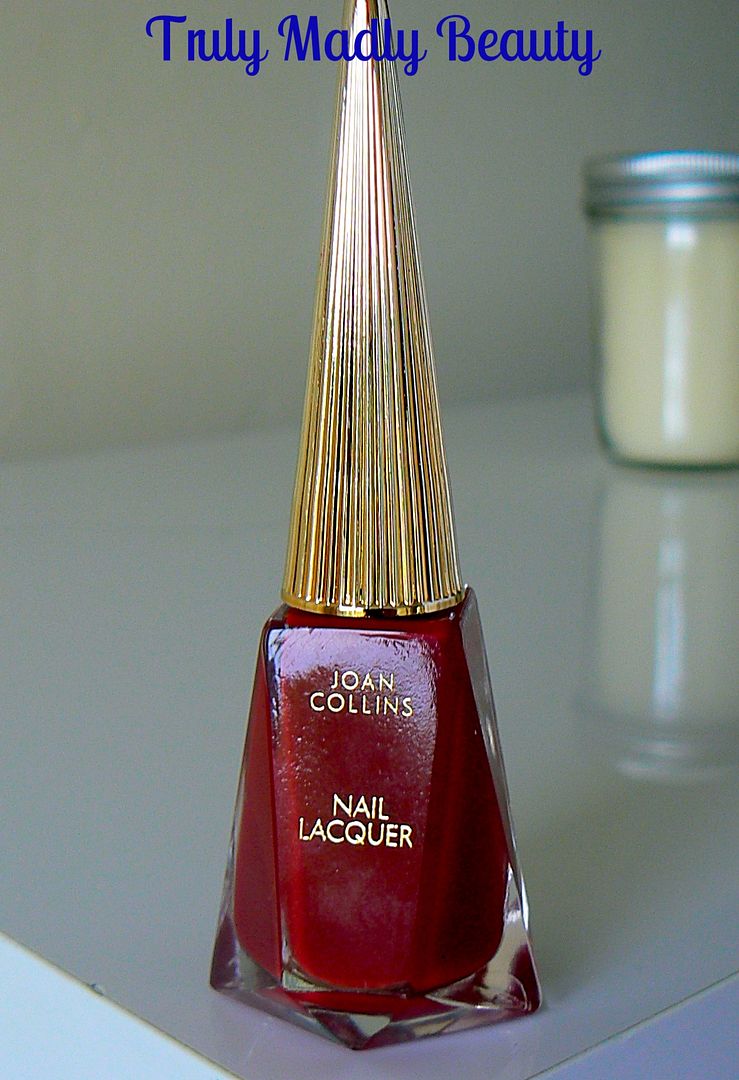
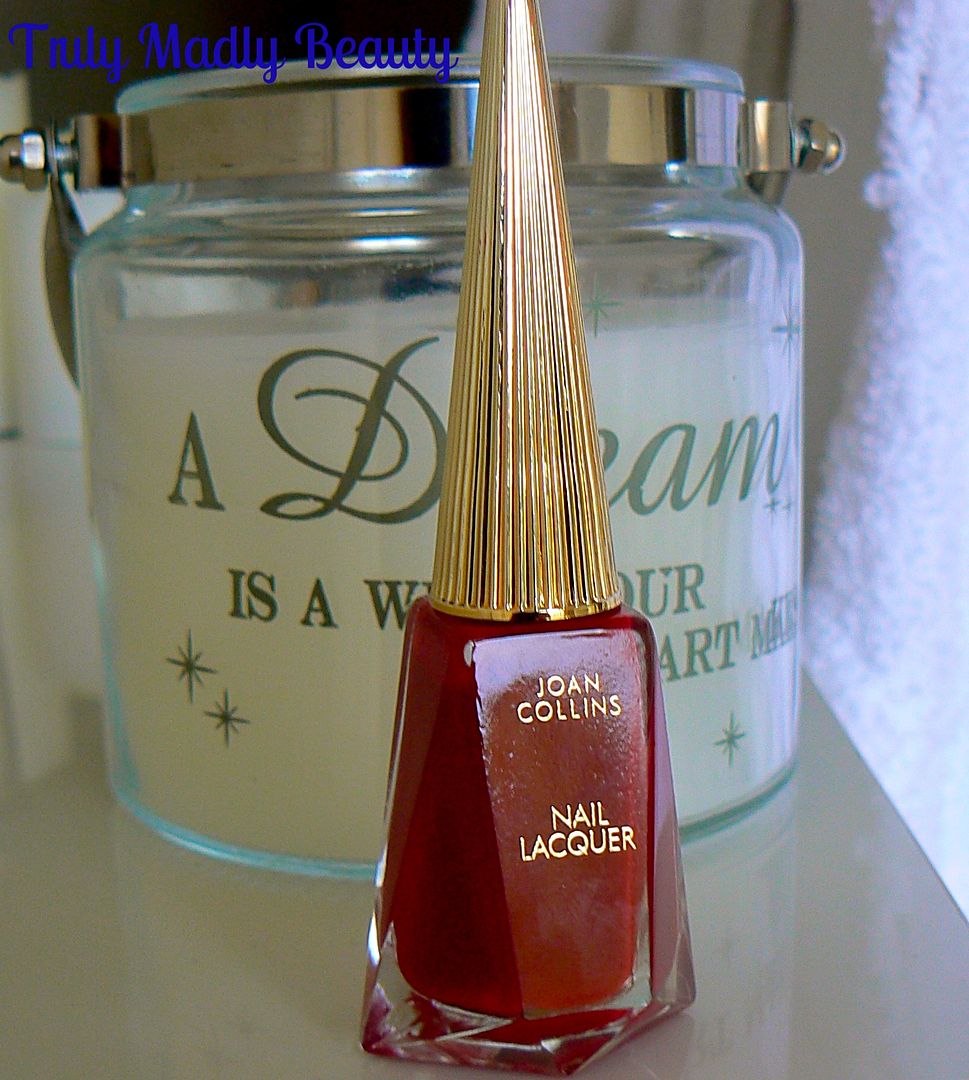
The range features a collection of nail lacquers including this divine
red which goes by the name Crystal* & just so happened to be the perfect
shade to recreate my blood!
Can we just take a moment to admire the beautiful bottle this polish is
housed in? I absolutely LOVE the diamond edged bottle shape & pointed
long gold cap, it gives the polish a wonderful vintage look that immediately
made me reminisce of my mums signature bottles of polish that I used to always
admire from afar. Not only that but doesn't it also have a major Louboutin vibe
going on? LOVE
The polish itself is a lovely glossy formula & an intriguing brown
toned red, so classy & yet actually perfect for recreating some blood!
To create your blood drips first apply some of your red polish across
the tips of your nails using the brush, this doesn't have to be done neatly!
After all it IS meant to resemble a puddle of blood ;)
Then for your drops, instead of just applying one drop, apply two
smaller ones side by side, before joining the two together at the bottom to
create your heart drop! Add about 3 of these per nail.
Then draw a vertical line from the pointed bottom of your hearts up to
your red tips. Once you've done this you can then go back in to curve the edges
of your lines to make them resemble drips!
I coated the entire little finger nail with the pretty Joan Collins
polish as I just loved the shade so much & well because I'm just random.
Finish with topcoat & you’re done! Hope you liked this year’s
variation on blood drip nails! Sorry I haven't been able to do step by step
pictorials to go with the instructions for my Halloween designs, all of which
you can find HERE, lighting & time have not been in my favour lately!
You can find Joan Collins Timeless Beauty range which includes not just
nail polish at only £13 each, but a wide range of gorgeous looking products in
M&S stores as well as online. Thanks for reading!
Lotsa love to ya!
7.03.2016
Fourth of July Drip Nails Tutorial!
Hello
there lovely readers!
Hope
you're all having a top weekend, especially my American beauts on the
other side of the pond! Oooh what I wouldn't give to be back in the
states right now as this weekend sees the US celebrating its Fourth
of July Independence Day meaning days of fab parties & fun times.
Naturally
I couldn't resist marking the occasion in the way I know best &
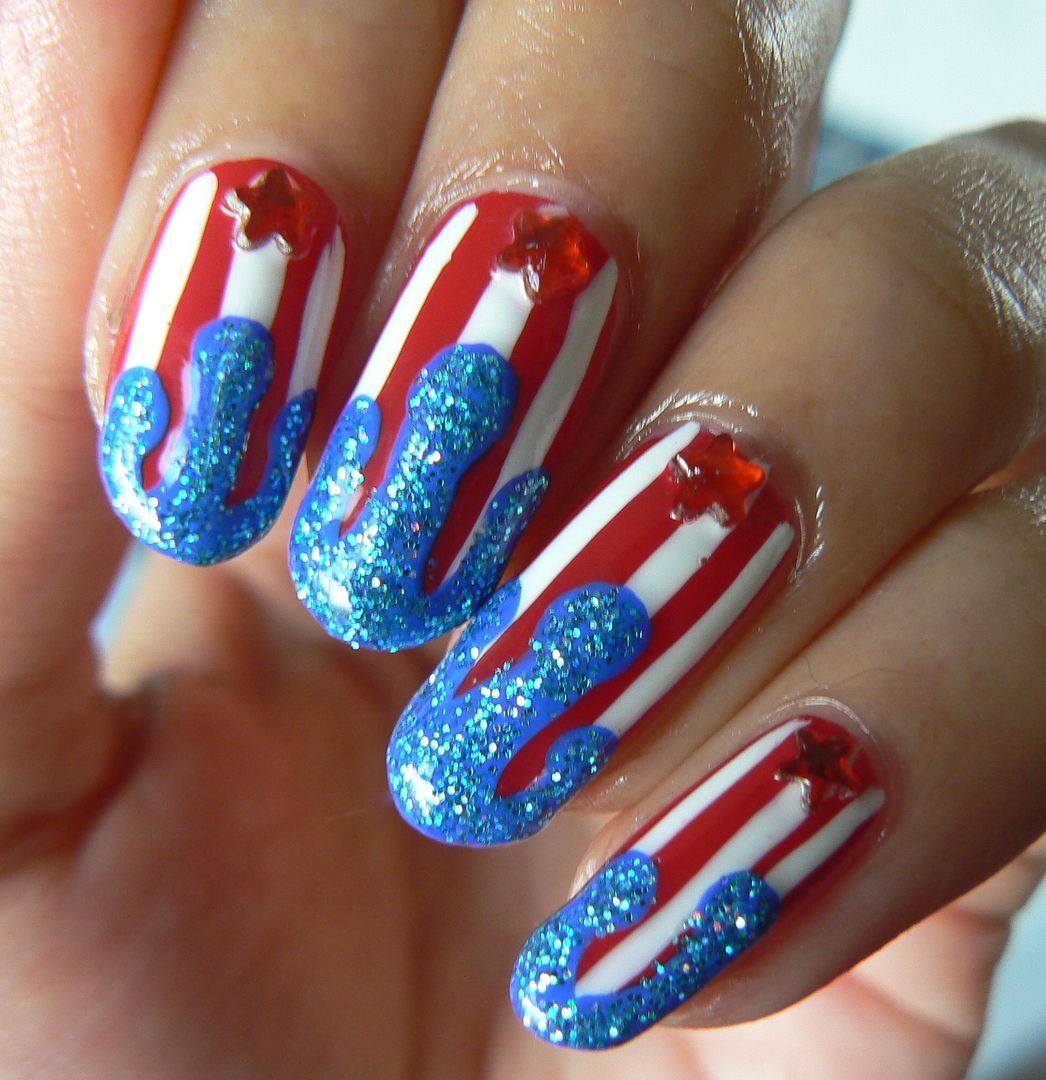
getting my nail art on. Using the American patriotic colours of
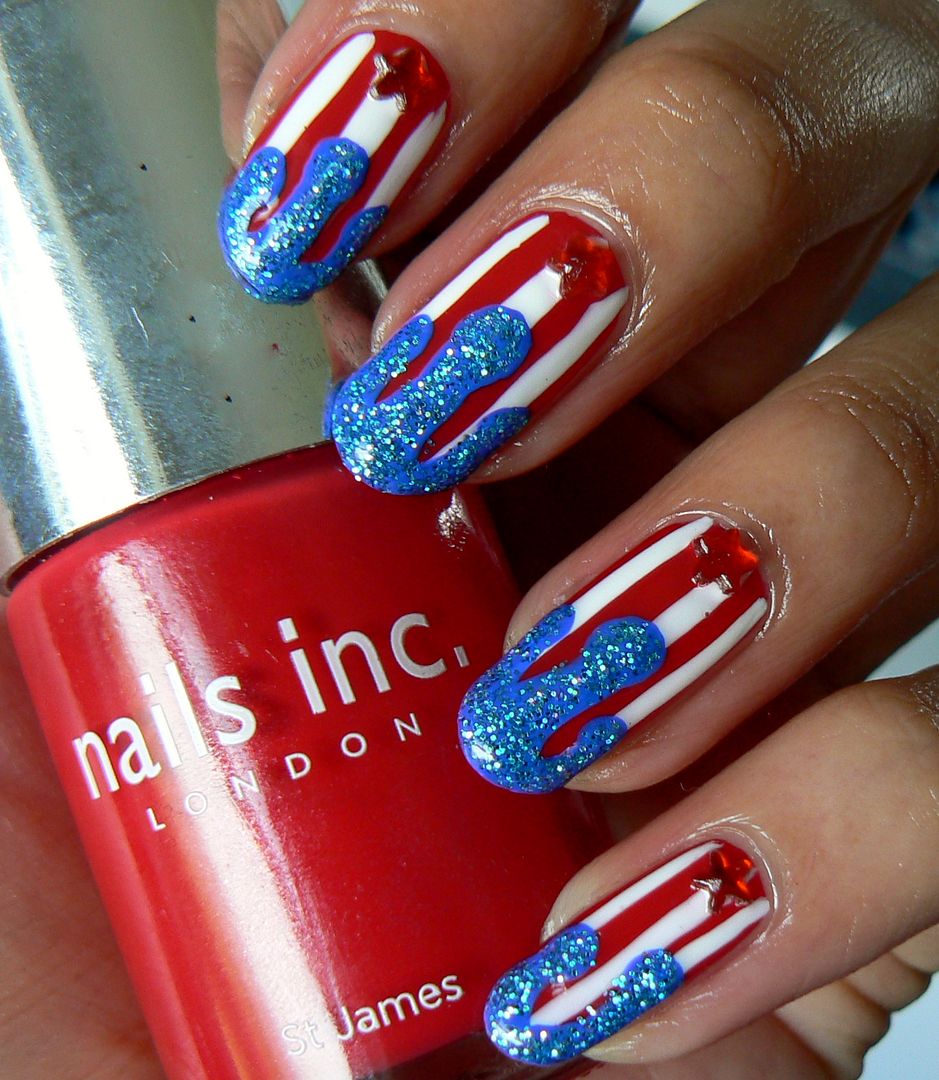
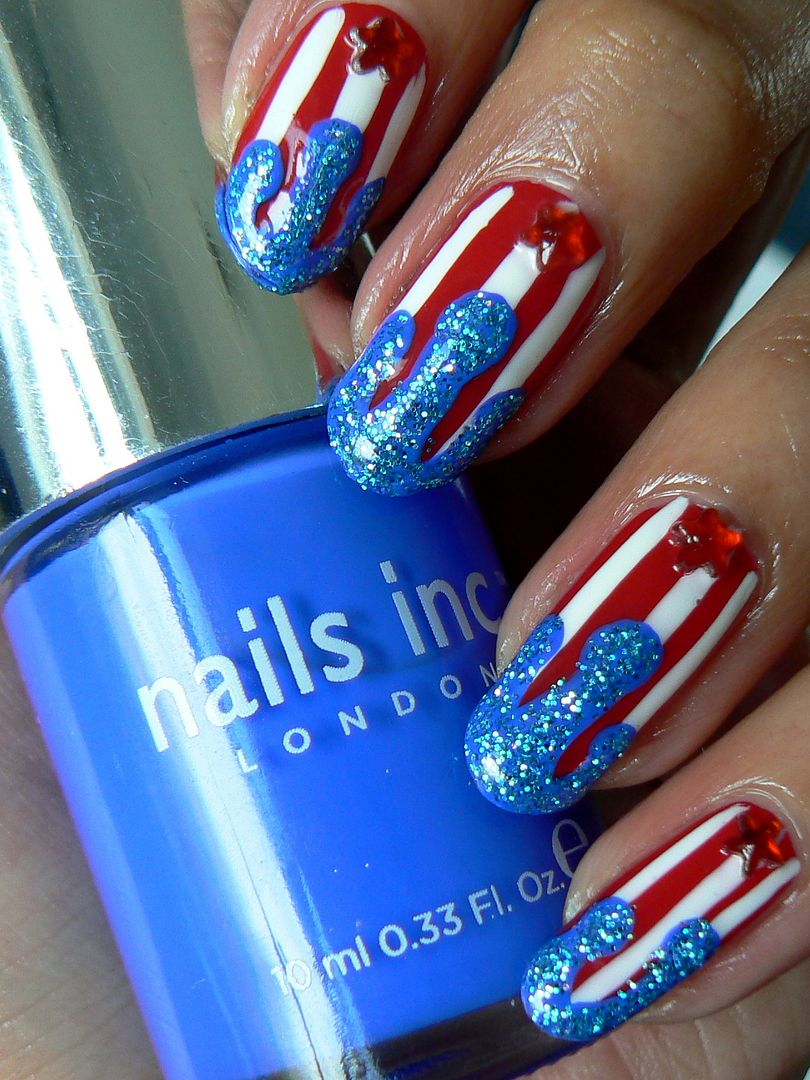
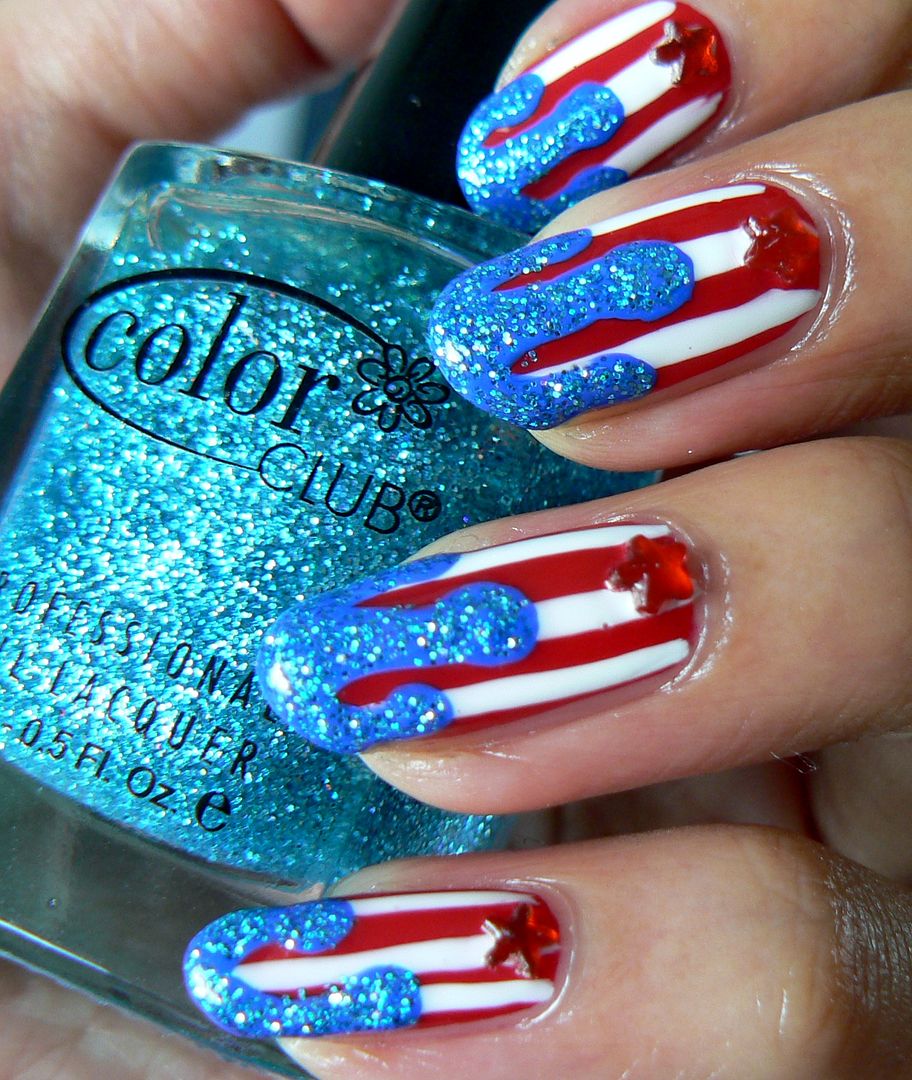
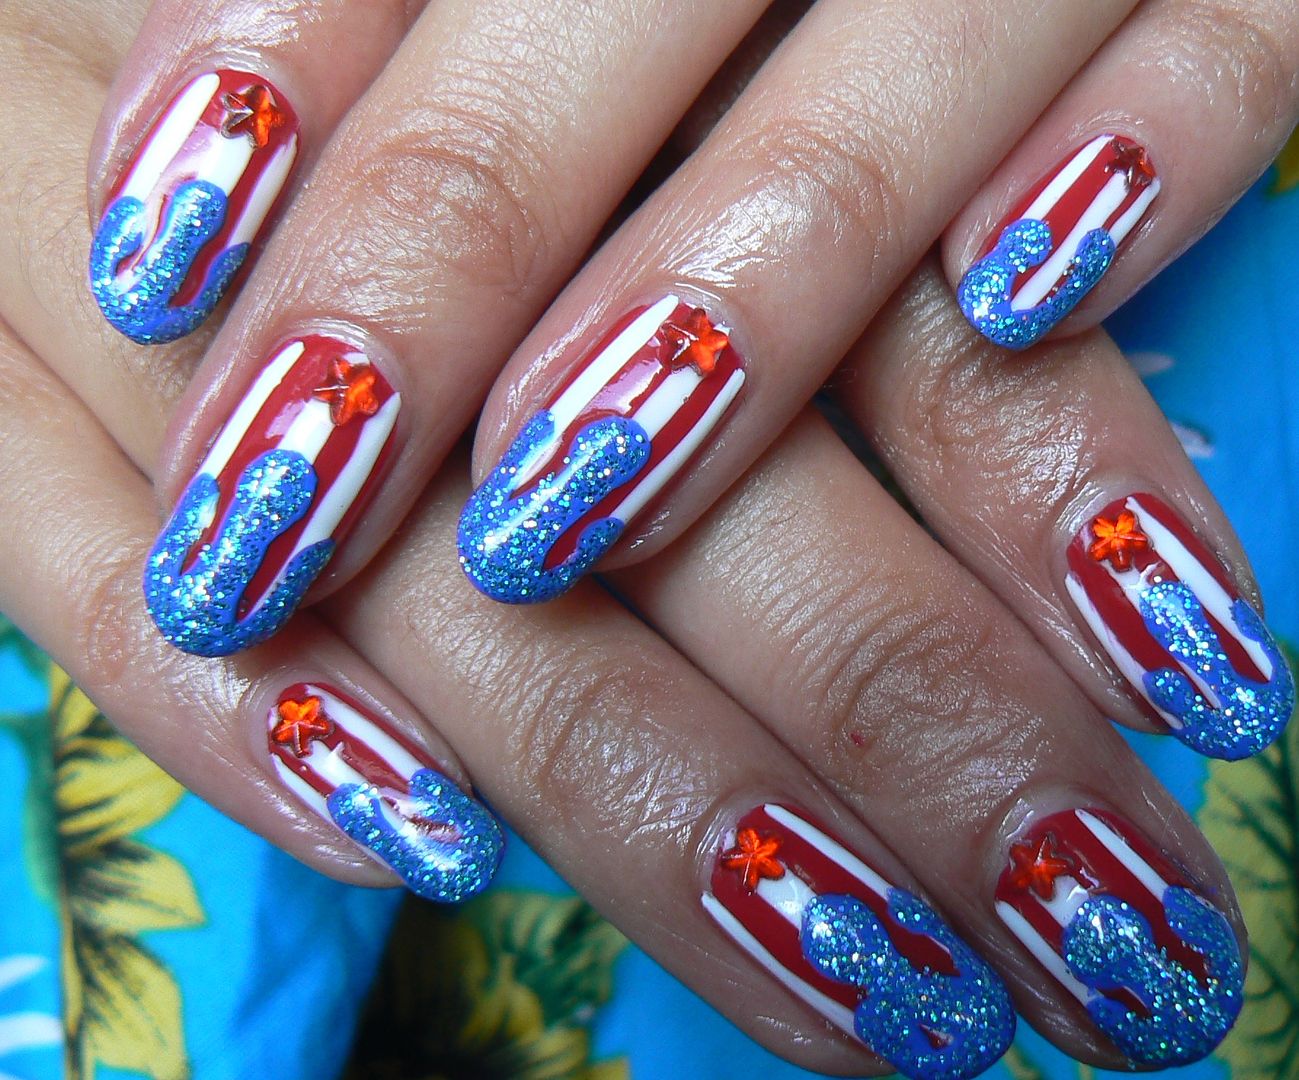
red, white & blue I went for some dripping glitter Fourth of July
Nails plus I've done a step by step tutorial so you can create these
too!
I saw a picture of a similar design in a Daily Mail article of all
places & thought ooooh what a fun & innovative way to do
patriotic nails! Plus I love drip nail art (see my chocolate drip
nails on the left of the page) & haven't done the design in
yonks, perfect time to remedy that with this :)
If
you want to re-create this design as well then keep on reading
dolls...
First
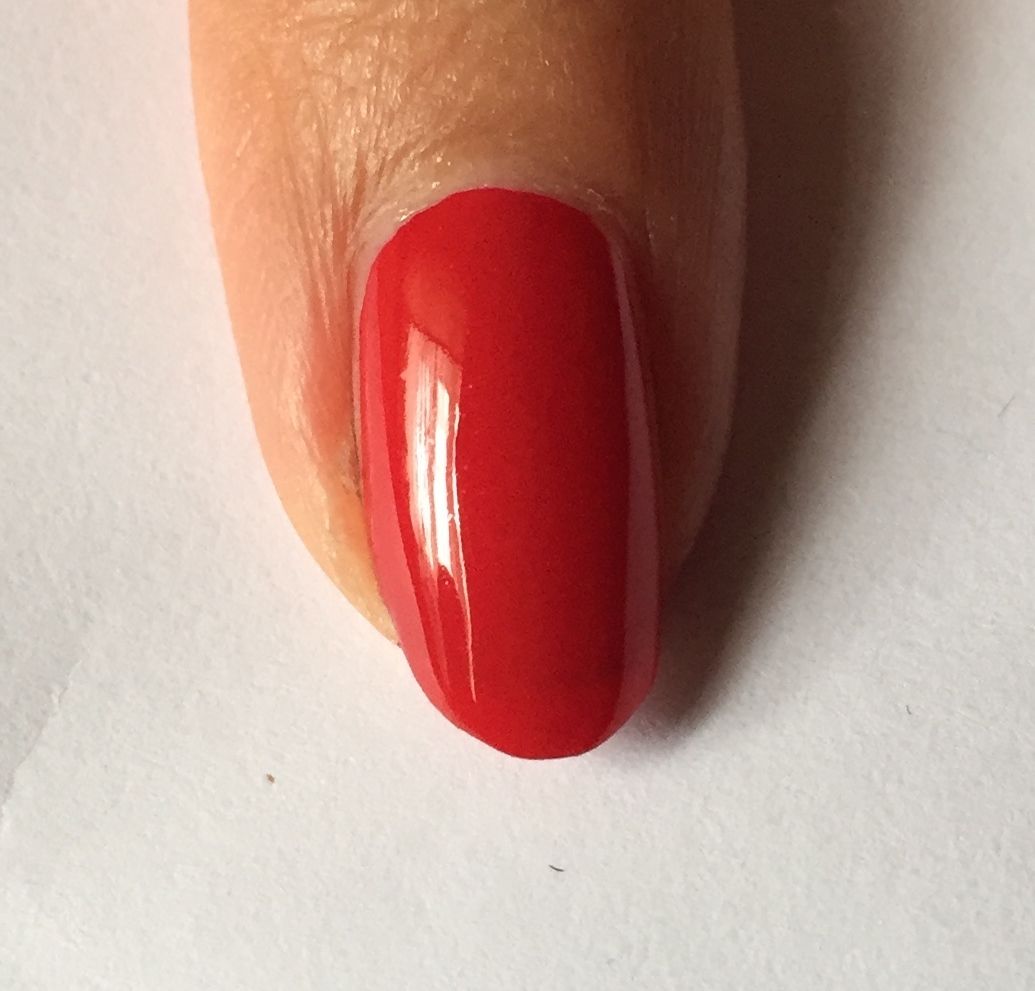
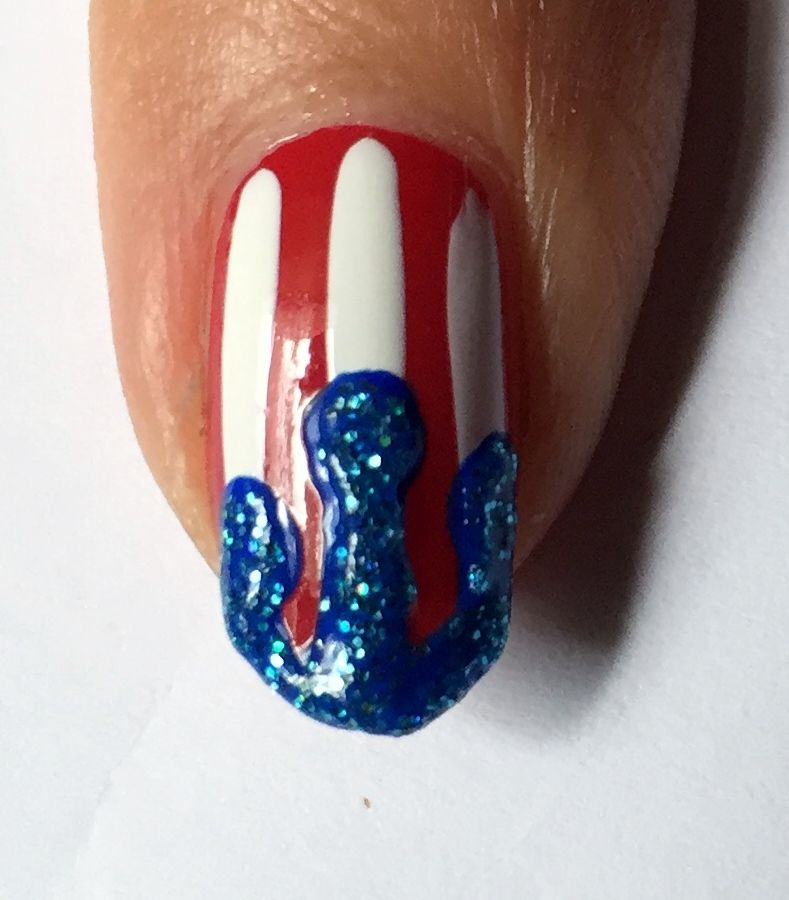
start with your red base, here I've applied just one coat of Nails
Inc St James as I knew there would be a few layers of polish on top &
didn't want to overdo it.
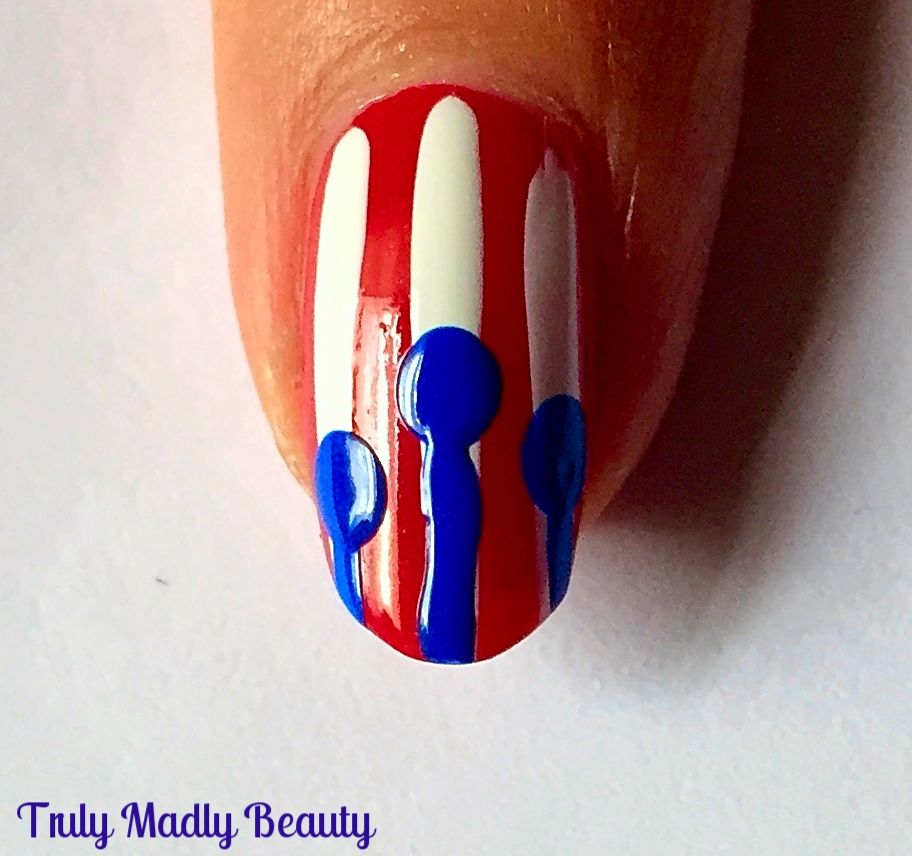
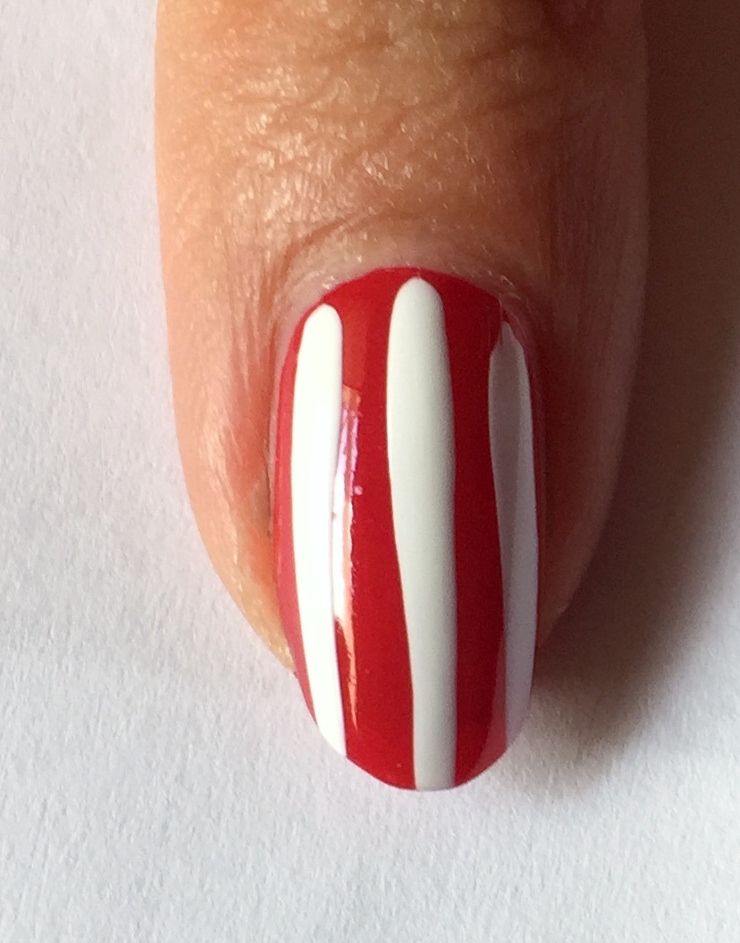
Then
using the thin striper brush from my Models own white nail art pen I
applied three vertical stripes down the length of the nail.
Now
for the drips! Start by applying three dots on to the nail using a
dotting tool as shown with your chosen blue polish, here I've used
Nails Inc Baker Street.
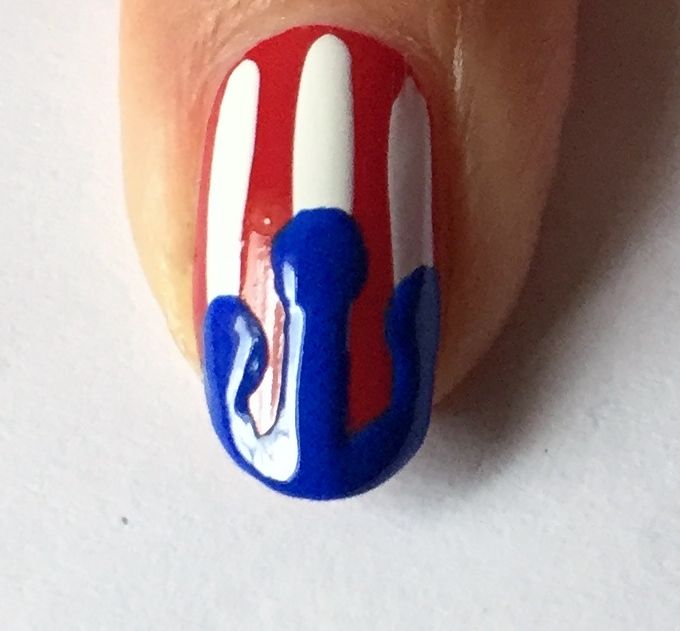
Next,
using a thin nail art brush, draw three vertical lines going down
from your dots to the tips.
Using
the same thin brush, curve the edges of the straight lines into your
dots as well as applying polish along the tips of your nails to create
your drip effect!
You
can skip this next step but my inner magpie was calling for an extra
bit of sparkle so I applied a bit of blue blingy glitter polish from
Color Club on top.
For
a final touch I just applied a wee red star rhinestone underneath my
drips to finish.
Apply
your topcoat & you're done! Sparkly Fourth of July nails ready for Independence Day party celebrations!
Thanks as always for reading!
Have a fab weekend whatever you may be doing my dears!
Lotsa
love to ya!
Labels:
Blue,
Color Club,
Fourth of July,
Glitter,
Independence Day,
nail art,
Nail Art Tips,
Nails Inc,
NOTD,
Patriotic,
Red Nails,
Tutorial,
White
3.29.2016
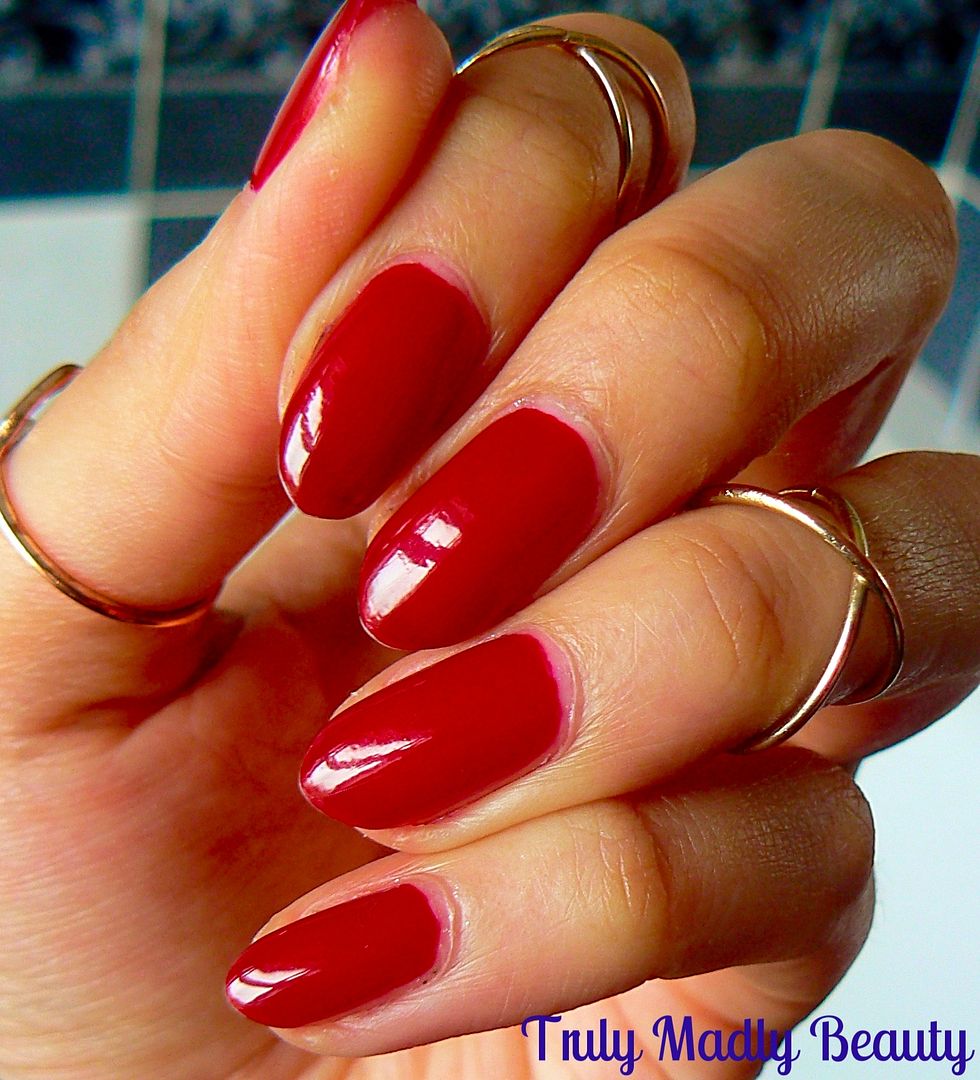
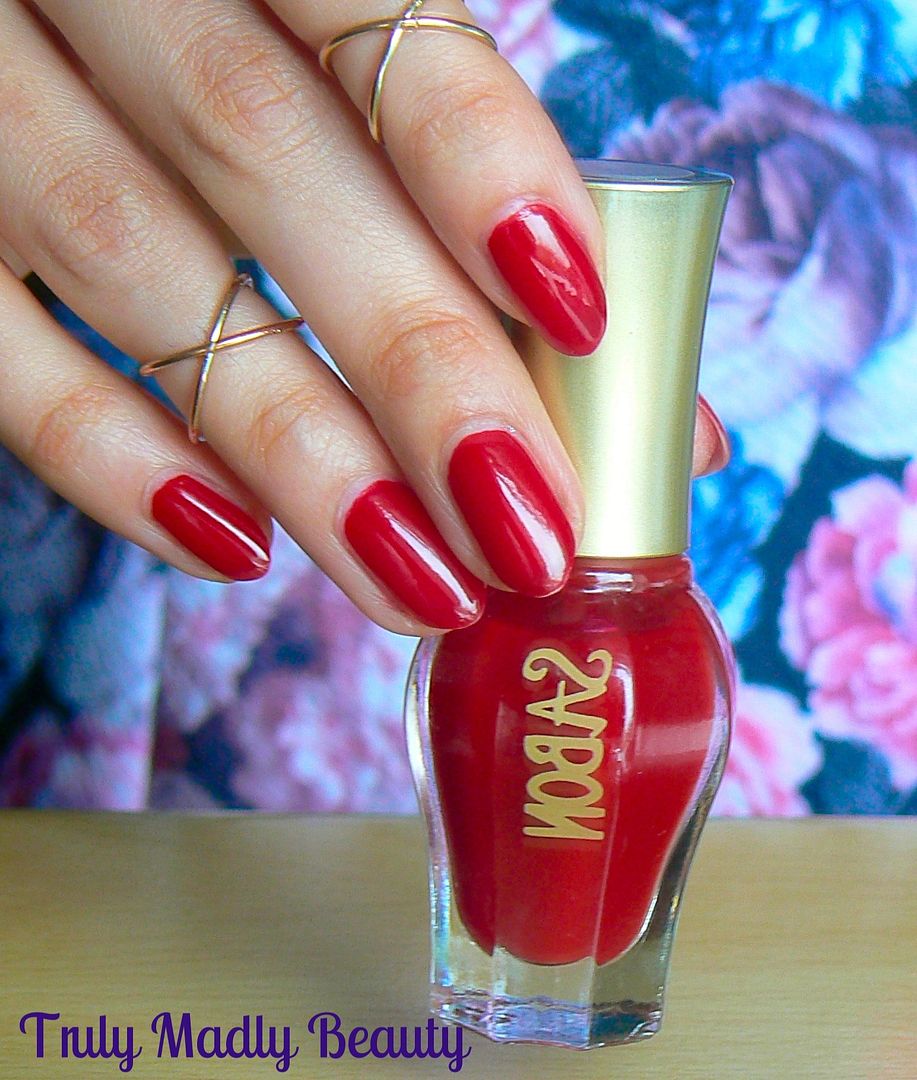
NOTD - The PERFECT Red Polish!
Hello lovely readers!
Red
lips...red nails. Vintage & iconic, whether you're a loyal fan of
one or go all out & love to rock both, there's no doubt that both
are timeless looks that will never fade out. Its a mission in every
girls life to find THE perfect red. Me, I'm still yet to find the
perfect red lipstick...it may be a while till this task is
accomplished seeing as red lips scare the bejesus out of me however,
I am happy to say that my hunt for the perfect red polish may finally
be over as I have discovered one that I've fallen head over heels in
love with! And its brand Sabon who have delivered so perfectly...
Sabon is in fact a brand specializing in bath and body products, not so
hugely well known in the UK...yet. I've heard on the grapevine that
they plan to make their stamp here too which I am so happy to hear &
they now have a UK website! I actually stumbled across this store on
my trip to NYC last year & was drawn in immediately by the
delightful scents & cute kitsch packaging.
After
befriending the absolute sweetheart of an assistant, gosh I really
miss how wonderful New Yorkers were during my time there &
indulging in a complimentary hand pamper session in which a sublime
selection of Sabon products were used, including scrubs & hand
cream potions, my nail polish raider went in to overdrive when I
spotted the bottles sitting so prettily amongst the bath products.
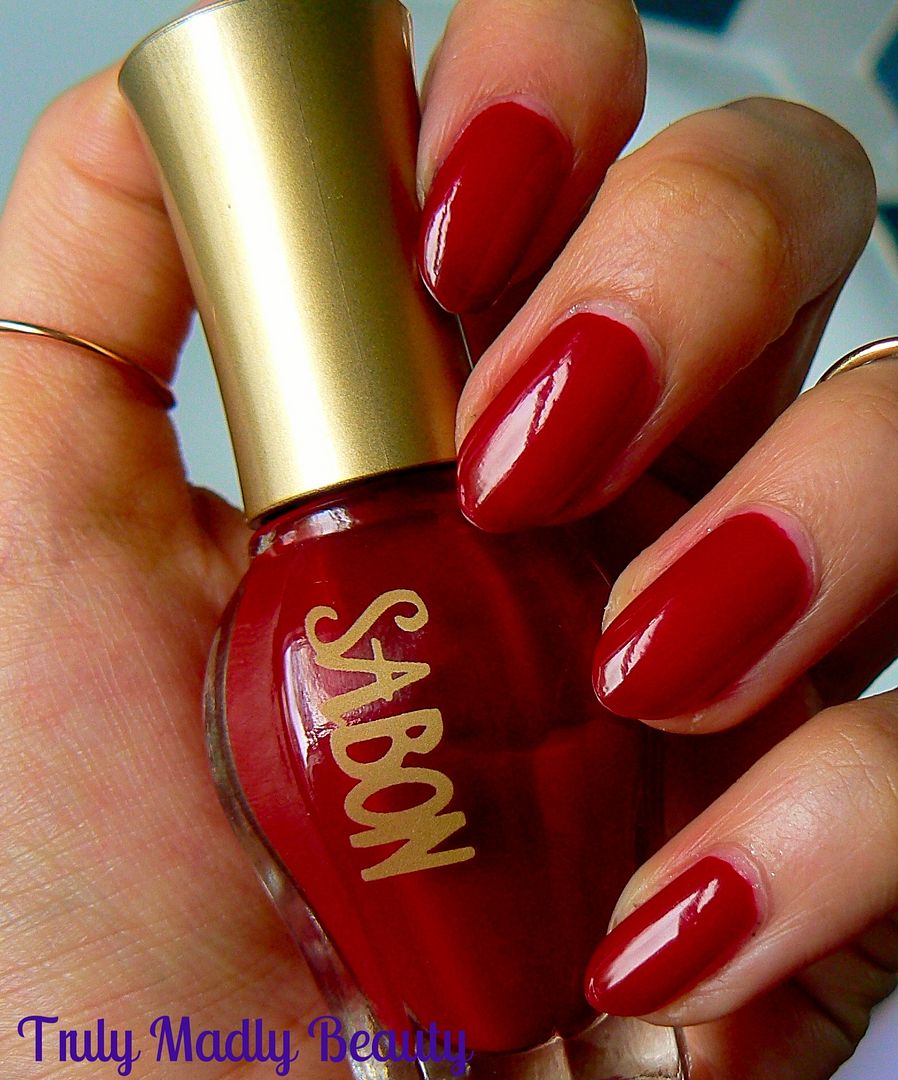
Naturally I was in my heaven & I ended up taking this beauty home
with me which goes by the simple title of Burgundy ;)
Regardless
of the simplicity of the name every other aspect of this polish more
than makes up for it, firstly packaging. Just look at that beautiful
vintage bottle, wouldn't that look so pretty & elegant sitting on
your vanity table? J'adore!
Next
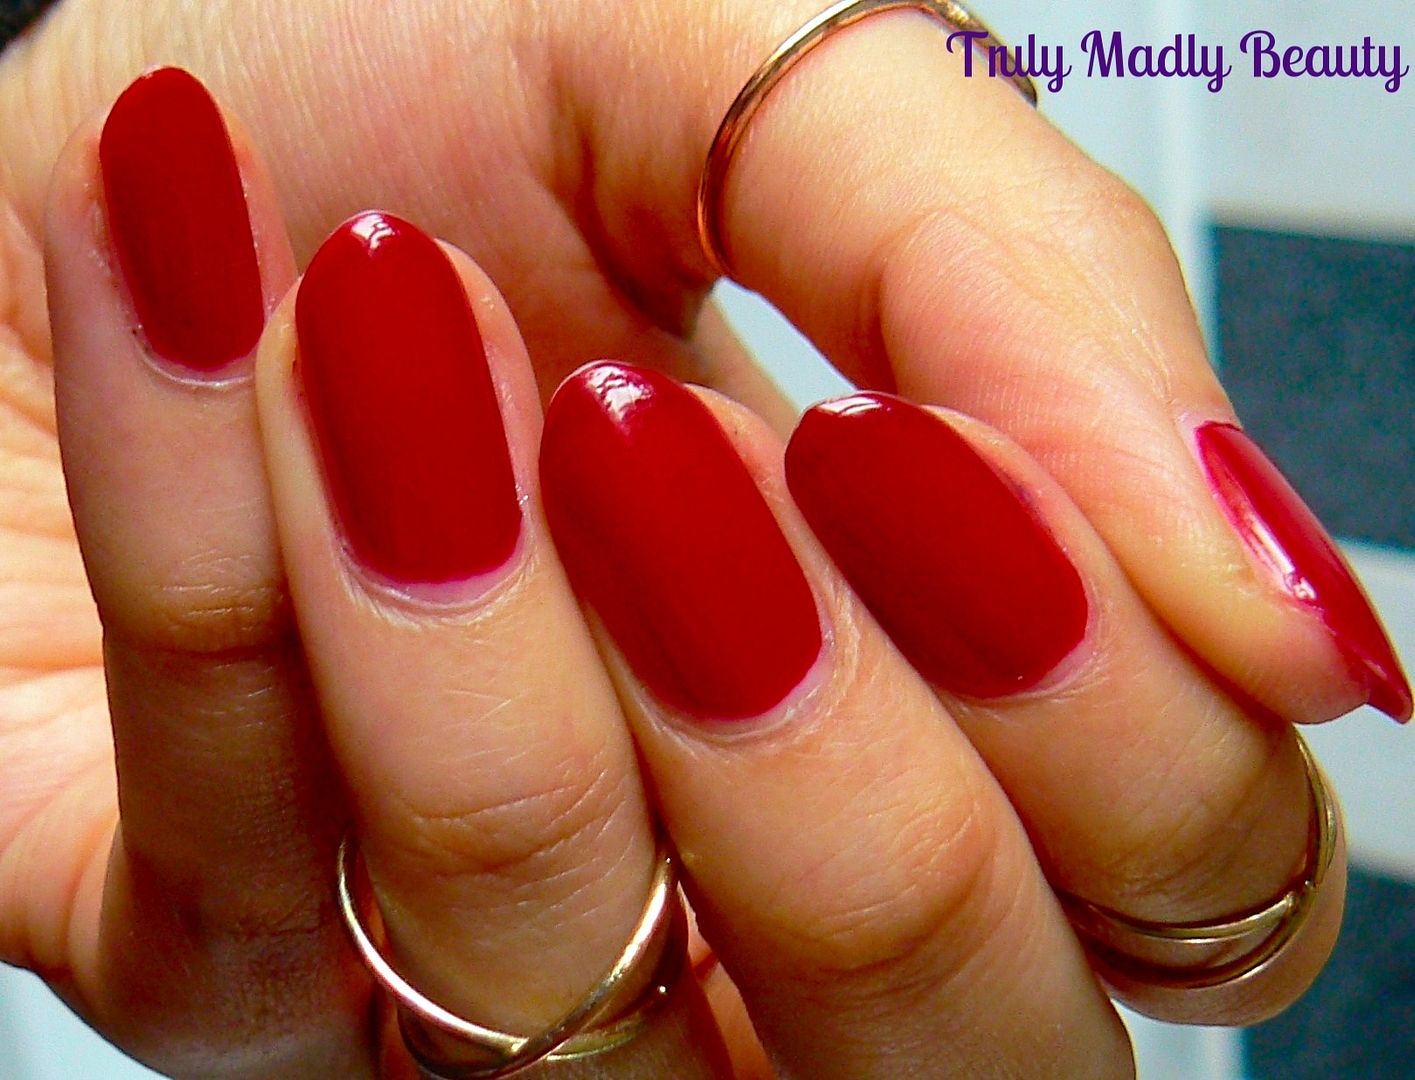
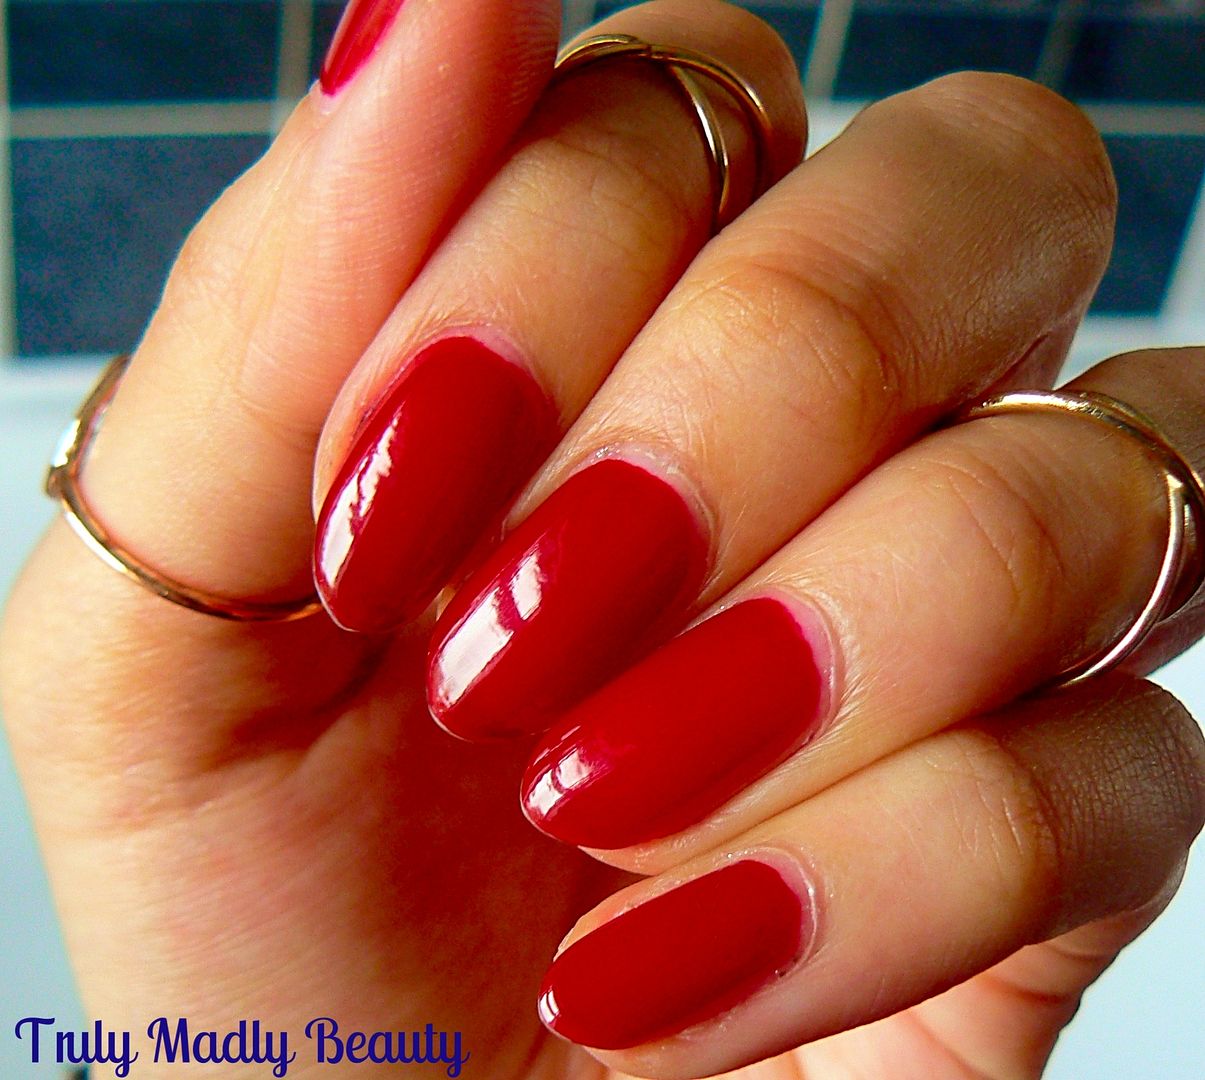
is the colour, what can I say its just the PERFECT vintage red for
me, not too orange toned, nor too bright or too dark,
just....PERFECT.
Finally
the formula of the polish, which I absolutely love, it does veer
towards the thin side, but I actually prefer this as it prevents any
possible gloopiness & makes the polish so much easier to work
with. Due to the consistency of the formula being such, you are left
with a lush glossy almost jelly like finish to your manicure. This
was 3 coats applied.
The
finishing result...glossy, vintage pin up red goodness. You could
even forgo topcoat however its always a good idea to finish with a
thin coat at least for longevity. So yes, my hunt for the perfect red
is over. Huzzah! You can find Sabon products as well as these
beautiful polishes online but I believe there is now a store in Covent Garden...either way I will definitely be popping in again when I return to
NYC in June!
Do
you have your perfect red shade? Thanks for reading!
Lotsa love to ya!
2.11.2016
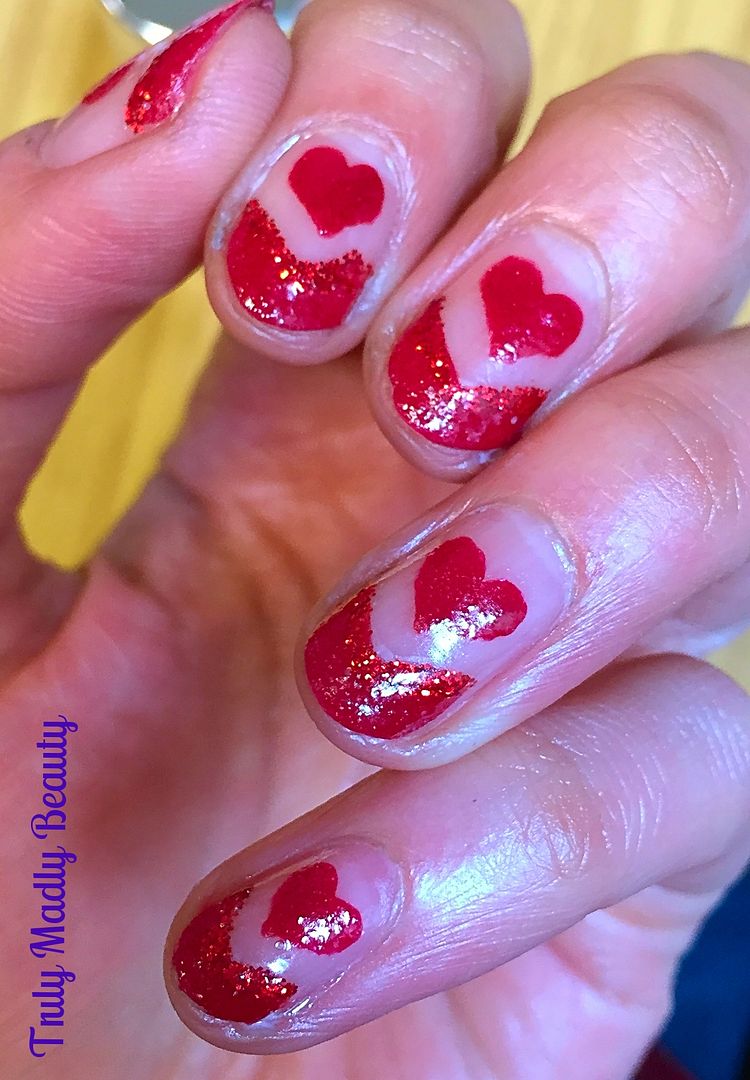
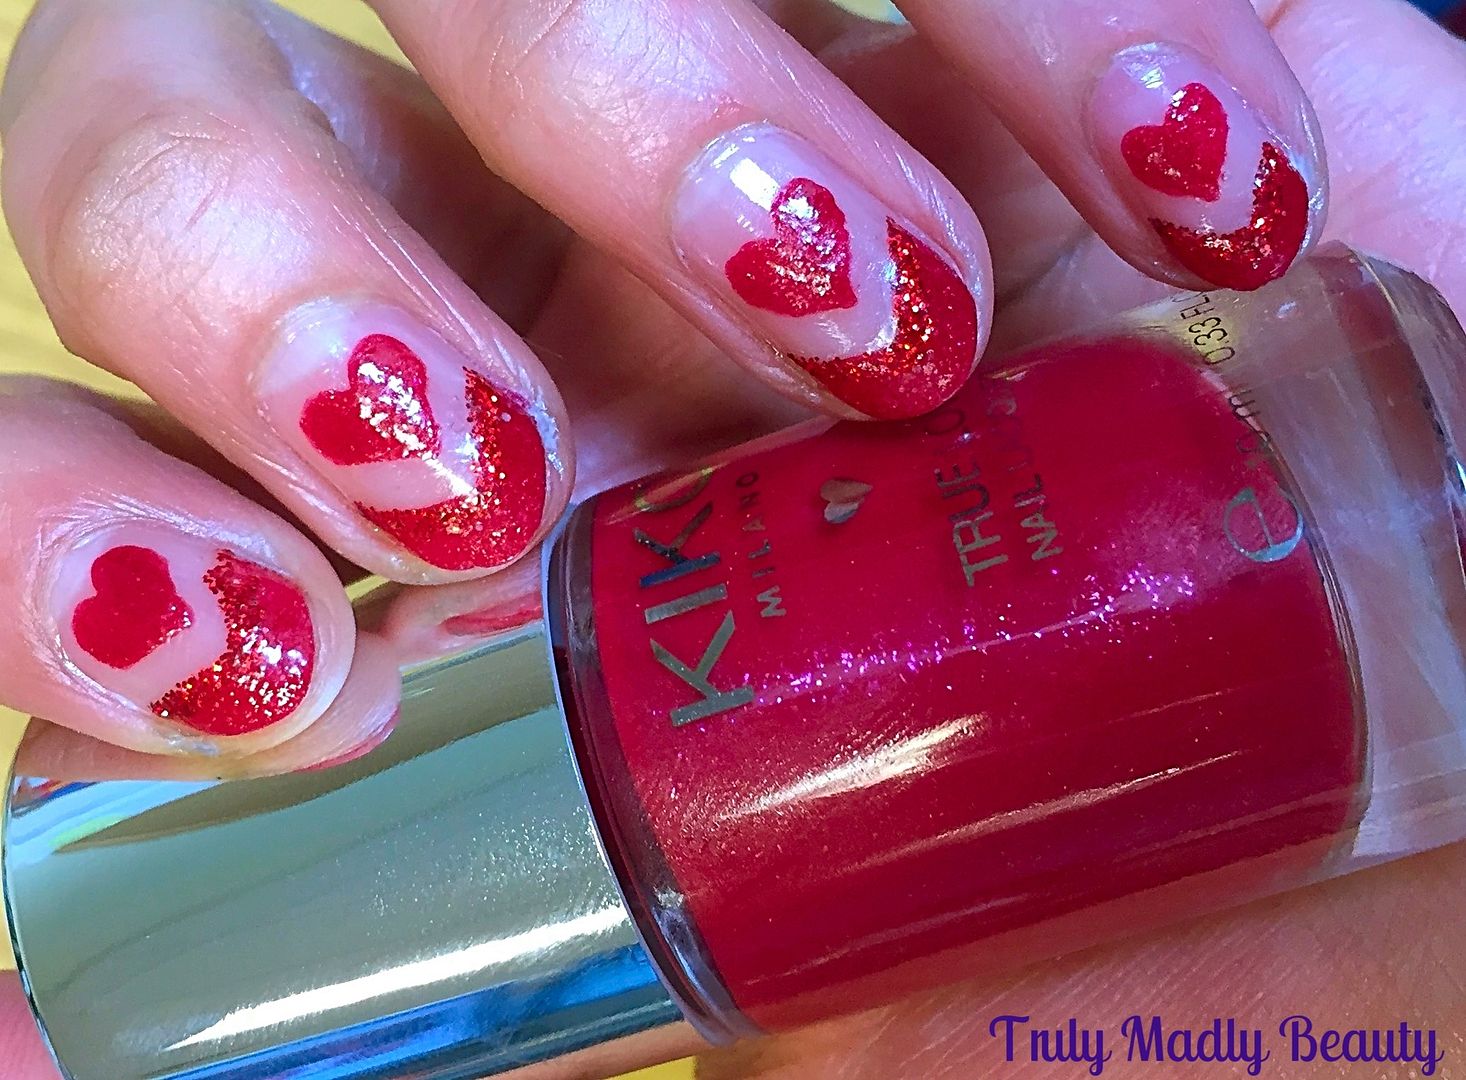
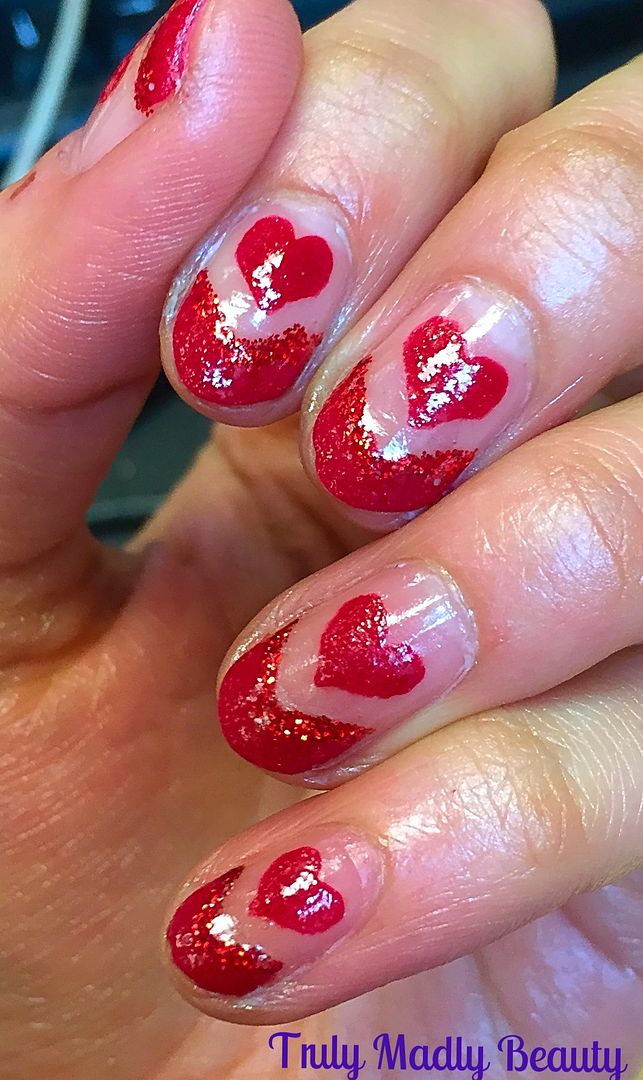
NOTD - Floating Hearts Nails plus Tutorial ft KIKO True Love Lacquer!
Hello
there my lovely readers!
Another
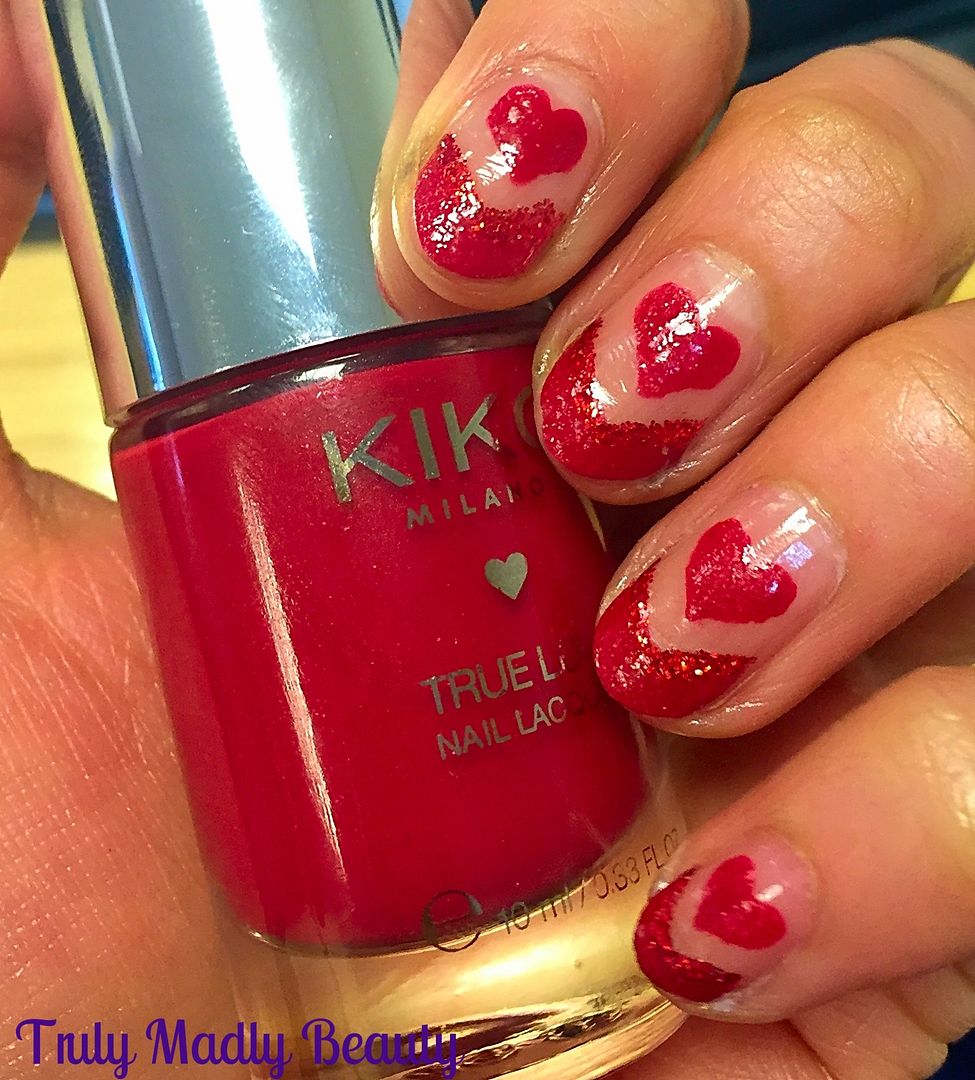
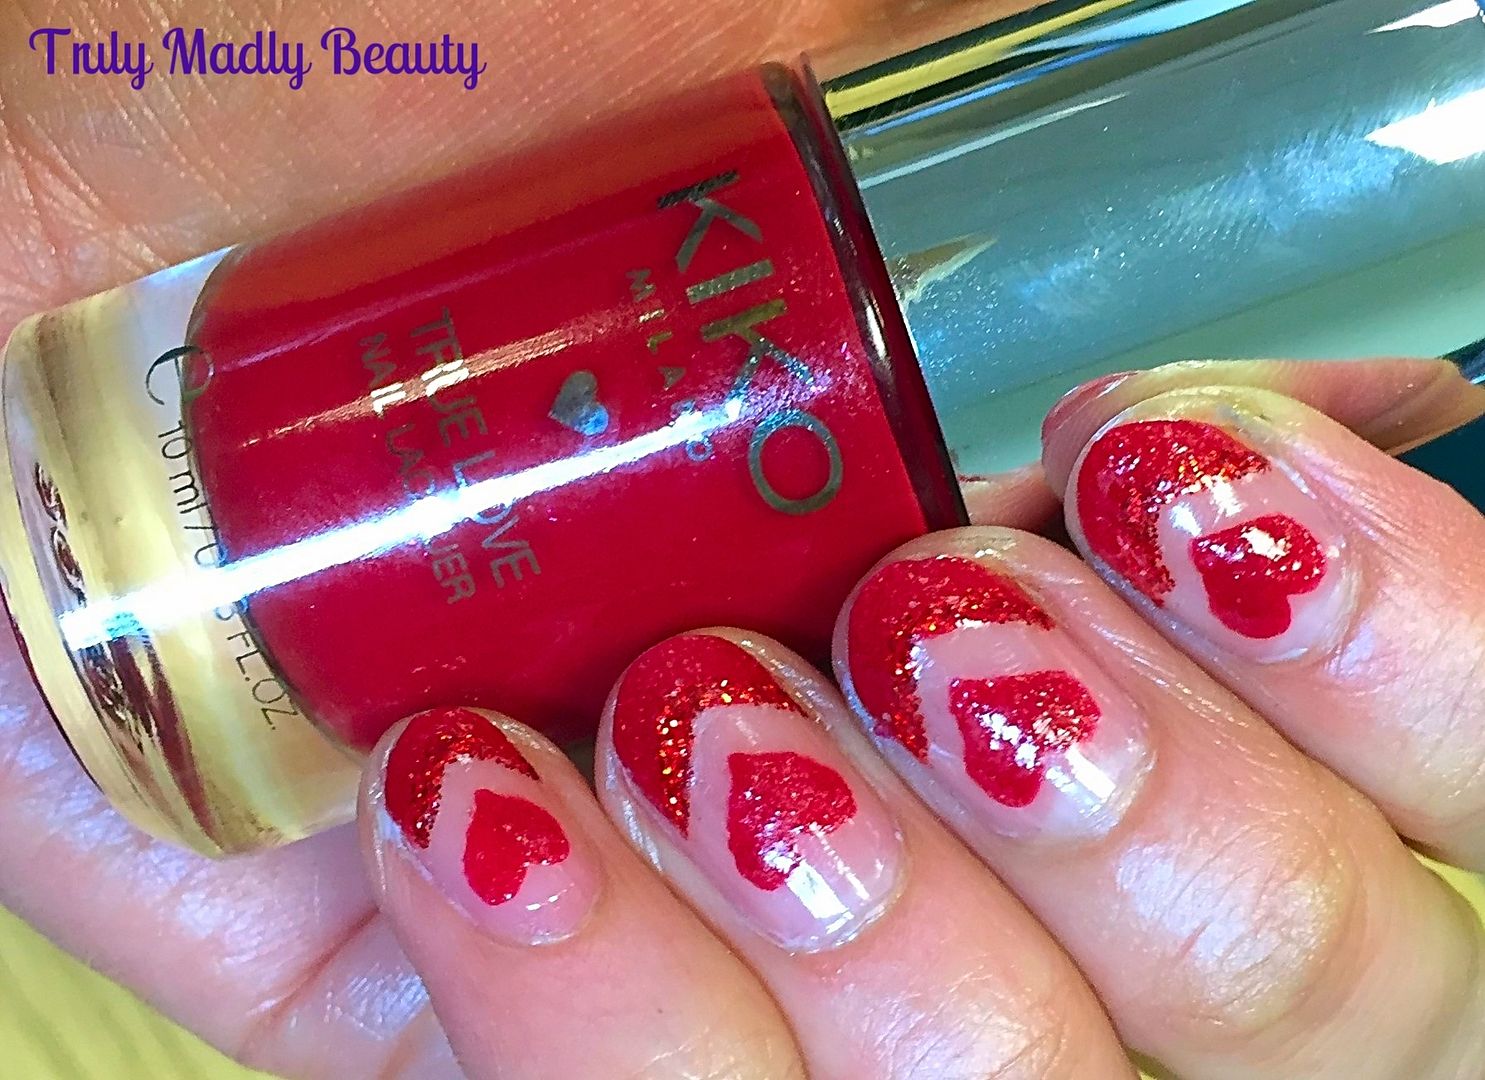
Valentines themed mani for you today my dears! This time I've thrown together some fun floating hearts that are super simple to do & which I'll show you how to create...
For
this I've used KIKO's True Love Lacquer in Red Kiss, which the lovely
Safiyah aka Frootibeauty kindly gifted me when I saw her recently
because she's just an absolute angel who knows my weakness! I've
always adored KIKO polishes, fab quality for a bargain price. Well I
saw this & though it an apt polish for a Valentines manicure!
What
I didn't realise however was that these particular polishes from
KIKO's recent BFF collection for Valentines day are actually
textured! By the time I noticed this I was already on my 3rd nail in
haha!
The
True Love Nail Lacquers are micropearls which in fact dry to a matte
textured finish, almost like sand effect polishes. I hadn't seen any
swatches online so you could say it took me by surprise a tad.
Normally I wouldn't have chosen a textured/effects polish for this
type of mani but hey ho, I rolled with it anyhoos :)
The
theme of the polish not to mention the fire engine red shade was
perfect for a valentines mani. The textured finish is definitely
interesting, matte polish lovers especially would love it. You have
to work quick with the polish as the formula can get gloopy if
overworked hence why its not the best choice for nail art, & the
polish dries fast, another bonus of these textured type polishes.
Here's
a quick step by step guide on how to create the floating hearts
french nails...
To
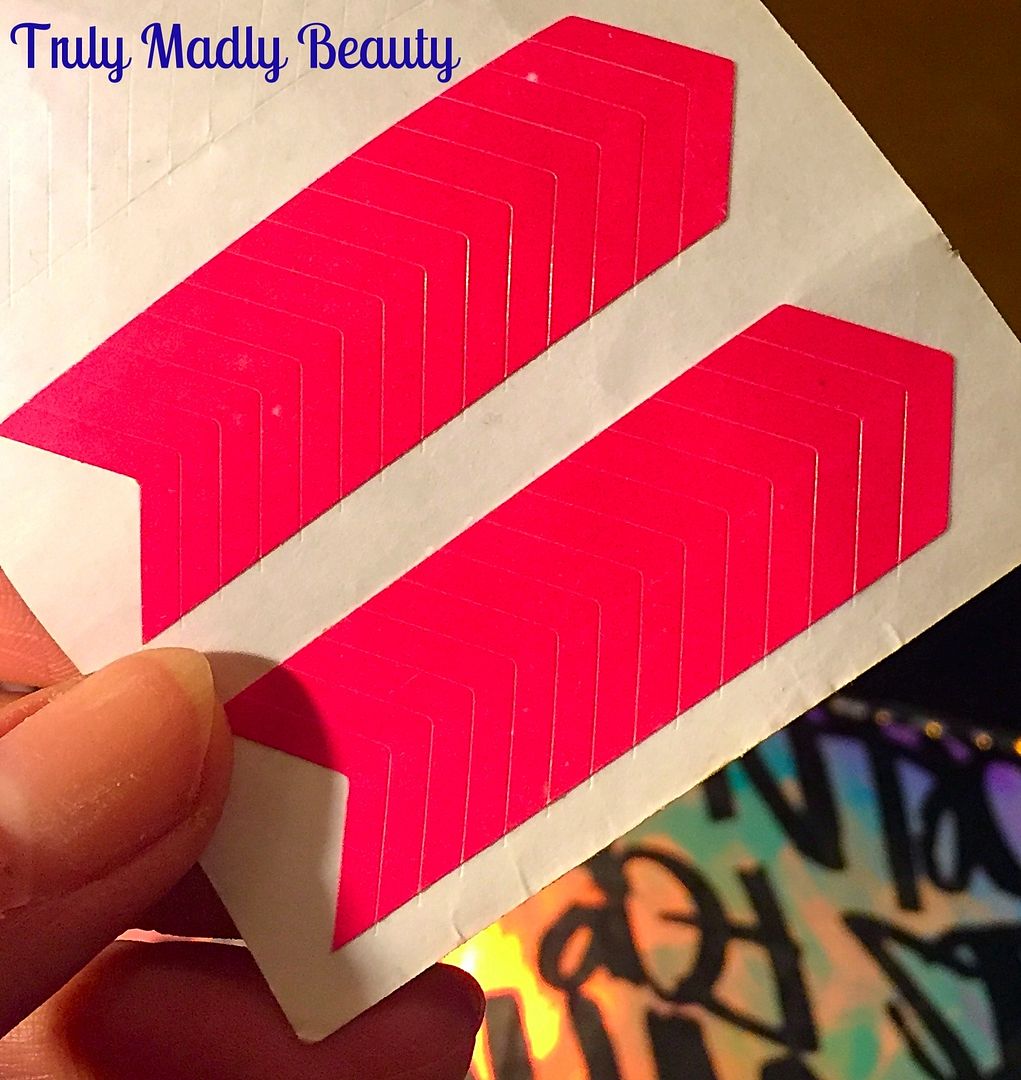
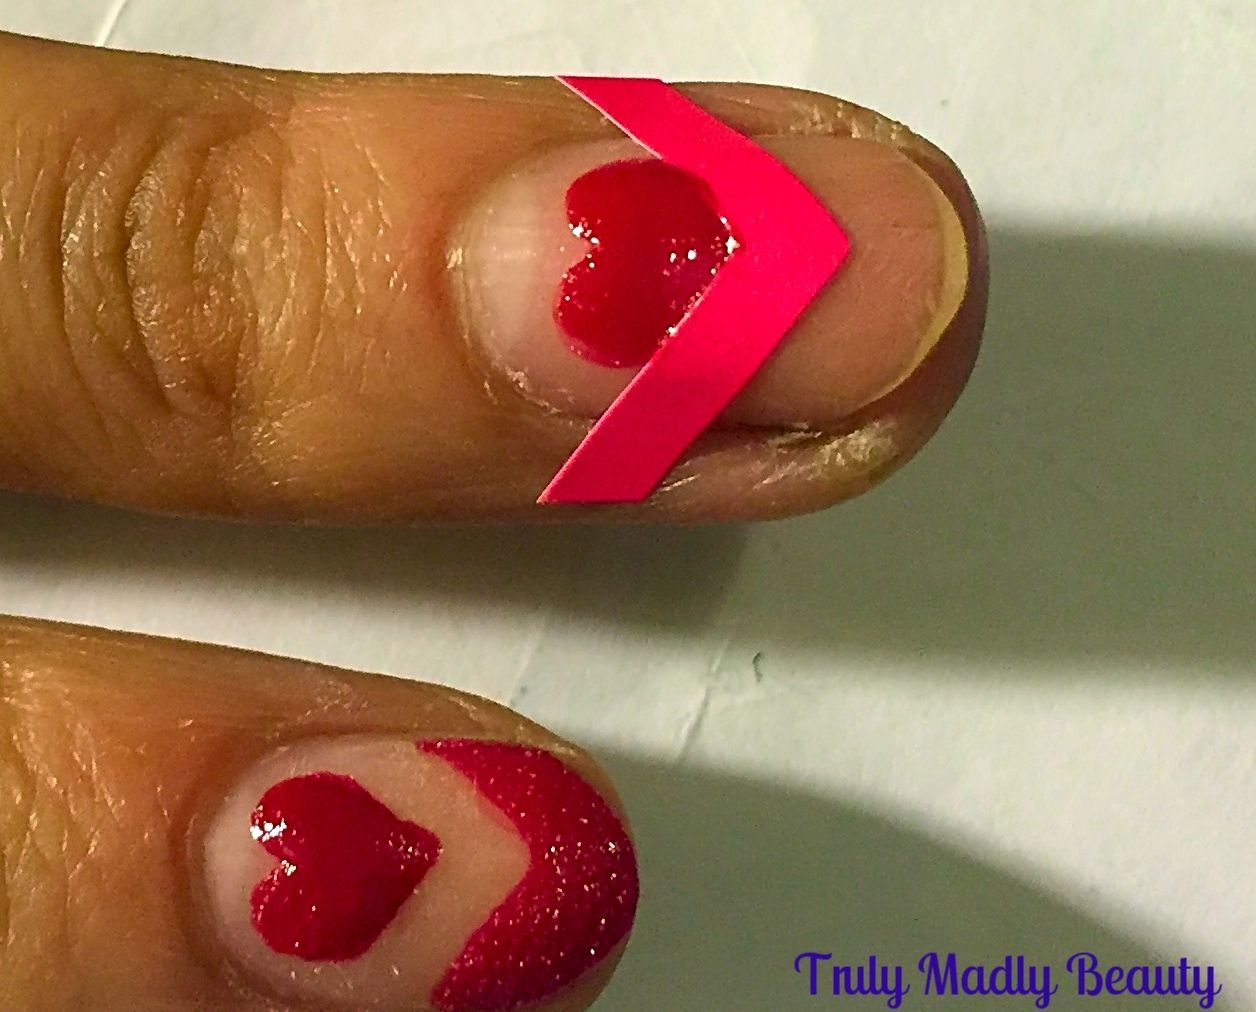
create the sharp edged french tip & to help shape the heart I've
used these pointed manicure guides which I picked up in Savers a
while back but you can easily find these on Ebay or Born Pretty
Store. You can of course do it all free hand but these definitely
make life easier! And I'm ALL for that ;)
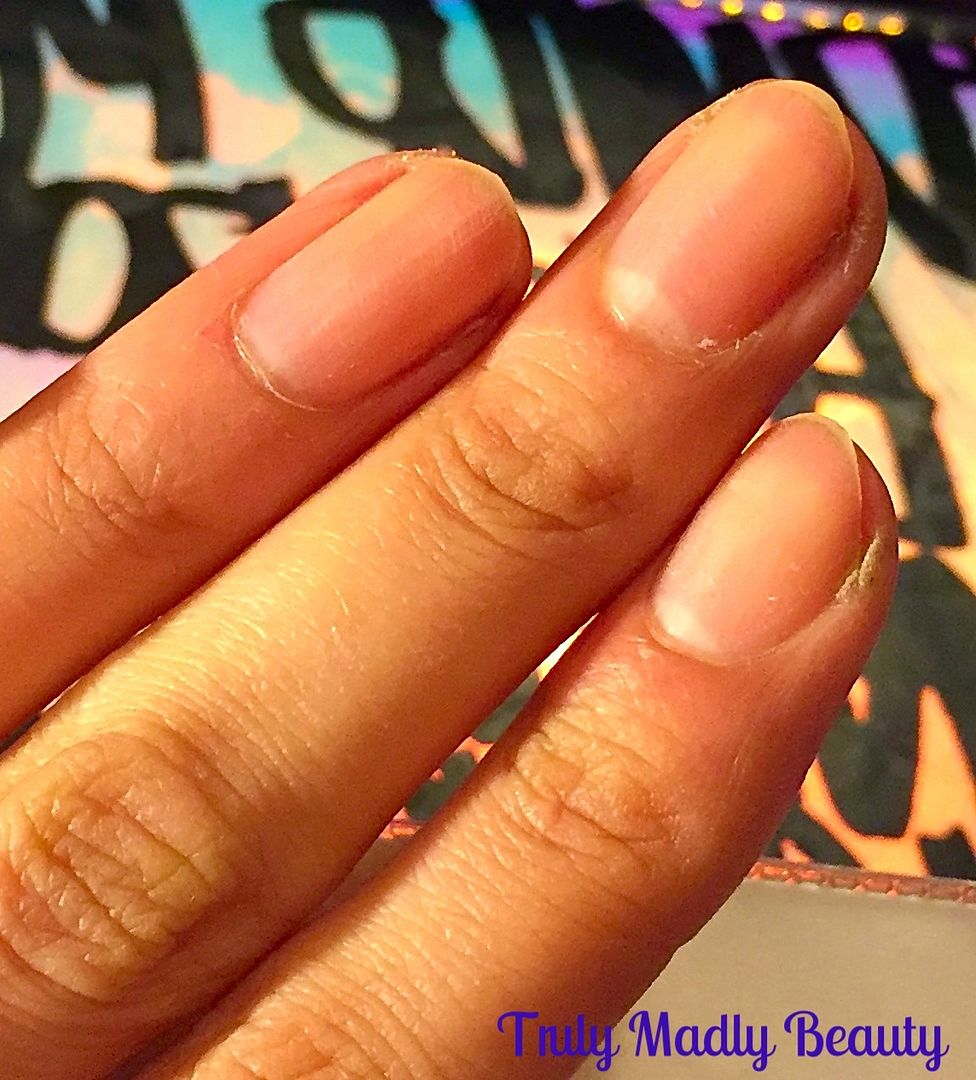
I
start off with a bare nail base as I'll be using the guides &
don't want to risk them peeling off a base coat when removing. Plus I
find the guides stick better to a bare nail.
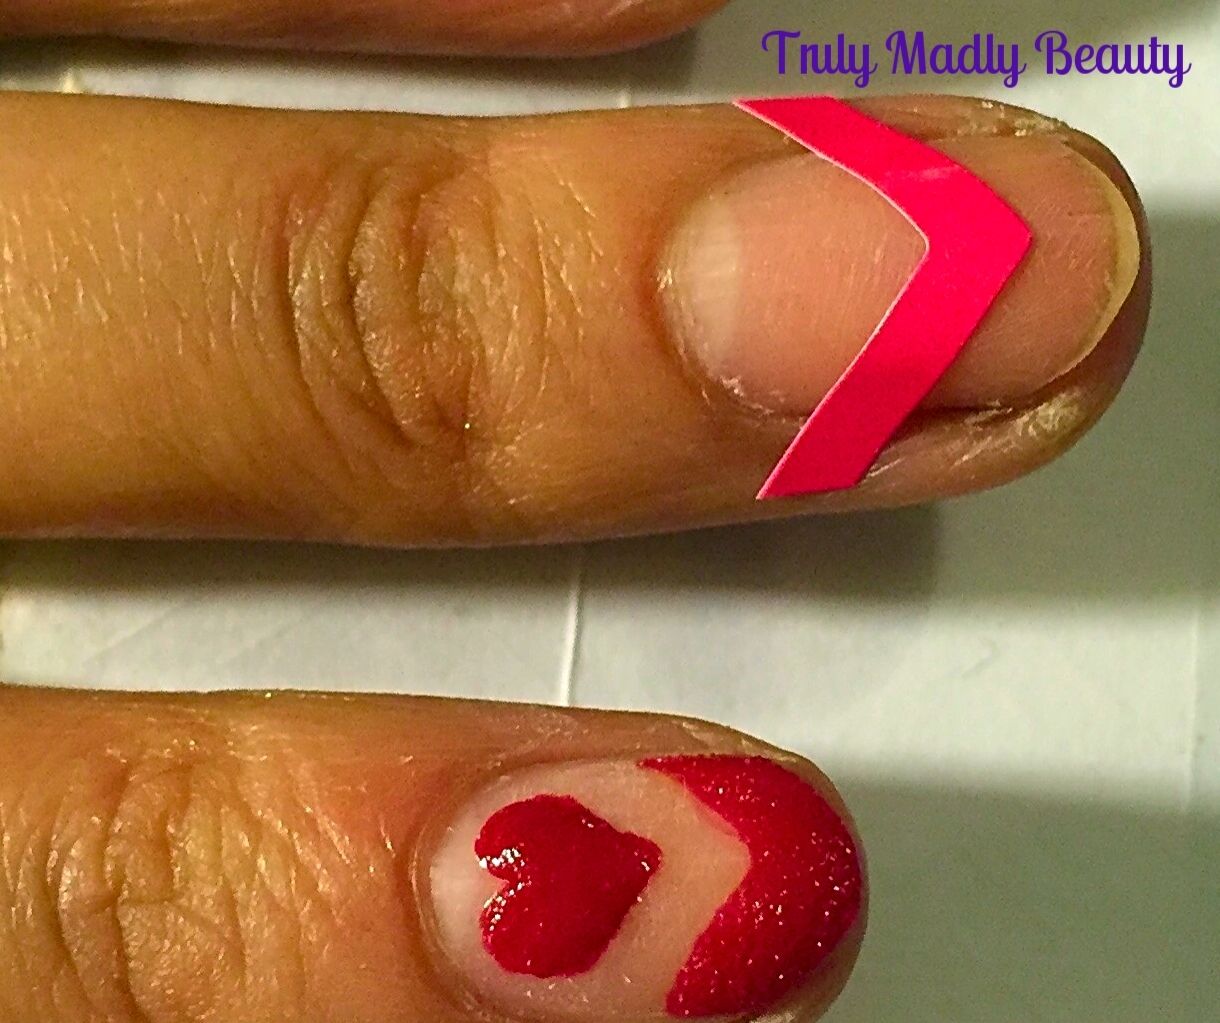
Position
your guide about 3/4 of the way on the nail, depending on how thick
you want your french edge. As I currently have small nubbins I
position my guides a bit further down to give the illusion of tips,
WHY OH WHY DO YOU KEEP BREAKING NAILS?! I'VE BEEN GOOD TO
YOOOOOUUUU!!! ....*cough*....Apologies...my current nail length state
is a sensitive subject at the moment...
Start
with drawing your heart. Using a fine nail art brush, dip into your
polish & free hand two curved line next to each other creating
the top of your heart. You can see how the guide helps with the
shaping of your heart.
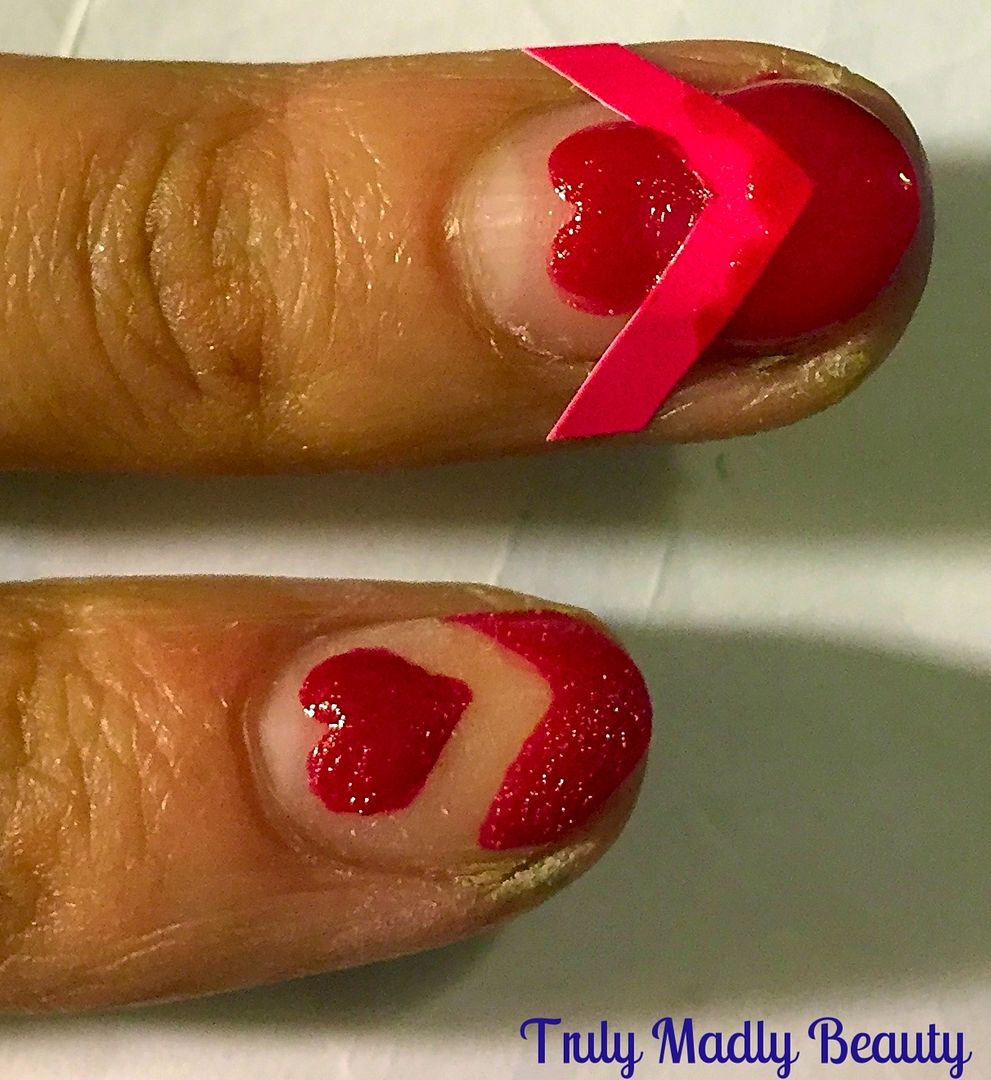
Then
using the brush from the polish, apply the polish to the tips. Its
good to use a thick opaque shade for negative space mani's like this
as ideally you only want to apply one coat.
Once
you've applied your polish to the tips, immediately remove the guide,
with a pair of tweezers if you have some just to make it a tad
easier, whilst the polish is still wet.
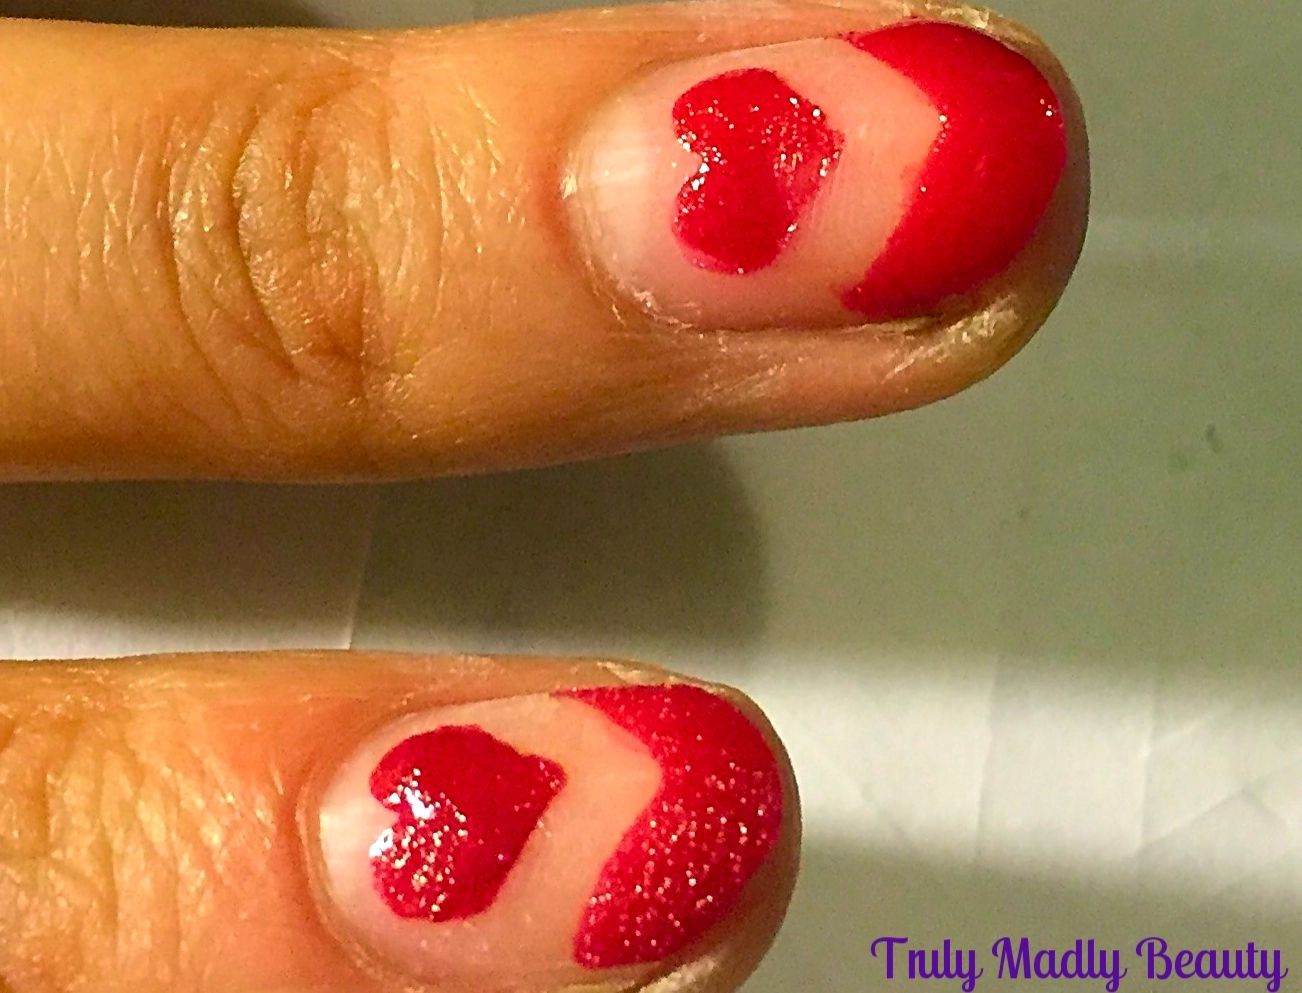
Once
removed you have your floating heart & french tip!
Don't worry if
some polish has smudged whilst removing your guides, I always do a
bit of clean up at this point with my brush & acetone, going
along the lines so that the edges are sharp & clean.
I
also went over the floating heart once more to get a stronger colour
pay off as well as making the bottom point & edges a bit more
curved & neater.
I
still felt it missing something, so whenever this happens I reach for
MAH GLITTAH! Using some glitter red polish I applied some sparkle to
the inner edge of the tips. This is of course an optional step.
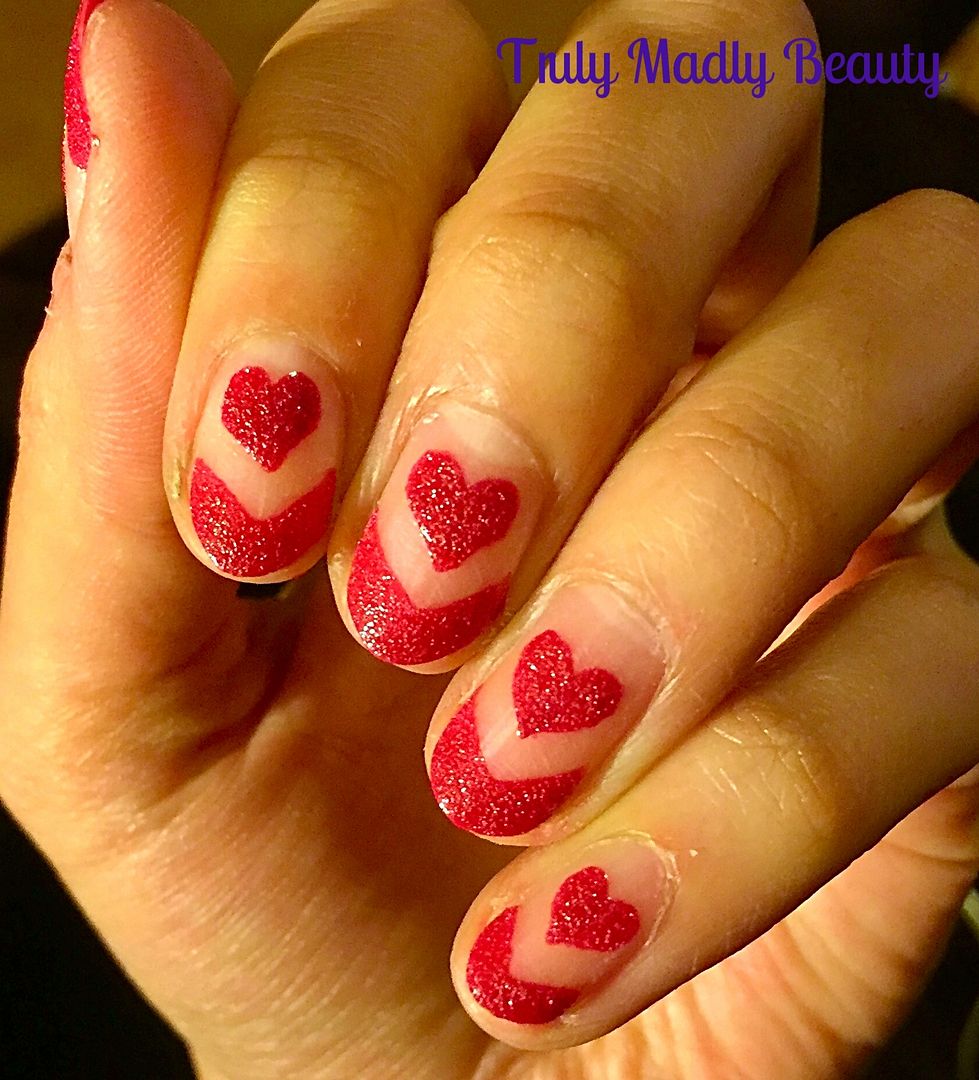
Because
I wanted a super glossy finish & not the textured effect, though to be honest I actually quite liked that too, I went
over the mani with two thick coats of topcoat to get that sheen.
And
thats it! Hope you liked the floating hearts valentines nails
lovelies! Thanks as always for reading!
Lotsa love to ya!
Labels:
Kiko,
nail art,
Nail Art Tips,
NOTD,
Red Nails,
Tutorial,
Valentines
2.01.2016
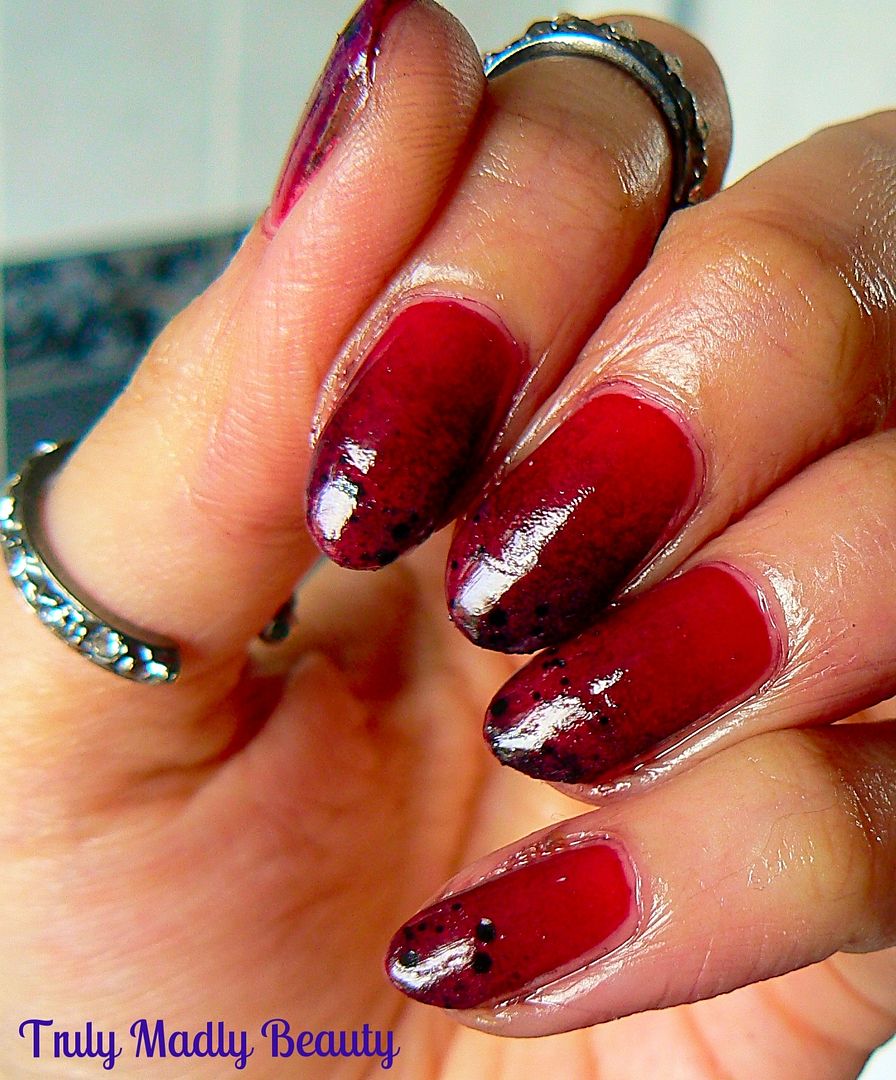
NOTD - Louboutin Inspired Gradient Nails
Hello
there my lovely readers!
Aaaah
Louboutins...a name I'm sure many are familiar with & whose
iconic shoes are present on most gals wish lists! I'm still yet to be
fortunate enough to call a pair my own but one day...it will be. The
same goes for the beautiful Louboutin nail polish with its stunning
bottle, I confess its mostly for the bottle that I want it...one day
you WILL be mine!
In
the mean time I guess I can still get my wee fix by using the
infamous red & black colours to inspire my nail art which is what
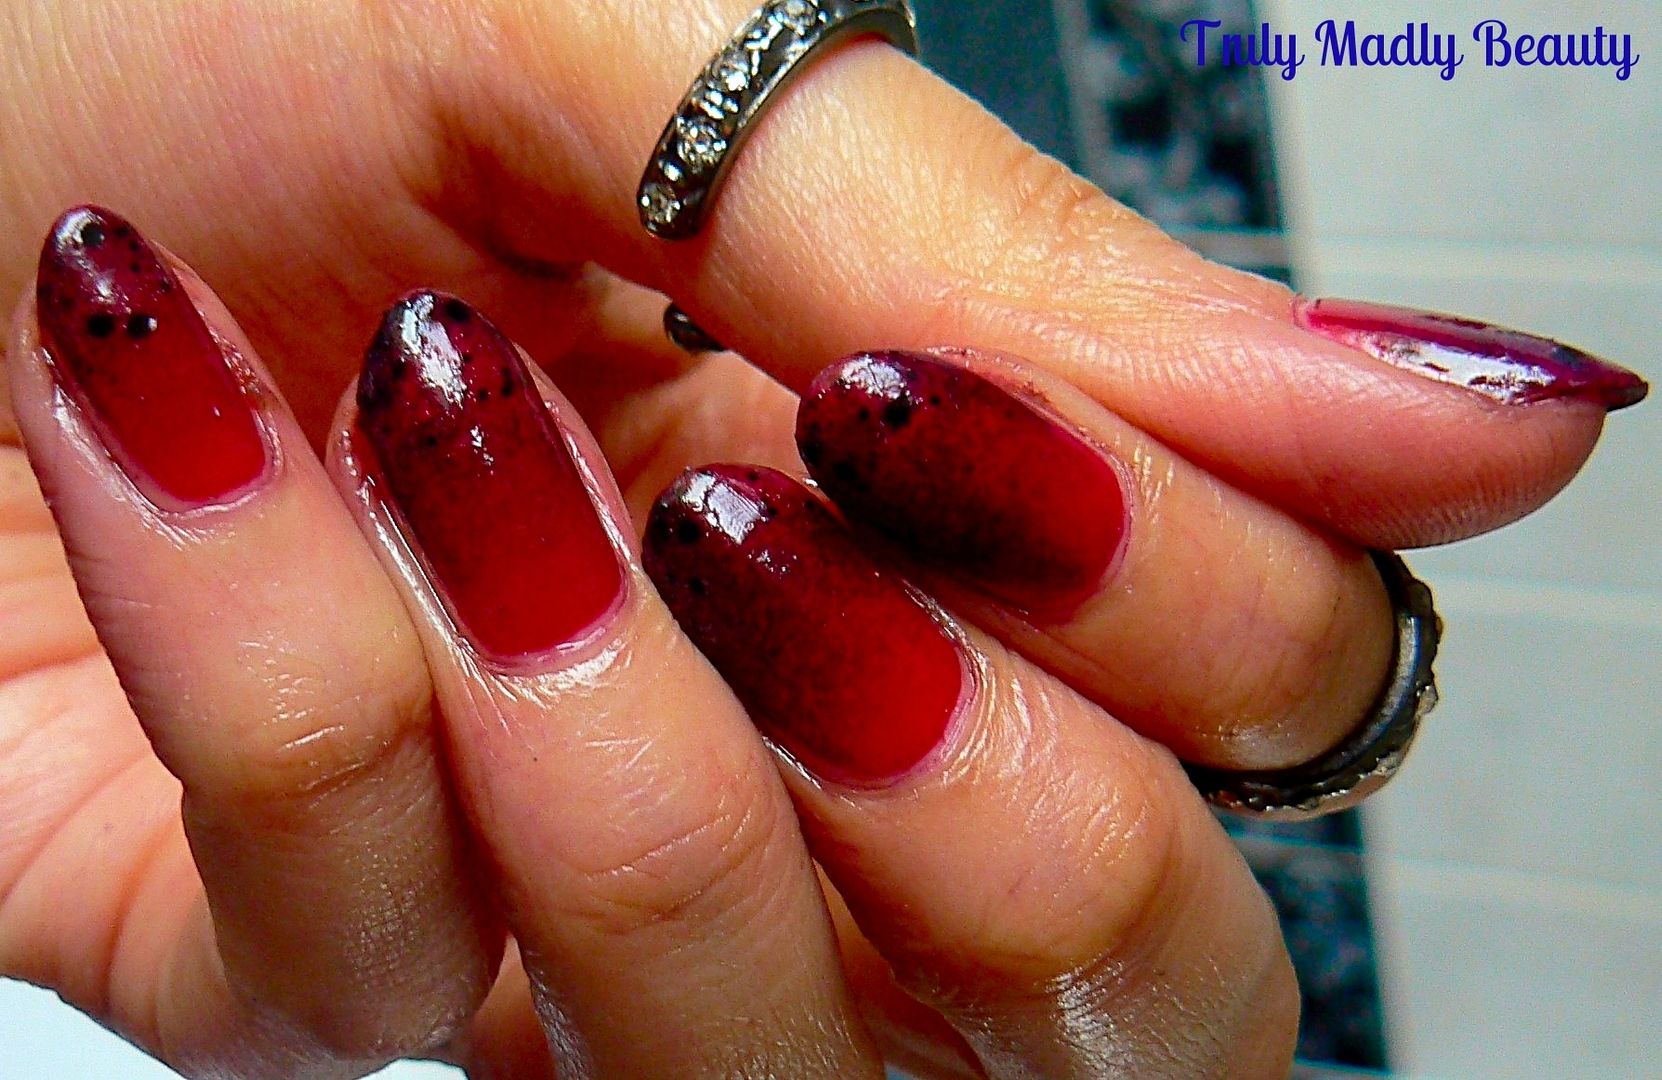
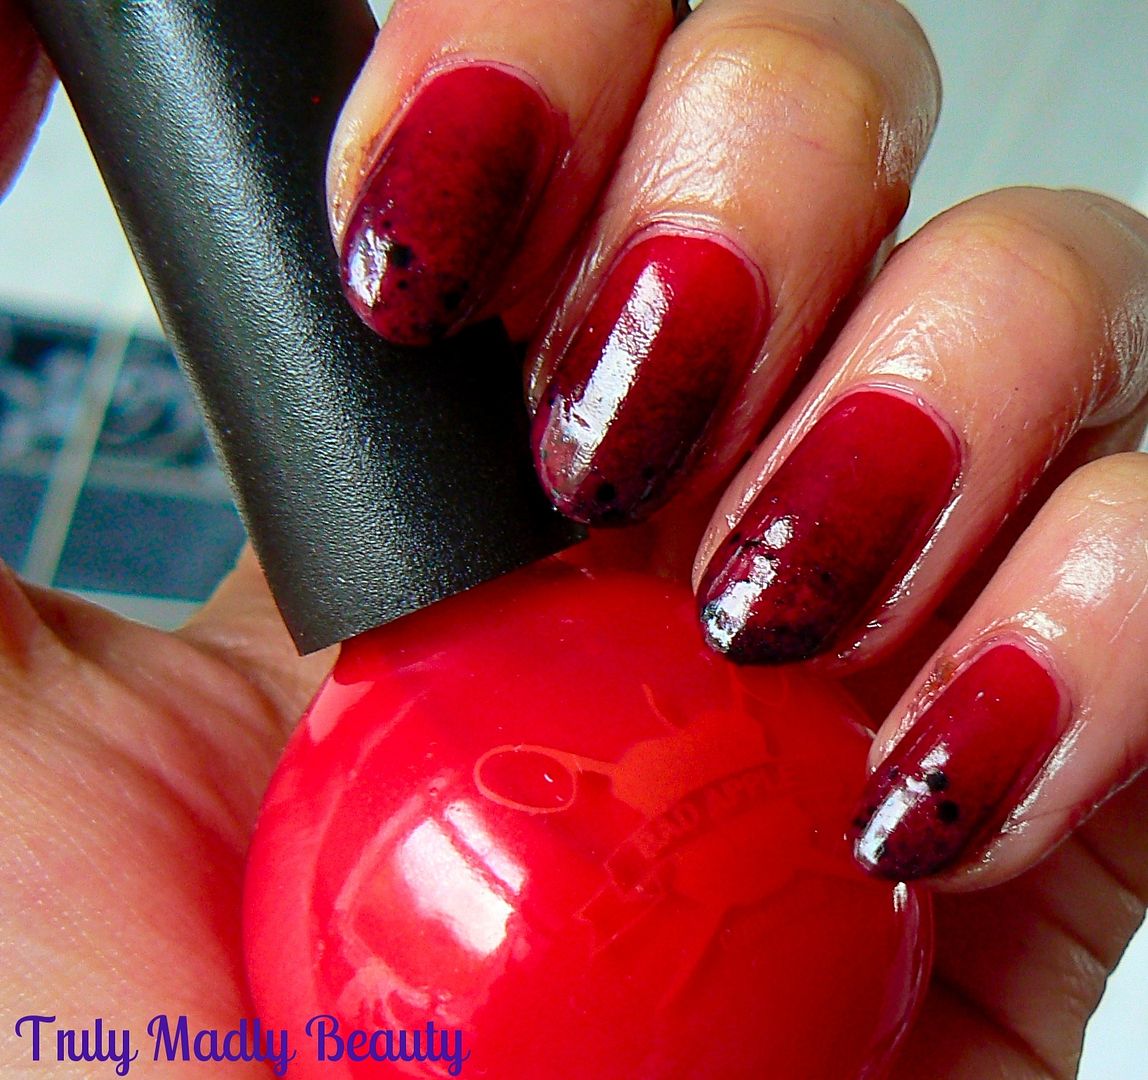
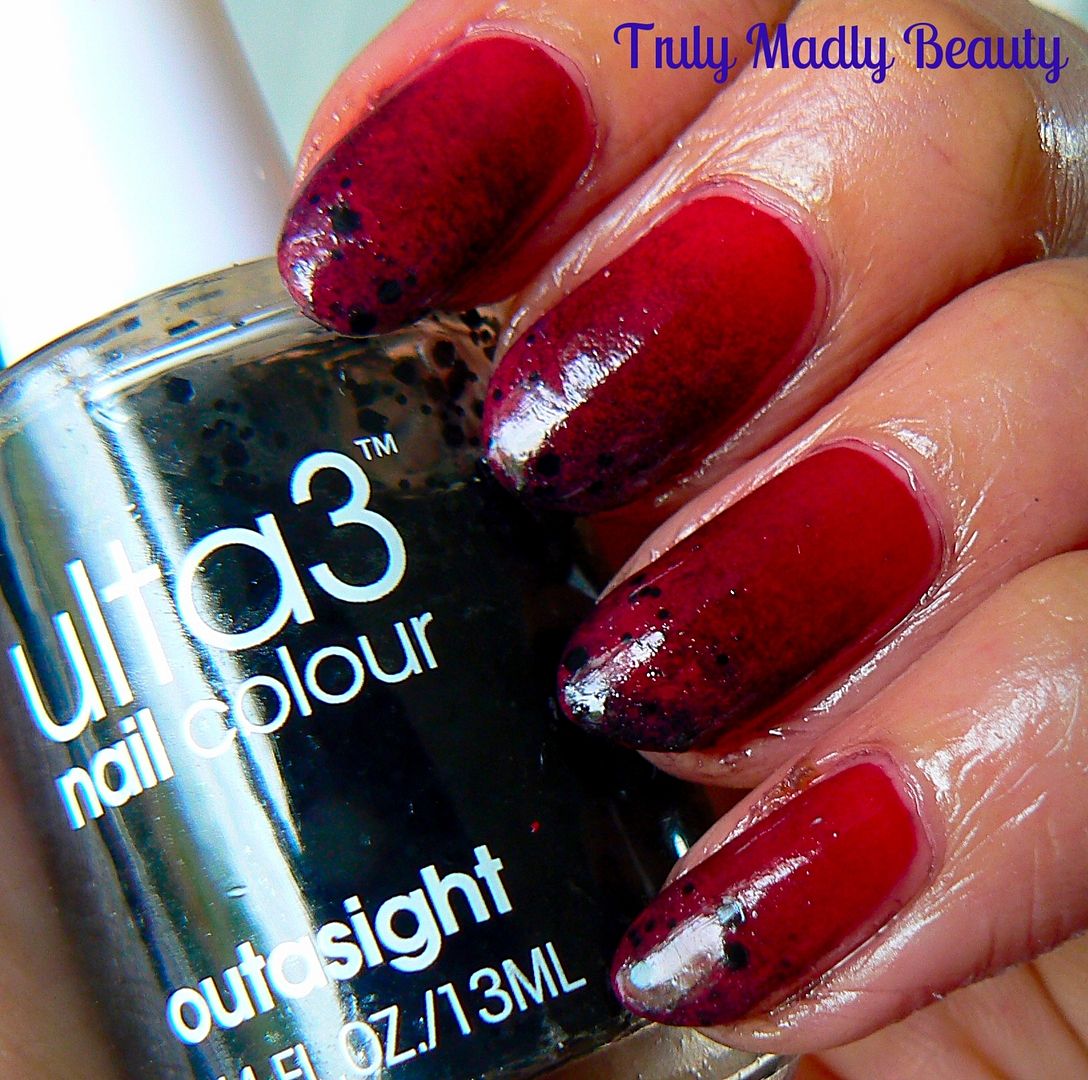
I've done today with these Louboutin inspired gradient nails...
I
wasn't entirely happy with how these came out if I'm honest, I'm
still practicing doing gradients with darker colours which I'm
finding a tad more tricky so do forgive me! This was one of those
manis that looked much better at distance haha! But practice makes
perfect so I'll persevere for sure :)
For
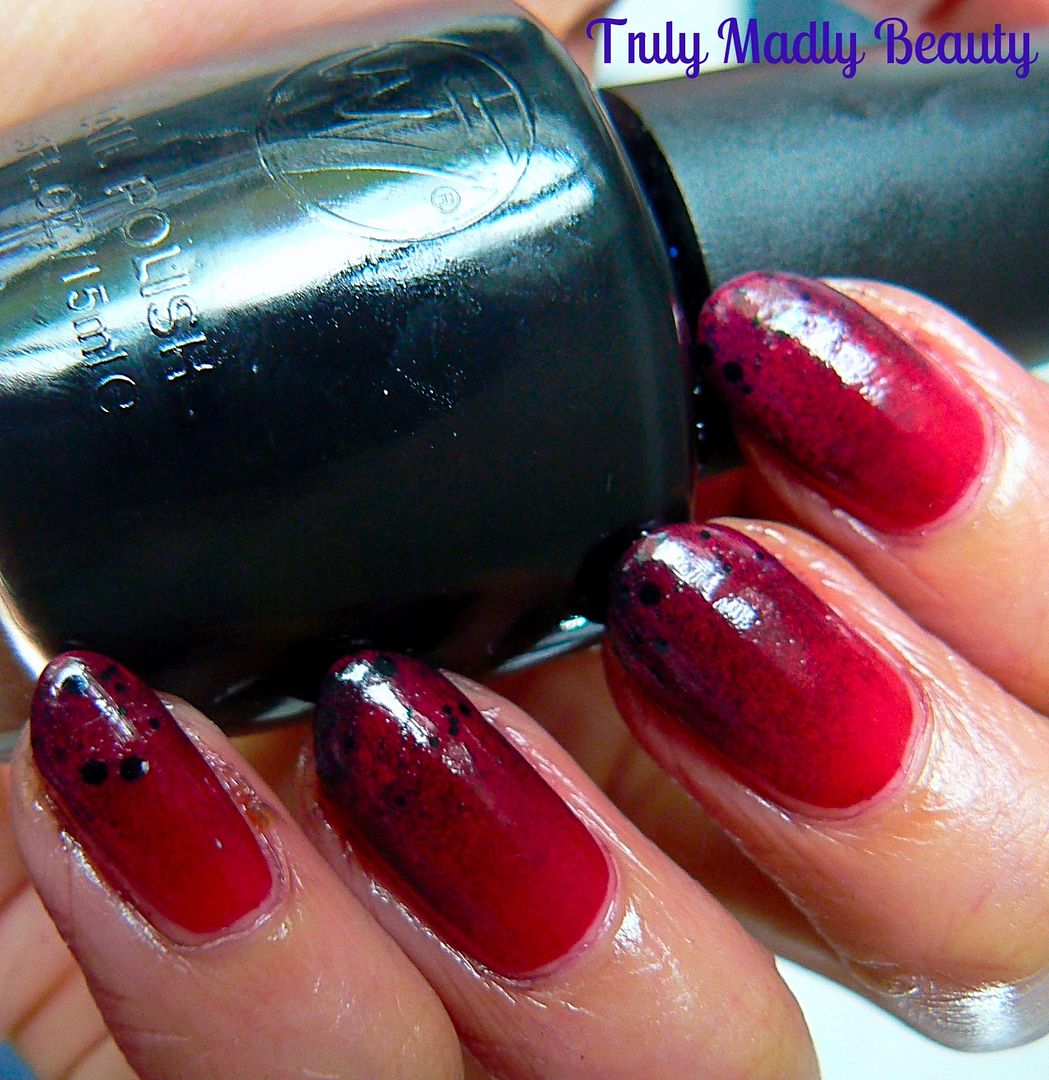
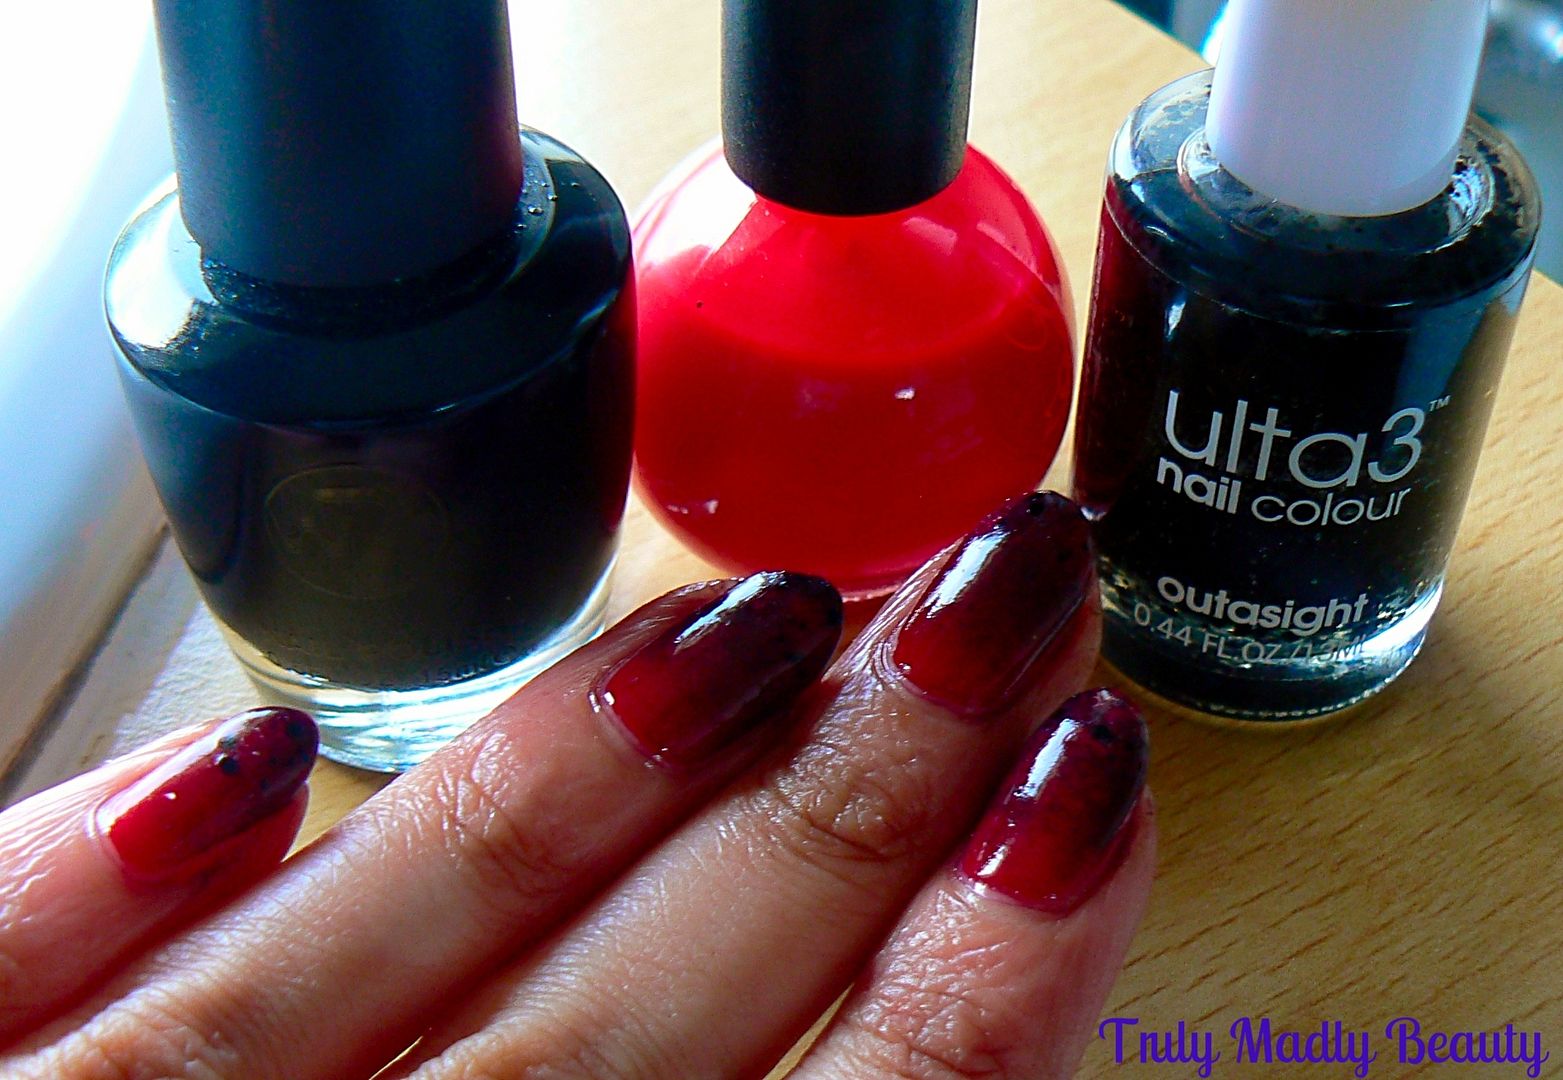
my Louboutin nails I of course required a nice red & black
polish, here I've used W7 Black & Bad Apple Red Delicious.
To
start first apply a coat of red polish as your base to do your
gradient on top of, then wait for it to completely dry.
Then
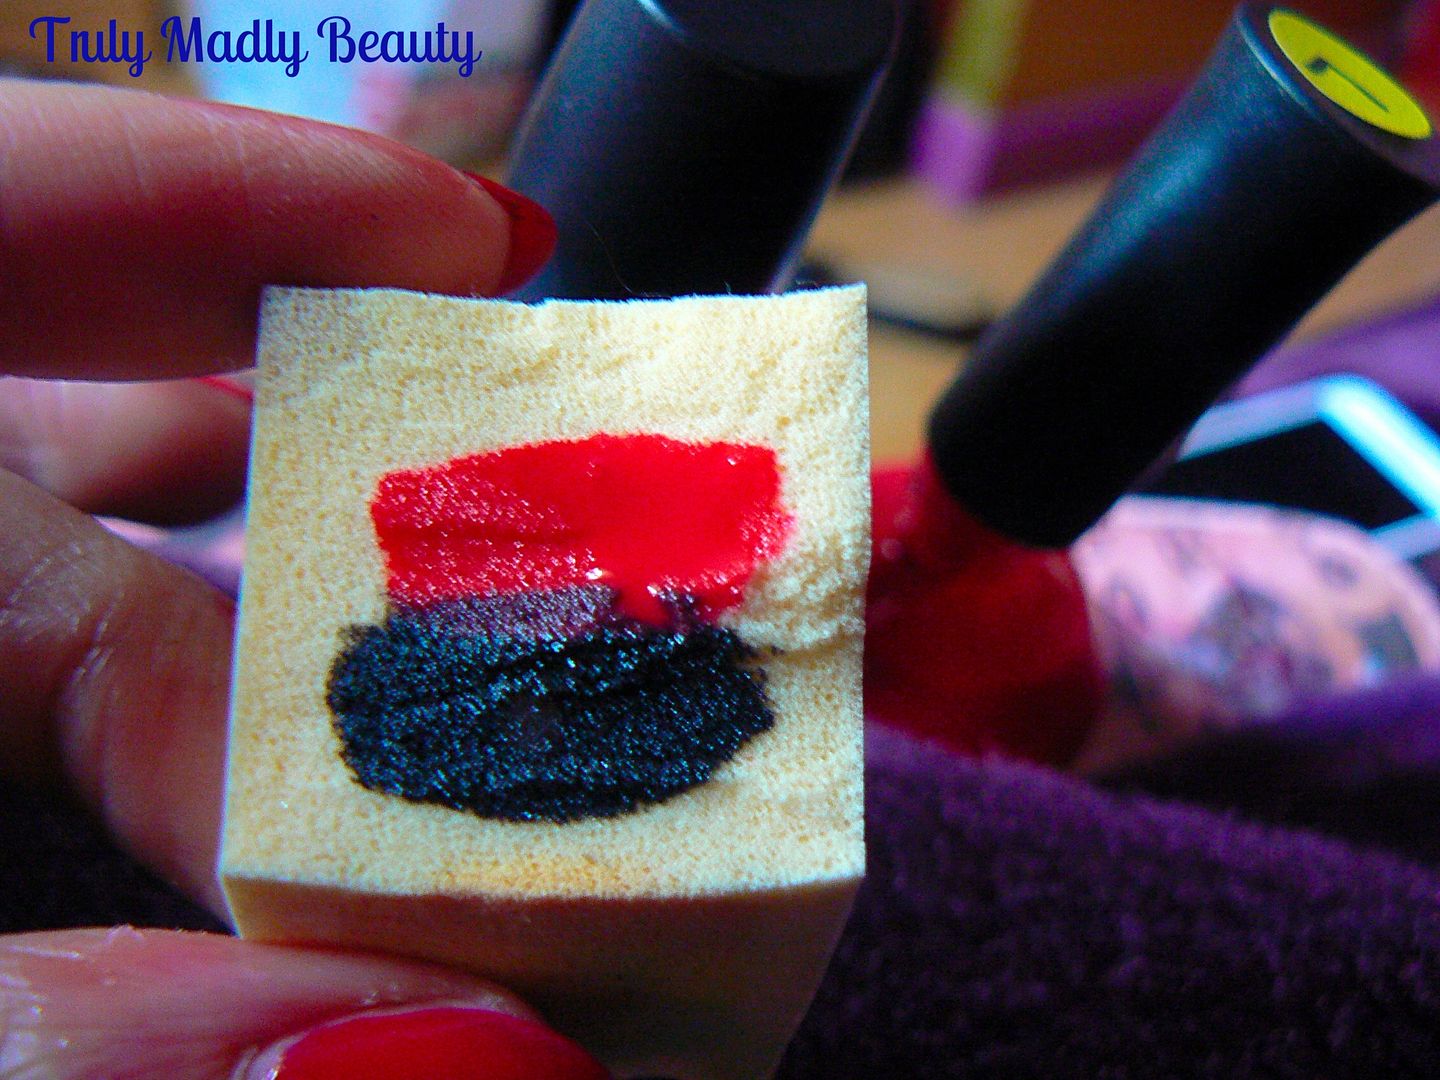
grab a piece of makeup sponge, I guess you can use any old sponge but
I like using these. I pick up a bag from good old Poundworld.
The
gradient will go from red to black so apply a stripe of each shade
side by side onto your sponge, then dab onto the nail with up/down,
side to side motions to create your faded gradient look.
Do
this a few times, adding more polish to your sponge, to get a nice
opaque finish or until your happy with the effect. To finish I also
dabbed a bit of Ulta3 Outasight which is a black glitter, onto the
tips for an added touch.
Go
over with a nice thick coat of topcoat & you're done! Now
gradients can be messy, I used ZAP!, a liquid latex nail art skin
protector to help with the clean up part of this manicure,which I'll
be reviewing in full for you in my next post so do keep posted for
that!
FYI
the ring bling is Hugo Sophia :) Thanks for reading lovelies!
Lotsa
love to ya!
Labels:
Bad Apple Cosmetics,
black,
Bling,
Fashion,
gradient,
Hand Jewellery,
Hugo Sofia,
Jewellery,
Louboutin,
nail art,
NOTD,
Red Nails,
Shoes,
W7
Subscribe to:
Posts (Atom)