Showing posts with label Bronze. Show all posts

2.08.2017

Kco Cosmetics Natural Glow Review - My New HG Bronzer!

Hello there lovely readers!

Now this post is way overdue & I'm annoyed with myself that its taken me so long to blog about this brand, one that many I'm sure are unaware of, because basically you NEED to know about them beauts! So here's me rectifying this & you can thank me later.

Kco Cosmetics is the creator of the Natural Glow Original Compact powder which has now become my HG contour/bronzing powder as it has literally blown ALL others out the water.

I first came across Kco Cosmetics at a beauty show a while back, I'm actually talking a good few years! I stopped by the stand as I'd never heard of them & naturally the blogger in me is always intrigued with newbies in the makeup world.

It was there that I was introduced to their signature product, the Natural Glow Compact. This face powder promises an instant healthy gorgeous glow to your skin, adding warmth & covering blemishes.
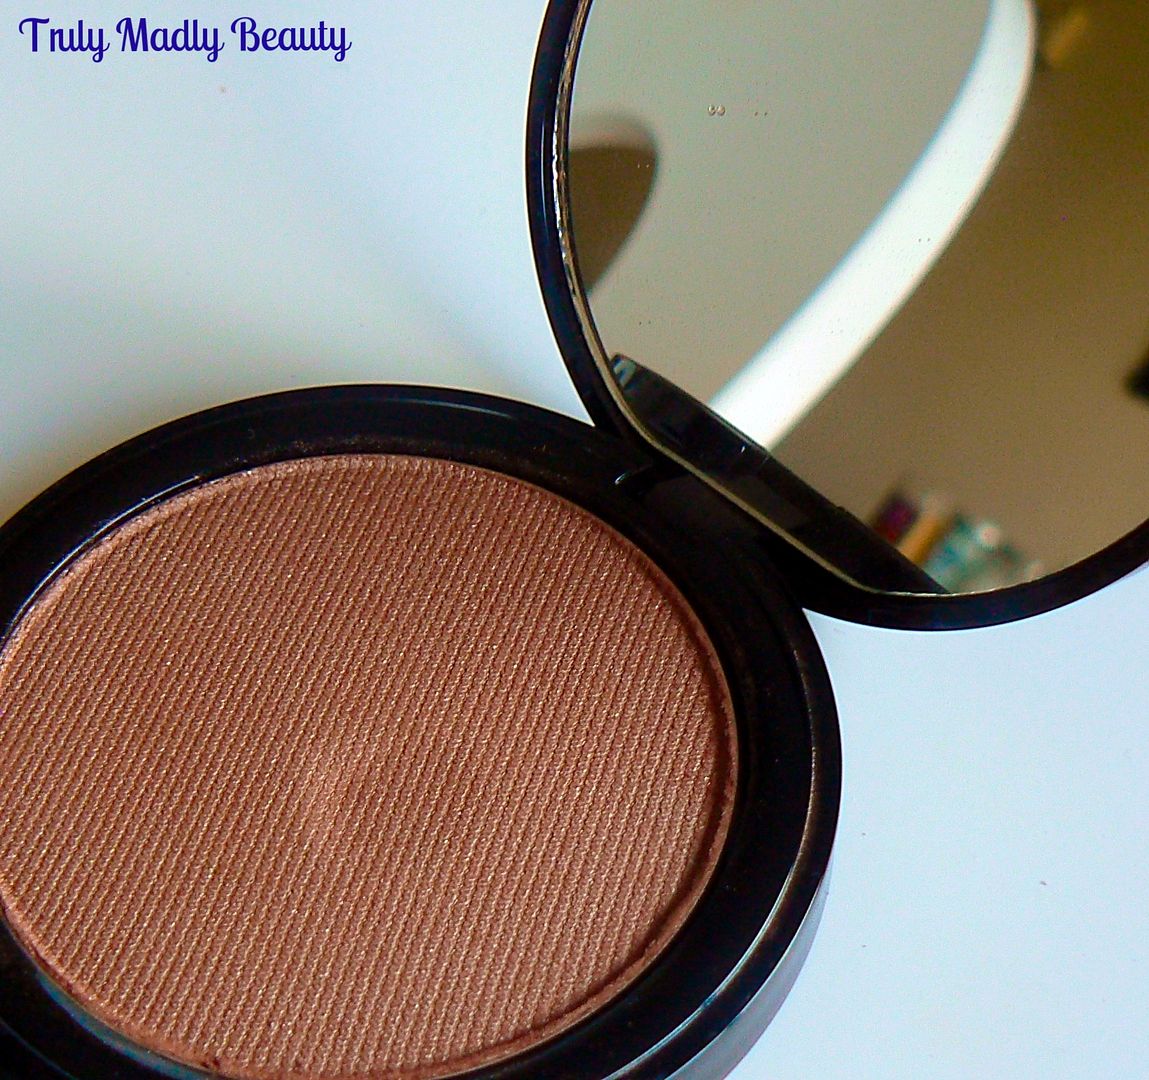

Now I confess this is where I get a teeny bit miffed with the products main concept, as you can probably see looking at my pics here, its clear that the Natural Glow is a bronzing powder of sorts mostly...to me anyway, however I've heard (& looking at some reviews too)  that it can also be used as a face powder, in place of foundation as well? Perhaps that may be the case by using a lighter touch with a kabuki face brush to give an all over glow without looking like you've been tangoed.
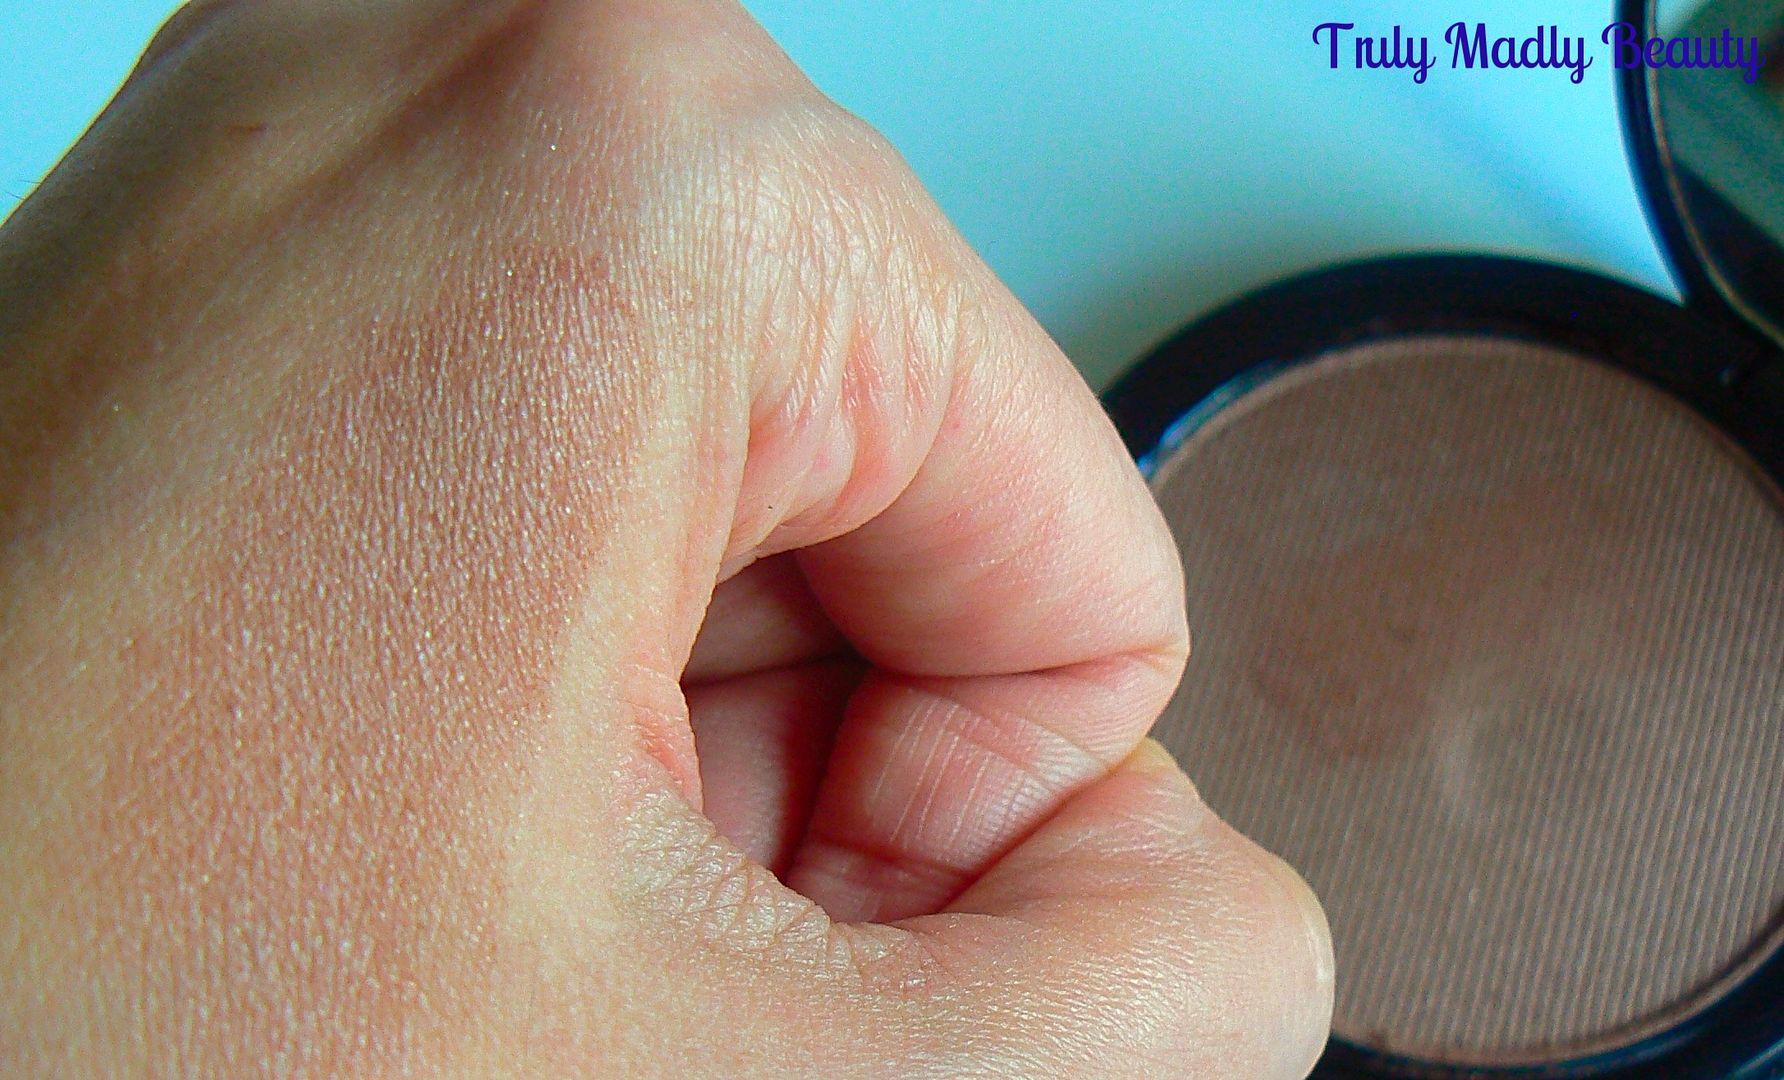

I know for certain that this would be way too dark for me to do that & unfortunately on the website there are no swatches, which is a bit of a downside as clearly you will want to see what you are buying...hence why I've done my best to swatch for you here. There also doesn't seem to be much information on the origins of the brand either on the site, disappointing as I always love to read up on how a brand came about...hopefully they will rectify this too.

The formula of the Natural Glow Powder is amazing & what makes it now my favorite bronzer of ALL TIME. I have never come across a powder that not only blends SO perfectly on to the cheekbones, but also defines them, contouring so beautifully & leaves your makeup with the most glorious warm & healthy finish. No muddy patches here!

There is a very slight element of shimmer in the Natural Glow Powder, however this doesn't transfer on to the skin leaving you looking like a vampire out of Twilight at all! In fact, I may be in the minority here, but I've always been more fond of bronzers which have a touch of shimmer in them, Barry M Natural Dazzle was my first bronzer LOVE & still is...or 2nd love now next to the Natural Glow!
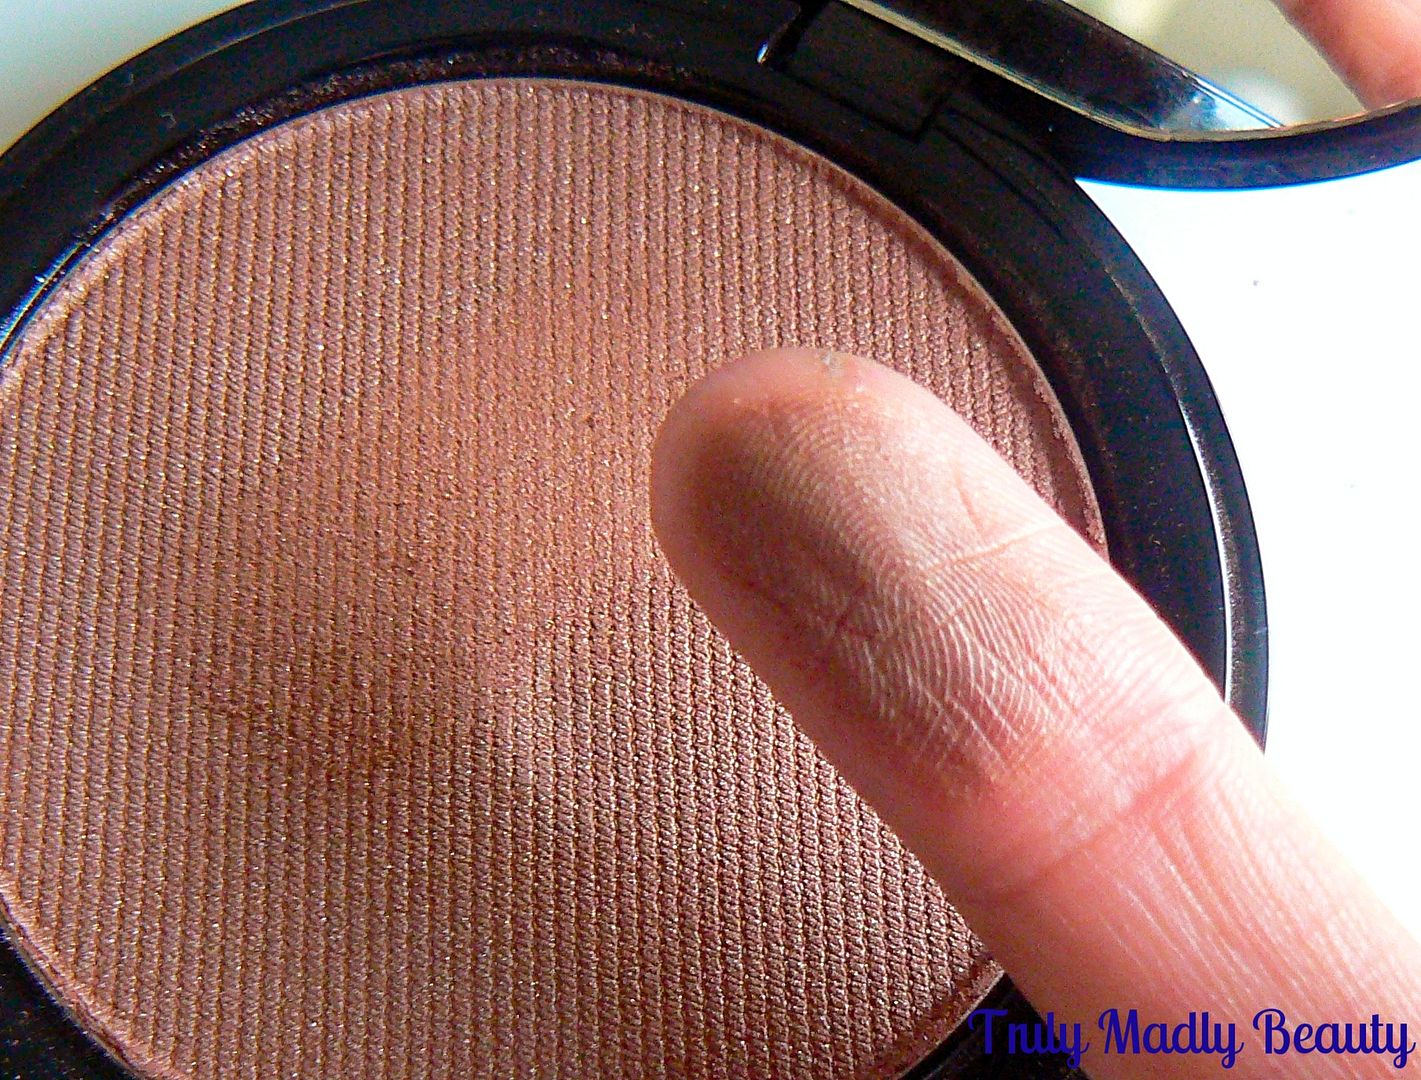

I use an angled brush to apply the powder under my cheekbones to define & add warmth, as well as along my jawline, forehead & anywhere else I want to add a touch of glow! If I use another bronzer then I always find myself reaching for this still & using my ELF contouring brush, tap along the cheekbone for added definition.

I've almost hit pan on my current compact it has gotten that much usage but the beauty of this product is that a little goes a long way, it is very pigmented & you only need to touch your brush to the pan to pick up enough product to sweep along your jawline, cheekbones etc & I've had mine for ages! But I know for certain that I will be repurchasing the Natural Glow powder till the end of time. Unfortunately though it seems the brand is only available online via their website....they NEED to expand out! 
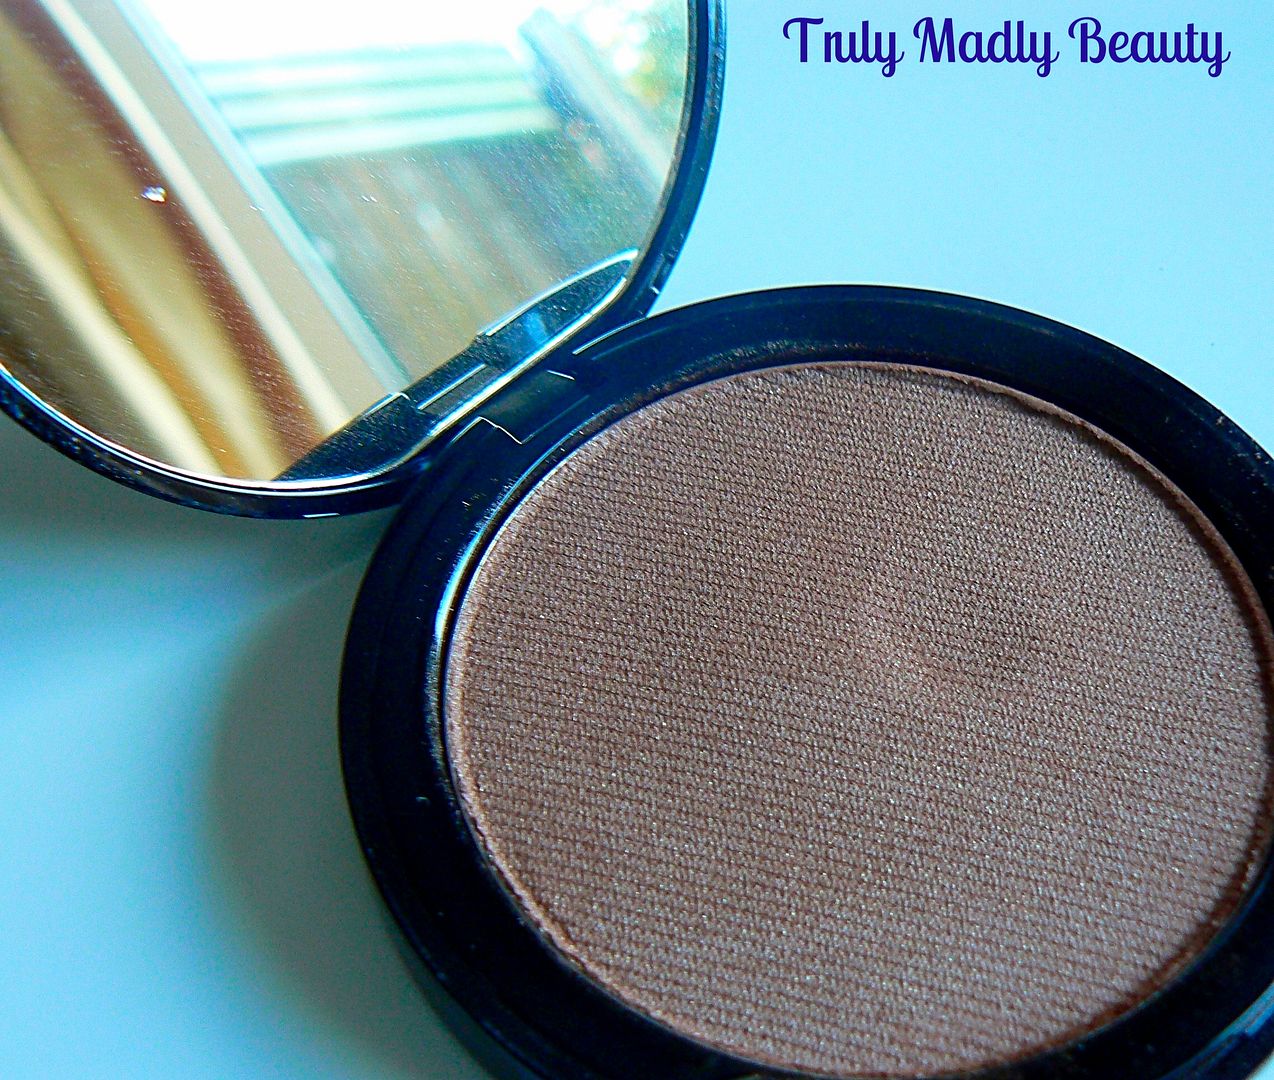

The Natural Glow Powder is £24.99 & worth every penny in my opinion, try it & see for yourself my beauts. I've also recently been using the Blonde Terracotta bake highlighting powder* which has....like the Natural Glow, SERIOUSLY impressed me. But seeing as I've gone on quite a bit already, I'll share the Terracotta Bakes delights with you in another post & babes...if you have a soft spot for highlighters then you will LOVE THIS, so stay tuned! 


Lotsa love to ya!


11.07.2016

NOTD - Bronze and Lace Nail Tutorial

Hello lovely readers!

Squeezing in a last Autumnal manicure for you beauties today! One of the things I've repeatedly told myself can definitely be considered one of the positives of moving has been that I've had to select only a few of my polish drawers from my stash to take with me...This naturally grieved me greatly at first, but it does mean that I'm getting usage out of many polishes that I would probably normally skim over in favour of my other more well know brands. See? Positive mental attitude FTW


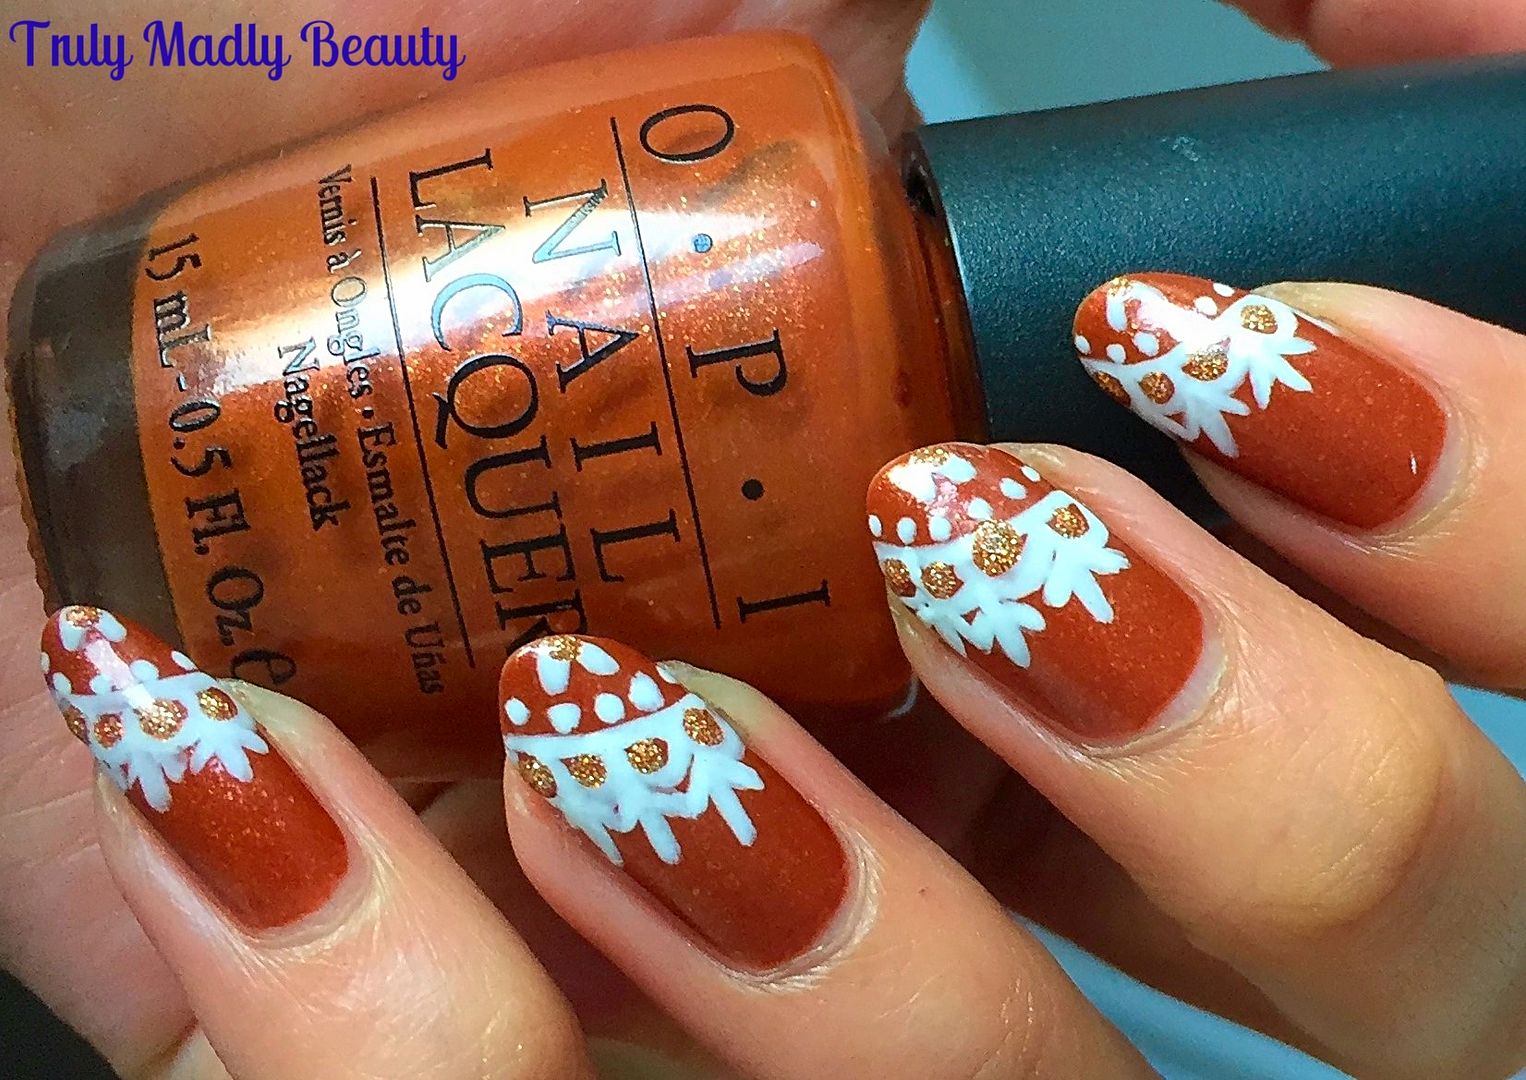
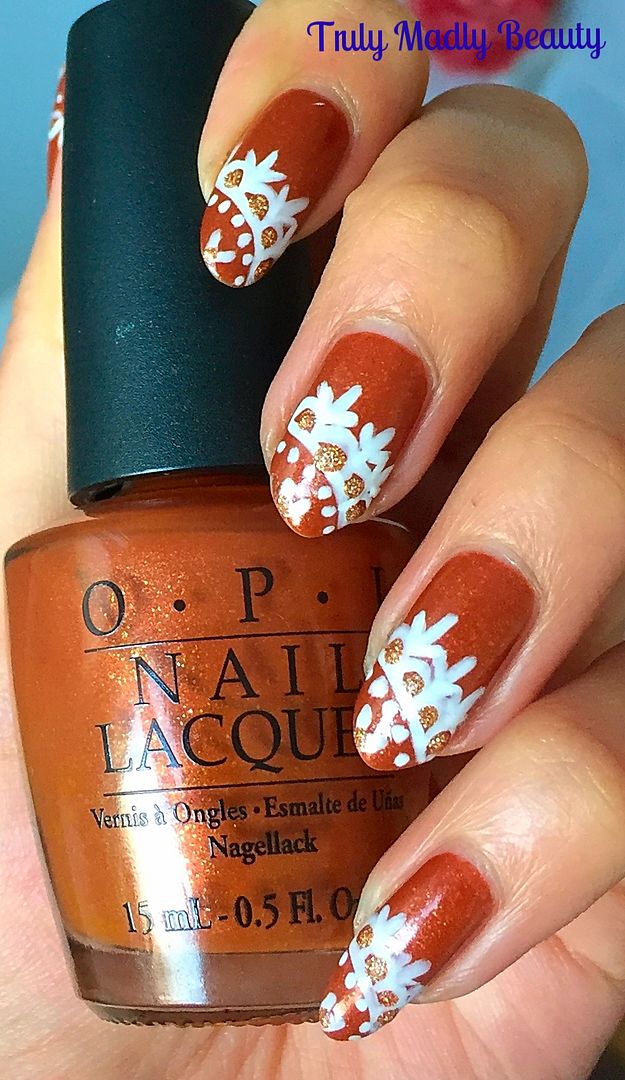
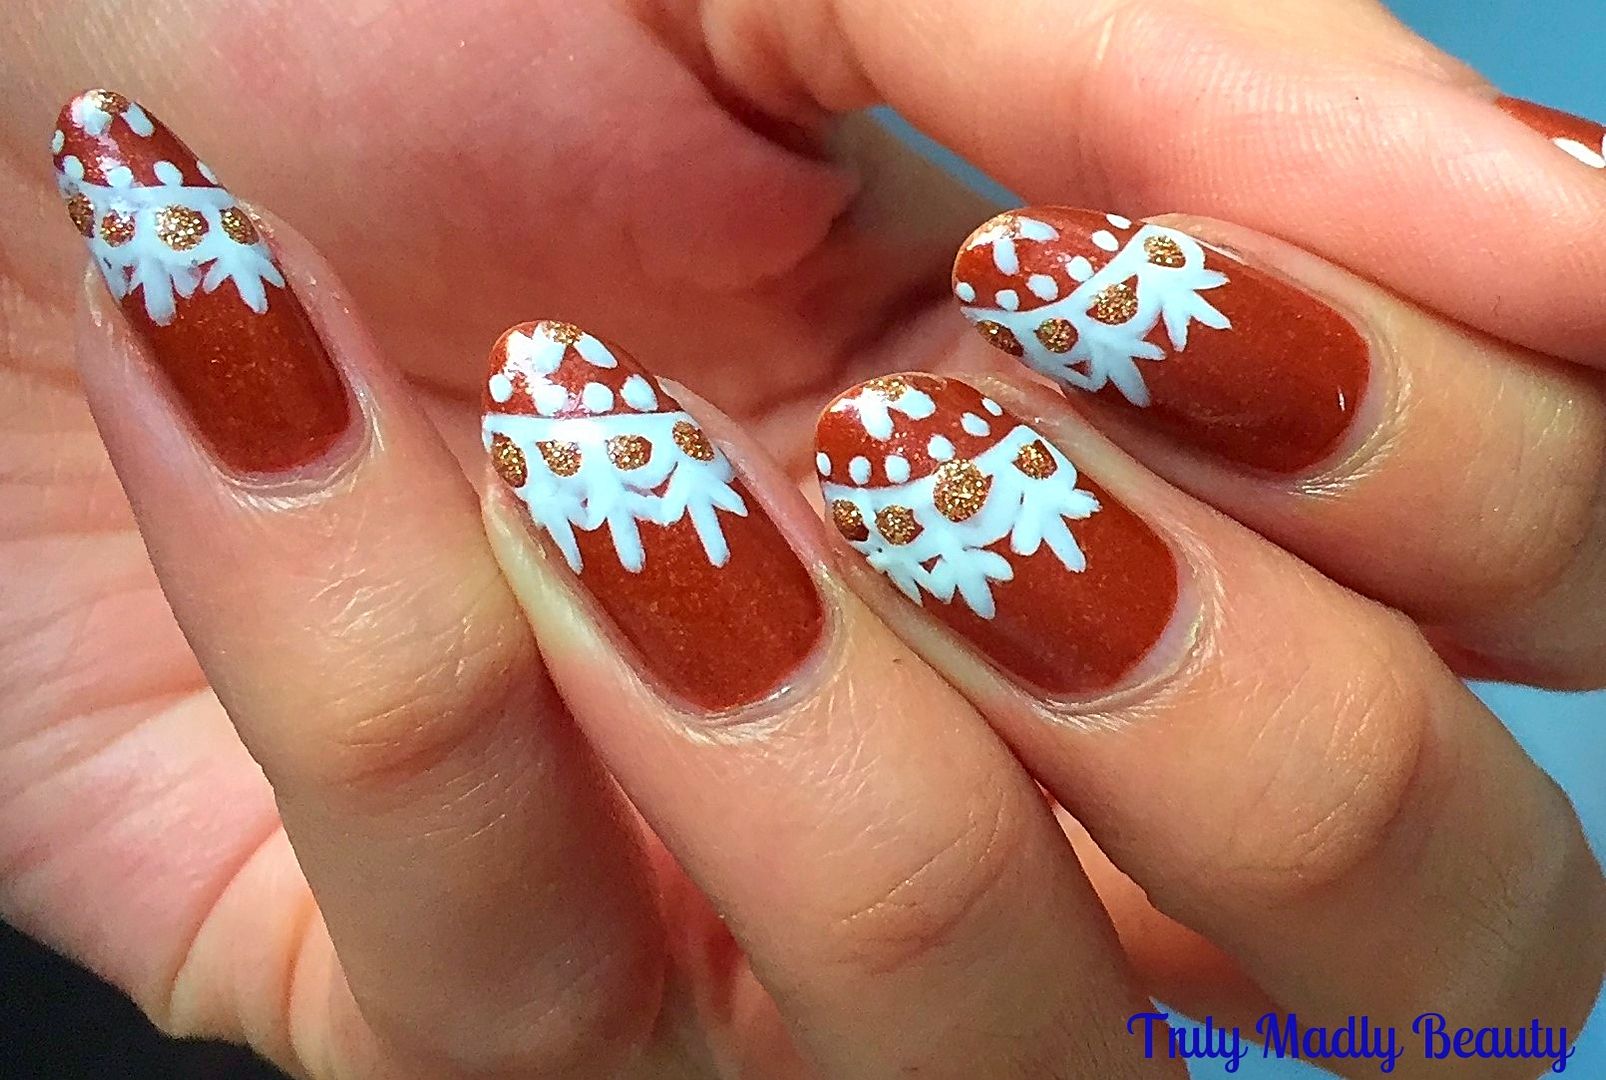
This also includes finding myself reaching for shades that I would not normally choose, including this offering from OPI which I have for you today & goes by the name of Bronzed To Perfection

Normally, a shade such as this would not particularly grab me, but with its burnt orange brown tones it seemed the perfect colour to dig out for the season & I confess it has most certainly grown on me greatly.


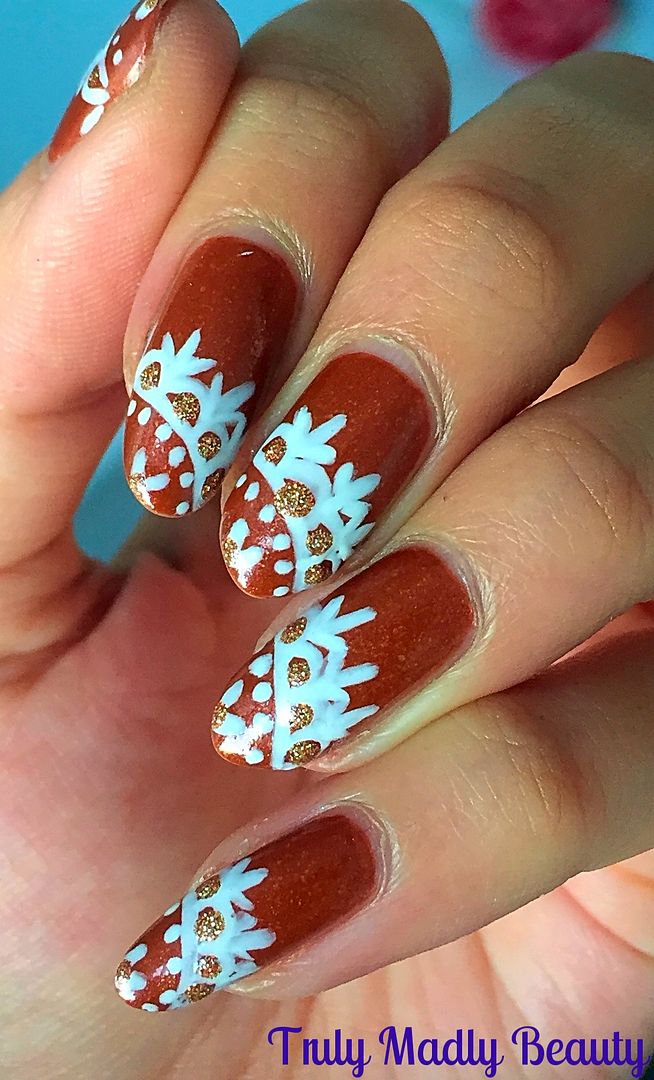
A beautifully warm, caramel brown with coppery shimmer touches Bronzed To Perfection definitely screams Autumn vibes. As pretty as it is by its onesie I decided to jazz it up a tad with some lace nail art touches.


To recreate this lace pattern is super simple and its become one of my favourite quick nail art designs to do, just read on to see how you can create this design as well in a quick step by step pictorial I've put together for you....

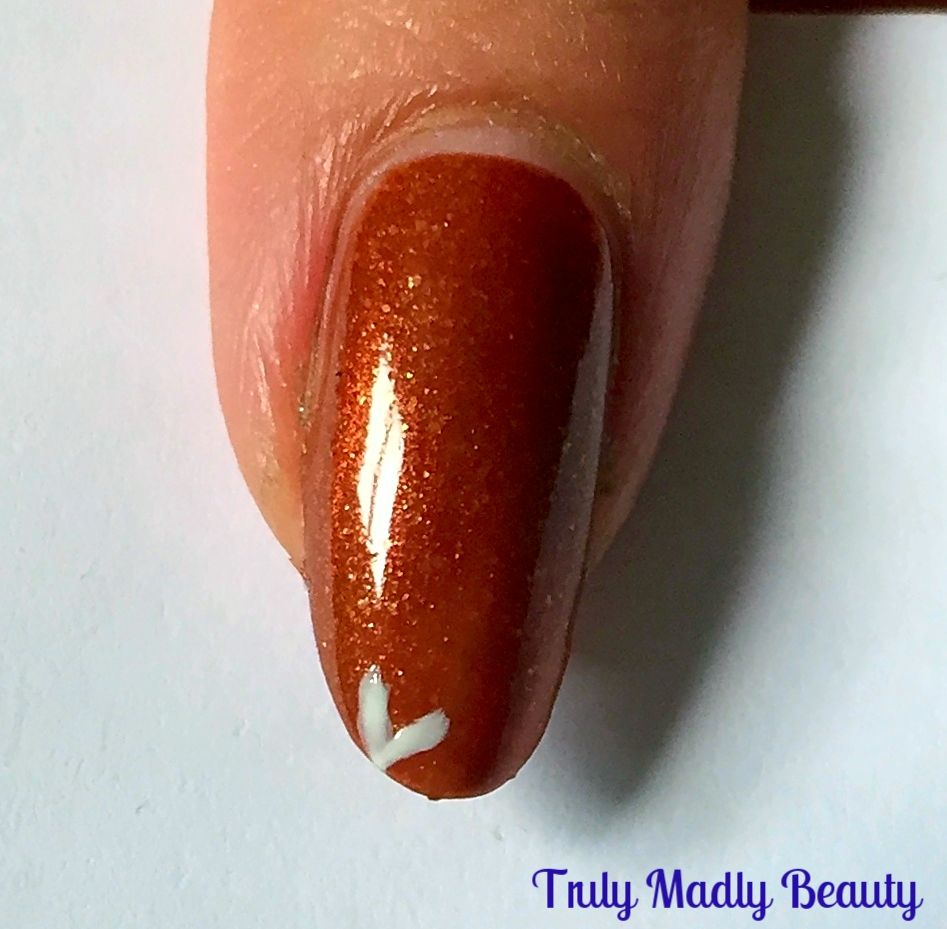
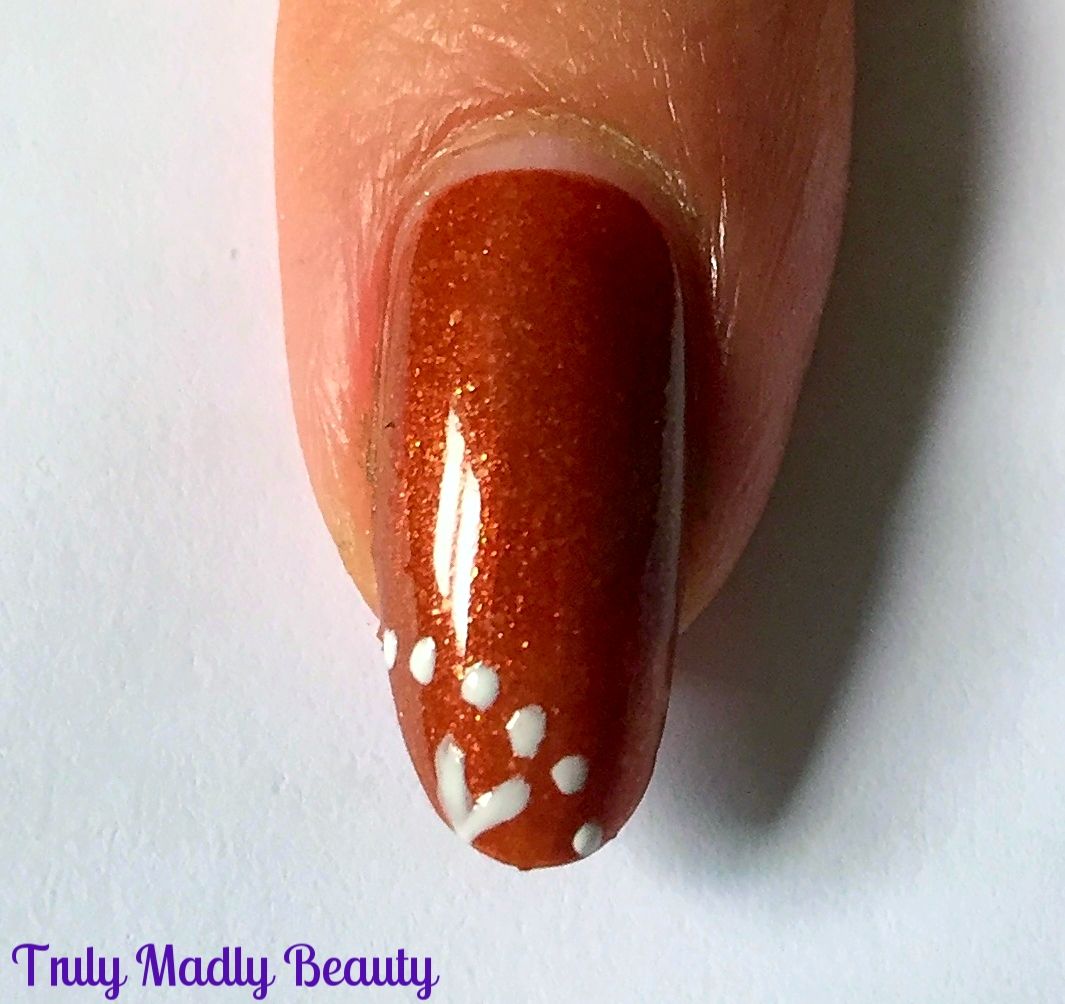
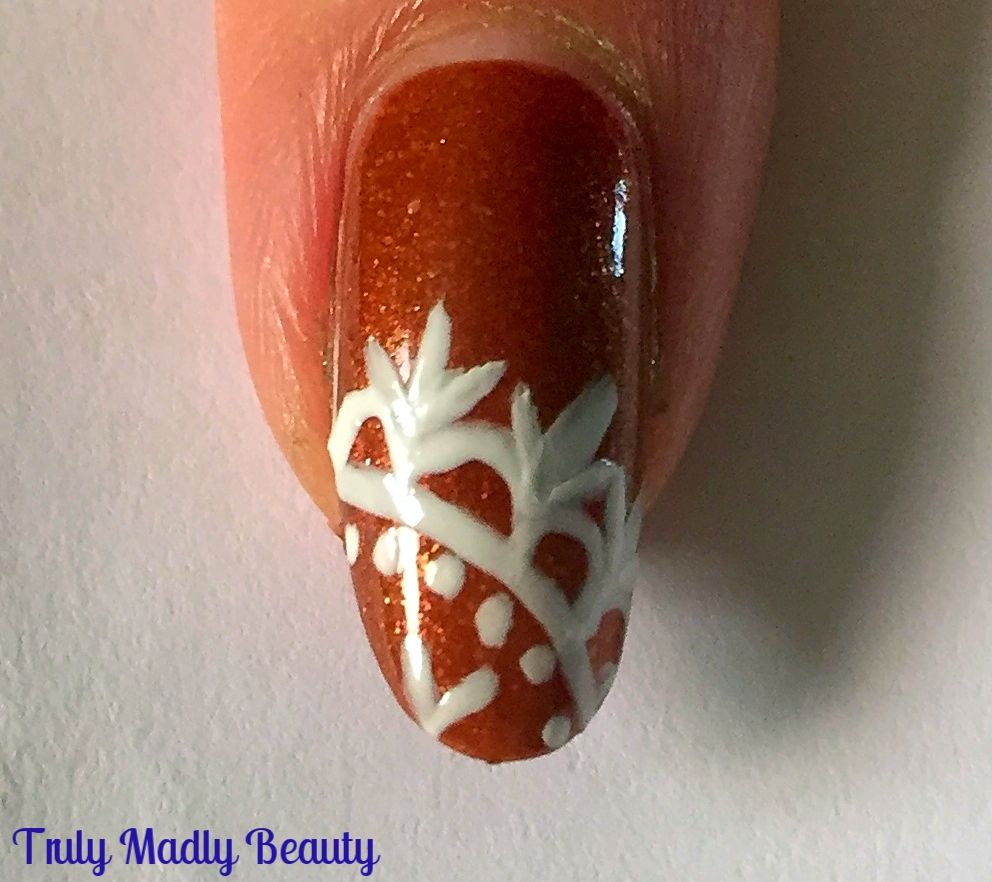
After your base colour has dried, grab your nail art brush & some white polish and begin by applying a tiny V on the side of the tip like so...


Next, using a wee dotting tool, apply a curved row of white dots around your V.


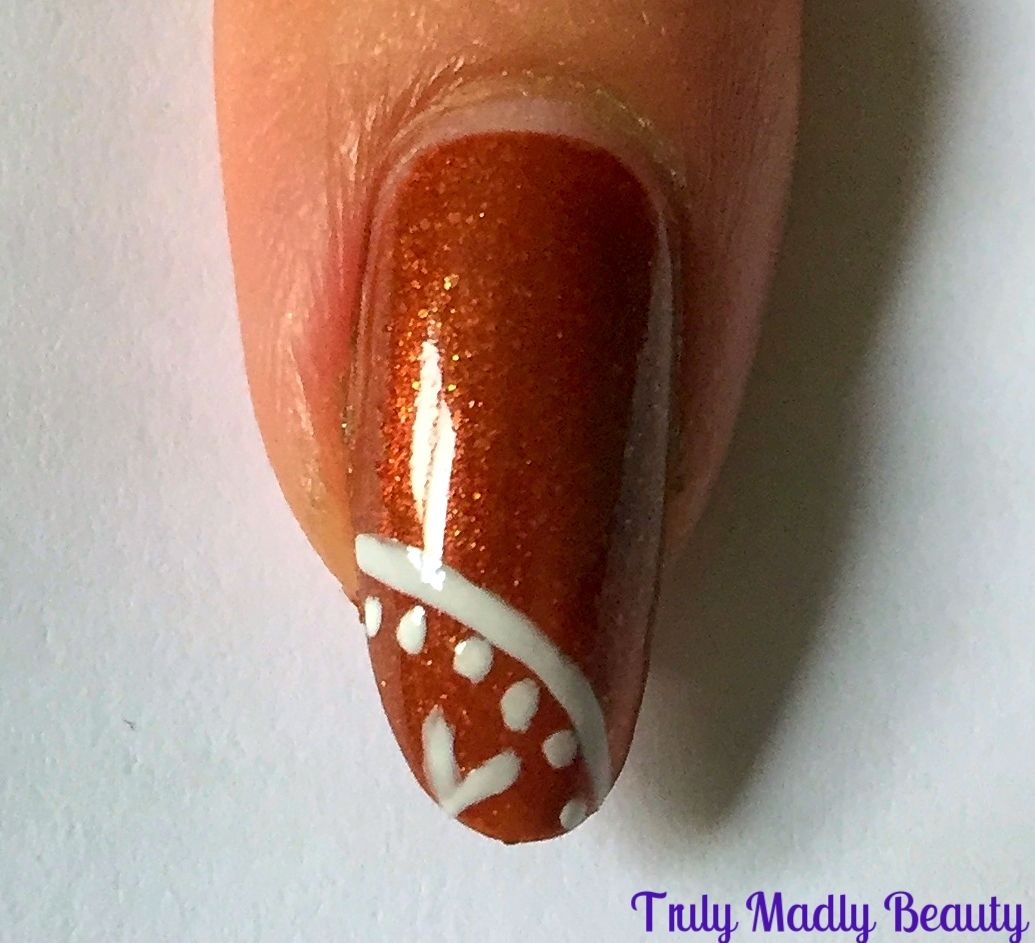
Then grabbing your brush again, apply a curved line just above your dots.


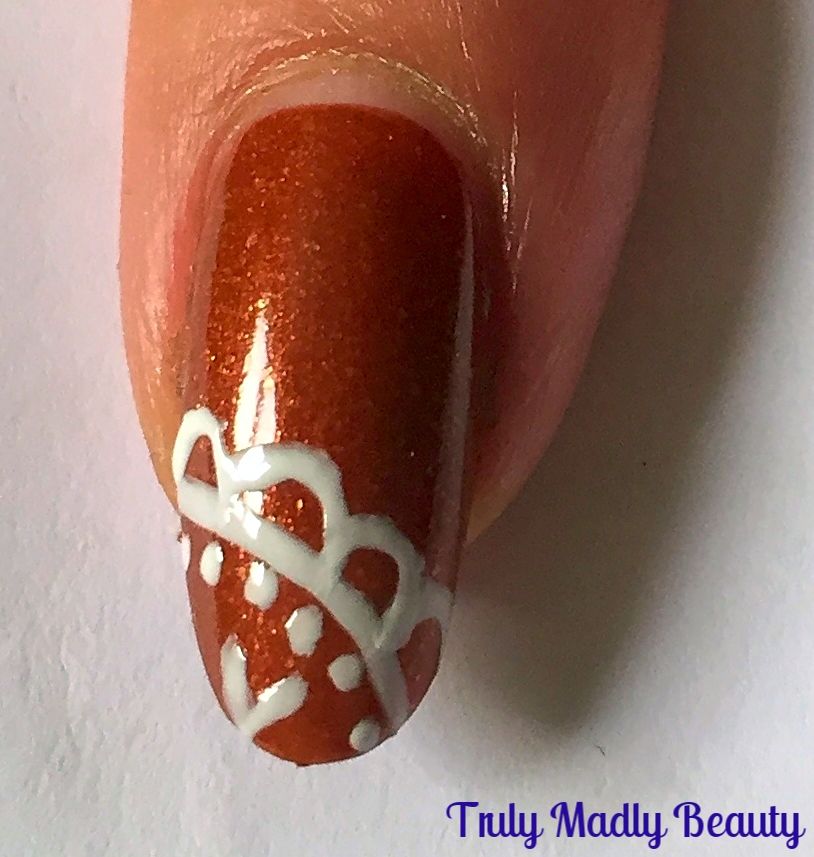
For the next part of the design, again with your fine brush & polish, apply a row of small semi-circles along the top of your curved line...


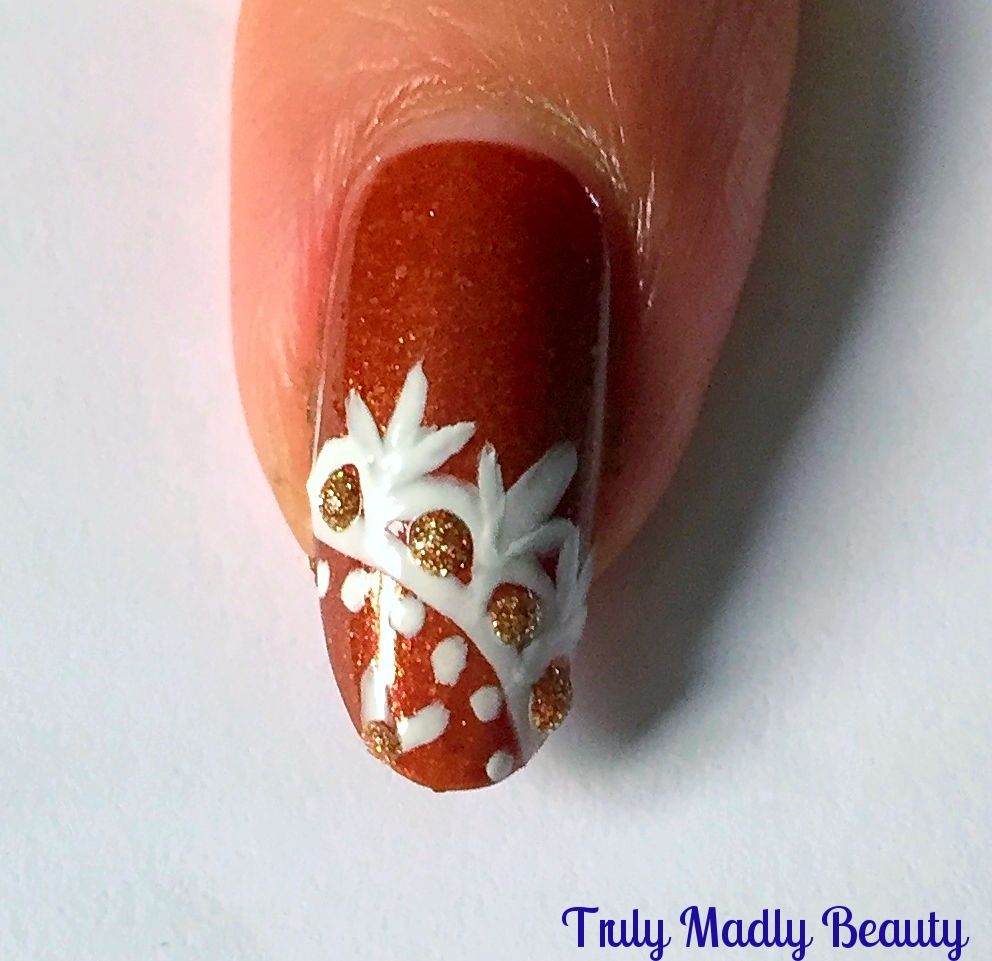
See the pretty lace design slowly coming together? Next step is to apply a straight line in between each of your little curves as shown....


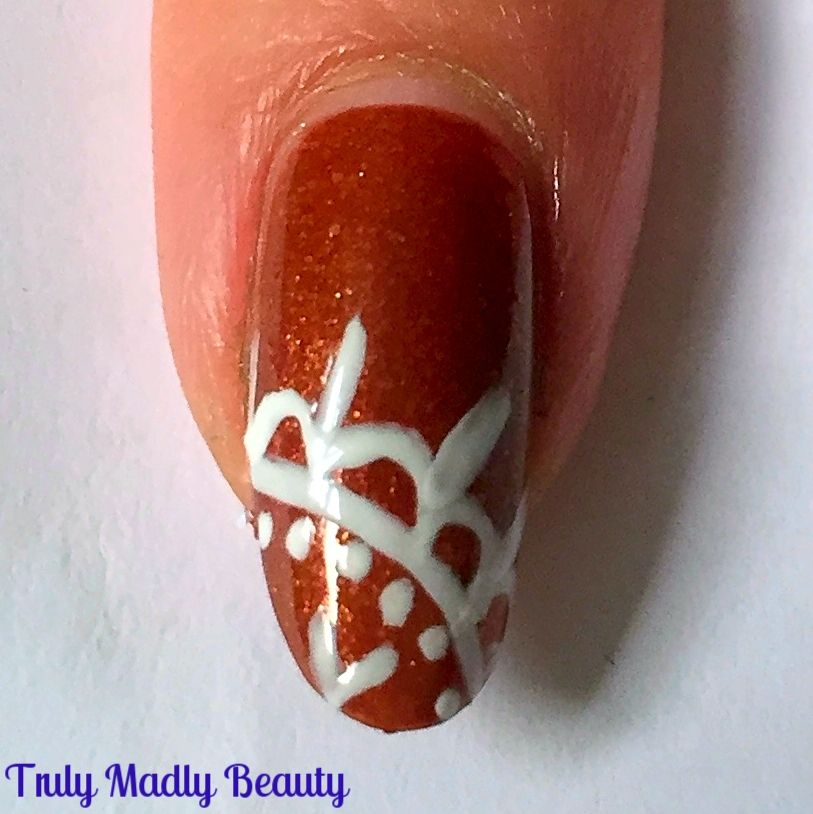
Then finally to finish your lace pattern, add on two little lines either side of the straight line.


This is an additional step you can skim over but I naturally couldn't resist adding a touch of golden glitter in between the gaps.


Finish with top coat and thats it! Easy peasy right?! I love doing lace details to jazz up my block colour mani's :) Do give it a go!


Thanks as always for stopping by beauts!

Lotsa love to ya!


11.03.2016

Autumn/Fall Inspired Diva Nails & Tutorial!

Hello there lovely readers!

Halloween took precedence when it came to my nail art over the past few weeks but now that has passed *sobs* I can now embrace Autumn in all its glory with some Autumnal nails! There's still time non? Better late than never...I'm definitely an Autumn baby & adore this time of year with its abundance of burgundy tones, blankets, bubble baths, burning candles...ungh I LOVE IT!


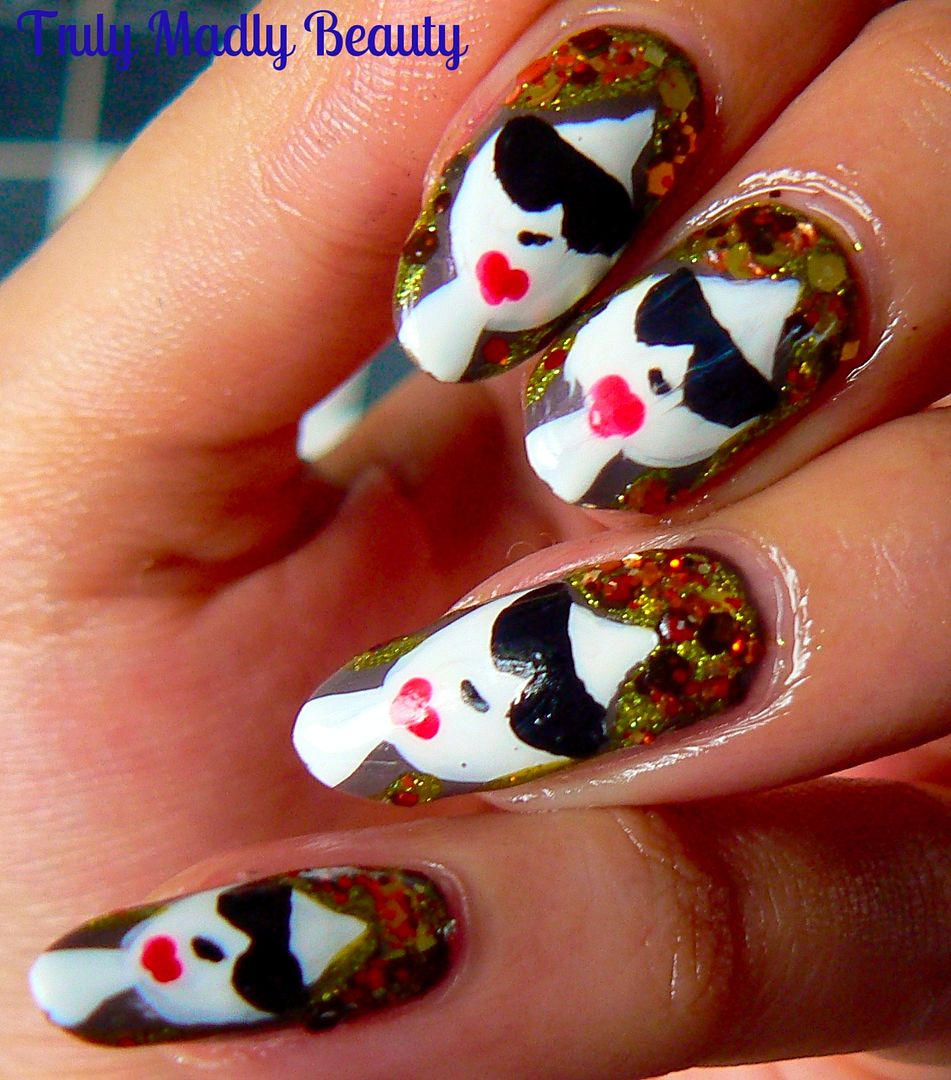
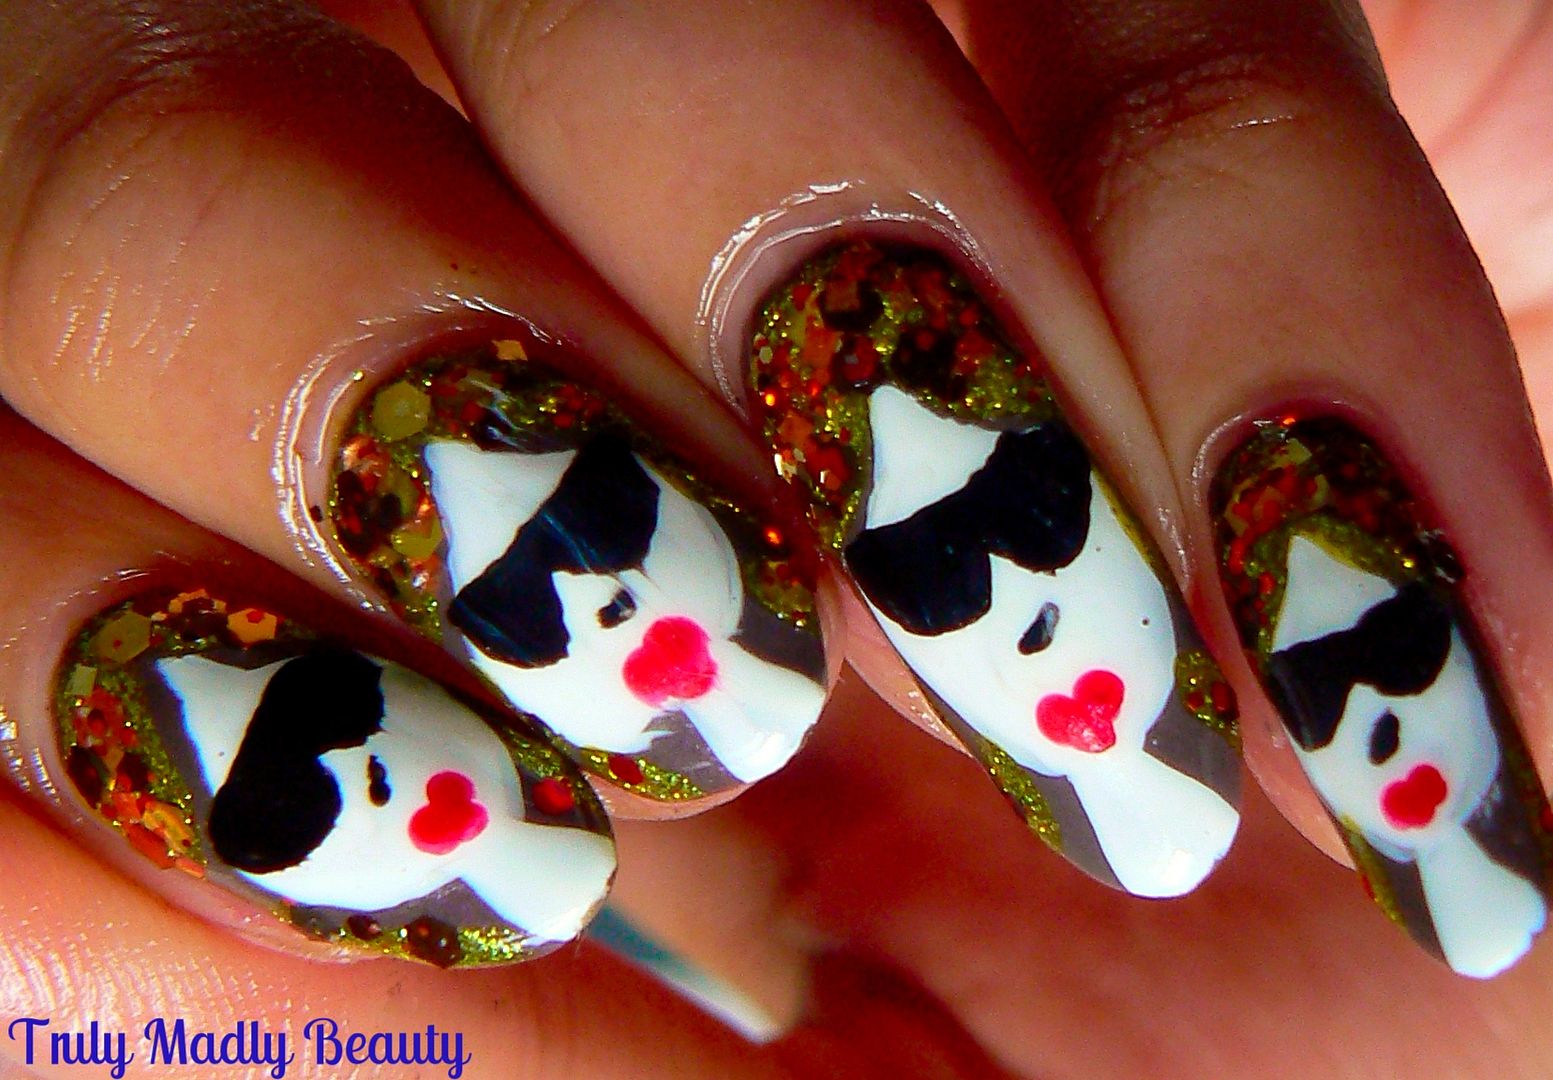
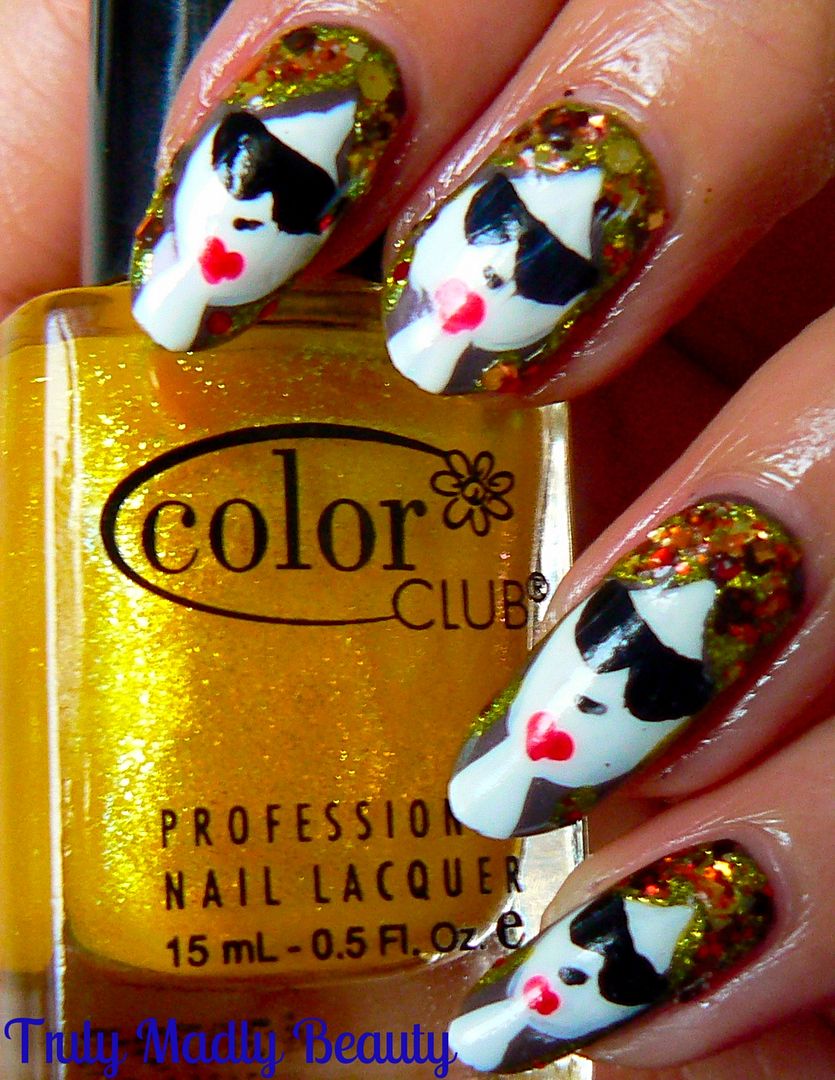
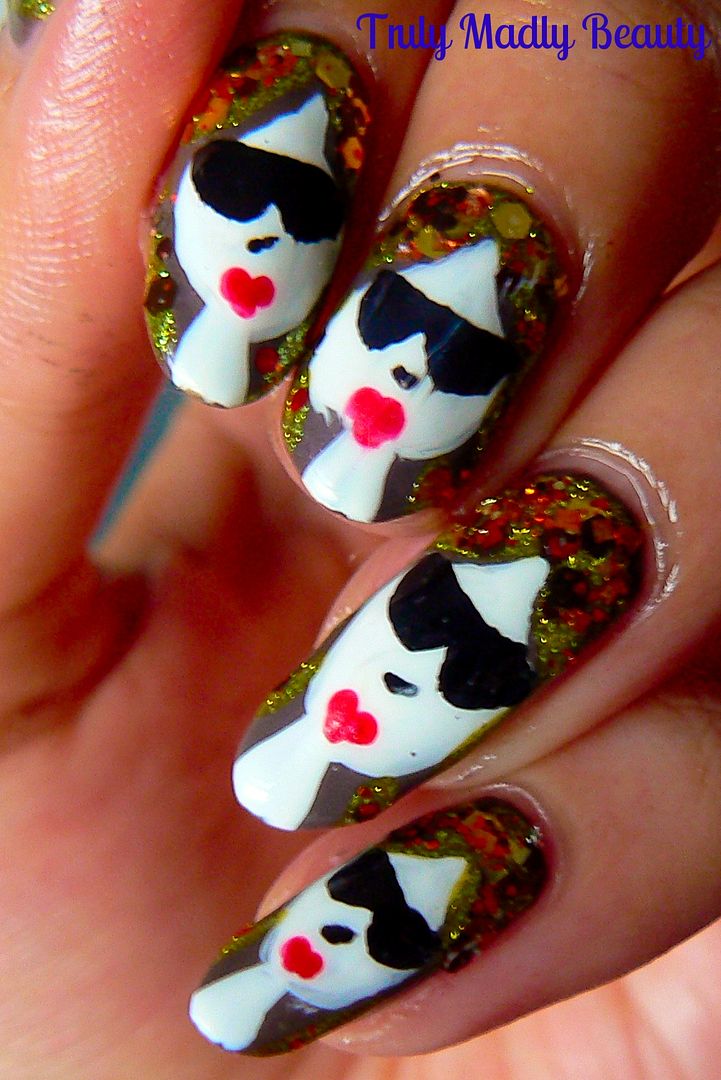
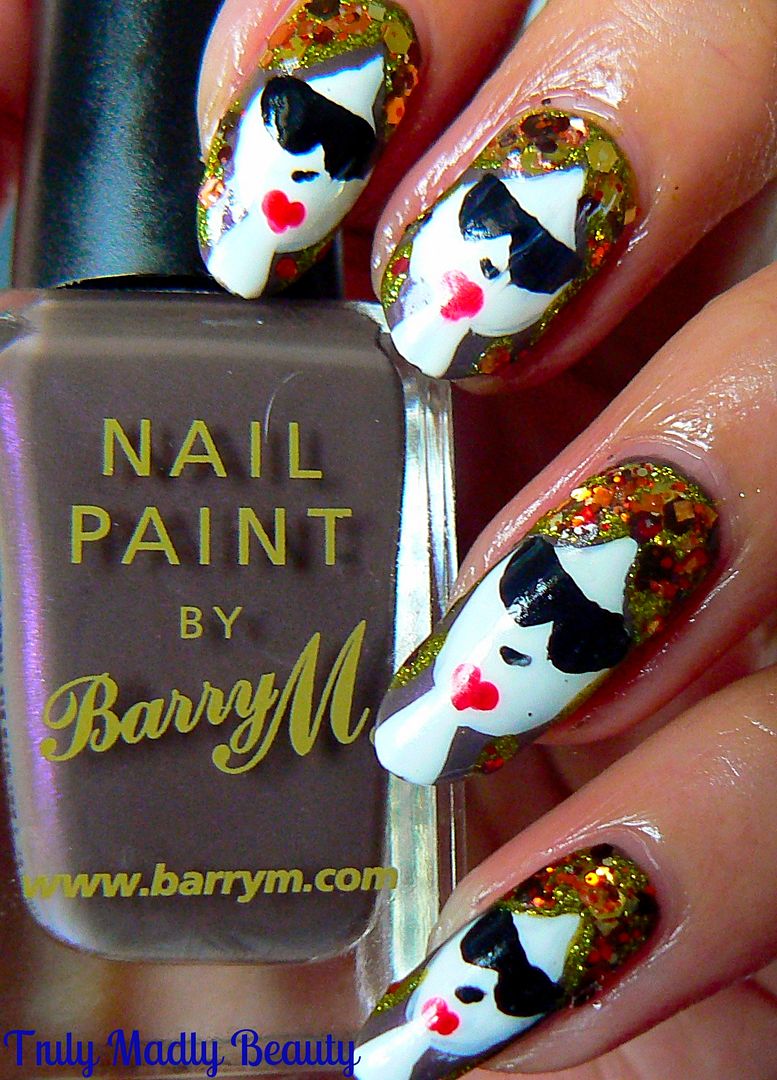
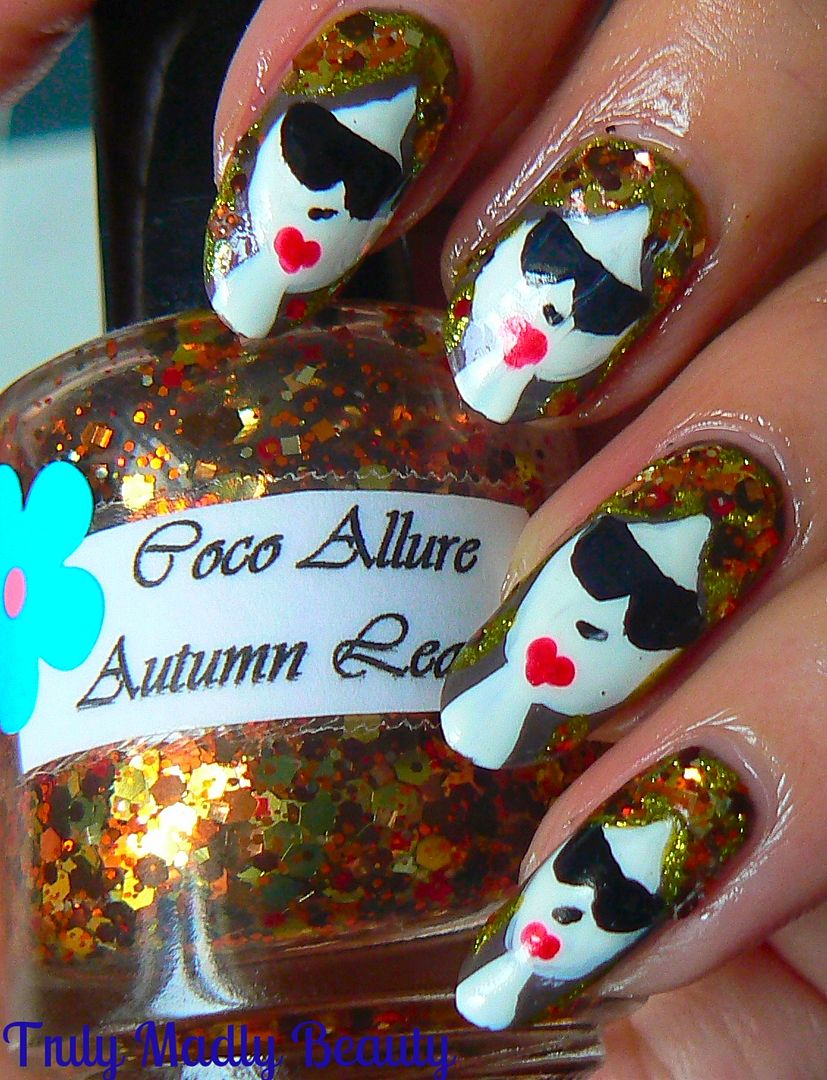
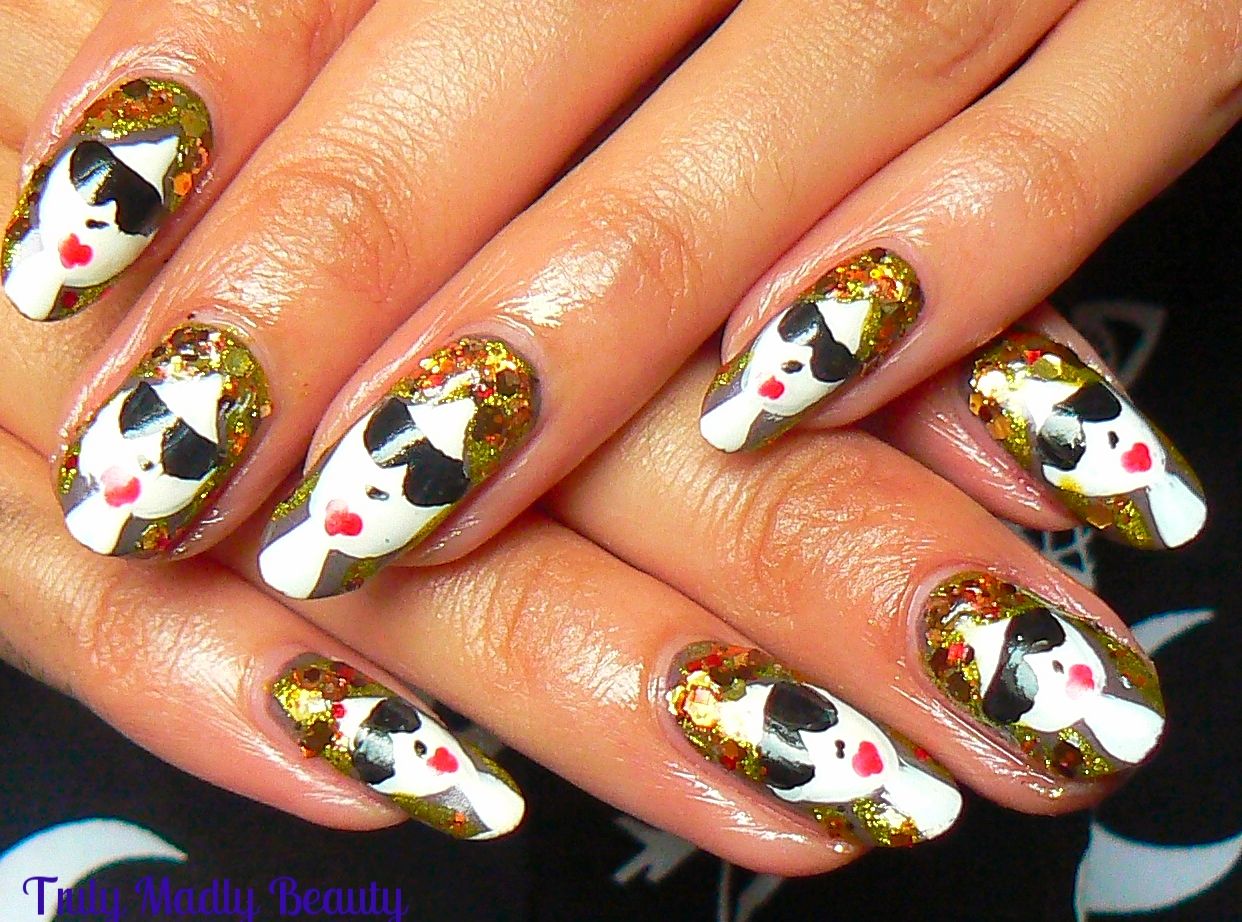
Naturally my favourite way of expressing myself is through my nails so I got to thinking & created this Autumn vibed design featuring a pouting painted diva with vibrant flowing hair reminiscent of burnt Autumnal leaves!


I was inspired by a Robin Moses Tutorial on YouTube, her nail art designs are wonderful, in her design she created the one lady accent nail & incorporated her flowing Autumn/Fall leaved hair over the remaining nails. I loved the look so much I decided to do an individual painted lady on every nail!


To re-create this design is easier than it seems & I've done a step by step pictorial for you to show how you I did mine...


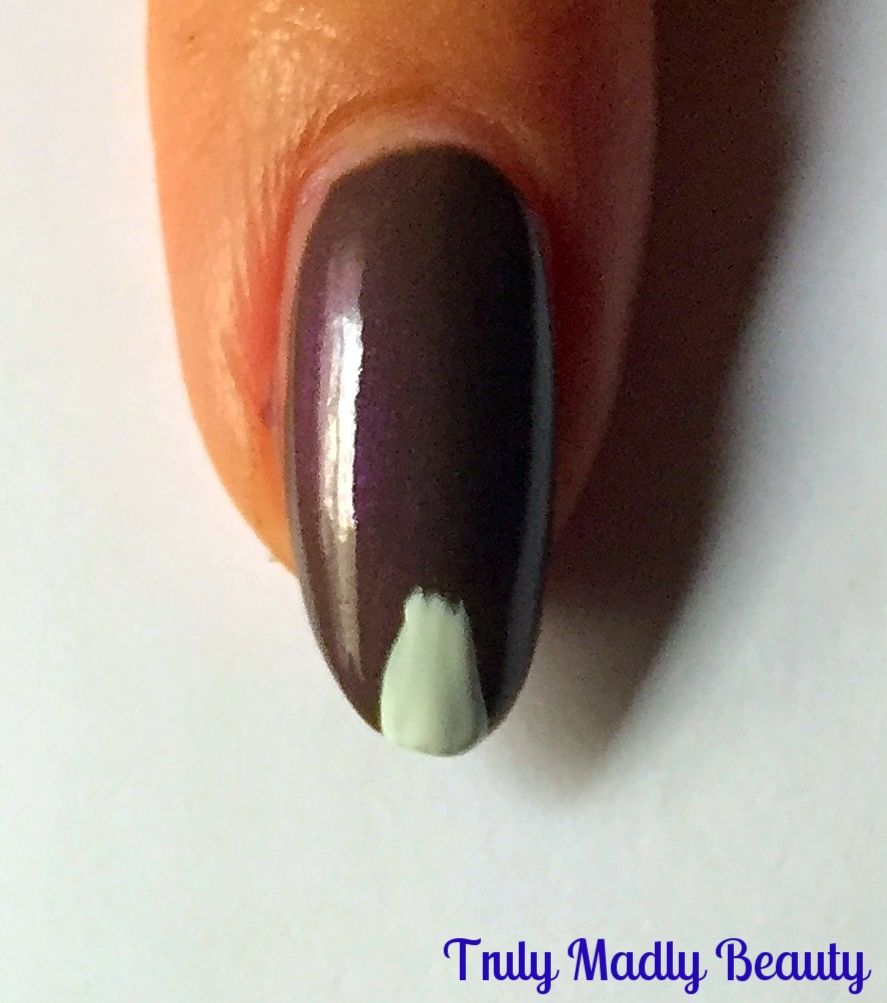
Begin with your base colour, wanting to keep with the Autumn tones I reached for Barry M Dusky Mauve. Remember when everyone went doolally over this shade due to its high dupe level of Chanel's Paradoxal? Here I've applied 2 coats of this lovely purple griege shade.


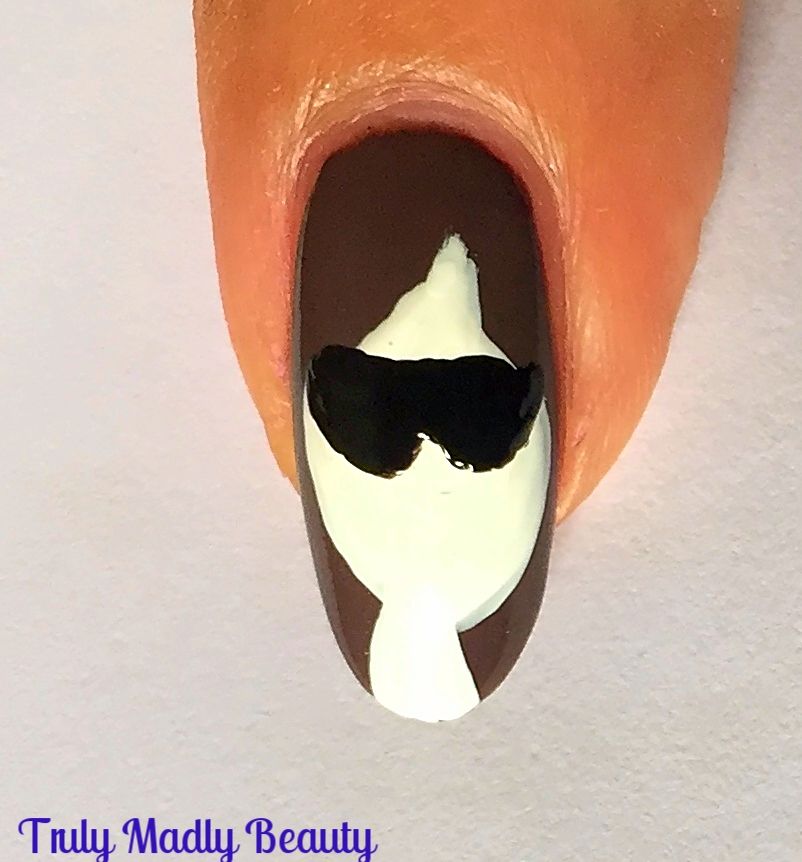
Now to begin creating our shaded divas, start with applying her slender neck starting at the tip of the nail, using white polish & a nail art brush.


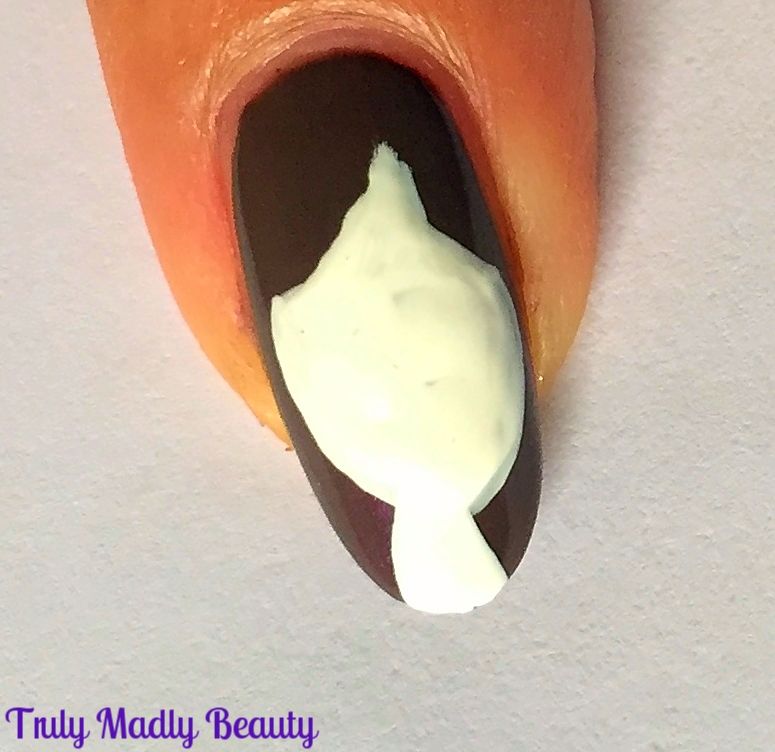
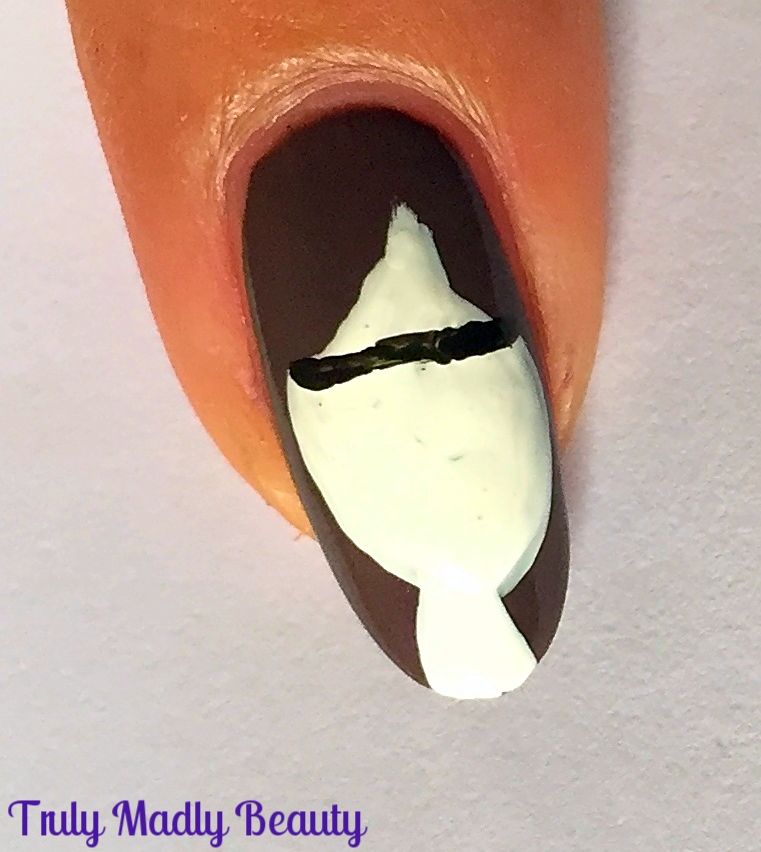
Now to create the face, using your thin nail art brush & white polish, start about 3/4 of the way up your nail where you want the forehead to be & draw a curved triangle with the top point angled slightly to the right, to give the appearance of bangs/fringe, then continuing on from the two bottom points of your triangle,curve a round oval like shape down to the neck before filling in.


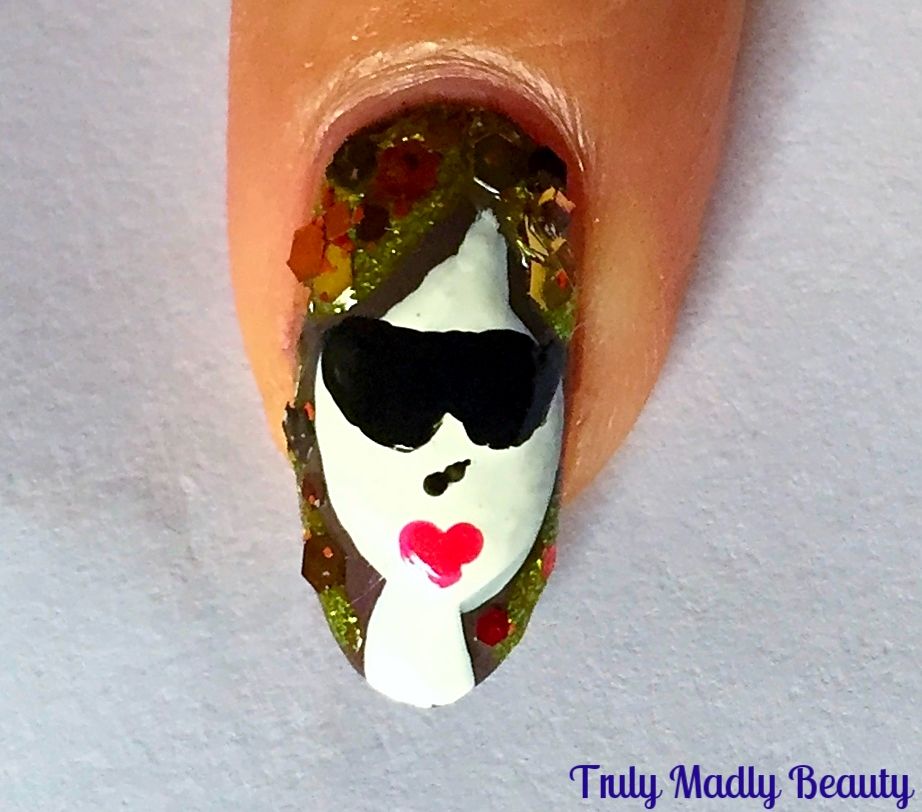
Next step is to add on our ladies sophisticated sunnies! Because even though its Autumn, shades can be rocked ALL YEAR ROUND. To do these simply start by adding a thin horizontal black line just underneath the fringe/bangs.


Then with the same black, underneath your line add two semi circle-esque shapes to create lenses.


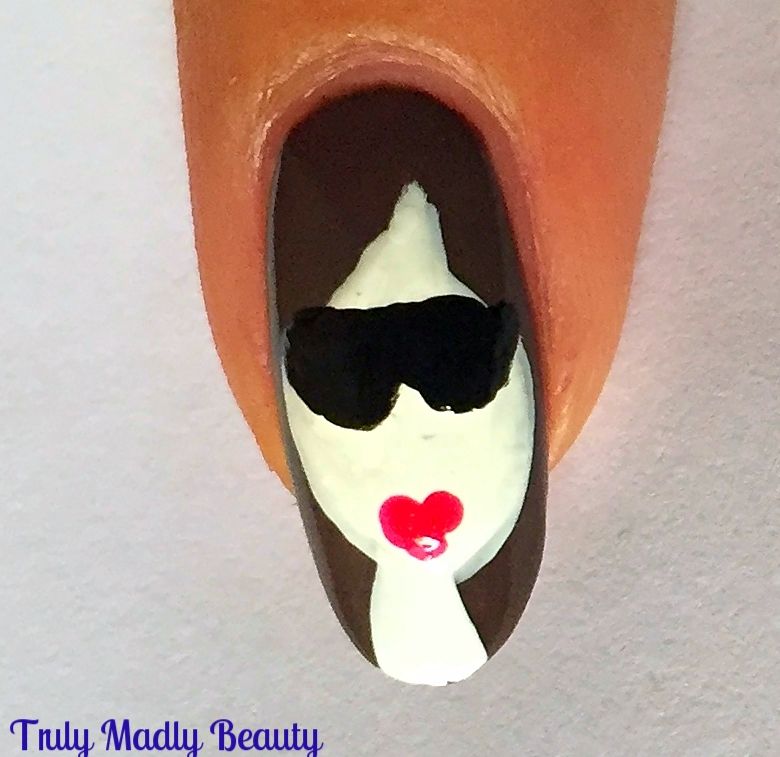
Now for our diva's pout, grab a pink or red polish & a dotting tool or a bobby pin & place two dots of red with one dot underneath, almost creating a heart like shape for the lips.


Final detail to the face is a tiny angled line for the nose before you can go to town with all the Autumn colours for her hair! I decided to use a shimmer yellow polish by Color Club to add on some strands in the brown, because its ALL about the balayage babes, before using the aptly named Autumn Leaves glitter polish by indie brand Coco Allure which I picked up from Etsy donkeys ago!


As the glitter in this polish is quite large I poured out a bit of the polish on to a piece of paper first & then used a toothpick to pick up the pieces of glitter which come in shades of burnt orange, reds, coppers & gold & just placed on to the hair.


Finish it all with a nice thick coat of topcoat & your done! Thank you Robin Moses as always for the inspo, a really fun & interesting way to wear Autumn/Fall nails! Hope you like them too!


Thanks as always for reading! 

Lotsa love to ya!

10.06.2016

Eye of Horus Liquid Metal Eyeliner!

Hello there lovely readers!

It seems my blogging mojo decided to go on a wee vacation for a while there, but hopefully she's had a nice reprieve as I'm determined to get my blog back on. And just in time for my favourite month too because yes...ALL THE HALLOWEEN EVERYTHING. I can't wait to get started on throwing together some spooky Halloween manis for you because gods know I love this time of year! Have a sneak peak at some of my designs from Halloweens past HERE for some early inspo but there'll be more to come fear not! Or be feared... ;)

Before I begin on all things ghoulish I have some other bits & bobs to share with you, I've recently come across some absolute GEM beauty treats lately & am eager to share their awesomeness with you. I feel it is my duty.


Next to nails, my HG beauty product is without a doubt eyeliner, I feel naked without it & am rarely without my armour of a cat wing flick! Lately I've enjoyed mixing it up a tad with different styles & looks. There's so many fun & fab ways to jazz up your liner & one way in which to do so is incorporate some colour. Not only do I love my eyeliner but I am a sucker for all things metallic...enter at this point...Eye of Horus Liquid Metal Eyeliners*...one word....ERMAGEEERD!


I'd heard about the brand Eye of Horus amongst the beauty grapevines but never had the opportunity to try myself, shocking really as I adore anything Egyptian themed which is clearly the inspiration behind this award winning Australian brand that is not only cruelty free but also paraben, nut & gluten free.

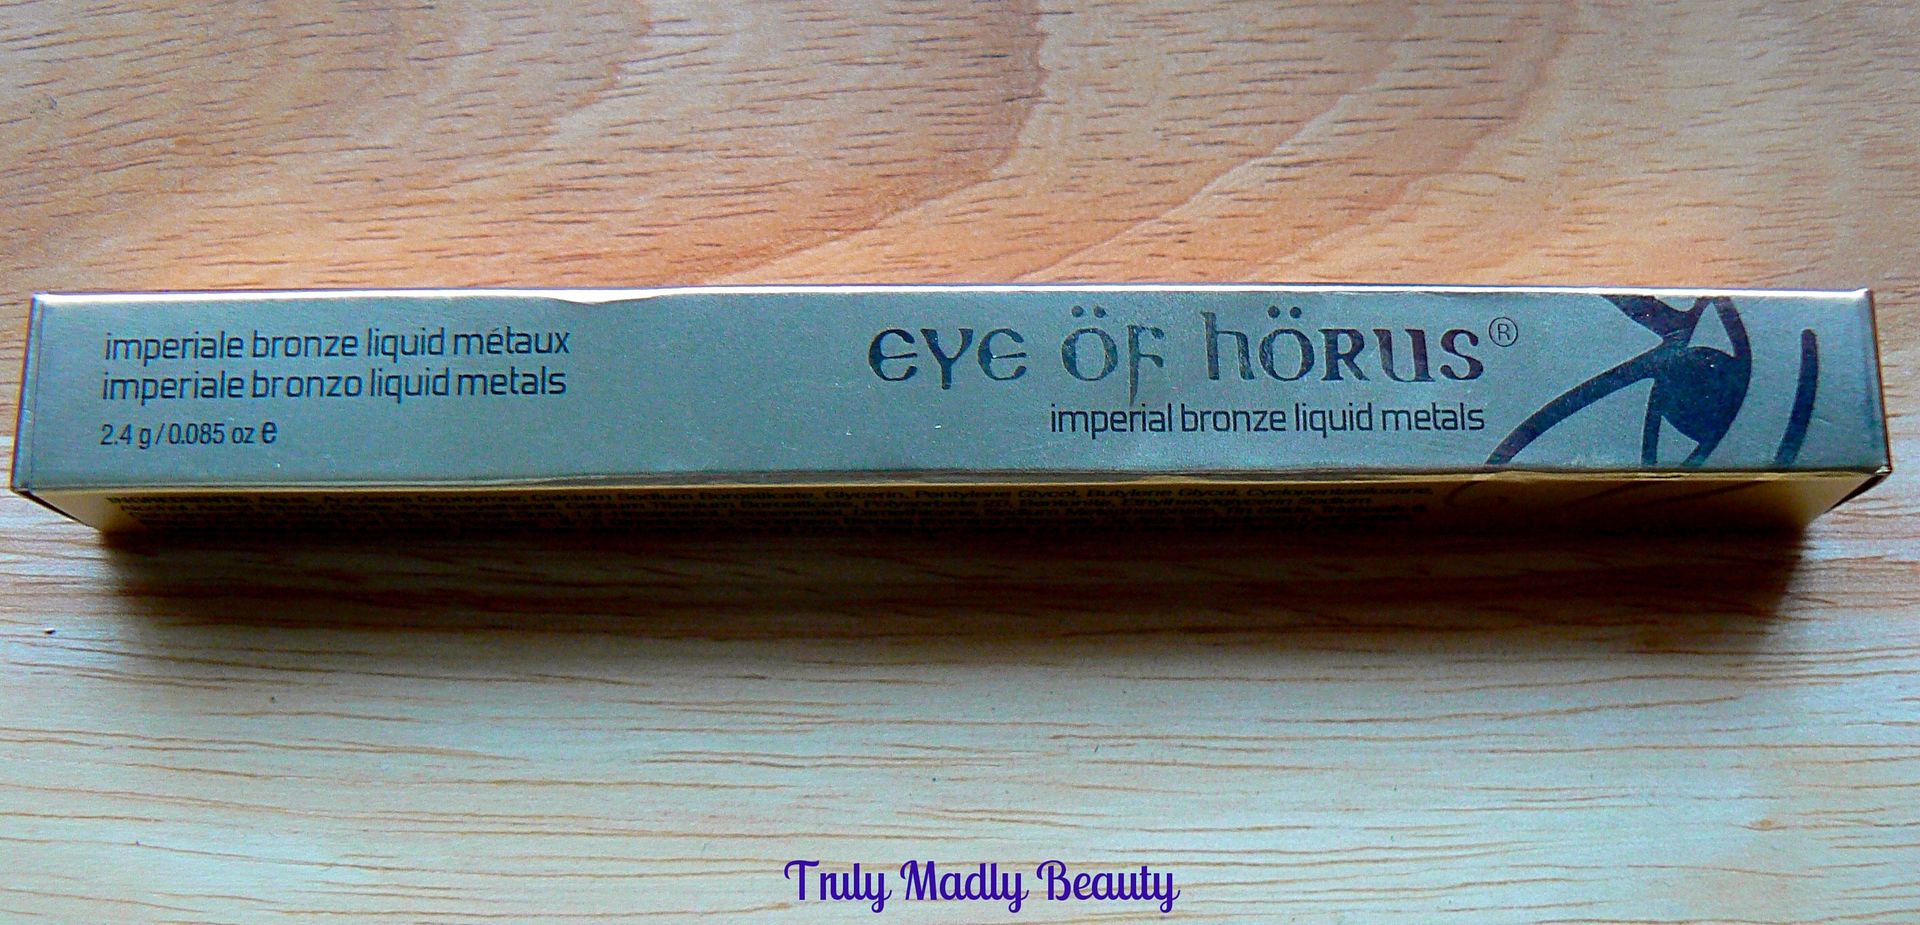
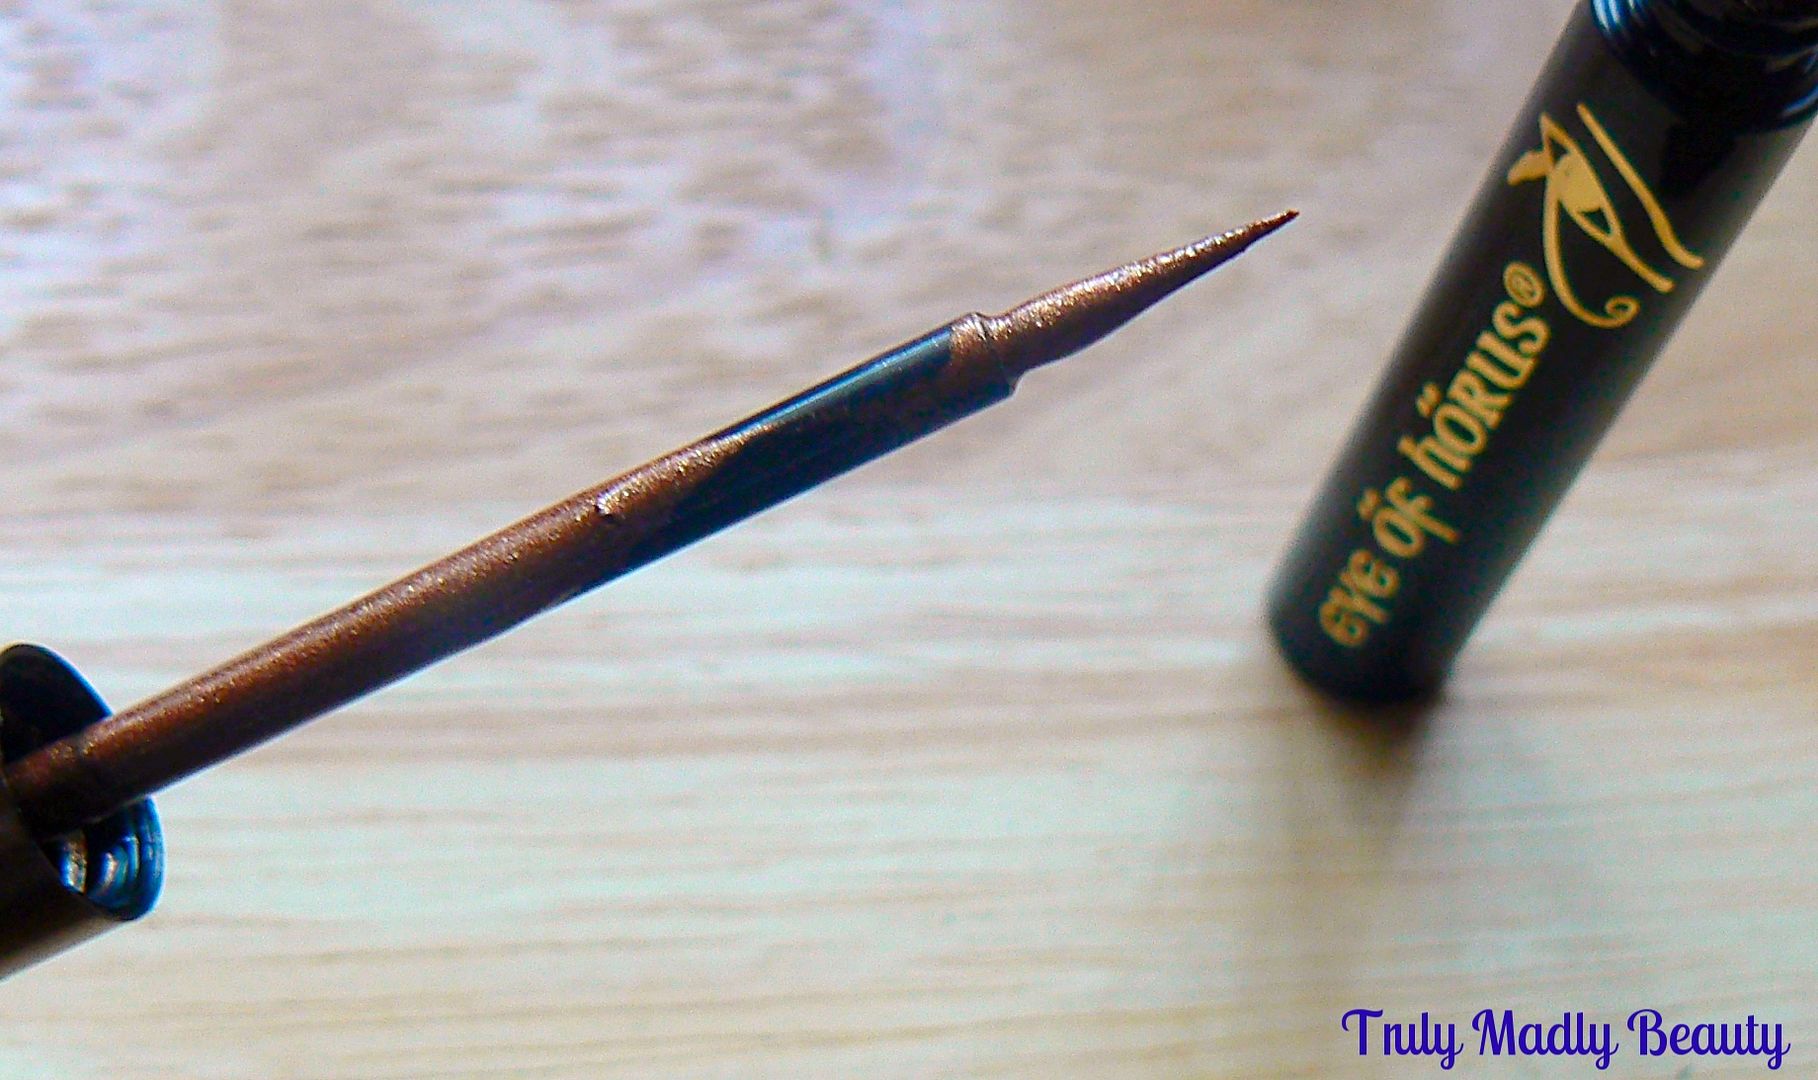
The Eye of Horus Liquid Metal Eyeliners come in four different shades: Alchemy Gold, Ancient Pewter, Copper Sphinx and Imperial Bronze*, which is the shade I'm sharing with you today.


I've come across many liquid eyeliners that promise a multitude of wonderful results but sadly never delivered but I am happy to tell you that the Eye of Horus Liquid Metal liners are exactly what they say on the tin...hello gorgeous, pigmented molten metal finish!


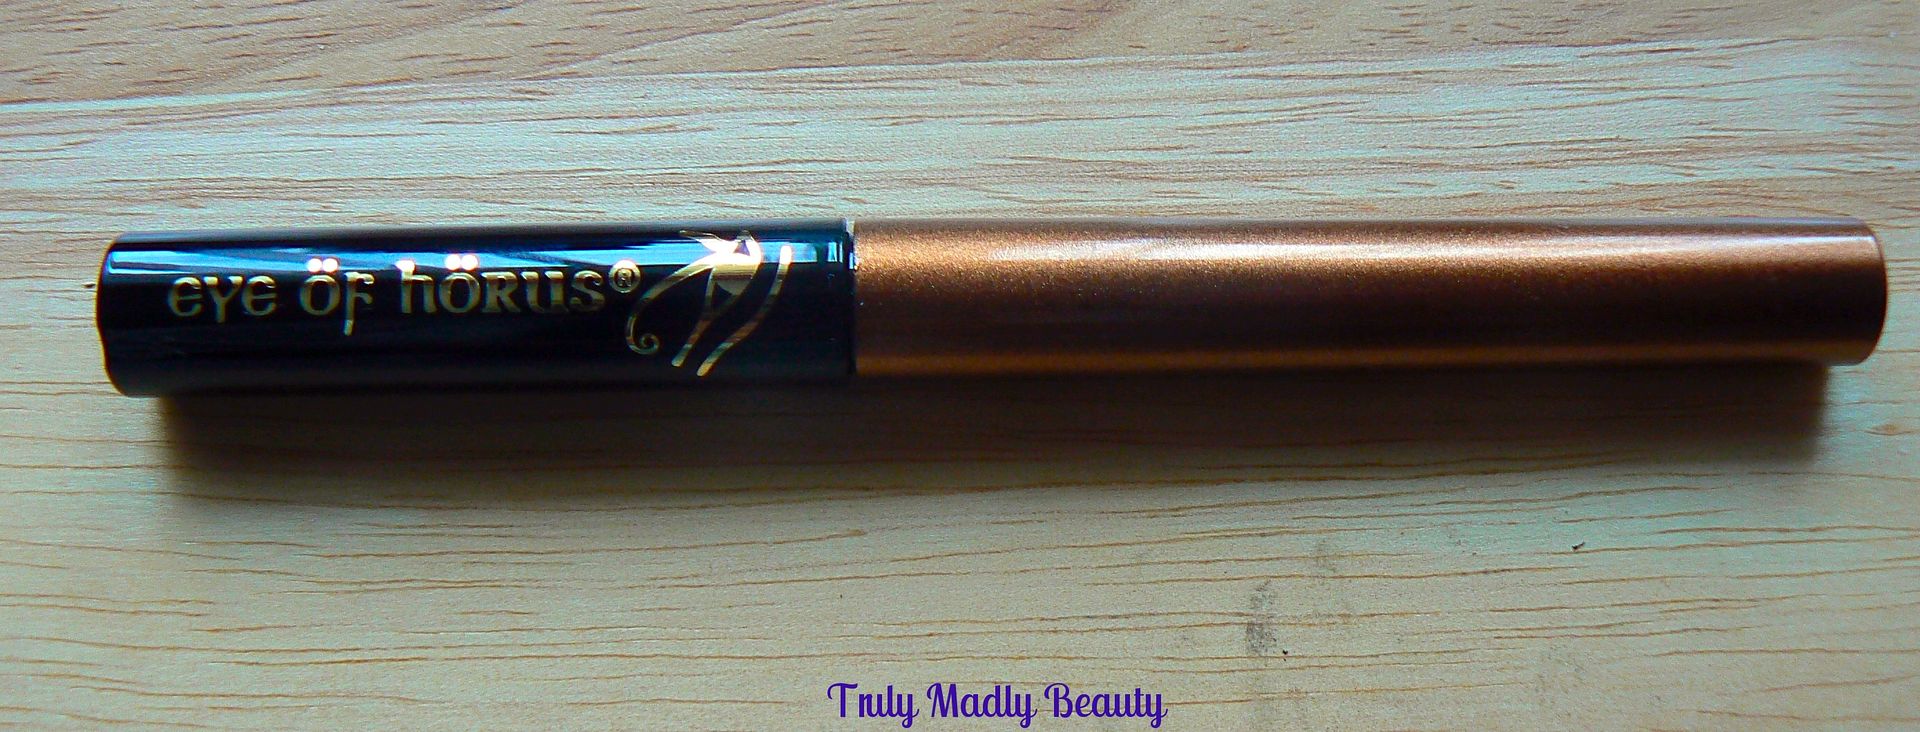
The packaging as you can see is beautifully sleek, with the brush & handle being the long coloured cap part of the liner, the length actually makes handling the brush much easier.

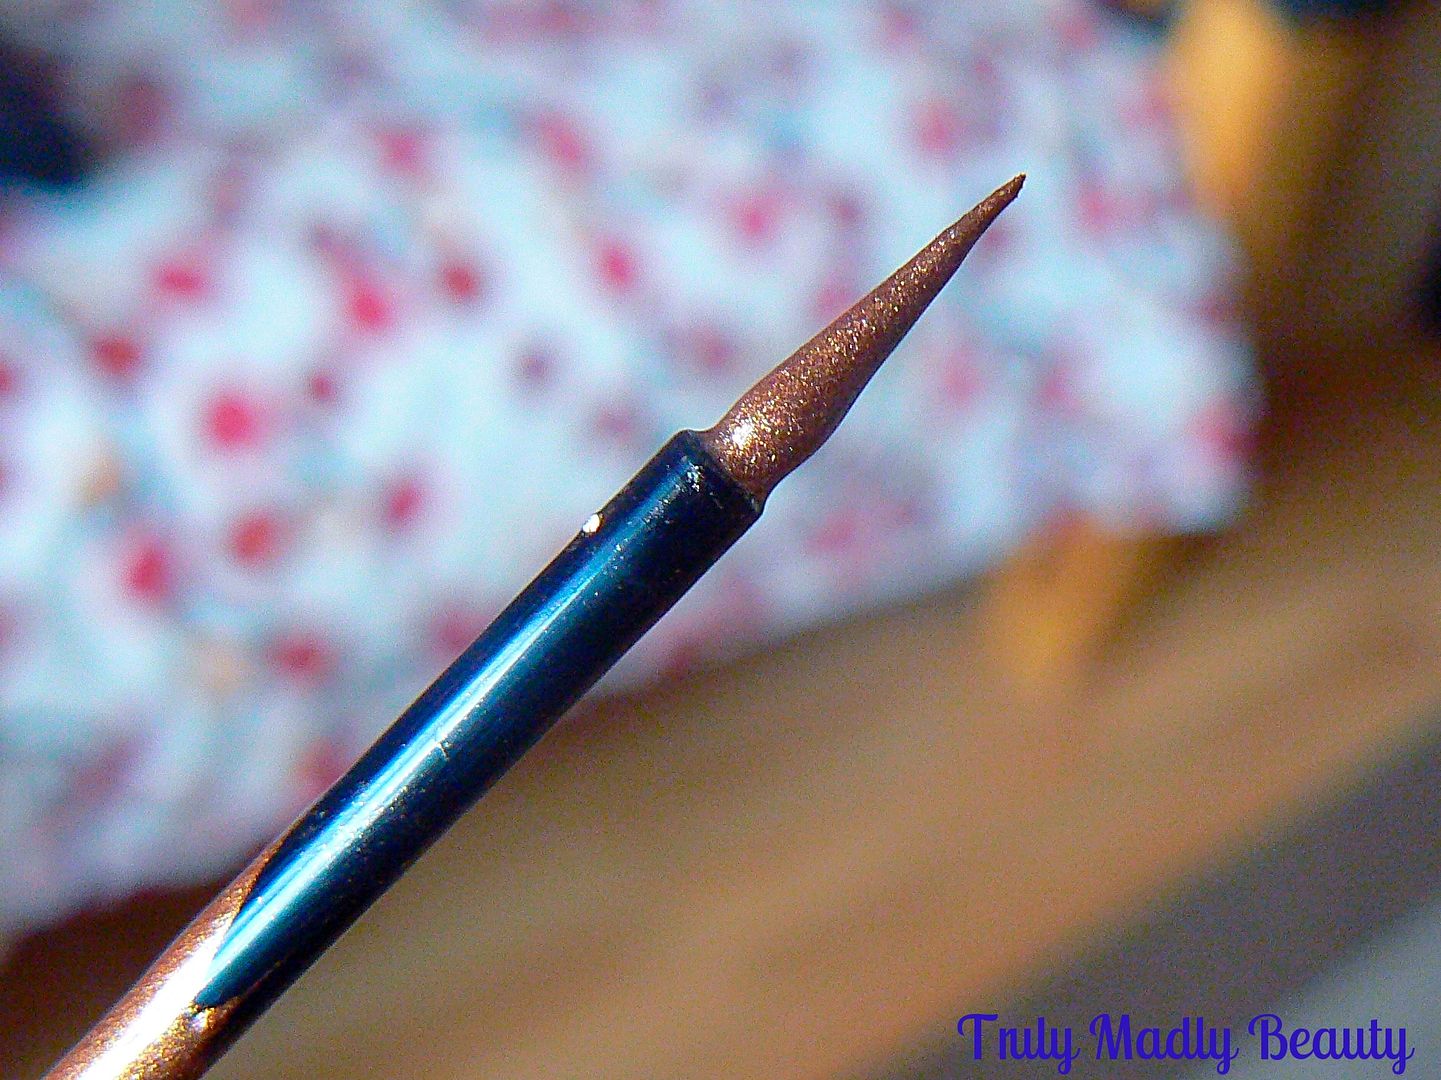
The nib is most important when it comes to applying eyeliner & these are not only fine pointed but sturdy as well, making applying a smooth line an absolute breeze.


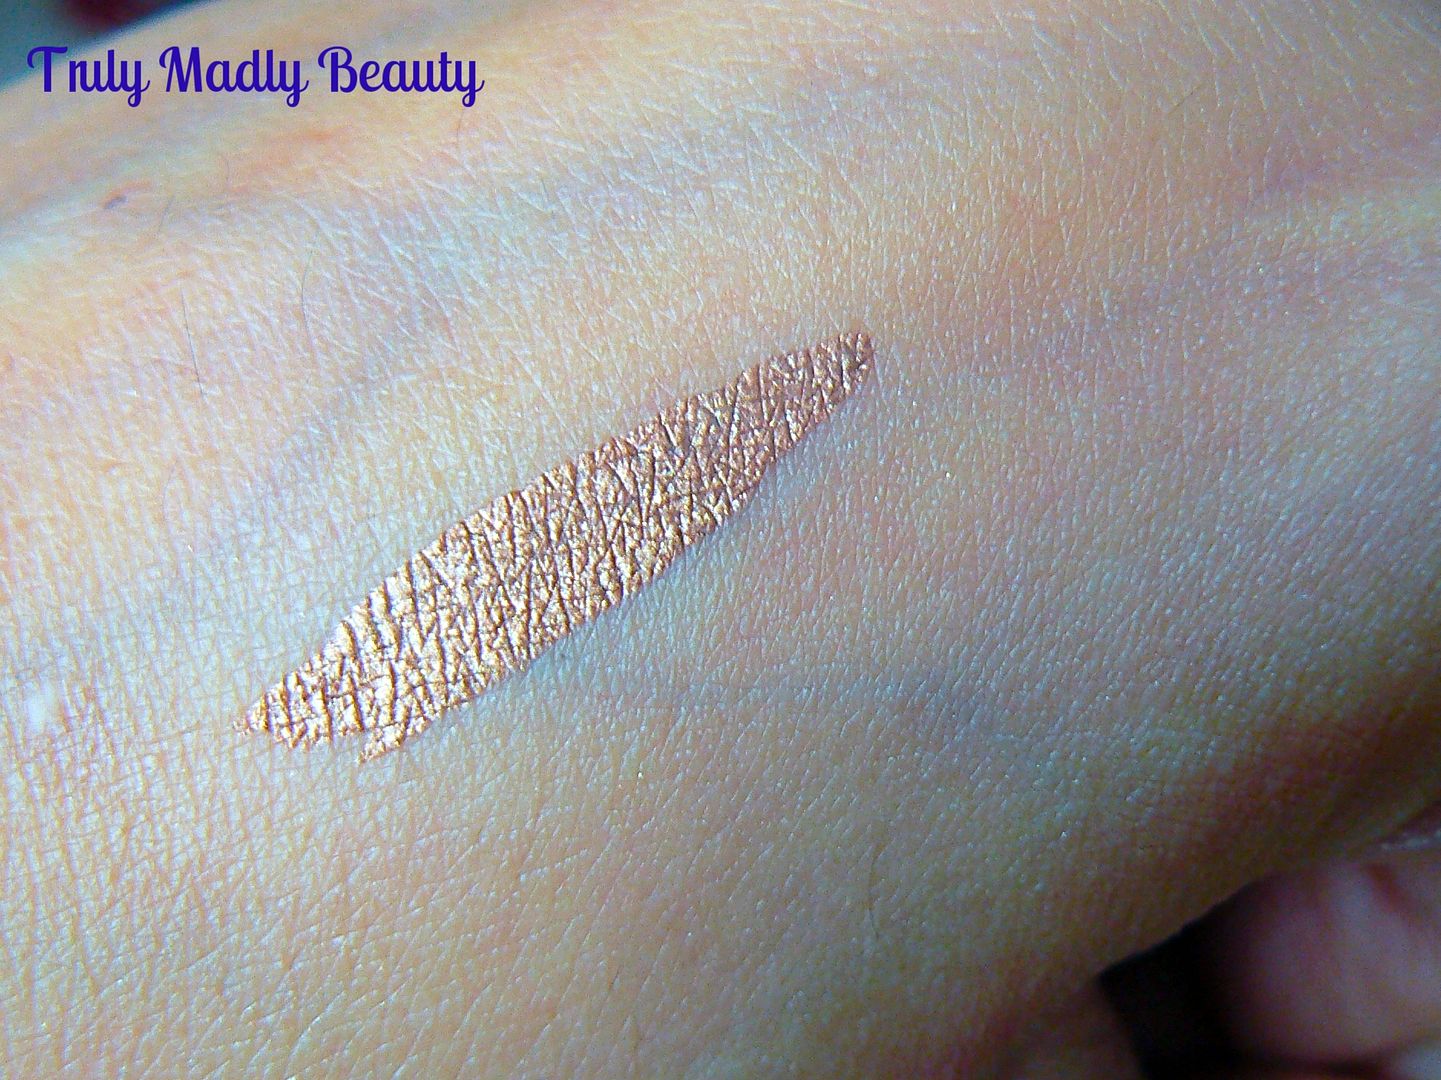
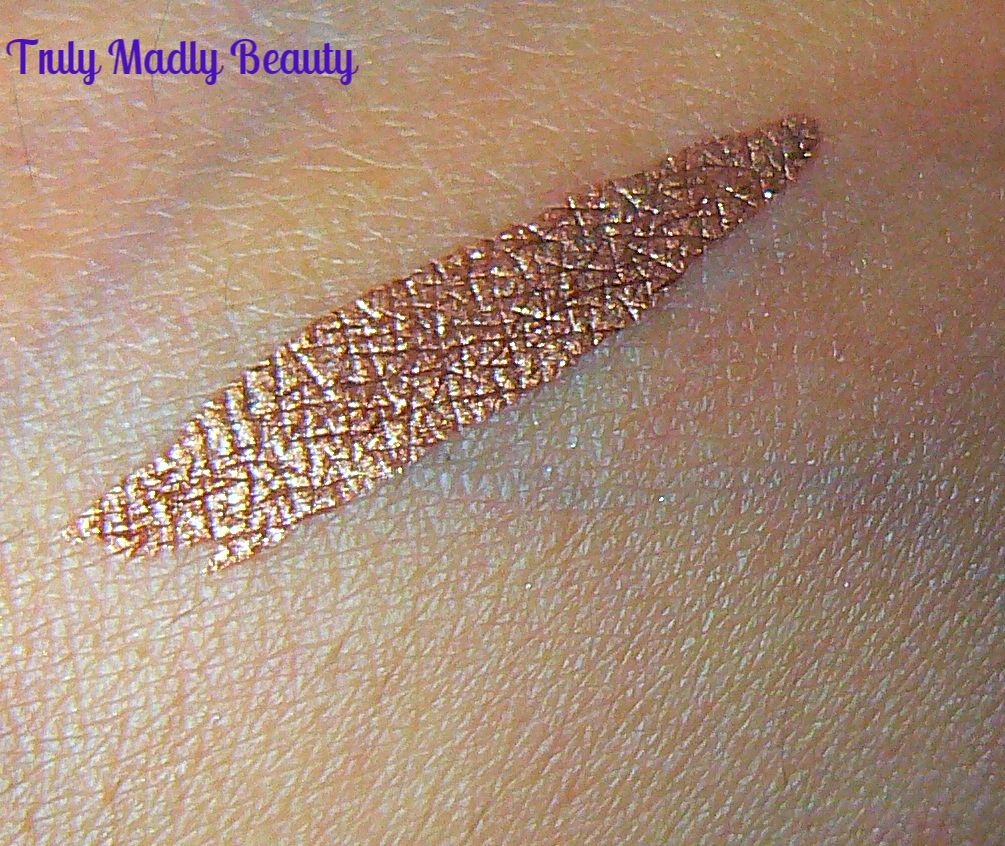
The swatch here is one swipe of the liquid metal bronze goodness & I completely went into real life heart eye emoji face at the mirror like molten metallic finish...ungh just look at it *swoons*


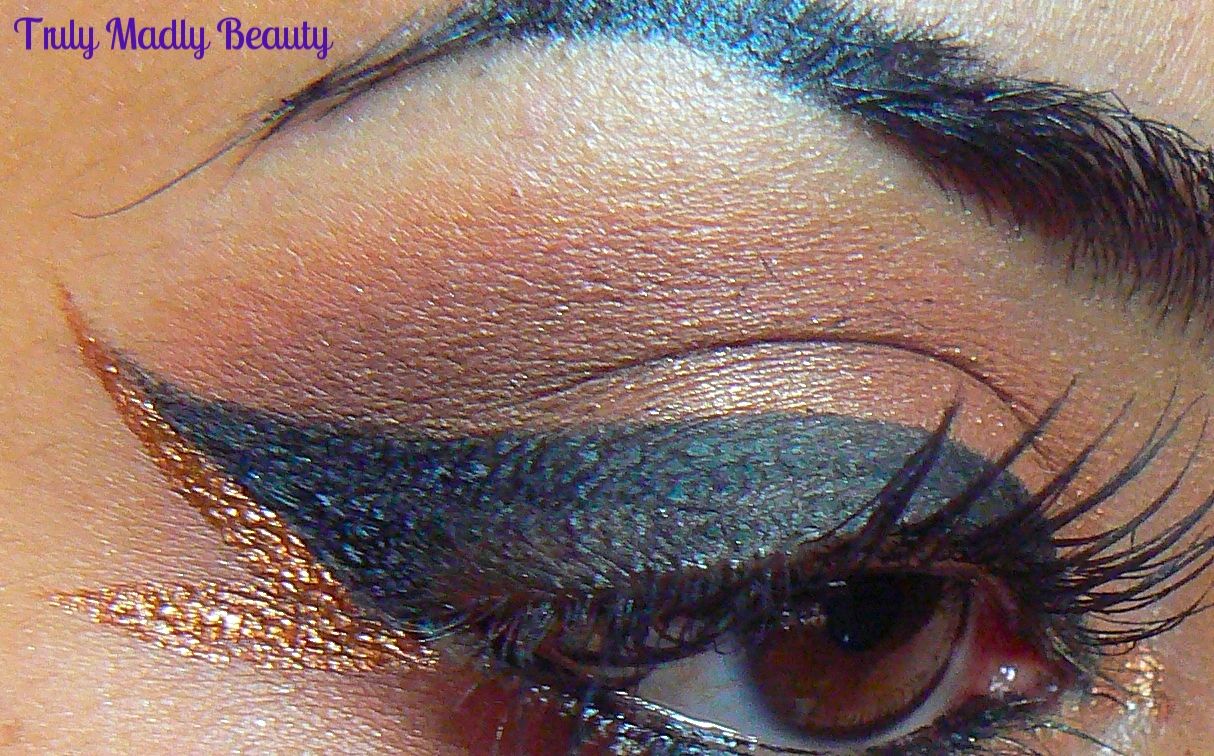
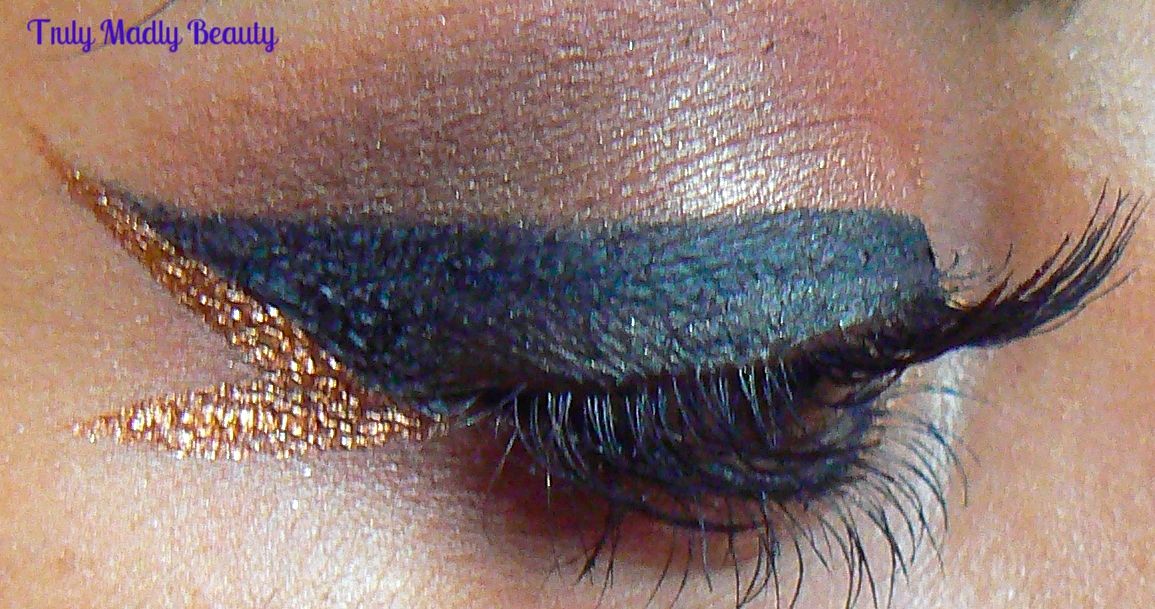
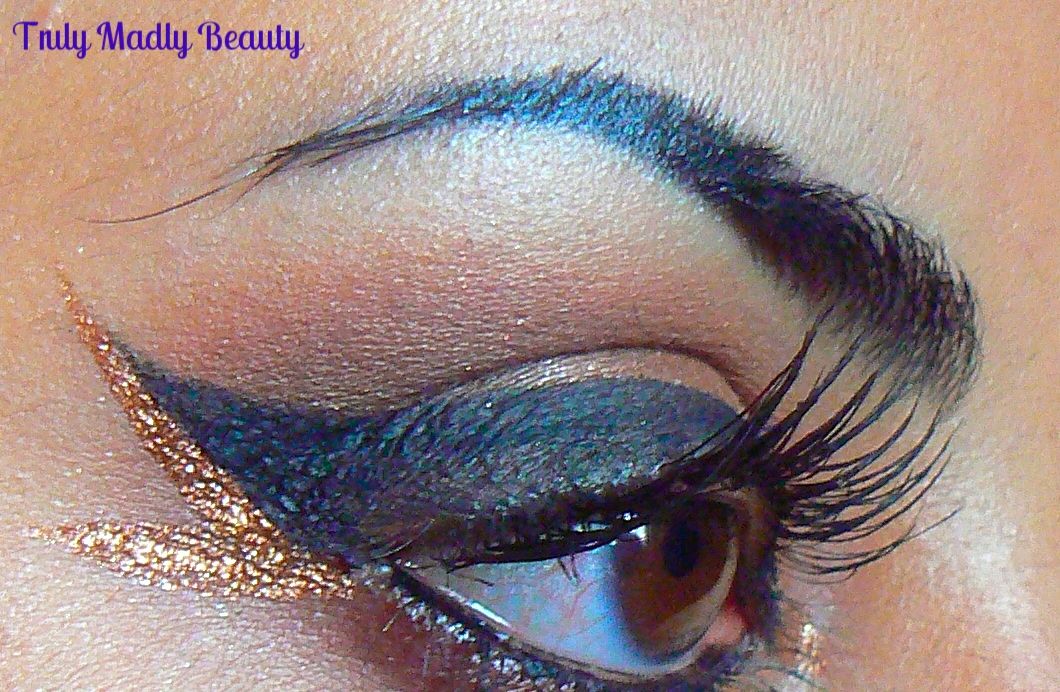
I couldn't wait to incorporate some of this bronze goodness into a look & this is what I came up with. I decided to do a bronzed smokey eye with a double wing, using the Liquid Metal to create the extra flick as well as adding a touch of sparkle to the inner corners...


The formula is dreamy, smooth not grainy & as you can see beautifully pigmented, the colour pay off is divine, you wont find yourself having to apply layer upon layer to get an inkling of sparkle with these. And better still they will not budge once dry which is in no time at all.


I love how just incorporating a bit of pretty metal bronze into a simple wing instantly transforms your whole look to something more eye catching. There so many ways you can use this, on the upper lid, inner corners, a pop of colour along part of the lower lashline...there are actually some BEAUT looks on the Eye of Horus website that have got me all inspired to try!


Of course these would also be absolutely PERFECT for bold Arabic eye looks which I am all over...Cleopatra coming at ya...I am definitely going to enjoy creating a fun bold look worthy of the Egyptian queen.

I've come to the conclusion that I absolutely NEED the silver pewter & alchemy gold liners in my life yesterday. The Eye Of Horus Liquid Metal Liners can be found on Beauty Bay as well as Bath and Unwind for £16.50.

Thanks for reading beauts and catch up soon!

Lotsa love to ya!

Disclaimer - * products featured were sent to me for my consideration. I am not affiliated with the brand nor paid for this post, this review has been as always my 100% honest opinion! :)