Hi there lovely readers!
I've been wanting to revisit my Disney Nail Art Series for some time as yet again its been a while! You can see all my Disney recreations on the nails HERE, including classics such Beauty & The Beast, The Little Mermaid, The Lion King & more!
Frozen became a bit of a sensation with Disney for this generation of youngsters & the source of many parents loss of sanity at the thought of hearing Let It Go for the 3496th time....I myself waited a long time before watching as I am a hardcore CLASSIC Disney fan & was somewhat cynical at these newbies. However I confess, whilst I didn't understand the obsession, I STILL enjoyed the film immensely & seeing as its that time of year that ice likes to make its frosty appearance...what better for my next Festive look than some Disney Frozen Nails!
Showing posts with label Winter. Show all posts
12.17.2018
Disney Nail Art Series - Festive Edition - Frozen Nails!
Labels:
Blue,
China Glaze,
Christmas,
Disney,
Disney Nail Art Series,
Festive,
Glitter,
Leighton Denny,
Meebox,
Model's Own,
nail art,
NOTD,
Sparkle,
Winter,
Xmas
11.28.2018
Festive NOTD - Xmas Vintage Roses & Gold Glitter
Hey there lovely readers!
So Fall has passed us by far too quickly in my opinion & it seems that the natural way of things to go moving forwards is Christmas! Yup tis the season to be jolly which means nail art will be getting suitably sparkly around these parts, or I hope anyway! As usual it all depends on time but I do hope to roll out some fun festive goodness for the nails this year!
10.19.2018
Halloween Dripping Blood Scream Nails!
Hey there lovely readers!
Holy moly its been a minute! I had hoped to get in the spirit of Halloween with my nail art but time it would seem has run away with me! I've just returned from a much needed & most amazing break in New York City, my most favourite place on earth! With that, work & also the fact that I had me some beautiful gel nails did whilst out there means any new nail art looks will be put on hold for a month or so...thankfully I have a backlog of looks & also managed to throw together one spooky look before I left so woohoo!
I always like to do some form of dripping blood nails every year so keeping in with tradition that's what I've done but this time with a spooky twist!
11.27.2017
NOTD - Autumn/Fall Tree Dotticure
Hello there lovely readers!
Before we wave a fond farewell to Autumn this year I wanted to share with you one of my favourite Fall Nail Art designs I did but totally forgot to put up on here! Plus I'm just not yet ready to get rid of all the comforting Autumn feels just yet!
11.23.2016
Getting Lippy - Winter Lip Hydration with Korres & Burts Bees
Hello
there my lovely readers,
Harsh
weather brings with it skin in desperate need of hydration &
requires us to enforce a bit more TLC to our skin & lips. For me
this is pretty much a year round problem, especially dry lips. Its
been a bane of my existence for a long time & also the reason why
I rarely venture in to that world of lippies that is so daunting to
me! Mostly a fan of tinted balms, what I look for in a good
product is a light wash of colour with smooth moisturizing properties
without stickiness. Two such brands who have delivered on this for me
are Korres & Burts Bees with their range of lip butters & shimmers...
Starting
with Korres, I've heard nothing but praise when it comes to their
products so was keen to investigate for myself. When passing through
my local Lloyds chemist I saw that they'd introduced a wide range of
skincare & beauty products, including both Korres & Burts
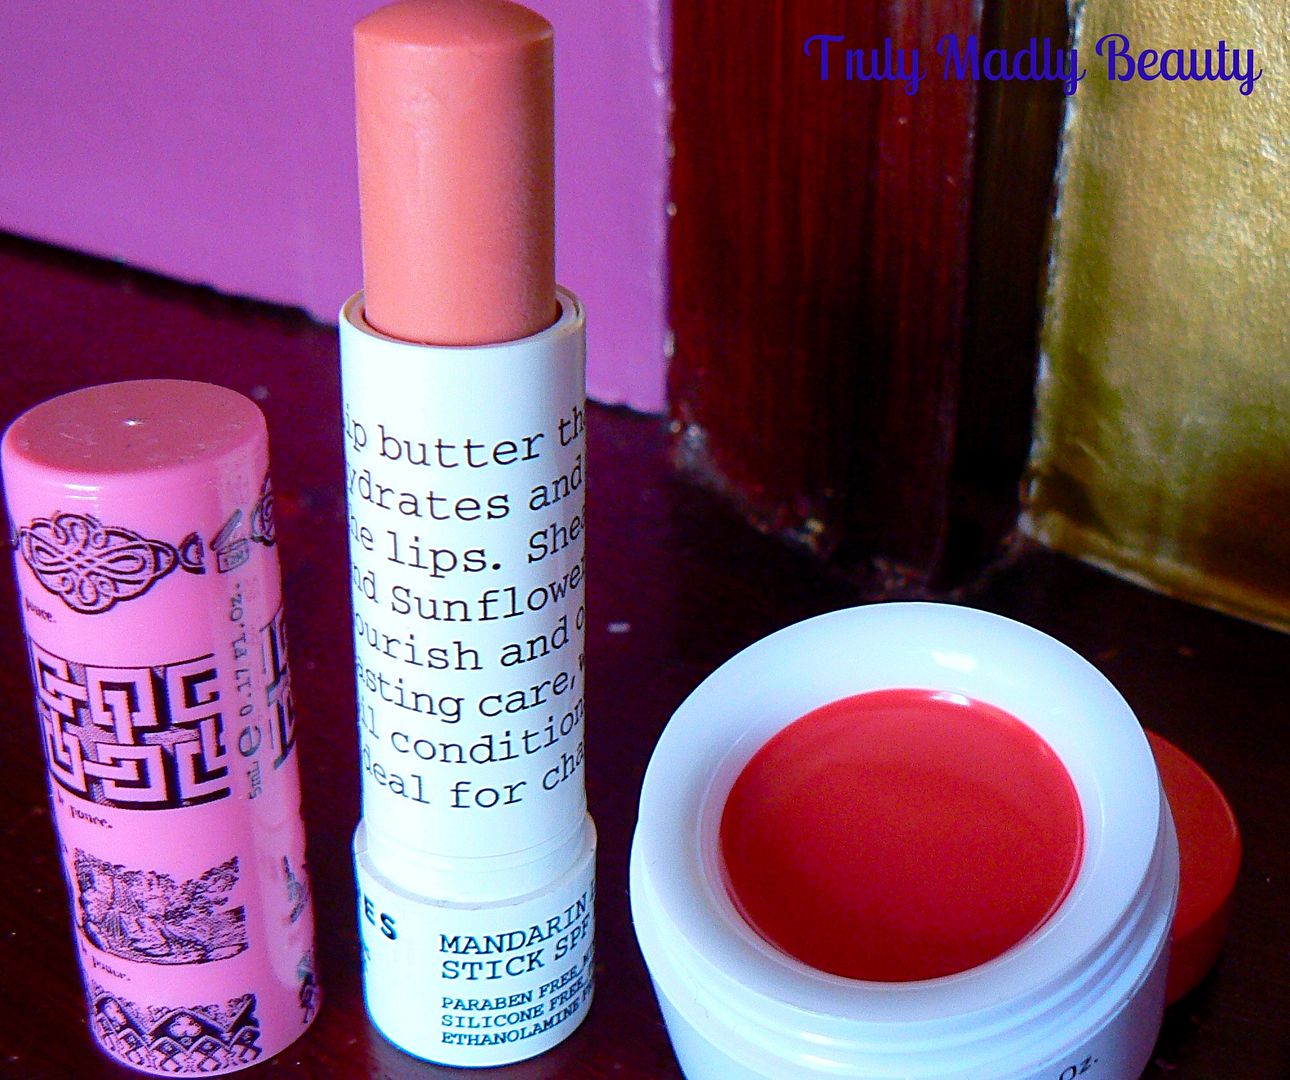
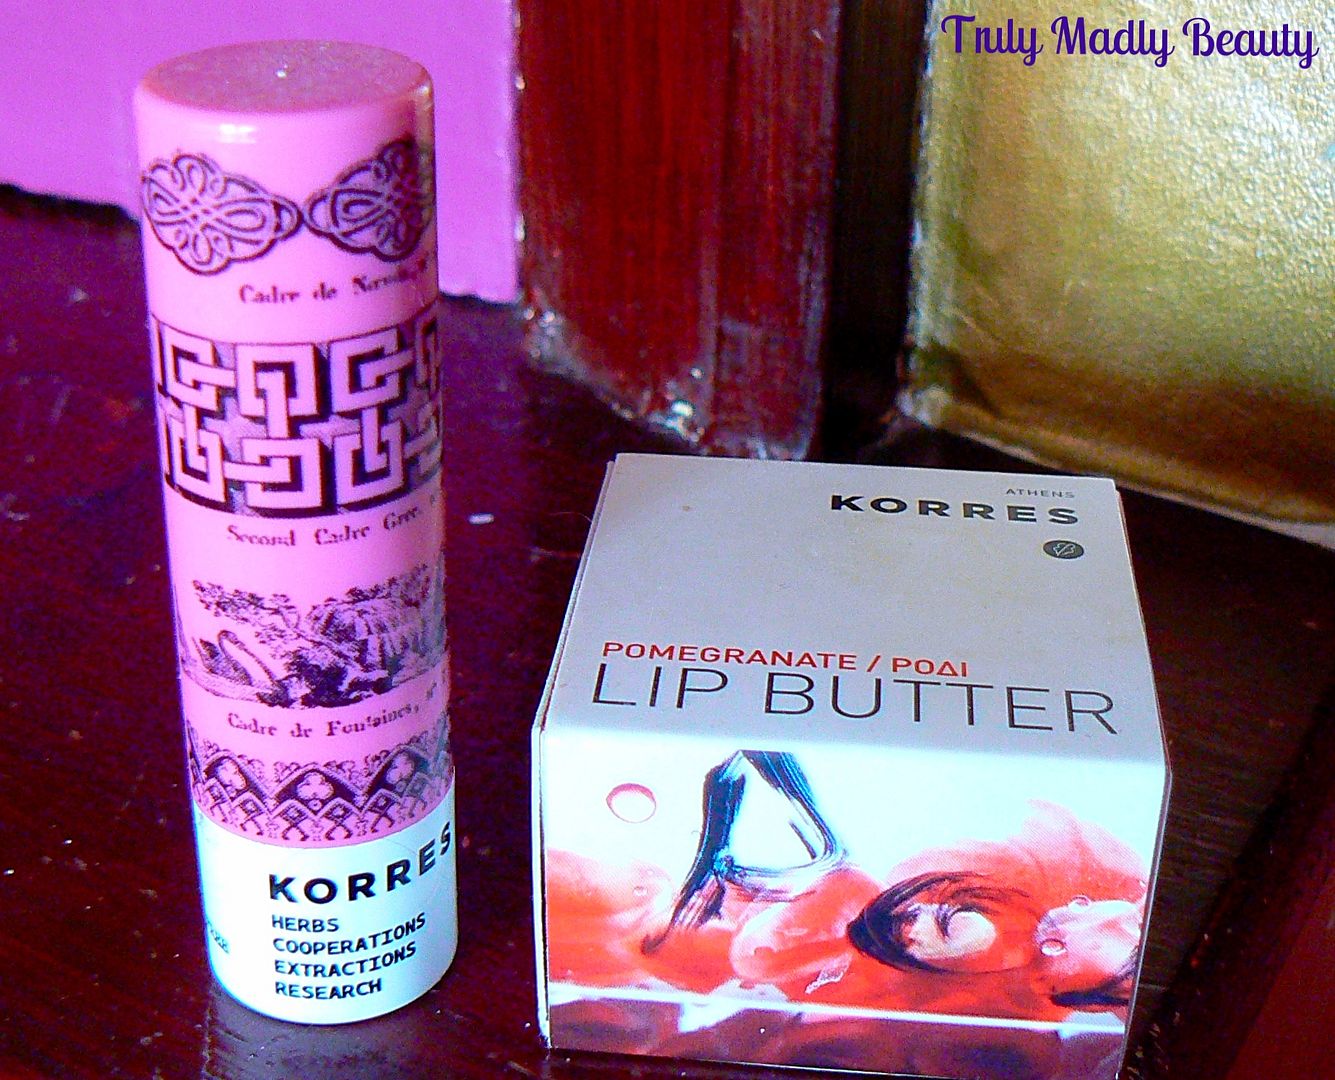
Bees. I noticed that there were two variations of Korres lip butter
available, the well known pot form as well as a more convenient
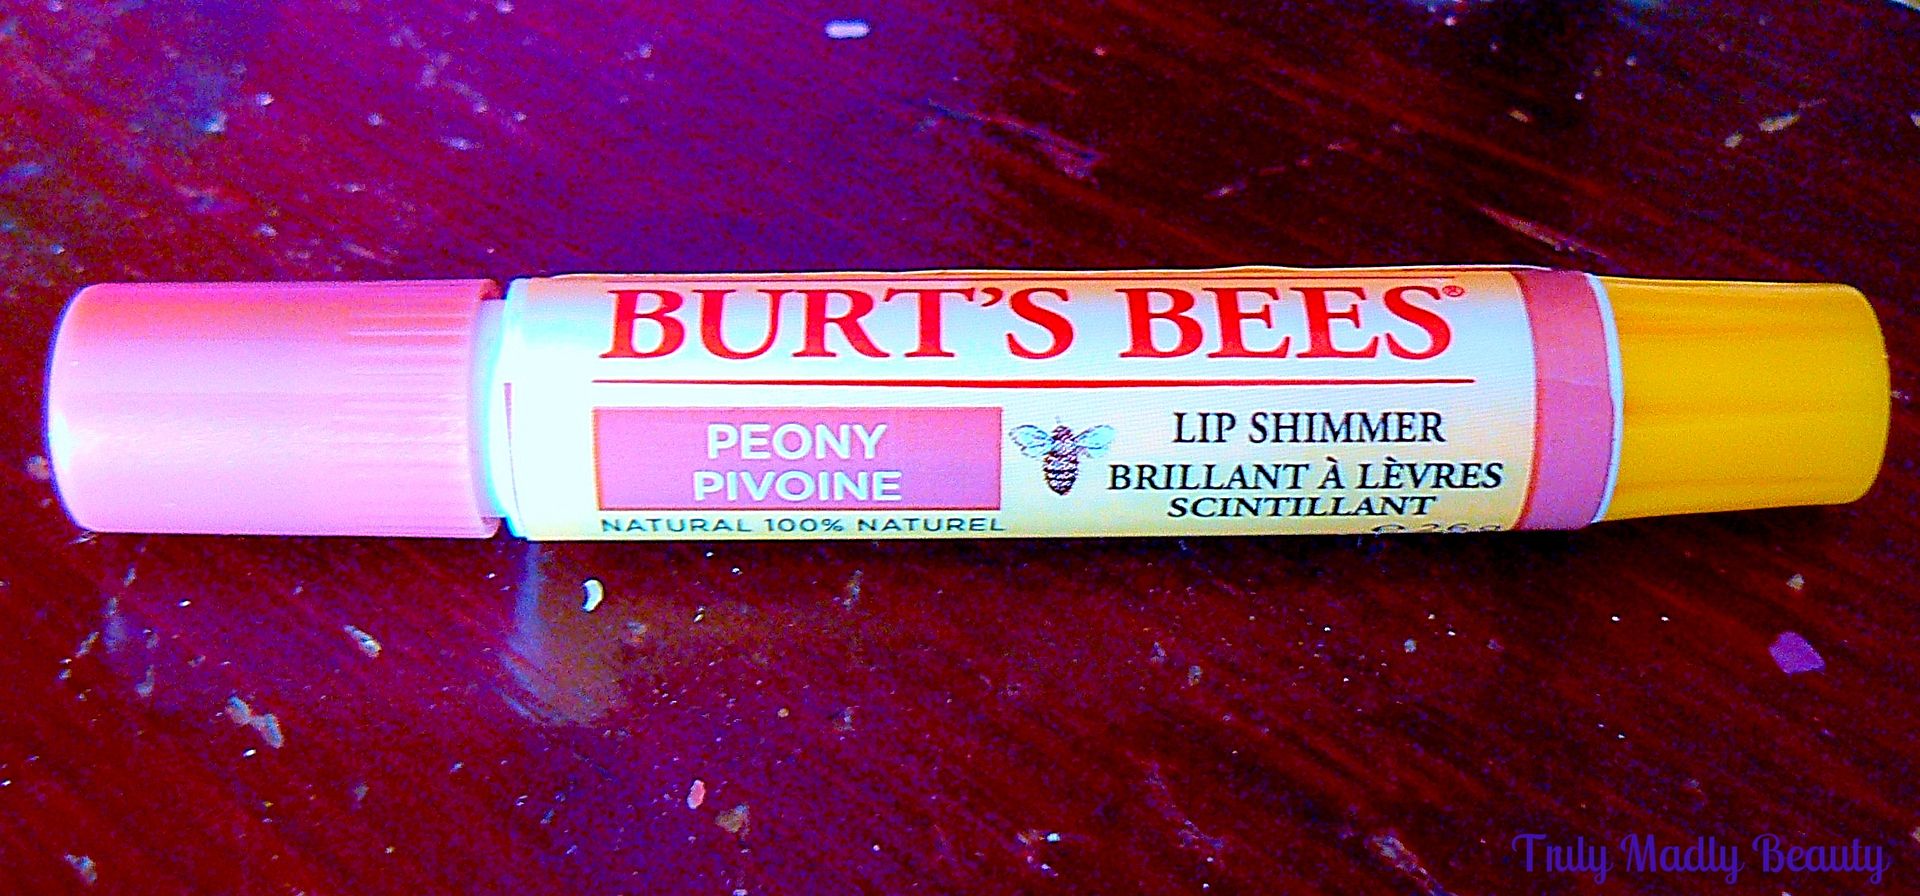
stick, so went for one of each as well as nabbing a Burts Bees Lip
Shimmer in the shade Peony.
The
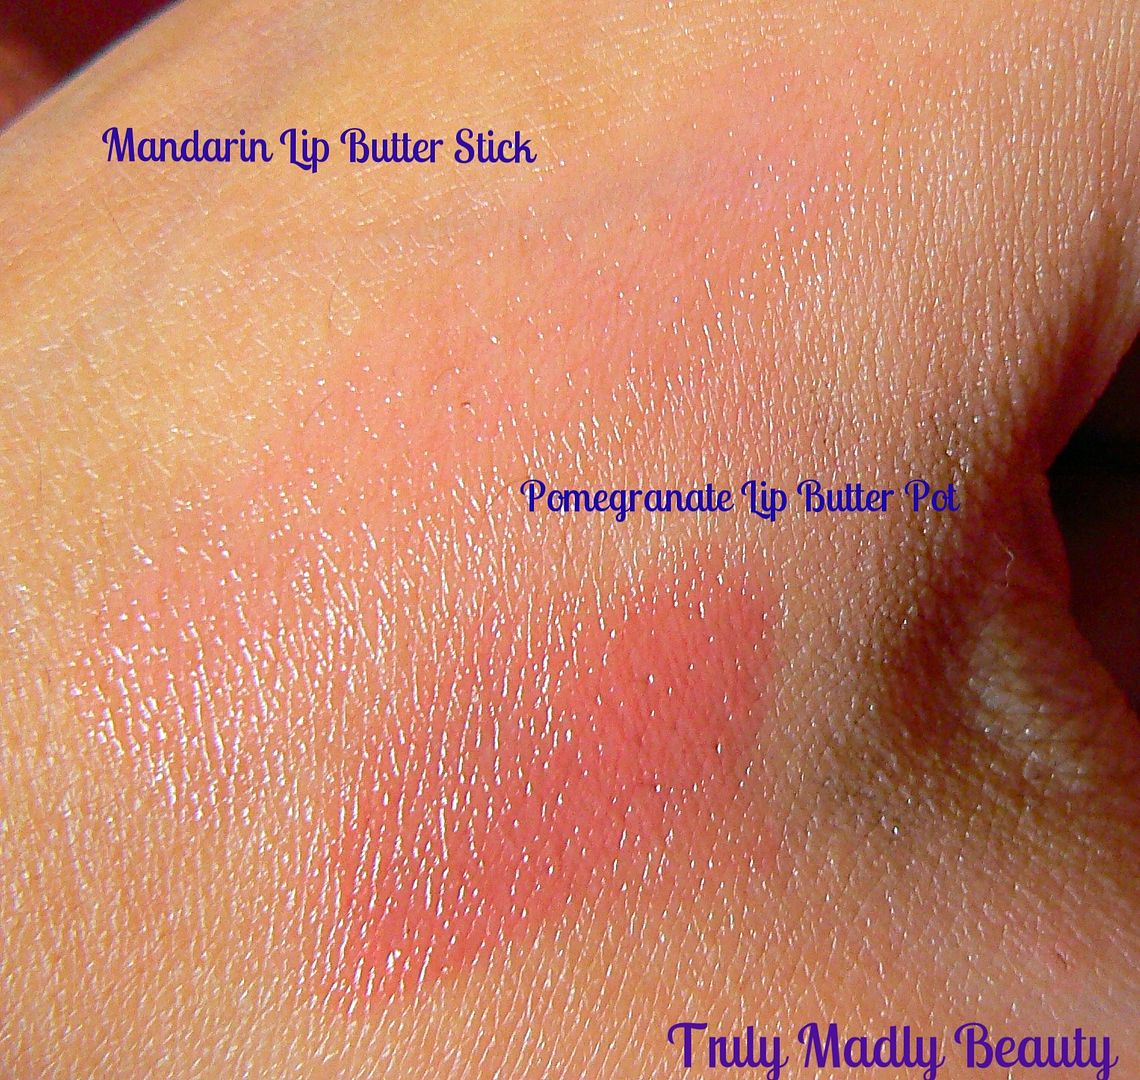
Korres Lip Butter pot (RRP £8) I opted for was Pomegranate which has
a lovely red tint & contains Shea Butter, well known for its
moisturising properties including soothing chapped irritated skin.
The butter is almost jelly like in formula & glides smoothly on
to the lips without feeling too heavy. The shade is more pigmented in
the pot however you still get a really lovely delicate wash of colour
across the lips. I love the feel of this after application & keep the
pot by my bedside applying as often as I can remember, however I know
many are put off using balms/butters in pots, which is why I love
that Korres also have the stick option as well.
Not
only more compact & travel friendly, the Korres Mandarin LipButter stick (RRP £8) also contains SPF15 giving it major score
points as well as including lush ingredients of Mandarin Oil,
Sunflower Wax & the Shea Butter. The shade I have is Pink which
again gives a lovely delicate rose tint to the lips as well as
moisturizing. I found this slightly more creamier in consistency to
the jelly like pot butter but equally lovely on the lips & I love
using this as a base for the rare occasions when I DO wear lipstick
as it glides on so smoothly over the top.
Now
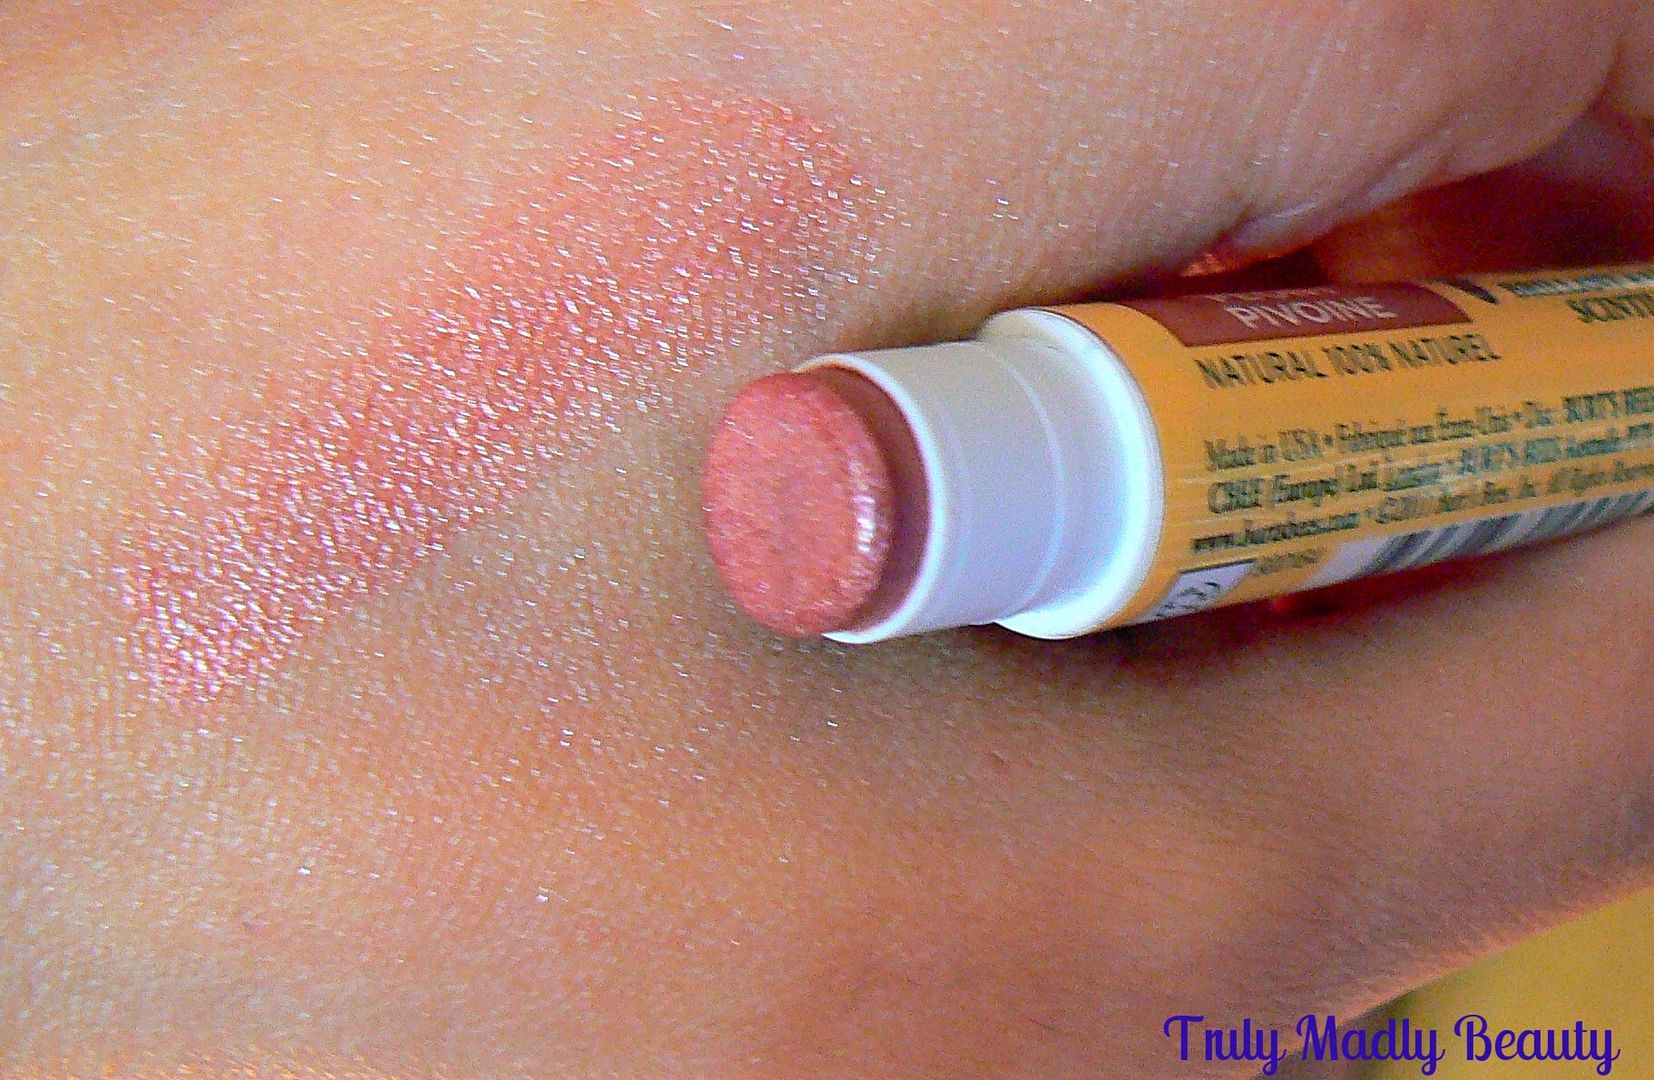
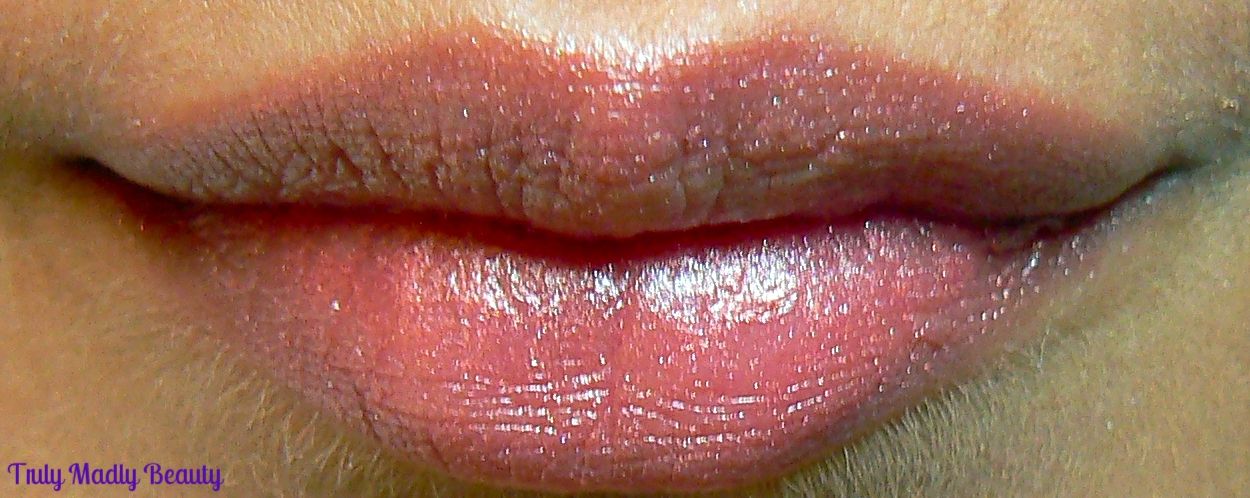
we have a touch of glam factor if you like with the Burts Bees LipShimmers (RRP £5.99). These moisturizing balms are divine,
delivering a wash of subtle colour to the lips but with a touch of
shimmer in the form of macroglitters & come in a nice selection
of shades to choose from ranging from plums & reds to warmer
nudes & browns.
Thankfully
the macroglitter is very fine preventing the balm from looking like a discoball or feeling gritty
on the lips, which wouldn't be pleasant at all. The shade I have here
is Peony which is a lovely warm brown toned nude.
The
lip shimmers contain Vitamin E, Beeswax, Sunflower & Coconut oils
making them incredibly nourishing & have a subtle peppermint
flavour which feels nice & refreshing on the lips. I love that
the tube is also nicely compact & slender, making it ideal for
popping into your bag or pocket when on the go.
Overall
I am utterly converted to these lovely lip hydration offerings from
Korres & Burts Bees, they are a joy to wear & my lips are
certainly happier & in better condition. The Mandarin Lip Butter
stick is also available in a colourless version if tint is not your
thing, I'm keen to try a few more of the Lip Butter pots too, Jasmine
and Wild Rose look dreamy as well picking up a few more adventurous
shades of the Burts Bees Lip Shimmers!
You
can find both Korres & Burts Bees in selected Lloyds Pharmacies as well as
online via FeelUnique or LookFantastic to name a few.. its worth
having a hunt around as prices vary on different sites. Thanks as
always for reading!
Lotsa love to ya!
Labels:
Burts Bees,
Coconut oil,
Getting Lippy,
Korres,
Lipbalm,
Lippie Love.,
Lips,
Lipstick,
Natural,
Review,
Shea Butter,
Winter
11.03.2016
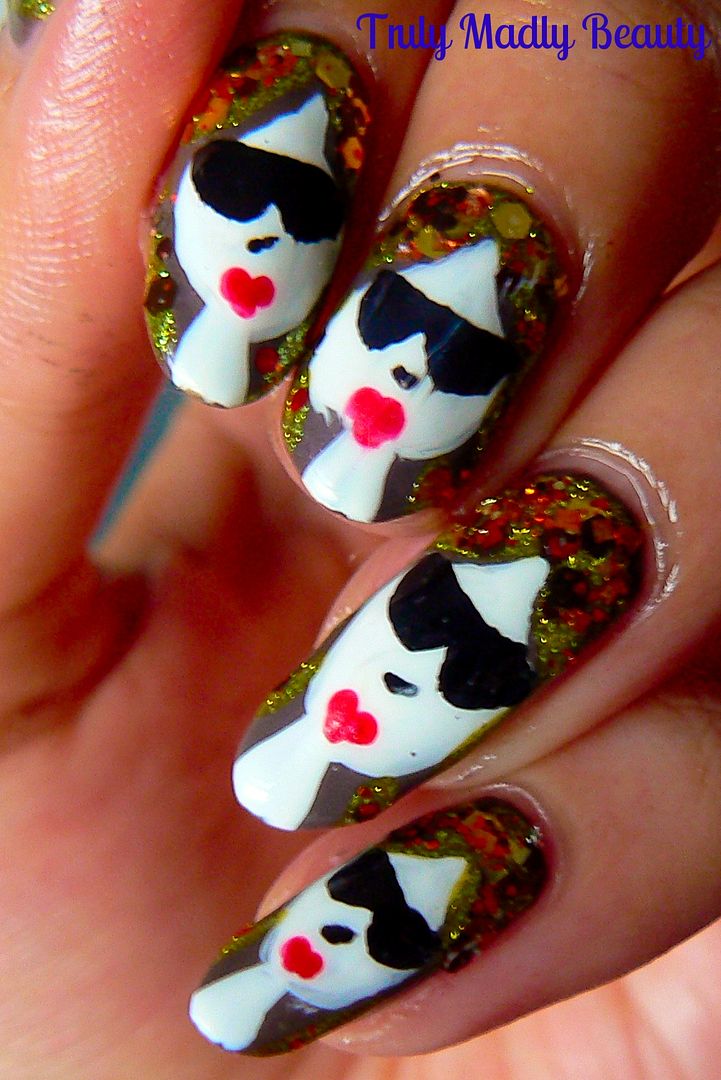
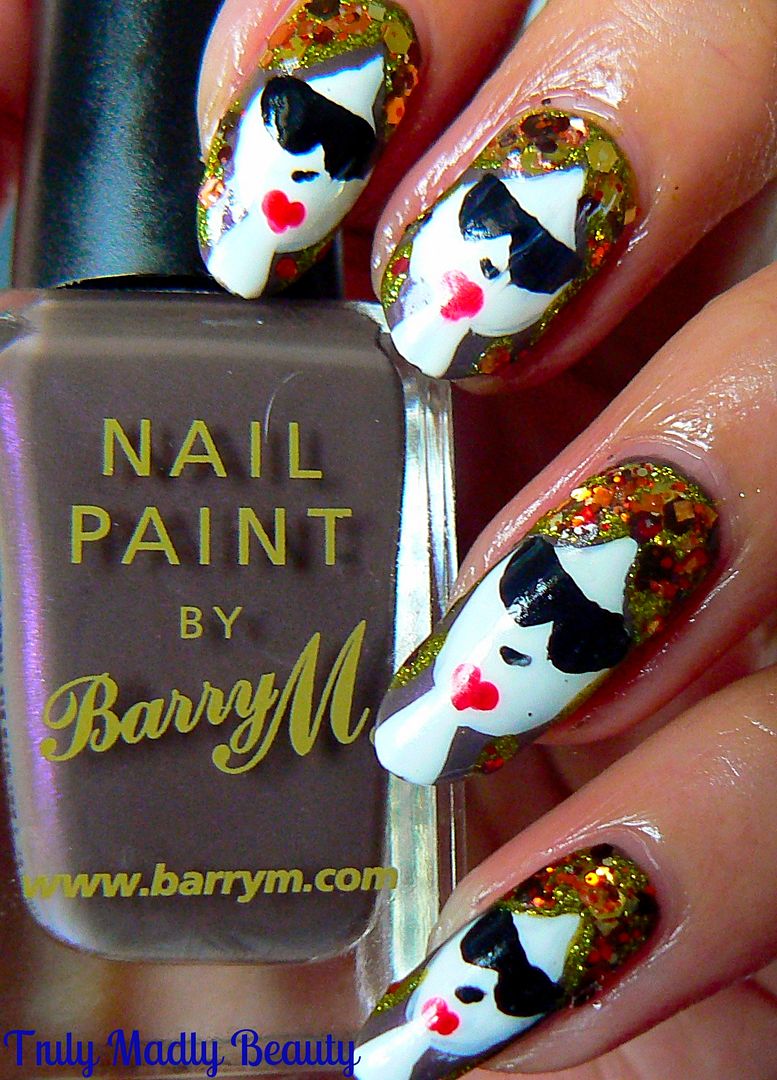
Autumn/Fall Inspired Diva Nails & Tutorial!
Hello
there lovely readers!
Halloween
took precedence when it came to my nail art over the past few weeks
but now that has passed *sobs* I can now embrace Autumn in all its
glory with some Autumnal nails! There's still time non? Better late
than never...I'm definitely an Autumn baby & adore this time of
year with its abundance of burgundy tones, blankets, bubble baths,
burning candles...ungh I LOVE IT!
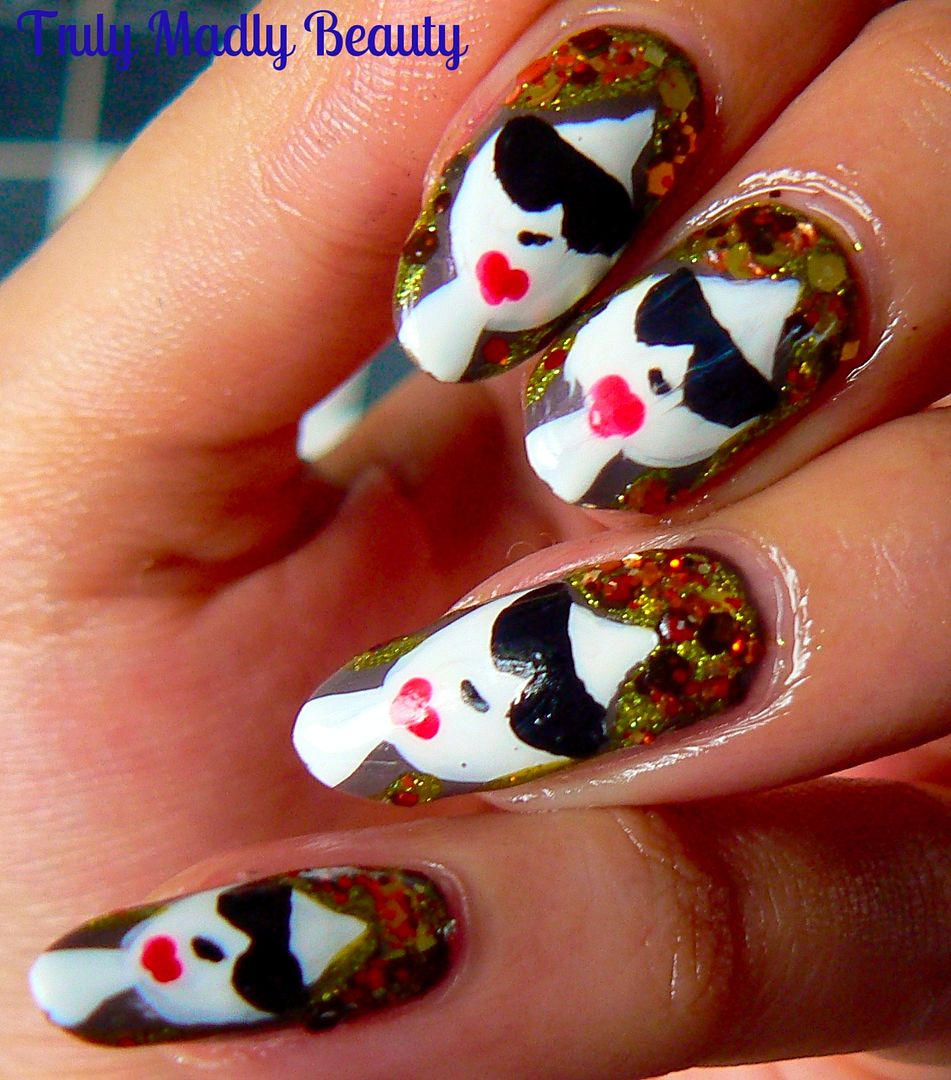
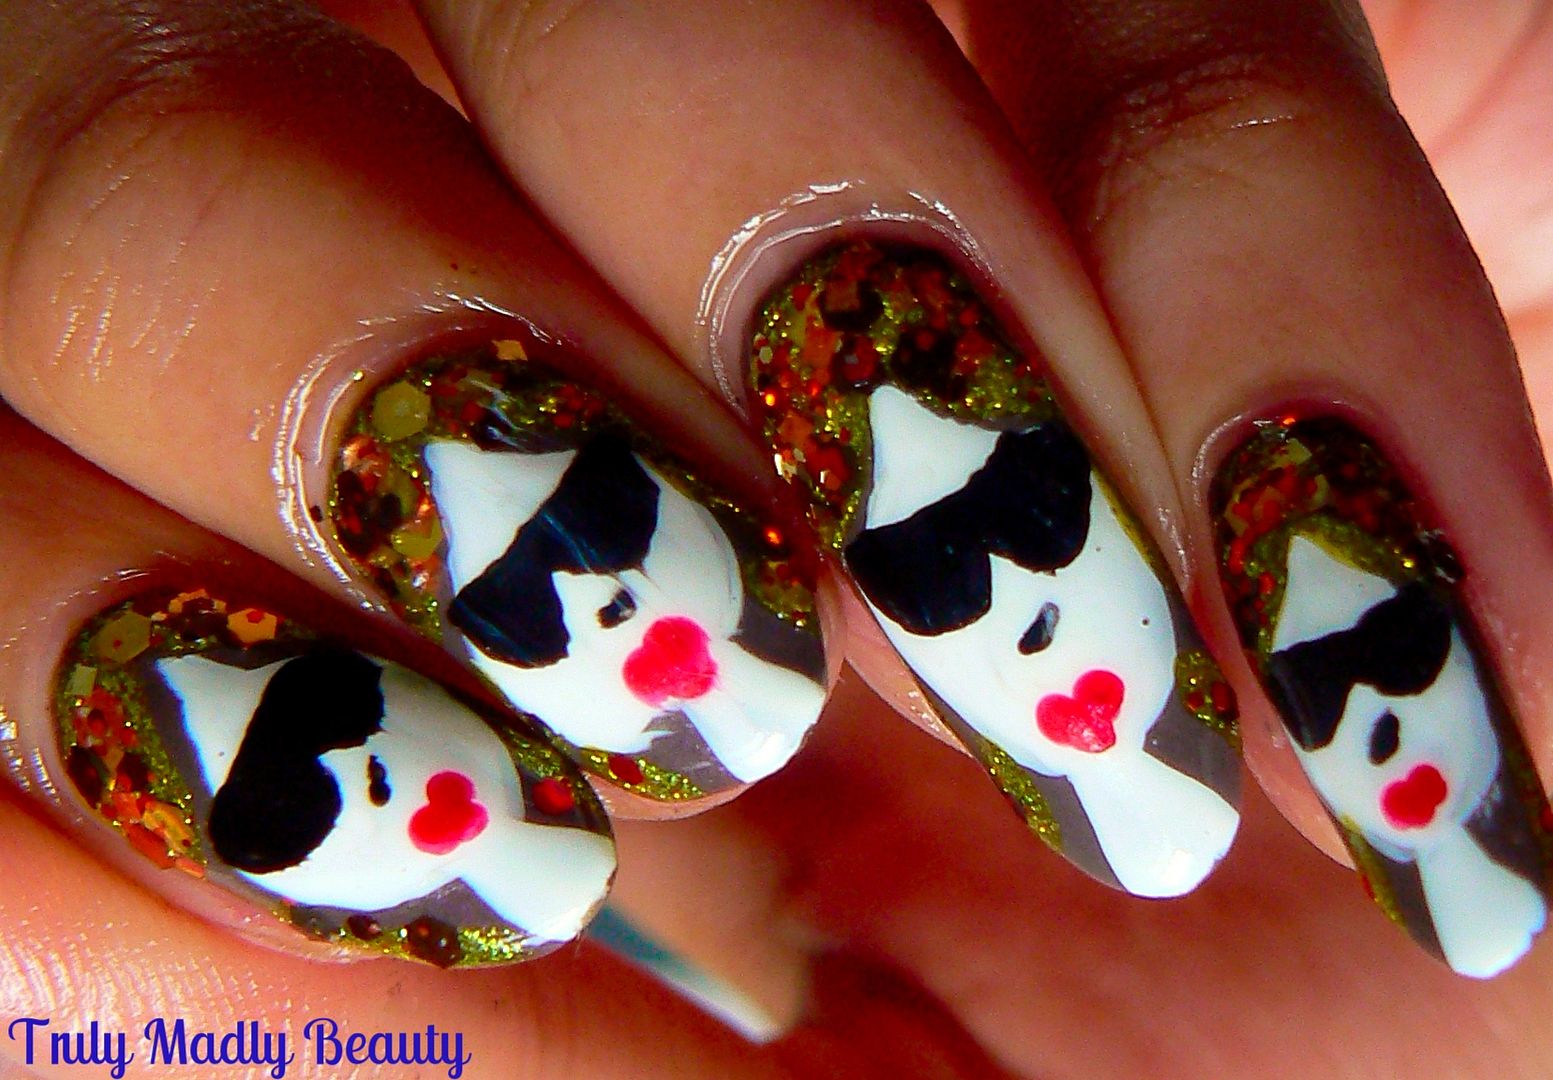
Naturally
my favourite way of expressing myself is through my nails so I got to
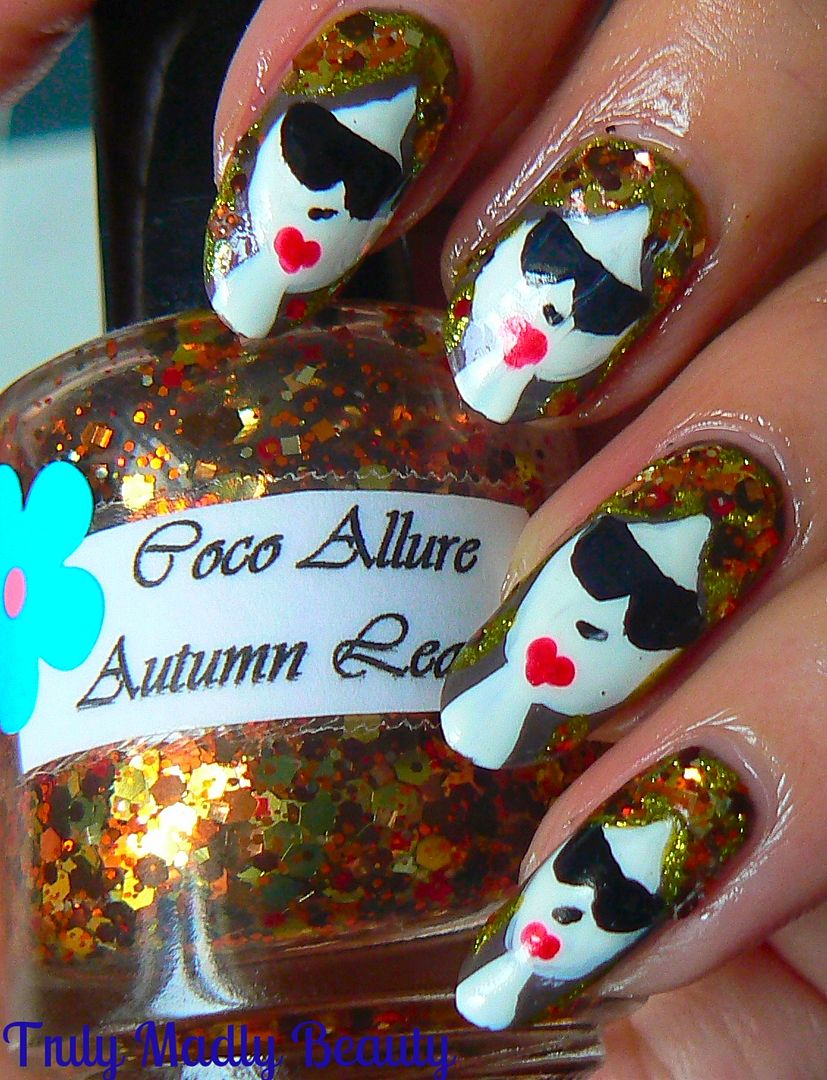
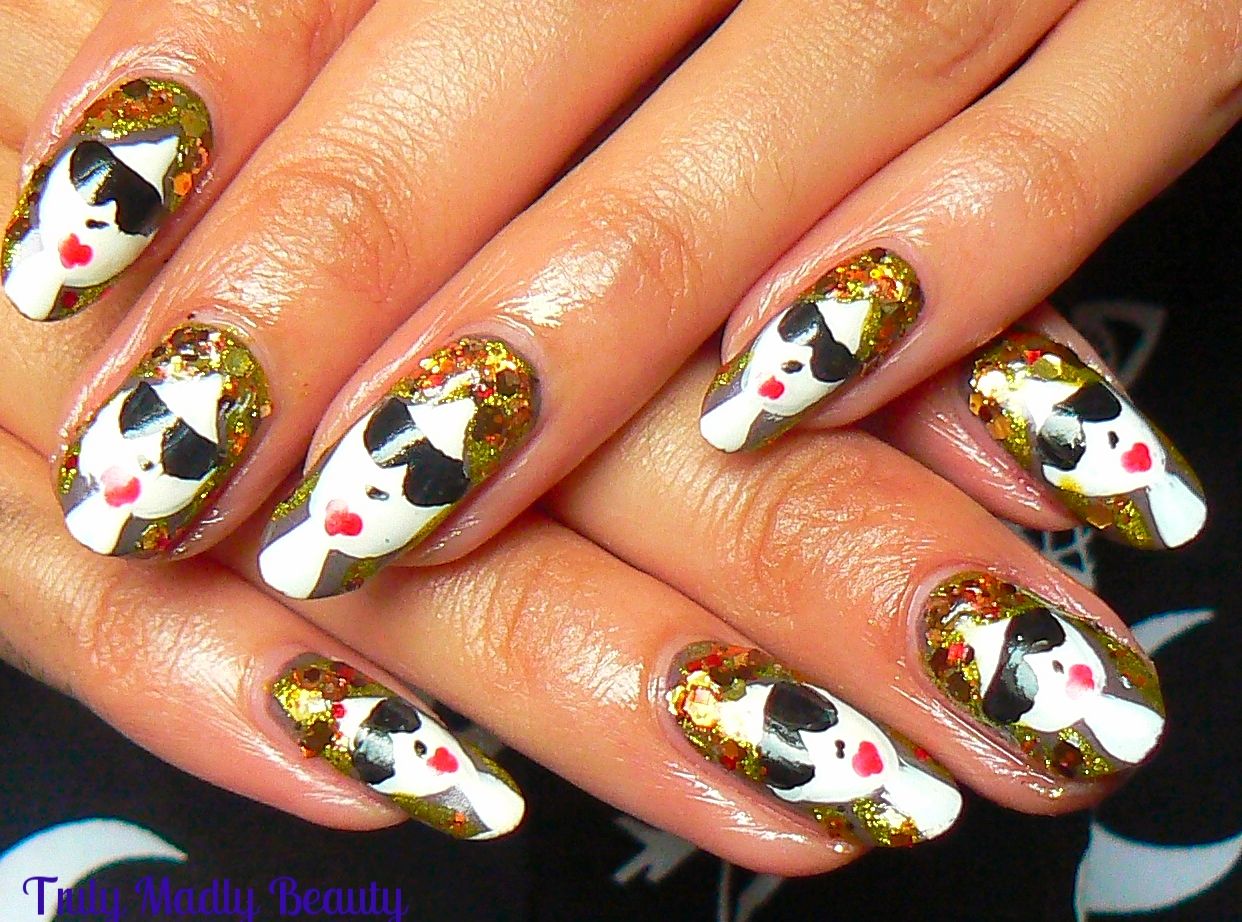
thinking & created this Autumn vibed design featuring a pouting
painted diva with vibrant flowing hair reminiscent of burnt Autumnal
leaves!
I
was inspired by a Robin Moses Tutorial on YouTube, her nail art
designs are wonderful, in her design she created the one lady accent
nail & incorporated her flowing Autumn/Fall leaved hair over the
remaining nails. I loved the look so much I decided to do an
individual painted lady on every nail!
To
re-create this design is easier than it seems & I've done a step
by step pictorial for you to show how you I did mine...
Begin
with your base colour, wanting to keep with the Autumn tones I
reached for Barry M Dusky Mauve. Remember when everyone went doolally
over this shade due to its high dupe level of Chanel's Paradoxal?
Here I've applied 2 coats of this lovely purple griege shade.
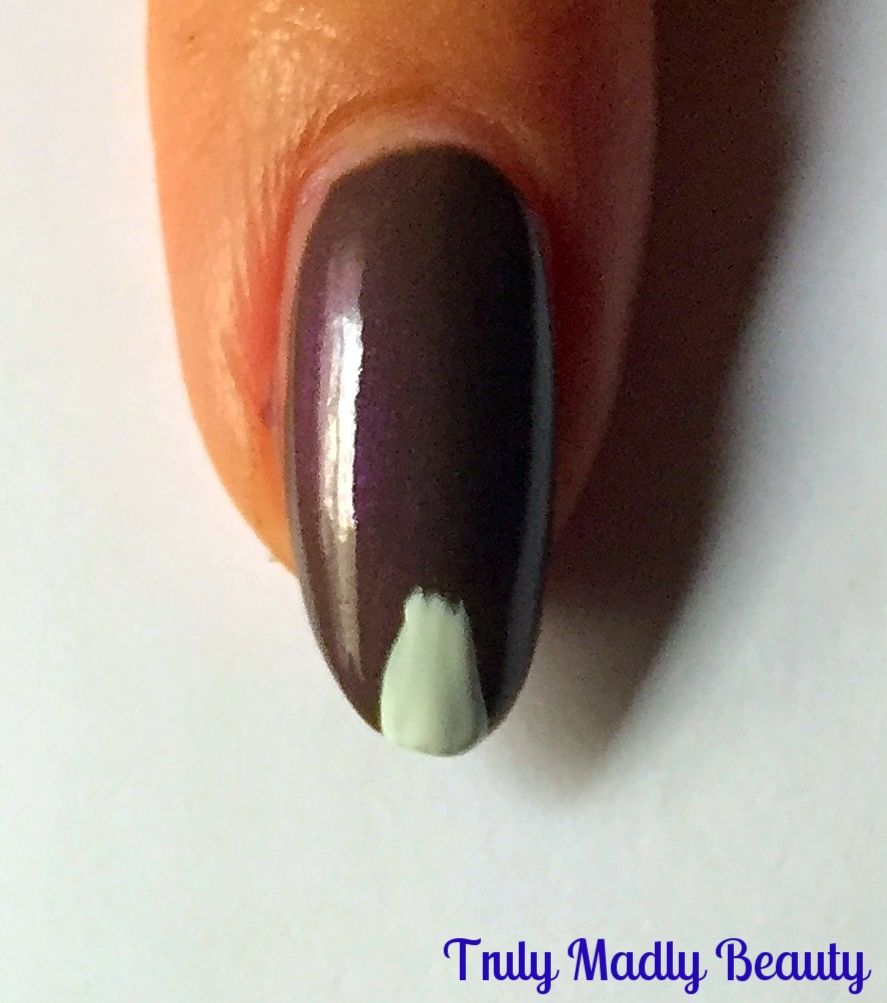
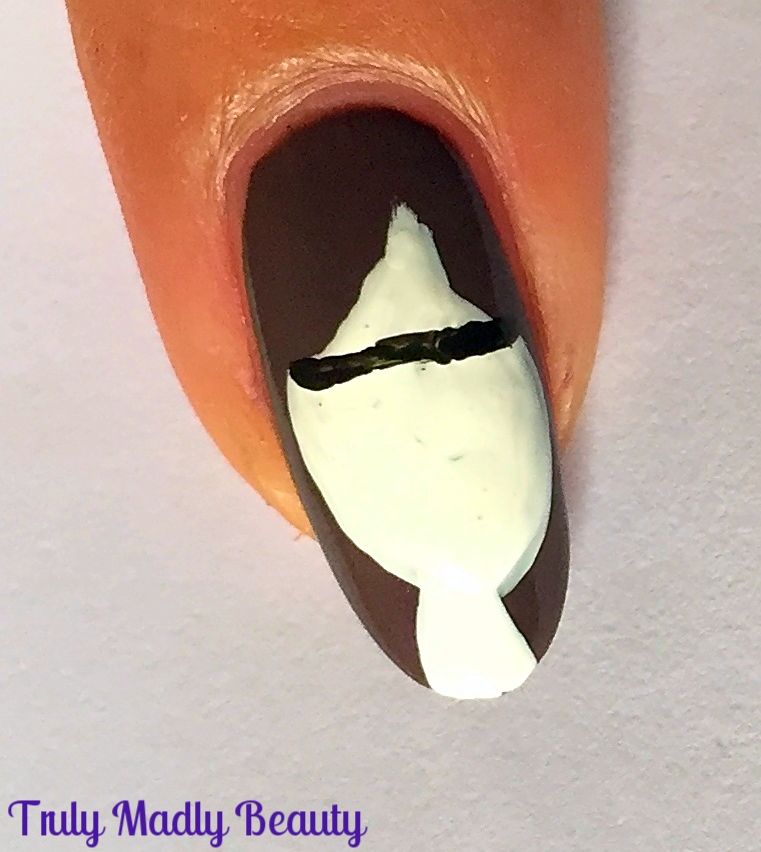
Now
to begin creating our shaded divas, start with applying her slender
neck starting at the tip of the nail, using white polish & a nail
art brush.
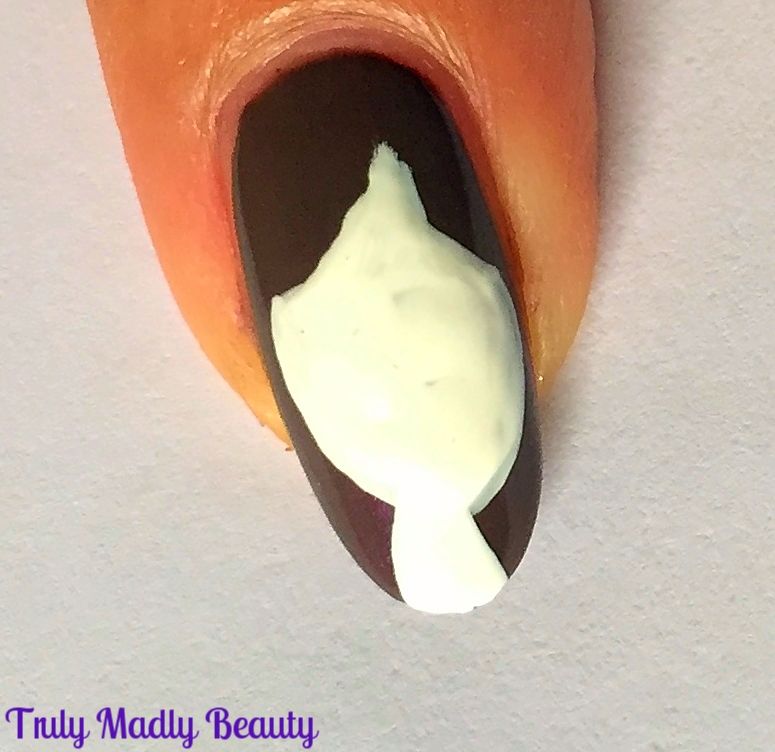
Now
to create the face, using your thin nail art brush & white
polish, start about 3/4 of the way up your nail where you want the
forehead to be & draw a curved triangle with the top point angled
slightly to the right, to give the appearance of bangs/fringe, then
continuing on from the two bottom points of your triangle,curve a
round oval like shape down to the neck before filling in.
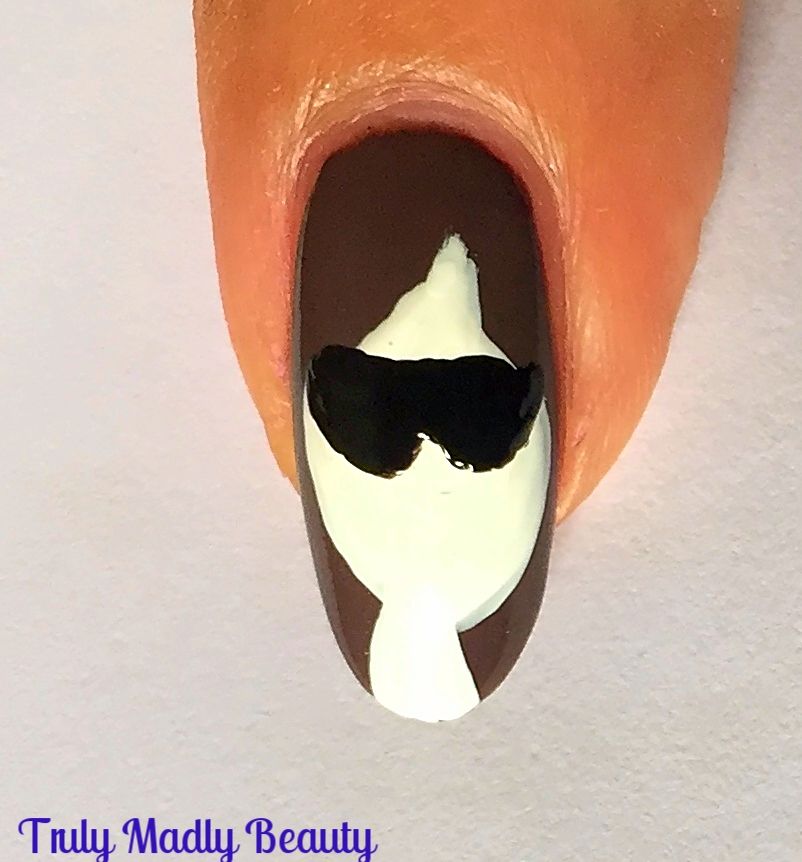
Next
step is to add on our ladies sophisticated sunnies! Because even
though its Autumn, shades can be rocked ALL YEAR ROUND. To do these
simply start by adding a thin horizontal black line just underneath
the fringe/bangs.
Then
with the same black, underneath your line add two semi circle-esque
shapes to create lenses.
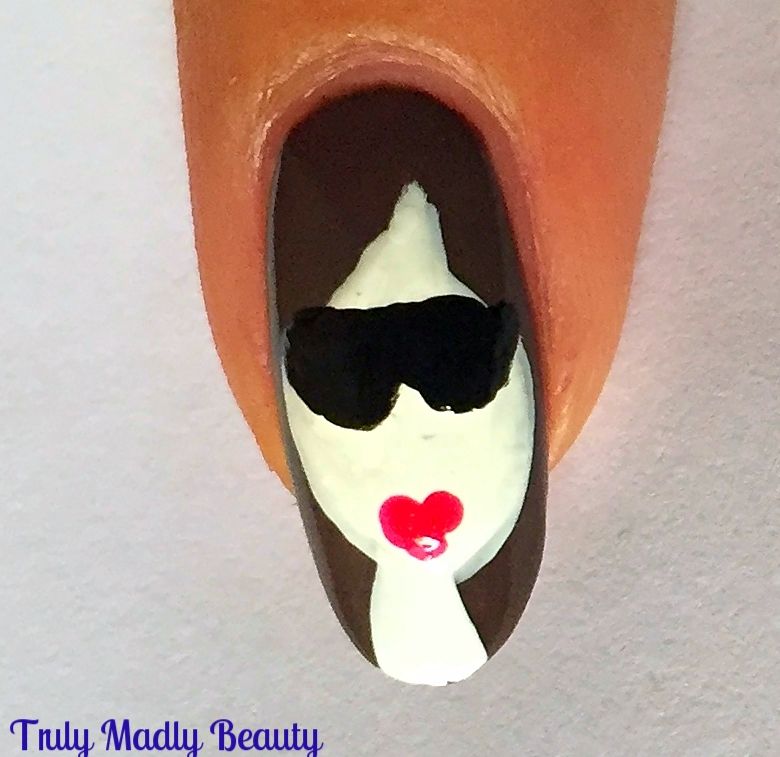
Now
for our diva's pout, grab a pink or red polish & a dotting tool
or a bobby pin & place two dots of red with one dot underneath,
almost creating a heart like shape for the lips.
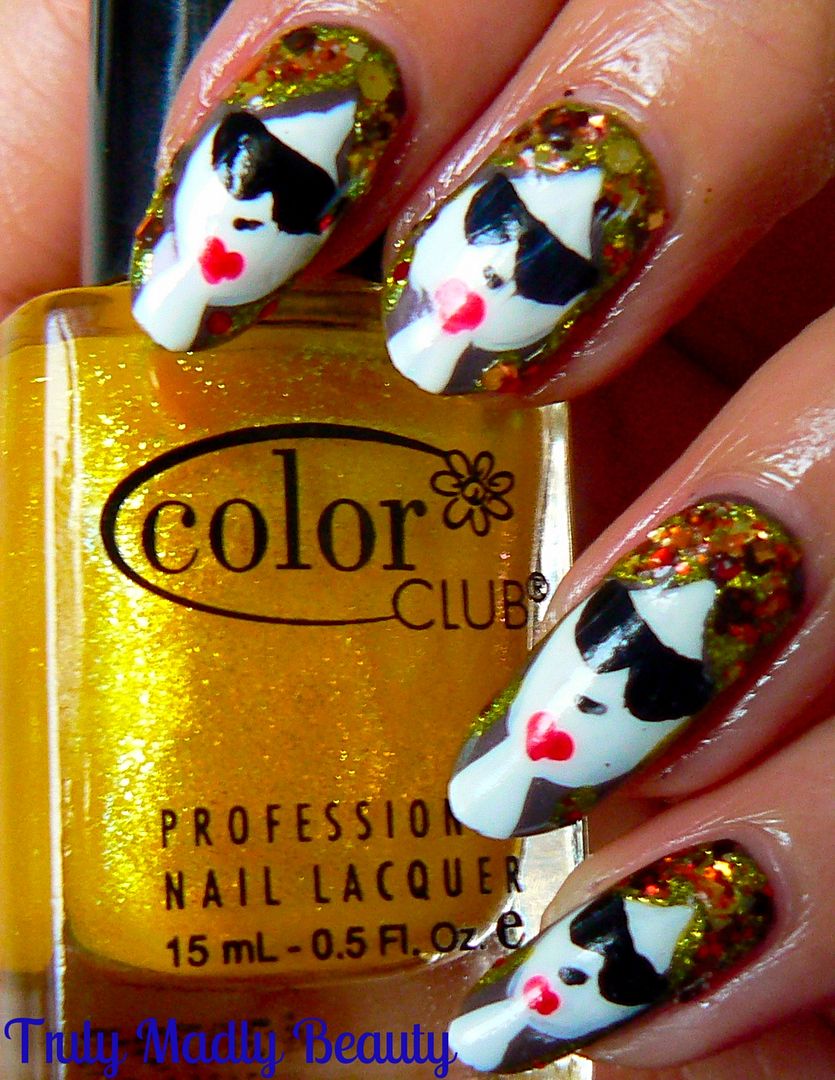
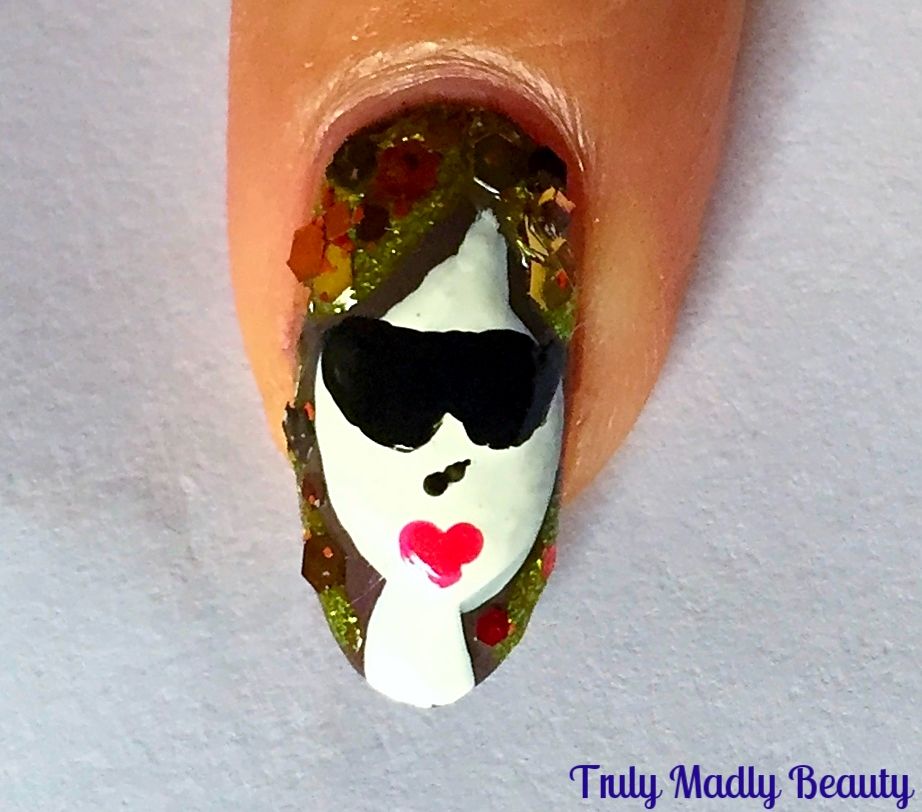
Final
detail to the face is a tiny angled line for the nose before you can
go to town with all the Autumn colours for her hair! I decided to use
a shimmer yellow polish by Color Club to add on some strands in the
brown, because its ALL about the balayage babes, before using the
aptly named Autumn Leaves glitter polish by indie brand Coco Allure
which I picked up from Etsy donkeys ago!
As
the glitter in this polish is quite large I poured out a bit of the
polish on to a piece of paper first & then used a toothpick to
pick up the pieces of glitter which come in shades of burnt orange,
reds, coppers & gold & just placed on to the hair.
Finish
it all with a nice thick coat of topcoat & your done! Thank you
Robin Moses as always for the inspo, a really fun & interesting
way to wear Autumn/Fall nails! Hope you like them too!
Thanks
as always for reading!
Lotsa love to ya!
12.13.2015
Happy Feet - Winter Foot Pampering!
Hello
there my lovely readers,
Now,
the tootsies are a topic that no one likes to get in to too much
detail about, however just because we now find ourselves in the
season of wrapping up the layers, doesn't mean we should start
neglecting our little feet, we do owe them a lot after all, getting
us from a-z everyday, often suffering at the hands of high heel
torture ;) Every now & again I like to treat myself to a
wee foot pamper session to keep them in as tip top condition as
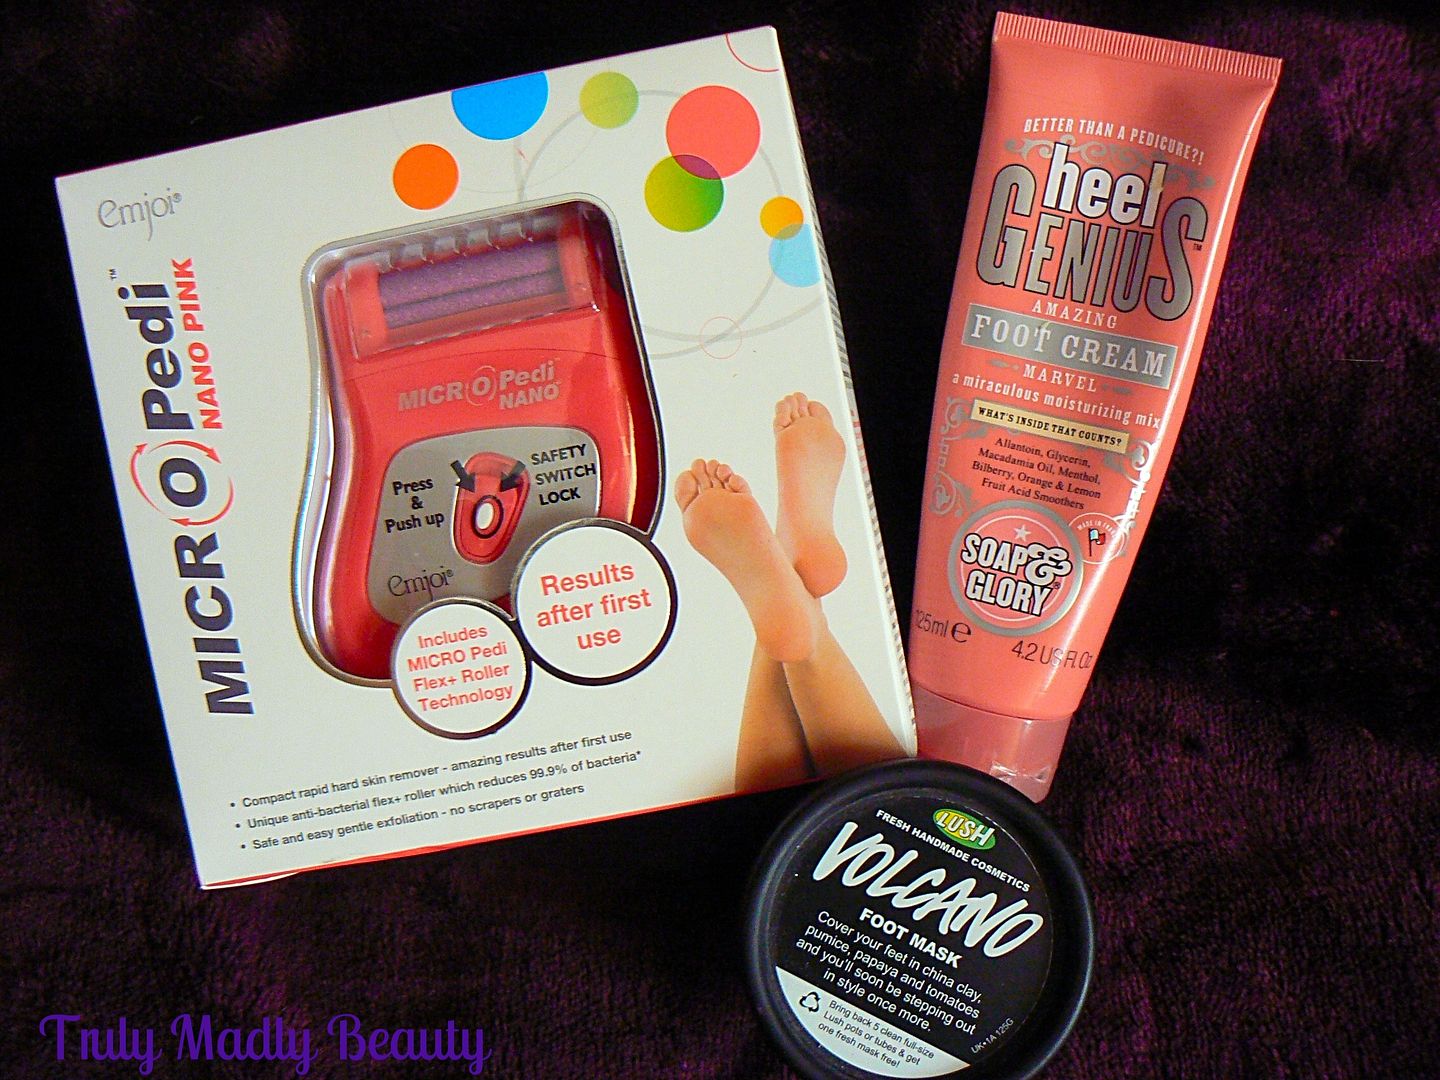
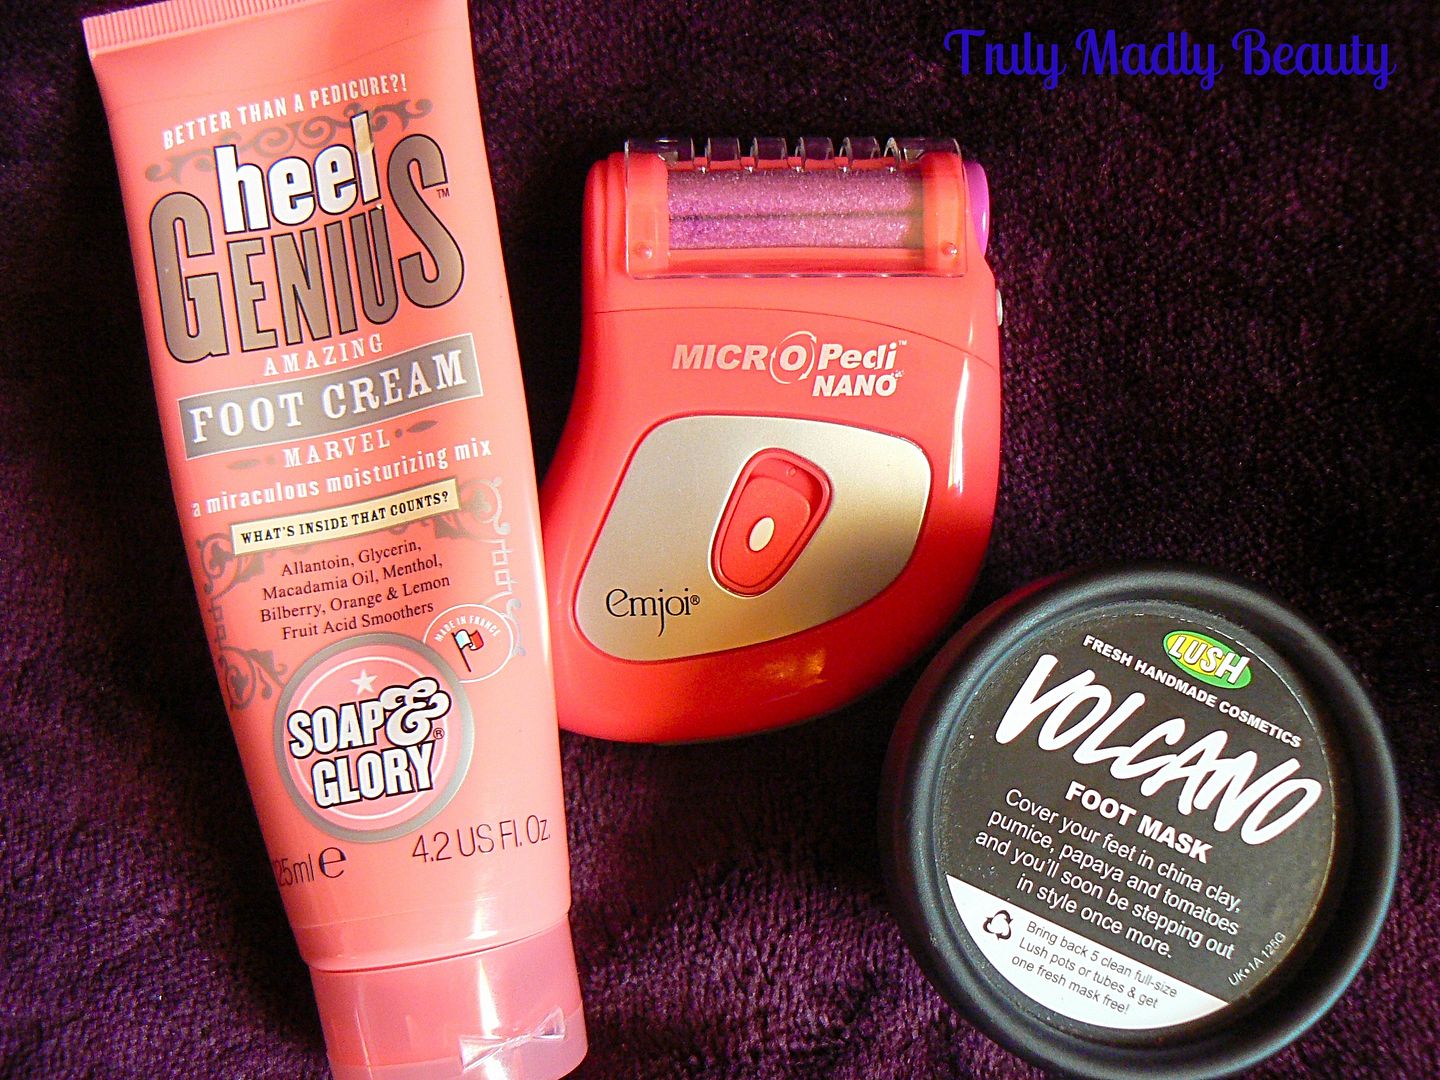
possible, with the help of these few essential products that have
become firm favorites of mine.
First
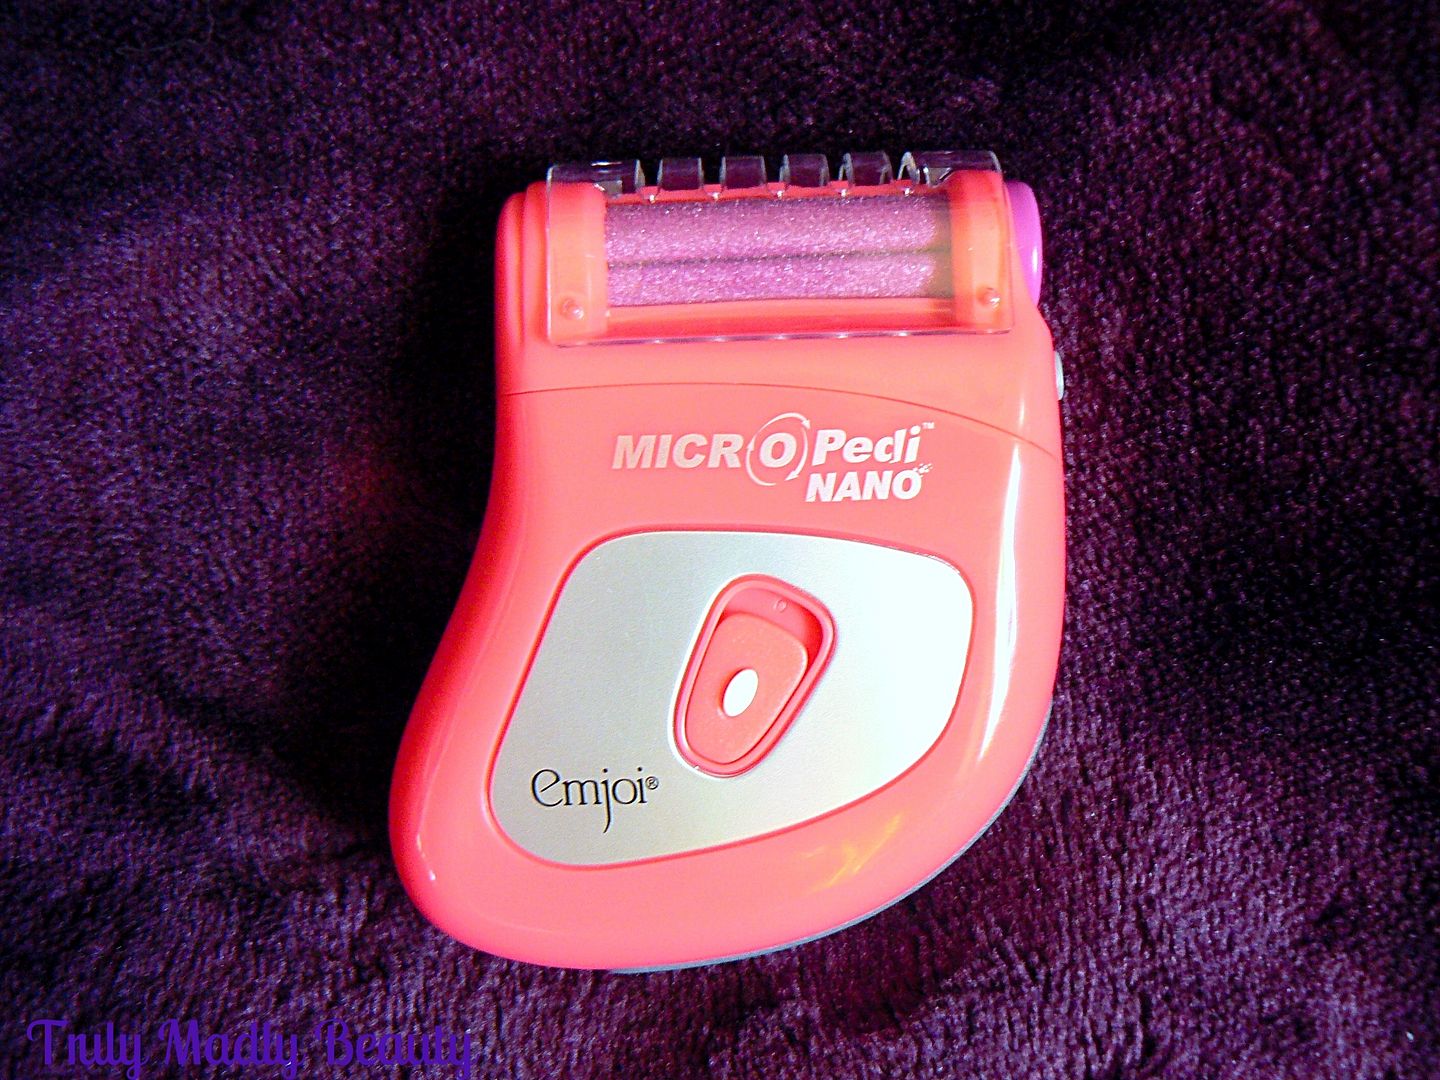
up we have the *Emjoi Micro Pedi Nano foot exfoliating device. You
may be familiar with this range available in Boots, of which I am
already a fan of. I've tried & tested the MicroNail Electronic Buffer & been very impressed with the results of beautifully
buffed shiny nails. Emjoi also offer a range of electronic foot exfoliaters, including this new addition which not only comes in a
range of cheerfully bright colours but is also travel sized for your
convenience!
The
Emjoi Micro Pedi Nano (RRP £29.95) is battery operated (2xAA) &
works by gently removing hard rough skin with the use of the unique
anti-bacterial Flex + roller technology that contours around the foot
enabling you to gently yet effectively exfoliate those hard to reach
places.
Thanks
to its compact size, you can easily pop the Micro Pedi Nano in your
travel bag without taking up too much space & it is so easy to
use, in the space of minutes you are left with smooth soft skin. I've
used this quite a few times, noticing a visible difference & the
little Nano has been perfect to prep the feet for the next stage of
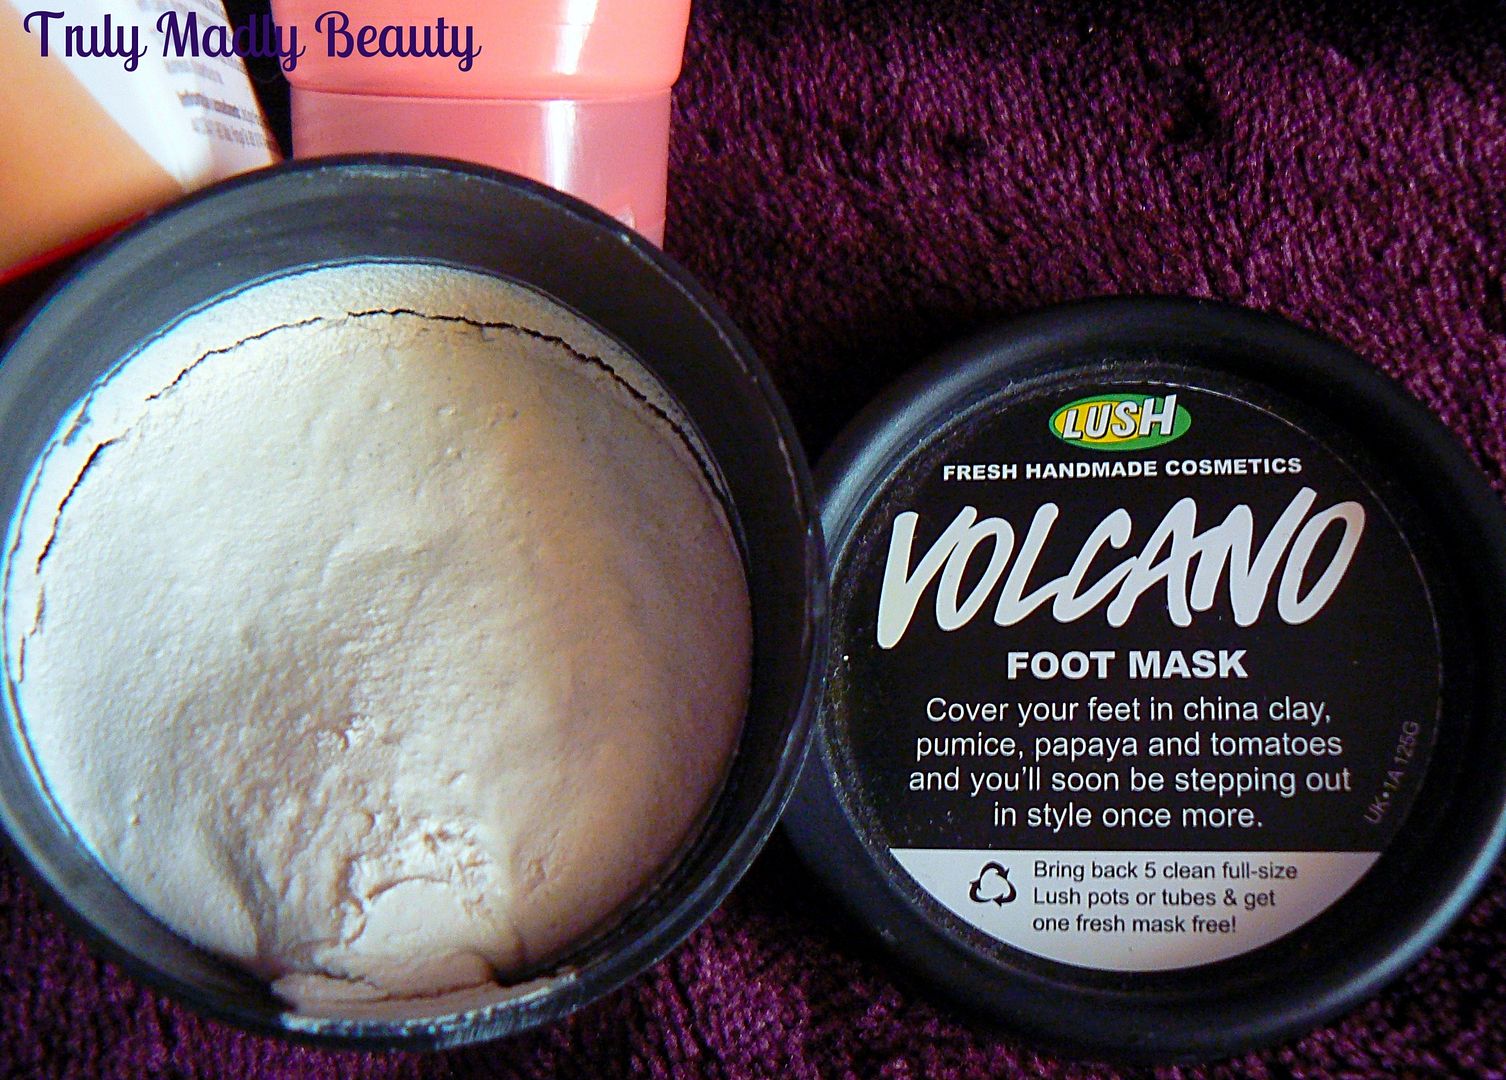
my foot pamper routine, bringing me on to my next product...LUSH Volcano Foot Mask!
I
picked this up on one of my LUSH sprees, after reading many positive
reviews & being very curious to try it myself. Containing an
intriguing mix of ingredients from kaolin & pumice to tomatoes &
papaya, Volcano (RRP £6.75) is an invigorating foot mask that also
doubles as an exfoliater. The scent of the mask is quite pungent &
spicy but not in an unpleasant way at all.
To
use the mask apply generously to the feet, I would do this in the
bath as it can get quite messy! Whilst applying be sure to rub the
thick paste in well activating the exfoliation. Then whack a couple
of plastic bags over your feet, I use sandwich bags which are the
ideal size, & leave the mask to work its magic for about 20
minutes. During this time you'll feel a slight tingly sensation but
not uncomfortable, it just means the mask is working! Once ready,
remove the bags & rinse off the mask well using the shower head,
a bit of rub rub rub action will be required too. Once completely
clean you are left with noticeably smooth & soft tootsies ready
for the final stage of my foot pamper session...moisturisation!
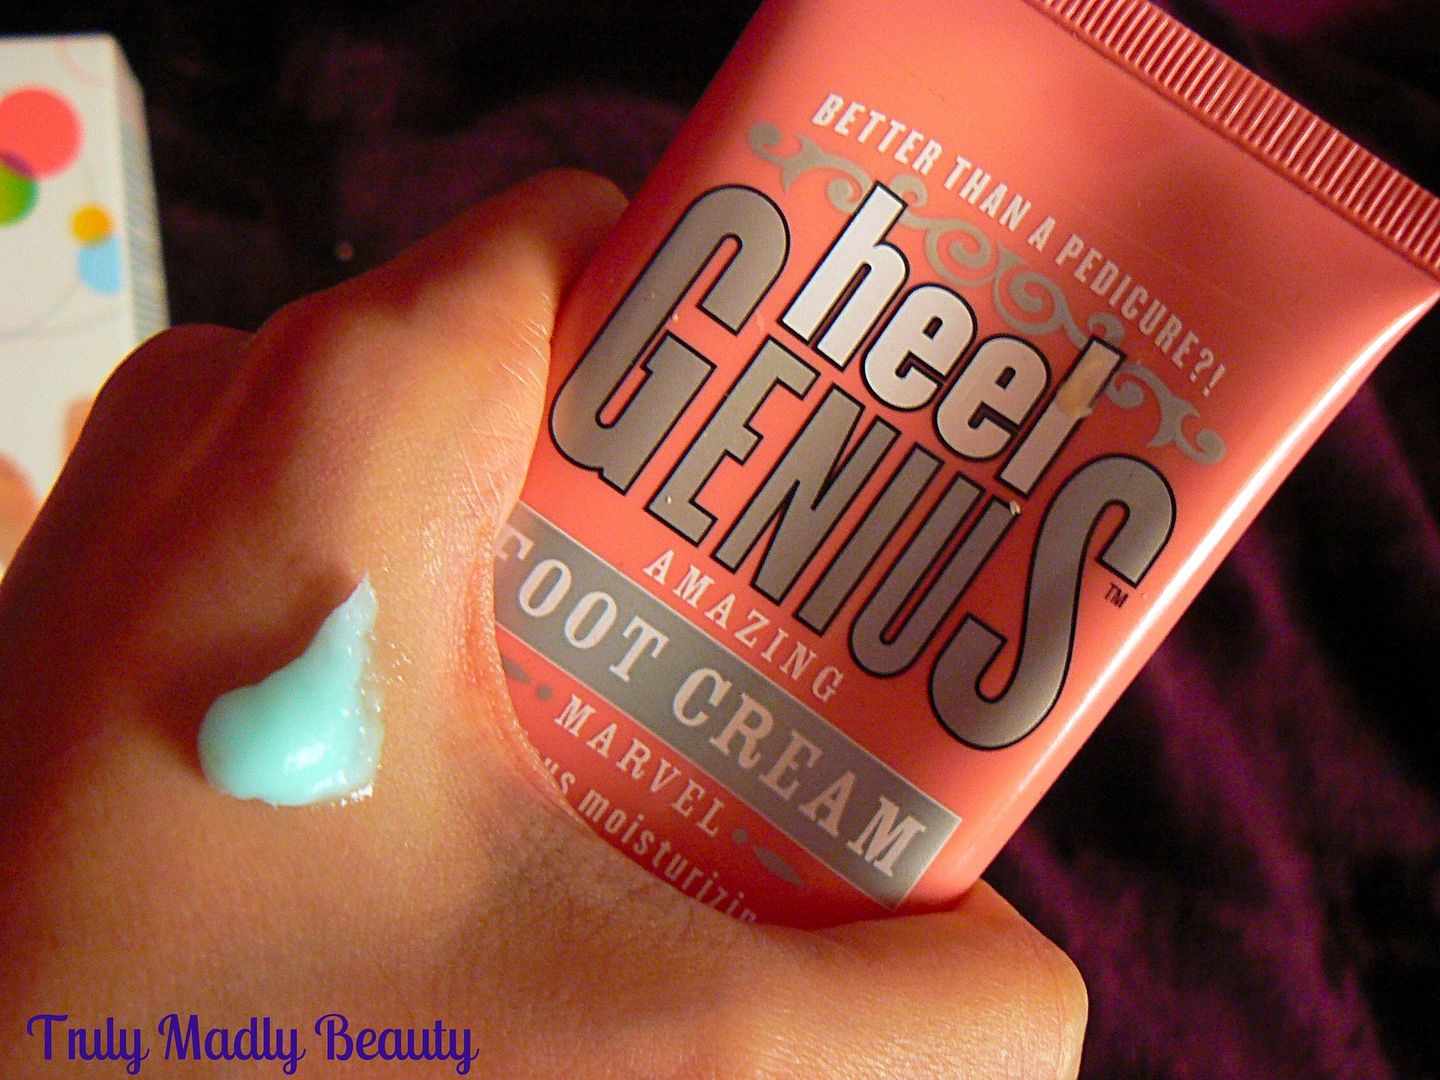
For
this I reach for Soap & Glory's Heel Genius (RRP £5.50) which
has become a Holy Grail product for me...this stuff is INCREDIBLE &
blows all other foot creams out the water. Heel Genius Amazing Foot
Cream really deserves that title, a thick blue gel like
formula, it contains magic making ingredients such as allantoin,
glycerin, macadamia oil, menthol & bilberry & provides such
intense hydration to the skin without the weight of a heavy cream. I
apply this straight after the foot mask & immediately whack on a pair of of socks,
which I keep on overnight, letting the cream soak in, really reaping
the full benefits.
Come
morning you'll have smooth soft feet fit to rival a goddess ready for
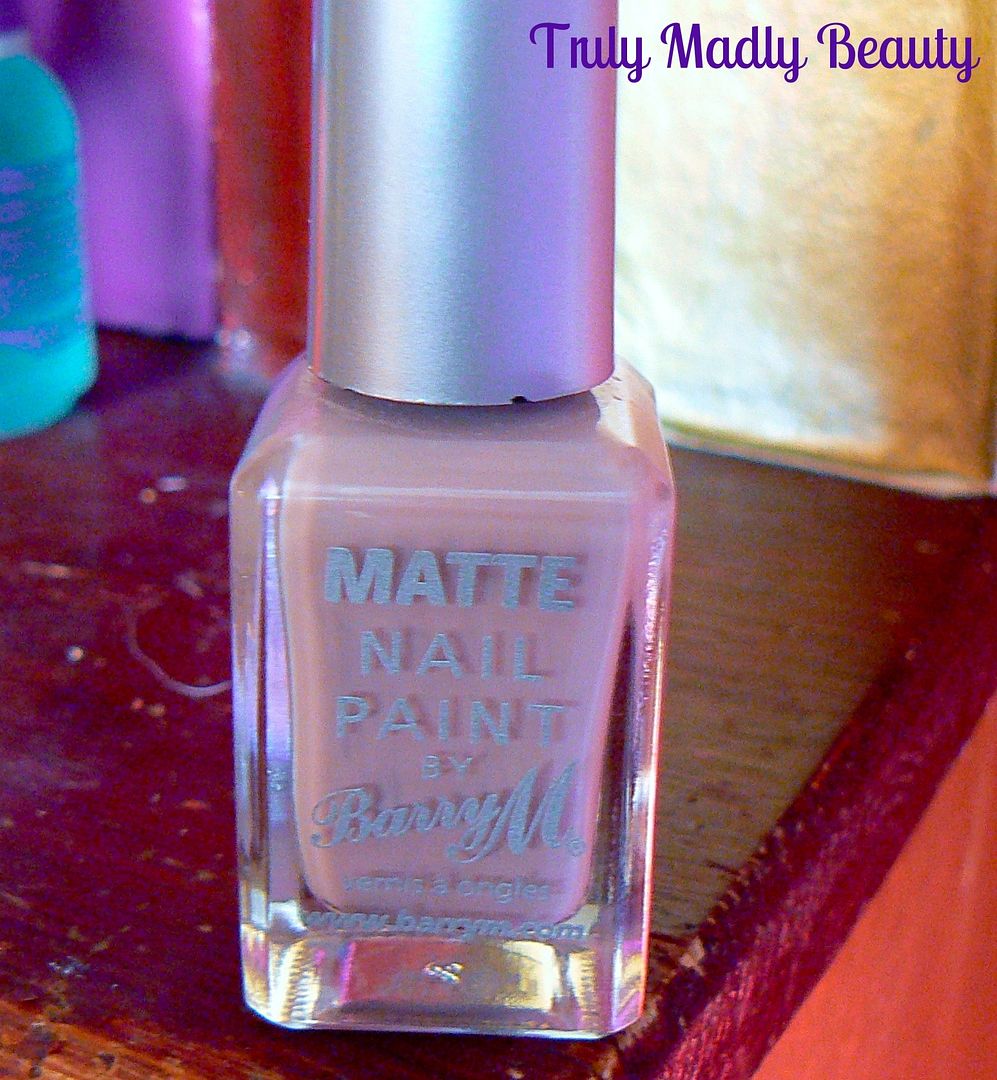
some pretty polish to complete your foot pampering! Me being me I
can't finish this post without suggesting a polish to you my
lovelies, currently I'm LOVING wearing Barry M Vanilla Matte on the
toes, an odd pick perhaps but this is such a lovely lilac tinted
nude, so pretty, especially when topped with a glossy top coat!
Highly recommend!
And
that sums up my winter foot care pampering, happy feet all the way! Have you
tried any of these products? Thank for reading!
Lotsa love to ya!
Disclaimer
- * products featured were sent to me for my consideration. I am not
affiliated with the brand nor paid for this post, this review has
been as always my 100% honest opinion! :)
11.19.2015
Polish & Poise - Adore Me Lingerie Inspired Nails!
Hello
there lovely readers,
I
do enjoy finding nail-spiration in all kinds of places, fashion,
food, media, you name it. Lately I've loved creating nail art
inspired by fashion, such as this Colour Block mani that was inspired by
a beautifully printed dress. Another avenue I've found myself going
down is lingerie. Think about it, all the pretty lace detail &
jewel tones are perfect for nail art inspo! Just the simple task of
wearing a pretty set underneath your winter layers can make you feel
as good as when having a freshly painted manicure, so why not match
both for extra brownie feel good points? When
I came across lingerie brand Adore Me
I became inspired to participate in their fun Polish n
Poise project by creating some lacquered looks inspired by a few of
their pretty pieces, I couldn't resist the challenge!
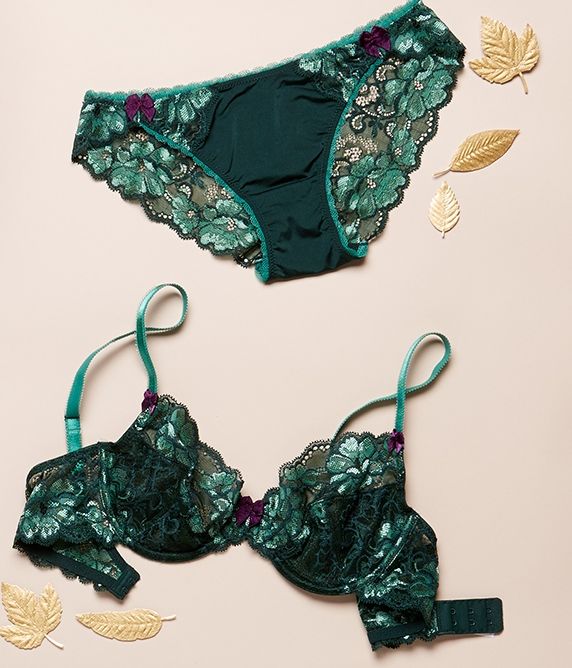
Adore Me is a New York based online lingerie company with a vast selection
of pretty pieces to tempt. From dark vampy to angelic pastel sets
there's something for everyone. This time of year, the warm tones
especially draw me in & this gorgeous emerald two piece Wilhemina
set caught my eye with its gorgeous jewel green lace & bow
details.
And
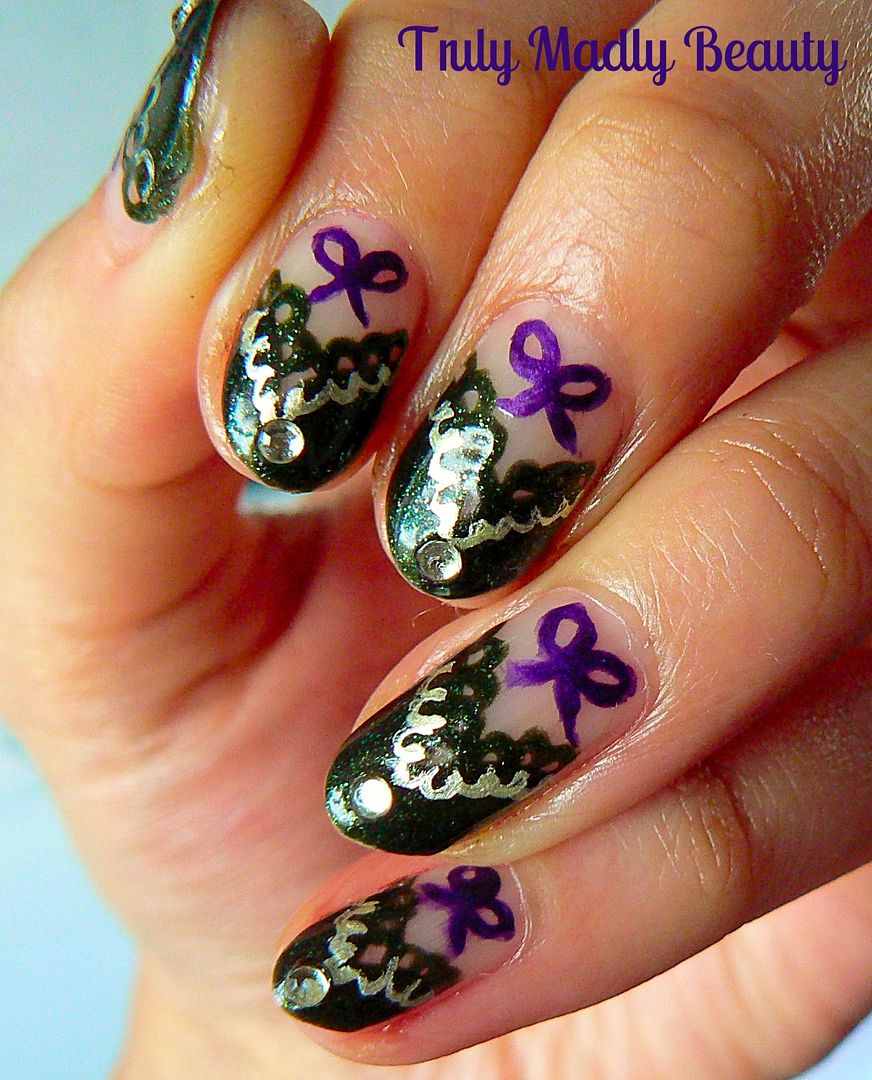
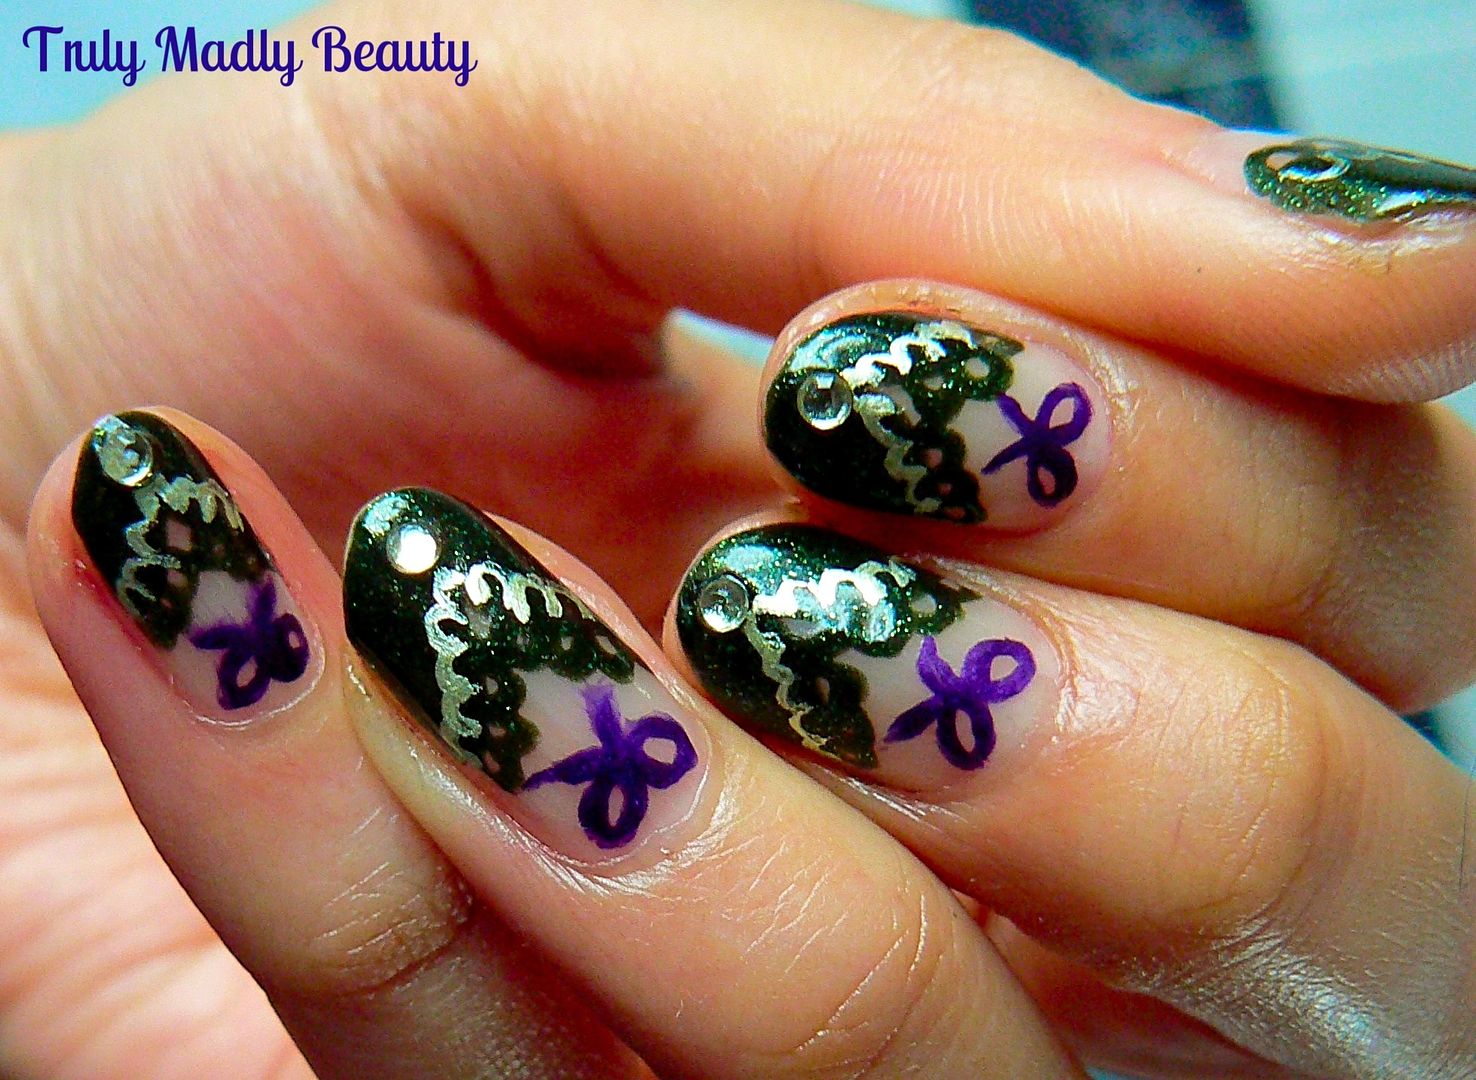
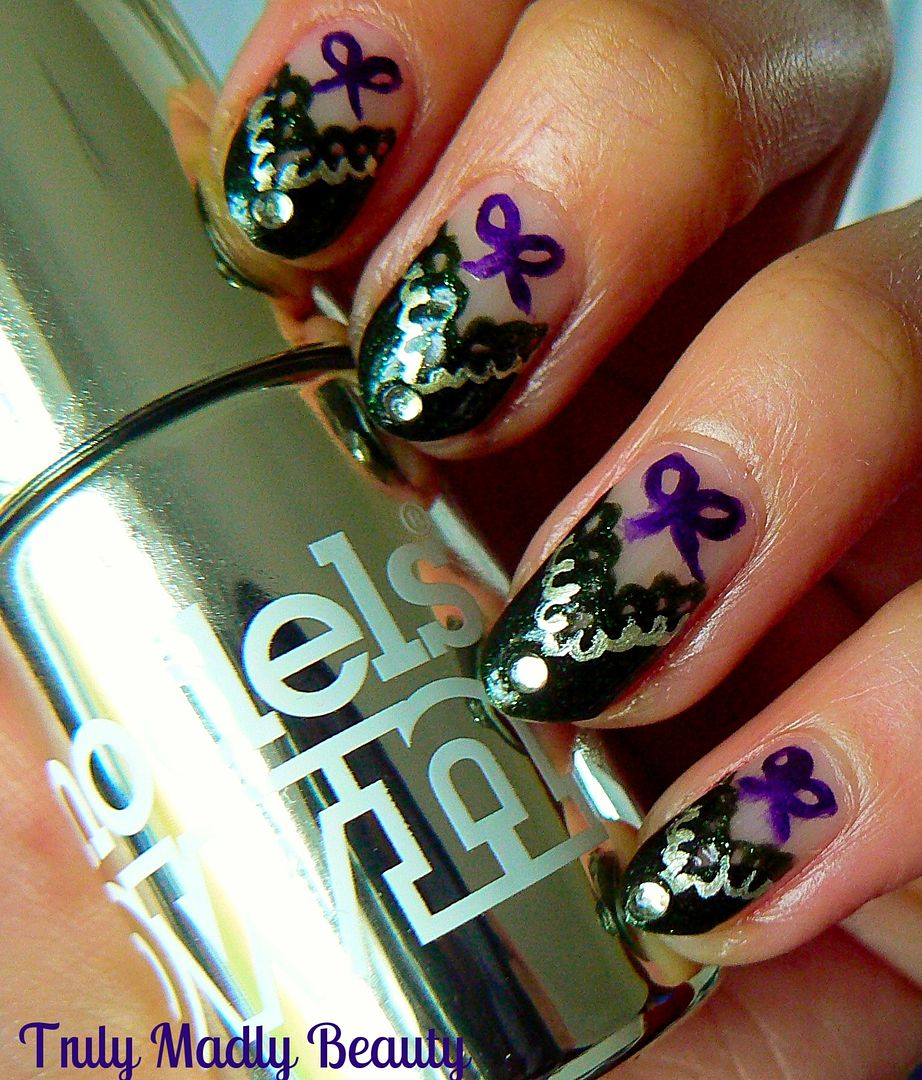
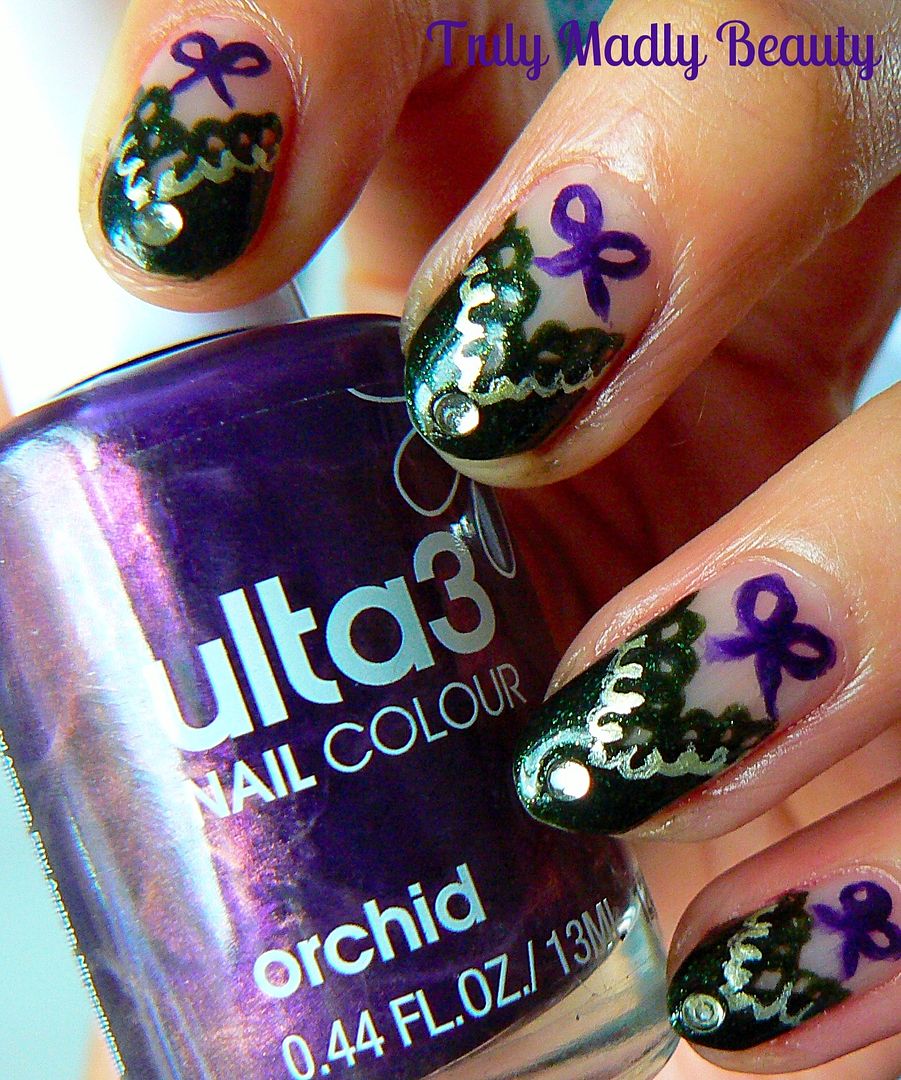
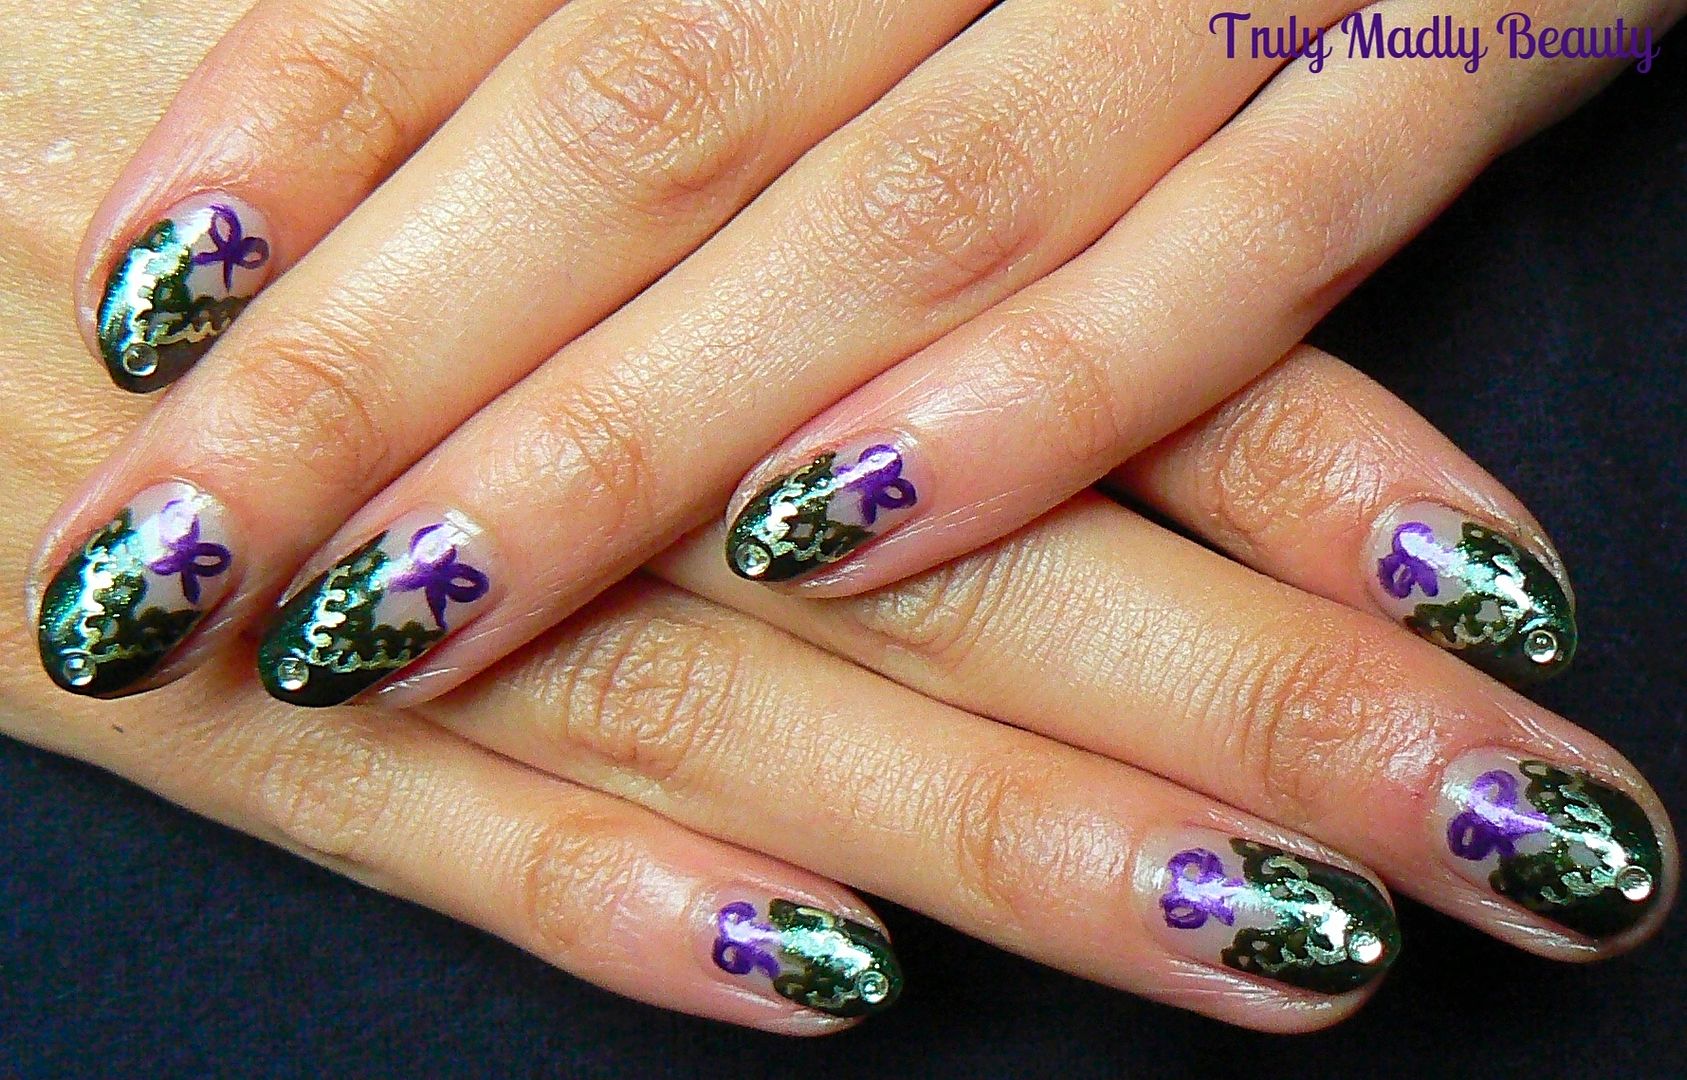
here is the nail look I've created inspired by this lovely piece...
To
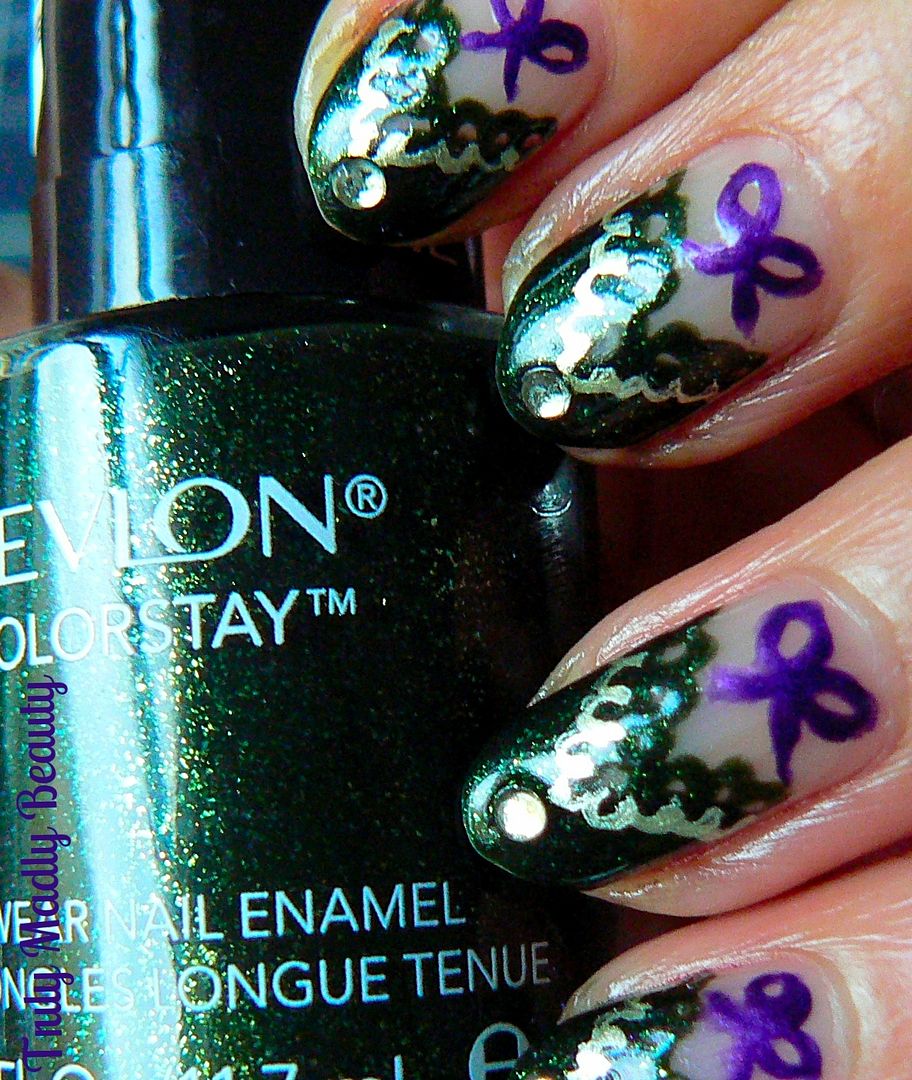
create the design start off with your green, I'd been eyeing up the
gorgeous Revlon Rain-forest polish for a while now so was happy to
finally give it a whirl! Rain-forest is a delightfully deep green
shade with pretty glitter particles suspended in the formula making
it shimmer so nicely! Perfick for this time of year.
First
step is to apply Rainforest as a V shaped tip to each nail. This is
so easy to do & can be done using the brush with the polish,
apply one stroke at a diagonal halfway across the tip before doing
the same on the other side of the nail creating the V shape.
To
start with the lace detail, grab a fine nail art brush & your
green again & simply apply a row of small round circles along the
top edge of your V.
For
added detail do the same on the opposite inside edge using a lighter shade,
here I used Models Own Chrome polish in Olive which is a beautiful
green tinted gold that really stands out. Again using a fine nail art
brush apply your row of circles mirroring the dark green.
Next
to add on your little bows, again grabbing a fine nail art brush &
a dark purple, I've used Ulta3 Orchid, simply freehand your bows by
drawing on two loops with a couple of curved lines underneath for the
ribbon strands.
For
a final touch of bling I added a pale green rhinestone to the center
of the tips before sealing it all with topcoat.
Thanks
as always for reading, I hope you liked the lingerie inspired nails
my lovelies! I've seen a few other sets that have got me itching to
create some more nail art to accompany them! Why not try rocking your
nails to match your lingerie next time?
Lotsa
love to ya!
11.14.2015
NOTD - Burgundy Beauty with Bourjois Rouge Diva!
Hey there lovely readers,
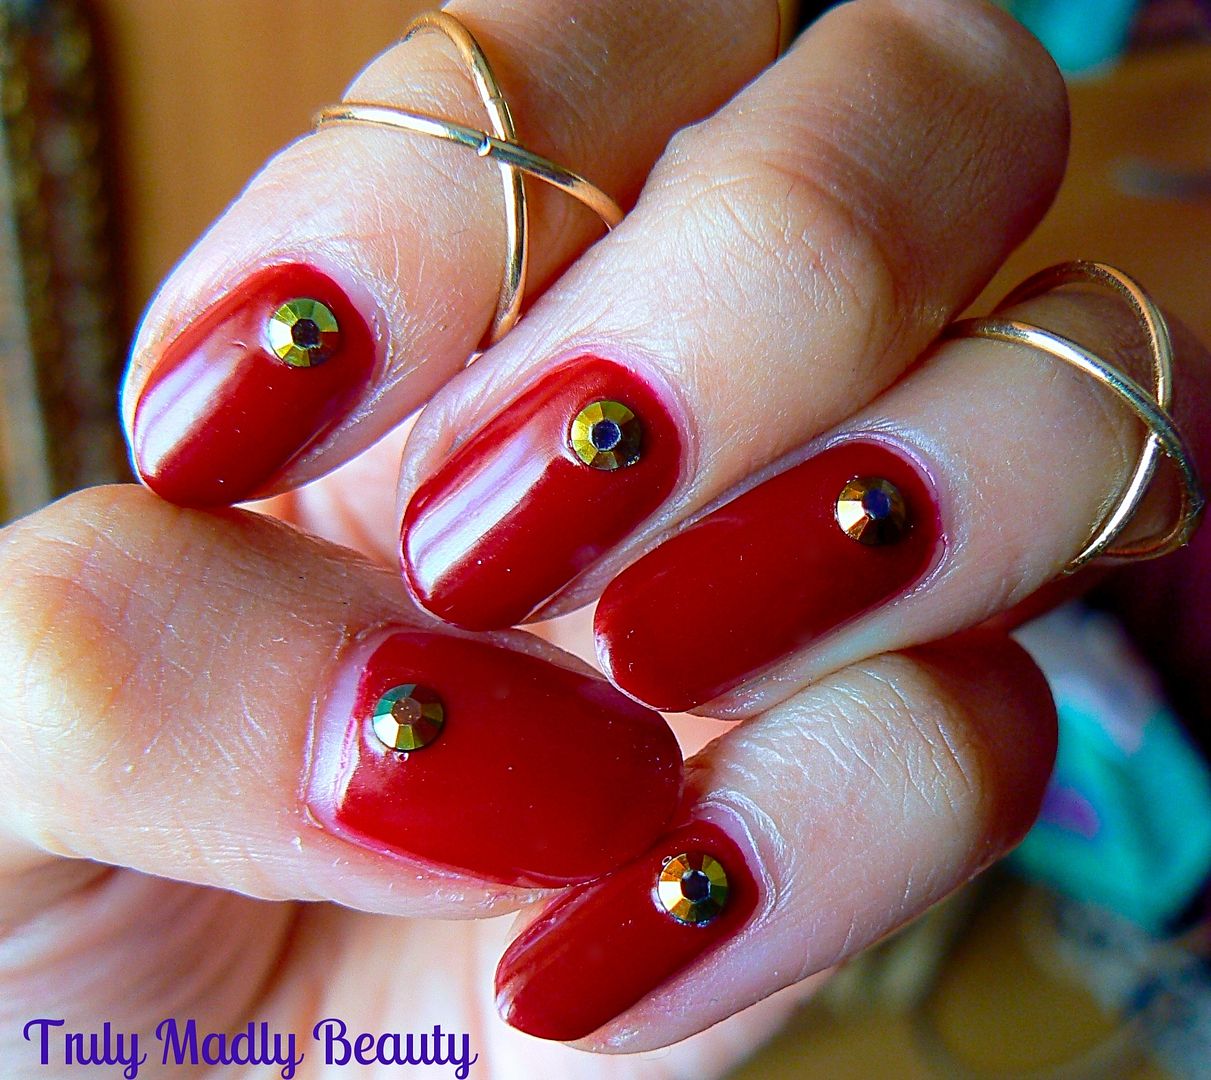
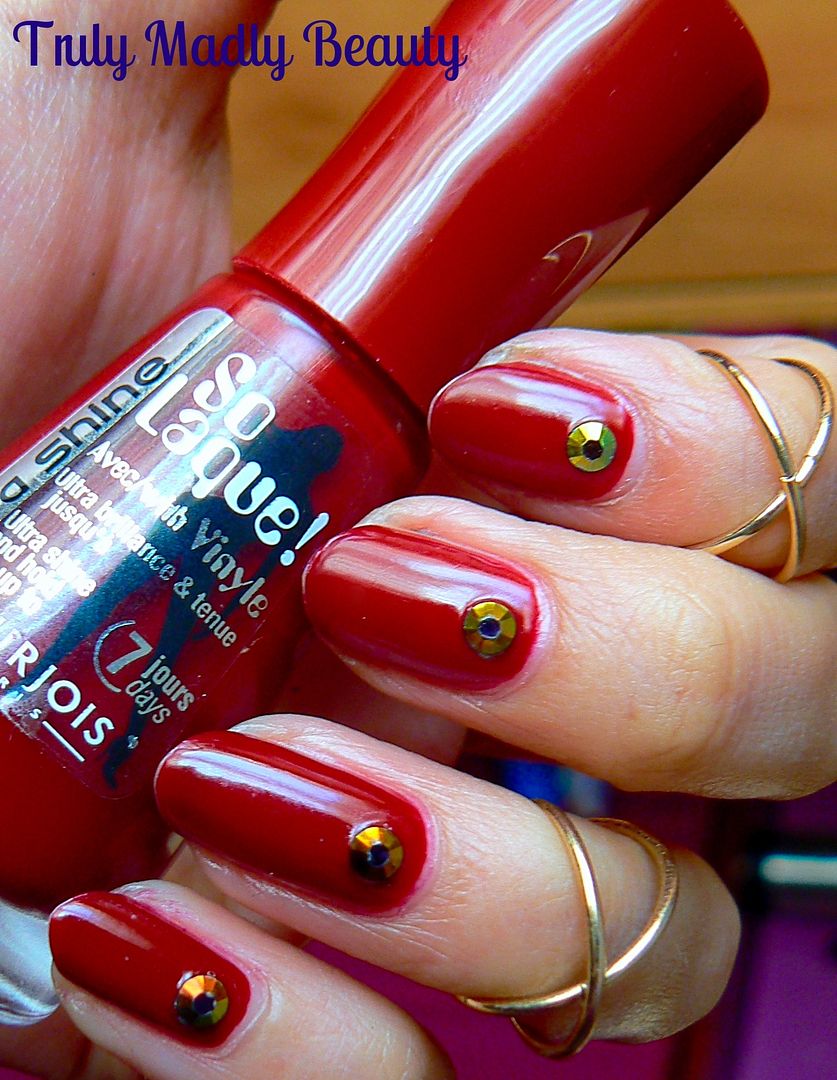
Burgundy is one of those shades that most definitely falls into the perfect tone category for the Autumn/Winter months & certainly gets a lot of love at this time of year especially! A warm & flattering shade which suits everyone, every girl needs at least one burgundy polish in her stash.
I
wanted share with you one of my favourite Burgundy red polishes which I
find myself reaching for time & again as it meets all my needs,
everything from the colour to the formula is just perfection & is
courtesy of good old high street brand Bourjois!
This
little pretty goes by the name Rouge Diva & is from Bourjois So
Laque Ultra Shine Range which retails for around £5.99.
I
don't know why I don't own more of these babies in my collection as
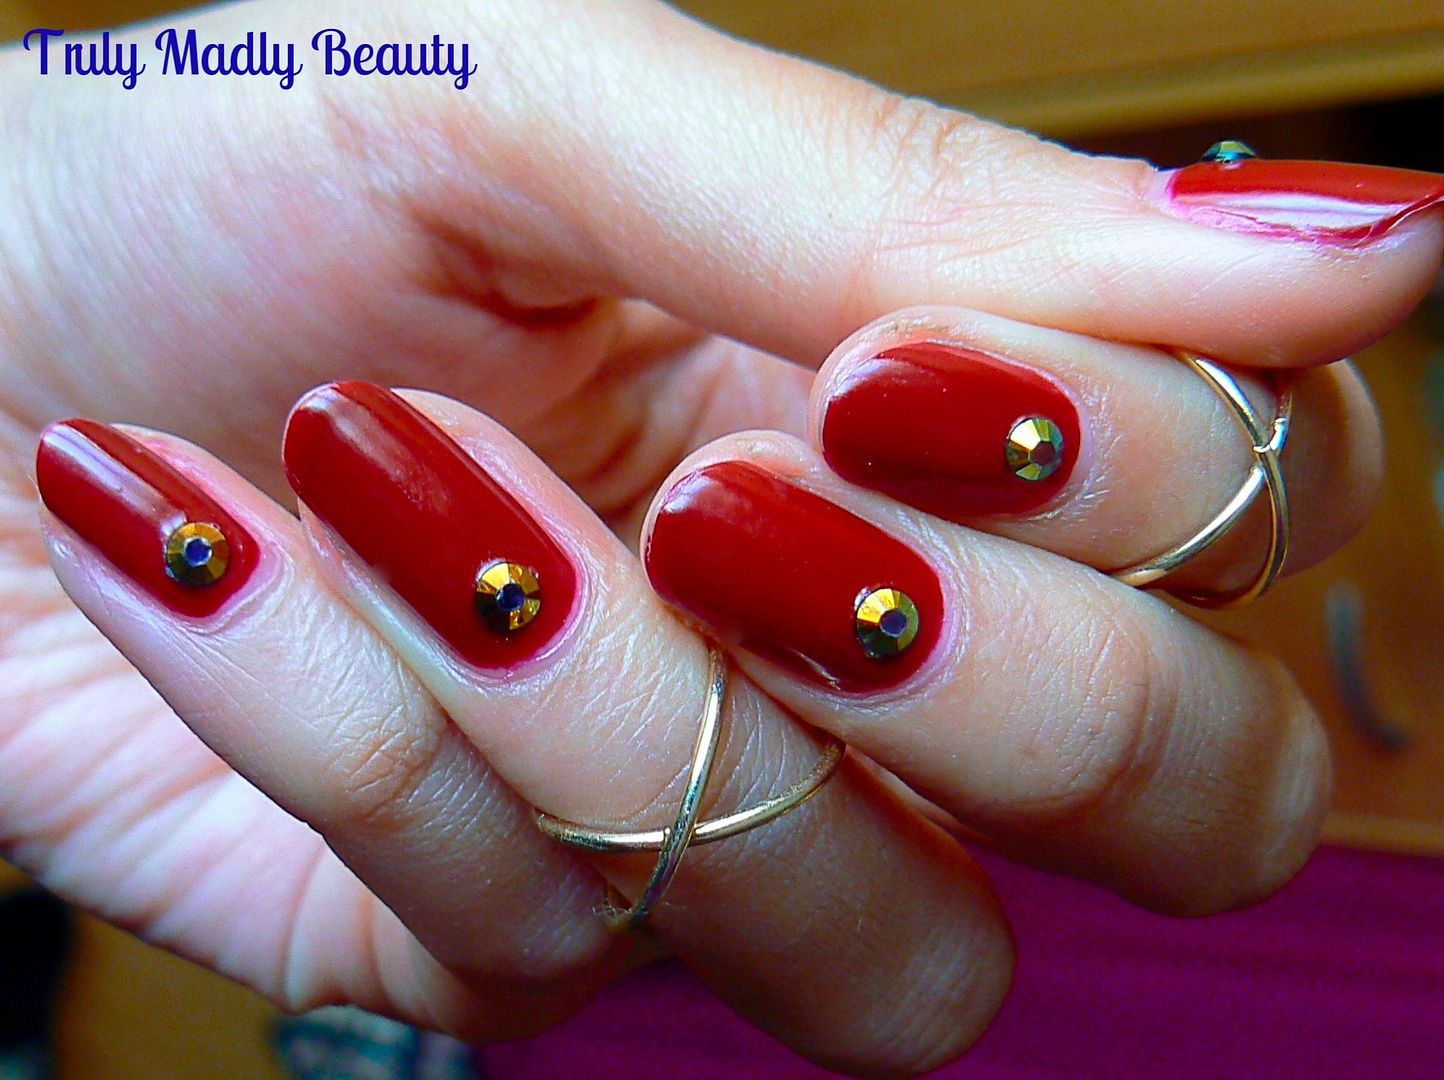
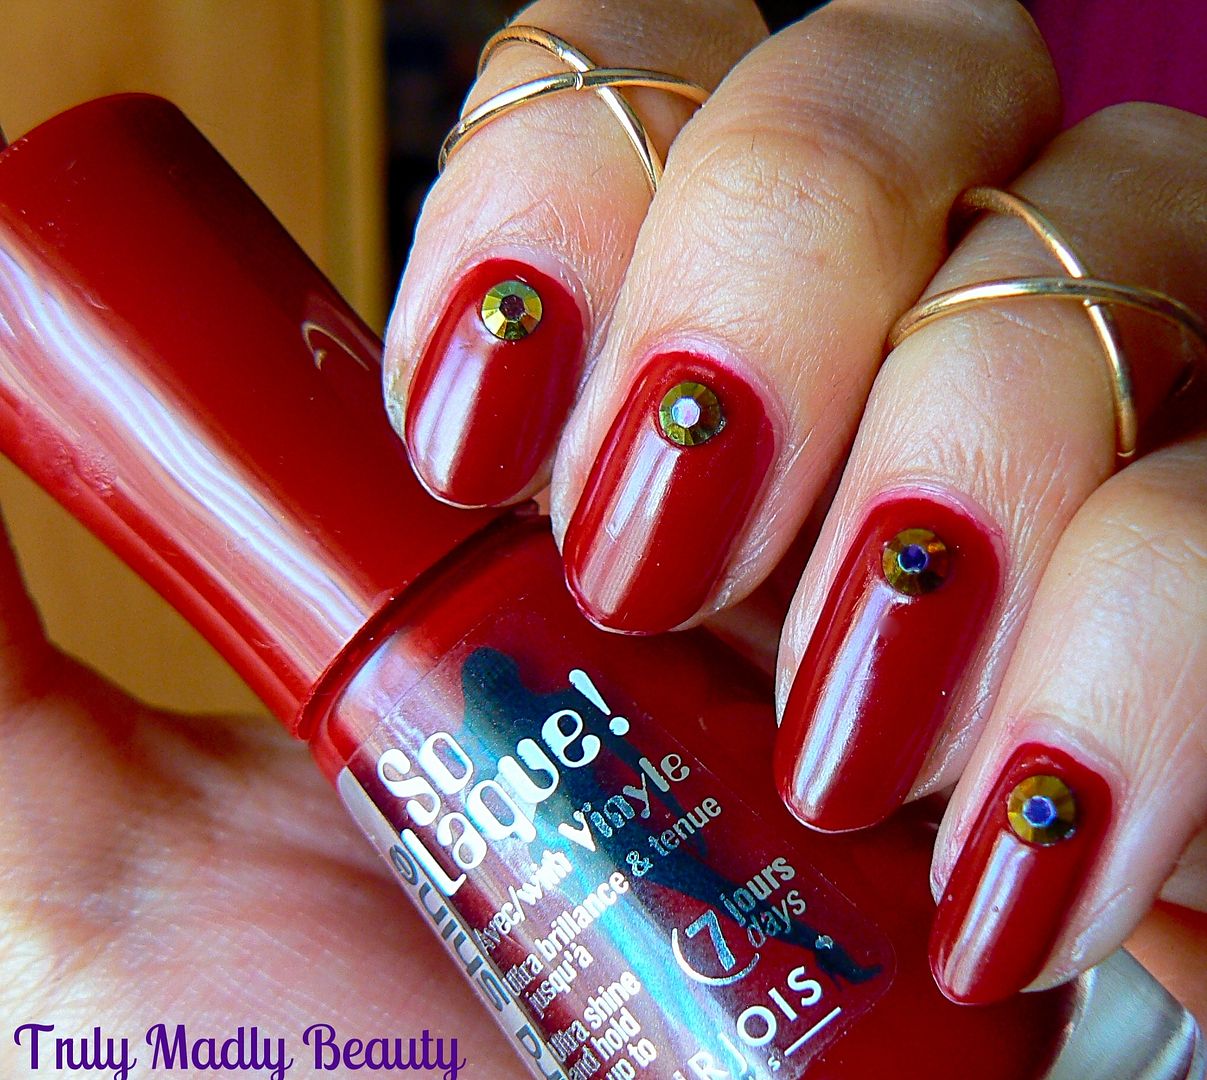
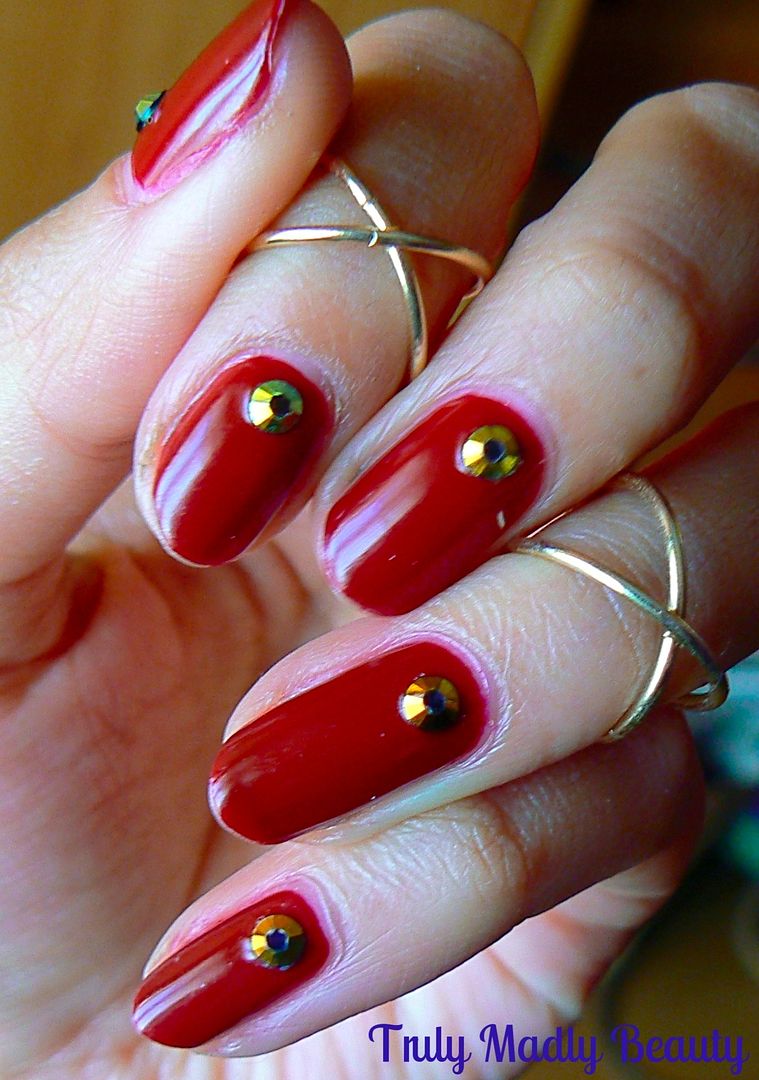
the formula is fantastic. Rouge Diva is a lovely rich marsala
red & applies like a dream.
The
formula is smooth & enriched with twice as much vinyl giving it
that thick glossy almost gel like finish. It could even pass as a one
coater but of course I always go for my obligatory two, creature of
habit is me!
Rouge
Diva is lovely enough all by its onesie but I couldn't resist jazzing
it up a tad as is my way with the addition of these pretty blue/black rhinestones available from Born Pretty Store. You can use my code
TRUW10 to get 10% off of your order ;) The midi rings are Topshop, I do love me some finger bling I
do :)
Thanks
for reading my lovelies, do you have any favourite burgundy polishes?
11.08.2015
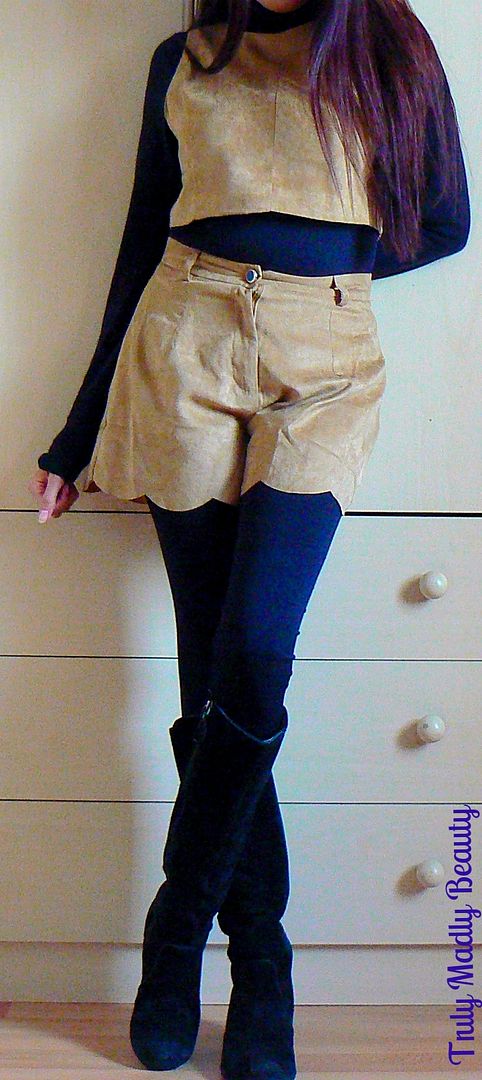
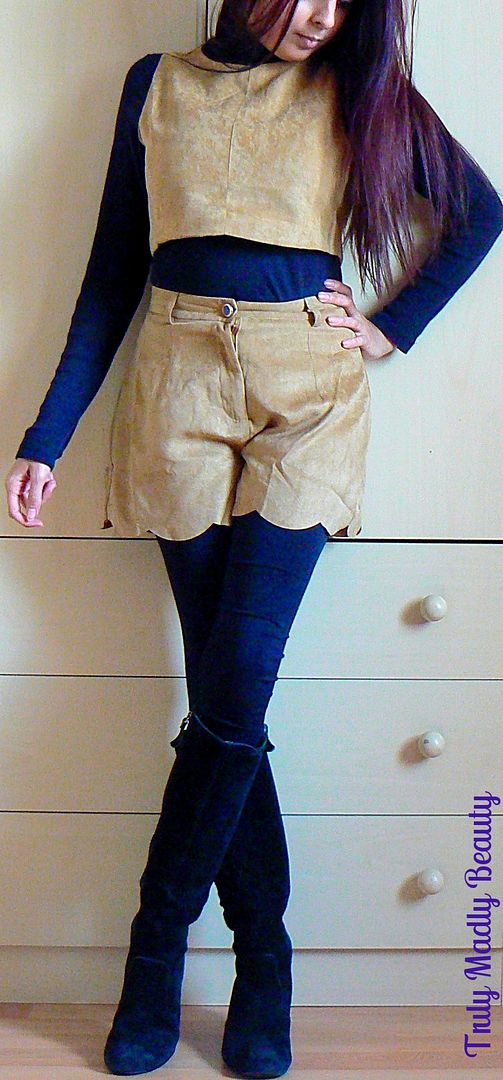
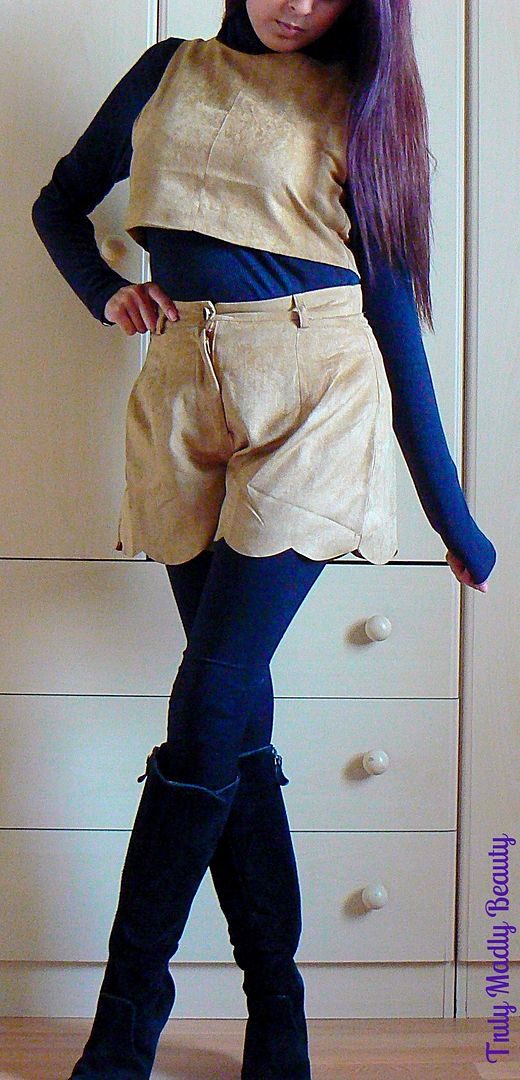
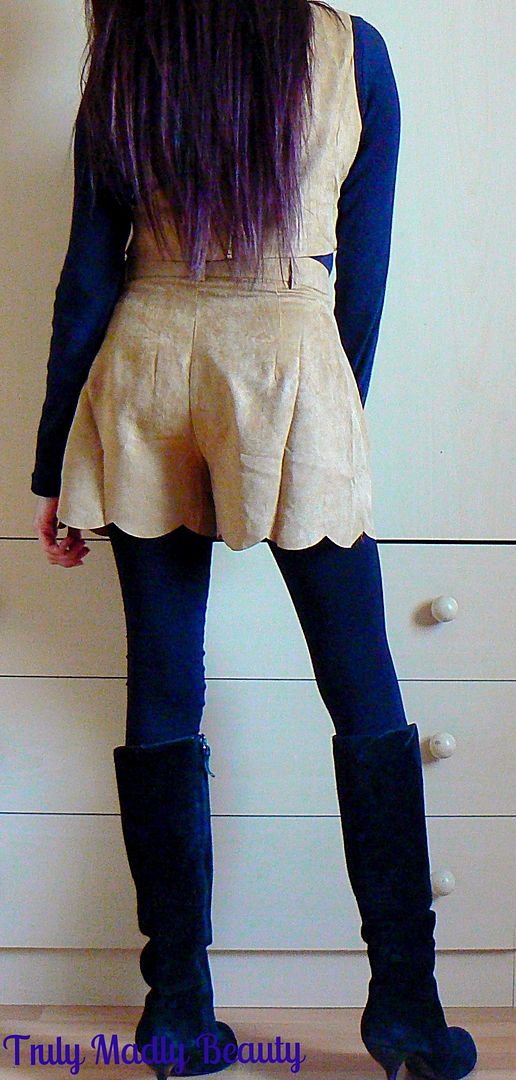
What I Wore - Seventies Suede & Scallop Edges ft Luxemme
Hey
there lovely readers,
Happy
Sunday! Are you having a good weekend? Currently recuperating from a recently returned break to the lovely city of
Edinburgh. I've always wanted to visit & it definitely met
expectations & then some! At just under an hours plane ride away
its guaranteed to be a place I see myself returning to again! :)
Thought
I'd mix things up a tad with something a bit different on the
blogaroony today, I was delighted to be contacted by new fashion
brand Luxemme recently for the opportunity to do a wee collaboration
with them, after swooning completely over the range online I couldn't
say no!
Luxemme
is a new luxury fashion brand whose range of pieces embodies
sophisticated Parisian chic with cool clean cut Manchester street
style. After having a browse at some of the gorgeous pieces on offer
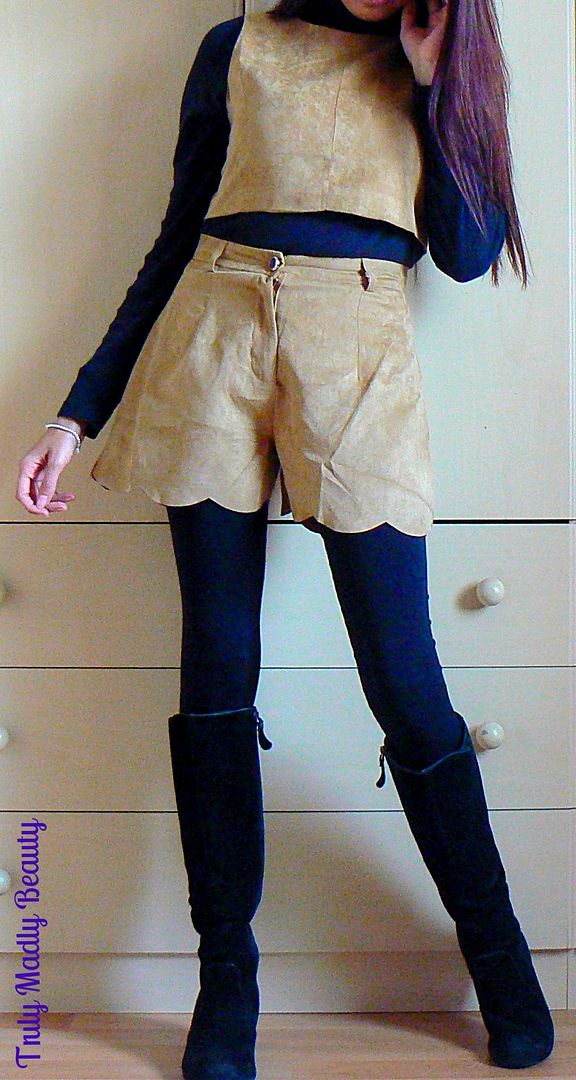
I decided to opt for the Charisse Suede Crop Scallop Two Piece Co-ord
& style it in a way ideal for the now much colder months with the
help of some Parisian vibed black layering action....
I
confess, going for a co-ord was WAY out of my comfort zone, for
ages I've been drooling over the trend of two piece outfits
consisting of crop tops, paired with either shorts or midi skirts.
However I've always been self conscious about baring my midriff as,
to be quite blunt & TMI here, I suffer from bloatedness &
will never possess a washboard stomach! No joke but by the end of the
day I often have the appearance of one who is expecting a wee bundle
of joy! Even when it comes to swimsuits I always go for one pieces
instead of bikinis O_O However one of the reasons why I love
Autumn...LAYERS! Thus I decided to style my suede two piece with a
polo neck, leggings, some knee high booties & voila, a two piece
co-ord outfit styled in a way I can wear, hurrah!
It
was with much eagerness in which I opened up the package containing
my first two piece, the combination of camel suede & scalloped
edges had me excited with its interesting mix of seventies retro &
safari like vibes!
I'm
not going to lie to you, I may have spent a short time simply rubbing
that smooth suede against the cheek, I couldn't help myself. I can
confirm it IS very soft...*tumbleweed* AHEM! Moving on I decided to
keep with the seventies vibe & dug out my favourite Clarks suede
knee high boots & a black polo neck with leggings to complete the
look.
The
outfit was so comfortable to wear & I am utterly in love with
this two piece. I hope you liked the Autumn/Winter friendly styling
of the co-ord lovelies! I'm already eyeing up more of their
delightful range, especially the playsuits! The Luxemme range can be
found online & you can even get 10% off your order using my code
trulymadlybeauty :)
Thanks
for reading!
Lotsa love to ya!
Subscribe to:
Posts (Atom)