Showing posts with label Nail Art Tips. Show all posts

1.20.2020

Nail Polish Remover Cream?! A High End & Low End Comparison Review!

Hey there lovely readers!

If I stumble across a gimmicky, quirky, out of this worldy nail related product, you can guarantee I will be ALL OVER IT like butter on toast. I feel like it is my duty ya know?

When Nailfix and Chill came upon my radar via twitter, an innovative nail polish removing CREAM, I was naturally filled with curiosity to find out how this product worked & if it was any good.


1.16.2019

NOTD - Three Quick & Easy Dotticure Looks ft Models Own SoFly Collection Review

Hello there lovely readers!

I stumbled across this post in my archives which I'd written as a guest post donkeys ago for the lovely Safiyah who kindly sent over to me the Models Own SoFly collection to review for her, where I also shared a few super quick nail art looks. In case you missed it I thought I'd whack it on here as well for your perusal as the easy peasy nail art is my favourite kind! :)


11.16.2018

NOTD - Keeping Sharpie!

Hello there lovely readers!

One of my favourite places to go looking for a bit of nail inspiration is Instagram. I follow large number of extremely talented beauties who create magic on their nails & one such lady is the lovely Kate aka @altergo_nails, who creates the most fabulous nail art!

I'm always on the lookout for fun new ways to create nail art & as I've now entered the wonderful world of stamping it glaringly obvious I've only touched the surface.

Kate recently shared a stamping design in which she used Sharpie pens to create a stunning rainbow watercolor like effect, say what?! Needless to say I was intrigued & after watching her fab tutorial I hotfooted it down to my nearest stationary shop to pick me up some Sharpies!


9.18.2018

NOTD - Easy Sci Fi Nails using Nail Wraps!

Hey there lovely readers!

Whilst having a sort through my nail art stash recently, I came across a bunch of old nail wraps which I'd accumulated quite some time ago, if the dust gathering on them was anything to go by! O_o


5.23.2018

NOTD - Asa No Ha Step by Step Nail Art Tutorial

Hey there lovely readers!

Oooh its been a while since I've had the time to do a proper step by step nail art tutorial for you guys so I thought it was high time to rectify that & boy am I coming at you today with a banger of a one!


2.01.2018

Nail Stamping For Beginners - My First Foray In To The World Of Nail Art Stamping!

Hey there lovely readers!

Grab yourselves a cuppa dear ones as this is a bit of a one! As I'm sure is QUITE clear by now if you are a regular peruser of my blog & basically just by looking at my page...nail art is my passion. Nails, beauty, food & cats...pretty much in that order most of the time. But yus, nothing makes me happier than when I'm sat down at my work station (aka the dining room table) with all my nail art bits & bobs laid out in front of me ready to get to creating something fun on my nails. 

I mostly love experimenting & playing around when it comes to my nail art designs, some projects more successful than others! Let me tell you there is nothing more devastating for a nail artist than spending time on a design you had such high hopes for it to turn out an epic FAIL. However as much as I love getting arty with my brushes, I also like to delve further & try out different techniques. One such technique, which has been around for quite a time now is Nail Art Stamping & I'll confess...its one that has had me in palpitations at the thought of attempting.


6.27.2017

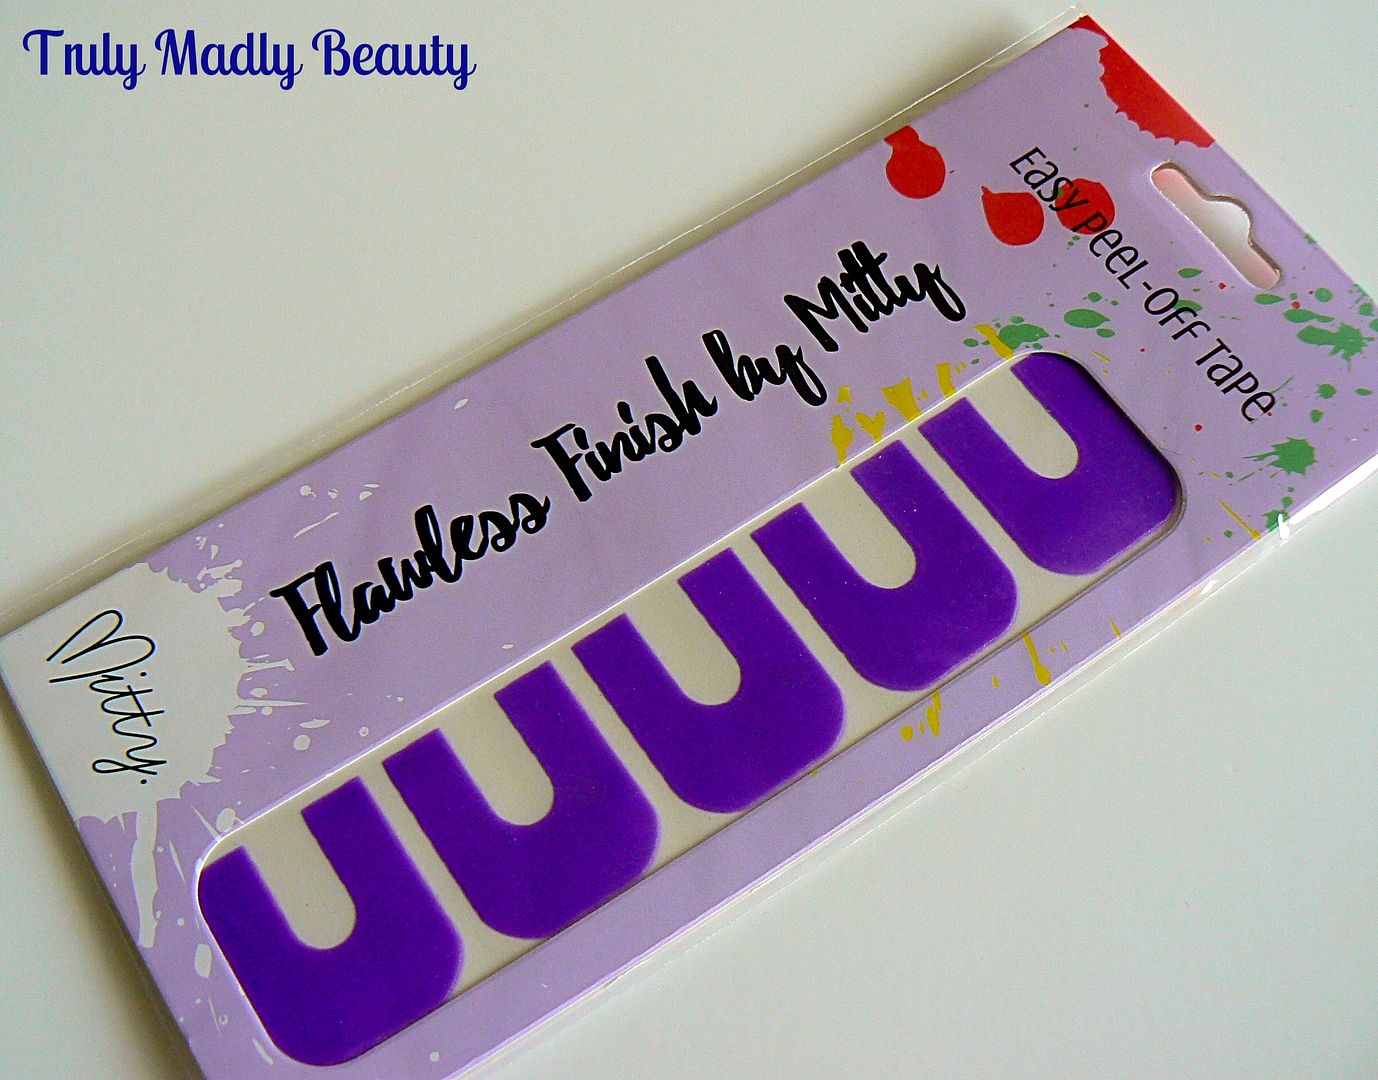
Mitty Flawless Finish Peel Off Mani Tape Review

Hi there lovely readers!

When it comes to doing nail art, no one likes a lot of mess. And yup there are a number of techniques that can cause just that, thus putting many people off doing them. Sad times. However nail art has come a long way & now there are lots of ways to make the whole process so much easier with minimal stress & easy cleanup! Happy times!

I'm sure you've heard of the method of using liquid latex as a skin barrier when doing messy nail art such as sponging, stamping, water marbling etc. If not then go have a peek at my post touching on that HERE.

Using liquid latex really has been a game changer for sure, waving goodbye to the days of having to wrap cellotape around your cuticles, praise the gods! 


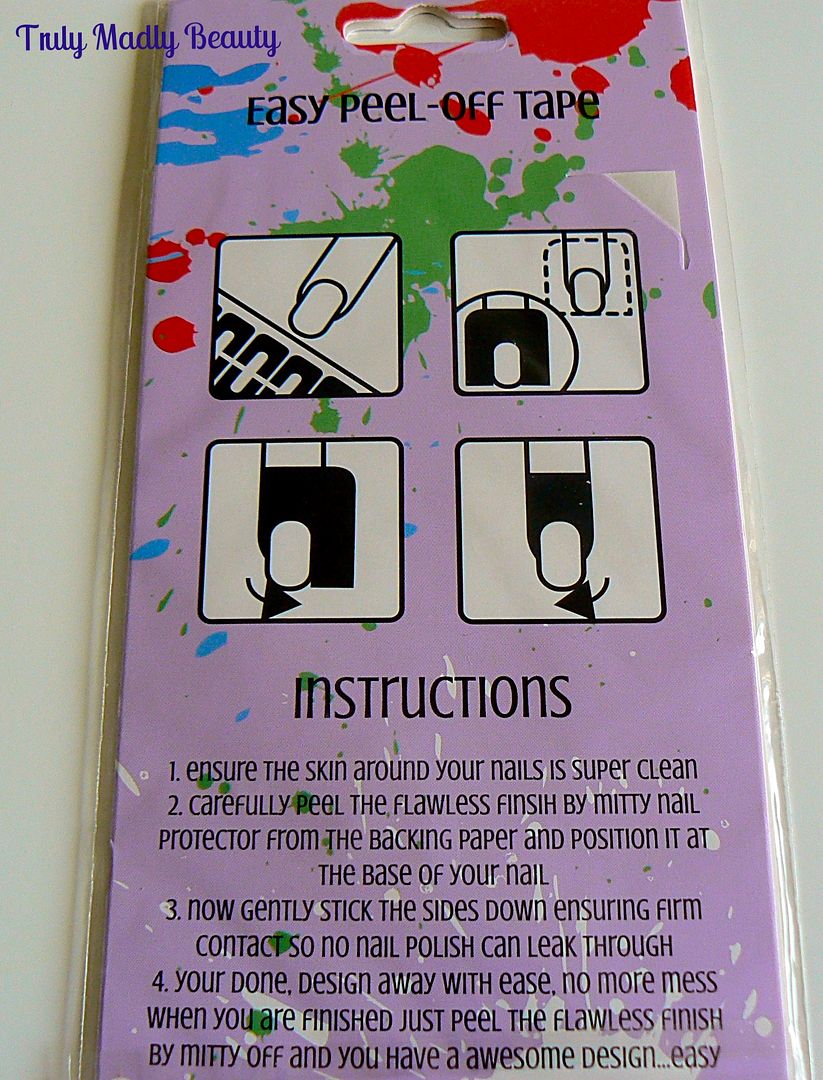
One little product that caught my eye were these peel off mani tape barriers from Mitty Burns that basically work in the same way except, not only are they latex free which is fab news for those who have skin allergies but also no fiddly bottle or brushes required, or waiting around for the barrier to dry, you simply peel the tape from the sheet, wrap it around the skin, then peel off in one go after you've done you nail art! Nifty! 


6.22.2017

KISS Gel Fantasy Press On Nails

Hello there lovely readers!

Being the bonafide polish lover, I'm not usually one for falsies. However I can't deny that having some stick on nails on stand by is actually quite handy, a fact proved quite recently when I had a last minute family do to attend & no time to paint the nails!


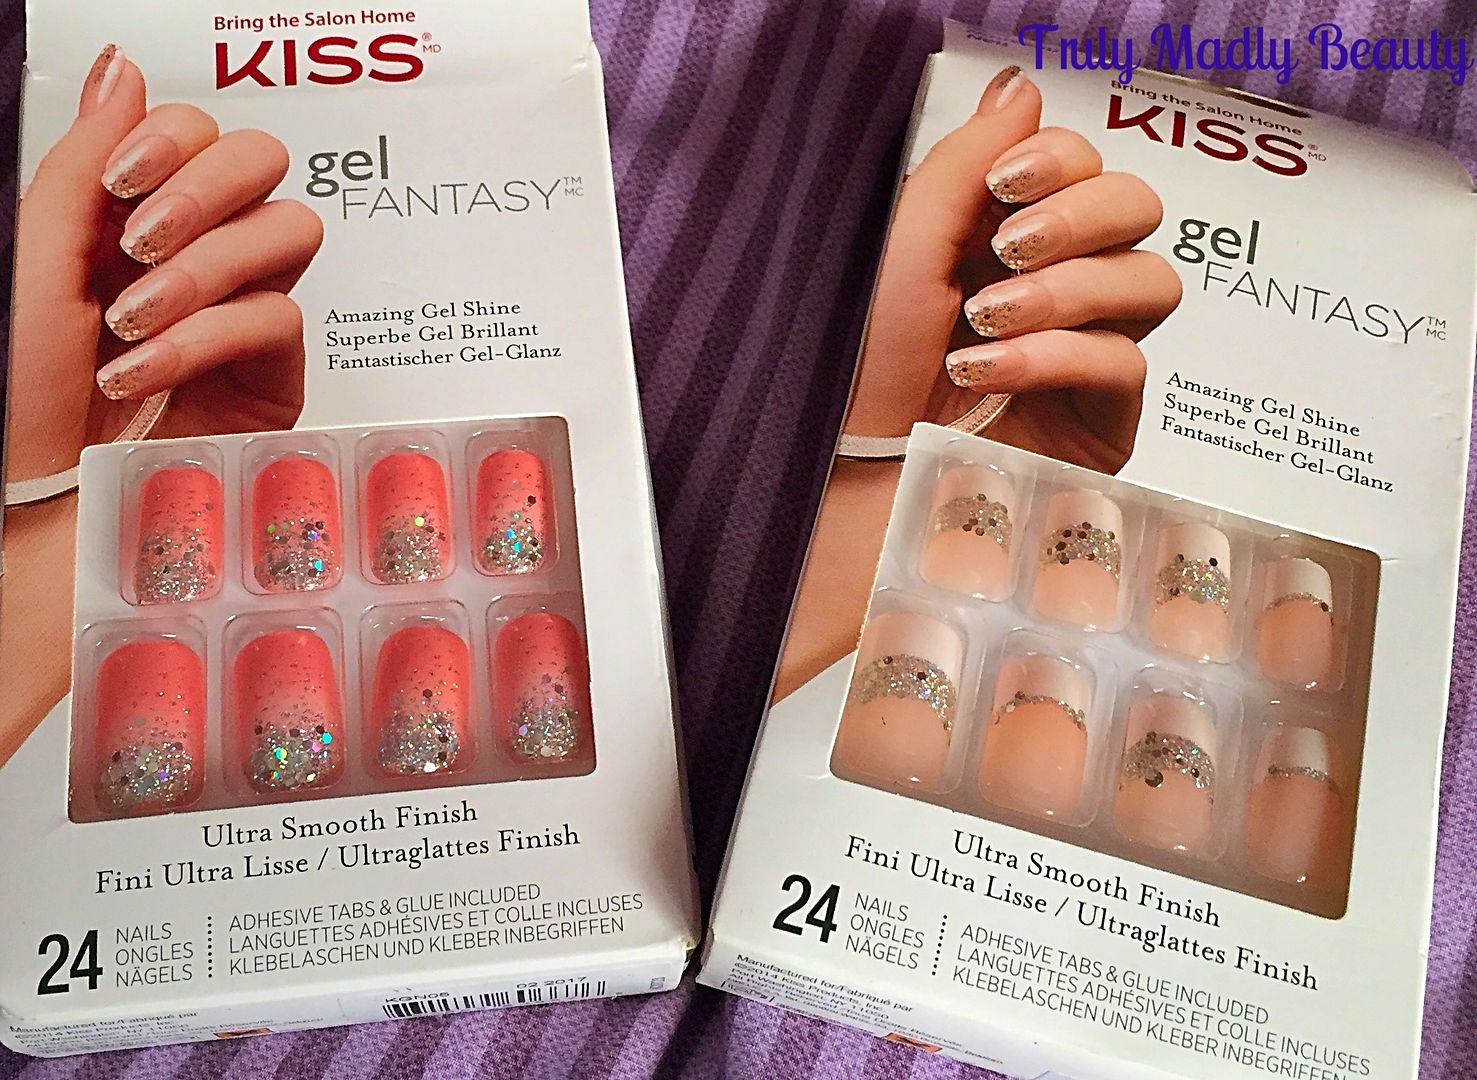
I was sent the Kiss Gel Fantasy Press On Nails* a while back & as mentioned, as I don't really like to use false nails I honestly did not think I would use them! But thankfully there they were ready to save the day & by doing so, also proved to me that they are actually pretty darn awesome as falsies go! Forgive me for neglecting you so.


3.10.2017

NOTD - Jewel Bloom Nail Art Tutorial

Hello my lovely readers!

A wee tutorial for you today, I want to try & do more step by step pictorials for you to show just how easy it can be to create fun & fabulous designs on your nails! My favourites this year so far have to be my Flamingo Nails, they just make me smile so much & I'm itching to do them again. But of course Mother Nature will play a big part in allowing this to happen & whenever she doth bestow upon me decent lighting & time for photos I will make sure to take advantage!


2.03.2017

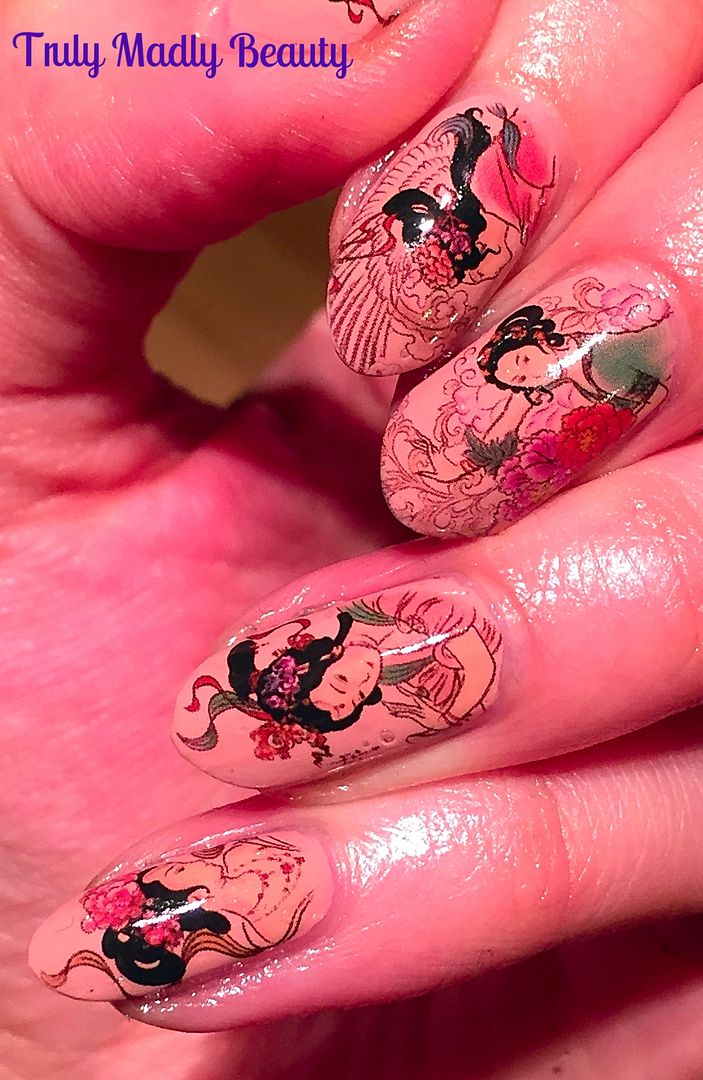
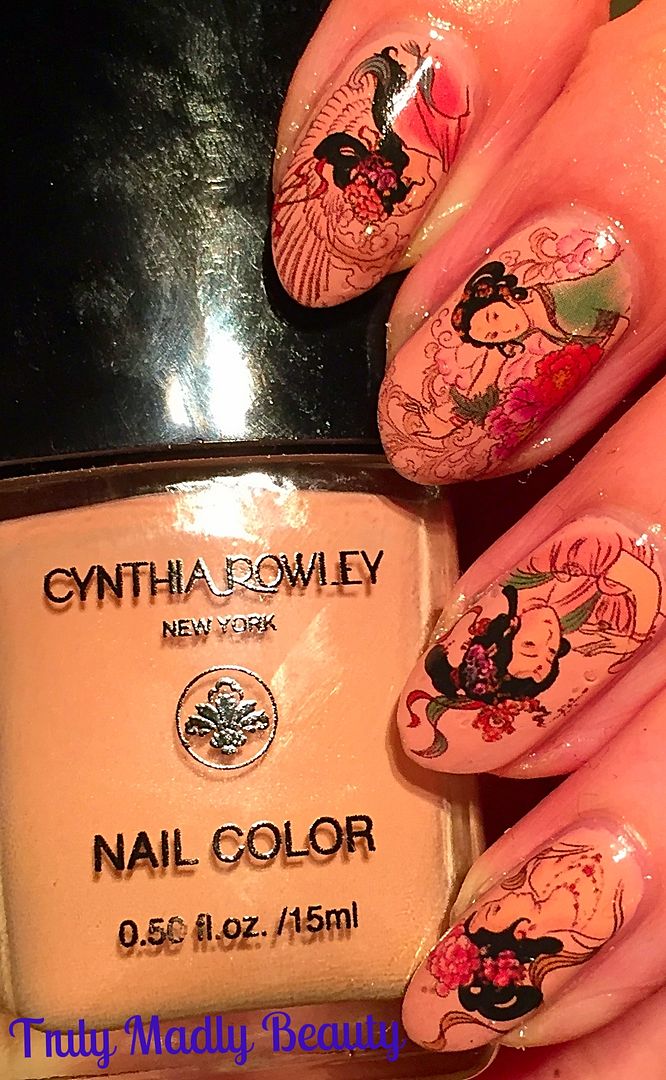
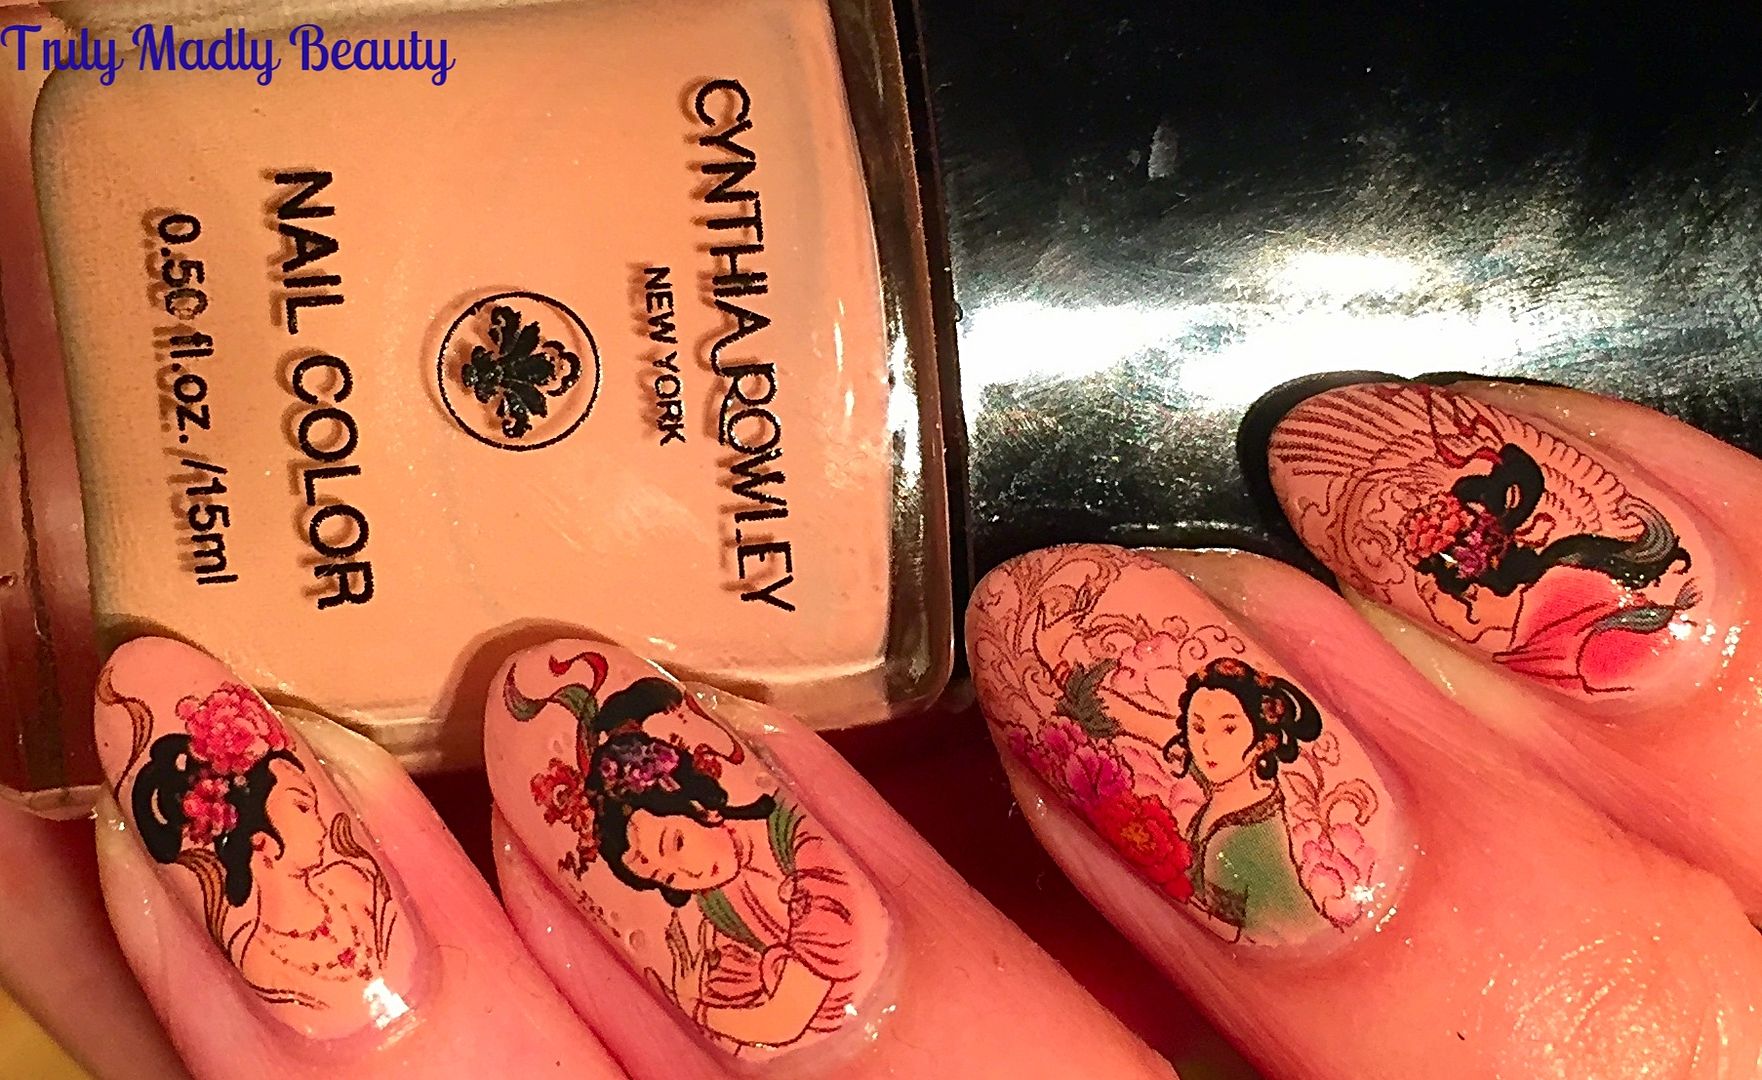
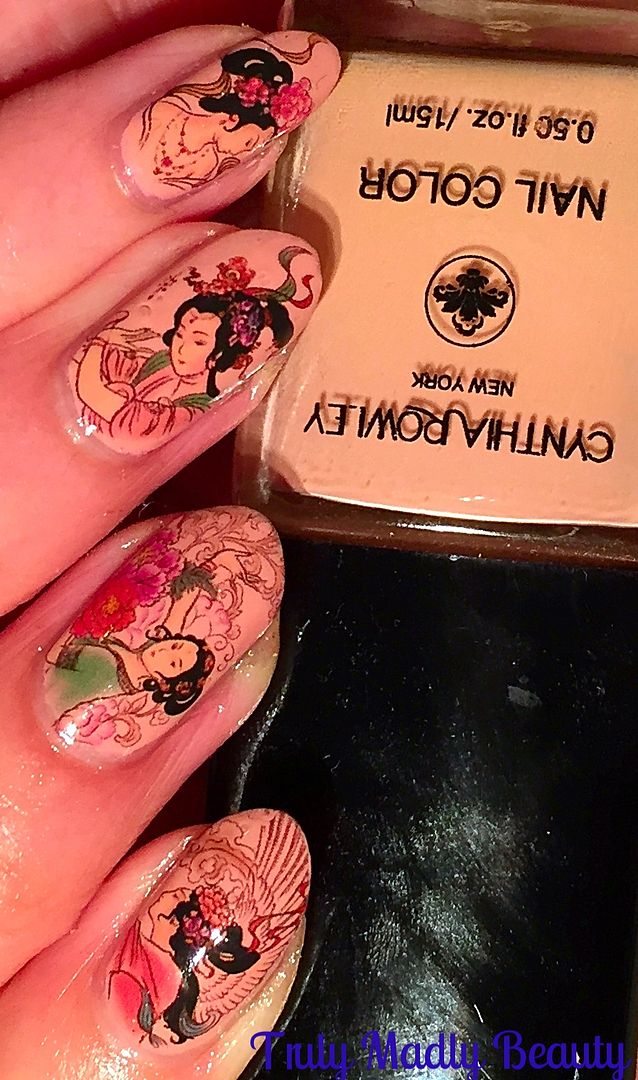
NOTD - Geisha Nails!

Hello there my lovely readers!

As much as I adore nail art there are times when life gets in the way meaning that quick solutions are required when wanting to pretty up those nails but finding oneself lacking in time!

One nail hack that I love is the use of water nail decals. These are designs/images which you can transfer on to your nail, either polished or bare, after soaking in water, a concept rather like those quirky tattoos you used to get in sweet/bubblegum wrappers as a kid, remember those?  


I usually get  my nail decals from my favourite place for nail art supplies, Born Pretty Store, not only are they super cheap, but they have a huge range to choose from! FYI you can also get 10% off your order using my code TRUW10


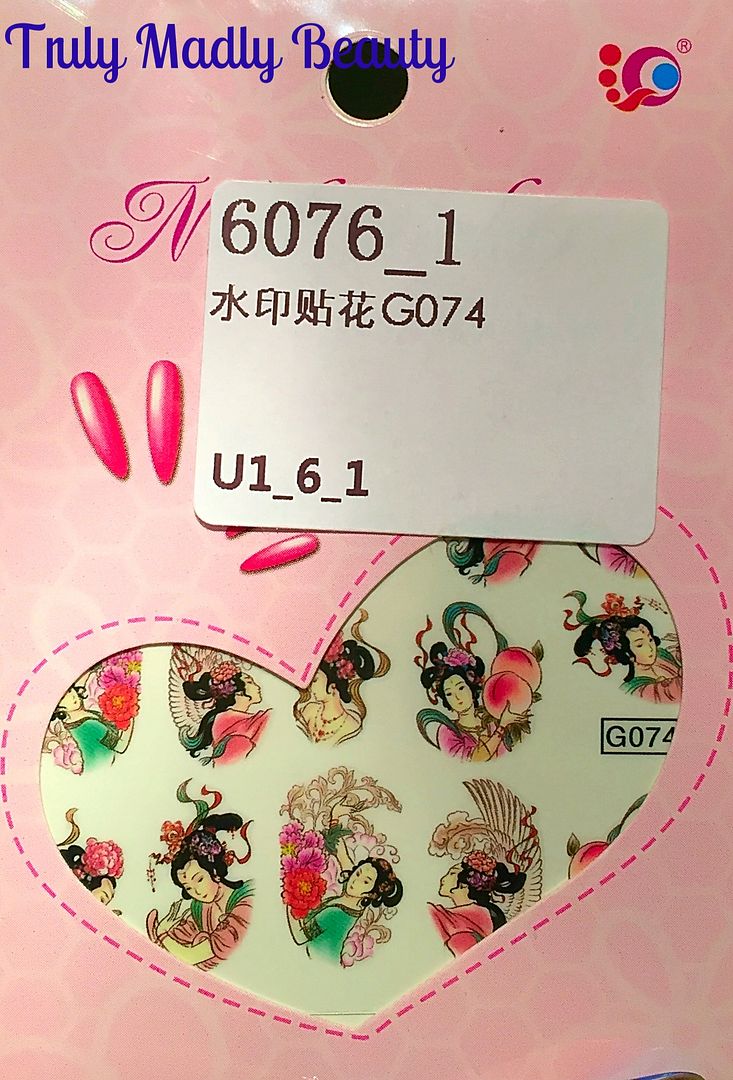
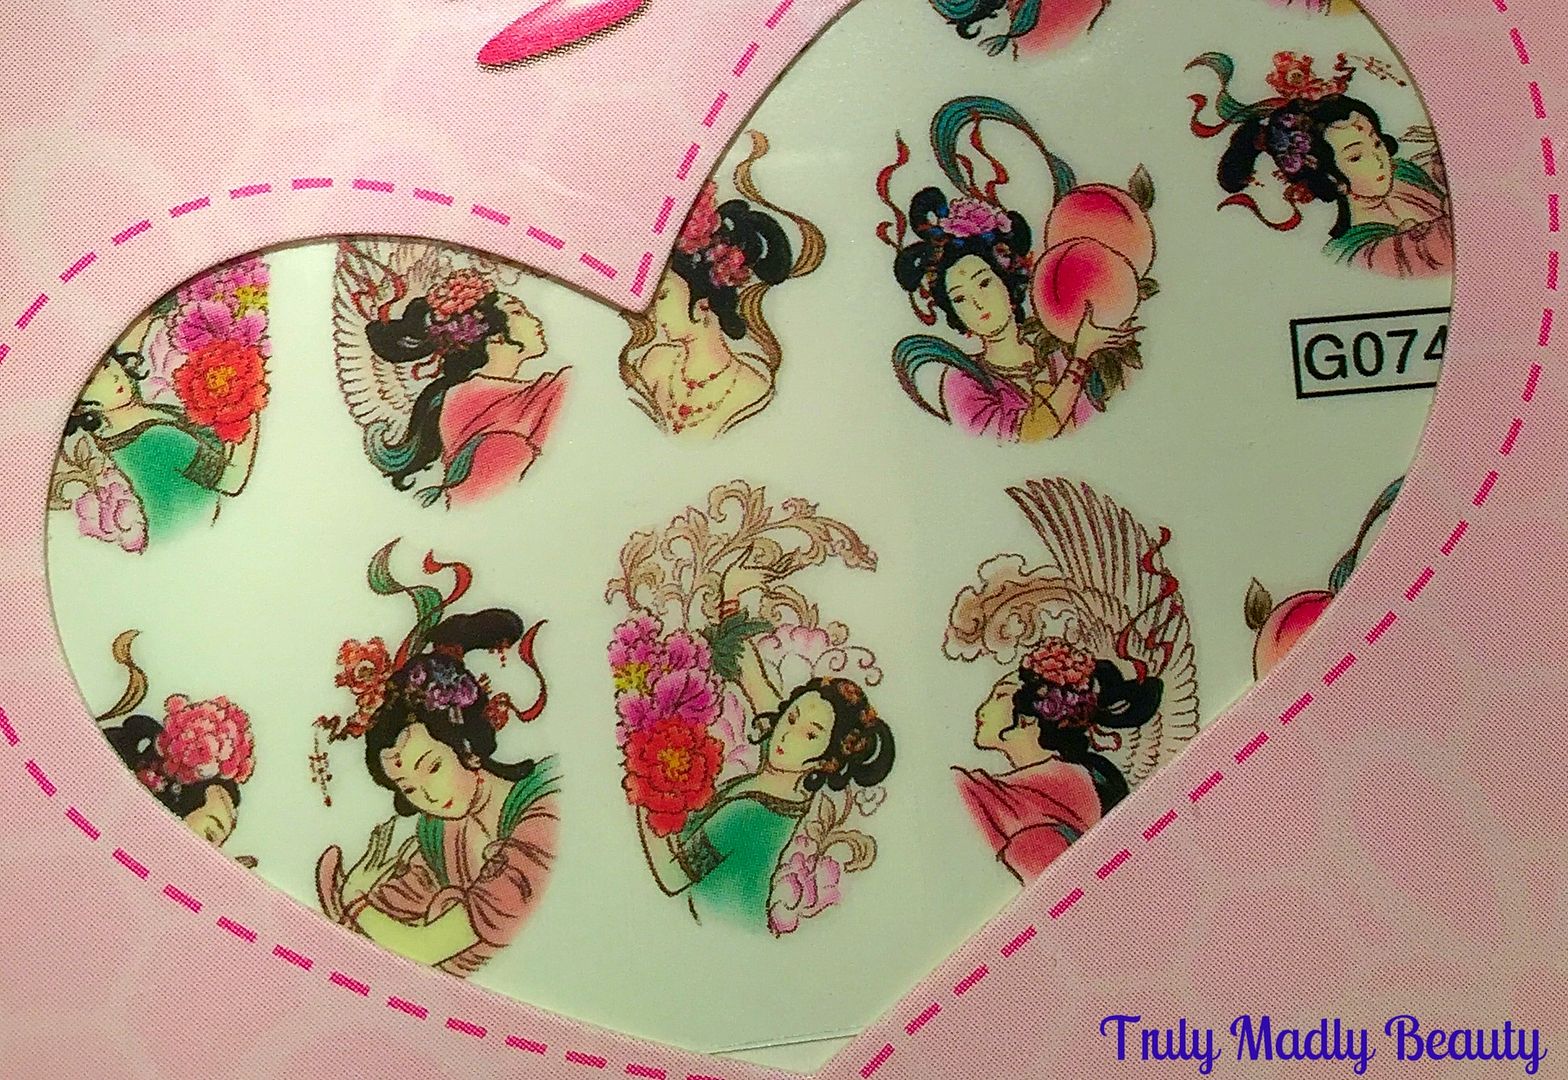
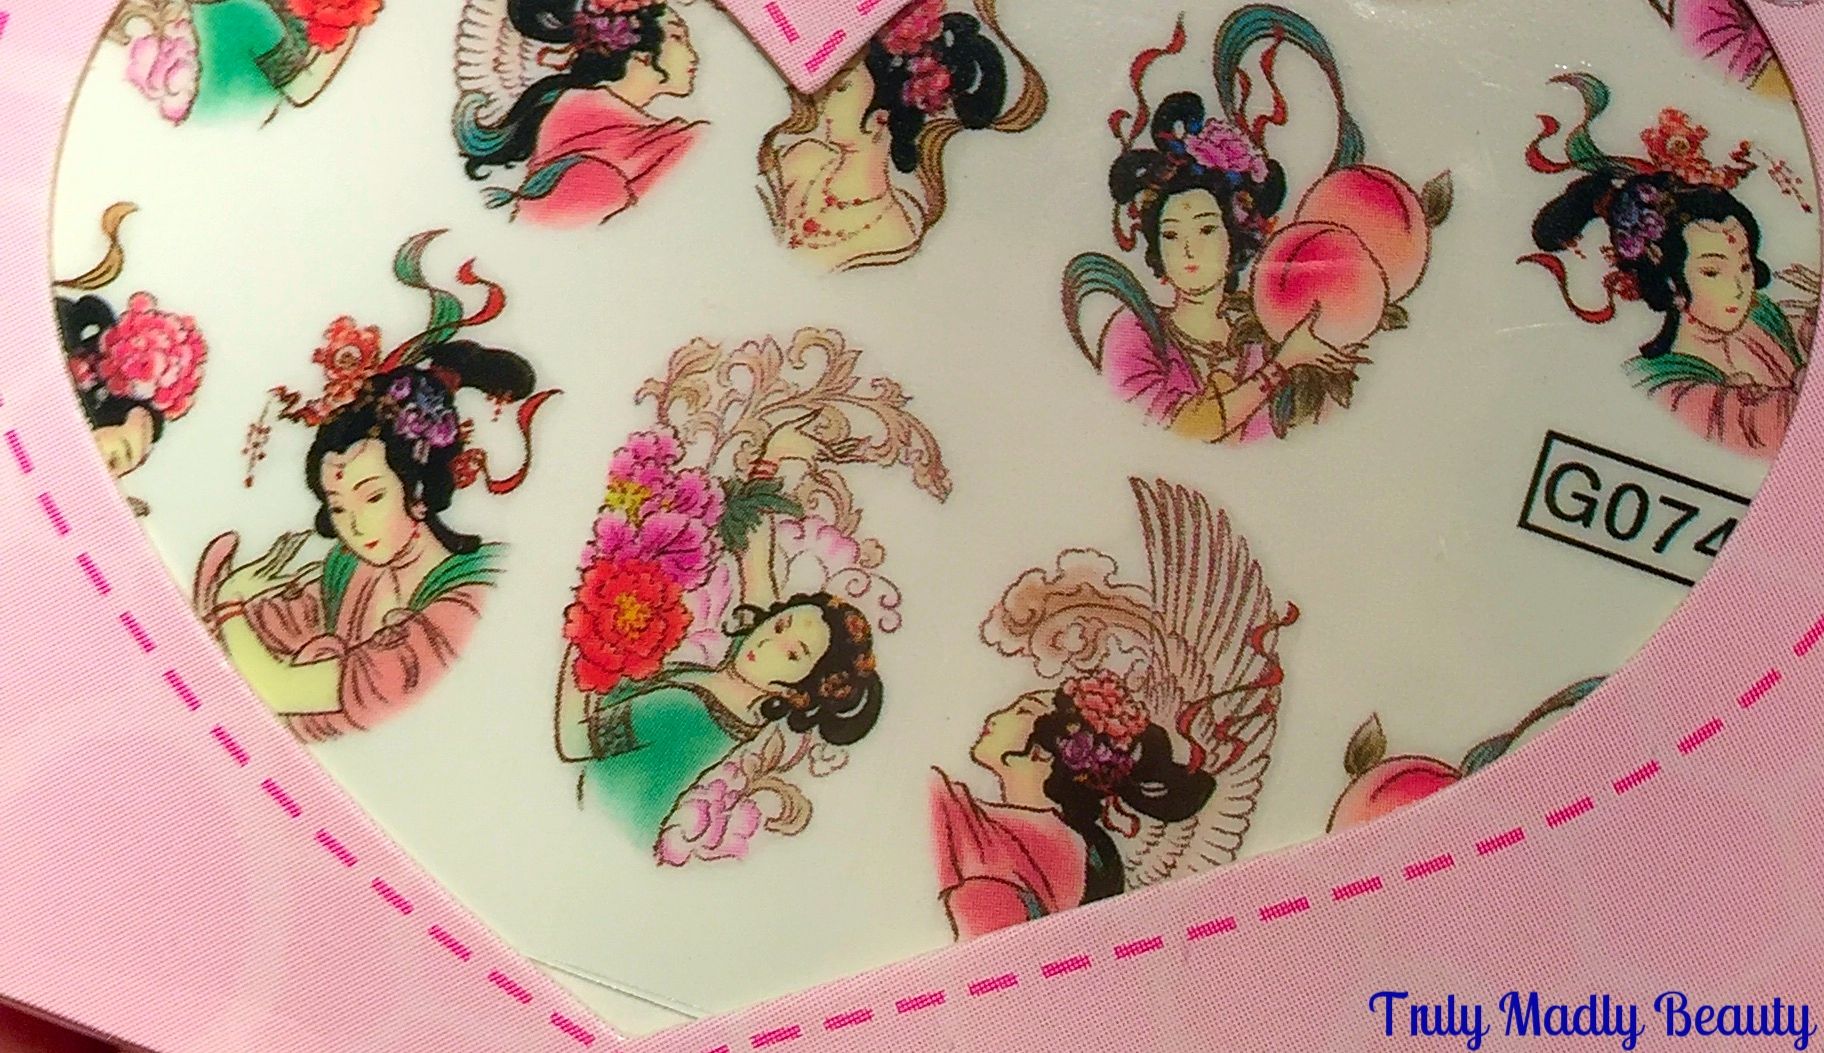
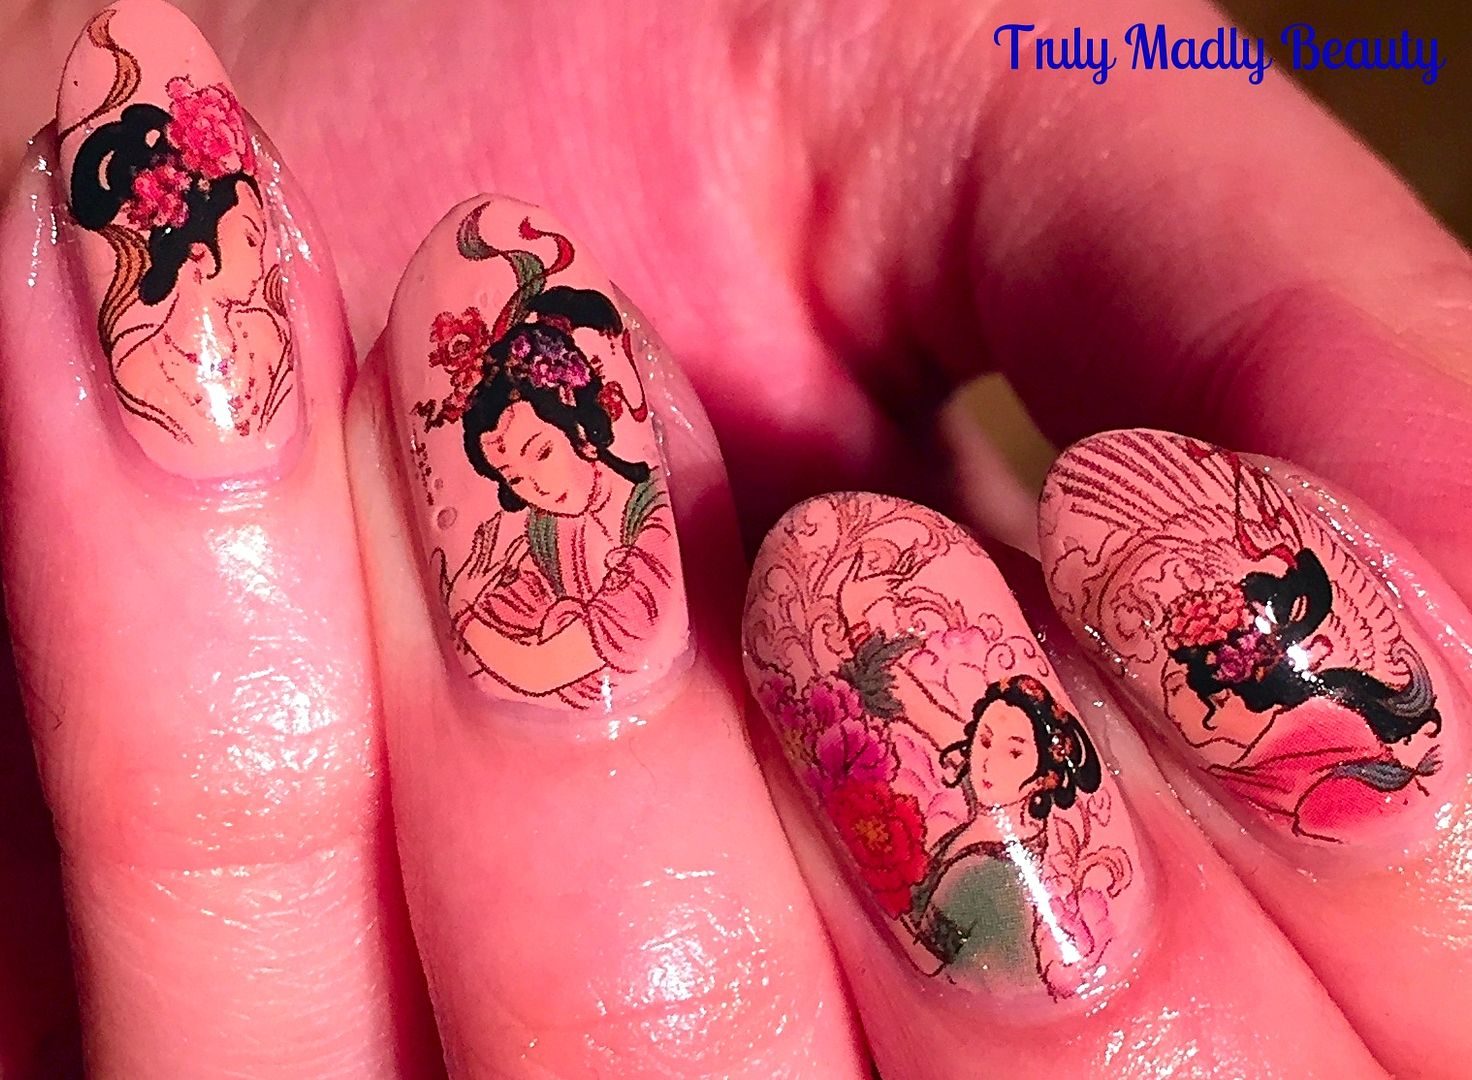
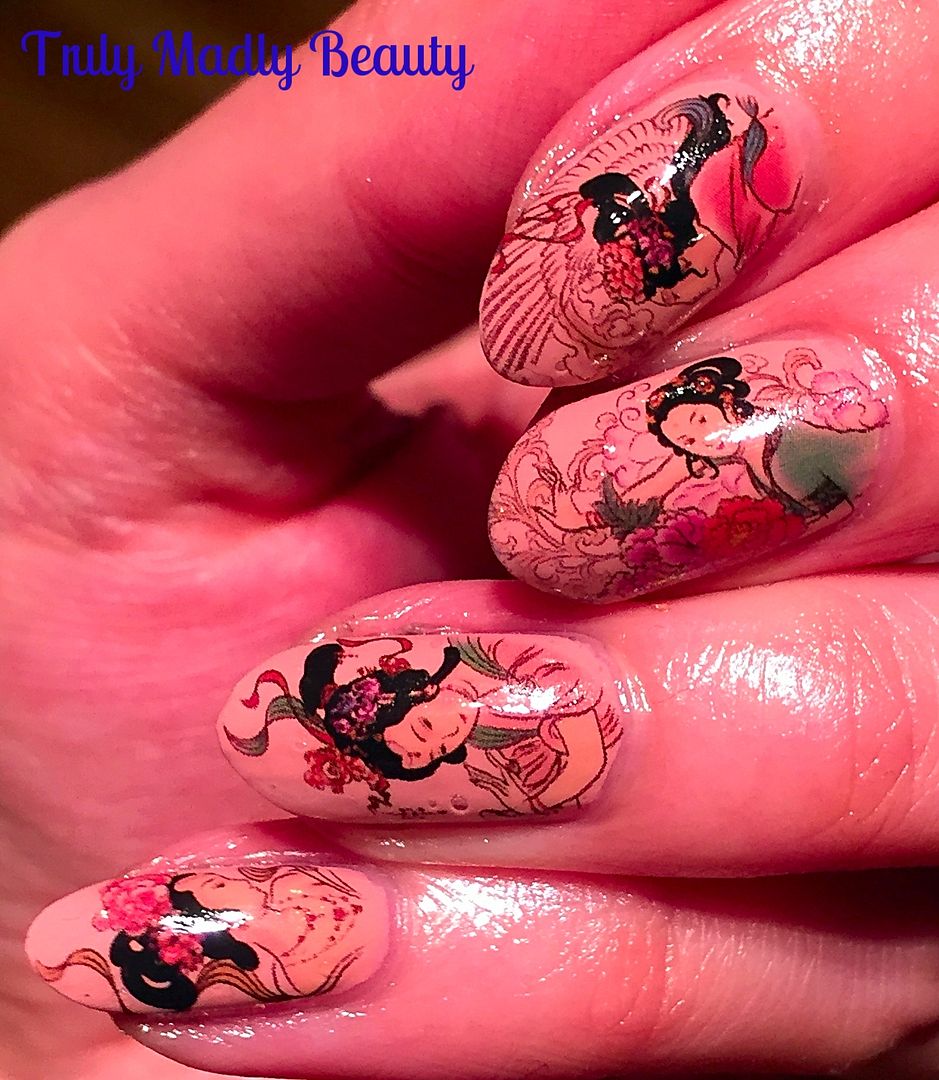
On a recent little haul I picked up some of the Geisha nail decals that I'd had my eye on for ages, I mean how could I not, how beautiful are they?


Depicting pretty painted images of the stunning Geisha ladies, the design is so intricate & beautiful, I couldn't stop staring at them & was eager to get them on! 


I wanted to place these on a nude base to really show them off so applied a couple of coats this Cynthia Rowley nameless biscuit toned nude creme.


Your polish needs to be completely dry before applying the decals so you can always apply them the next day or just use a speed dry topcoat like I did with my one true topcoat love CND Air Dry as I have no patience!


Now the fun part of adding the decals, its best to have everything in front of you so have your sheet of decals, scissors, tweezers, kitchen towel & a cup of water at the ready & do one nail at a time. I wanted to do a step by step pictorial for you but it was evening & the lighting was bad (blogger problems) so I'll just explain each step!


Pick which image you want, cut out & using the tweezers, dip the decal into the water for about 10 seconds. Lift out the decal & pat on to the kitchen towel to get rid of excess water. 


Then using your finger, push at the image & your decal should slide right off the backing card, if not then just place back into the water for a few more seconds.


Again using the tweezers place the image on to the nail, sliding back & forth until your happy with the placement, then using the towel, press firmly to flatten any creases. If the decal is a bit big, trim with scissors & if you find some of the image going over the nail onto the skin then you can also remove this with acetone & a brush to clean around the edges.


Do the same on each nail & once all ten are done, seal everything with a nice thick slick of topcoat to not only protect the design but for a lovely glossy finish.

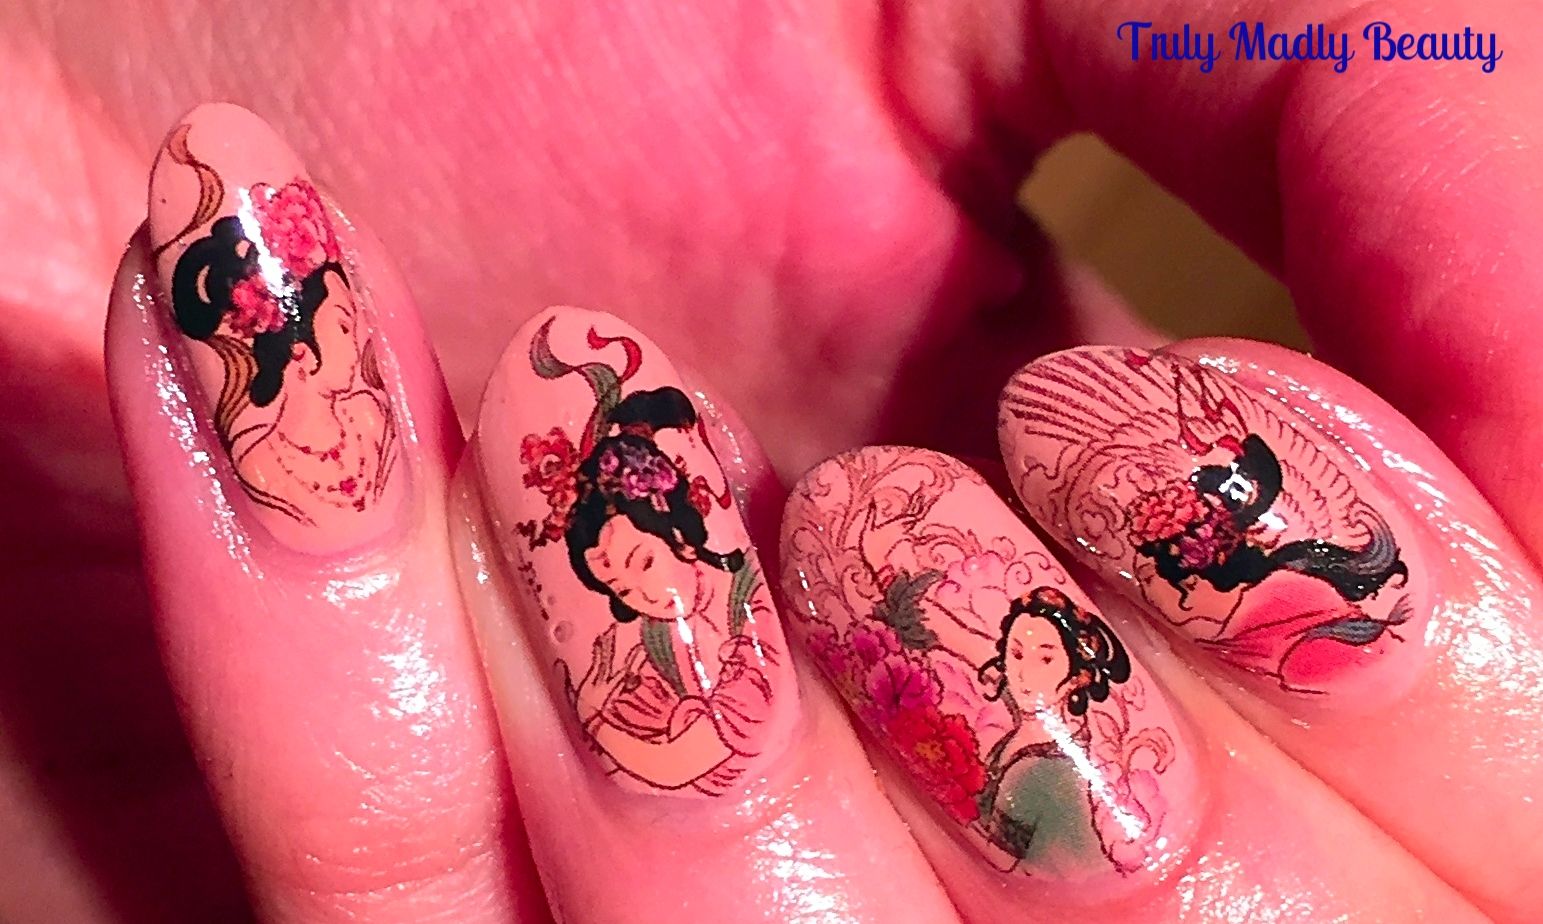
And the finished look you are left with is a stunning,  gorgeous intricate manicure design that looks like it took hours but twas done in literally minutes! I will definitely be getting more of these beauties & you can to...just head on over to Born Pretty Store now beauts.

Thanks as always for reading!

Lotsa love to ya!


9.13.2016

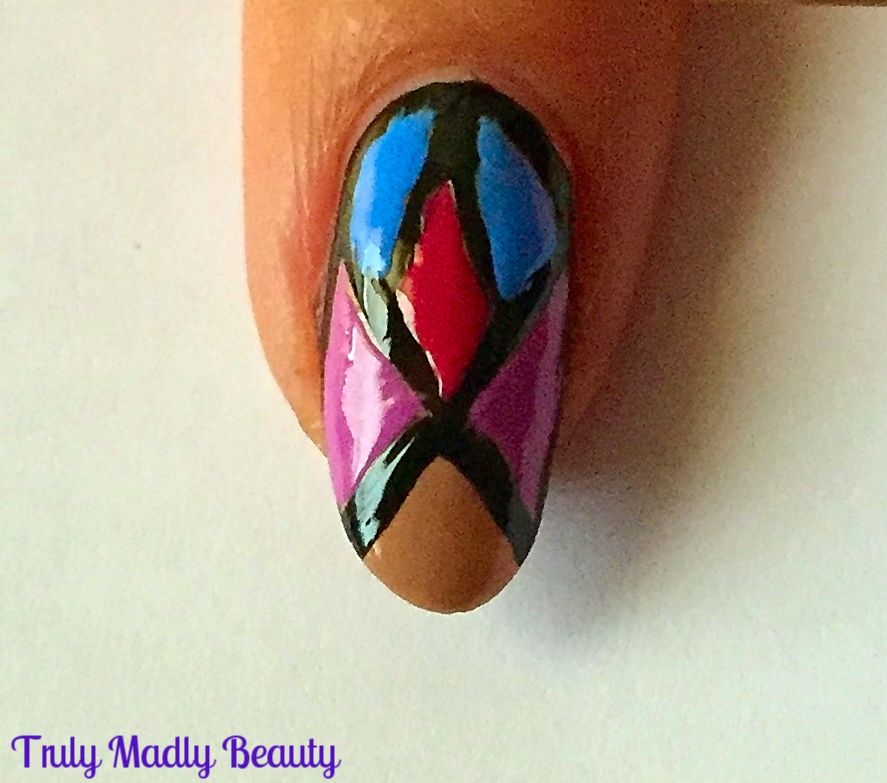
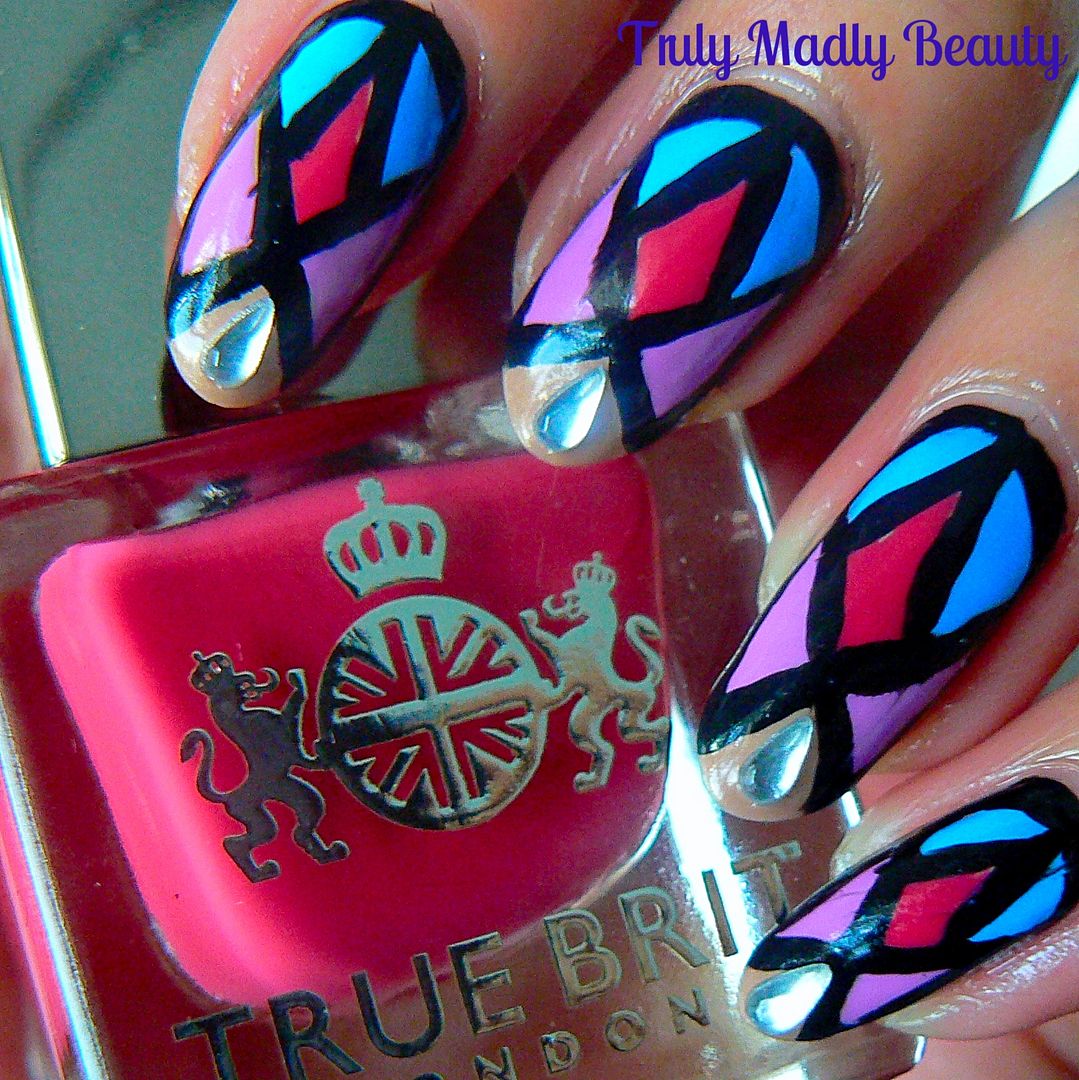
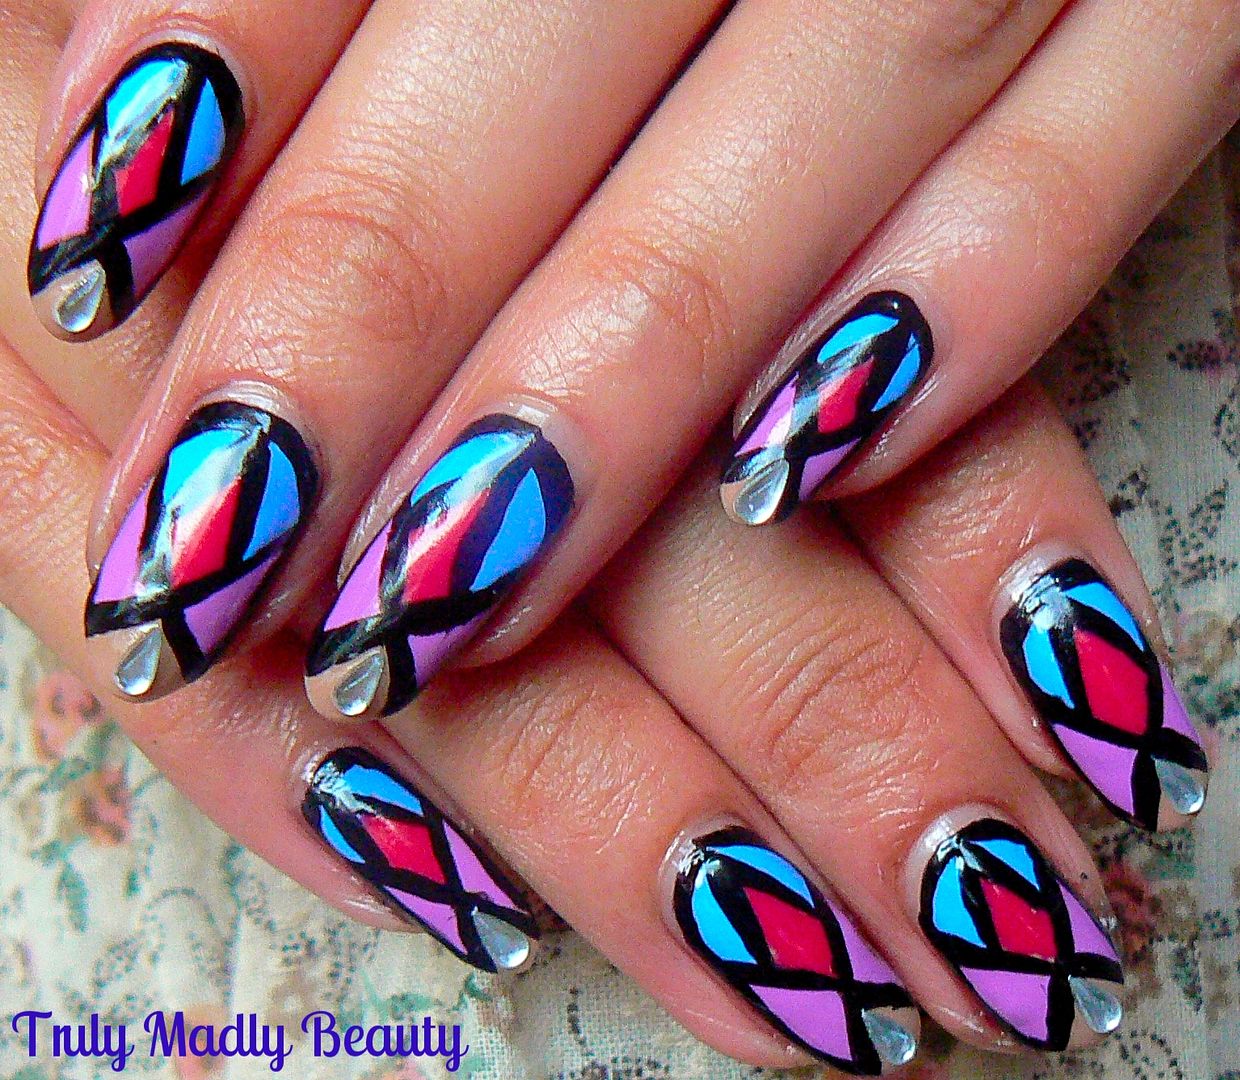
Block Colour Stained Glass Nail Tutorial ft True Brit London!

Hello there lovely readers!

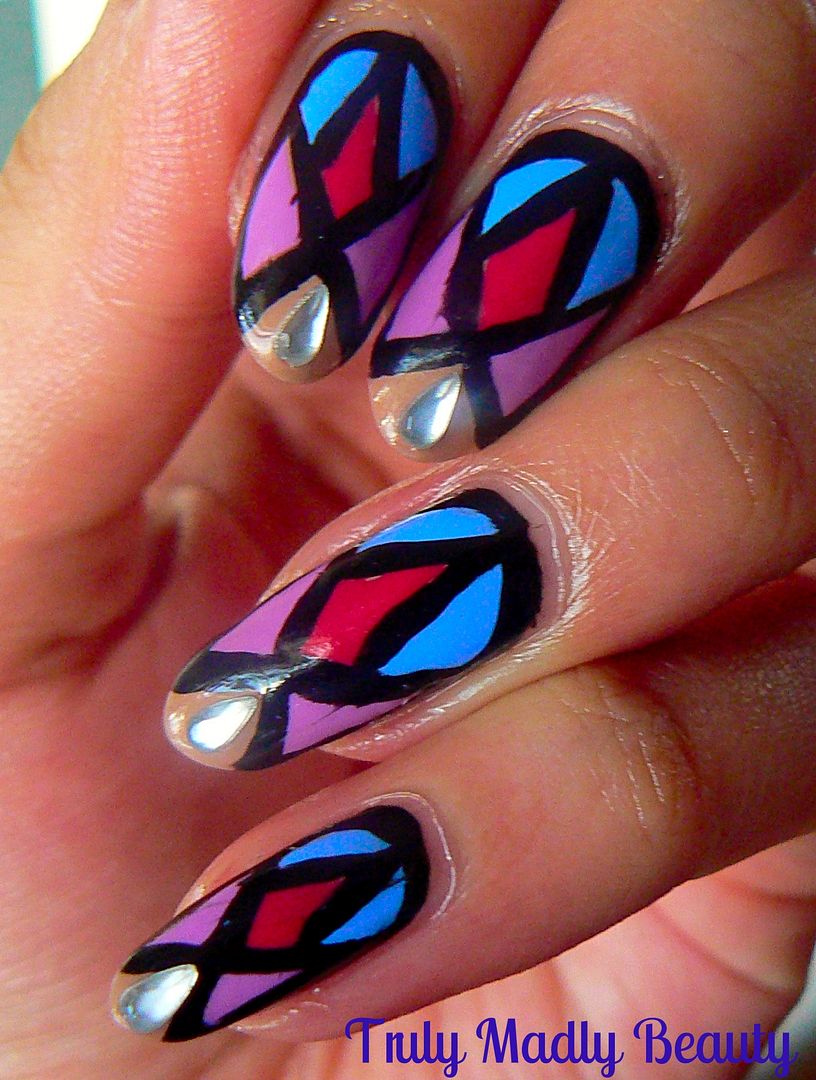
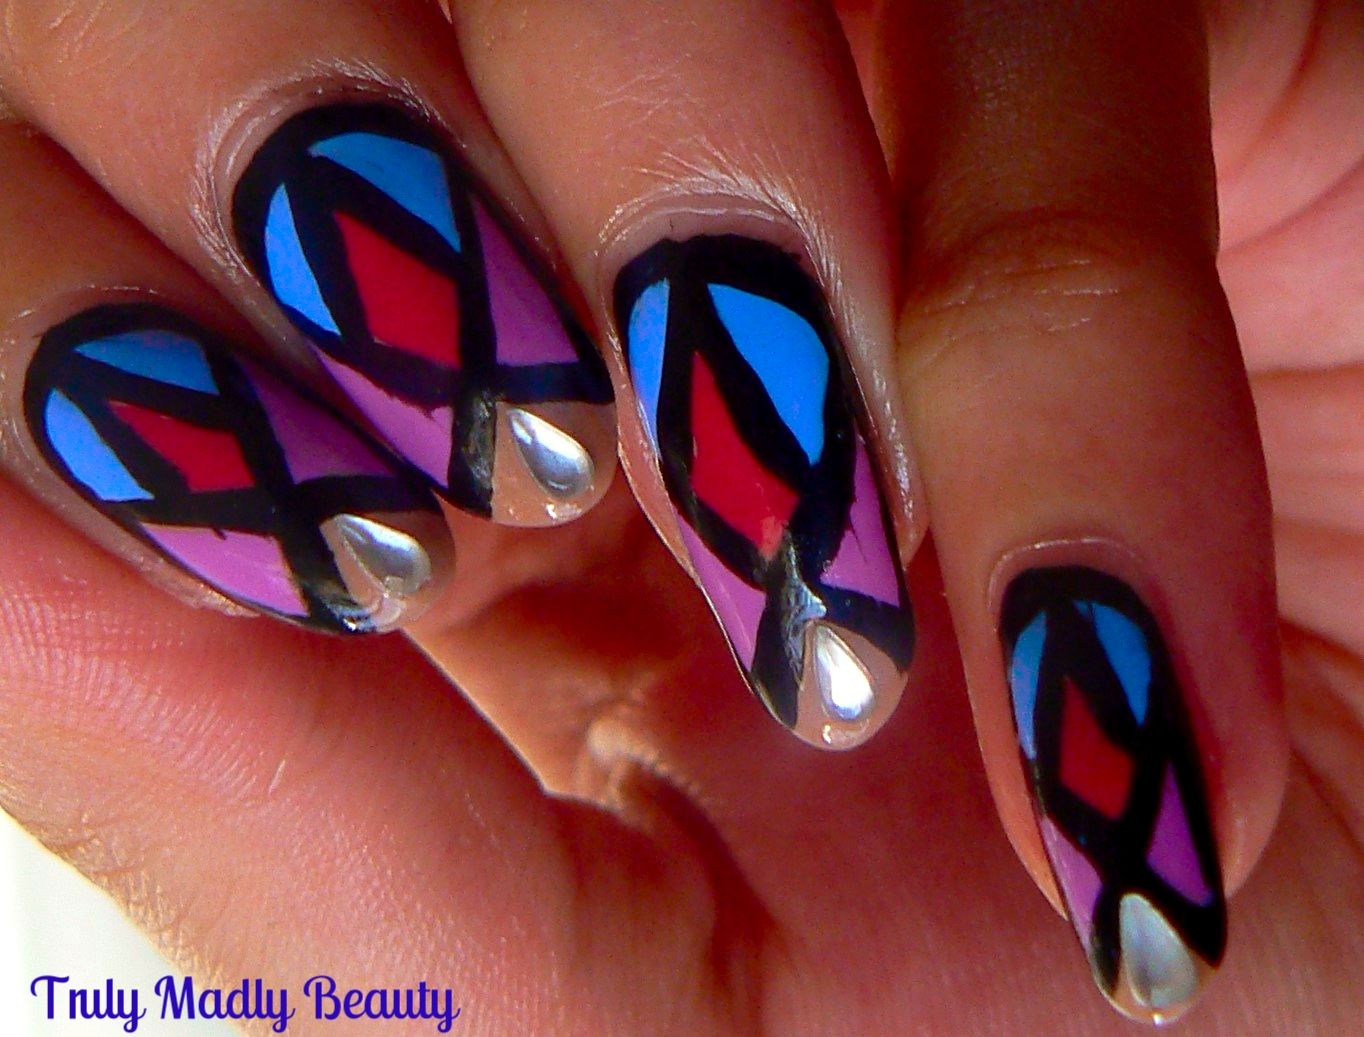
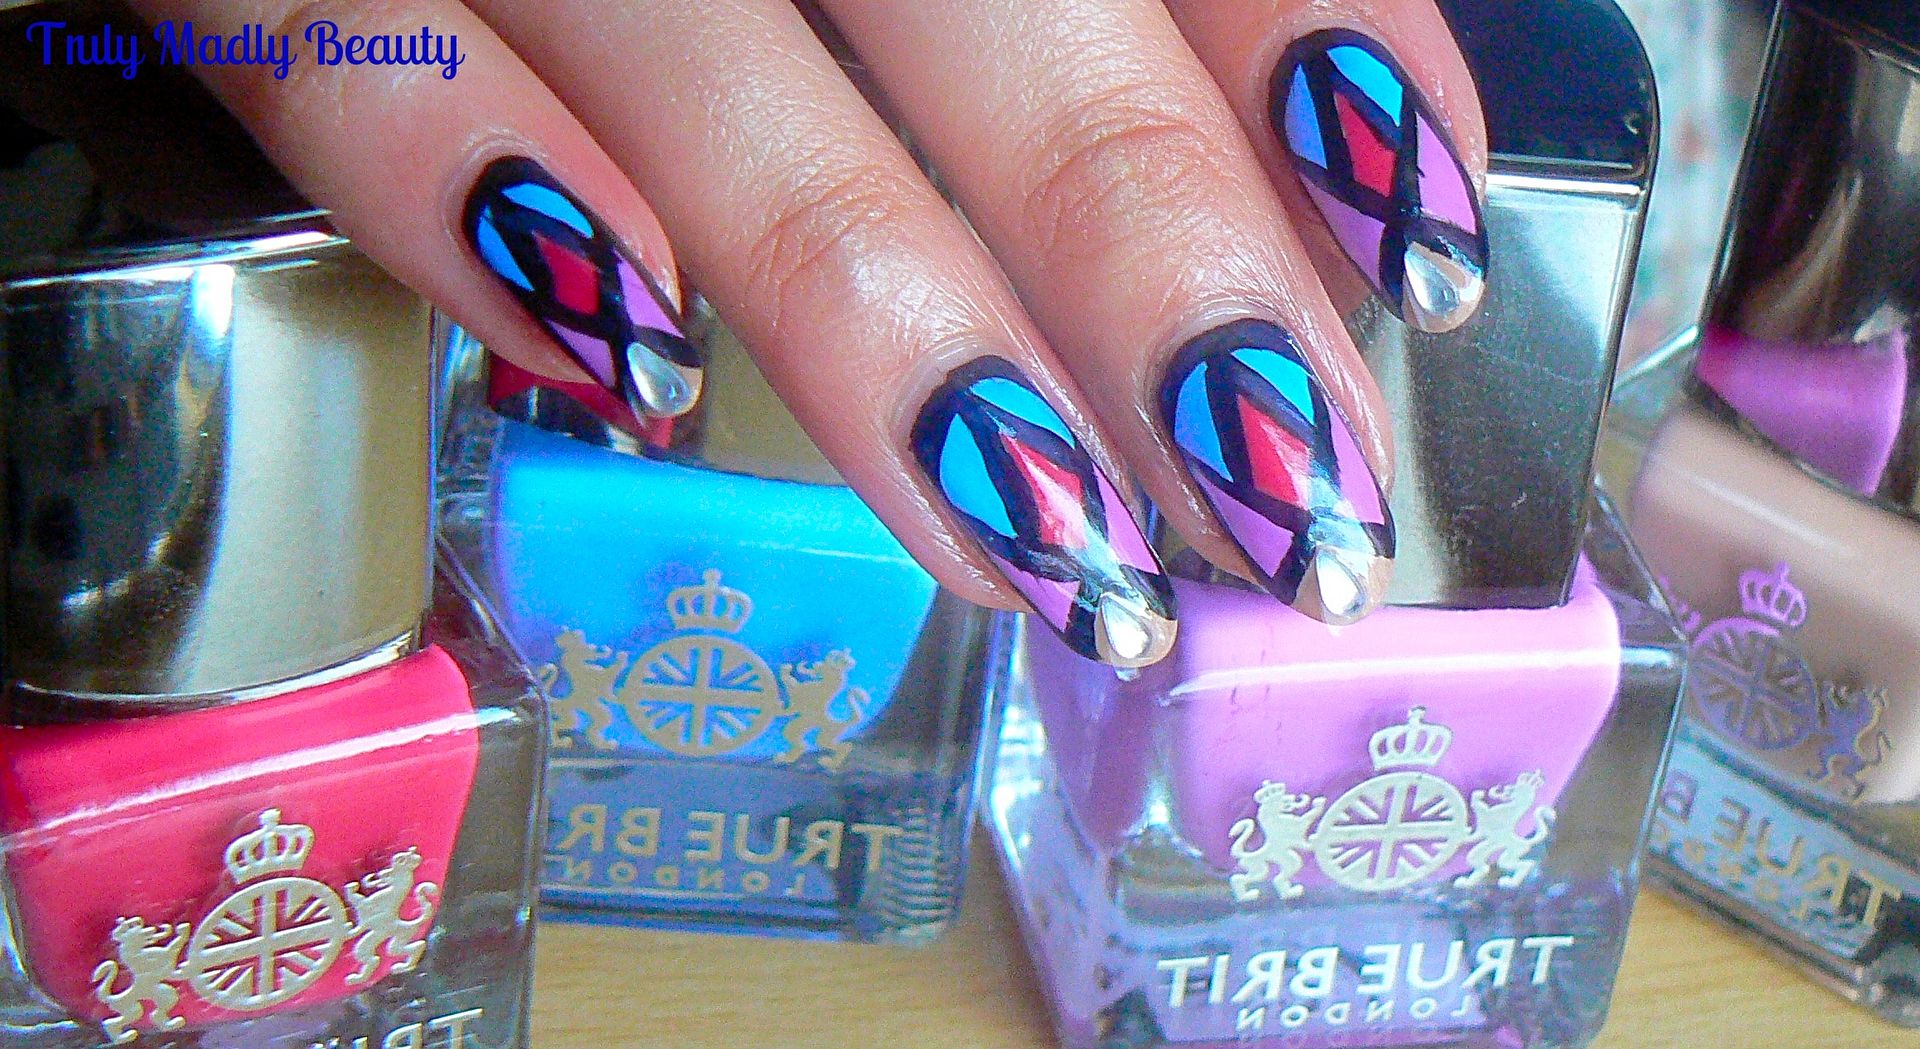
On the hunt for some nail-spiration recently I found myself looking at different types of stained glass nail art looks as its a design I've been wanting to try for ages. After having a play this is the finished look I came up with 


Rather than using foils or shards that everyone's been going gaga over, which does indeed look fabularse & I do wish to try at some point, I instead wanted to create a vibrant block colour design using cream polishes & for this I reached for some of my favourite True Brit London shades to achieve it.


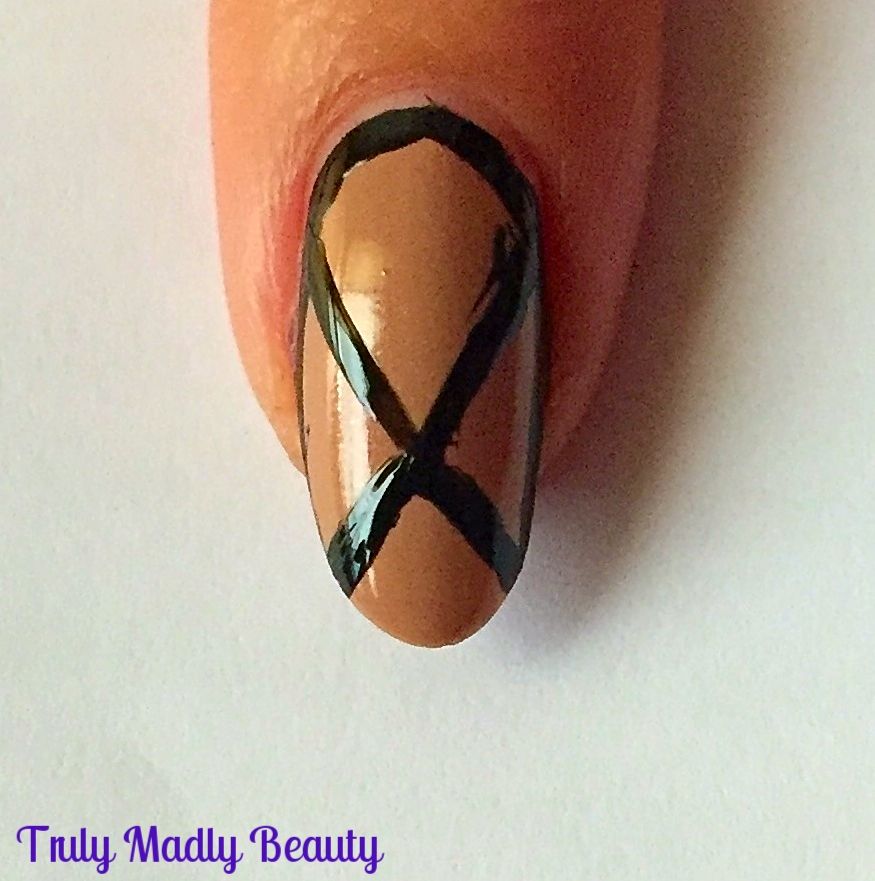
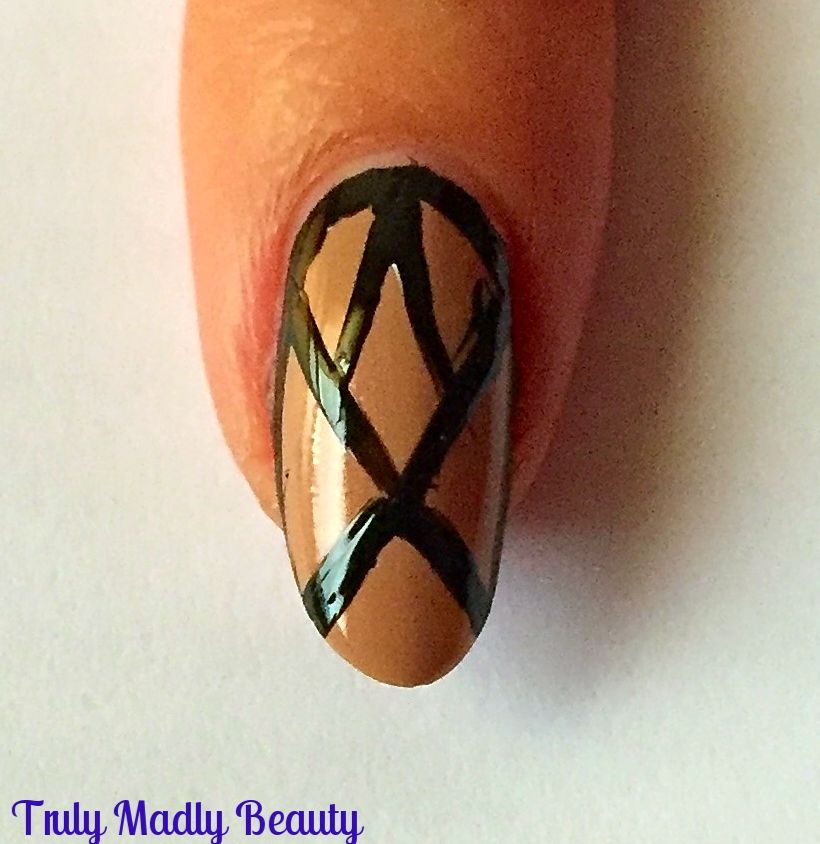
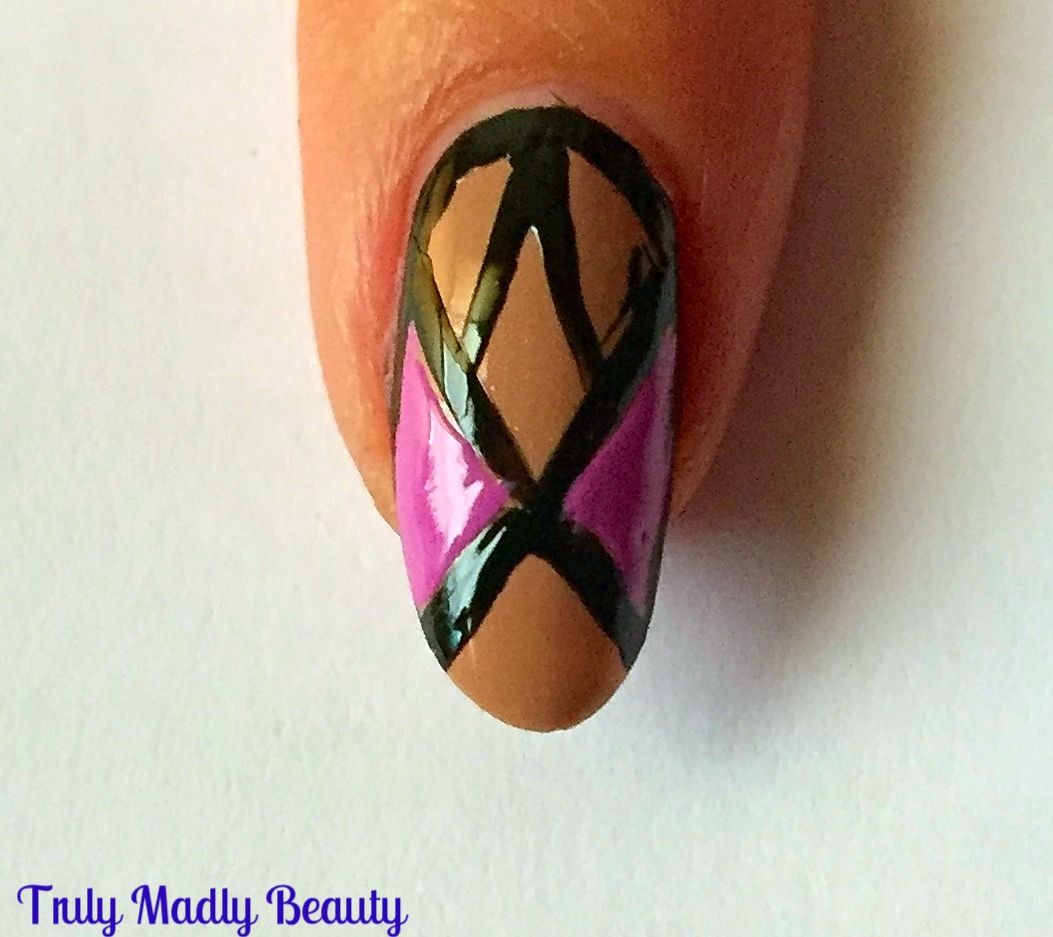
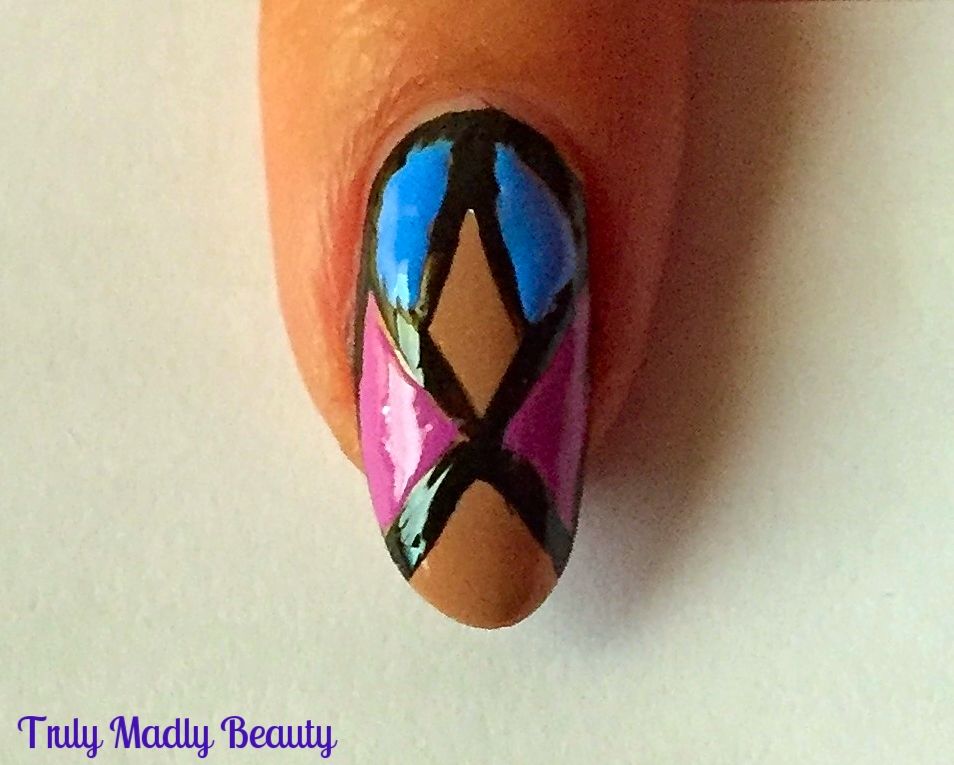
Creating this look is super easy too & to show you how you can create these yourself I've done a step by step pictorial showing each of the stages for you to get your stained glass look nails!


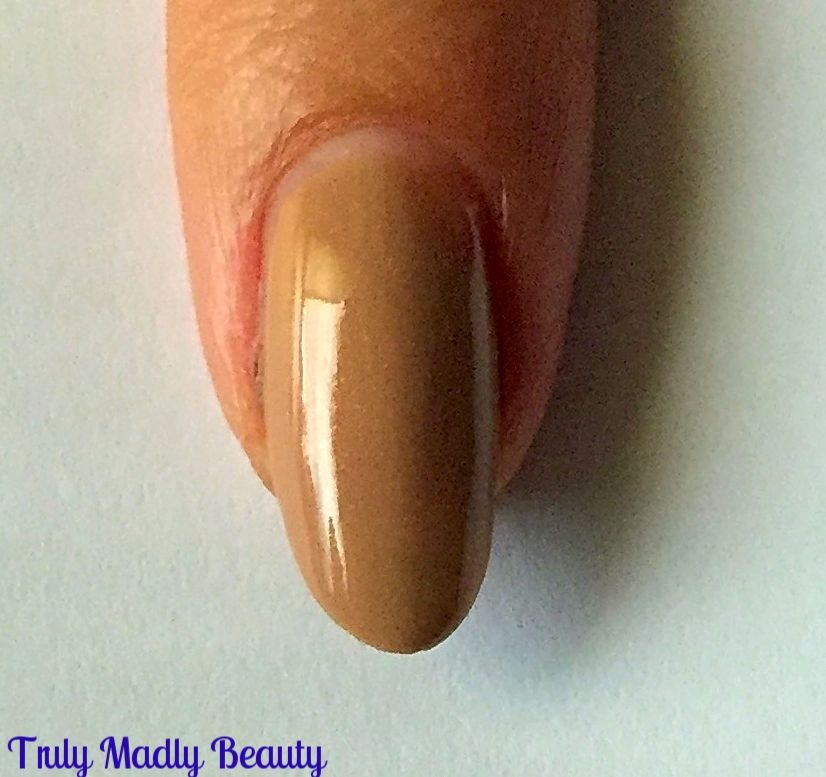
Start off with your base colour, as mentioned I've used only True Brit London polishes to create this look, here I've used The Summer House which is the perfect nude creme.


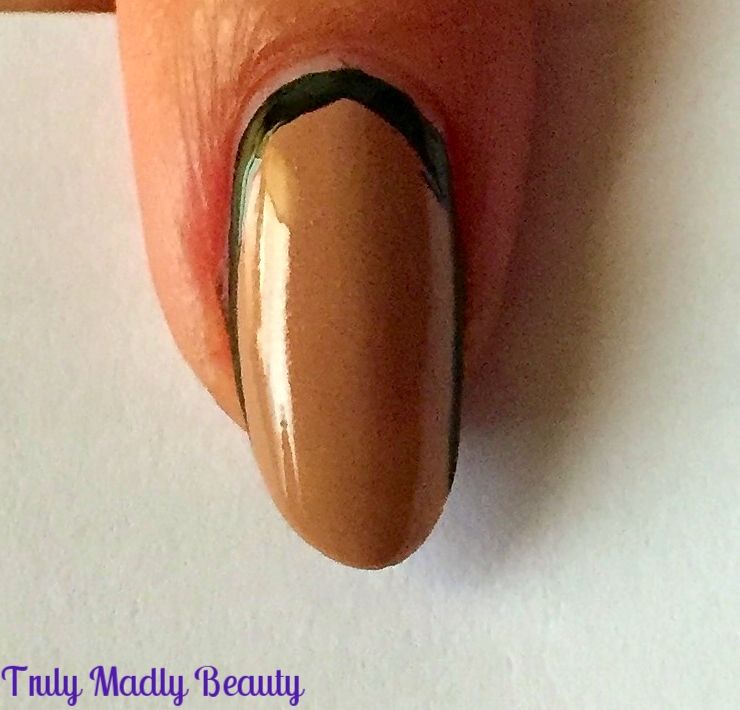
Next grabbing a nail art pen in black or a thin brush with some black polish, apply a thin black outline along the edge of the nail.


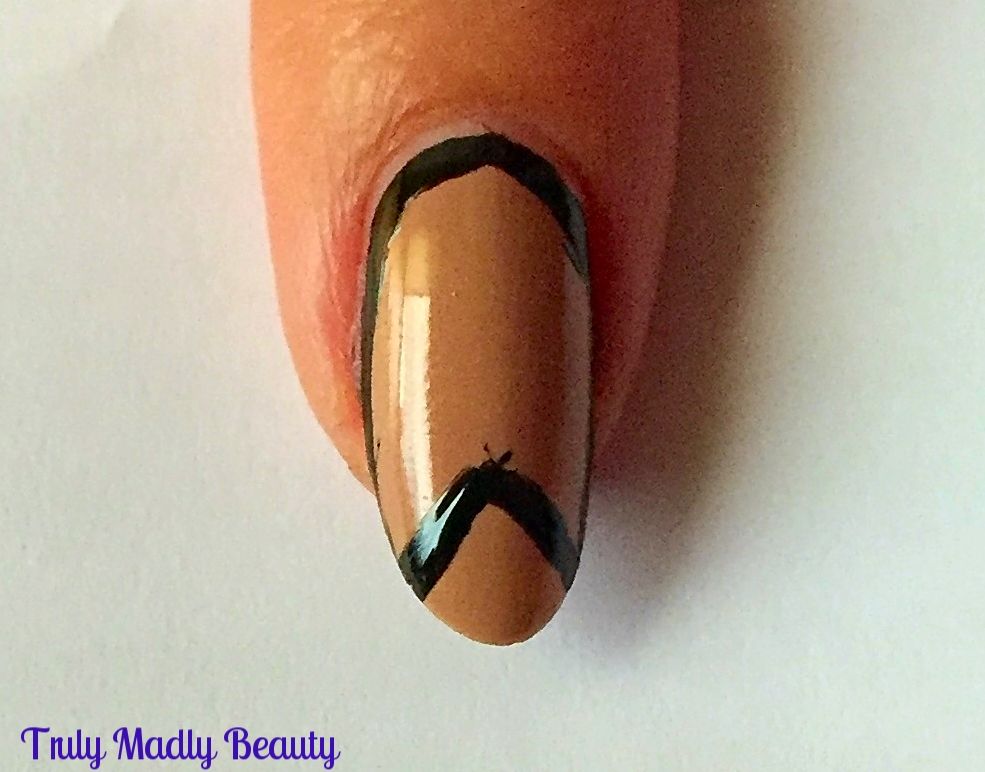
Now, still using your brush & black polish, apply two small angled lines on the tip end of the nail, coming to meet in the middle in a triangle shape.


Then from the top point, continue with the black line, going in both directions to the bottom end of the nail, so you have a cross design that is longer on the top & shorter at the bottom like shown.


On the larger side of your cross, add on two more angled lines inside the space, meeting in a point at the cuticle like shown. This is your stencil for the stained glass design & its in all the triangle spaces you've just created where we can start adding some colour!


Starting with the pretty purple toned pink True Brit London 'Coat Of Arms', I used a thin nail art brush to apply the polish into the two side triangles


Next I reached for the beautiful baby blue creme by True Brit London 'British Blue' & applied this shade in the two bottom triangles


Finally I used pretty red True Brit London 'Portobello' to fill in the centre triangle, leaving the tip alone as I still wanted some of that lovely nude to show. For a final touch I add on a pretty glass rhinestone which I felt really enhanced the stained glass look!


Once you filled in all your colours, its time to just go over the black lines one more time, as some of the coloured polish may go over & you want that neat sharp finish.


Leave to dry for a few minutes before sealing with topcoat to avoid your black polish dragging & ruining all your work, which as you can see I was STILL a bit impatient with (whoopsie) & you're done!


Hope you like this design dolls, I definitely want to try using foils or shimmers for a true stained glass look next time! FYI you can get 10% off True Brit London polishes using my code TRULY10 ;) Thanks as always for reading! 

Lotsa love to ya!


8.30.2016

NOTD - Art Deco Nails!

Hello there lovely readers!

Hope you had a lovely bank holiday weekend? Yay for a shortened working week!

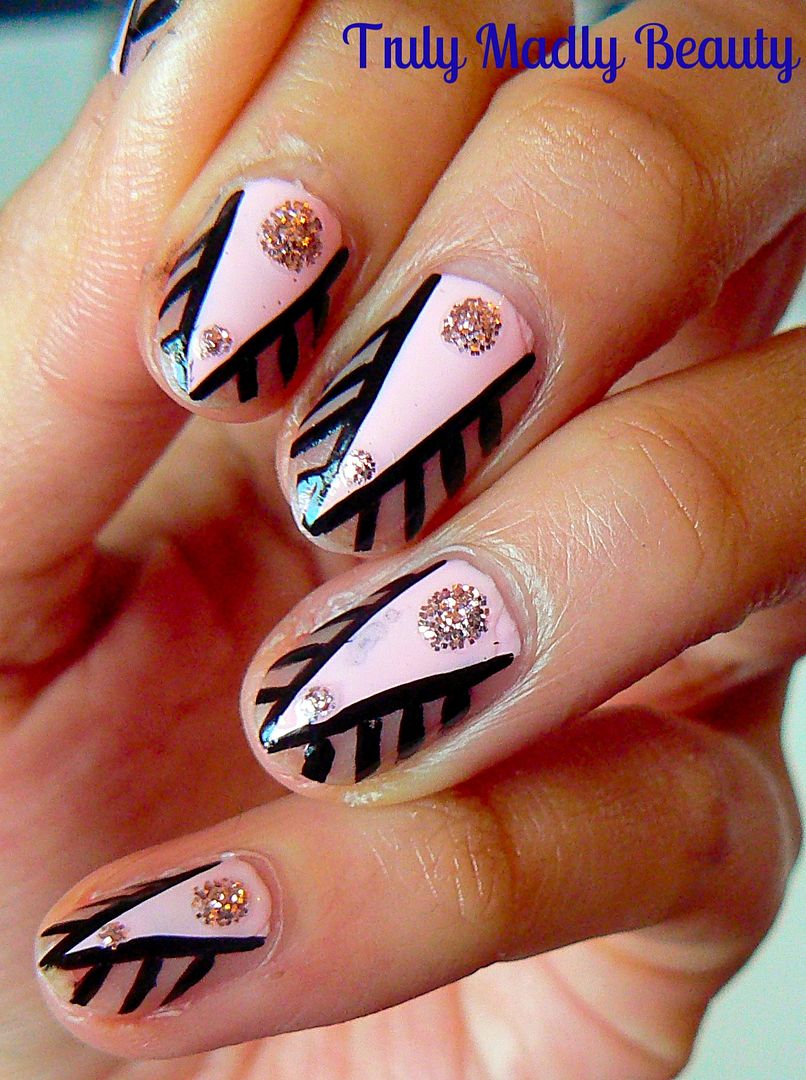
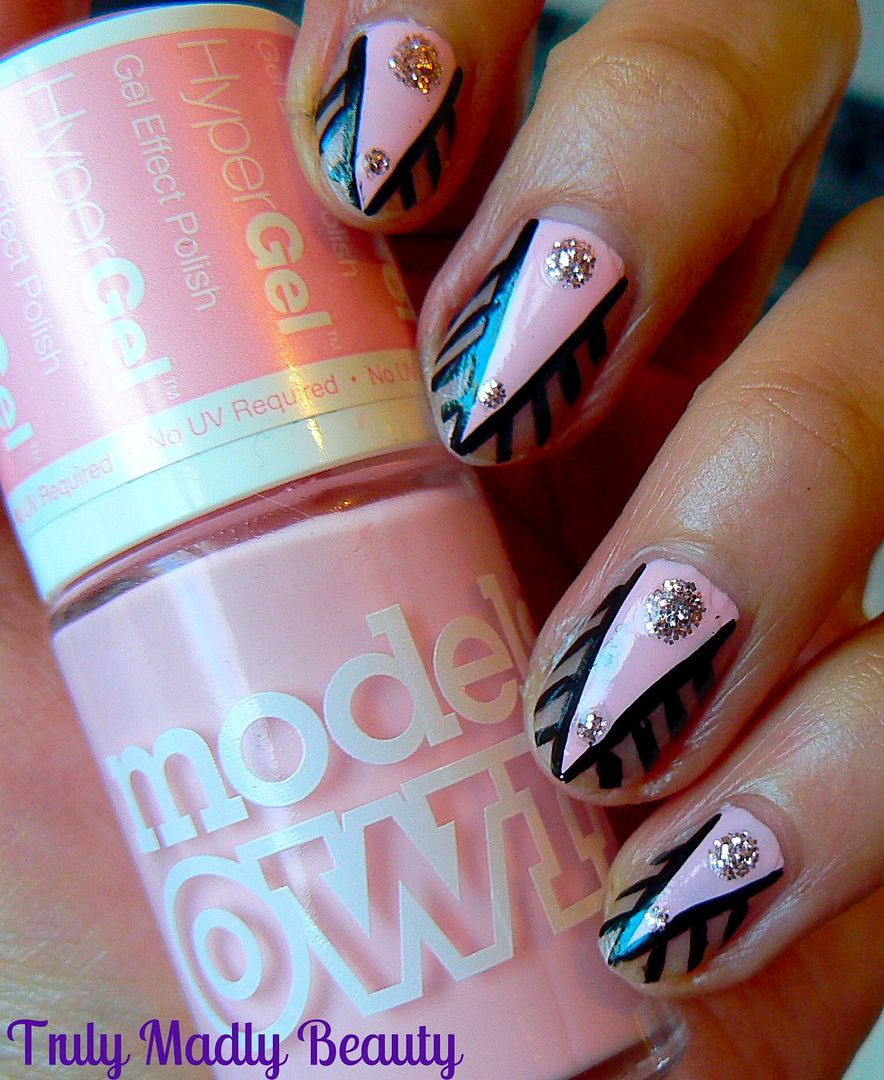
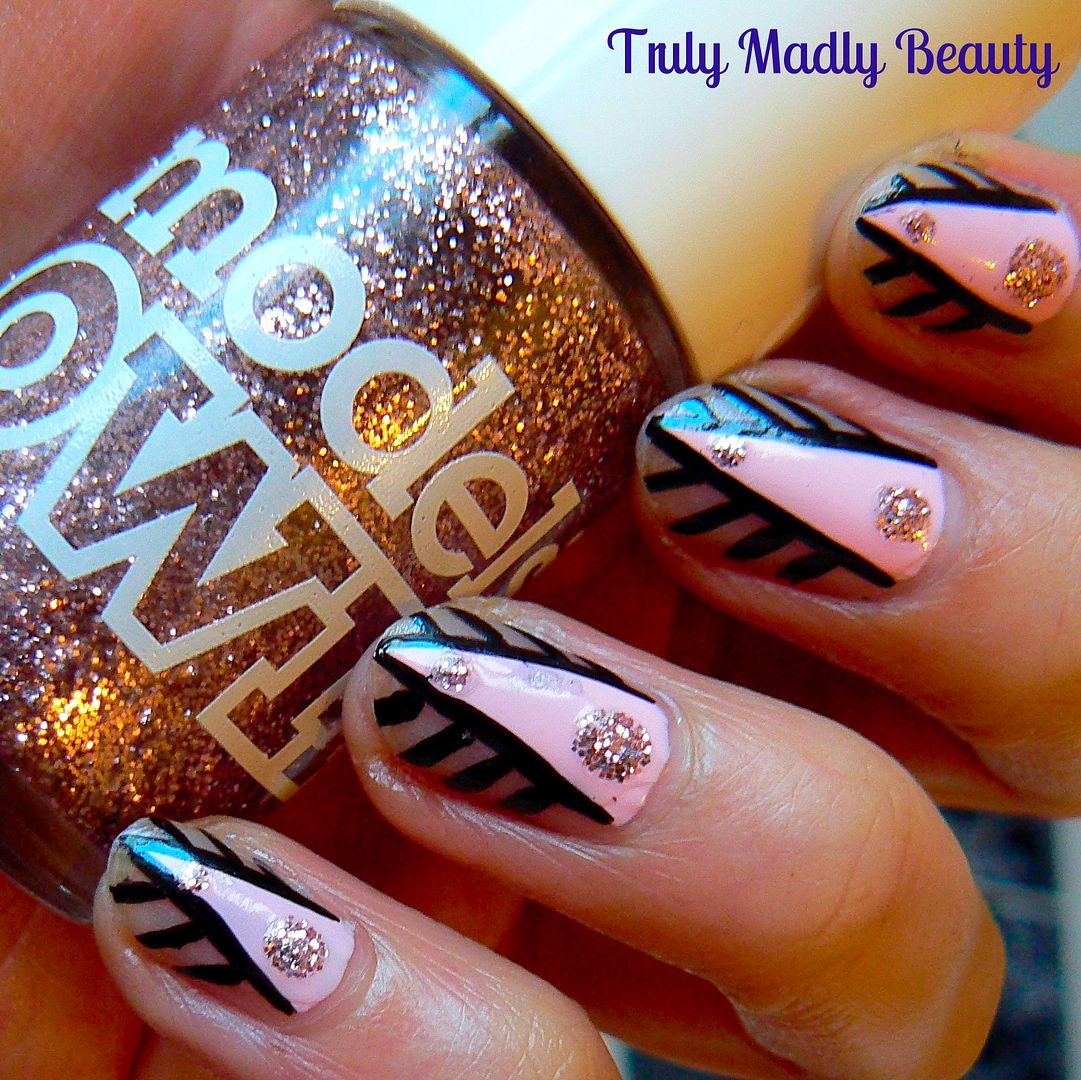
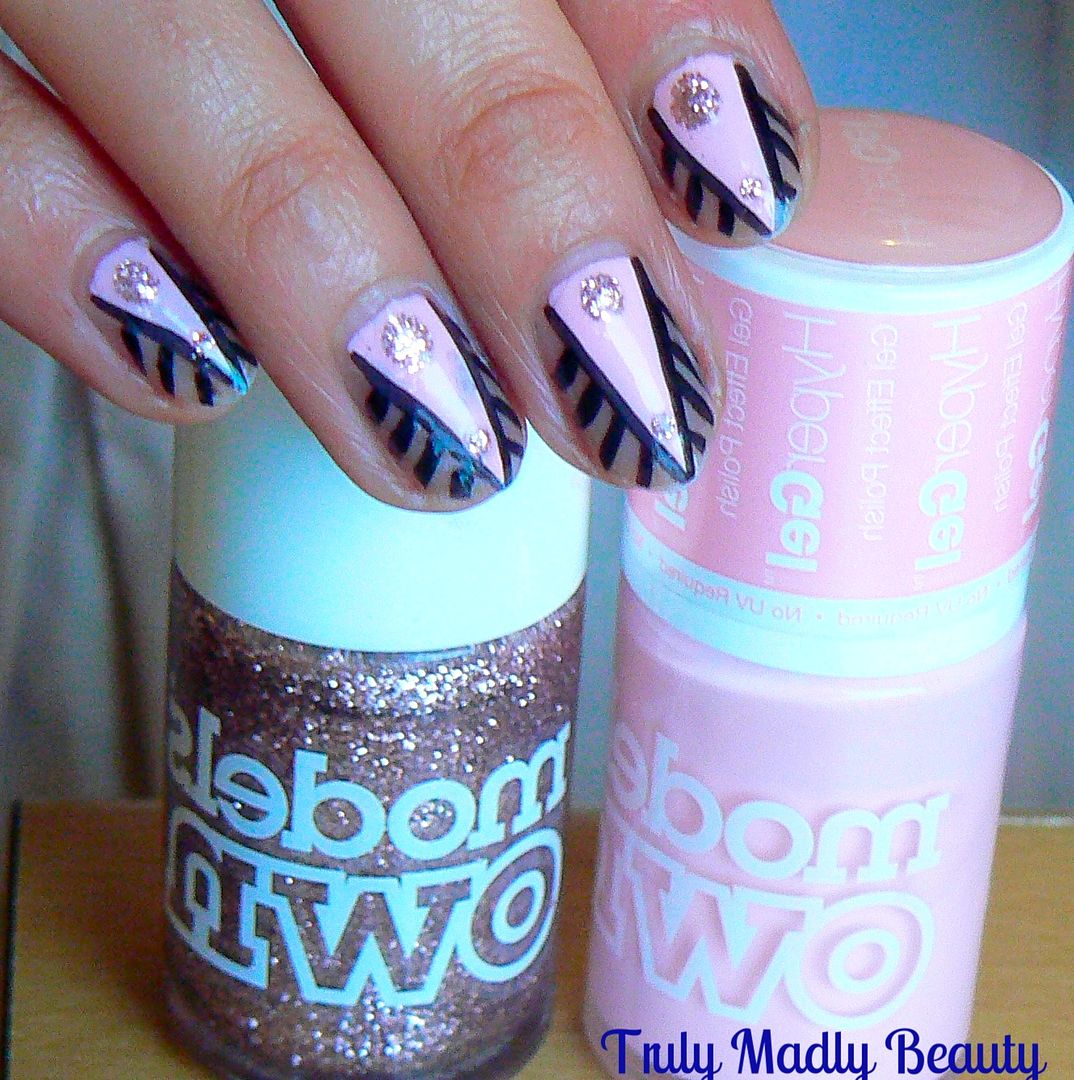
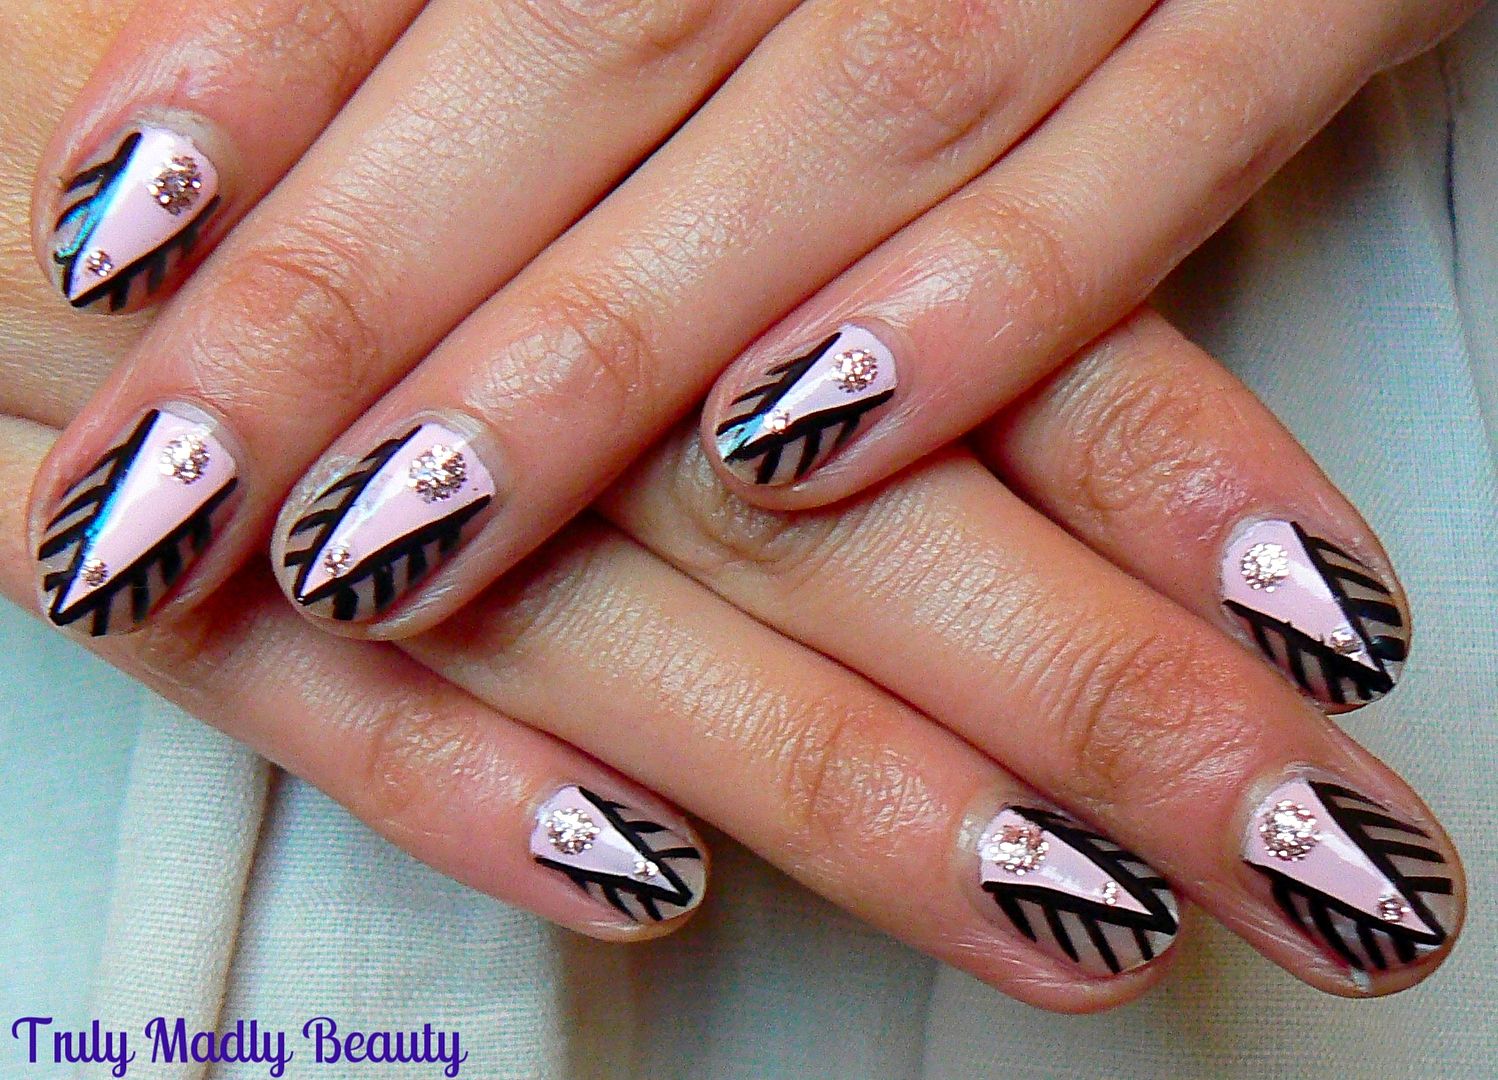
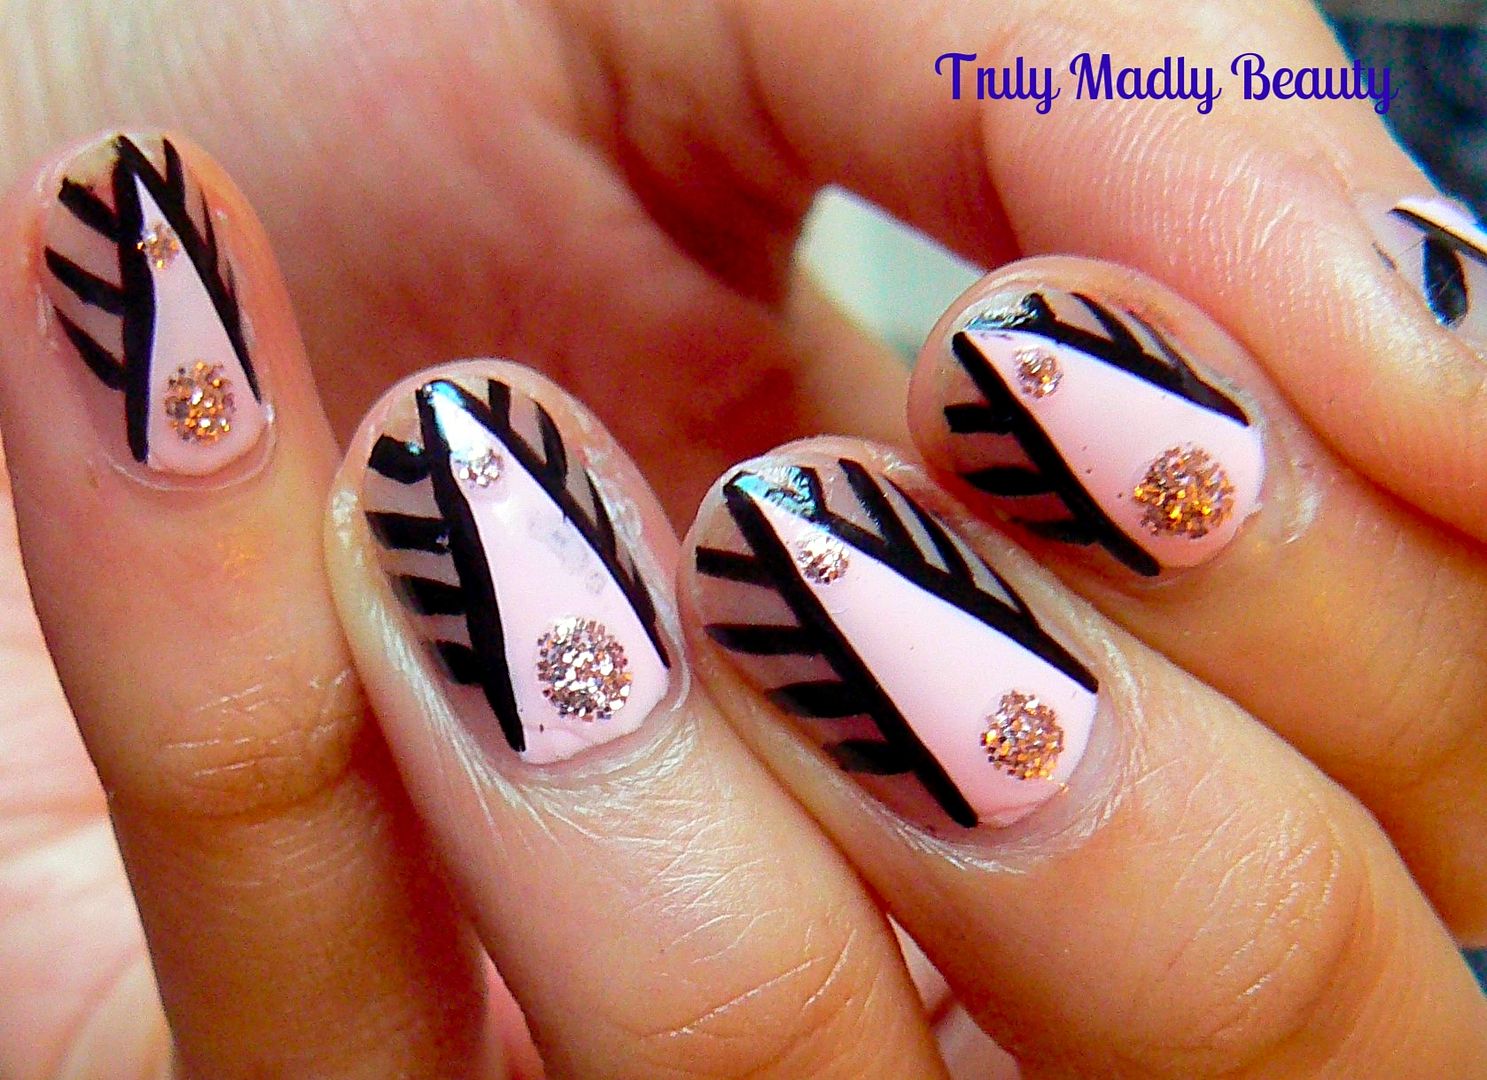
I seem to be having a phase at the moment & find myself reaching for the pink polishes more of late! I do that sometimes...but you really can't beat a pretty pink mani can you? If your in the mood for pink nails but after something a bit edgy & different then why not try this Art Deco design that is so much simpler to do than it looks!


To start you need your pink, here I've used Models Own HyperGel in Pink Veneer, a really lovely marshmallow pink creme. To create the triangle shape I used some square pieces of cellotape which you place on the nail, next to each other at an angle to create your guide.


Fill in your gap with polish & peel away the cellotape immediately whilst the polish is still wet. Don't worry if your edges aren't completely sharp & clean as this will get covered.

Next, either using a black nail art pen or fine brush & black polish, start by applying a thin outline of black along the outer edge of your pointed pink triangle.


Once done, using the same brush/pen apply horizontal lines angled upwards along the bare space left on the nail, either side of the pink triangle starting from the top going all the way to the bottom, you should be able to squeeze in about four lines either side.


Reaching for my beloved Pink Fizz, gods I cannot express my adoration of this champagne rose glitter bomb, its definitely goes under the “if you only own ONE polish in your life then it must be THIS” category.


I finished the design with a couple of wee dots of Pink Fizz, one at the bottom & a smaller one at the top of my triangle using dotting tool.


Apply your obligatory topcoat & you are done! Told you it was easy eh? Thanks as always for reading!

Lotsa love to ya!


8.19.2016

Olympics 2016 TeamGB Nails!
Hello there lovely readers,

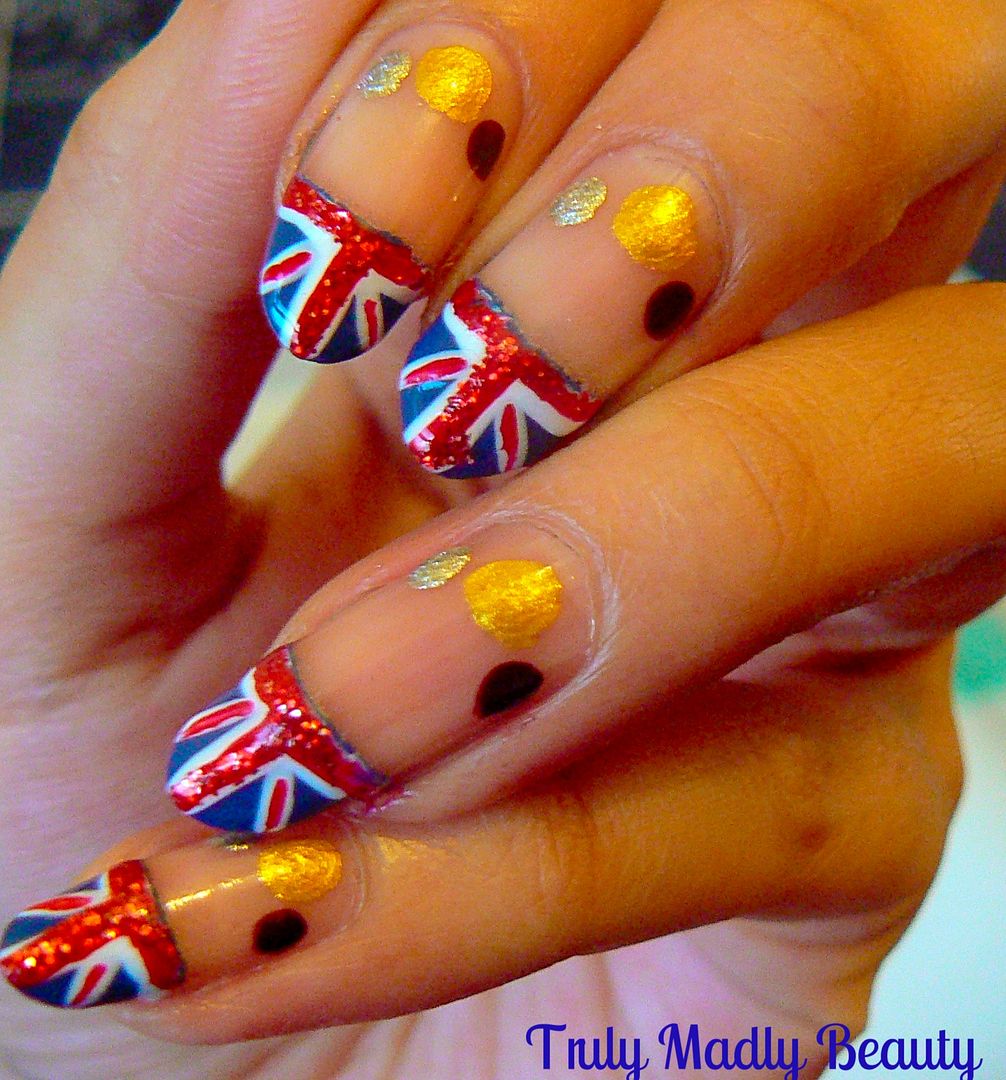
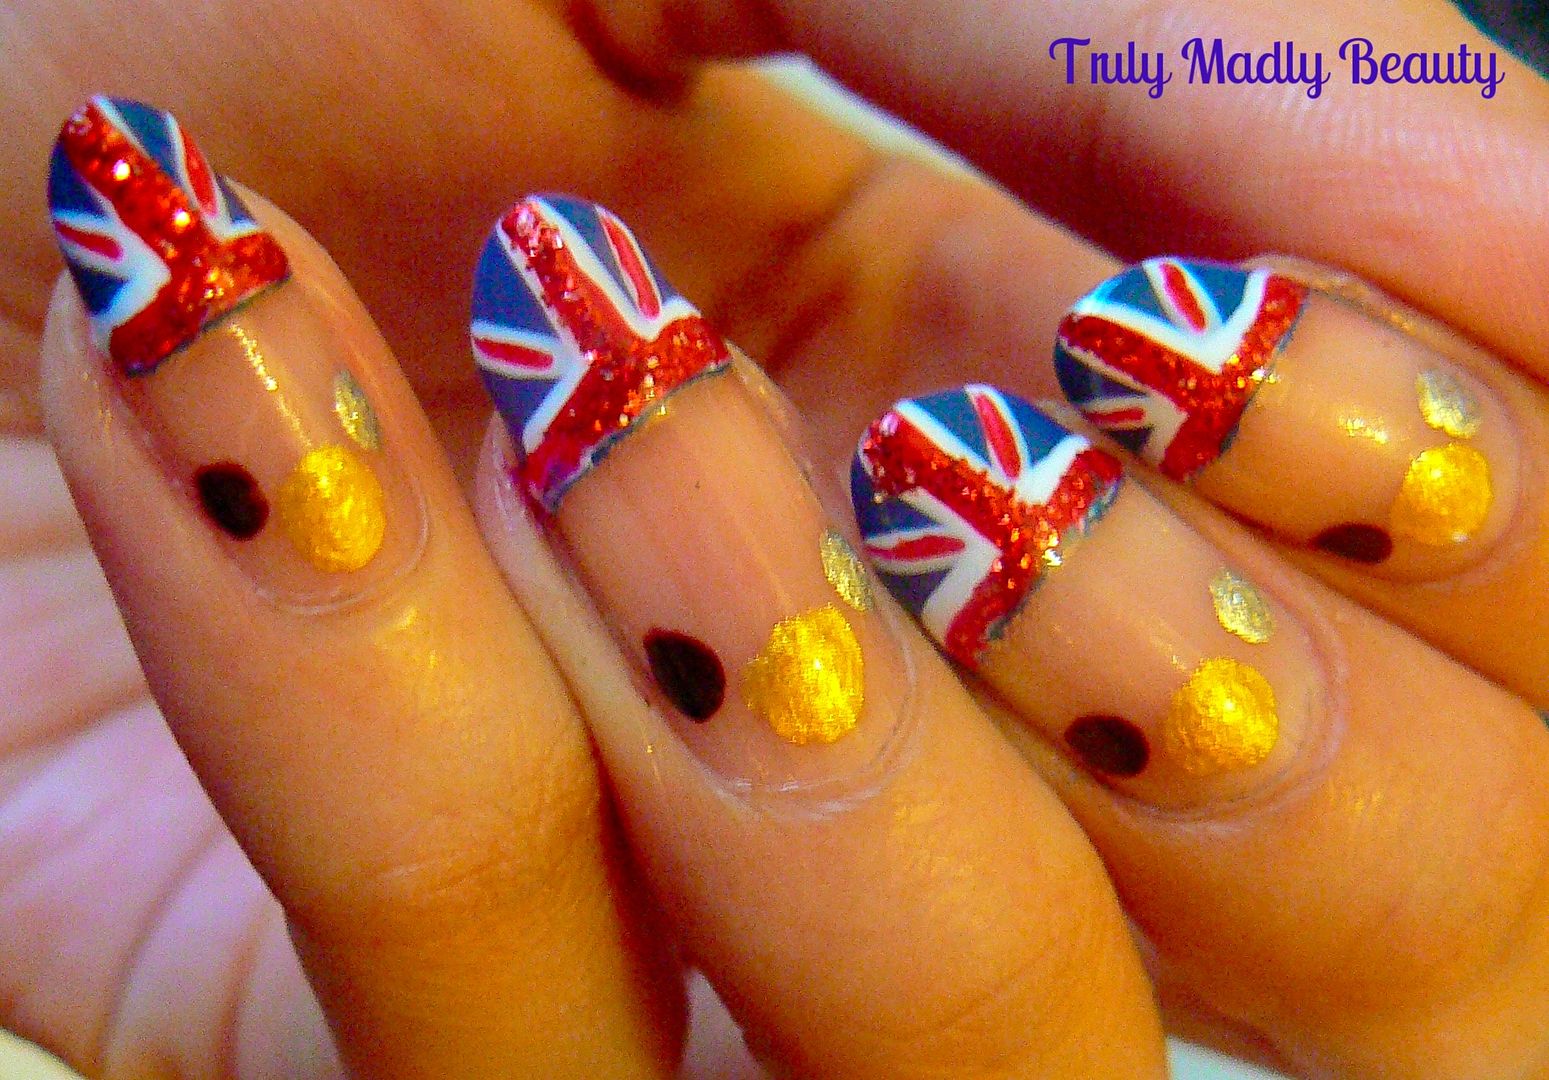
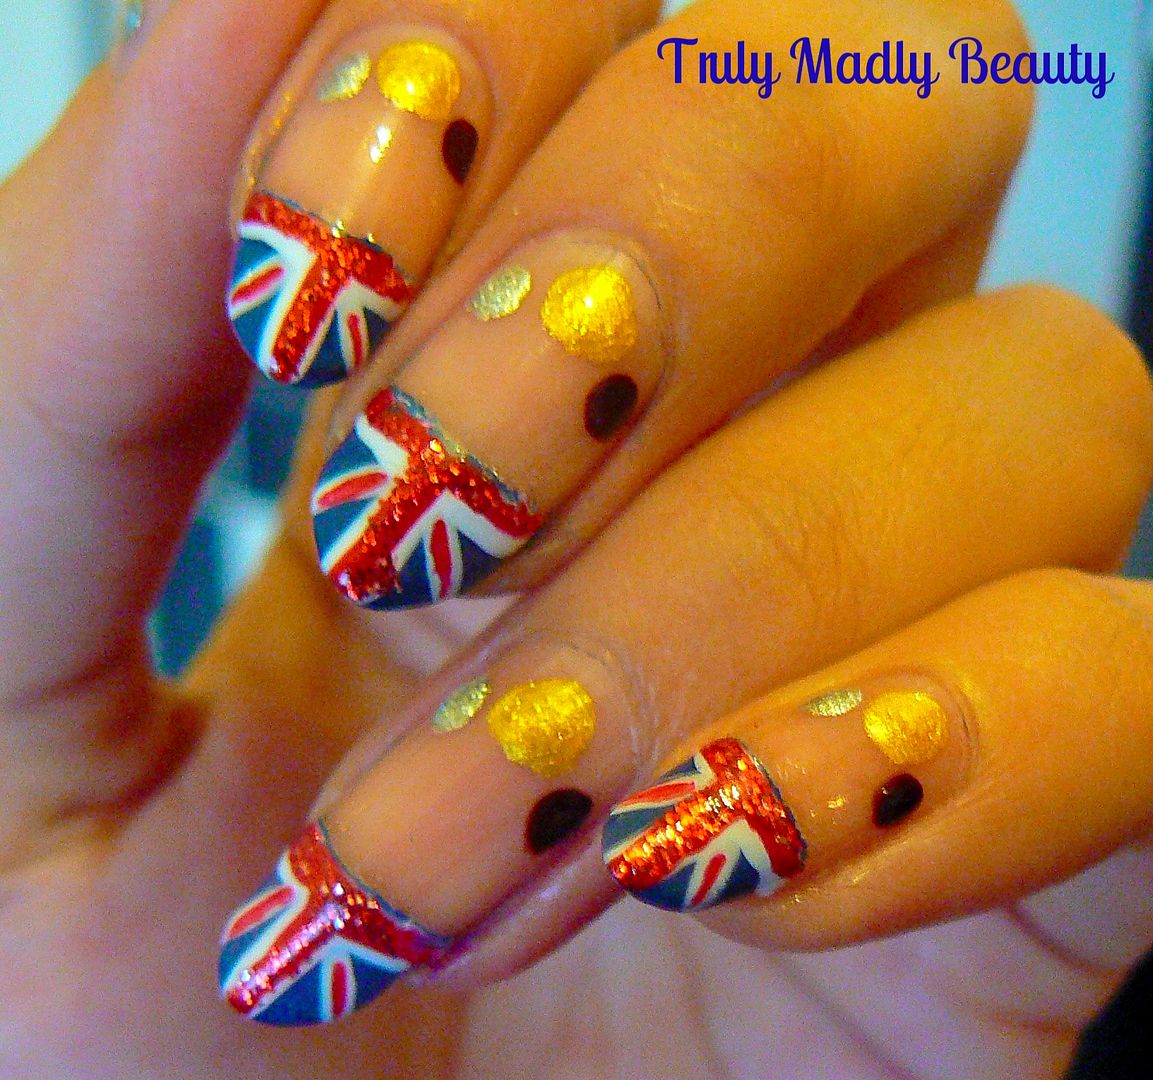
Now I wasn't actually planning on doing an Olympics themed manicure dolls! But unless you've been living under a rock these past few weeks, its hard NOT to get absorbed in the goings on over in Rio right now, especially the incredible performances from the Team GB athletes! Seriously how amazing have they done & it really is so great to see so much positivity & inspiration in a time where there seems to be so much sadness going on in the world. So in honour of the Olympics & a subtle nod to Team GB I've done a suitably styled mani which I'll show you how to create as well!


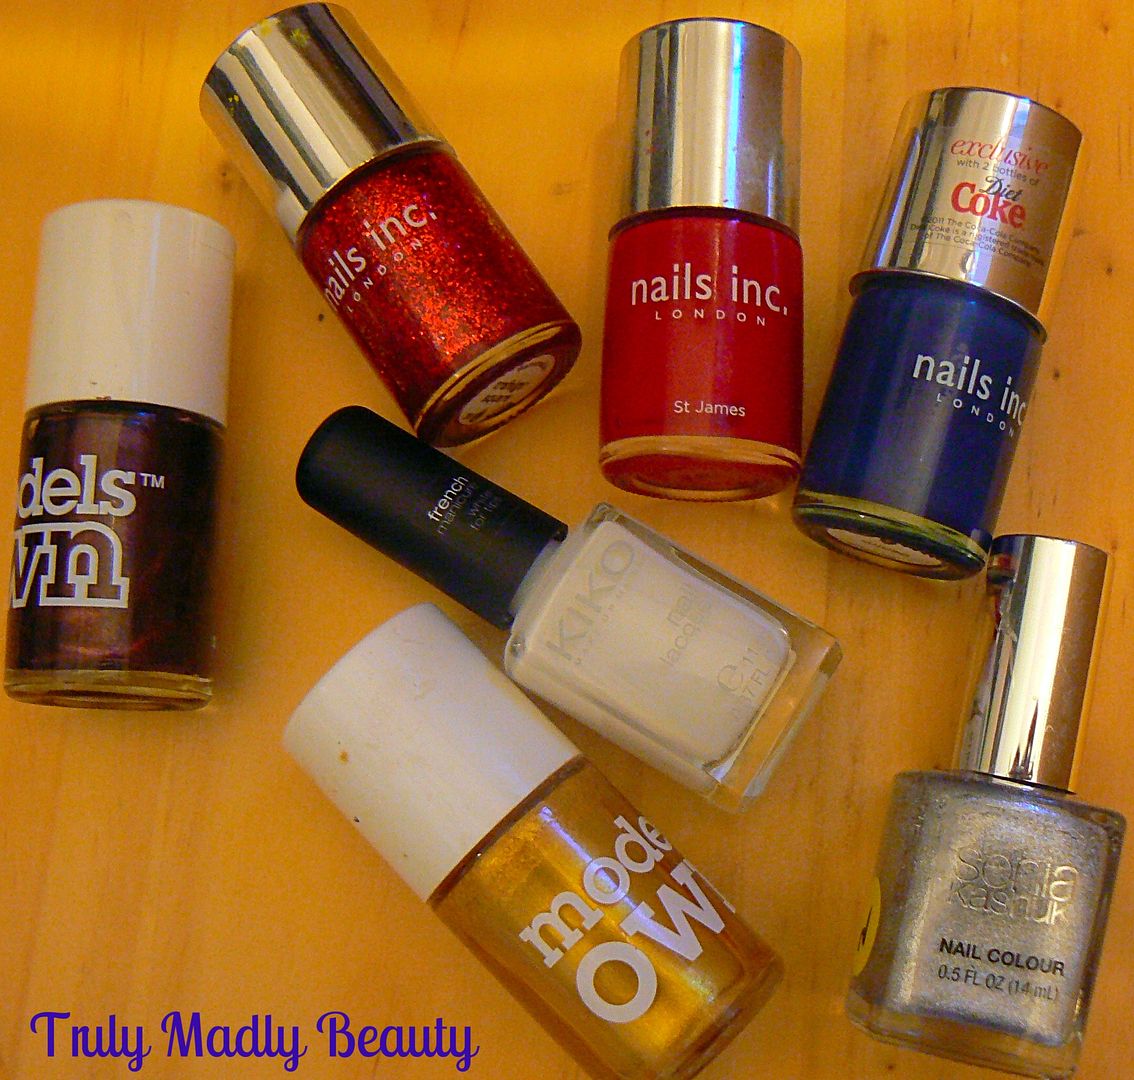
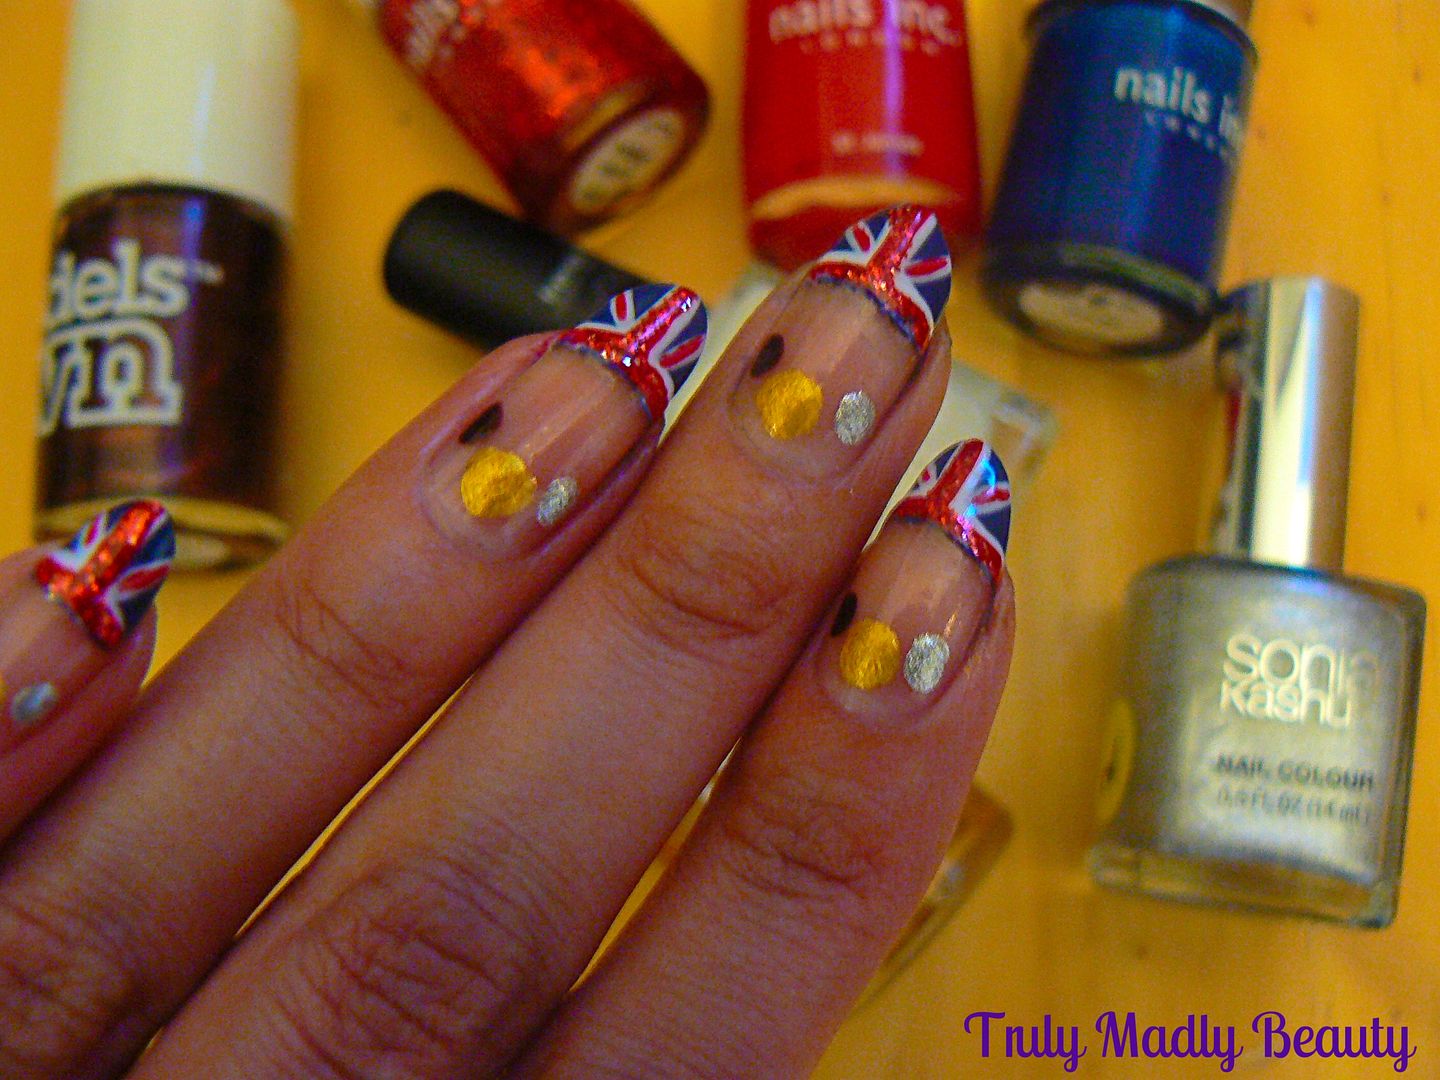
As you can see I've gone for some GB flag tips with some Gold, Silver & Bronze medals thrown in there too & its honestly so easy to do :) First things first, gather together the polishes you'll be using. Here I've opted for some Nails Inc, KIKO & Models Own to help create this design.


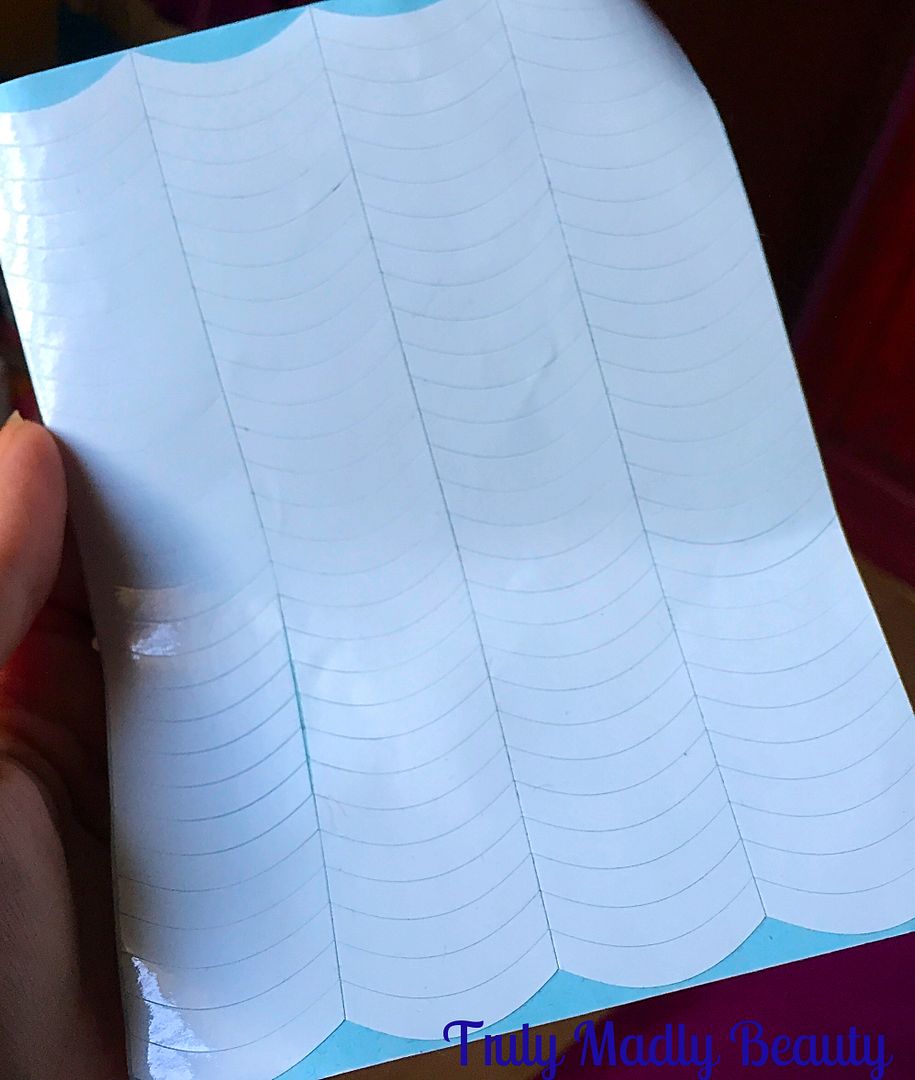
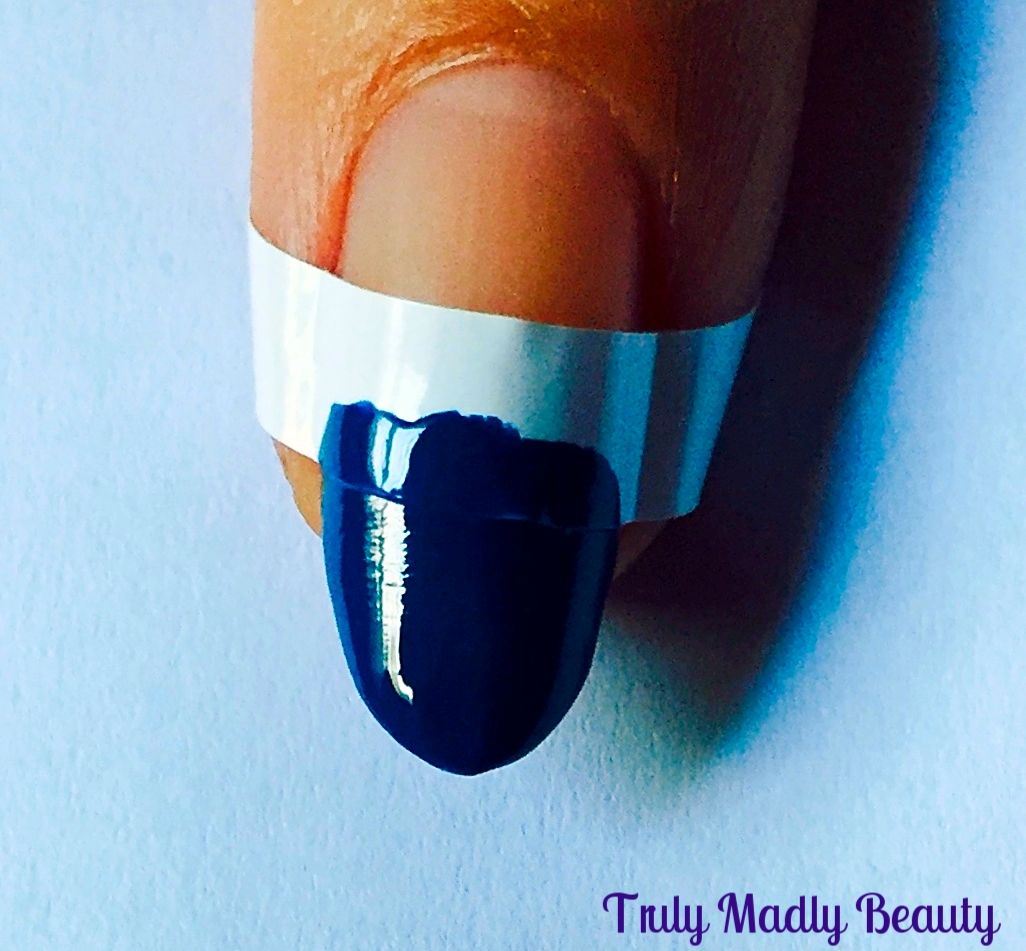
To start things off you'll need these nifty little french mani guides which you can get super cheaply of Ebay. I always make sure I have these in constant supply! Place a guide on each of your nails,about a quarter of the way down as you'll only be painting the top part of your nail.


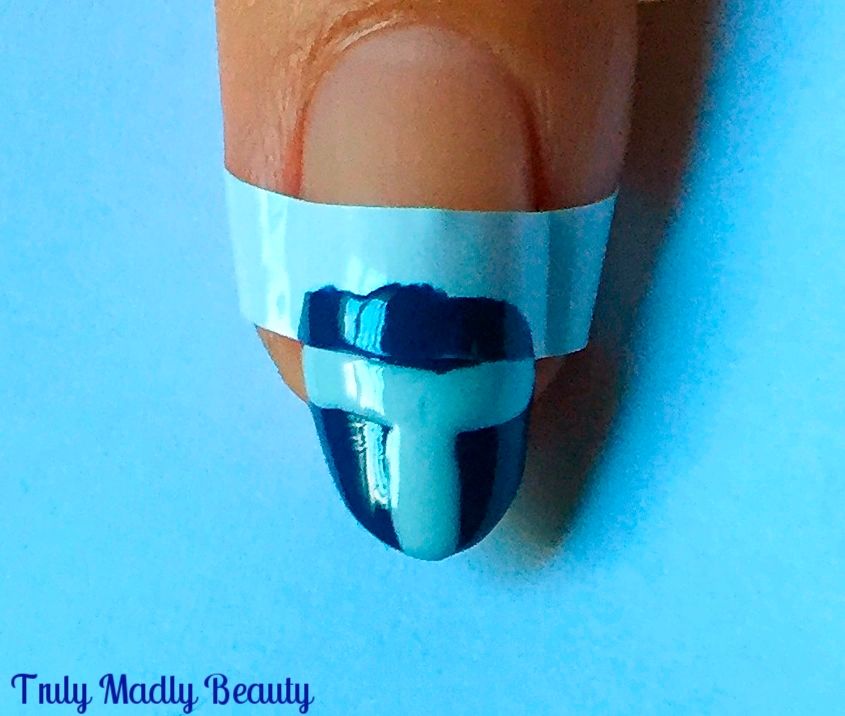
Now begin with applying your blue, this is Nails Inc Denim, a nice thick opaque blue crème so only one coat is needed. Wait for the blue to dry as now you'll be adding the white detail of you flag & the last thing you want is the blue running into the white!


I used the KIKO french manicure for white tips nail lacquer which I LOVE & has replaced ALL of my nail art pens. The thin brush is perfect for detailed nail art, I only hope they still do it as I want to stock up on these babies!


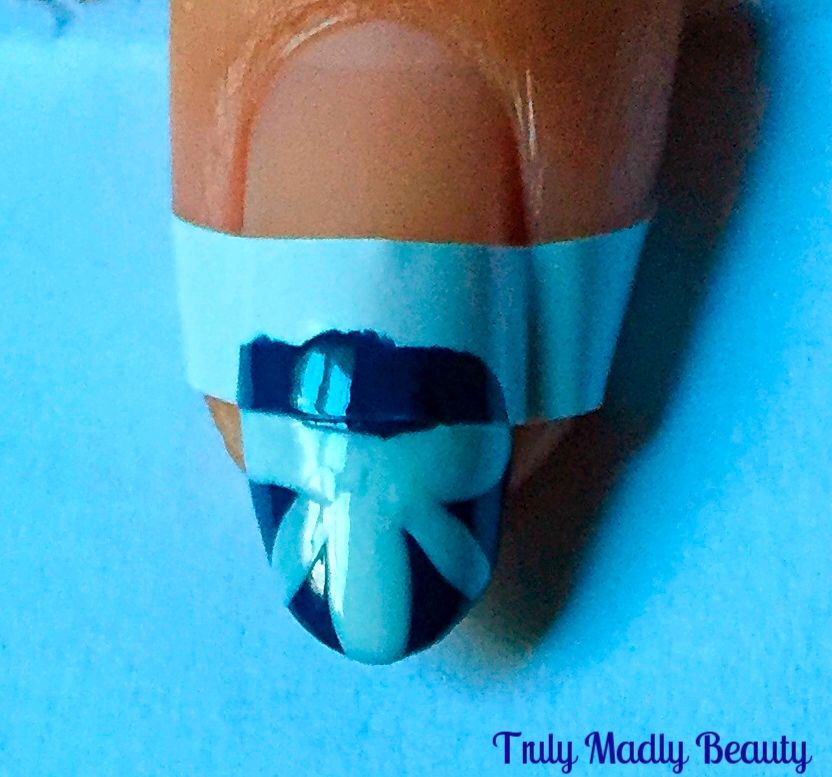
Using the brush, apply a line along the bottom edge (so right above by the mani guide) & one horizontal line in the centre going up to the tip.


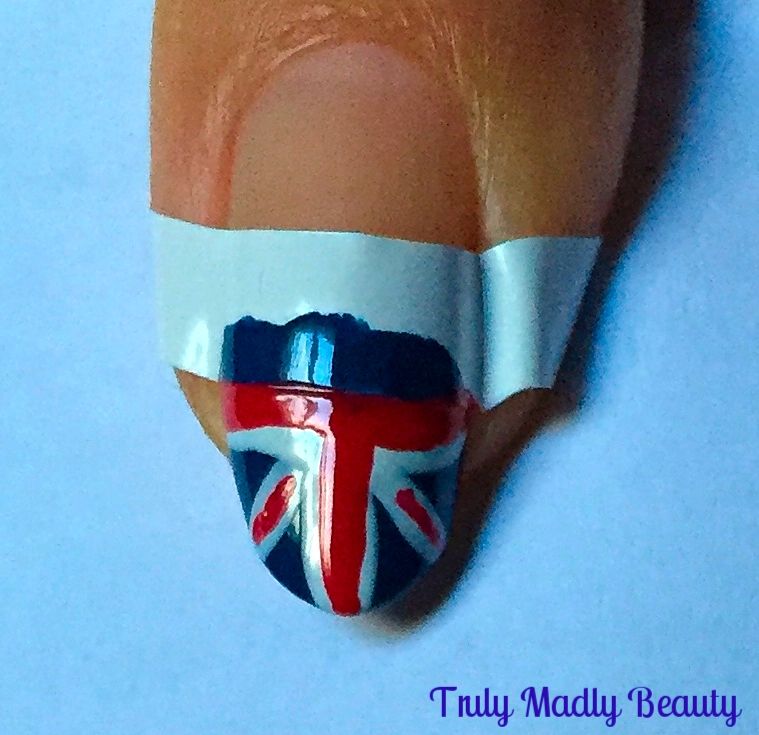
Then add two diagonal lines going up from either side of your horizontal line.


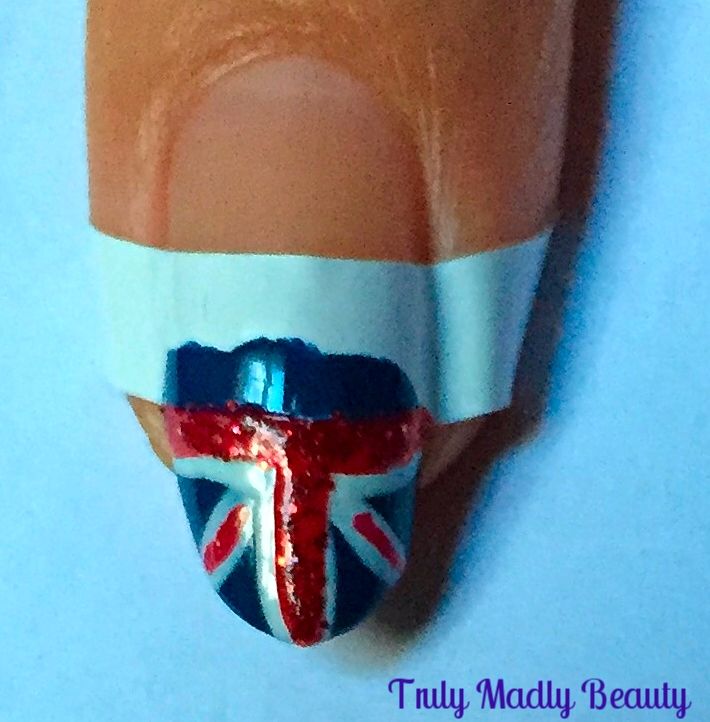
Now grabbing your red polish & a thin nail art brush, I've used Nails Inc St James, apply a thinner line on top of the white, making sure you still leave a bit of white showing.


Aaaaand finally, because y'all know I am a sparkle FIEND, as an additional touch I went over the red with a bit of red glitter courtesy of Nails Inc Trafalgar Square.


Now you can (slowly) peel off your mani guides, don't worry if you have any smudges or your edges aren't perfect, this can easily be rectified with a small brush & some acetone. And you have your GB flag tips!


You can leave these as they are but I couldn't NOT put some medals on too, so using a dotting tool & Models Own 25 Carat Gold, Sonia Kashuk Smoke & Mirrors & Models Own Cherry Pie, I added me on some Gold, Silver & Bronze medals along the cuticle.


Finish with topcoat & you're done! Told ya it was easy.


Hope you liked the mani dolls, how are you celebrating the Olympics this year? Thank for reading & keep up the awesomeness Team GB!


Lotsa love to ya!