Hello there lovely readers!
I have some new nail art to share but before then how's about a bit of a catch up before getting to that...
So...despite the year starting off in not the best of ways with bush fires, apocalyptic storms & of course being hit with a worldwide virus pandemic...I am still determined to try & achieve the goals I wanted to this year, especially after having such a rough 2019. This includes travel (though naturally one is holding fire for now...) better health (I finally bought a bicycle & will be attempting regular cycling when I can!) & one other thing that I have wanted to do for the longest time which is...POTTERY!

Showing posts with label Bling. Show all posts
Showing posts with label Bling. Show all posts

4.25.2018
The £1.30 Stila Glitter & Glow Eyeshadow Dupe!
Hey there lovely readers!

No your eyes are NOT deceiving you dear ones you read that title right...So yah, I'm pretty darn excited to share this post with you today but before I continue I must mention that 100% credit for this goes to the lovely blogger Gemma aka Gemmaetc, who first brought these to my attention! I was casually perusing her lovely blog (if you haven't checked her out already, rectify!) when I saw her post on this particular product pop up on her sidebar, so naturally rushed to click!
12.23.2017
Festive NOTD - Christmas Wreath French Tips!
Hey there lovely readers!

I have seriously slacked with the Christmas nail art this year...bah humbug Aysh! But on account of being away in sunnier climates for part of the month (where, lets be honest, festive inspiration is harder to come by right?) I think I'll let myself off whilst at the same time pat myself on the back for managing to do any at all haha! But here we are with a fourth & final Festive mani for the year...Christmas Wreaths!
6.28.2016
Armour Your Nails with All That Jazz Nail Filigree!
Hello
there lovely readers!
I'm
always on the lookout for intriguing & innovative new ways to
jazz up my nails & today I have such a nifty nail art product to
share with you that will help do just that in the most blingy
beautiful way courtesy of All That Jazz Nail Filigrees*!
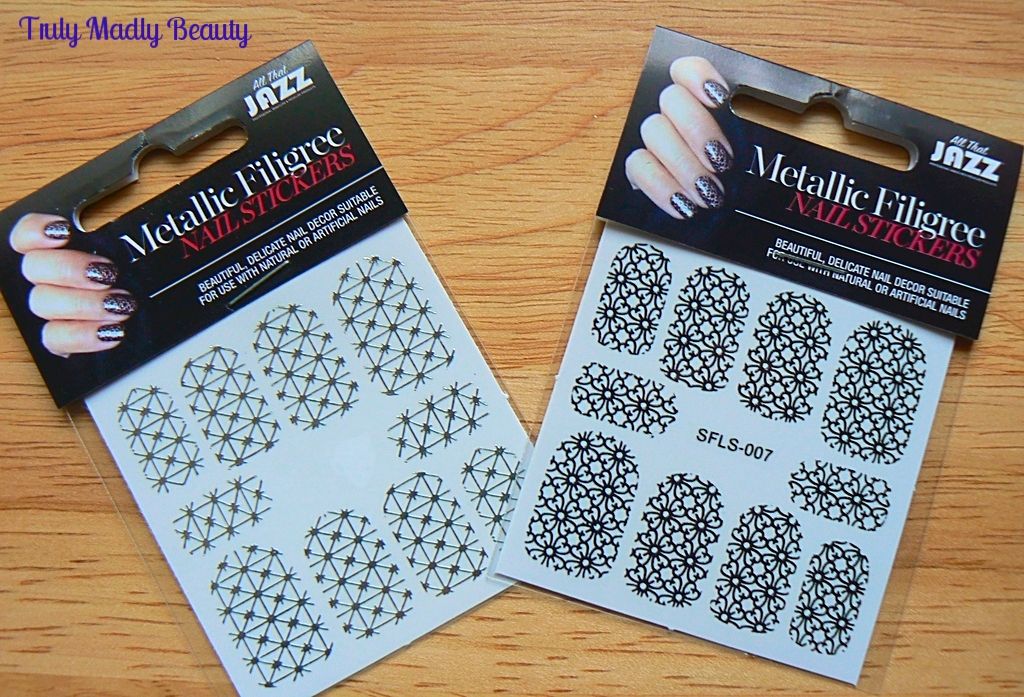
Nail
filigrees are a fantastic option if nail art or nail wraps feel too
complicated & time consuming. What I adore about these is not
only how easy they are to use, but also the range of pretty designs
that are available in a selection of gorgeous metallic finishes
including white, silver, black, gold & rose gold.
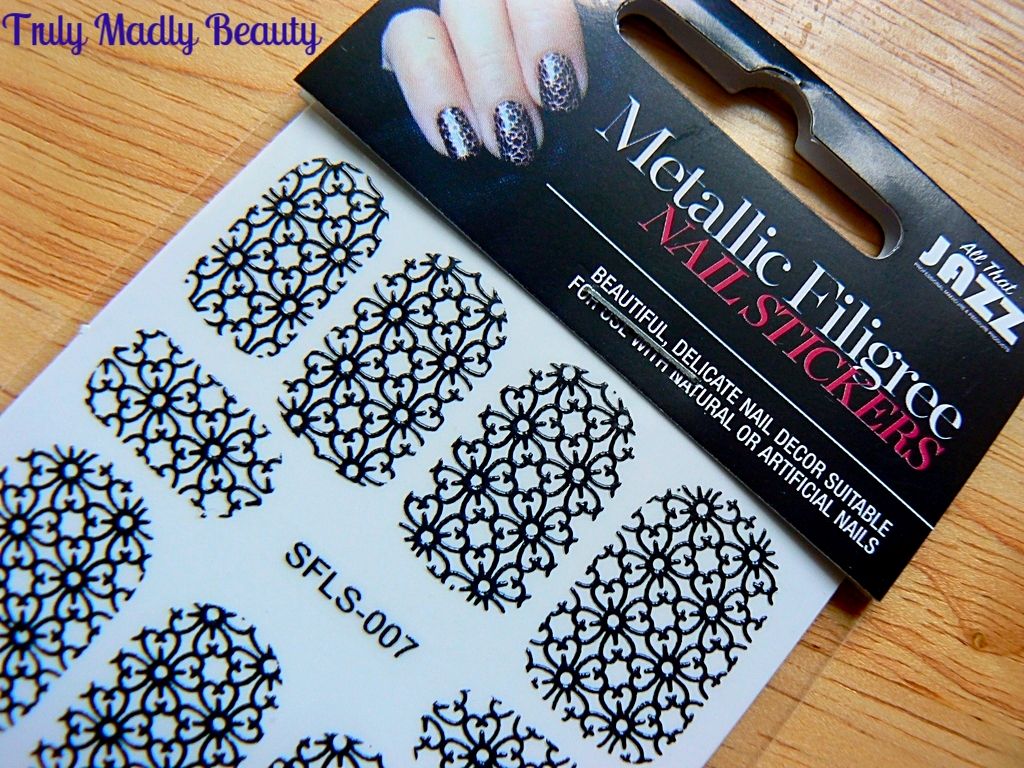
I
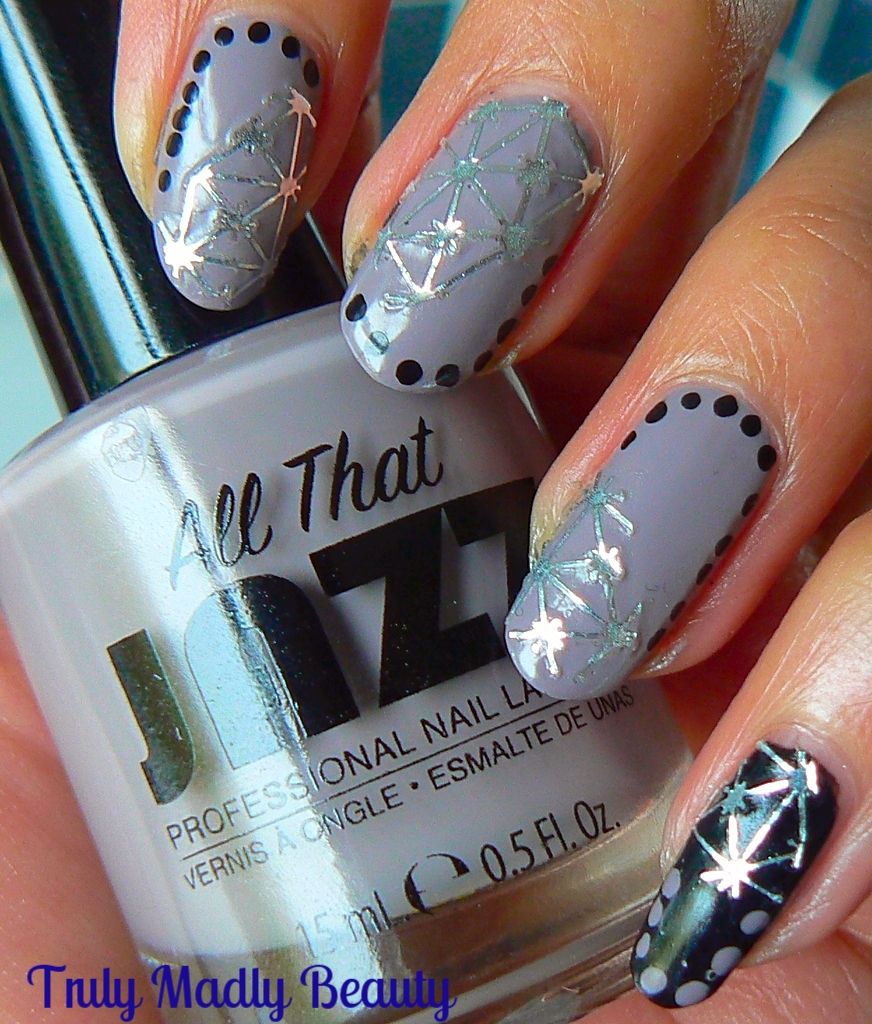
couldn't wait to try & decided to give the silver a whirl first,
the design here is the cross pattern which reminds me of star
constellations! The filigrees are quite fine so require a bit of
delicate care when handling.
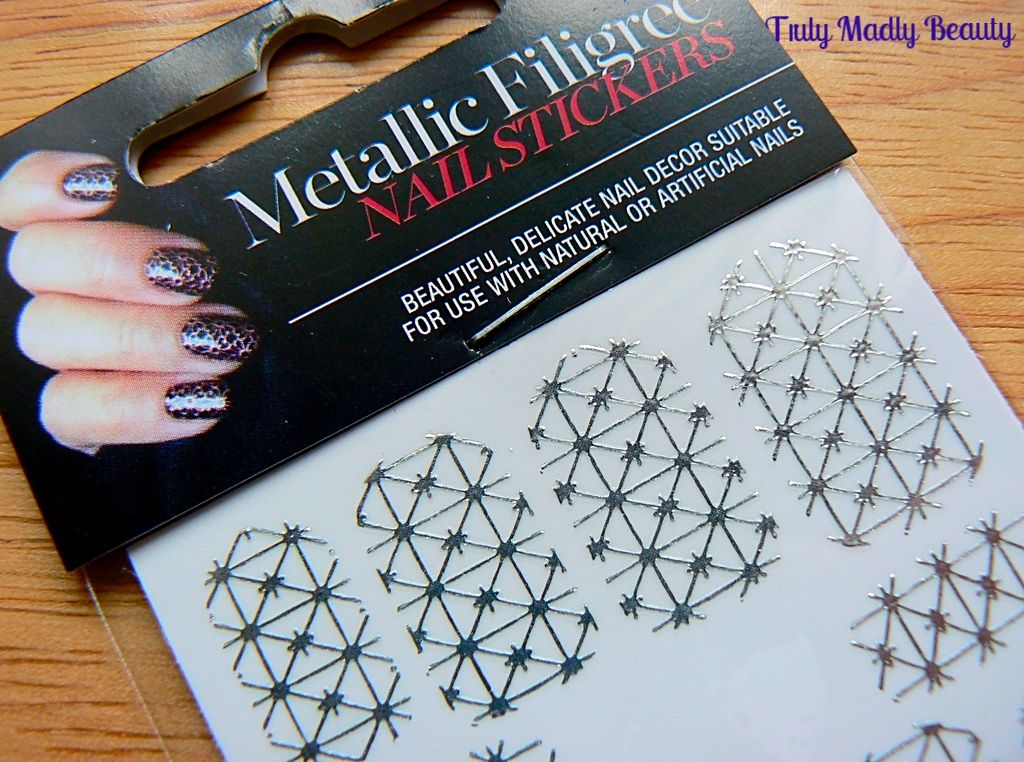
In
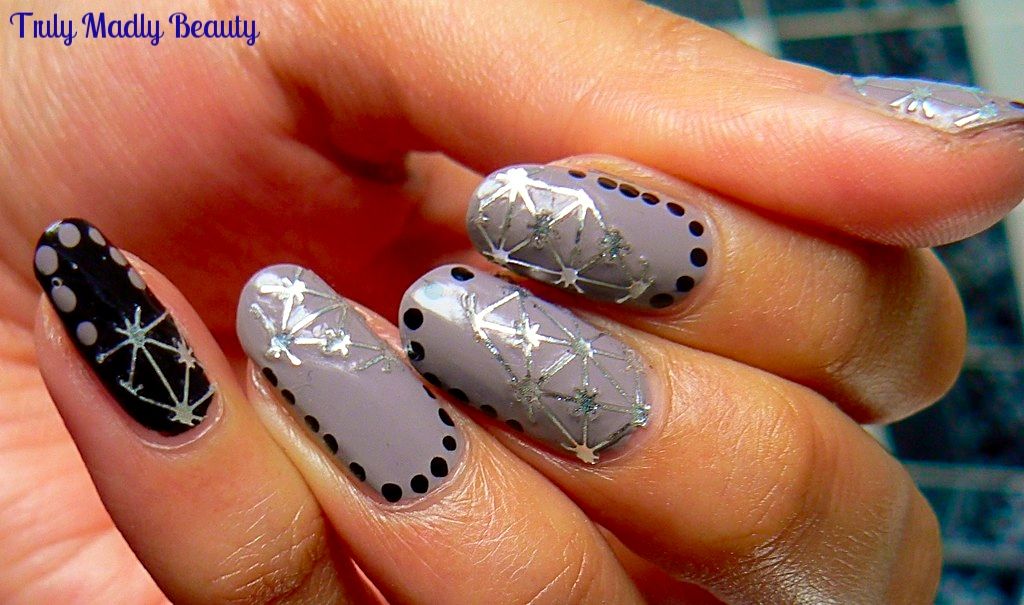
each pack you get a sheet of 10 filigrees, one for each nail, however
my favourite way to use these is by cutting each filigree & just
covering part of the nail as I've done for this mani. Not only do I
love the finished effect but it'll make the nail filigrees last
longer too. WIN!
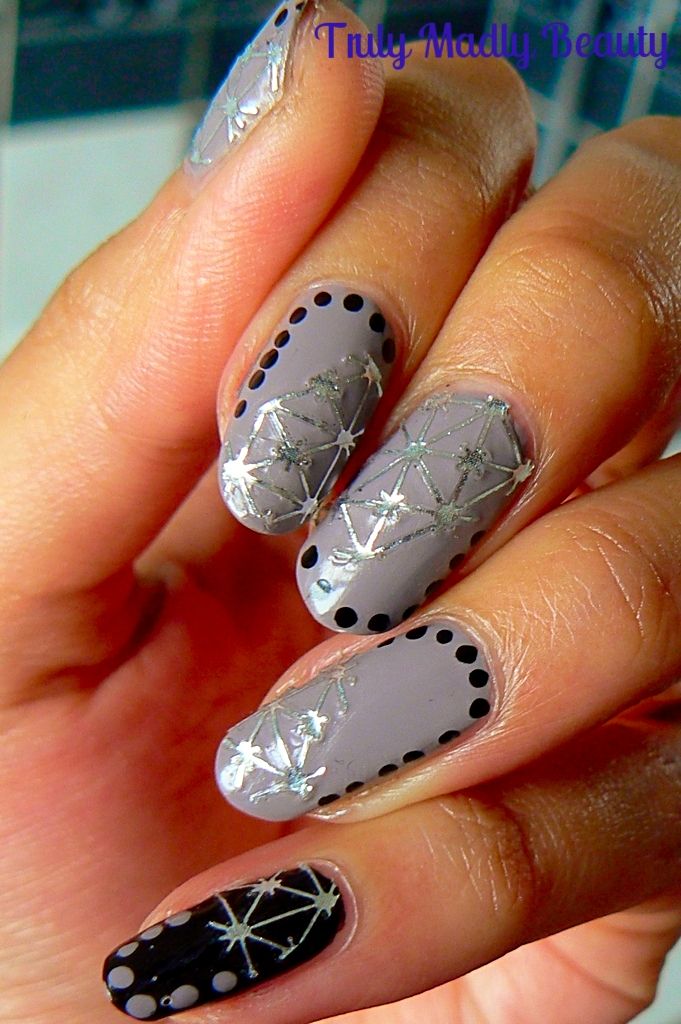
For
my base shade I applied two coats of All That Jazz nail lacquer in
Total Eclipse*, a lovely creamy grey. This is my first time trying
All That Jazz polishes & I am mightily impressed, I can
understand why they have such a large fan base. Quality formula,
smooth & opaque in two coats, simply sublime! I decided to paint
the pinkie in black to really bring out the silver filigree.
As
mentioned, instead of using the entire filigree, what I've done is
cut the filigree in half at an angle. It doesn't have to be neat, in
fact the more random the cut the better it looks in my opinion!
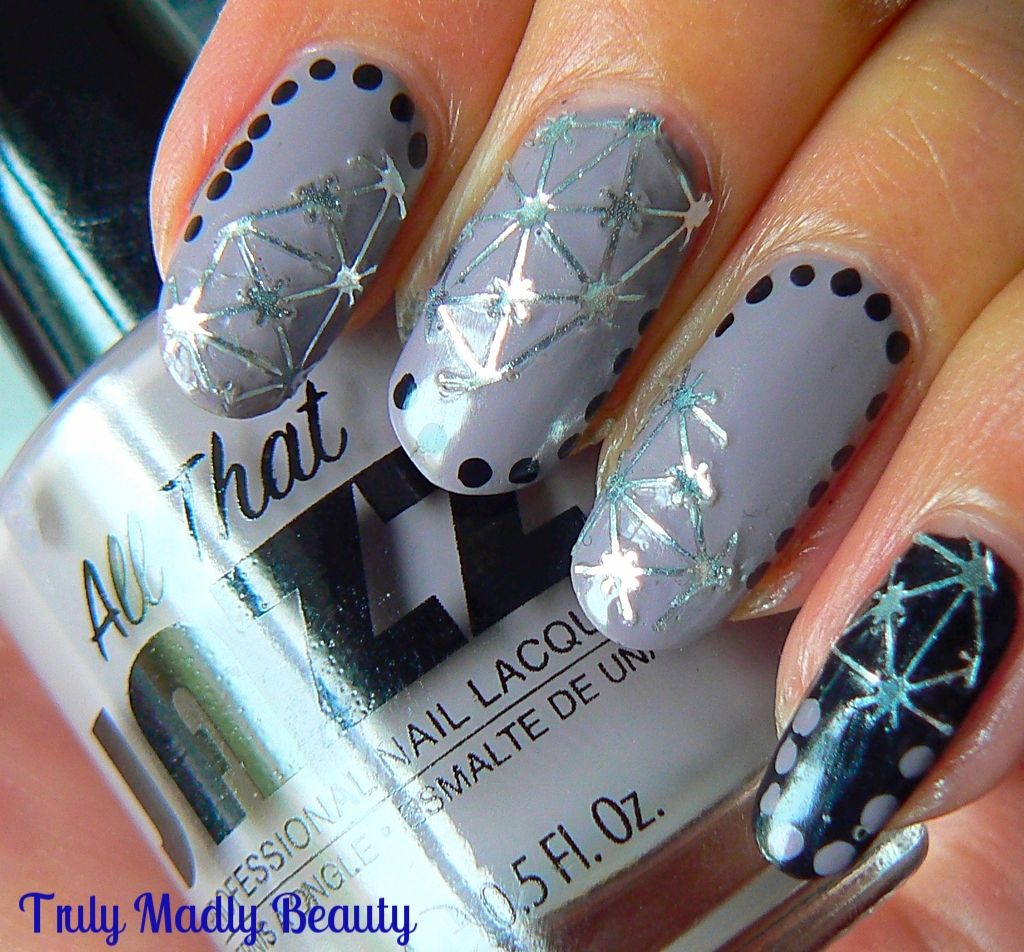
You
then have 2 pieces of filigree which can be then positioned on to
each nail wherever you like, using tweezers to help place them. Important note – make sure that your
polish base is completely dry! A good idea can be to simply apply the
filigree the next day if you don't have a speed dry topcoat.
After
applying my filigree pieces, as fab & blingtastic as they look I
couldn't resist adding a bit of extra detail with some black dots
around the edge of the nail which was done with a dotting tool & alternated with the grey on the pinkie.
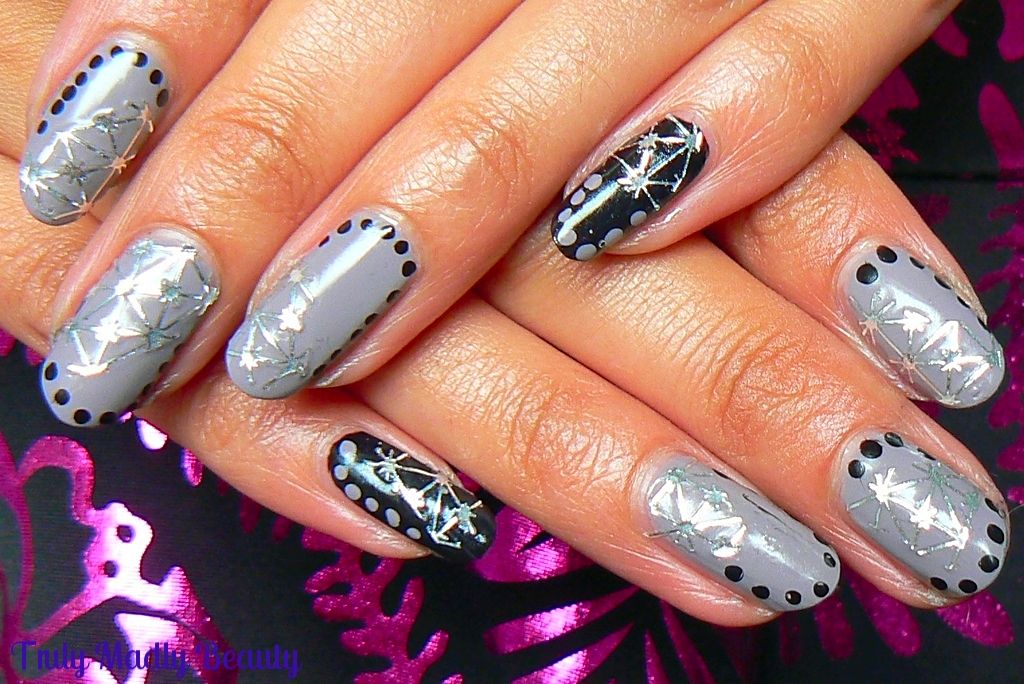
Finish
with topcoat to seal & you have your gorgeous filigree armored look nails ready to rock! I'm utterly digging these so much &
cannot wait to incorporate more into my mani's, you can be sure I'll
be stocking up on some rose gold ones!
You
can find the All That Jazz Nail Filigree (RRP £1.79) & NailLacquers (RRP £9.98) online.
Thanks
as always for reading!
Lotsa
love to ya!

Disclaimer
- * products featured were sent to me for my consideration. I am not
affiliated with the brand nor paid for this post, this review has
been as always my 100% honest opinion! :)
2.01.2016
NOTD - Louboutin Inspired Gradient Nails
Hello
there my lovely readers!
Aaaah
Louboutins...a name I'm sure many are familiar with & whose
iconic shoes are present on most gals wish lists! I'm still yet to be
fortunate enough to call a pair my own but one day...it will be. The
same goes for the beautiful Louboutin nail polish with its stunning
bottle, I confess its mostly for the bottle that I want it...one day
you WILL be mine!

In
the mean time I guess I can still get my wee fix by using the
infamous red & black colours to inspire my nail art which is what
I've done today with these Louboutin inspired gradient nails...
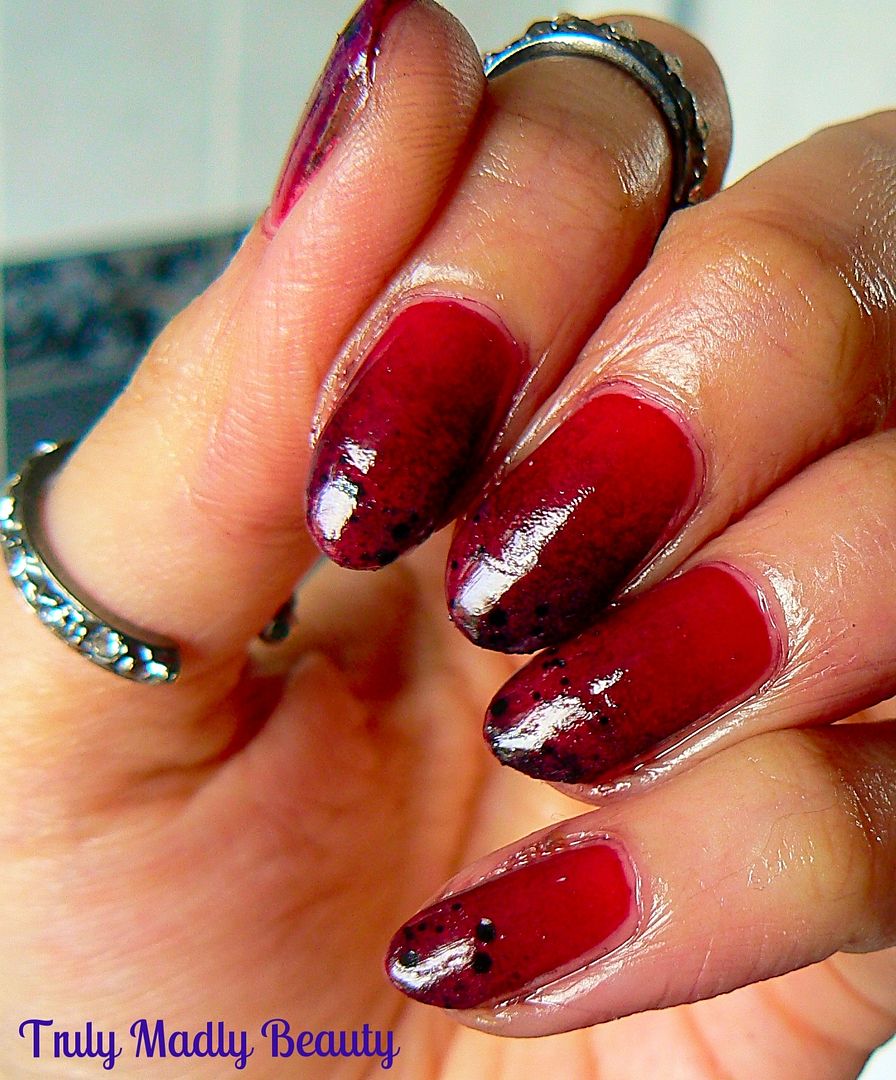
I
wasn't entirely happy with how these came out if I'm honest, I'm
still practicing doing gradients with darker colours which I'm
finding a tad more tricky so do forgive me! This was one of those
manis that looked much better at distance haha! But practice makes
perfect so I'll persevere for sure :)
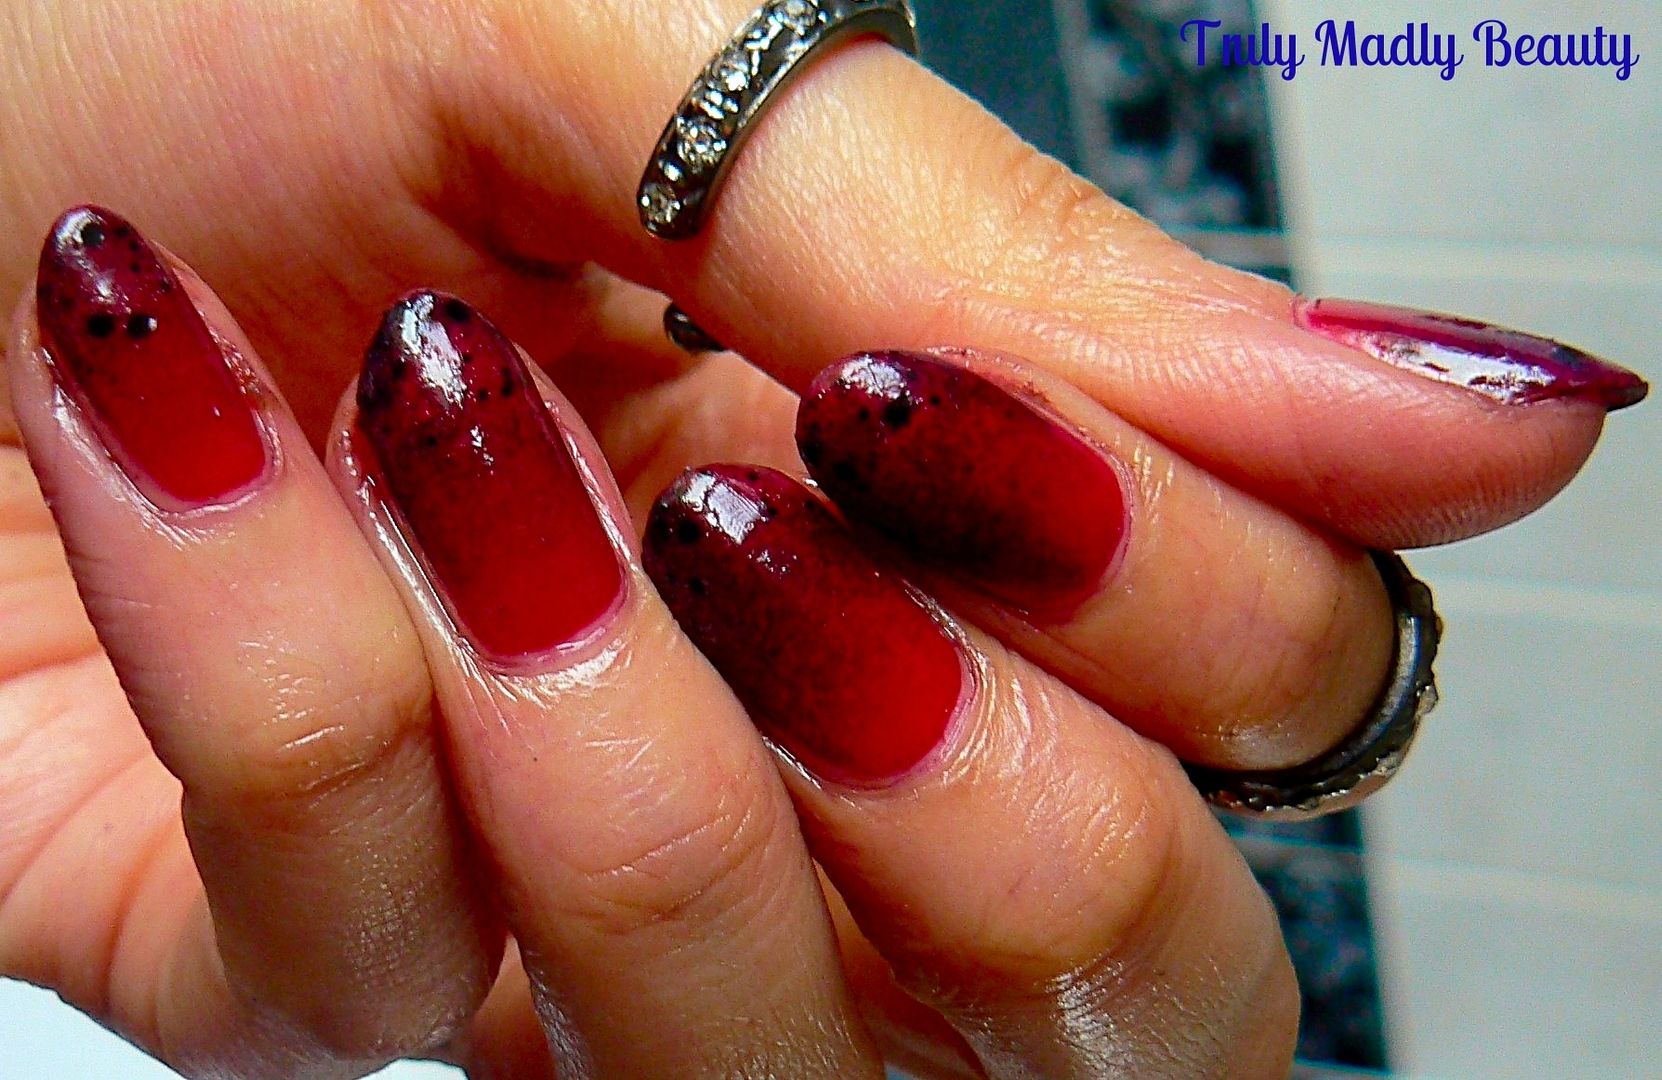
For
my Louboutin nails I of course required a nice red & black
polish, here I've used W7 Black & Bad Apple Red Delicious.
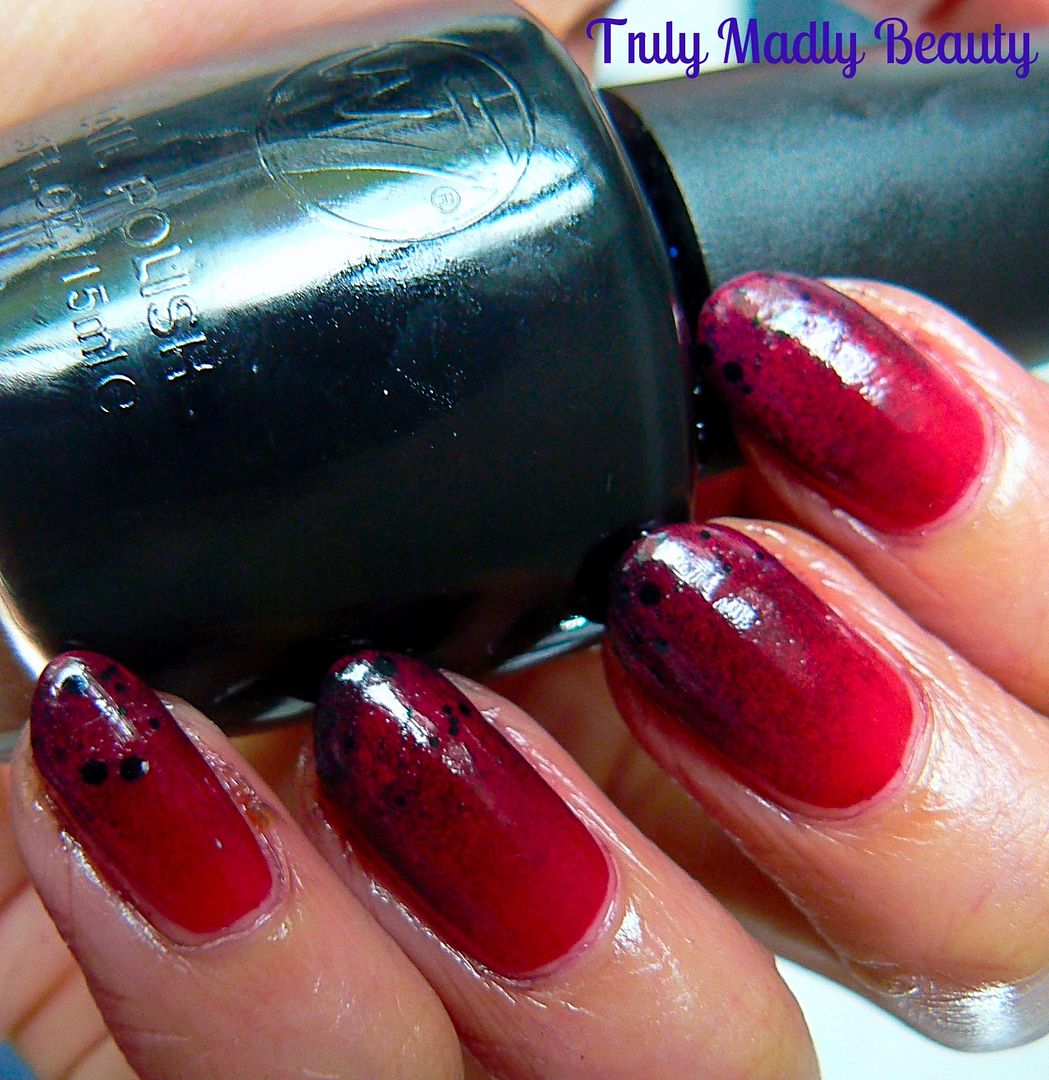
To
start first apply a coat of red polish as your base to do your
gradient on top of, then wait for it to completely dry.
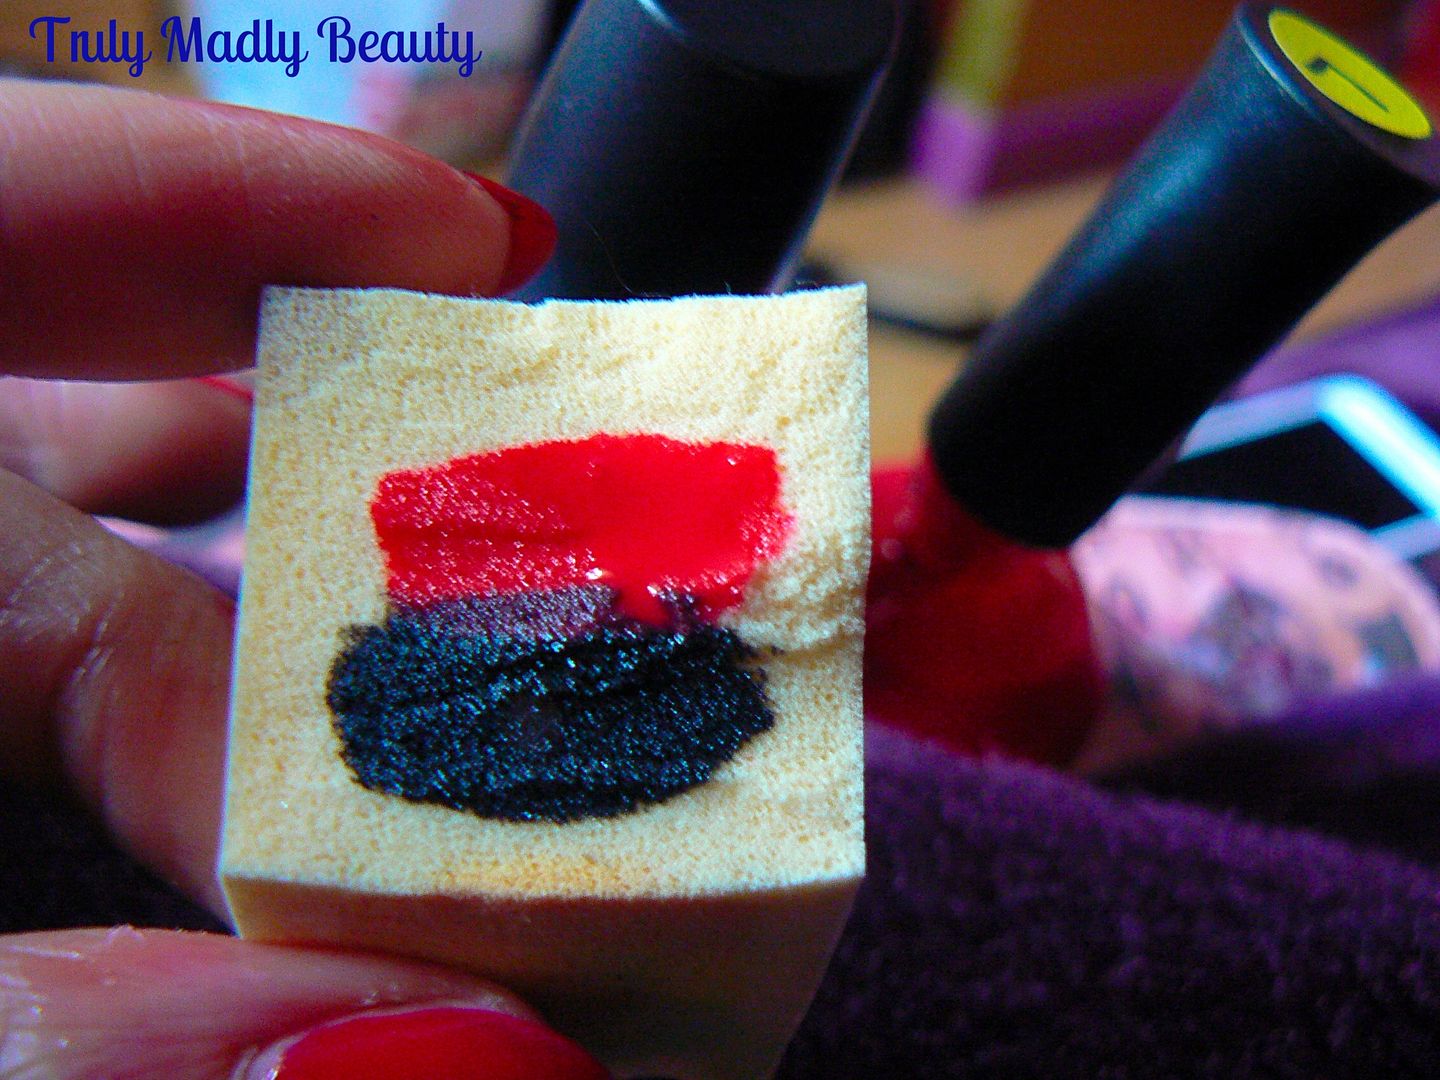
Then
grab a piece of makeup sponge, I guess you can use any old sponge but
I like using these. I pick up a bag from good old Poundworld.
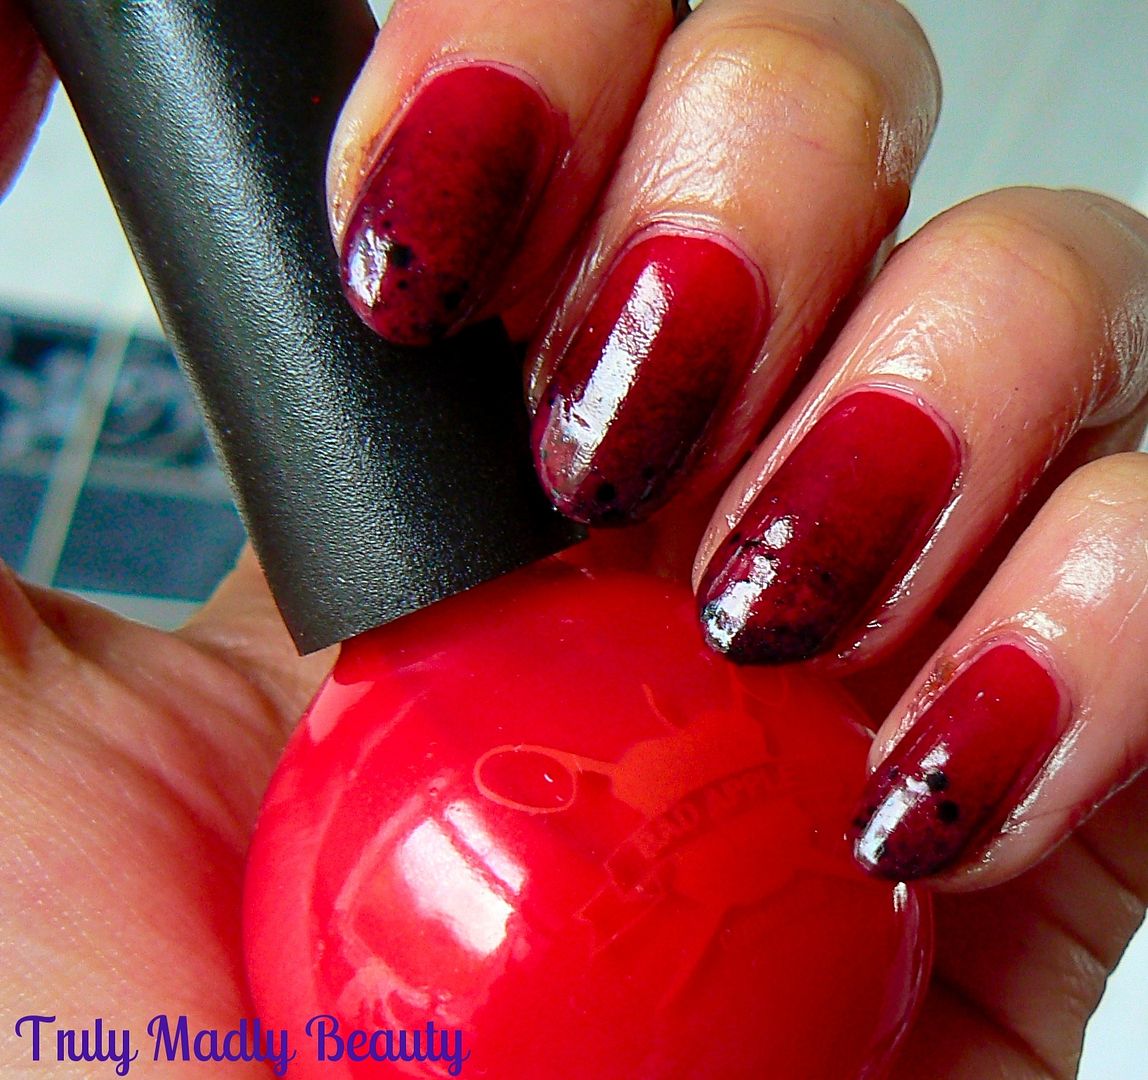
The
gradient will go from red to black so apply a stripe of each shade
side by side onto your sponge, then dab onto the nail with up/down,
side to side motions to create your faded gradient look.
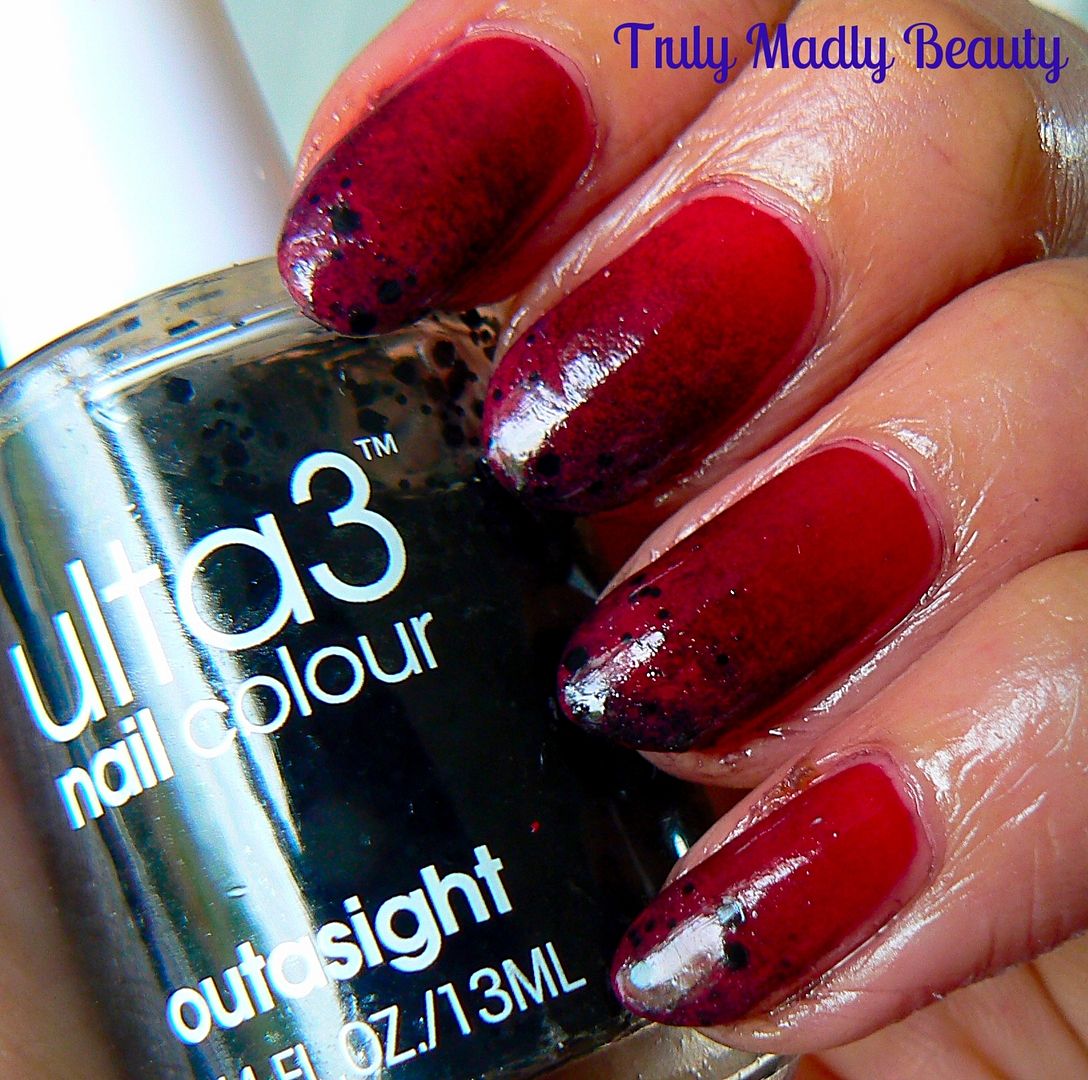
Do
this a few times, adding more polish to your sponge, to get a nice
opaque finish or until your happy with the effect. To finish I also
dabbed a bit of Ulta3 Outasight which is a black glitter, onto the
tips for an added touch.
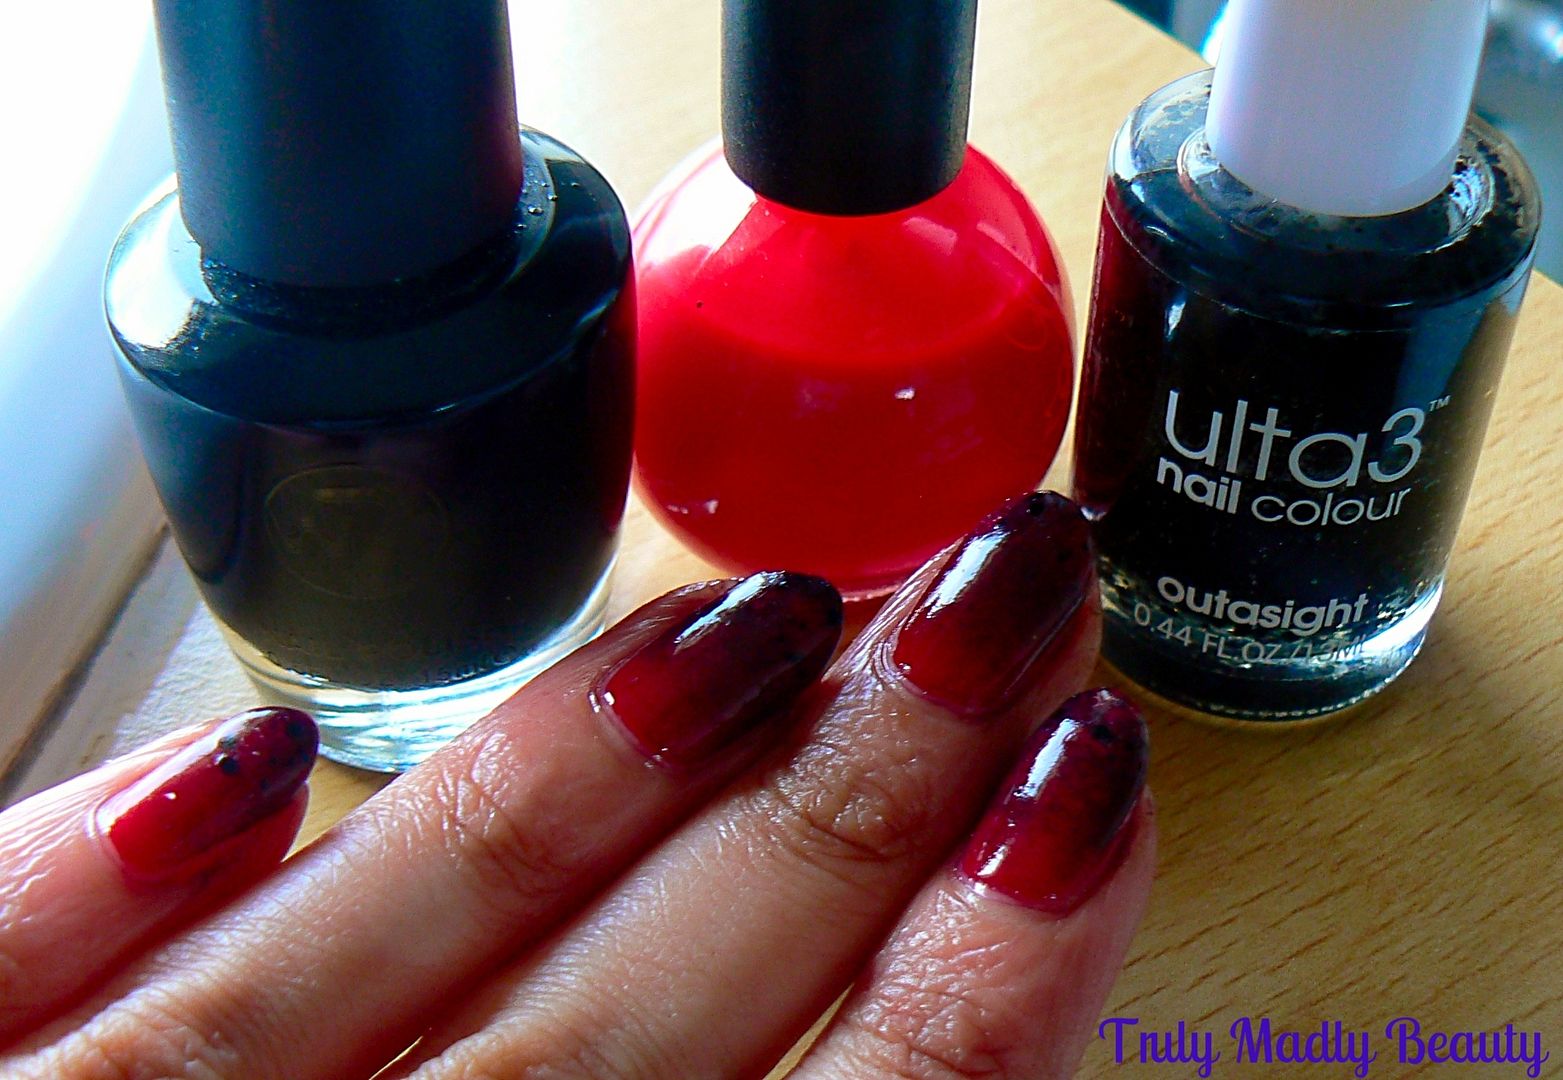
Go
over with a nice thick coat of topcoat & you're done! Now
gradients can be messy, I used ZAP!, a liquid latex nail art skin
protector to help with the clean up part of this manicure,which I'll
be reviewing in full for you in my next post so do keep posted for
that!
FYI
the ring bling is Hugo Sophia :) Thanks for reading lovelies!
Lotsa
love to ya!
1.11.2016
NOTD - Egyptian Jewel Inspired Nails!
Hello
there lovely readers!
I've
always been fascinated with Egyptian history. I adore watching films
depicting the time of the Pharaohs & I hope to visit Egypt one day,
being a huge Poirot fan also, a Nile cruise has been on the bucket
list for a long time!
From
a beauty addicts perspective, the Egyptian era is truly a feast for
the eyes...the stunning hairpieces, the bold makeup, the eye catching
jewels! Its the jewels in particular that inspired this particular
mani I have for you today, using tones of black, turquoise & gold
I came up with these Egyptian inspired jewelled stone nails.
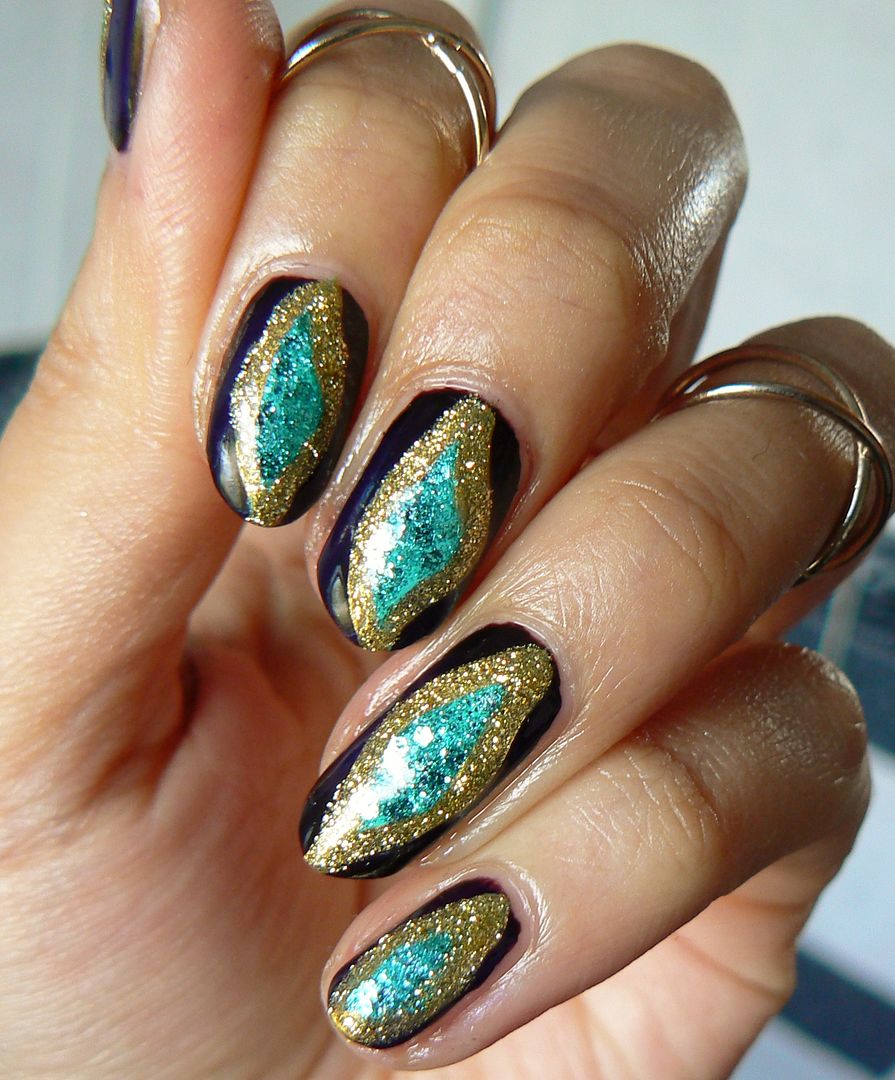
To
recreate these could not be easier. Start with applying a black base.
Here I've used two coats of A England Lancelot, one of my favourite
blacks, it has a divine Gothic red tint to it & a beautiful
glossy formula.
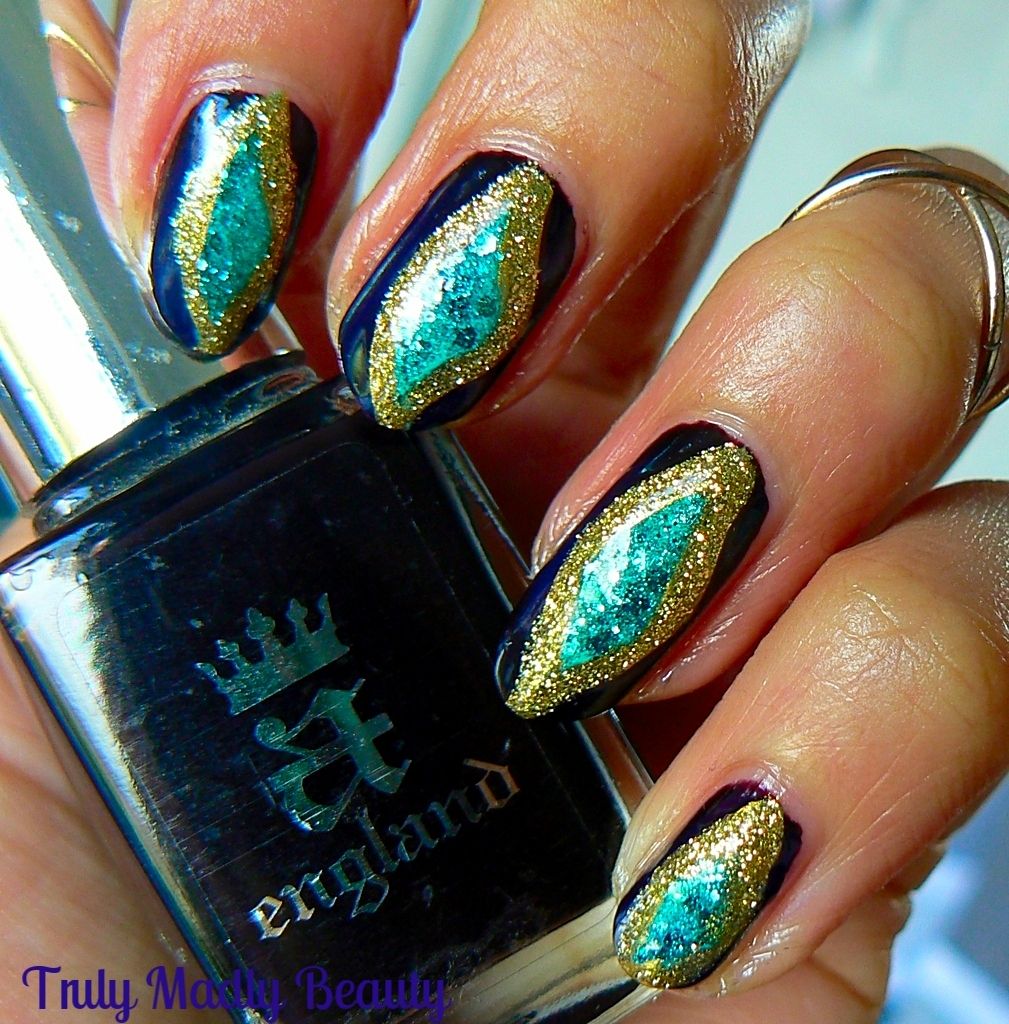
Next
apply your turquoise centre. To do this I used a fine nail art brush
& Models Own Turquoise Gloss. Free hand a teardrop/diamond style shape in
the centre of your nail, before filling in. Don't worry if they don't
match, I actually think having each nail look slightly different is
better!

You
know I am a glitter FIEND so sparkle was definitely required. To
bring out that turquoise I applied some of this gorgeous Jordana
glitter in Celestial on top of the Models Own.
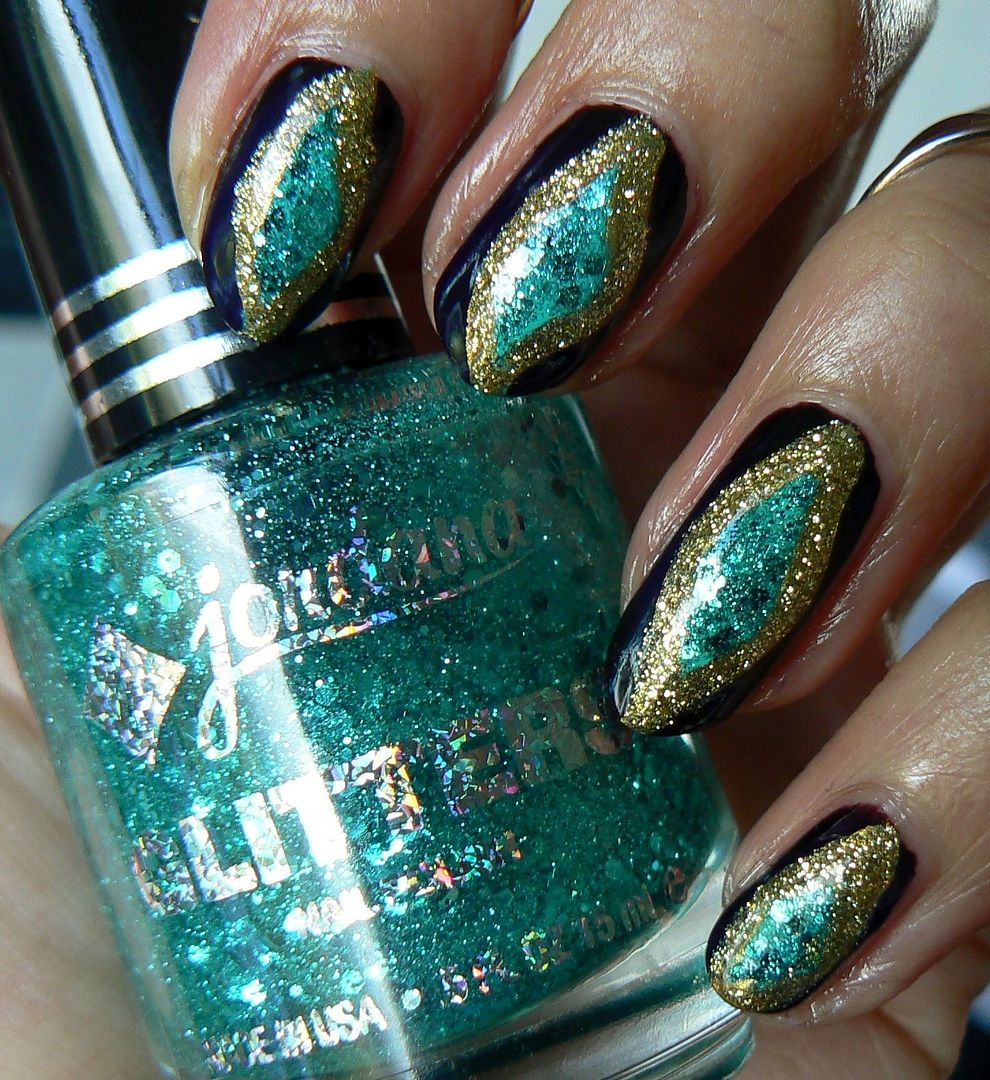
Then
using a fine nail art brush & some gold polish or a gold nail art
pen which I've done here & naturally forgot to photograph
because...well...I'm a plonker, apply a gold border around the
turquoise.

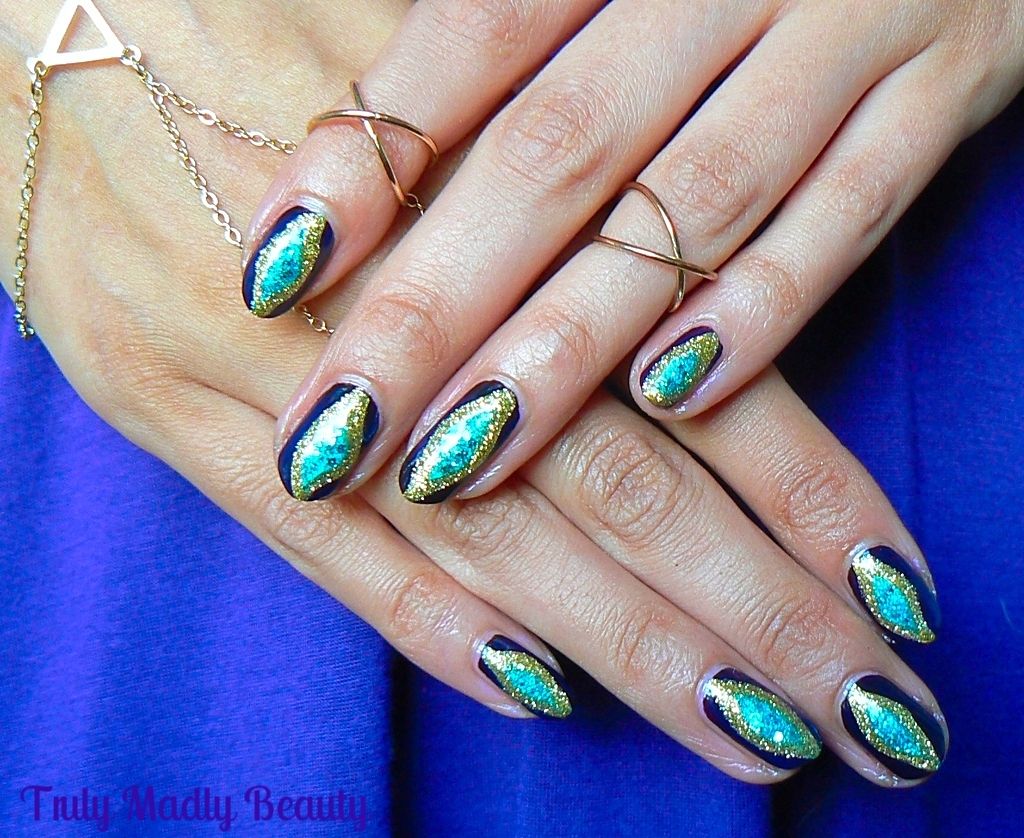
Finally
grab that glitter again, this time some sparkly gold, I love my
trusty Color Club & simply go over your gold border with the
glitter using another fine brush.

Finish
with a coat of topcoat & jazz up the hands with some hand
jewellery if you like & your Egyptian inspired manicure is done!
This
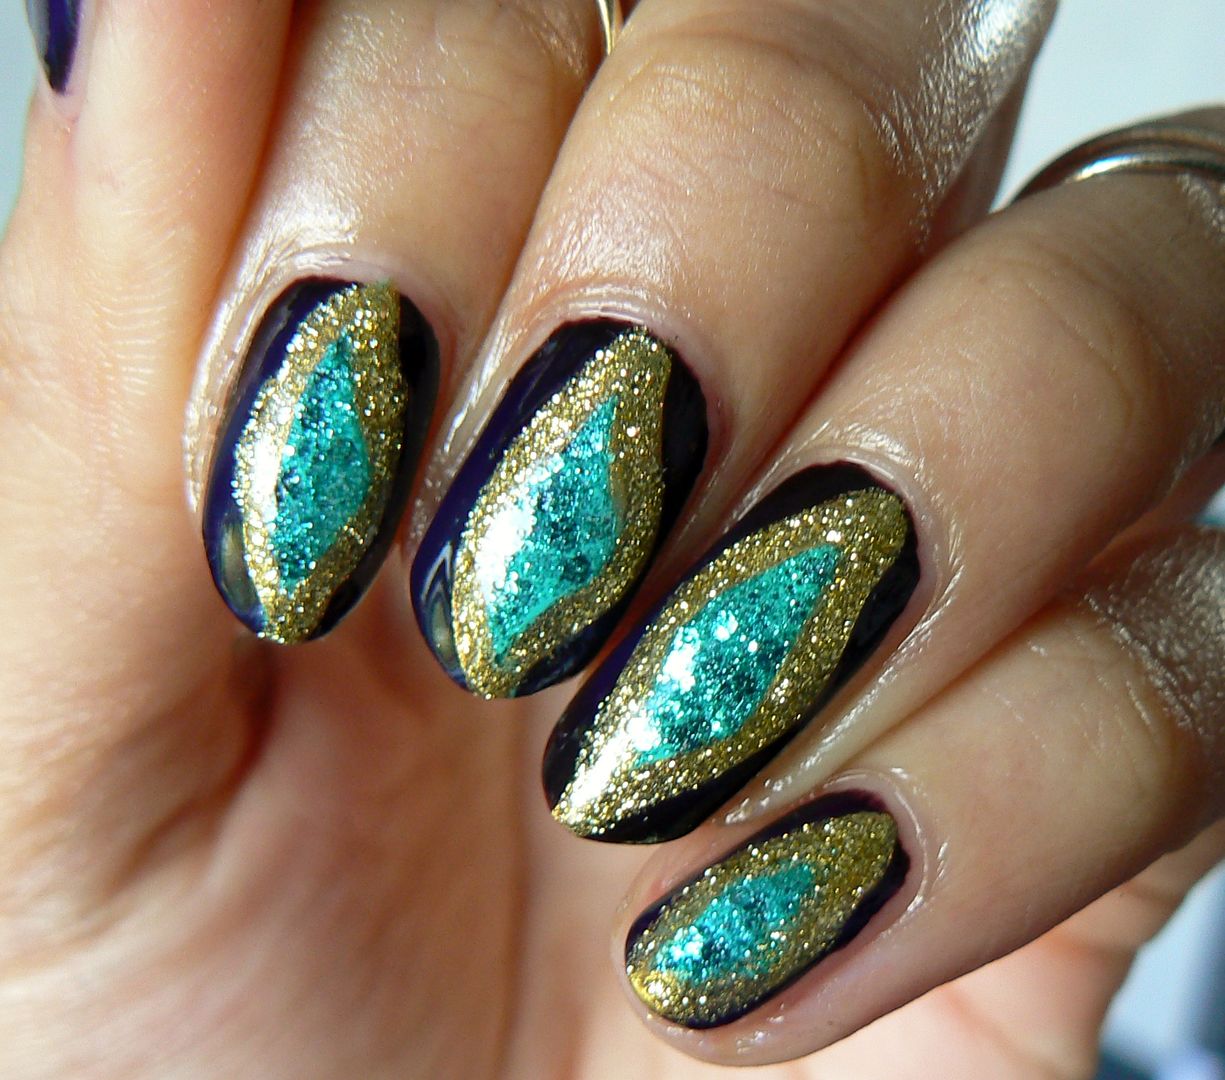
mani is actually from my archive from a few months back but I'm in
mourning for how long my nails are here! Lately they've been breaking
left, right & centre & its slowly driving me mad! *throws
self down dramatically & wails in despair*
If
anyone has any tips to share to help aid this wee problem I'd love to
hear any recommendations! Thanks for reading!
Lotsa
love to ya!
11.14.2015
NOTD - Burgundy Beauty with Bourjois Rouge Diva!
Hey there lovely readers,
Burgundy is one of those shades that most definitely falls into the perfect tone category for the Autumn/Winter months & certainly gets a lot of love at this time of year especially! A warm & flattering shade which suits everyone, every girl needs at least one burgundy polish in her stash.
Burgundy is one of those shades that most definitely falls into the perfect tone category for the Autumn/Winter months & certainly gets a lot of love at this time of year especially! A warm & flattering shade which suits everyone, every girl needs at least one burgundy polish in her stash.
I
wanted share with you one of my favourite Burgundy red polishes which I
find myself reaching for time & again as it meets all my needs,
everything from the colour to the formula is just perfection & is
courtesy of good old high street brand Bourjois!
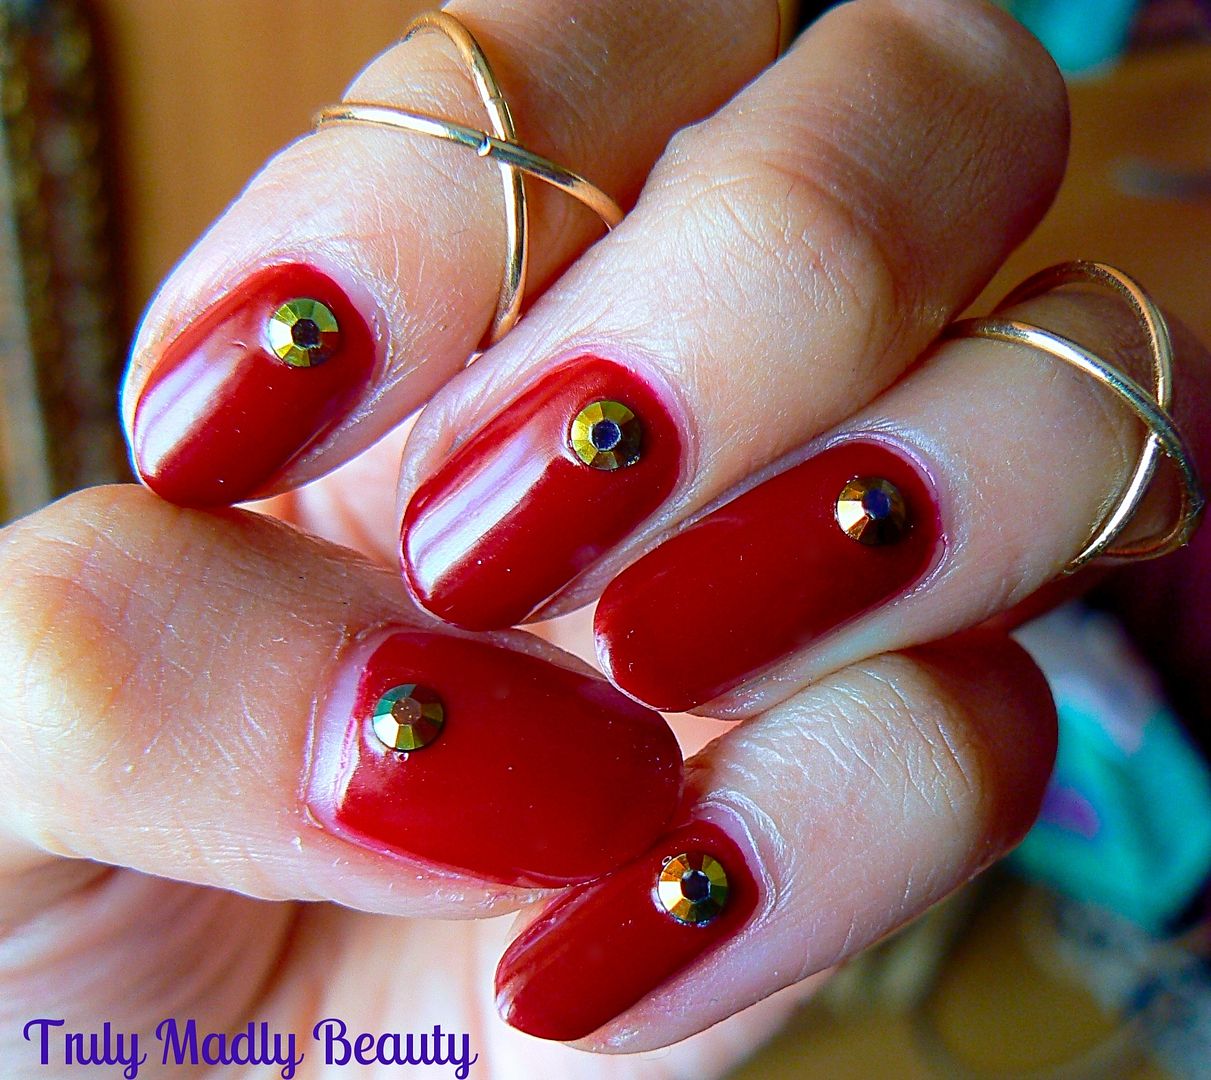
This
little pretty goes by the name Rouge Diva & is from Bourjois So
Laque Ultra Shine Range which retails for around £5.99.
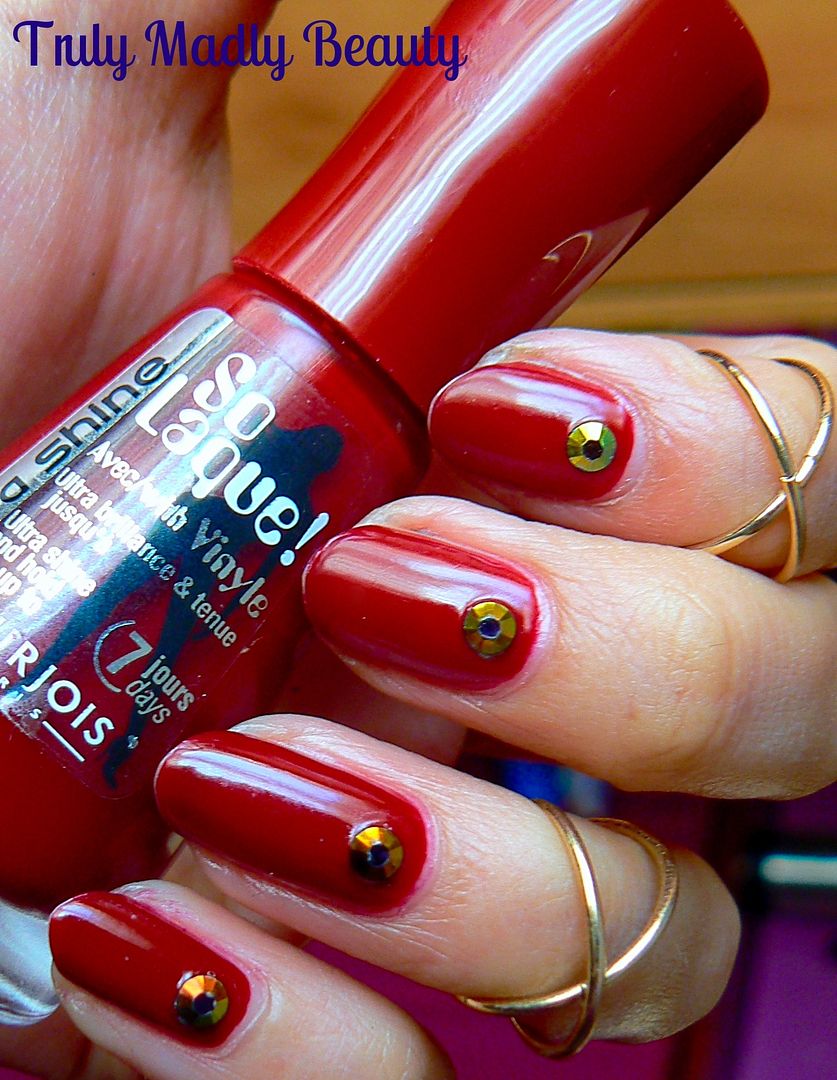
I
don't know why I don't own more of these babies in my collection as
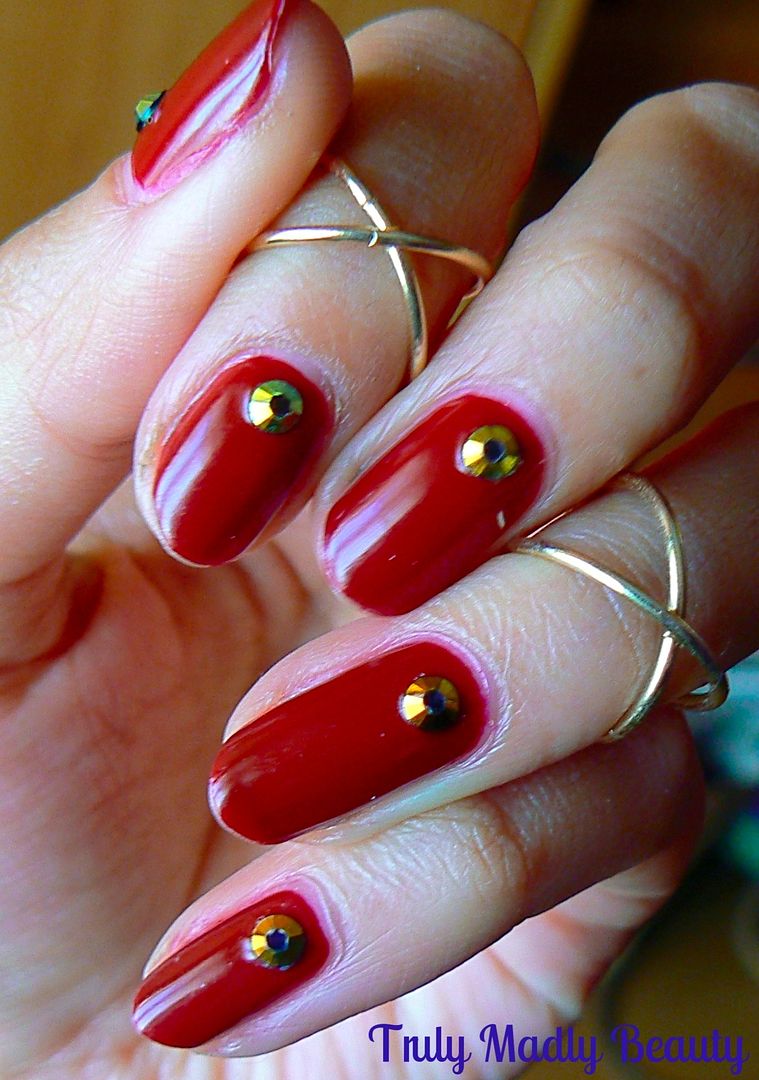
the formula is fantastic. Rouge Diva is a lovely rich marsala
red & applies like a dream.
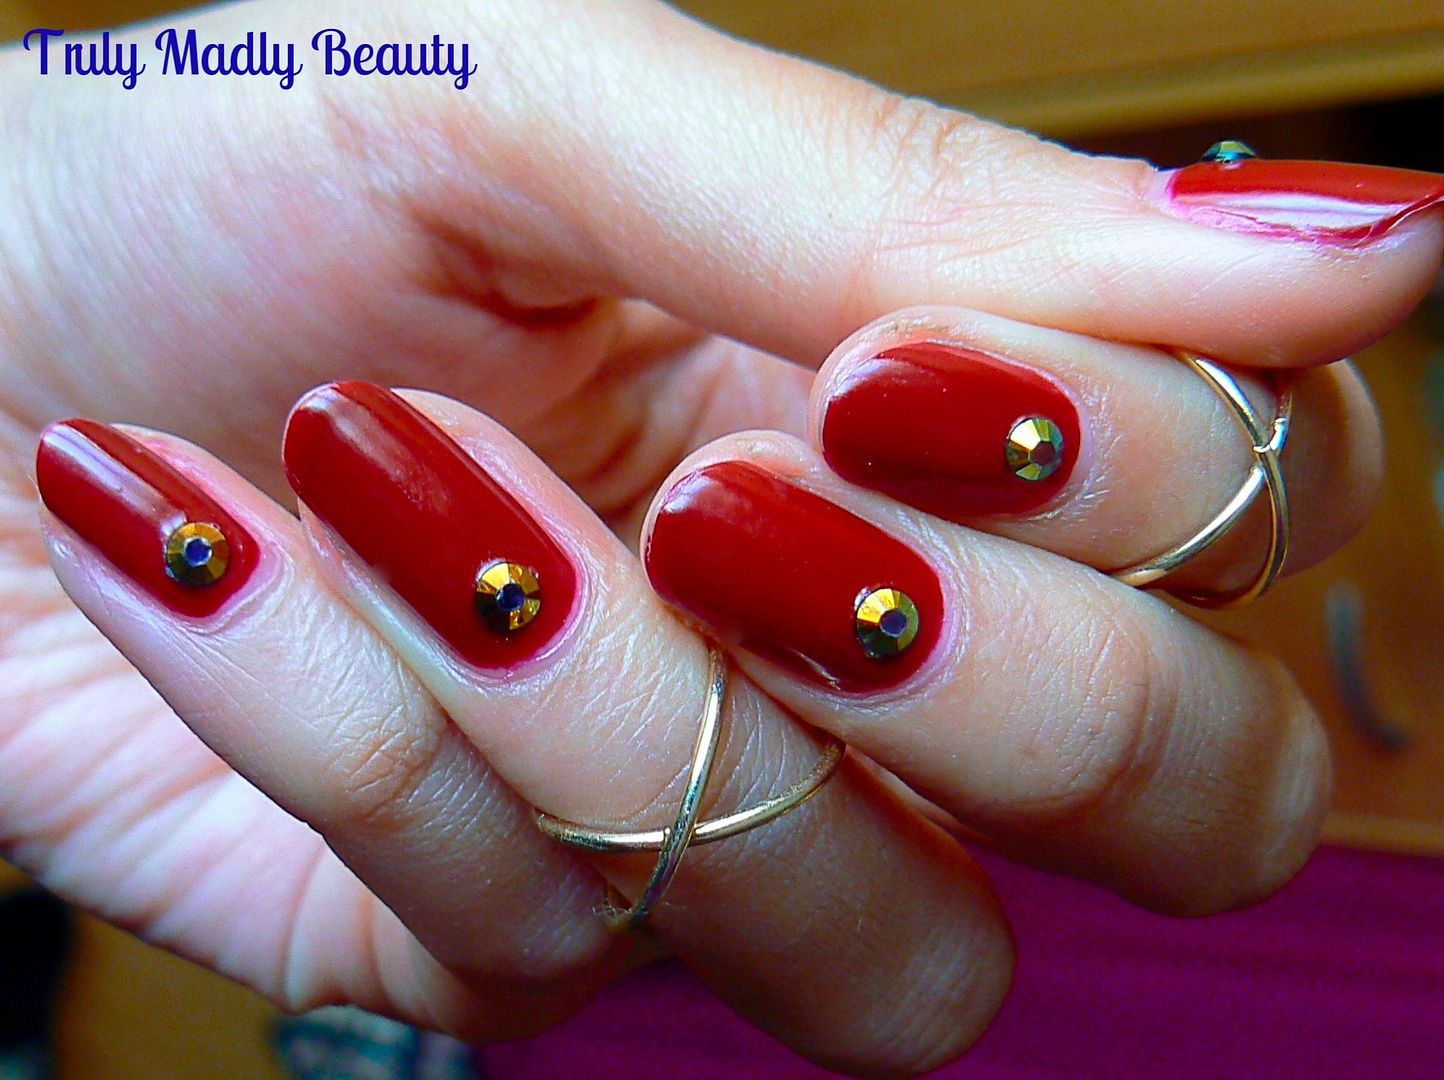
The
formula is smooth & enriched with twice as much vinyl giving it
that thick glossy almost gel like finish. It could even pass as a one
coater but of course I always go for my obligatory two, creature of
habit is me!
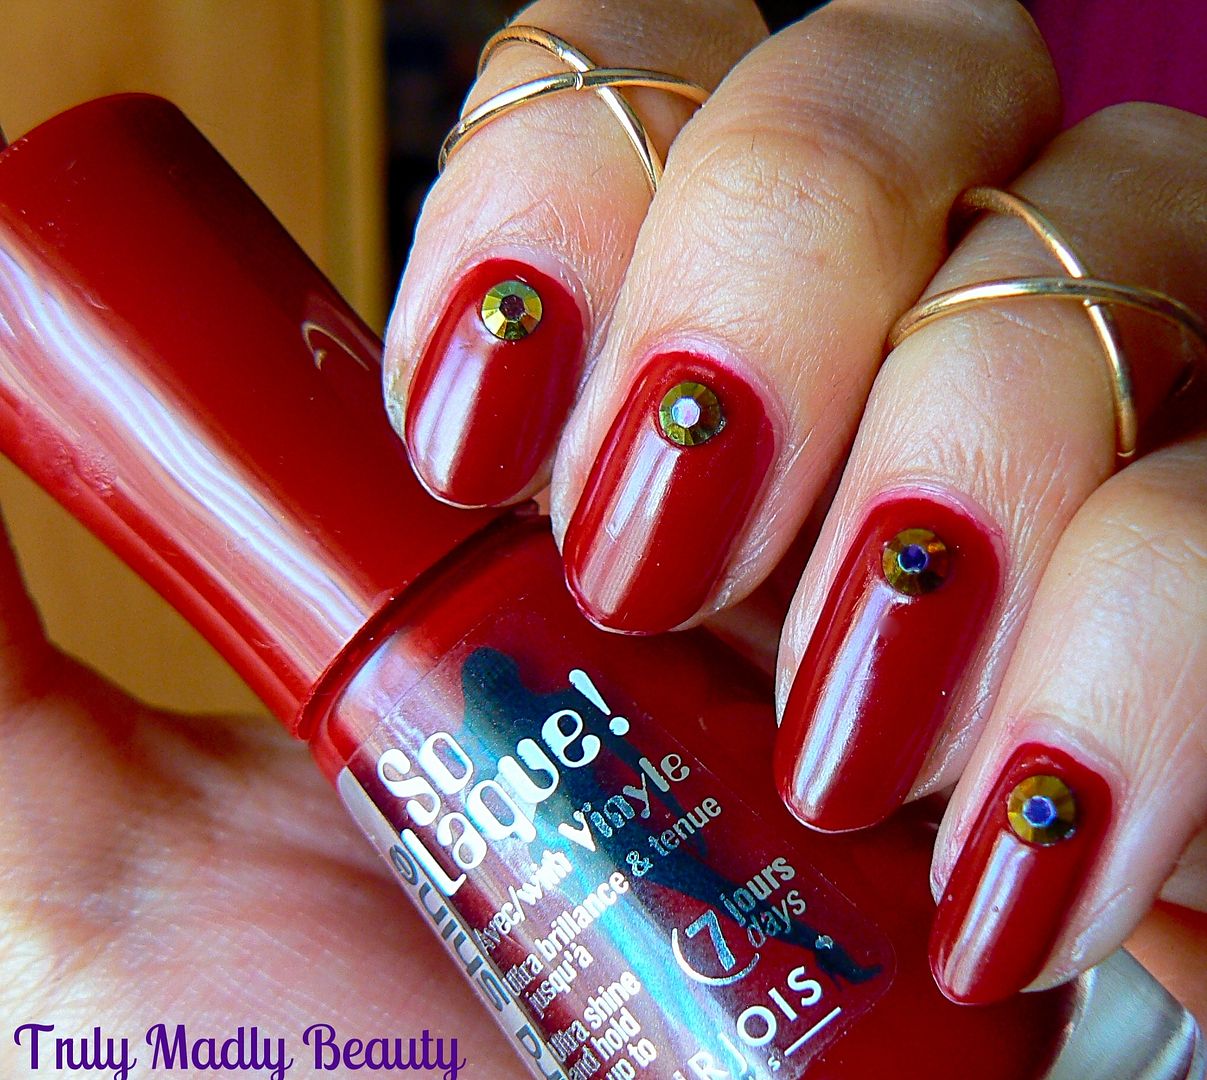
Rouge
Diva is lovely enough all by its onesie but I couldn't resist jazzing
it up a tad as is my way with the addition of these pretty blue/black rhinestones available from Born Pretty Store. You can use my code
TRUW10 to get 10% off of your order ;) The midi rings are Topshop, I do love me some finger bling I
do :)
Thanks
for reading my lovelies, do you have any favourite burgundy polishes?
Lotsa
love to ya!
10.26.2015
Witchcraftery - Join The Coven With The Rogue & Wolf...
Hi
there lovely readers!
With
Halloween around the corner, I thought now would be perfect to share
with you beauties a jewelry range that has captured my
heart of late & brought me back in touch with my darker side! As
much as I love colour, I do have days where I like to embrace the
darkness & become that gothic gal I remember so well again, one
who was obsessed with Practical Magic, owned 456172 Henna tattoo
chokers that everyone & their cat bought in bulk from Claire's
(which seem to have made an epic return of late) & watched Buffy
the Vampire slayer so many times that each episode could be quoted
word for word. Aaah...good times. Statement accessorization played a
key role as much then as it does now & that's where The Rogue & Wolf have delivered perfectly with their gorgeously gothic range...
I
first came across the brand via my beloved Twitter. Once I clicked on
the website to view their wares I was in pure dark gothic HEAVEN!
With a wide range of chokers, rings, midi rings & earrings in
unique & enchanting styles/designs to capture one within their
spell, they definitely succeeded in captivating moi as my wishlist is
now growing to alarming proportions!
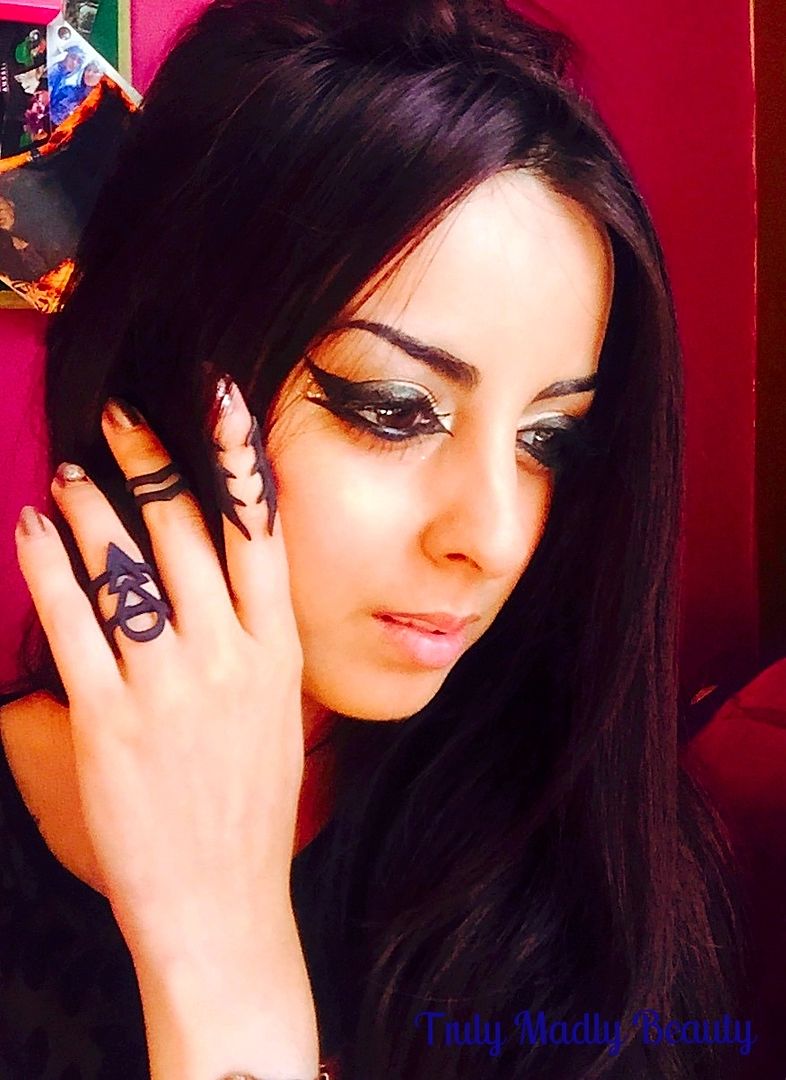
When
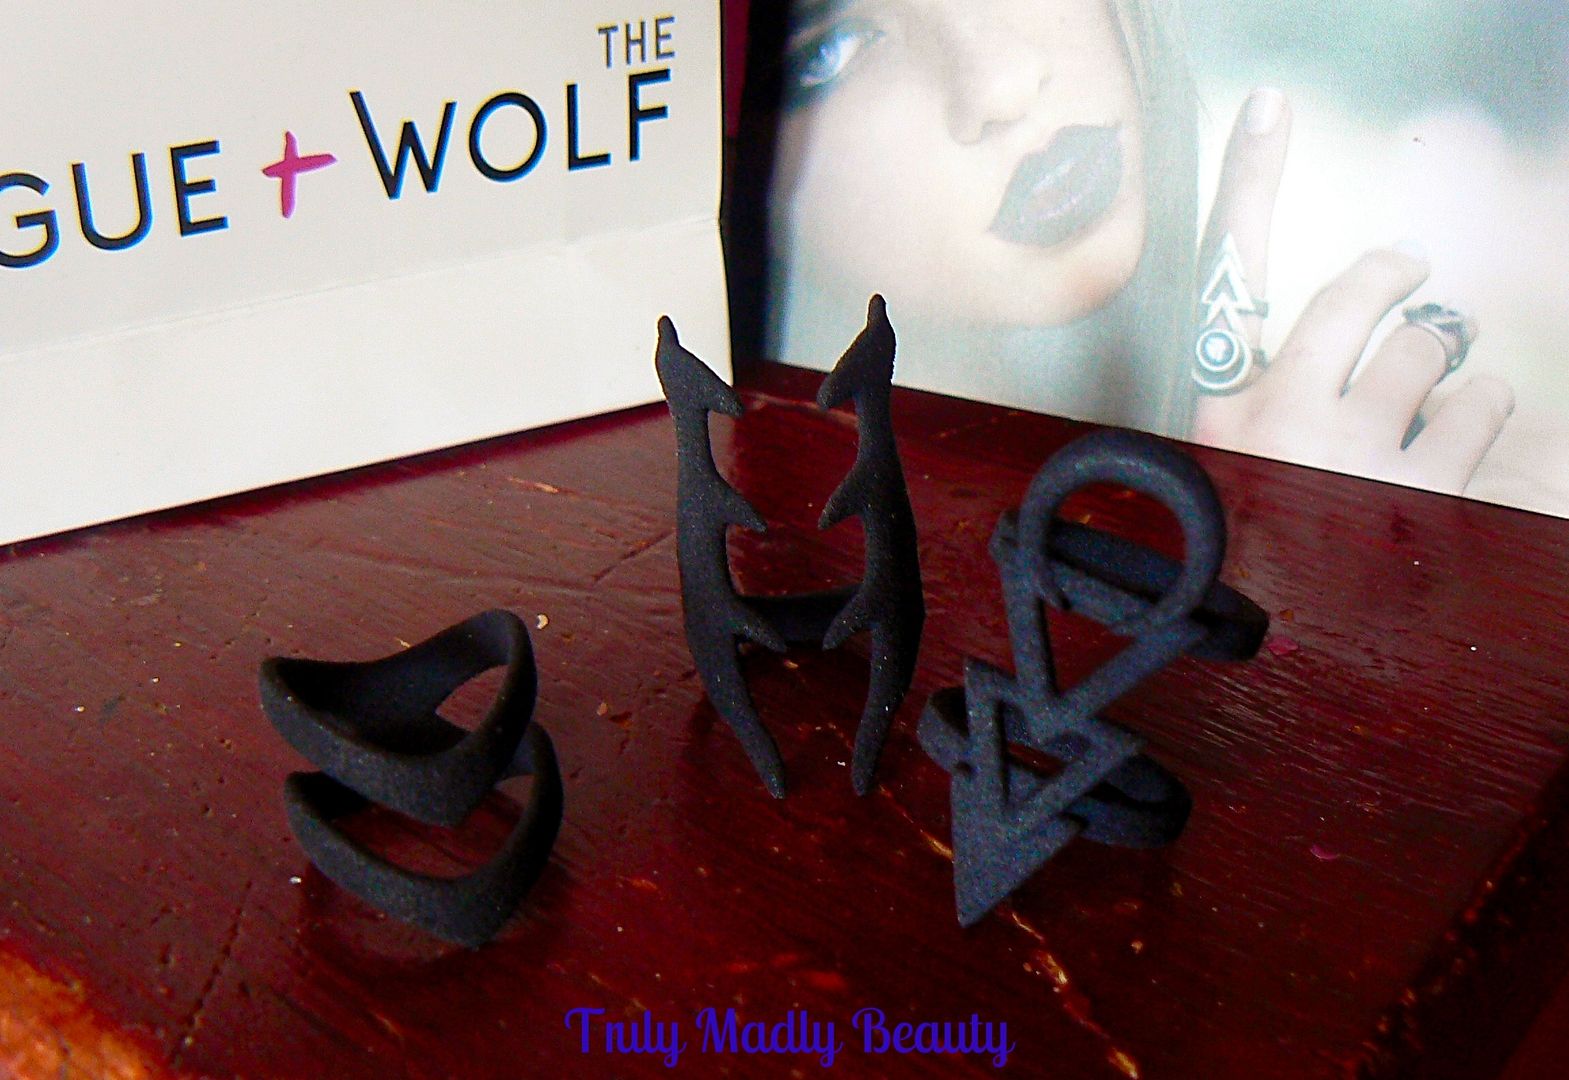
it came to choosing my first Rogue & Wolf pieces I opted for 'The Betray' (index finger) & 'The Hunt' (middle finger) from the
Fair/Feral Collection & 'The Rune' from The Witch's Hawk
Collection which I'm wearing on my ring finger. Having quite thin
fingers, buying rings can always be a bit of a palava hence why midi
rings are my favourite accessory as often they can work as rings on
me too!

The
rings are made from an interesting black polyamide plastic material,
quite different from anything I've come across or own. The designs
are simple yet so feminine, elegant & look stunning on, I've been
asked quite a few times when wearing these eye catching beauties
where I got them from.

These
beautiful pieces have been getting some serious loving for sure &
I am already eyeing up more to add to my collection! The Rogue & Wolf
have recently released the Lunae collection which includes the
most stunning pieces designed in bronze infused stainless steel with
gorgeously coloured gemstones incorporated within. Just look at this
amazing Draco ring that reminds me so much of the eye of
Sauron...NEED!

I
also want to mention that the lovely folks at The Rogue & Wolf are
absolutely dolls! Not only was delivery super quick but their
customer service & interaction on social media is so nice, which
is another touch that really draws me to a brand! So my fellow
witches if you wish to join the coven & nab yourself some truly
unique & stunning statement pieces as well, you can find the
range online.
Thanks
as always for reading!
Lotsa love to ya!
9.14.2015
NOTD - Rule Britannia by True Brit London
Hello there lovely readers!
Hope you're all having a not too blue
Monday! After a few days in the capital city for my birthday, I found
myself back in the office yesterday on a working Sunday (boo!) so
remedied that with a much needed day off today as lets just say ones
limbs may still be recovering haha! If you follow moi on social media
you'll know that I visited Lady Dinahs Cat Emporium for high tea as
part of the birthday celebrations & FYI cat lovers...definitely
go! Such a cute gem of a place hidden away in Shoreditch, you will love
it! Mumma bear is already begging I take her! :)
Now you can't go wrong with a perfect
red polish can you? Like a lipstick, every girl should also have a
signature red polish in her collection & the polish I have to
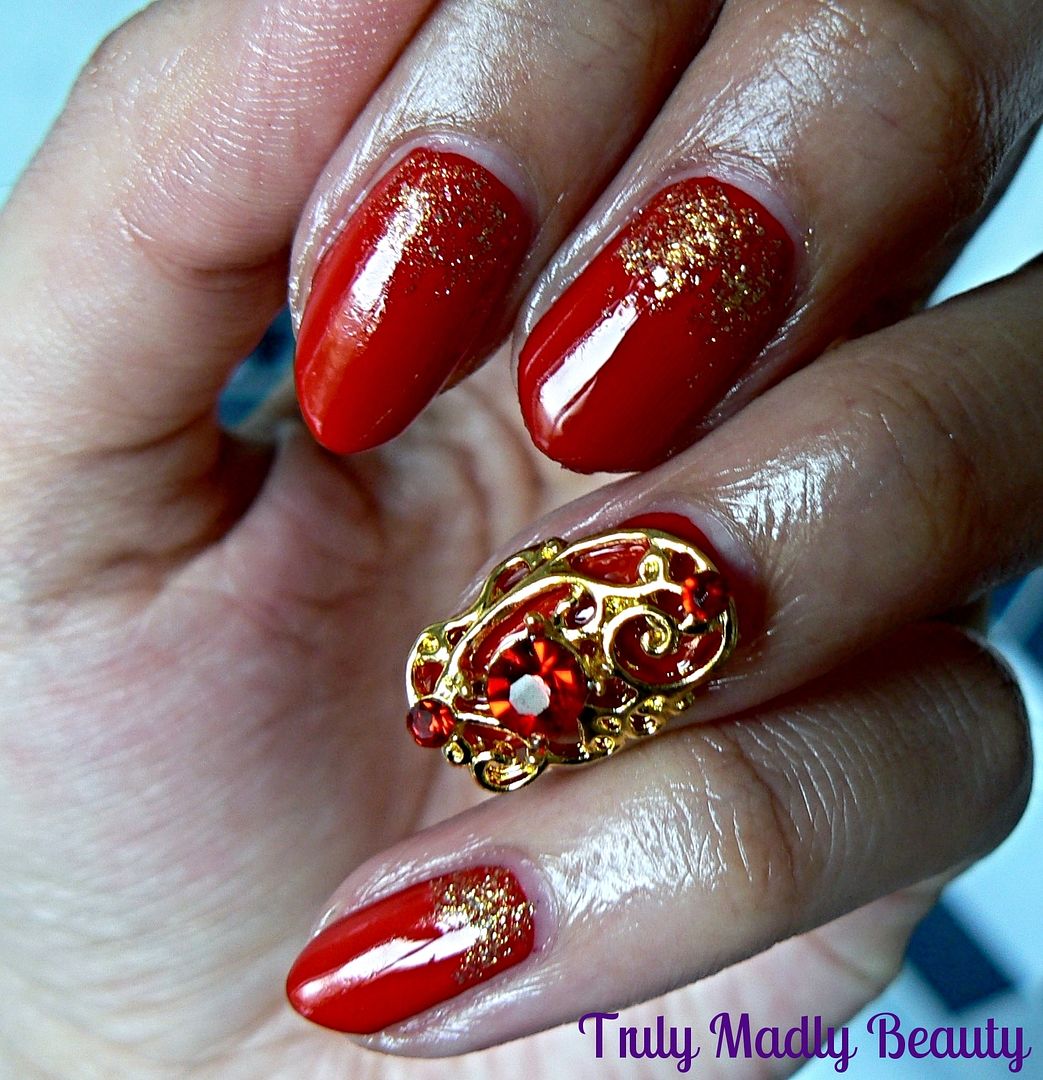
show you today is True Brit London's offering in the form of the elegant Rule Britannia* from the Essentials Collection.
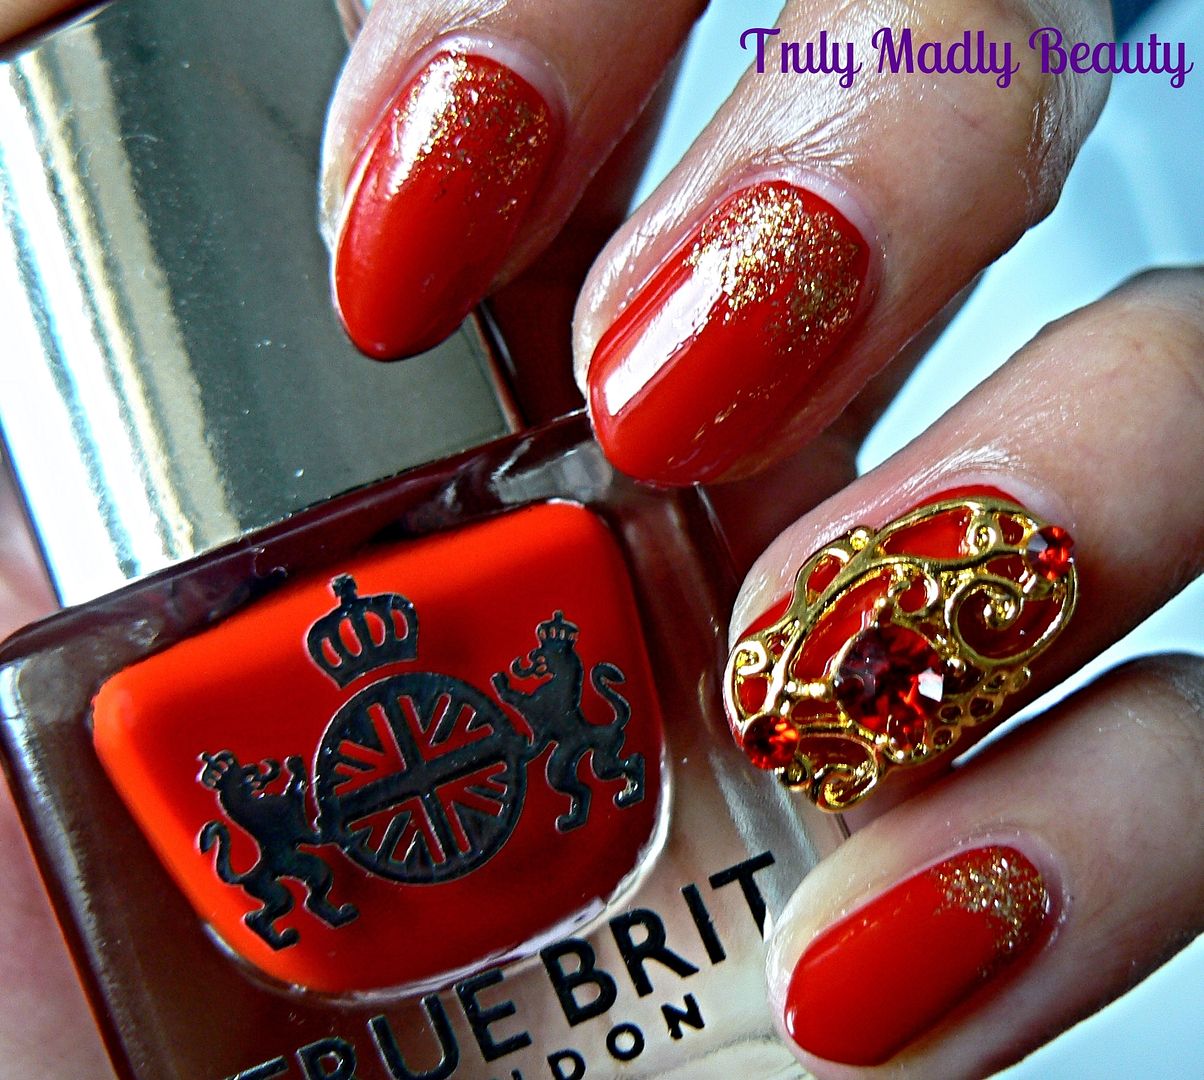
With a polish named thus, I couldn't
resist glamming it up with some serious bling! But first things first
lets start with that divooone shade. FYI dolls...photographing red
tones is an absolute pain in the caboose! However I did my bestest to
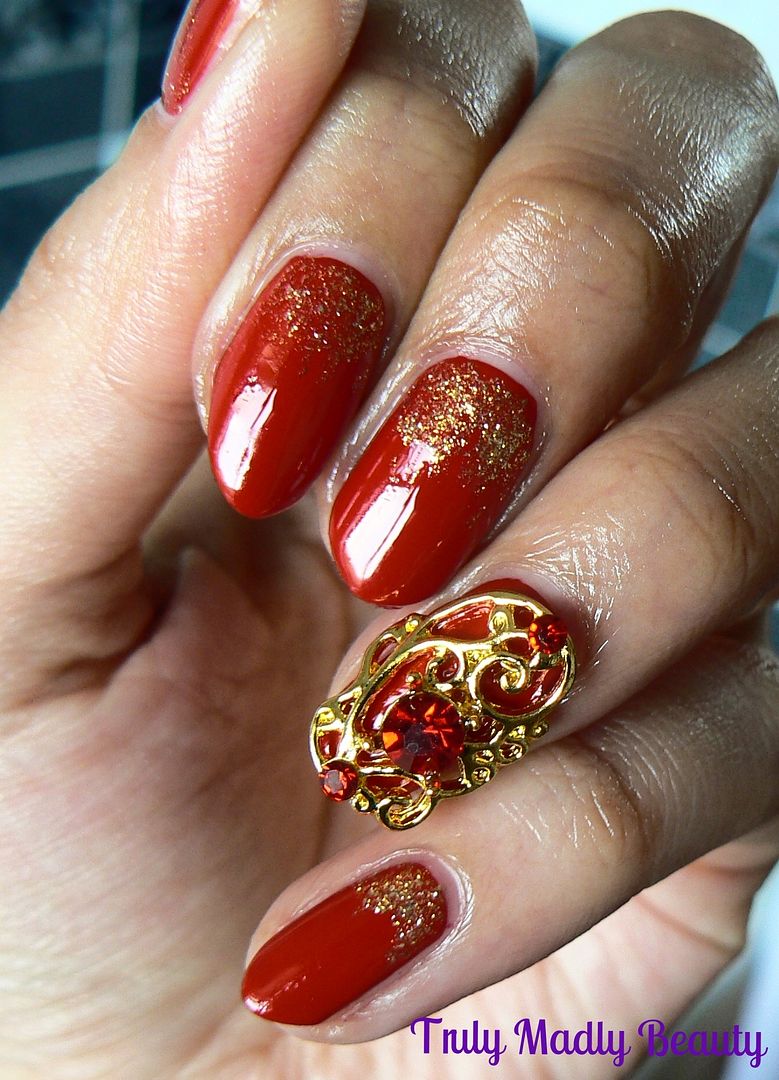
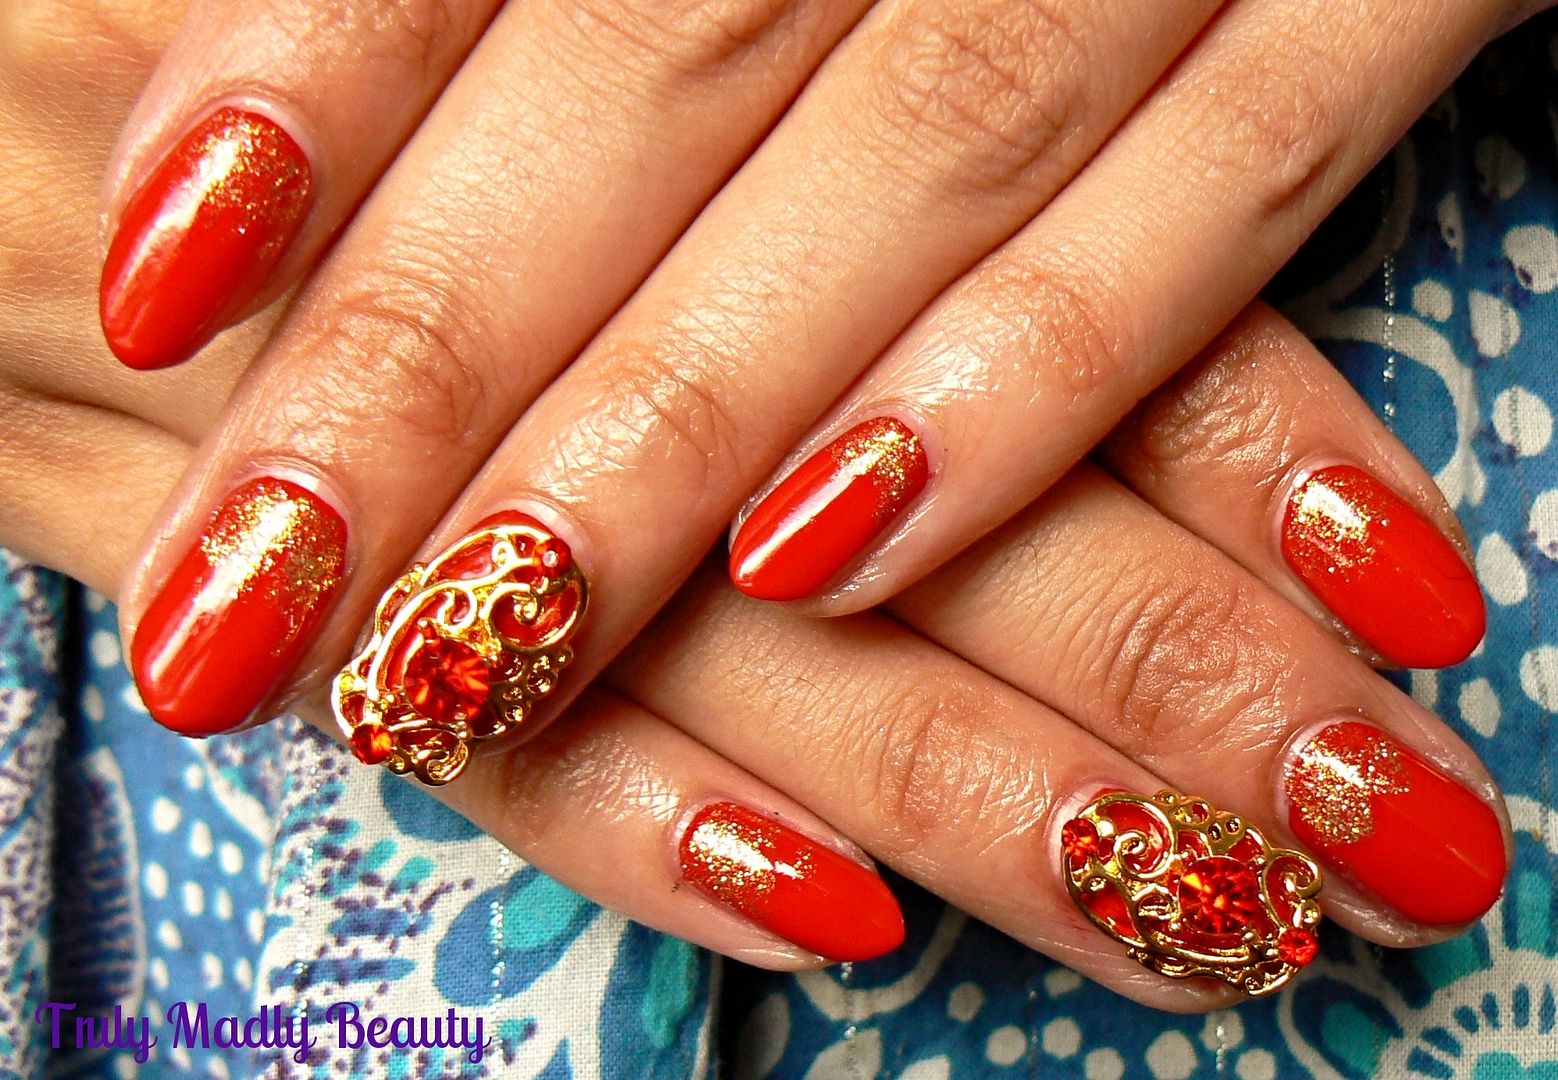
capture it. Rule Britannia is a lovely vintage vibrant red which
veers more towards the orange toned red family.
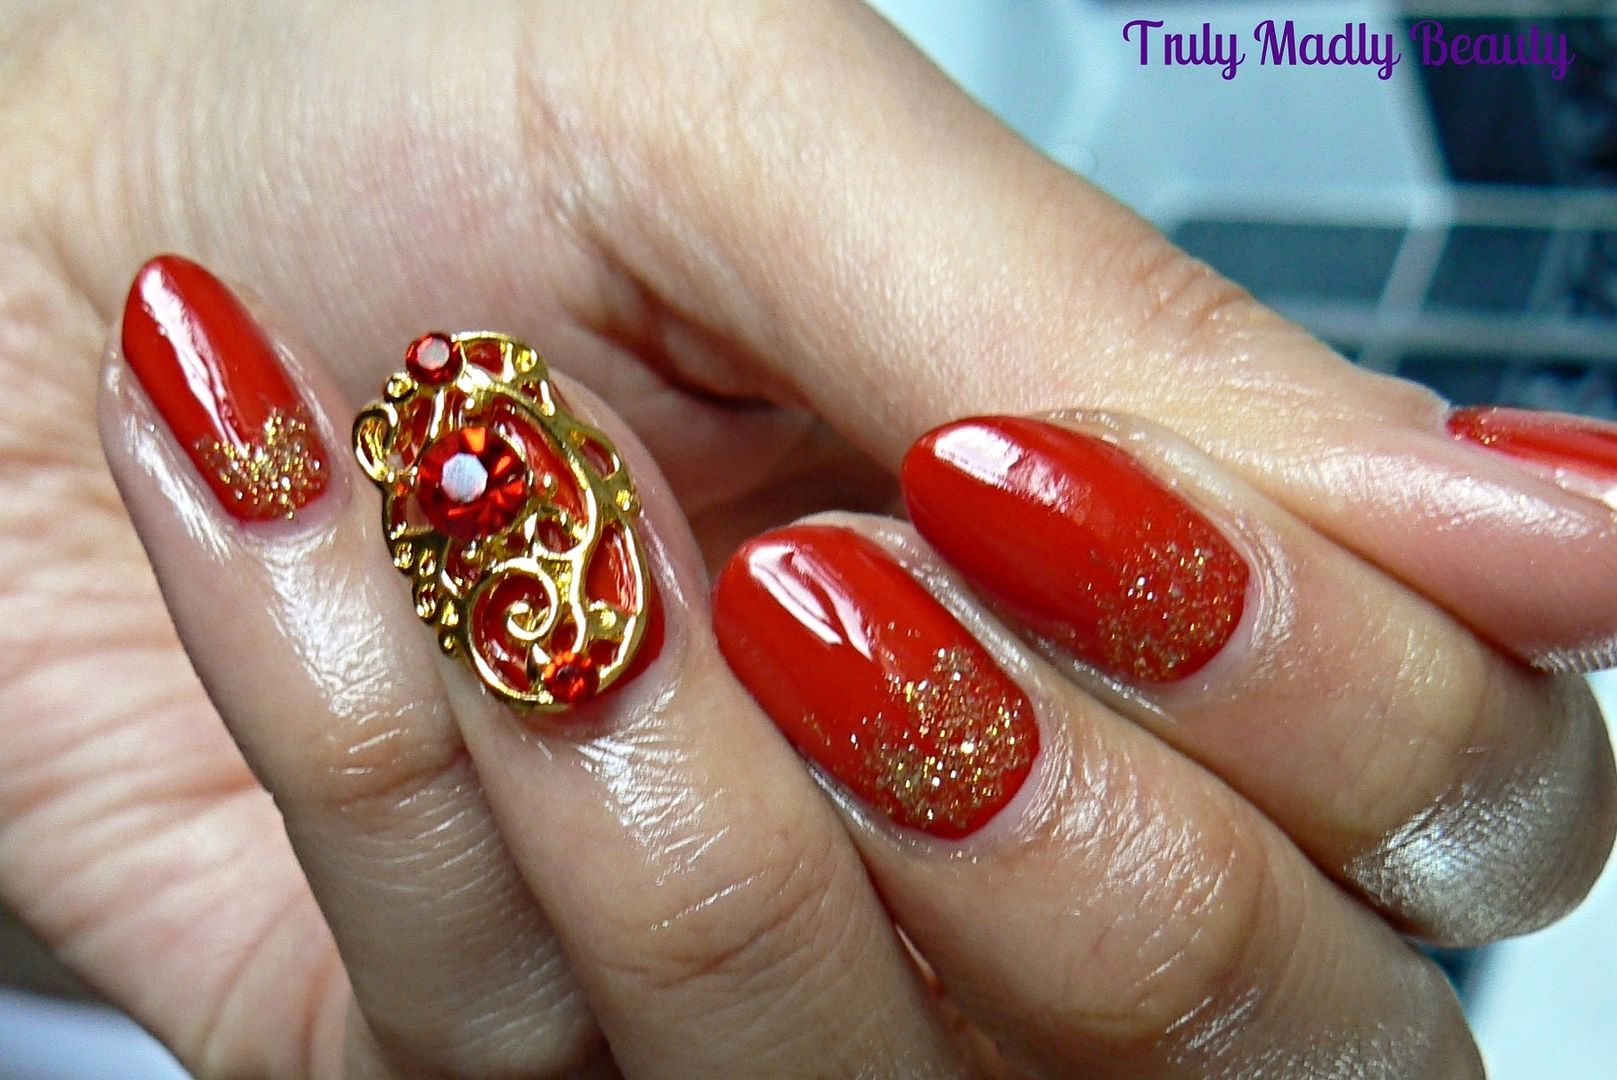
This was two coats applied & as
always with True Brit London polishes the formula was faultless, so
smooth to apply & dries to a lovely glossy finish. I've found
that a lot of the True Brit London polishes are easily one coaters
which is fab! However I'm a creature of habit & always go for my
two!
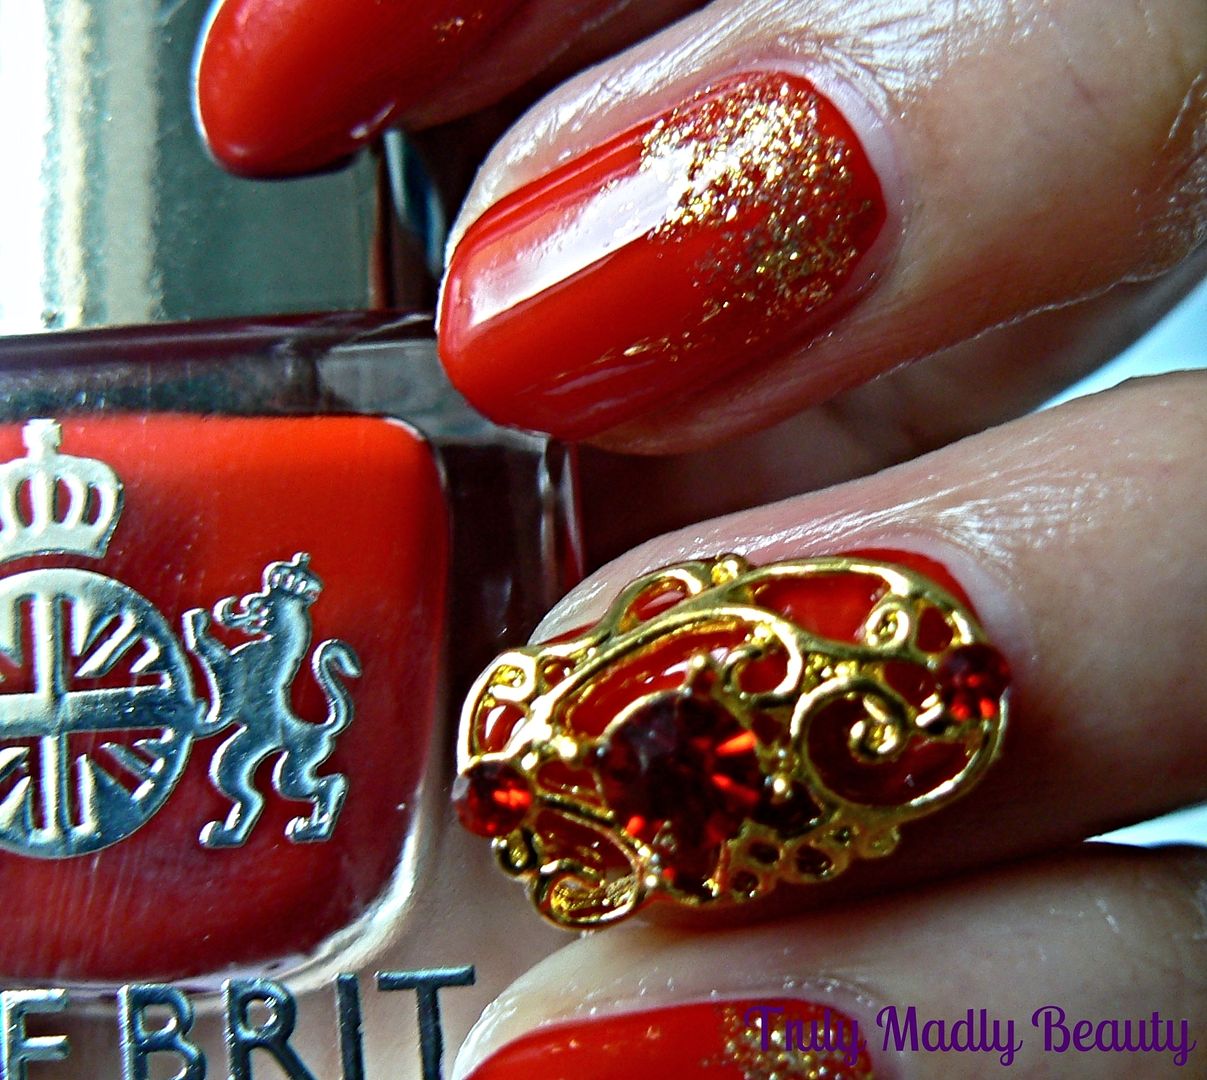
Once dry I decided to dab on some gold
glitter starting from the cuticles using a gold glitter
Color Club polish before dragging down slightly to create a subtle gradient effect.
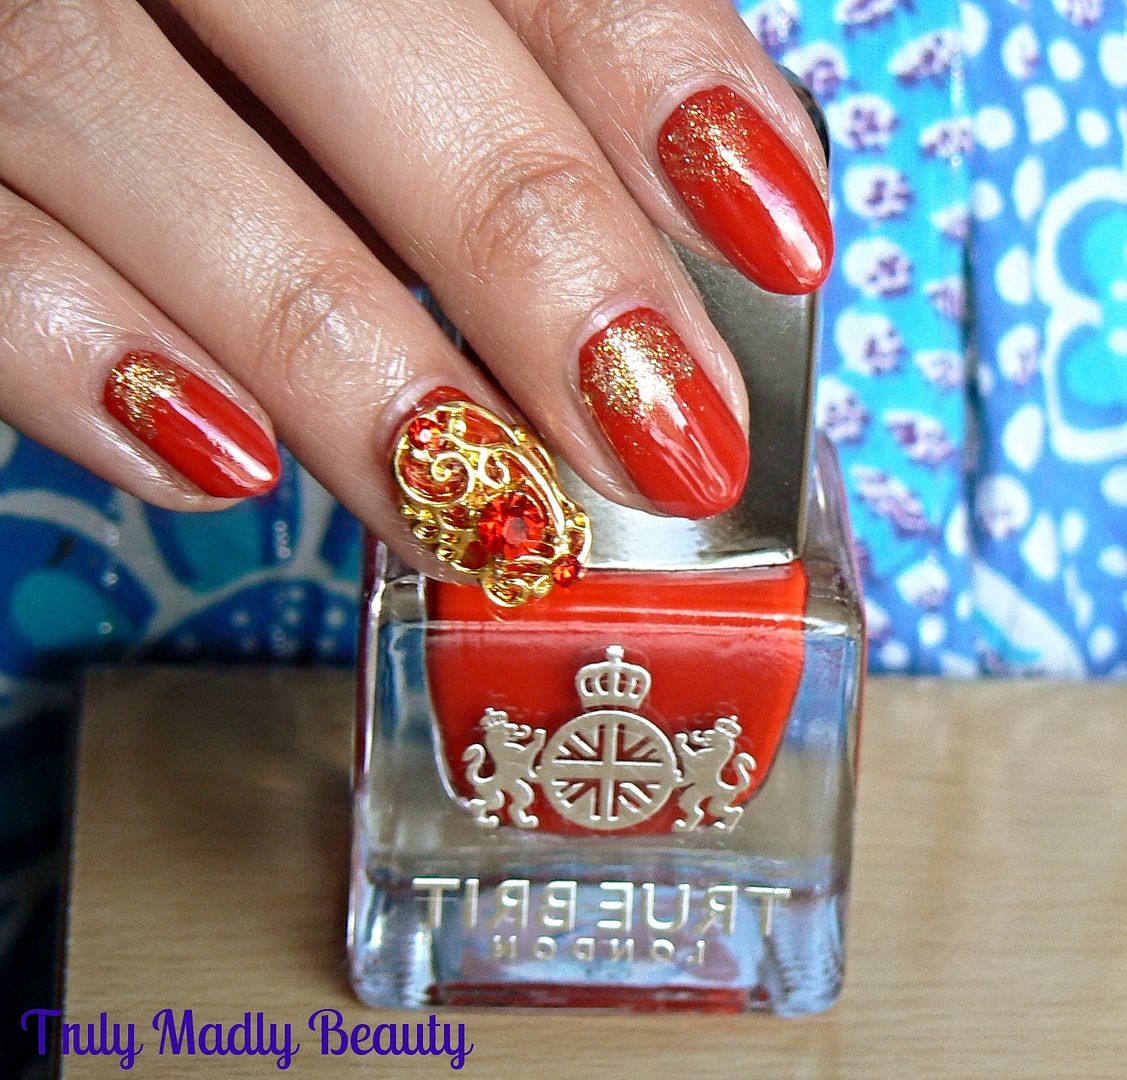
Now on to that pretty nail jewellery, its a bobby dazzler huh?! This pretty nail charm twas
purchased from my fav nail art supply store Charlie's Nail Art &
seemed quite fitting & the perfect accessory for my Rule
Britannia manicure. The great thing about these lovely nail charms is
that they can be re-used again!
I applied the True Brit London Gloss
topcoat to each nail as well as using it to help stick the nail charm
on the nail, as its a lovely thick formula, the charm held strong
for the whole duration I wore the mani.
Thanks as always for reading lovelies!
True Brit London polishes retail for £12.50 & can be found
online. Don't forget you can also get 10% off your order using my
special code TRULY10.
Lotsa love to ya!
Disclaimer
- * products featured were sent to me for my consideration. I am not affiliated with
the brand nor paid for this post, this review has been as always my
100% honest opinion! :)
7.20.2015
Pretty Bling from Cheap Frills!
Hello there my
lovely readers!
I hope your
weeks gotten off to a good start! Truly did not want to return to
work after a blissful weekend spent with family on Saturday for Eid,
followed by a divine day perusing my favourite place on Earth, Brighton! I
got to meet up with the lovely Jayne whilst there also which was the cherry
on top of an ace weekend :)
Just one of the
many wonderful things I love about the world of Twitter (come find me
@Aysh_tmb) is it often brings you into contact with many incredibly
talented independent jewellery businesses that I wouldn't know
existed otherwise.
I've already
become addicted to a number of boutiques which produce some
stunning pieces. One that I have a soft spot for in particular is Cheap Frills, which is run by the lovely Georgie, who actually resides in
Brighton the lucky thing, not jelly at all, & has such a
delightful selection of pretty vintage bling. I thought I'd share
with you beauts a few bits & bobs I've picked up from this store
which has become a firm fav of mine...
One of the first
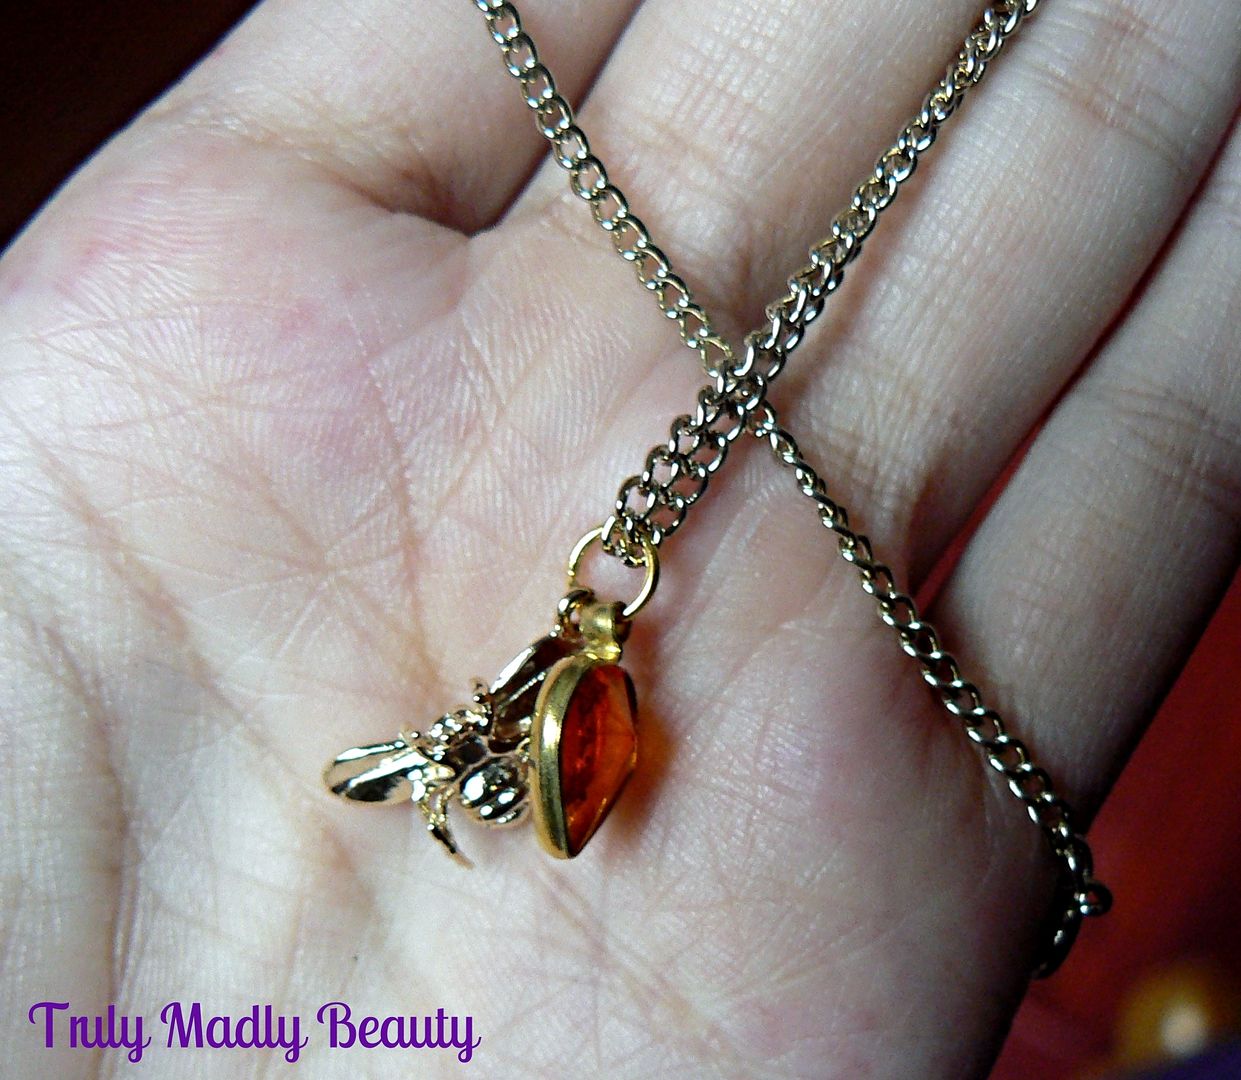
items I ever purchased after having a browse through all the delightful
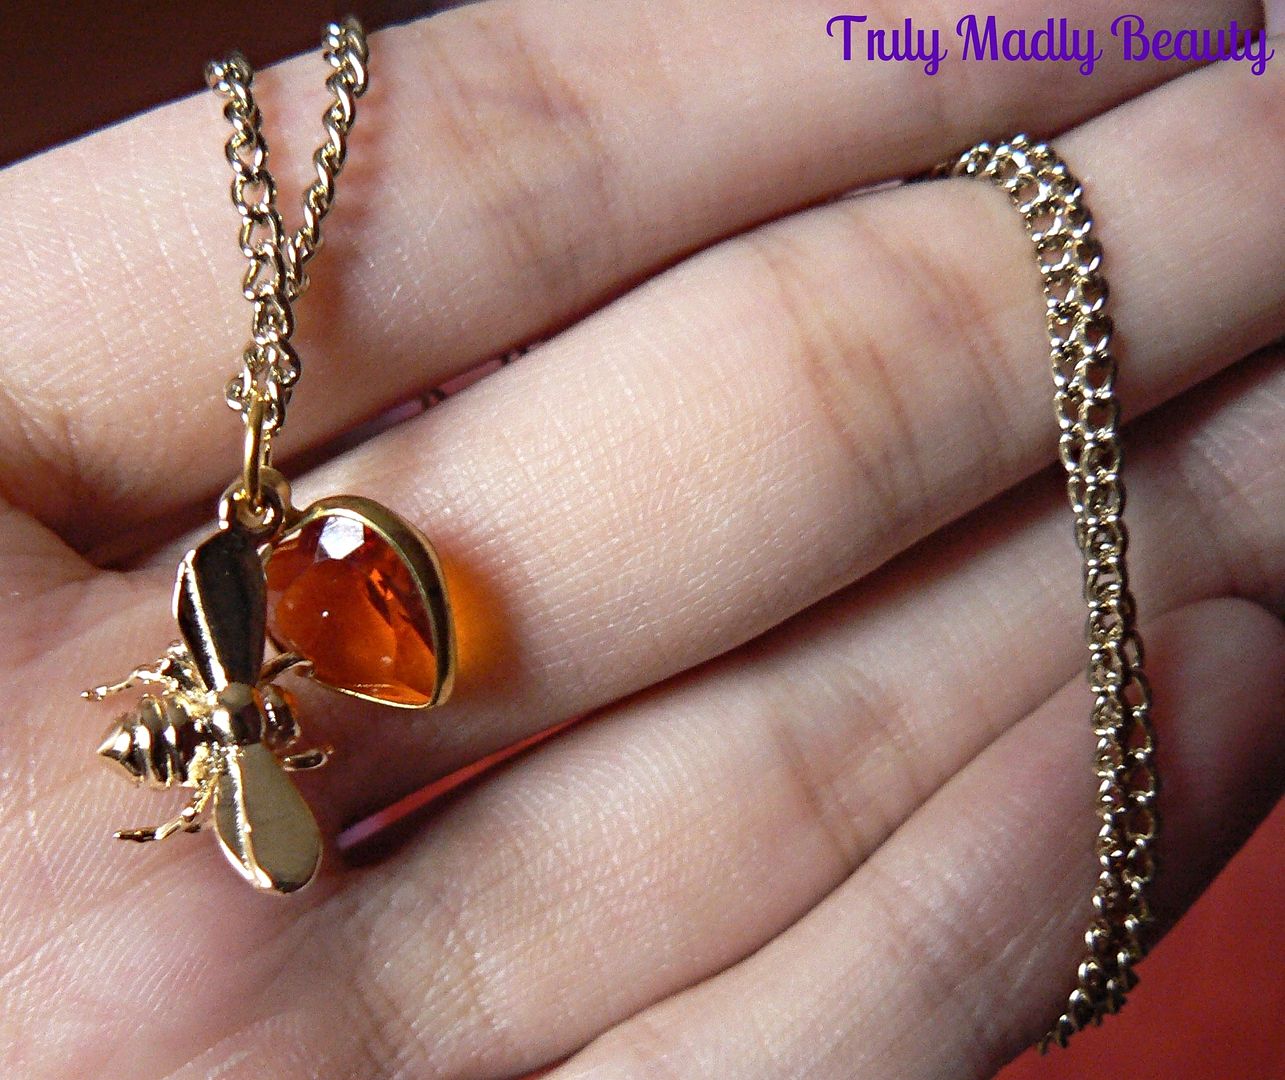
wares on offer was this adorable golden bee & amber stone
necklace...isn't it so puuuurdy?
First things
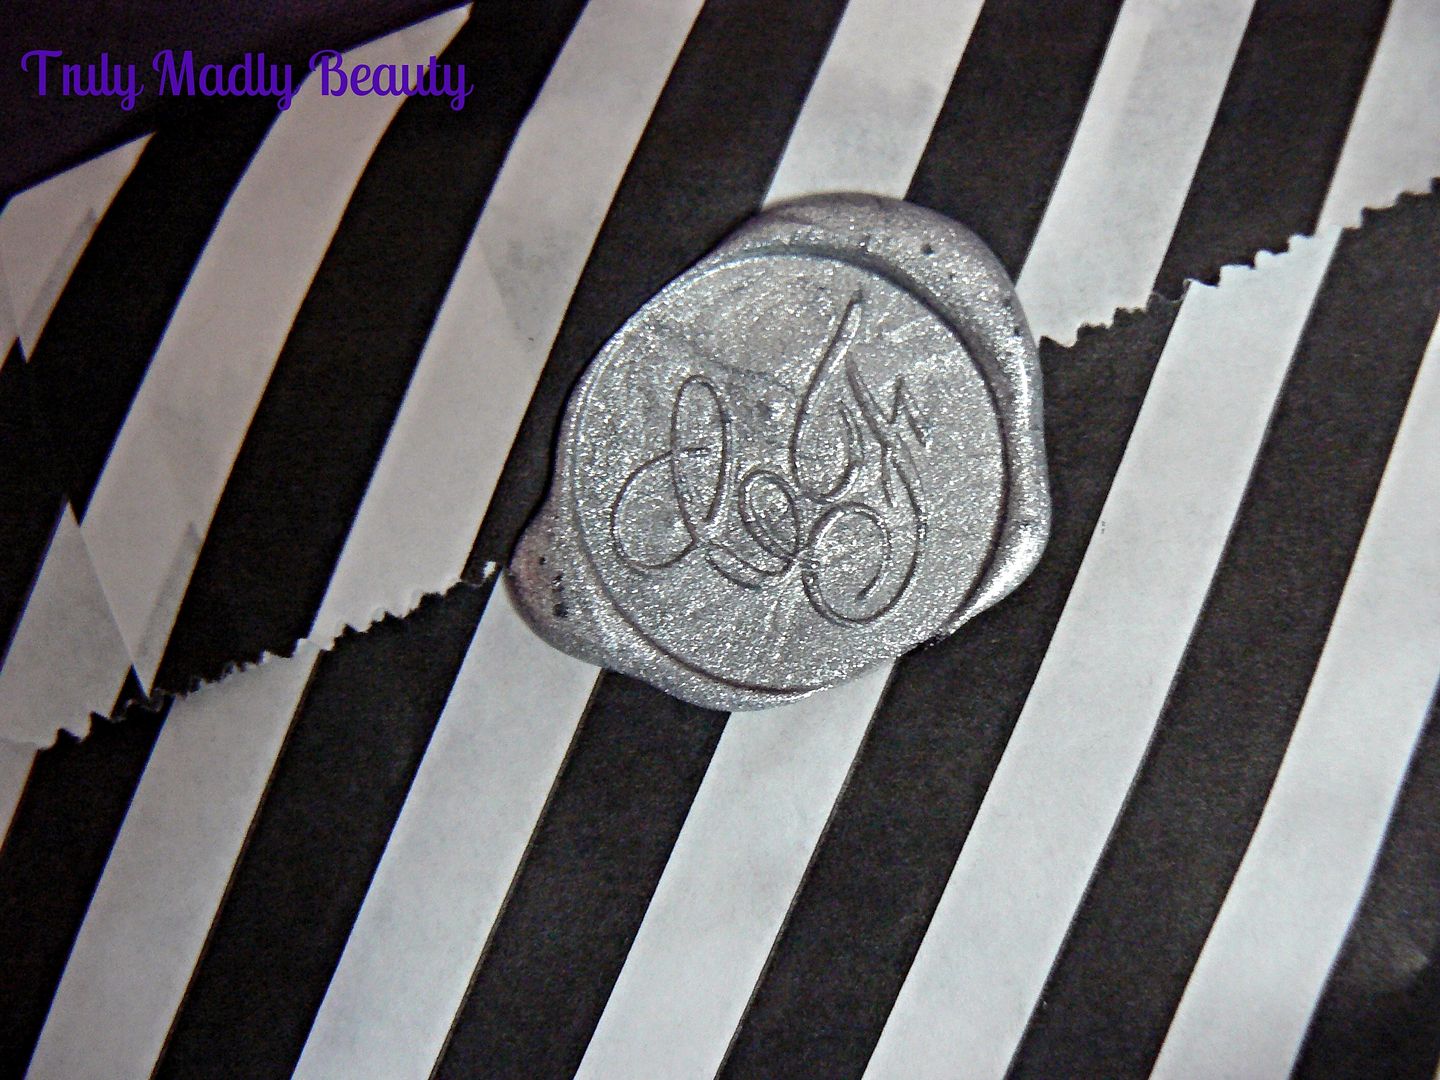
first though I absolutely adored how the necklace came packaged when
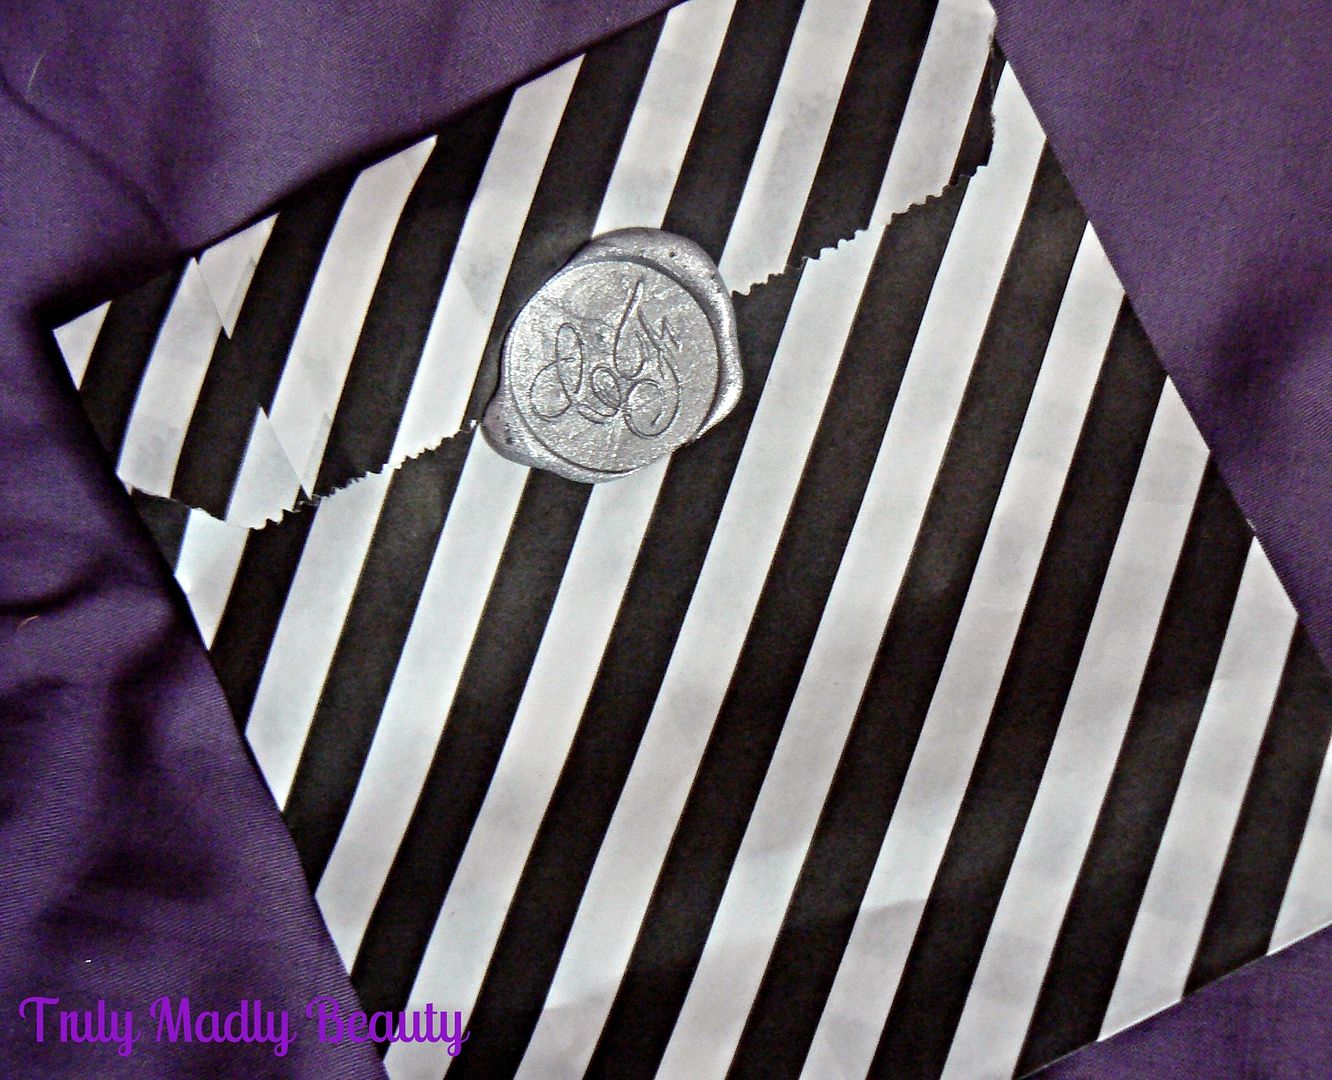
it arrived. Each piece is parceled inside a cute paper bag &
sealed with wax & a Cheap Frills stamp embossment which I thought
to be so quaint & its little touches like this that really endear me to a product!

The necklace
itself is exceptionally pretty with the delicate gold chain, intricately detailed solid bee pendant & the pretty amber heart stone to complete the whole
piece. Now in reality bees actually scare the beejesus (pun totally
intended...sorry) out of me. However in jewellery form...no such
problems. Weird.
Another couple
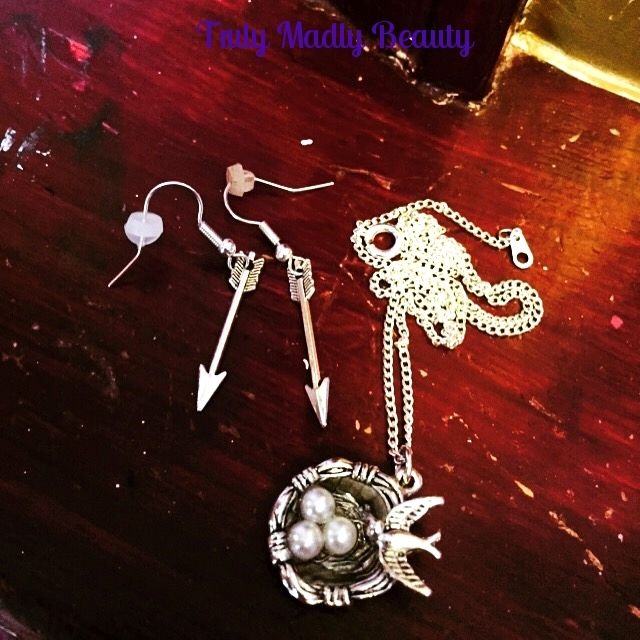
of pieces I couldn't resist hauling a little later on were these super cute silver
arrow earrings & swallows nest necklace which came with it. These pretty items of bling have all gotten a lot of usage!
Lovely right? I
definitely urge you to check out Cheap Frills if you're looking for
pretty cameo jewellery & accessories. I already have my eye on
the Oxblood Vintage Cocktail Ring! Unfortunately I don't think the
Bee & Amber necklace is available any more (I did get it a while
back!) however Georgie is forever introducing new equally stunning
pieces & FYI there's always some fab bling around Halloween time
so defo worth keeping an eye out!
Thanks as always
for reading lovelies! Till next time.
Lotsa love to
ya!
Subscribe to:
Posts (Atom)