Showing posts with label Shimmer. Show all posts

2.19.2019

NOTD - Lisbon Tiles

Hey there lovely readers!

One of my trips last year took me to the beautiful city of Lisbon, which was not just the most magical place but filled with the nail-spiration around every corner! Famous for its beautifully patterned tiles I knew I had to try & re-create in some shape or form on my nails. 

I was still a bit stumped with which particular pattern to go for, so when one of my (many) favourite nail artists on Instagram, Katie Masters aka @nailthoughts whipped up a Portugal tile design of her own, I fell in love with her interpretation completely so this look is utterly inspired by her!


8.07.2018

A England "A Symphony In Green and Gold" and "Peaseblossom A Fairy" Polishes

Today I wanted to share two beautiful new additions to my polish collection from one of my all time favourite brands...A-England

A-England is an indie polish creation by the lovely Adina & the collections within her range seek inspiration from English history & myths...thus appealing to my aesthetic completely. Not only are the polishes themselves stunning with faultless formulas but the stories behind the collections are equally intriguing & magical. Collections such as "Tudoresque", which is dedicated to King Henry VIII & his 6 wives. "The Legend", which touches on the story of St George & the dragon and "To Emily Bronte", a collection inspired by the gothic novel Wuthering Heights...these are just a few of the magical collections...can you see why I am besotted?


7.09.2018

NOTD - Peony and Mirage by For Your Nails Only

Hey there lovely readers!

Today I have another wee nail polish haul to share with you in which I picked up a couple more For Your Nails Only shades that I had my eye on to add to my collection :)


1.11.2018

NOTD - 503 Orchid Holographic Magnetic by Wycon Cosmetics

Hey there lovely readers!

Boy do I have a pretty polish to share with you beauties today! Remember when Magnetic polishes came forth into the nail polish world & blew our minds into oblivion with their magical properties? Or was that just me...? I recall quite a few high street brands took a slice of this pie & released some lovely magnetic polishes however of late I've not seen so many which makes me sad!


12.23.2017

Festive NOTD - Christmas Wreath French Tips!

Hey there lovely readers!

I have seriously slacked with the Christmas nail art this year...bah humbug Aysh! But on account of being away in sunnier climates for part of the month (where, lets be honest, festive inspiration is harder to come by right?) I think I'll let myself off whilst at the same time pat myself on the back for managing to do any at all haha! But here we are with a fourth & final Festive mani for the year...Christmas Wreaths!

11.23.2017

NOTD - Geode Nails plus Step by Step Tutorial

Hey there lovely readers!

When it comes to one of the biggest nail art trends to hit 2017, I think its safe to say that Geode nails were definitely a fore runner & has been one of the most popular looks of the year. 

What are Geode nails exactly? Think Amethysts, Jade, Crystals & other semi precious stones/rocks carved in half & the pretty designs magically revealed within the rock being then recreated into a fantabulous funky nail art design!


11.13.2017

NOTD - Moustache Nails for Movember plus Tutorial

Hey there lovely readers!

You may be aware already that during the month of November, many menfolk partake in Movember, a great initiative where the month is spent abstaining from shaving & an attempt to grow some stellar facial hair goes into effect, the purpose being to raise awareness for men's health issues & specifically cancer. 


10.15.2017

NOTD - Dragon Egg Nails plus Step by Step Tutorial!

Hello there lovely readers! 

Taking a wee reprieve from Halloween Nail Art for the moment (not for long though!) as I really wanted to share this mani with you! 

You may remember the stunning Chameleon Flakies I reviewed a few posts back from Beauty Big Bang? These little pots of wonderfully magical flakes transform an ordinary polish into a stunningly ethereal multichrome flakie finish. 


Each shade has a different colour shift effect, the J2443-3A flakies, when applied over a dark polish, gave a stunning purple to green colour shift, have a peek at my post HERE to see how pretty it is. Well naturally I was eager to see how the other shade I picked J2443-4A would fare so couldn't wait to give it a try & this time, keeping in with the dragon theme I decided to use it as the perfect base to create me some Dragon Egg Nails!


6.08.2017

NOTD - Dry Marble Lily Nail Art

Hi there lovely readers!


Now I have me my fair share of nail art FAILS. Dreadful & dark times indeed when these events occur let me tell you. Times that are frequenting more of late, mostly (okay entirely) due to a certain cheeky little fluffball...if you follow me on social media (Twitter @aysh_tmb/Instagram @aysh_xox) you'll know that we now have a new addition to the family in the form of Lunar, our new kitten! Needless to say we all miss our beloved Hoshi muchly, so we all needed to have that gaping hole she left behind filled with another sweet soul to cherish & Lunar certainly is that. Even at a young age I can see she is such a character & its been an eventful couple of weeks! Lets just say nail painting when I'm at home is gonna be a whole new challenge!

However, pardon my digression there, I do occasionally have moments when (if I'm not being distracted by a curious little kitty) a design turns out far beyond my expectations & then the world is put to rights again...life is all about balance eh? Though to be fair I could do WITHOUT the fails that see me losing my hair & ageing at a more drastic rate...


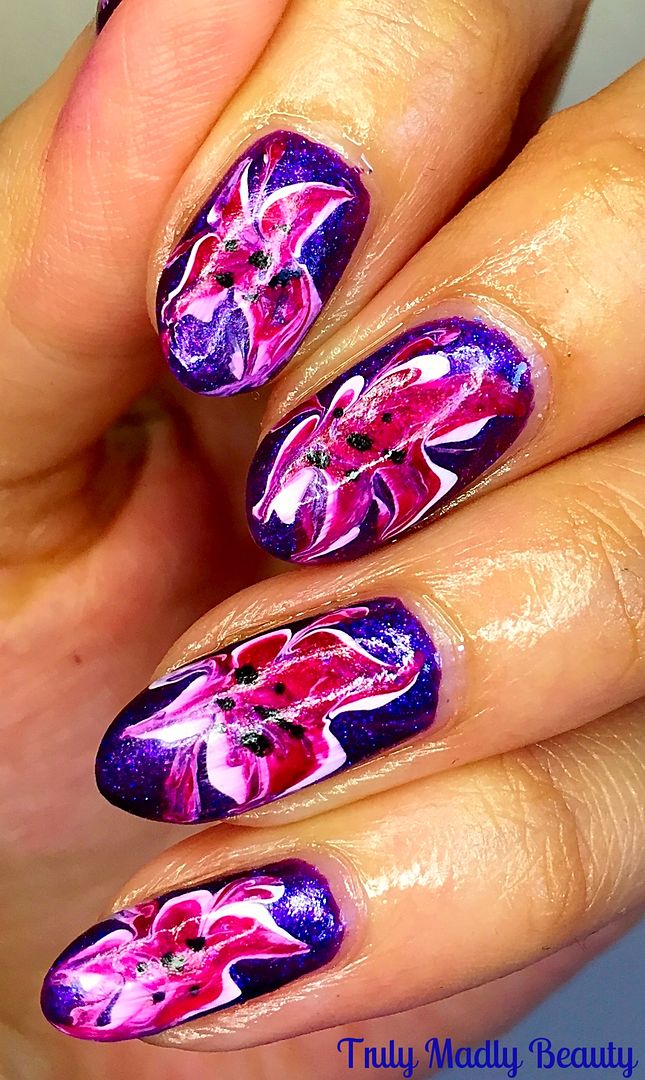
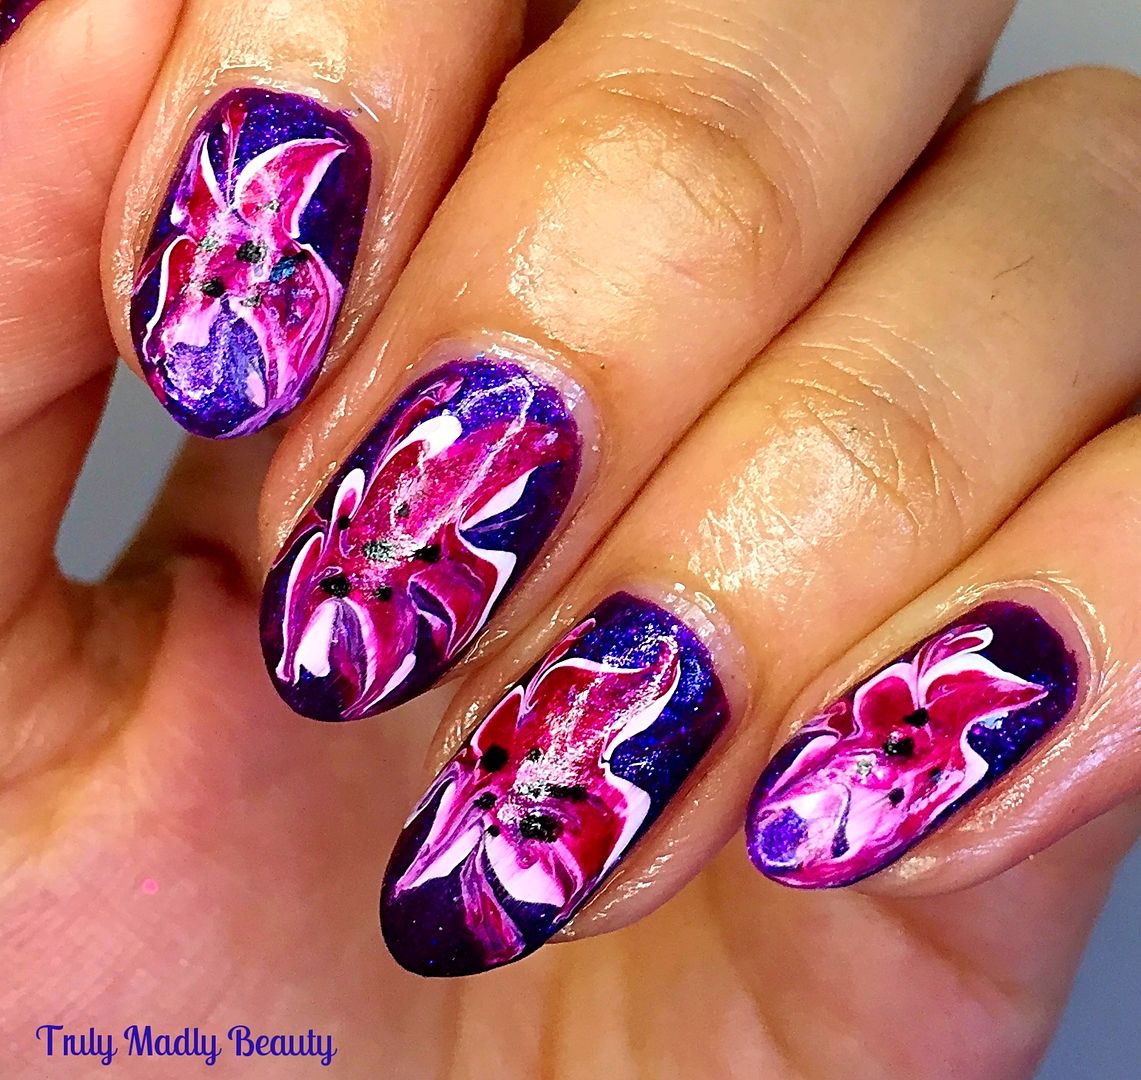
Anyhoo mani WINS are much more welcome naturally & such is the case with today's design which features what is becoming one of my favourite nail art techniques...dry marbling. Until the day comes when I find the inner mental & emotional strength to even think about tackling the intimidating task that is water marbling...I shall get all my marble fix needs met this way!


5.24.2017

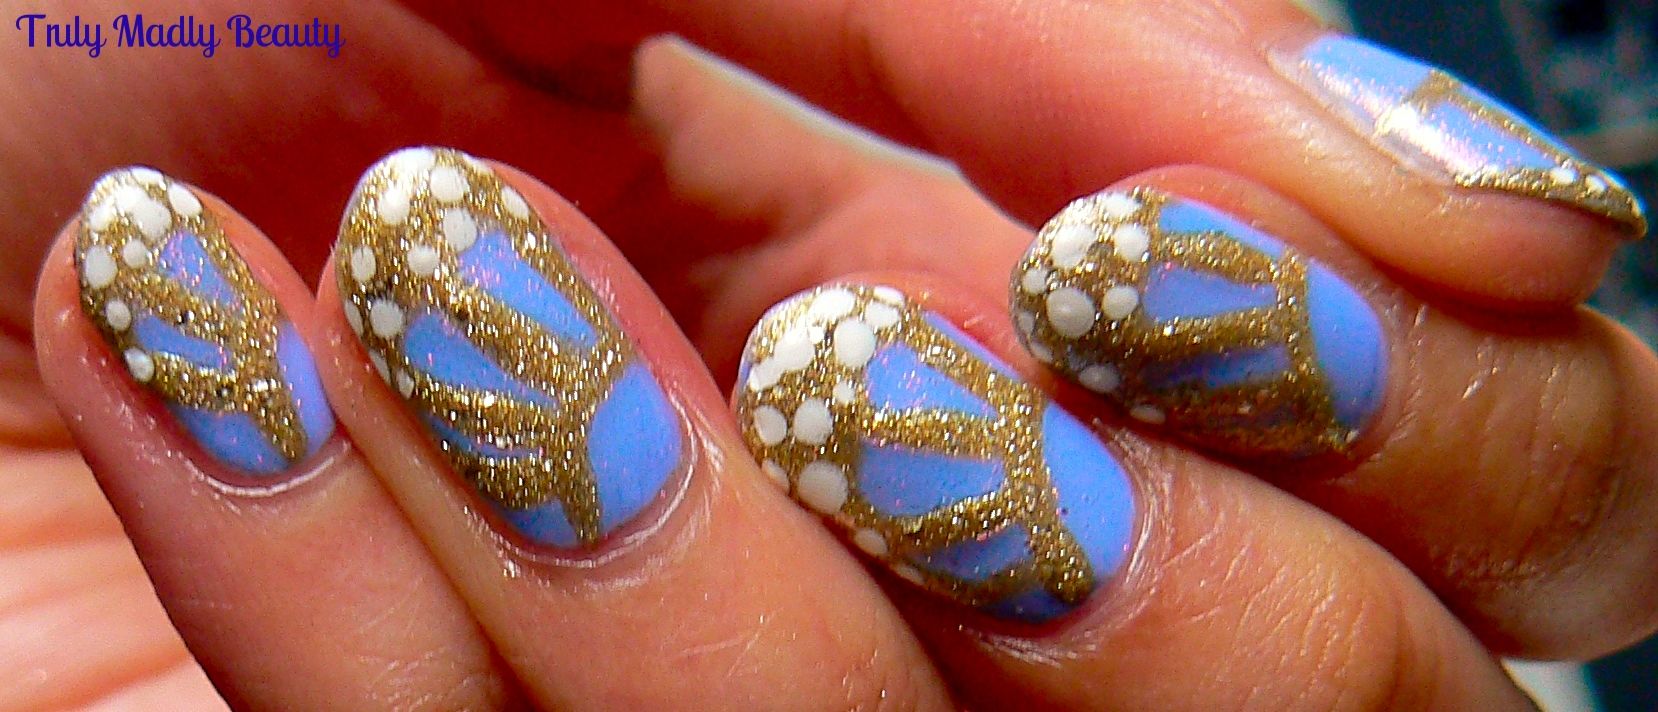
Disney Nail Art Series - Cinderella Fairy-tale Butterfly Wings!

Hello there my lovely readers,

Not too long ago I decided to begin a Disney Nail Art series on my blog, combing my everlasting adoration for the two passions in my life...nail art & Disney!

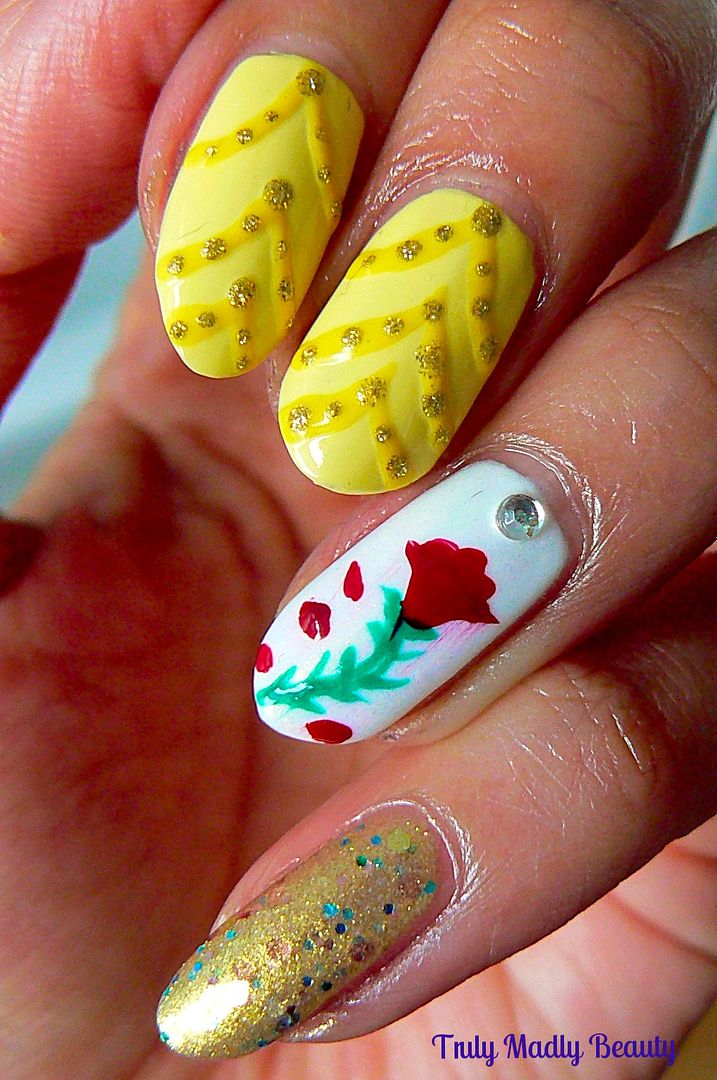
I started things off with this Beauty & The Beast manicure which I thought was quite a fitting way to begin the series as the new live action film had just been released. 


I've, rather unexpectedly I'll admit, adored ALL the live action Disney remakes that have been made so far & if my sources are correct there are many more to come! Cinderella was one of the Disney classics that was recently remade & I absolutely loved it, not just for the glorious presence of one Richard Madden as Prince Charming & the divine Cate Blanchett whom I adore as the Evil Stepmother! Lily James as Cinderella herself was a bit meh in my opinion but I still adored the movie mostly due to its beautiful consistent message throughout the film..."Have Courage & Be Kind" A motto I think everyone should live by...


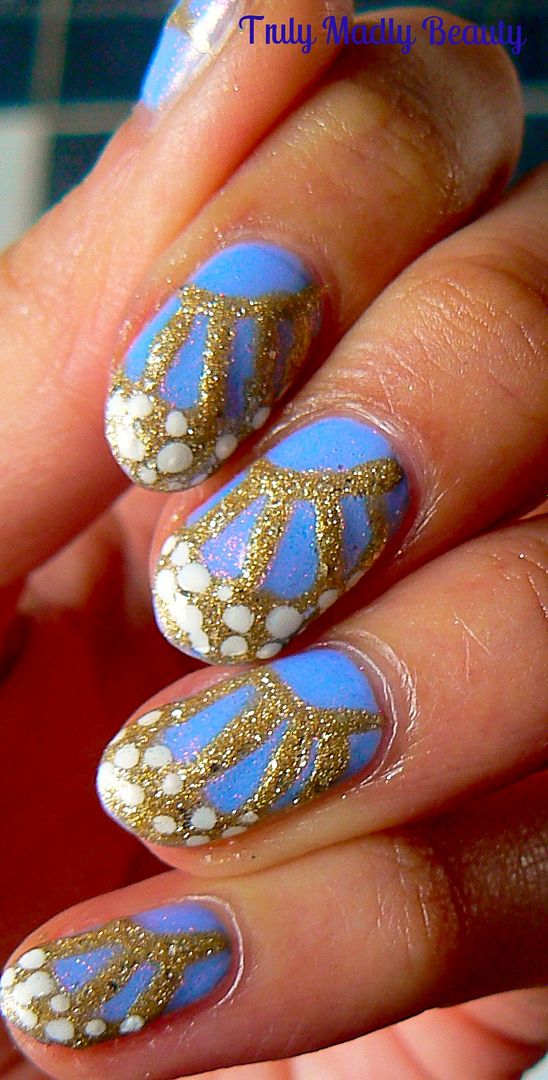
I noticed in the film that butterflies were quite prominently featured so I decided to use this as my main inspiration as well as the beautiful perriwinkle blue shade I've come to associate with Cinderella. Combining these two magical properties I ended up with this finished look...Golden Blue Butterfly Wing Cinderella nails fit for a fairytale princess...


5.10.2017

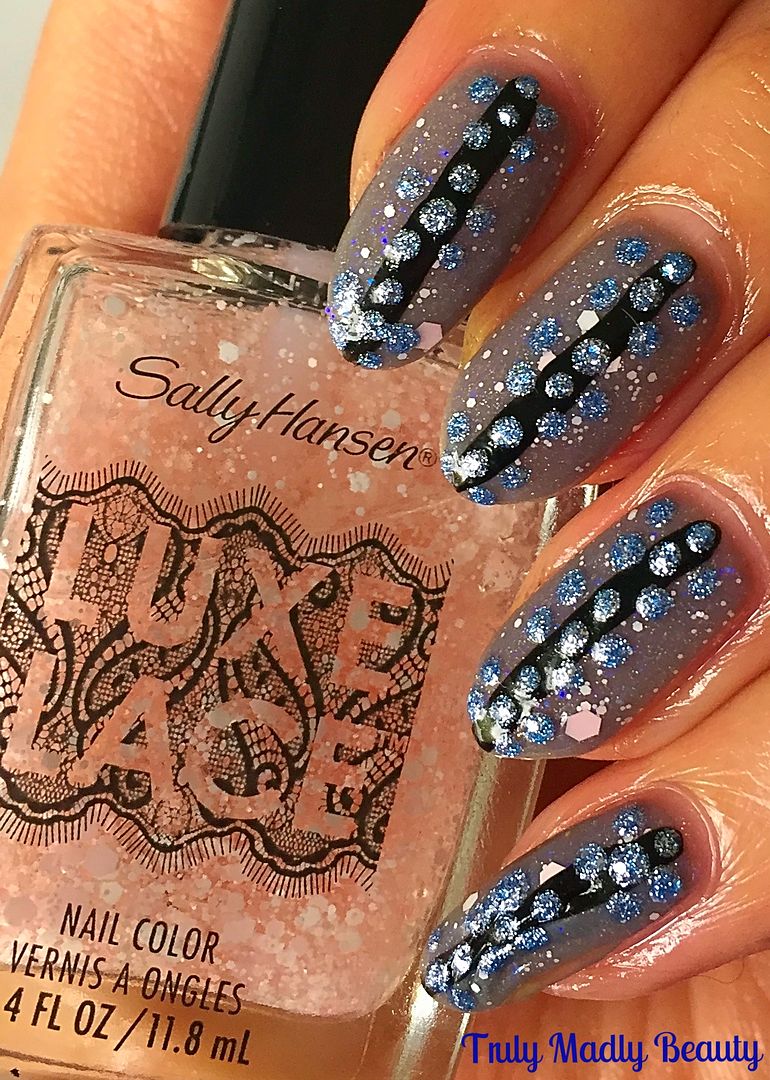
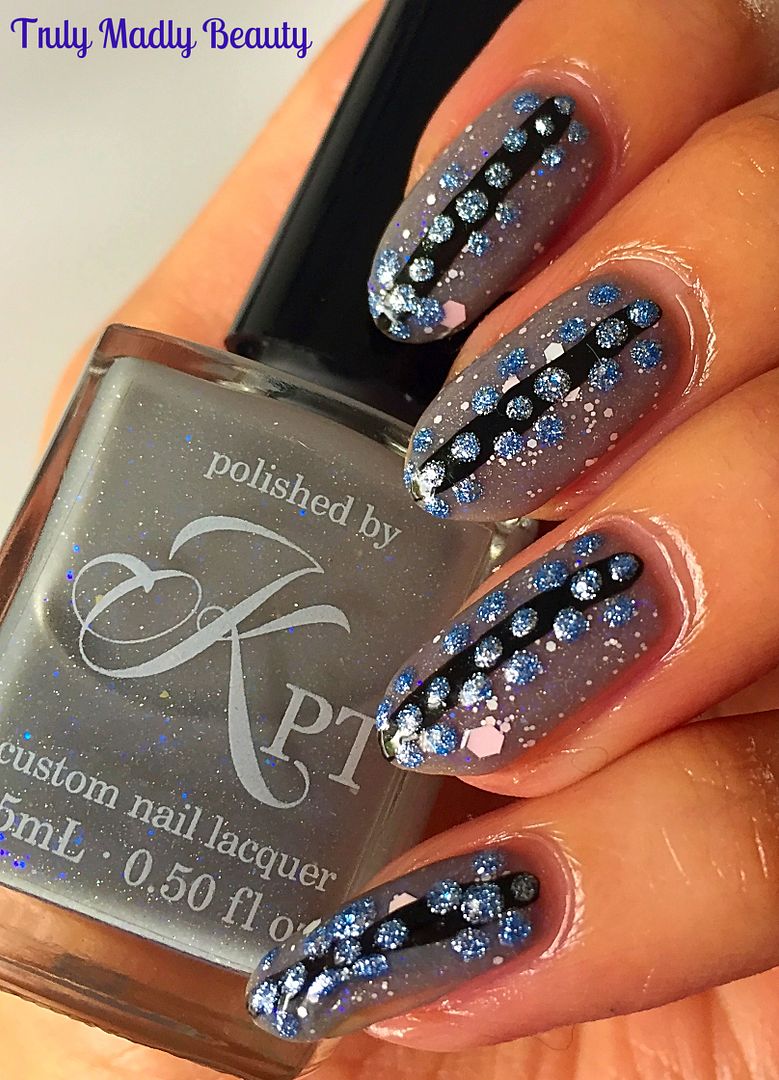
NOTD - Lace & Grey

Hello there lovely readers!

Grey can be considered dull & dreary yes indeed but I confess I've grown a certain fondness for wearing it on my nails. Far from depressing it can work very nicely as a classy & on trend shade to wear.

And if going for a block colour grey is not your thing well then...why not jazz it up a tad like I've done here?


You'll be surprised by what a difference simply adding a few strategically placed lines & dots can make & transform an otherwise ordinary mani into something more fun :)


3.08.2017

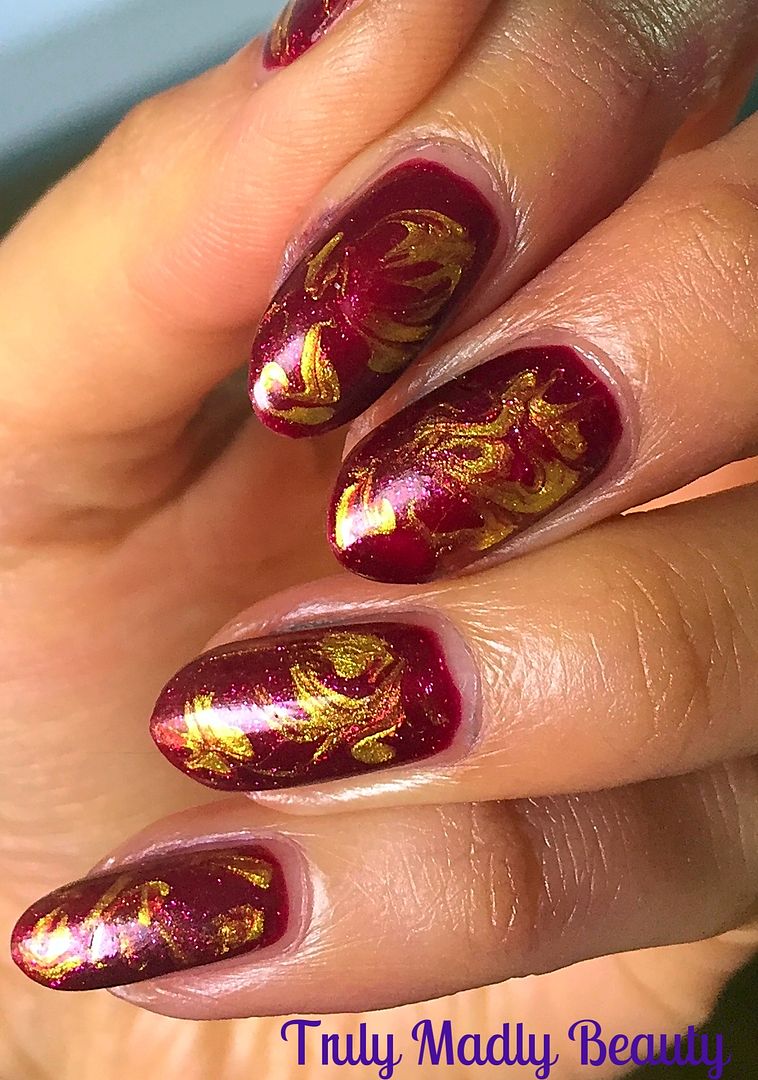
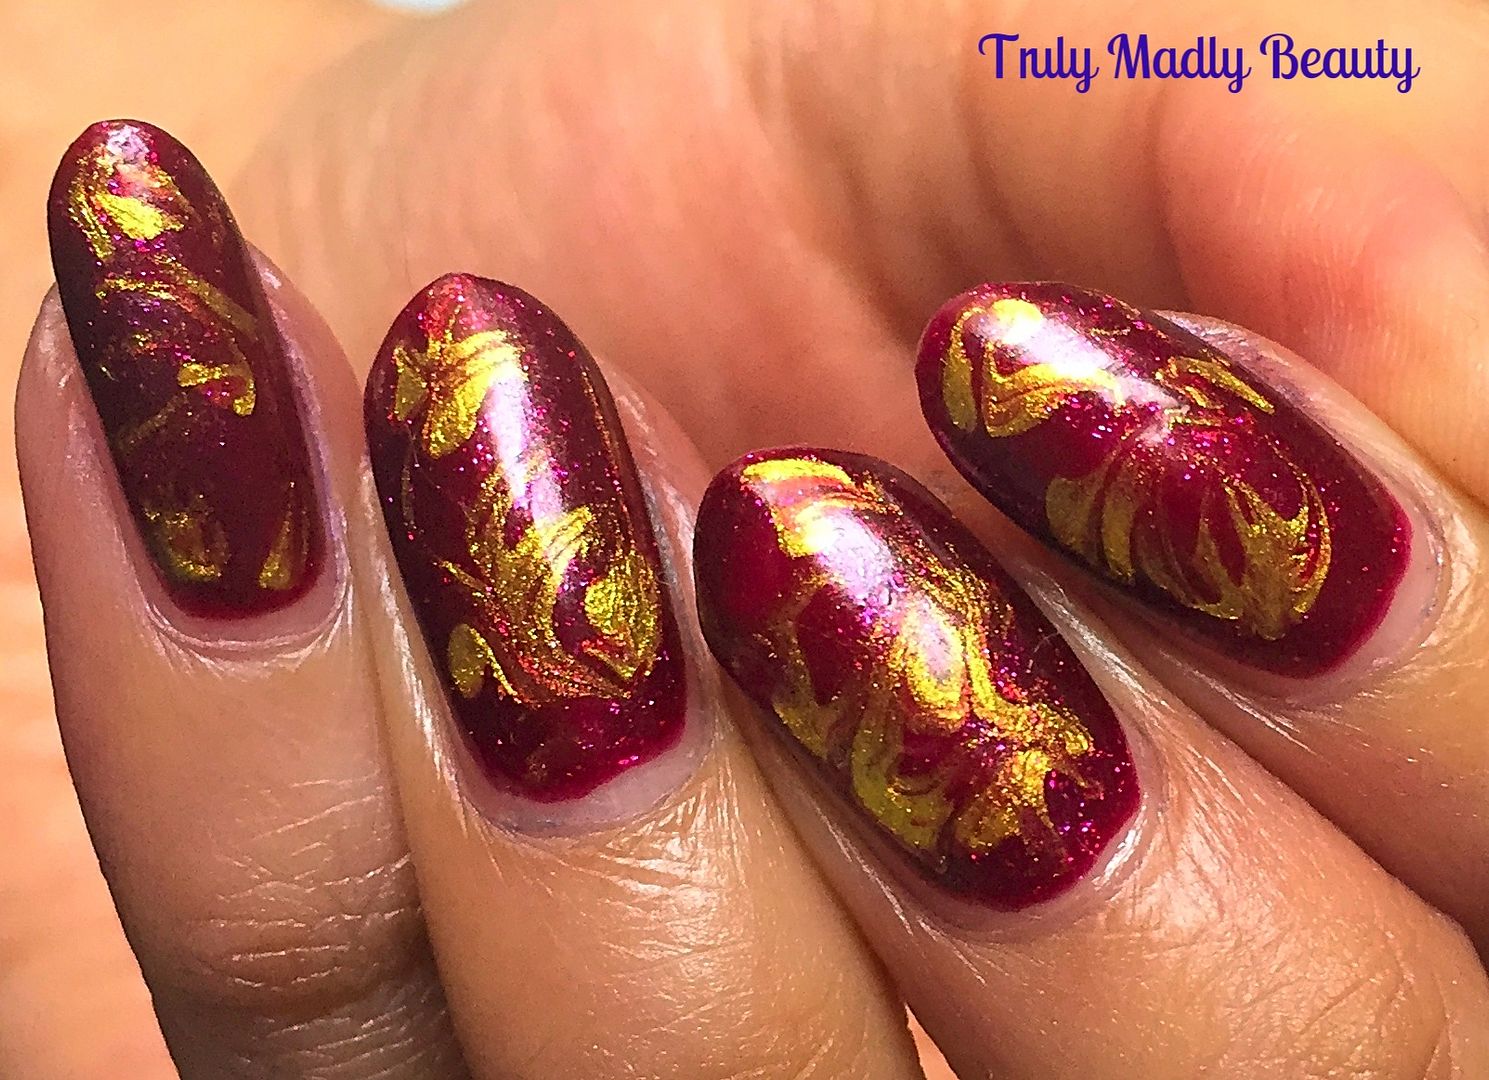
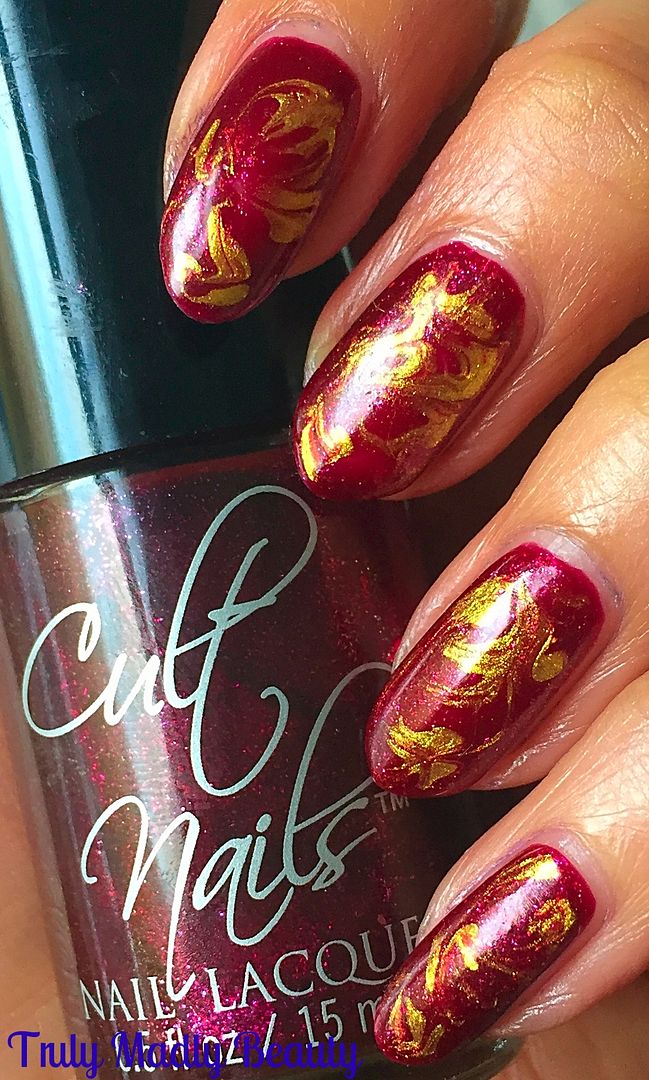
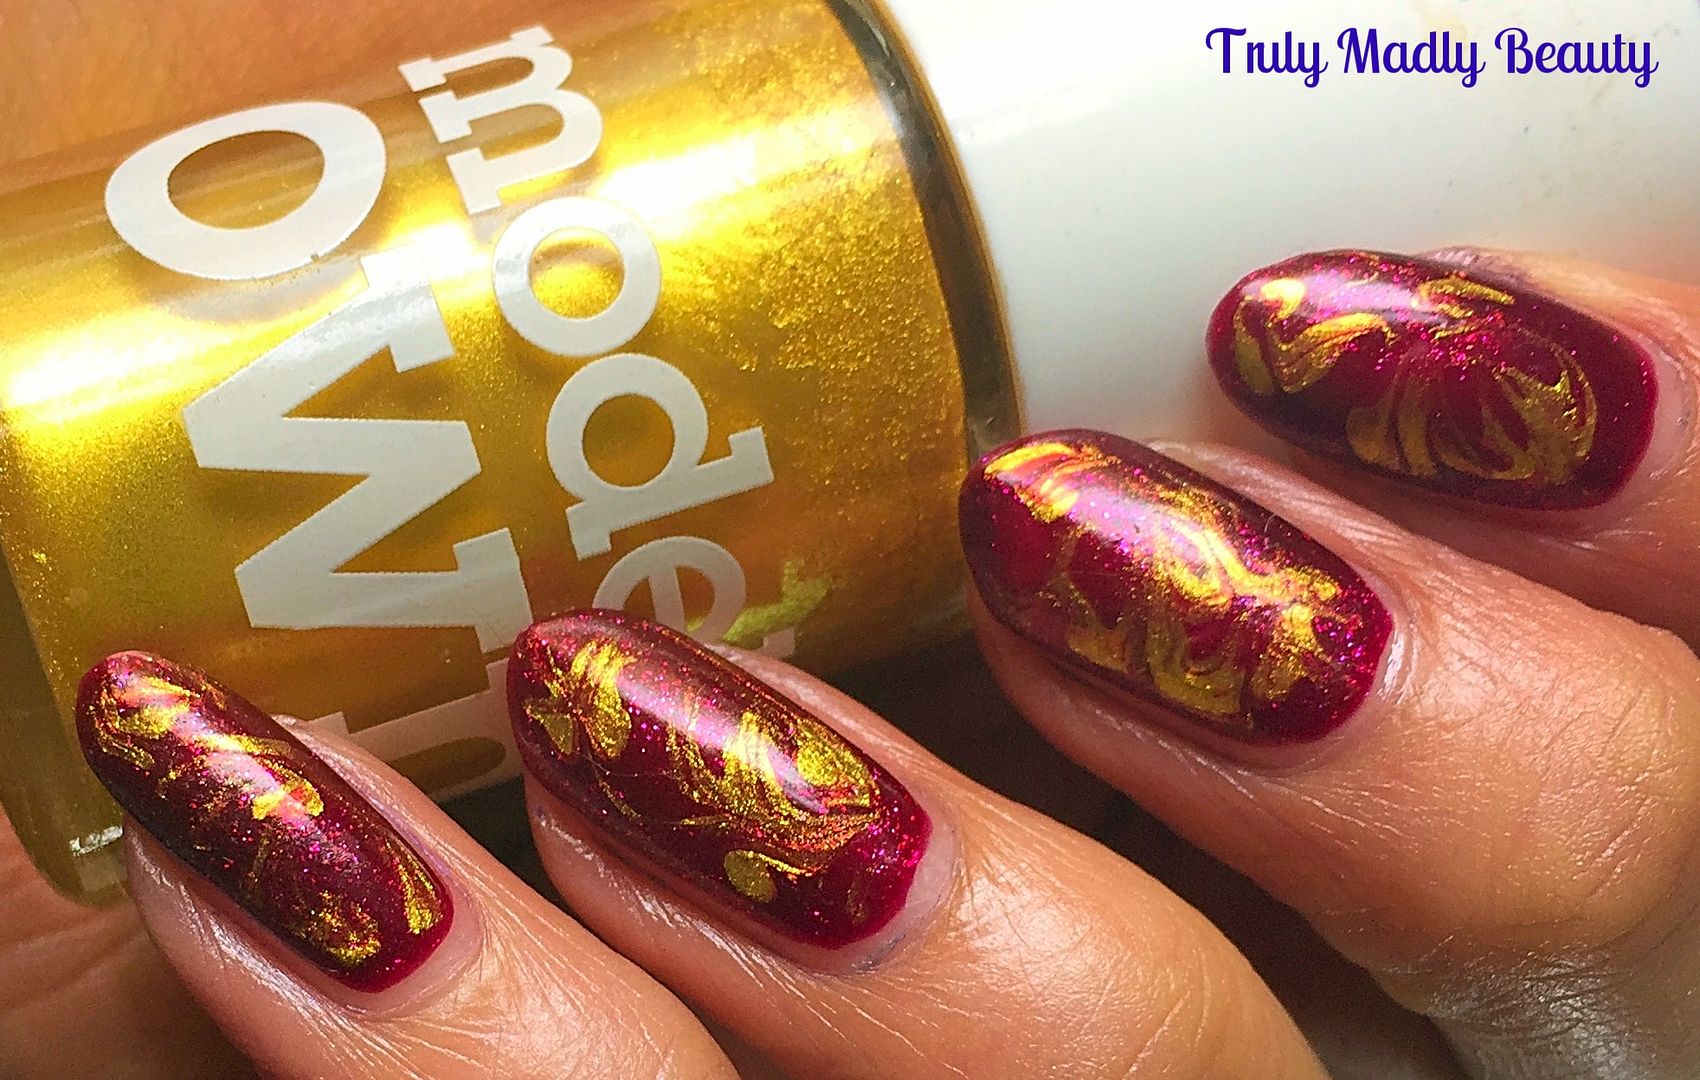
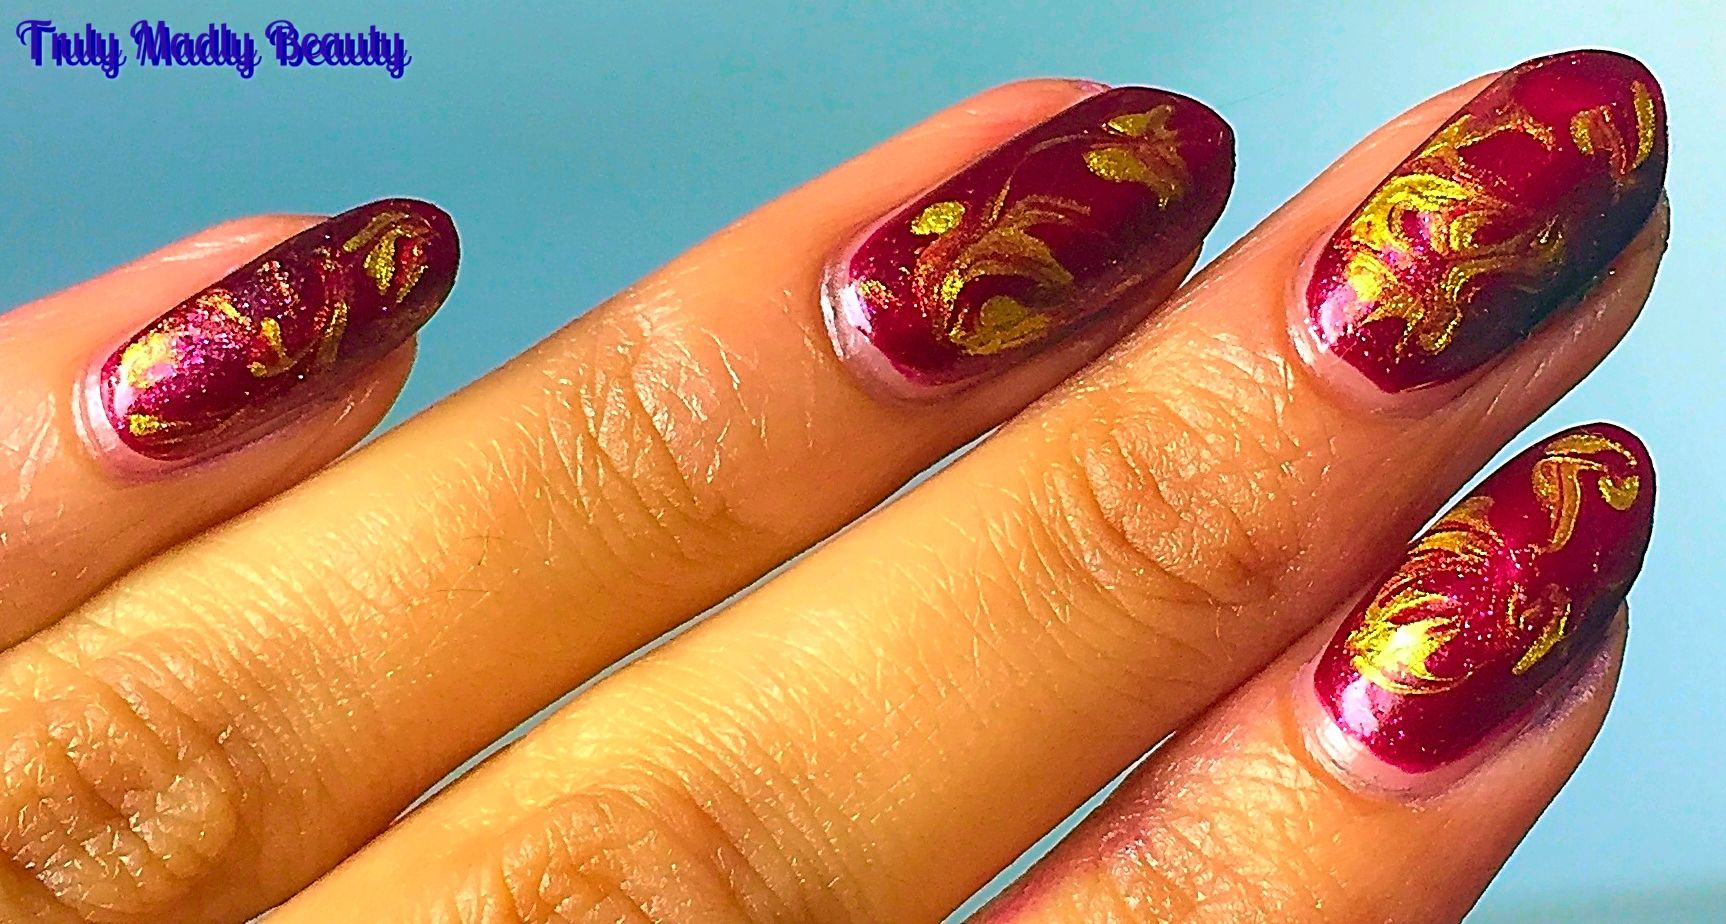
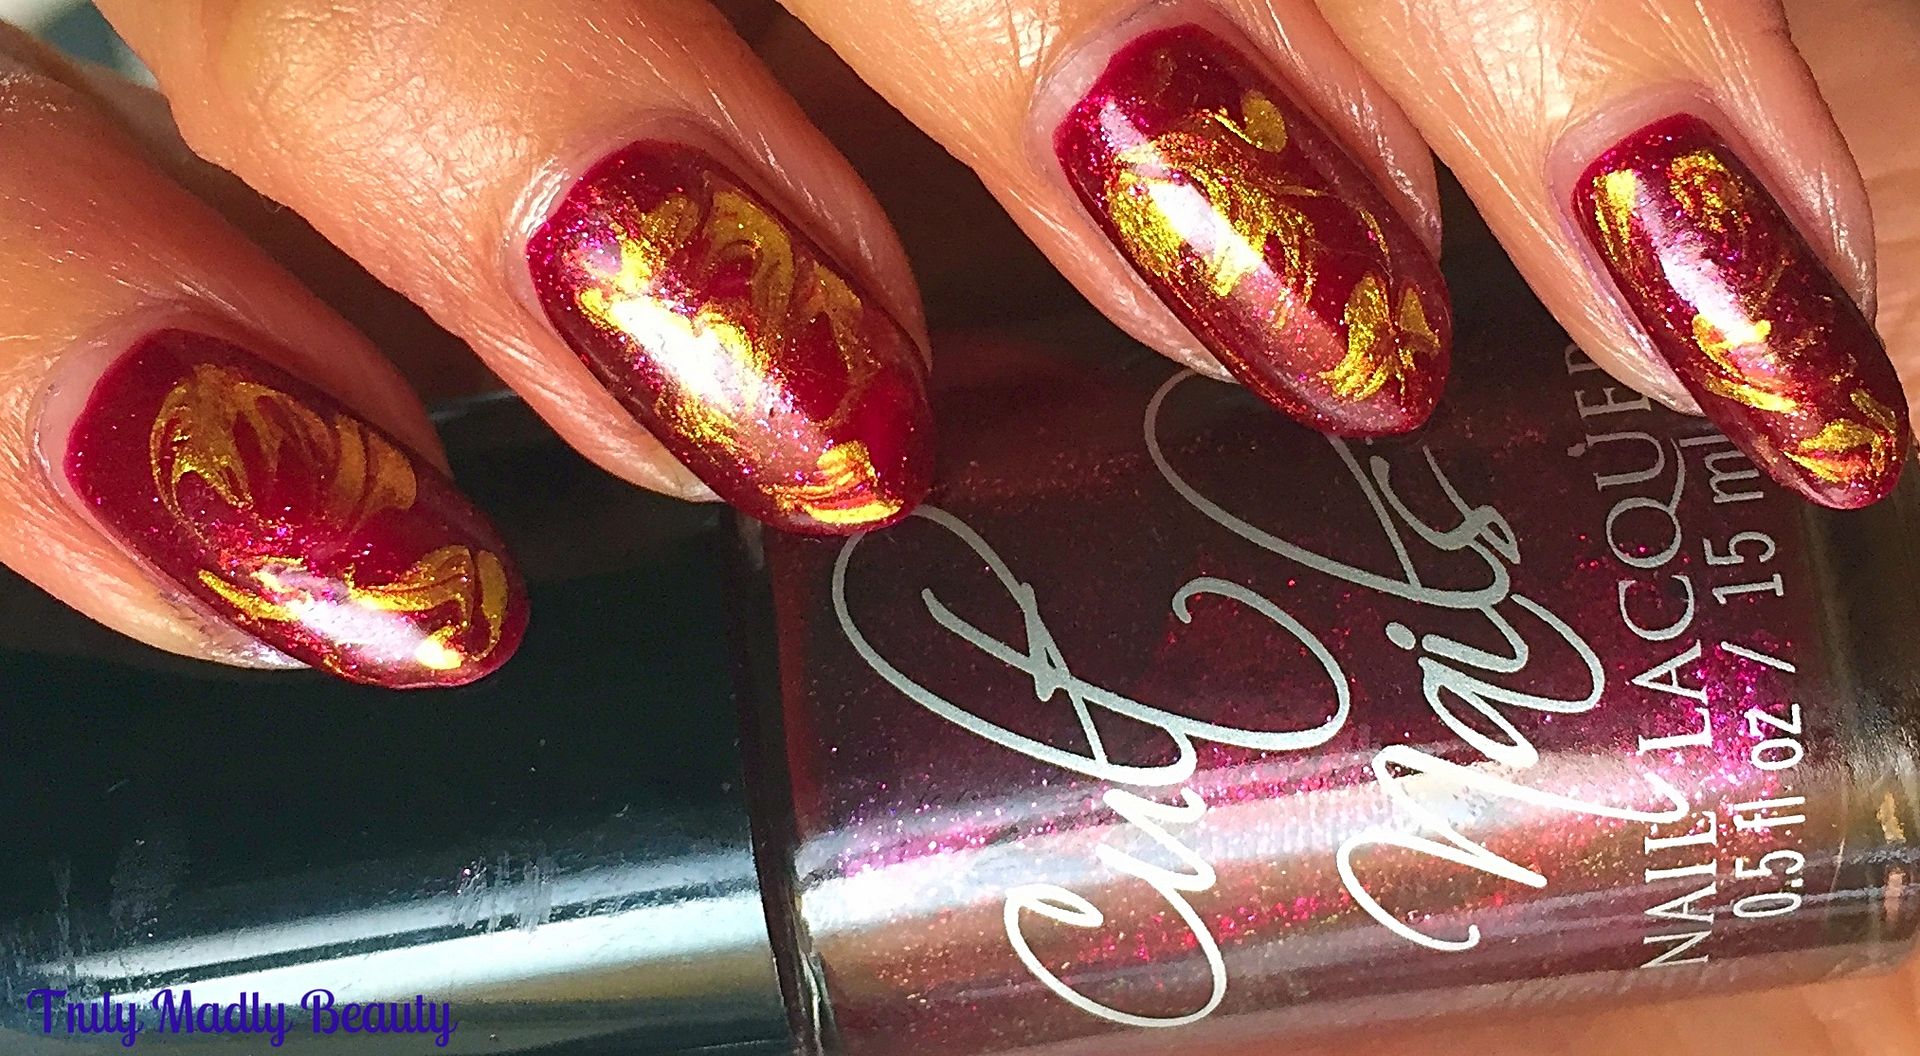
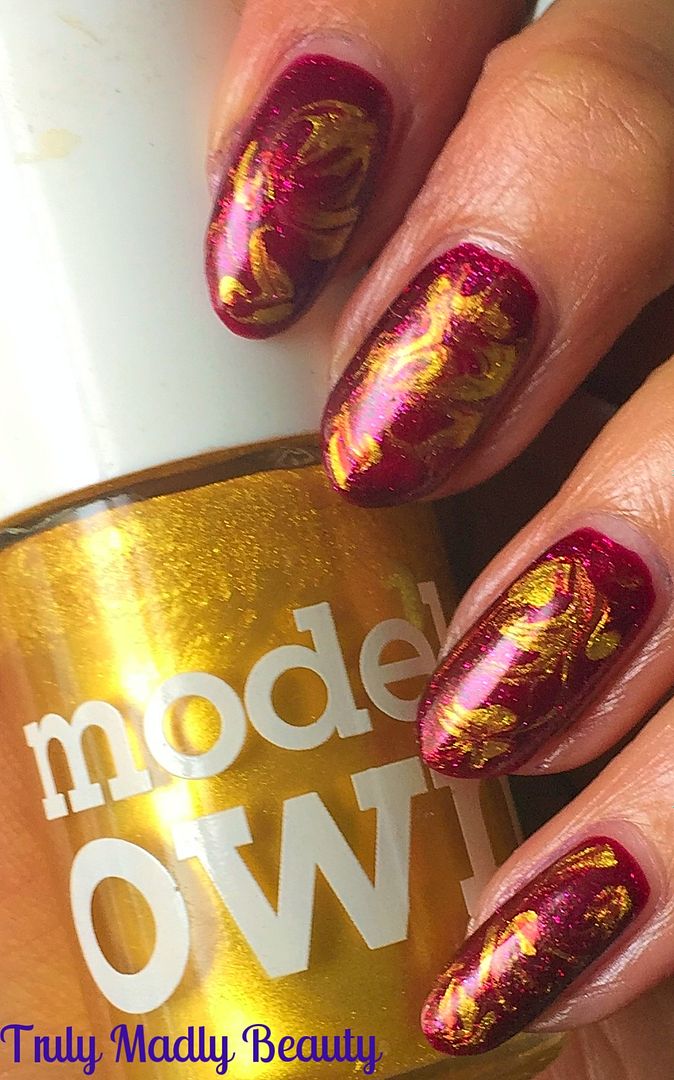
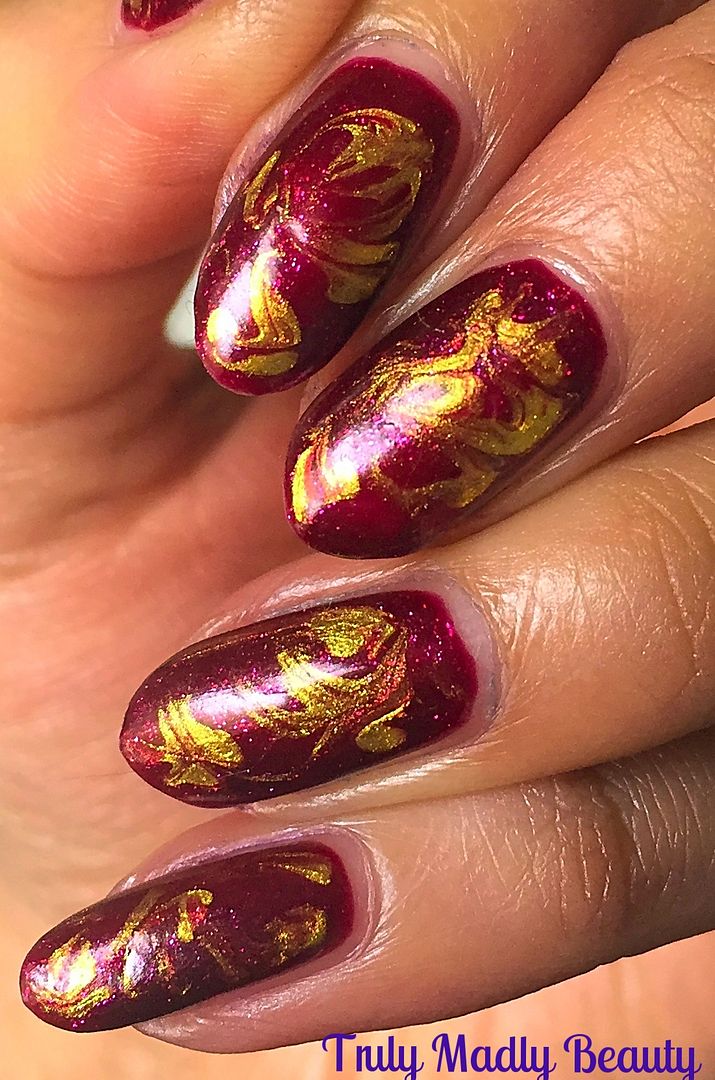
NOTD - Marble Flames

Hello there lovely readers!

So I have recently rediscovered the love for dry marbling nail art. Still feeling somewhat daunted at even the thought of attempting water marbling, I WILL man up & try it one day I'm sure, but until that day arises dry marbling on the other hand is one nail art technique I am totally on board with. 


Not only is it super easy to do but the results can be so pretty as well. I love having a play around with different colours & tones to see which ones mesh well together. You can see some of my previous dry marbling manicures HERE.


To do a dry a marble all you need is two polishes, or more if you wish to have a mixture of more colours & a tool to create the marble. This can be either a toothpick, dotting tool or brush. You can have a peek at some of my previous marble nail art posts, in particular my favourite one HERE, where I've done some more in depth step by step pictorials on how to create this effect.


I personally prefer to use a brush as it allows you a lighter hand when marbling your colours together on the nail. Whenever I've used a dotting tool or toothpick I've always found myself pressing too hard & going straight through the polish to the nail bed.


The color combo I've used in this manicure is red & gold, I absolutely love mixing these two jewel tones together as the colours really contrast & stand out so beautifully creating a fab flame like effect.


My red polish of choice is Bitten from old indie brand Cult Nails, & was part of the Behind The Closed Doors collection, a stunning raspberry red glossy shimmer. This polish is just so gorgeous, I'm an absolute sucker for these kinds of gothic-y reds & I can't wait to use it again. Apply one coat of red & then apply your second coat ready to marble!


Whilst your second coat of polish is still wet, add about two drops of gold, here I've used Models Own 25 Carat Gold, & then using your brush or whichever tool you prefer, swirl the gold in to the red using light strokes, not blending too much that you lose the gold.


If you think you've applied too much gold you can always add a couple of drops of red & blend some more, careful not to overload the nail with polish though otherwise you'll end up with puddles of polish in your cuticles. 


Once you are happy with the design seal with topcoat. Done! I have lots of ideas floating around for some more marble designs so keep posted. Let me know if you give it a try!

Thanks as always for reading!

Lotsa love to ya!


1.16.2017

NOTD - Dotted French Duochrome!

Hello there my lovely readers!

I do love me a french mani I do, but sometimes doing just a bog standard white tip bores me so I like to look for different ways to make things a bit more interesting.


And there's nothing I love more than a dotticure so...combining the two together I created this dotted French look that I am loving so much! Smile lines are so yesterday...now its all about the dotted French ladies!


And even better is that this is so easy to do, no stress about getting that perfect sharp smile line edge to your French tips. All you need is your white polish & a dotting tool. And if you don't have one a bobby pin will suffice. Who says you need special tools for nail art?


You can stick with the French mani look & go for a nude or pale pink base but I was in the mood for some colour so I dug out this stunning Polish Me Silly lacquer in the shade Show Off which is the most beautiful ethereal blue purple duochrome with pink & gold shimmers. This I applied two coats.


Then grabbing my white polish & dotting tool, simply applied a large white dot at the centre of my tip, before adding a slightly smaller dot either side & if you can fit it on to your nail, then two final smaller dots on either side of those, so altogether you have about 7 dots all across the tip.


I added on a pretty blue rhinestone to complete the mani before finishing with topcoat to seal and shine & thats it!


Easy peasy huh? And it looks so pretty! I have a feeling that standard French tips will be taking a back seat for quit some time. Thanks for reading as always.

Lotsa love to ya!


6.20.2016

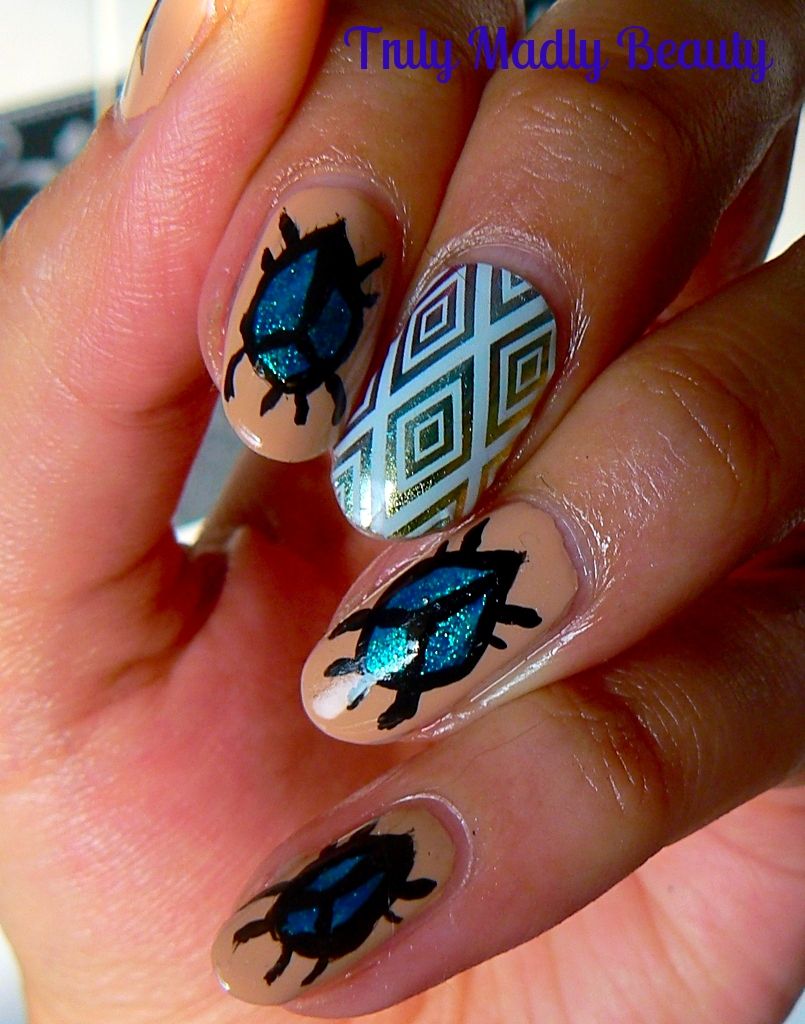
NOTD - Egyptian Scarab Beetle Nail Tutorial!

Hello there lovely readers!

I found myself in a bit of a dilemma with todays nail art design. You see, I adore Ancient Egyptian history, if someone would hurry on up with inventing a time machine, Cleopatra would the first on my list of historical women to visit!


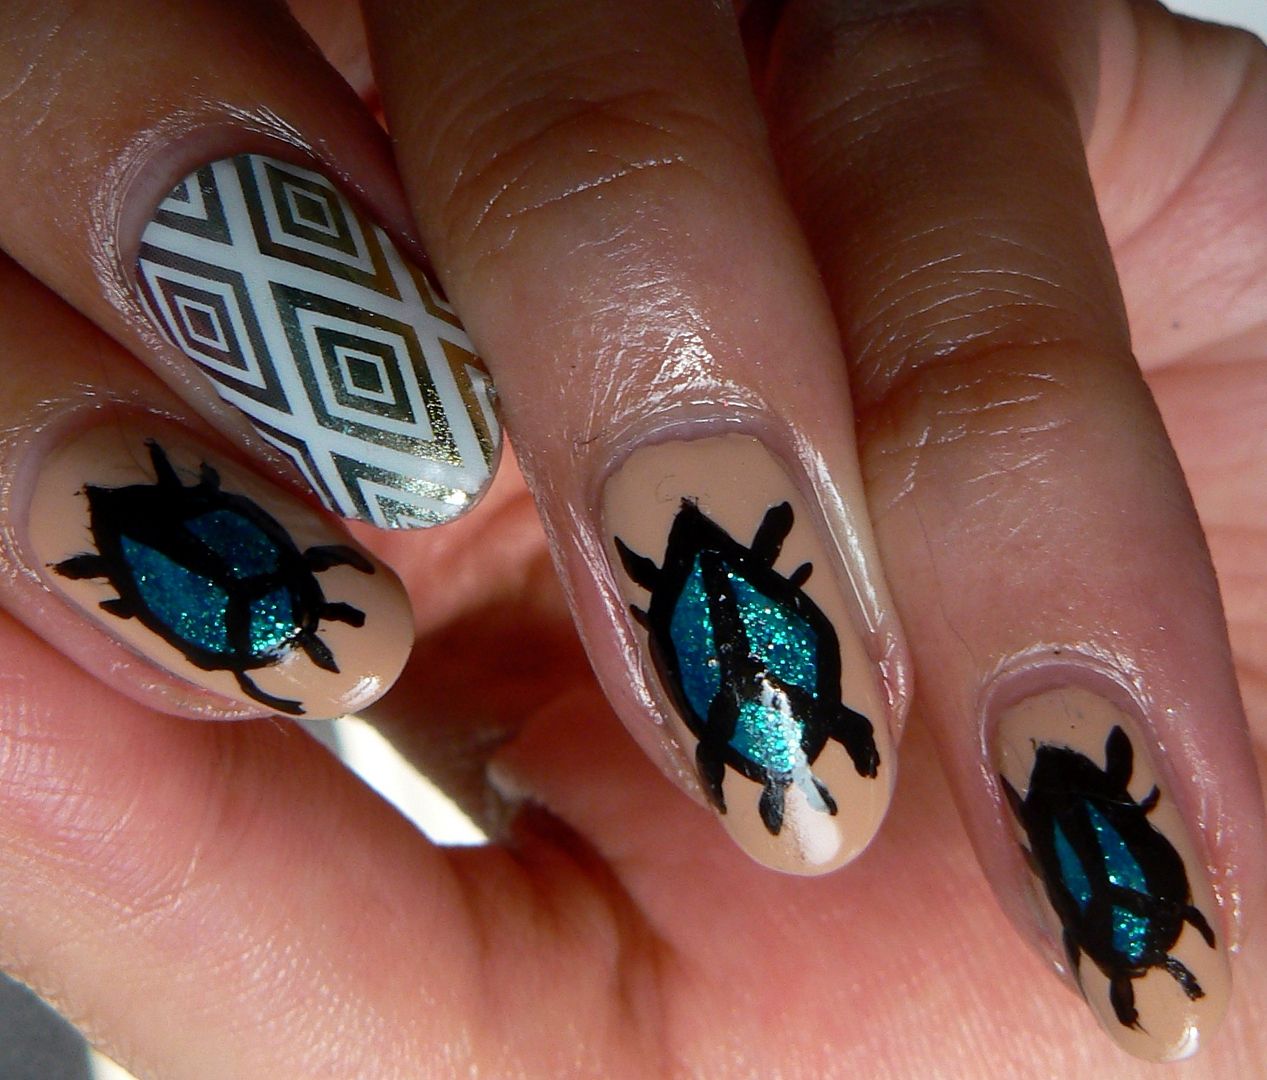
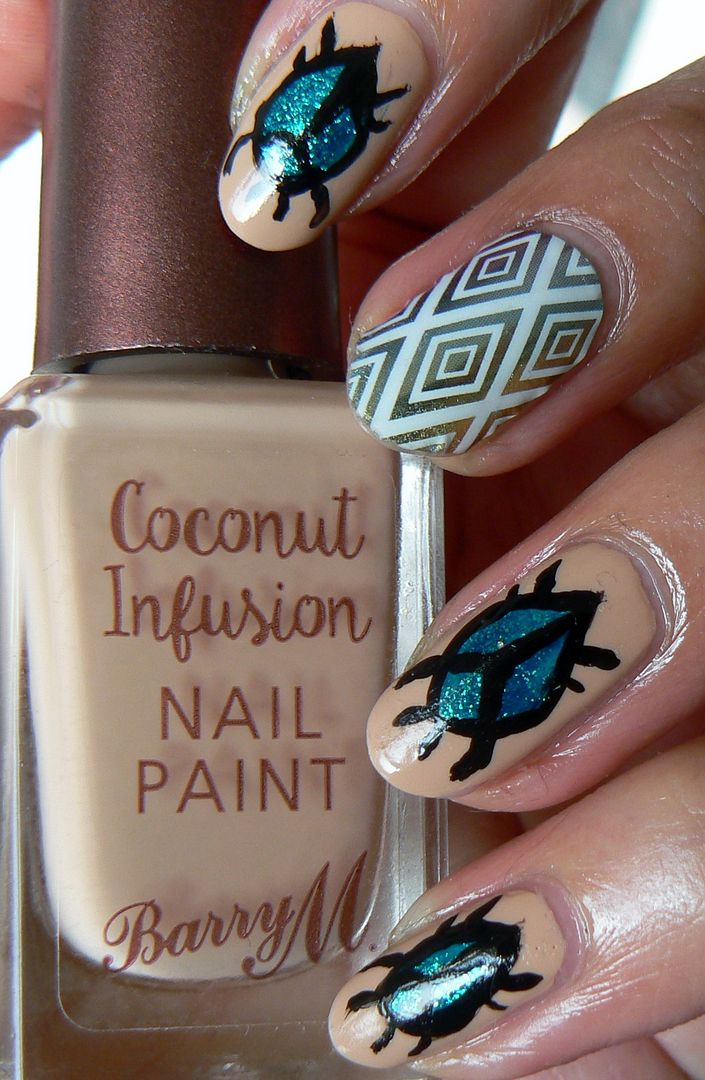
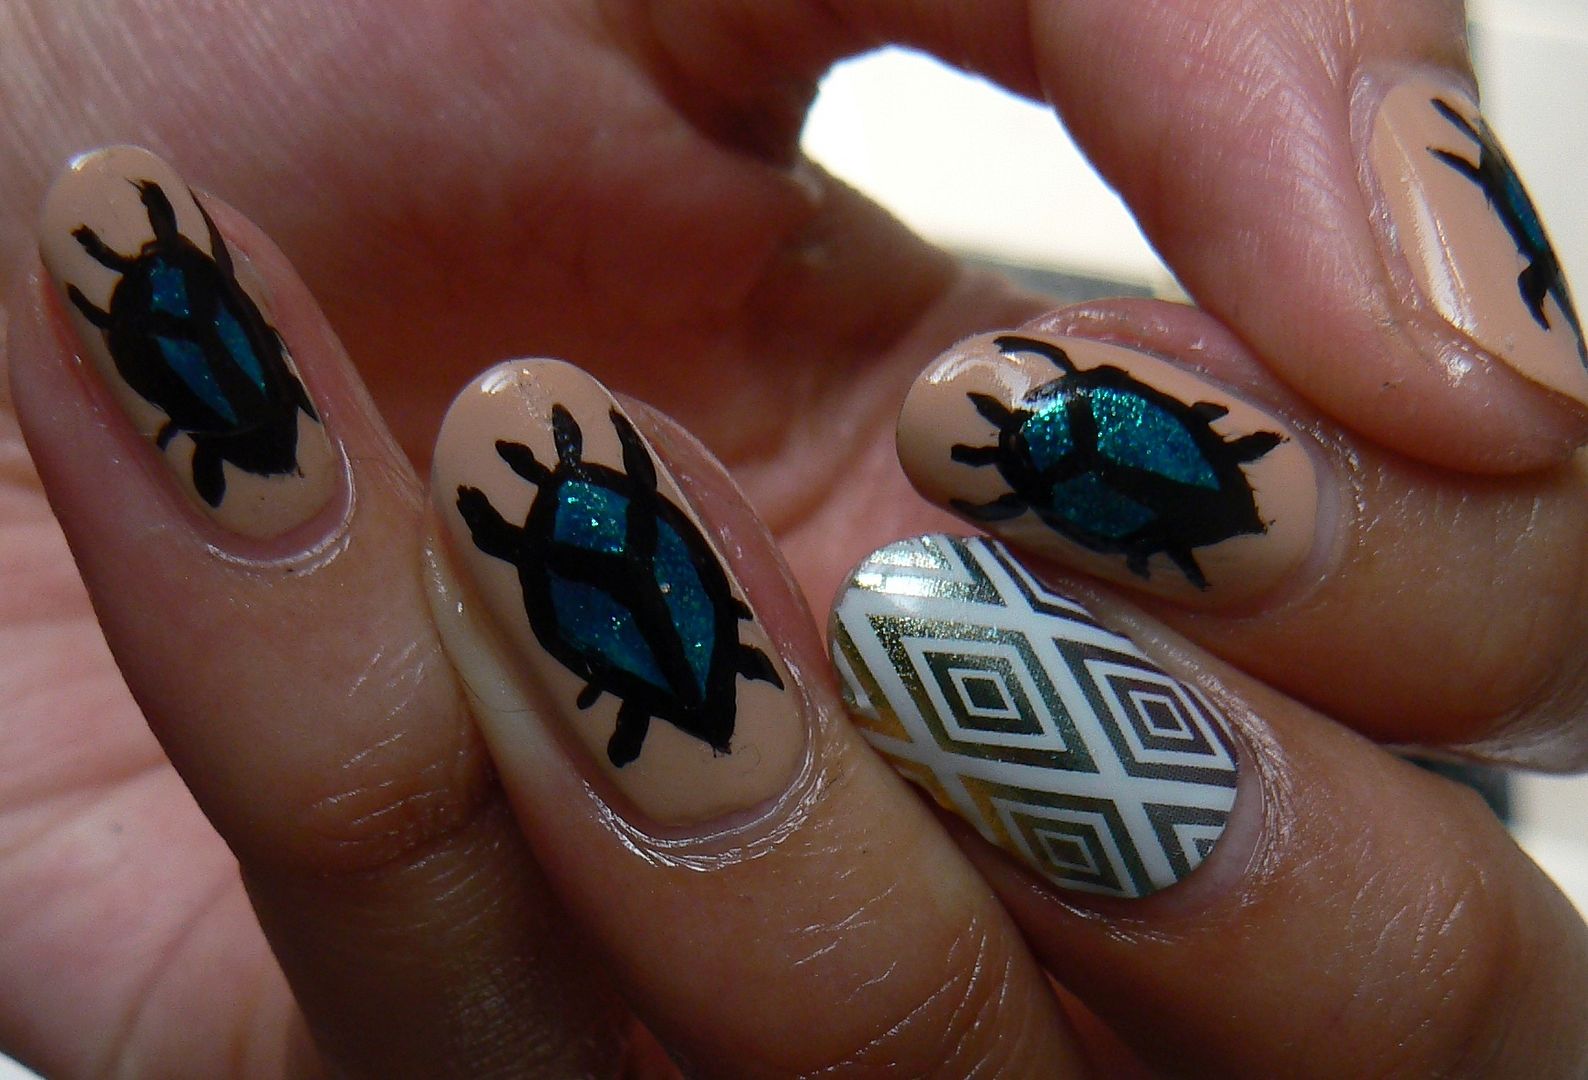
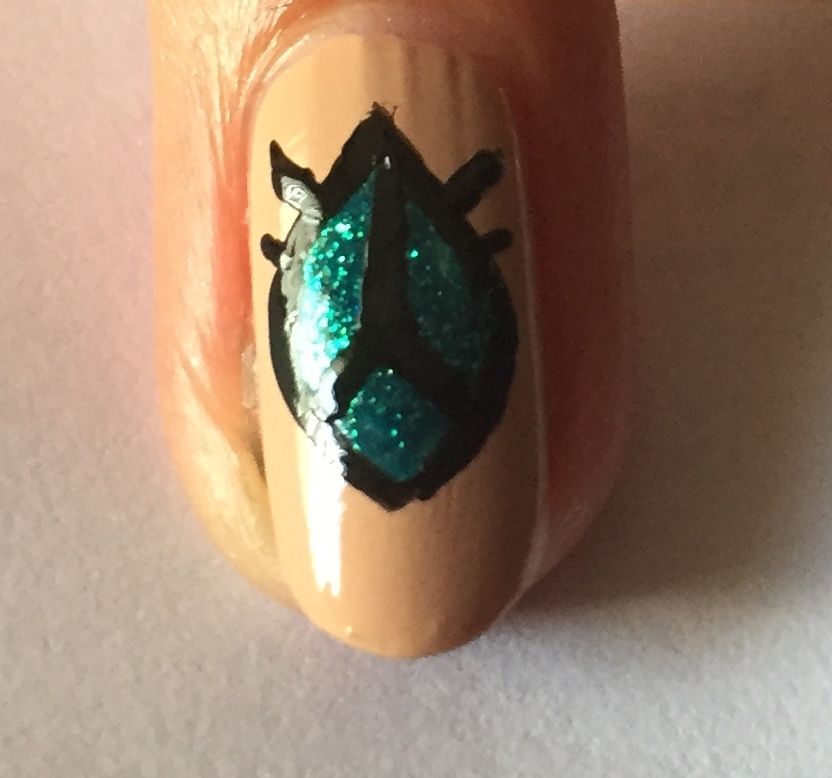
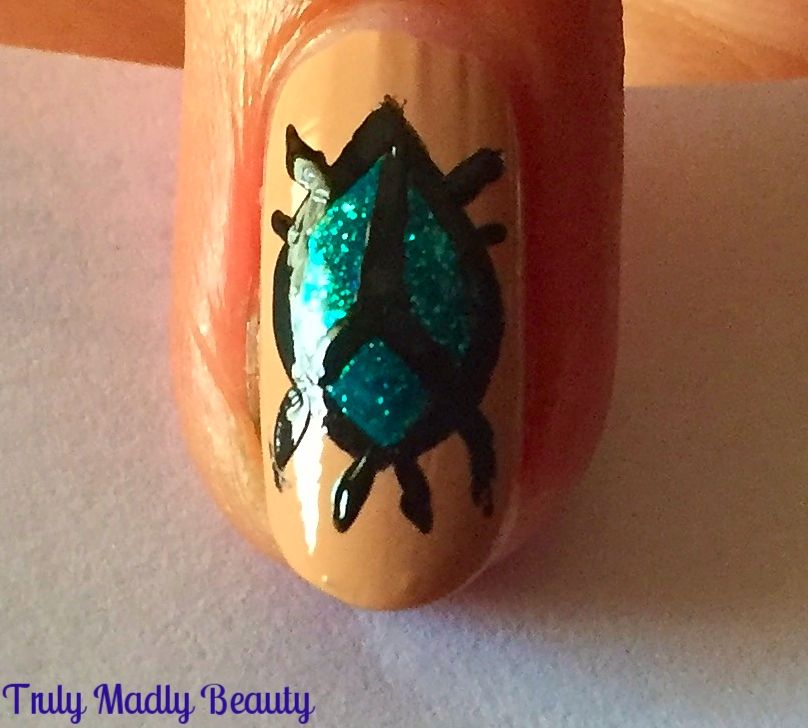
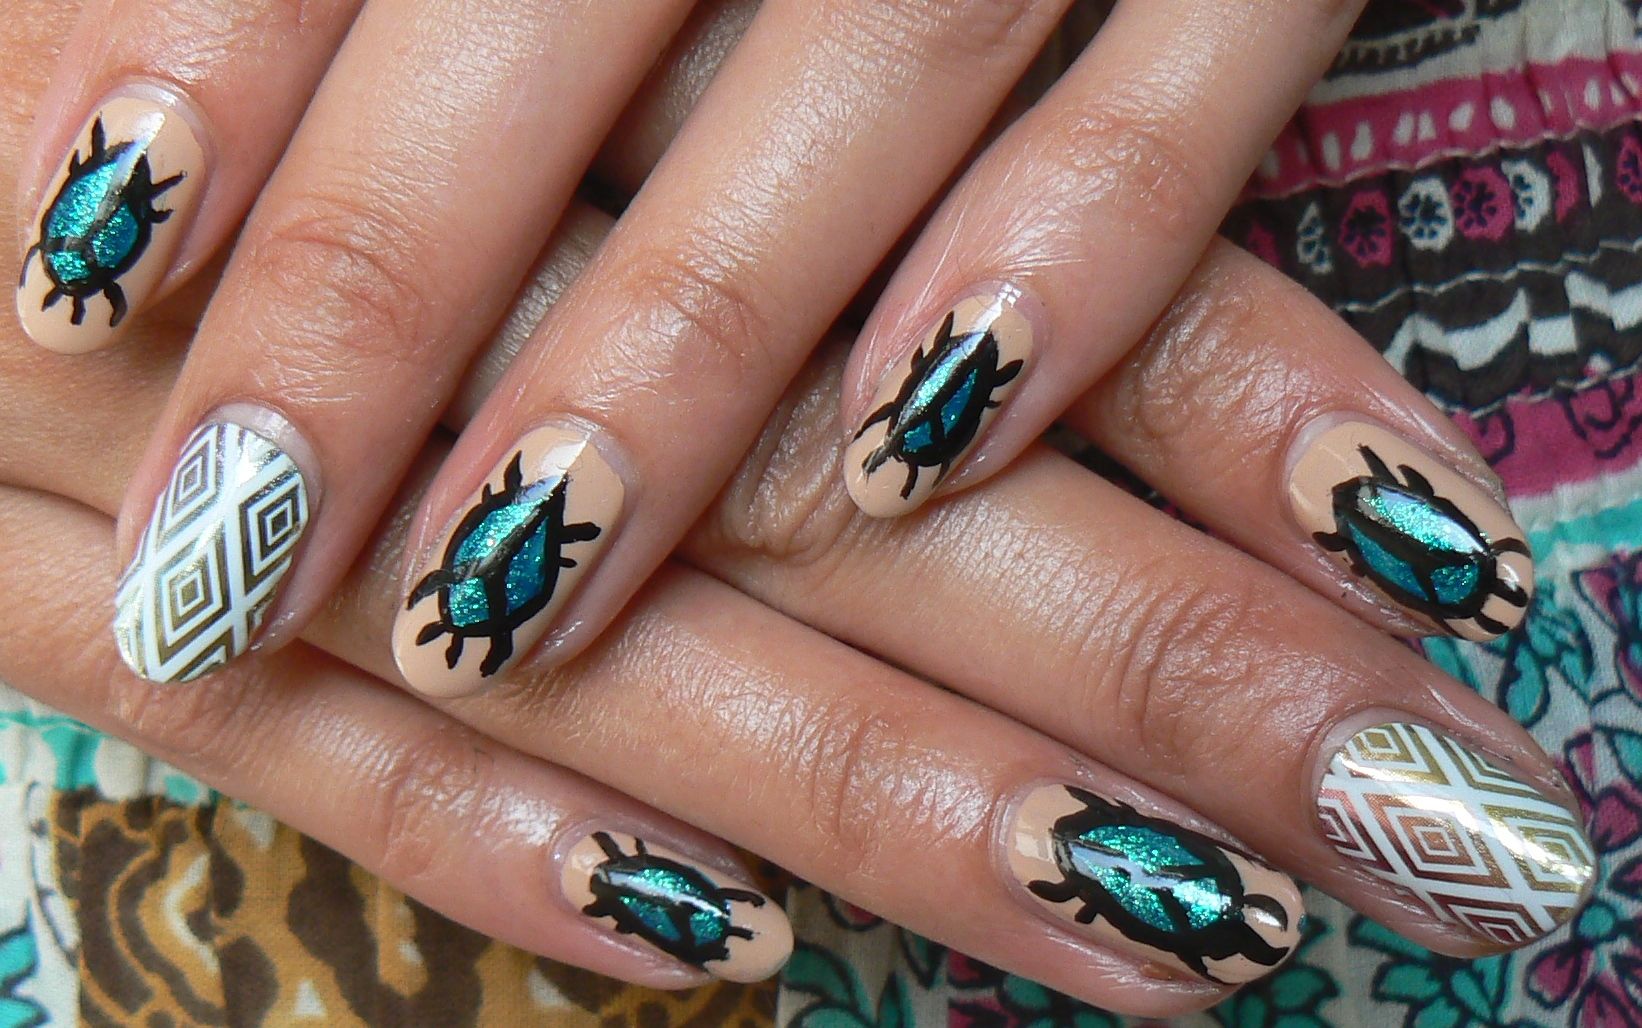
A well known symbol in Egyptian culture is the Scarab beetle & after seeing a beautiful jewelled design incorporating stunning turquoise tones in the shell I knew I wanted to recreate something similar in nail art form. Herein lies the dilemma....I hate bugs! But in the name of the nail art sisterhood I decided to set aside my squeamishness & put those Scarabs on mah nails!


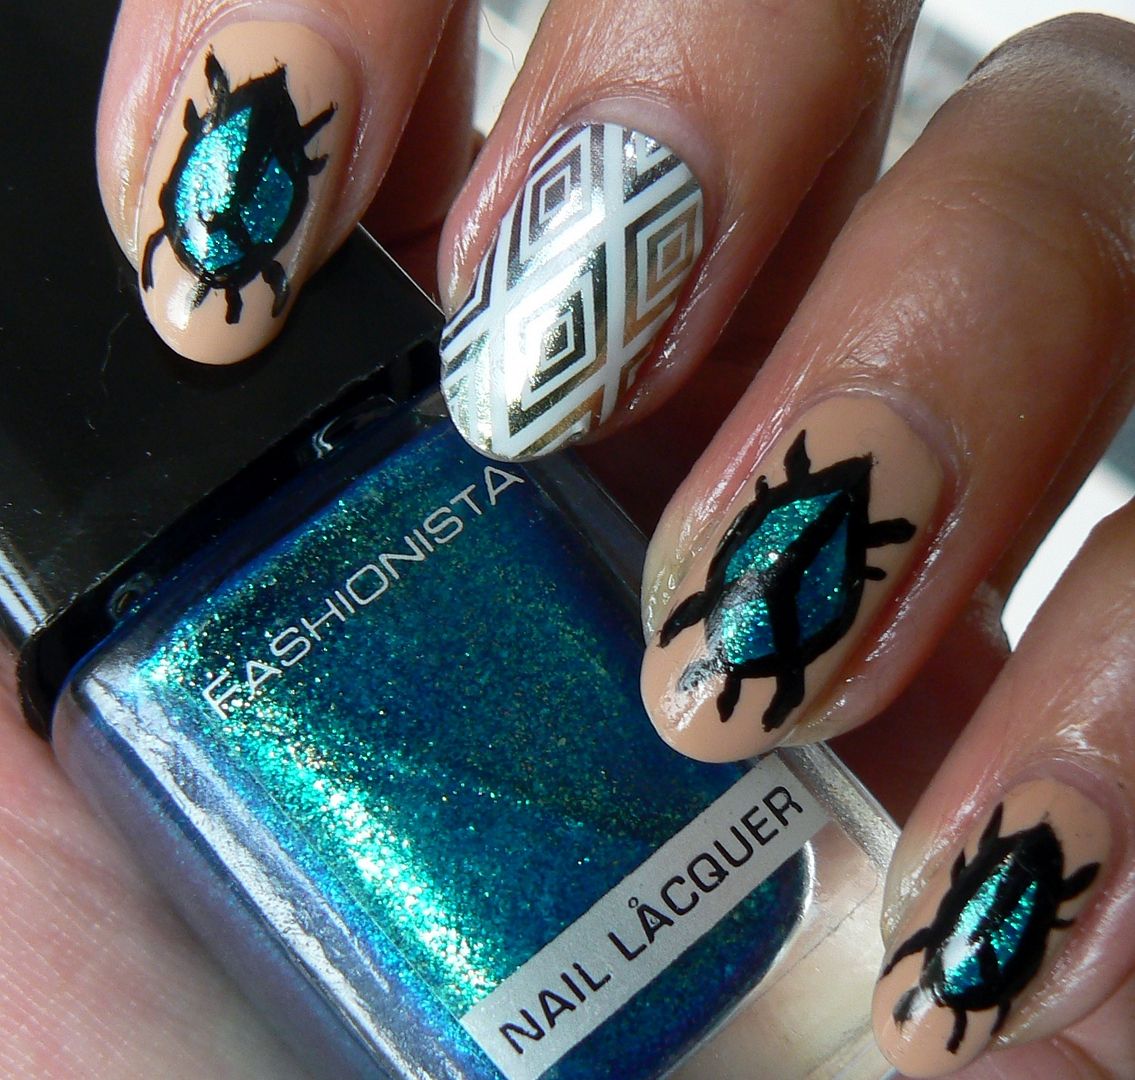
I managed to dig out a super pretty turquoise green sparkler in my stash which gave just the finish I wanted for my beetle shells which chuffed me greatly. I've done a step by step tutorial guide so that you can create these too!


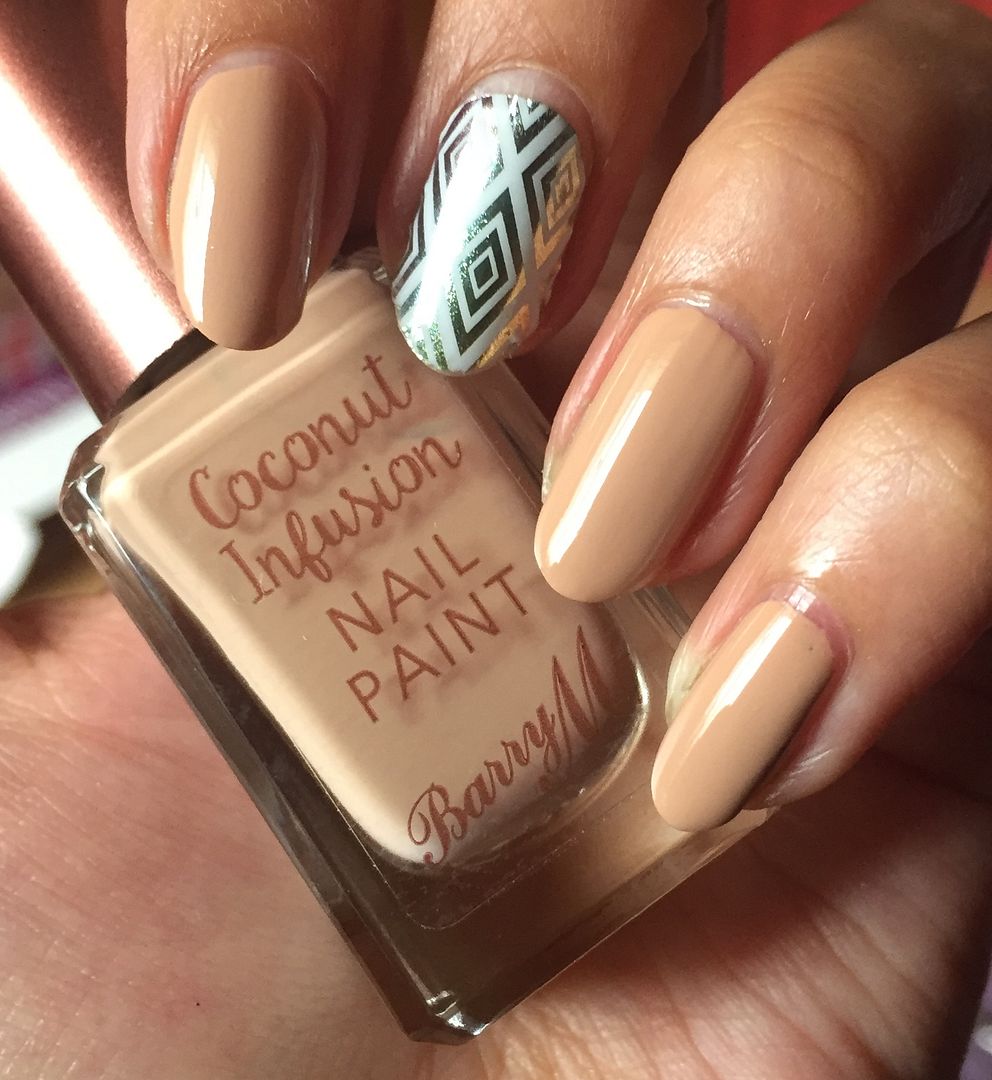
I wanted my Scarabs to stand out thus required a nude base creating the perfect opportunity to give Barry M Coconut Infusion in Sunkissed a whirl!


And dolls...Barry M always has the ability to impress me & the Coconut Infusion range is no exception. This swatch is just one coat applied, amazing coverage! The formula was faultless too, top marks Barry M! The Coconut Infusion polishes require no basecoat, however I'm currently using a base treatment on my nails (post to come soon!) so I have not yet tried on bare nails.


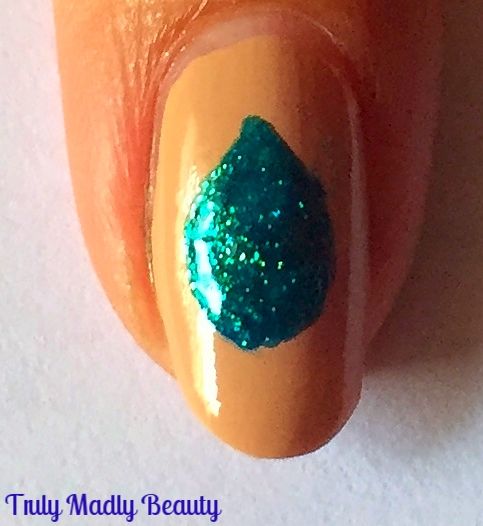
After swooning over the lovely Sunkissed, next step is to add the Scarab beetles! You'll need an eye catching blue/green turquoise, here I've used an old brand Fashionista in shade Mystical Dragon, another utterly swoon worthy shade...


Grabbing your polish & nail art brush start with applying a teardrop shape in the centre of the nail. You can actually also use the polish brush & just place a large blob on the nail, then dragging the top upwards slightly to create the teardrop :)


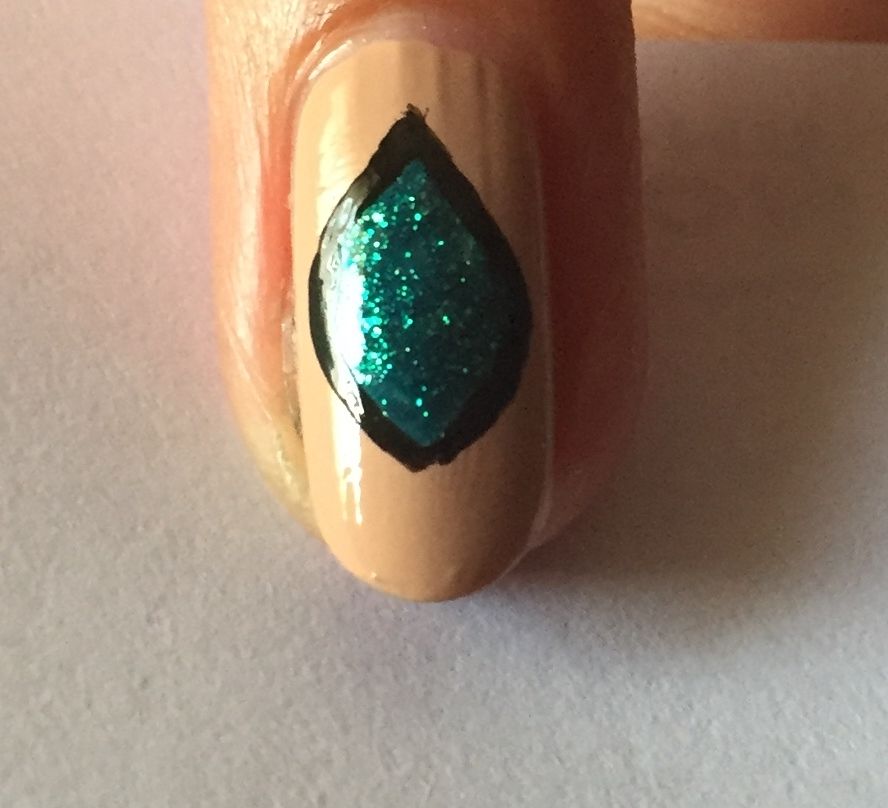
Then using a black polish & another nail art brush or a black nail art pen, outline the outer edge of your teardrop in black


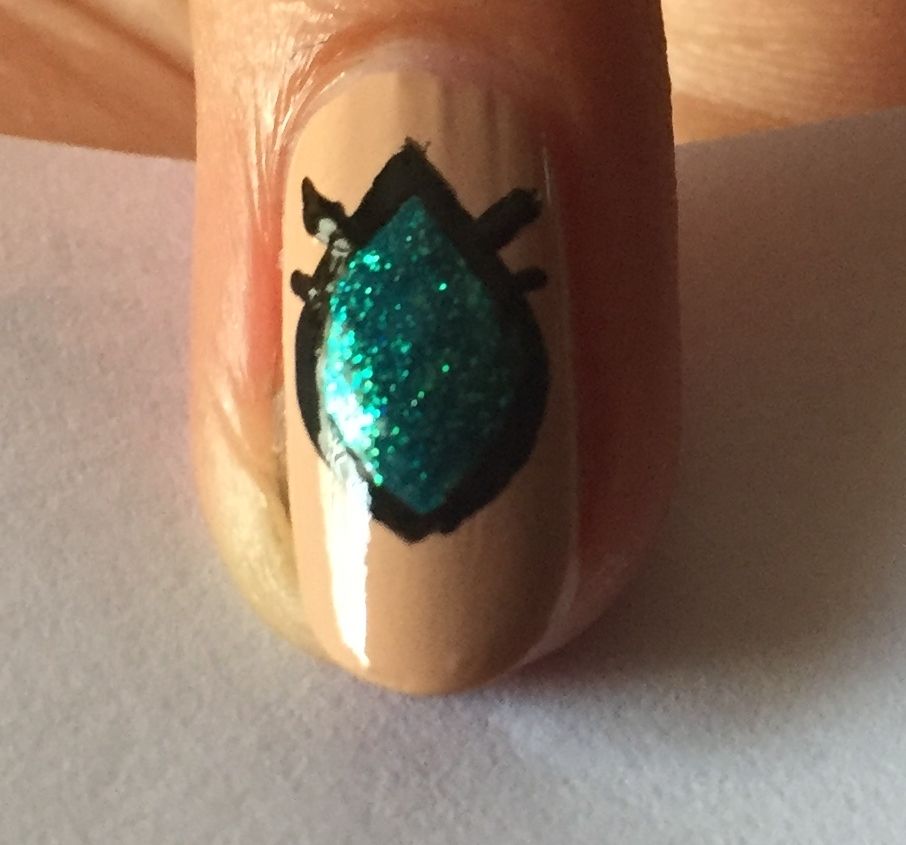
Next add the back legs first by applying two sets of angled lines at the top end of your teardop going upwards making the topmost legs a bit longer.


To create your shell apply a thin black line down the centre, stopping about ¾ of the way before veering two angled lines in opposite directions to the bottom as shown.


Finally to complete your Scarab beetle, add on two more lines for the front legs before finishing with two smaller lines at the end for the...err...what are these called? Pincers? Antennae? Lets go with antennae shall we?


Add a slick of topcoat to seal it all & you have your Egyptian Inspired Scarab beetle nails!


As you can see I've got me a Jamberry nail wrap accent going on too on the middle finger with the stunning metallic "Trippin" nail wrap! You can find this beaut wrap & more designs on my website HERE. 

Hope you liked! Thanks for reading!

Lotsa love to ya!


2.17.2016

Product Love - Collection Gorgeous Glow Highlighter Review

Hello there lovely readers,

I do love me a good highlighting product, whether it be powder or cream based I can't finish my makeup routine without adding a little something something to give that fairy like finish. I have many favs already including the Make Up Revolution Undress Your Skin highlighting powder which everyone & their uncle has no doubt tried & loved, not only pretty in its finish but pretty in price too! LUSH Feeling Younger, a dreamy highlighting cream which I've blogged about HERE is another fav. However there's a new kid on the block thats given these two a run for their money that I've been reaching for often of late & its from none other than good old Collection!


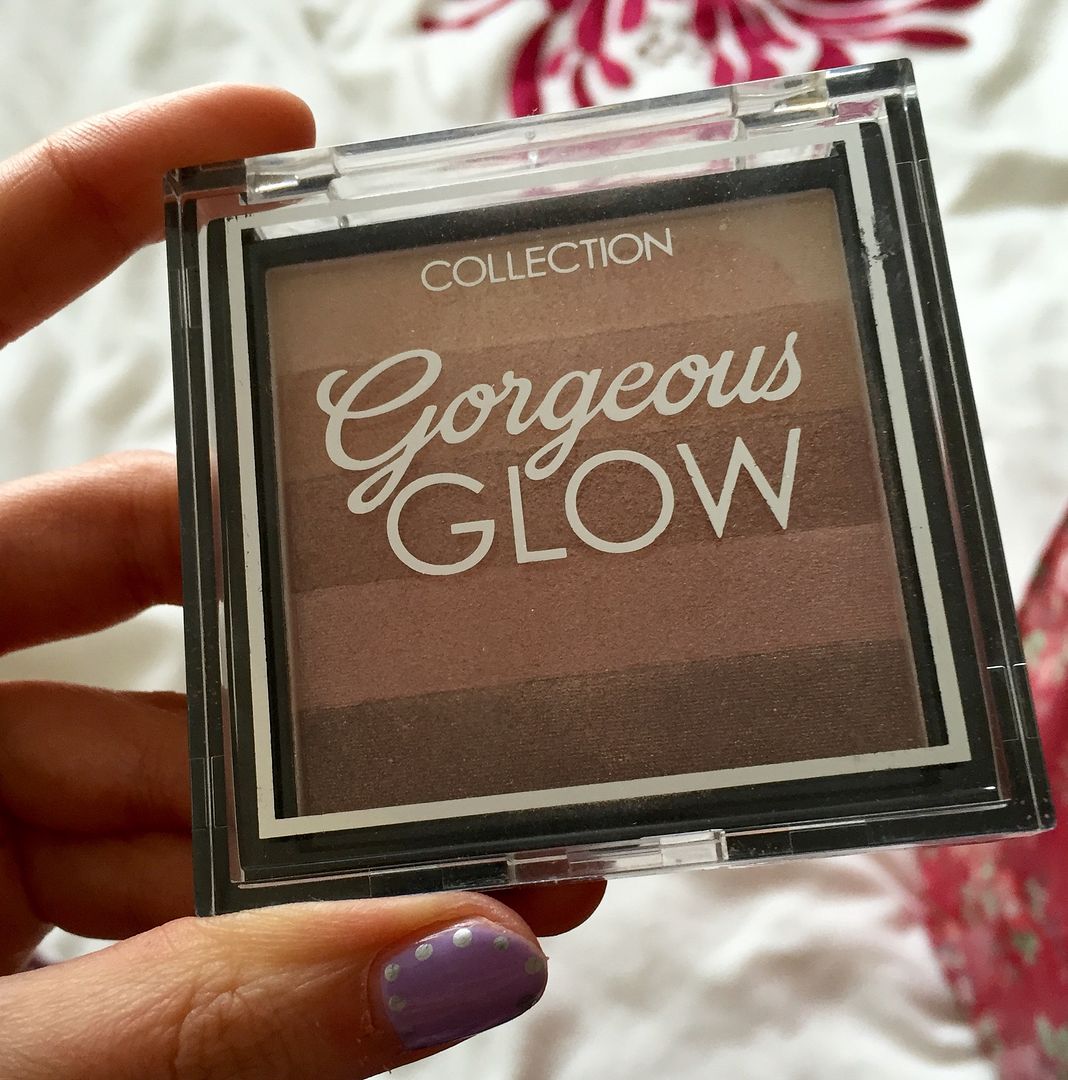
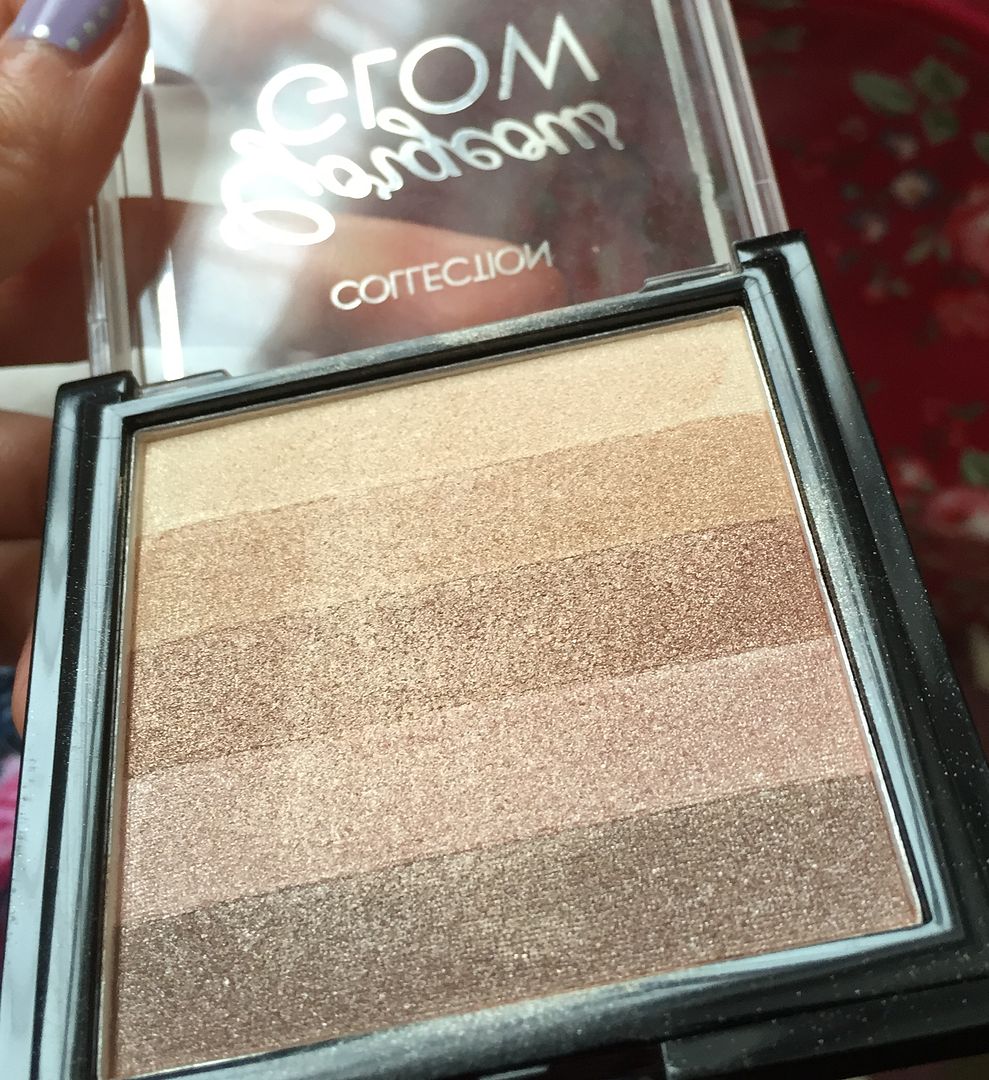
Collection is one high street brand that has impressed me greatly with their makeup, not just in value but really delivering in quality too. We all I think know & love the infamous MAC dupe that is the Collection concealer which has been on the receiving end of many positive reviews, its one product I've repurchased many a time & will continue to do so! Another product I've fallen in love with is the Gorgeous Glow highlighting palette*


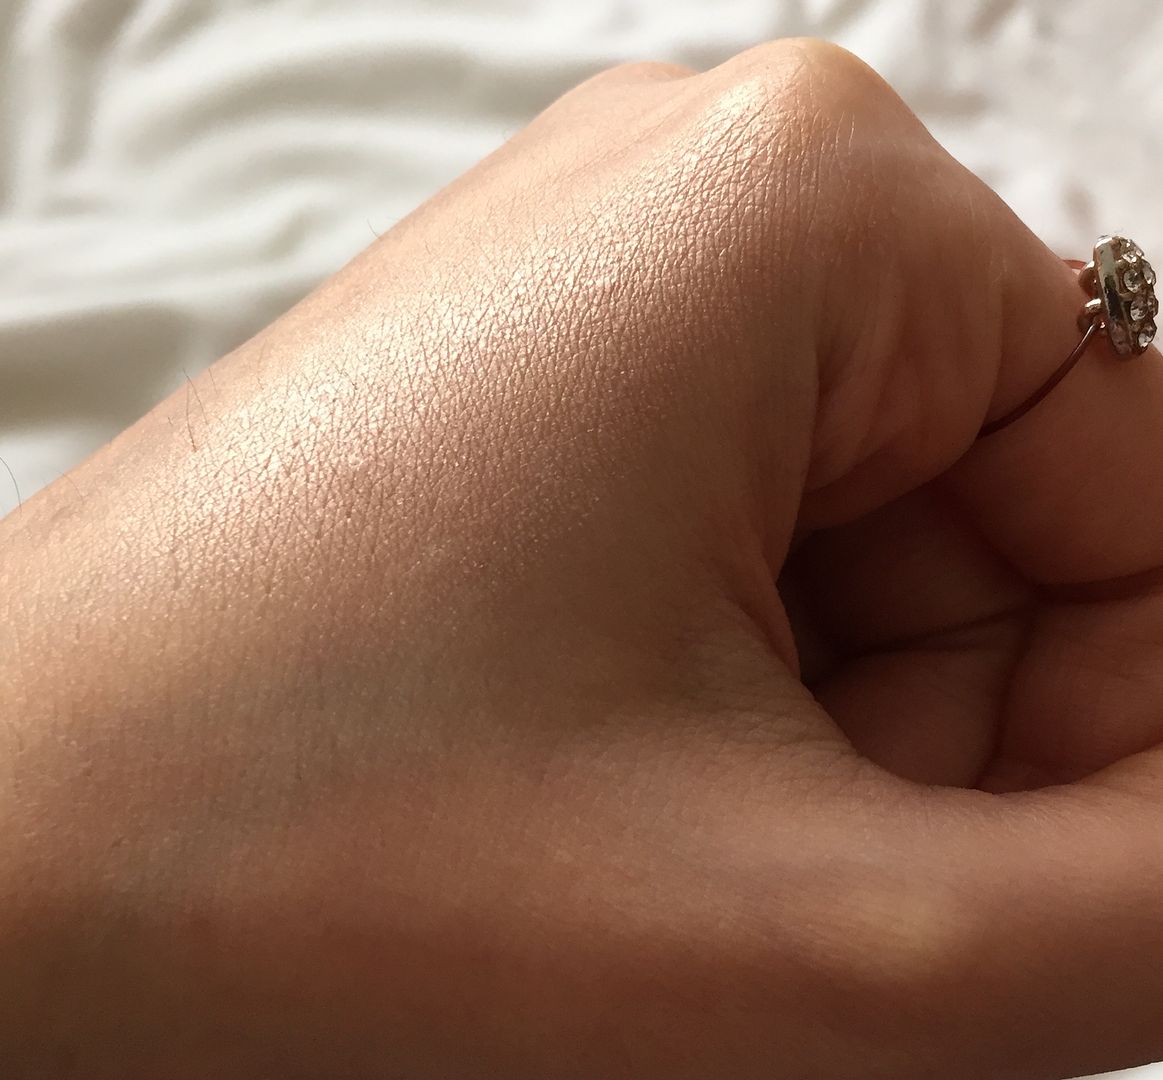
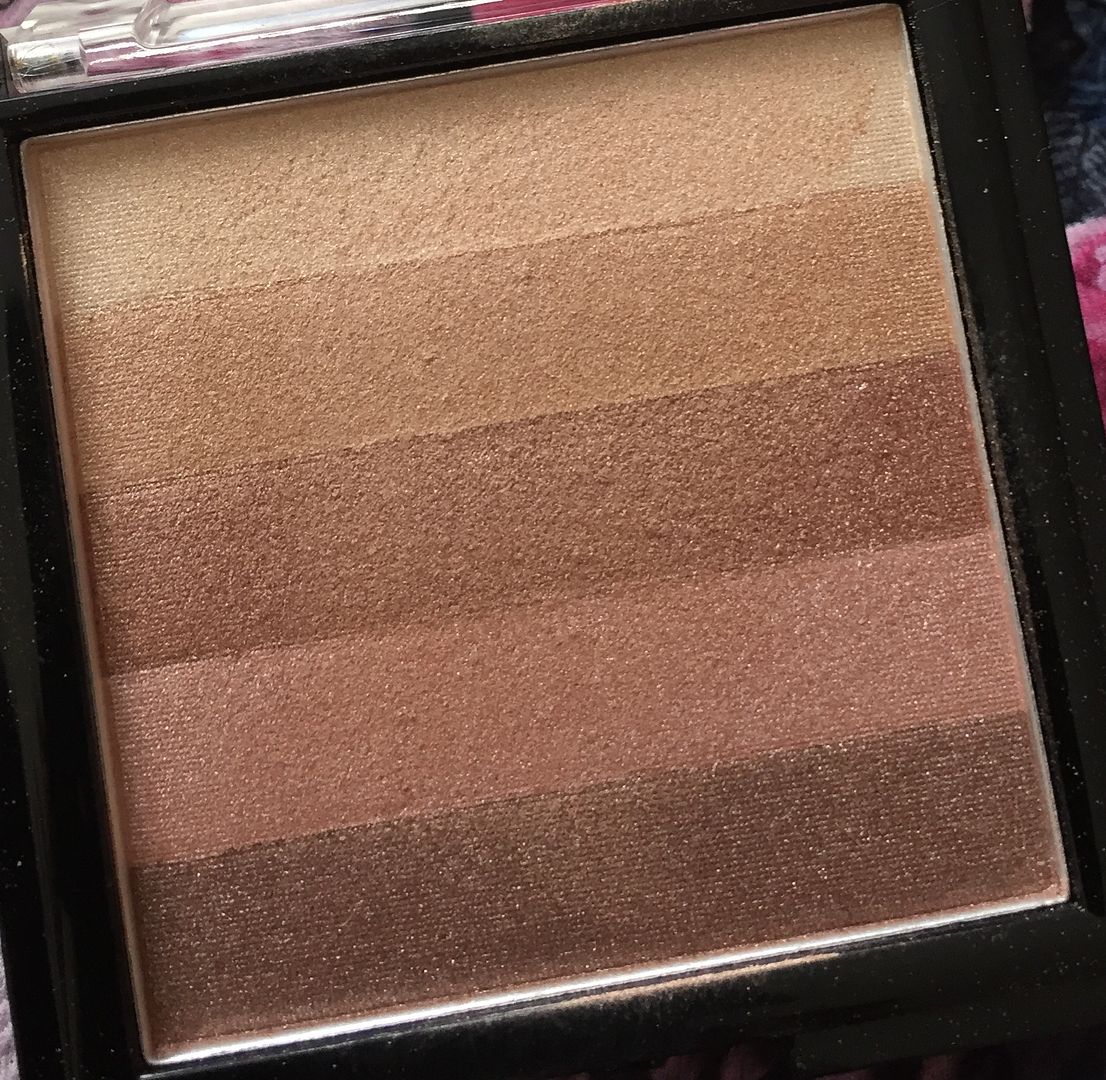
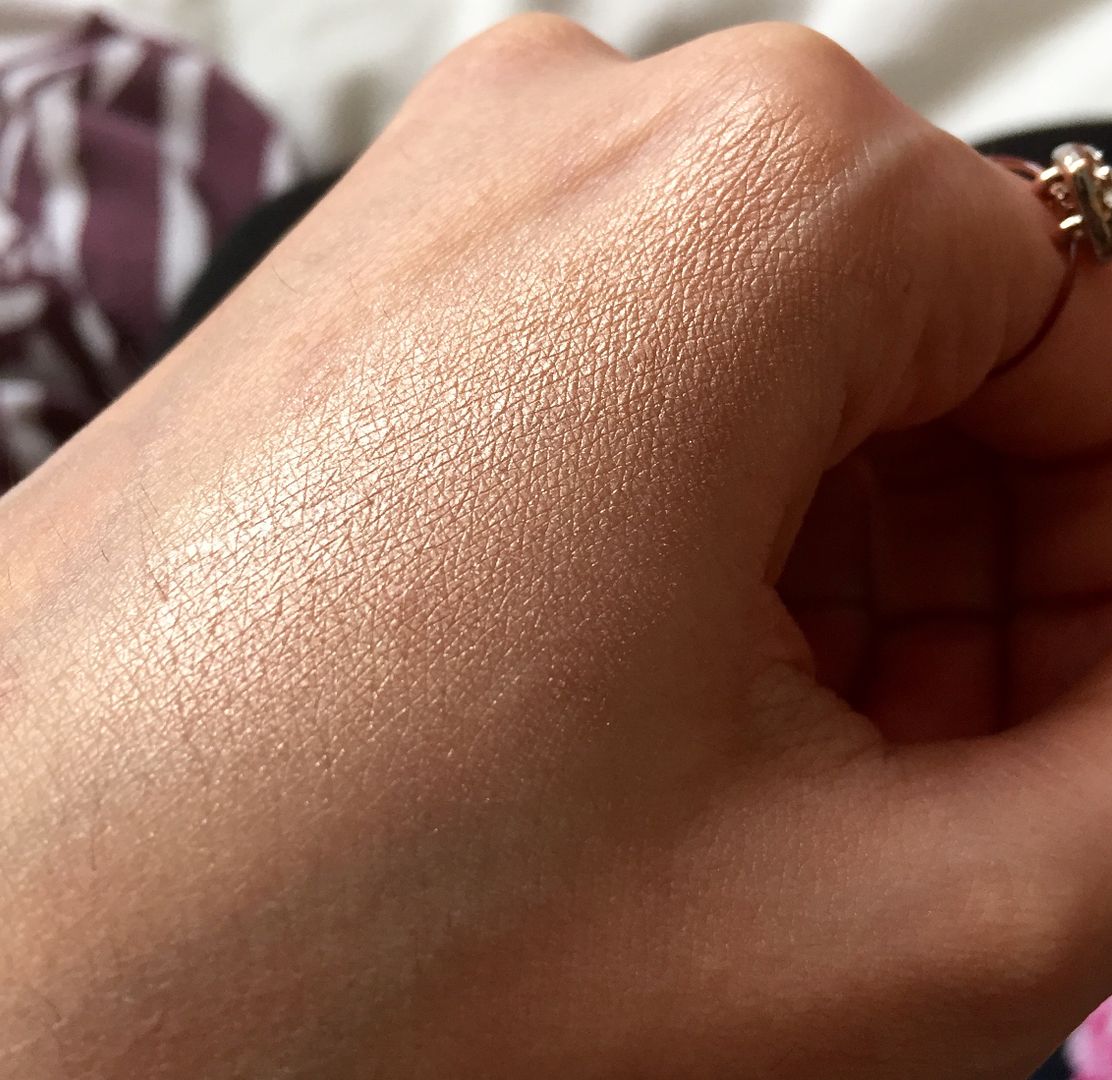
Available in two shades, the blush block & the bronze block, the one I have here is the bronzing palette & is made up of 5 shimmering powder shades ranging from light bronze to brown which when mixed together, result in giving the most beautiful healthy golden glow to the skin.


The formula of the powder is just dreamy, buttery soft, easily blended & SO pigmented, you only need to swirl your brush on to the palette lightly & even then still tap off excess before sweeping softly across the cheekbones as a little goes a long way.


The finish is perfect for my skin tone but this palette would suit everyone as its not over the top at all, not glittery or overly sparkly, instead simply creating that healthy holiday like glow. I like to apply this across the top of my cheekbones, down my nose & on my temples.


And the price of this pretty fab highlighter? £3.99! Yup I tell no lies, for a price as a good as that you can't NOT have this in your makeup stash!

Thanks as always for reading! 

Lotsa love to ya!


Disclaimer - * products featured were sent to me for my consideration. I am not affiliated with the brand nor paid for this post, this review has been as always my 100% honest opinion! :)