Showing posts with label Easter. Show all posts

3.05.2019

Easter NOTD - GoT Dragon Eggs ft Prism Polish Viserion

Hey there lovely readers,

So countdown is in motion for the final season of Game of Thrones...who else is excited?! I'm sure it comes as no surprise that yours truly is a fan. I am in equal parts over the moon excited for the new season but also devastated that it will all be coming to an end soon! How will we cope?! 

In honour of the occasion & also because Easter just happens to be around the corner, I thought it apt to recreate some Dragon Eggs nails using a very special polish!


3.27.2018

NOTD - Fancy Faberge Egg Nails for Easter!

Hello there lovely readers!

Gosh I've been on really bad form lately when it comes to producing new nail art for the occasion! Not only did I completely miss St Patricks Day but Easter is around the corner already & I've not done a single look! 

Blaming it entirely on the new job taking centre stage right now, but anyhoo do go have a peek at some of my previous Easter Nail Art Looks HERE, for some inspiration including cheeky bunnies & chicks galore! However if you fancy something a bit different...FANCY being the operative word here, then how about some glam Faberge Egg style nails?


4.18.2017

NOTD - Cute Kawaii Chicks!

Hello there lovely readers,

So this post is going up a tad delayed, I had initially planned on Good Friday but unfortunately I was hit with some very sad news on Thursday. if you follow me on social media you'll know that last week I lost my beloved Miss Kitty. I can't even begin to explain how devastated my family & I are with the loss of my sweet Hoshi, those who know me well know how much my little furbaby meant to me, but my little one was just too poorly & it would have been cruel to keep her with us. She was such a big character its hard to think her gone & I was so overwhelmed & touched with the thoughtful messages received over the Easter break, it truly meant a lot to me so thank you so so much. RIP my little star.


On to todays post...despite it being a bit late I couldn't very well let Easter pass on through without some form of suitably themed nail art now could I? As always nail-spiration is in abundance with pastels, speckles & cute creatures galore, I so love creating something fun every year. Have a peek at some of previous Easter themed nail art including, Cheeky Bunny Booty nails which remain a firm fav for obvious reasons, my Easter Minion Chicks Tutorial for a fun take on the design as well as a wee White Wabbit Tutorial featuring some speckled goodness too.

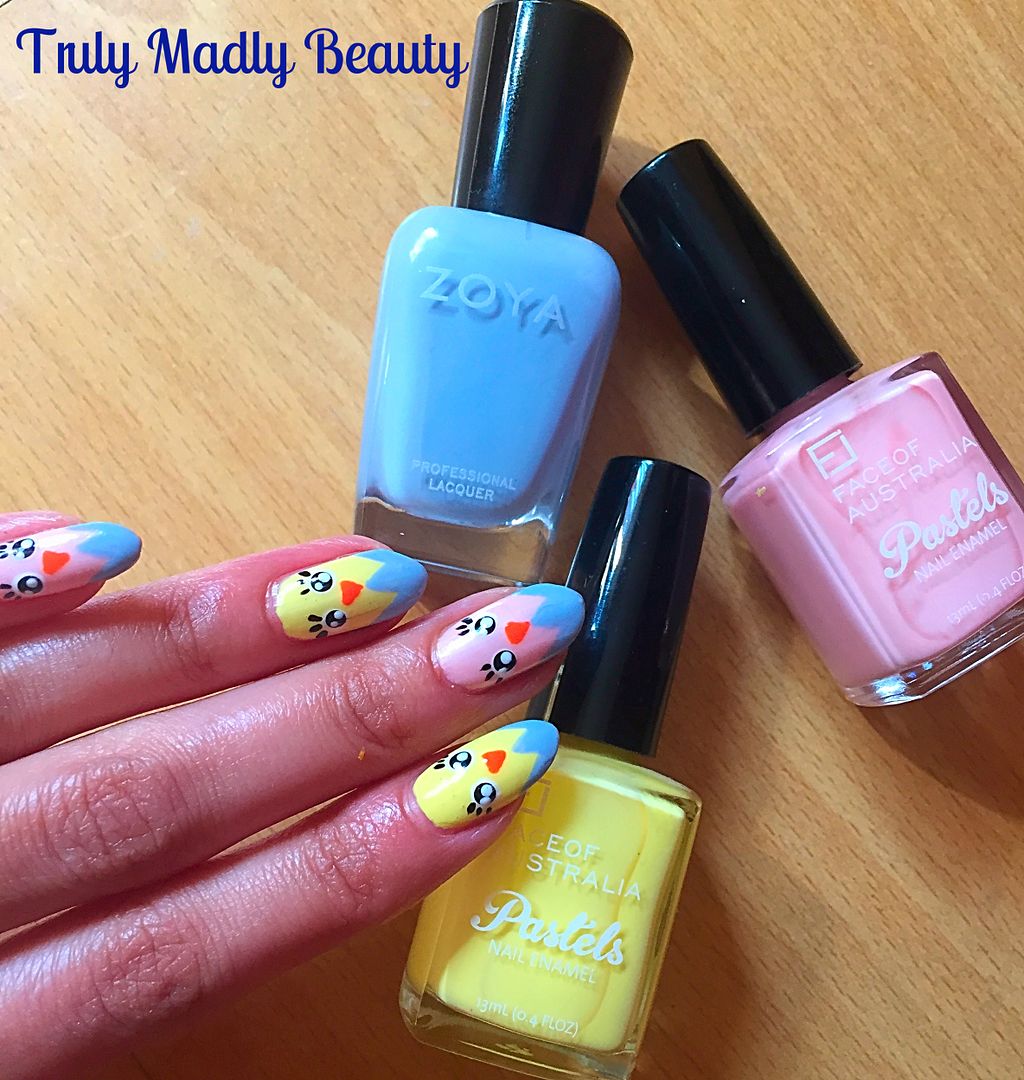
This year I decided to go down the chick route again but with a slight kawaii twist & created these cute little newborn chickadees popping out of their shells with their curious faces & batting us with their eyelashes :)


3.25.2016

Easter NOTD - Minion Chicks plus Tutorial!

Hello lovely readers!

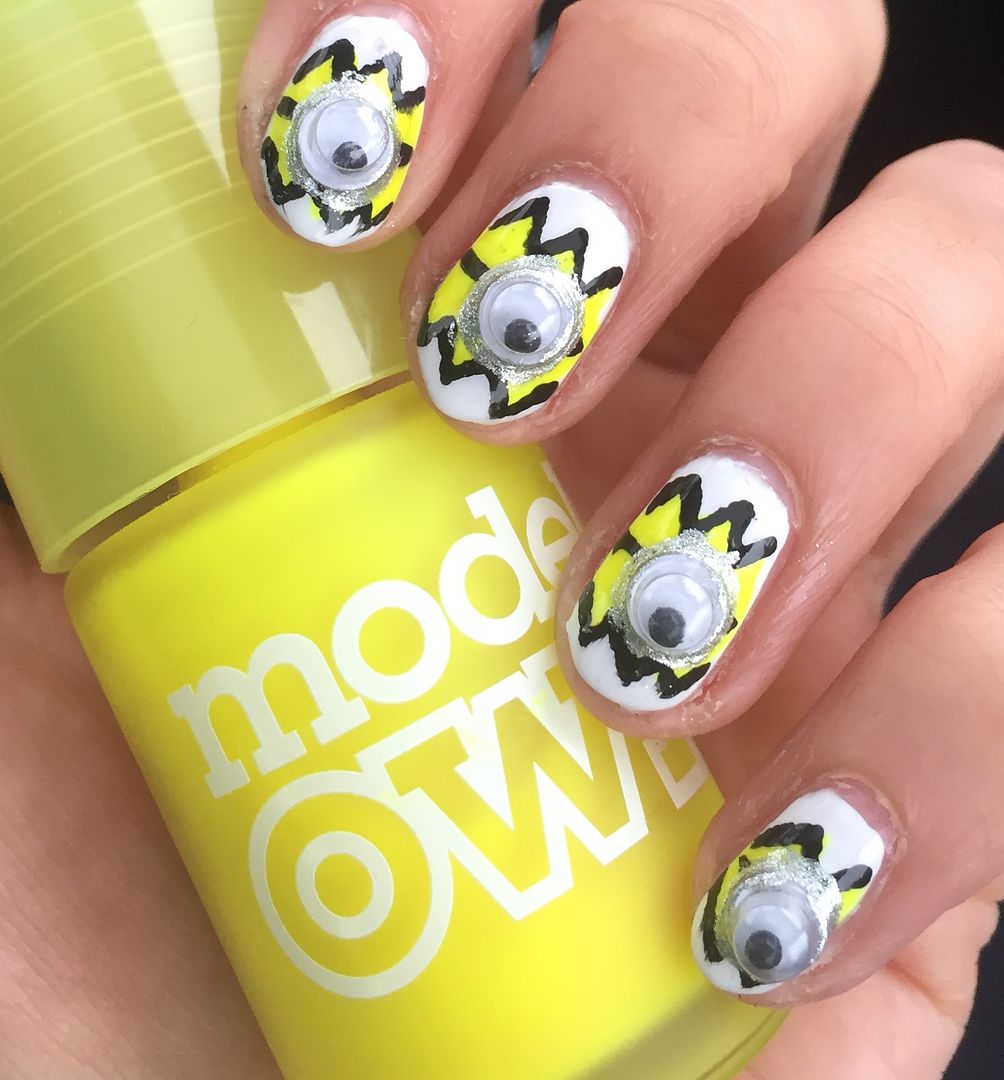
Happy Easter! Yay for four day weekends! If only every weekend could be so. Made a start on all the chocolate gorge-fest-ing yet? If not then get on it beauties! I hope you liked the Easter Bunny nail tutorial from my last post, I've managed to roll out one more Easter mani to share with you & this one was especially for my work colleague who has a thing for minions...who doesn't, those guys are adorable! Remember I told you I had some googly eyes lying around? Well here's how they come of use...


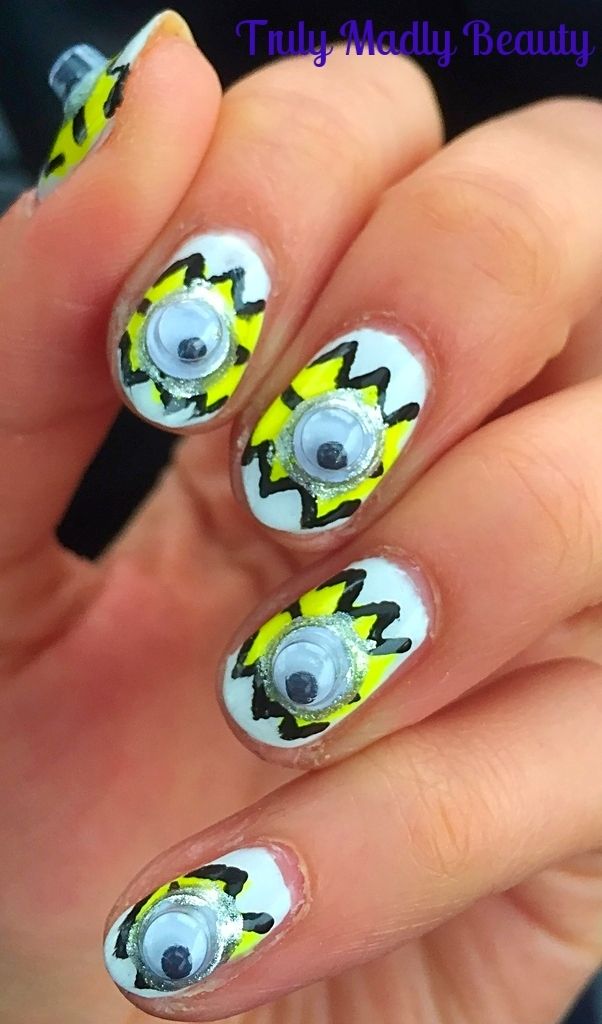
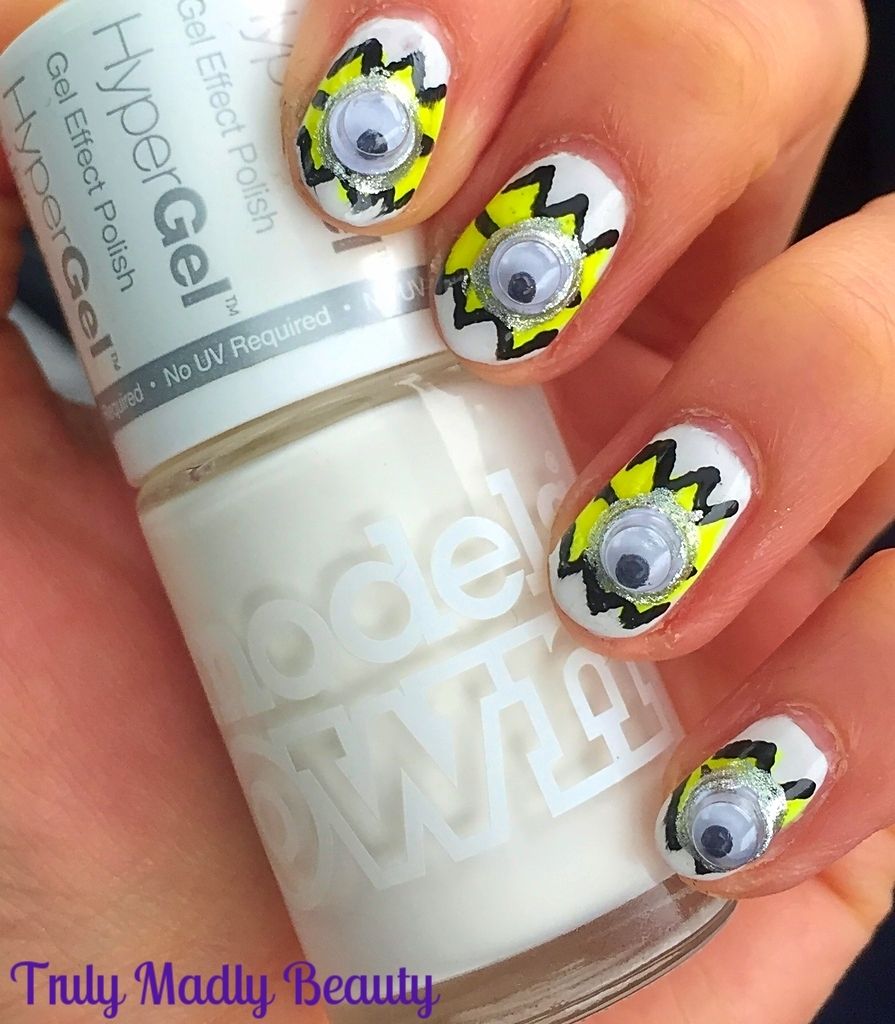
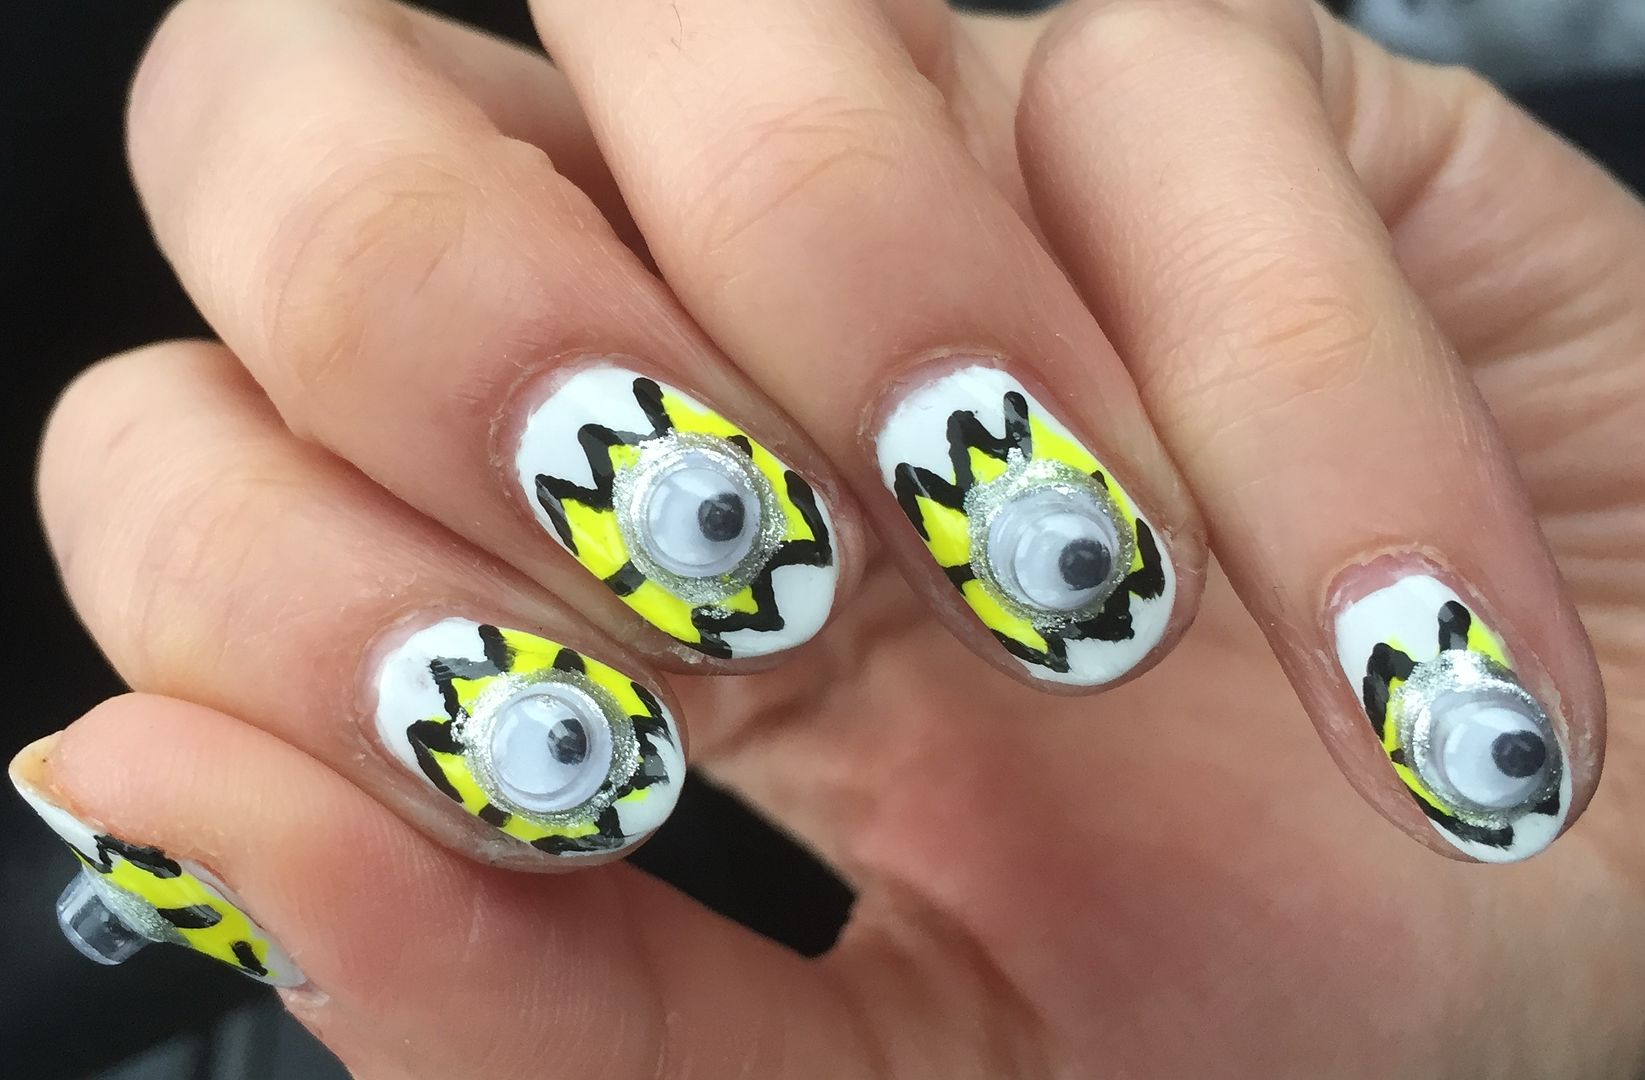
Minion chickies cracking out of their shells! Haha! Well it sure was different lets put it that way & went down well with aforementioned work chum so high minion fives! And my nails made jiggly sounds whenever I shook my fingers (which was often)...that was quite entertaining too. I'm easily amused.


Again I reached for my trusty Models Own polishes to create my minion nails, for the white shells I used Models Own HyperGel in White Light and Models Own Neon in Luis Lemon for the minion chicks themselves.


If you want to re-create this design then here's a step by step breakdown on how to do so!

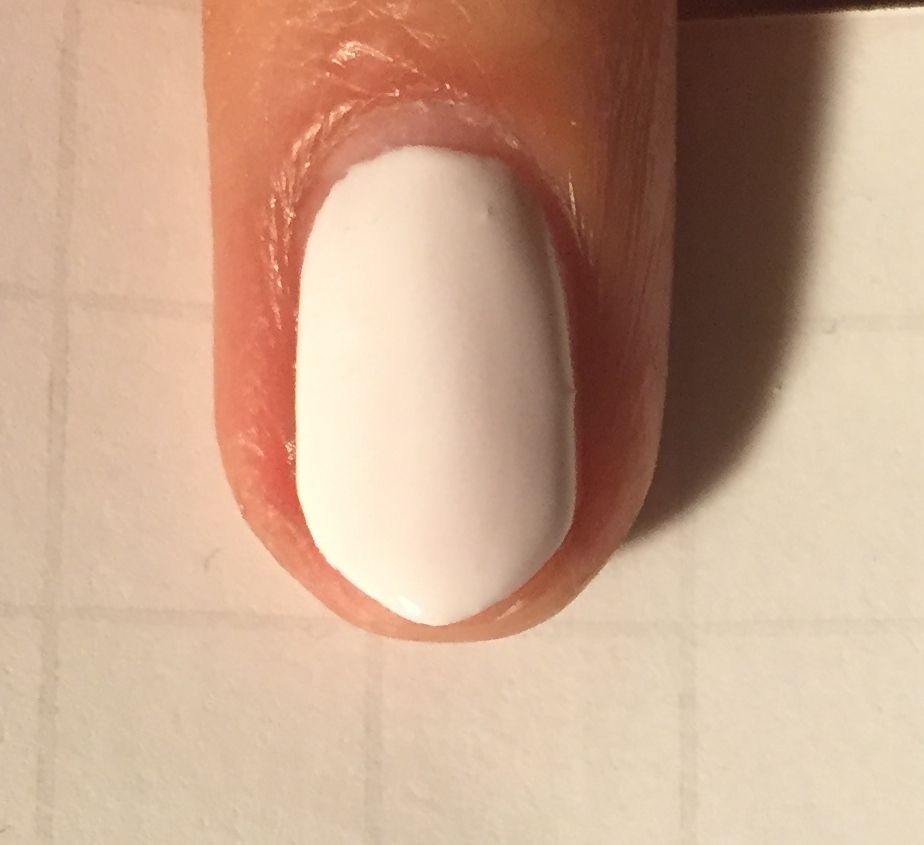
Start with your white base, here I've used two coats of the Models Own White Light


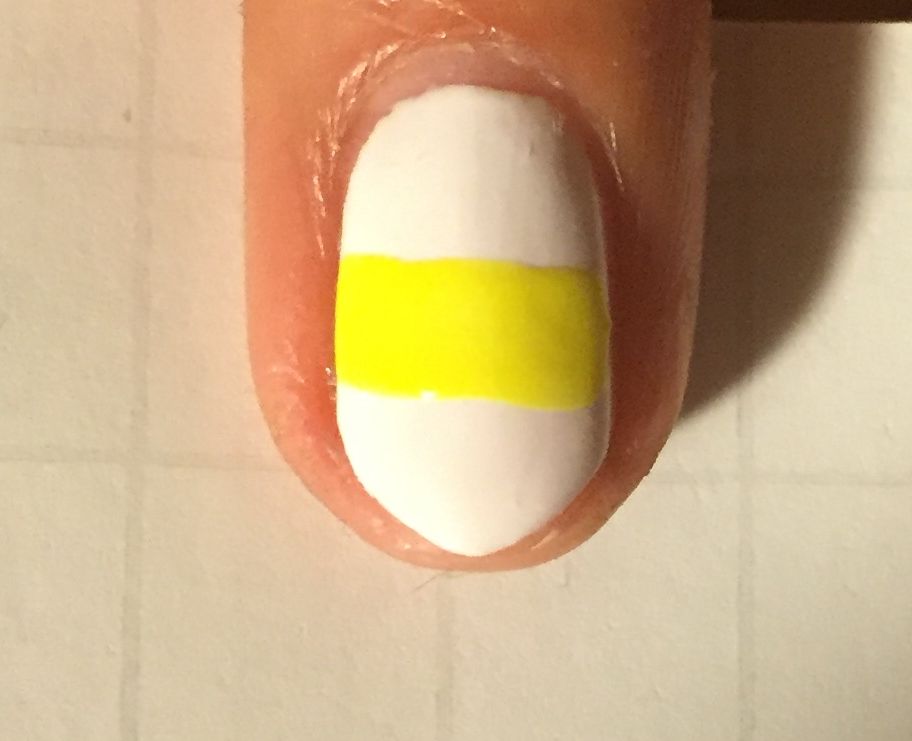
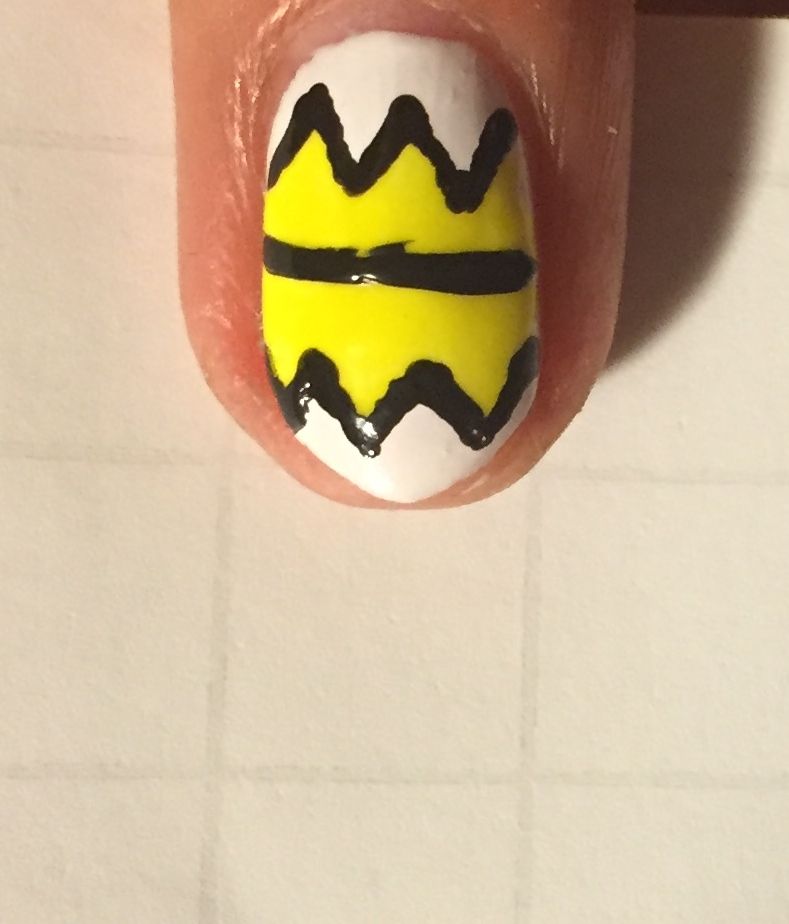
Then grab your yellow polish & apply a horizontal strip of yellow across the middle of the nail using the polish brush


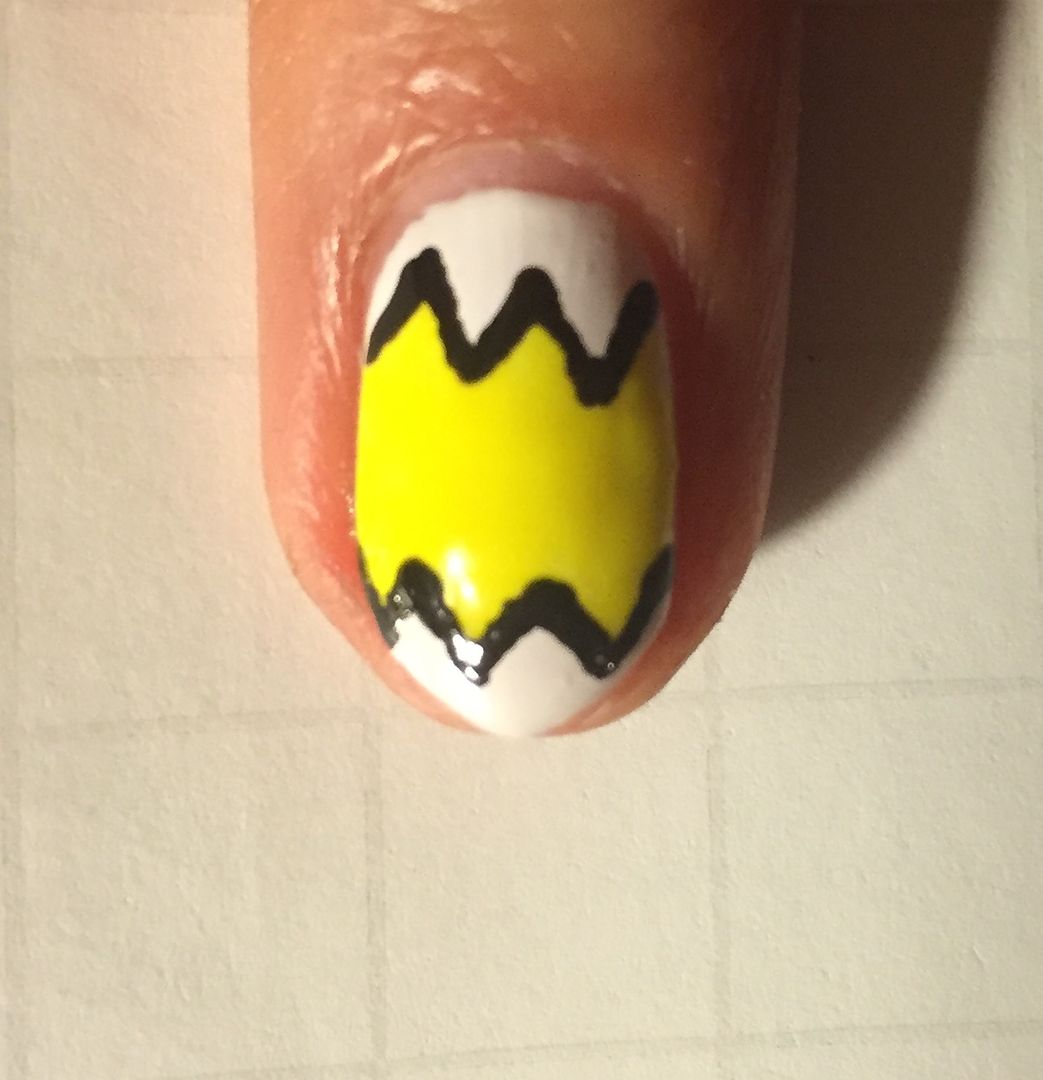
Now grab a finer nail art brush & using the same yellow polish, apply three triangles above the yellow line & three below, before filling in with more yellow polish


Because my yellow was so neon it kind of faded in to the white so to make the egg shell cracks more prominent I went over the edge of the yellow triangles with some black polish using a fine nail art pen.


Using the same nail art pen, apply a thin horizontal black line in the middle of the yellow


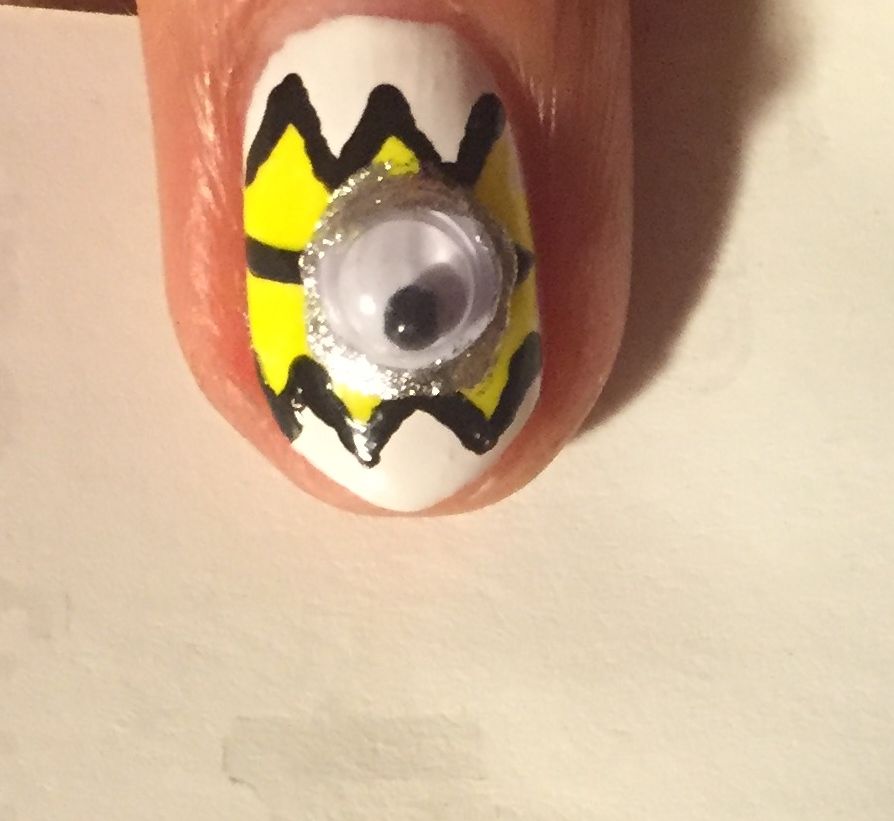
Then apply a thick large round circle of silver polish in the centre of that black line, this was an old Sonia Kashuk polish I had that was nearest at the time!


Then whilst the polish was still wet I stuck on my little google eyes which I had lying around...as you do! Of course if you don't have these then you can just add a smaller white circle of polish inside the silver before adding a black dot for the pupil!


To finish I applied a bit more silver around the rim of the googly eyes to help secure them before adding about two coats of topcoat just to make sure they stayed put.


And thats it! A fun yet quirky Easter mani...I am partial to bouts of oddness ;) Thanks as always for reading, have a fab Easter dolls!

Lotsa love to ya!


3.21.2016

Easter NOTD - White Wabbits Tutorial!

Hey there lovely readers!

So I'm sure it won't have escaped your notice that Easter upon us, if the abundance of fluffy bunnys & cheeky chicks everywhere weren't a big enough giveaway then the lure of a four day weekend definitely catches attention!

Naturally I can't help getting in to the spirit of things by indulging in my favourite thing...nail art! As well as chocolate egg over eating...a skill I take most seriously. So I guess make that SECOND favourite thing ;)

Last year I created these pink Easter Bunny Booty nails which still make me giggle everytime I think of them. As cute as they were to wear they were also of course hugely impractical, but for the wee time they were worn the wabbits were dearly loved.


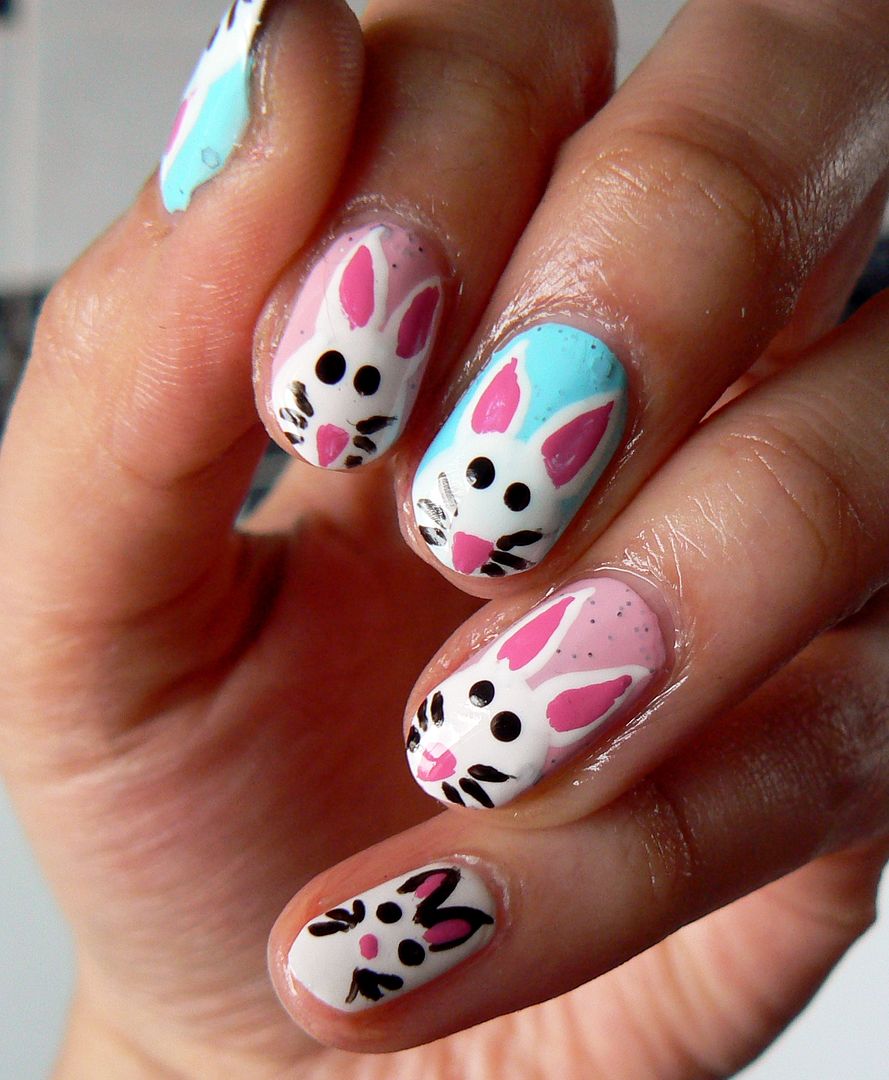
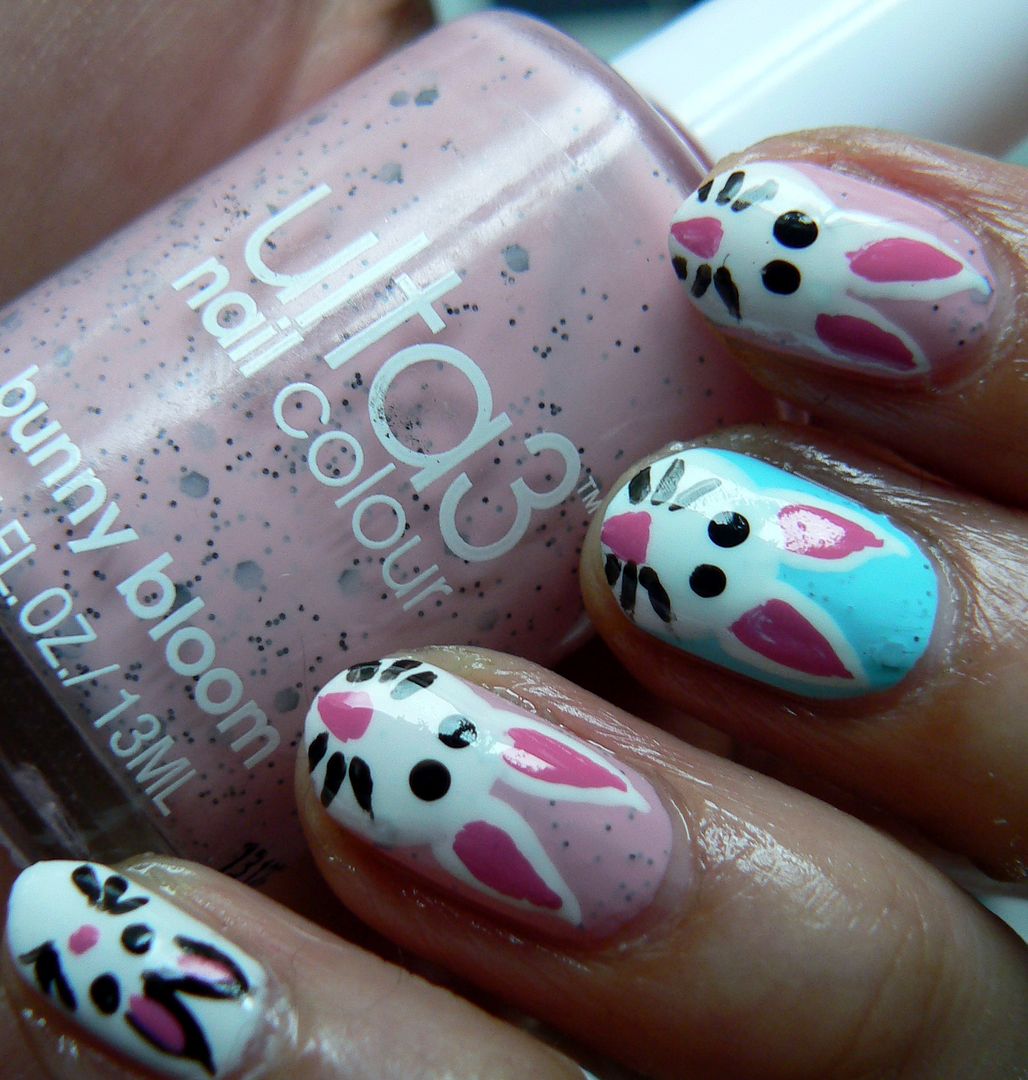
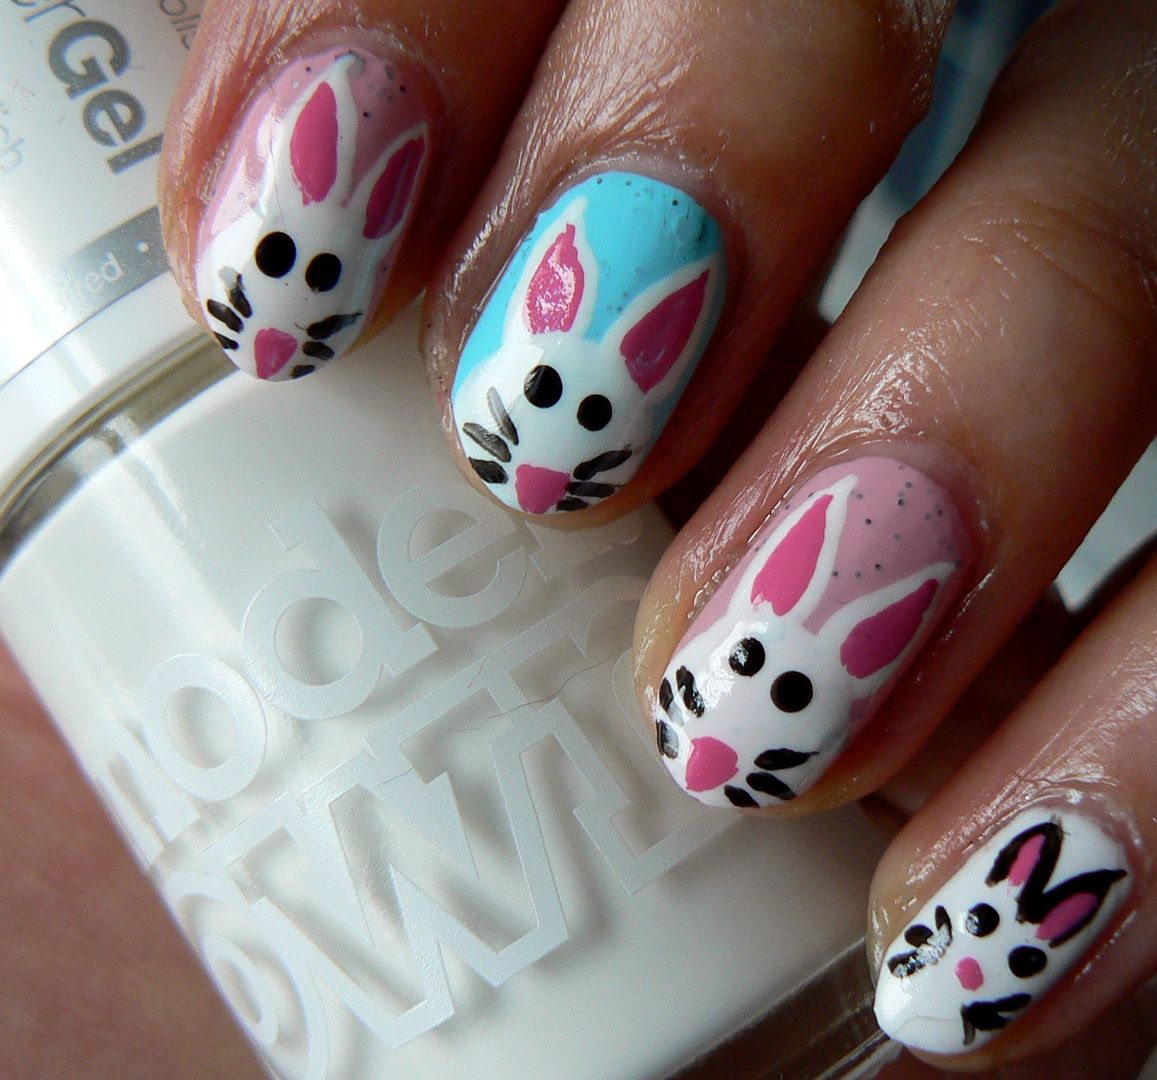
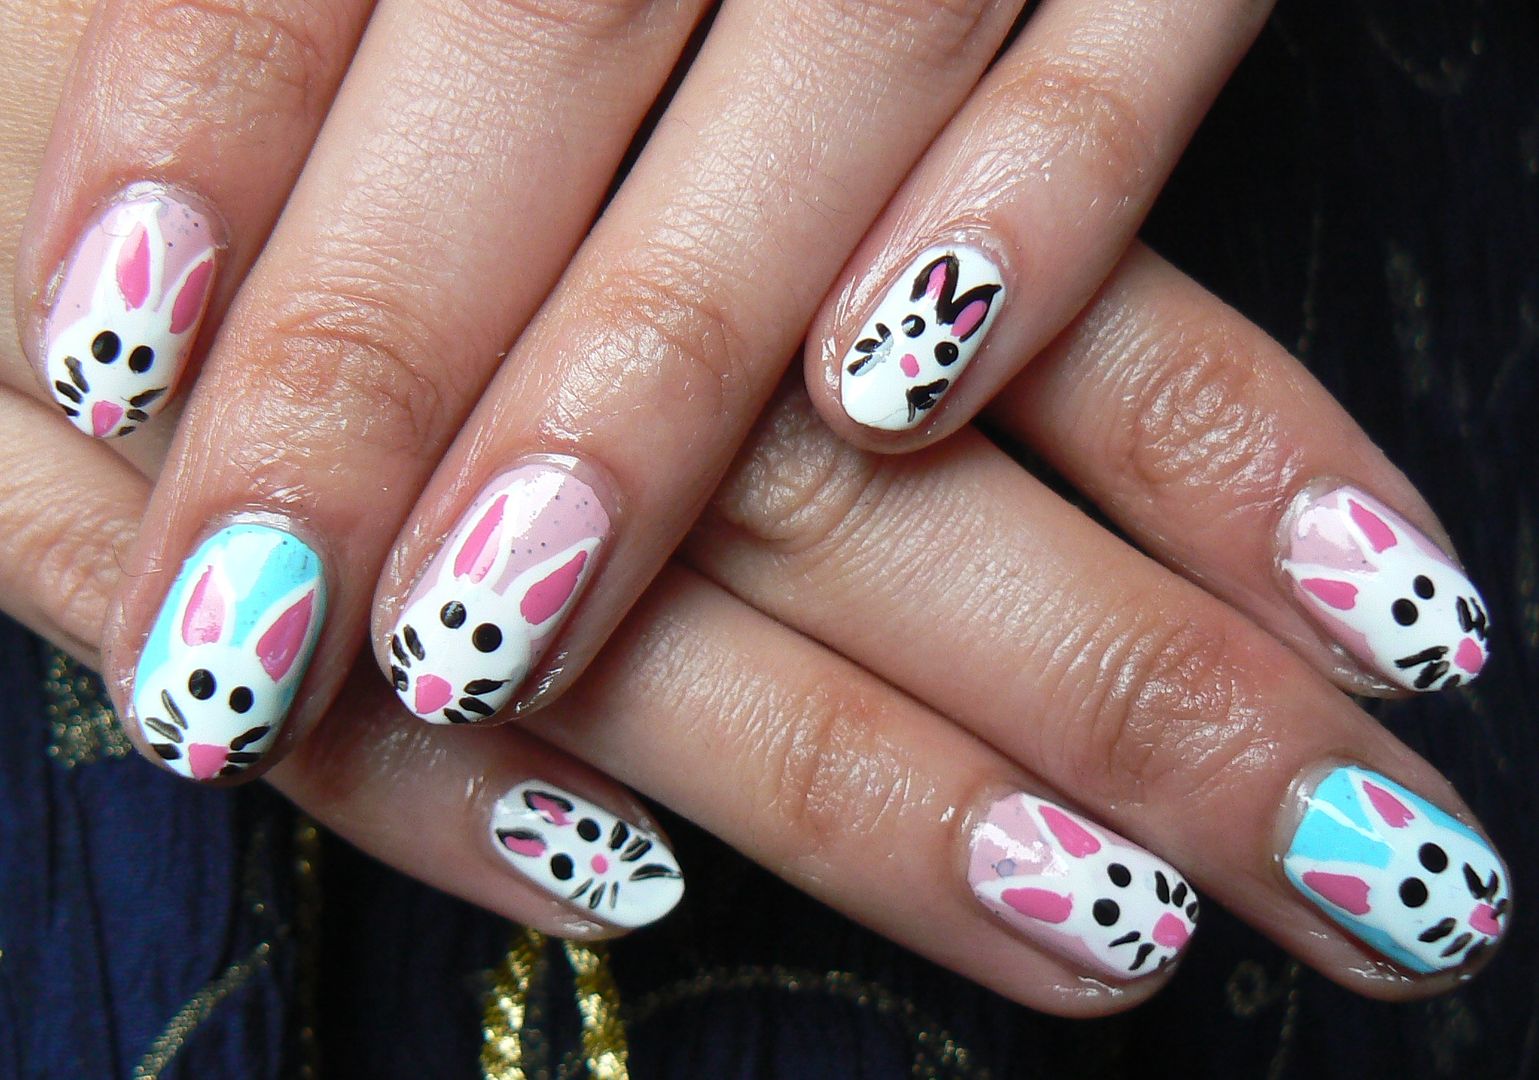
This time I decided to create some slightly better behaved bunnies, who instead of showing us their behinds, give us their best selfies smiles instead! :)

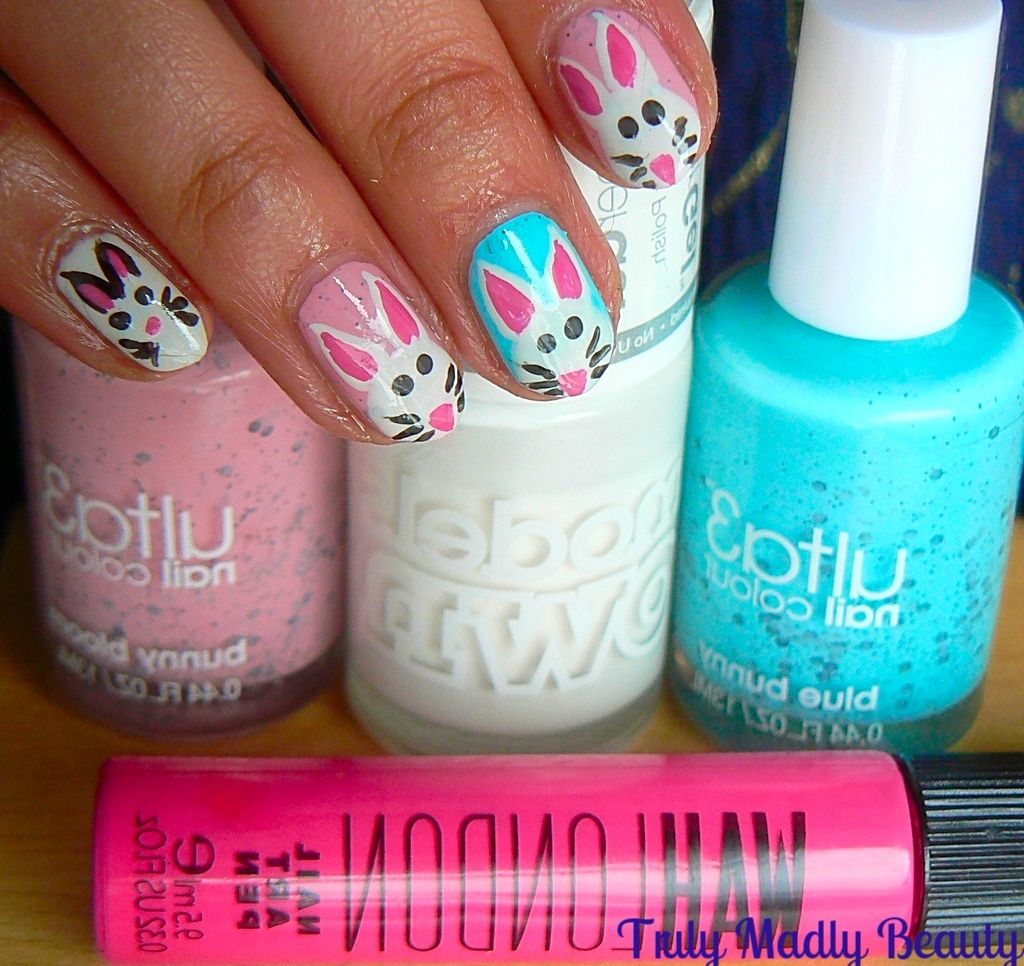
Easter time always makes me want to reach for pretty pastels & I had the perfect polishes to use  courtesy of Ulta3 who (along with many other brands I'm sure you remember!) released some speckled polishes a while back for the season each with delightfully bunny themed titles! 


On my thumb & middle fingers I used one coat of Blue Bunny a bright blue pastel creme with teeny black glitters as well as a few larger hexagonal ones. 


On my index & ring fingers I went for the pink offering using one coat of Bunny Bloom, a pretty strawberry pink creme with the same black glitters. On my pinkie I decided to go all white using Models Own White Light HyperGel which is what I also used for my rabbits.


Now to draw our bunnies! Here is a wee step by step breakdown on how to create your own wee wabbits...


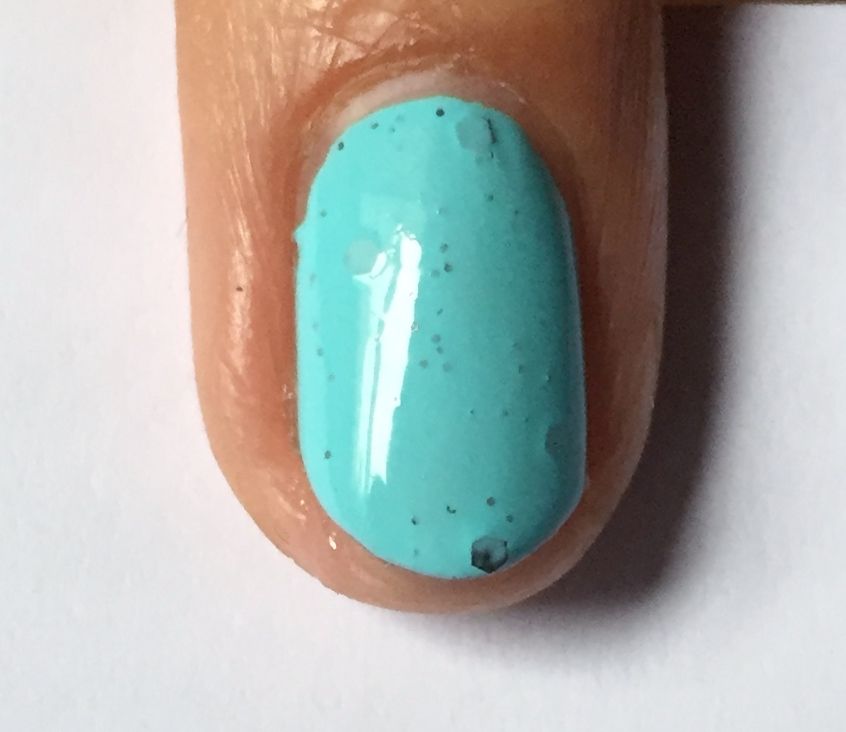
Begin with one or two coats of your base colour, with these Ulta3 polishes I felt one was more than enough, especially as I'd be adding more polish for my bunnies


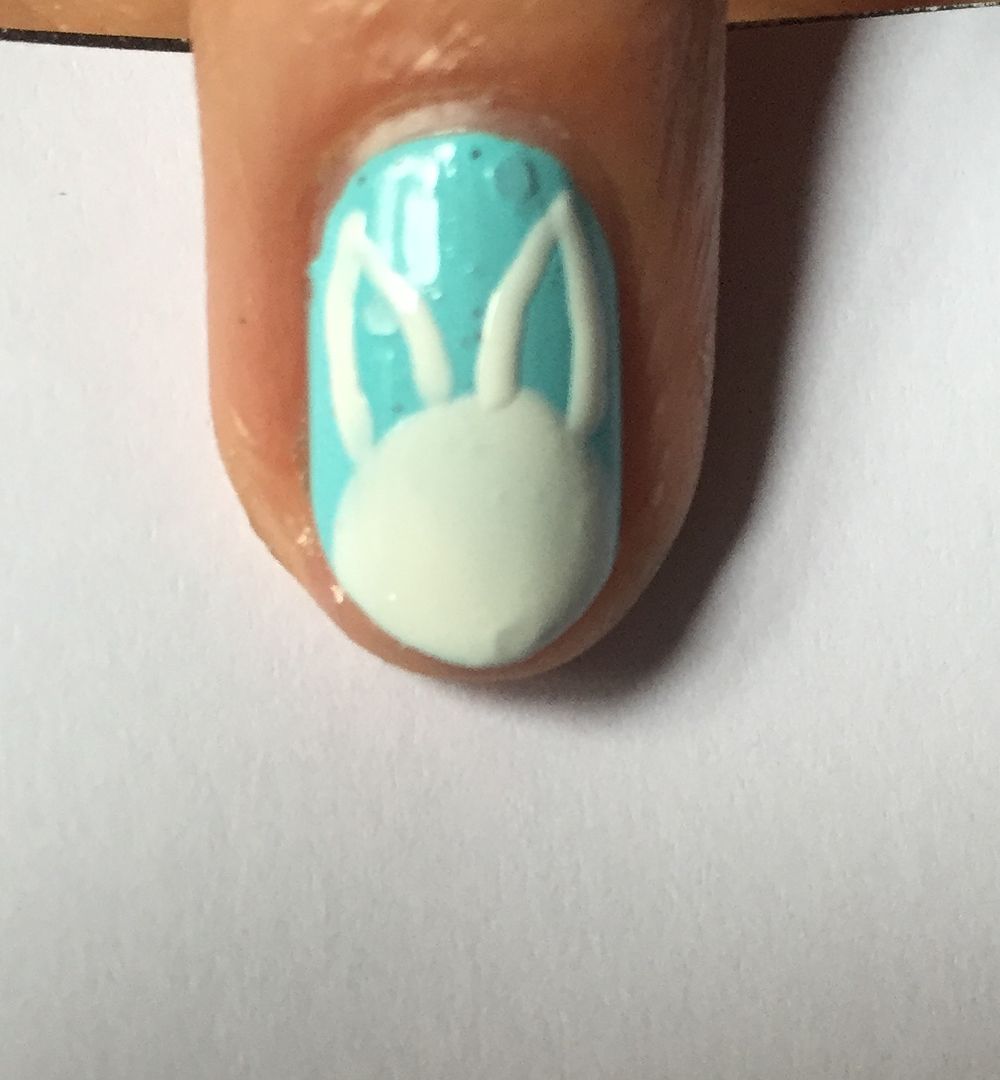
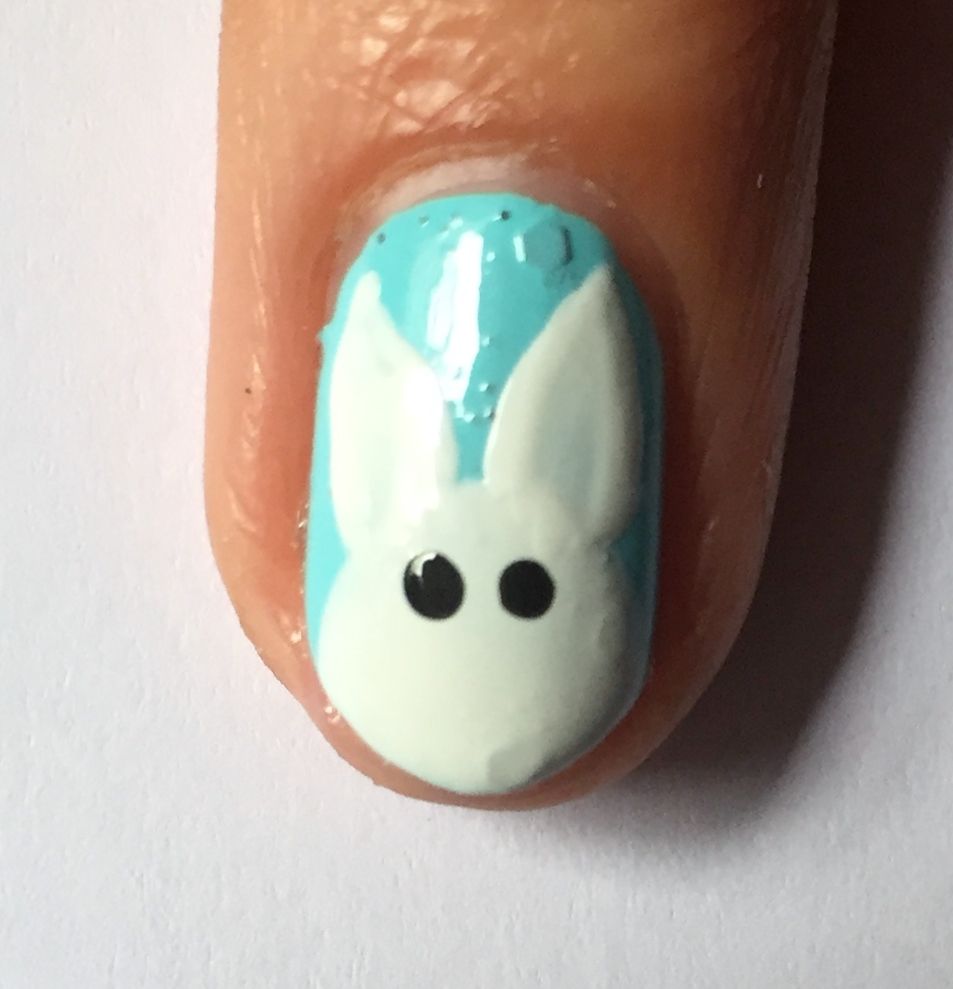
Start by drawing a round(ish) circle at the tips of your nails for the bunnies head using the brush that comes with the polish.


Then grabbing a finer nail art brush, dip into your white polish & draw on two ears above the head, if you want to make them floppy you can but I didn't have enough space. Fill in your two long triangular ears with more white


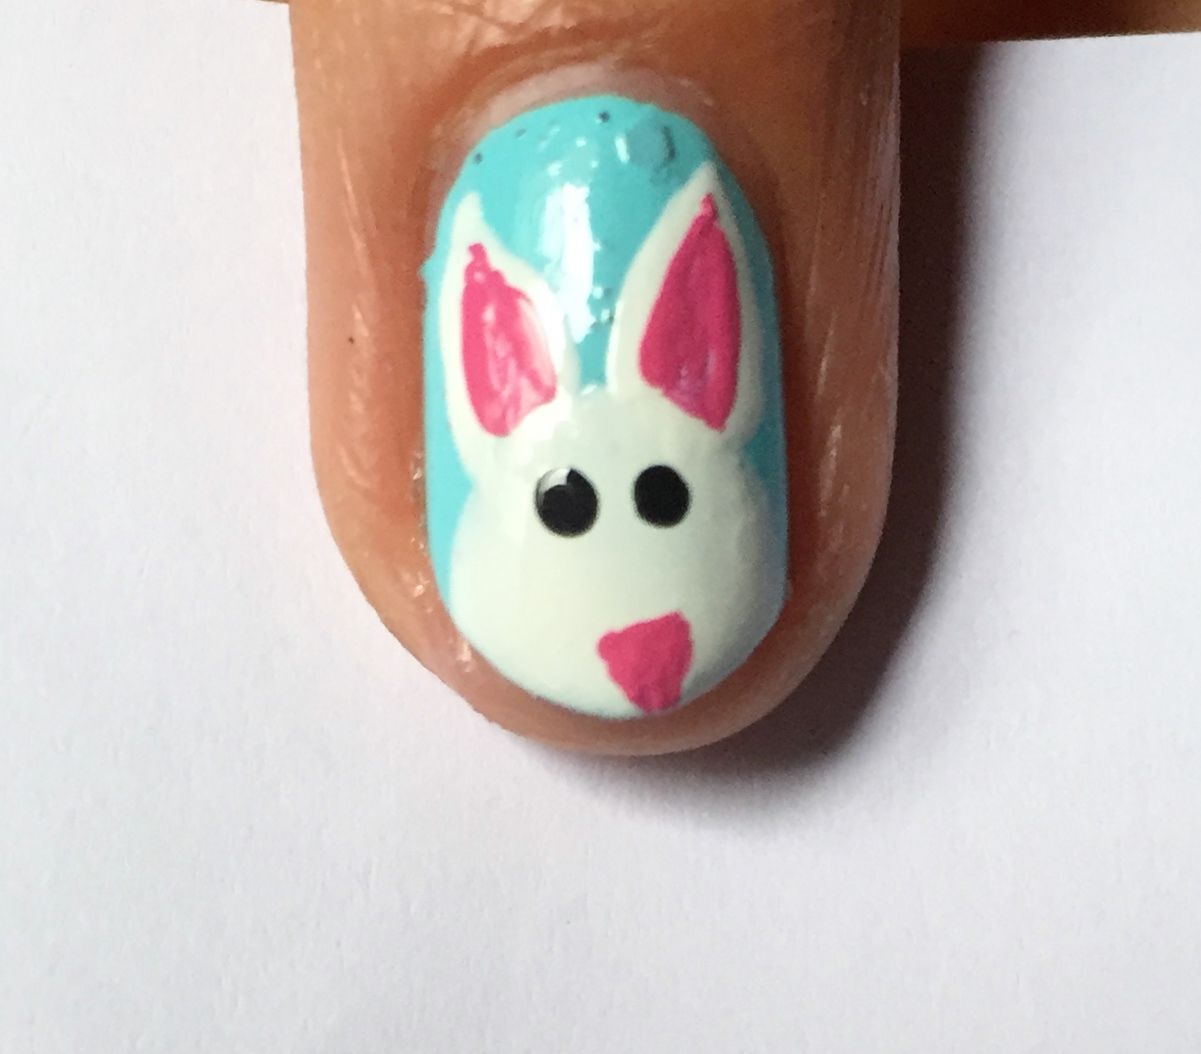
Then using some black polish & a dotting tool apply two dots next to each other for the eyes.


Next using a bright pink polish, here I've used WAH nail art pen in Pink & used the fine nib to apply a teeny nose & to fill in the inside of the ears with a smaller triangle.


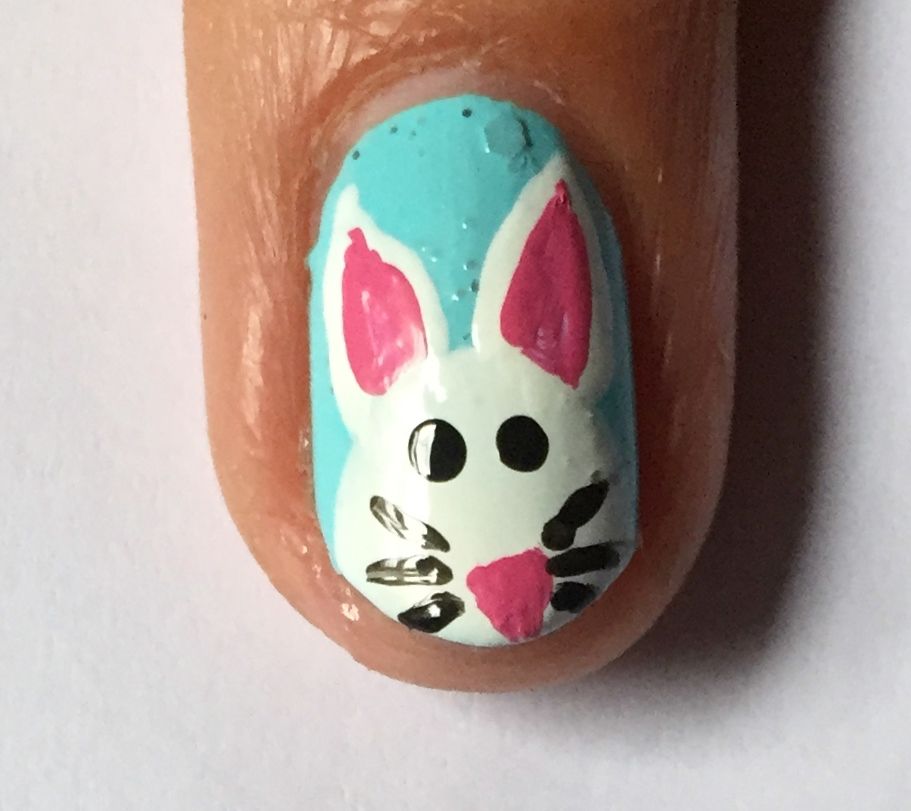
Final step is to add those whiskers by simply adding three small strokes either side of the nose with black polish


For my pinkie white bunny I simply used the black & pink polishes to draw on a rabbit face a little differently, more comic book, rustic arty style? That's what I'm telling myself with anyway...


Not forgetting a nice covering of glossy topcoat & your cute bunnies are ready to hop :) I have some googly eyes lying around that I'm itching to use & I've just had an idea for what they might be perfect for so stay tuned for more Easter nail art... 

Losta love to ya!


4.01.2015

Easter NOTD - Easter Bunny Bootys!

Hello there lovely readers!

Happy Easter! Naturally I couldn't let the occasion pass without some form of Easter inspired nail art. Last year I did some cute if slightly psychotic chick nails, this year I wanted to do something different so here we have some naughty pink bunny's showing us their bootys!


4.19.2014

Easter NOTD - Cheeky Chicks!

Hello there lovely readers & Happy Easter weekend! Hope you've all made a start on the chocolate over indulging that is an absolute necessity on this holiday, I plan to feel like a complete heifer before the day is through so I'd best get started!


Now brace yourselves lovelies for the complete & utter mani fail I'm about to throw your way today you lucky things you. I wanted to squeeze in another quick Easter themed mani so literally threw this one together & it was pretty much one of those situations where once I started to realise this mani was going downhill fast, I had already reached the point of no return, there was no going back, I simply had to continue & finish. So here we go dears, some rather psychotic looking cheeky chicks...

4.16.2014

Easter NOTD - Duck Egg Nails!

Hullo there lovely readers! Hope you're all having a tip top week, the weather is slowly but steadily picking up, work is good & the countdown has already begun for the beauty that is a four day Easter weekend, also giving two very delightfully shortened weeks in the process! *happy dance*

A wee bit concerned I haven't consumed me an easter egg yet though, plenty of the mini variety but those little uns hardly factor, this is something I plan to rectify greatly in the upcoming days...


Speaking of Easter naturally brings me on to the subject of today’s post...Easter themed nails! Unfortunately I can't seem to find the time lately to do any nail art but I am definitely going to try at the weekend! However I realised after doing this mani how much it resembled duck eggs, which is kind of an Easter theme right? Hey presto quick & easy Easter nails! All ya need? A base colour & some crackle polish!