Hey there lovely readers!
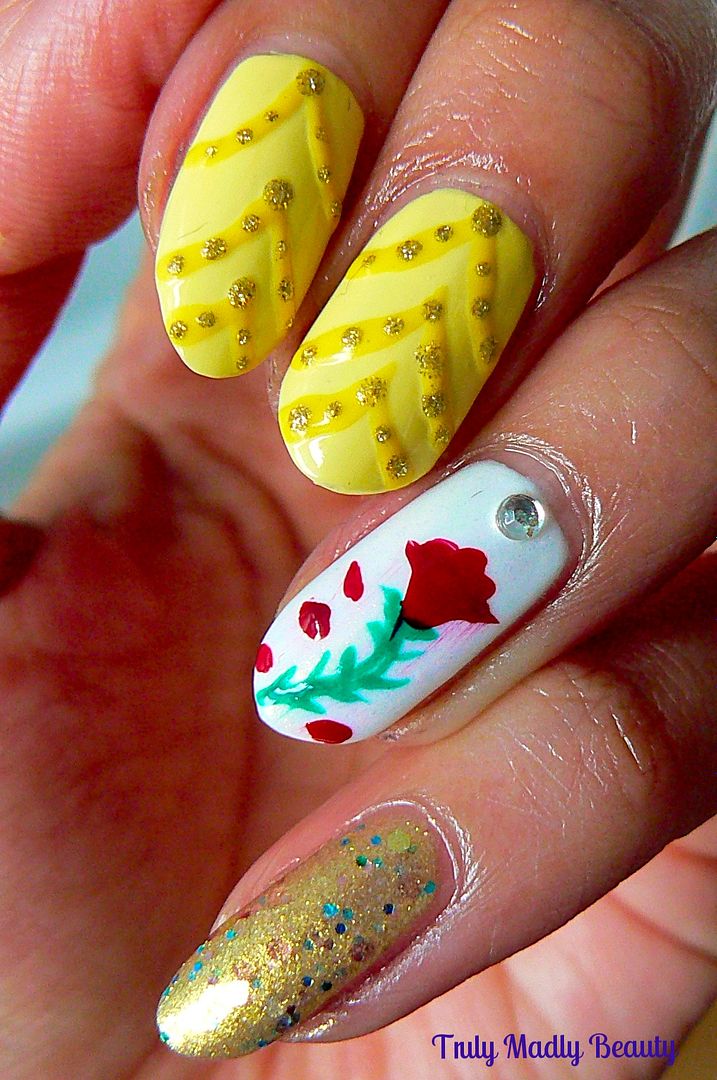
Florals you'll know if you're a regular reader, are my jam & I don't see this love going anywhere anytime soon! Speaking of love it is of course Valentines season, but moi? I'm celebrating Galentines with my gals! Today's nail art is for Galentines Day babes & features one of my favourite red polishes which was sent to me by one of my darling friends Chelle all the way from Australia! Which I thought perfect for the occasion.
Showing posts with label Ulta3. Show all posts
2.10.2019
3.27.2018
NOTD - Fancy Faberge Egg Nails for Easter!
Hello there lovely readers!
Gosh I've been on really bad form lately when it comes to producing new nail art for the occasion! Not only did I completely miss St Patricks Day but Easter is around the corner already & I've not done a single look!
Blaming it entirely on the new job taking centre stage right now, but anyhoo do go have a peek at some of my previous Easter Nail Art Looks HERE, for some inspiration including cheeky bunnies & chicks galore! However if you fancy something a bit different...FANCY being the operative word here, then how about some glam Faberge Egg style nails?
3.16.2018
NOTD - Napping Unicorns!
Hey there lovely readers!
In today's hectic world its muchly important to get plenty of rest, even for mythical creatures.. If anything they require it more so on account of all the wish granting, rainbow farting & other strenuous fairytale activities. So today I have some magical unicorns getting some shut eye partaking in one of my favourite hobbies...napping!
1.22.2018
NOTD - Valentine's Holo Pink Roses Tutorial
Hello there lovely readers!
Out of all the ENDLESS nail art possibilities in the universe, there is one look in particular that will forever remain a firm favourite of mine & that is FLORALS!
Labels:
Color Club,
Creme,
Floral,
holographic,
Lime Crime,
Model's Own,
nail art,
NOTD,
Pastel,
Pink,
Rhinestone,
Rose,
Tutorial,
Ulta3
3.20.2017
Disney Nail Art Series - Beauty and the Beast!
Hello
there lovely readers!
Now
this is something that I have been wanting to do on my blog for the
longest time & for various reasons prolonged but now I am finally
on it huzzah! As you may know about me, one of my great loves is
Disney. It played a huge part in my upbringing & still to this
day I love nothing more than taking a break from adulting &
indulging in a Disney movie marathon, immersing myself back into that
magical world. One of my best holidays was Christmas spent in
Disneyland Paris 4 years ago & I am yearning to visit
Florida's offering one day. So it would only make sense to channel
this passion of mine through another love which is of course....nail
art!
I
already have a few Disney themed manicures that I cannot wait to
share with you, I'll be exploring all sides of Disney, both Good and
Evil in my nail art series, so this will include not only Princesses
but Villains & additional characters as well, if you have any
requests then please do let me know! But to start off my Disney Nail
Art Series I thought I would begin with of course the main movie
remake that EVERYONE is talking about at the moment....Beauty and The
Beast which I went to see last Friday!
5.02.2016
NOTD - Marble Stone Look Nails & Tutorial!
Hello
there my lovely readers!
How
have you all been? Attempting to restore some semblance of normality
after spending 7 blissful days in Antalya. My friend & I stayed
at the Litore resort & the holiday consisted of much sunbathing,
eating, relaxing before repeating it all over every day. Much needed
let me tell you & we had such an incredible time, it was
definitely hard to leave! But one must get back to the normal scheme of things now & that of course includes blogging!
You
may remember I went through a bit of a marbling phase recently when
it comes to nail art. I love playing around with different colours
not knowing what the finished result will be. However one effect that
I adore is the pretty marble stone itself & one I wanted to
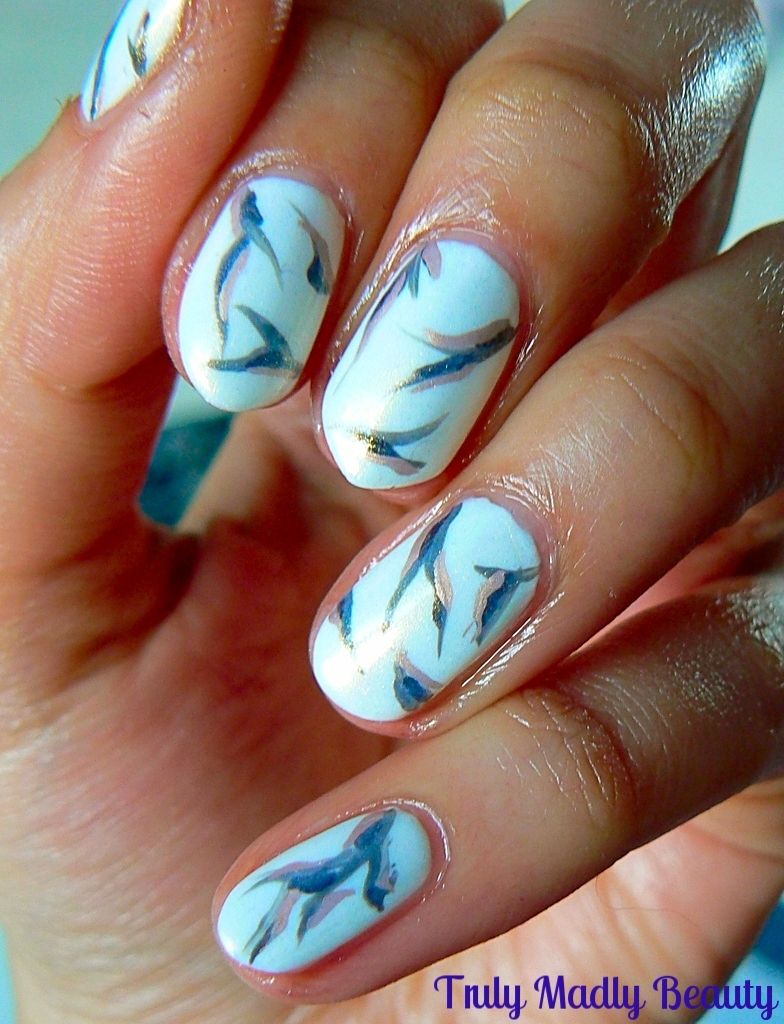
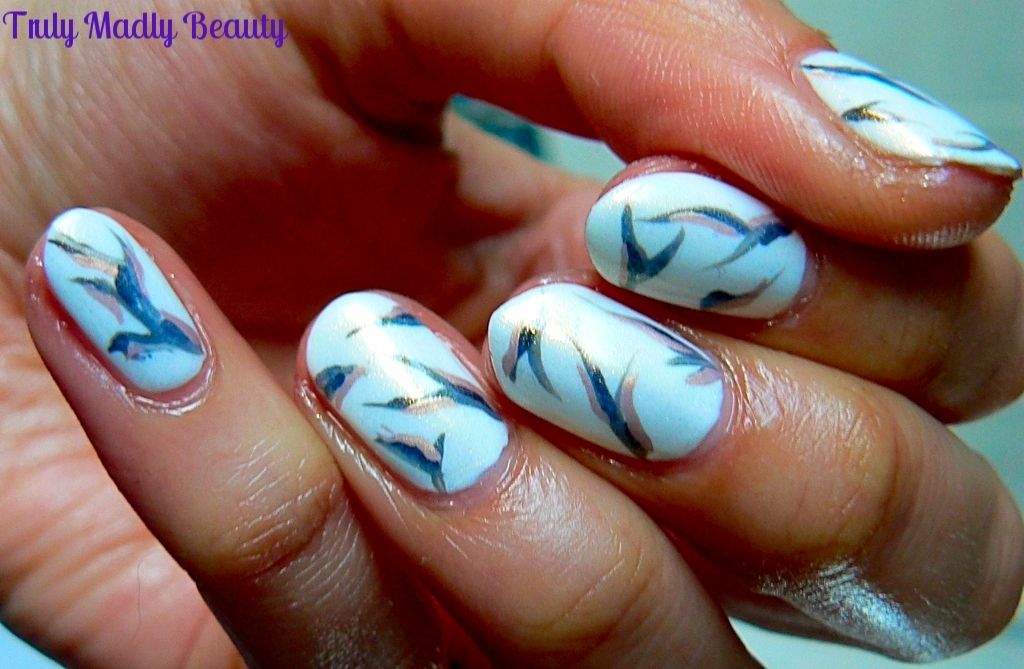
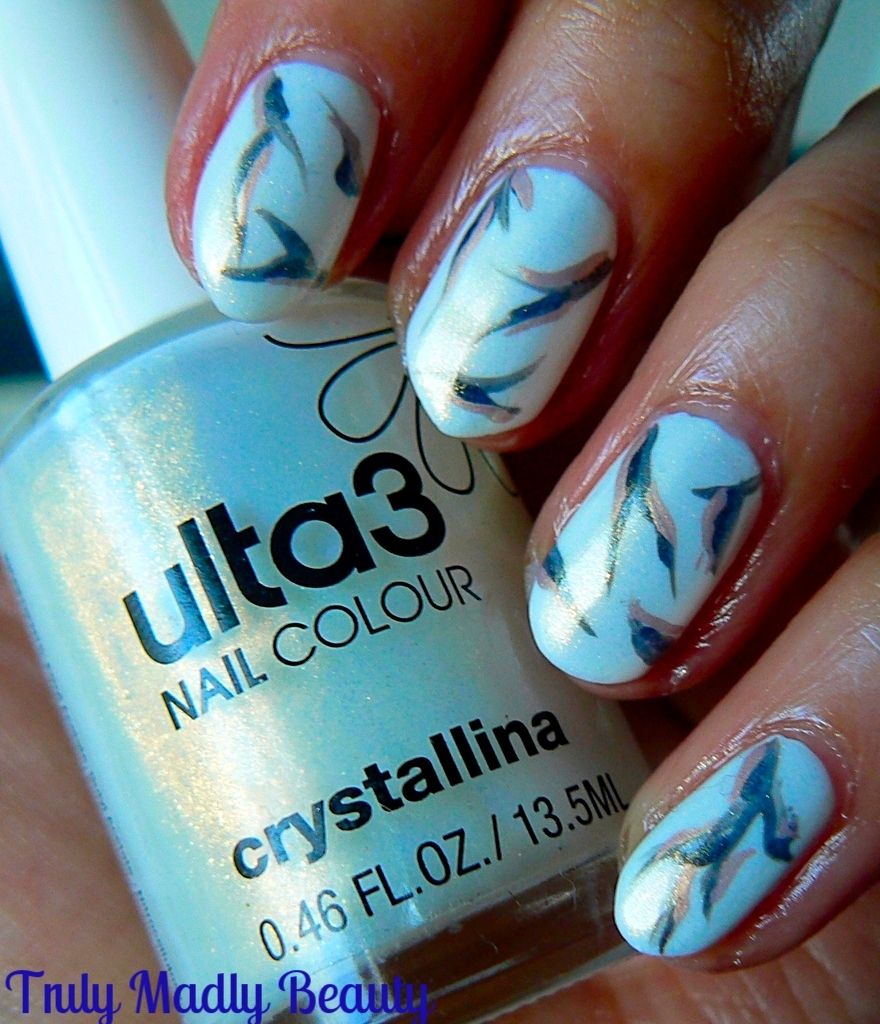
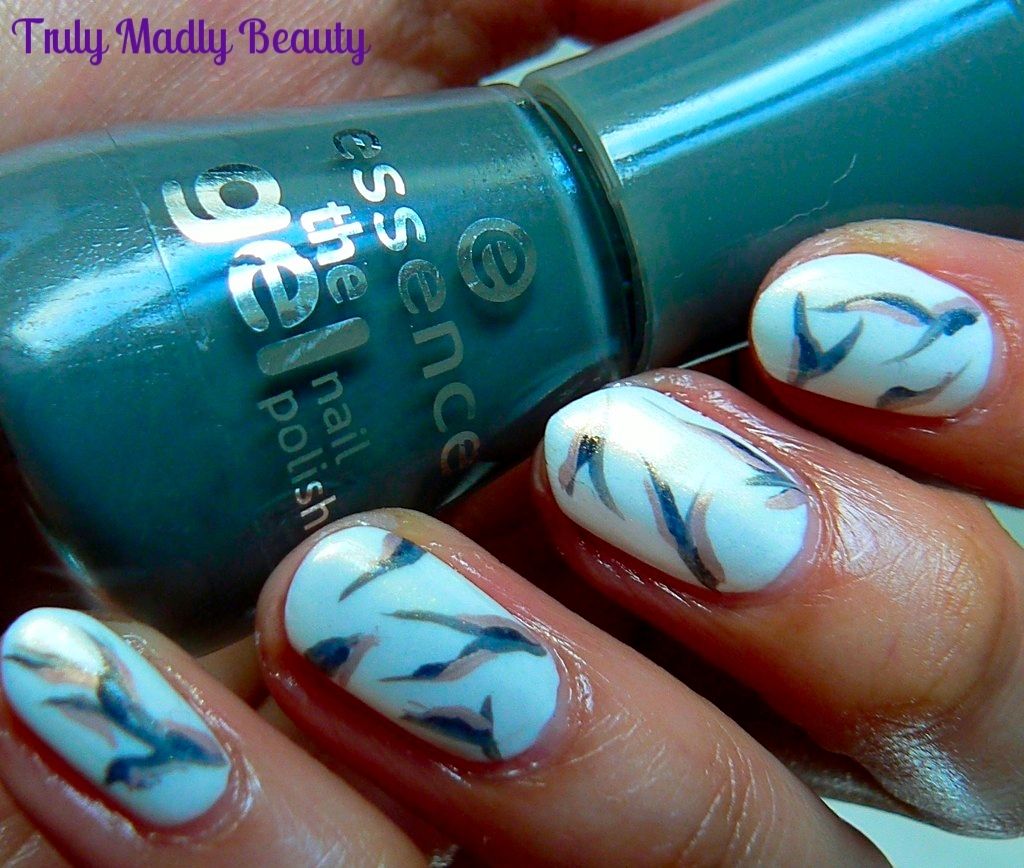
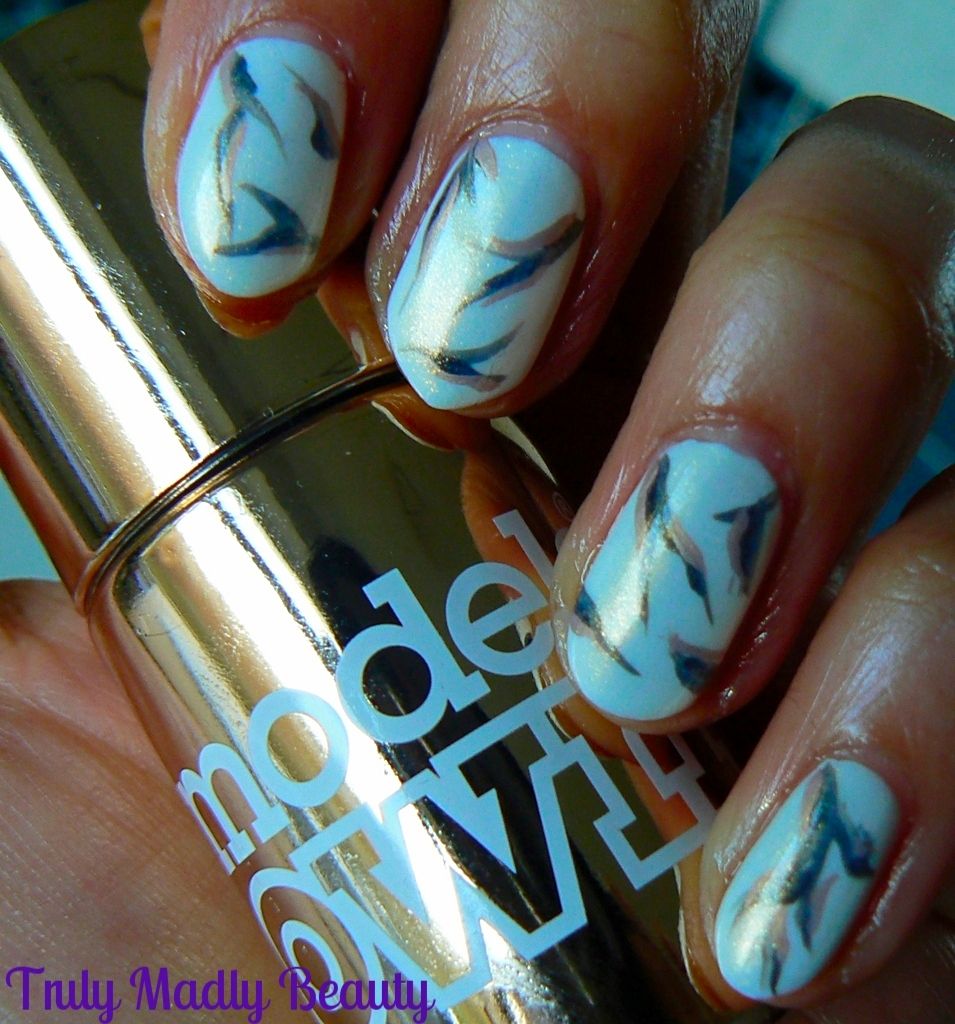
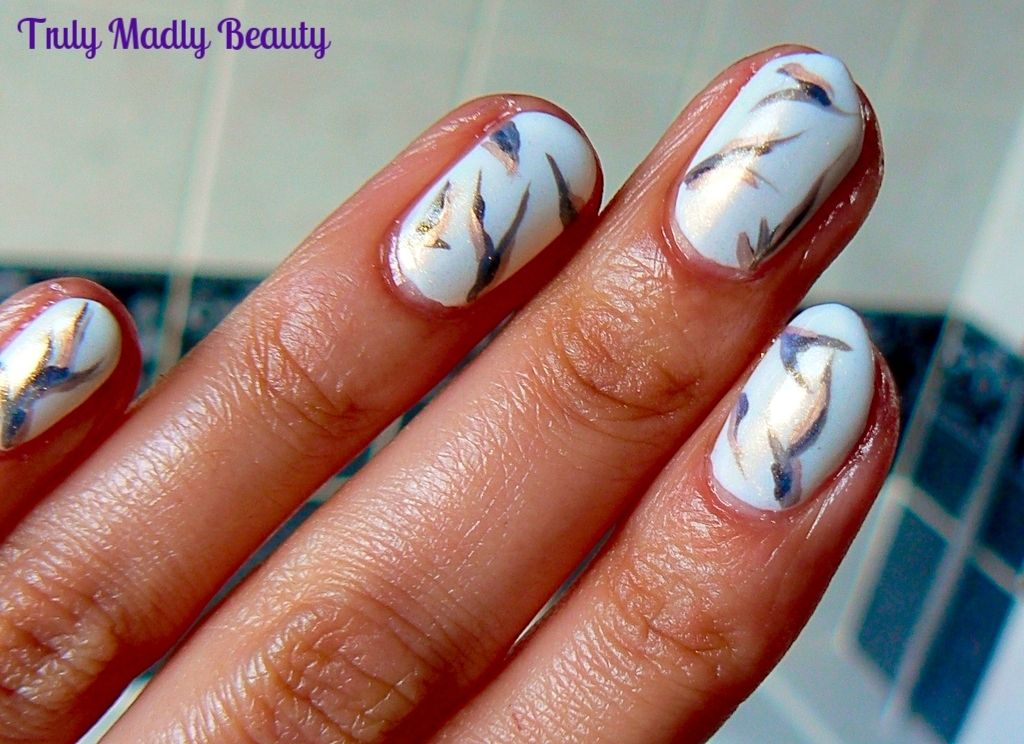
attempt to recreate on my nails...& this was the result
What
do you think? I tried to get my cracked stone lines to be as thin as
possible but I think I still need to get a thinner brush! Overall
though I was pretty happy with the finished look!
If
you want to see how I created my marble stone effect nails then read
on for a tutorial...
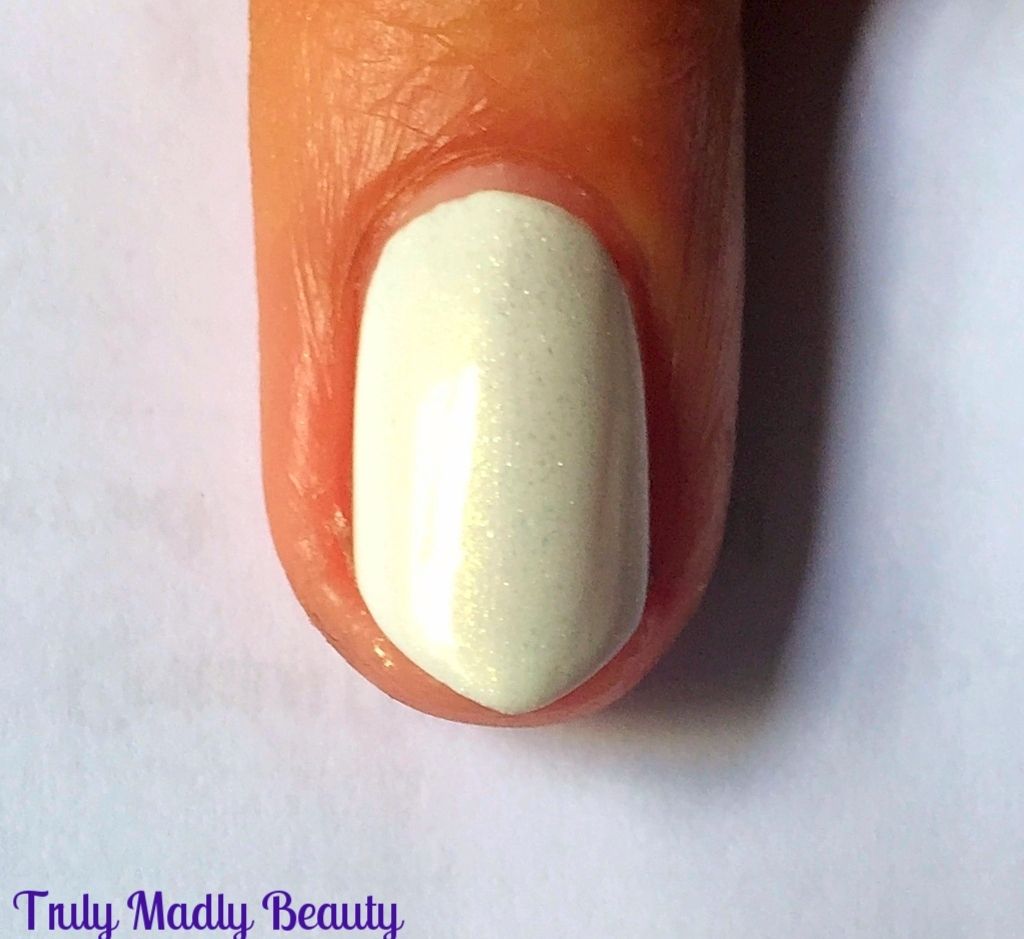
Start
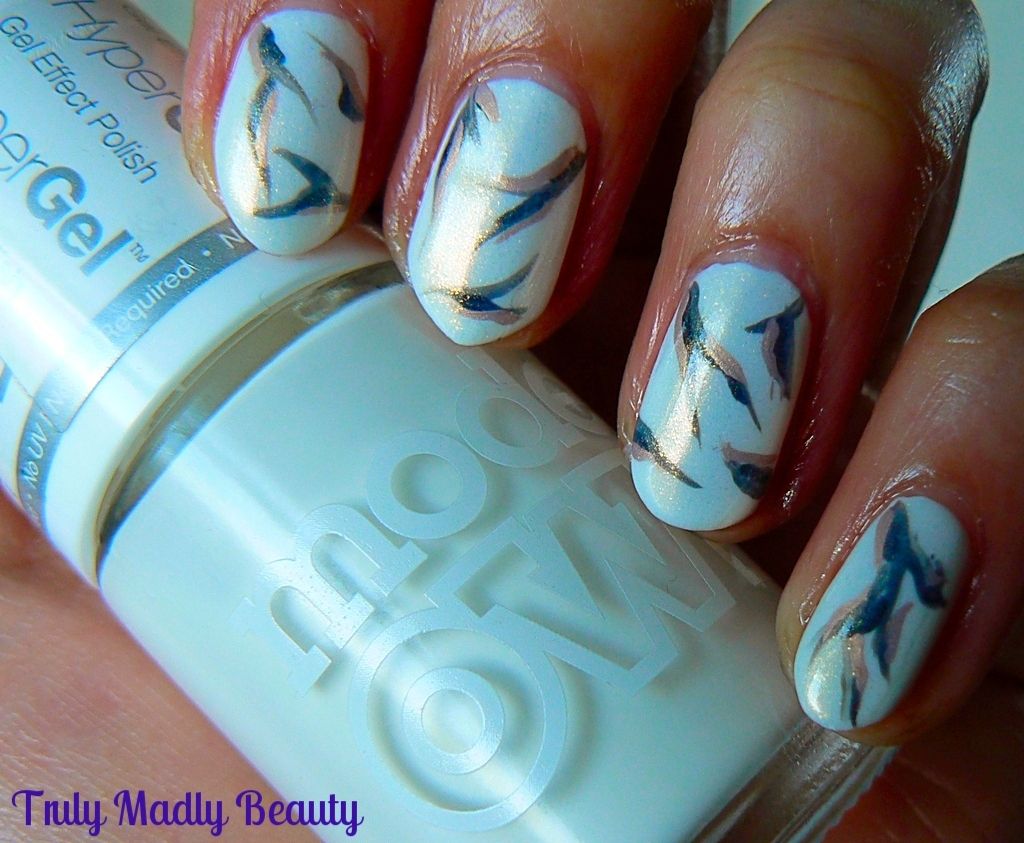
off with a white base, here I've used one coat of my trusty Models
Own White Light. Normally I would apply two coats for a base however
I wanted to give it a bit of an edge so I applied one coat of Ulta3
Crytallina one of my fav topcoats which adds a subtle golden
luminescent glow to your polish
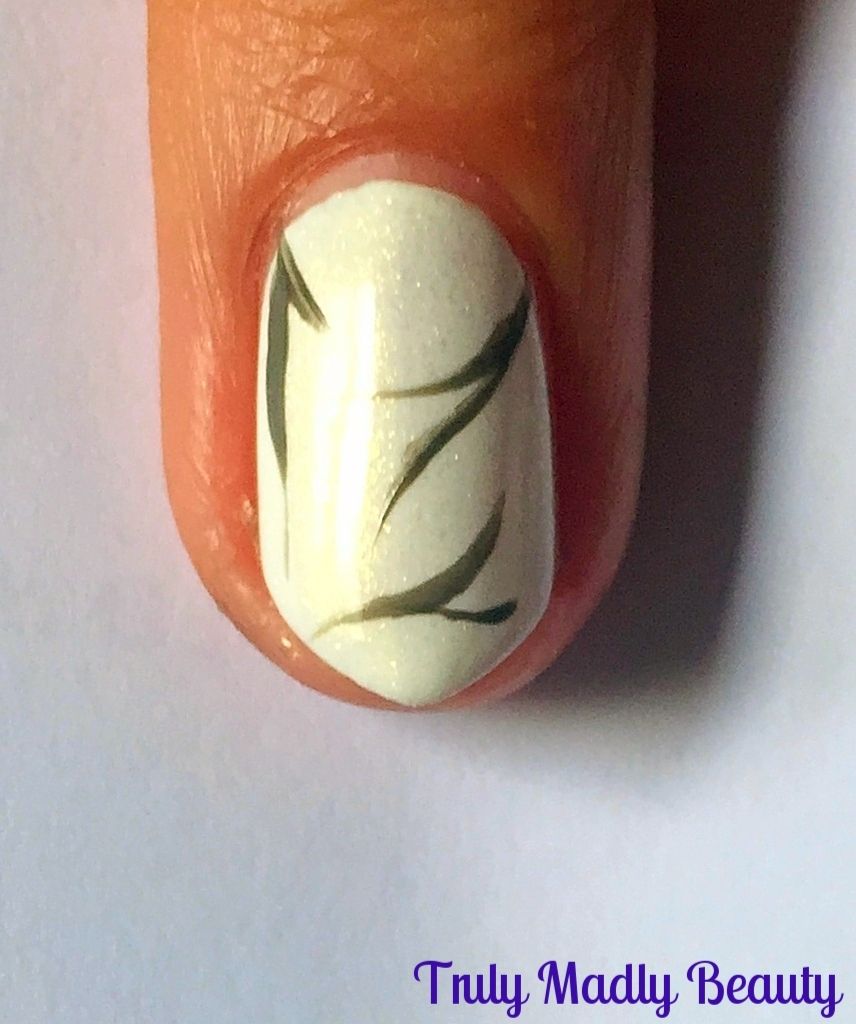
Now
to start with the cracked lines to create that marble stone effect! I
first grabbed a grey polish, Essence Rock My World. Putting a blob of
polish on to some scrap paper, dip in your nail art brush & apply
two or three thin wavy lines starting from the edges of the nail
going in, with the line starting off slightly thicker before thinning
out at the tips...
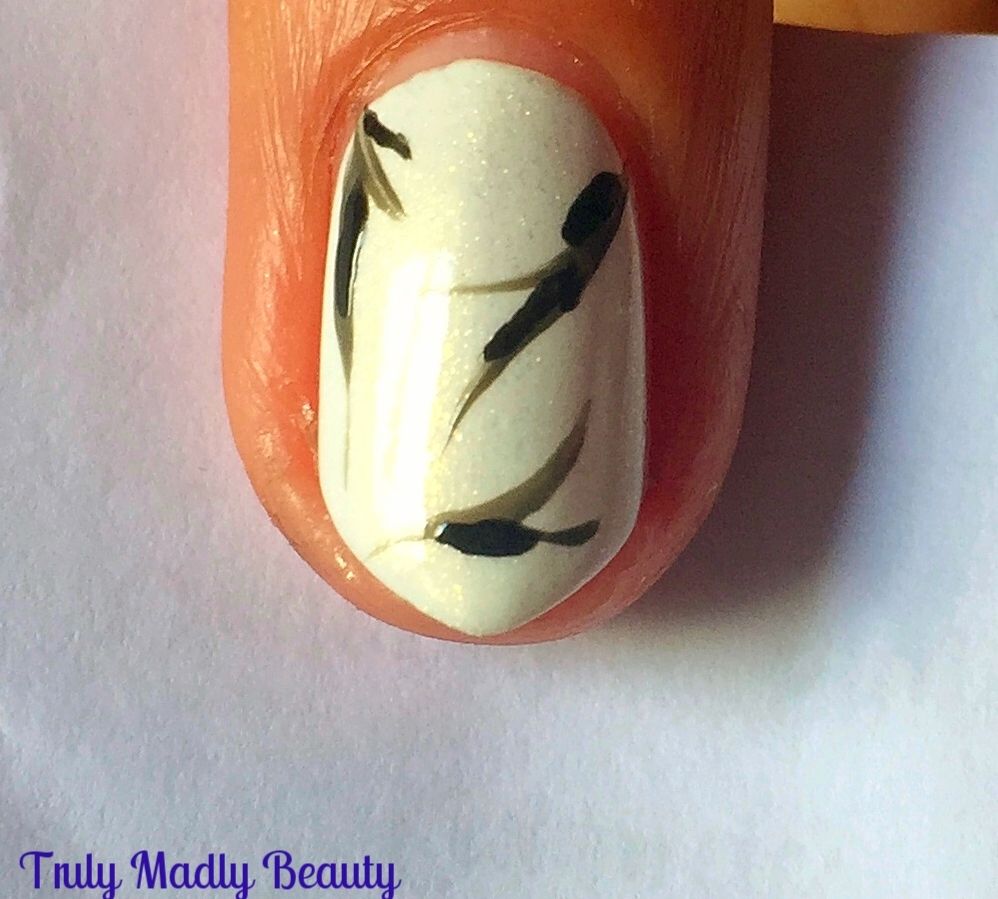
Then
to define the lines a bit more, again using a thin nail art brush &
now some black polish, apply some of the black along the edge of the
grey lines...
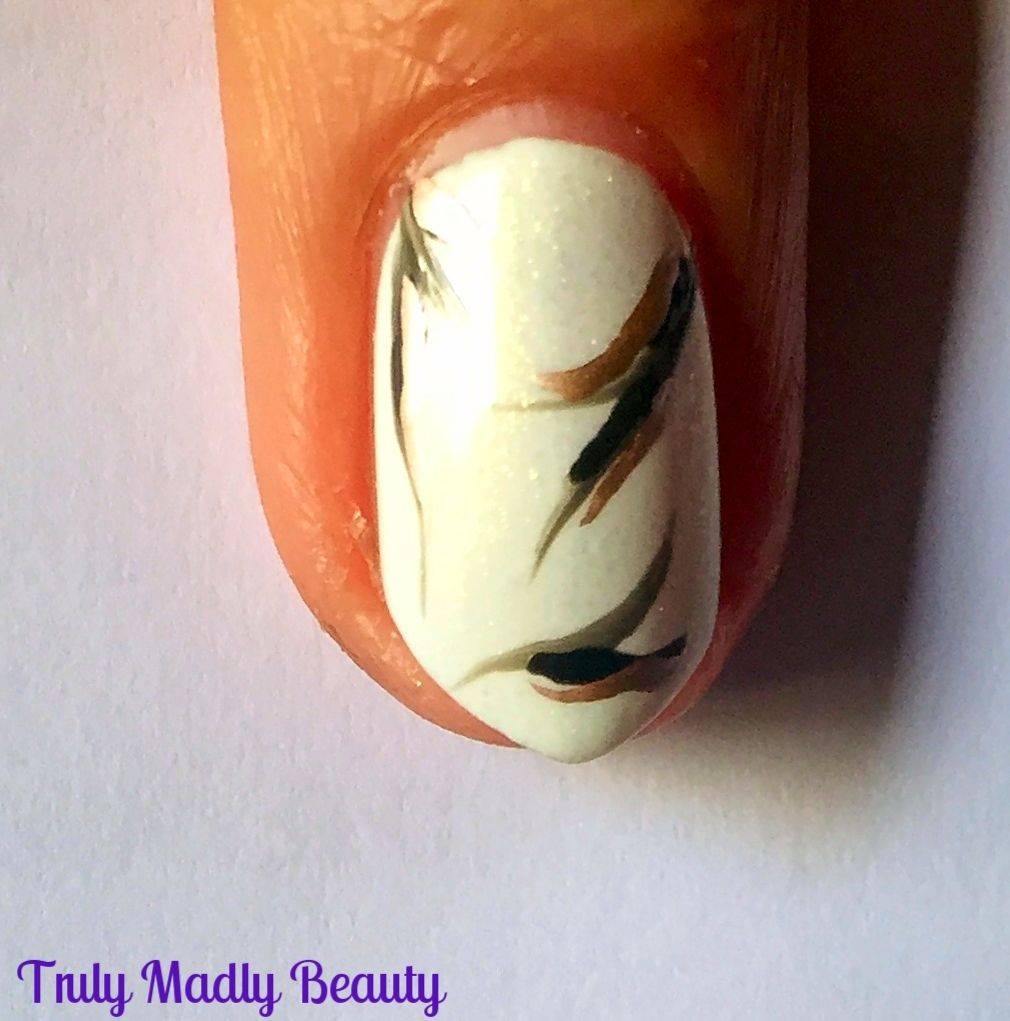
Finally
to give the look of jewelled marble stone, I grabbed some rose gold
polish in the form of Models Own Chrome Rose & using our thin nail
art brush again, applied a few delicate strokes of rose gold to my
lines.
I
decided to apply one last coat of Ulta3 Crystallina on top of it all
to give that slightly faded finish & thats it!
I
have a few ideas on techniques to try next time to help create this
marble stone look even better, maybe dabbing acetone on top to help
blur & blend the colours in to the white?
Also
the cling film method seems to be another way to achieve a marbled
look...I'm tempted to do some Jade stone effect nails next so when
doing so will give some of these ways a try!
Hope you liked darlings! Thanks
for reading!
Lotsa love to ya!
3.21.2016
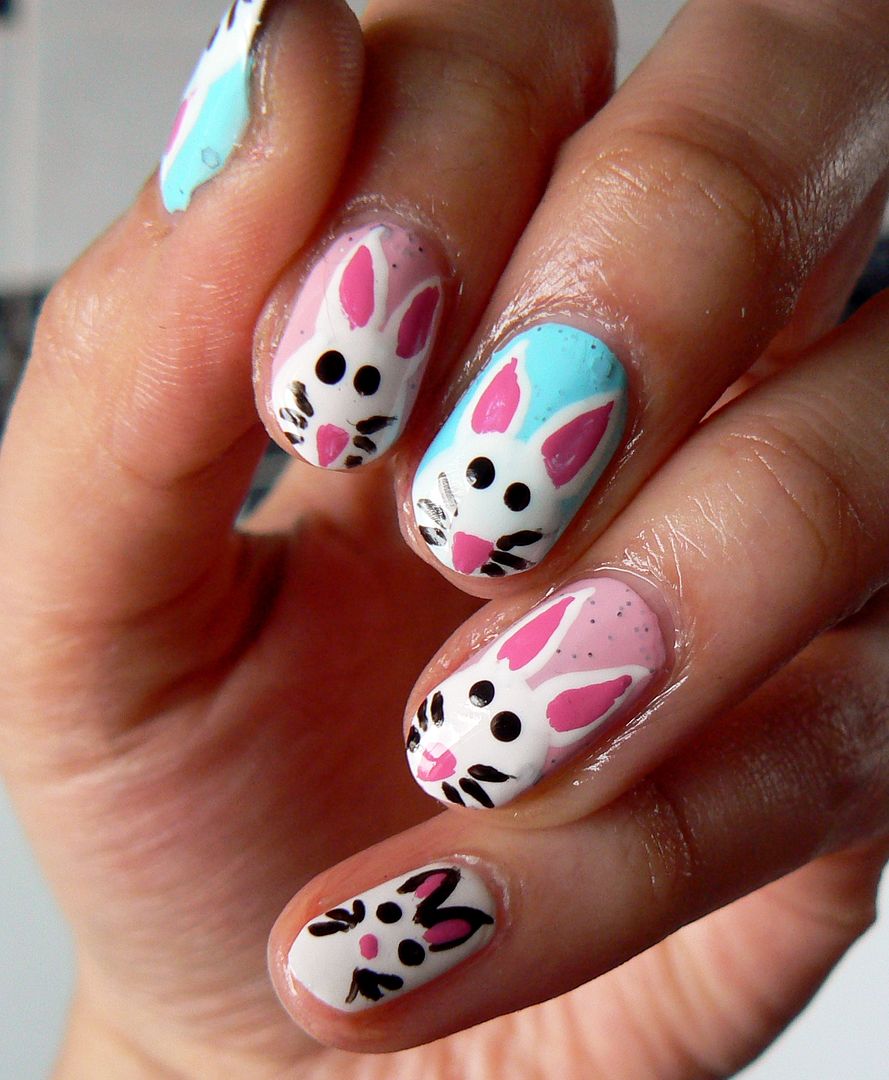
Easter NOTD - White Wabbits Tutorial!
Hey there lovely readers!
So
I'm sure it won't have escaped your notice that Easter upon us, if the abundance of fluffy bunnys & cheeky chicks
everywhere weren't a big enough giveaway then the lure of a four day
weekend definitely catches attention!
Naturally
I can't help getting in to the spirit of things by indulging in my
favourite thing...nail art! As well as chocolate egg over eating...a
skill I take most seriously. So I guess make that SECOND favourite
thing ;)
Last
year I created these pink Easter Bunny Booty nails which still make
me giggle everytime I think of them. As cute as they were to wear
they were also of course hugely impractical, but for the wee time
they were worn the wabbits were dearly loved.
This
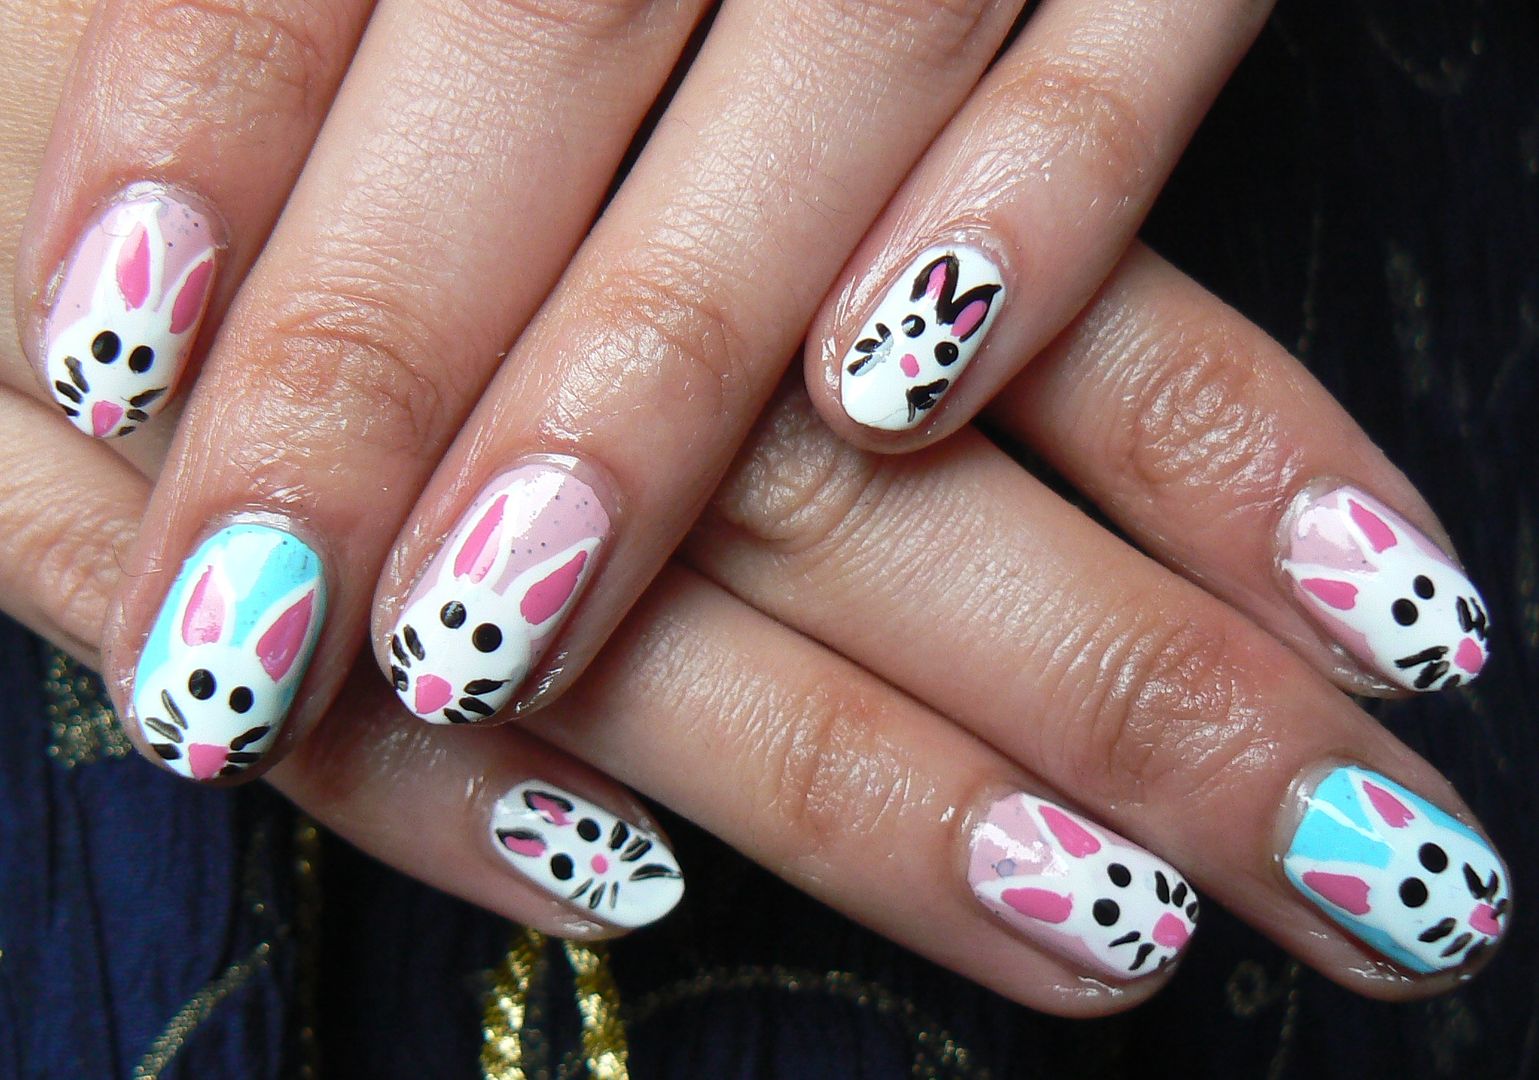
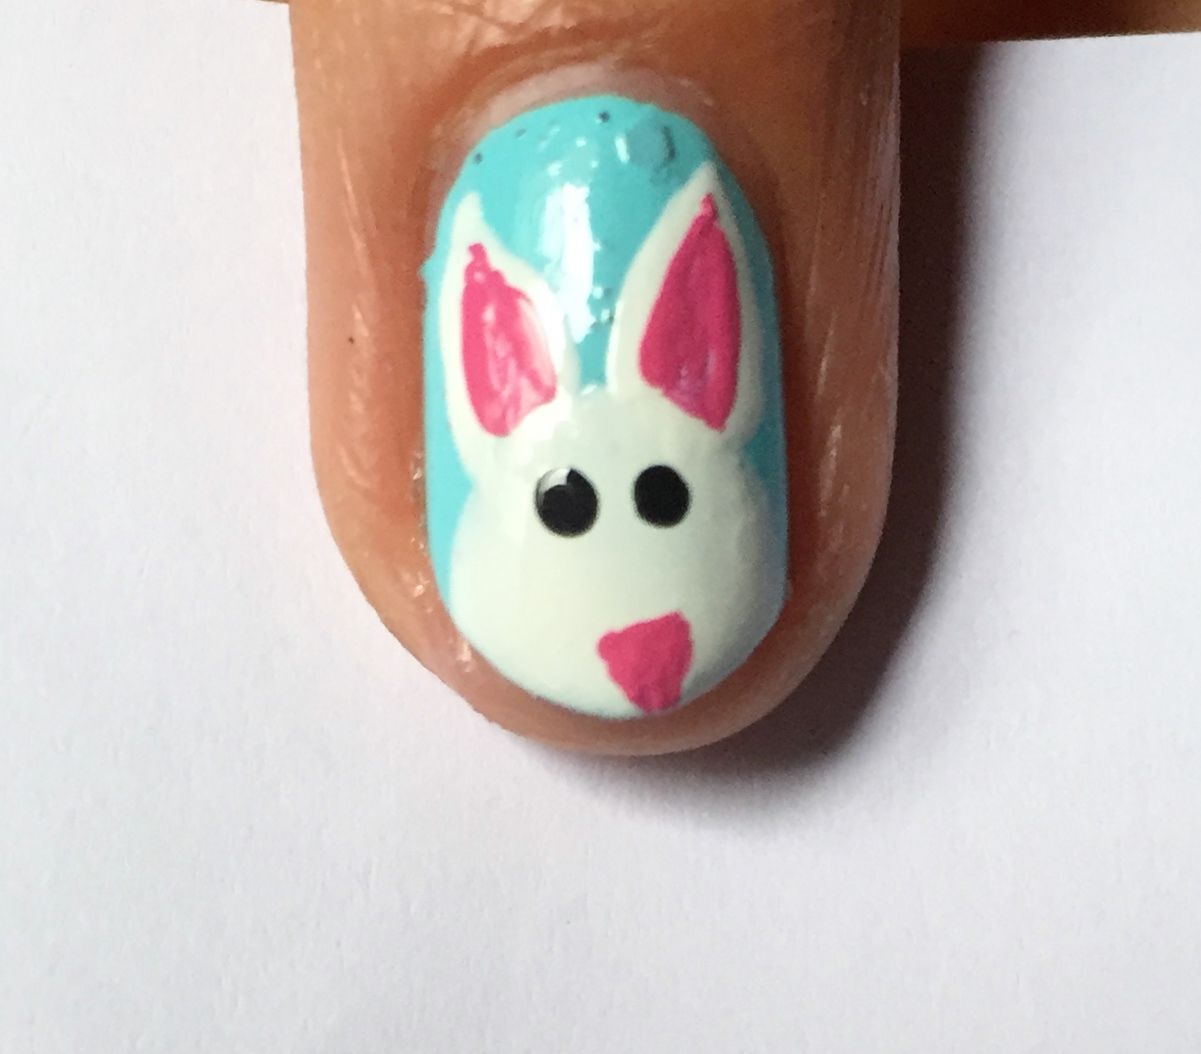
time I decided to create some slightly better behaved bunnies, who
instead of showing us their behinds, give us their best selfies
smiles instead! :)
Easter
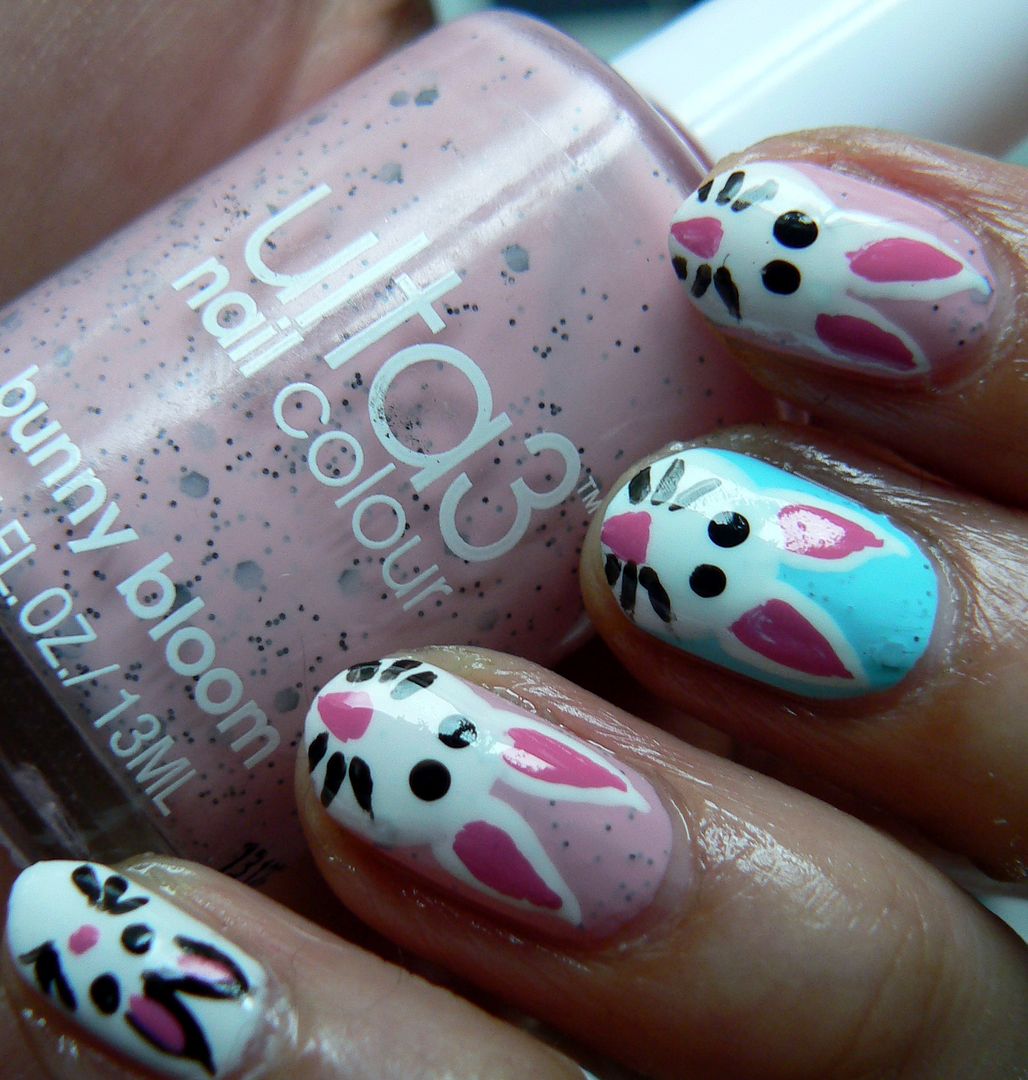
time always makes me want to reach for pretty pastels & I had the
perfect polishes to use courtesy of Ulta3 who (along with many
other brands I'm sure you remember!) released some speckled polishes
a while back for the season each with delightfully bunny themed
titles!
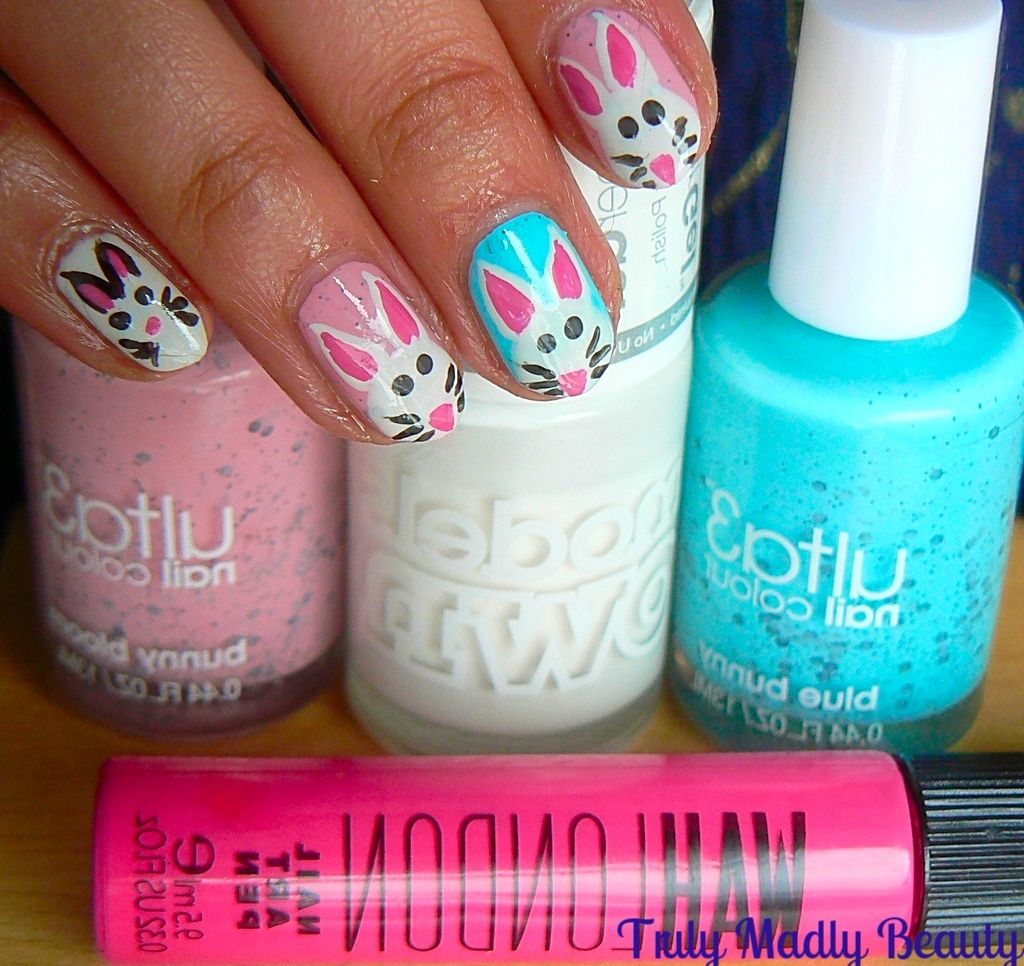
On
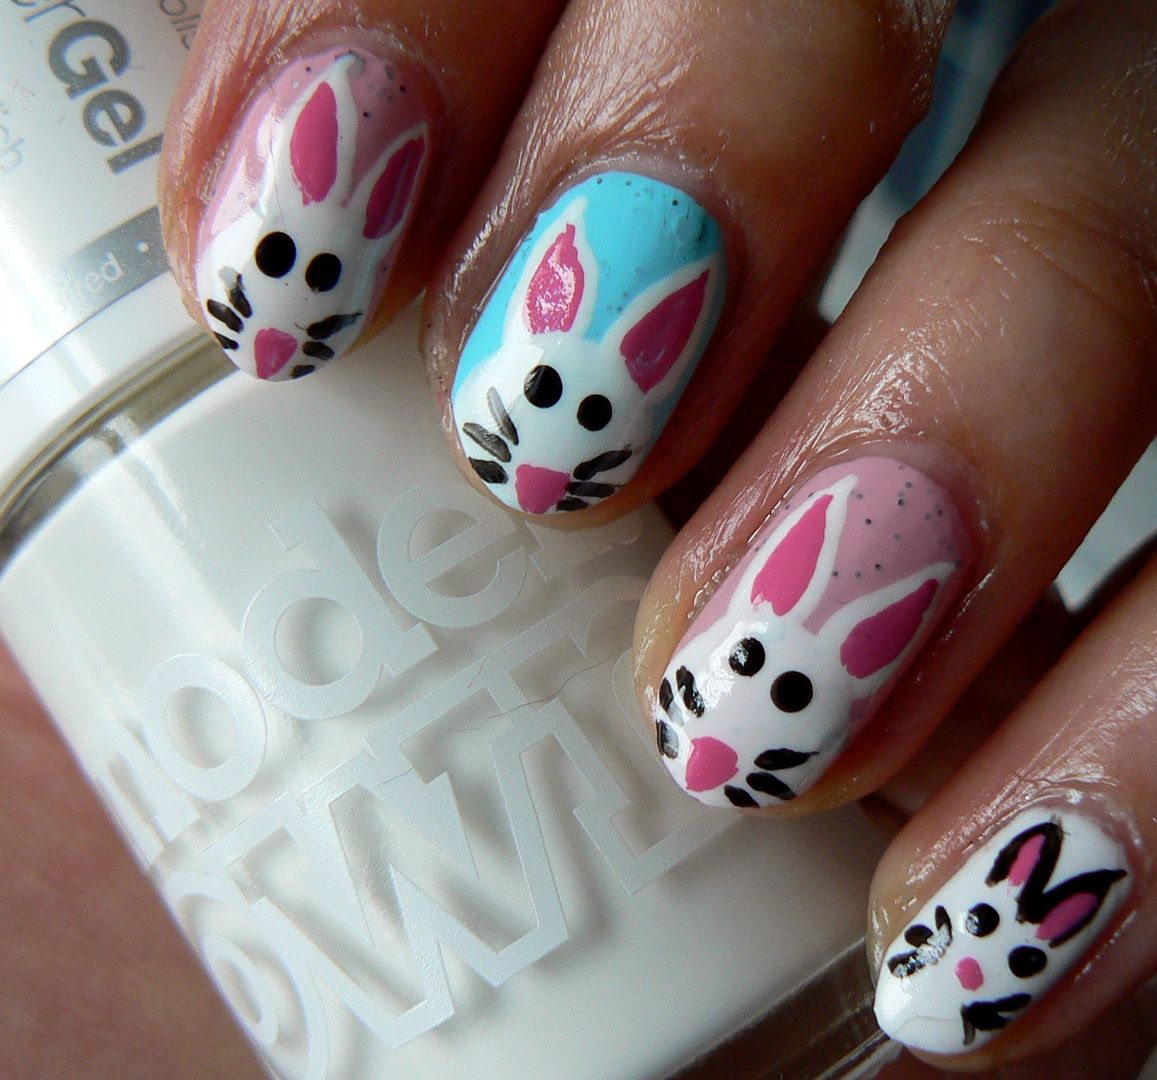
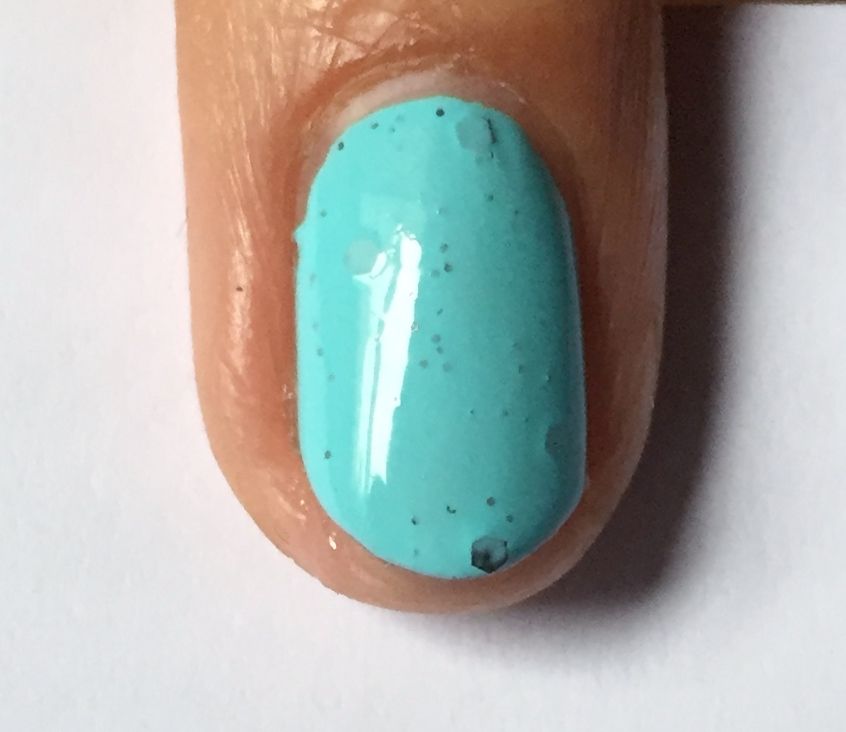
my thumb & middle fingers I used one coat of Blue Bunny a bright
blue pastel creme with teeny black glitters as well as a few larger
hexagonal ones.
On
my index & ring fingers I went for the pink offering using one
coat of Bunny Bloom, a pretty strawberry pink creme with the same
black glitters. On my pinkie I decided to go all white using Models
Own White Light HyperGel which is what I also used for my rabbits.
Now
to draw our bunnies! Here is a wee step by step breakdown on how to
create your own wee wabbits...
Begin
with one or two coats of your base colour, with these Ulta3 polishes
I felt one was more than enough, especially as I'd be adding more polish for
my bunnies
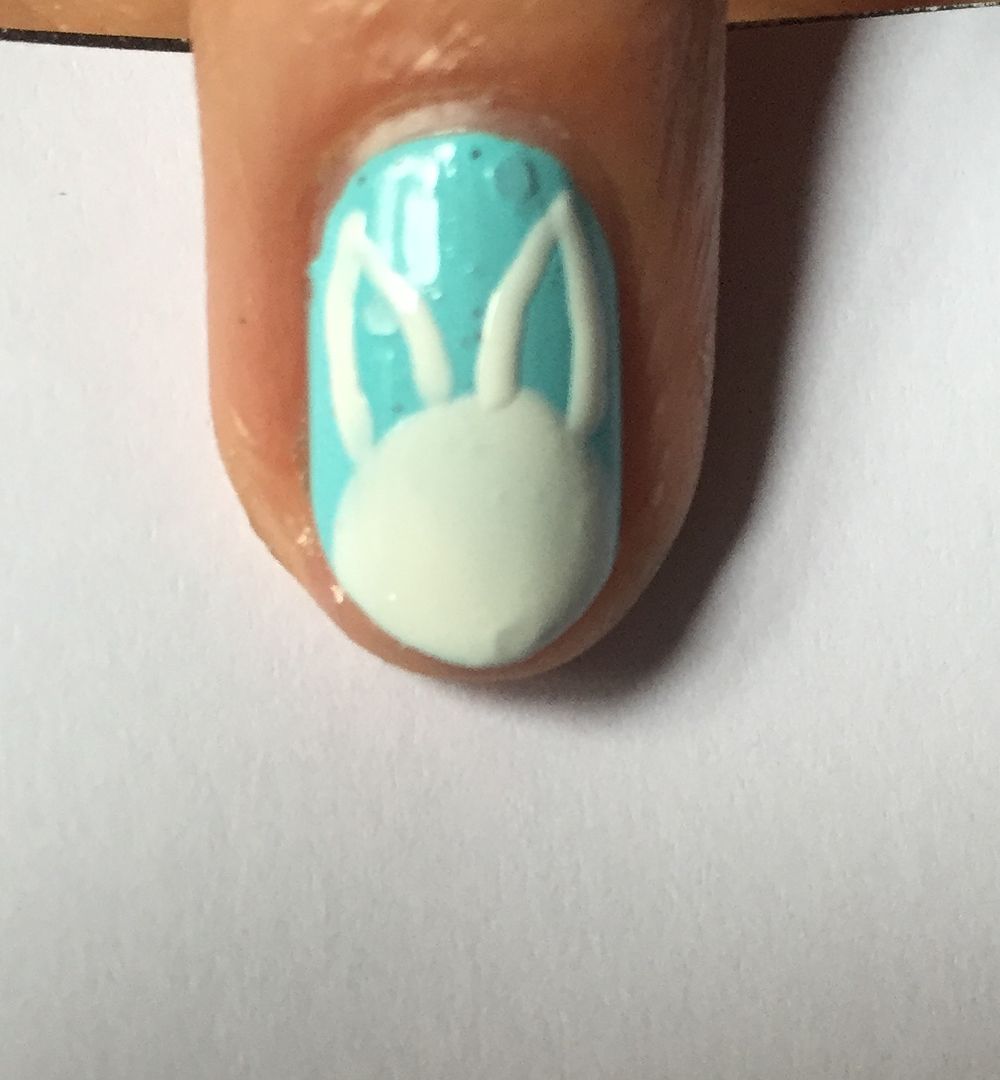
Start
by drawing a round(ish) circle at the tips of your nails for the
bunnies head using the brush that comes with the polish.
Then
grabbing a finer nail art brush, dip into your white polish & draw on
two ears above the head, if you want to make them floppy you can but
I didn't have enough space. Fill
in your two long triangular ears with more white
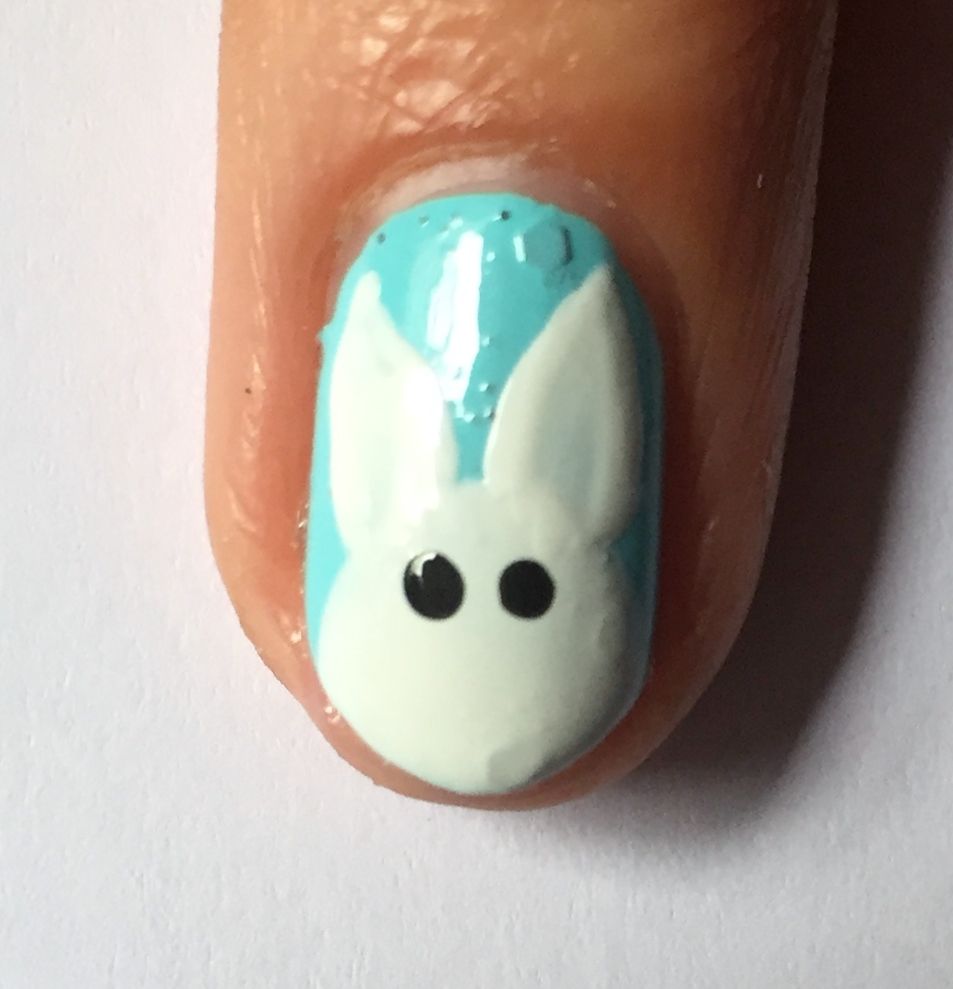
Then
using some black polish & a dotting tool apply two
dots next to each other for the eyes.
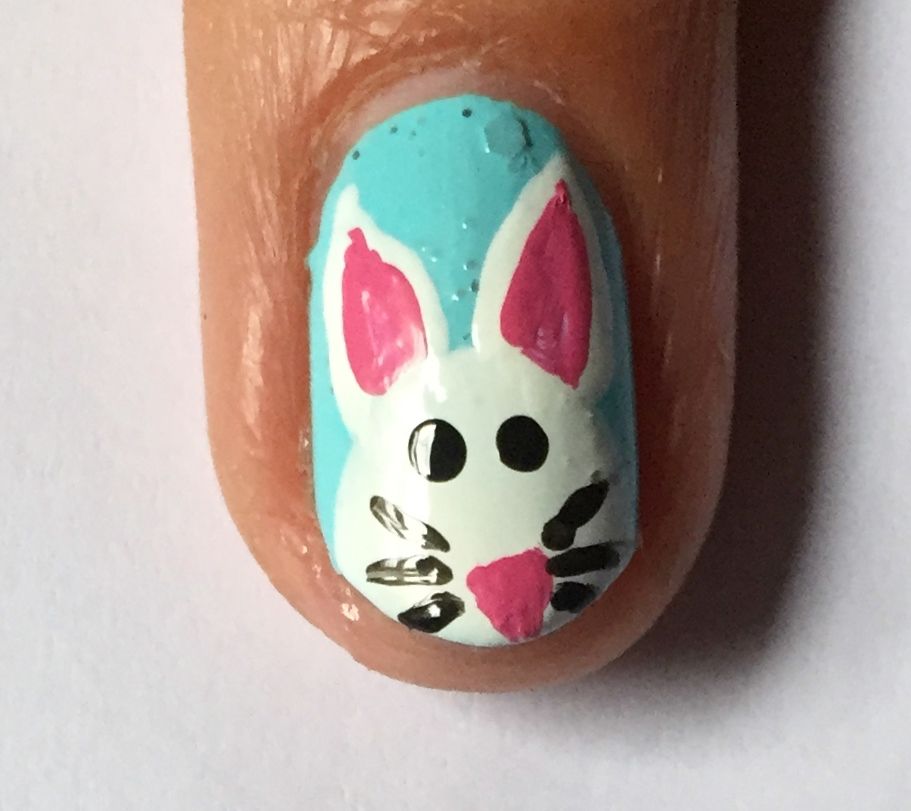
Next using a bright pink polish, here I've used WAH nail art pen in Pink & used the fine nib to apply a teeny nose & to fill in the inside of the ears with a smaller triangle.
Final step is to add those whiskers by simply adding three small strokes either side of the nose with black polish
For
my pinkie white bunny I simply used the black & pink polishes to
draw on a rabbit face a little differently, more comic book, rustic
arty style? That's what I'm telling myself with anyway...
Not
forgetting a nice covering of glossy topcoat & your cute bunnies
are ready to hop :) I have some googly eyes lying around that I'm
itching to use & I've just had an idea for what they might be
perfect for so stay tuned for more Easter nail art...
Losta love to ya!
Labels:
Animal Print,
Easter,
Model's Own,
nail art,
Nail Art Tips,
NOTD,
Pastel,
Spring,
Tutorial,
Ulta3
3.14.2016
NOTD - Celtic Love Knot Nail Art Tutorial for St Patricks Day!
Already
Easter is approaching! How do I know this? (apart from the abundance
of bunny filled promos in every retail store) The arrival of
Milkybar Mini Eggs of course! Whilst everyone goes crazy for those
pretty pastel original mini eggs, I myself await eagerly for the
white chocolate form, if you haven't tried these yet...RECTIFY.
Apologies,
I digressed there, tends to happen when chocolate is
involved. Before Easter however is St Patricks day! So prior to going
all Easter obsessed with the nail art, I always love to do a mani or
two to celebrate the Irish holiday, especially as green is one of my
ultimate favs :) I've just remembered that I was in NYC for the St
Patrick's day parade last year...sigh *reminisces* Twas a good day,
the Irish sure do know how to put on a good show!
I
wanted to challenge myself with doing something a wee bit different
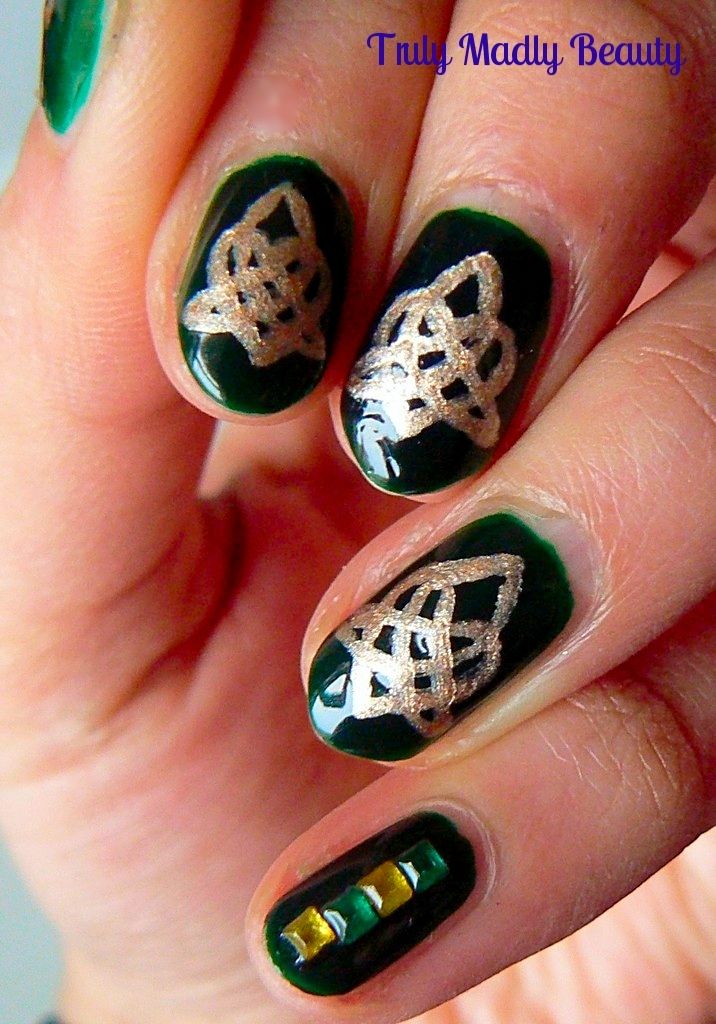
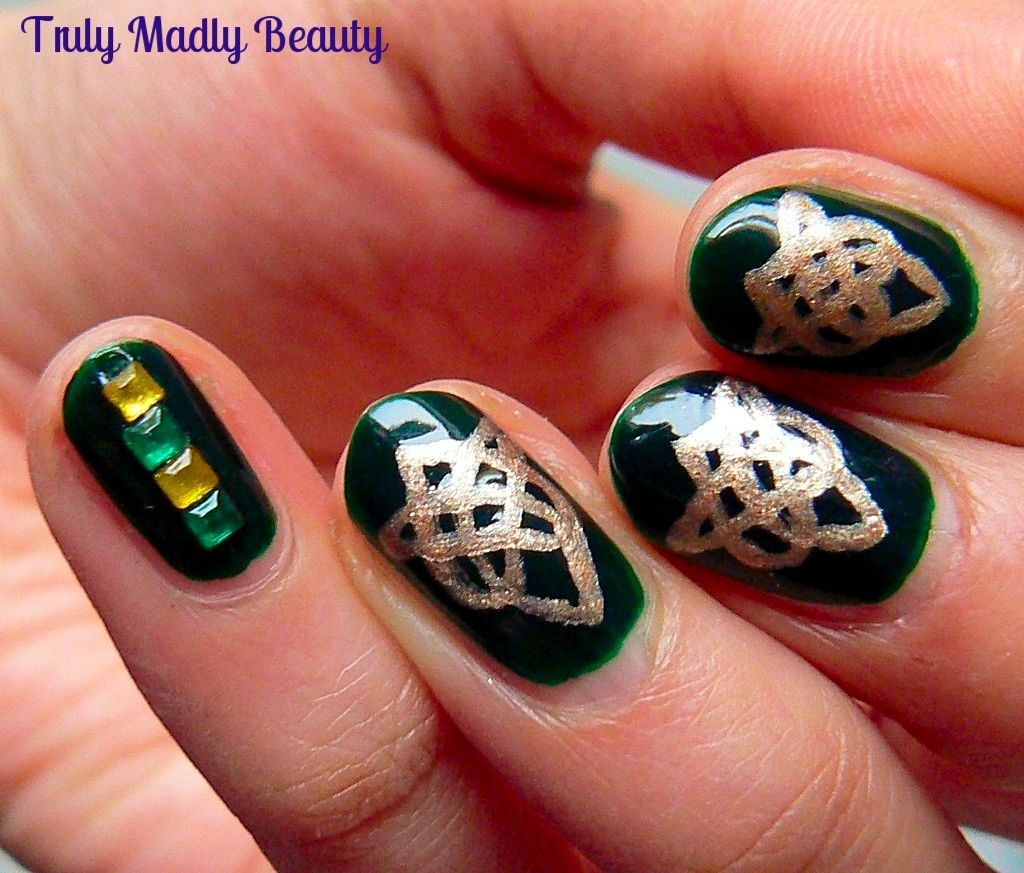
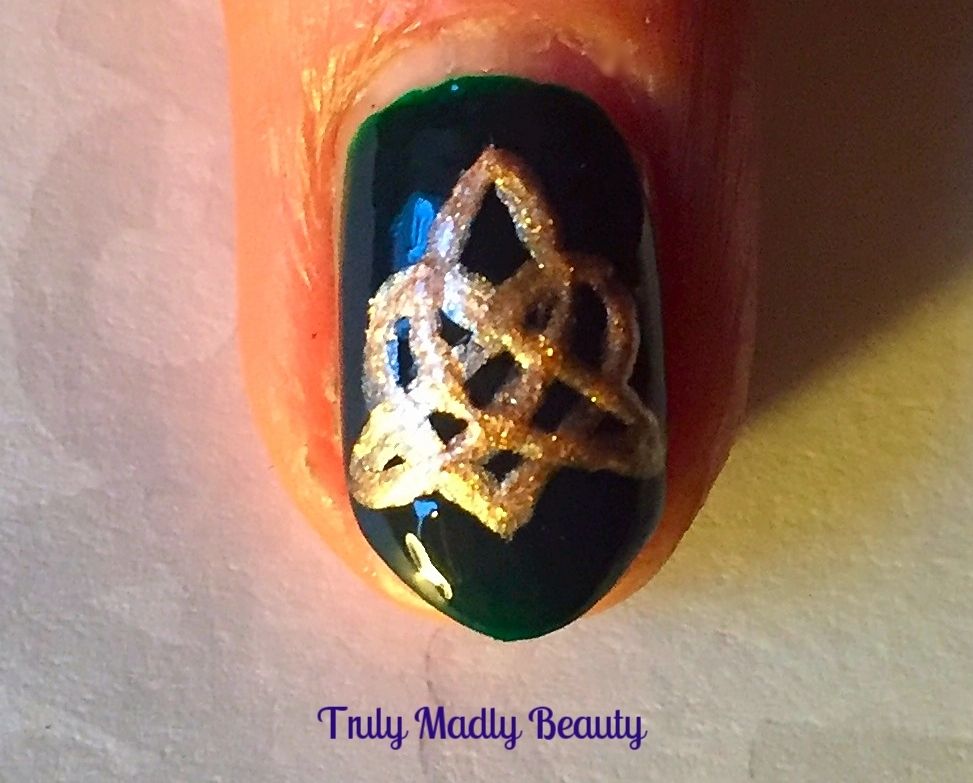
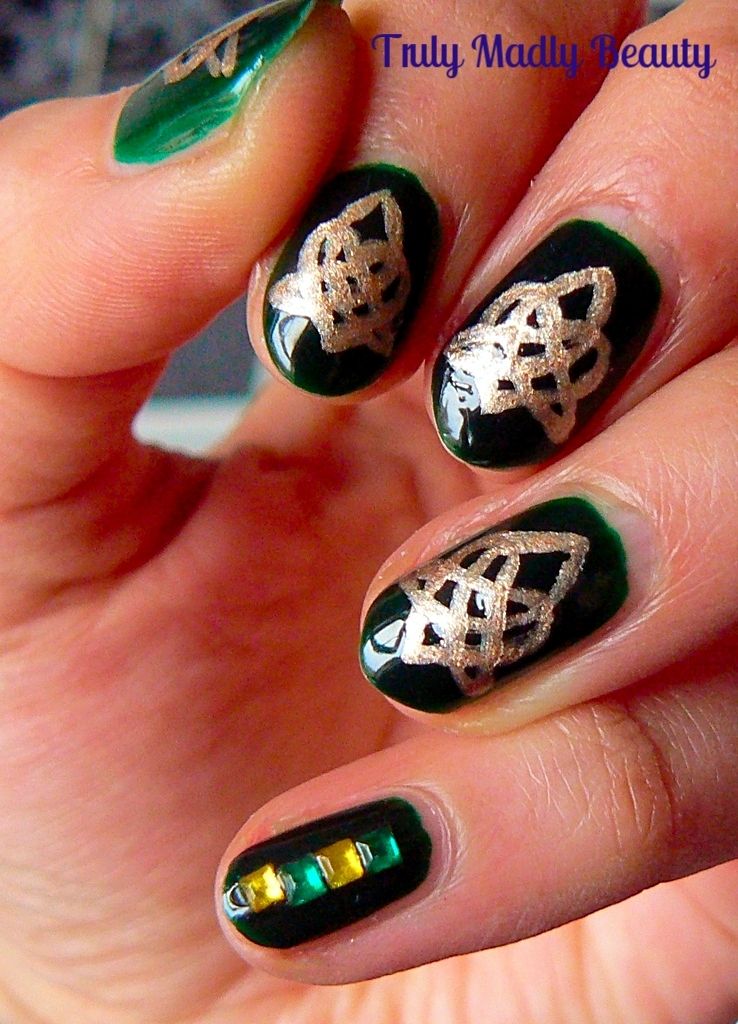
for my first St Patricks Day mani, so I decided to create this Celtic
Love Knot design, which I'll show you how to do as well in 3 steps.
Why I do this to myself I don't know. I must be a closet masochist!
However
I exaggerate, despite the intricacy of the design, once you get the
hang of it, it really is straightforward I promise you! After one or
two FAIL nails, I was pretty chuffed with the finish. I adore Celtic
designs & jewellery with their Gothic vibes & I thought it
would be quite fitting for the Irish occasion.
To start with you of course needed a green base, for this I reached for Models Own in Ebony Green, an absolutely gorgeous Gothic vampy green. I don't know...can a green be vampy?! But this one somehow manages it, I just LOVE it. Two coats applied leaves a divine glossy finish.
Now
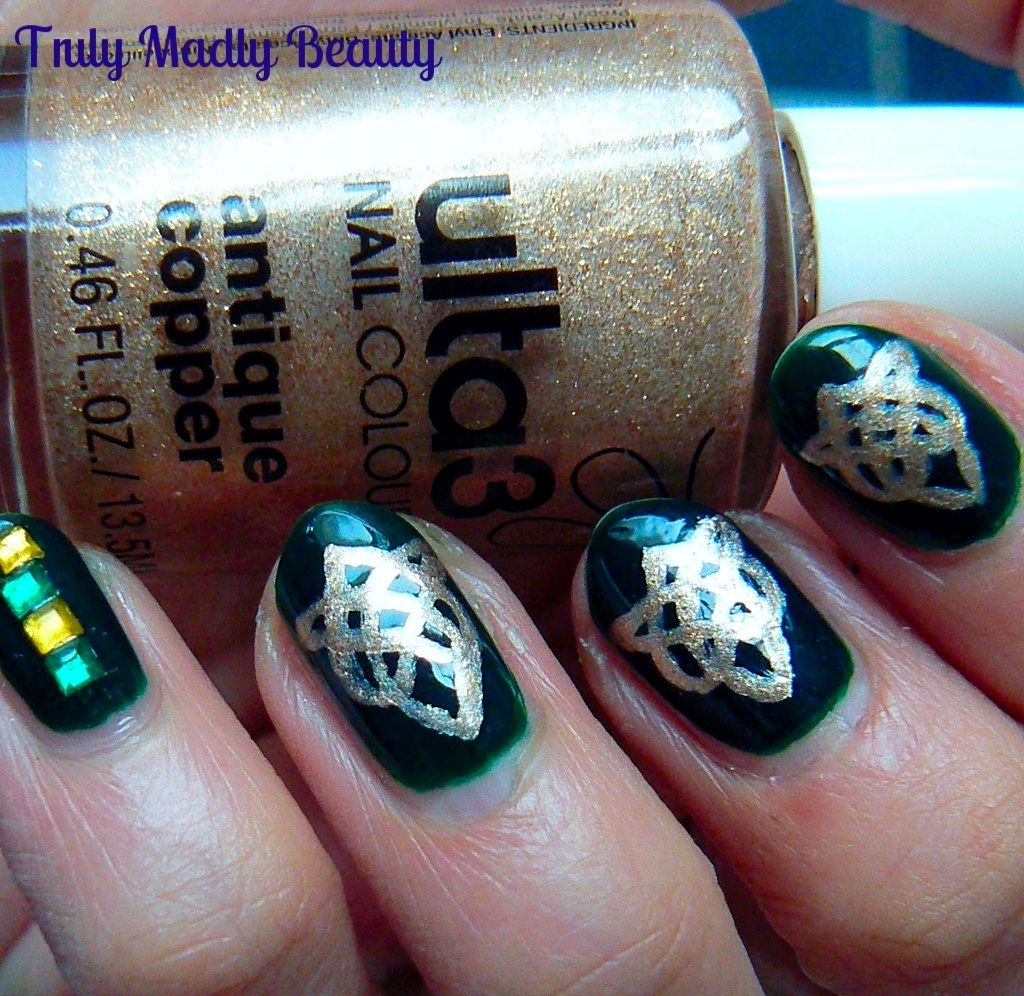
to create the Celtic Knot I wanted a pretty pale bronze gold for that
Medieval feel & for this Ulta3 in Antique Copper was just
perfect. Grabbing my Pure Color 10 nail art brush which is great for detailed
nail art I got started with creating my knots...
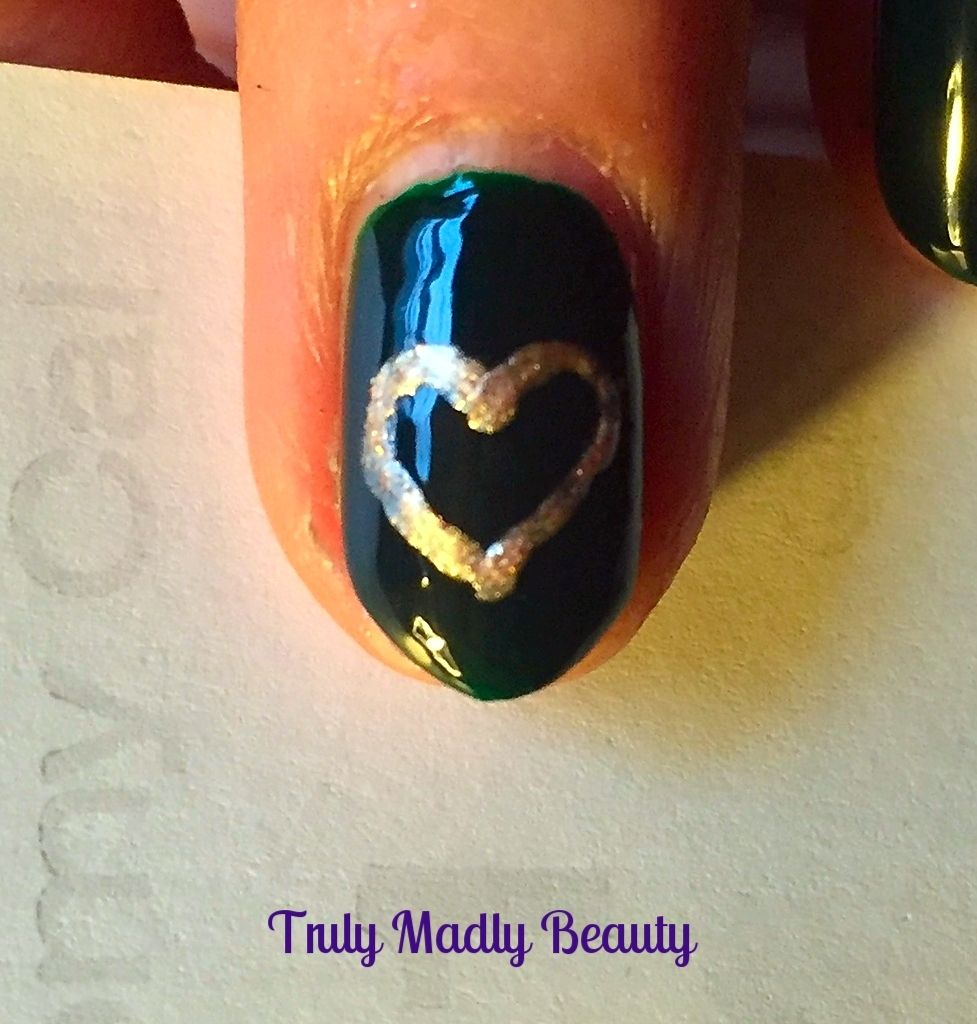
To
begin, you first need to draw a heart shape on to the centre of the
nail.
Then
starting from the centre of the top of the heart (where the two
curves meet) draw a straight line going to the left, at a 45 degree
angle, down till you pass through the left side of the heart. Then
continuing from this point slowly bring up a curved line that goes
through the heart again & up past the right curve at the top,
stopping just above the middle of the top of the heart.
Now do the exact same thing for the opposite side, this time drawing a line to the right, then bringing up another curved line, all the way to the centre of the top of the heart, joining the two lines together at the top. Hopefully that made sense & if not then at least the pics can show you each step in detail!
I
couldn't fit a knot on to my pinkie finger so instead just applied
some green & yellow square stones in a row down the centre.
Finish
with topcoat & you're done :)
Needless to say for this particular design my left hand looked a
lot better than my right & my patience was most definitely tested
but I'm so glad I persevered as I loved the finish look & will
definitely attempt again!
Thanks
as always for reading! I'll try & roll out another, more simple
mani idea for St Paddys day later on in the week so keep posted!
Lotsa love to ya!
Labels:
Celtic,
gold,
gothic,
Green,
Iriss,
Model's Own,
nail art,
Nail Art Tips,
NOTD,
St Patricks Day,
Tutorial,
Ulta3
2.09.2016
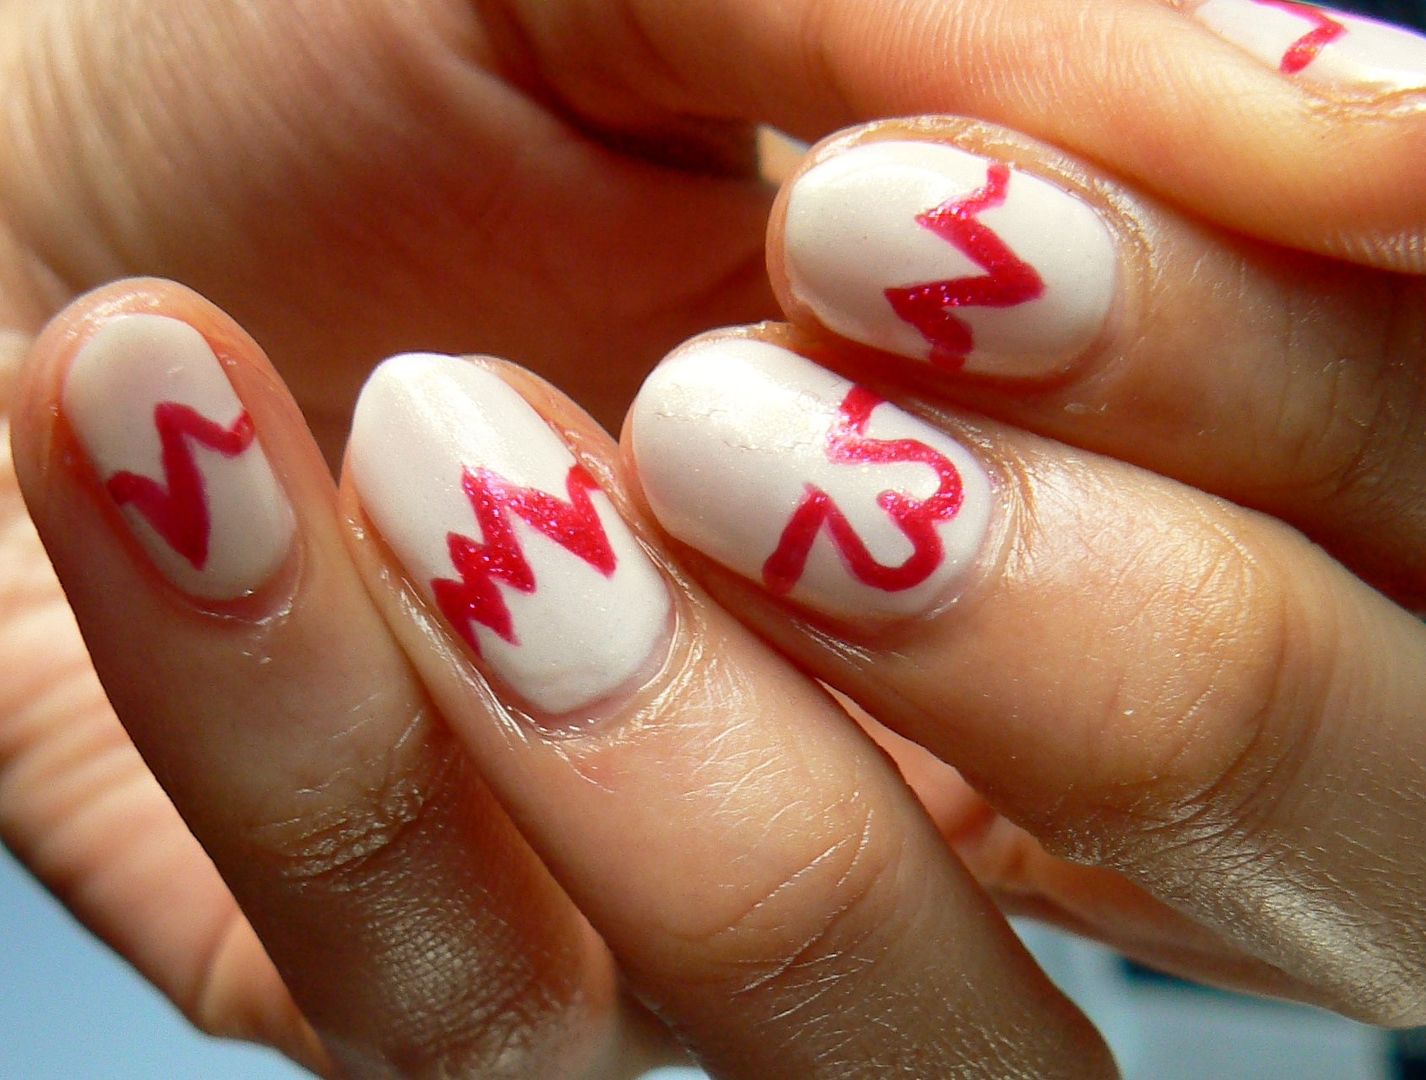
NOTD -Valentines Inspired Heartbeat Nails!
Hello
there lovely readers!
So Valentines is around the corner aka the perfect excuse to reach for
those pretty pinks & reds in particular to help romance up those
nails which I can never resist doing as I always love an excuse to
play around with nail art :) You can see some of the Valentines
themed mani's I've done in the past HERE if you're looking or a wee bit of inspo. Today I have for you some
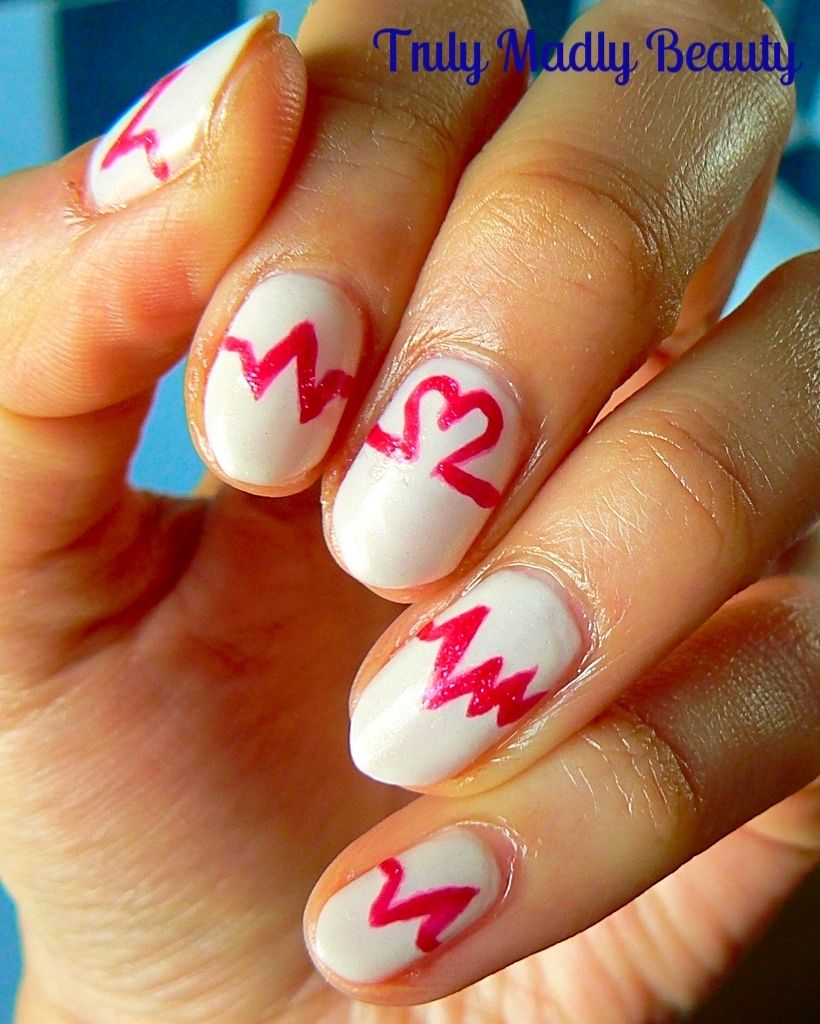
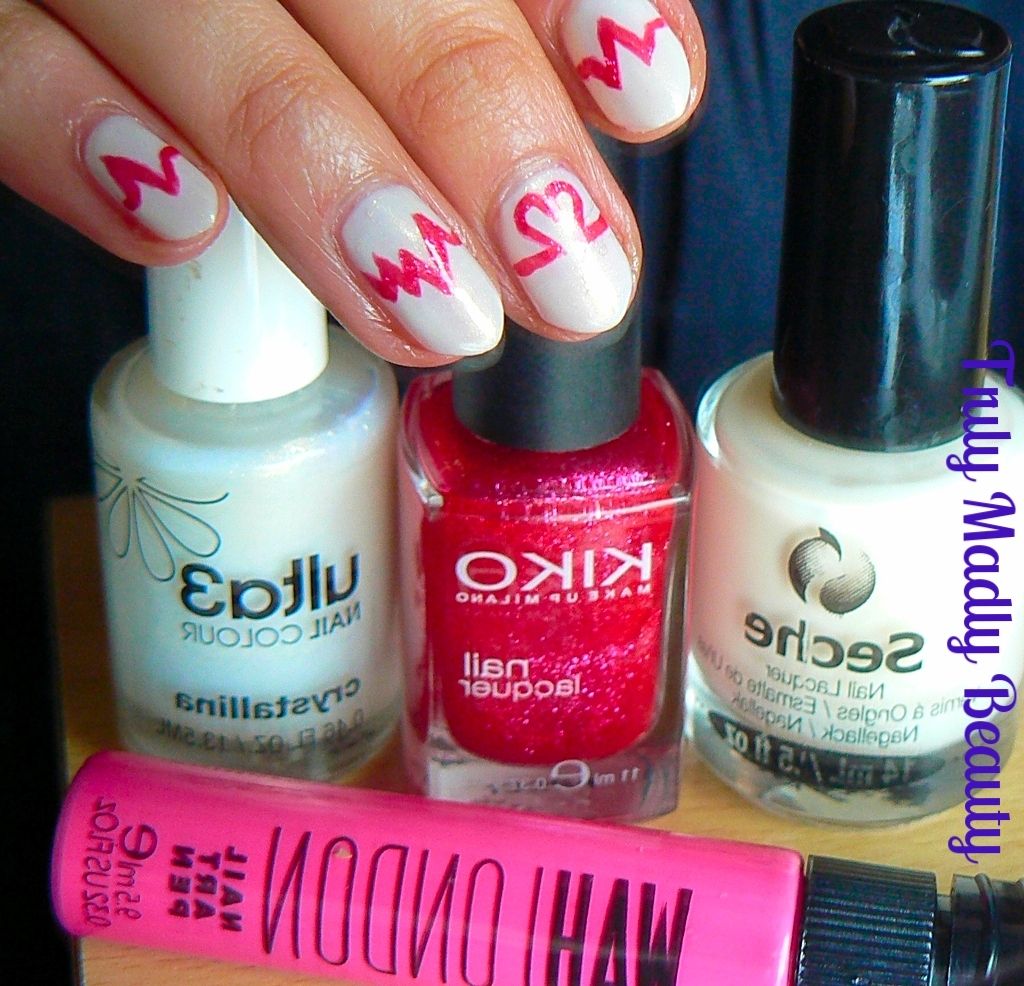
skip a beat, Heartbeat Nails!
A
bit different eh? I wanted my heartbeat design to stand out so opted
for a nude coloured base but you can of course totally have a play
around with whichever colours you like!
To
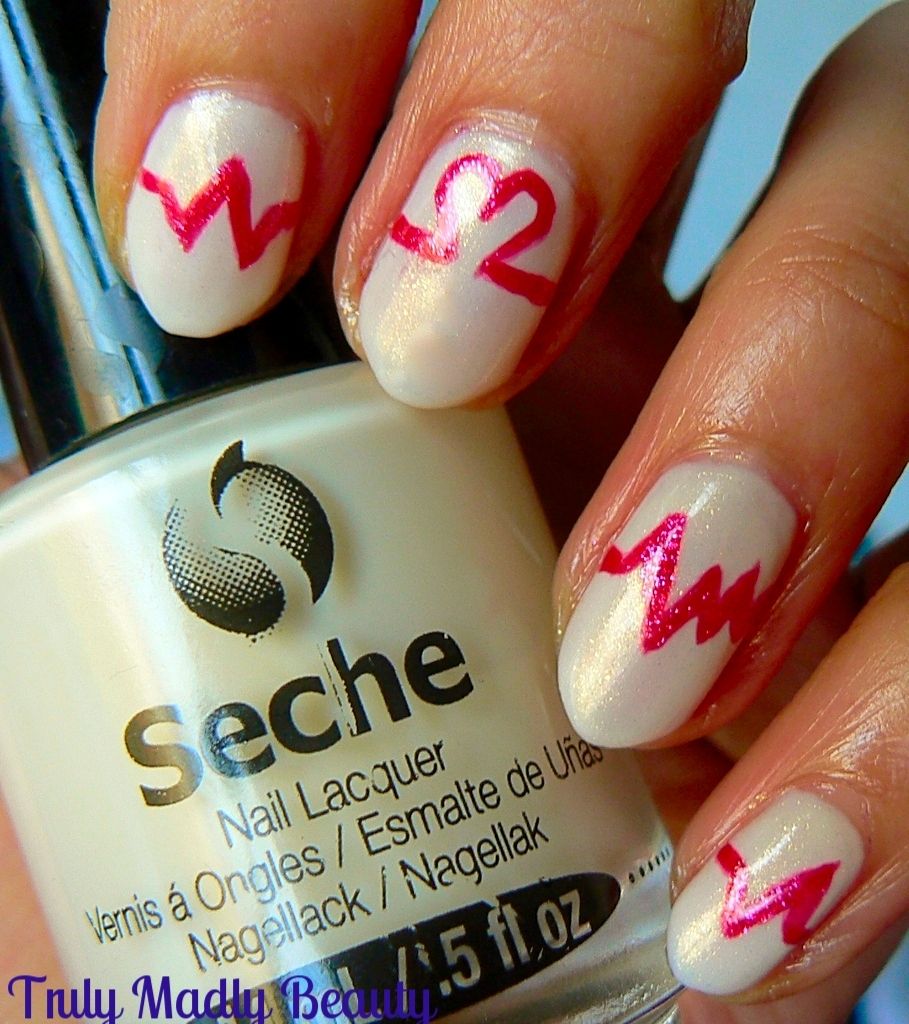
start off I applied two coats of this Seche Vite Blanc II, a soft
creamy beige, not the most mind blowing in quality or colour, simply
the first nude polish that was within reach at the time haha! The
first coat was a tad streaky, but managed to smooth out in the second
coat.
I
then decided to add a coat of Ulta3 Crystallina to just jazz it up a
tad. I love adding this pretty ethereal holo white on top of ordinary
shades to give them a pretty iridescent pixie like glow!
Next
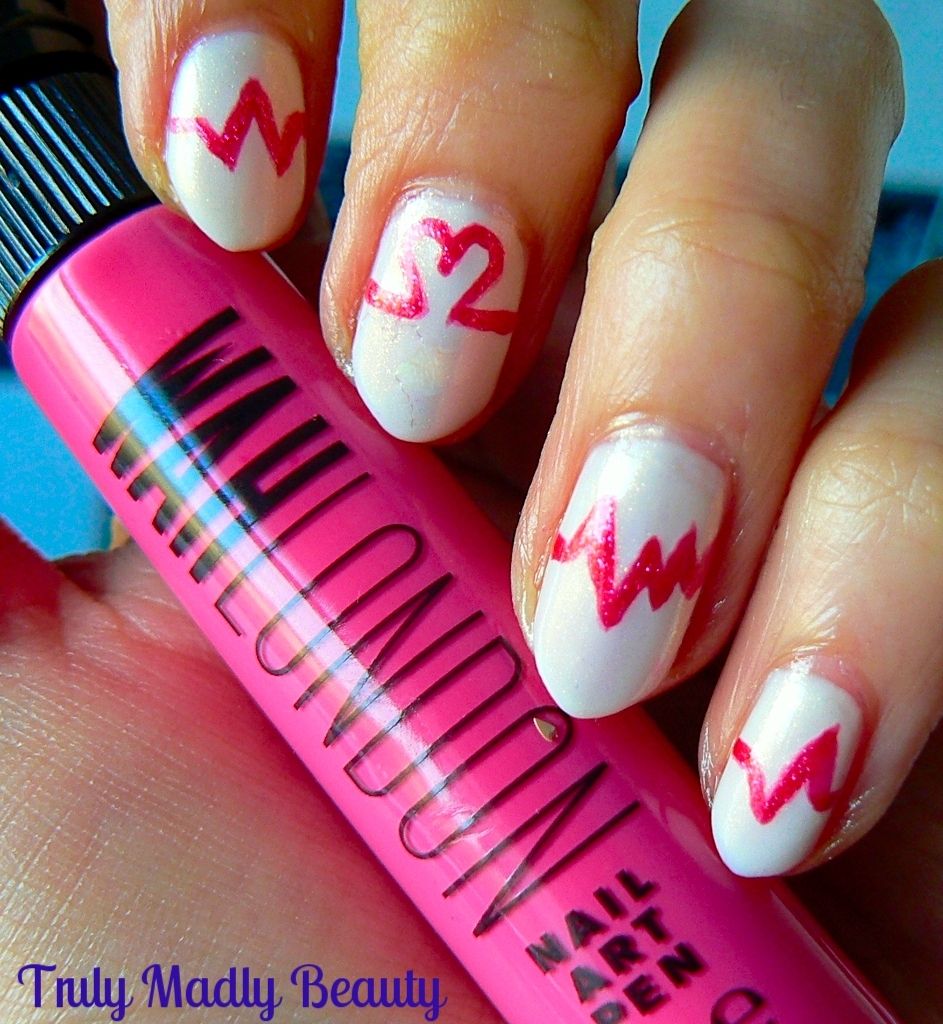
for my heartbeat line I decided to first draw the design using the
nib end of my WAH London nail art pen in a hot pink shade as this
allows you to draw much finer lines than what could be achieved with
a brush.
To
do the design just apply the polish across the middle of each nail
with your nib, starting with a straight(ish!) line, adding some up &
down zig zags along the way, not forgetting to do the heart shaped
beat on the middle nail.
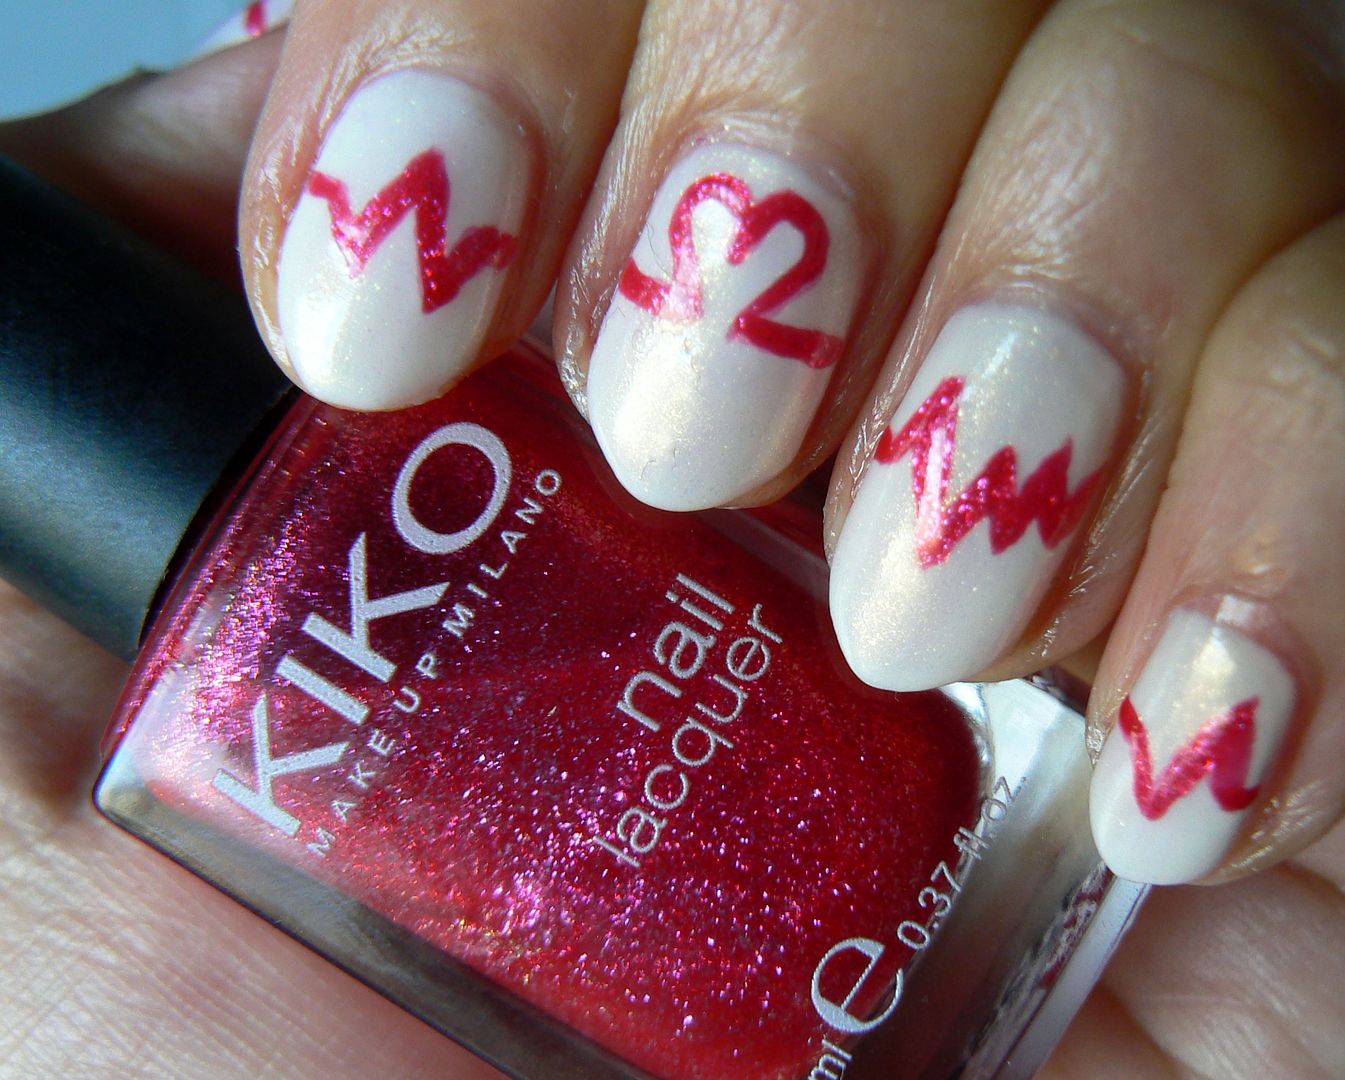
I
wasn't satisfied with the level of pink so I decided to then go over
the lines with this lovely KIKO hot pink glass fleck shade 277 with a
fine brush, which gave the design a satisfying shimmer :)
Finish
with a coat of topcoat and you're done!
I
hope you liked these Valentines themed nails! Thanks as always for
reading dolls!
Lotsa
love to ya!
Labels:
Kiko,
nail art,
NOTD,
Pink,
Seche Vite,
Shimmer,
Ulta3,
Valentines,
WAH
12.18.2015
Festive Nails - Xmas Trees!
Hello
there my lovely readers!
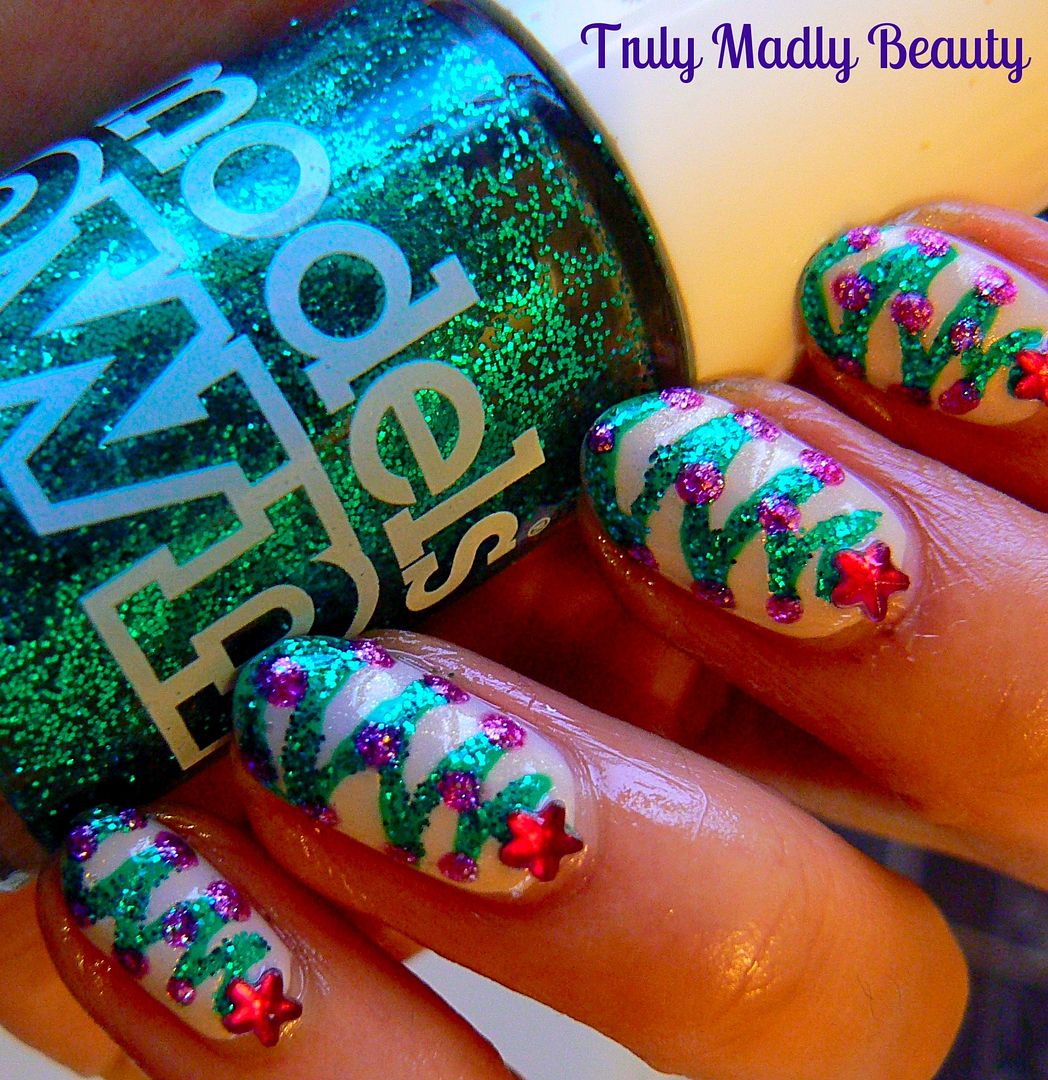
You
can't really get more festive than with Christmas Tree's eh &
its a design which I like to do on my nails every year. You can check out my last
two HERE and HERE. I try & change up the design a wee bit each
time & go for something new which is what I have done again this
year & I think this may actually be my favourite! So without
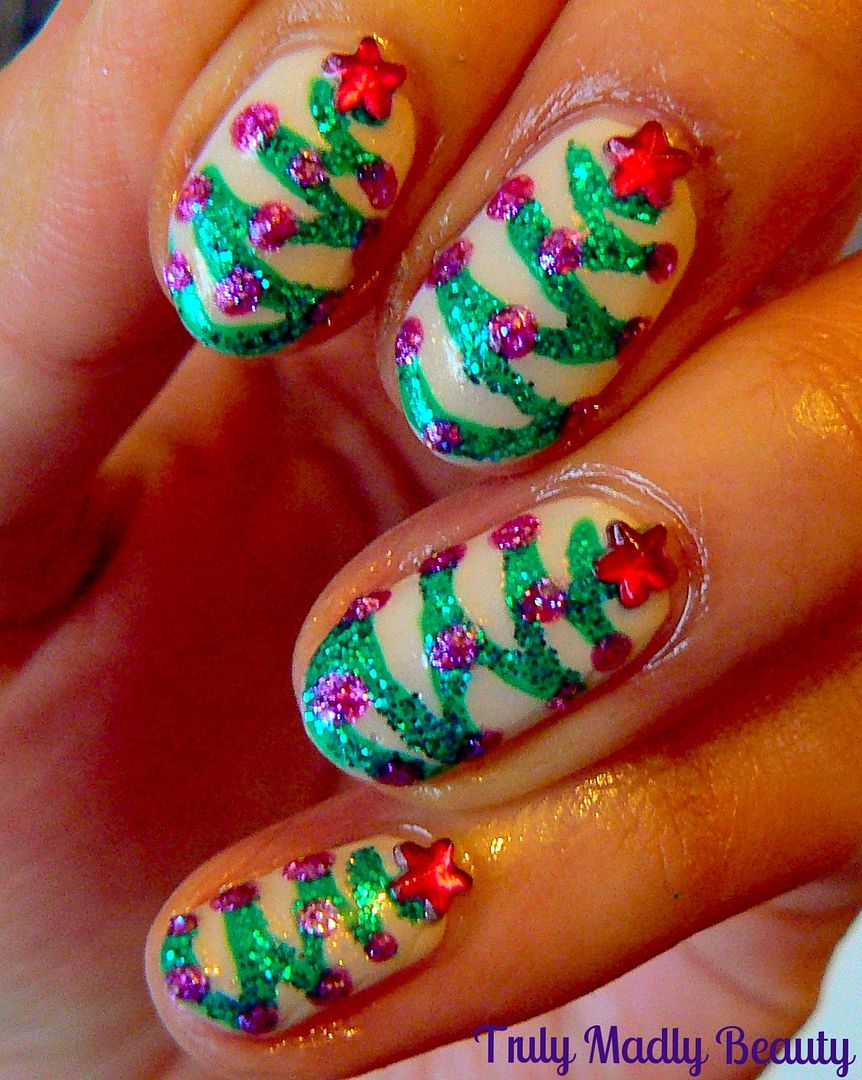
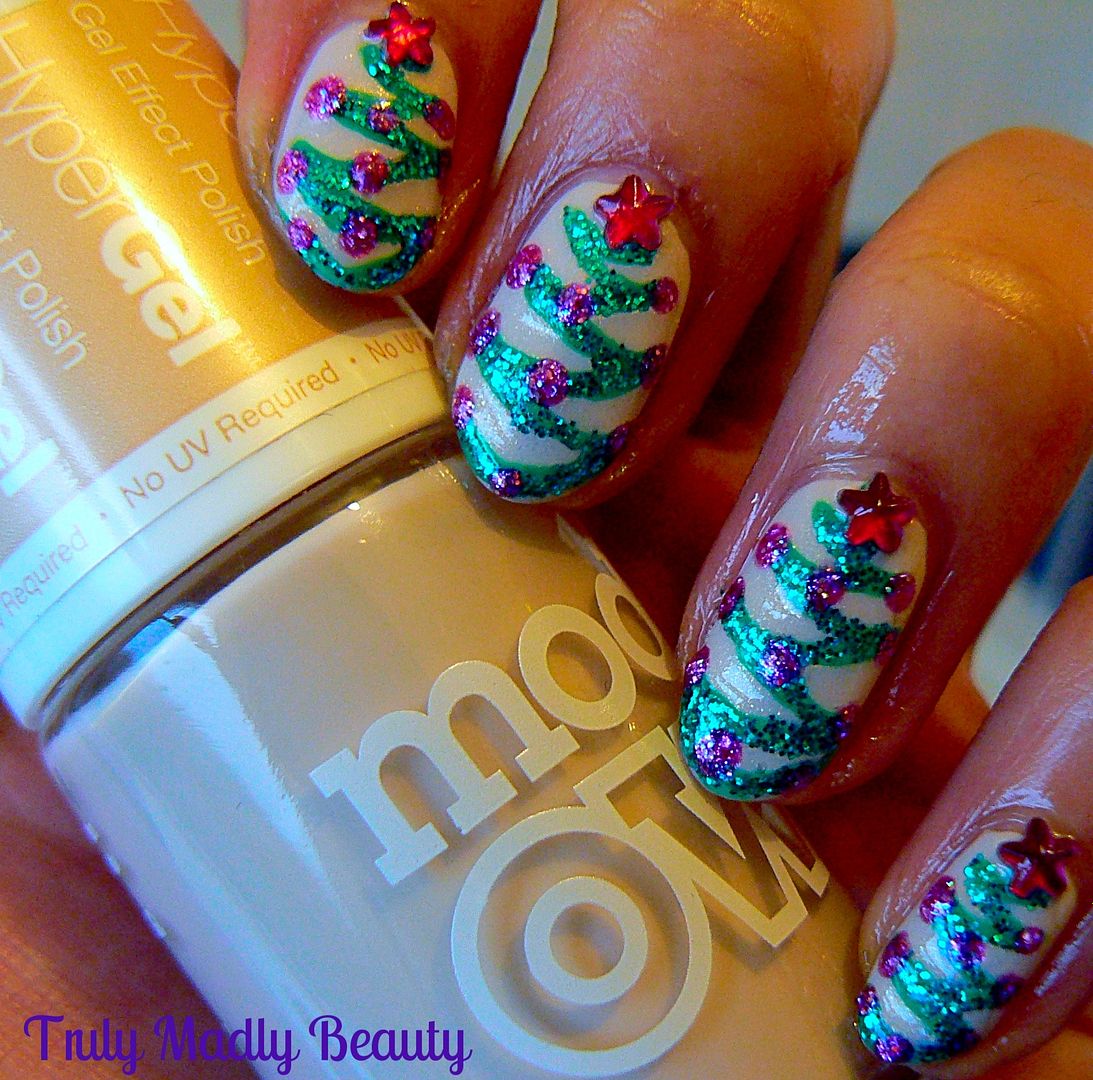
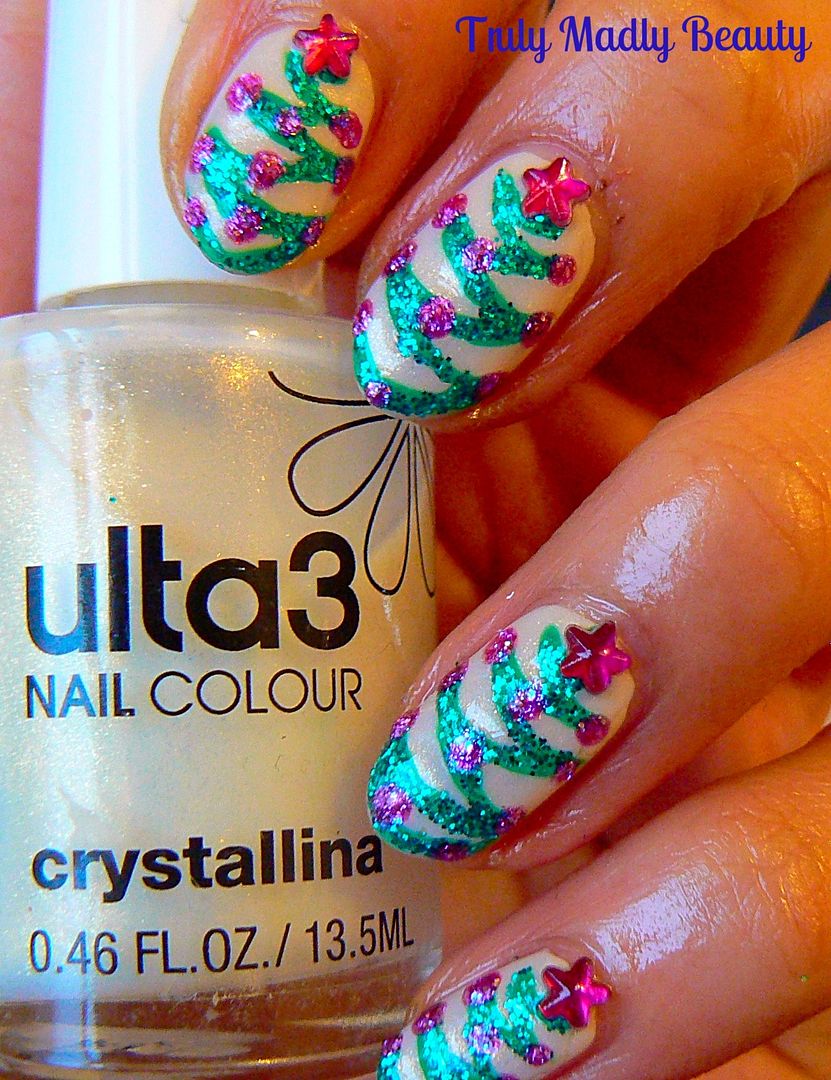
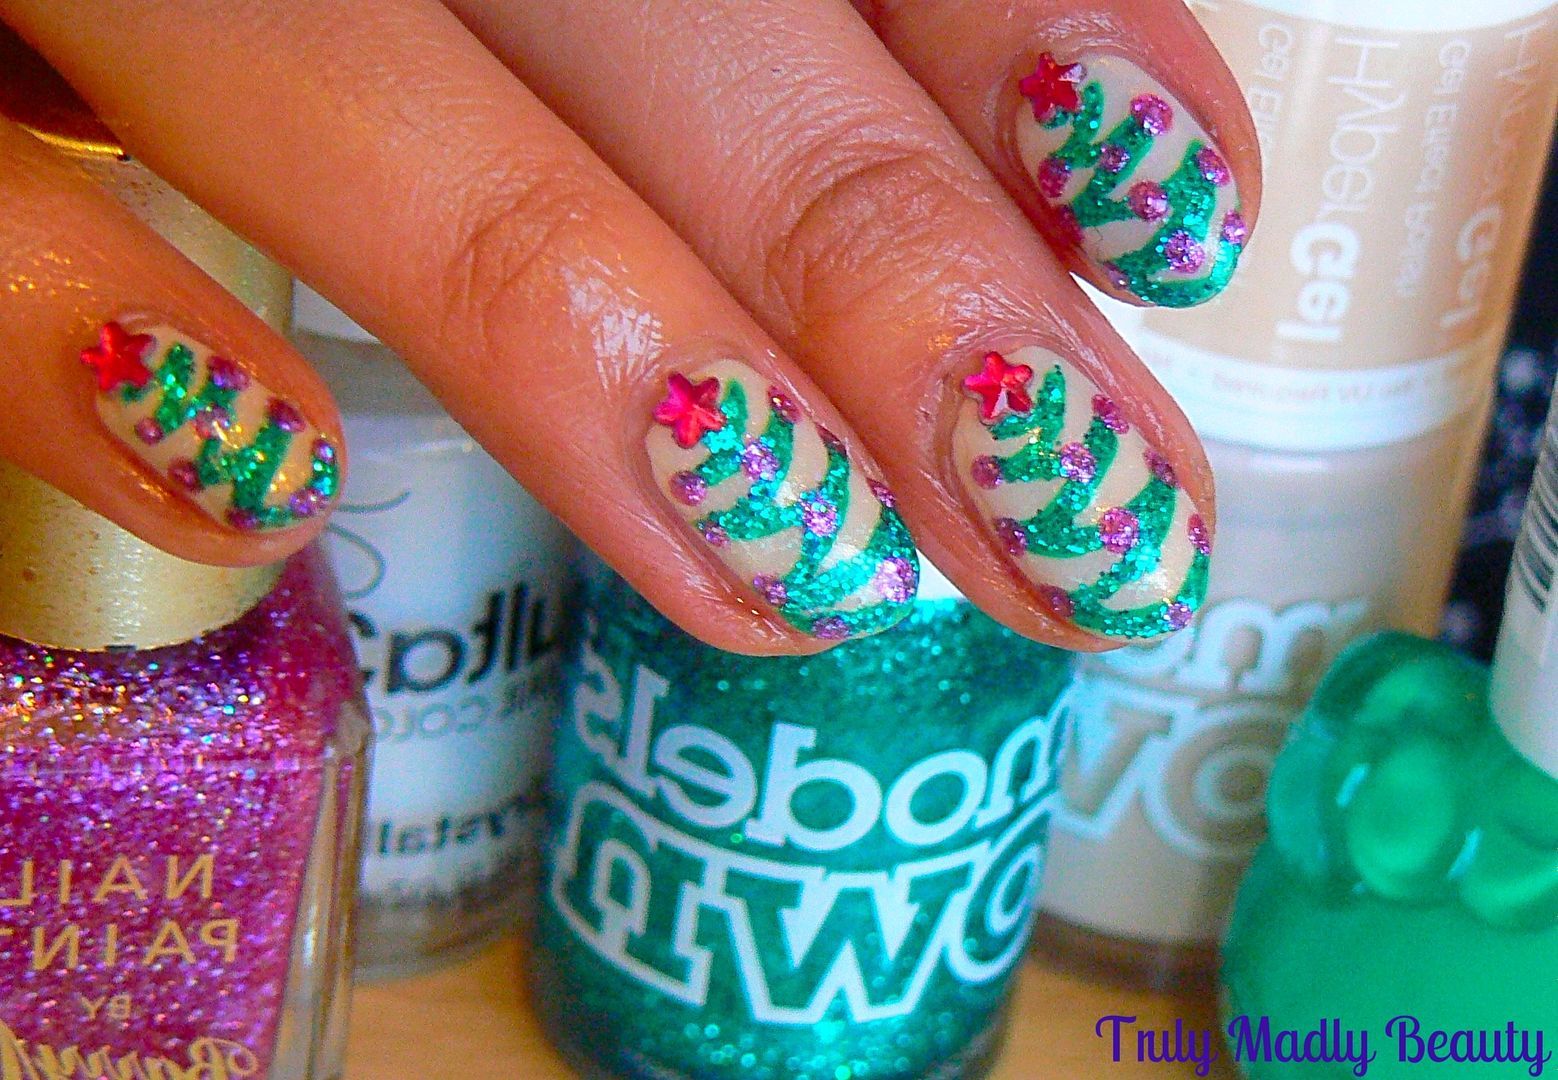
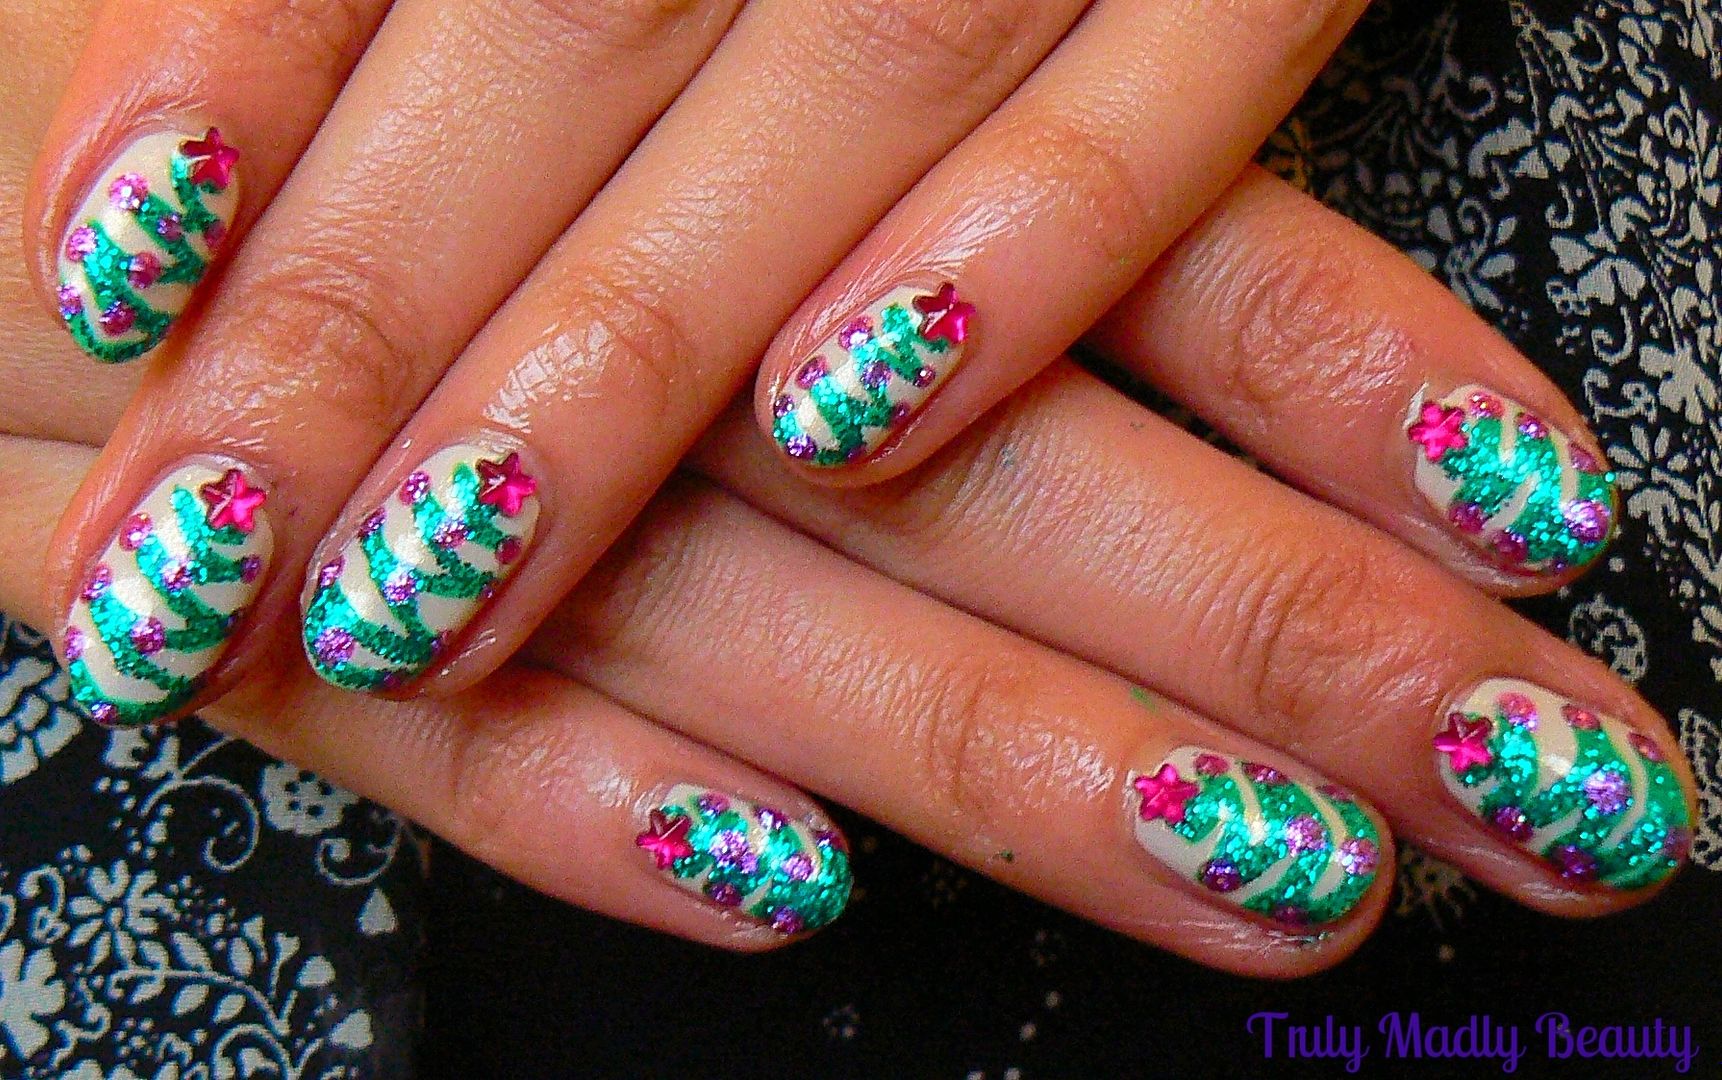
further ado, here's Festive mani number 4...Christmas Trees!
What
I love about this design is that its great if you're a bit uneasy
with doing complex nail art as the design is nice, simple &
relatively straightforward to create!
I
wanted my trees to stand out as...well..we know I've made the mistake
of using too dark a base before...AHEM O_O *flashbacks to
HERE...erases from memory* So for my base this time I opted for
Models Own Hypergel in Naked Glow, a really lovely nude beige which I
applied just one coat of.
The
reason why I did only one coat of the nude is because I wanted to add
another coat of this delightful opalescent shimmer polish Crystallina by
Ulta3, which gives the base a subtle yet oh so pretty golden
luminescence that makes one feel rather fairy-esque.
Now
for the trees, to create these I reached for my Pure Color 10 brush
which is probably my best nail art purchase this year! Love this
brush so much as it has super fine bristles, great for details. I
dipped my brush in to some green polish which came courtesy of this
absolutely darn ADORABLE Hello Kitty nail polish that I found in TK
Maxx & which I may have entirely picked up purely for the
bottle...o_O
Starting
from the top of the nail by the cuticle, start your tree with a
little curved line at an angle for the top point, then gradually zig
zag your way down the nail, adding more curved lines, making each
line slightly wider than the one above before finishing the bottom of
the tree by the nail tip.
To
add more definition to the trees & because really there is no
need to justify glitter at Xmas is there, I went over the the trees
with Models Own Emerald City glitter.
You
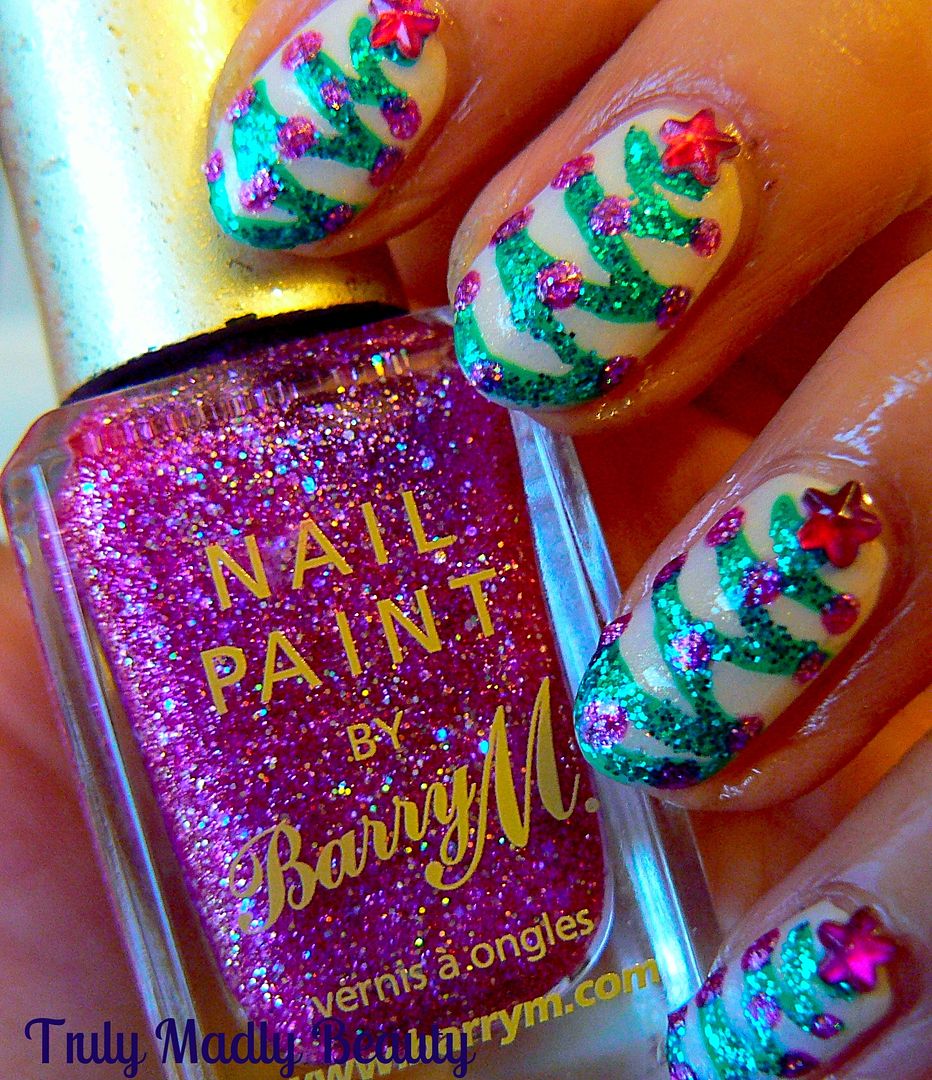
can't have a tree without some bauble action so for these I reached
for this lovely bright pink sparkler Socialite by Barry M. Such a lovely
festive shade, I'm tempted to do a pedi with this! To add the baubles
I just used a small dotting tool & dotted the polish on to the
pointed edges & down the centre of the tree.
Finally
every tree needs its topper, here I went for a lovely bright pink
star to crown my trees with.
Finish
it all with a nice slick of topcoat & your done! Hope you liked
this variation on a Christmas Tree manicure lovelies! Thanks for
stopping by!
Lots
of love to ya!
Subscribe to:
Posts (Atom)