Showing posts with label Tutorial. Show all posts

1.25.2019

NOTD - Lilac Leopard Print Nail Art Tutorial!

Hey there lovely readers!

If you checked out my previous post you'll know I shared some super easy nail art looks using the Models Own SoFly collection. I wanted to create a final nail art look that was fierce enough to do this gorgeous collection justice & what better than some roaring leopard print nails?


7.02.2018

NOTD - Watermelon Nail Art Tutorial!

Hello there lovely readers!

Today I have a step by step pictorial to share with you lovelies showing how I created these fun Watermelon Tips.


5.23.2018

NOTD - Asa No Ha Step by Step Nail Art Tutorial

Hey there lovely readers!

Oooh its been a while since I've had the time to do a proper step by step nail art tutorial for you guys so I thought it was high time to rectify that & boy am I coming at you today with a banger of a one!


1.22.2018

NOTD - Valentine's Holo Pink Roses Tutorial

Hello there lovely readers!

Out of all the ENDLESS nail art possibilities in the universe, there is one look in particular that will forever remain a firm favourite of mine & that is FLORALS!


12.21.2017

Festive NOTD - Snowflakes plus Step by Step Tutorial

Hey there lovely readers!

If you caught my previous post HERE you'll recall the gorgeous polish I shared with you all, in all its chameleon chrome goodness, the super pretty Zealous by For Your Nails Only

As I was utterly obsessed with this polish & had no desire to remove it from my nails I decided to use it as a base for my next festive mani & I think it worked out really well! 

11.23.2017

NOTD - Geode Nails plus Step by Step Tutorial

Hey there lovely readers!

When it comes to one of the biggest nail art trends to hit 2017, I think its safe to say that Geode nails were definitely a fore runner & has been one of the most popular looks of the year. 

What are Geode nails exactly? Think Amethysts, Jade, Crystals & other semi precious stones/rocks carved in half & the pretty designs magically revealed within the rock being then recreated into a fantabulous funky nail art design!


11.13.2017

NOTD - Moustache Nails for Movember plus Tutorial

Hey there lovely readers!

You may be aware already that during the month of November, many menfolk partake in Movember, a great initiative where the month is spent abstaining from shaving & an attempt to grow some stellar facial hair goes into effect, the purpose being to raise awareness for men's health issues & specifically cancer. 


10.15.2017

NOTD - Dragon Egg Nails plus Step by Step Tutorial!

Hello there lovely readers! 

Taking a wee reprieve from Halloween Nail Art for the moment (not for long though!) as I really wanted to share this mani with you! 

You may remember the stunning Chameleon Flakies I reviewed a few posts back from Beauty Big Bang? These little pots of wonderfully magical flakes transform an ordinary polish into a stunningly ethereal multichrome flakie finish. 


Each shade has a different colour shift effect, the J2443-3A flakies, when applied over a dark polish, gave a stunning purple to green colour shift, have a peek at my post HERE to see how pretty it is. Well naturally I was eager to see how the other shade I picked J2443-4A would fare so couldn't wait to give it a try & this time, keeping in with the dragon theme I decided to use it as the perfect base to create me some Dragon Egg Nails!


7.17.2017

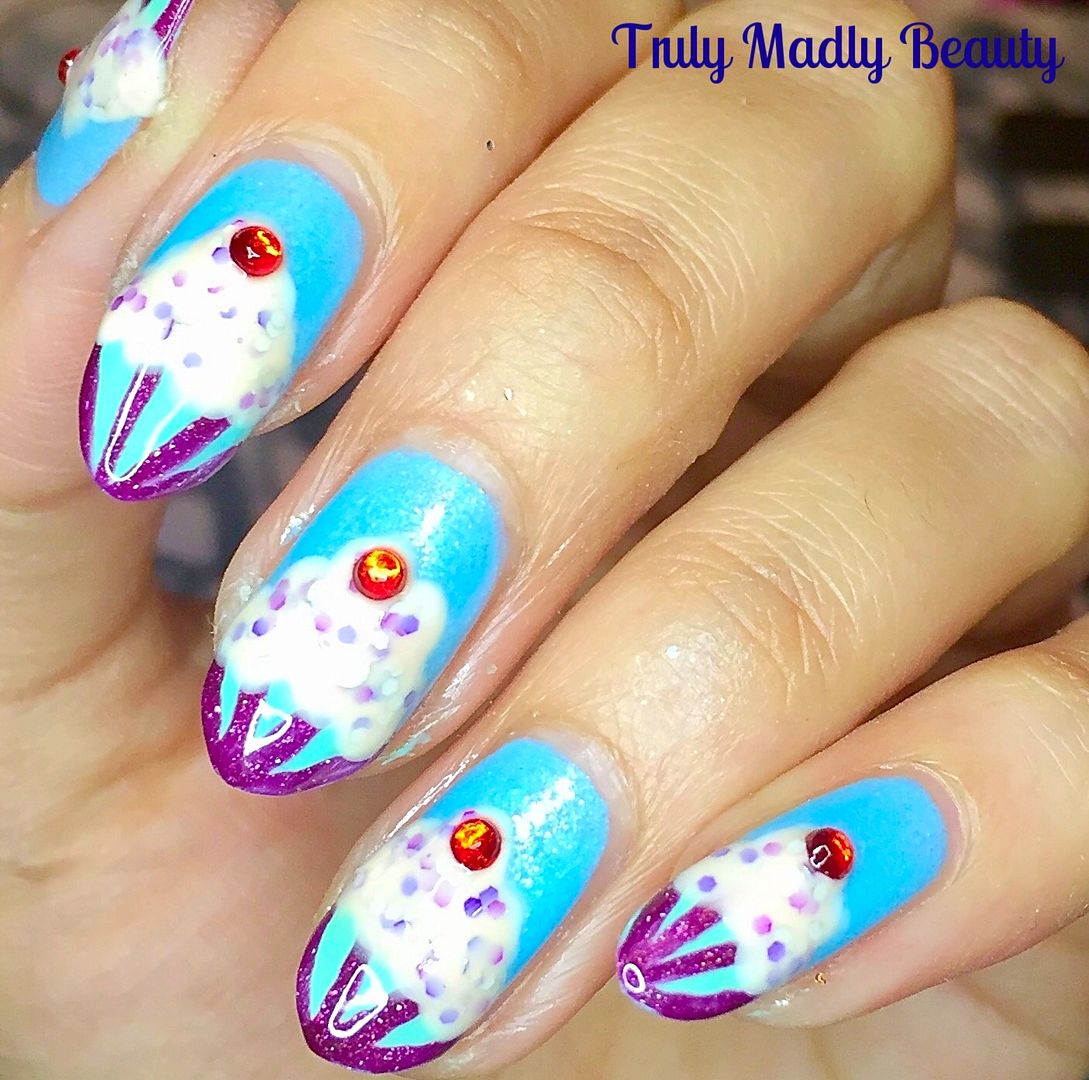
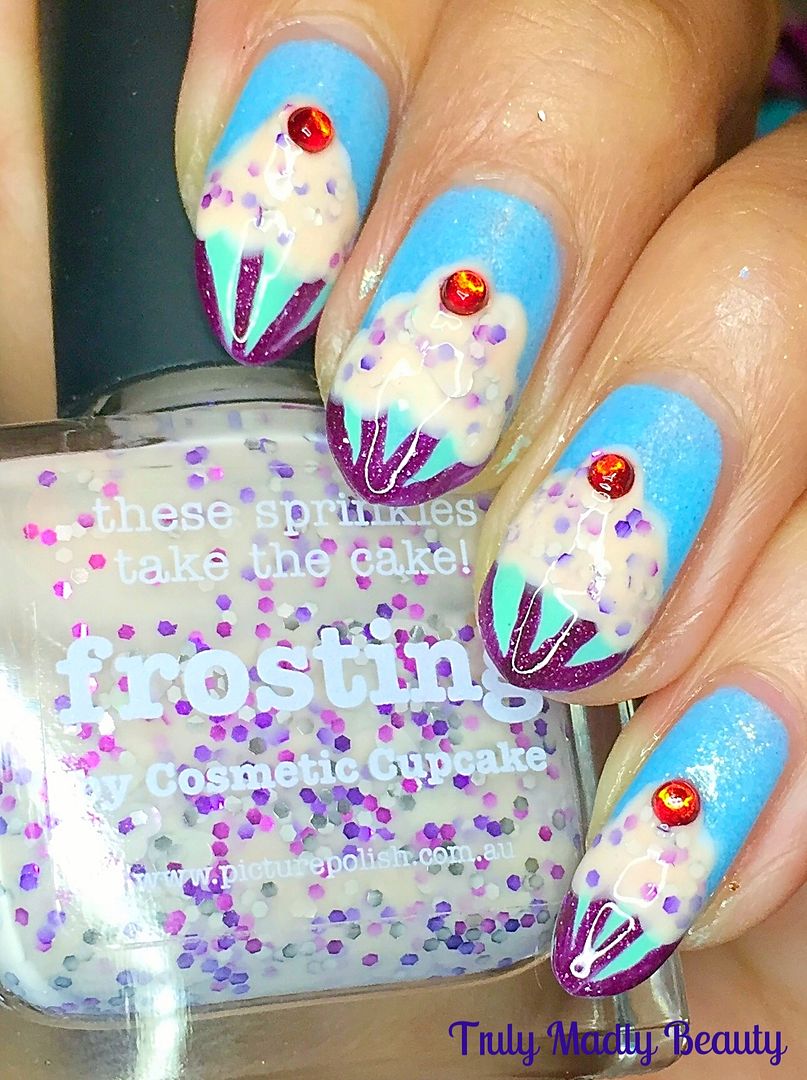
NOTD - Cupcake Nail Art Tutorial

Hello there lovely readers!

Its no secret my love of the sweet things, being the afternoon tea addict that I am I couldn't NOT be partial to a slice or ten of cake hmm? If anything its absolutely necessary for blogging purposes, if I didn't adore cake...no afternoon tea reviews...sad times.


When I can combine my petite joys in life with my other greatest passion, nail art in case you didn't know that already....yes I can feel the waves of shock emitting from you O_o, then that makes me a happy sweet toothed bunny! As you can see I got my inspiration for todays nail art from that bonny wee treat everyone loves to indulge in....cupcakes!


6.28.2017

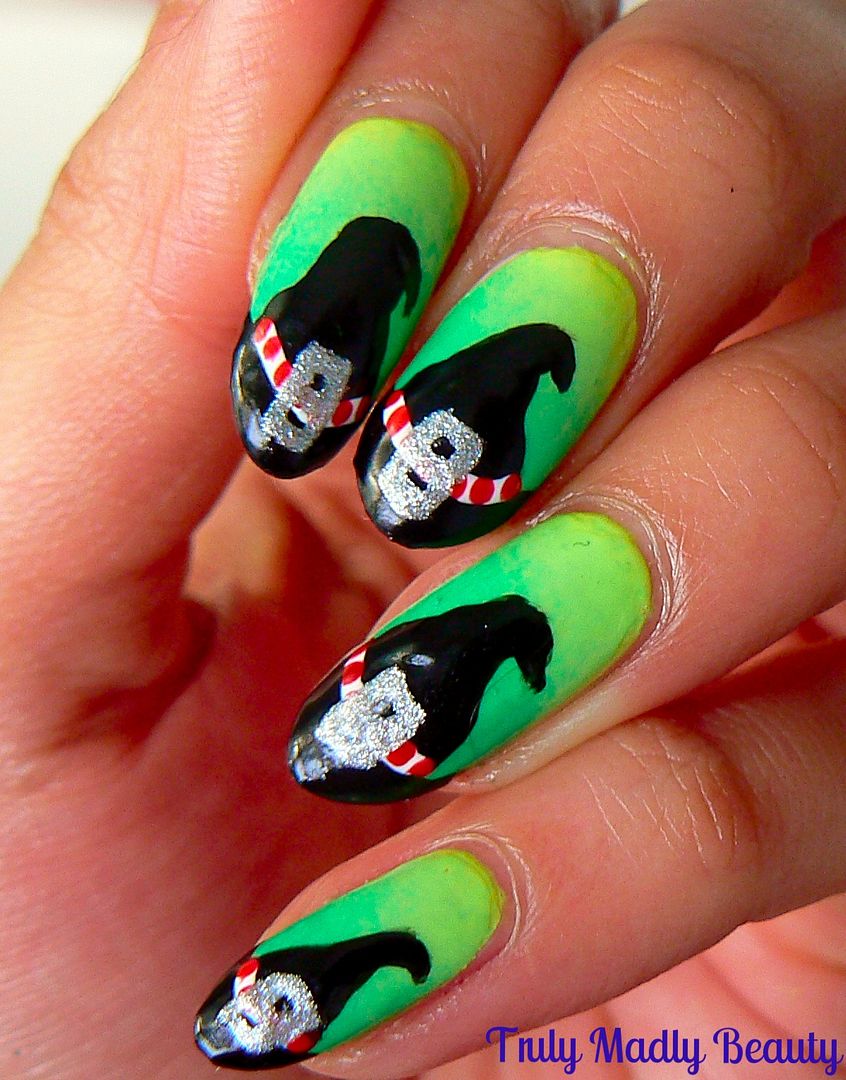
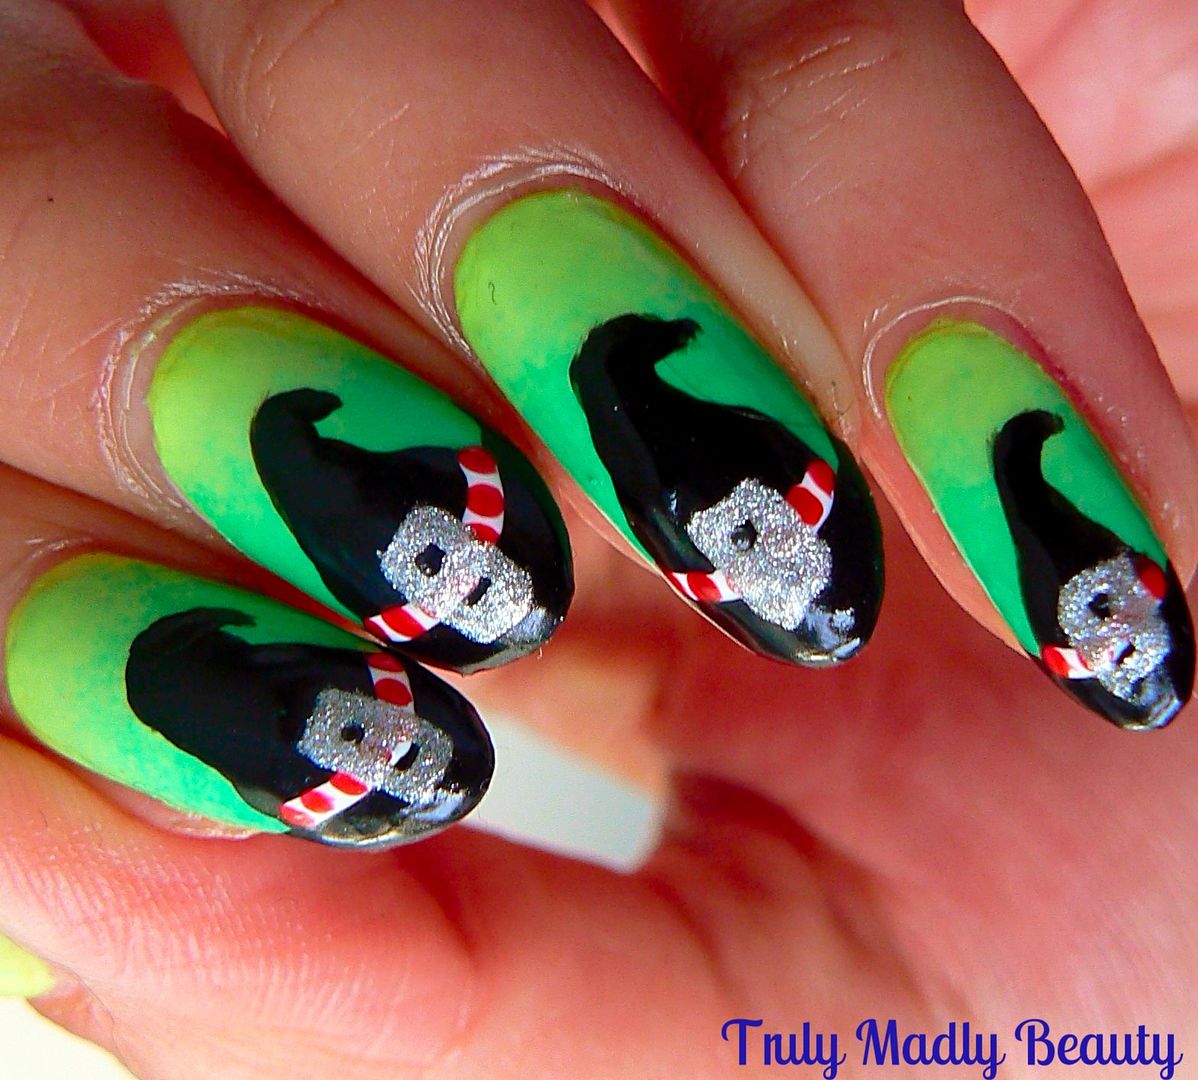
NOTD - Wicked Inspired Nails Tutorial!

Hey there my lovely readers!

If you caught my last post where I reviewed the Mitty Burns Peel Off Tape Barriers for easy nail art clean up, you'll remember how we left things...with a neon gradient nail base of yellow & green that was begging for some nail art action...


Well I had me some plans for this base & in particular with this colour combo especially. I recently went on a little London adventure with my dearest chum which saw us popping by the Apollo Theatre to finally watch the award winning show Wicked which (no pun intended) we absolutely loved. Honestly we must've been the last humans on earth NOT to have seen it & I'm glad to finally tick it off my list. 


6.12.2017

New Shade From True Brit London - Pillar Box & Royal Guard Nail Art Tutorial

Hello there my lovely readers!

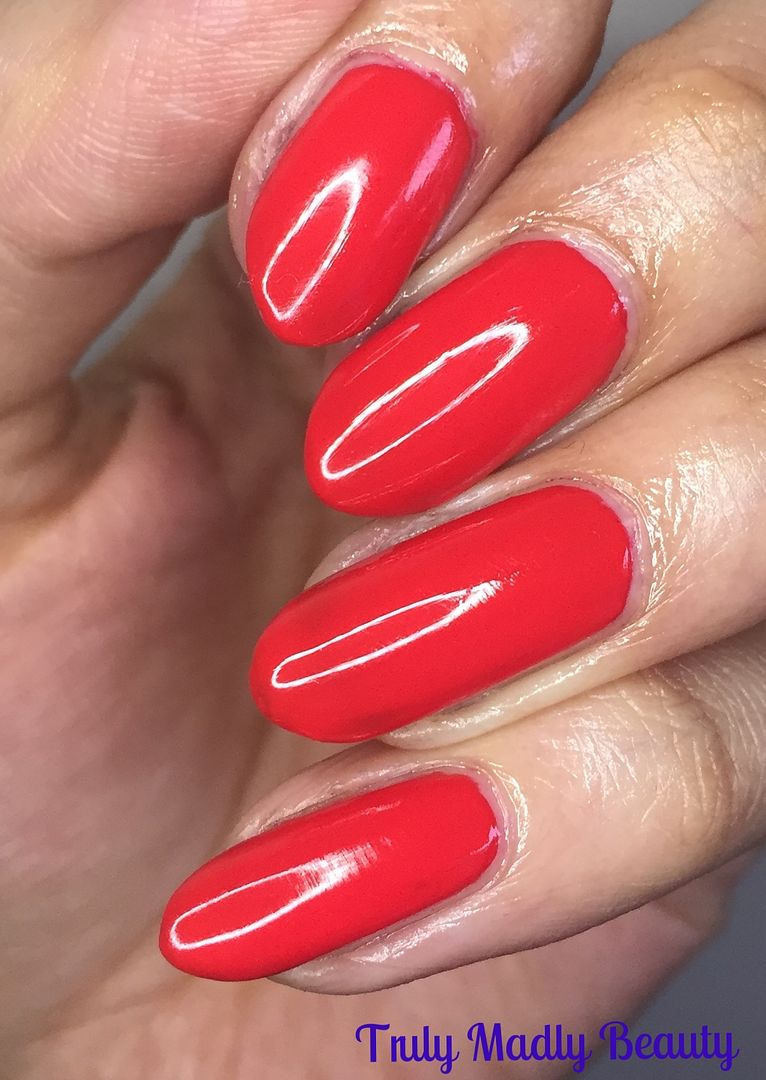
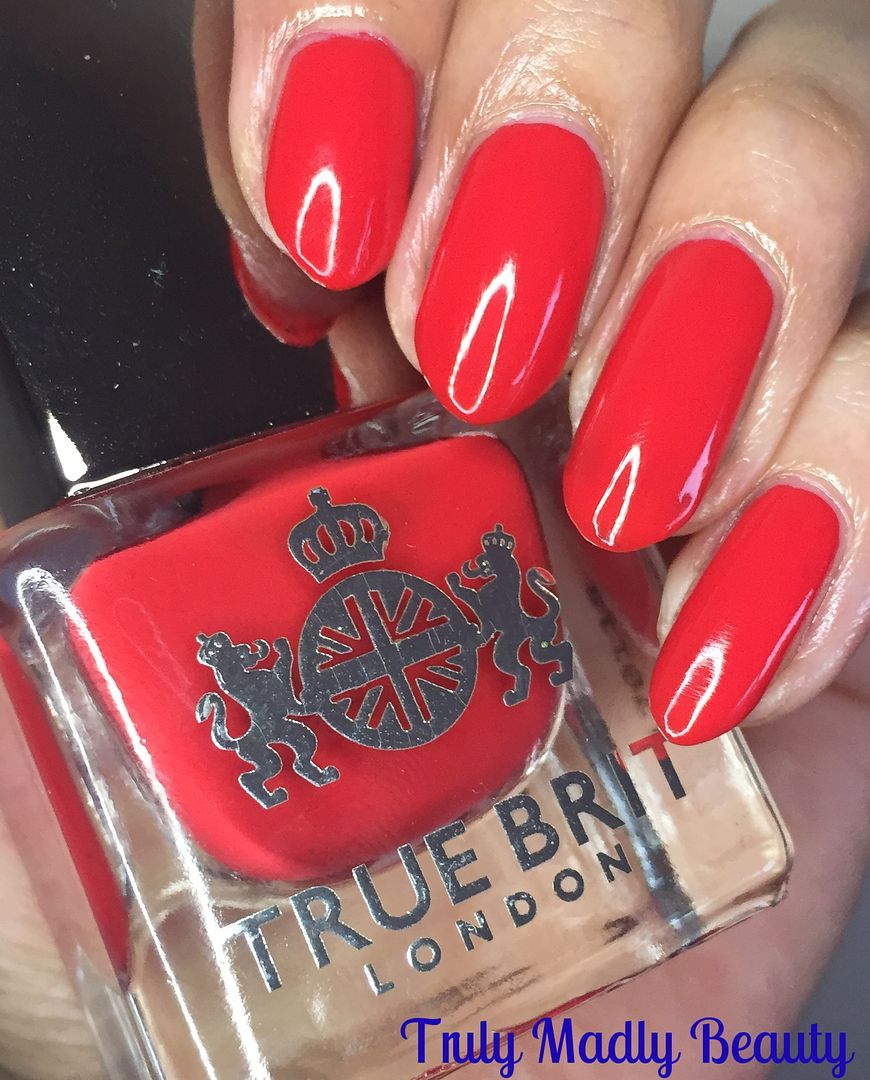
Every girl needs a signature red polish in her stash. Although in my case lets just say its more likely to be a few dozen, yet I assure you that they are all unique & entirely different tones of red...o_O


But if you are looking for a perfect Pillarbox red then look no further because my friends at True Brit London have got you covered with one of the new additions to their already outstanding nail lacquer collection.


5.03.2017

New Shade from True Brit London - Sunday Best & Bow Tie Tutorial!

Hey there my lovely readers!

So May is upon us! And with it the return of 5 day working weeks...*wails in despair* I confess one of the many reasons I love Spring time (though its obvious that Spring is clearly broken at the moment) is the abundance of bank holidays, oh how we've been spoilt with these glorious long weekends. 

Not the greatest start to the month with yours truly having a wisdom tooth extraction which I elected to have under local anesthetic because I'm either mental or a masochist. Most likely a bit of both. So one is currently on a cocktail of painkillers & anti-inflammatory's that could knock an elephant on its ass. Happy Days *cue creepy drug induced grin*

Powering on, today I have another deliciously delightful nail polish offering from True Brit London's newly released collection, pink ladies this is one for you...


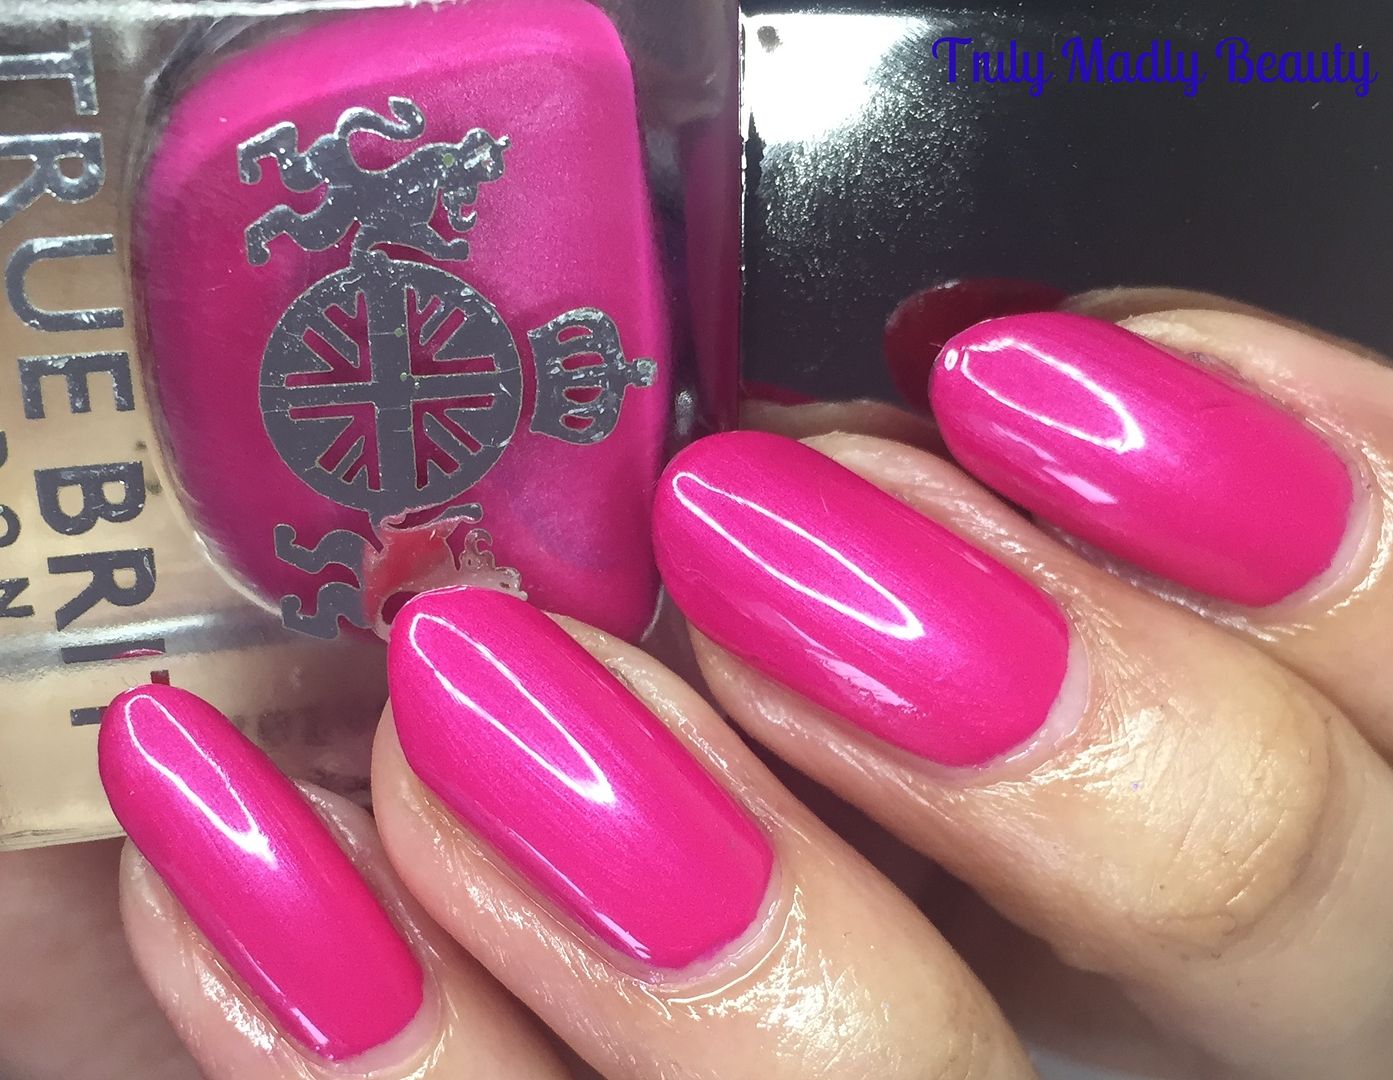
What did I tell you? Swoon worthy right? This beautiful polish goes by the title *Sunday Best & is a stunning glossy fuchsia peony pink that gets its glorious edge with the addition of an opalescent pearly shimmer giving this pink a magical iridescent glow.


3.10.2017

NOTD - Jewel Bloom Nail Art Tutorial

Hello my lovely readers!

A wee tutorial for you today, I want to try & do more step by step pictorials for you to show just how easy it can be to create fun & fabulous designs on your nails! My favourites this year so far have to be my Flamingo Nails, they just make me smile so much & I'm itching to do them again. But of course Mother Nature will play a big part in allowing this to happen & whenever she doth bestow upon me decent lighting & time for photos I will make sure to take advantage!


2.24.2017

NOTD - Dream Catcher Nails Tutorial

Hi there my lovely readers!

Long time no speak! If you follow me on social media you'll know I've been off having adventures on the other side of the world, Koh Samui to be exact. 10 days in glorious weather on a beautiful island was just what this girl needed, though the journey sure is a killer, 20 hours travelling through 3 different time zones really does a number on you! Only just starting to resemble some form of sanity, I can also get back to blogging with some new nail art!


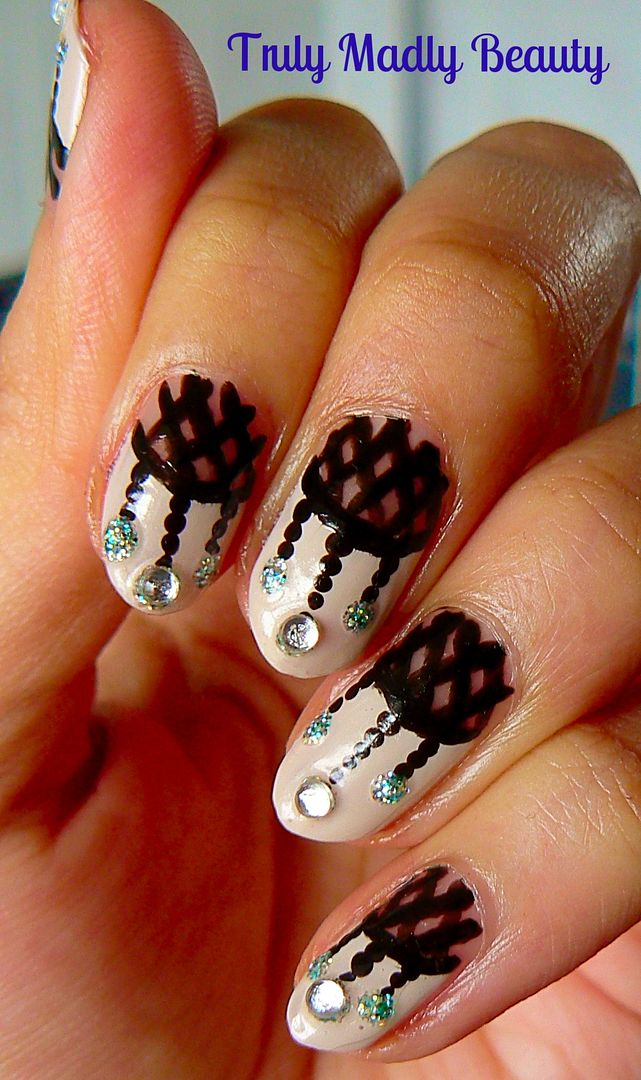
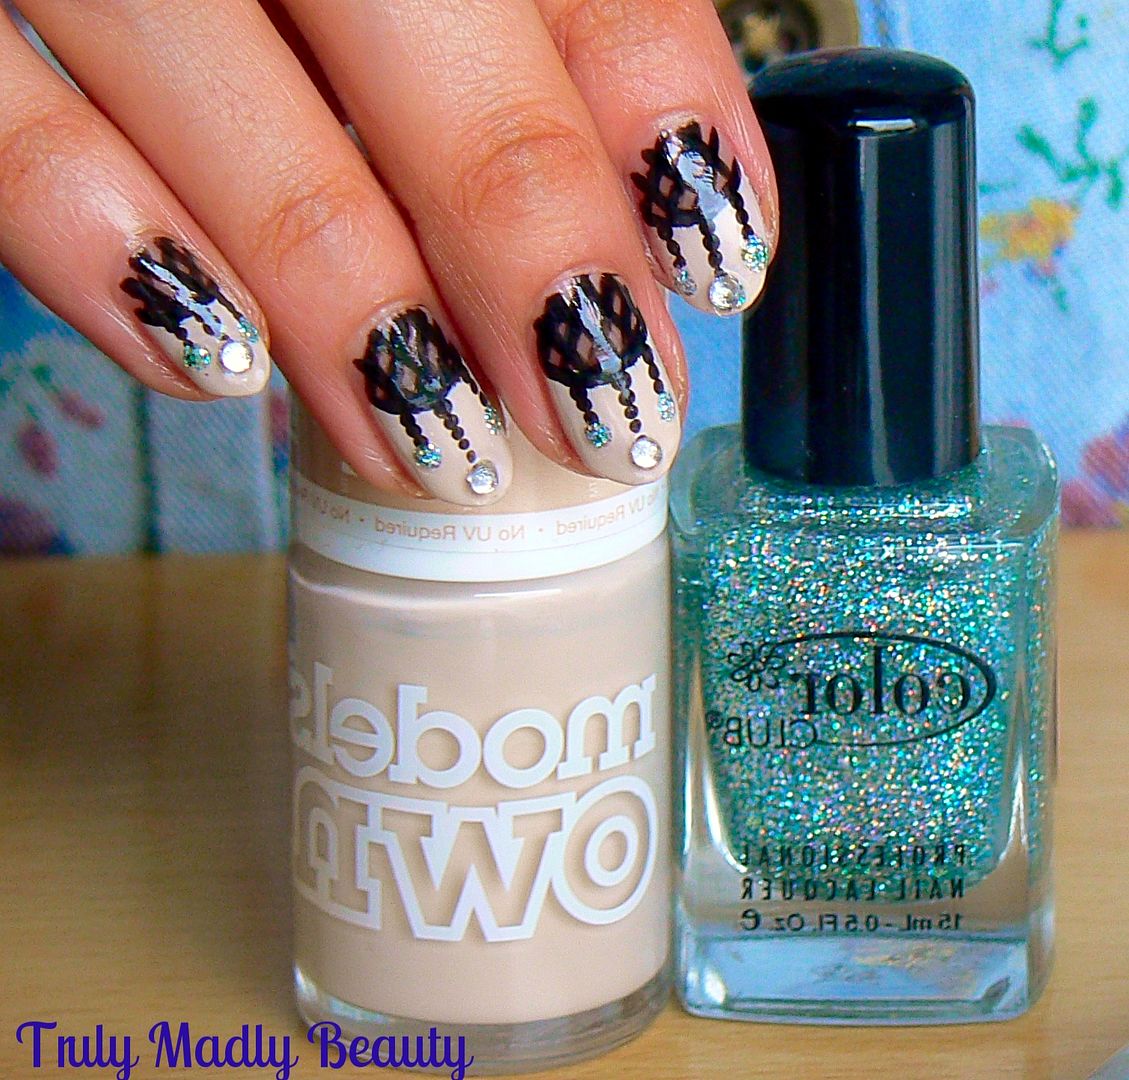
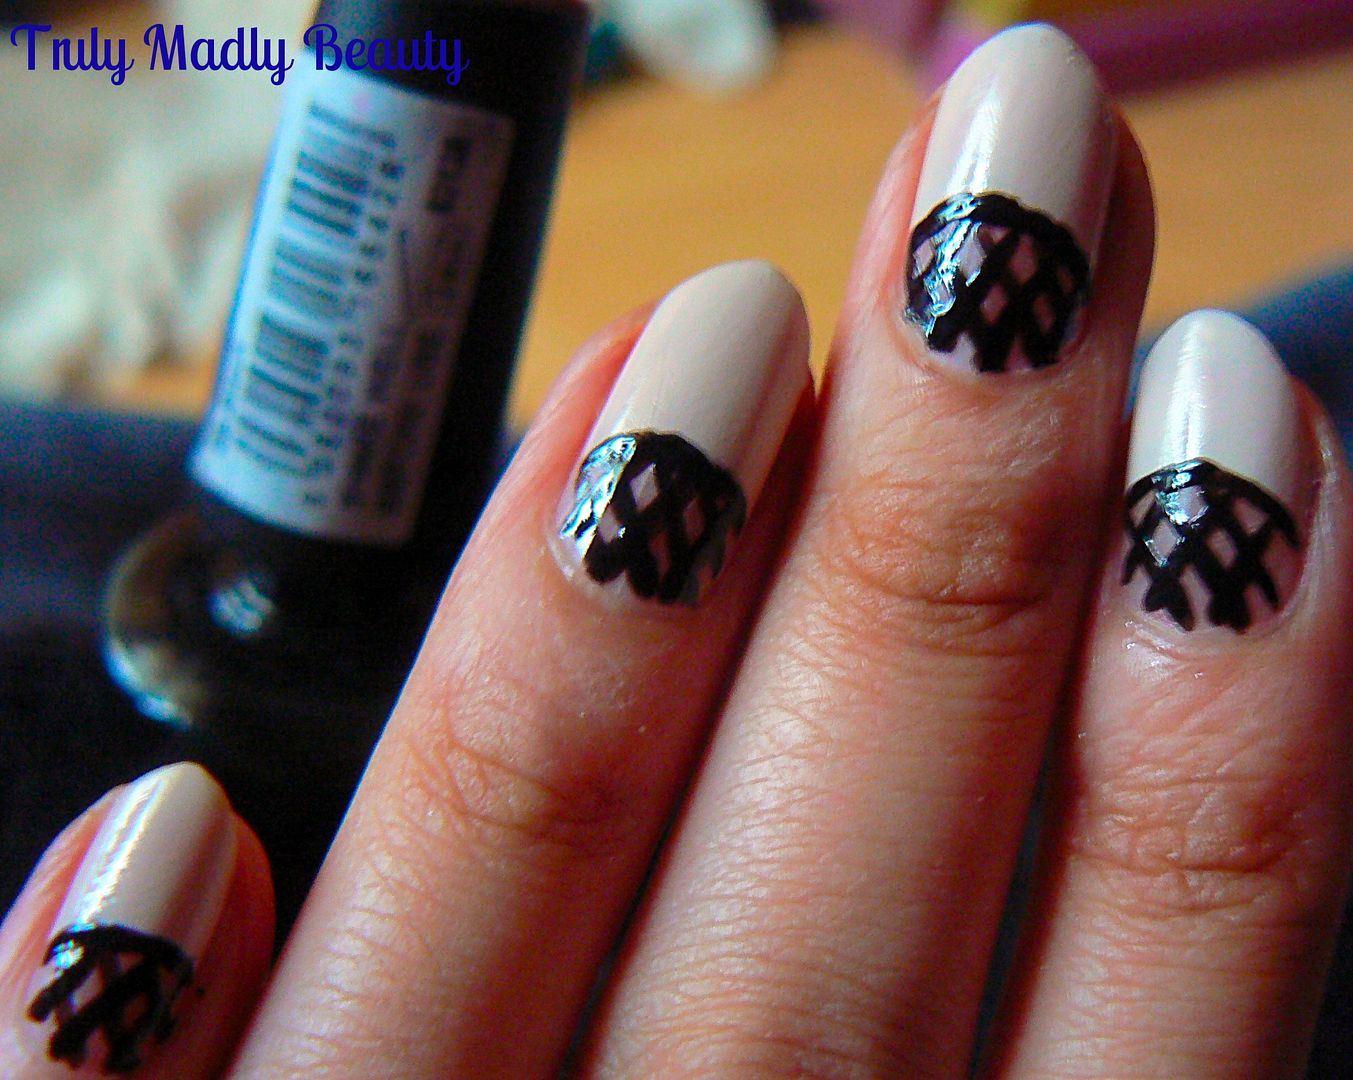
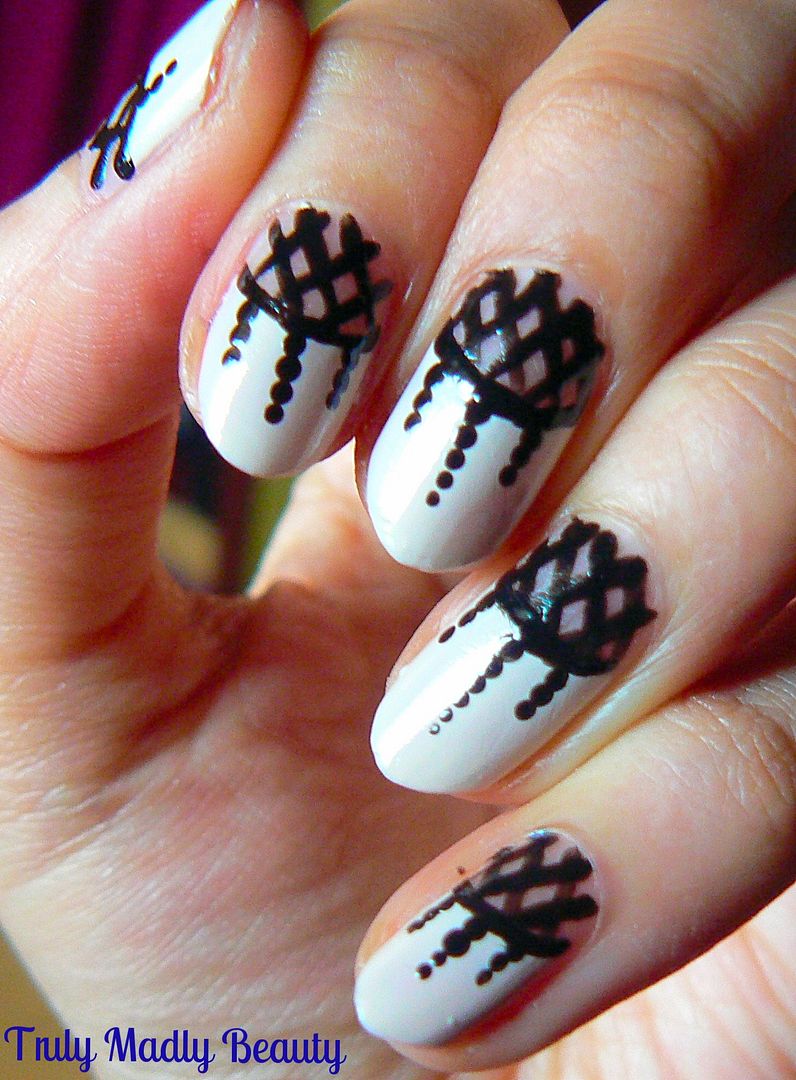
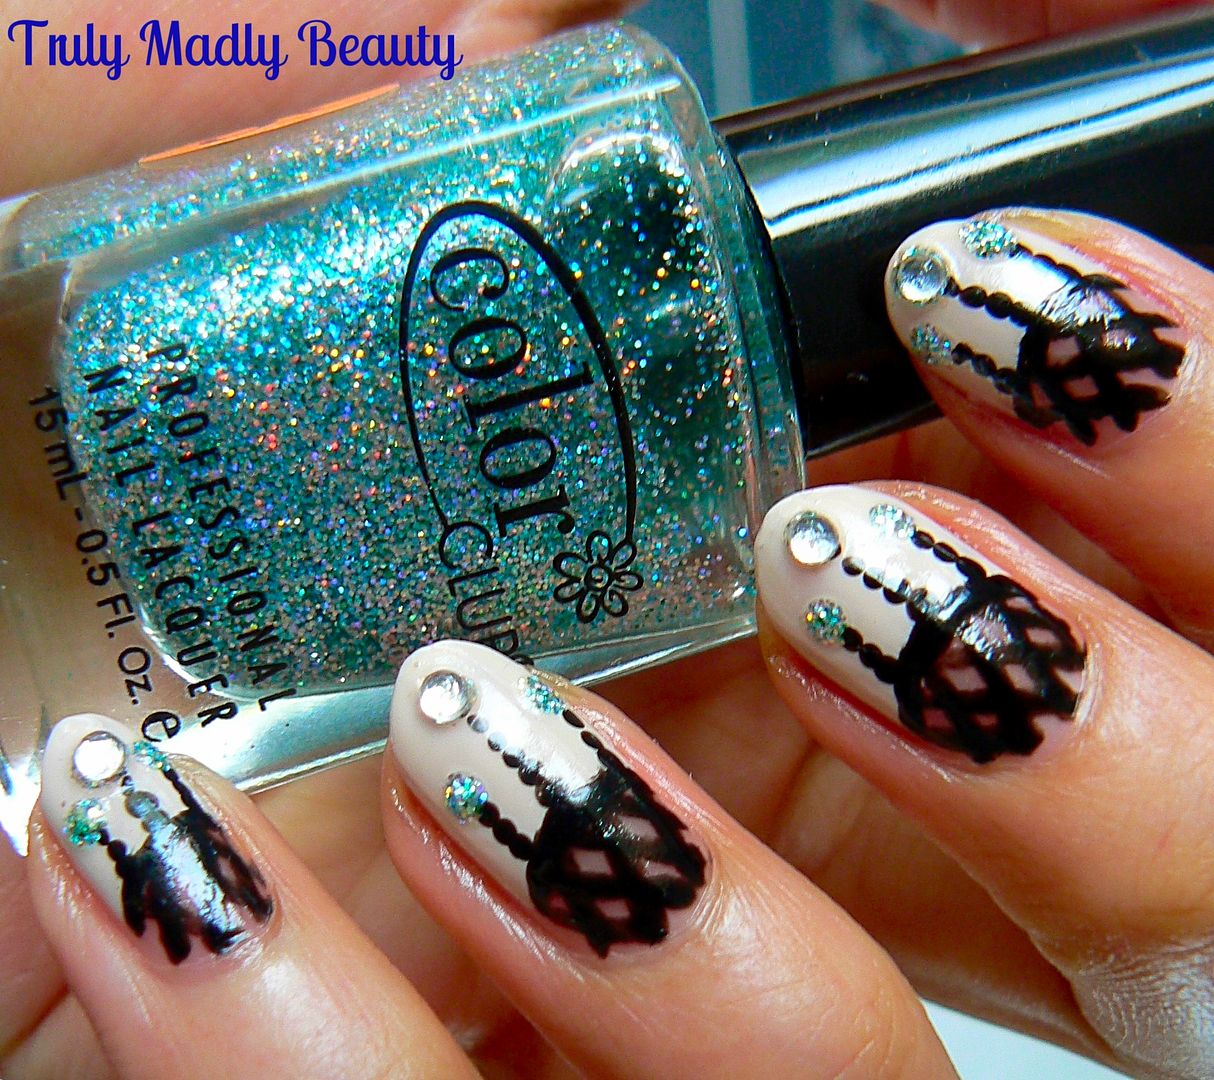
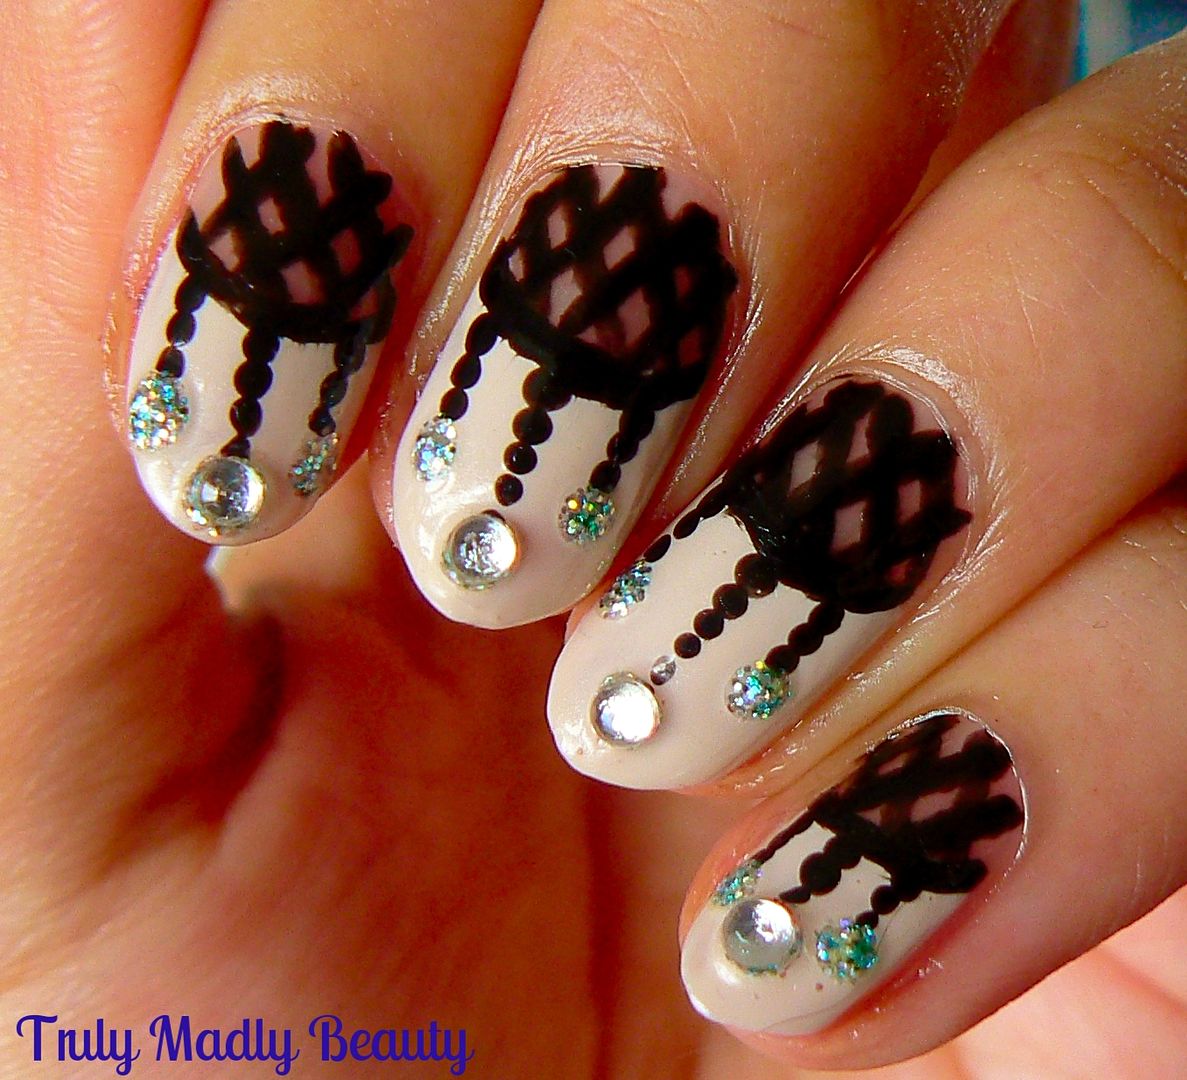
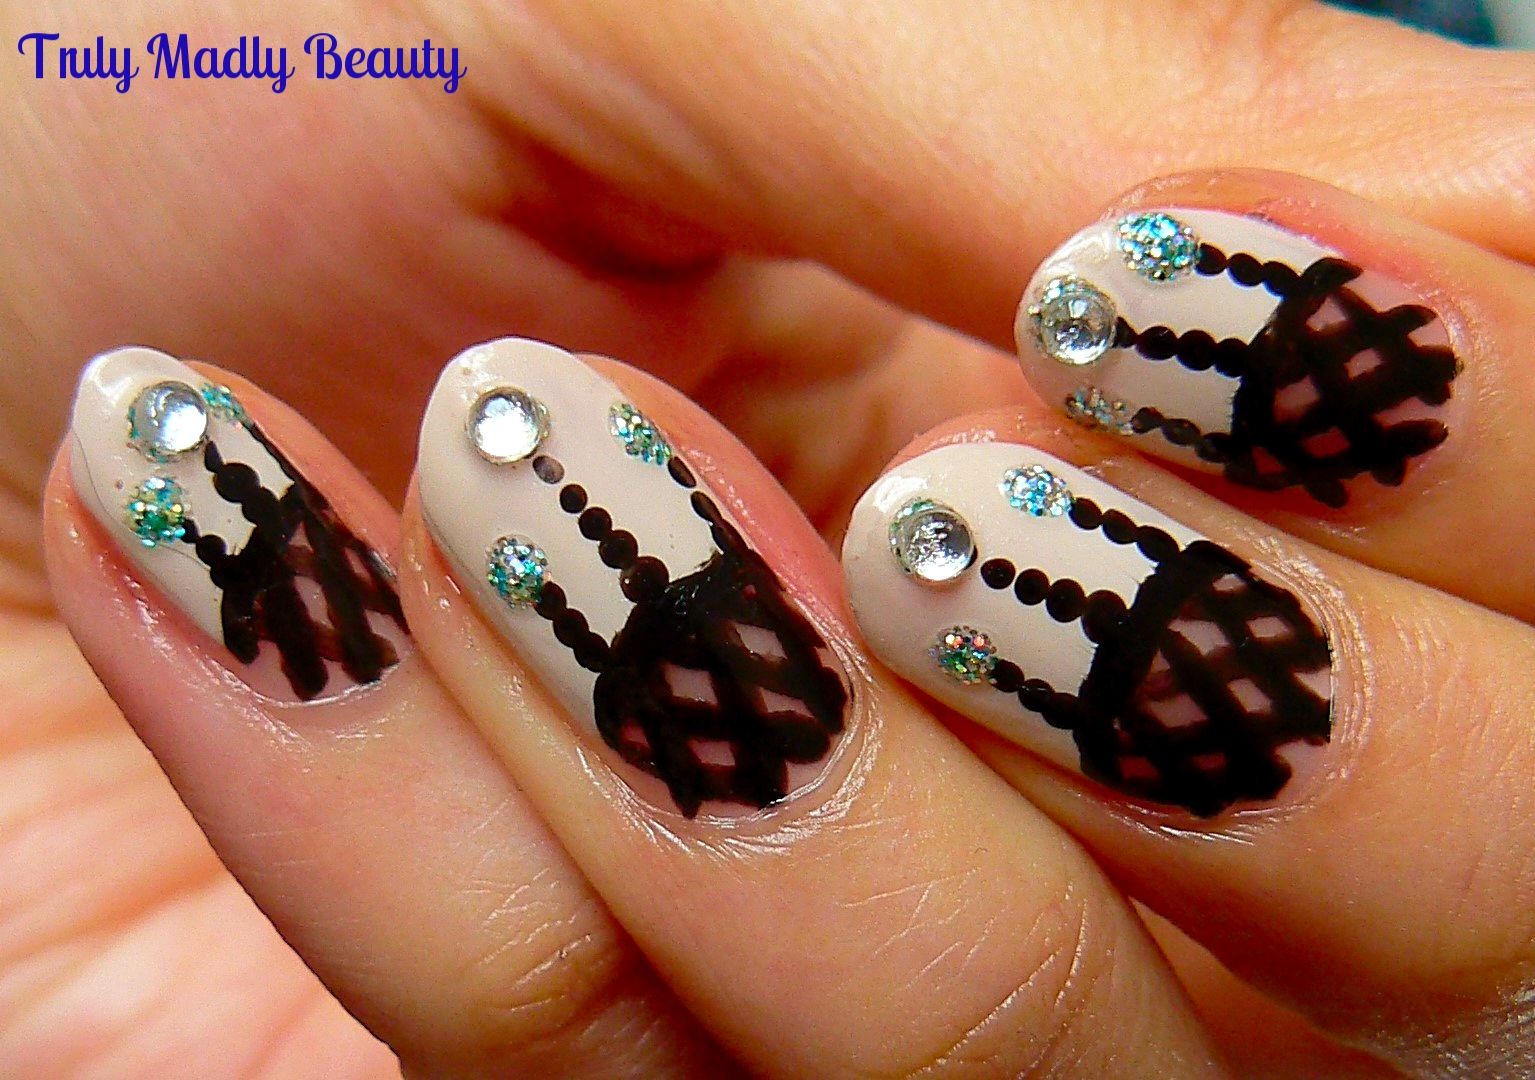
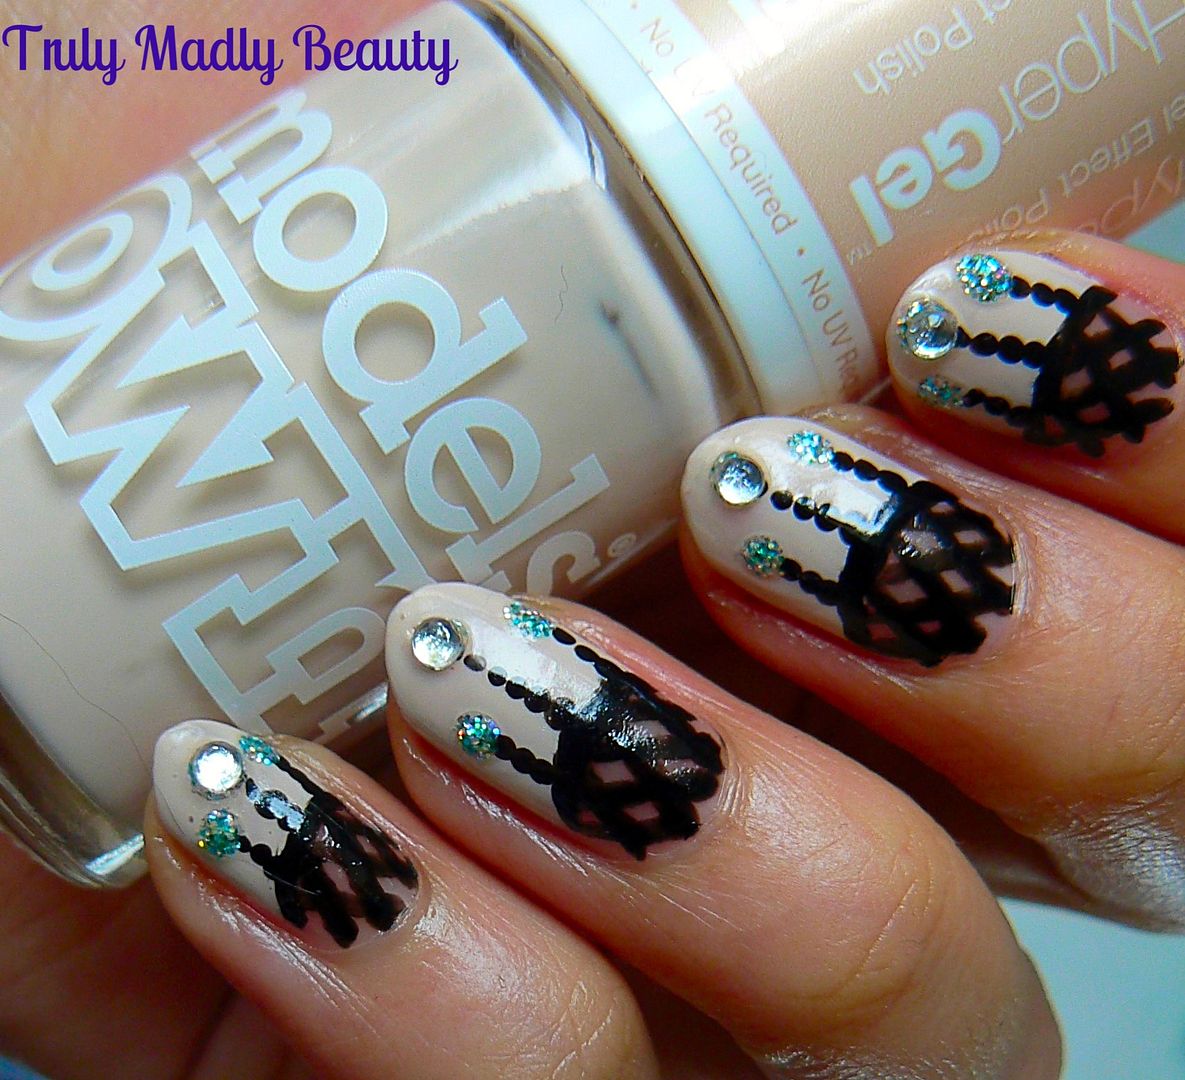
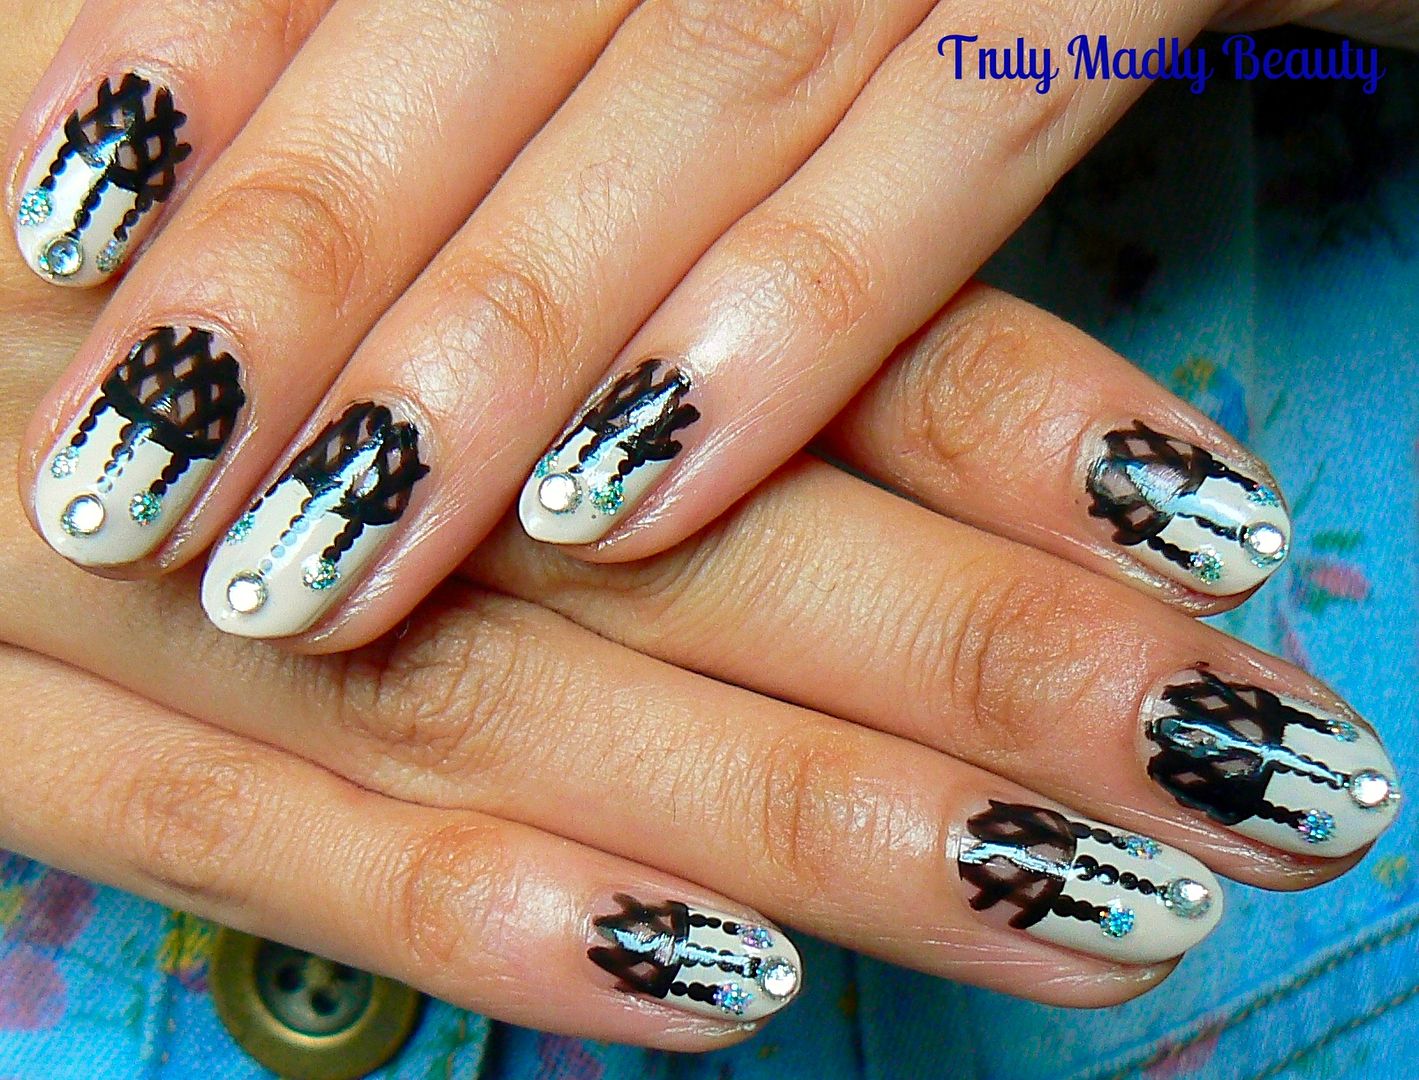
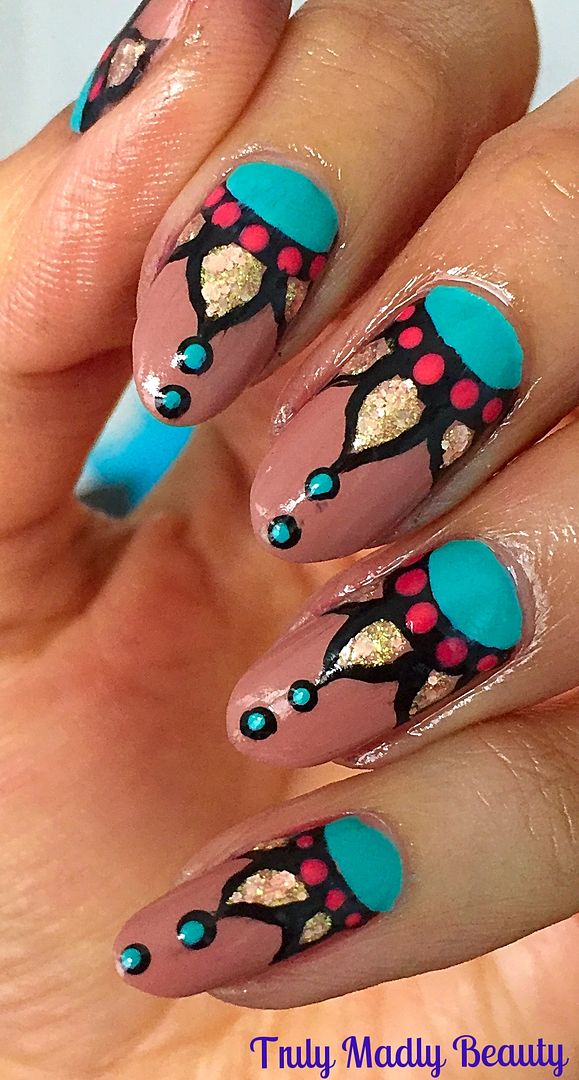
Today's design is Dream Catcher or Chandelier nails if you like! These pretty ornaments looks as lovely decorated on the nails as they do hung up on your walls & you can totally play around with different colours & glitters ;) I've gone for a black & nude look with silvery blue sparkles!


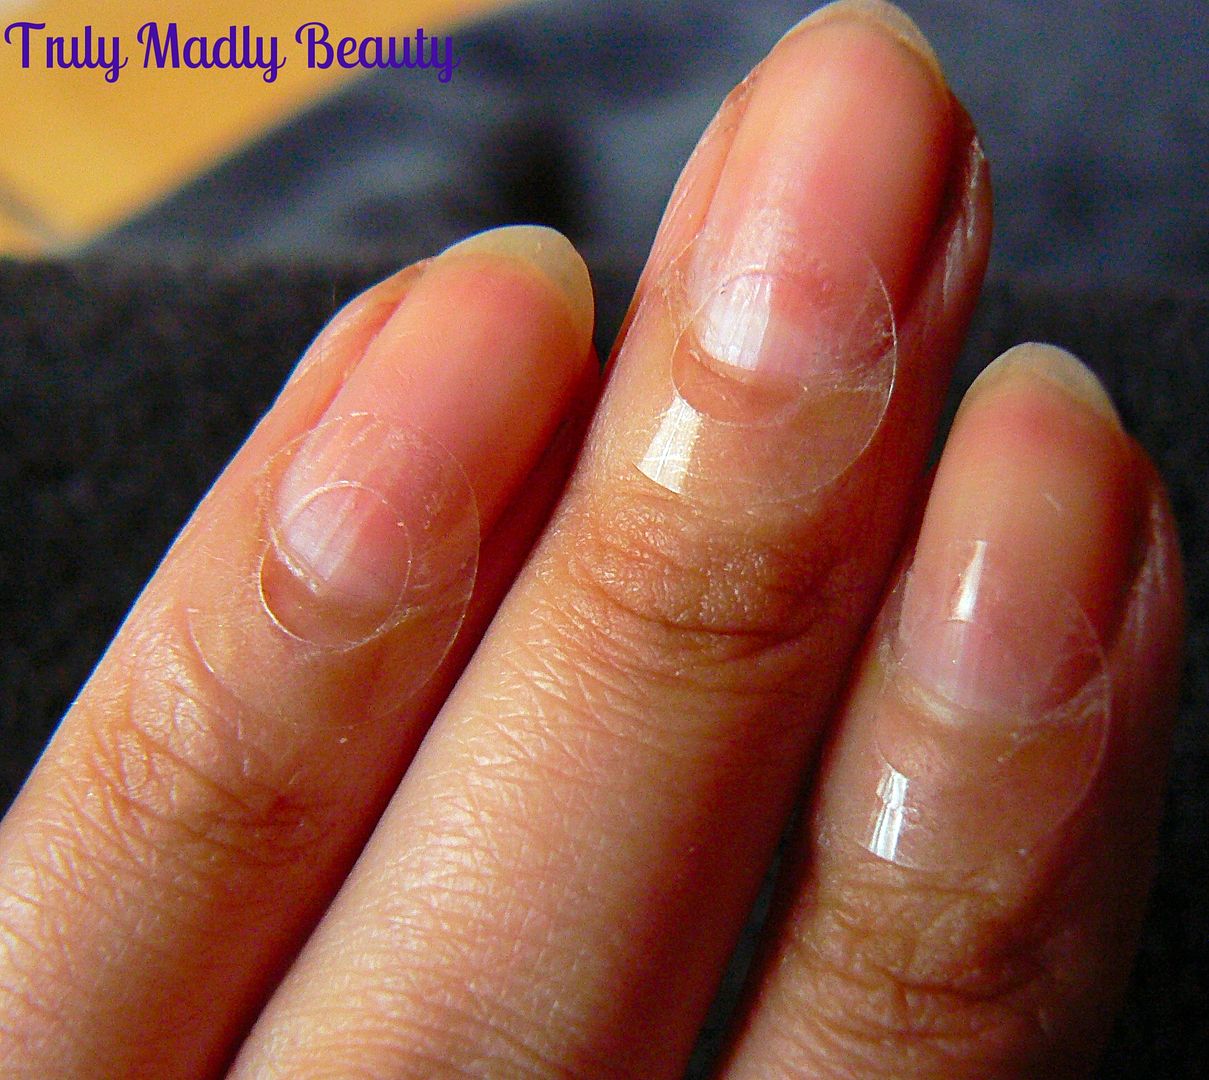
First you need to apply your polish whilst leaving a semi-circle gap for your Dream Catcher. I went for a lovely cream nude courtesy of Models Own HyperGel in Naked Glow.


To help create the curved space I simply used some hole punch reinforcer stickers which are perfect for this. Just stick these onto the bottom half of the nail as shown.


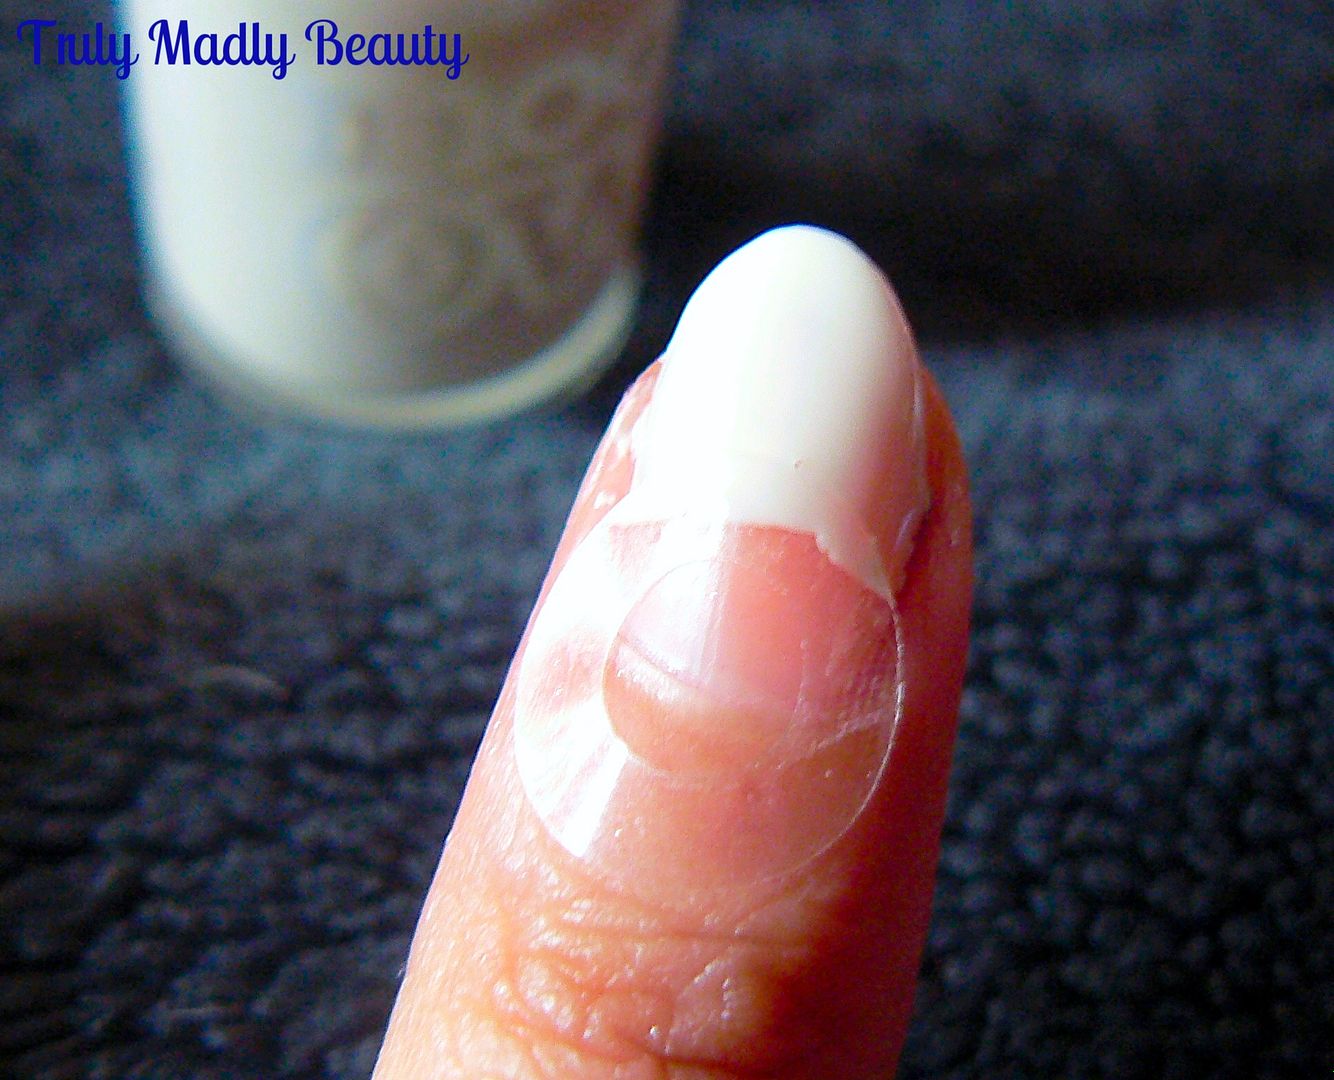
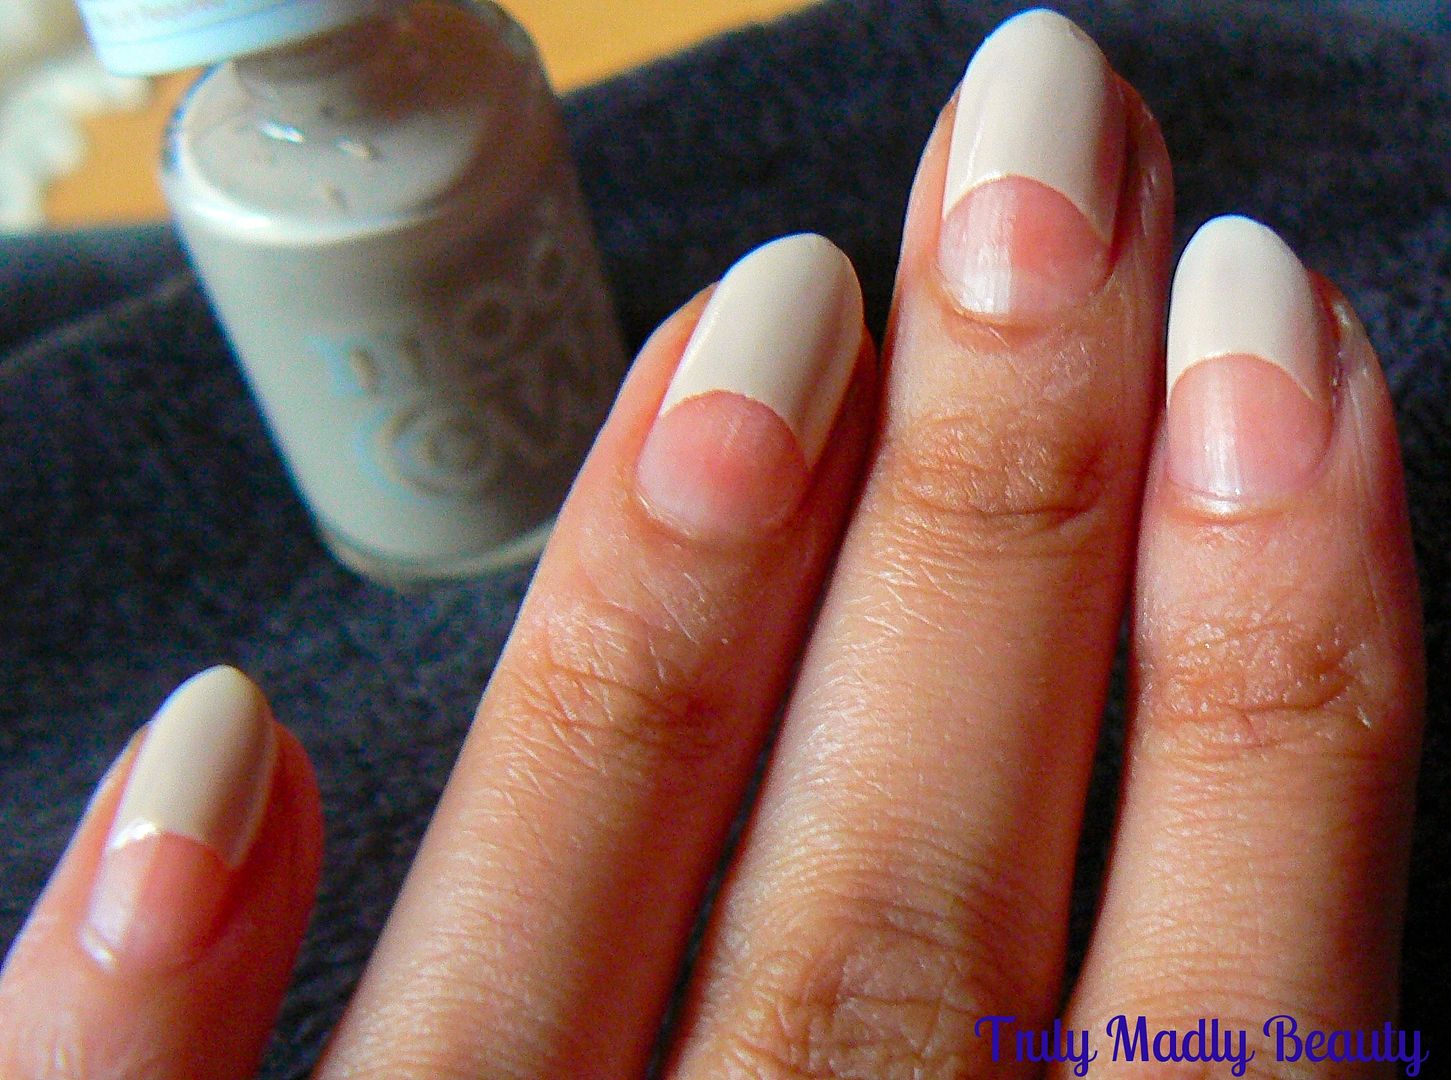
As the formula of the HyperGel polishes is quite thick I got away with applying just a coat for a nice opaque finish. Once applied remove the hole punch sticker whilst the polish is still wet (using a tweezer makes this task easier) & clean up any smudges with a fine brush & acetone.


Now to get to drawing your design. Grab your black polish, or whichever colour you like, & a fine nail art brush. In to the bare nail space apply a criss cross net pattern by drawing 3 diagonal lines & 3 more on top of those in the opposite direction. Apply a thin line of the black polish around the curved edge of the nude polish.


Then using a dotting tool, apply 3 dotted lines coming down from the net, gradually reducing the size of the dot & making the centre line slightly longer than the others. And hey presto you have your Dream Catcher!


And now time for the glitter! Here I've used a holo glitter from ColorClub. Using whichever shade you like, grab your dotting tool again & apply a blob of the glitter at the bottom of the two outer streams. 


At the bottom of the centre stream I applied a pretty rhinestone, but you can stick with the glitter if you prefer!


Wait for your polish to dry for a wee bit before sealing your design with topcoat. And thats it!


Hope you liked this design my lovelies, do let me know if you give it a try! Thanks for reading!

Lotsa love to ya!


1.26.2017

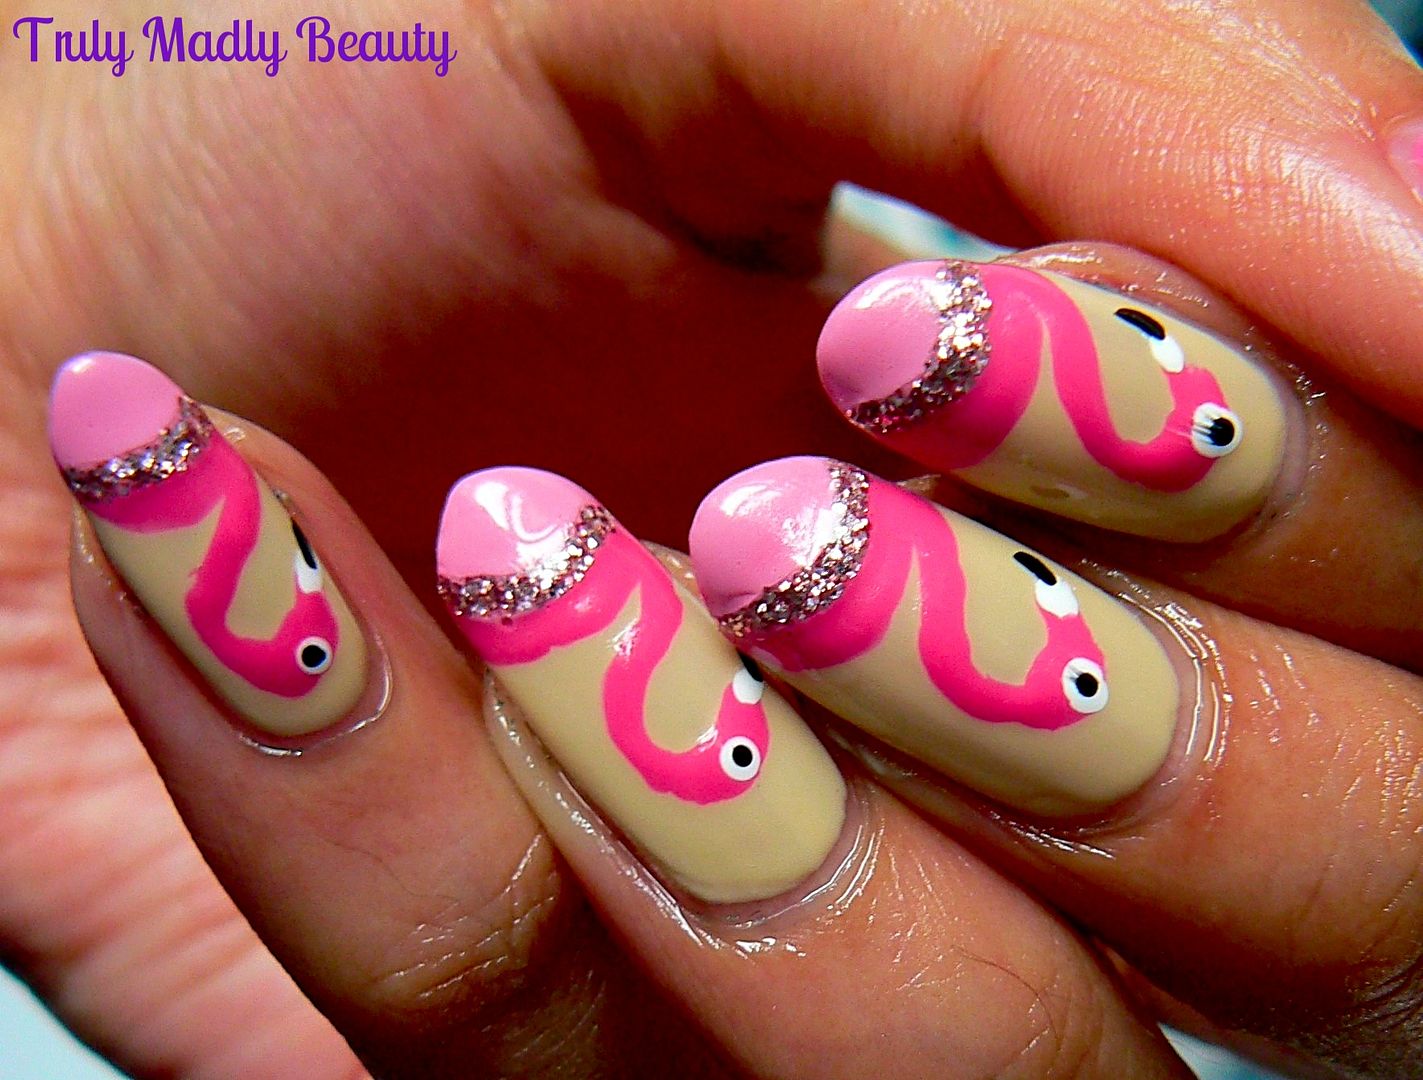
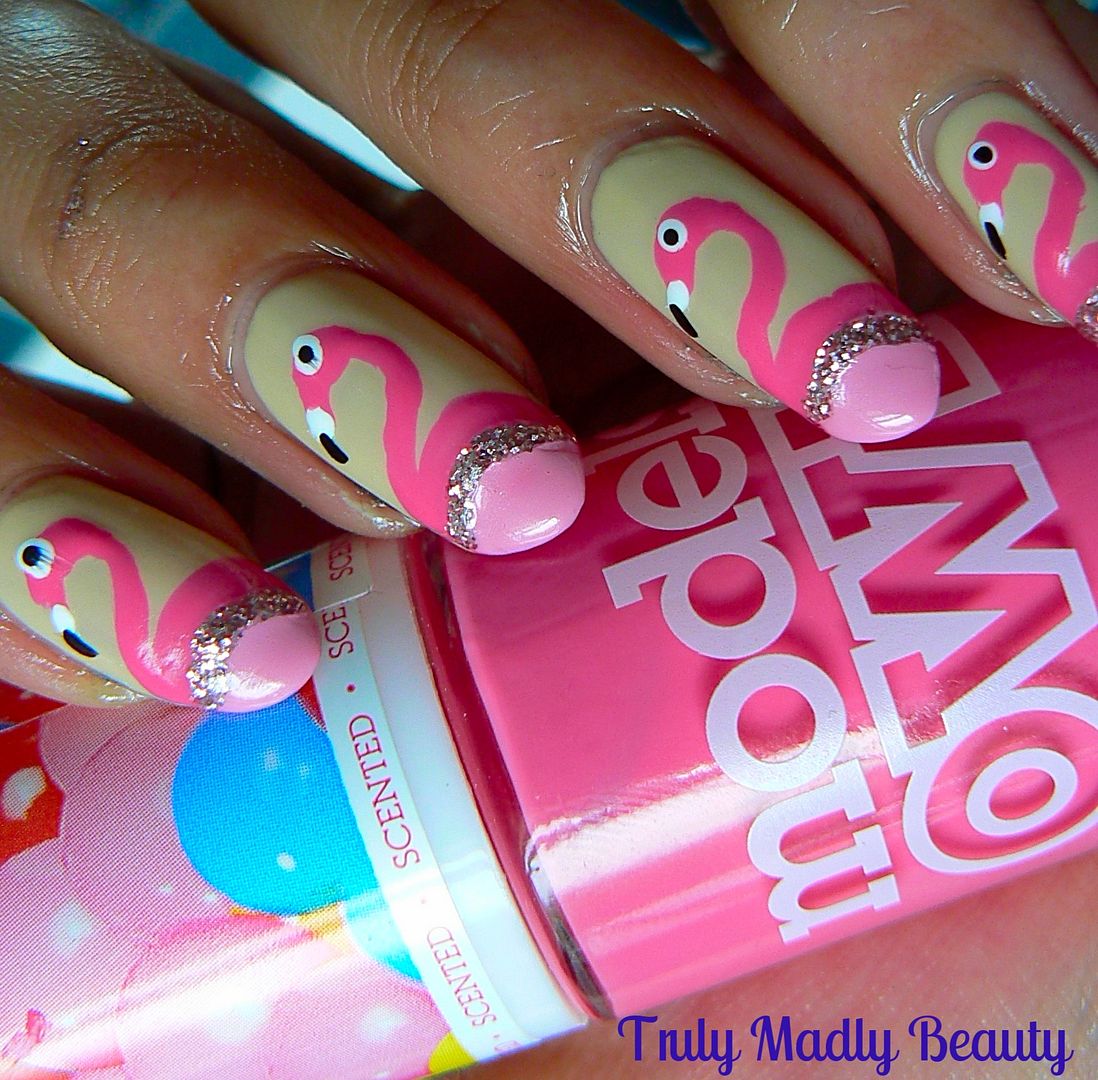
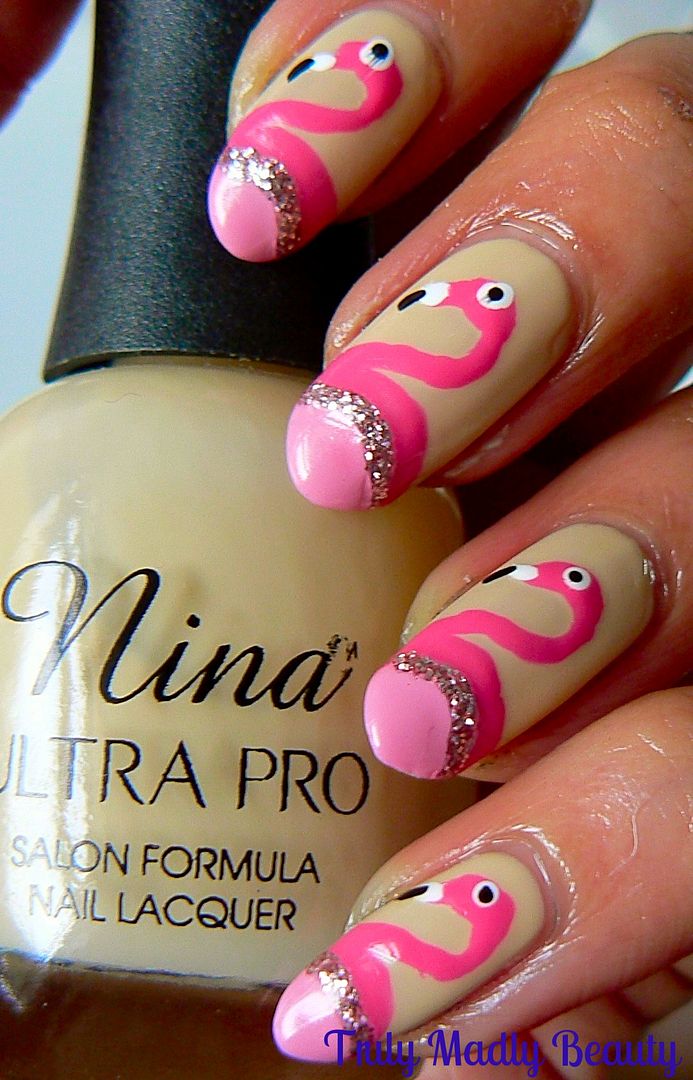
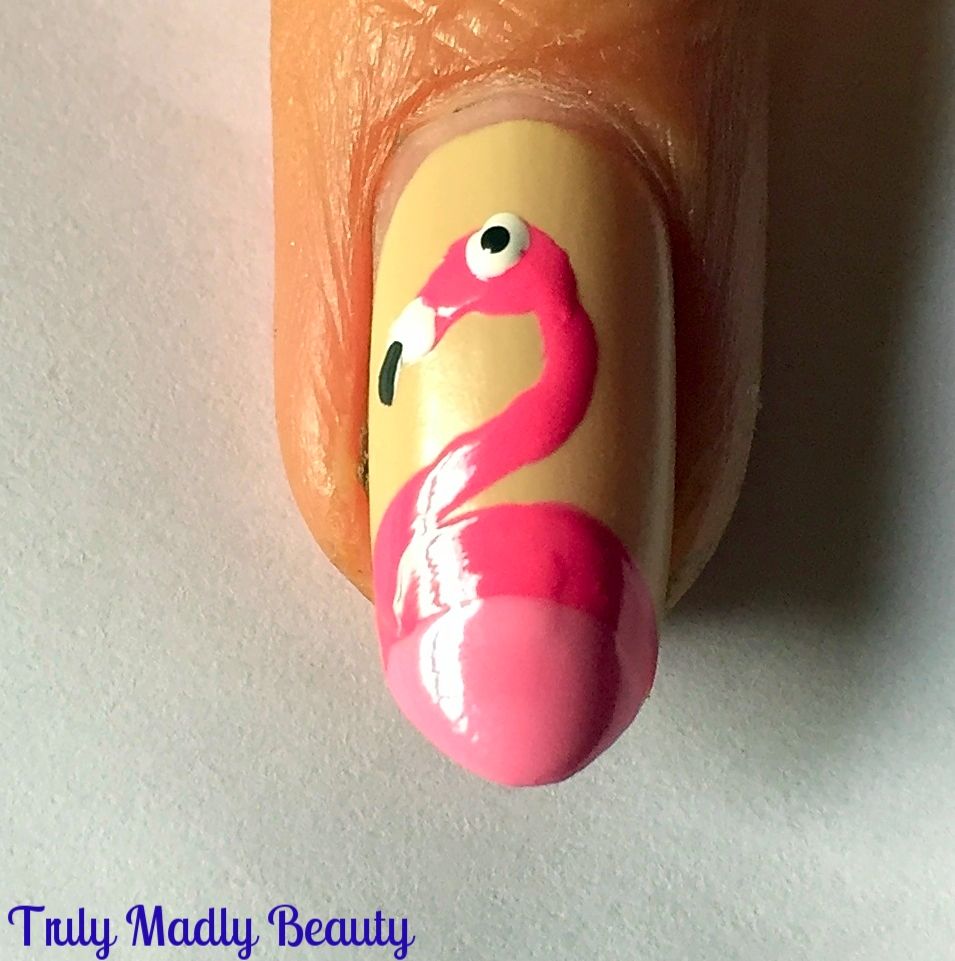
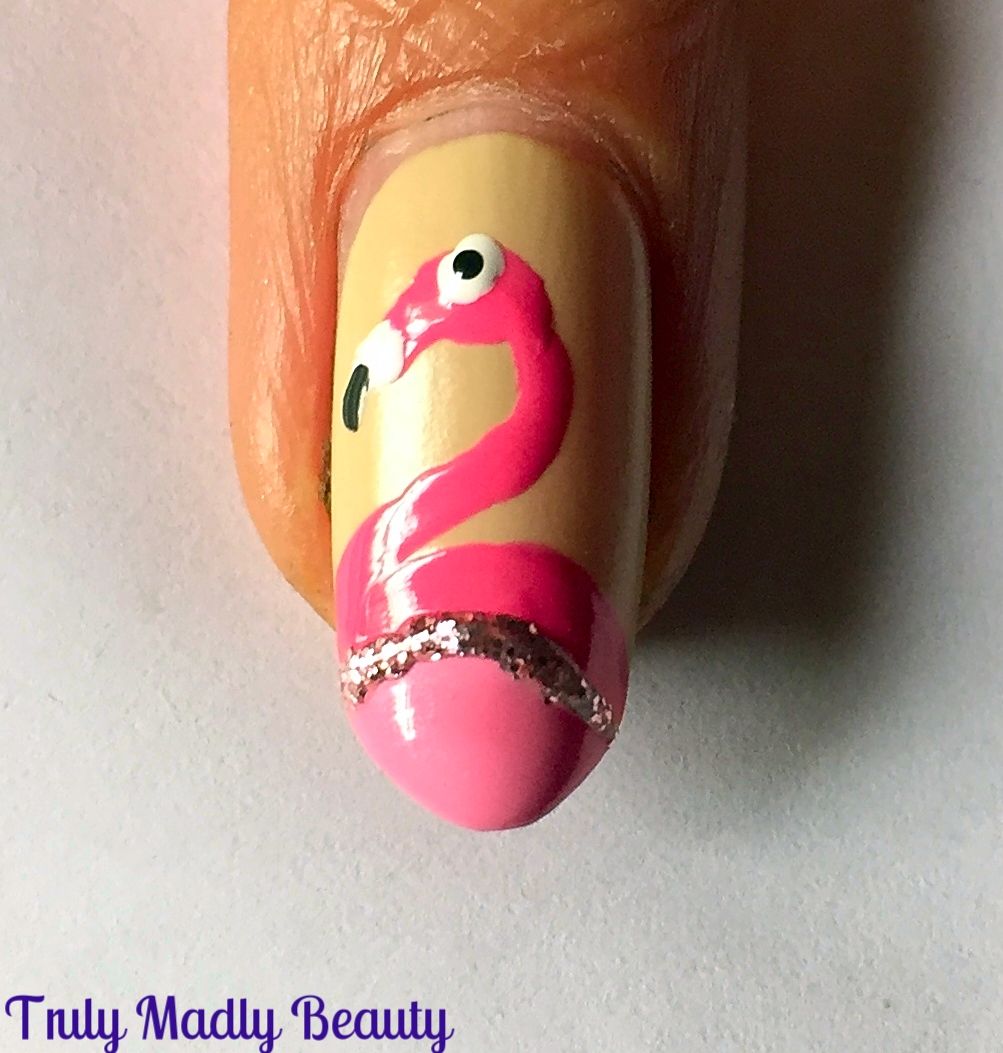
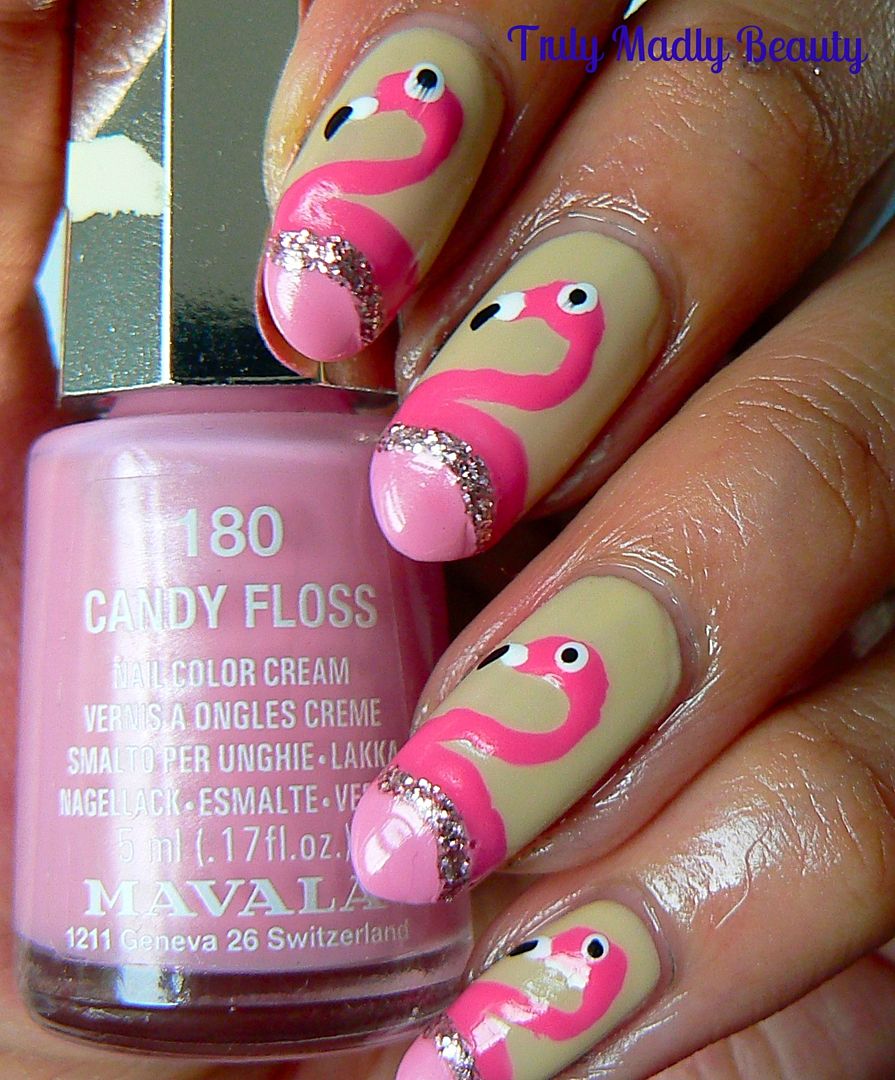
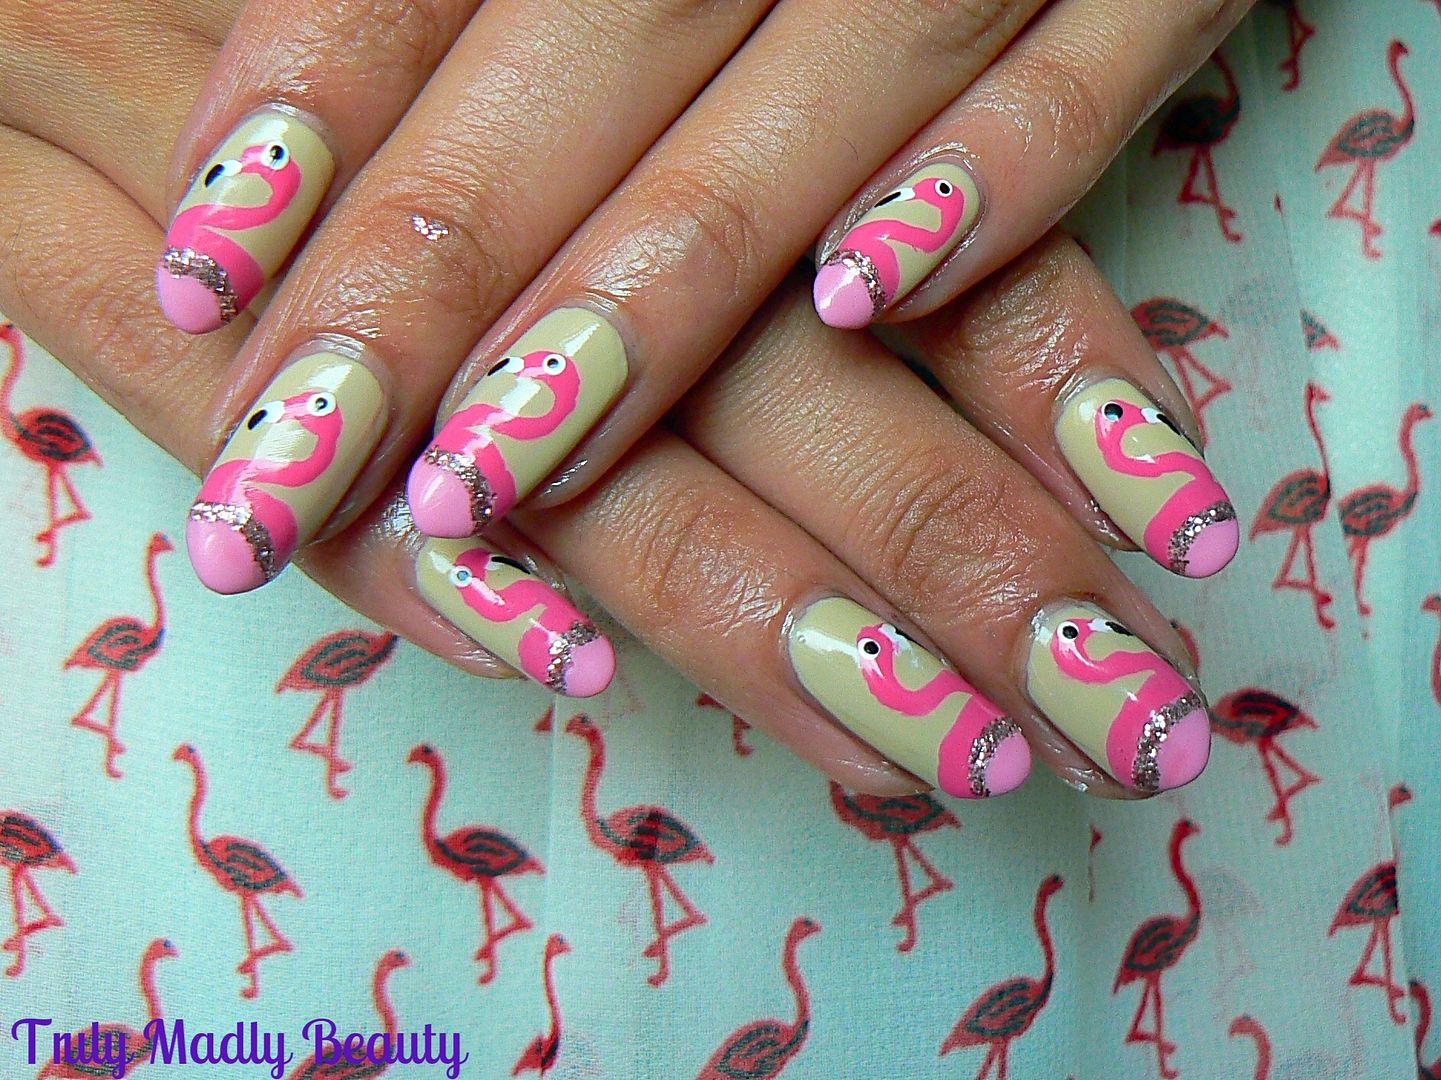
NOTD - Flamingo Nail Art Tutorial!

Hello there lovely readers!

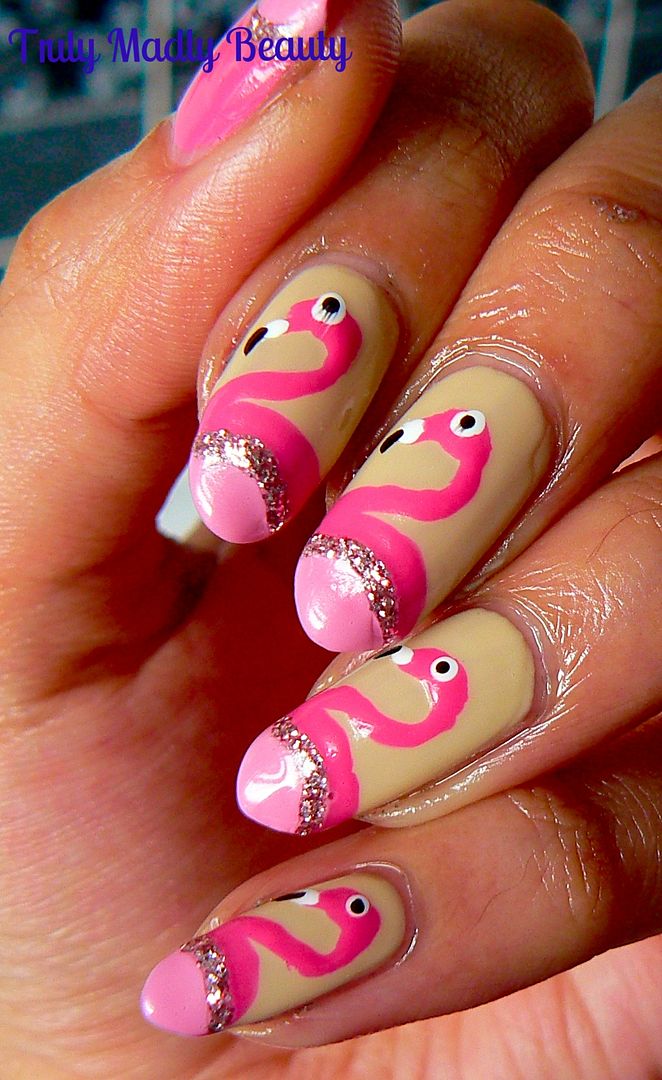
To celebrate almost making it through the first month of 2017 intact I have a quirky Friday Funday (okay its technically still Thursday but who's counting?) manicure for you that succeeded in putting a smile on my face with its featuring that most delightful of bird species...flamingos! 


Inspiration for this actually came from a darling flamingo print dress I picked up in an independent boutique in London. Once I had that on...I knew I had to have me some flamingo nails to match :)


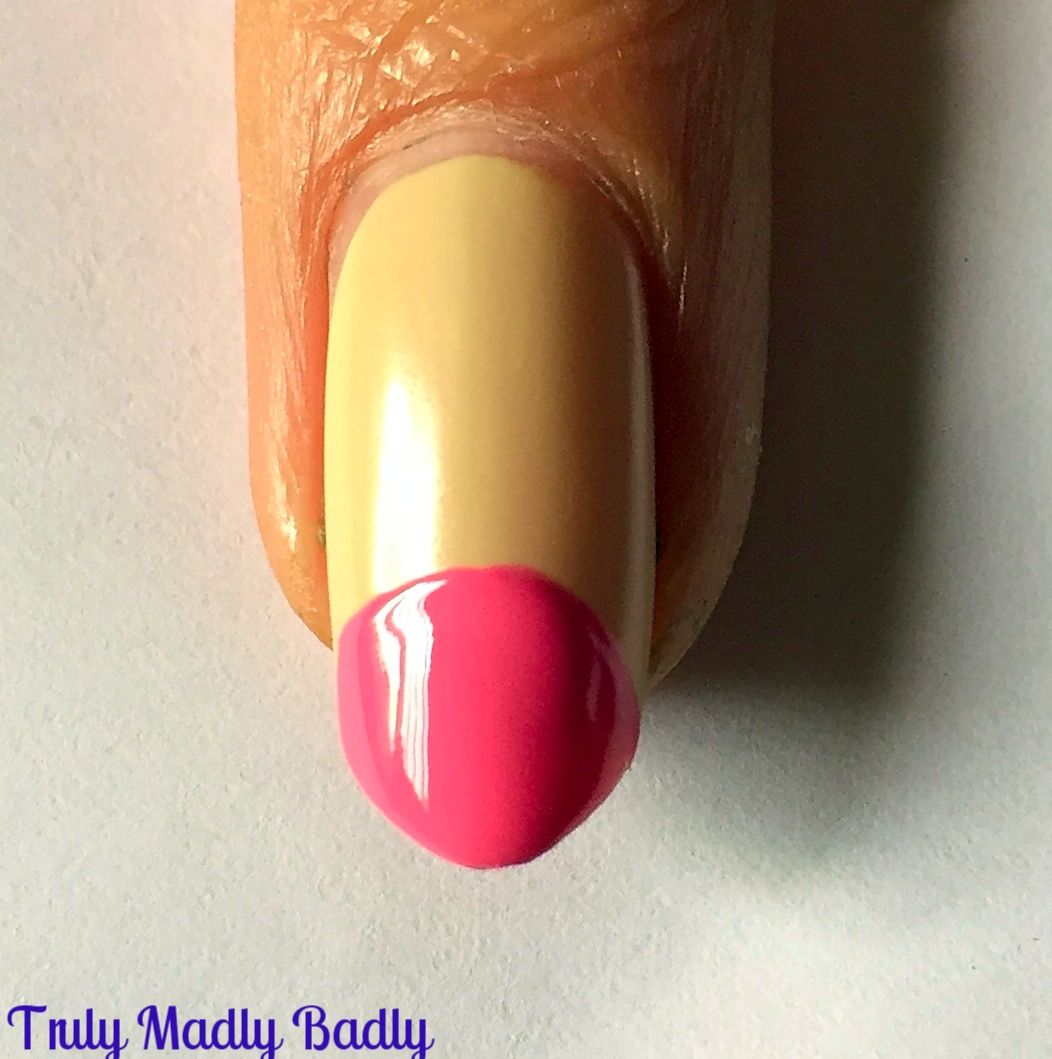
And creating these flirty flamingos is easier than you might think, to show you just how easy, I've done a step by step pictorial showing you each stage so that you can rock these funky birds too! Just keep on reading beauts...


Start with a nice neutral tone base to make those flamingos stand out, I've used one of my favourites, Rum & Reggae by Nina Pro Ultra. You can also choose to leave the nail bare with just clear base coat if you wish!


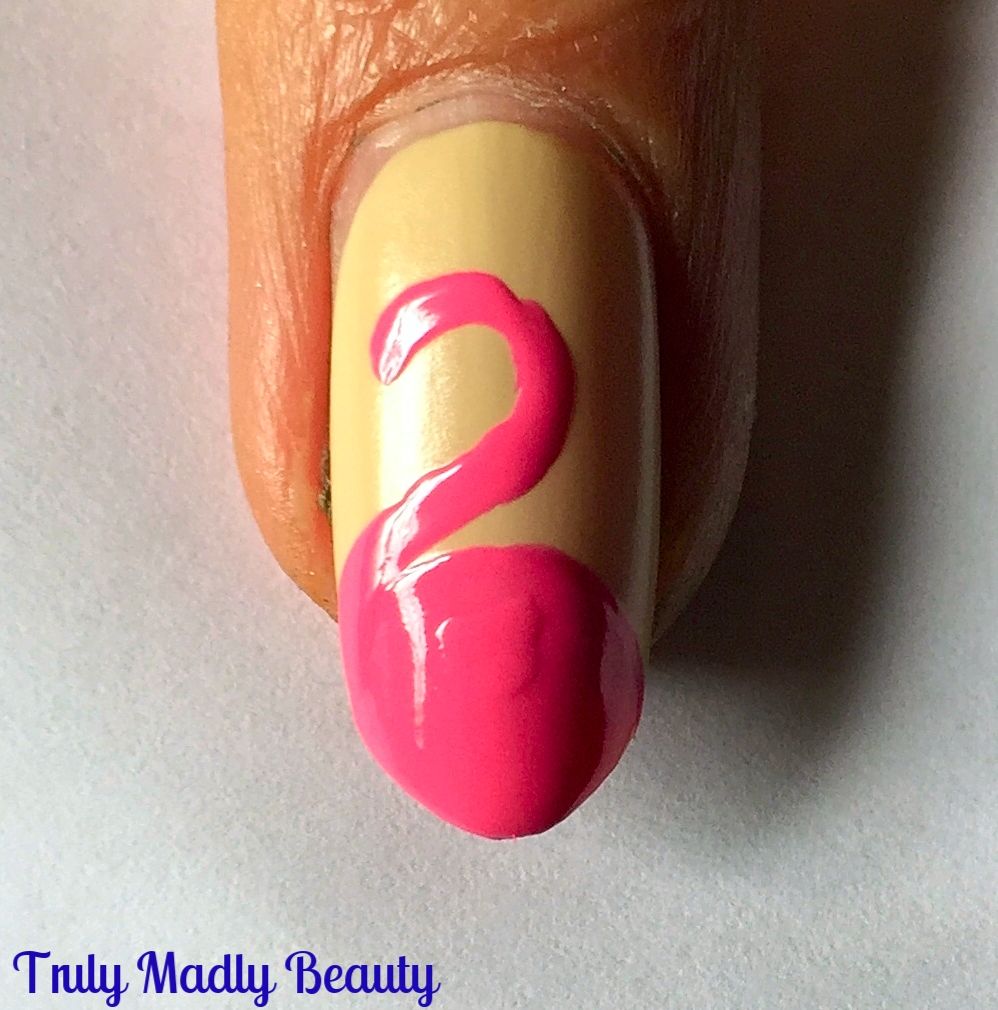
Now to begin creating your flamingos, start by applying a half moon/ semi circle of pink on to the tip of your nail as shown below, here I've opted for Models Own Gumballs from their sweet shop collection & yes it smells like bubblegum!


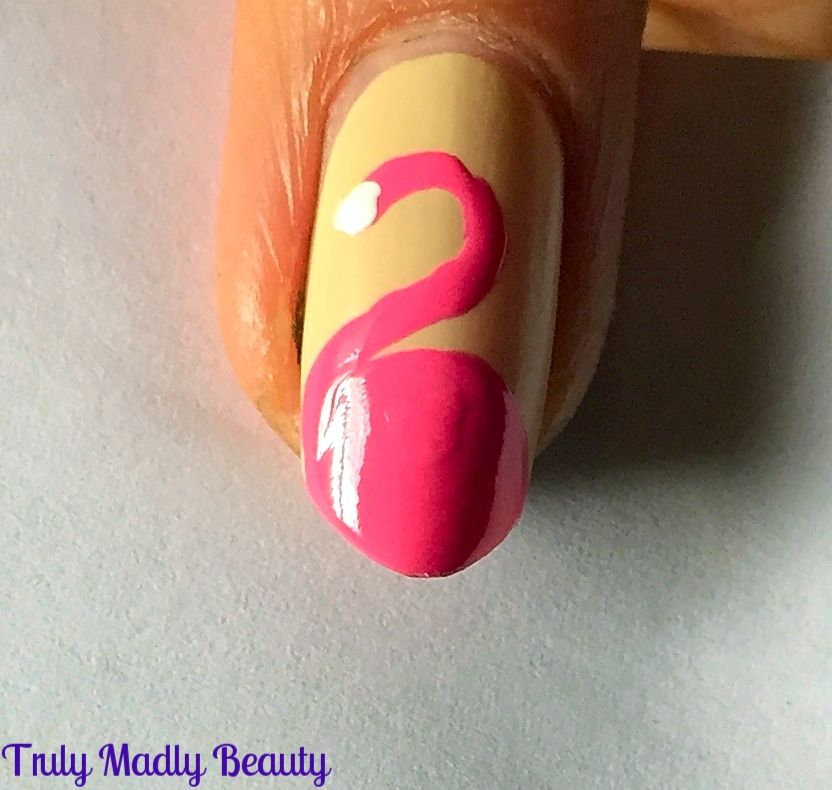
Next, using the same pink & a fine nail art brush, draw on a curved hook from the top of your half moon for the neck of the flamingo like so


Then grabbing a little bit of white polish, using another fine nail art brush or a dotting tool/toothpick/bobby pin apply a small blob of white at the tip of your pink hook


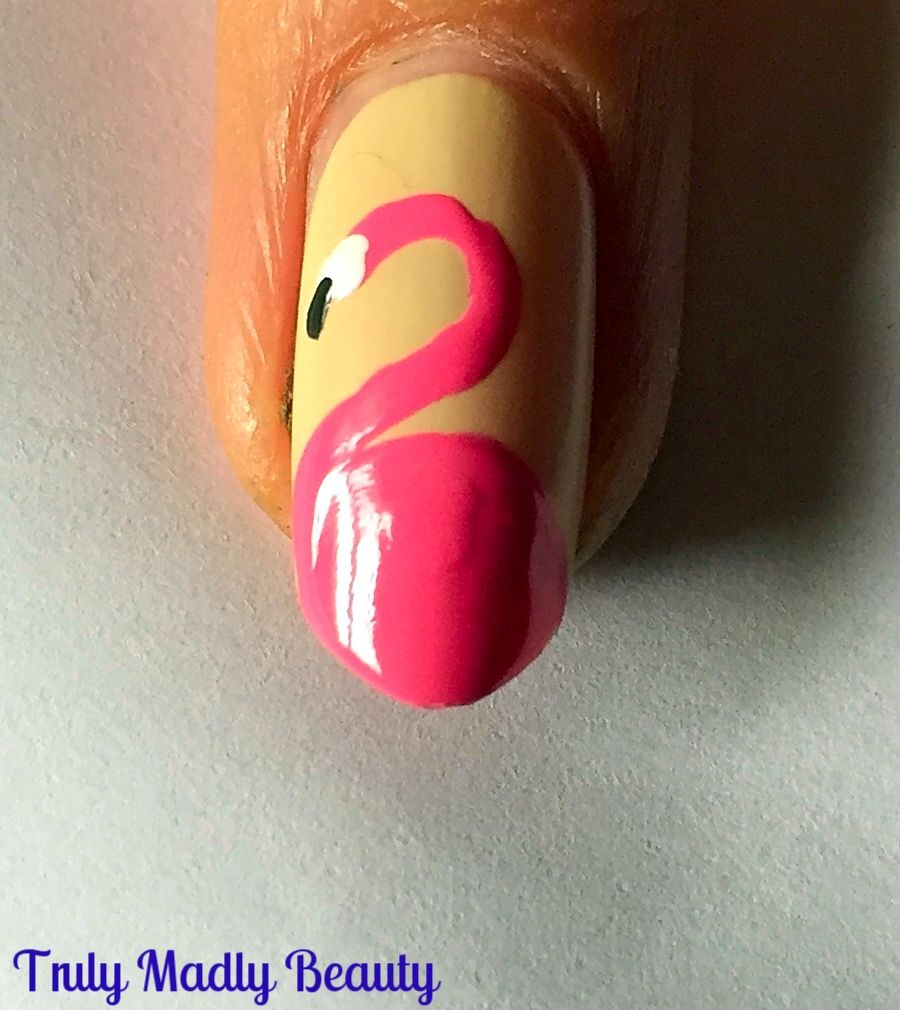
Now using some black polish & the fine nail art brush again, add on a small curved black beak to the edge of the white as shown, you can slowly see your flamingos coming together!


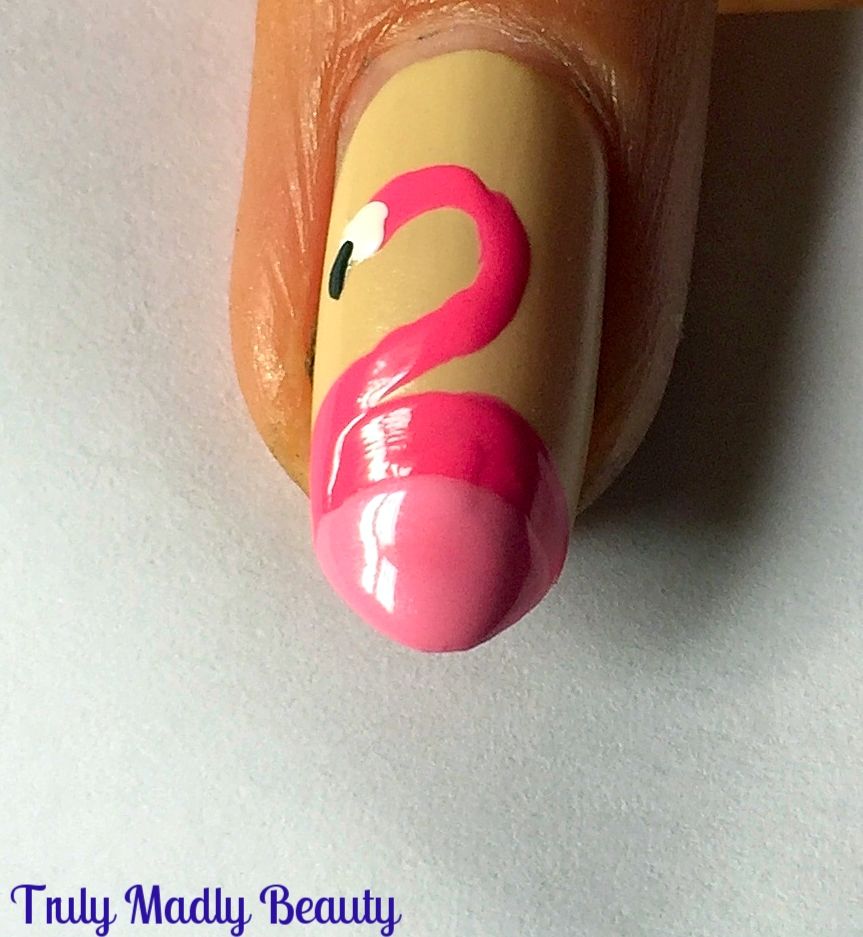
Next its time to grab a lighter shade of pink to what you've already used to add definition to the body, here I've used Mavala Candy Floss & applied a smaller little semicircle on top of the darker pink.


The eyes come next & are simply a dot of white with a finer dot of black in the centre, you can add a bit more pink for the head if you need to


And finally for a finishing touch I added on a curve of sparkly glitter courtesy of Models Own Pink Fizz which is optional of course but who can resist a bit of sparkle?


Cover your design in a a nice thick slick of topcoat & you have your flamingo's!


So easy right? I do love a quirky mani, its been a while since I've done a design like this & I've missed them! For me mani's are therapeutic in a way, having fun & vibrant nails always helps make me feel more content & positive & this definitely delivered on that :)


Do let me know if you give this a try, would love to see! Thanks as always for reading, till next time!

Lotsa love to ya!


1.19.2017

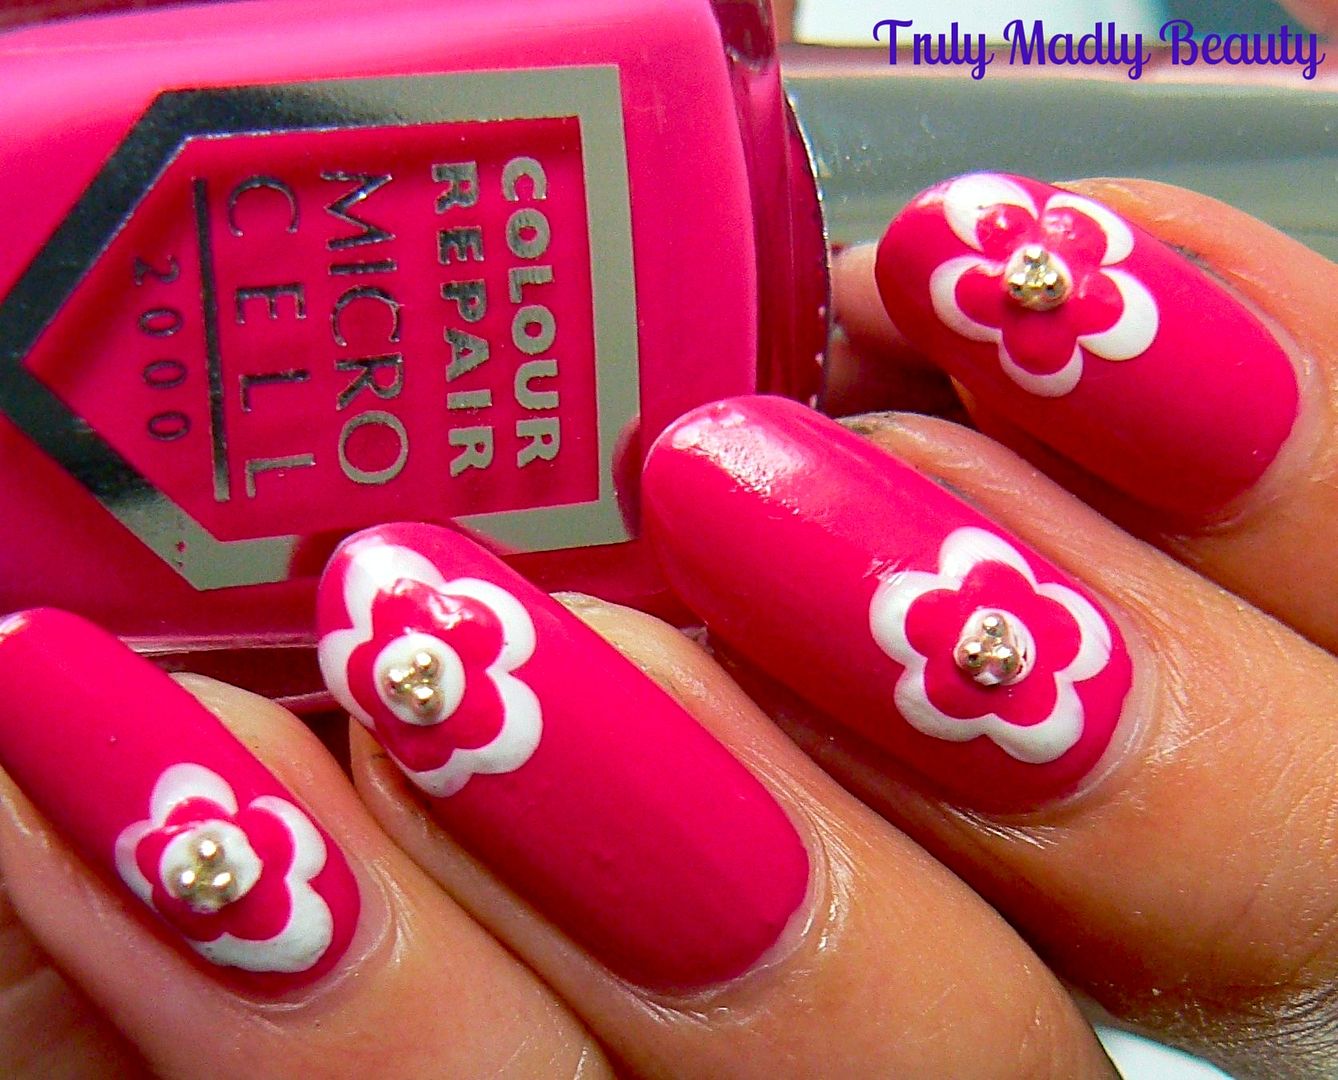
NOTD - Easy Dotted Flower Tutorial ft MicroCell Rapberry Kiss

Hello there lovely readers!

Not long ago I blogged about, what I can honestly say, was THE BEST beauty find of 2016 for me. The product in question is the MicroCell Nail Repair nail treatment which has literally changed my world. I am FOREVER recommending this little miracle product to everyone & now very rarely use any other base coat. No other treatment has made my nails grow as strong & healthy as they are now after using this magical elixir.

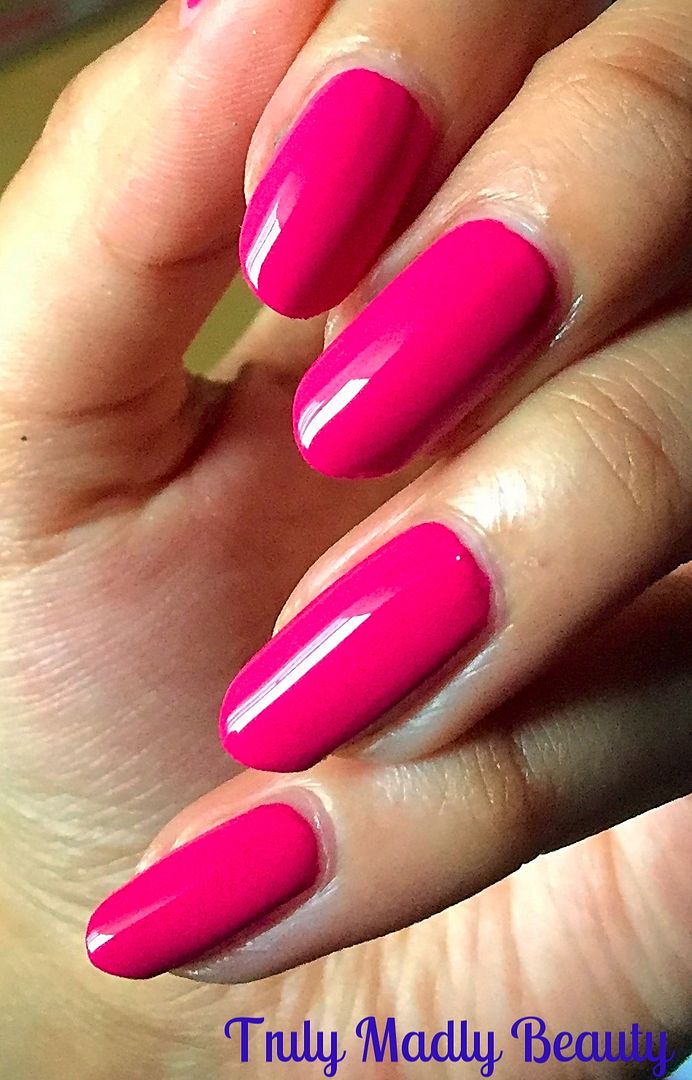
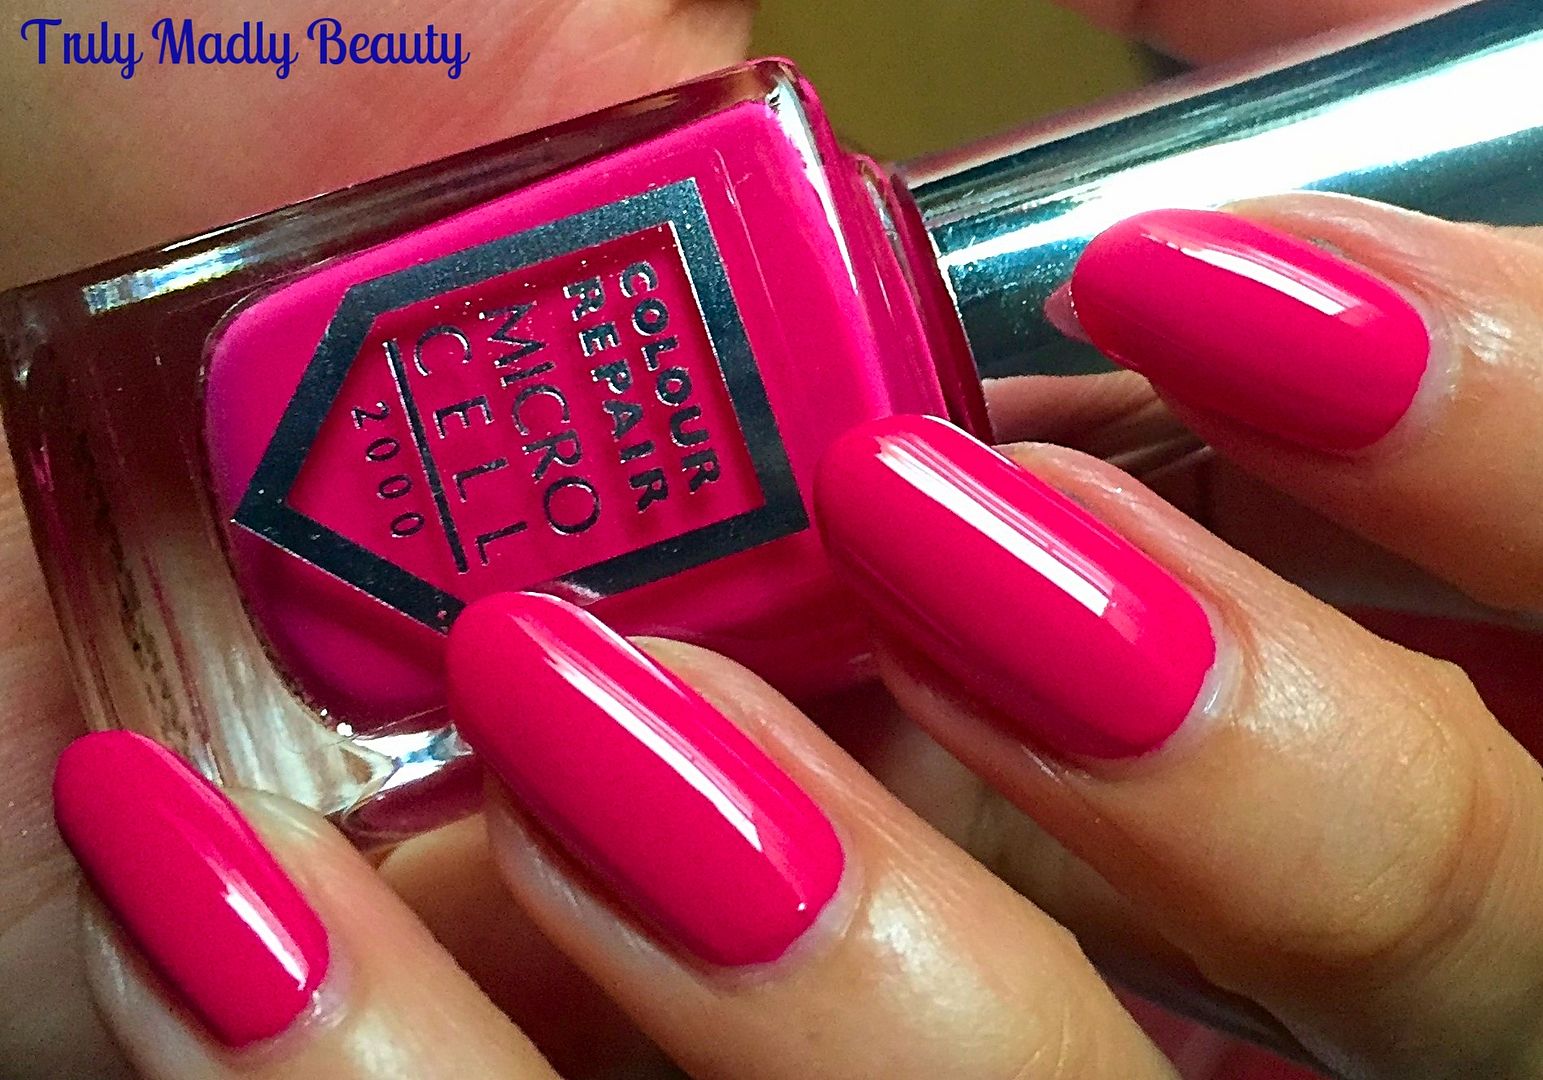
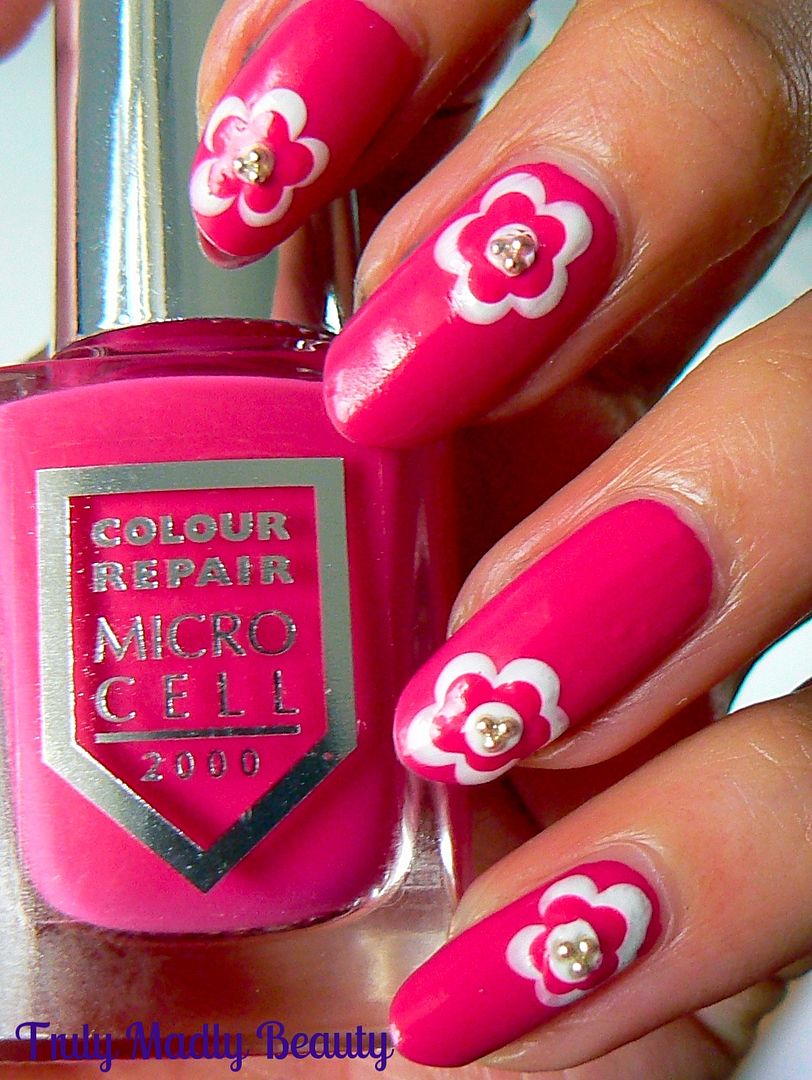
The brand MicroCell also have a range of other nail products including topcoats, oils, tools as well as of course my favourite...pretty polishes! So today I have one of the divine shades available in a gloriously vibrant pink called Raspberry Kiss*.


Isn't it a beaut? This here was two coats applied & I'm incredibly impressed with the quality of the formula.

The polish is so pigmented & vibrant in colour & thick in consistency but far from gloopy & glides onto the nail beautifully leaving a glossy almost gel like finish.


What makes this polish stand out even more so for me is that it also contains built in strengthener with the addition of silicone & calcium as well as green alga & diamond gloss, resulting in a dreamy formula that will last longer whilst protecting against flaking & staining.


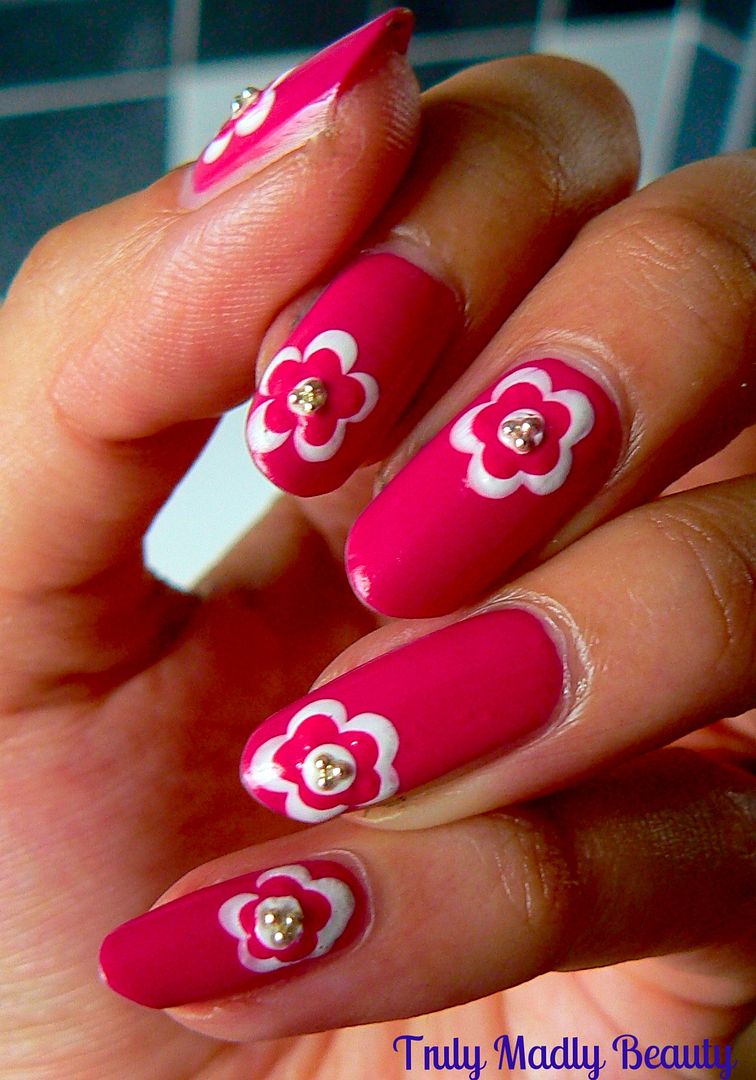
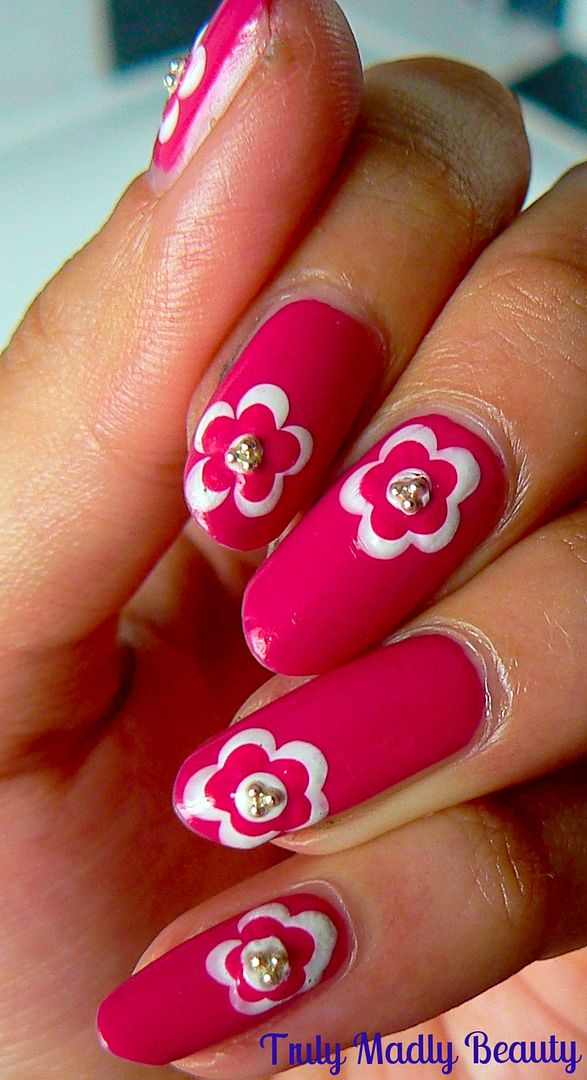
I wanted to do a spot of nail art with this pretty shade, so applied these pretty dotticure flowers with alternating petals which are super easy to do. Read on to see just how...


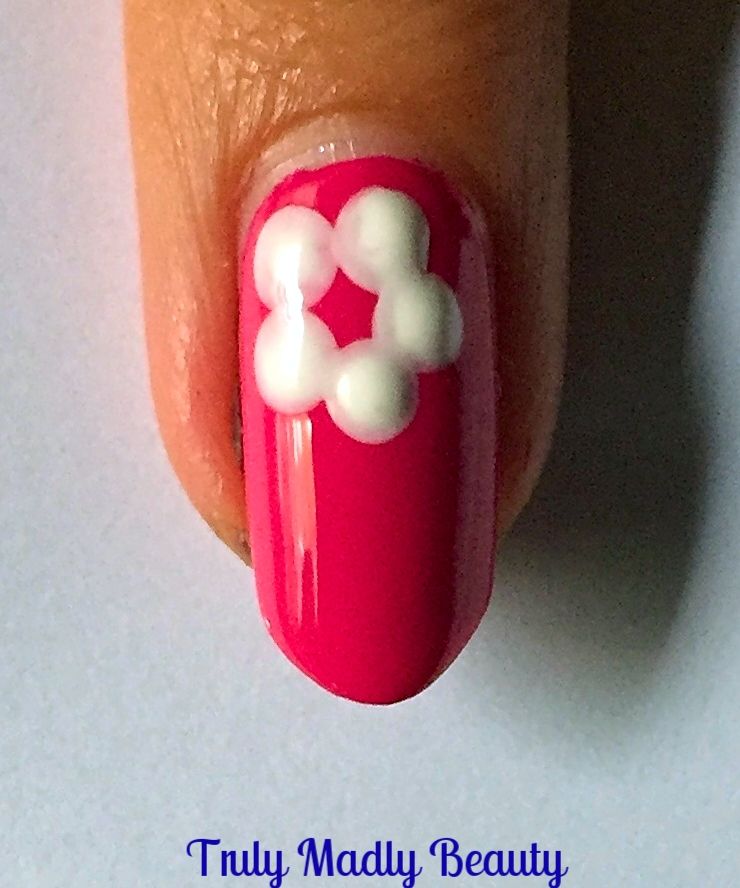
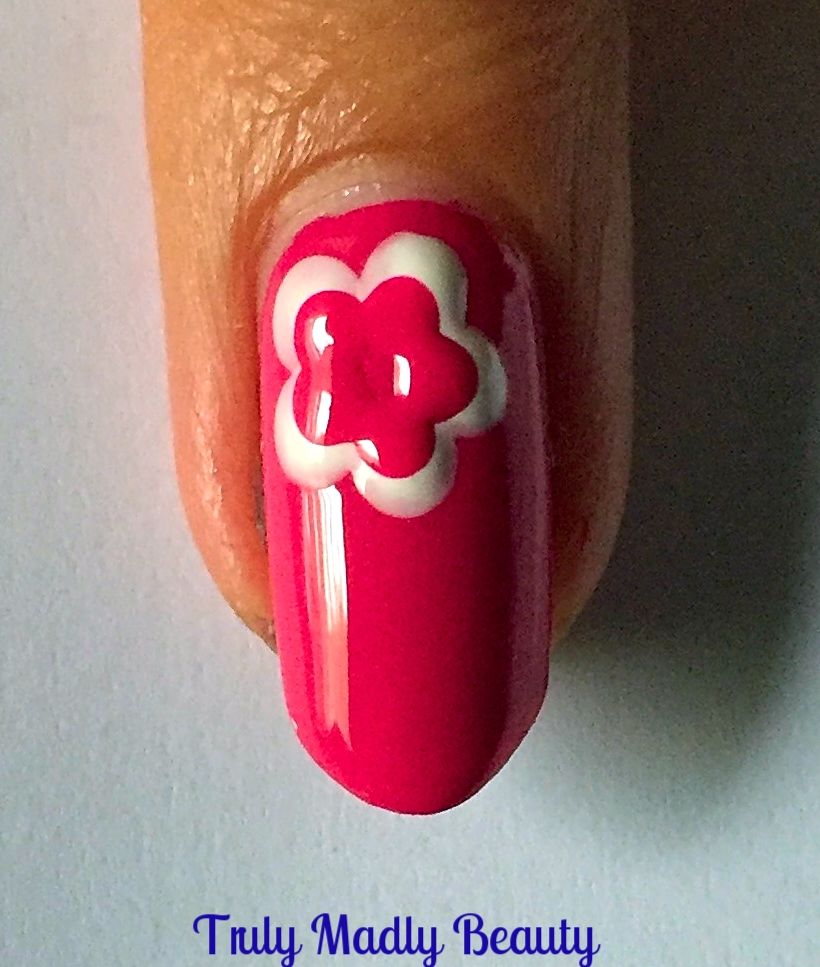
You can use any other alternate colour to your pink but I decided to use white as I thought it would be a nice contrast. Grabbing your dotting tool or a bobby pin, dip into your white & apply a circle of 5 white dots like so


Next, using your original pink & a smaller dotting tool/bobby pin, apply another circle of smaller dots on top of the white


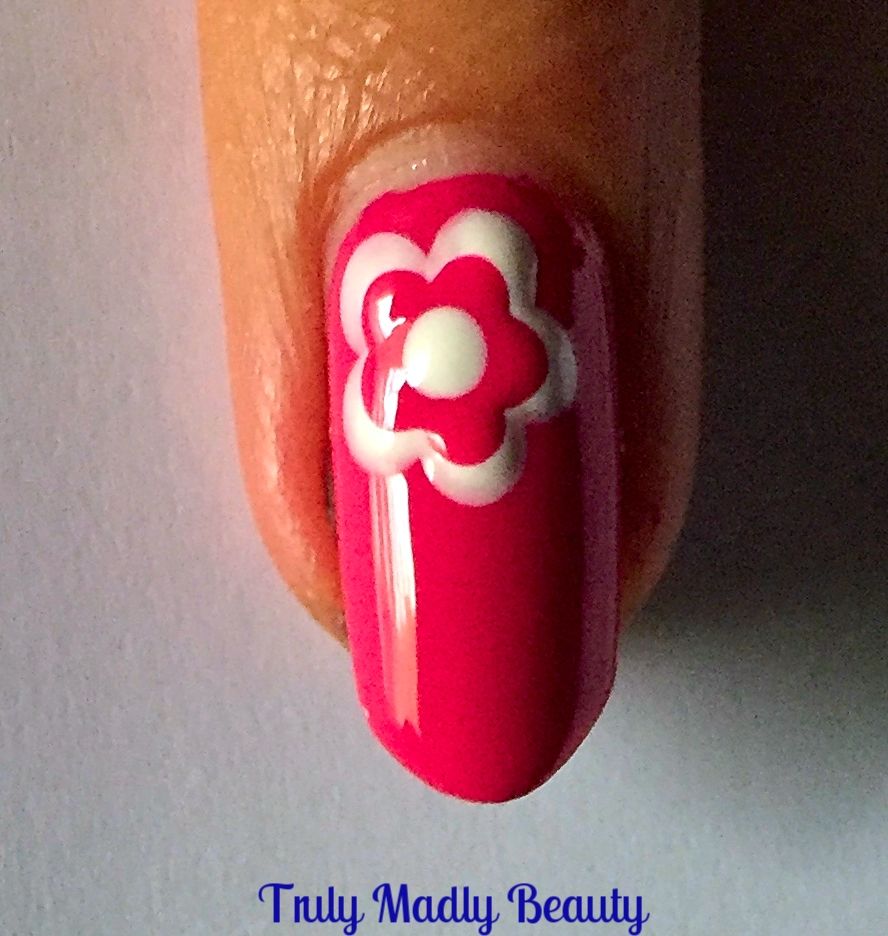
Then using the white again, use your bigger dotting tool again to apply a final white dot in the centre


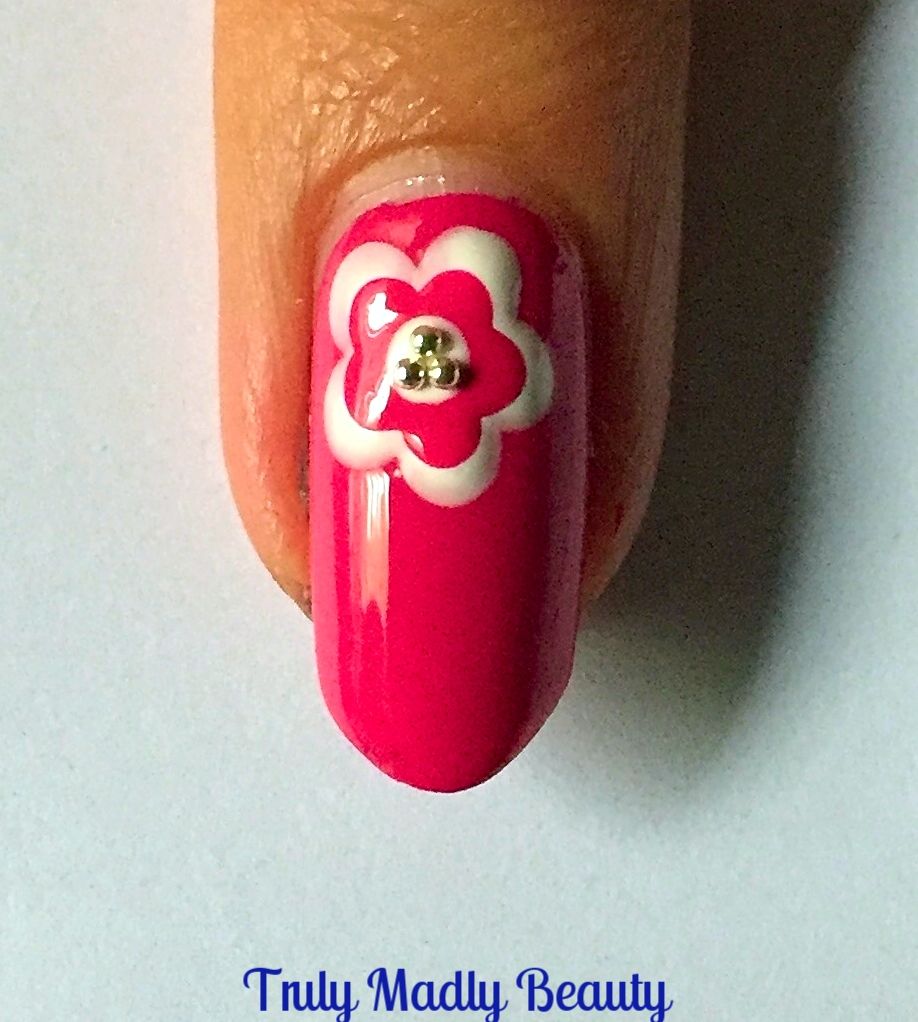
This is an optional touch but I couldn't resist adding a few small silver beads to the centre of my flowers for a bit of pow wow.


Finish with topcoat & thats it! Told ya it was easy :)


You can find MicroCell nail polishes (RRP £14.95) & range of nail care products including my HG Nail Repair treatment online via their website HERE as well as on Bath and Unwind


What are you waiting for? Go go go! Thanks as always for reading beauts! Let me know if you give this super easy floral nail art a try!

Lotsa love to ya!

Disclaimer - * products featured were sent to me for my consideration. I am not affiliated with the brand nor paid for this post, this review has been as always my 100% honest opinion! :)