Hello there lovely readers!
I have some new nail art to share but before then how's about a bit of a catch up before getting to that...
So...despite the year starting off in not the best of ways with bush fires, apocalyptic storms & of course being hit with a worldwide virus pandemic...I am still determined to try & achieve the goals I wanted to this year, especially after having such a rough 2019. This includes travel (though naturally one is holding fire for now...) better health (I finally bought a bicycle & will be attempting regular cycling when I can!) & one other thing that I have wanted to do for the longest time which is...POTTERY!

Showing posts with label White. Show all posts
Showing posts with label White. Show all posts

4.09.2019
NOTD - Peek-A-Boo Panda Nails for #artists4earth
Hey there lovely readers!
Coming at ya with some cuteness today with these sweet Peek-A-Boo- Panda Nails, not just for the good vibes because who DOESN'T want an adorable bear on their nails, but more importantly for a good cause too!

4.09.2018
NOTD - Dr Seuss The Cat In The Hat Nails
Hey there lovely readers!
Something a tad, crazy & quirky, for today's nail art I think is an apt way ti describe this design hah!

Something a tad, crazy & quirky, for today's nail art I think is an apt way ti describe this design hah!
10.20.2017
Halloween Nails - Day Of The Dead Sugar Skulls!
Hello there lovely readers!

Time for another Halloween mani & I believe we are on number 4 now! The next prompt that came up in the Instagram nail art challenge I'm currently partaking in was Skulls. Well this gave me the perfect opportunity to create some Day Of The Dead Sugar Skulls, perfick for Halloween & a design I've been wanting to do for ages!
7.03.2017
NOTD - Fourth of July Nails!
Hello
there lovely readers!
As
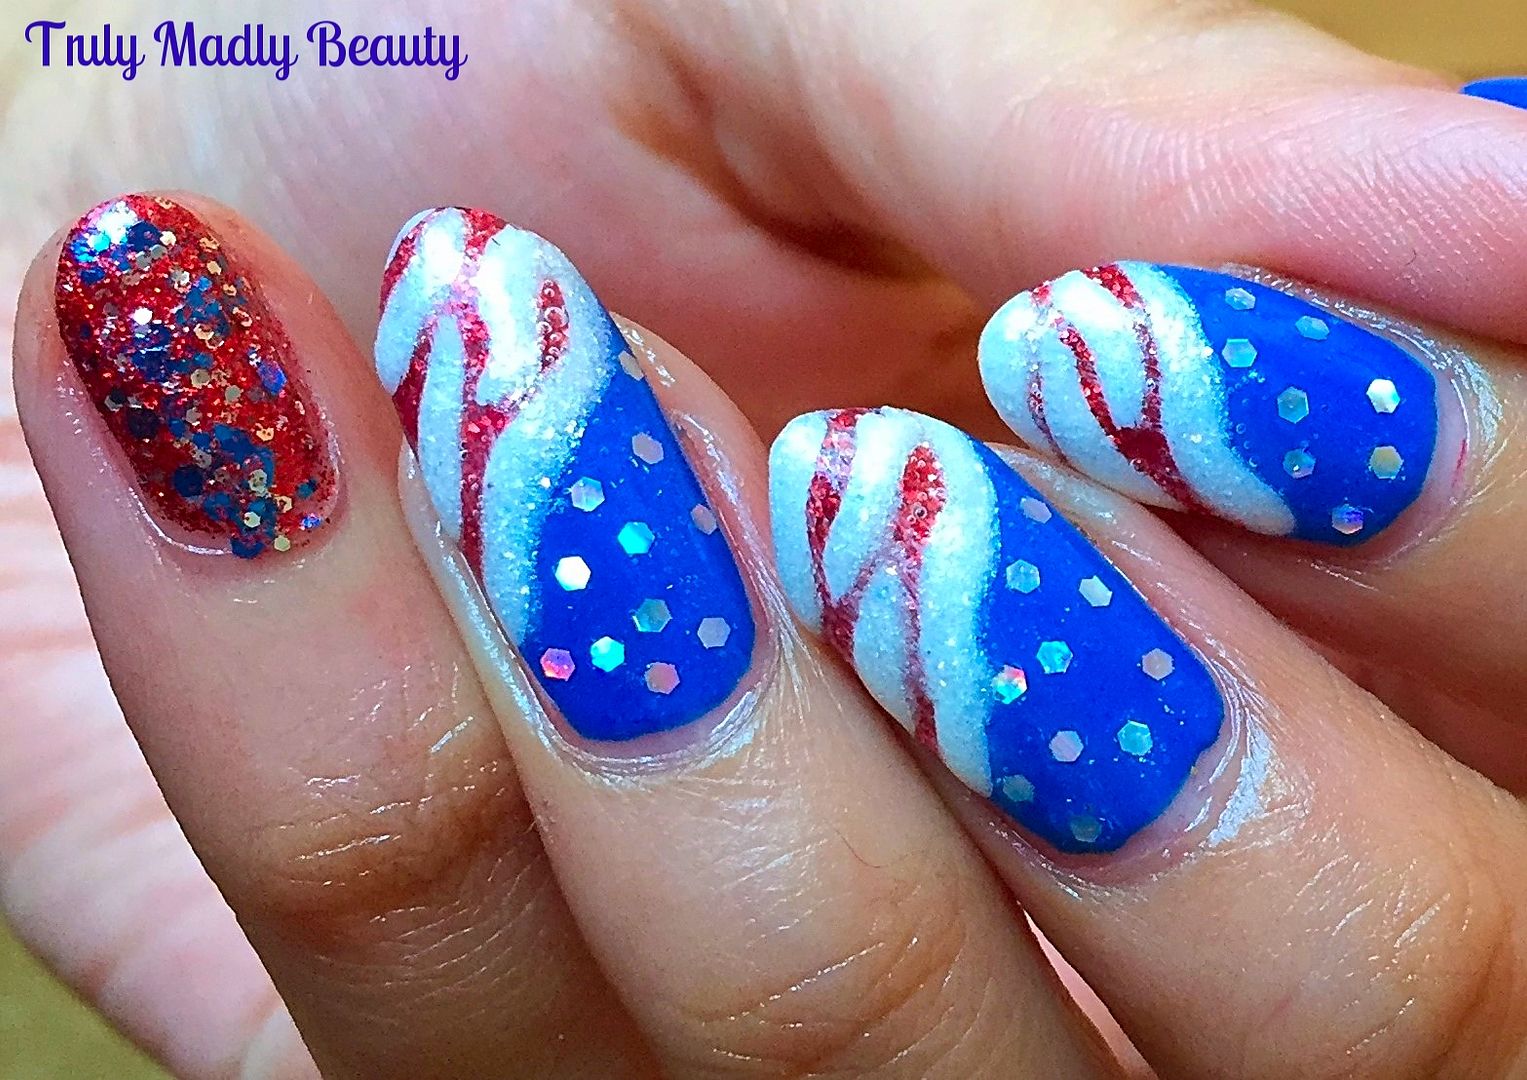
today's nail art has distinct red, white and blue vibes going on I
think its obvious what occasion is inspiration is here ;) Every year
I like to throw together a mani to mark my American cousins over on
the other side of the pond's Independence Day celebrations. Any
excuse to get my nail art on!
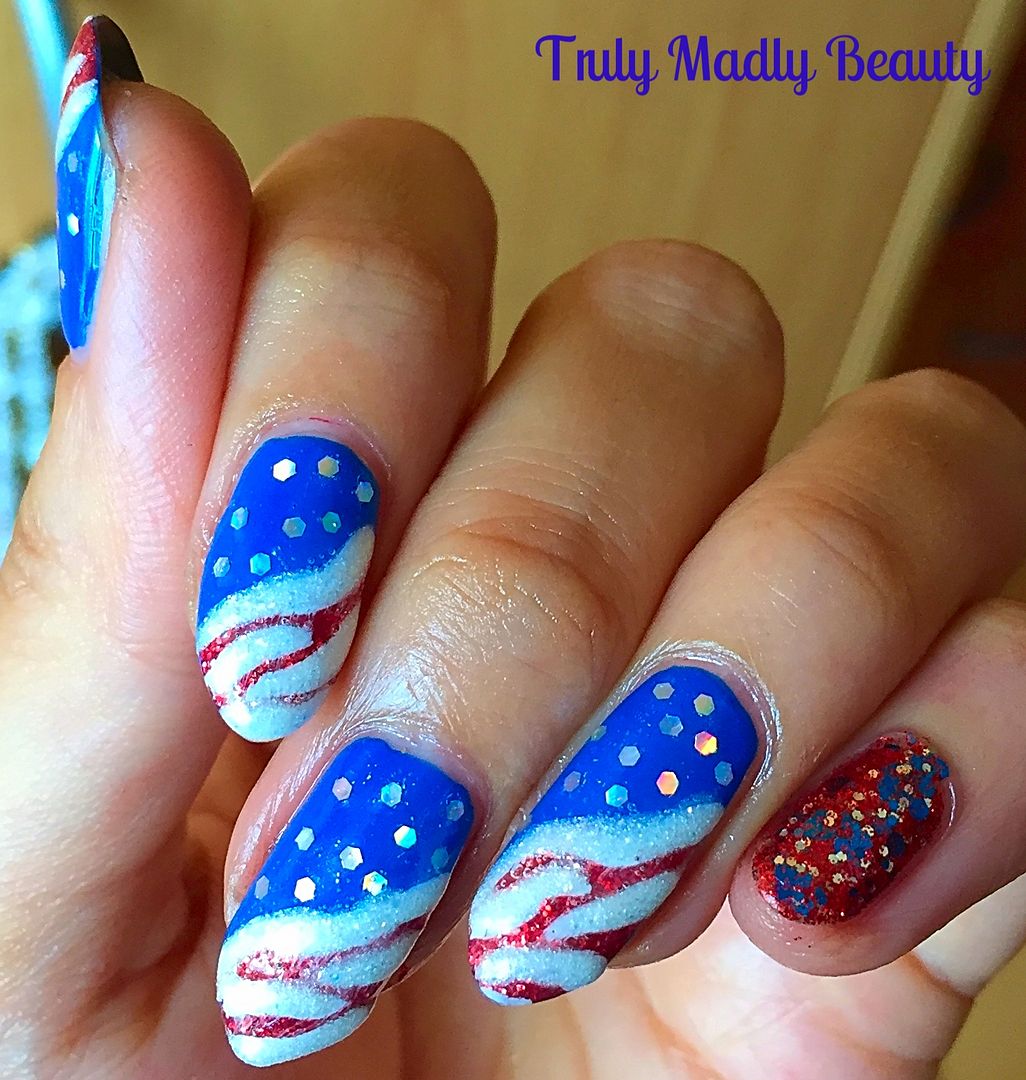
I
was muchos happy with my Fourth of July nails last year which
featured blue dripping glitter & a step by step tutorial so go
have a peek at those HERE. I loved them so much & didn't think I
could top them...maybe it was a mistake to go in with that attitude
as I really wasn't happy with how these ones for this year came out
but meh you win some, you lose some & I'm gonna roll with this
FAIL of immense proportions!
4.02.2017
NOTD - Pink Chevron & Pretty Lace Nails
Hello
there lovely readers!
I've
found myself with the rare treat of free time on my side of late
which has given me opportunity to take part in a few nail art
challenges that I've come across, not only are they fun to do but
also such a great way to connect with other nail obsessed lovelies!
They
also give me a chance to challenge myself with different designs,
especially freehand. Todays nail art that I have to share with you is
an entry I've done for a competition that my nail art Queen Yagala is
holding at the moment. The challenge being to recreate one of her
designs.
Haha
if only the competition happened a few weeks ago when I recreated
this Jewel Bloom Ornament Nail Art which I was inspired to do by
Yagala herself. But hey I was up for the challenge again as I adore
all her designs so after having a sift through her gorgeous Instagram
feed, I came across this pretty Pink Chevron & White Lace
Design that was just so gorgeous I definitely wanted to give it a go
myself
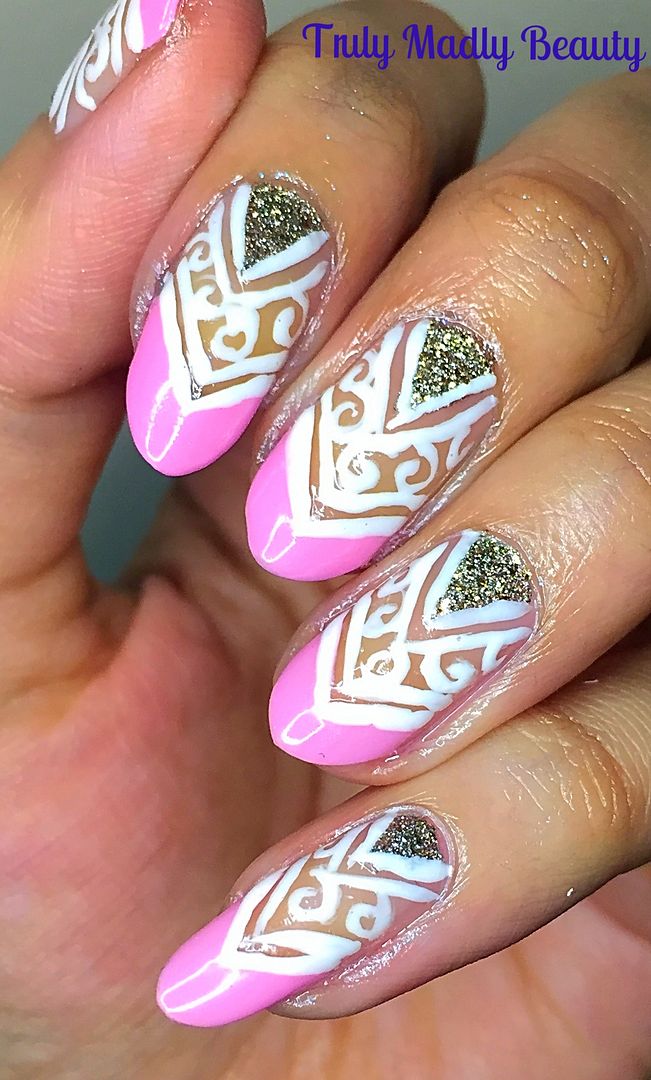
And
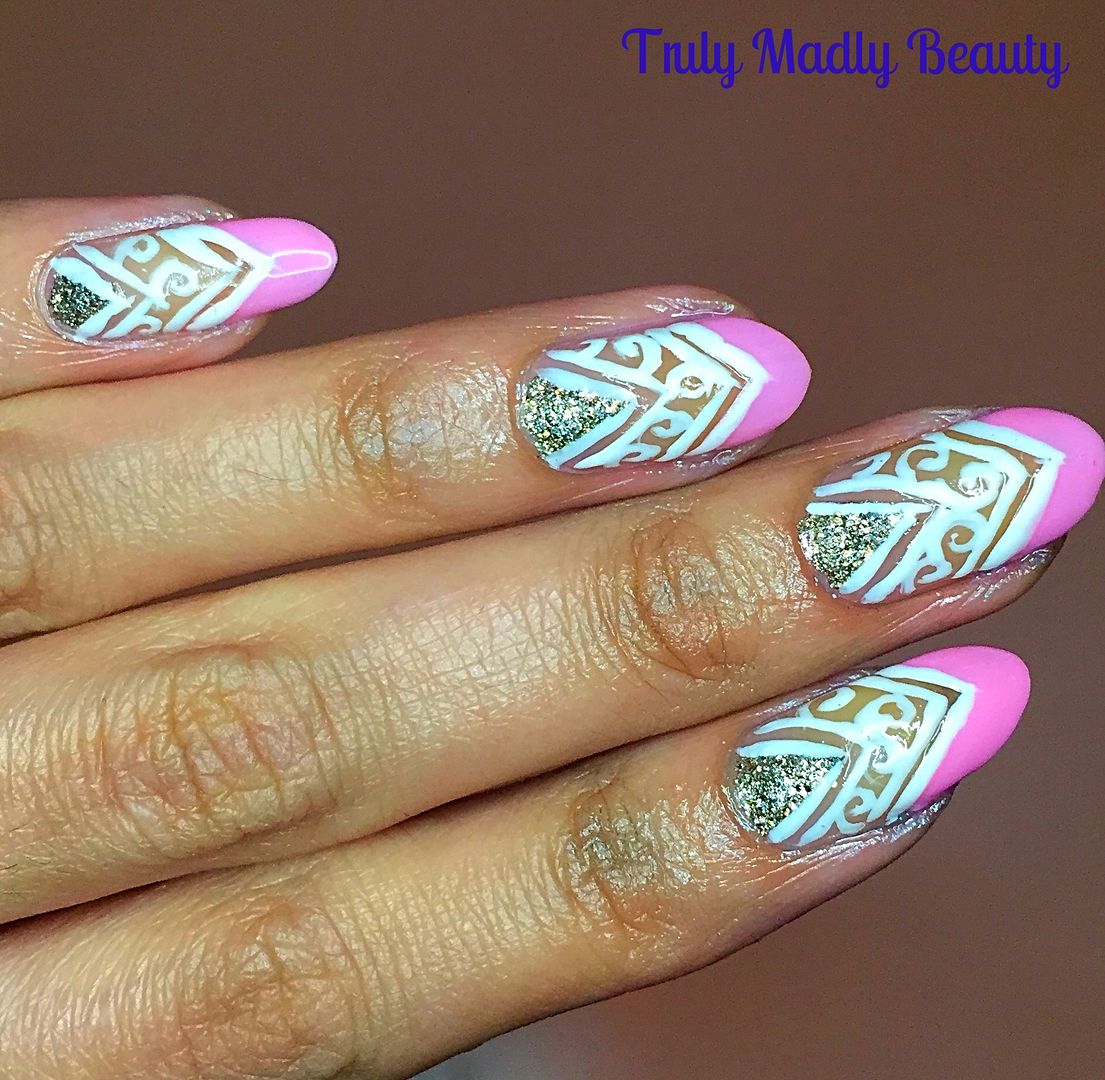
I'm actually so chuffed with how it came out! Of course it is in no way
anywhere near the league of the guru herself, but for a first attempt at this
type of design I was really happy with the result.
3.16.2017
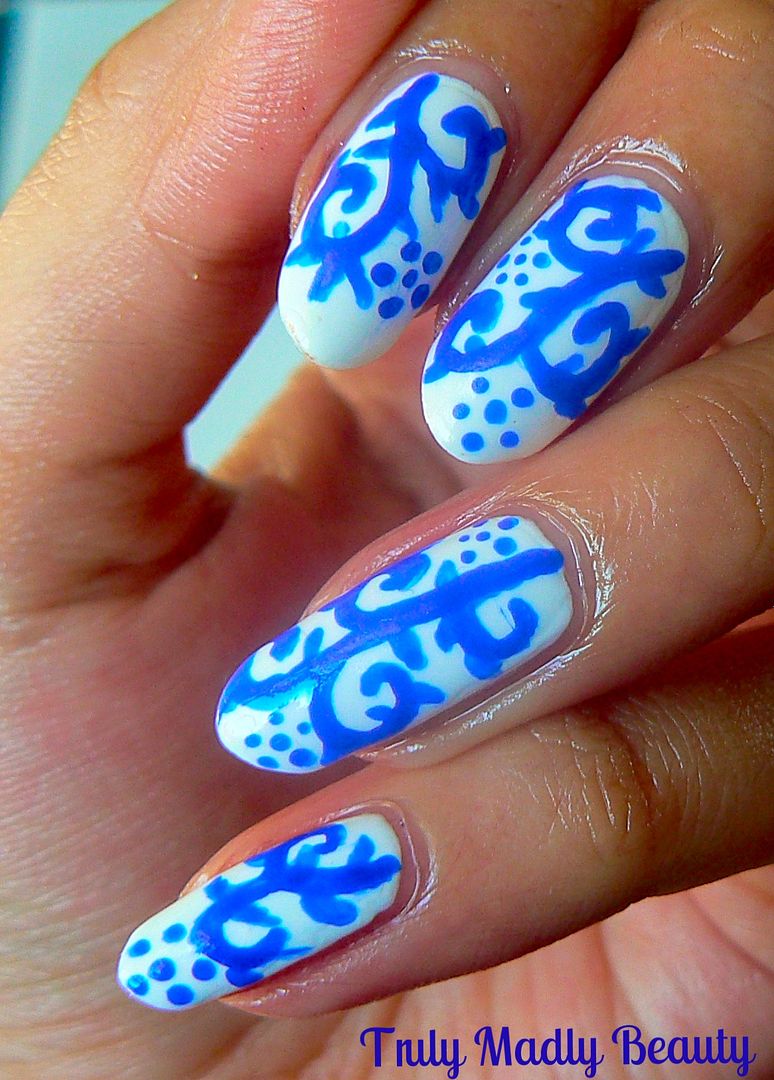
NOTD - Blue & White China Nails
Hello
there lovely readers!
Now
you know how much I adore my afternoon teas, the numerous reviews on
here would be a dead giveaway...One of my favourite parts of a good
tea, other than the food of course, is the pretty crockery used to
partake. Call me crazy (many do) but I do feel a cup of tea tastes
better when sipped from a pretty cup & saucer ;) I adore
intricately patterned teacups & have a somewhat odd addiction you
might say of accumulating said crockery, a habit that drives my
mother bonkers as I guess it ruins the aesthetic of her neatly
ordered cupboards with my random finds. There is a point of me
talking about this topic by the way & that point leads naturally
to my other addiction...nail art!
Many
times I've found myself inspired to create nail art using some of the
designs I've come across on my teacup & saucer adventures.
1.09.2017
NOTD - Expecto Patronum by Dollish Polish!
Hello
there my lovely readers!
Gotten
back in to the swing of things yet? Find myself currently surrounded
by gym obsessed work colleagues filled with the obligatory after
holiday over indulging guilt...& here's me just sat here happily
munching away on left over Roses...haha! I mean if it wasn't the fact
that I was allergic to gym I totally would succumb too...its not
pretty...sweats, palpitations, breathlessness, hot flushes...this
ALWAYS happens whenever I go...so for my well being I simply cannot
so hey ho.
One
of my favourite things about the Xmas break, other than all the food
& family time of course, is the fab selection of festive films to
enjoy during ones hibernation. This year we were treated to the
entire Harry Potter saga. I visited the studios last year which was
absolutely magical & it brought back so many wonderful memories,
these films will always have a special place in my heart just like
Disney.
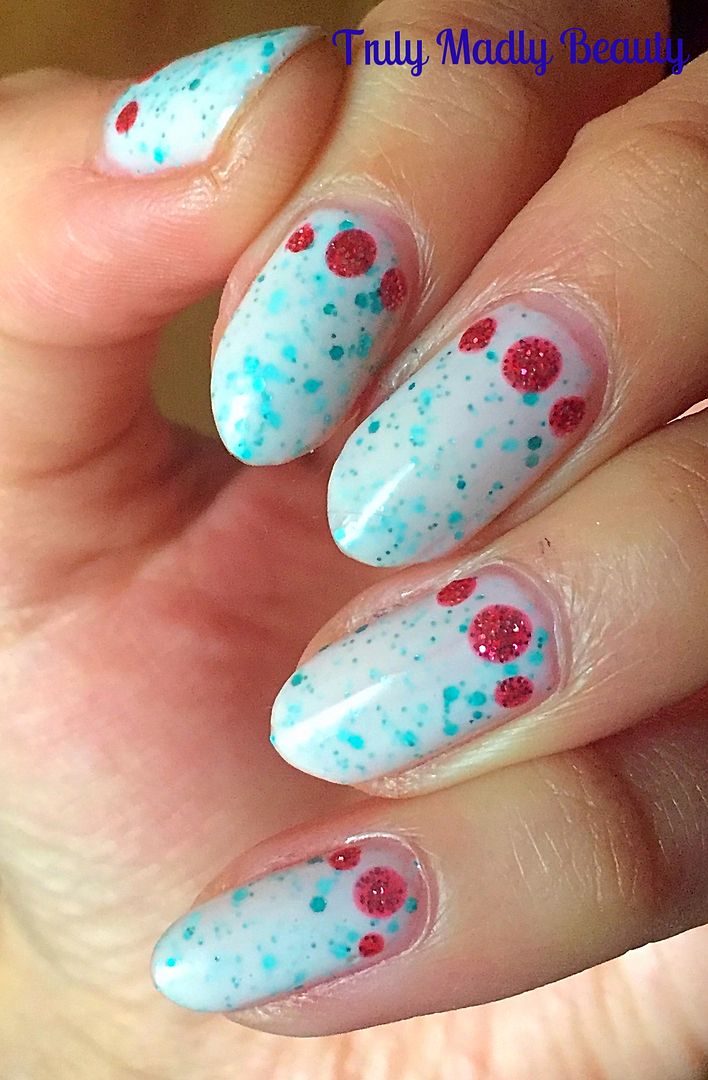
Anyhoo
watching the films immediately brought to my mind a particular polish
in my stash that I had picked up donkeys ago but had not yet had the
opportunity to test out...Expecto Patronum by Dollish
Polish...well...you can imagine my eagerness to rectify this
situation immediately after watching The Prisoner of Azkaban...so out
it came!
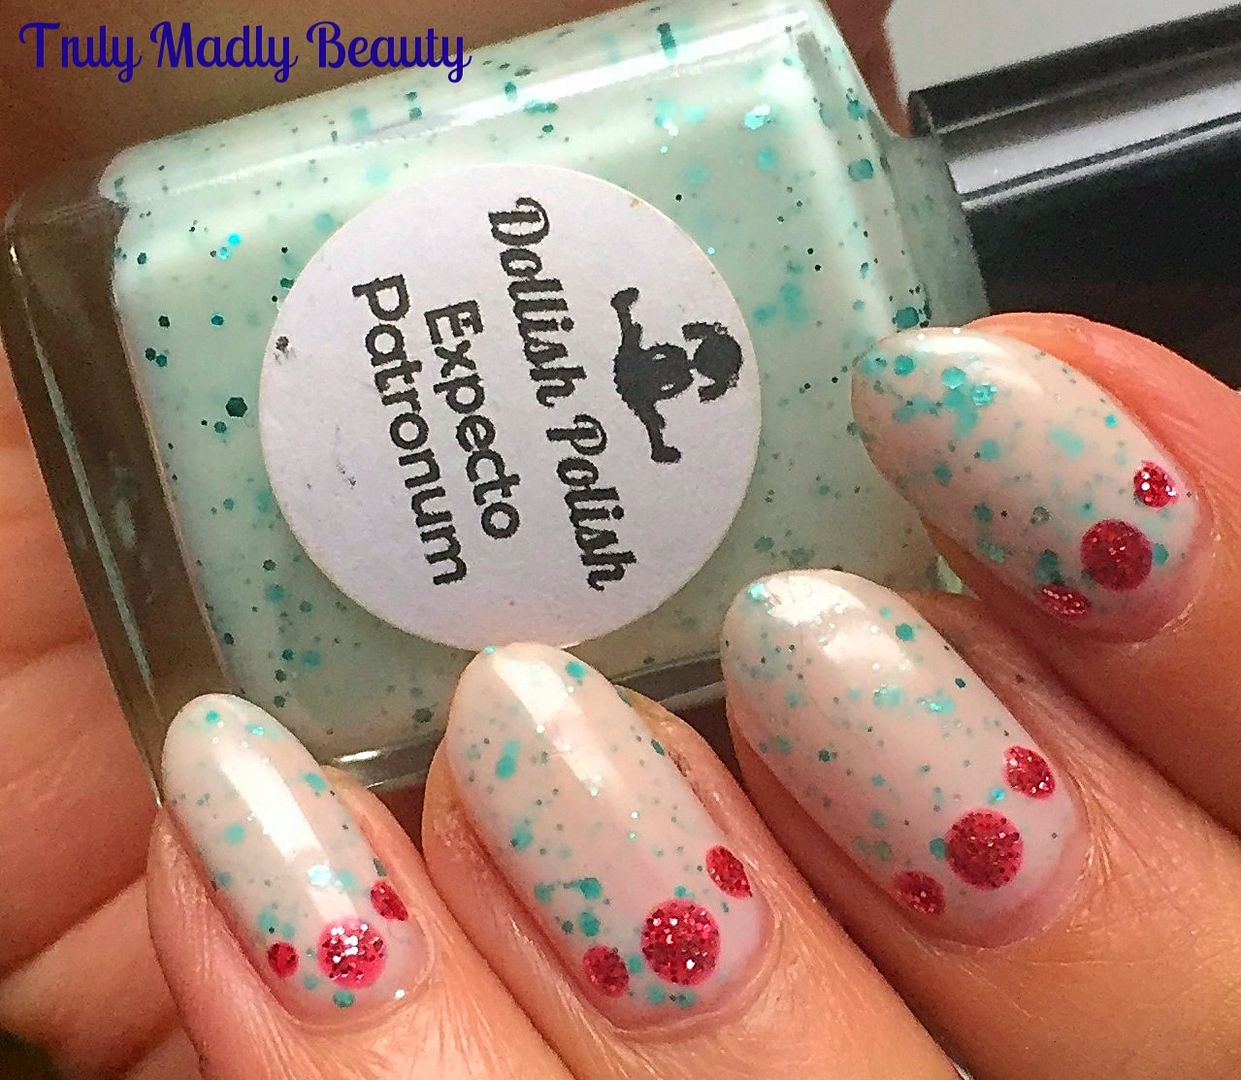
The
delightfully titled Expecto Patronum is an indie polish by the brand
Dollish Polish. I picked up this little beauty in a blog sale but you
can find it on their website HERE. This polish is seriously stunning
beauts & if you are a Harry Potter fan then you NEED THIS IN YOUR
LIFE. Heck even if you're not just look at its purdiness!
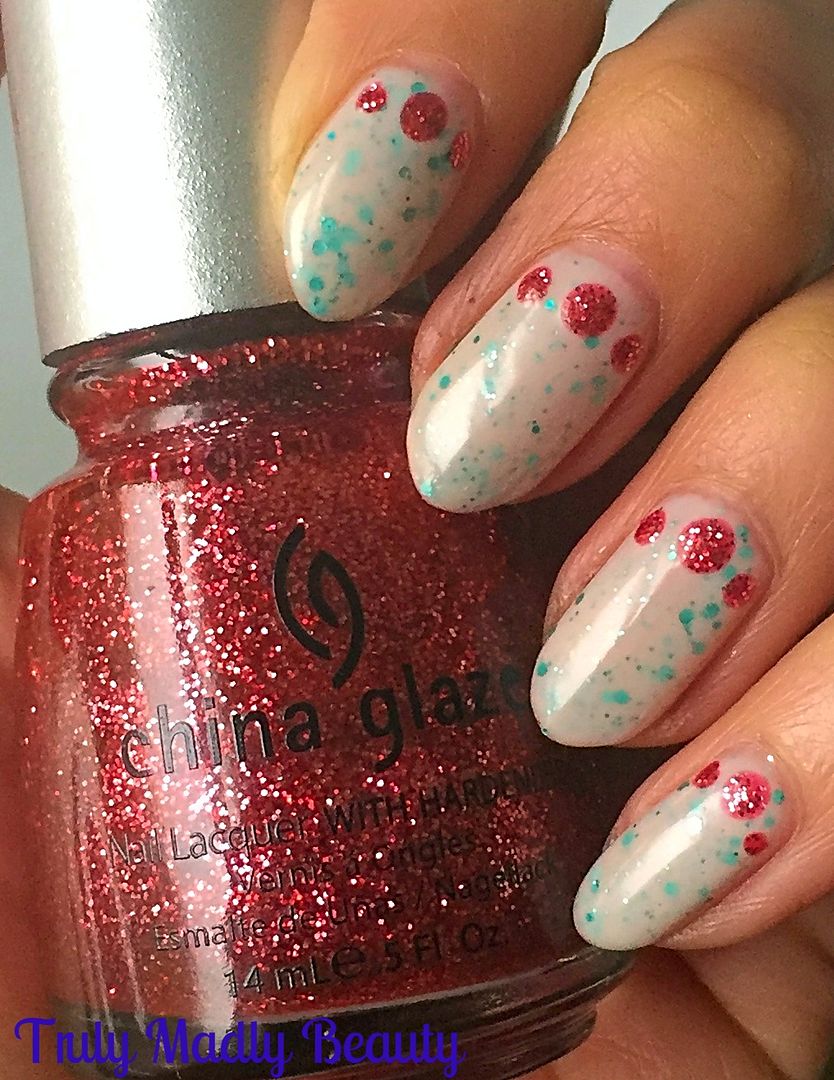
As
expected from a polish named after the well known charm spell,
Expecto Patronum is a beautiful milky white crelly shade that gets
its special magical element from the presence of beautiful minty
green iridescent flakies & teal green holo glitter chunks of
different sizes....SWOONS!
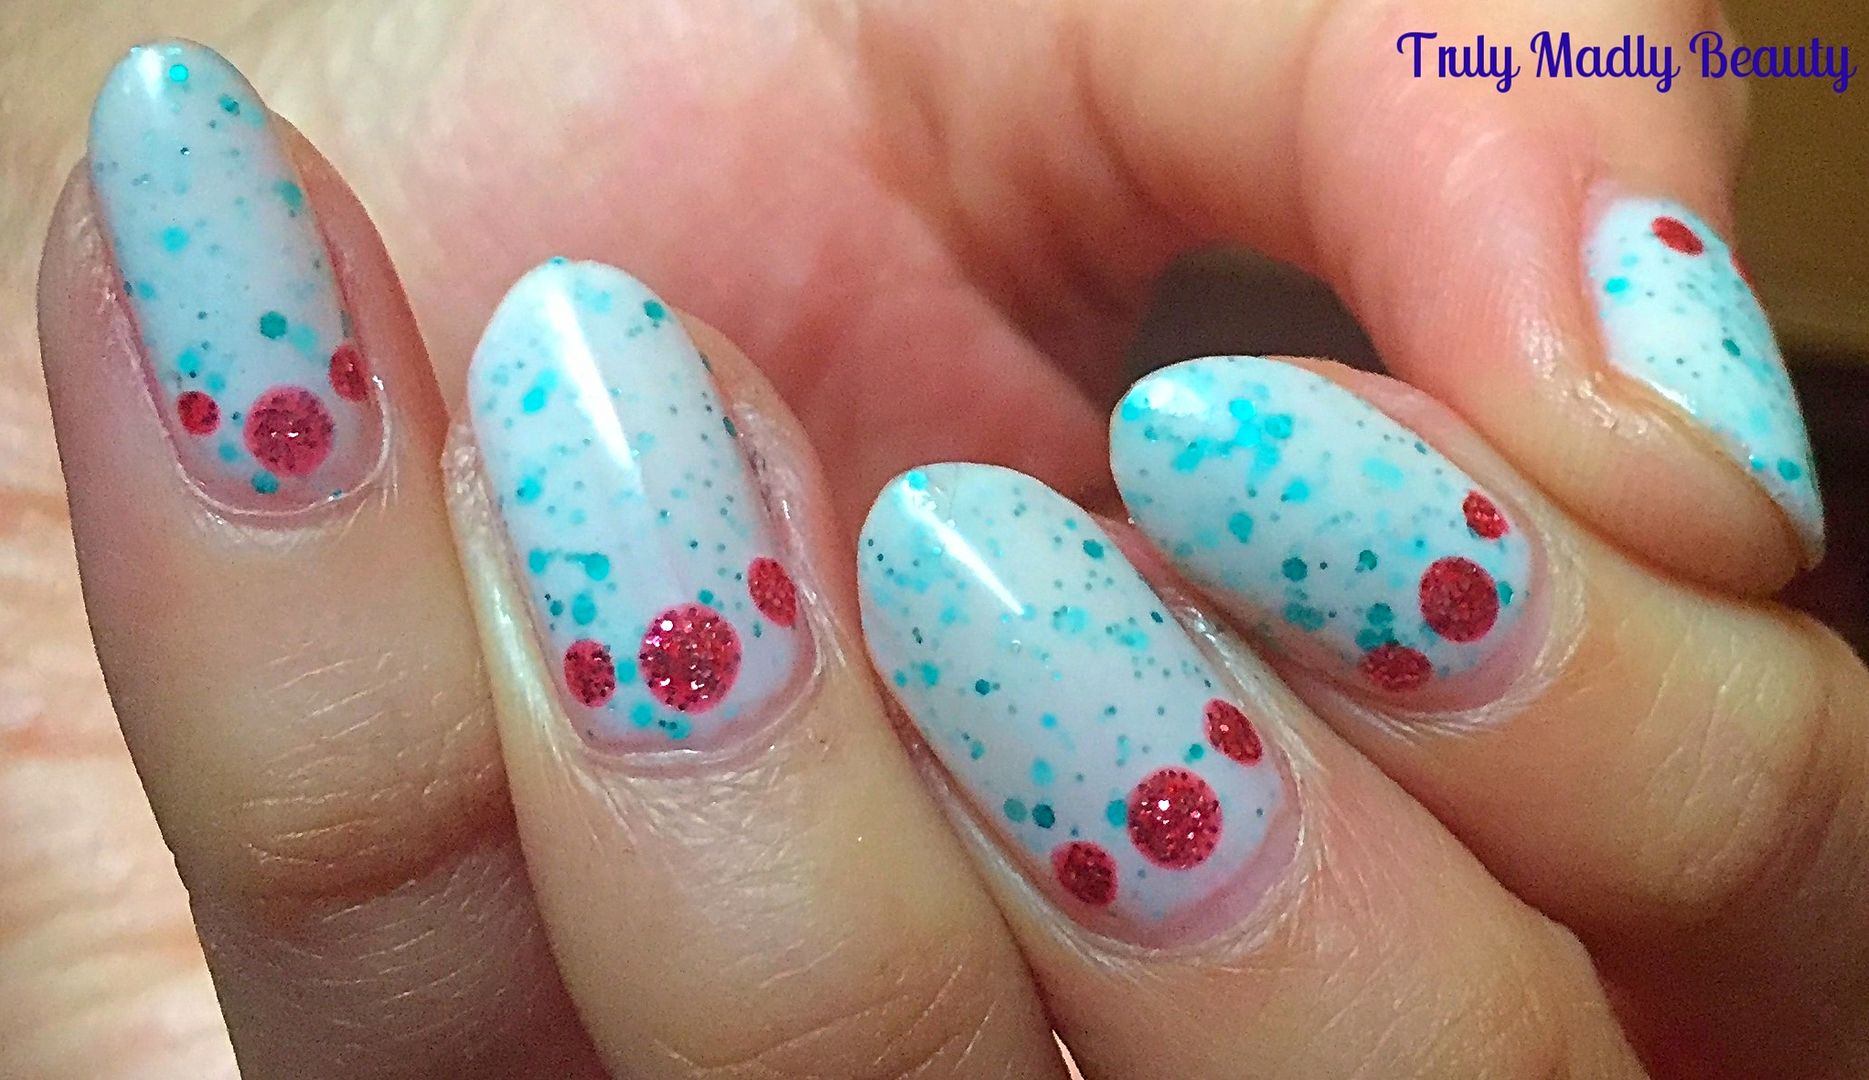
The
formula is light therefore to get full impact of this polish, 3 coats
will be required to achieve opaque coverage but oh boy is it worth
it. I can understand why this little gem is a best-seller as it
really is something rather special.
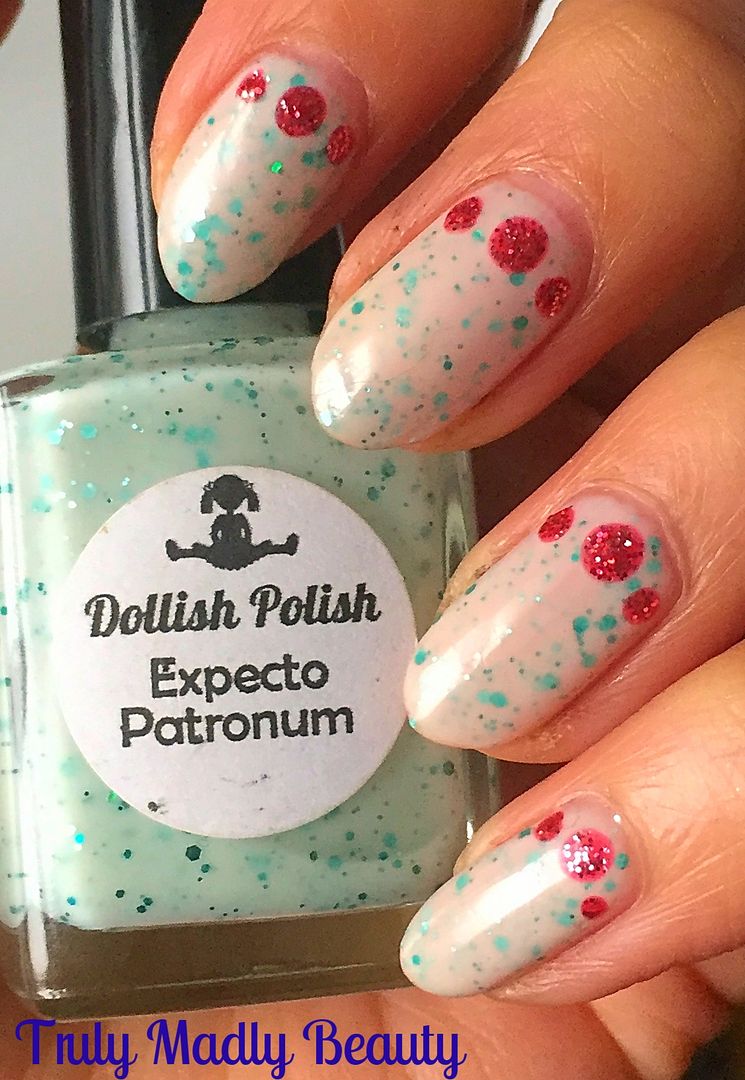
Not
that it needed it but to add a bit of extra oomph to the mani I added
on 3 dots of this gorgeous pink glitter from China Glaze called Mrs
Claus just above the cuticle, China Glaze really do glitter polish
well & this one is no exception. I love this sort of dotticure
nail art as its such an easy way to get a glitter fix & can jazz
up any mani effortlessly!
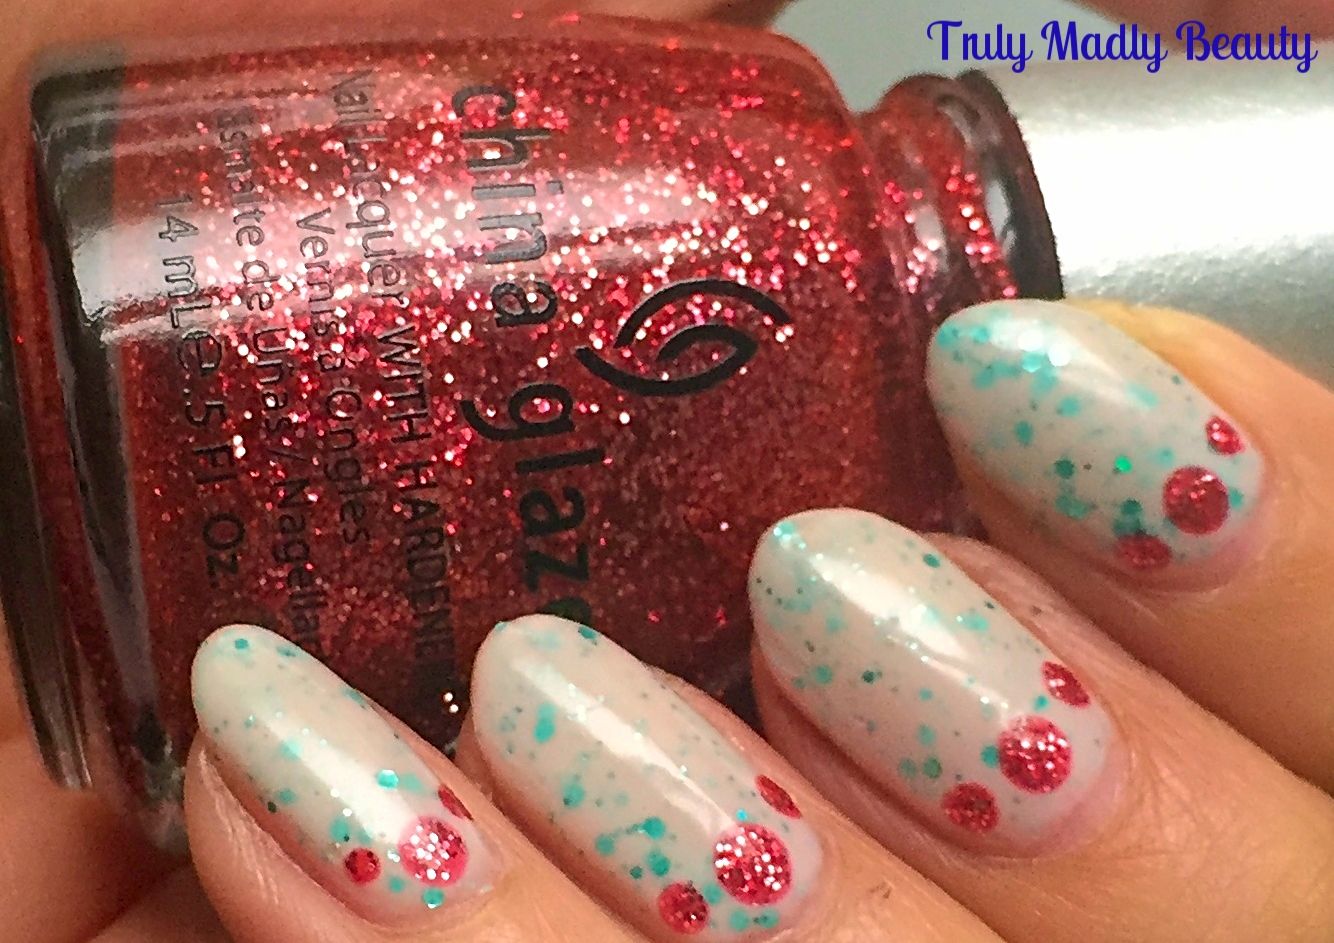
Finish
with obligatory topcoat to protect all that sparkly goodness &
you have your nails ready to cast your Patronus charm!
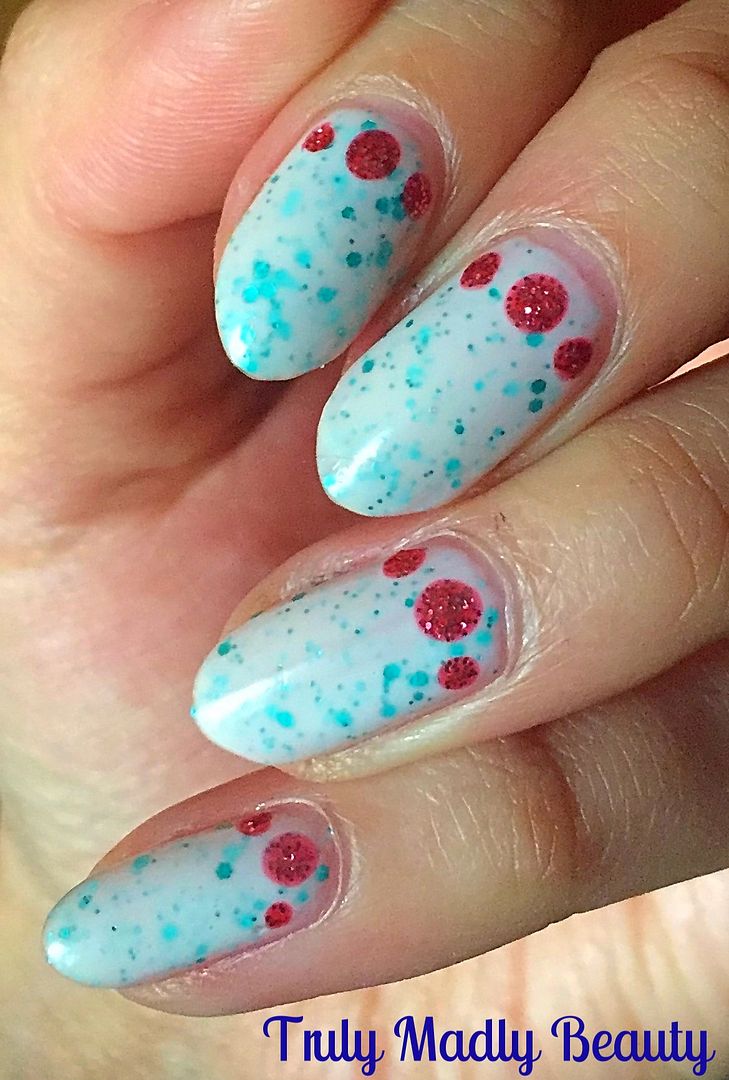
You
can get your hands on this divine polish via the Dollish Polish
website HERE where they offer international shipping & is
available in both large & small sizes. Thanks for reading!
Lotsa
love to ya!

8.19.2016
Olympics 2016 TeamGB Nails!
Hello
there lovely readers,
Now
I wasn't actually planning on doing an Olympics themed manicure
dolls! But unless you've been living under a rock these past few
weeks, its hard NOT to get absorbed in the goings on over in Rio
right now, especially the incredible performances from the Team GB
athletes! Seriously how amazing have they done & it really is so
great to see so much positivity & inspiration in a time where
there seems to be so much sadness going on in the world. So in honour
of the Olympics & a subtle nod to Team GB I've done a suitably
styled mani which I'll show you how to create as well!
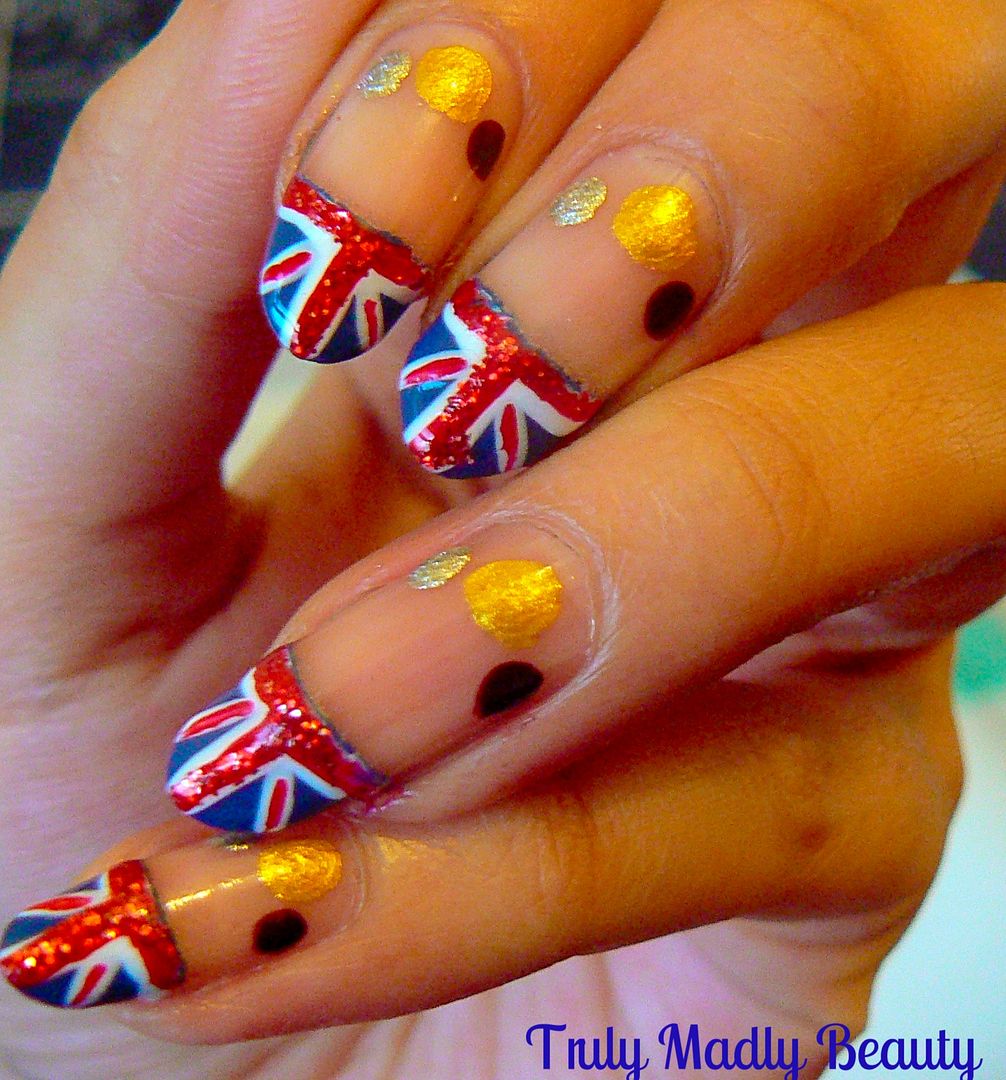
As
you can see I've gone for some GB flag tips with some Gold, Silver &
Bronze medals thrown in there too & its honestly so easy to do :)
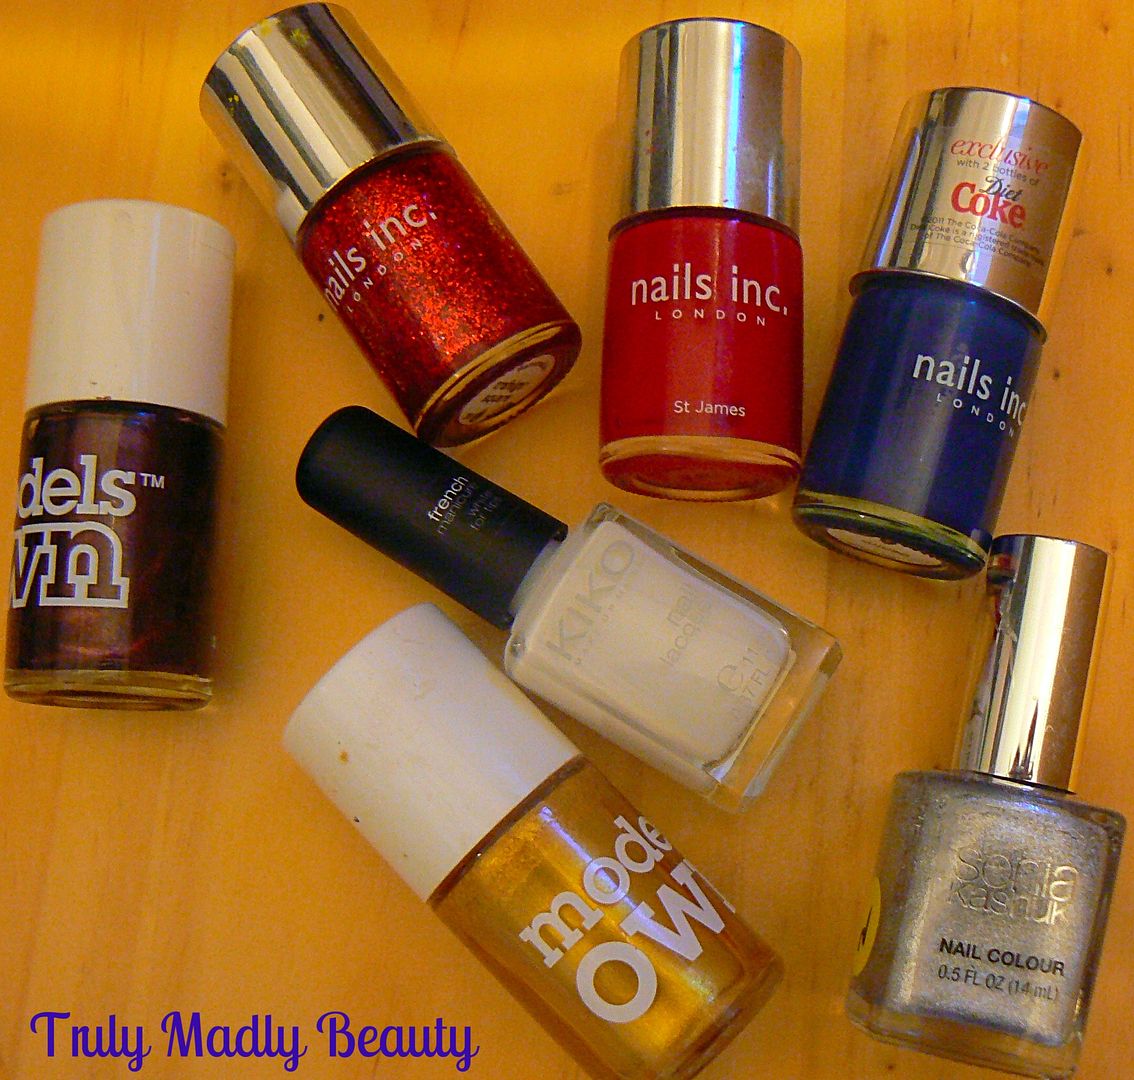
First things first, gather together the polishes you'll be using.
Here I've opted for some Nails Inc, KIKO & Models Own to help
create this design.
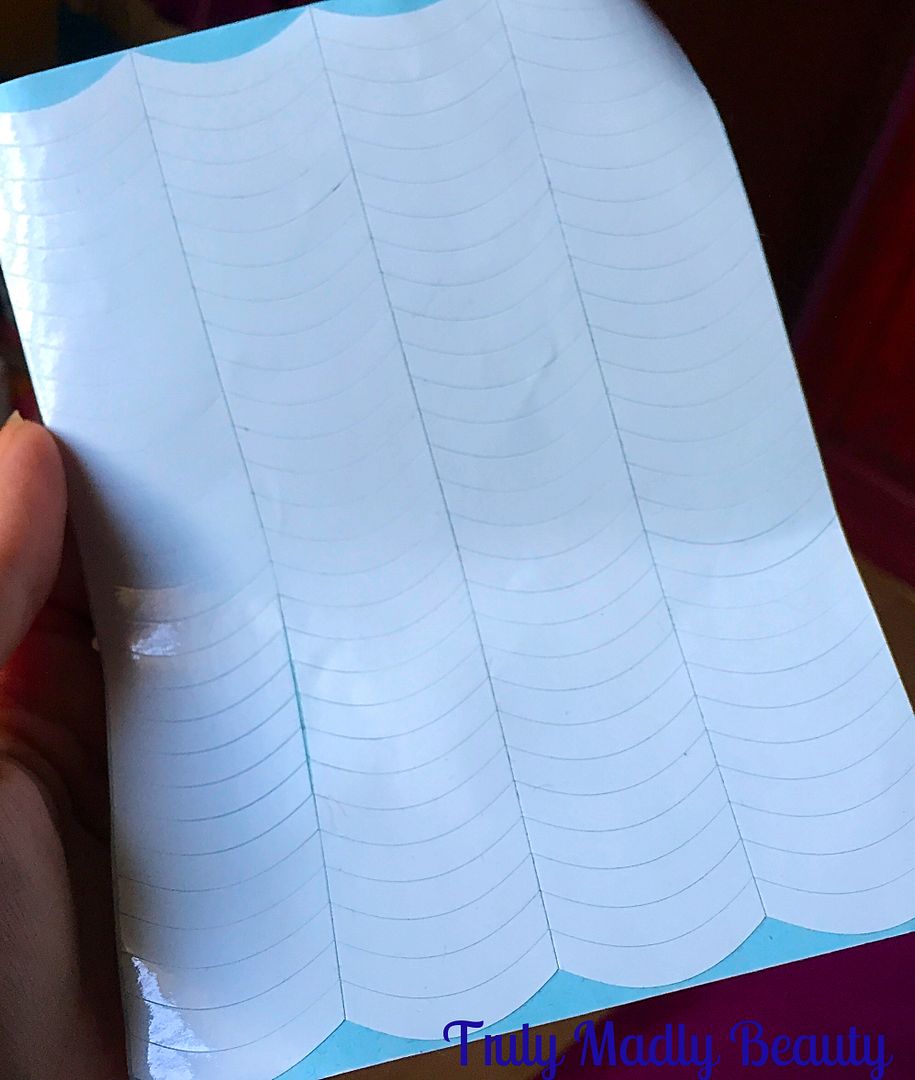
To
start things off you'll need these nifty little french mani guides
which you can get super cheaply of Ebay. I always make sure I have
these in constant supply! Place a guide on each of your nails,about a
quarter of the way down as you'll only be painting the top part of
your nail.
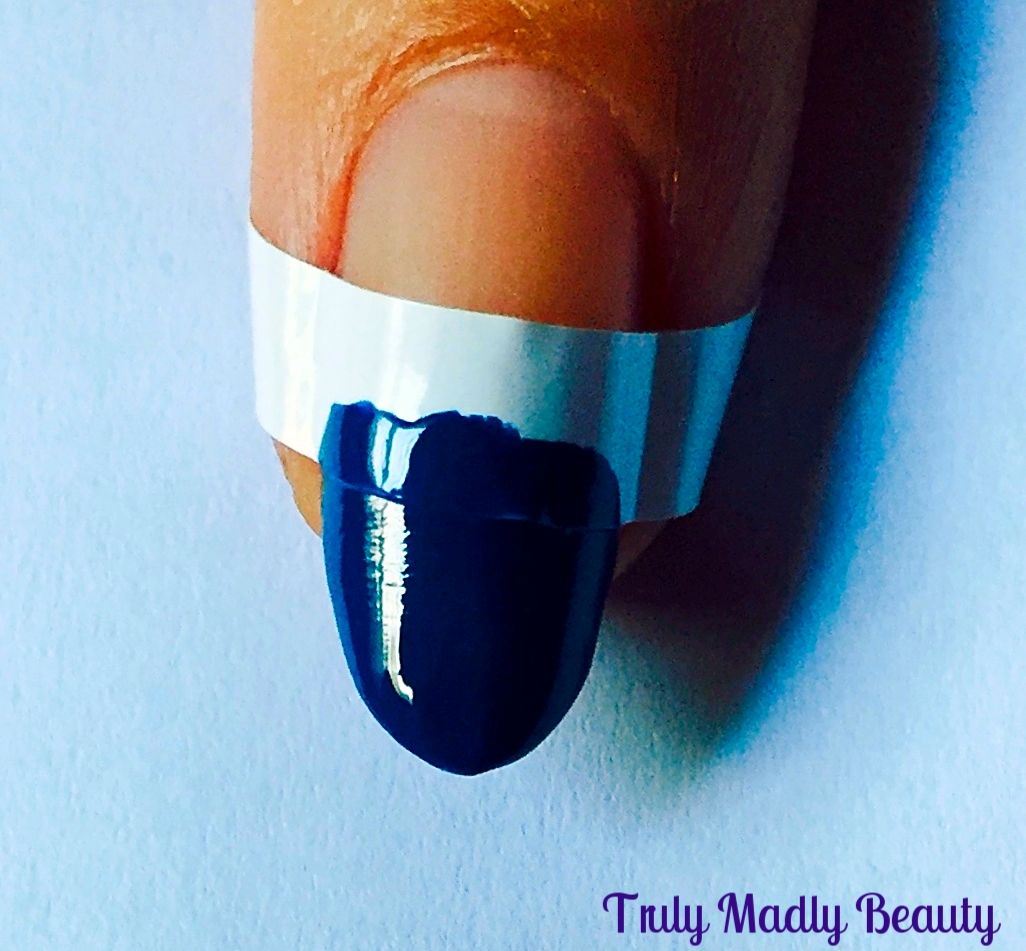
Now
begin with applying your blue, this is Nails Inc Denim, a nice thick
opaque blue crème so only one coat is needed. Wait for the blue to
dry as now you'll be adding the white detail of you flag & the
last thing you want is the blue running into the white!
I
used the KIKO french manicure for white tips nail lacquer which I
LOVE & has replaced ALL of my nail art pens. The thin brush is
perfect for detailed nail art, I only hope they still do it as I want
to stock up on these babies!
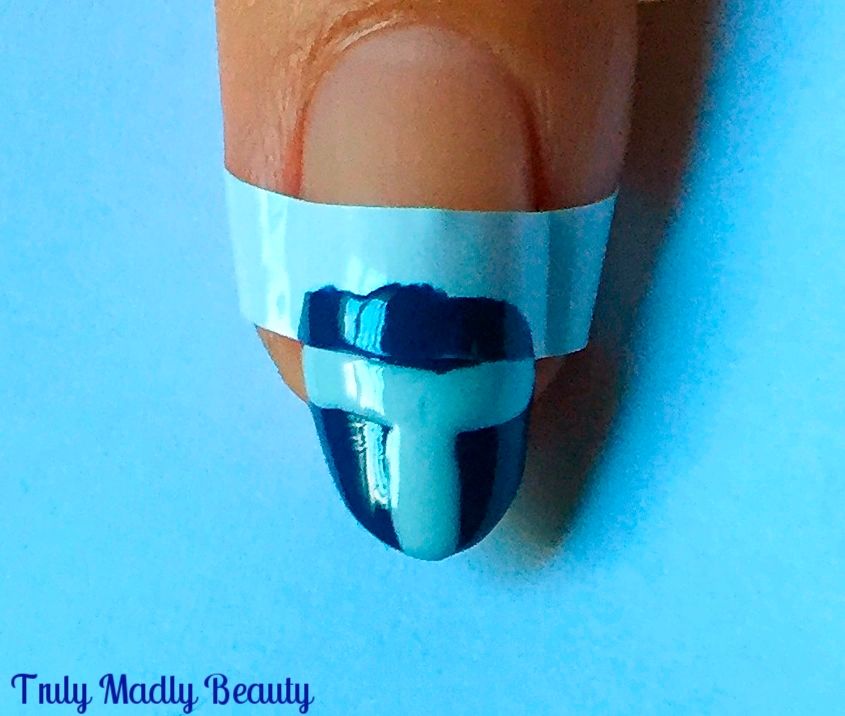
Using
the brush, apply a line along the bottom edge (so right above by the
mani guide) & one horizontal line in the centre going up to the
tip.
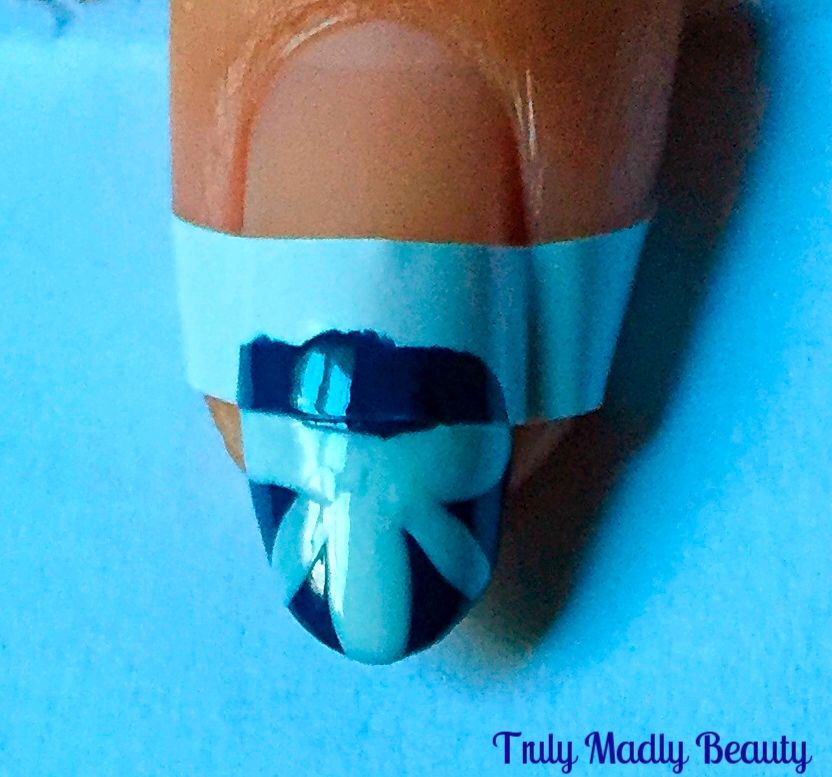
Then
add two diagonal lines going up from either side of your horizontal
line.
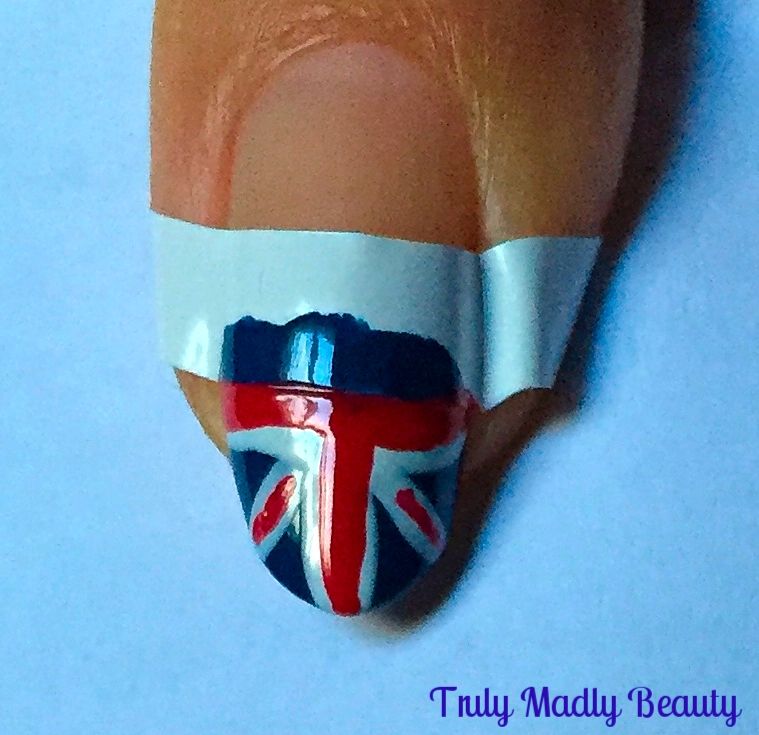
Now
grabbing your red polish & a thin nail art brush, I've used Nails
Inc St James, apply a thinner line on top of the white, making sure
you still leave a bit of white showing.
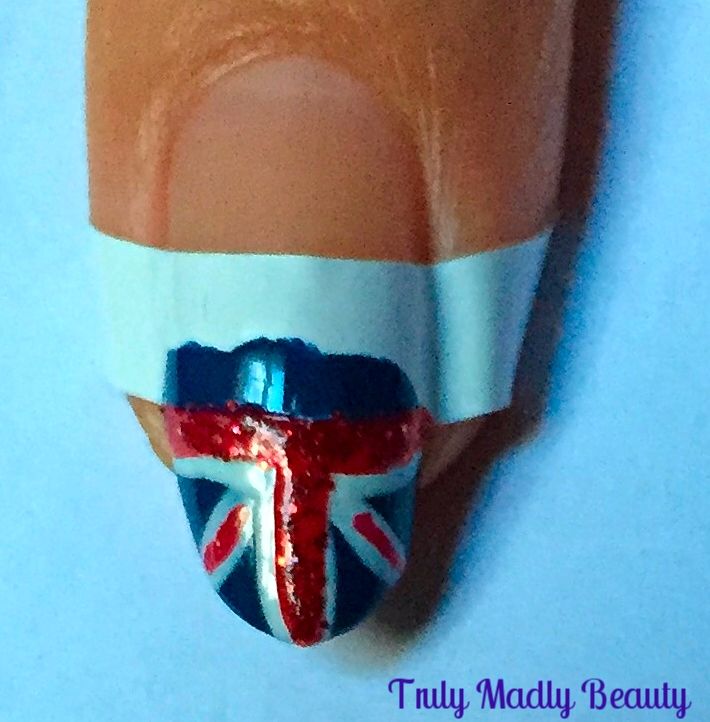
Aaaaand
finally, because y'all know I am a sparkle FIEND, as an additional
touch I went over the red with a bit of red glitter courtesy of Nails
Inc Trafalgar Square.
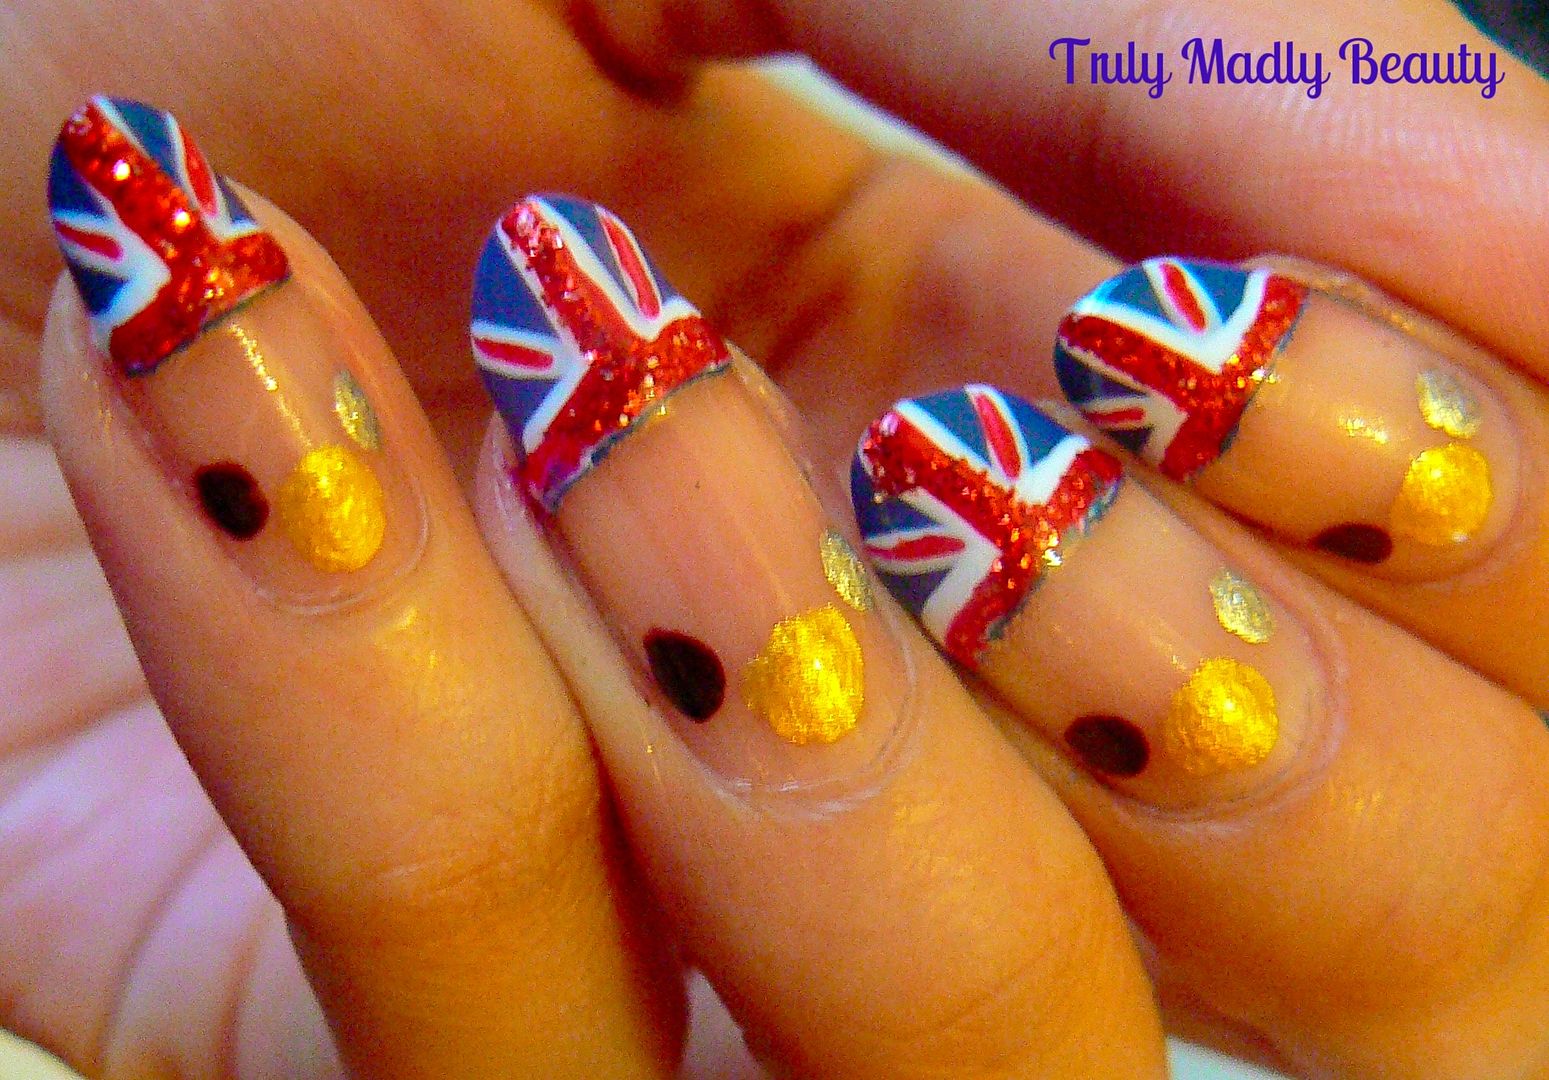
Now
you can (slowly) peel off your mani guides, don't worry if you have
any smudges or your edges aren't perfect, this can easily be
rectified with a small brush & some acetone. And you have your GB
flag tips!
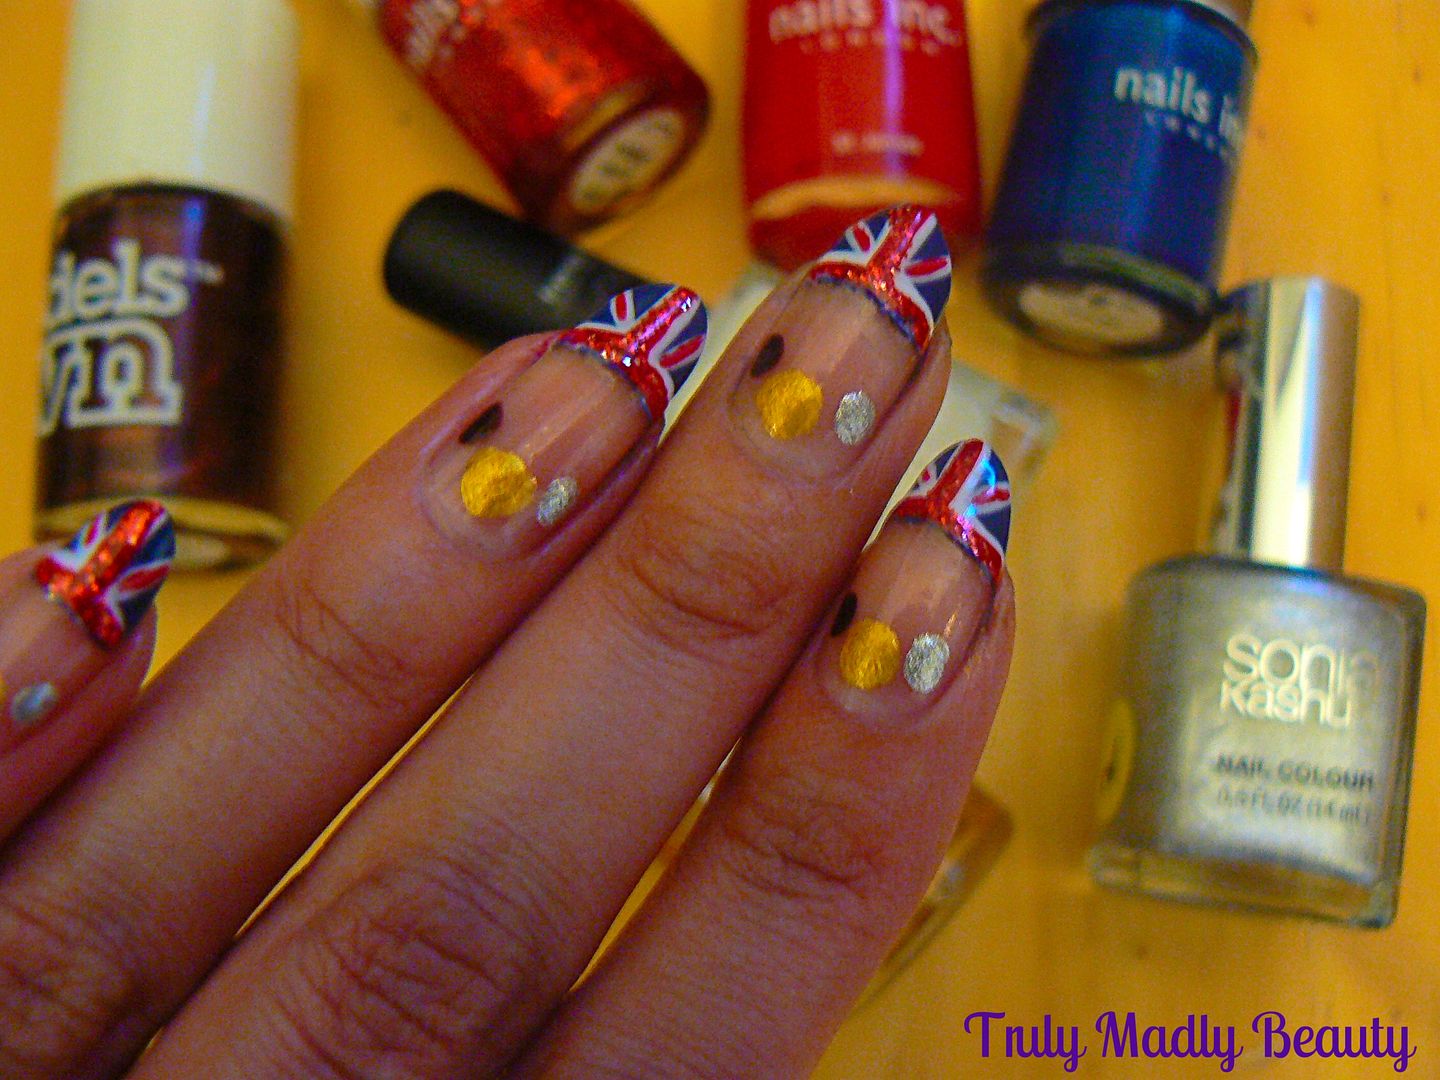
You
can leave these as they are but I couldn't NOT put some medals on
too, so using a dotting tool & Models Own 25 Carat Gold, Sonia
Kashuk Smoke & Mirrors & Models Own Cherry Pie, I added me on
some Gold, Silver & Bronze medals along the cuticle.

Finish
with topcoat & you're done! Told ya it was easy.
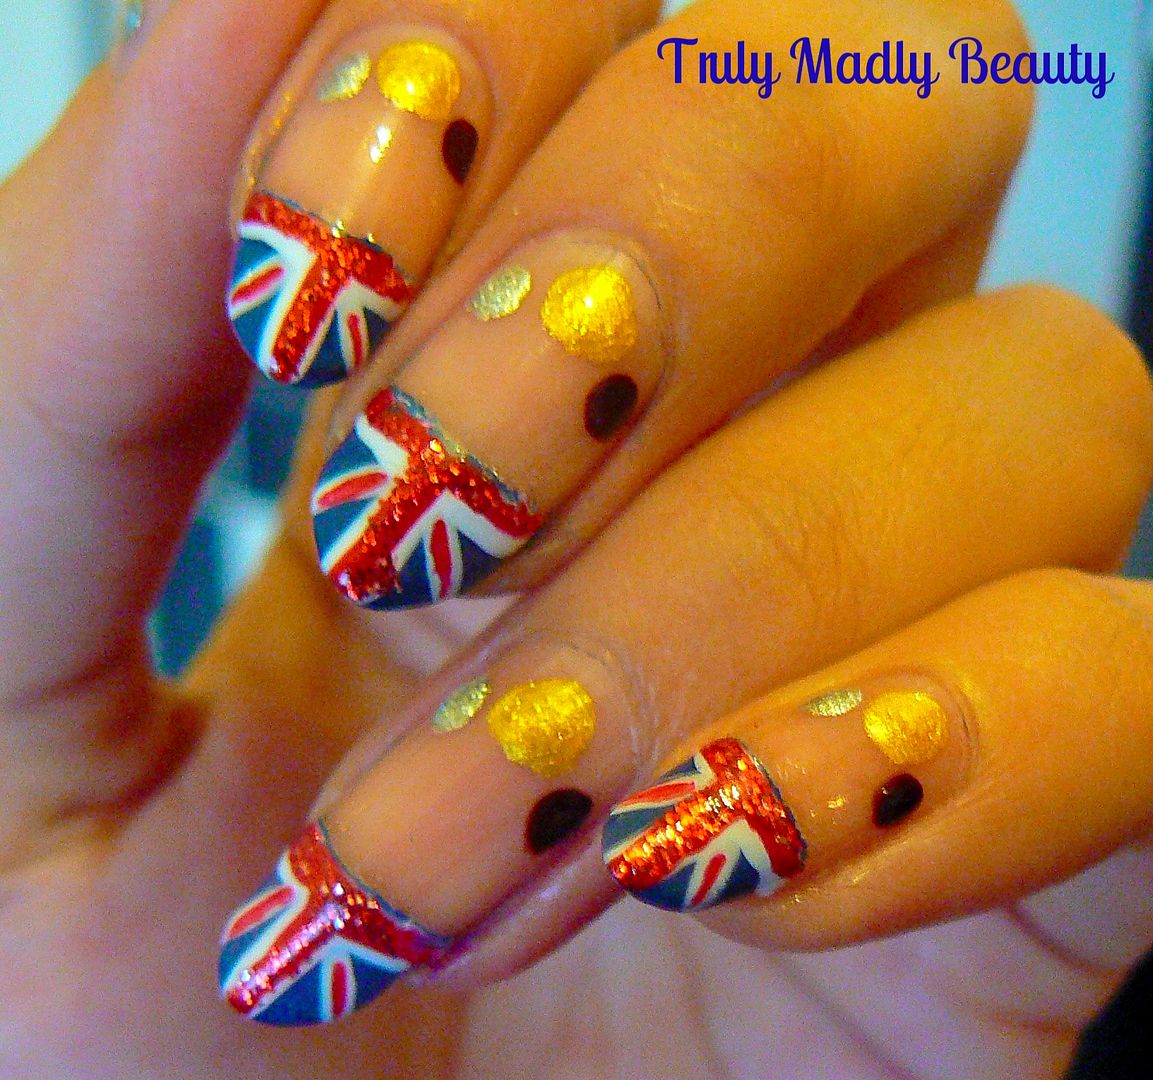
Hope
you liked the mani dolls, how are you celebrating the Olympics this
year? Thank for reading & keep up the awesomeness Team GB!
Lotsa
love to ya!
7.03.2016
Fourth of July Drip Nails Tutorial!
Hello
there lovely readers!
Hope
you're all having a top weekend, especially my American beauts on the
other side of the pond! Oooh what I wouldn't give to be back in the
states right now as this weekend sees the US celebrating its Fourth
of July Independence Day meaning days of fab parties & fun times.

Naturally
I couldn't resist marking the occasion in the way I know best &
getting my nail art on. Using the American patriotic colours of
red, white & blue I went for some dripping glitter Fourth of July
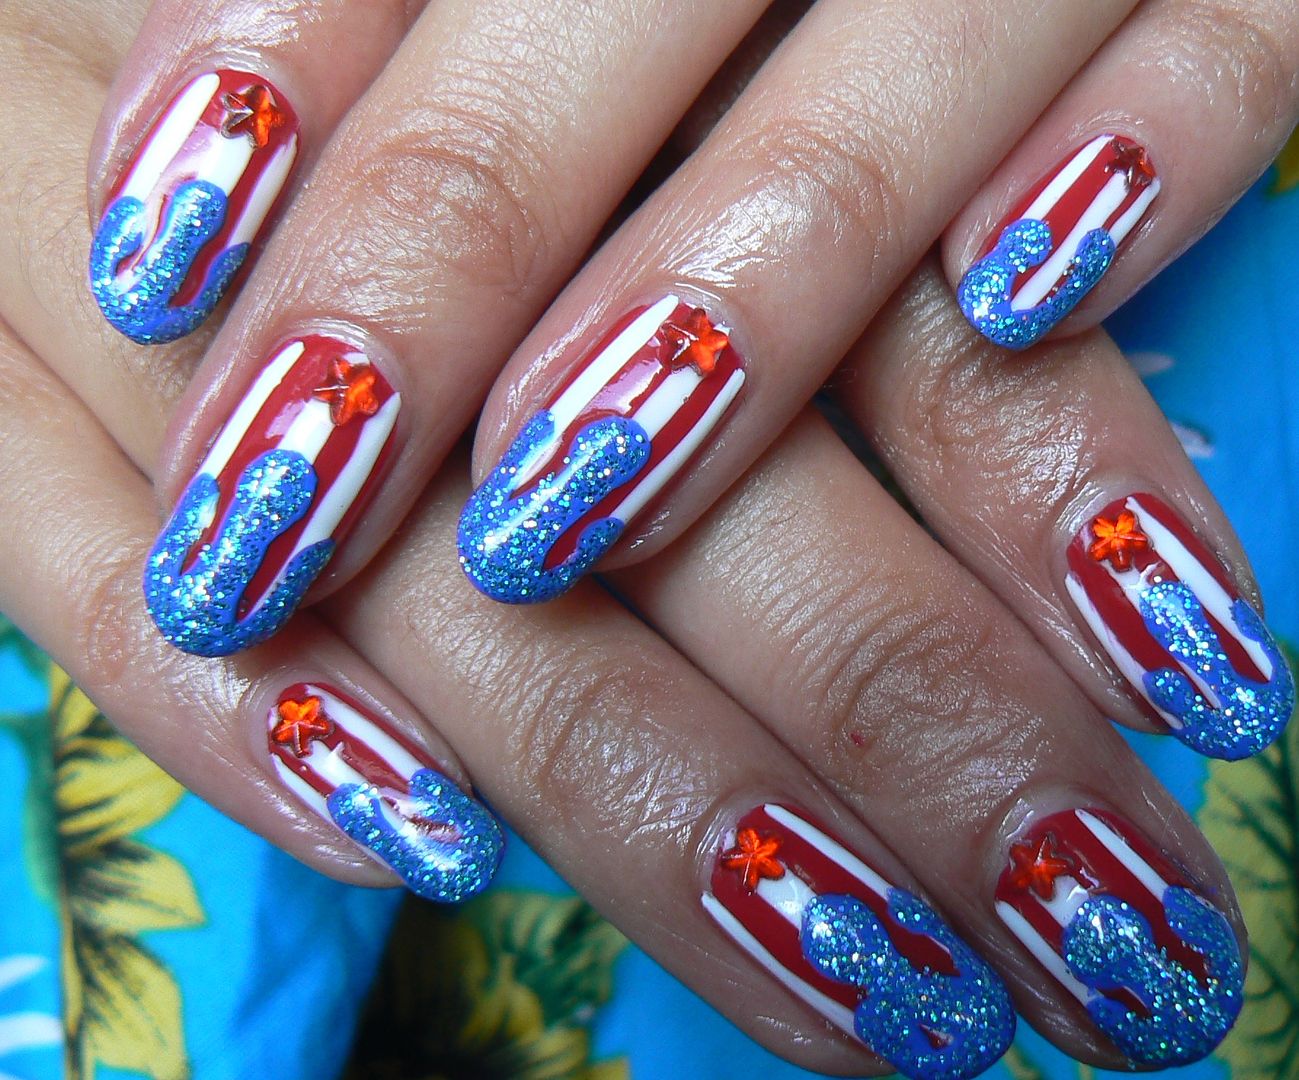
Nails plus I've done a step by step tutorial so you can create these
too!
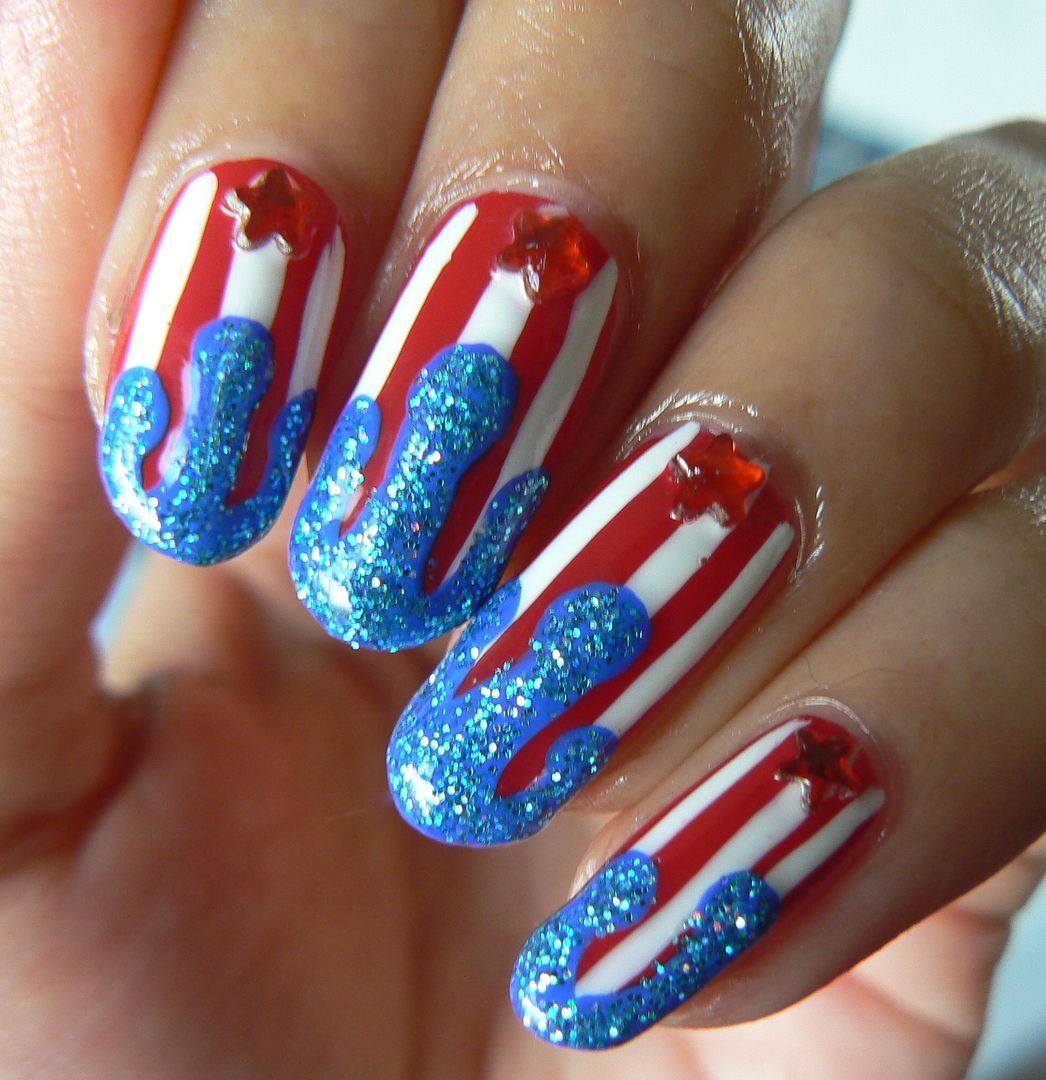
I saw a picture of a similar design in a Daily Mail article of all
places & thought ooooh what a fun & innovative way to do
patriotic nails! Plus I love drip nail art (see my chocolate drip
nails on the left of the page) & haven't done the design in
yonks, perfect time to remedy that with this :)
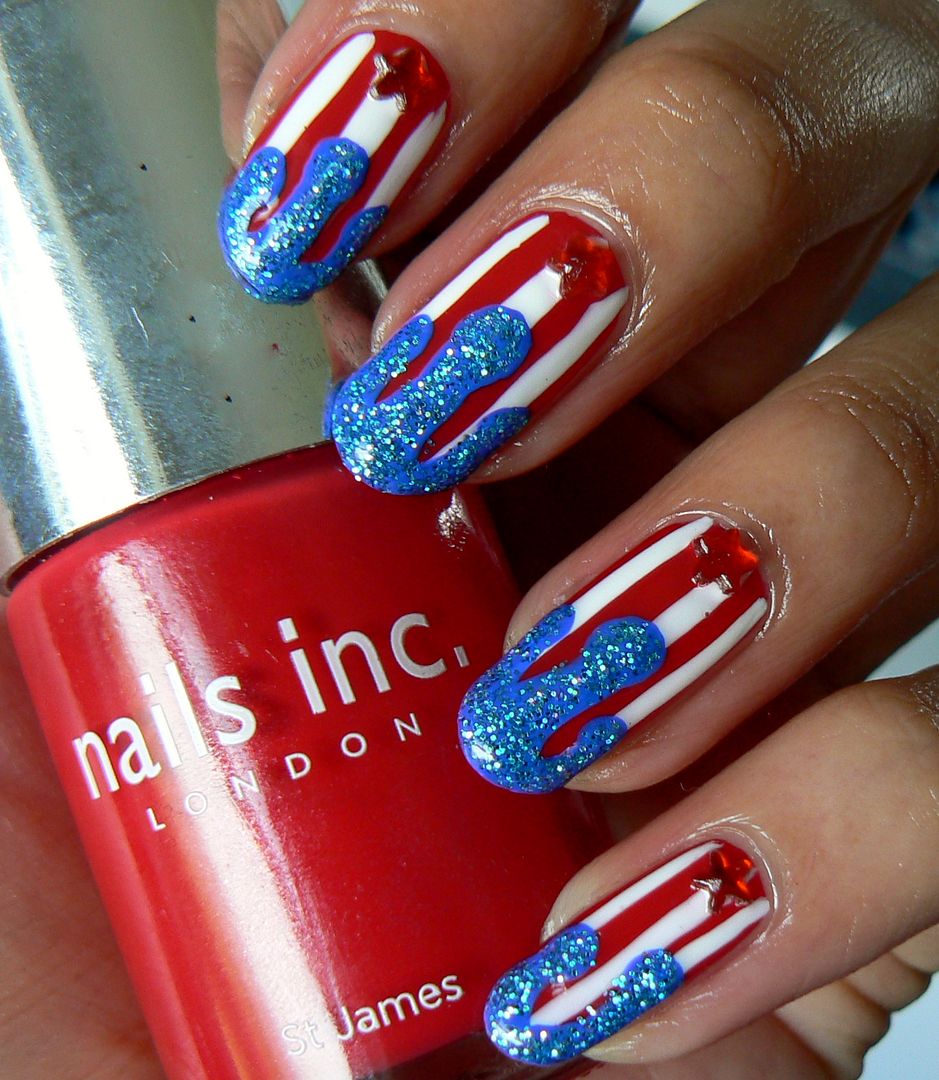
If
you want to re-create this design as well then keep on reading
dolls...
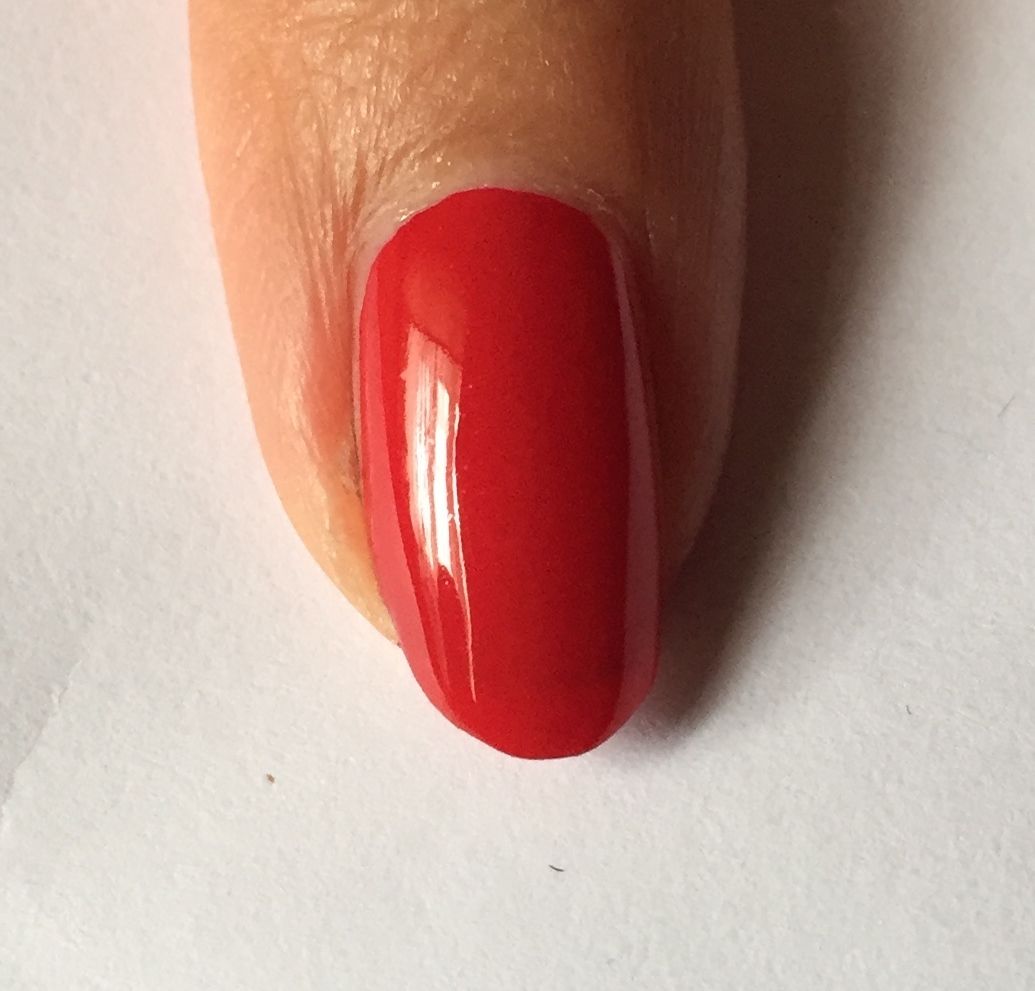
First
start with your red base, here I've applied just one coat of Nails
Inc St James as I knew there would be a few layers of polish on top &
didn't want to overdo it.
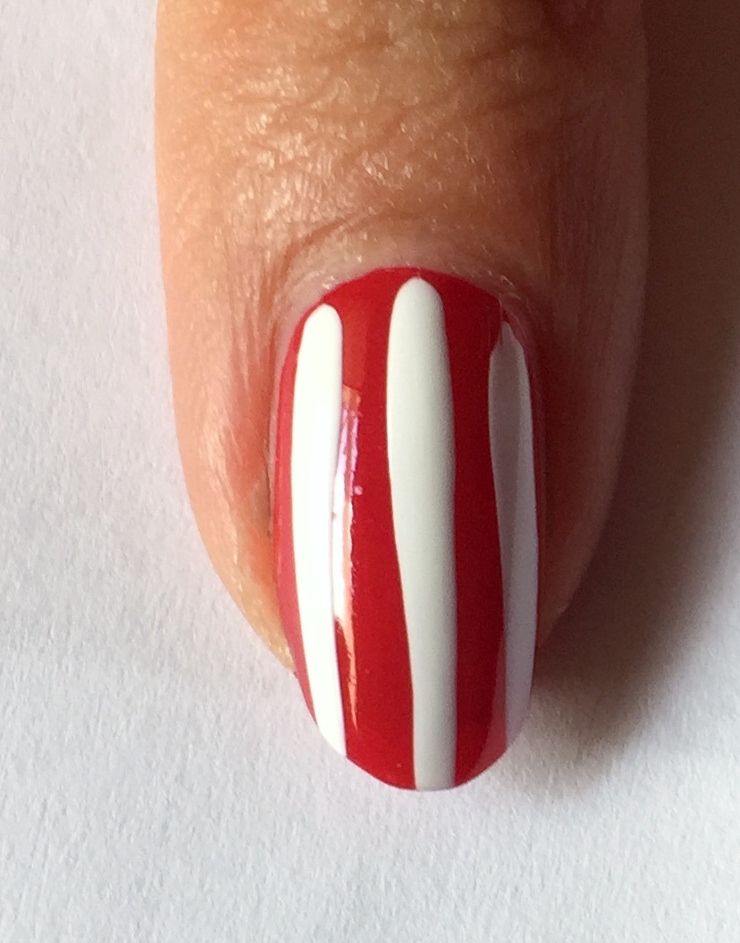
Then
using the thin striper brush from my Models own white nail art pen I
applied three vertical stripes down the length of the nail.

Now
for the drips! Start by applying three dots on to the nail using a
dotting tool as shown with your chosen blue polish, here I've used
Nails Inc Baker Street.
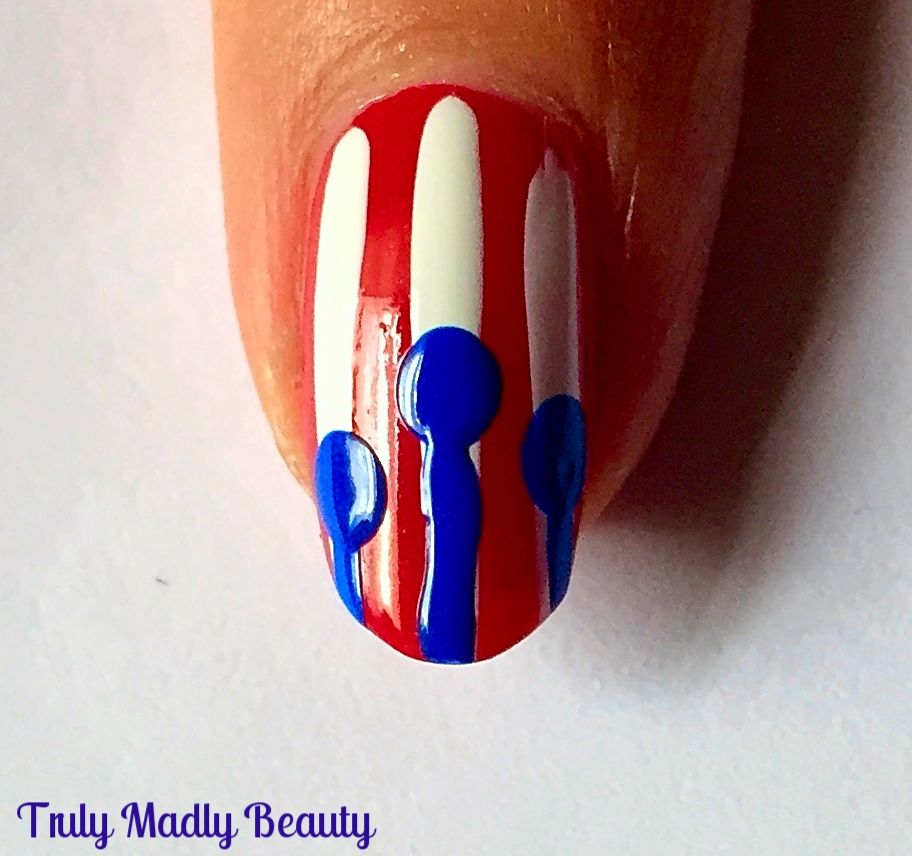
Next,
using a thin nail art brush, draw three vertical lines going down
from your dots to the tips.
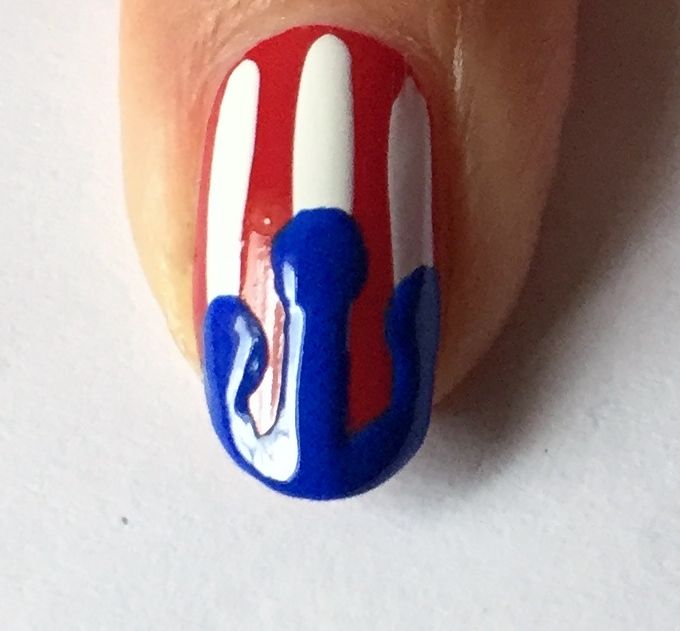
Using
the same thin brush, curve the edges of the straight lines into your
dots as well as applying polish along the tips of your nails to create
your drip effect!
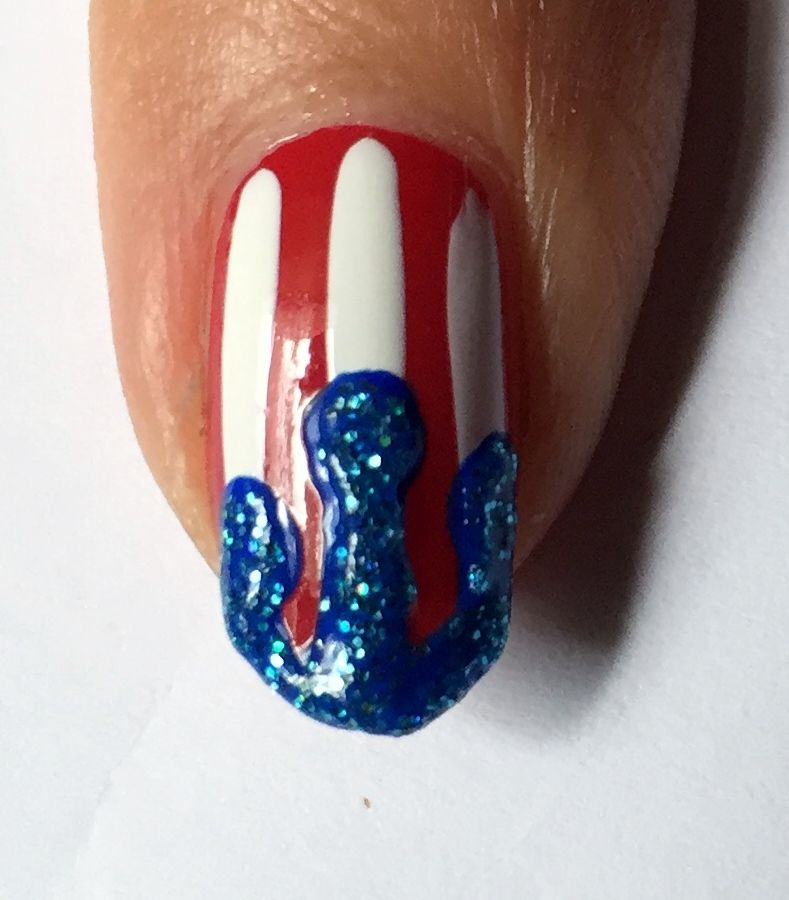
You
can skip this next step but my inner magpie was calling for an extra
bit of sparkle so I applied a bit of blue blingy glitter polish from
Color Club on top.
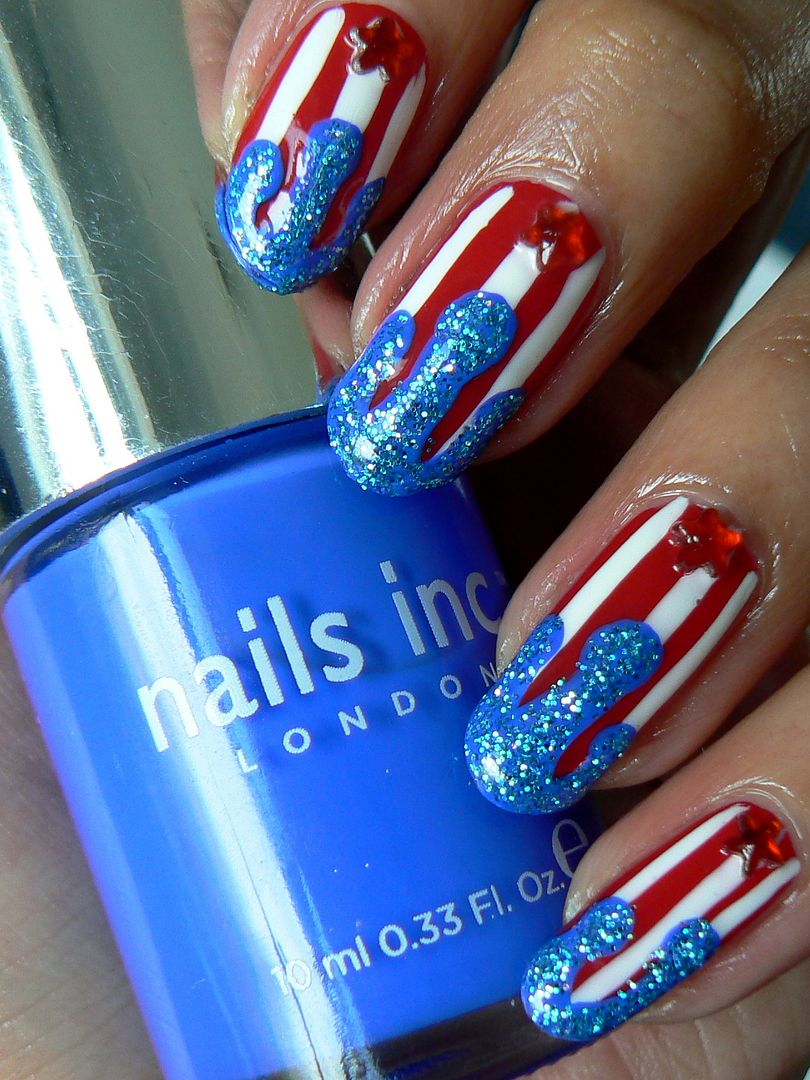
For
a final touch I just applied a wee red star rhinestone underneath my
drips to finish.
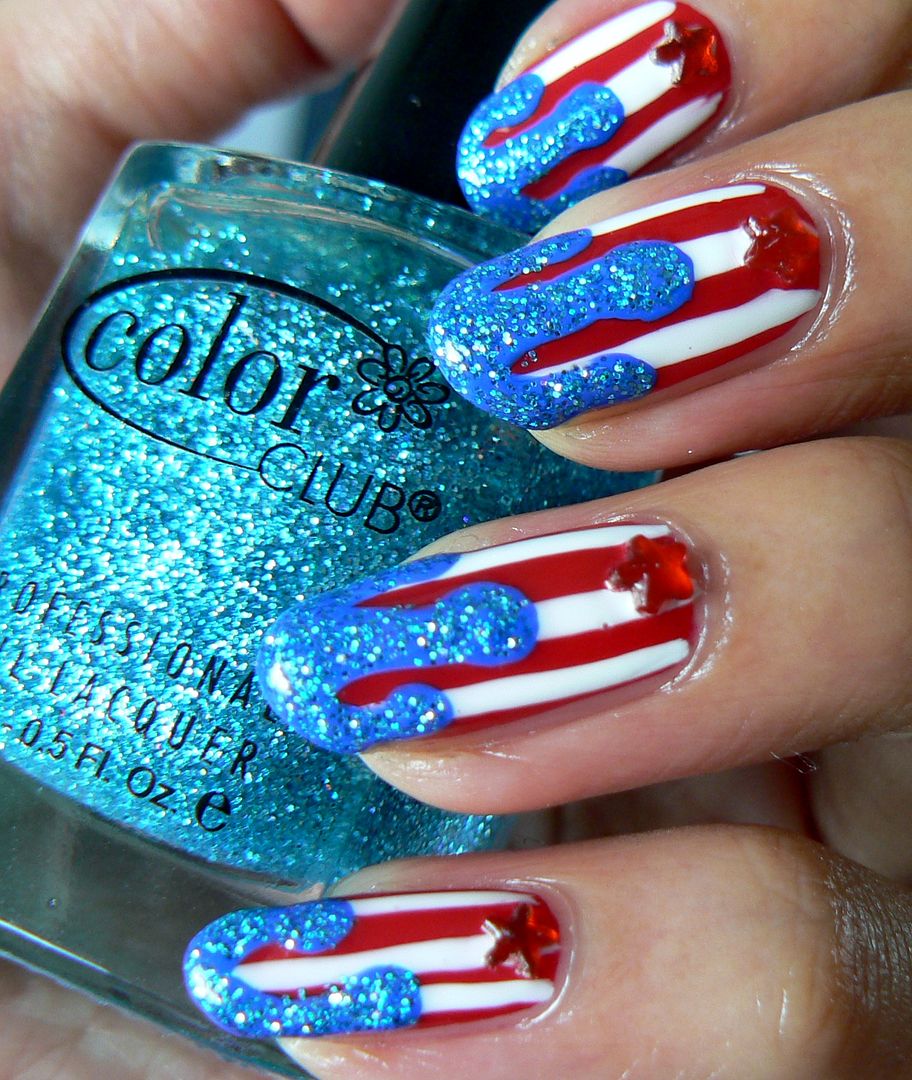
Apply
your topcoat & you're done! Sparkly Fourth of July nails ready for Independence Day party celebrations!
Thanks as always for reading!
Have a fab weekend whatever you may be doing my dears!
Lotsa
love to ya!
3.03.2016
NOTD - Faded Lavender & White Marble Nails...
Hello
lovely readers!
Anyone else a tad freaked that we are in March already?! Wooo where is the time going? Anyhoos my dears, the dry marbling obsession continues, I can't get enough of this fun
nail art technique, experimenting away with different shades &
combinations! Check back to my Blue Marbled Nails post for a wee
guide on how to create dry marbled effect nails.
For
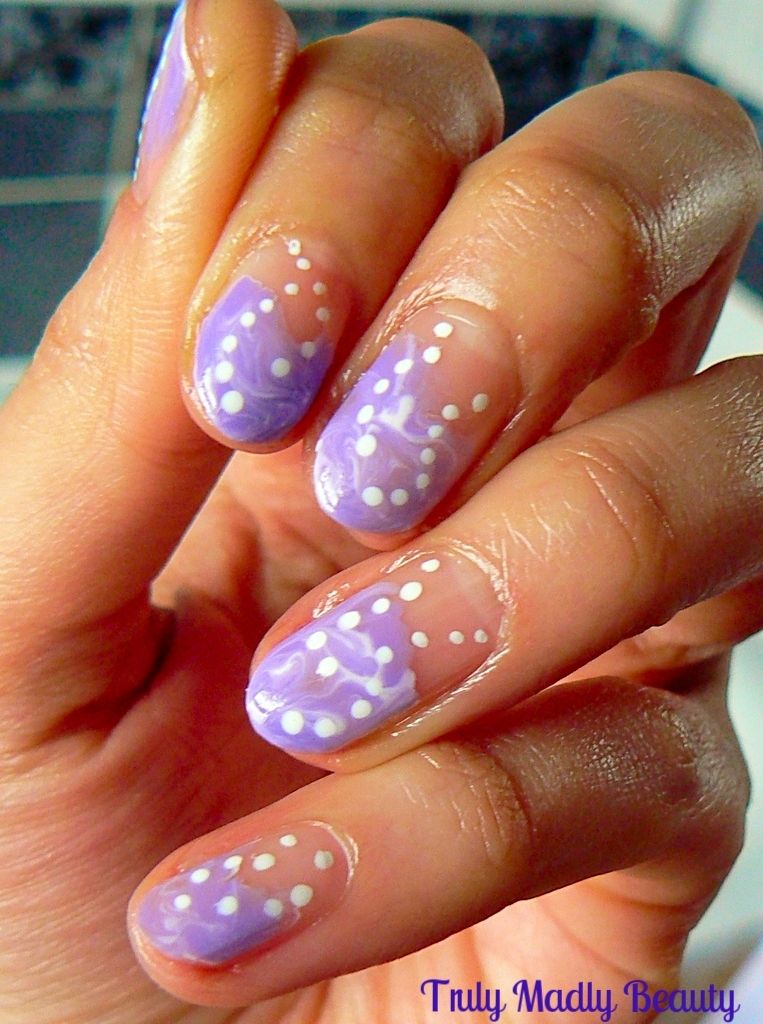
this mani I found myself prowling through Instagram & @Yagala's
account in particular for inspiration, her designs are simply
incredible. I saw her mani for marbled tips in pretty lilac tones &
just had to recreate!
Obviously
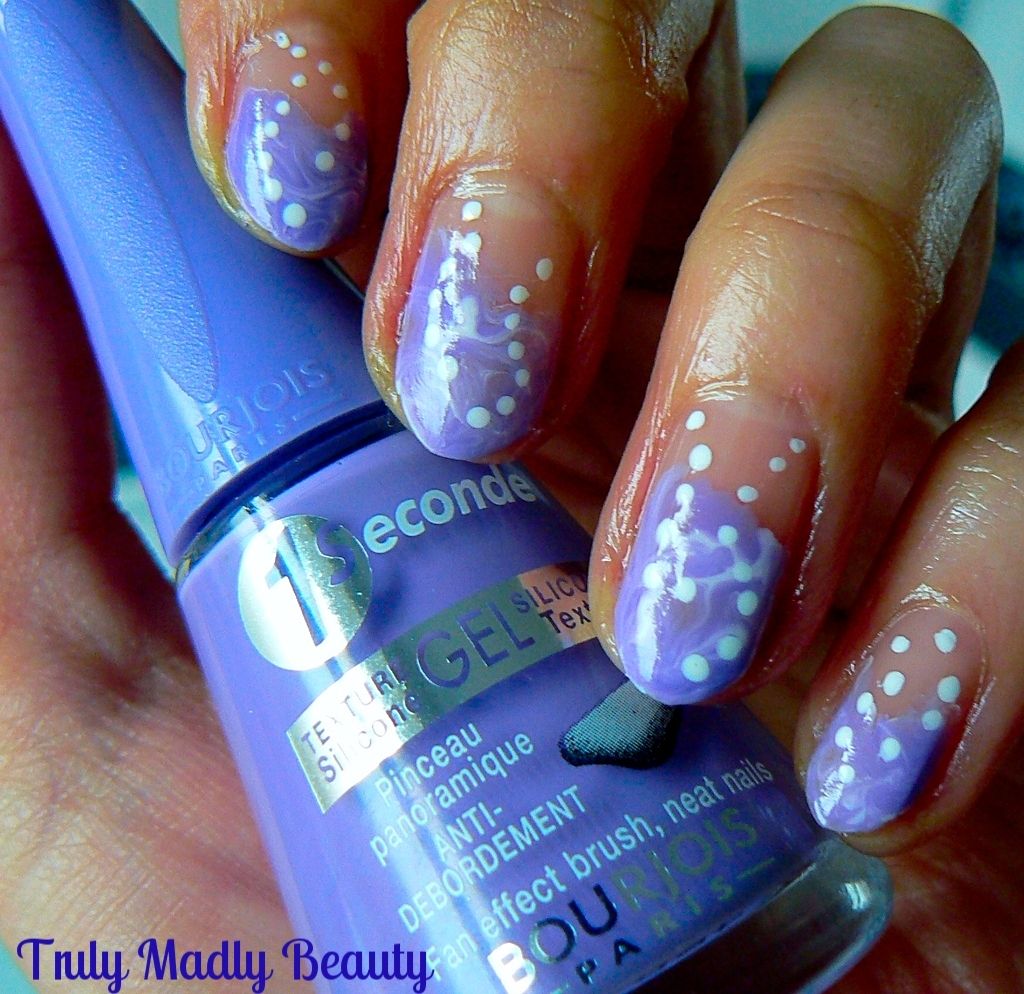
my skills aren't a patch on this talented ladies but I'm super
chuffed with how these came out. I love the idea of just applying to
the tips, ending three quarters of the way down the nail, almost
giving it a fading effect.
For
this I used Bourjois Lavender Esquisse for my lilac shade & a
random Claires polish in white.
These
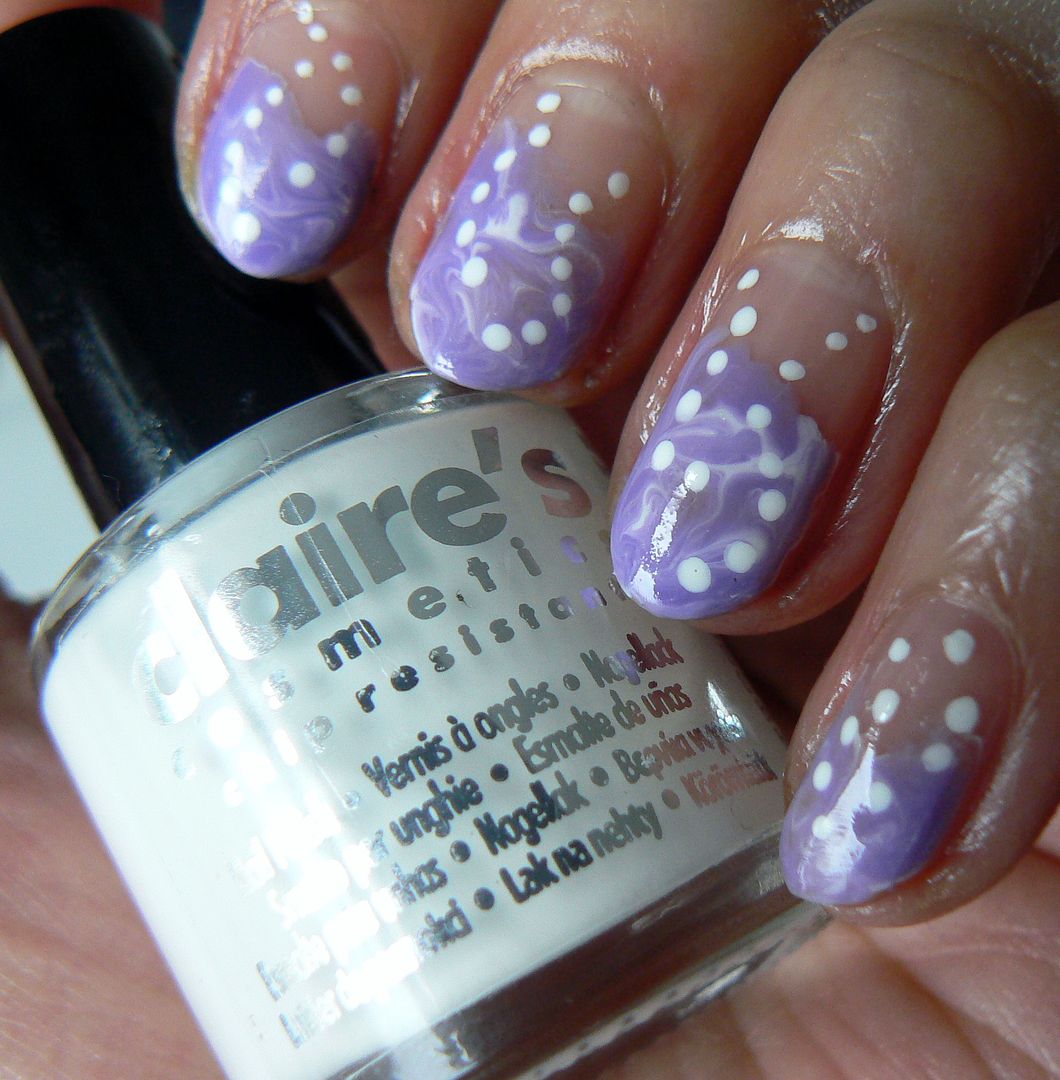
two polishes actually worked so perfectly together, not only due to
the colours but also the formulas. The Bourjois is a thick creme
whereas the Claires polish is actually extremely watery, so I'd flung
this into the back of my drawer with the idea that it would never be
used on account of this!

However
because the Claire's white formula is so watery, it actually made the
marbling with the thicker Bourjois much better, huzzah! Well done
Claire's you sly dog you, forgive me my impulsive error.

Start
with applying a coat of clear base polish to your nail, I dug out
this random Miss Sporty one, these polishes retail for just £1.99 &
are fab in my opinion, this clear one was perfect for the task! Then
whilst the polish is still wet apply a few dots of purple & a few
of white on to your tips & marble together using your
brush/toothpick/dotting etc bringing the polish down as you marble to
wherever your happy!

To
finish add two curved rows of little dots down the nail in various
patterns on each nail using a nail art pen or white polish &
dotting tool. Add your topcoat & your done!

Oooh these nails make feel so ready for Spring now! :)Thanks
as always for reading!
Lotsa love to ya!
Subscribe to:
Posts (Atom)