
Hey
there lovely readers!
Cherry
Blossoms have to be one of my favourite blooms with their pretty,
feminine & elegant presence. Not only do I adore the florals
themselves when they come out in all their glory every year but I am
a sucker for anything cherry blossom print & especially
(surprise surprise) nail art!
I've
done a couple of different takes on the design, which you can see
HERE & HERE. This time I was in the mood for some soft
pastel tones & gradient nails as its been a while since
I've done me some good ol sponging & this was the outcome!
To
create gradient nails one uses the sponging technique, a method
involving painting two or more polish shades on to a sponge
which you then dab onto the nail, using a side to side & up/down
motions to develop a gradient of the colours blending into each
other.
I've done a post which briefly touches on how to do
this technique HERE which FYI also shows how to use Masking Fluid as
a skin protection barrier for easy nail art cleanup!

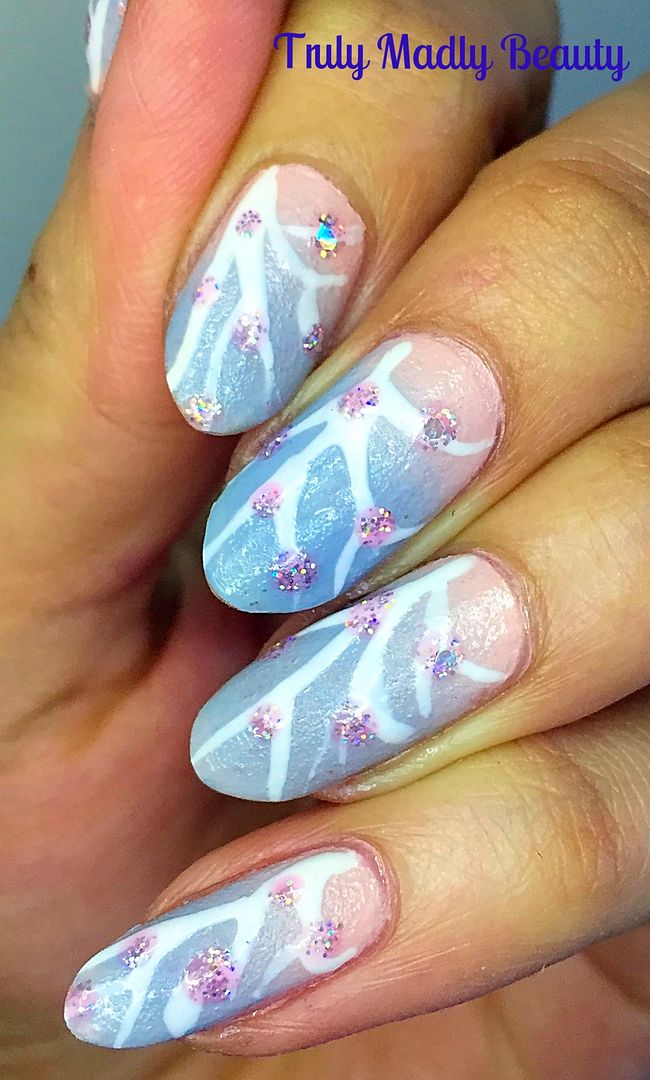
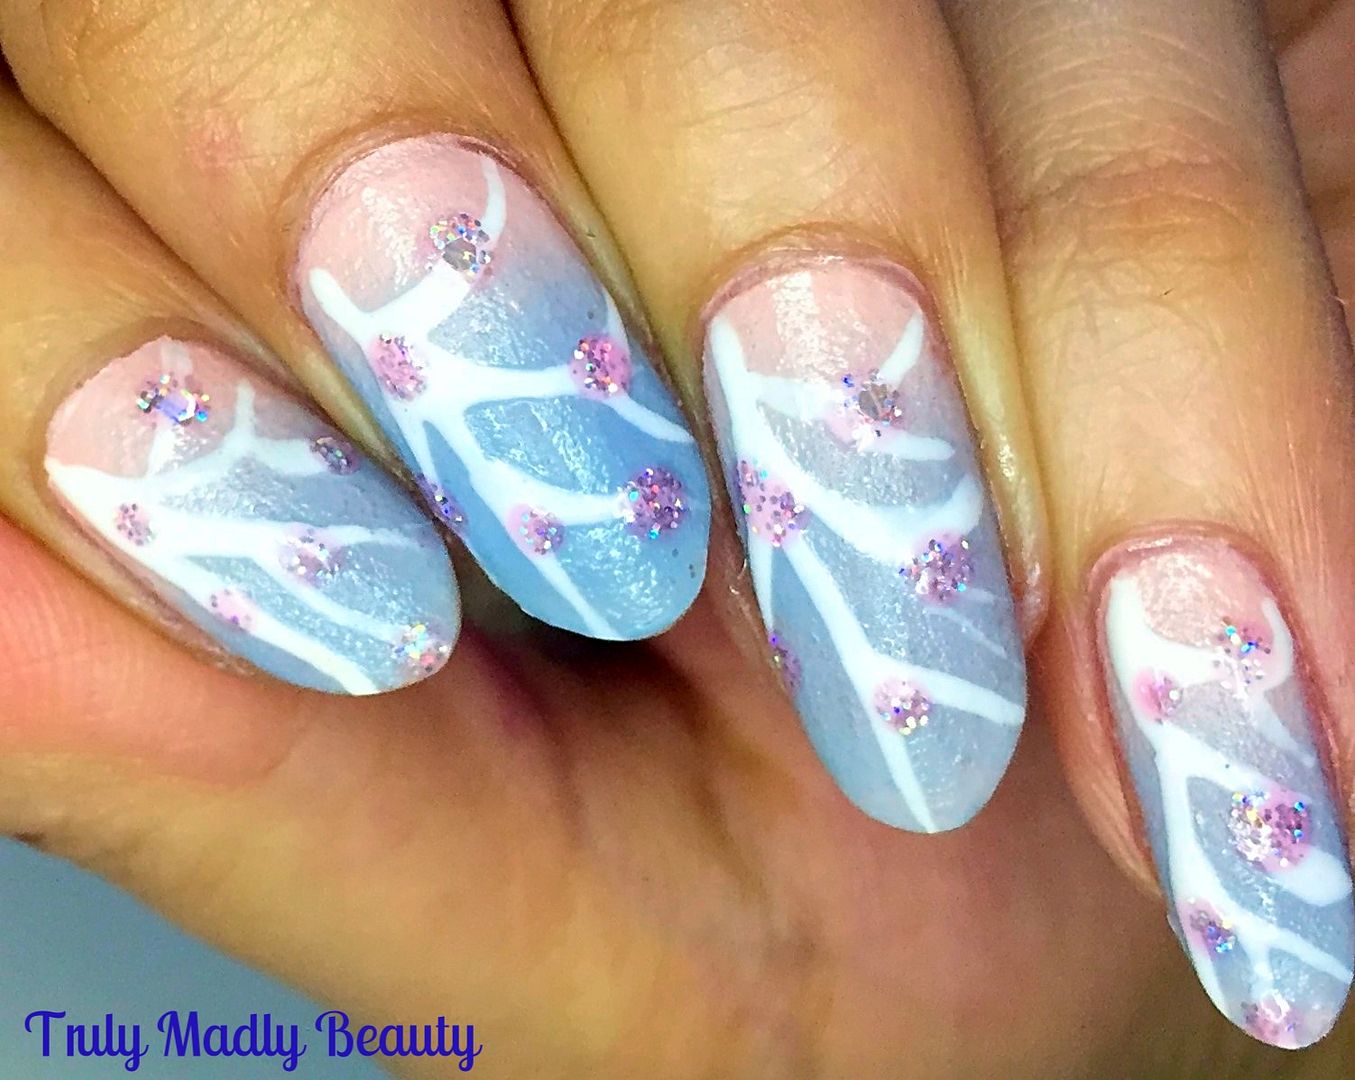
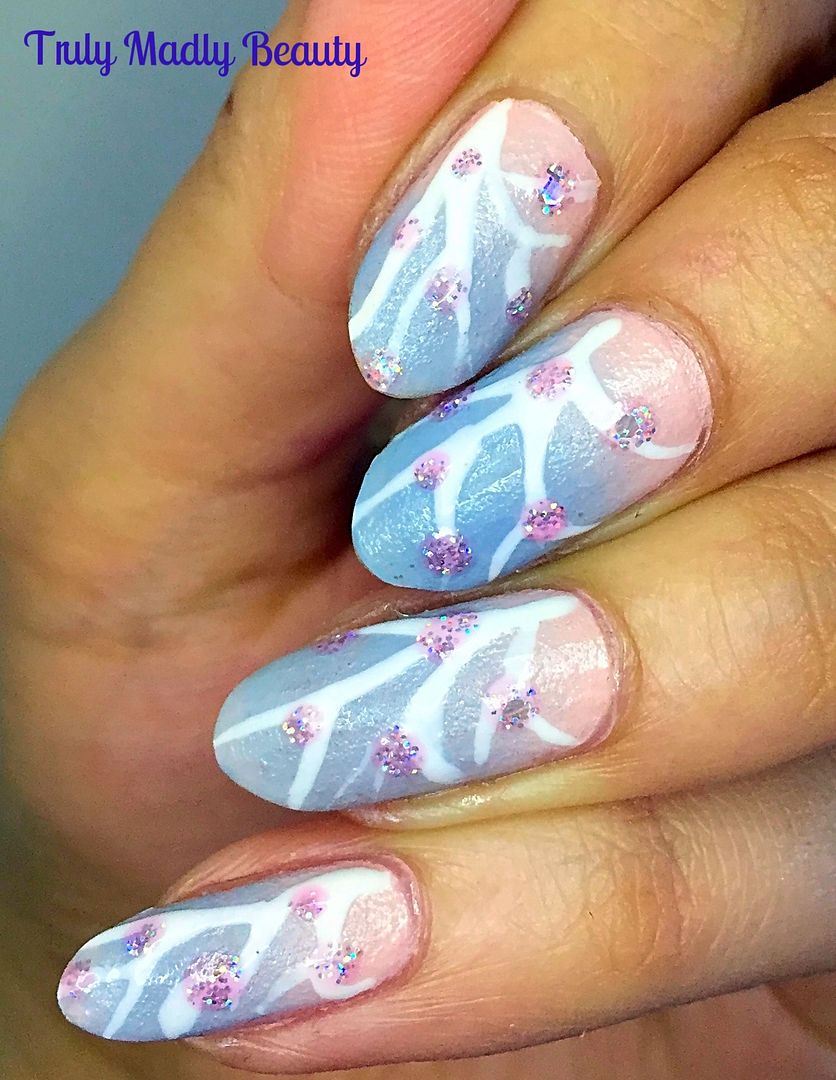
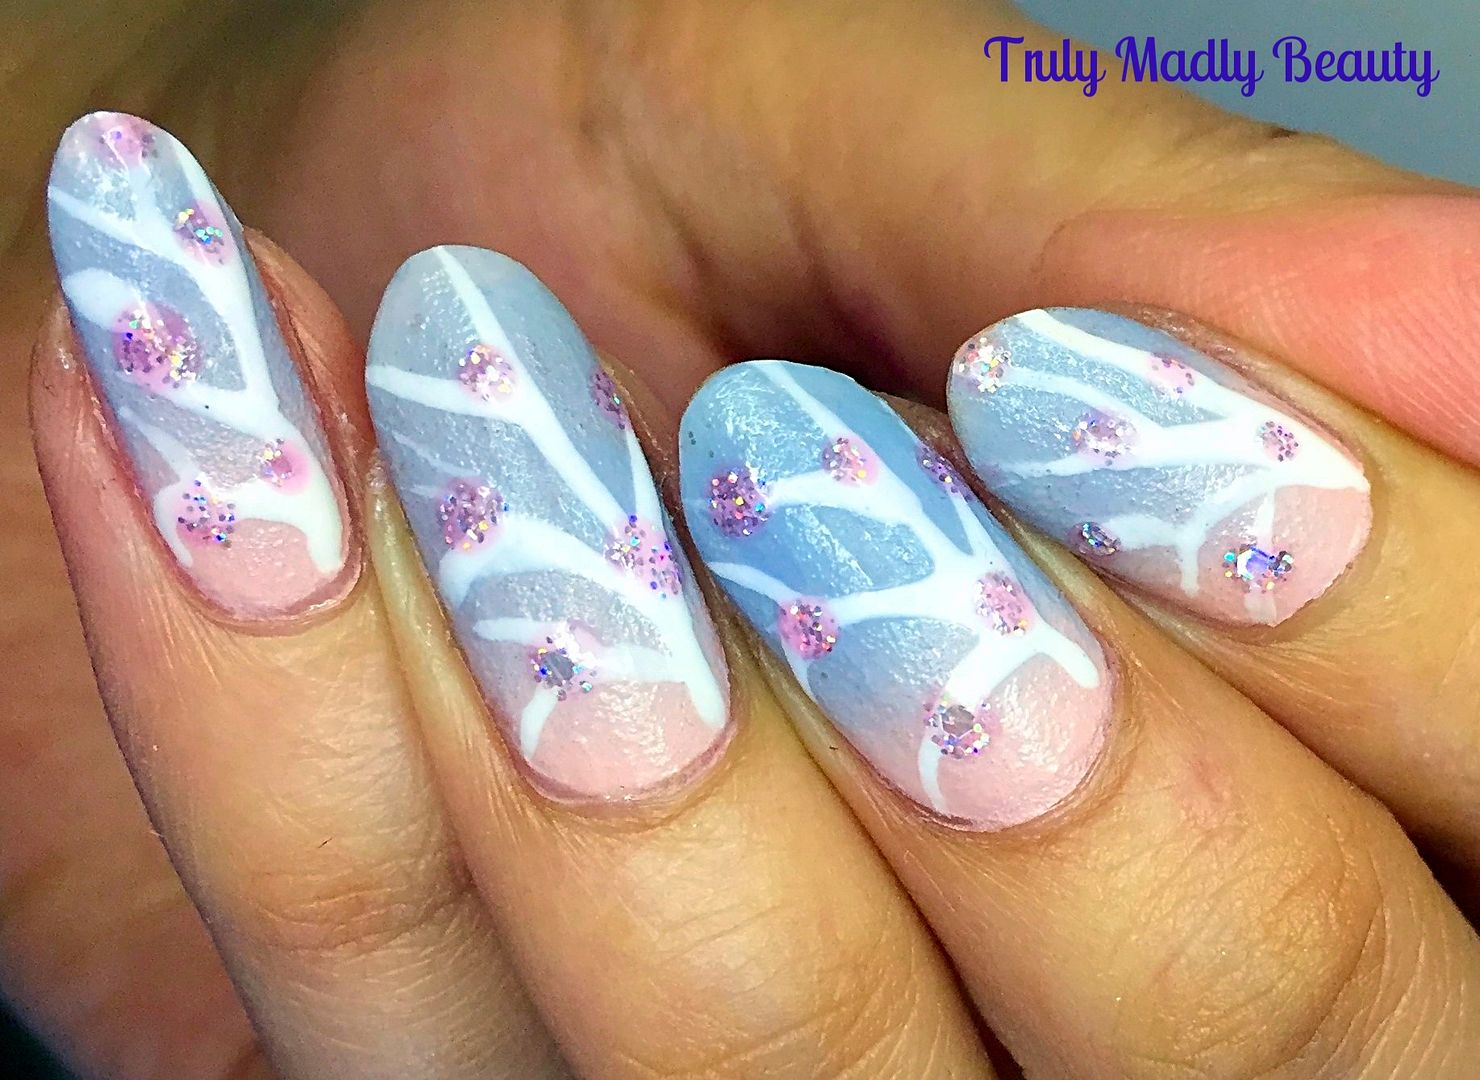
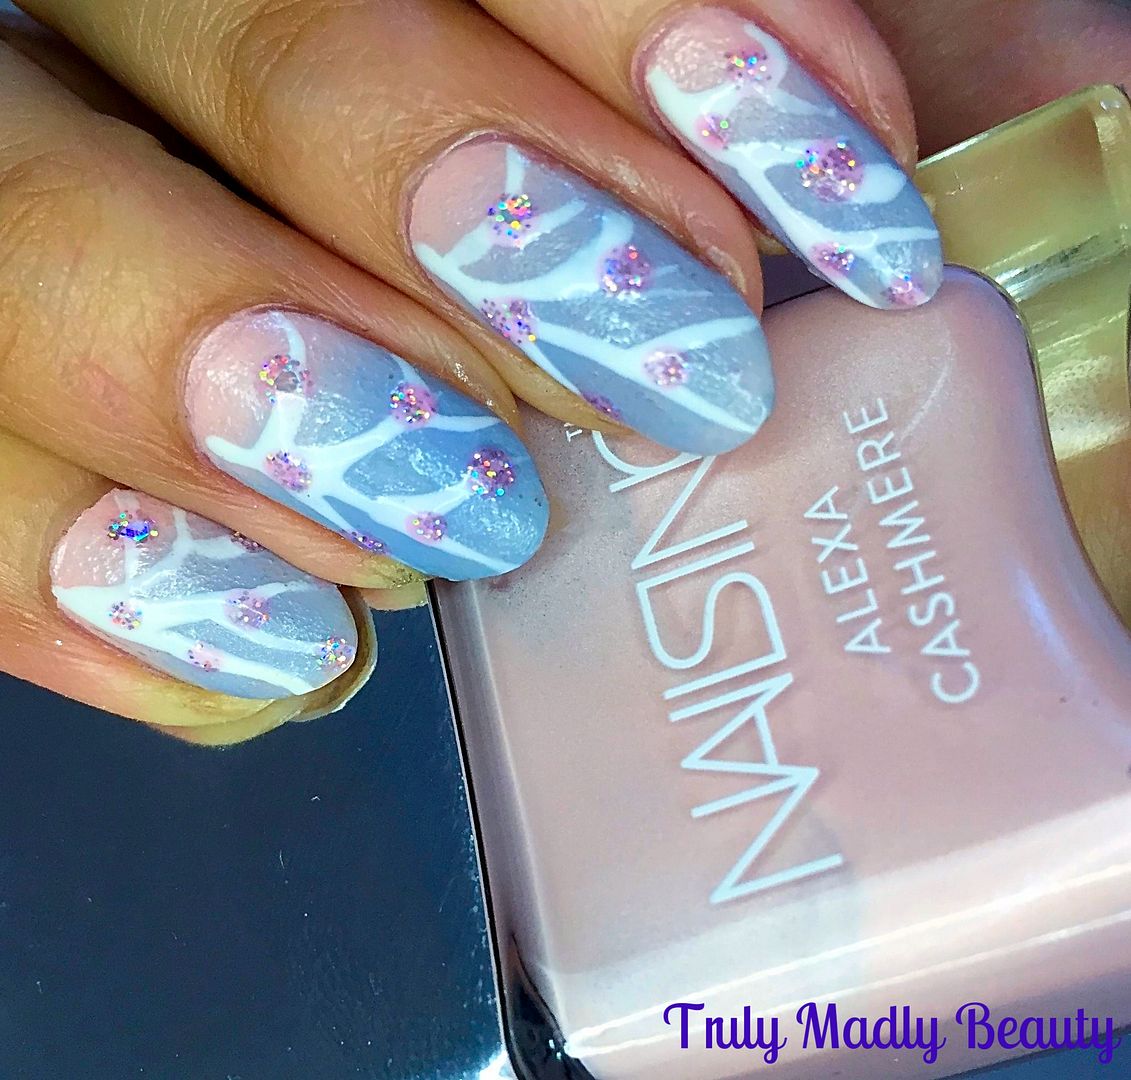
For
todays design I opted for a soft pink to lilac gradient, I'm loving
lilacs so much right now & I think the two colours blend so
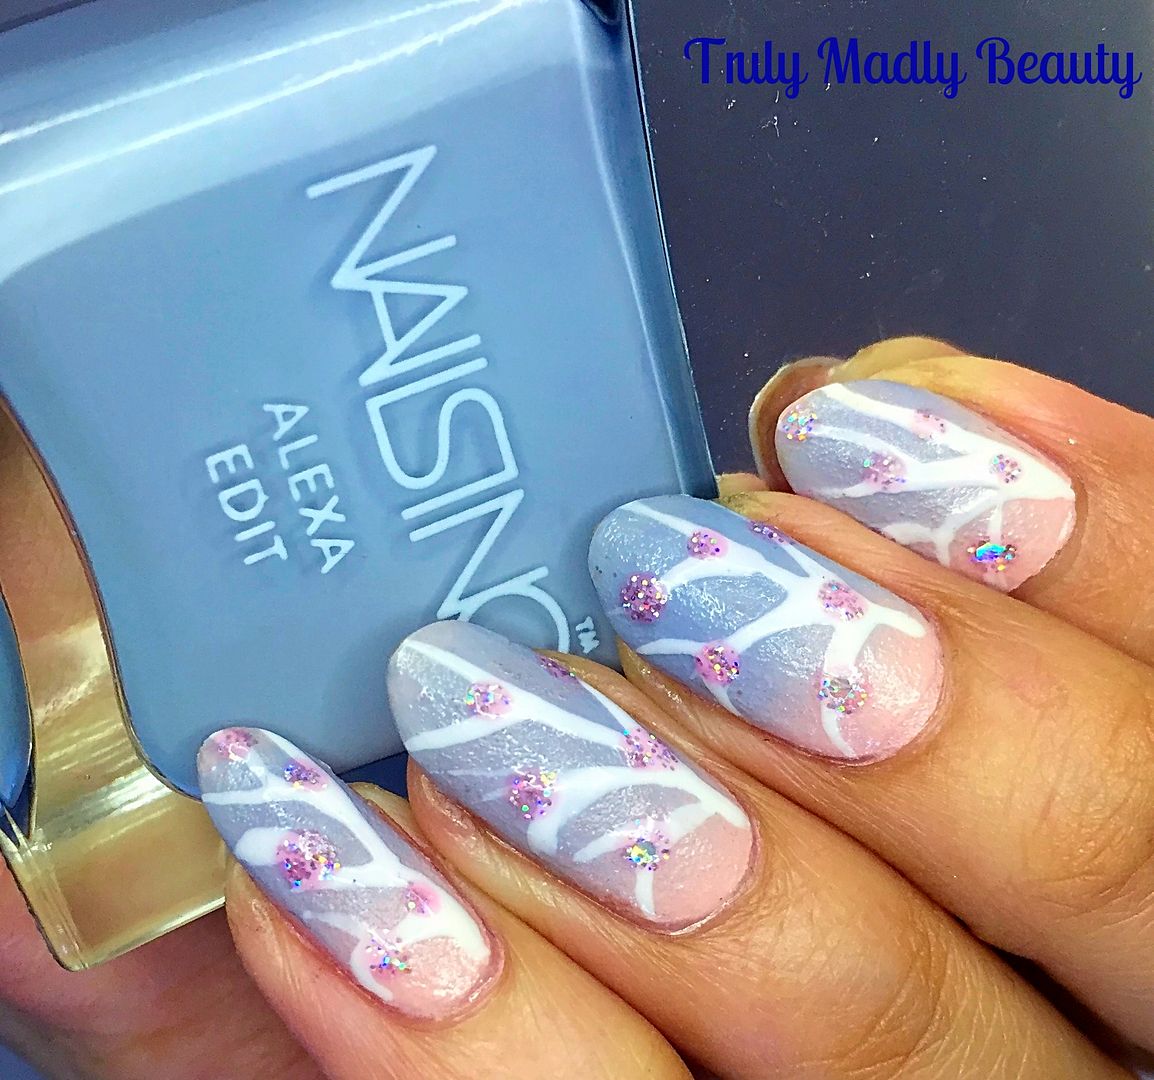
seamlessly together. Here I used two of Nails Inc Alexa Chung nail
polishes back from when she did her wee collab with them, Cashmere
Pink & Winter Lilac.
When
sponging its best to have a base colour on first, otherwise you'll be
sponging 1374313 layers before even getting near to an opaque finish.
You can use white for your base, that will really make the colours
pop or you can do what I have done which is use the lightest colour,
in this instance the Cashmere Pink.
I didn't
realise until after I'd applied one coat of Cashmere Pink as my base
that this is actually a slightly textured polish?! I had no inkling
or indication of this at all so it did come as a bit of a surprise
with its slightly rough finish. But as it wasn't overly gritty &
plus I'd already started so heck if I ain't a stubborn (& perhaps
just plain lazy) mule, I decided to persevere.
Once
your base is completely dry, you can add a speed dry topcoat to help
with this, go in with sponging on your polishes. To achieve a finish
I was happy with it took only two bouts of sponging.
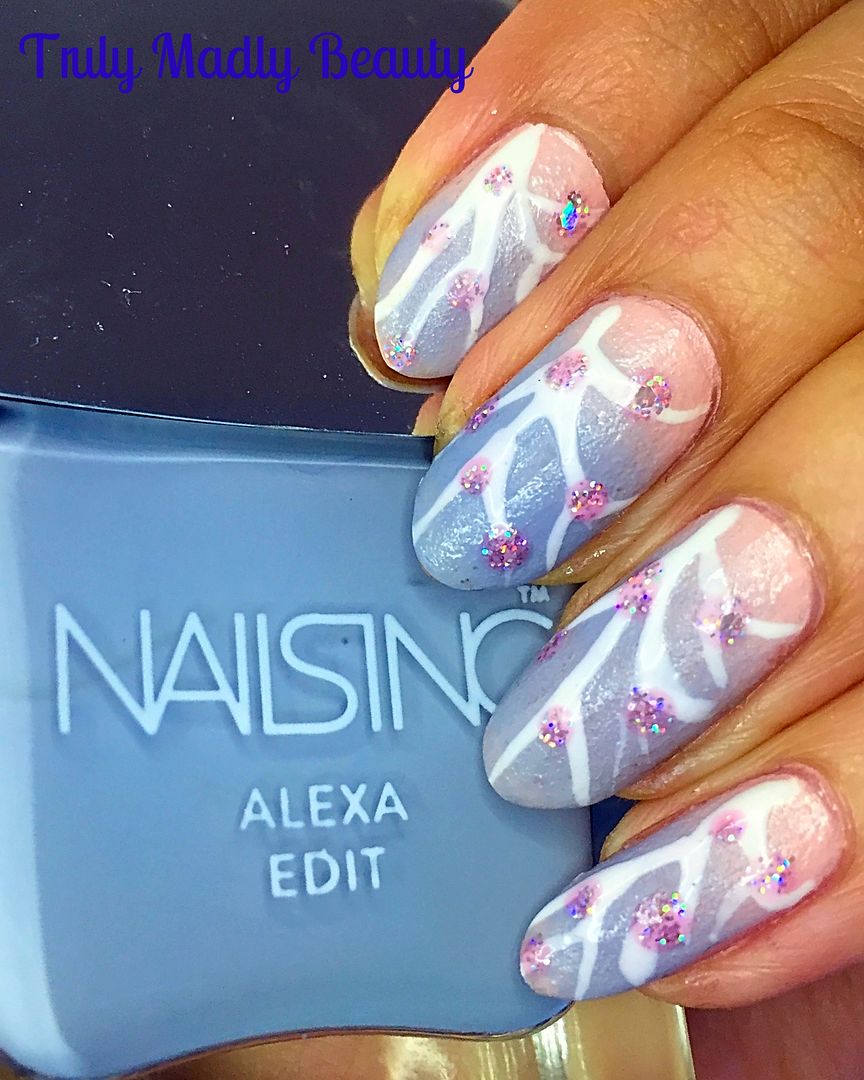
Now
I had my pretty base ready for some blossom art! This time I decided
to use white nail polish for my branches which I free handed with a
fine nail art brush, starting from one corner of the nail & going
outwards, keeping the bottom end of the branch thicker & thinning
out at the tips.
Then
for the final detail of the pretty blossoms themselves, this time I
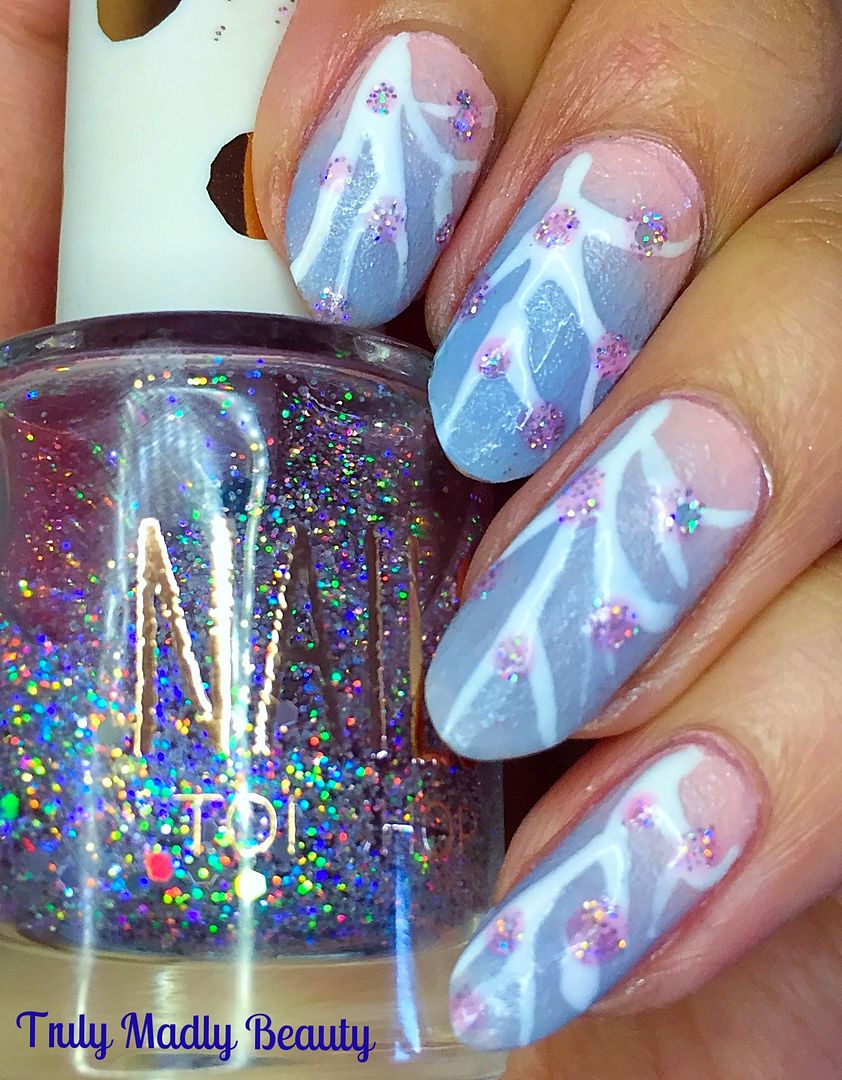
decided to go for some glitter because sparkle completes me.
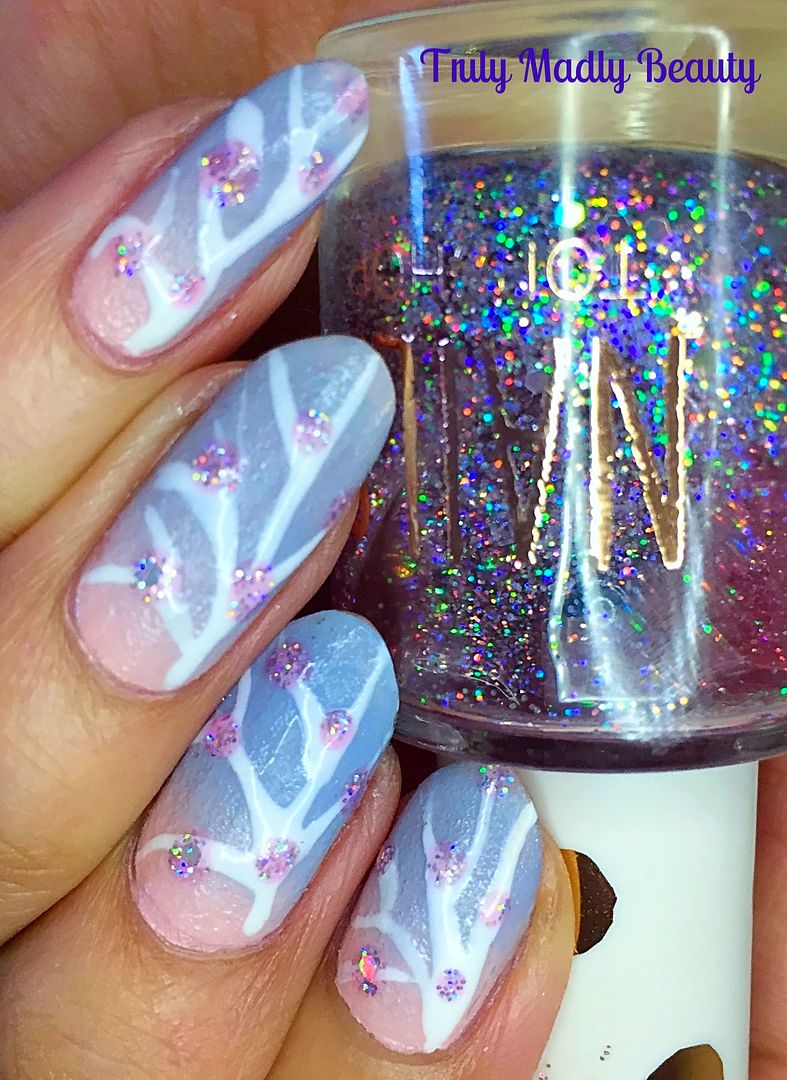
Here
I've used a pretty courtesy of Topshop by the name of Adrenalin which
is a sheer pink toned glitter topper filled with a rainbow of holo
sparkles that definitely get the heart rate pumping. Simply using a
dotting tool I dabbed on dots of glitter to represent my blooms.
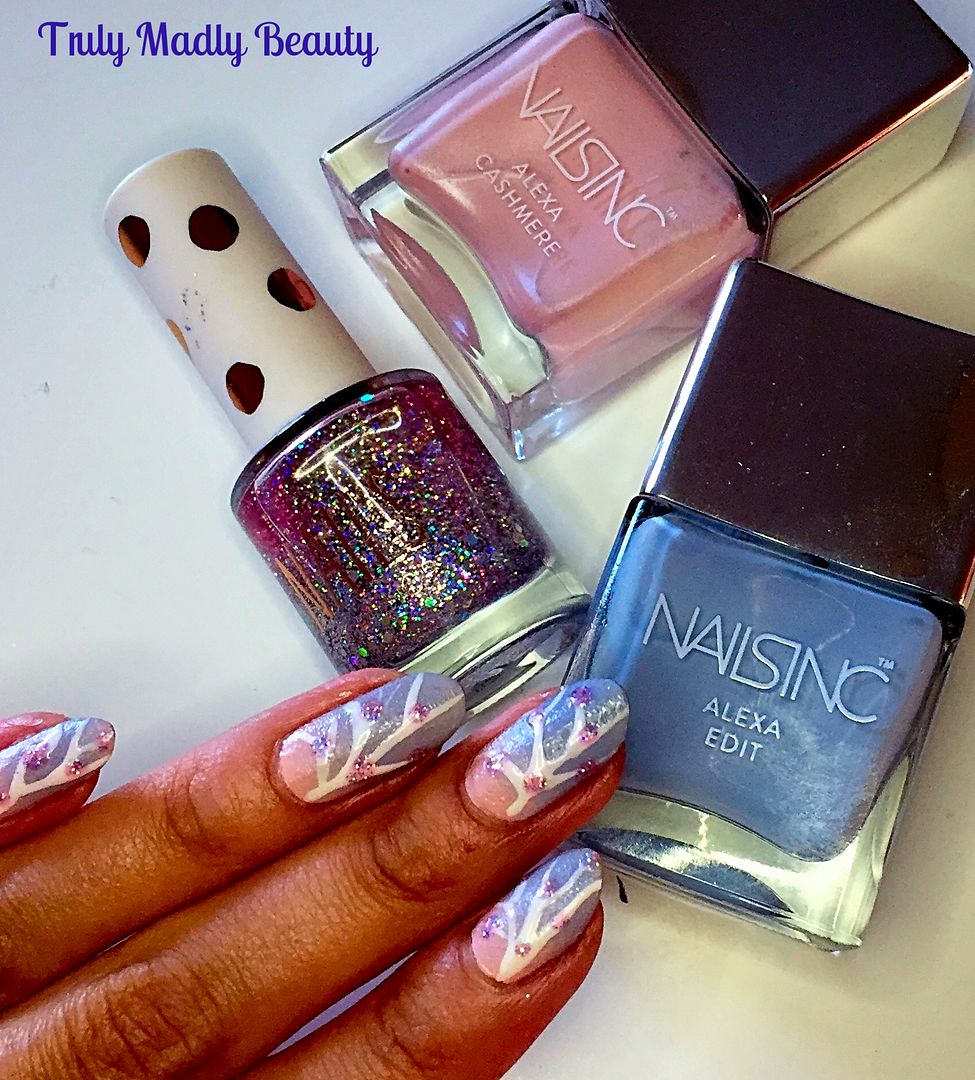
Finish
with topcoat & that's it! Hope you liked! Whats your favourite
floral? Thanks as always for reading!
Lotsa love to ya!

This design is so pretty and those Nails Inc colours are giving me spring or baby shower vibes ;)
ReplyDeleteHowever your nail art skills are incredible as always, you always create such wearable designs & I love them.
Vicky x
@thepolishlist
Aww Vicky, you have no idea how much your comments mean to me! Honestly so nice of you, I'm so glad you love them! xox
Delete