10.17.2015

Halloween Nails - Dripping Blood Tips!

Hello there my lovely readers!

Happy weekend! Now I couldn't let Halloween pass by without rolling out some obligatory blood effect nails! Its kind of a must really ;) Last year I decided to do things a tad differently with these Chanel Dripping Blood Nails using the well known emblem. This year I've gone for some simple yet satisfying dripping blood on the tips!
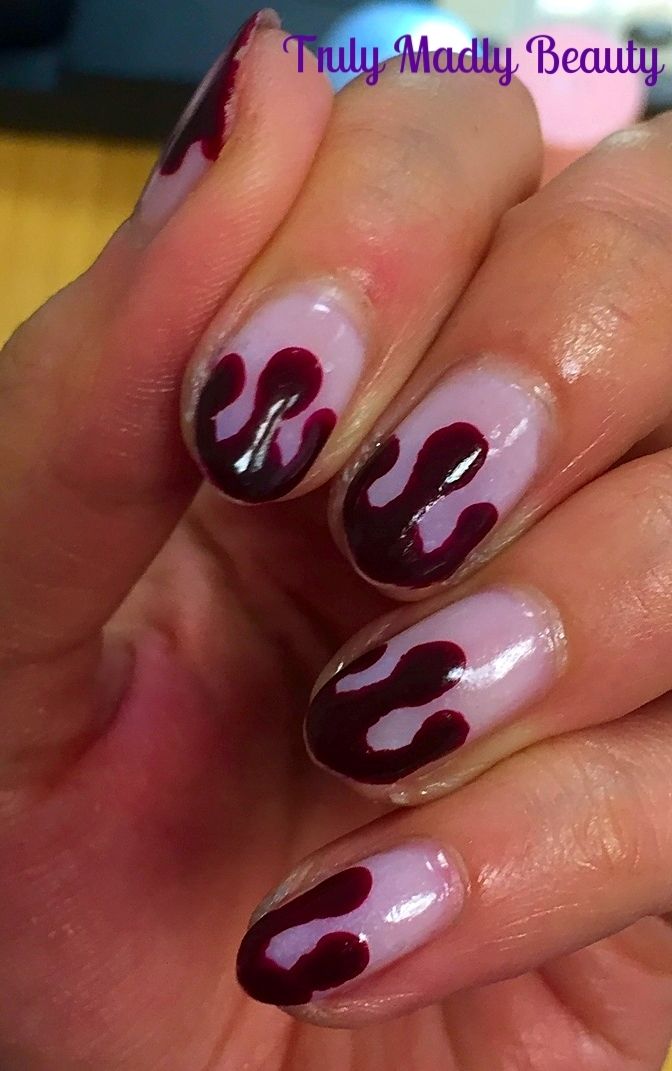

To start things off you need to have a nice nude base to really make that blood stand out ;) I decided to try out this Essence 6 in 1 Nail Candies polish which I picked up on a whim when I was passing by the stand in Westfields.
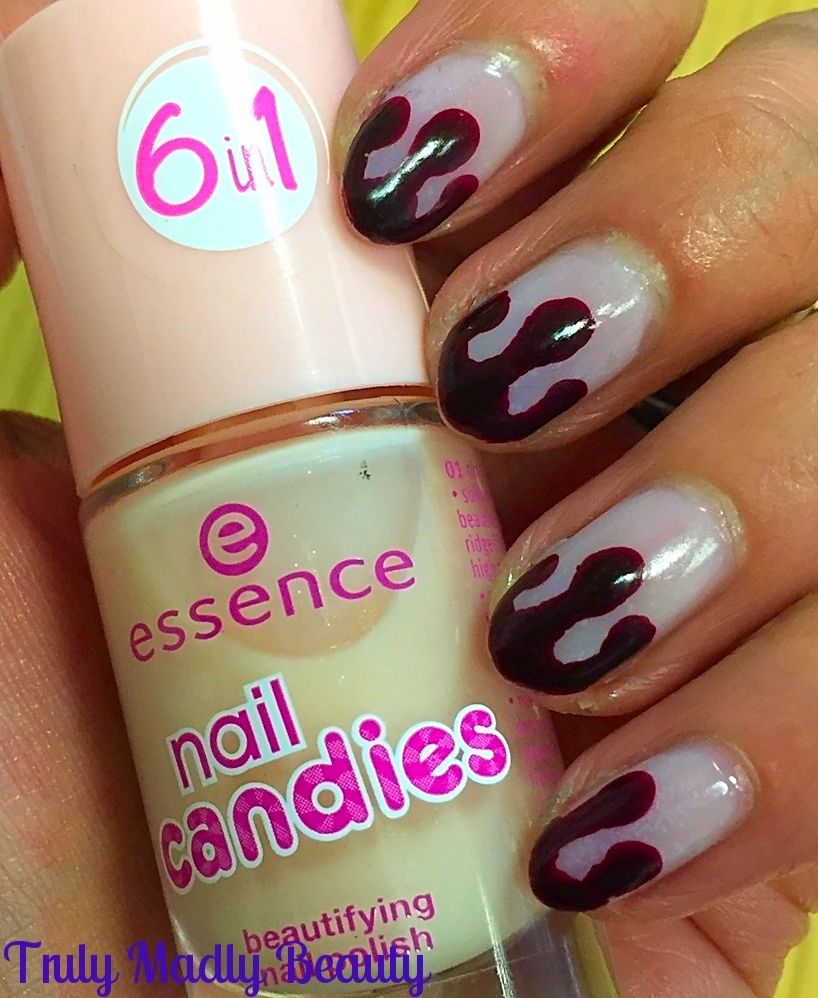

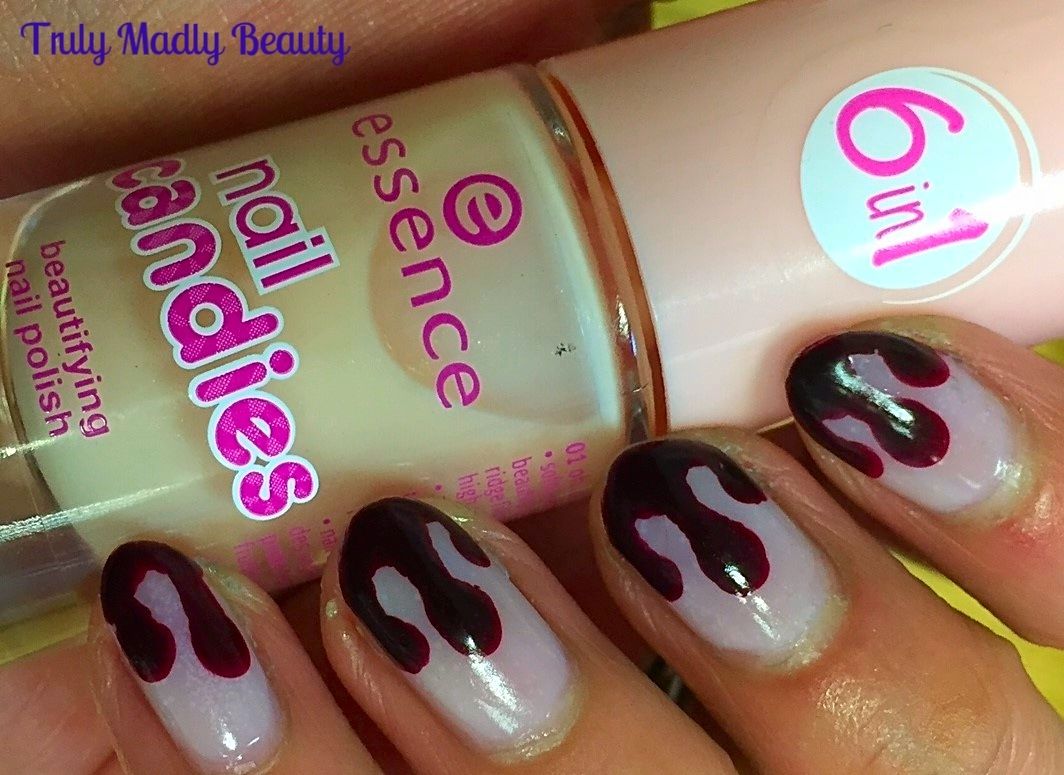
The Nail Candies are a range of sheer pastel polishes with 6 functions, to harden, protect, smooth out ridges, dry fast to a high gloss finish with a delightfully fruity scent. I do like me a multi-purpose product & I absolutely LOVE this! Not only does it deliver on all of those but I adore the finish it gives, so perfect for a 'my nails but better' look. The formula is sheer but two coats gave a gorgeously glossy jelly like finish.

Next for the blood! Having a look through all the vampy reds in my collection, of which there are an embarrassingly large number, but hey one can never have too many right, I decided on an old favourite, Nails Inc Chester Square.
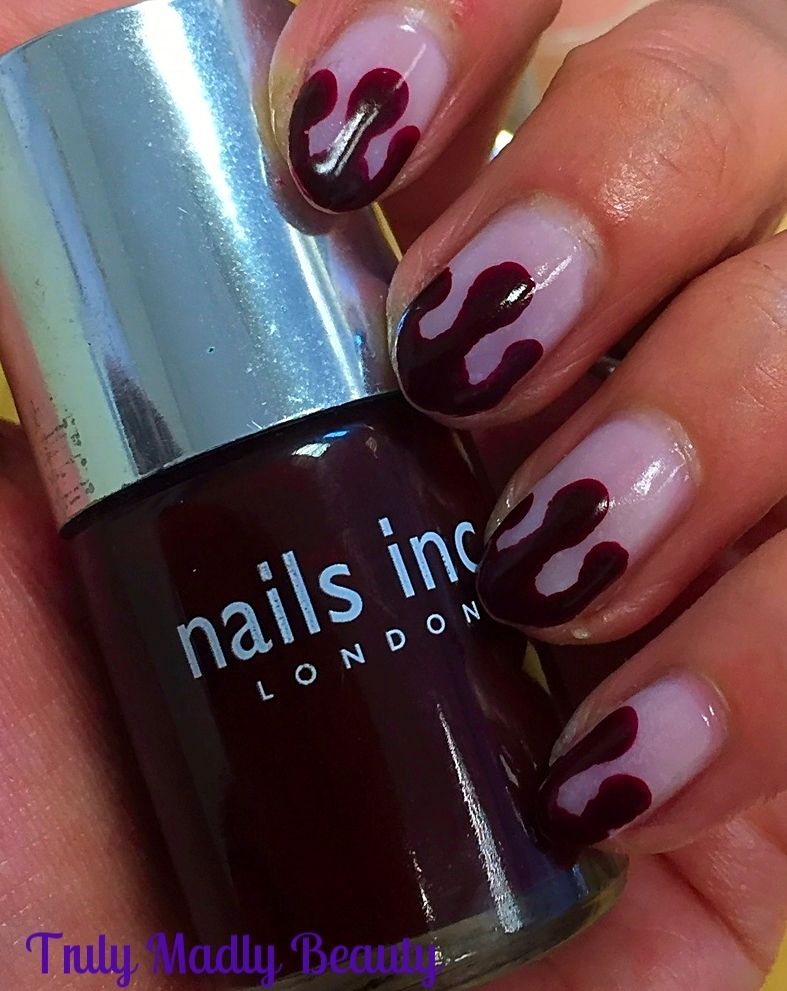

Chester Square is a deep brown toned burgundy red shade that dries to a lovely glossy finish, making it perfect for a realistic blood look hehe! You can decide whether to do your drips on the cuticles or tips, but having done my Toxic Slime & Tombstones Nails from the cuticles, this time I decided on tips.
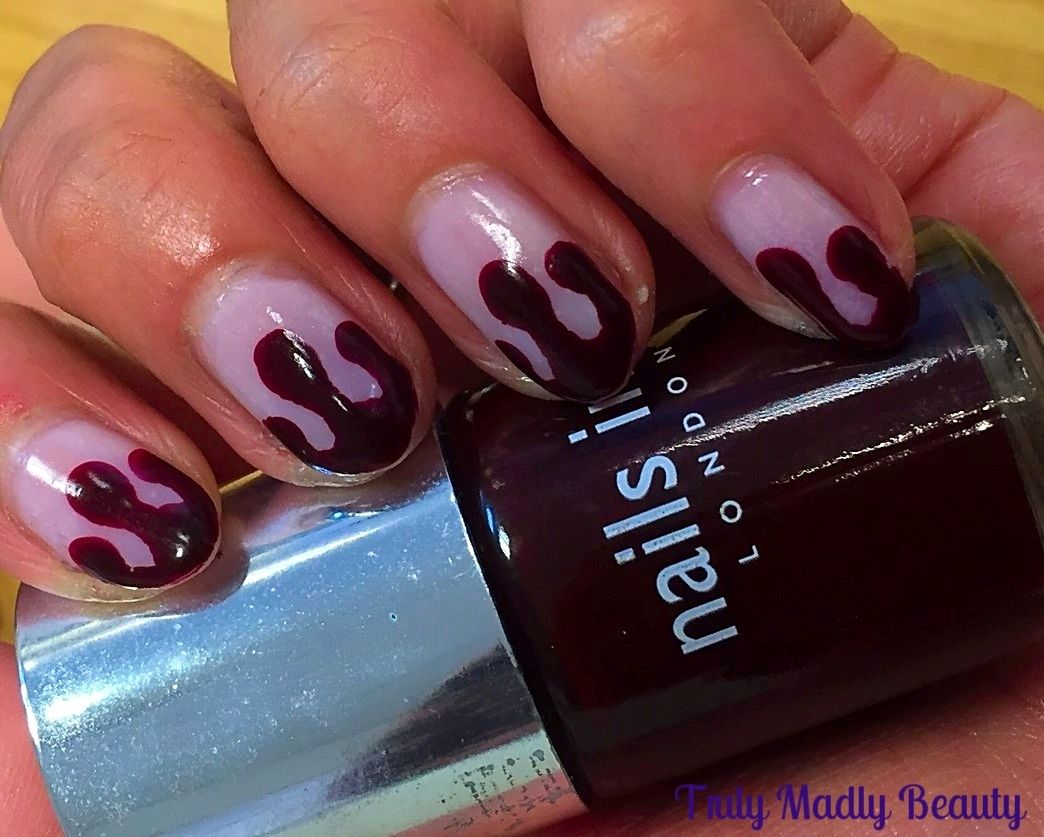

To create the dripping blood effect I simply applied three thick dots of Chester Square using my dotting tool, then using the same tool, dragged the polish drips up the nails before adding more on to the tips.
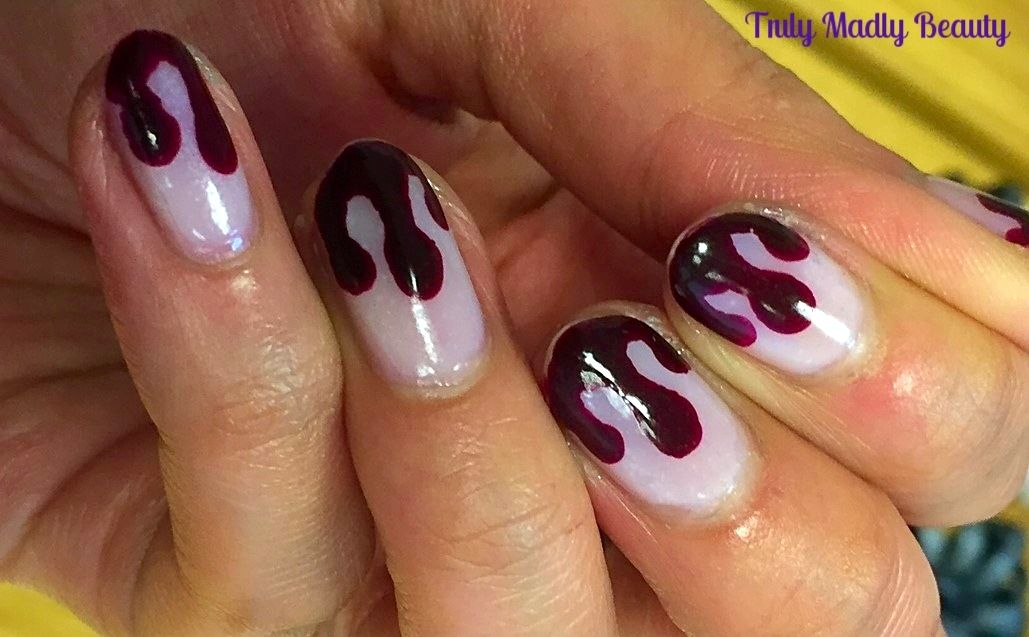

Finish with a nice thick coat of CNDAir Dry for super glossy finish & your dripping blood nails are good to go! And because of the Nail Candies even though my nails look gruesome they smelled SO GOOD! Haha!
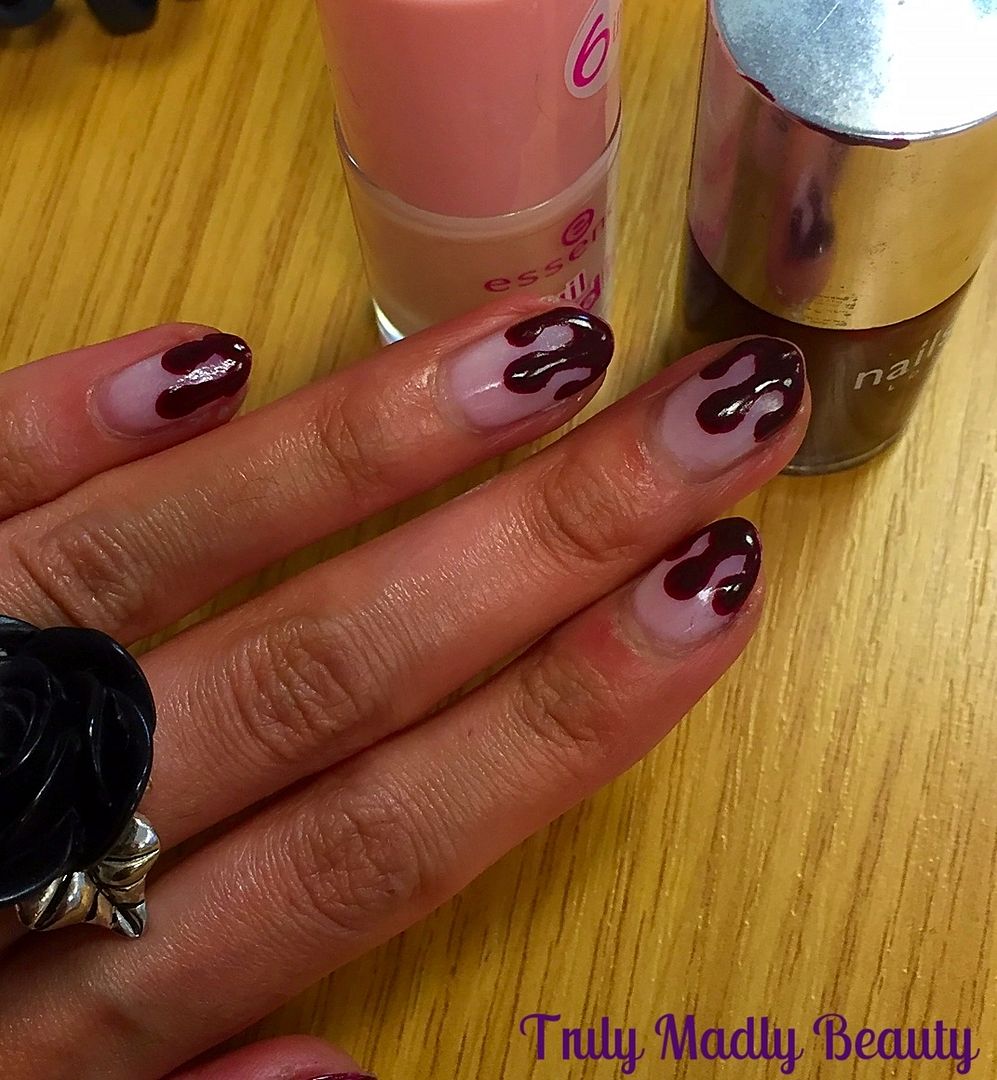

Thanks as always for reading dolls! Till next time!


Lotsa love to ya!


10.12.2015

Halloween Nails - Toxic Slime & Tombstones!

Hello there my lovely readers! 

If you follow me on social media you'll know the majority of my weekend was spent in the country as the time had finally come for the besties wedding. The whole day was simply magical with emotions running high & thankfully everything went smoothly! My friend decided to go for a small intimate affair & let me tell you coming from an Asian background this was so refreshing! It felt so much more special & the bride looked so stunning. Sad its all over now!

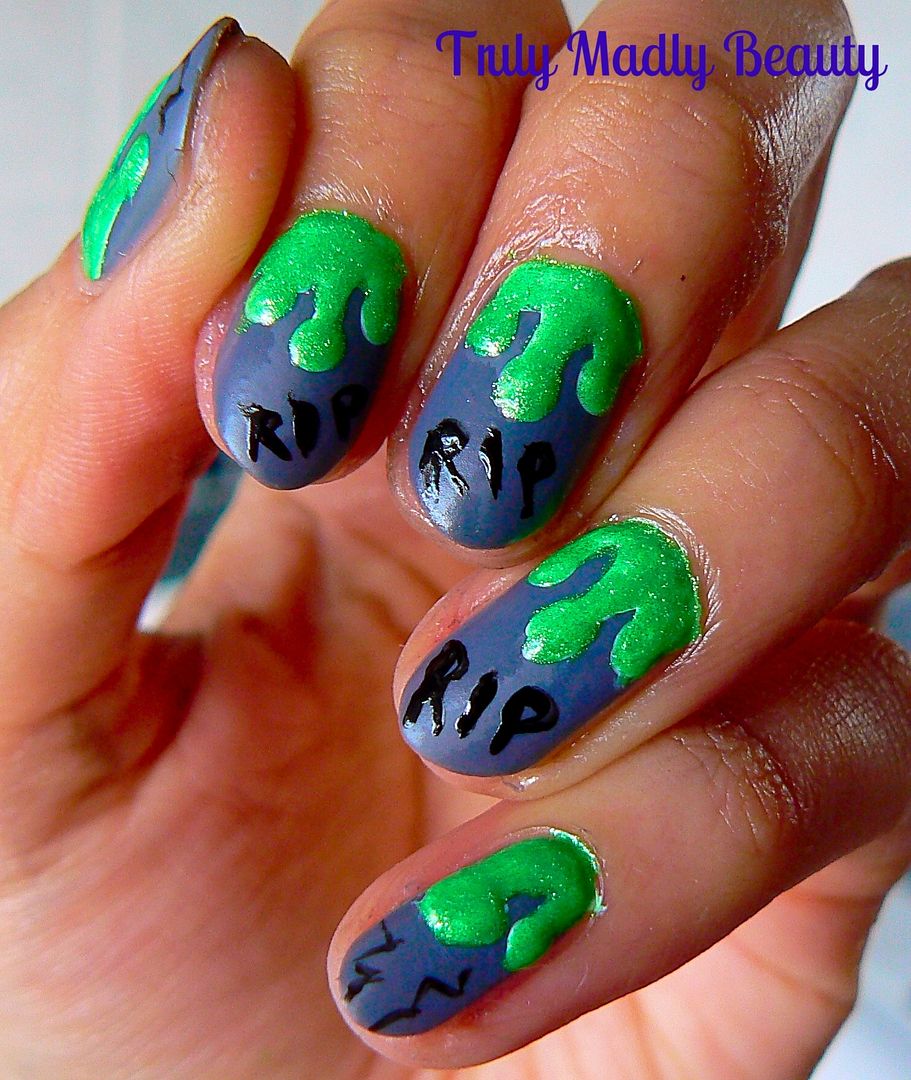
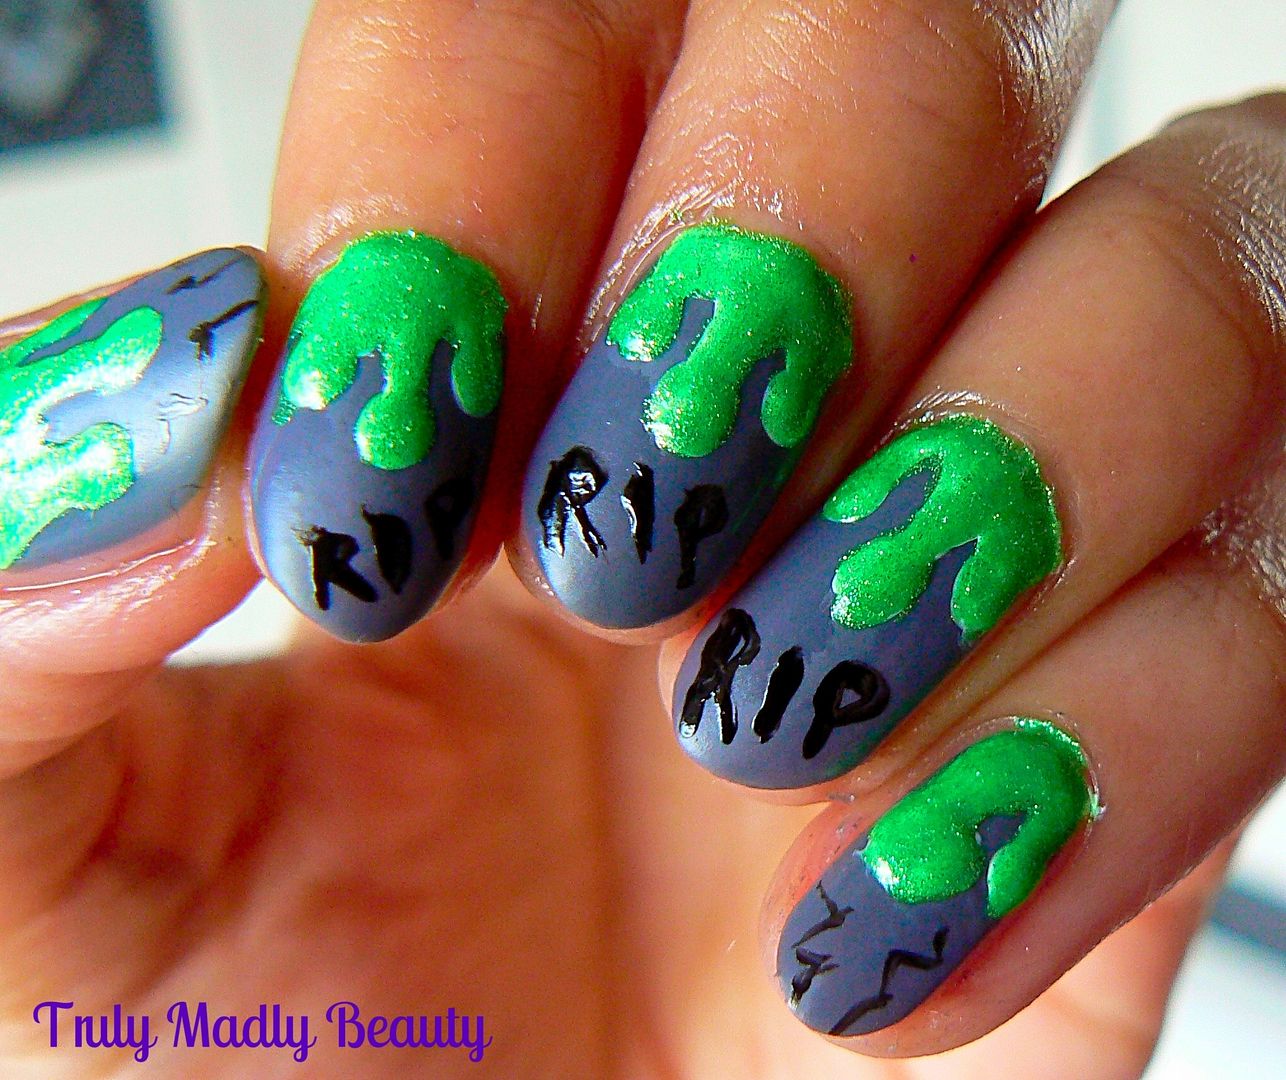
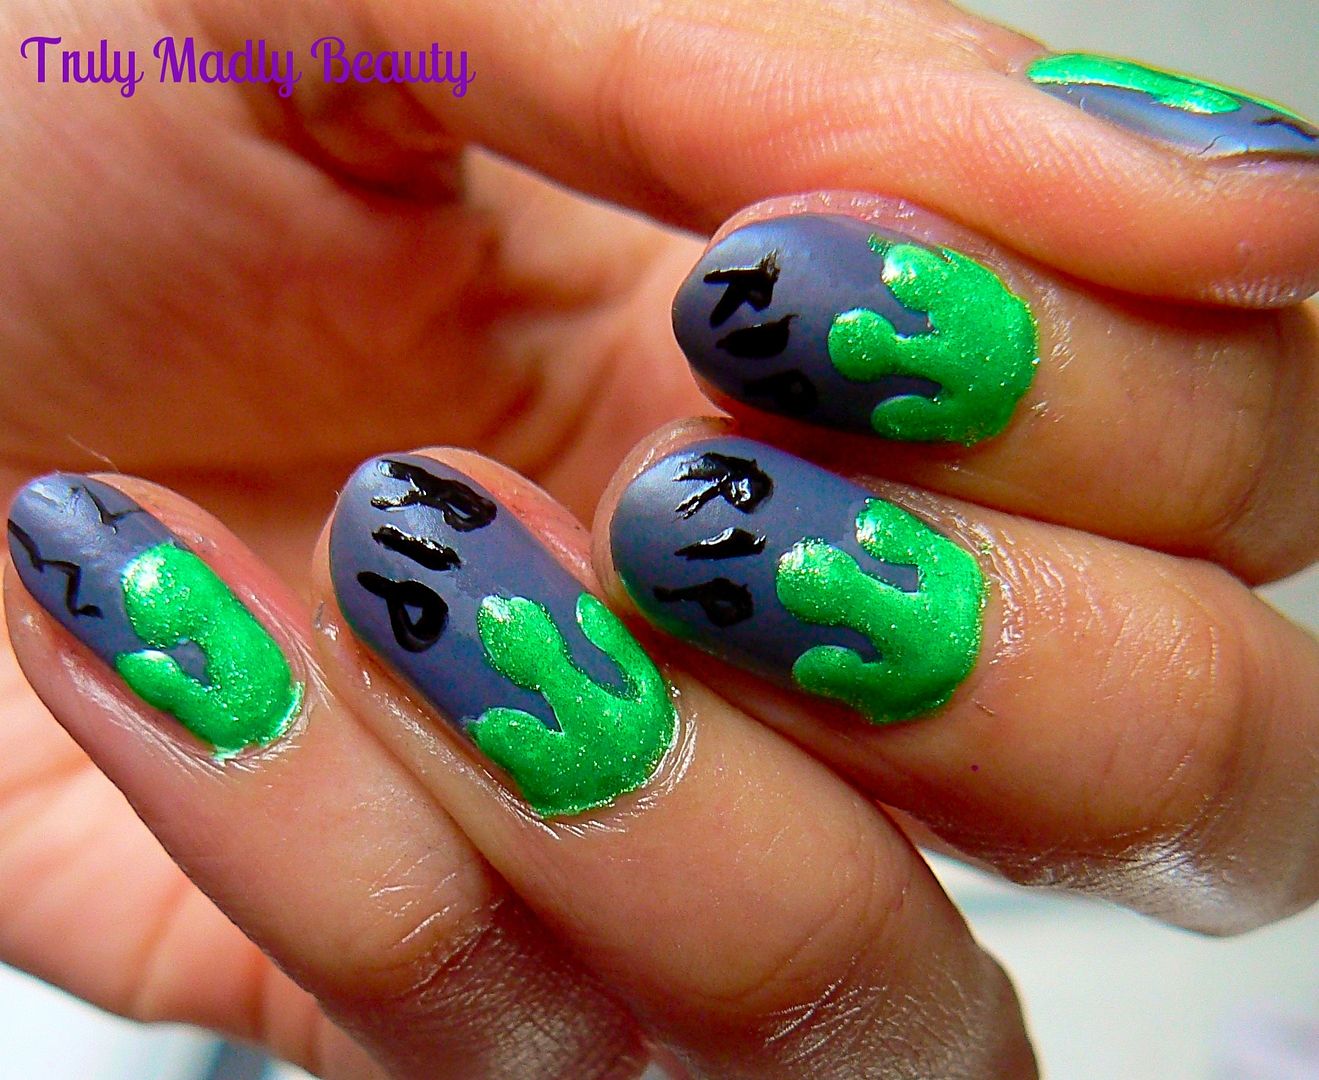
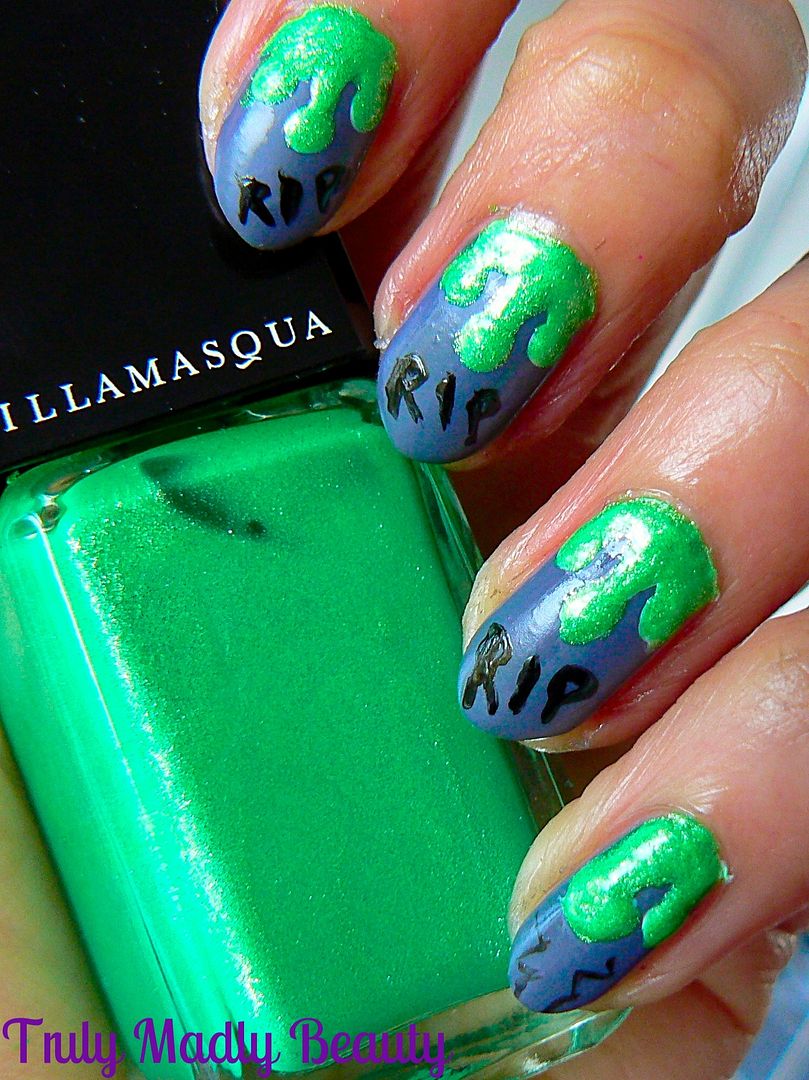
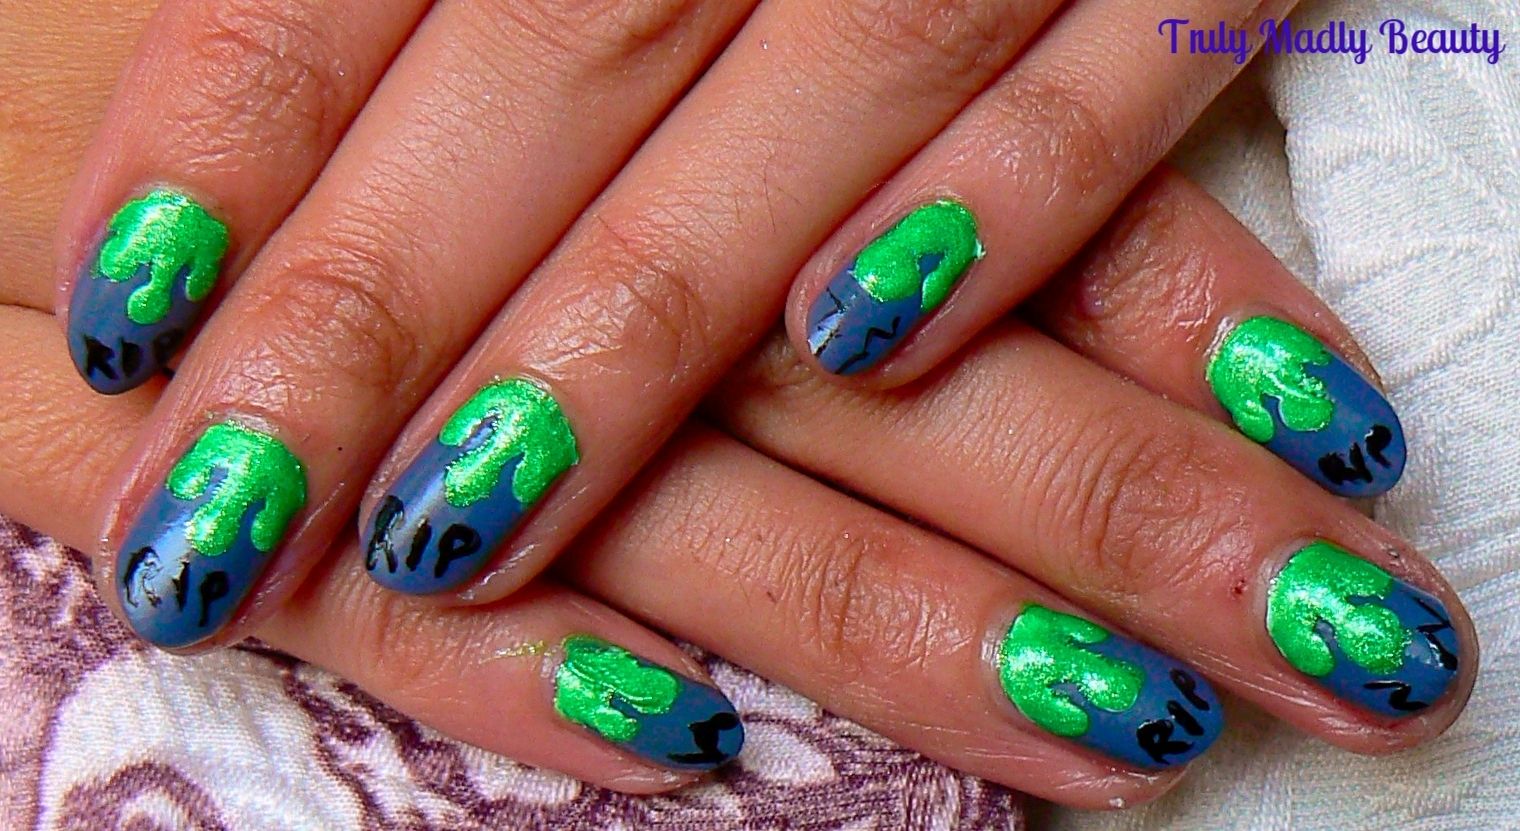
Moving on, as I'm sure you're all aware we are now in the month of October which means...HALLOWEEN NAILS! I hope to roll out as many as I can this year, you can see the designs I did last year HERE including Bleeding Chanel Nails, Frankenstein, Spooky Eyes which were a few of my favs & more. To start things off this year I've gone for some spooky tombstones covered in dripping green slime...


I wanted to practice my dripping effect technique hence why I decided to add some lovely slime to my tombstones :) I really love this effect & I plan to do some dripping blood nails naturally at some point!


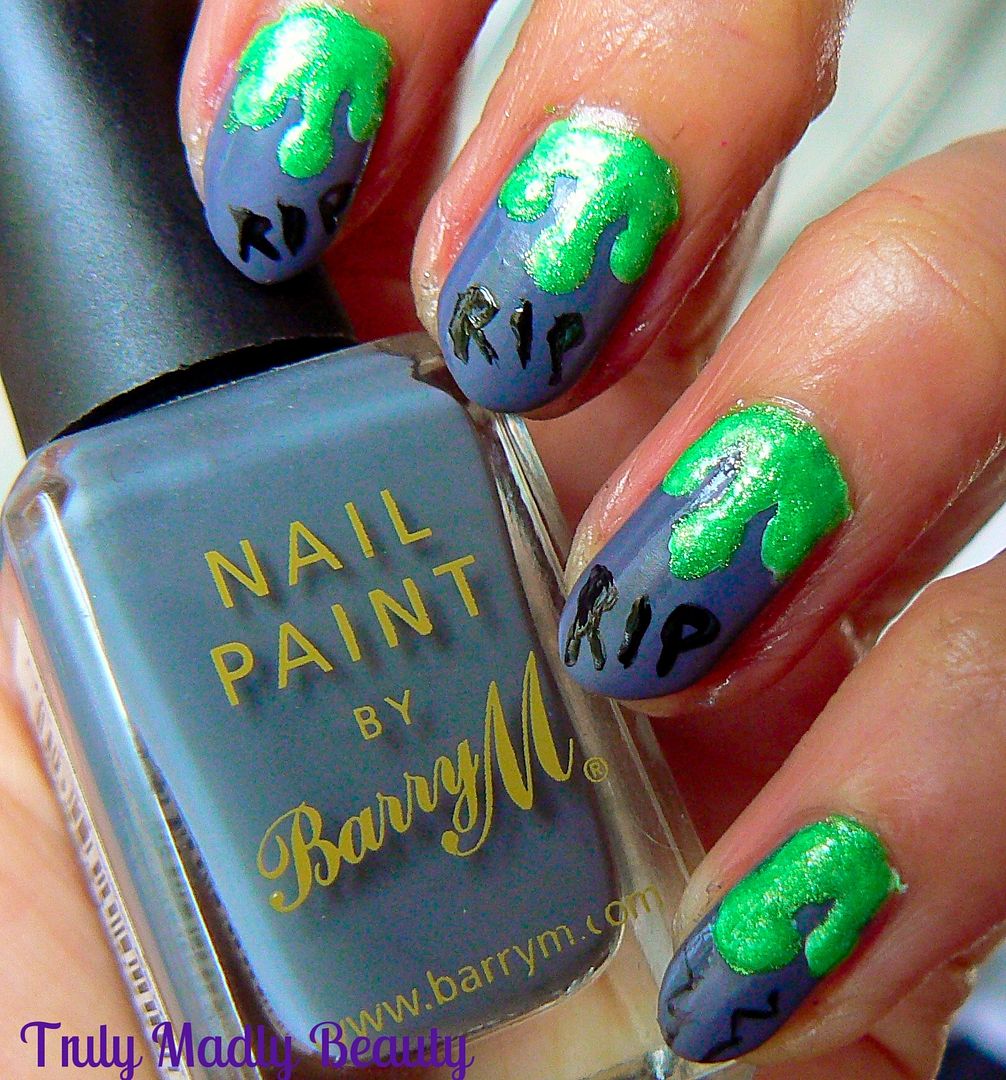
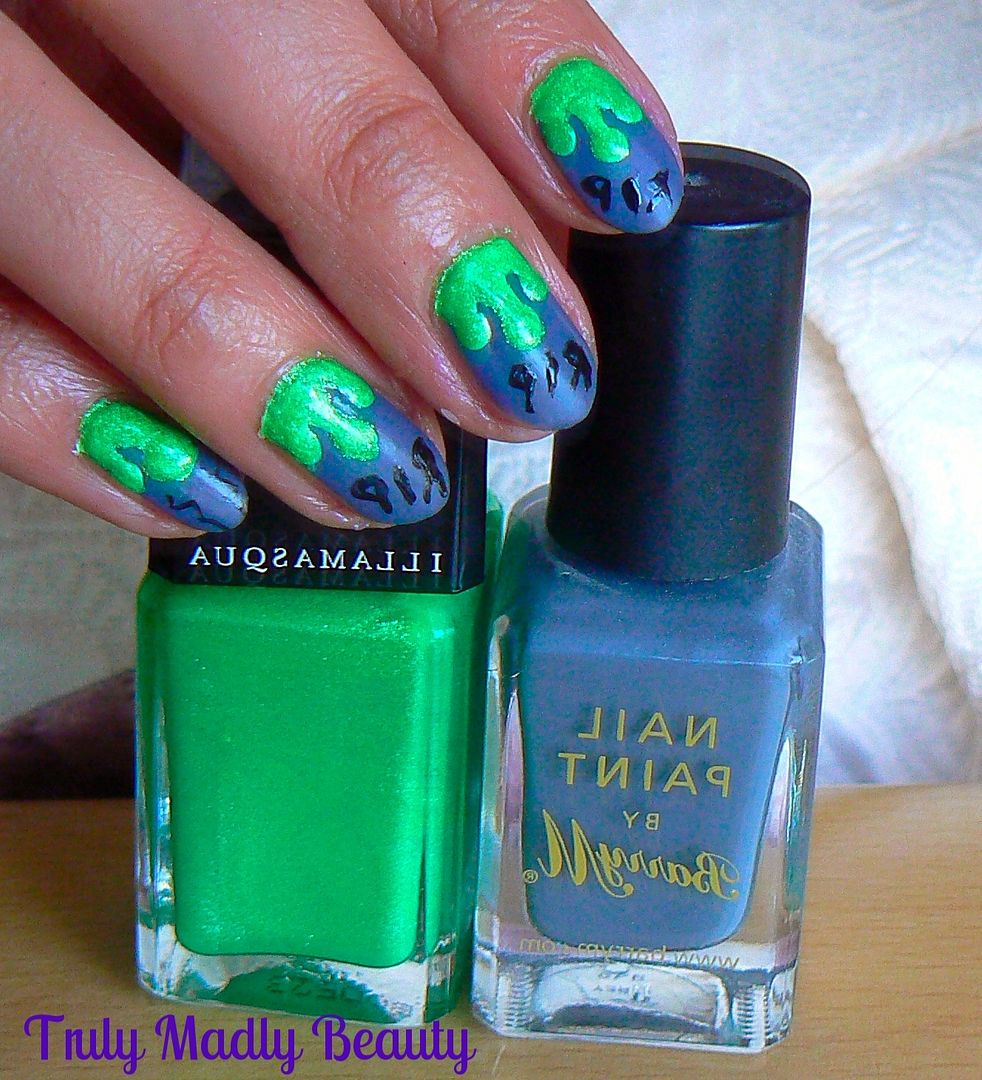
I started by applying Barry M Grey which was nice & opaque after just one coat which was fab. To give the grey a stone like look to it I decided to mattify the polish using Rimmel Matte top coat.


To create the slime I started by using a white polish canvas first, this is important if you really want your green to pop! Using a dotting tool apply three dots randomly to each nail at different heights. Next using a fine nail art brush draw a thin straight line from the dot, all the way up to the cuticle.


Then using the same brush or you can use the dotting tool, go back to your dots & blend them in to the lines using a curved edge to give them the appearance of drips, adding a bit more polish to the cuticle area.


Now for the slime! Here I've used Illamasqua Omen from the Paranormal collection, I couldn't find a more perfect pow wow green for some toxic slime! Omen is a gorgeous almost neon green filled with silver shimmer particles giving it an interesting edge. Plus it also glows in UV light! I used a fine nail art brush & simply applied Omen directly over the white drips.


Final step is to freehand a few cracks & RIP's on to the the tombstones using black polish & fine nail art brush & that's it! As I wanted to keep the matte look I skipped topcoat.


Hope you liked the first Halloween manicure this year witches! Thanks for reading!

Lotsa love to ya!


10.06.2015

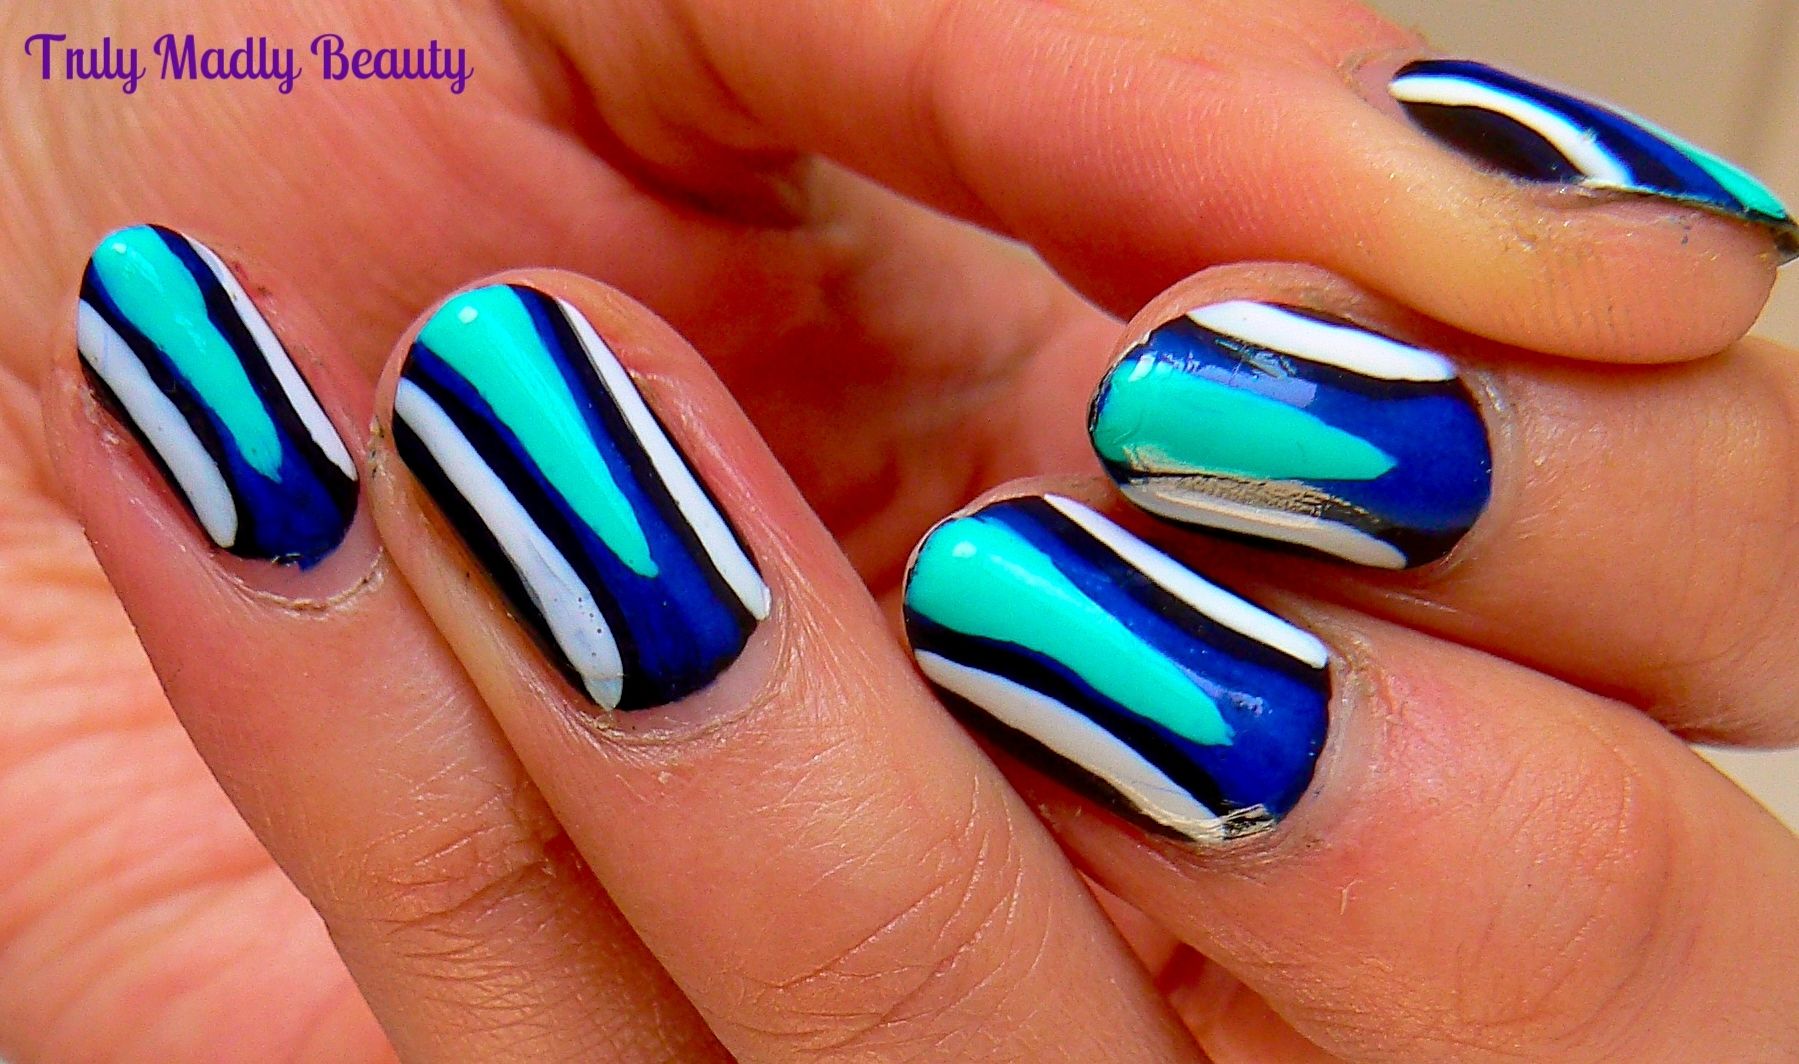
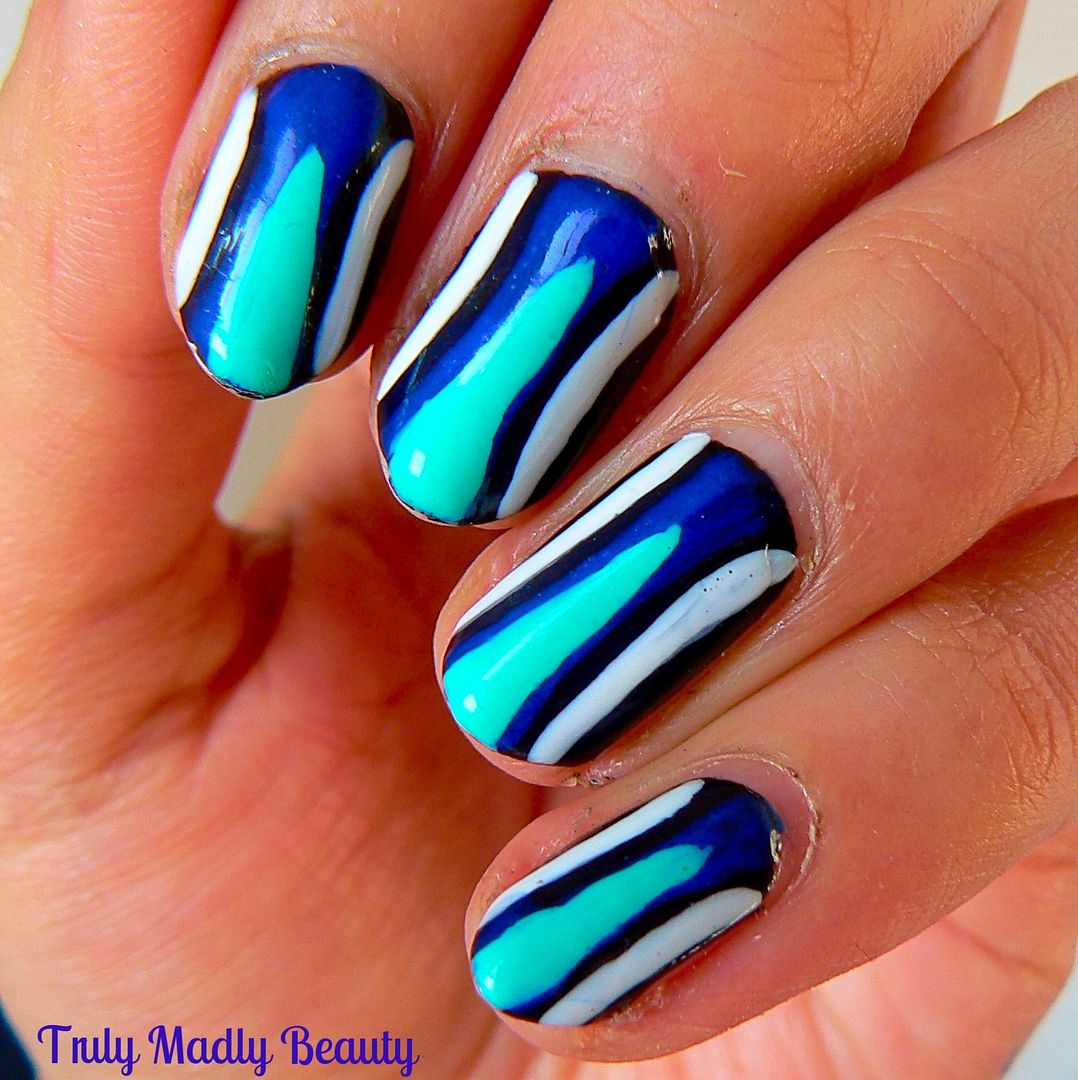
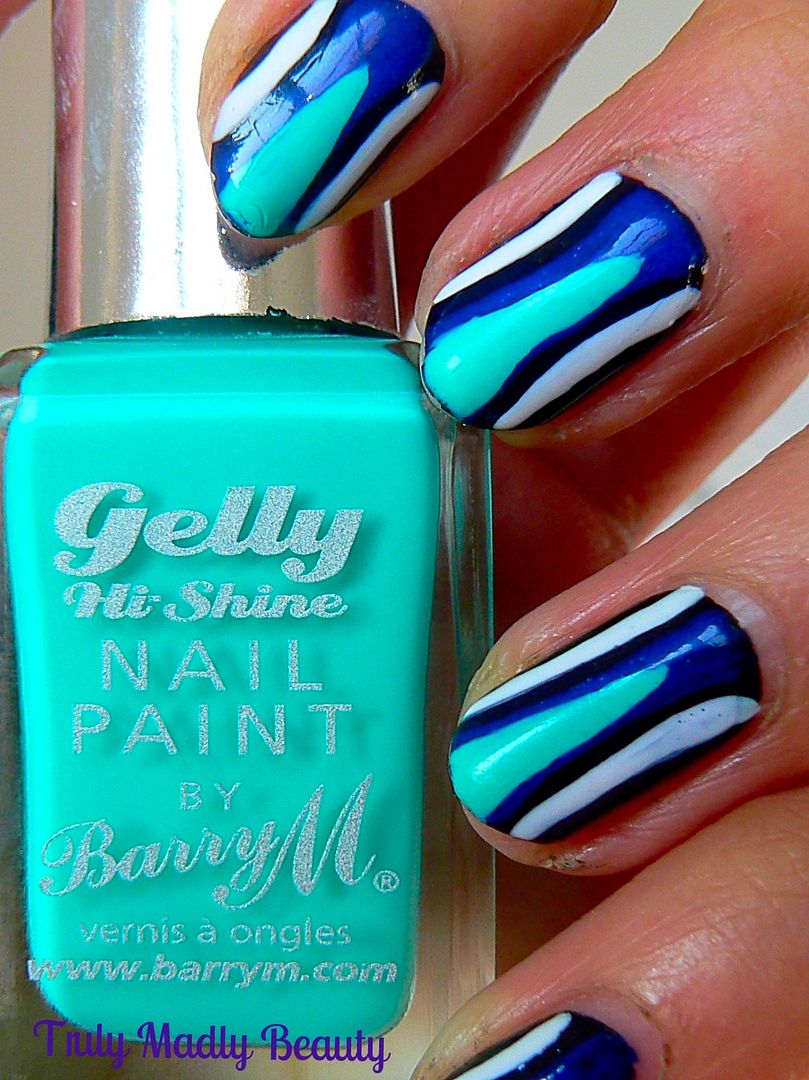
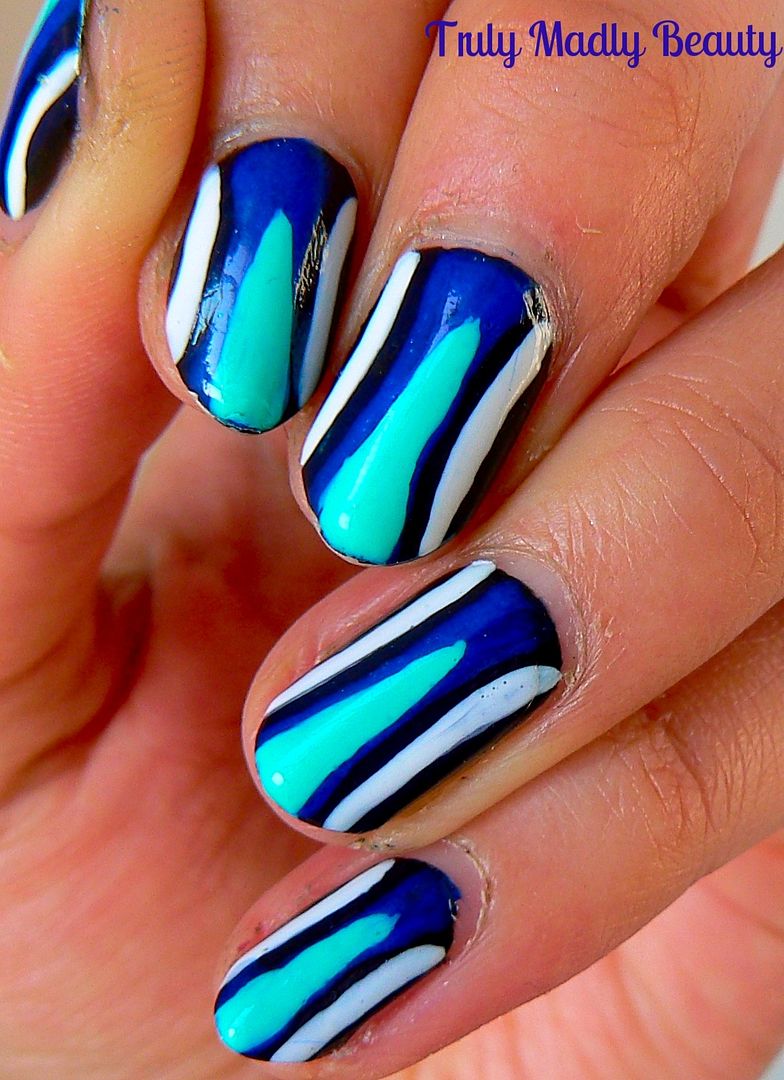
NOTD - Colour Block Nails inspired by Bonprix Skater Dress ft Barry M!

Hey there lovely readers!

Counting down the days now till my best friends big day this Saturday & actively hitting YouTube like nobodies business in the hope of finding some eye makeup inspo! My bridesmaid dress is a gorgeous burgundy (she was good to us) so I'm thinking Autumnal cranberry vibes with a hint of gold? With plenty of eyeliner of course...

Speaking of inspo I love finding nail-spiration within the fashion world. With LFW recently passed, whilst fashion bloggers are swooning & all heart eye emoji over the beautiful prints on the runway, I tend to obsess on how ace they'd look on the nails! 


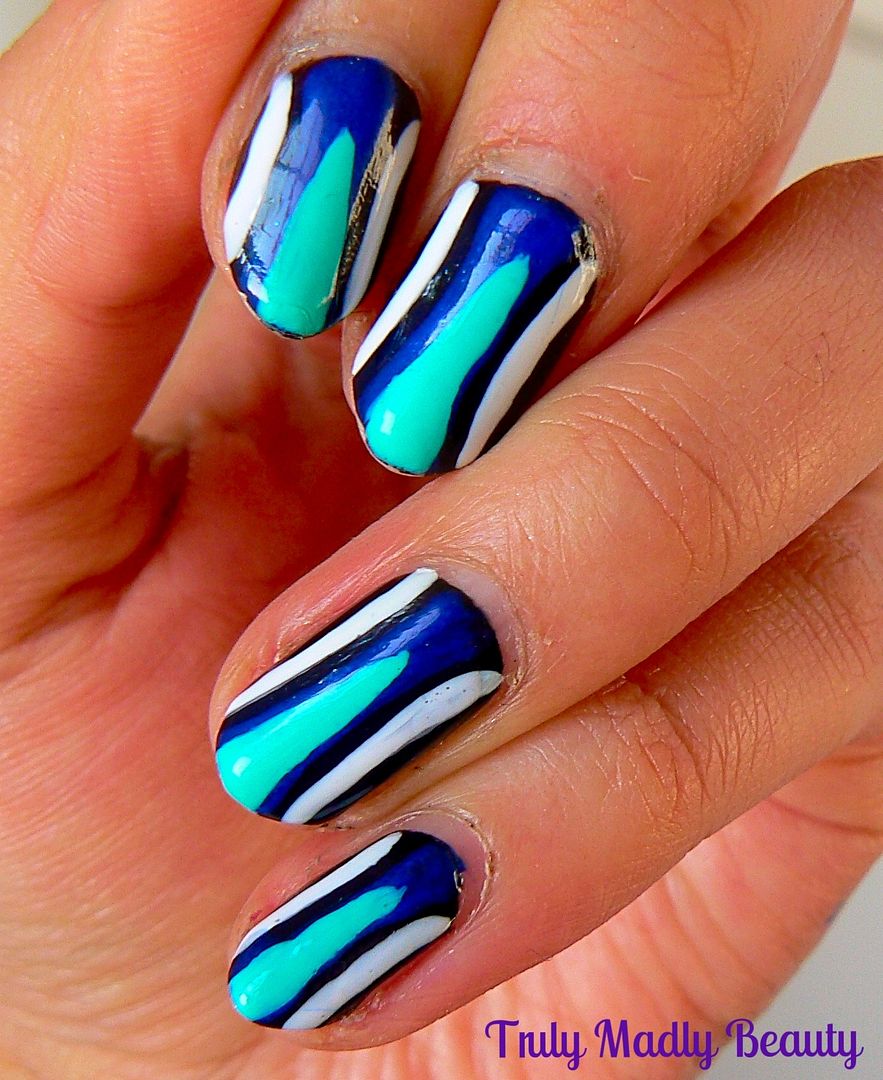
Bonprix is an online fashion site with a wide range of wears to tempt fashion lovers & they've recently teamed up with Barry M to hold a nail art contest in which the challenge is to create a manicure inspired by one of their dresses...well you know I'm ALL OVER THAT. So having a sift through the dresses on offer I decided on the stunning Colour Block Skater Dress above to create a similarly vibrant mani...


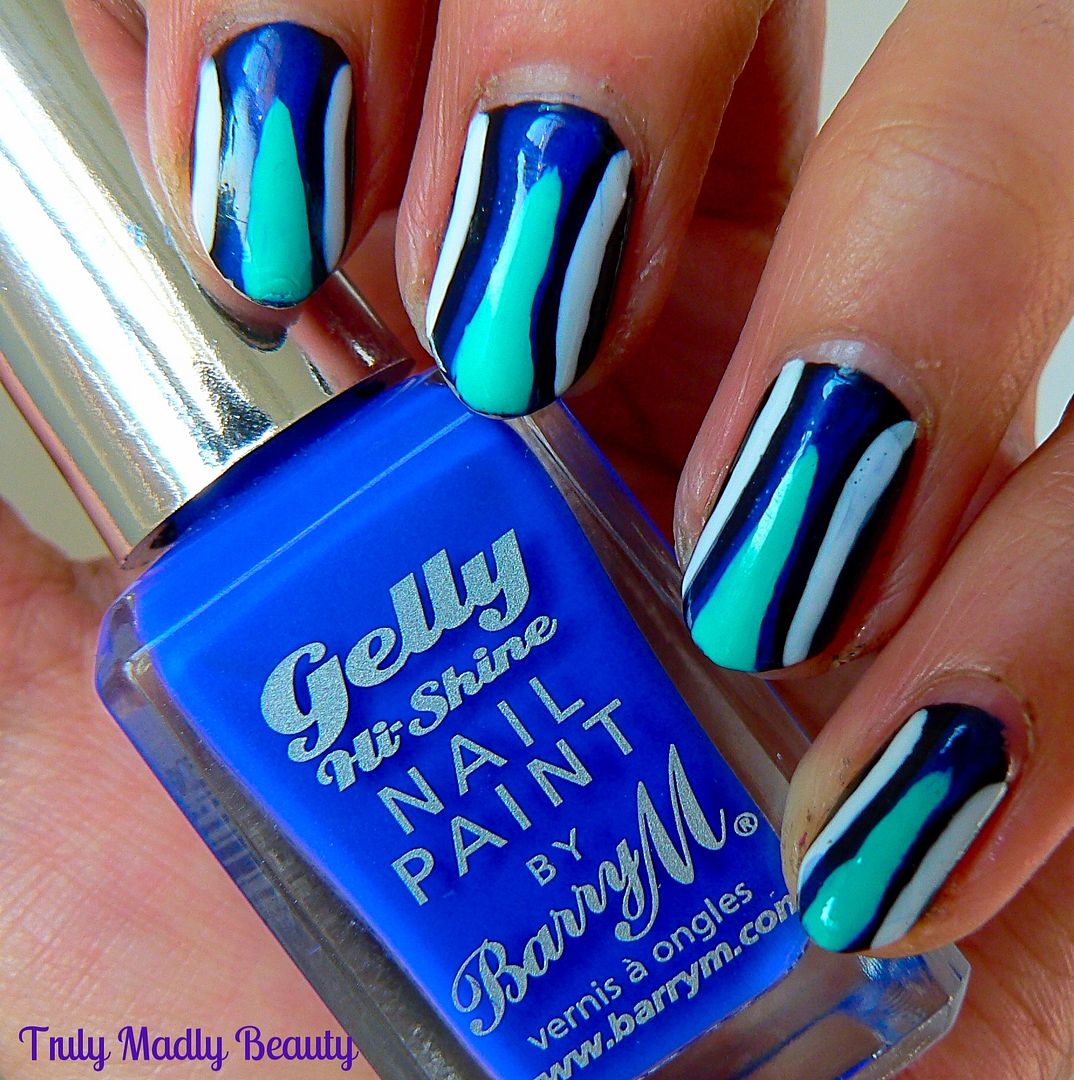
I've actually wanted to do a colour block mani for yonks so this came at the perfect time. I just loved the bright & uplifting cobalt blue & turquoise shades used in this dress & to re-create I found the perfect shades to match using Barry M Gelly paints.


To start I applied one of coat of black polish over the whole nail; I use W7 Black, one of the best black polishes ever!


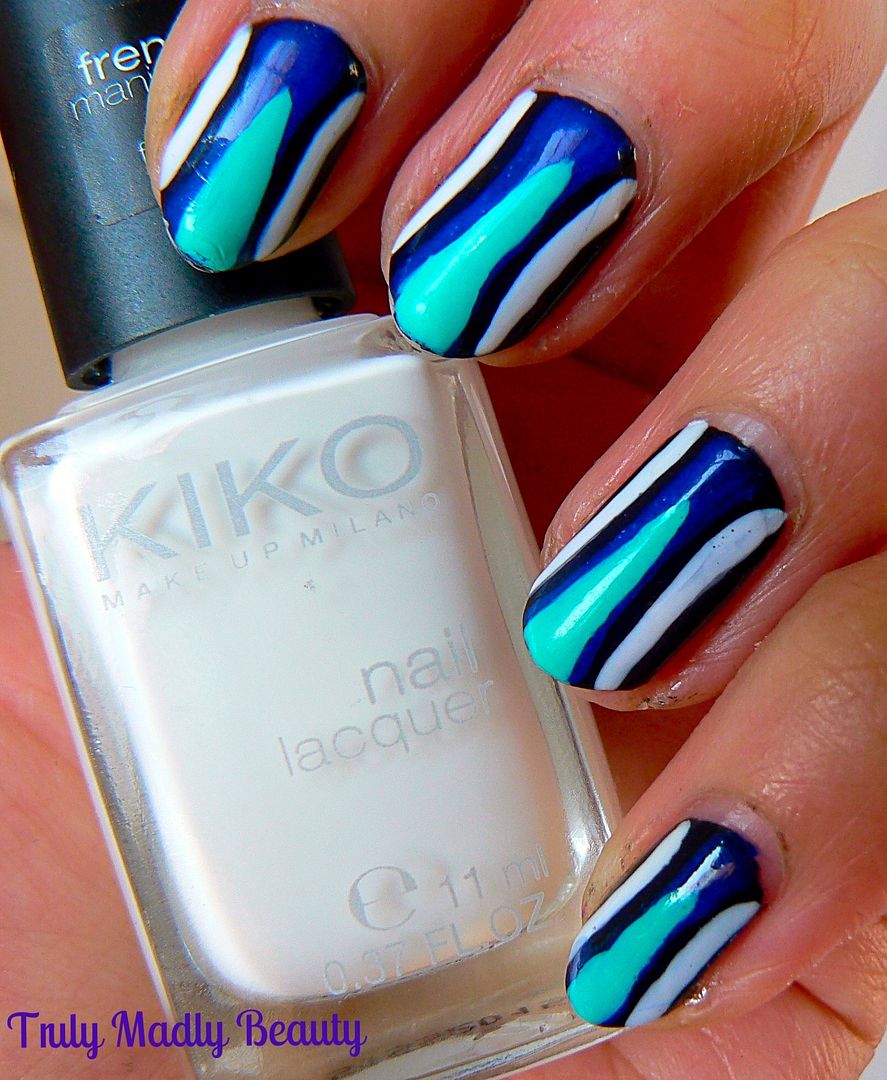
I then used this nifty french manicure white polish by KIKO. It comes with a very fine brush making it a fab little product to create french manicures or nail art! I applied a thin curved lined vertically on each side of the nail.


Next for the hit of blue I used Barry M Blue Grape Gelly polish & applied down the center of the nail using a nail art brush before filling in. 


Then for that turquoise fix I used Barry M Greenberry & applied in the centre of the dark blue using a fine nail art brush finishing in a point around 3/4 of the way up the nail.


Finish it all with a slick of glossy topcoat. I hope you liked my entry for the #PartyPolished competition dolls! Time to cross all those polished fingers & toes! Thanks for reading!

Lotsa love to ya!

10.03.2015

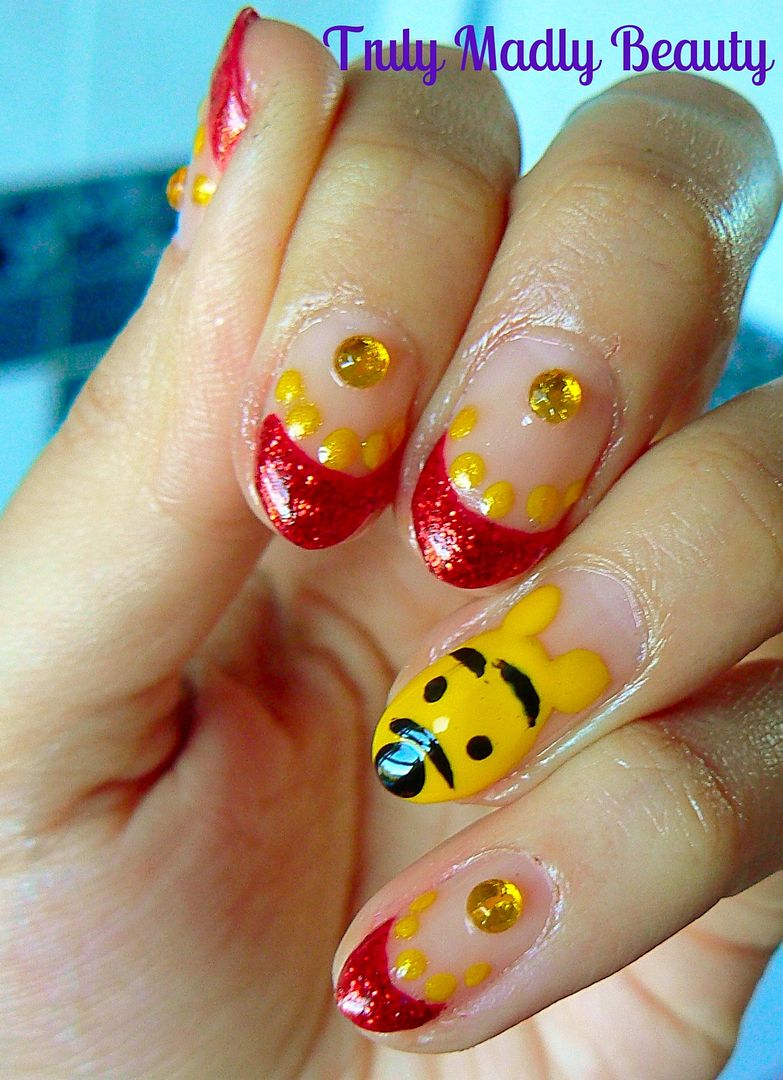
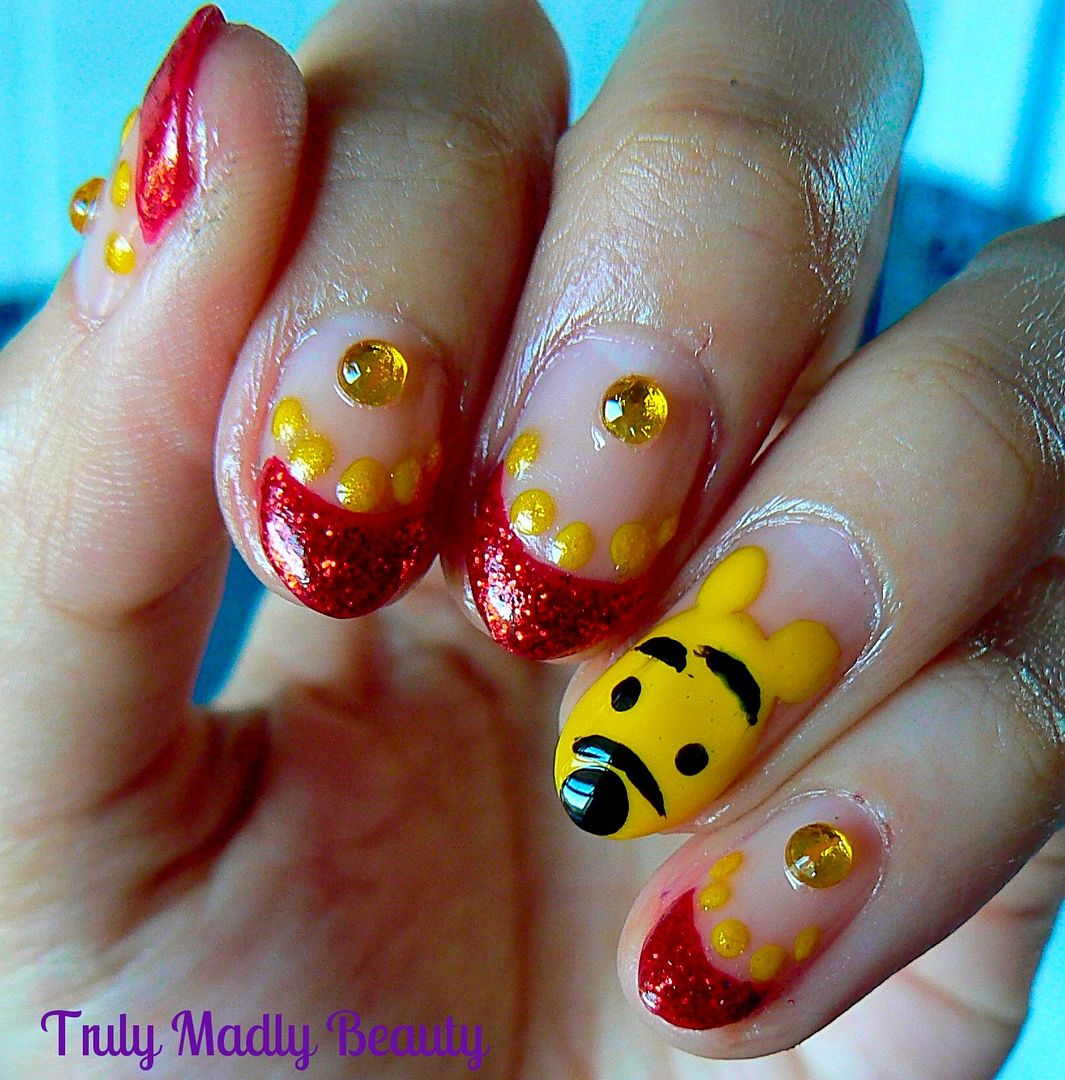
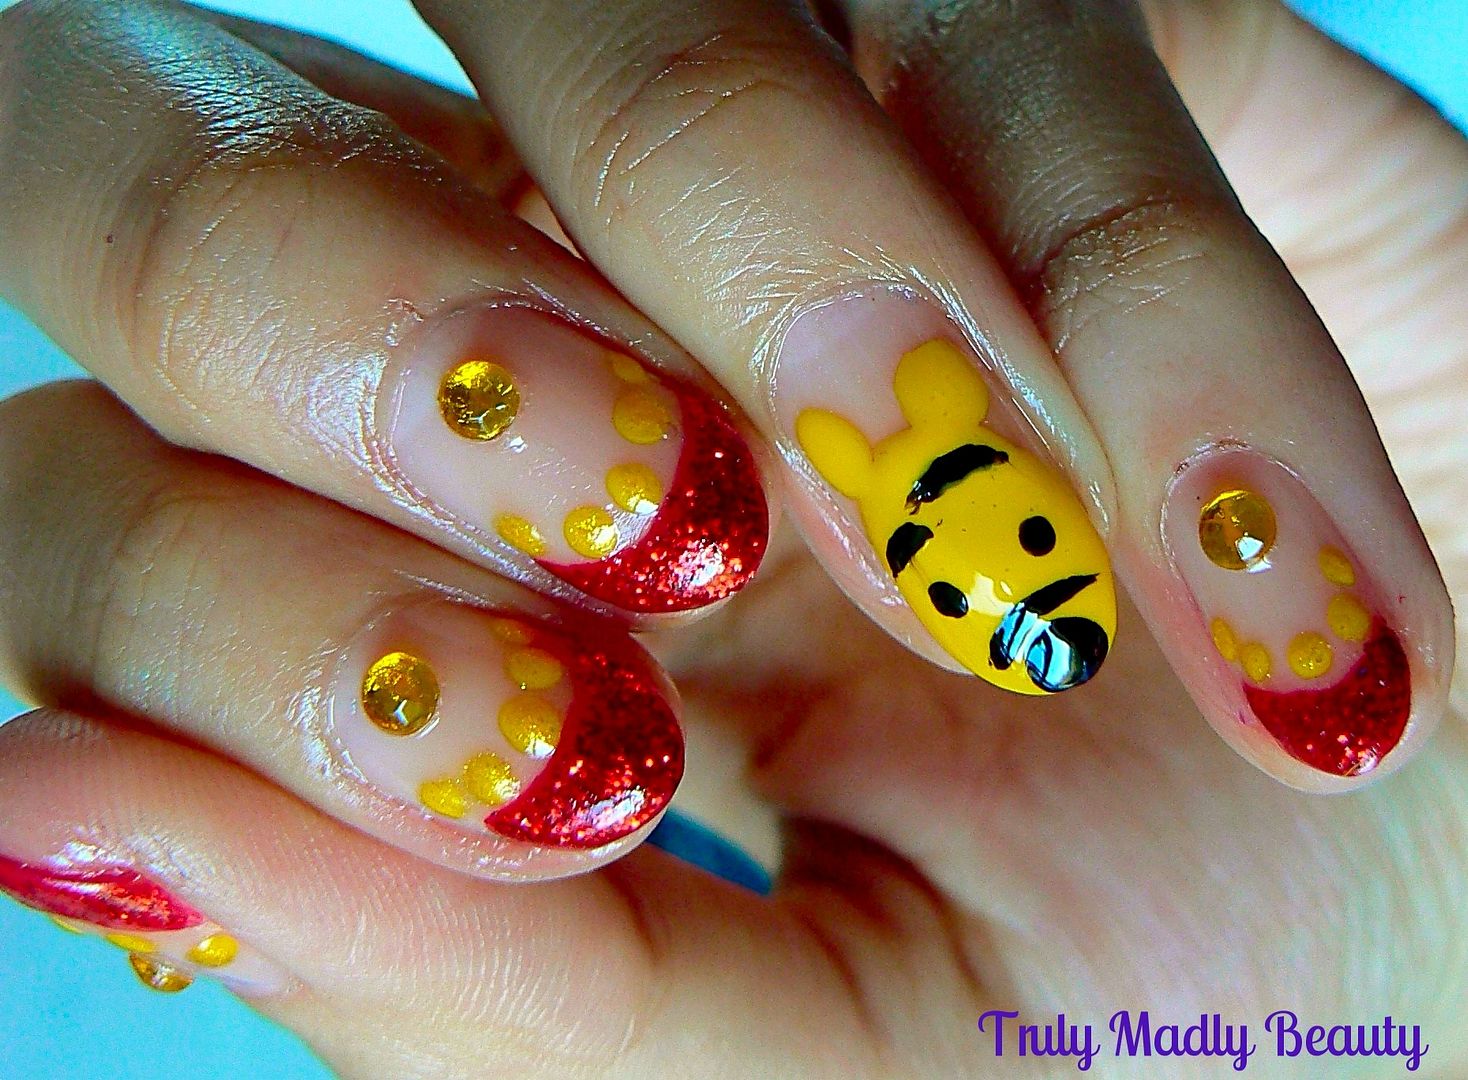
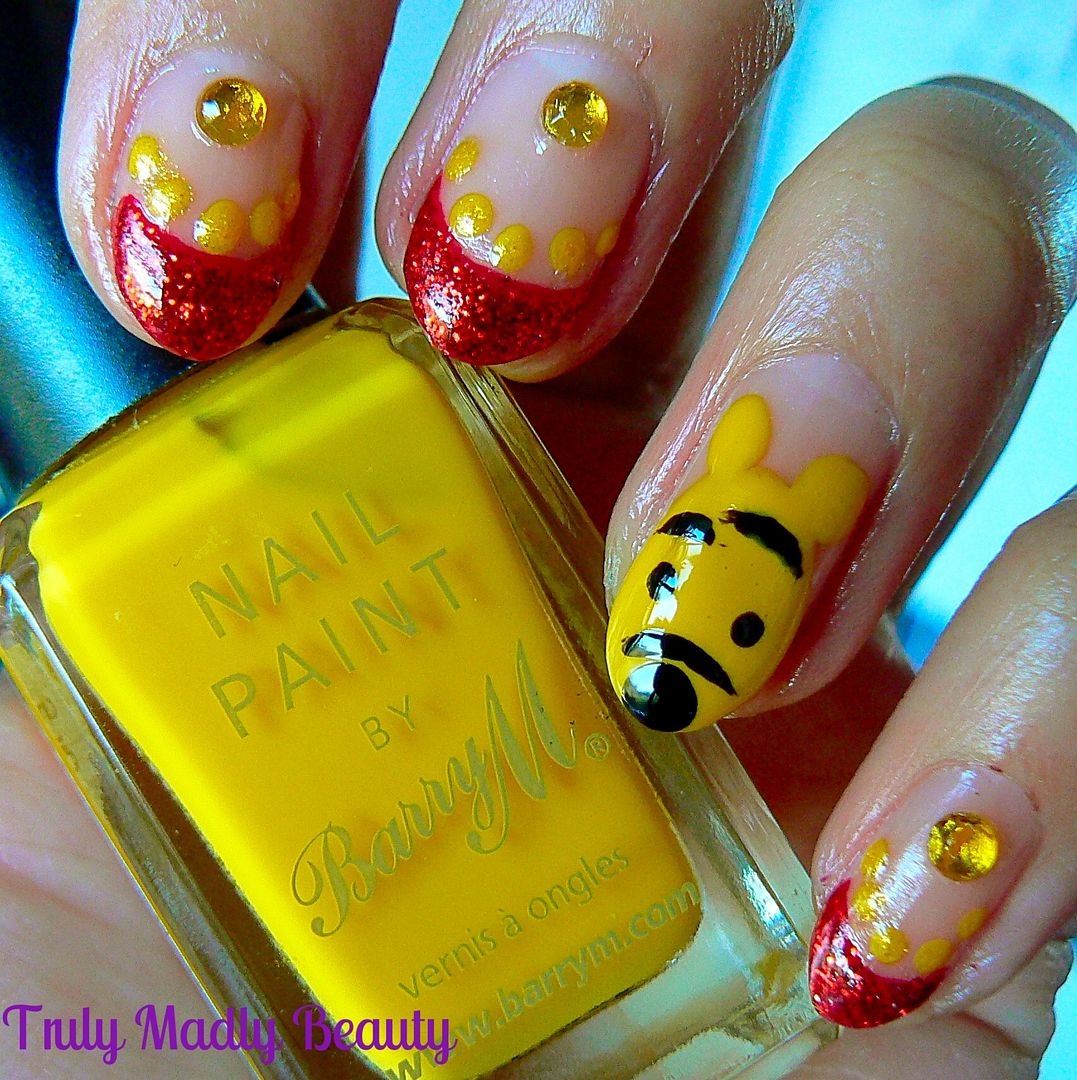
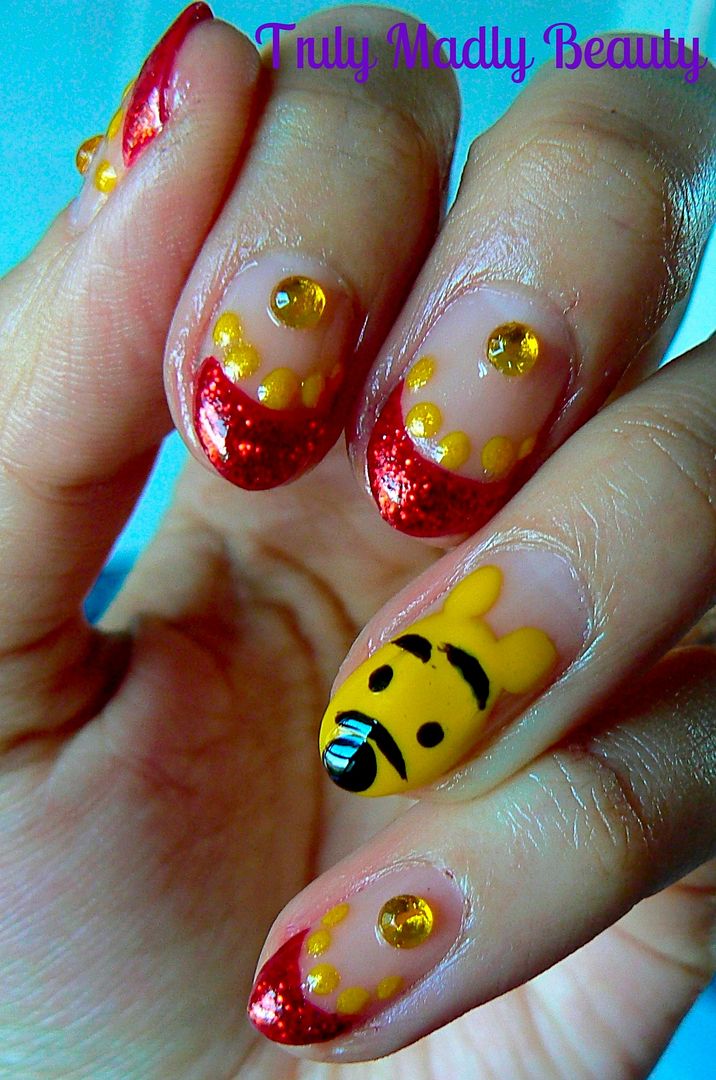
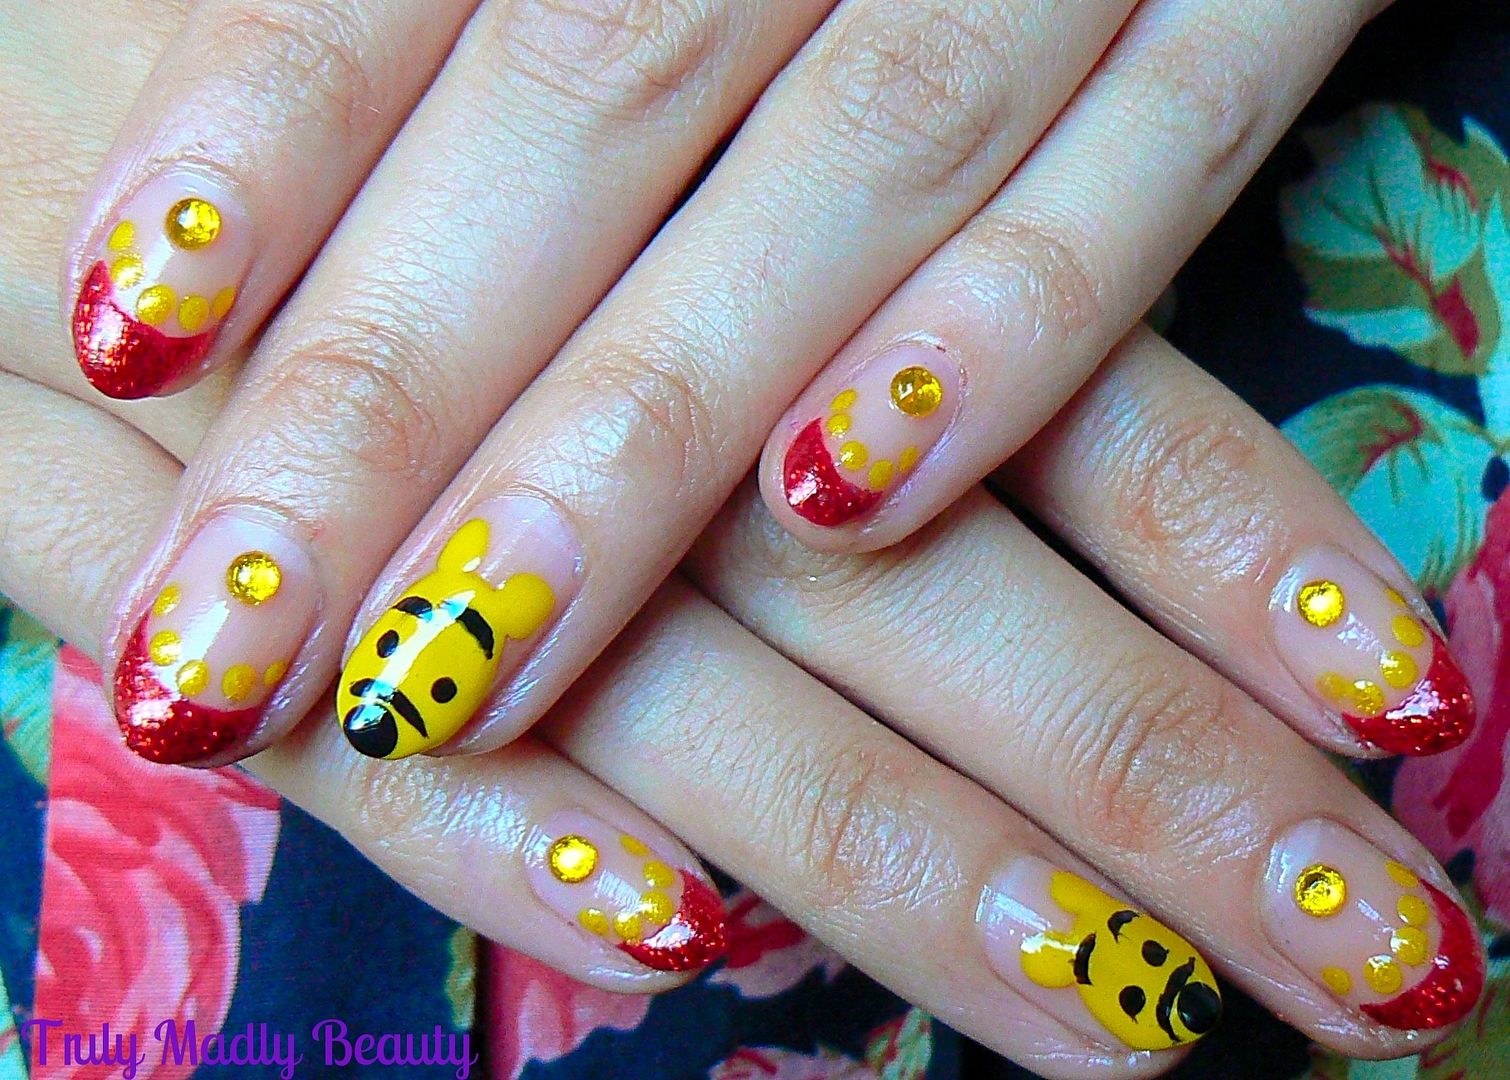
NOTD - Winnie the Pooh Nails!

Hey there lovely readers!

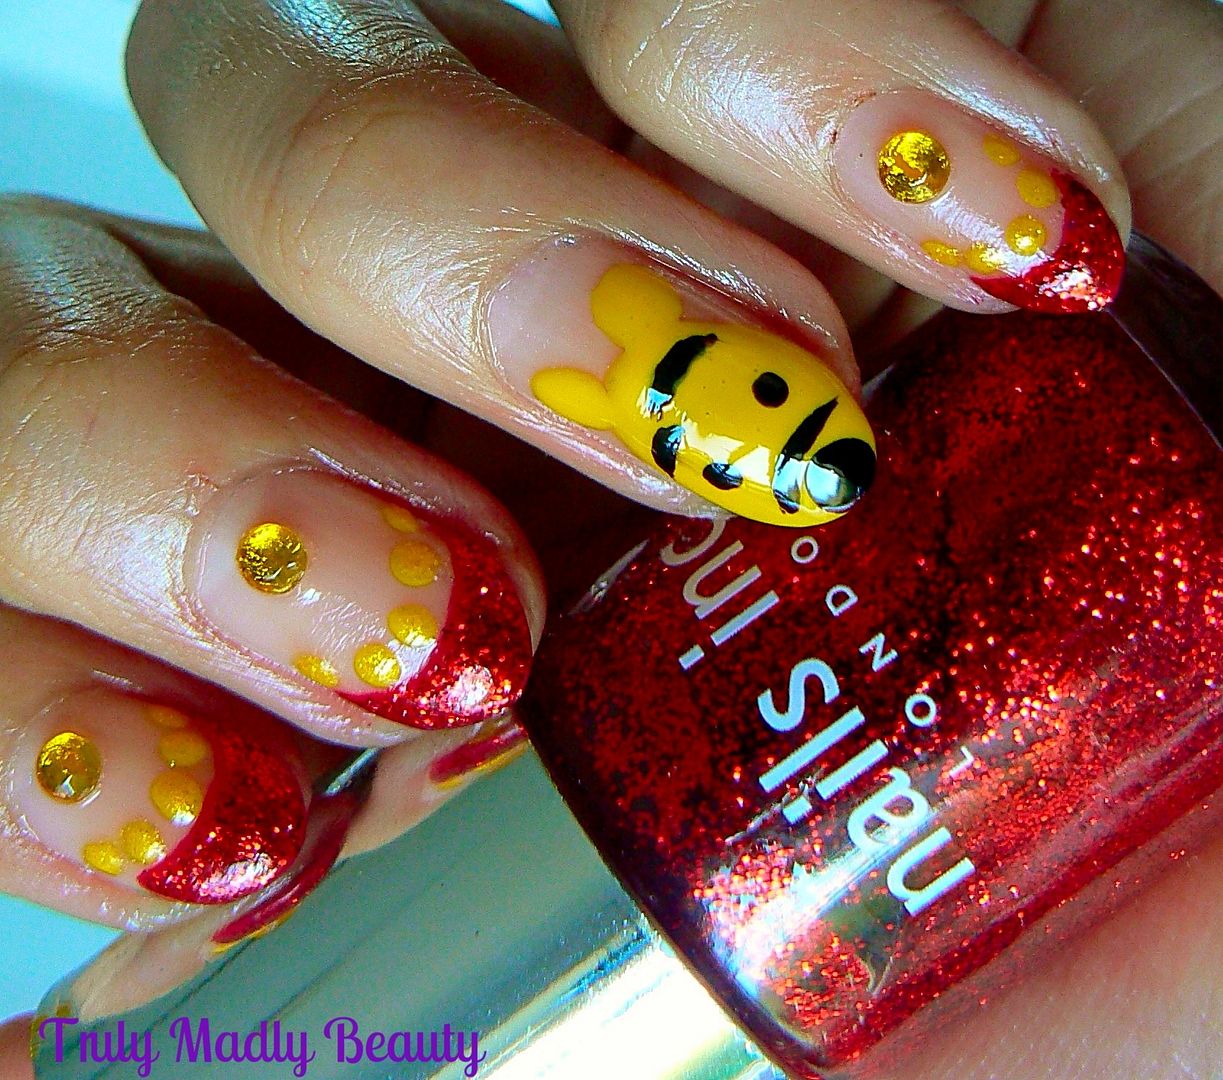
Happy weekend & hello October too! Cue inevitable overdose on all the pumpkin & Halloween things! I confess I do love this time of year with the Autumnal vibes at an all time high. Still attempting to defeat this nasty flu, I'm just thankful that I've gotten it out of the way before the besties wedding next week! I don't think she would've appreciated me hacking away in between her vows...When I'm feeling a tad down in the dumps, one of my favourite remedies is whacking something cheerful & fun on my nails to lift the spirits & these Winnie The Pooh nails did the task rather nicely! :)


Hehe what do you think? Who doesn’t have a soft spot for that adorable wee bear? Inspiration for this came via my main go to for when it comes to looking for nail-spiration these days...Pinterest! The moment I saw this it made me smile. I believe the original design was a CutePolish creation & I couldn't wait to re-create!


To start I went for some sparkly red french mani tips. I'm really loving wearing different coloured tips these days, remember the Rose Gold tips from my Vintage Afternoon Tea nails? White is SO yesterday dolls, jazz up your french mani with a rainbow of colours! :)


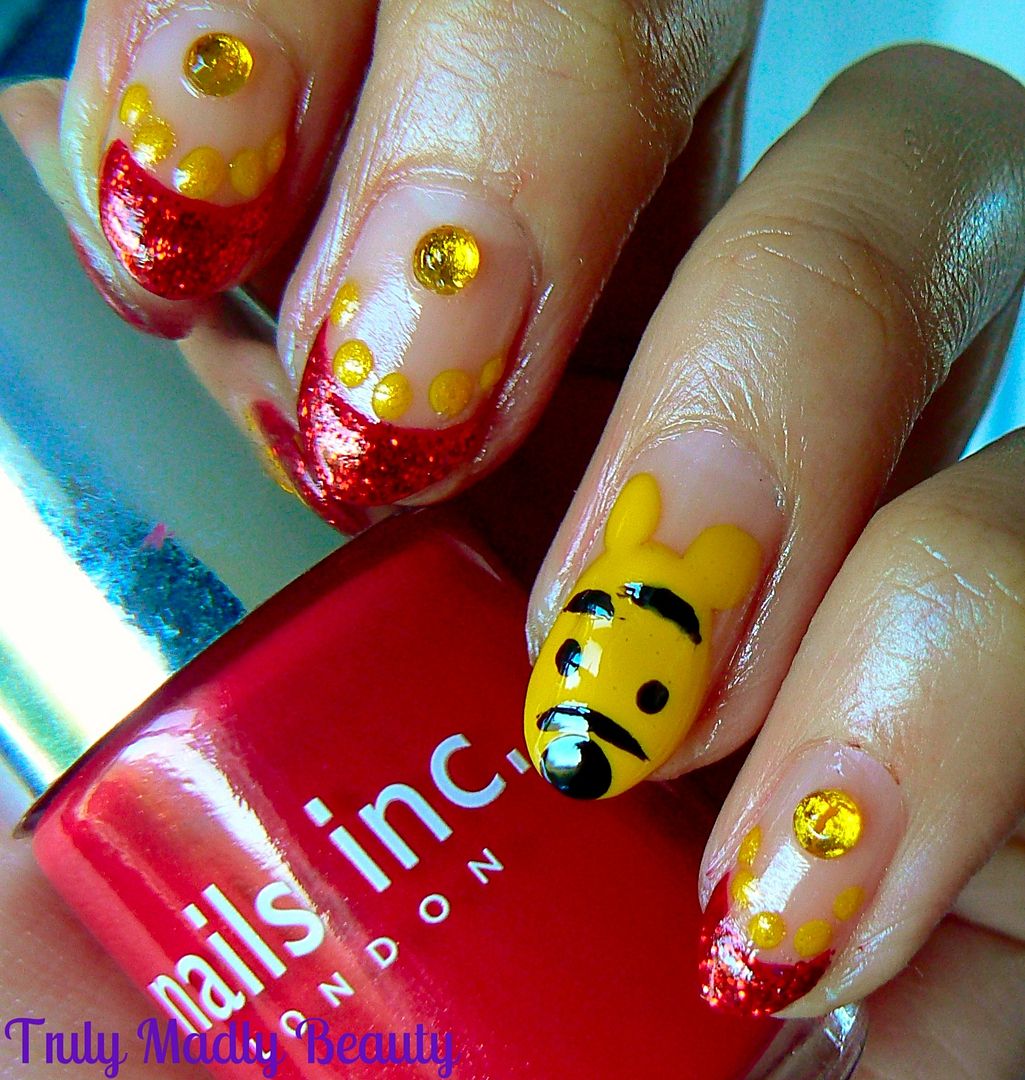
As usual I used hole punch reinforcements to help create a neat curved French tip. Once I had my stickers in place I applied some Nails Inc St James, a lovely red crème, before peeling away the stickers whilst polish is still wet. Any smudges can easily be rectified with a brush & some acetone to get a nice clean smile line.


You know I can't resist a bit of sparkle so I went over the red with some pretty red glitter, again using Nails Inc, this time a spot of Trafalgar Square, which I applied with a thin brush.


For my accent nail I used Barry M Yellow to freehand Pooh bear. Simply draw a roundish shape for the head, dot on a couple of ears, then using some black polish, dot on a wee button nose, eyes & eyebrows with a thin brush! My Winnie's eyebrows came out a tad thicker & more confused looking than I'd wanted but hey big bushy Cara Delevingne-esque eyebrows are like...so in right now aren’t they?


For a bit of extra detail I added some yellow dots just underneath my sparkly red french tips using a dotting tool, adding a bit of sparkly yellow glitter on top to make them stand out.


For a final bit of bling I added some golden honey yellow rhinetones to each nail, because Winnie he likes the sweet nectar, before sealing everything with my trusty CND Air Dry Topcoat. Done!


Thanks as always for reading. Hope you liked the Winnie the Pooh nails dolls!  :)

Lotsa love to ya!