
Hey there lovely readers!
So
I'm sure it won't have escaped your notice that Easter upon us, if the abundance of fluffy bunnys & cheeky chicks
everywhere weren't a big enough giveaway then the lure of a four day
weekend definitely catches attention!
Naturally
I can't help getting in to the spirit of things by indulging in my
favourite thing...nail art! As well as chocolate egg over eating...a
skill I take most seriously. So I guess make that SECOND favourite
thing ;)
Last
year I created these pink Easter Bunny Booty nails which still make
me giggle everytime I think of them. As cute as they were to wear
they were also of course hugely impractical, but for the wee time
they were worn the wabbits were dearly loved.
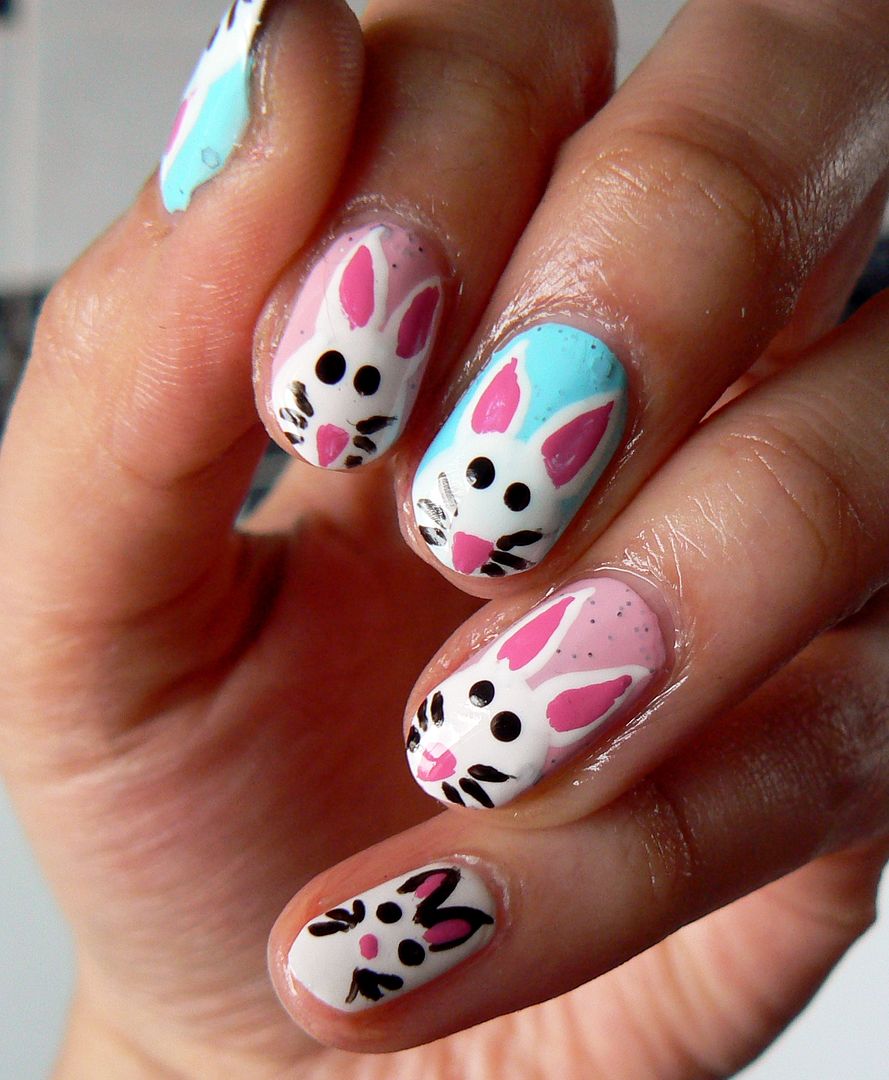
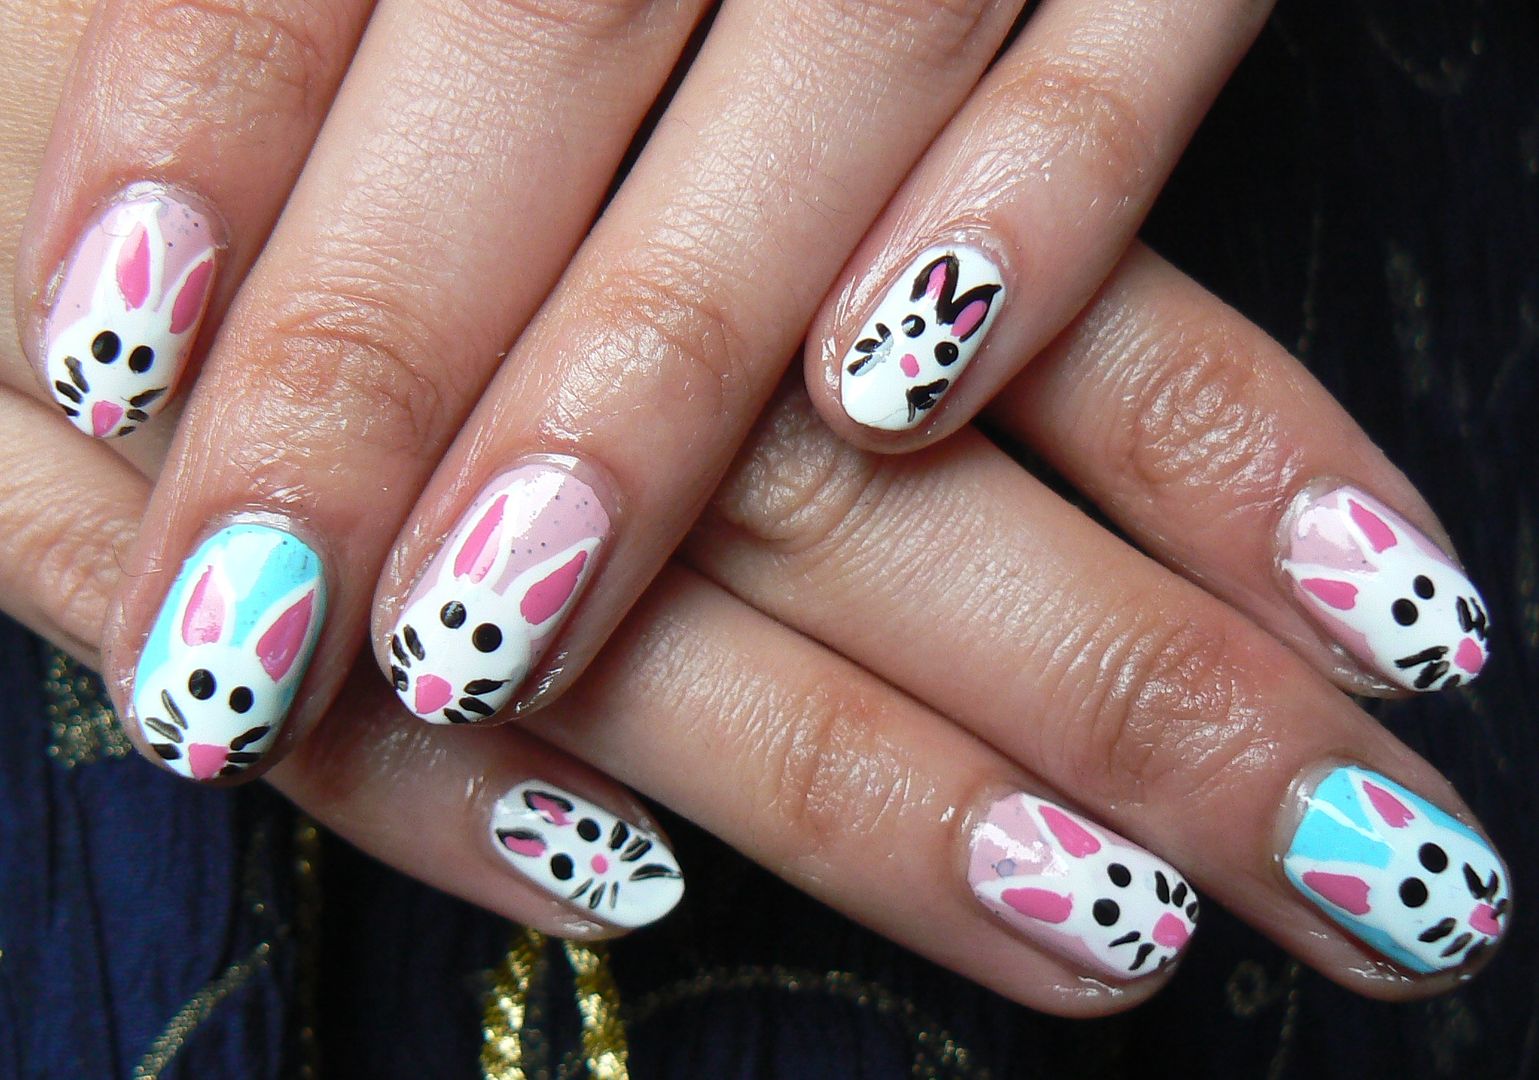
This
time I decided to create some slightly better behaved bunnies, who
instead of showing us their behinds, give us their best selfies
smiles instead! :)
Easter
time always makes me want to reach for pretty pastels & I had the
perfect polishes to use courtesy of Ulta3 who (along with many
other brands I'm sure you remember!) released some speckled polishes
a while back for the season each with delightfully bunny themed
titles!

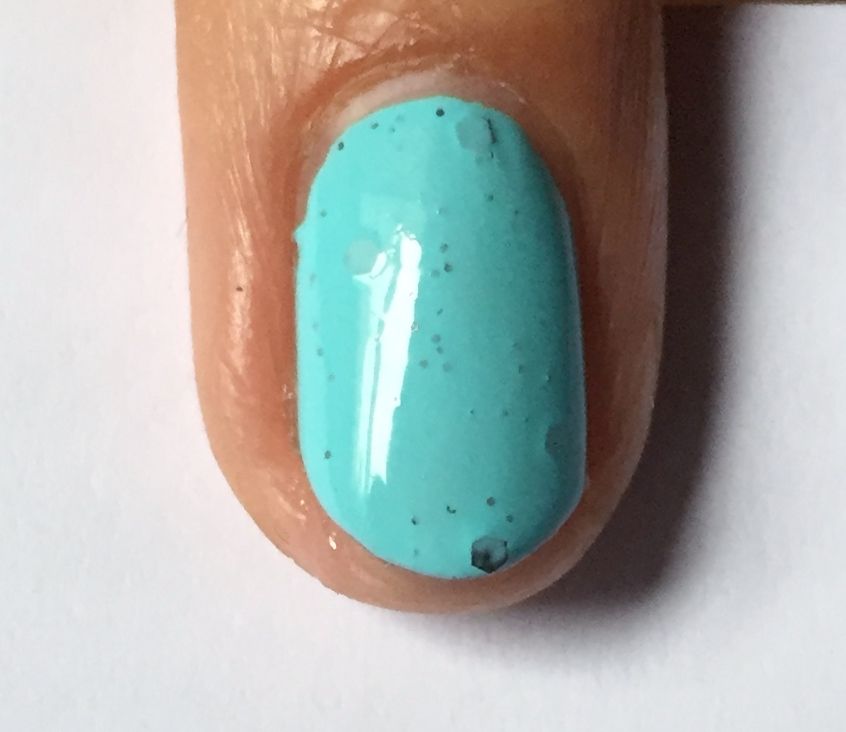
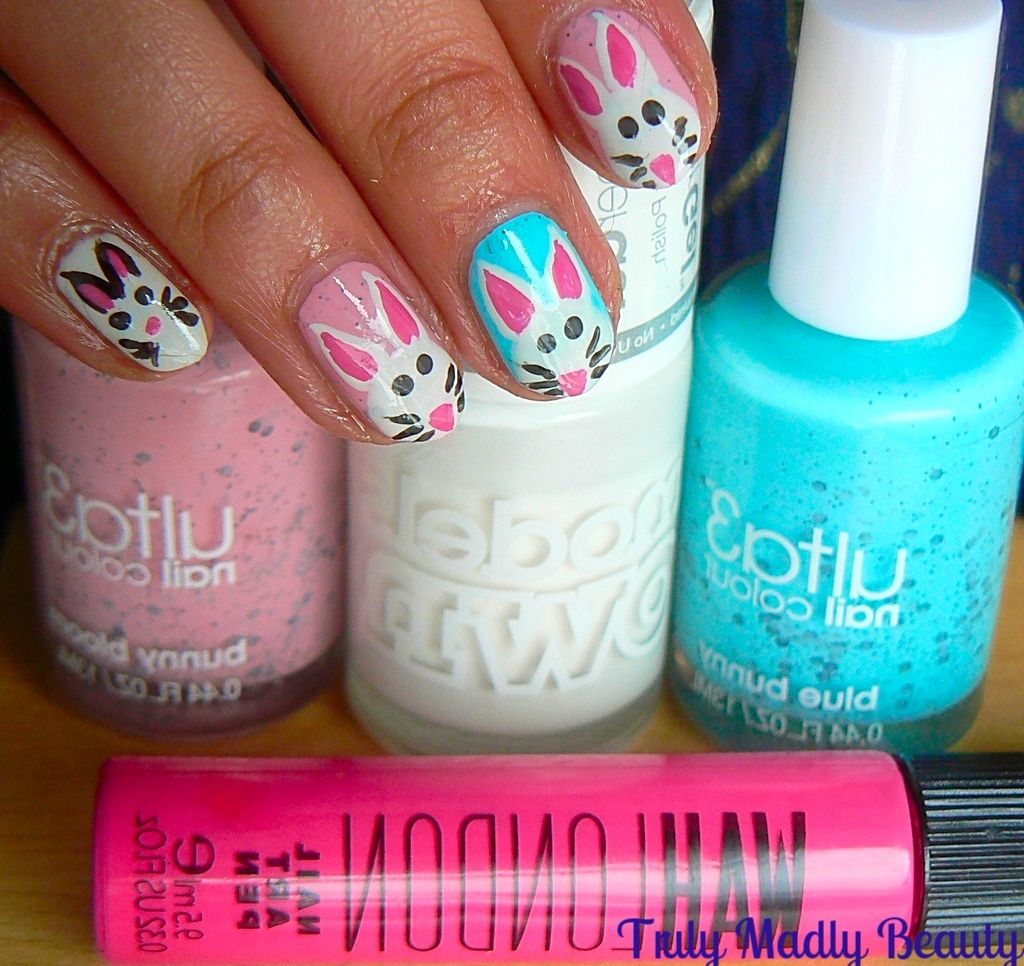
On
my thumb & middle fingers I used one coat of Blue Bunny a bright
blue pastel creme with teeny black glitters as well as a few larger
hexagonal ones.
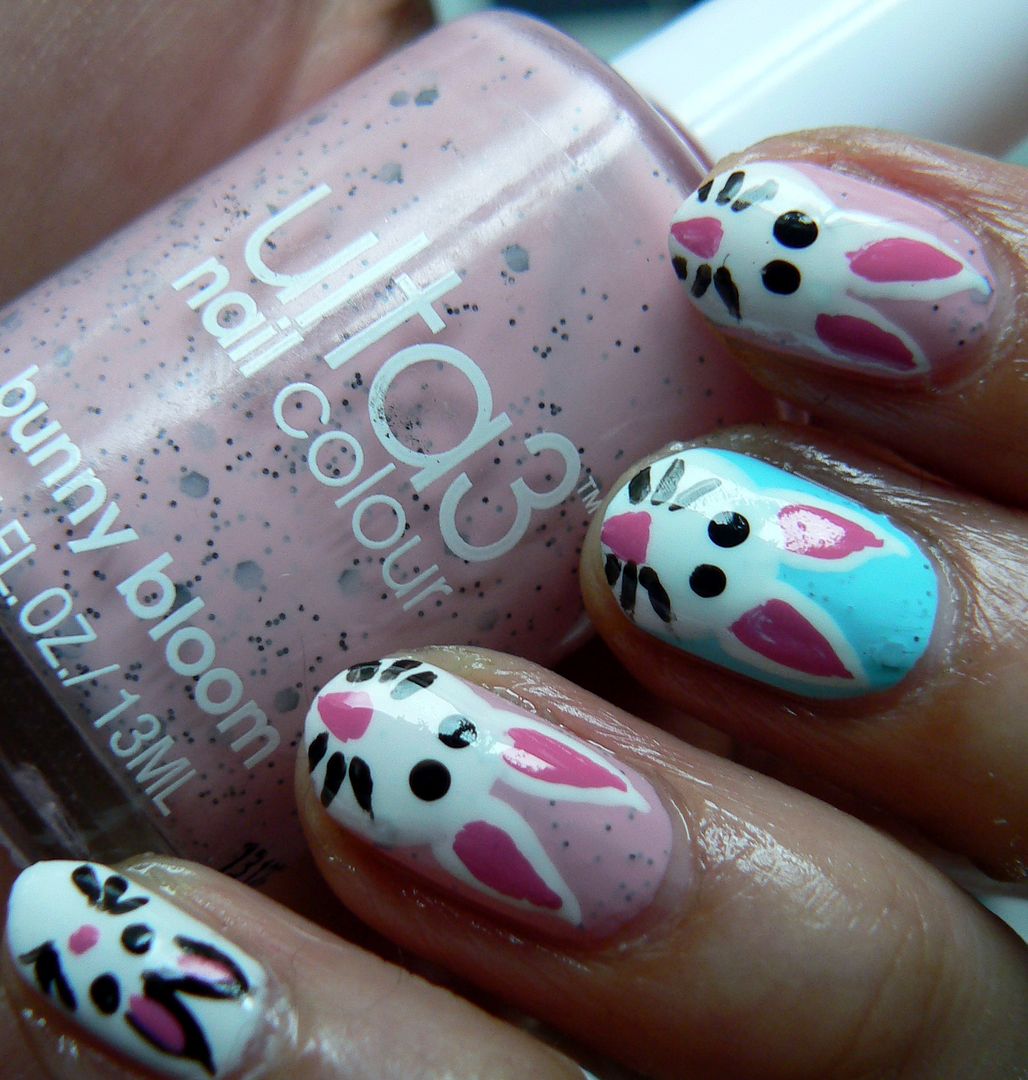
On
my index & ring fingers I went for the pink offering using one
coat of Bunny Bloom, a pretty strawberry pink creme with the same
black glitters. On my pinkie I decided to go all white using Models
Own White Light HyperGel which is what I also used for my rabbits.
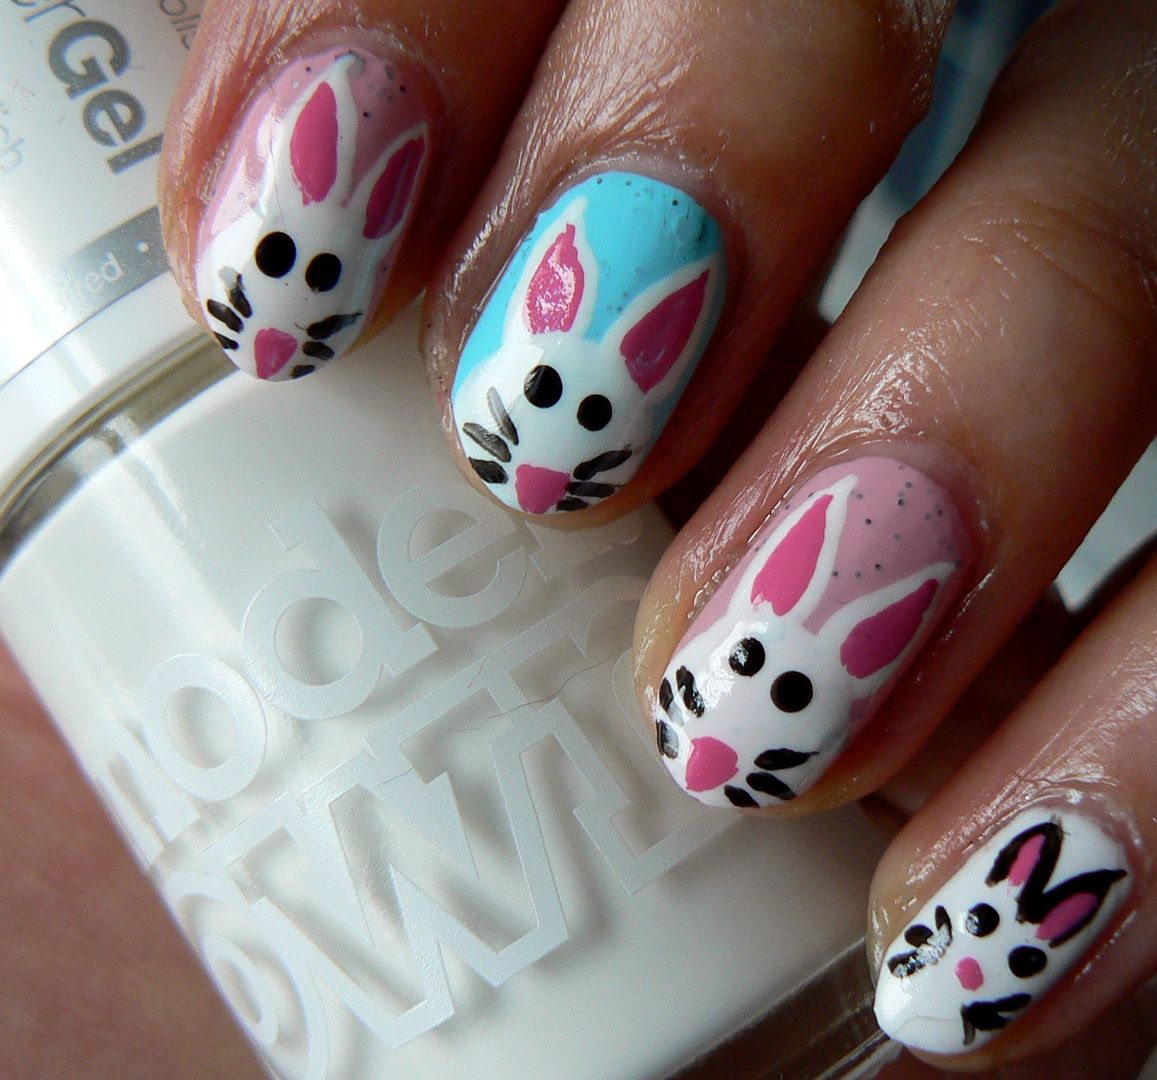
Now
to draw our bunnies! Here is a wee step by step breakdown on how to
create your own wee wabbits...
Begin
with one or two coats of your base colour, with these Ulta3 polishes
I felt one was more than enough, especially as I'd be adding more polish for
my bunnies

Start
by drawing a round(ish) circle at the tips of your nails for the
bunnies head using the brush that comes with the polish.

Then
grabbing a finer nail art brush, dip into your white polish & draw on
two ears above the head, if you want to make them floppy you can but
I didn't have enough space. Fill
in your two long triangular ears with more white

Then
using some black polish & a dotting tool apply two
dots next to each other for the eyes.
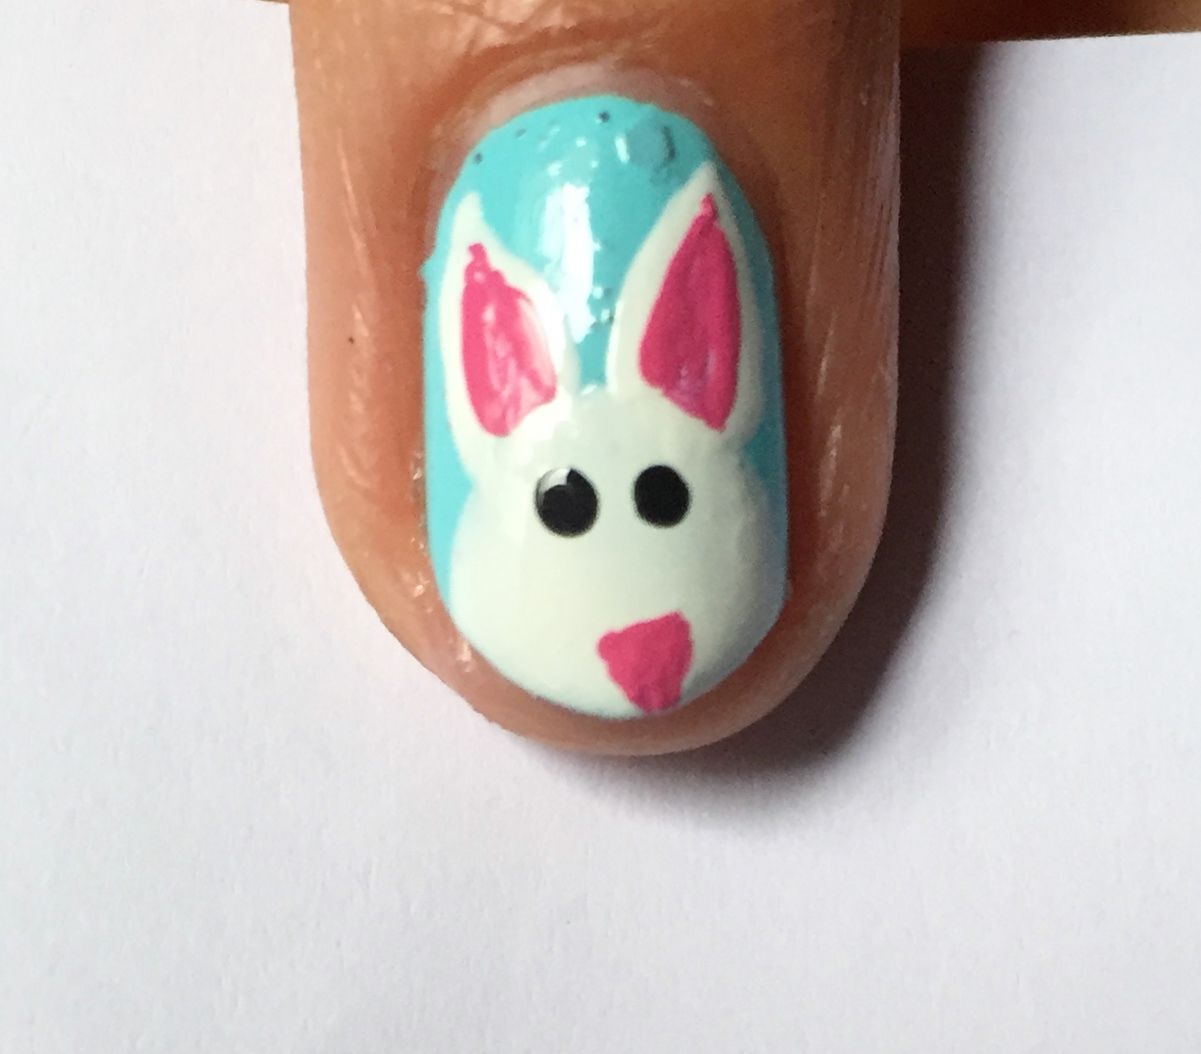
Next using a bright pink polish, here I've used WAH nail art pen in Pink & used the fine nib to apply a teeny nose & to fill in the inside of the ears with a smaller triangle.
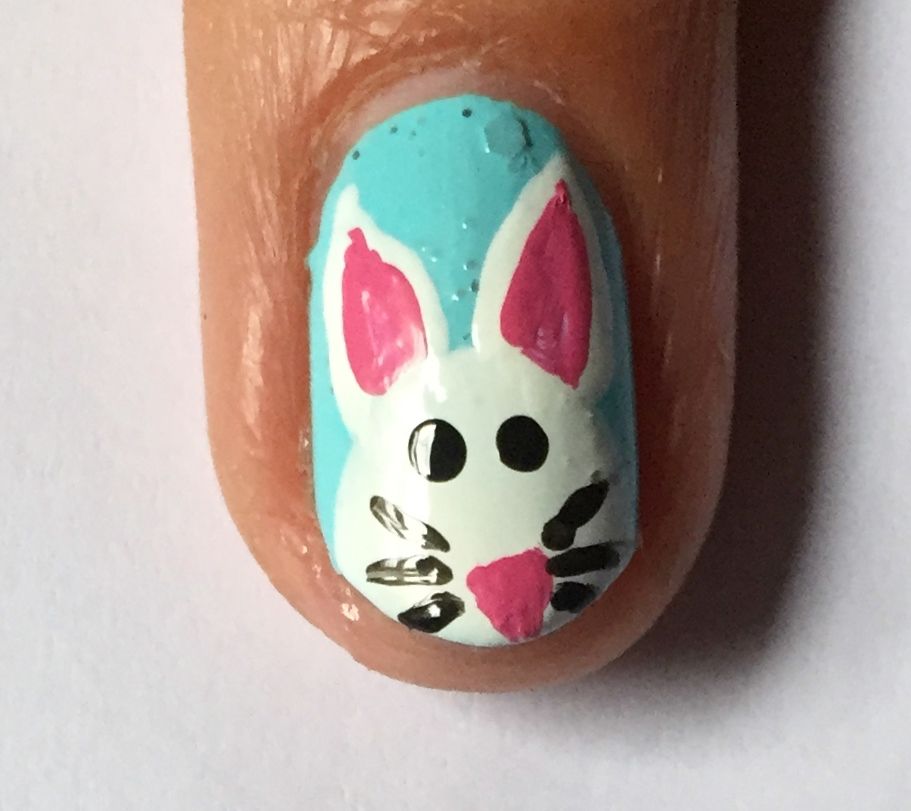
Final step is to add those whiskers by simply adding three small strokes either side of the nose with black polish
For
my pinkie white bunny I simply used the black & pink polishes to
draw on a rabbit face a little differently, more comic book, rustic
arty style? That's what I'm telling myself with anyway...
Not
forgetting a nice covering of glossy topcoat & your cute bunnies
are ready to hop :) I have some googly eyes lying around that I'm
itching to use & I've just had an idea for what they might be
perfect for so stay tuned for more Easter nail art...
Losta love to ya!

Your nails are so cute! I wish I could achieve this but I always mess my nails up when painting them.
ReplyDeleteCarla | carlamirabelli.blogspot.com.au
Aww thank you so much Carla! Aww do give them a go, hopefully having the step by step pictorials makes it a tad easier to recreate, definitely let me know if you do! xoxo
Delete