Hello
there my lovely readers!
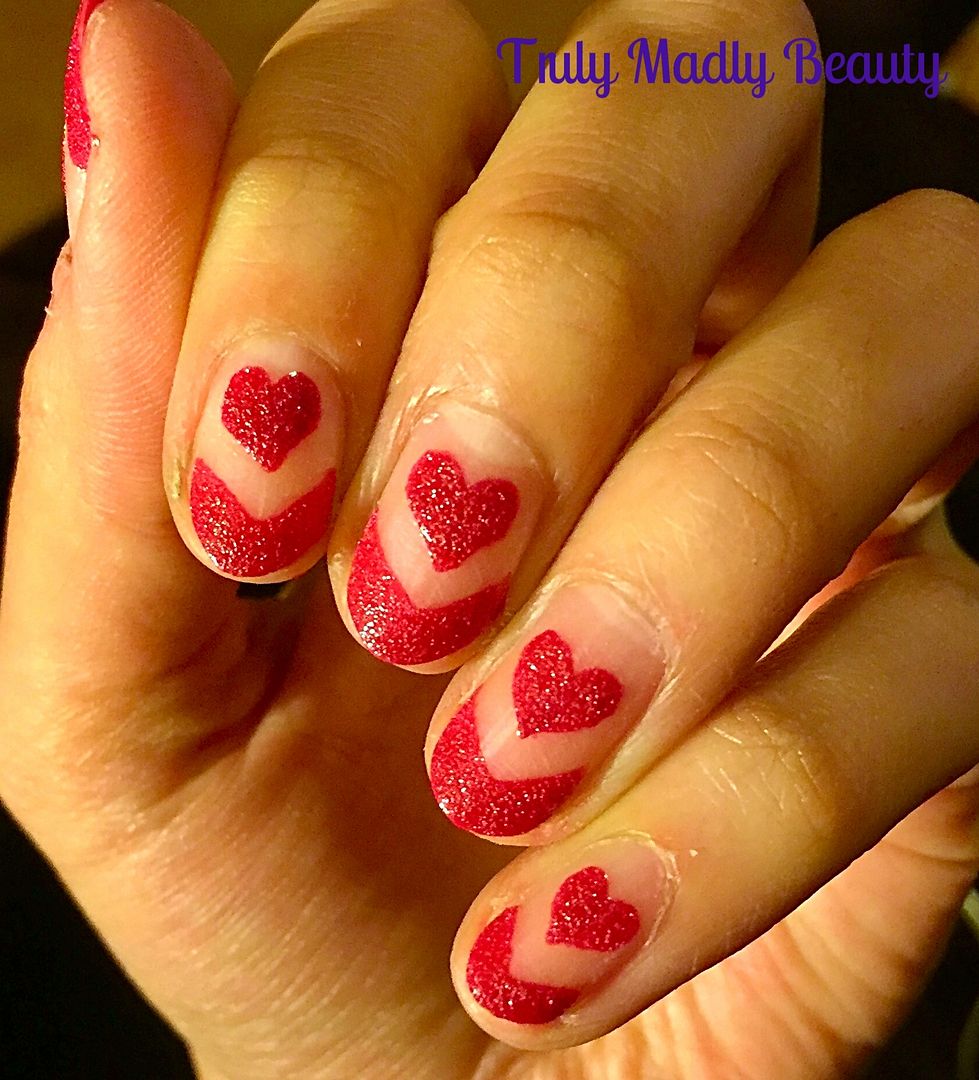
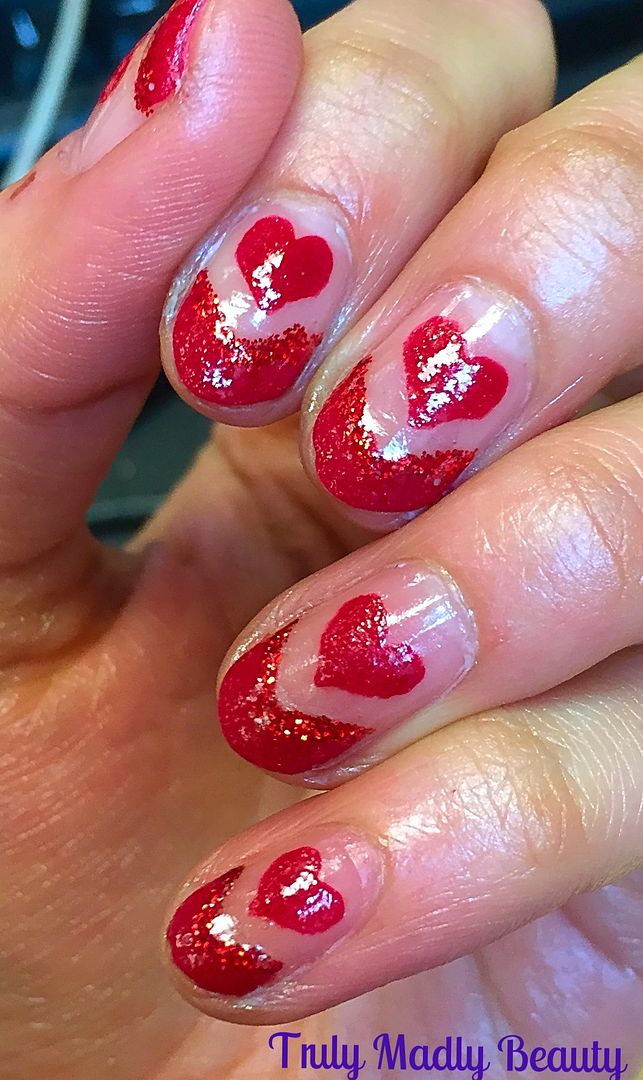
Another
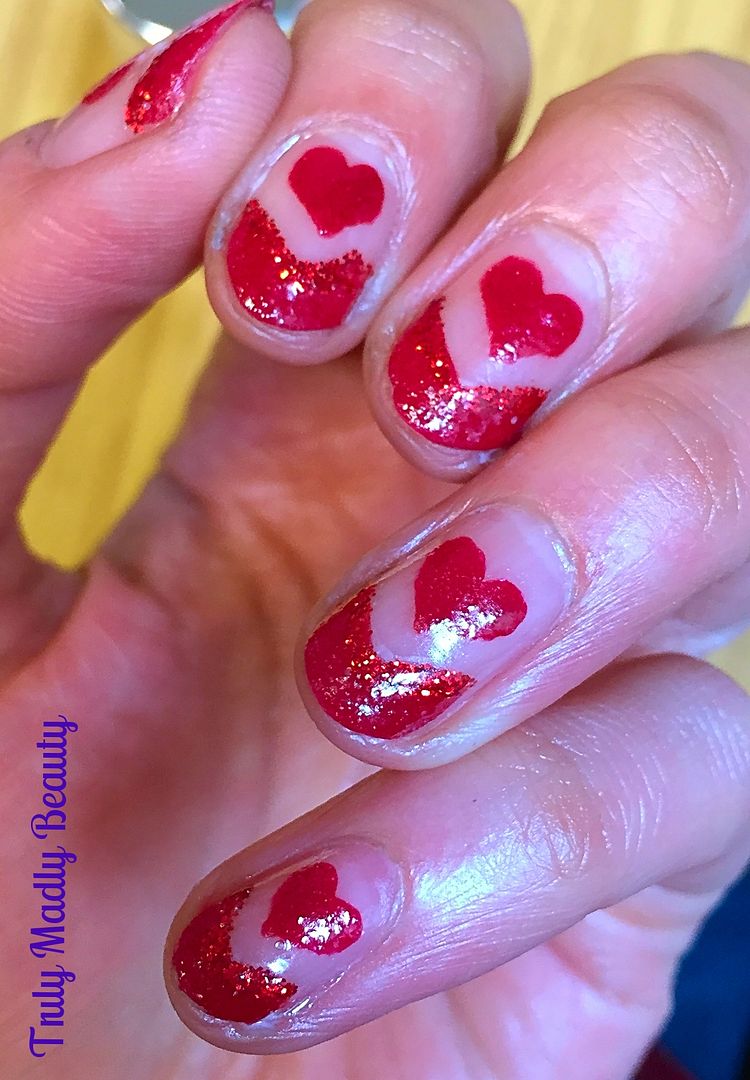
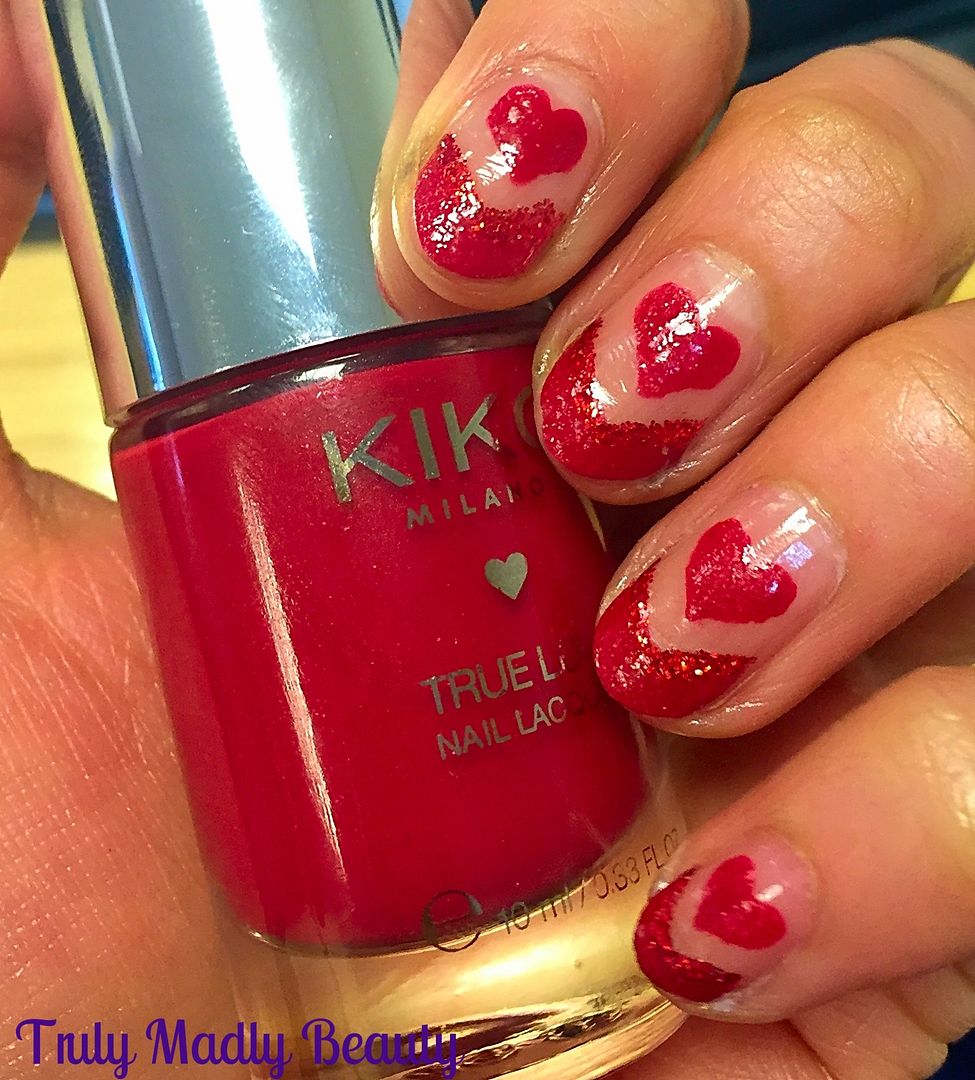
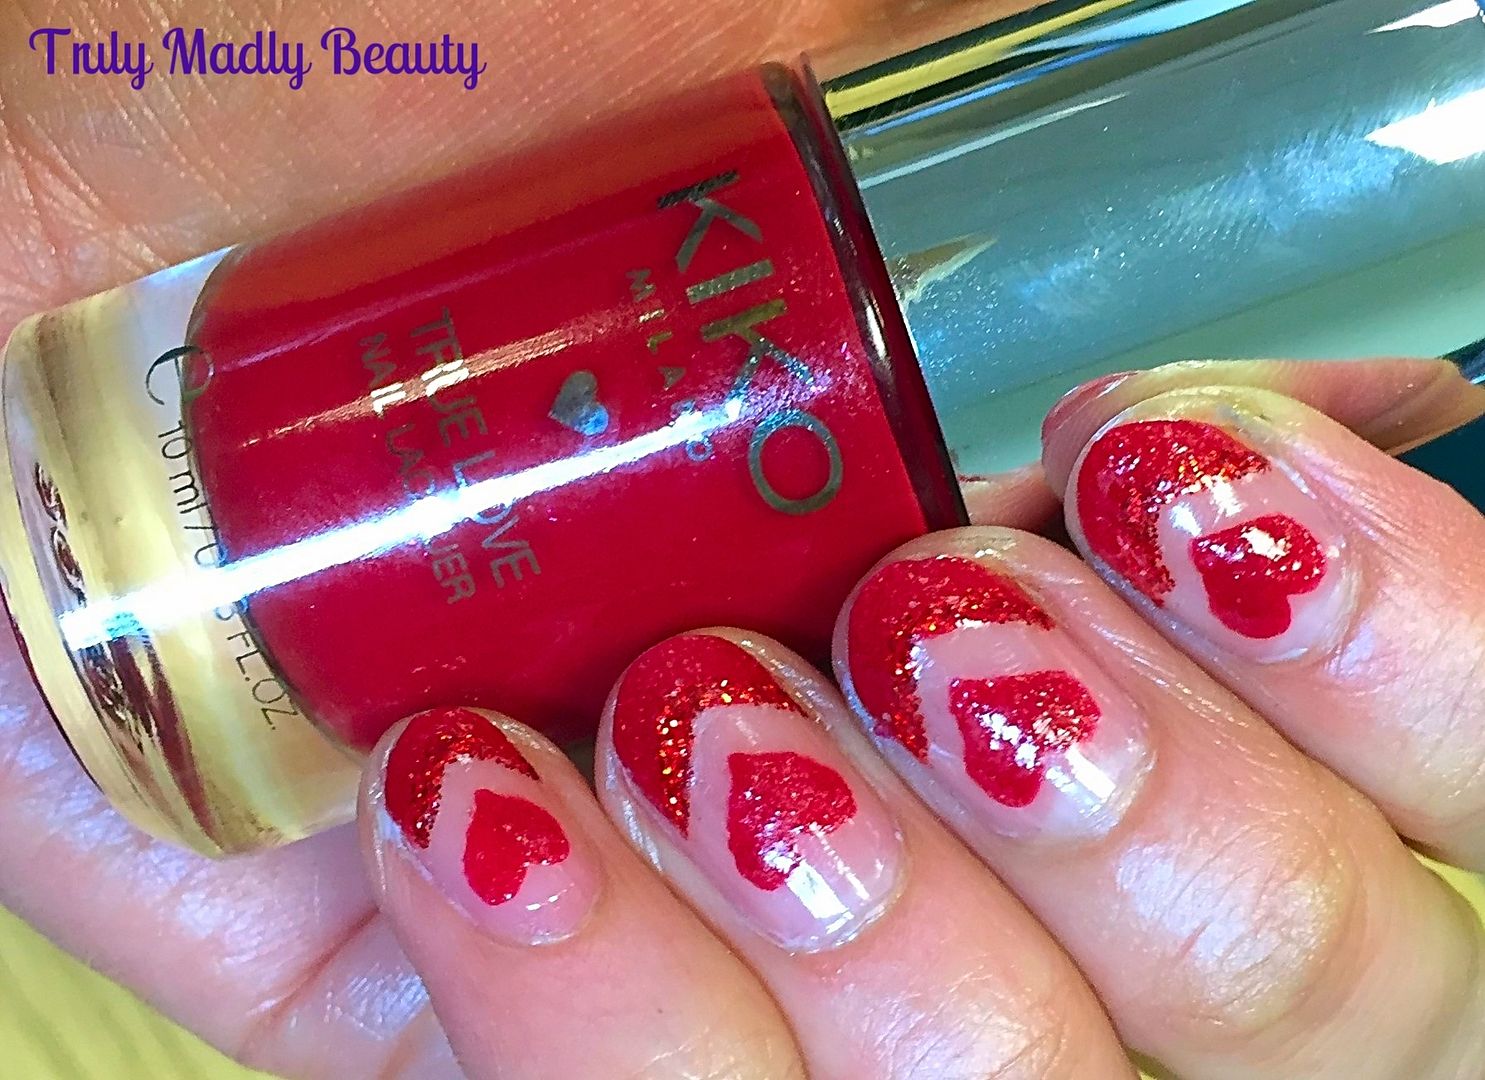
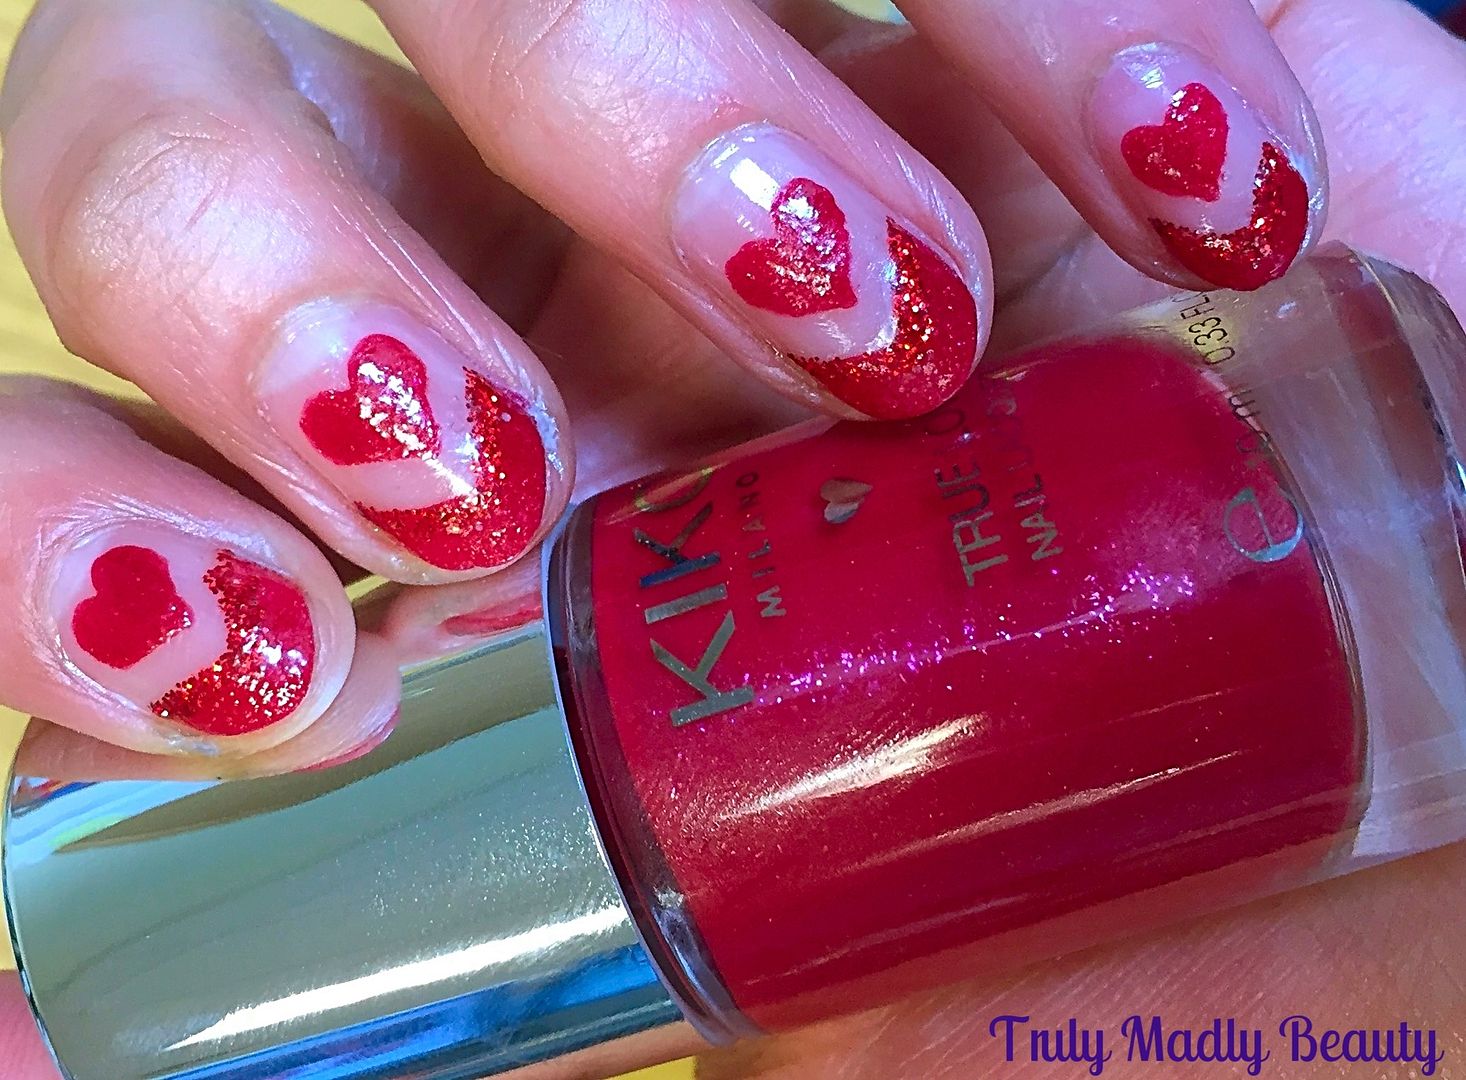
Valentines themed mani for you today my dears! This time I've thrown together some fun floating hearts that are super simple to do & which I'll show you how to create...
For
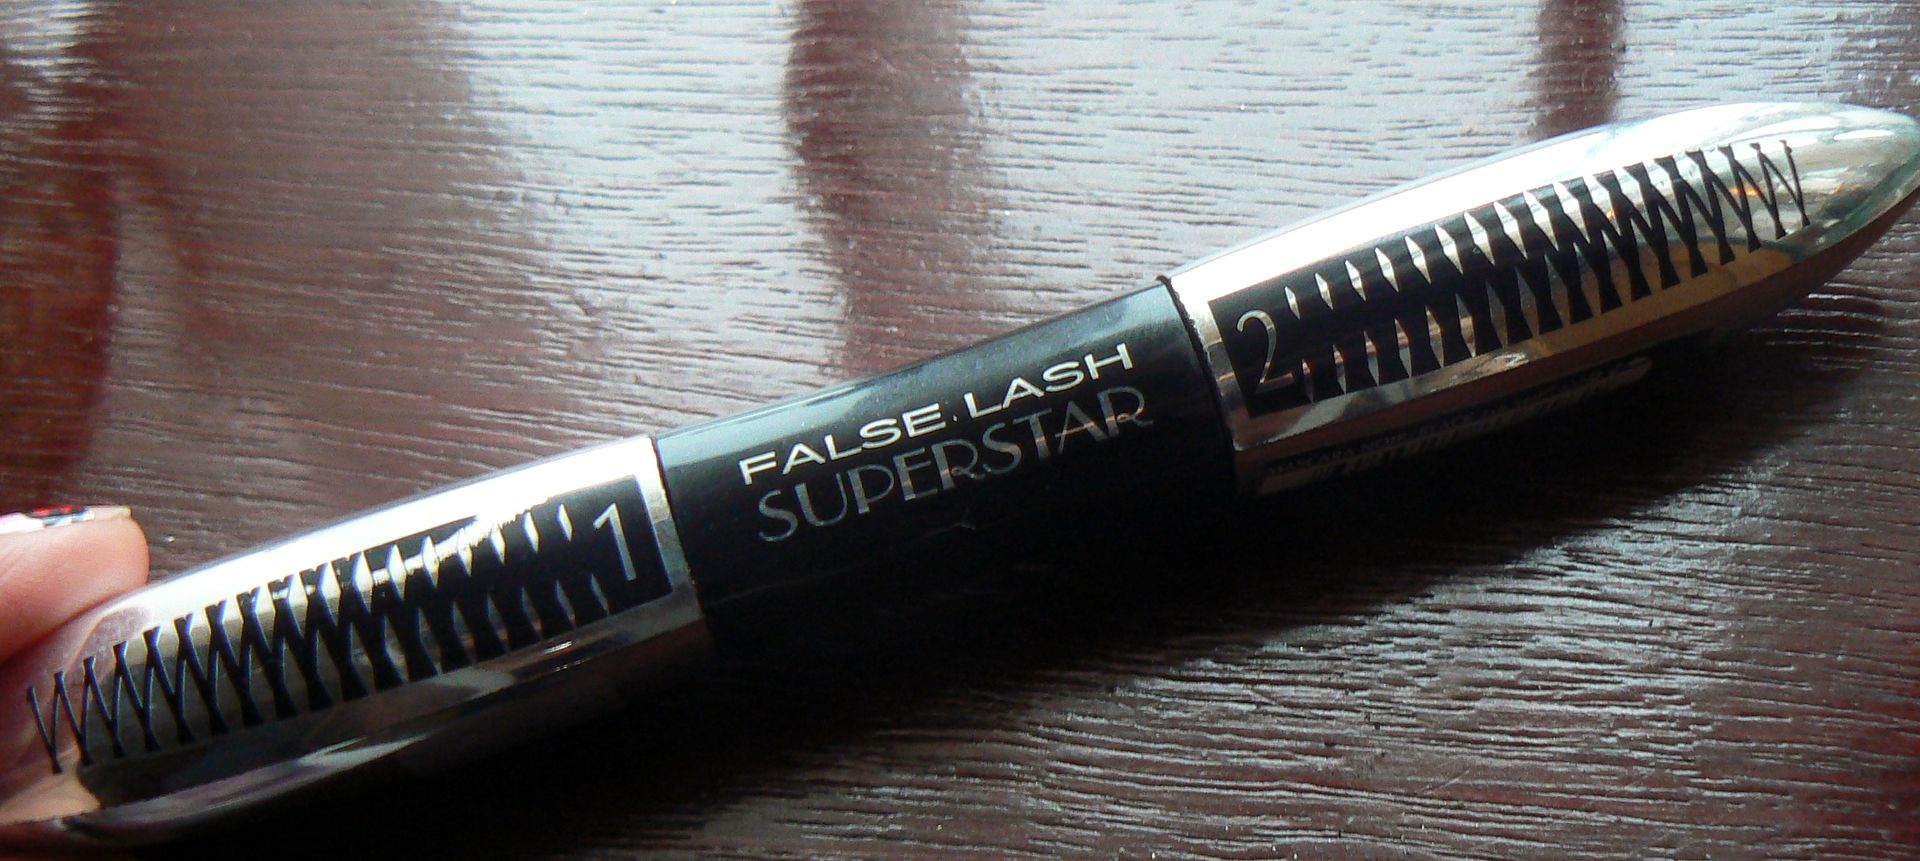
this I've used KIKO's True Love Lacquer in Red Kiss, which the lovely
Safiyah aka Frootibeauty kindly gifted me when I saw her recently
because she's just an absolute angel who knows my weakness! I've
always adored KIKO polishes, fab quality for a bargain price. Well I
saw this & though it an apt polish for a Valentines manicure!
What
I didn't realise however was that these particular polishes from
KIKO's recent BFF collection for Valentines day are actually
textured! By the time I noticed this I was already on my 3rd nail in
haha!
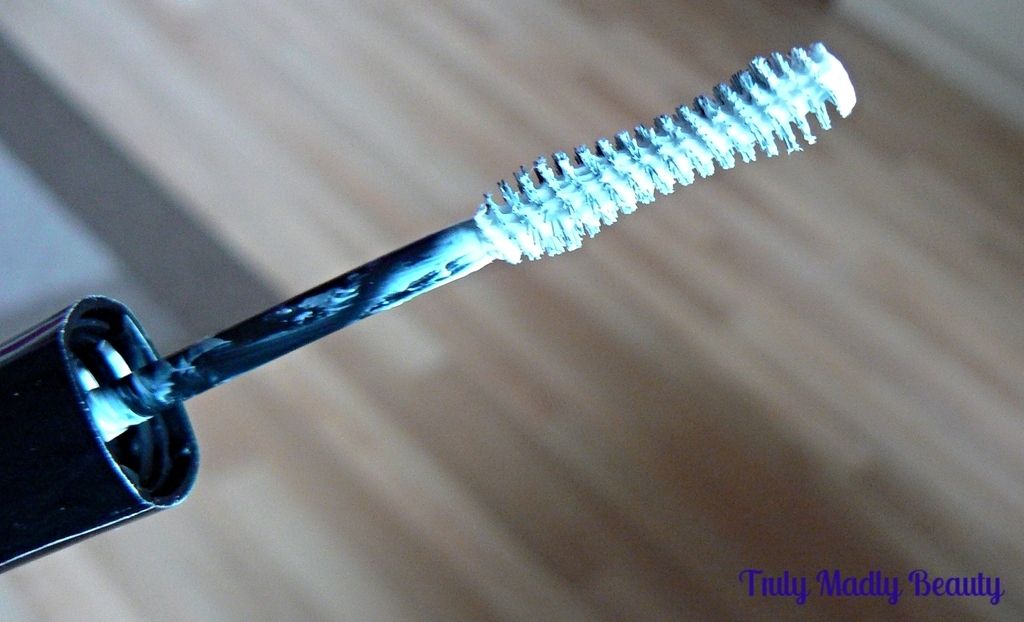
The
True Love Nail Lacquers are micropearls which in fact dry to a matte
textured finish, almost like sand effect polishes. I hadn't seen any
swatches online so you could say it took me by surprise a tad.
Normally I wouldn't have chosen a textured/effects polish for this
type of mani but hey ho, I rolled with it anyhoos :)
The
theme of the polish not to mention the fire engine red shade was
perfect for a valentines mani. The textured finish is definitely
interesting, matte polish lovers especially would love it. You have
to work quick with the polish as the formula can get gloopy if
overworked hence why its not the best choice for nail art, & the
polish dries fast, another bonus of these textured type polishes.
Here's
a quick step by step guide on how to create the floating hearts
french nails...
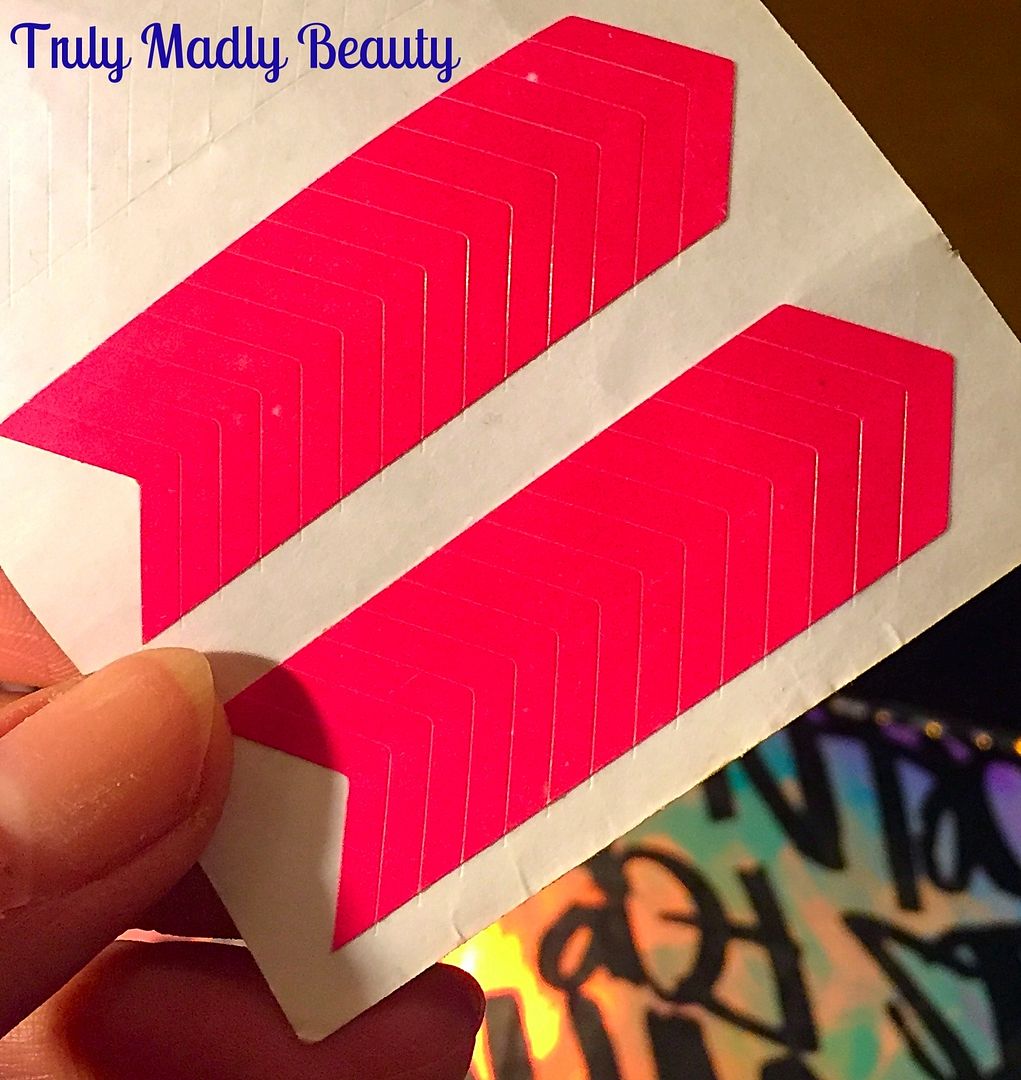
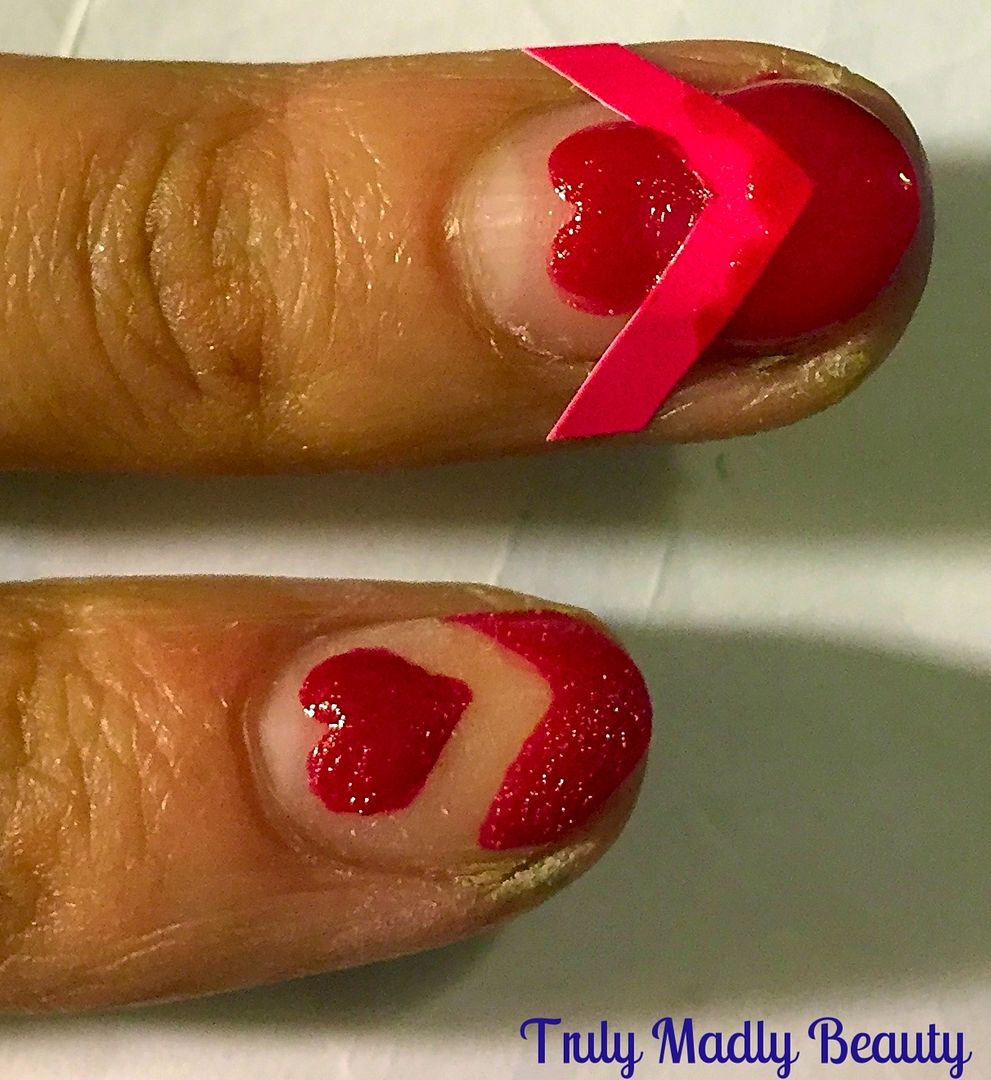
To
create the sharp edged french tip & to help shape the heart I've
used these pointed manicure guides which I picked up in Savers a
while back but you can easily find these on Ebay or Born Pretty
Store. You can of course do it all free hand but these definitely
make life easier! And I'm ALL for that ;)
I
start off with a bare nail base as I'll be using the guides &
don't want to risk them peeling off a base coat when removing. Plus I
find the guides stick better to a bare nail.
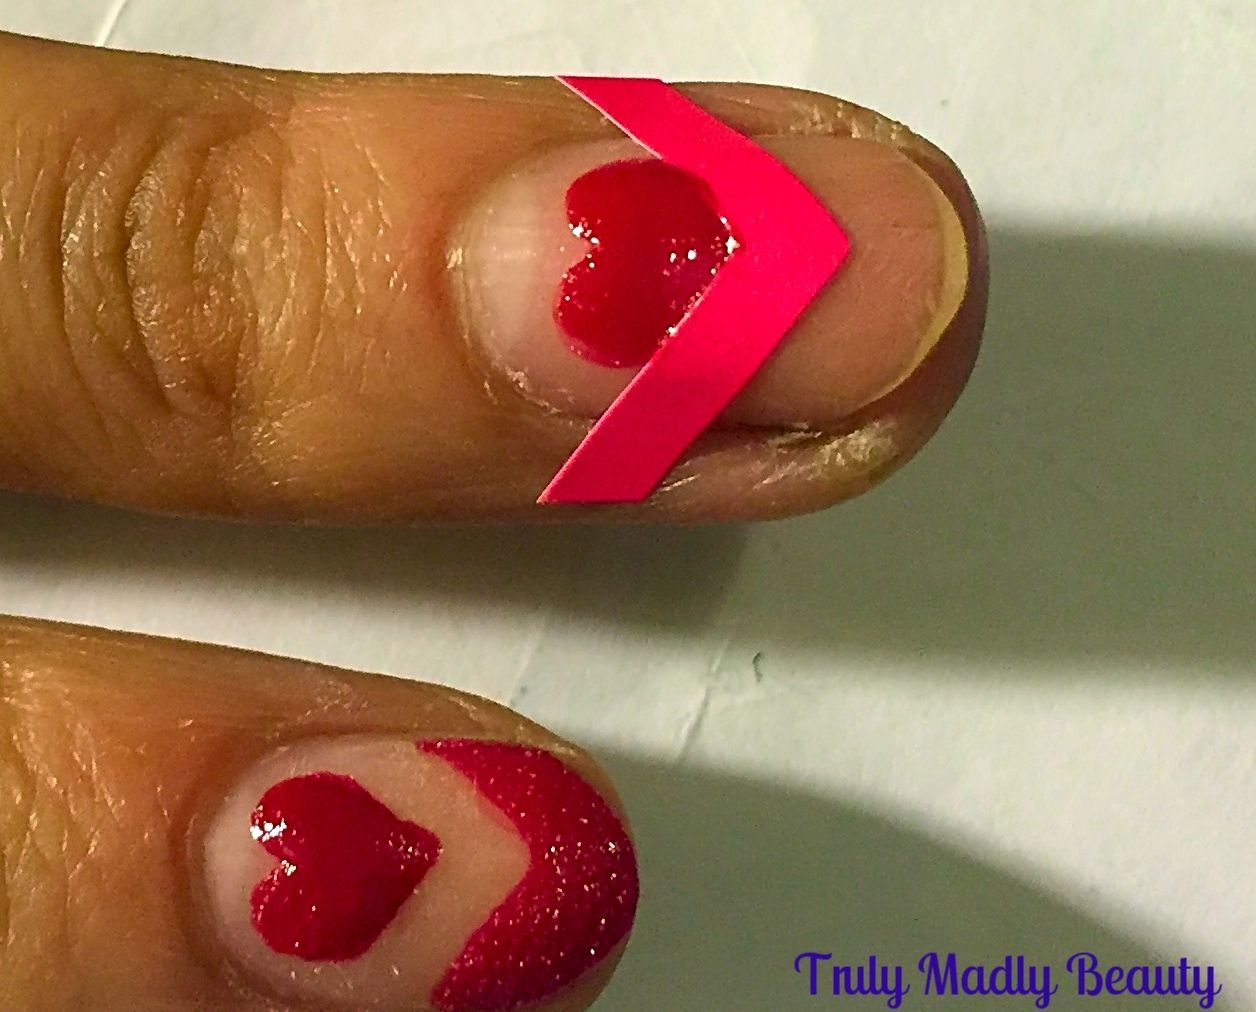
Position
your guide about 3/4 of the way on the nail, depending on how thick
you want your french edge. As I currently have small nubbins I
position my guides a bit further down to give the illusion of tips,
WHY OH WHY DO YOU KEEP BREAKING NAILS?! I'VE BEEN GOOD TO
YOOOOOUUUU!!! ....*cough*....Apologies...my current nail length state
is a sensitive subject at the moment...
Start
with drawing your heart. Using a fine nail art brush, dip into your
polish & free hand two curved line next to each other creating
the top of your heart. You can see how the guide helps with the
shaping of your heart.
Then
using the brush from the polish, apply the polish to the tips. Its
good to use a thick opaque shade for negative space mani's like this
as ideally you only want to apply one coat.
Once
you've applied your polish to the tips, immediately remove the guide,
with a pair of tweezers if you have some just to make it a tad
easier, whilst the polish is still wet.
Once
removed you have your floating heart & french tip!
Don't worry if
some polish has smudged whilst removing your guides, I always do a
bit of clean up at this point with my brush & acetone, going
along the lines so that the edges are sharp & clean.
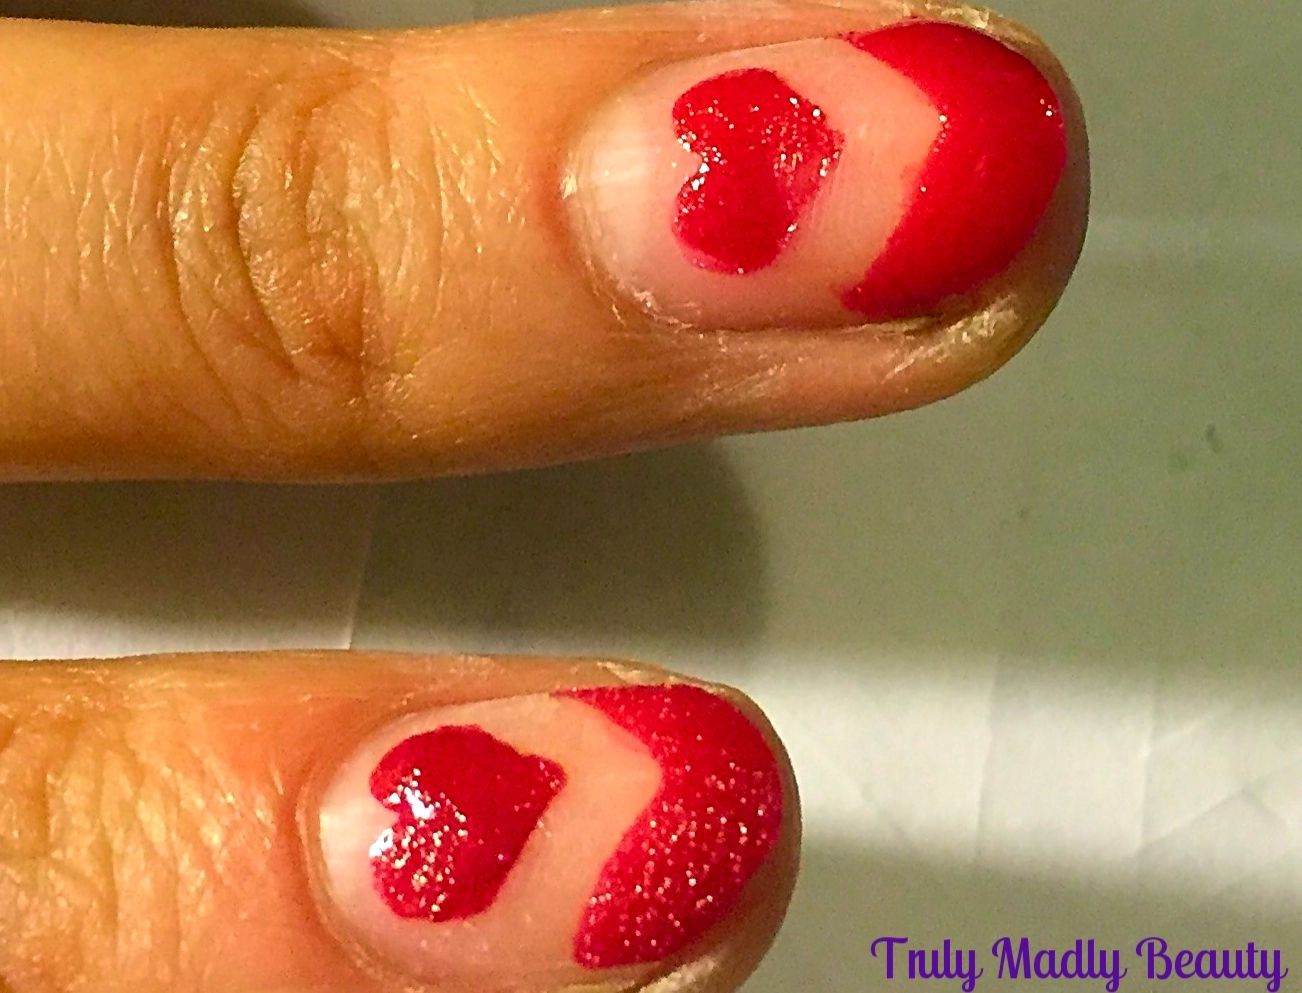
I
also went over the floating heart once more to get a stronger colour
pay off as well as making the bottom point & edges a bit more
curved & neater.
I
still felt it missing something, so whenever this happens I reach for
MAH GLITTAH! Using some glitter red polish I applied some sparkle to
the inner edge of the tips. This is of course an optional step.
Because
I wanted a super glossy finish & not the textured effect, though to be honest I actually quite liked that too, I went
over the mani with two thick coats of topcoat to get that sheen.
And
thats it! Hope you liked the floating hearts valentines nails
lovelies! Thanks as always for reading!
Lotsa love to ya!