Hello lovely
readers!
Hows tricks? So this post is a tad (okay VERY) late in going up, work has
once again pretty much taken over life, making blogging regularly hard which makes me sad! Tis my happy place after all. But
with a blissfully free weekend & an extra long one at that (yay!)
I can finally rectify this situation & get that mojo flowing again
:)
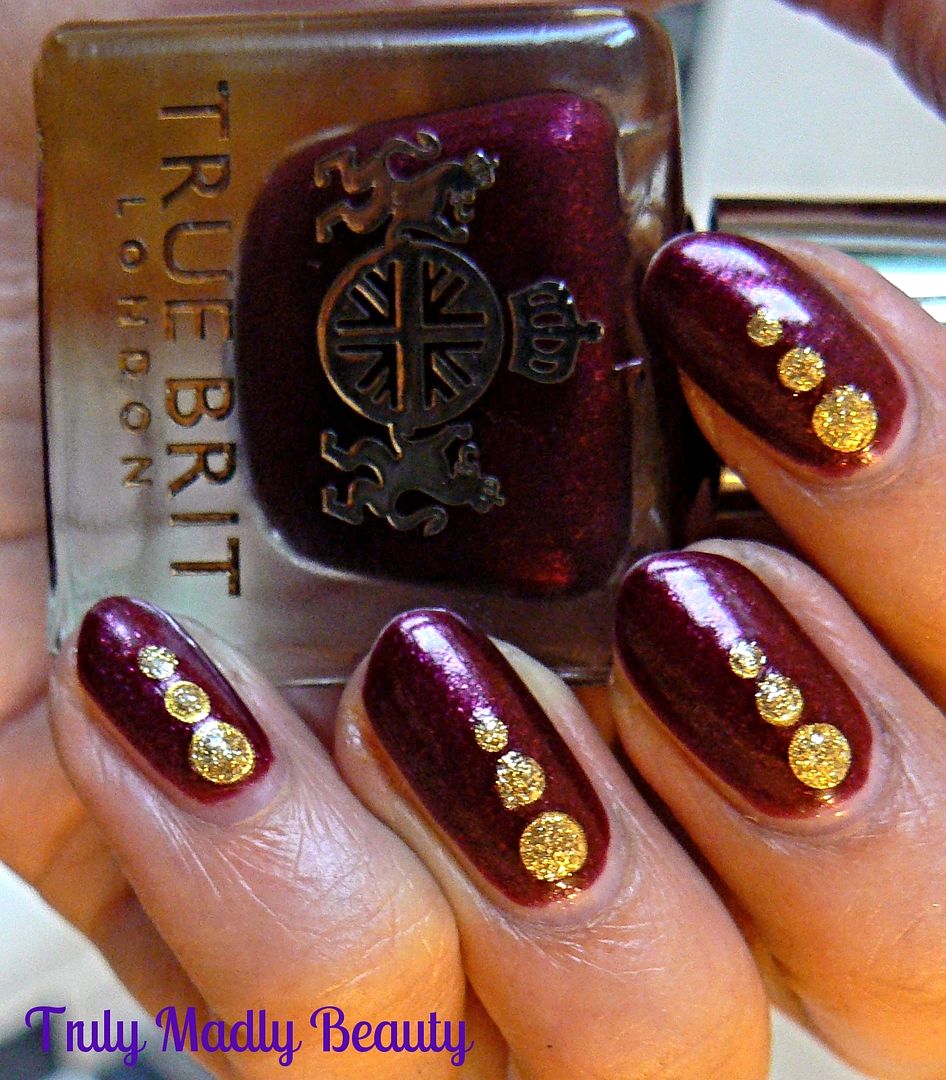
The mani I have
to share with you today features another delight from the brand True Brit London which I did for Afternoon Tea Week earlier this month &
which yes I am just blogging about now *facepalm* O_o....However being such a
devoted & avid fan of this most delightfully British pastime, one
week is simply not enough for moi & is definitely a tradition
that should be celebrated & actioned as often as possible all
year round! So in honour of that here are some Vintage Afternoon Tea
inspired nails...
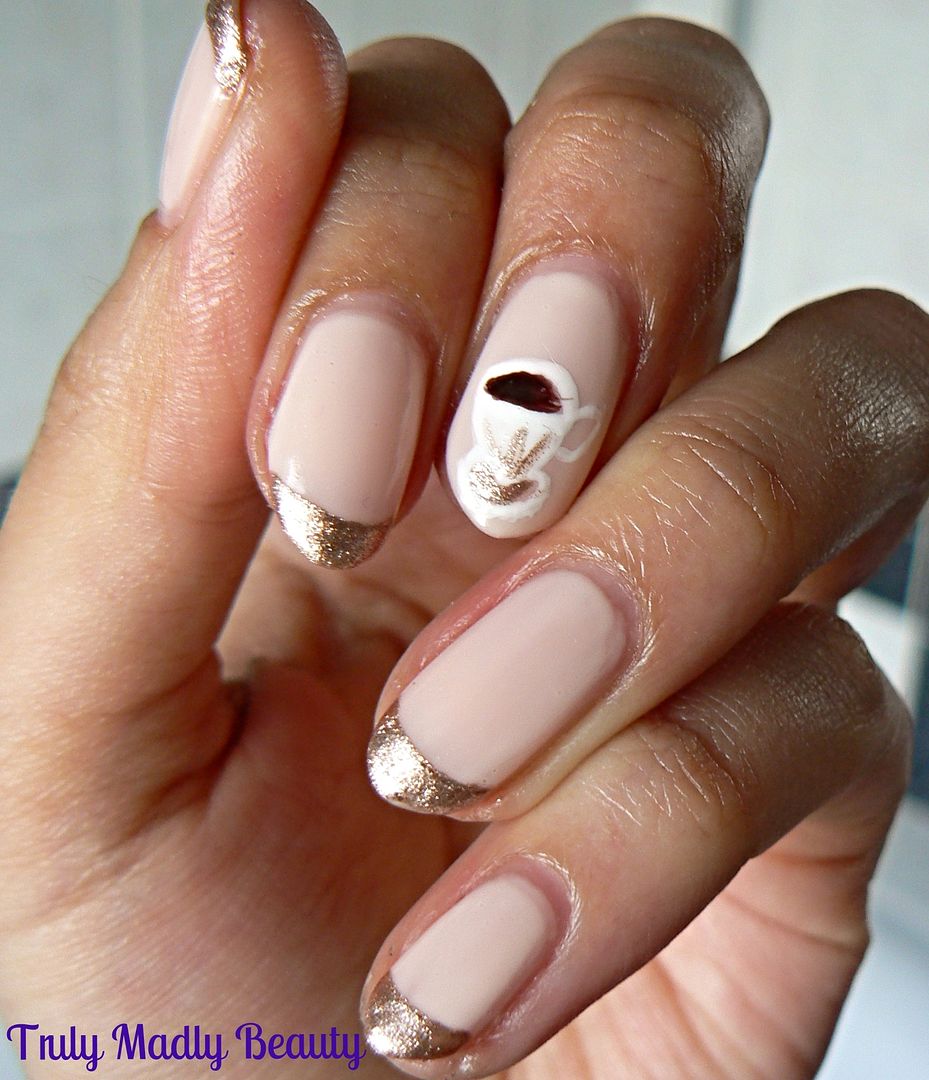
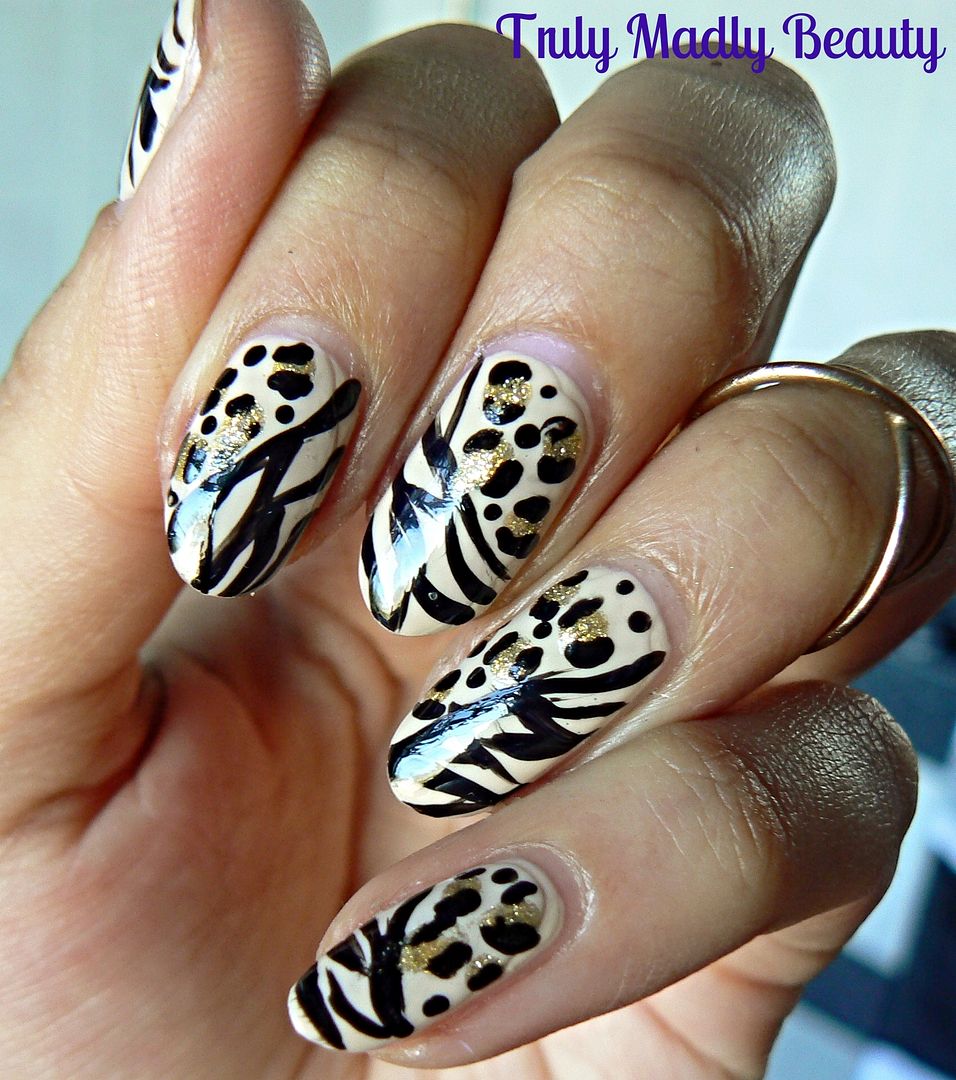
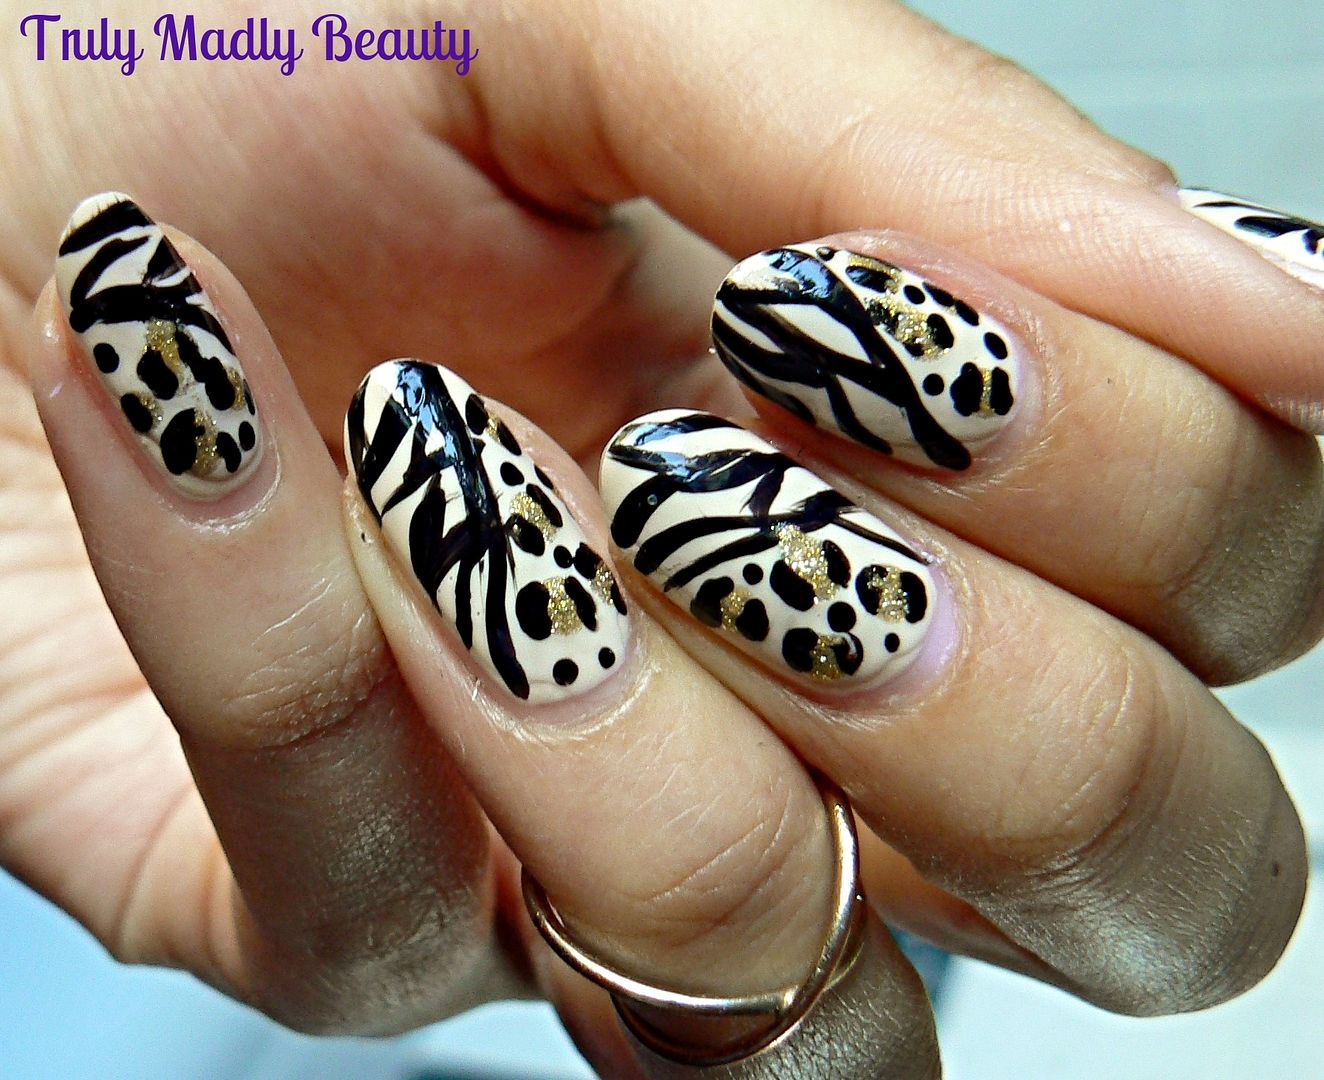
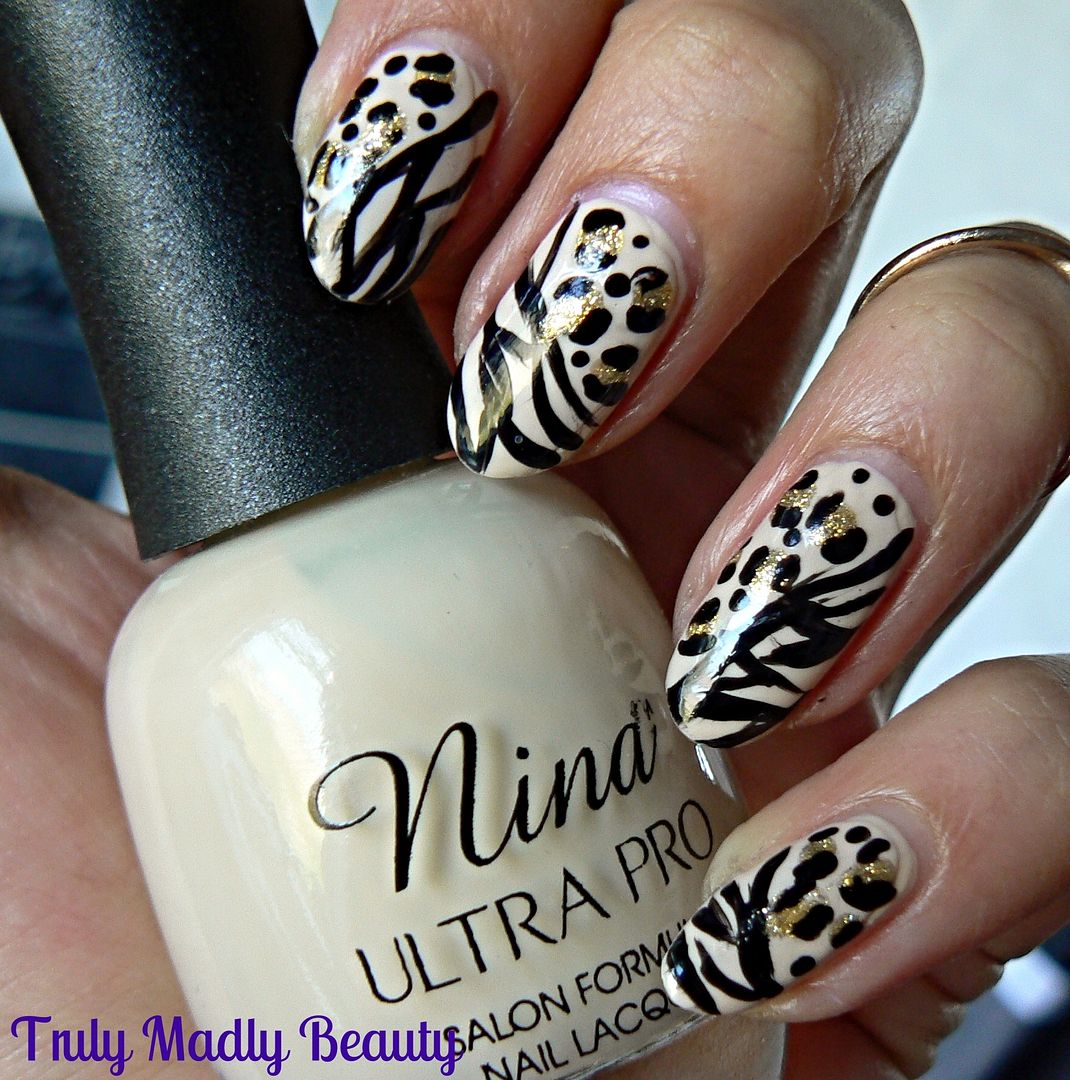
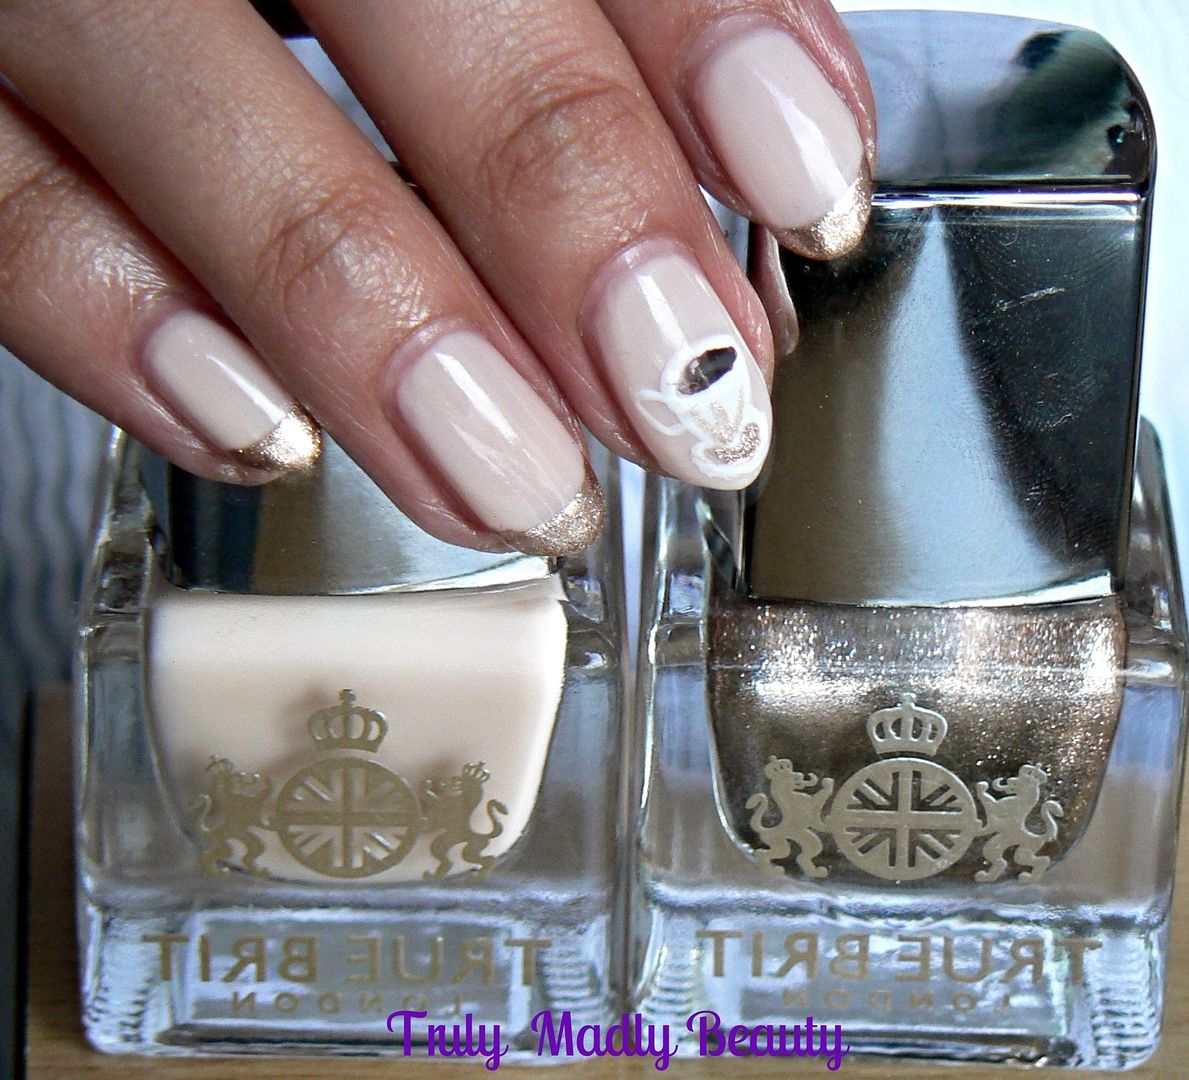
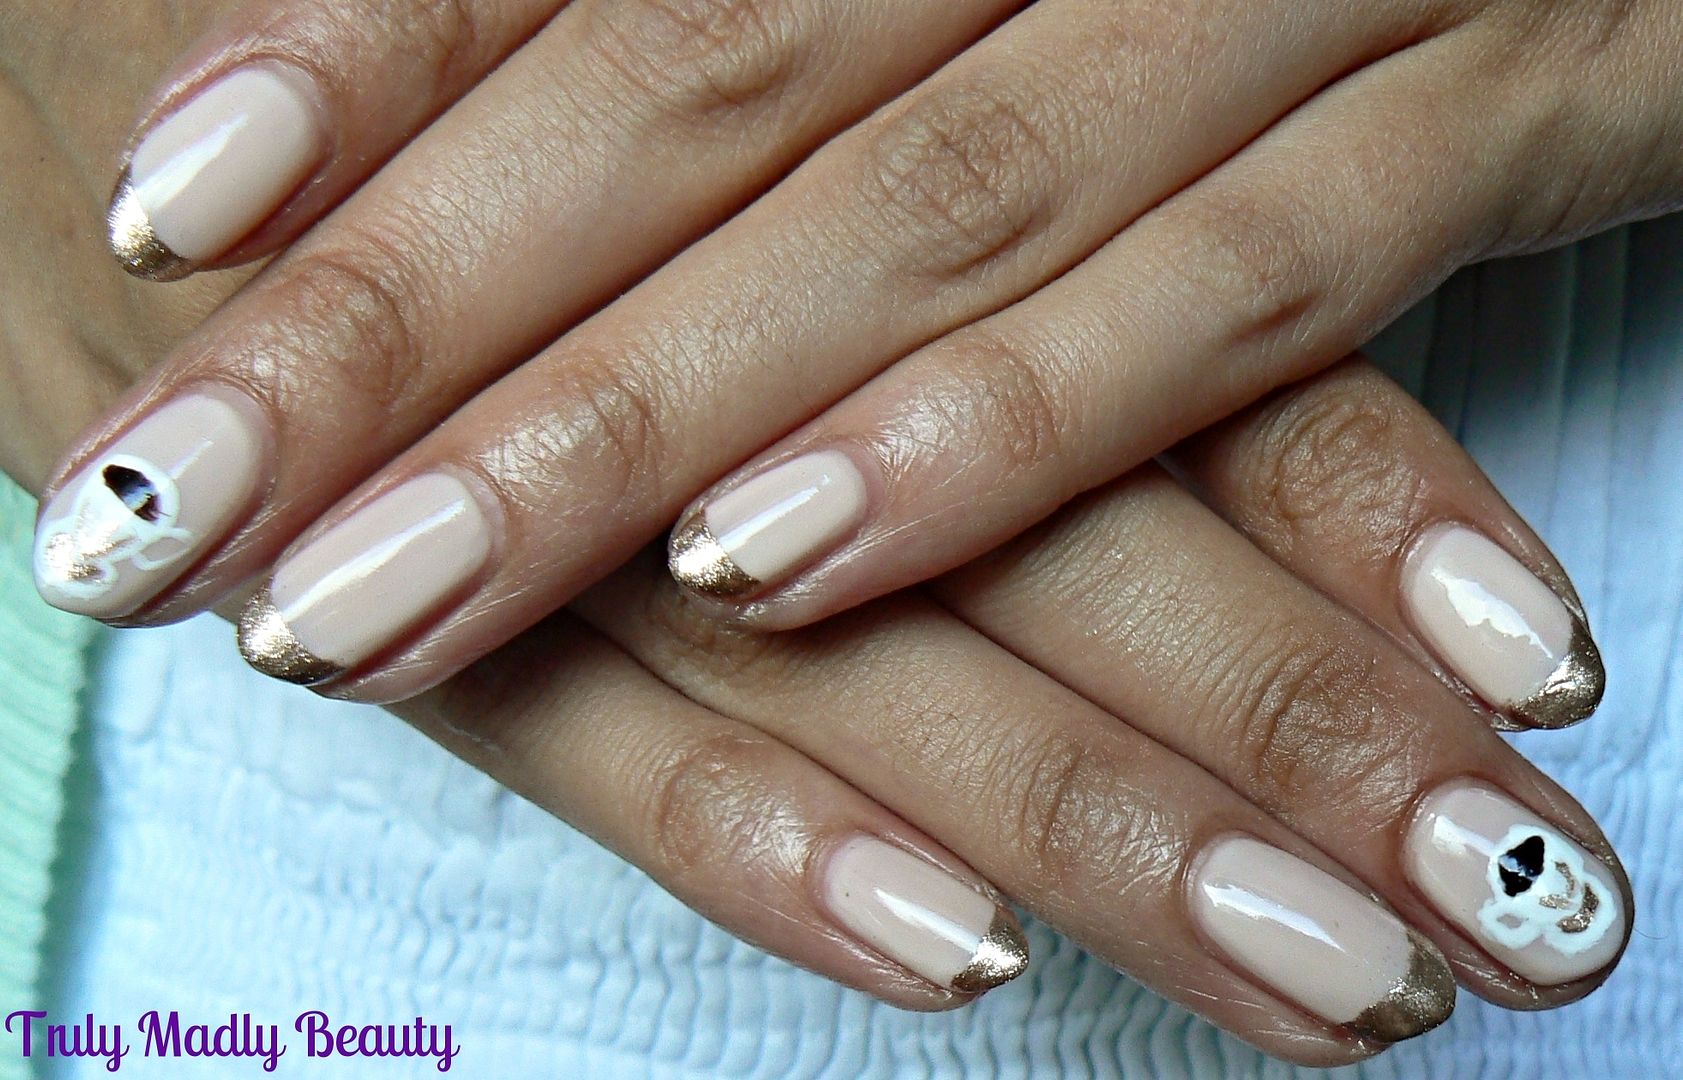
First of
all...HOW did it take me so long to try foil french tips?!
I am so in love with this slight alteration on a traditional french
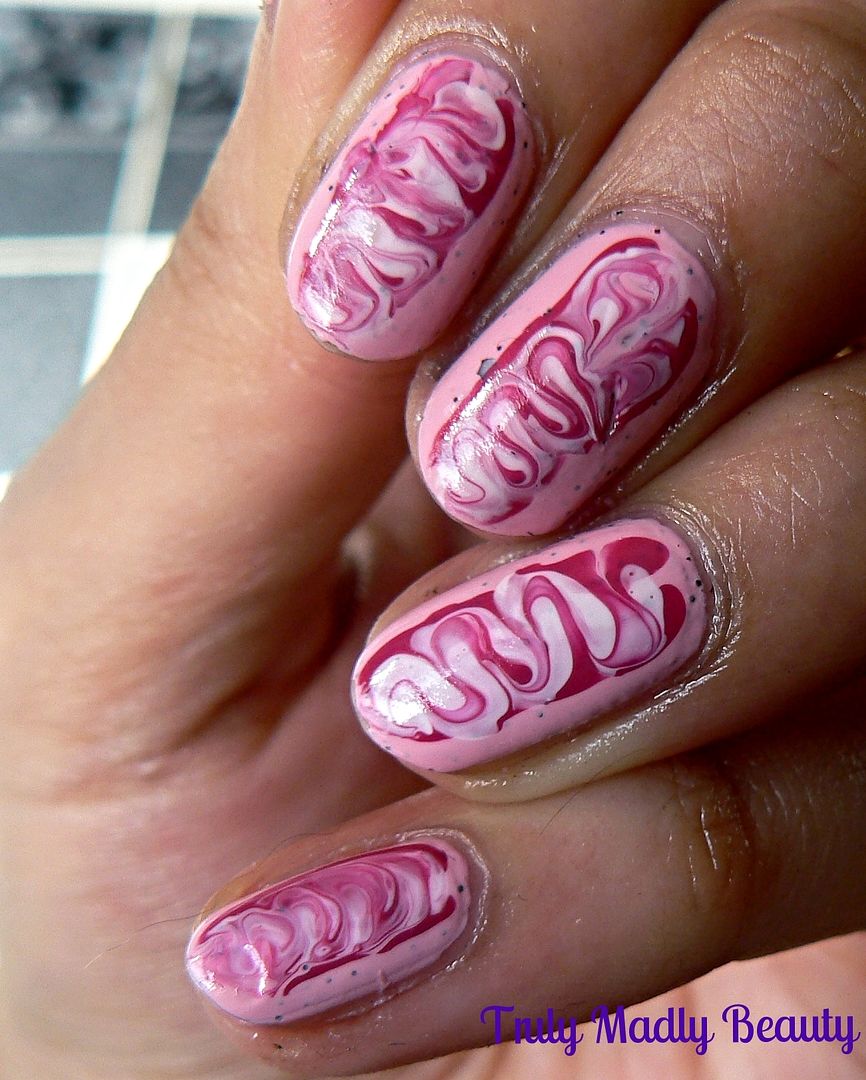
manicure but more on those later...Lets start with the gorgeous nude base
colour of the mani shall we, courtesy of True Brit London's Victoria*
from the Classic collection.
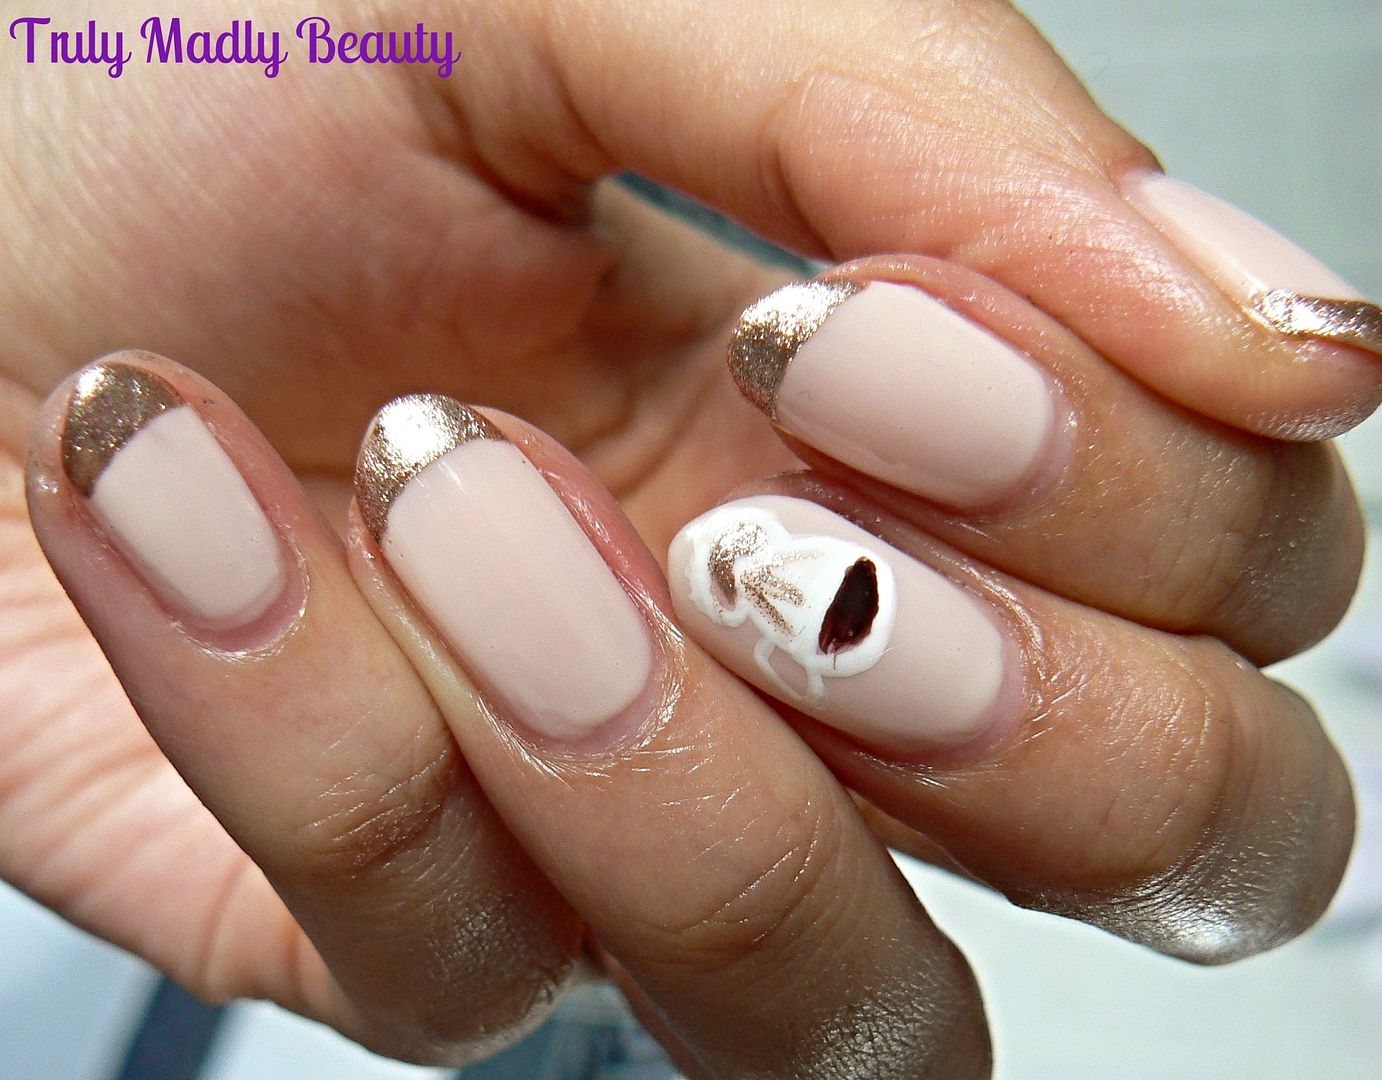
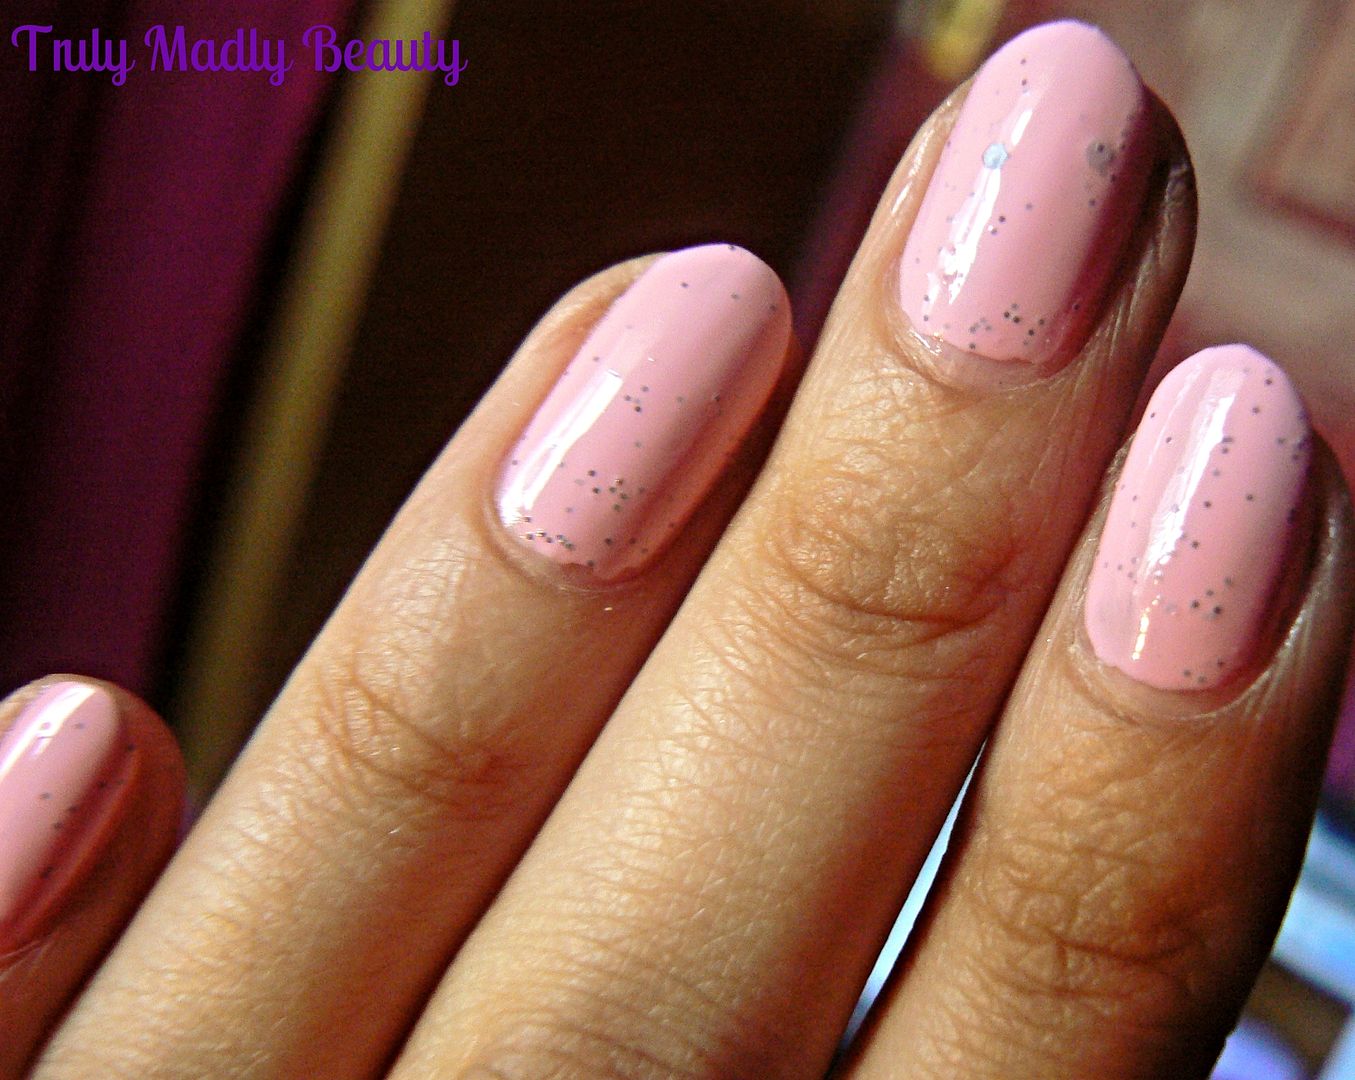
Victoria is one
of those perfect 'my nails but better' shades. A gorgeous, milky,
natural nude, it glides onto the nail beautifully creating a tres
chic & sophisticated look. This was two coats applied for a
lovely opaque finish.
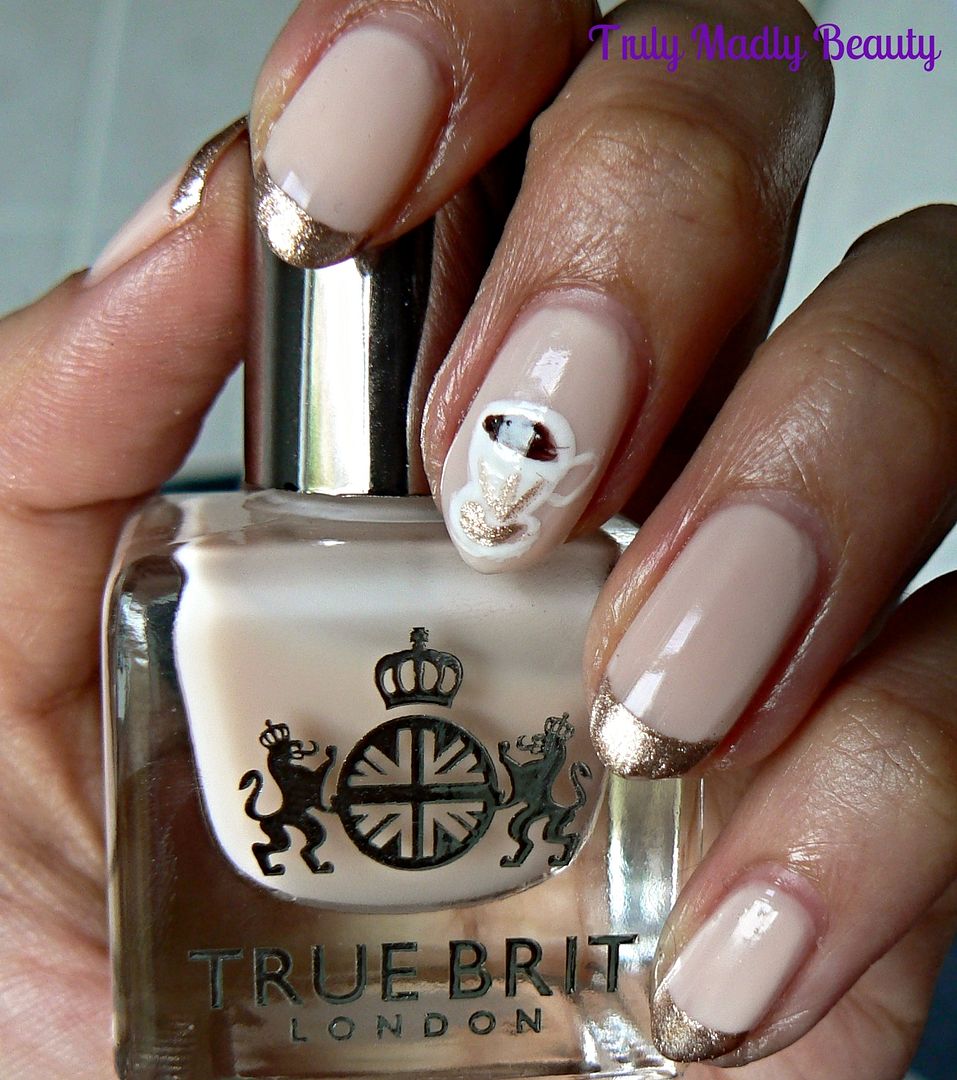
Once completely
dry I decided to add some french tips with a twist. Instead of the
usual white I opted for the pretty champagne rose gold goodness that
is True Brit London's Heirloom. Using some french mani guides, I
painted the tips before removing the guides whilst polish was
still wet. I am truly adoring foil french tips & can't wait to
try with some pastel shades!
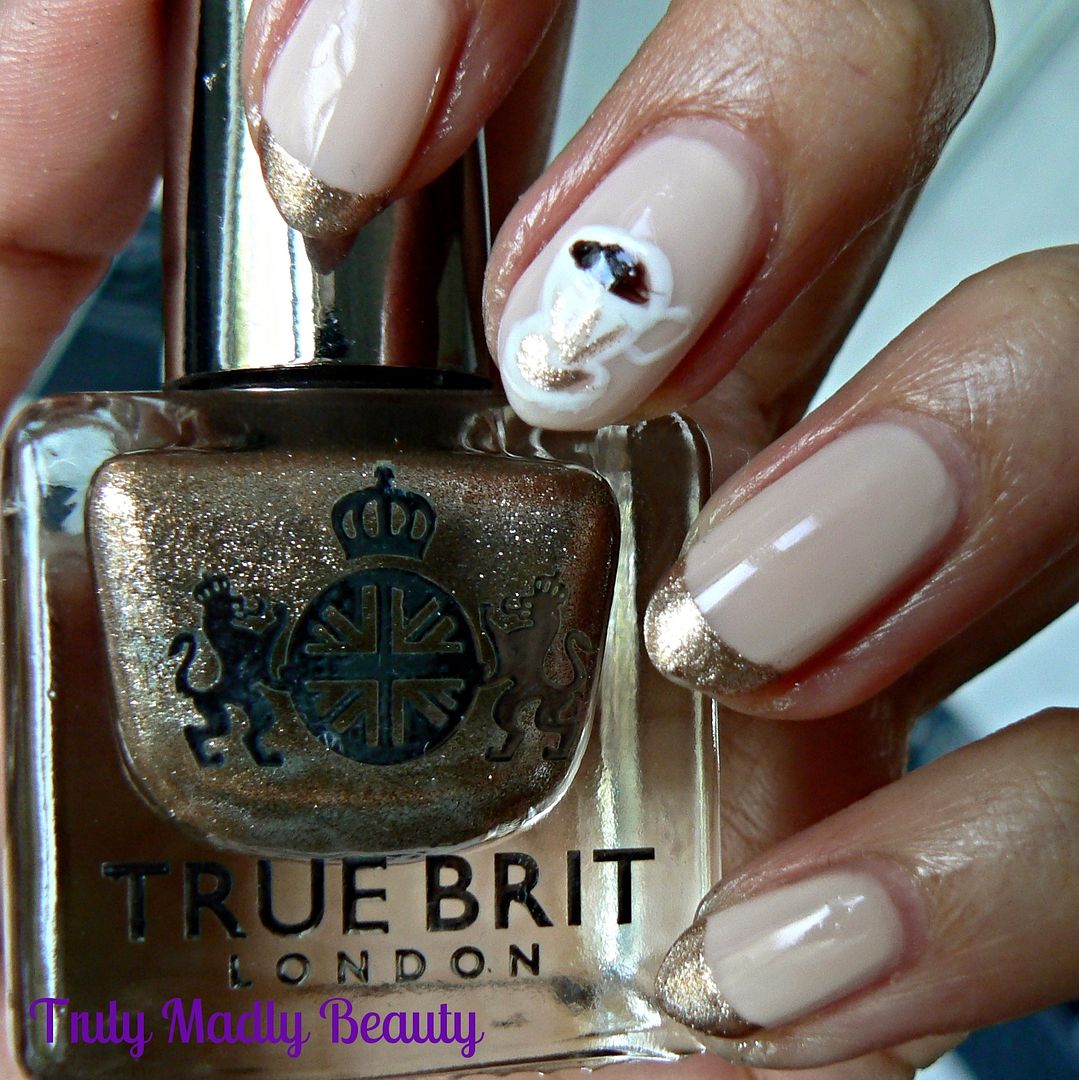
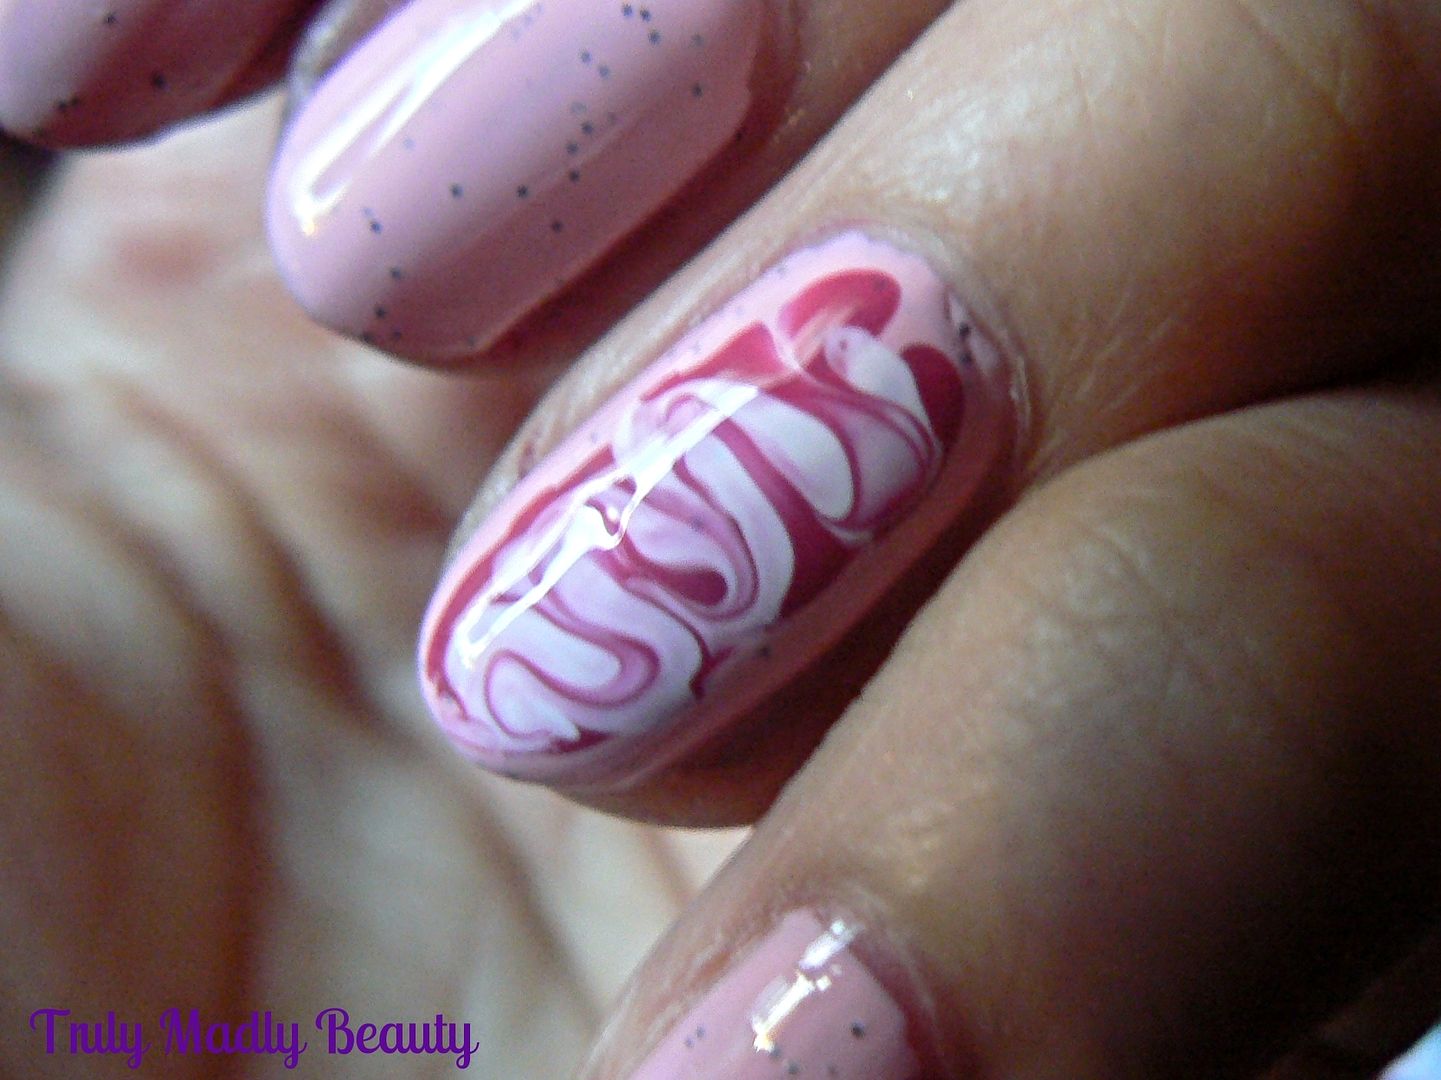
For my accent
nail I couldn't resist adding a wee delicate teacup, it is an
afternoon tea inspired mani after all! Using a thin brush I free handed the cup & saucer using white polish, a bit of Heirloom
for detail & brown polish for my tea blend of choice! I'm partial
to a spot of Darjeeling myself, whats your favourite blend?
Finishing it all
of course with a nice coat of True Brit London Gloss Topcoat &
that's it! Nails suitably ready to partake in some sophisticated tea
& cake action!
I hope you liked
the mani dolls! Thanks as always for reading. The pretty True Brit
London range can be found online for £12.50. Don't forget you can
get 10% off your order using my code TRULY10!
Lotsa love to
ya!

Disclaimer
- * products featured were sent to me for my consideration. I am not affiliated with
the brand nor paid for this post, this review has been as always my
100% honest opinion! :)