Hello lovely readers!
Red
lips...red nails. Vintage & iconic, whether you're a loyal fan of
one or go all out & love to rock both, there's no doubt that both
are timeless looks that will never fade out. Its a mission in every
girls life to find THE perfect red. Me, I'm still yet to find the
perfect red lipstick...it may be a while till this task is
accomplished seeing as red lips scare the bejesus out of me however,
I am happy to say that my hunt for the perfect red polish may finally
be over as I have discovered one that I've fallen head over heels in
love with! And its brand Sabon who have delivered so perfectly...
Sabon is in fact a brand specializing in bath and body products, not so
hugely well known in the UK...yet. I've heard on the grapevine that
they plan to make their stamp here too which I am so happy to hear &
they now have a UK website! I actually stumbled across this store on
my trip to NYC last year & was drawn in immediately by the
delightful scents & cute kitsch packaging.
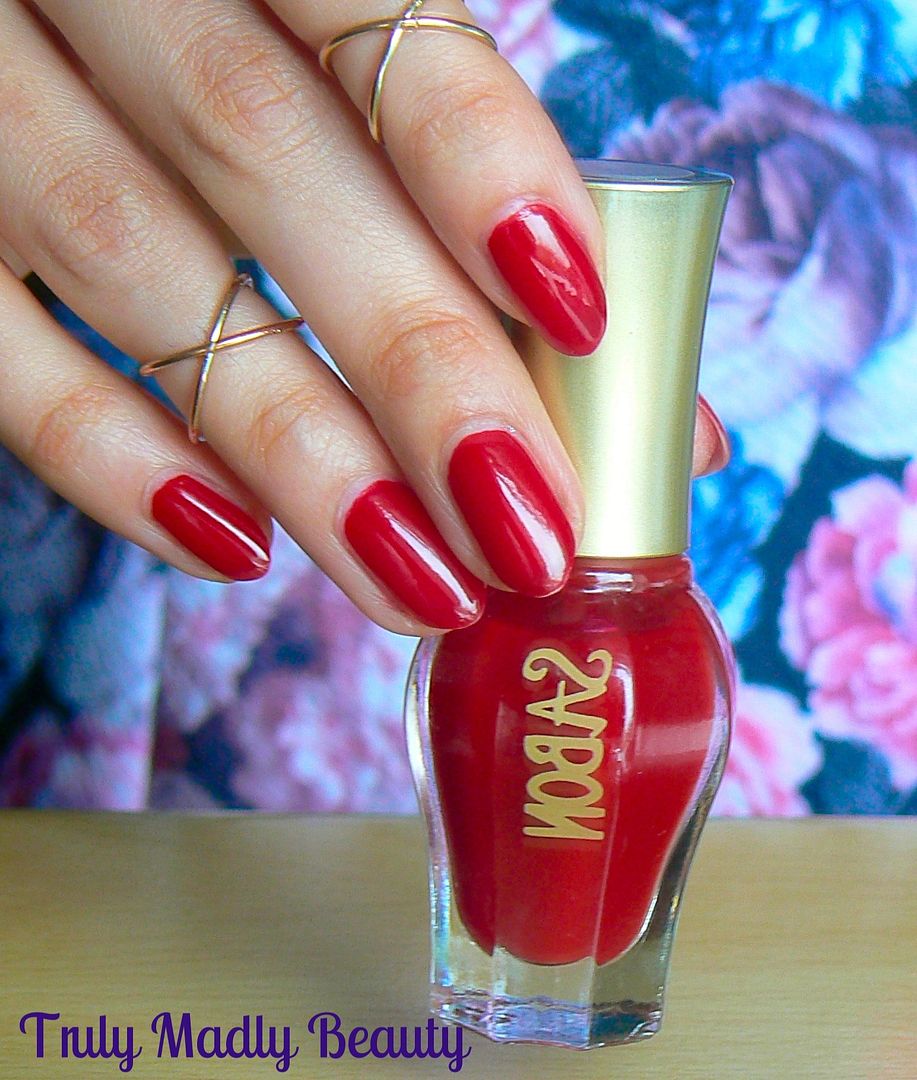
After
befriending the absolute sweetheart of an assistant, gosh I really
miss how wonderful New Yorkers were during my time there &
indulging in a complimentary hand pamper session in which a sublime
selection of Sabon products were used, including scrubs & hand
cream potions, my nail polish raider went in to overdrive when I
spotted the bottles sitting so prettily amongst the bath products.
Naturally I was in my heaven & I ended up taking this beauty home
with me which goes by the simple title of Burgundy ;)
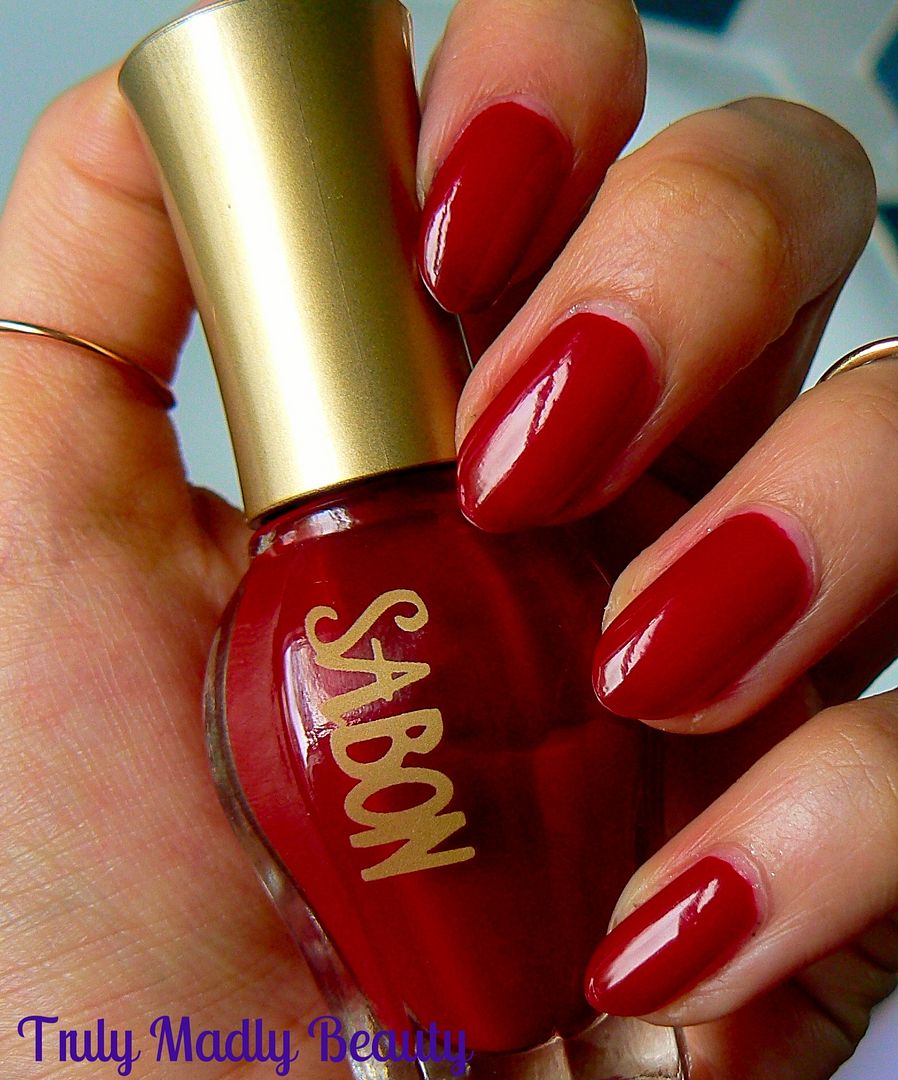
Regardless
of the simplicity of the name every other aspect of this polish more
than makes up for it, firstly packaging. Just look at that beautiful
vintage bottle, wouldn't that look so pretty & elegant sitting on
your vanity table? J'adore!
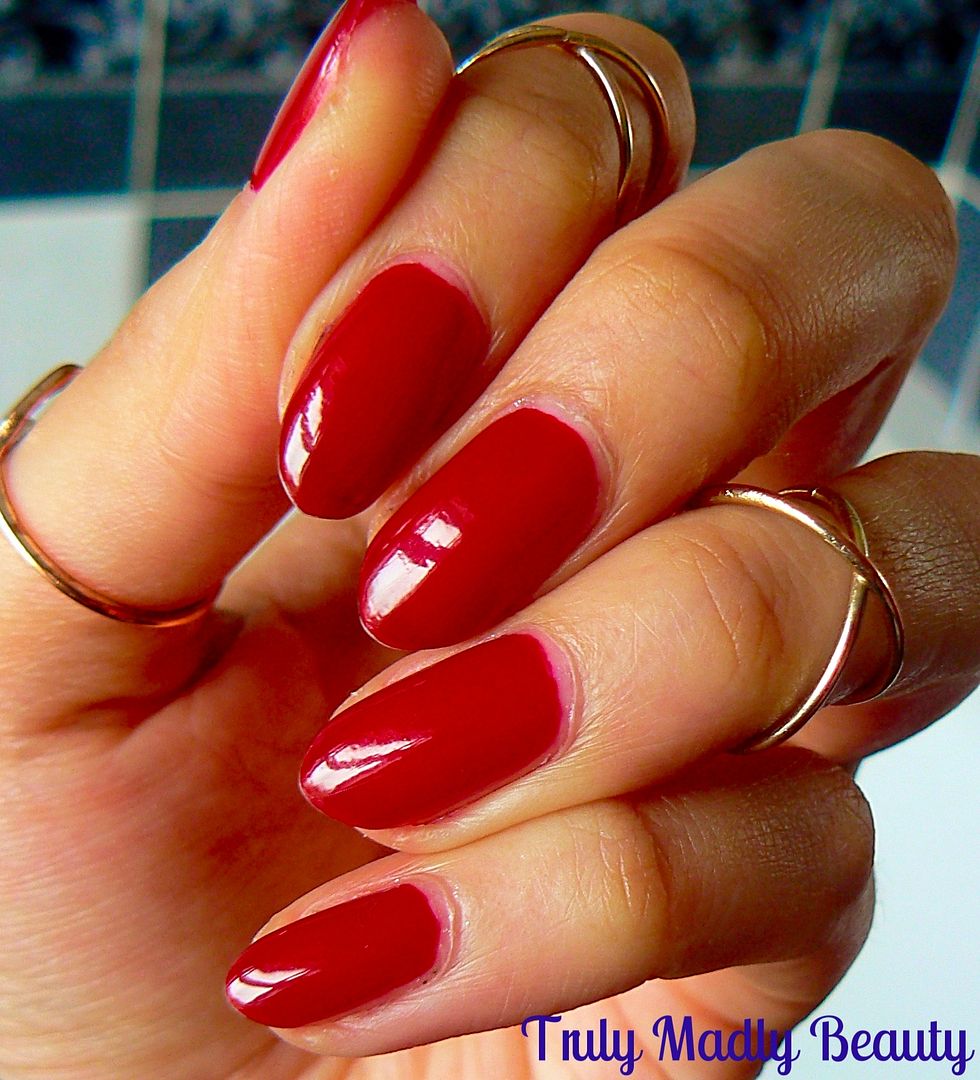
Next
is the colour, what can I say its just the PERFECT vintage red for
me, not too orange toned, nor too bright or too dark,
just....PERFECT.
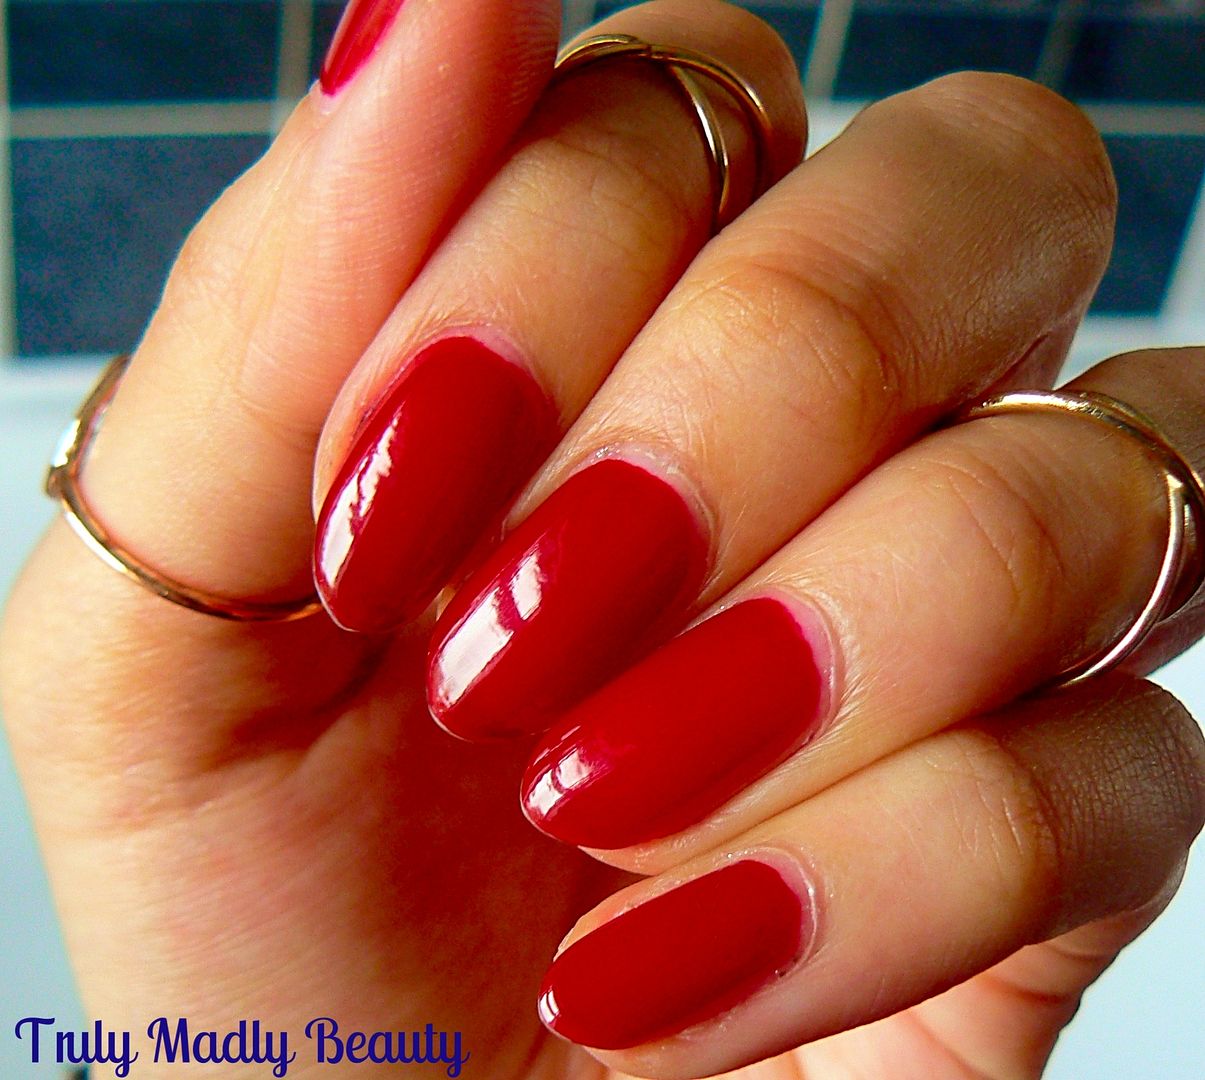
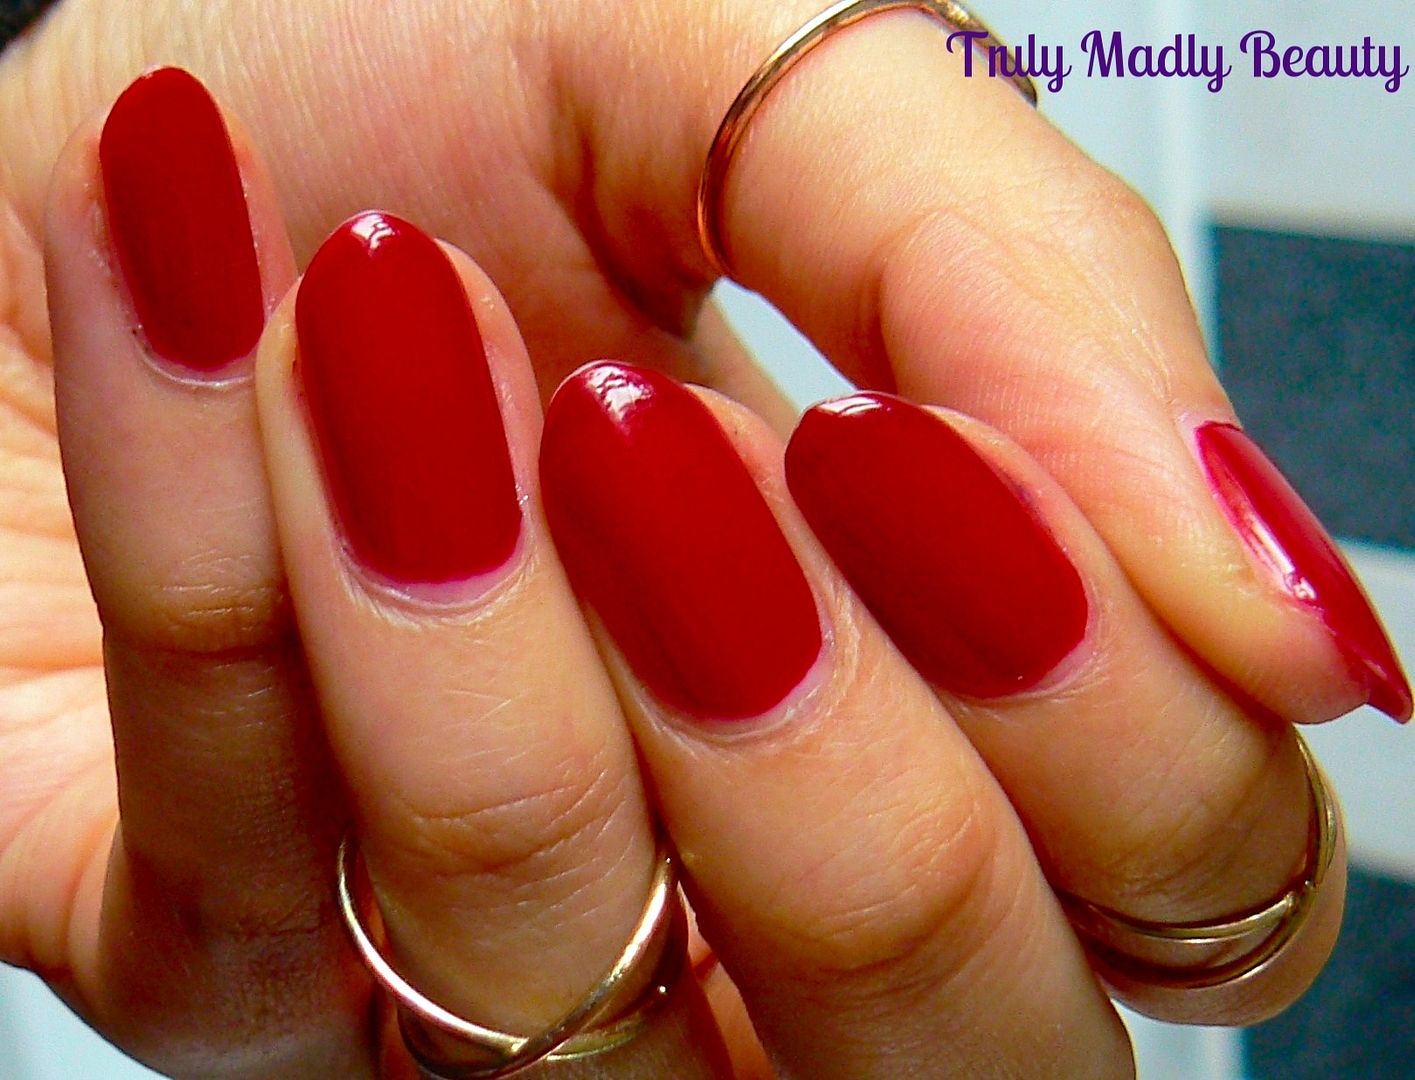
Finally
the formula of the polish, which I absolutely love, it does veer
towards the thin side, but I actually prefer this as it prevents any
possible gloopiness & makes the polish so much easier to work
with. Due to the consistency of the formula being such, you are left
with a lush glossy almost jelly like finish to your manicure. This
was 3 coats applied.
The
finishing result...glossy, vintage pin up red goodness. You could
even forgo topcoat however its always a good idea to finish with a
thin coat at least for longevity. So yes, my hunt for the perfect red
is over. Huzzah! You can find Sabon products as well as these
beautiful polishes online but I believe there is now a store in Covent Garden...either way I will definitely be popping in again when I return to
NYC in June!
Do
you have your perfect red shade? Thanks for reading!
Lotsa love to ya!