Greetings lovely
readers!
Things I've
learnt of late? NEVER get smug thinking you've successfully avoided
the flu bug that everyone & their dad has had because it is when
you're in this clearly vulnerable state that it decides to ensnare
you into its clutches. So yah...not feeling so smug now. Thankfully
I've got the day off to attempt to defeat the bugger where much
chocolate therapy (for medicinal reasons obvs) will be involved to
help speed up the recovery process.
Of course
another way to brighten up the day is with the help of a pretty
polish, so that's precisely what shall be done! Many pair Monday's
with the blues, but this doesn't have to be a negative thing at all,
so I have a super pretty blue shade to share with you lovelies today
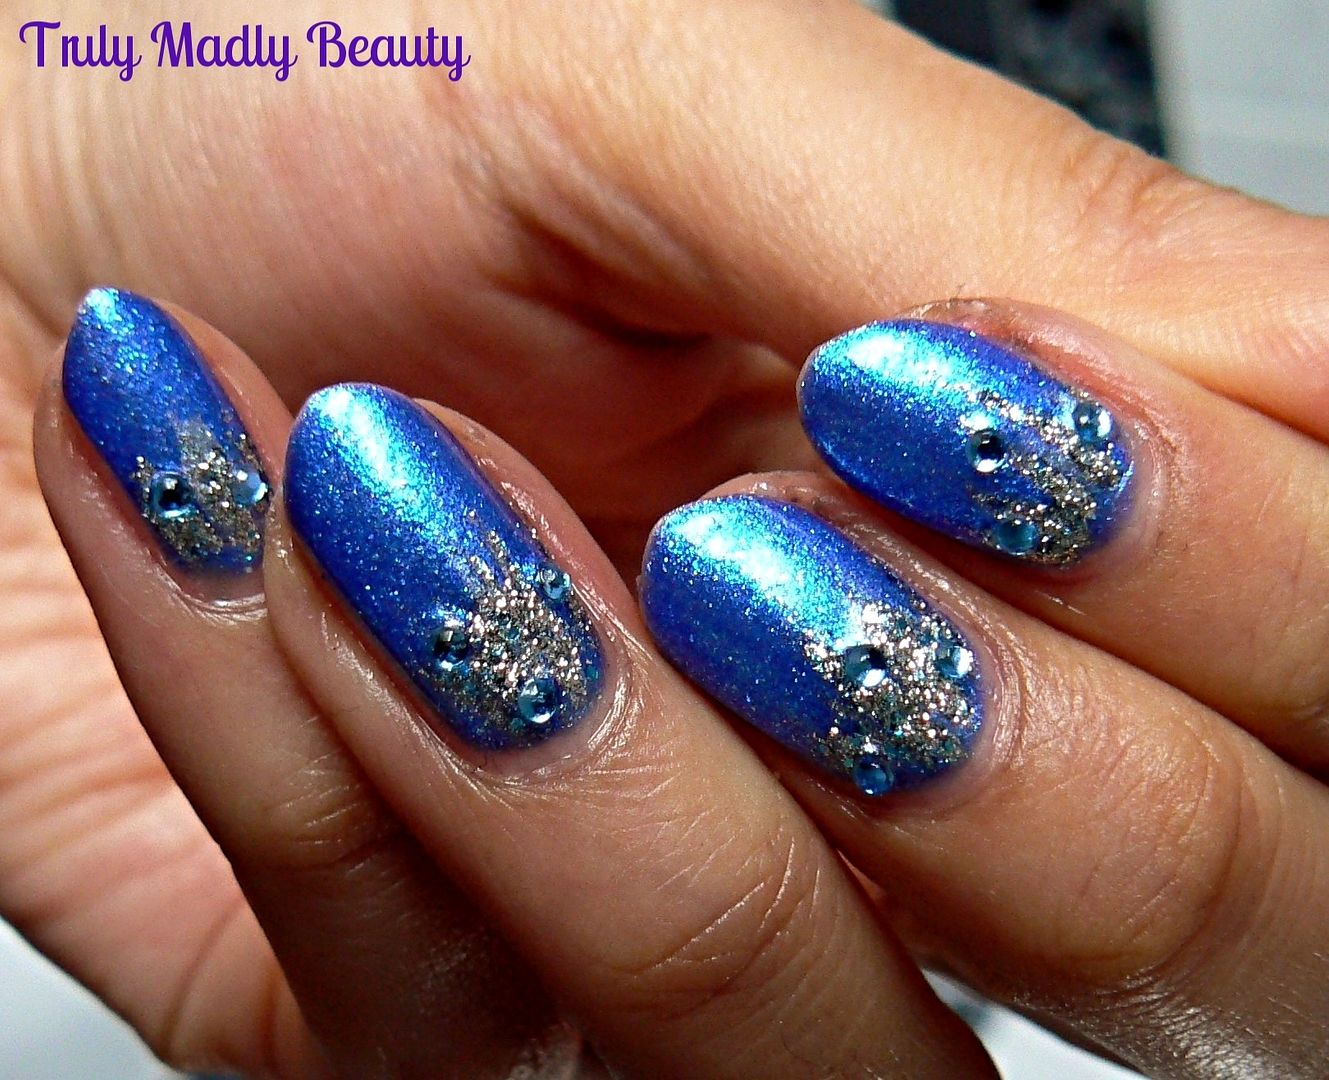
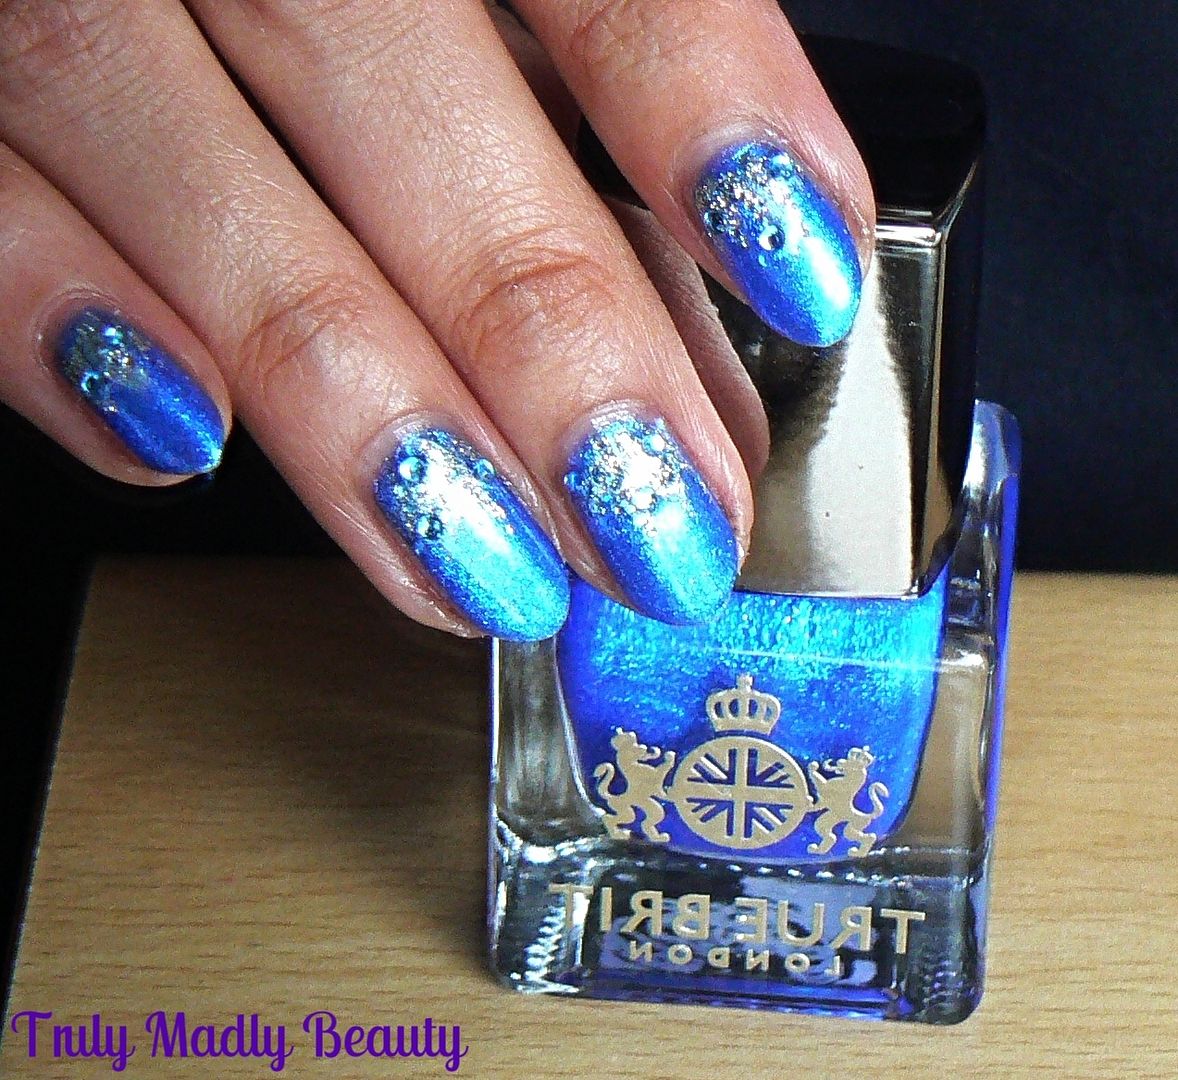
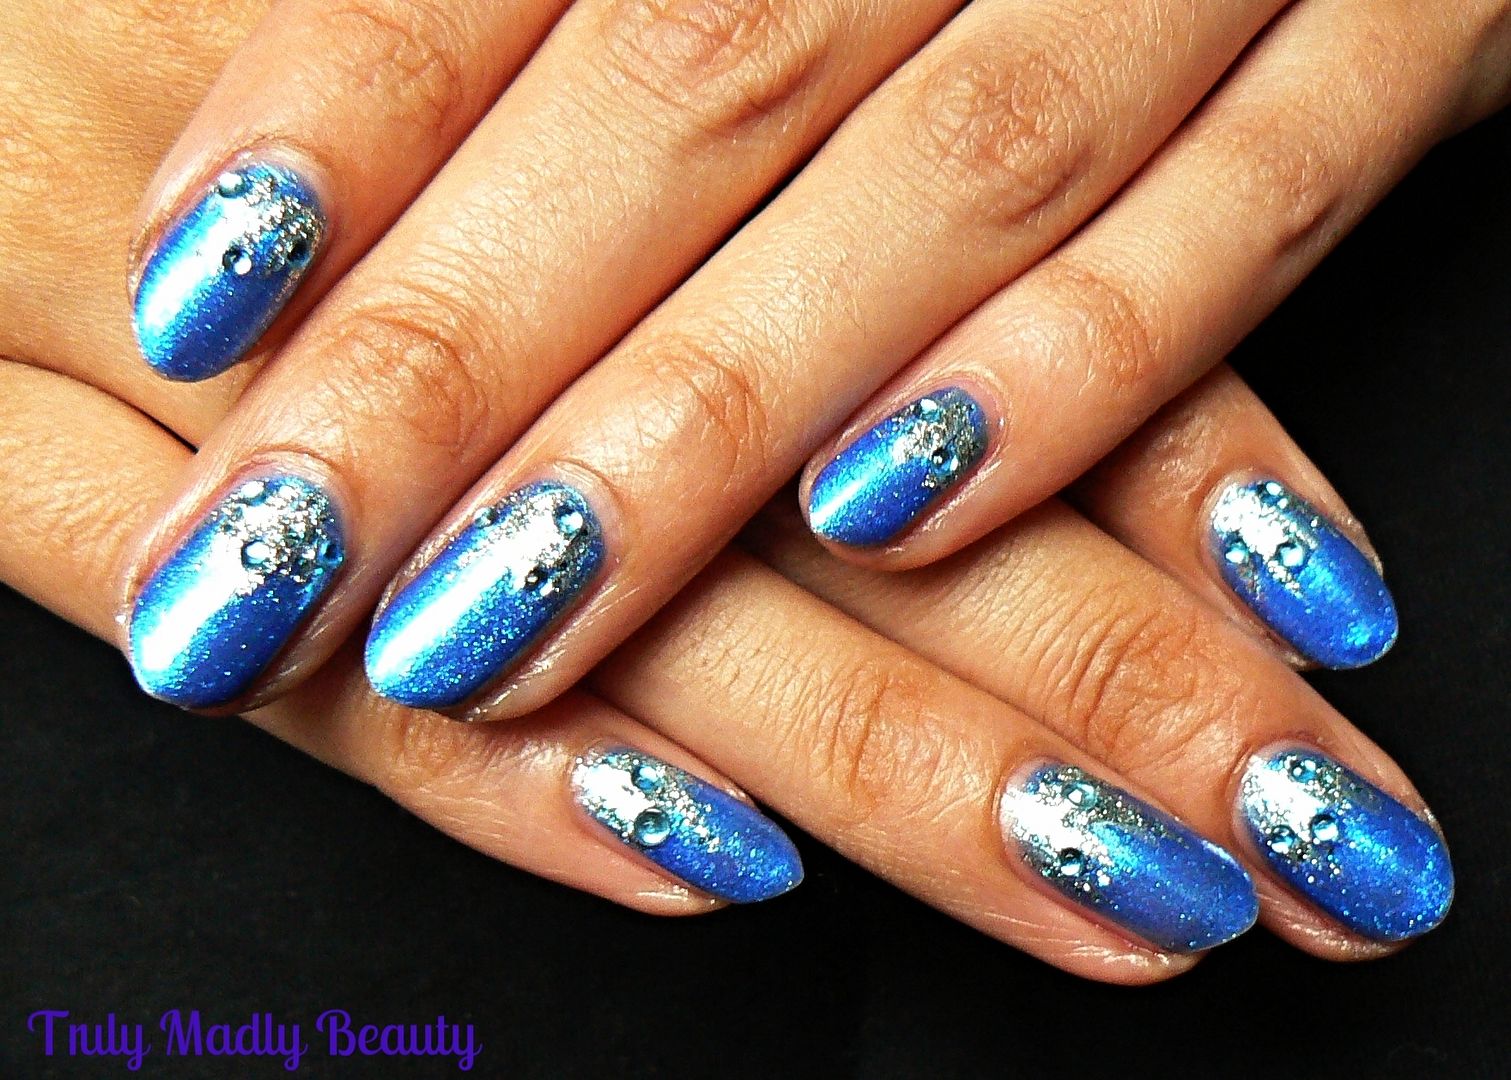
in the form of Chelsea* from True Brit London.
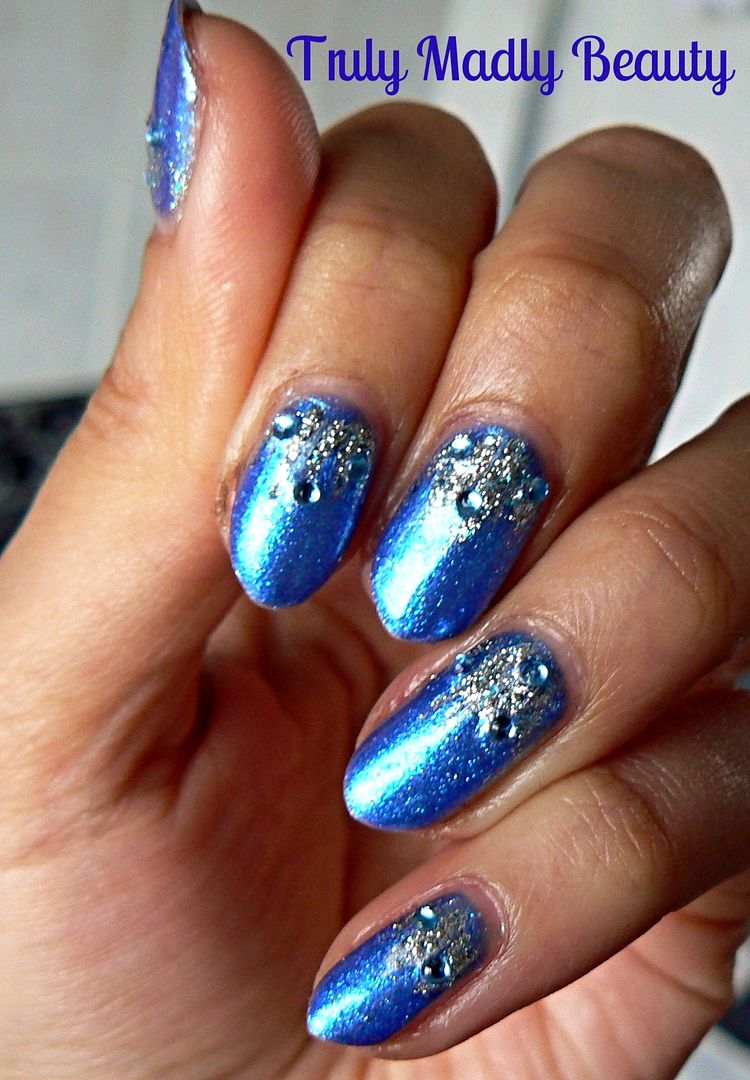
I wasn't kidding
was I? Mighty puuuurdy this blue most definitely is. Chelsea is a
gorgeous jewel cobalt blue with an interesting shimmery edge thanks
to the addition of finely milled pearls giving it a lush luxurious
finish.
The formula of
Chelsea was slightly sheerer than others I've tried from this range
so two coats is definitely required with this one, three if you
really want a pop of colour!
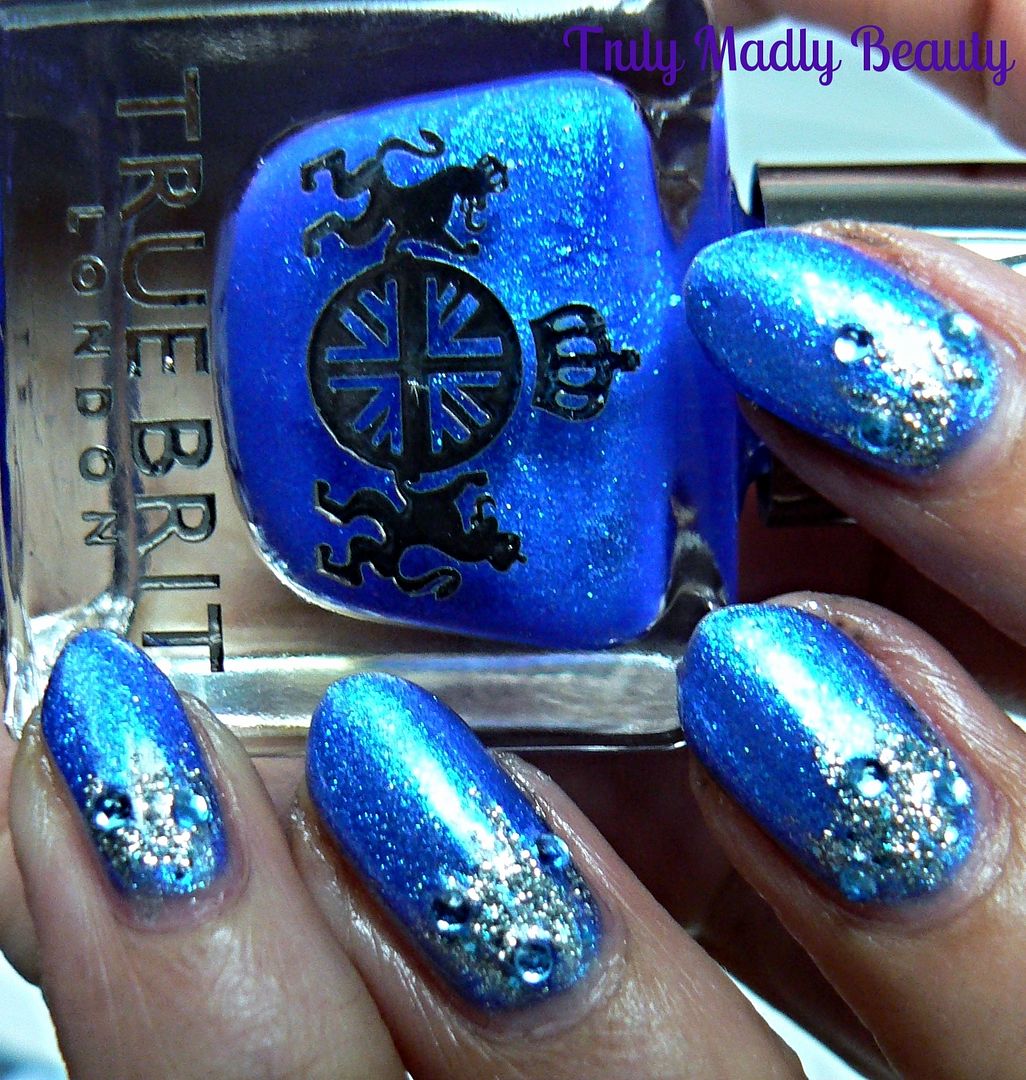
Not that this
beaut of a blue needs jazzing up, but I seem to have rediscovered my
love for glitter gradients again so I couldn't resist adding a touch
of sparkly goodness in the form of China Glaze's Lorelai's Tiara.
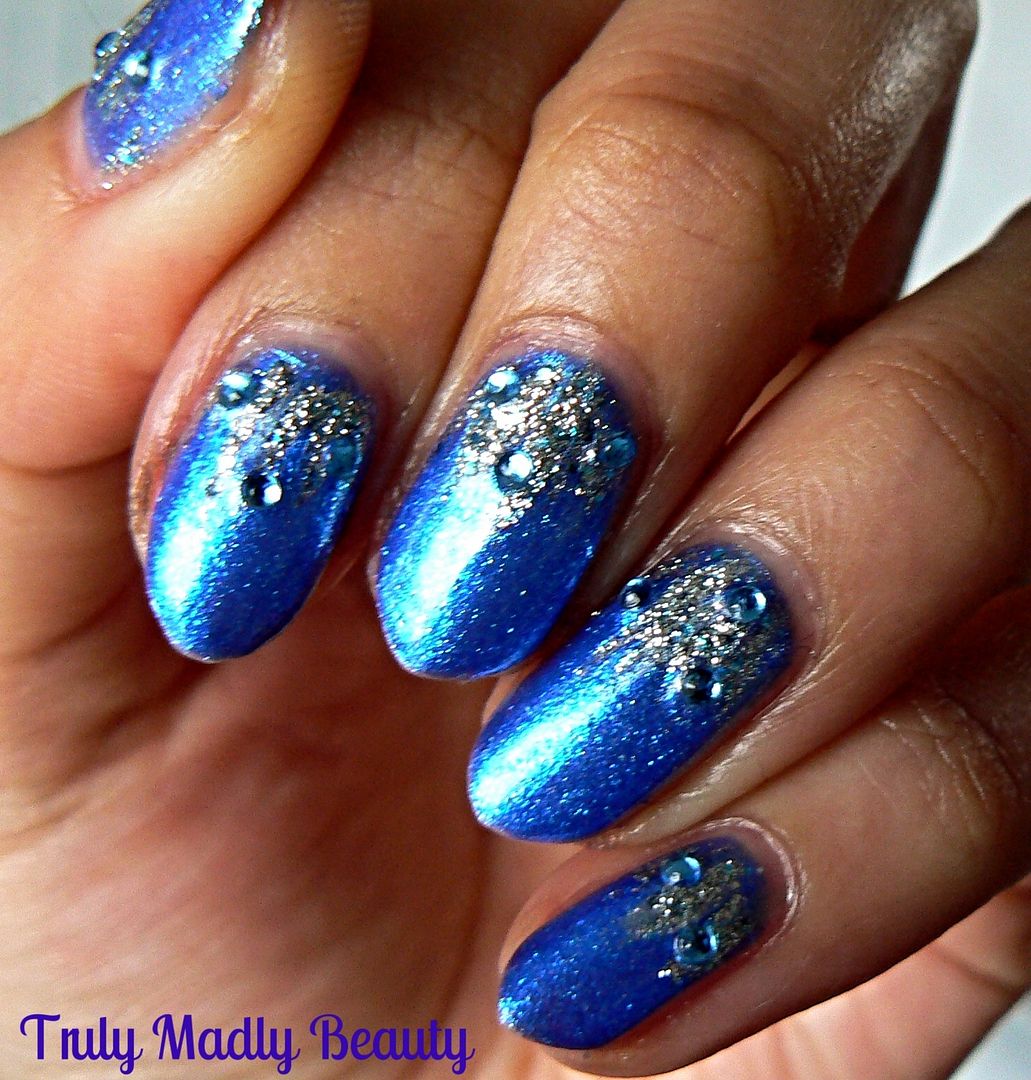
Lorelai's Tiara
definitely ranks up there as one of my top glitters, a gorgeous
molten silver with pretty ice blue flecks dotted in there, worn alone
it is truly an eye catcher! I actually lent this to a work colleague
for her wedding day polish as her something borrowed AND something
blue! :)
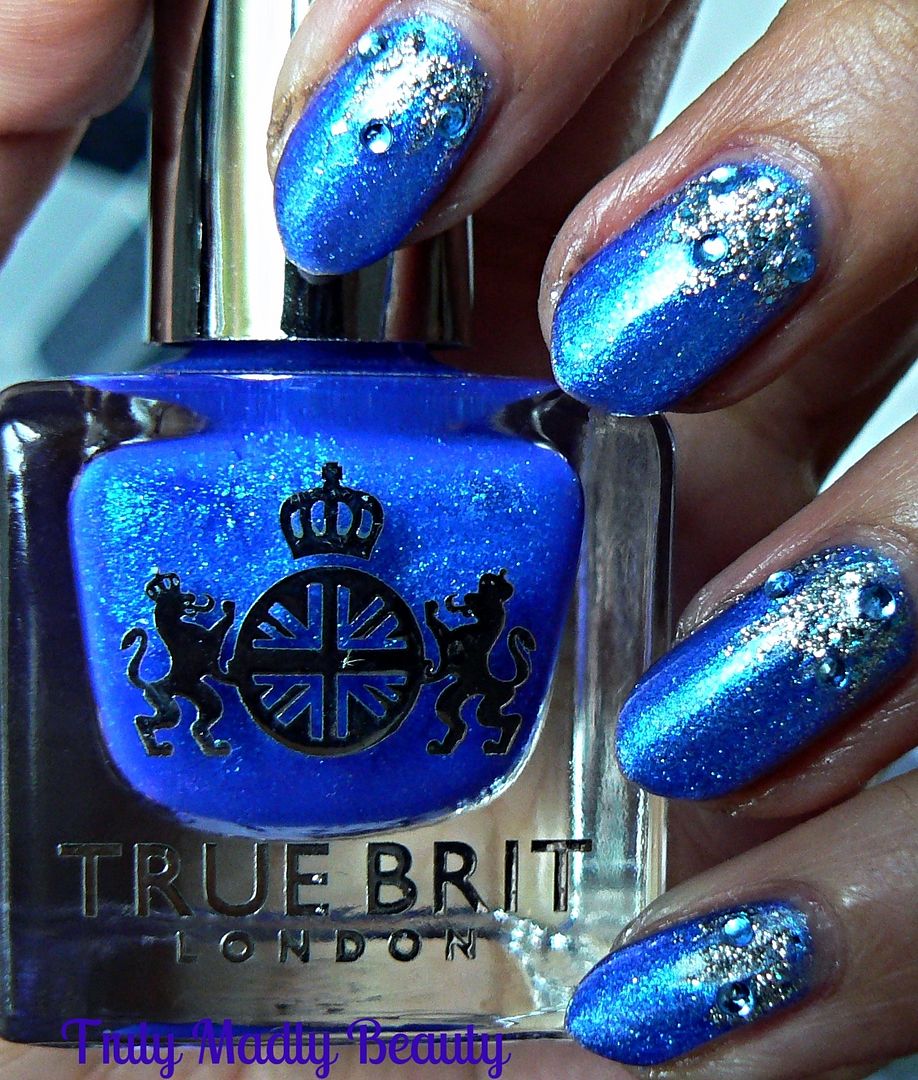
For the gradient
simply dab & drag the glitter down from the cuticles till you get
the desired finished effect. For a final glam touch I also added a
few pretty pale blue rhinestones on top of the glitter.
Finish with your
obligatory topcoat to seal the stones & glitter & you’re
done! Feeling some seriously frosty vibes with this icy mani!
Thanks as always
for reading dolls! Don't forget you can get 10% off True Brit London
polishes which are available online using my code TRULY10. Till next
time!
Lotsa love to
ya!

Disclaimer
- * products featured were sent to me for my consideration. I am not affiliated with
the brand nor paid for this post, this review has been as always my
100% honest opinion! :)