Hello
there lovely readers!
I hope
you're all enjoying the bank holiday weekend? Managed to
persuade papa bear to dig out & dust off the old barbie yesterday
for a satisfying feast that didn't disappoint, so its finally
starting to feel like summer at last! As I'll be away for a while I'm making the most of the extra
days break by rolling out a post in between last minute packing
for NYC on Wednesday :)
Anyhoos
on to today's polish treat for you, there's nothing I find more
satisfying than discovering a perfect nude polish & one of
the new Garden Party shades from True Brit London has, for me,
currently blown all others out the water.
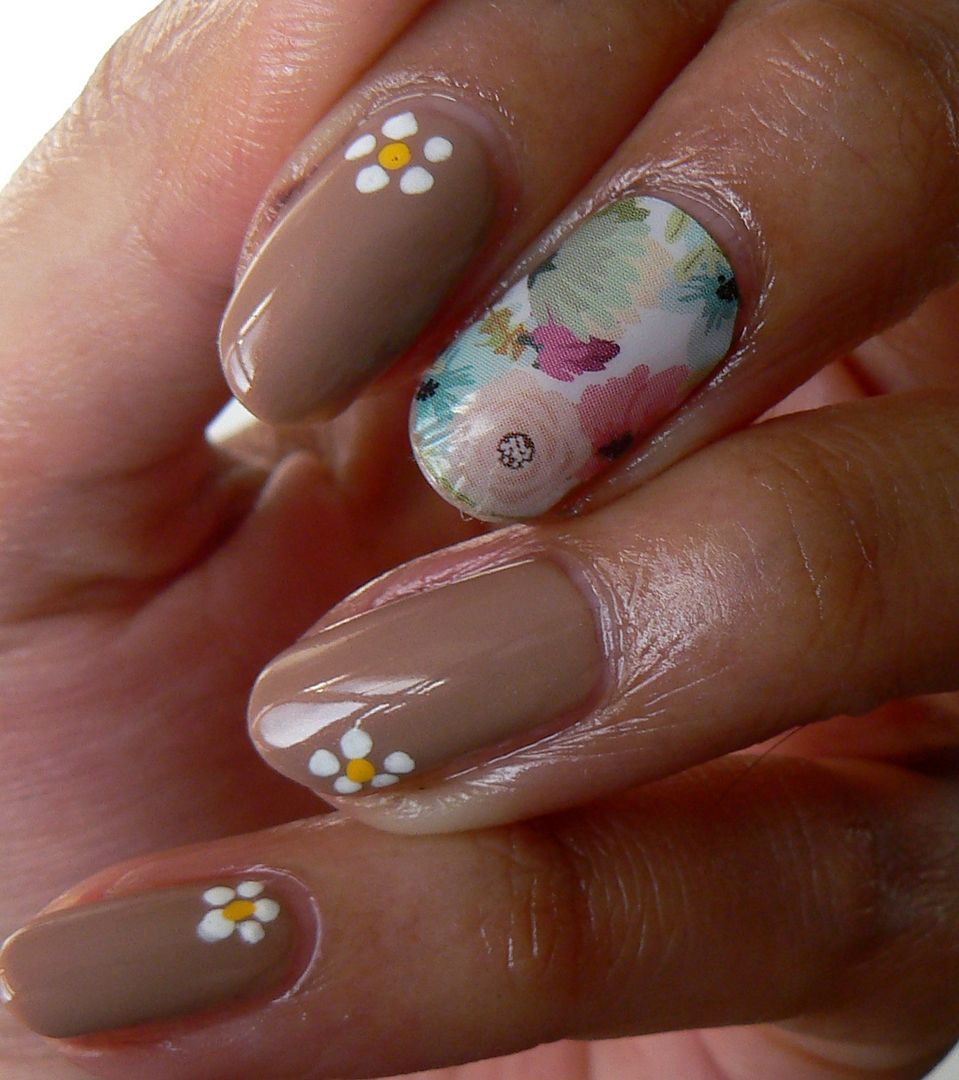
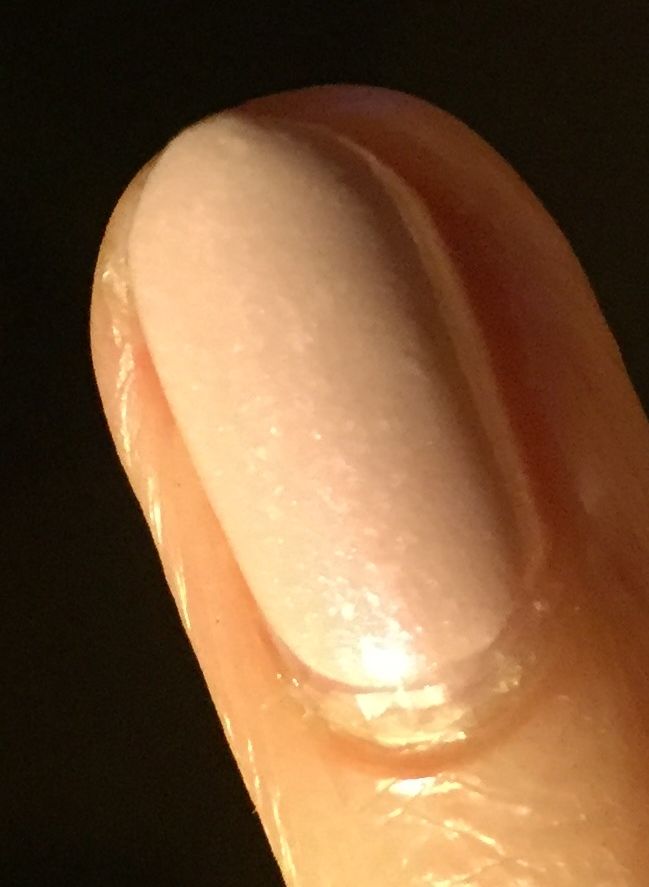
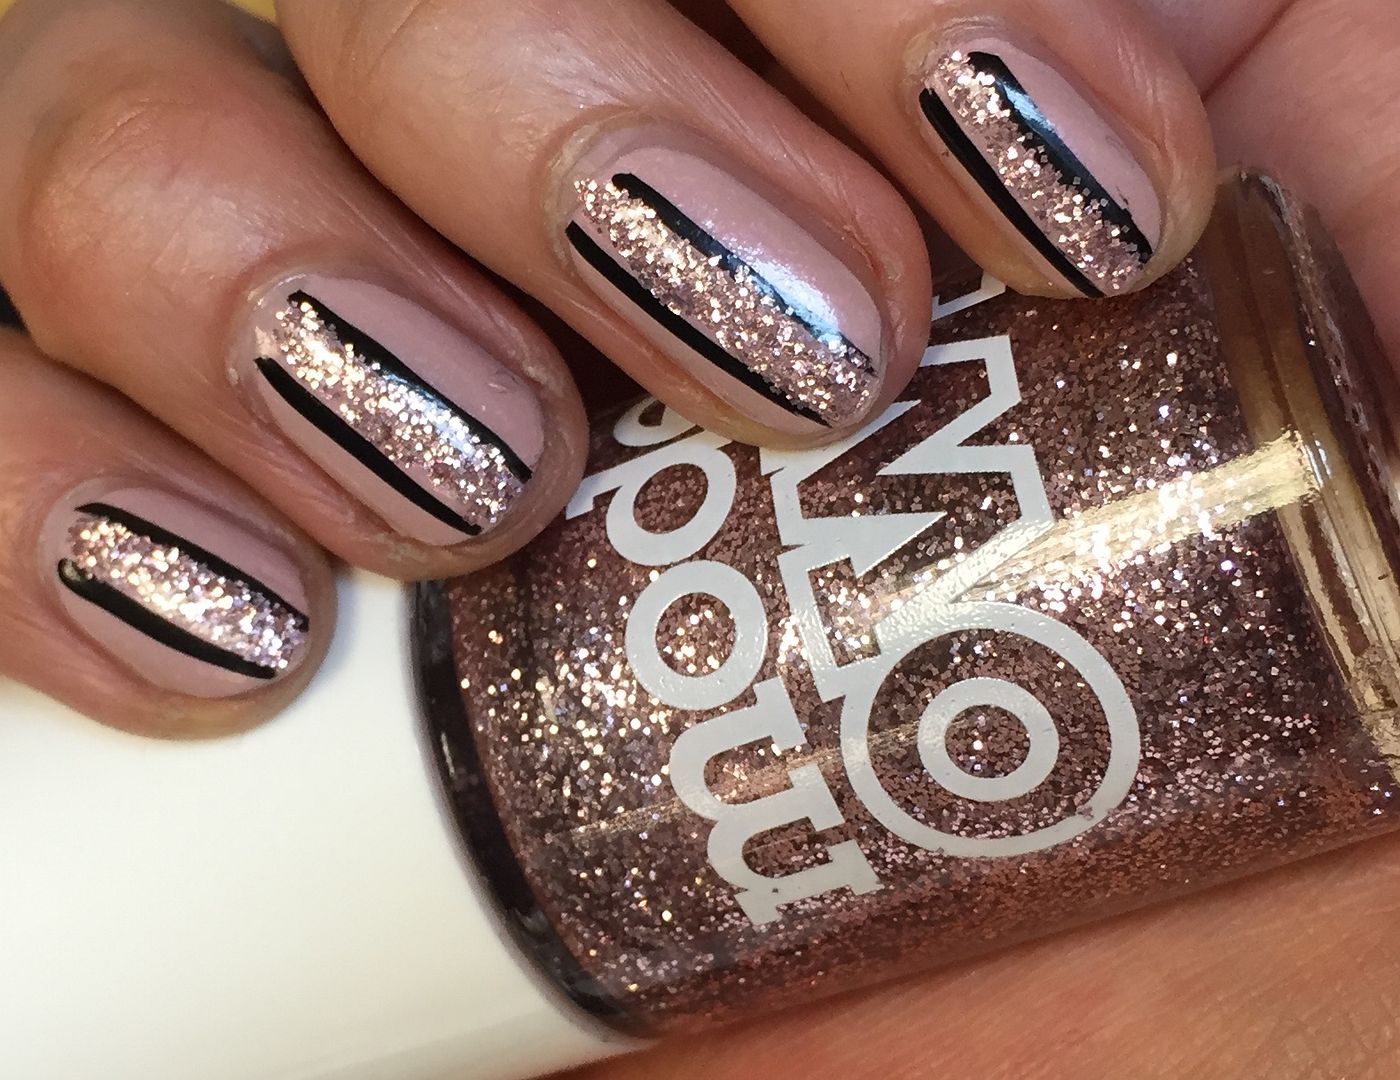
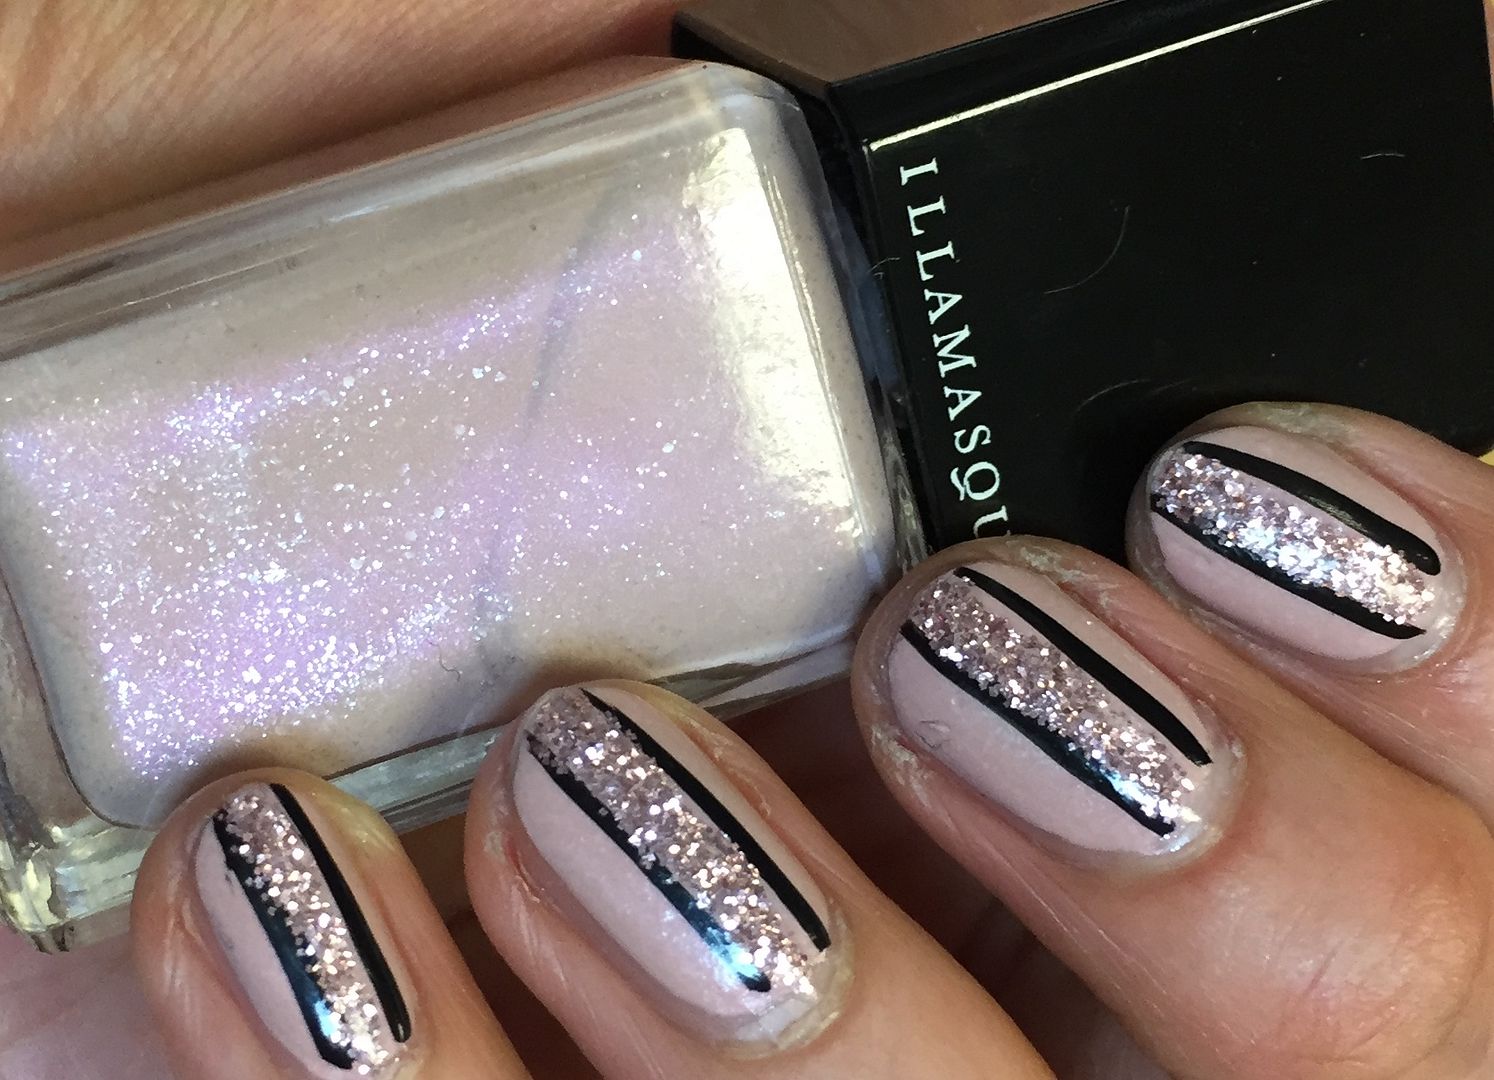
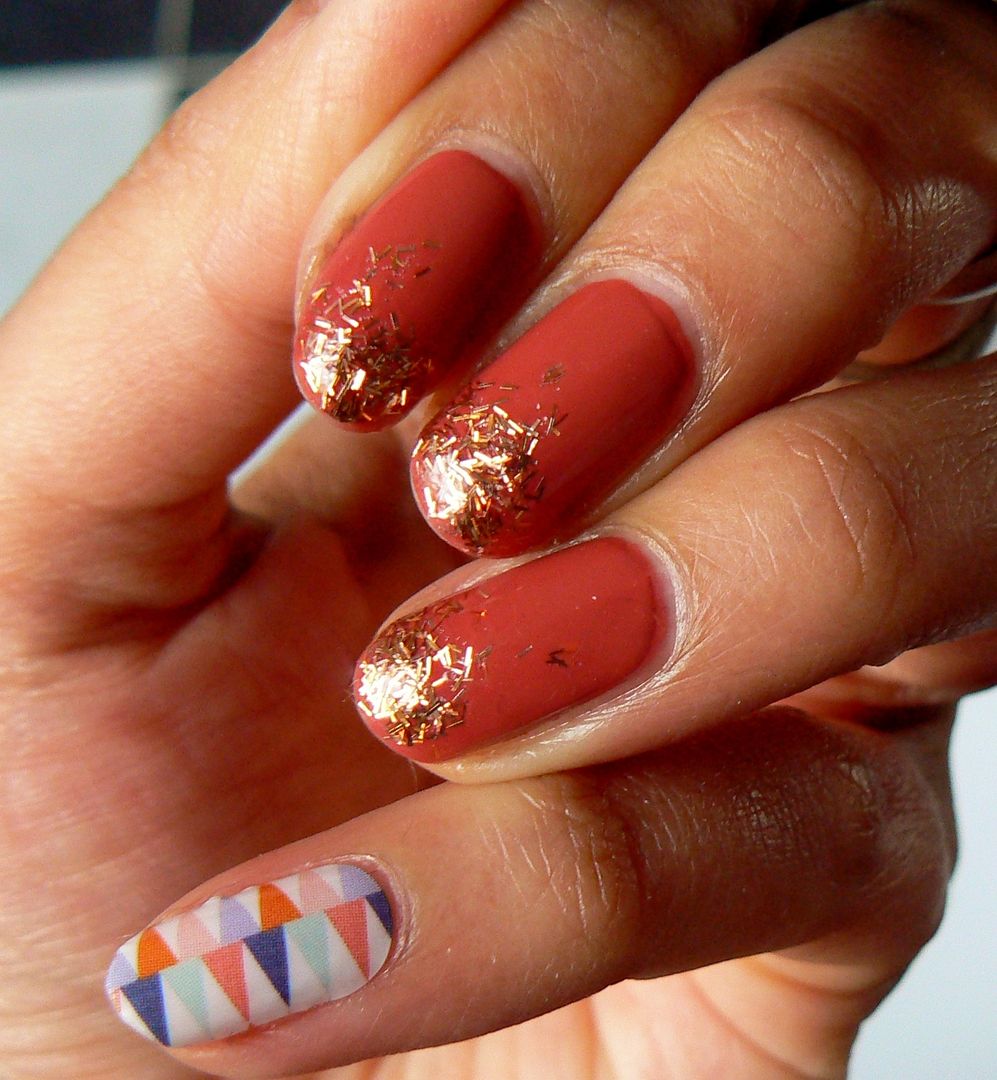
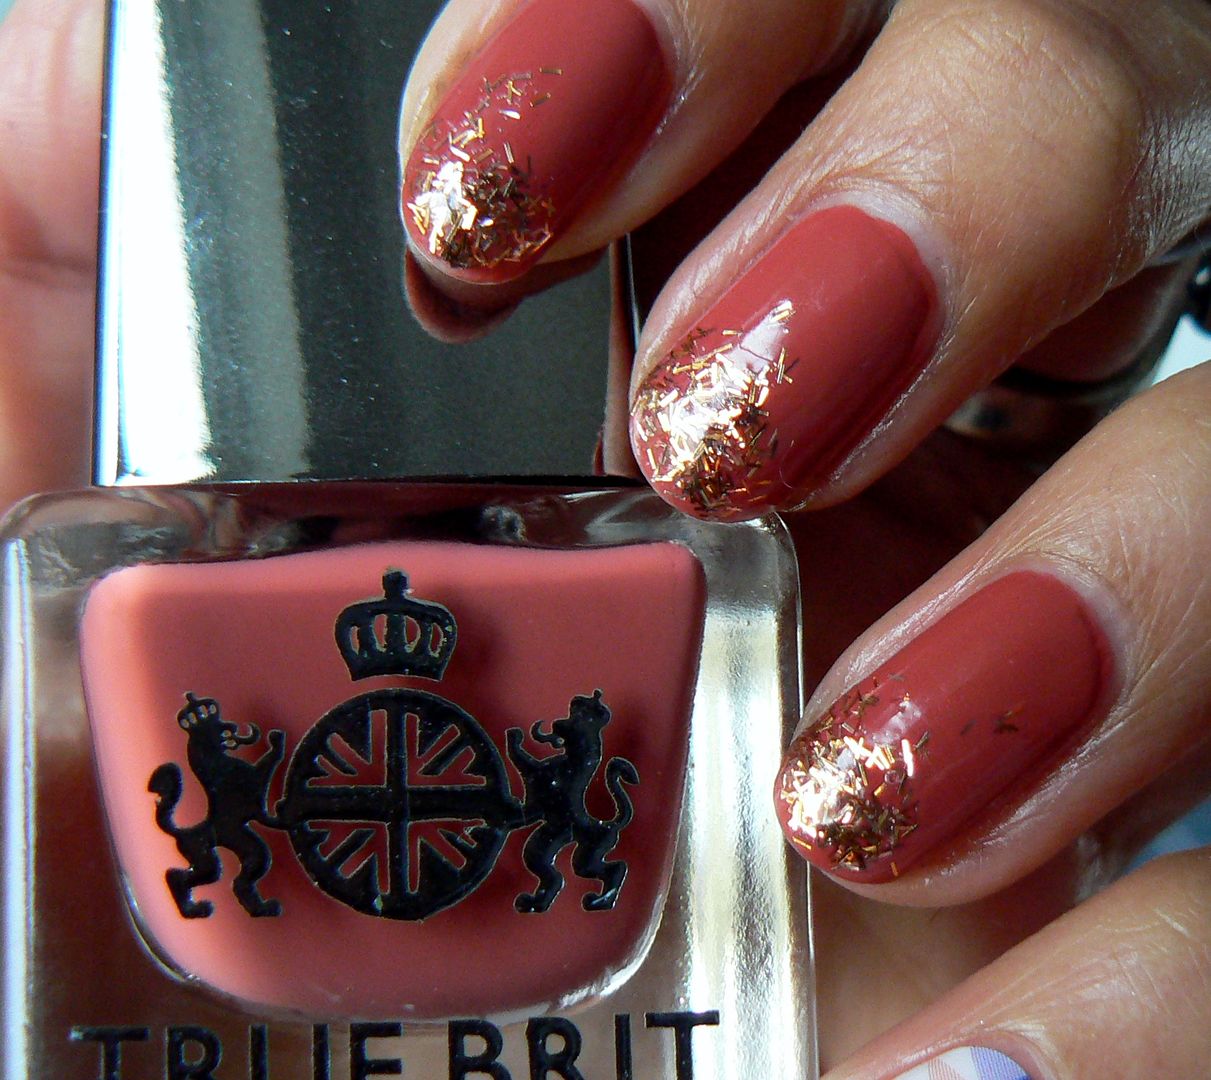
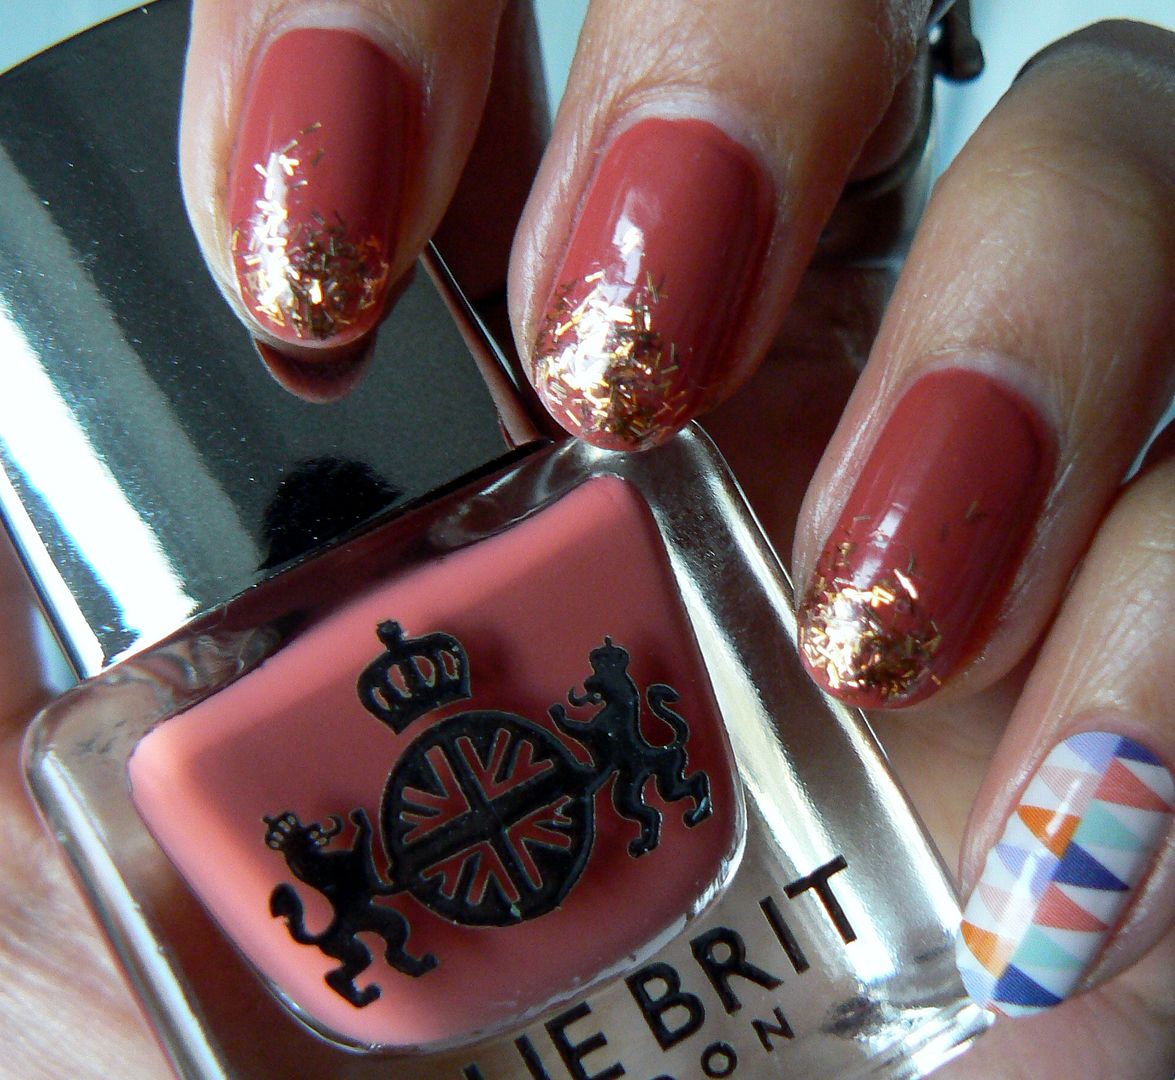
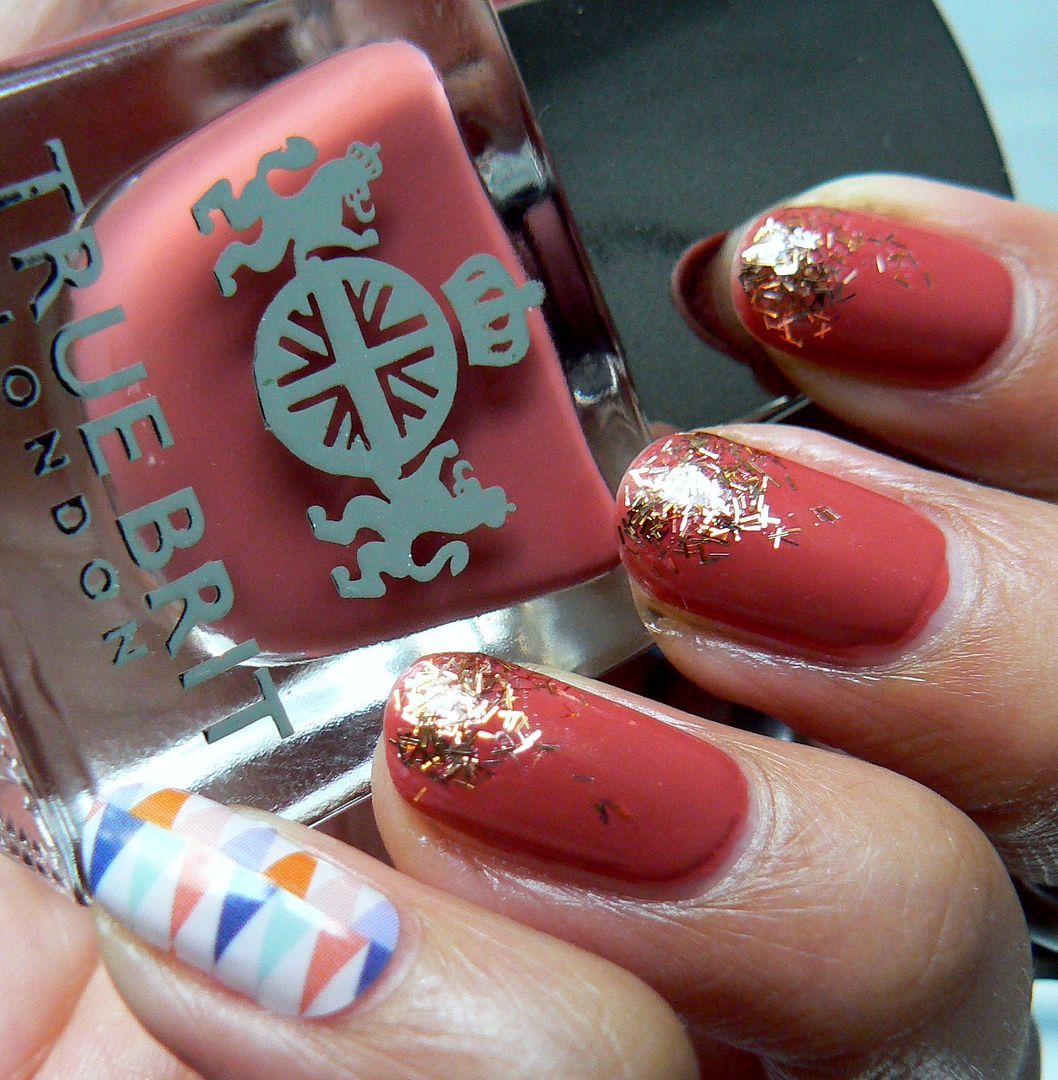
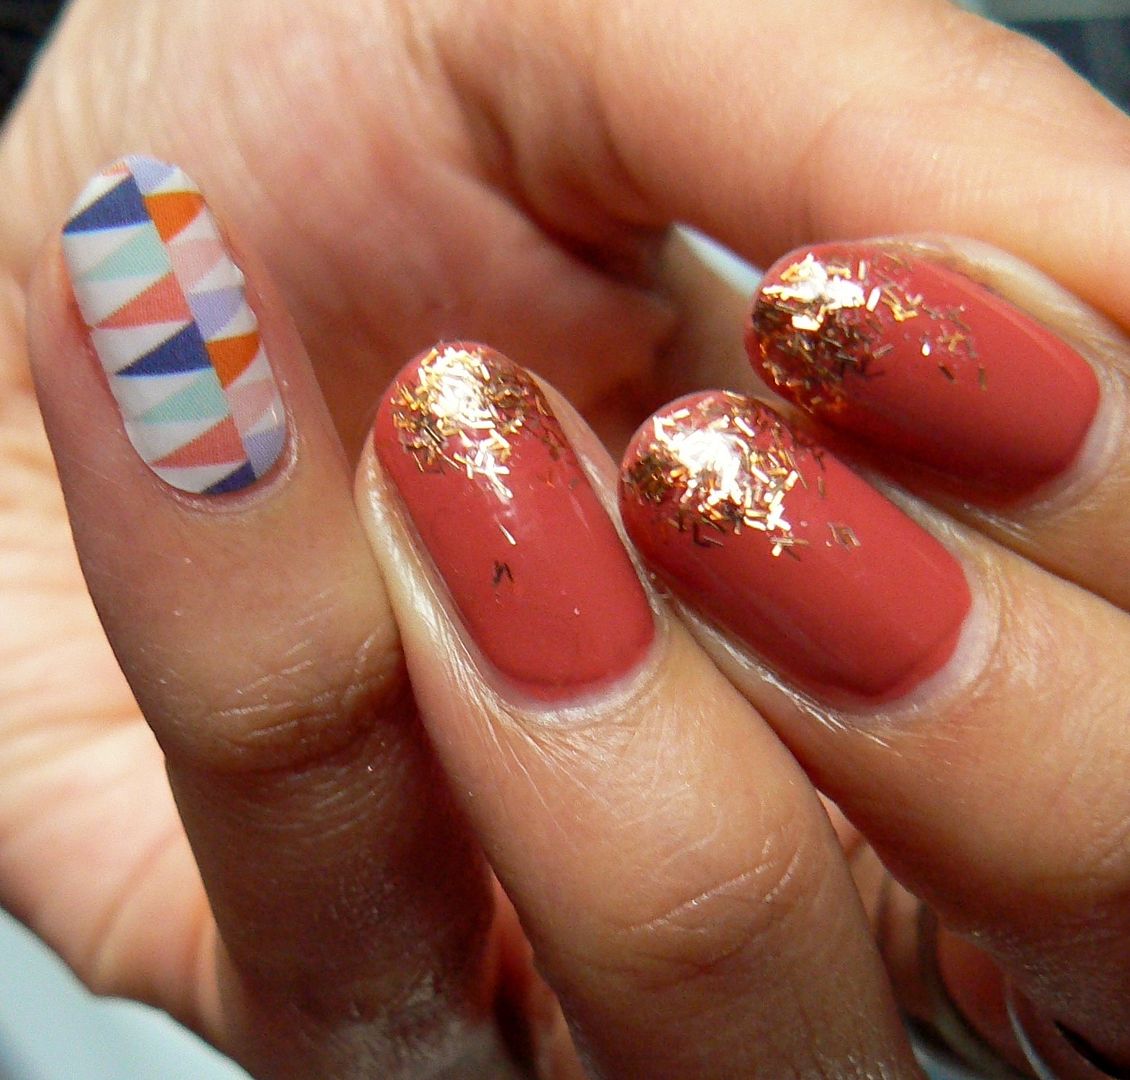
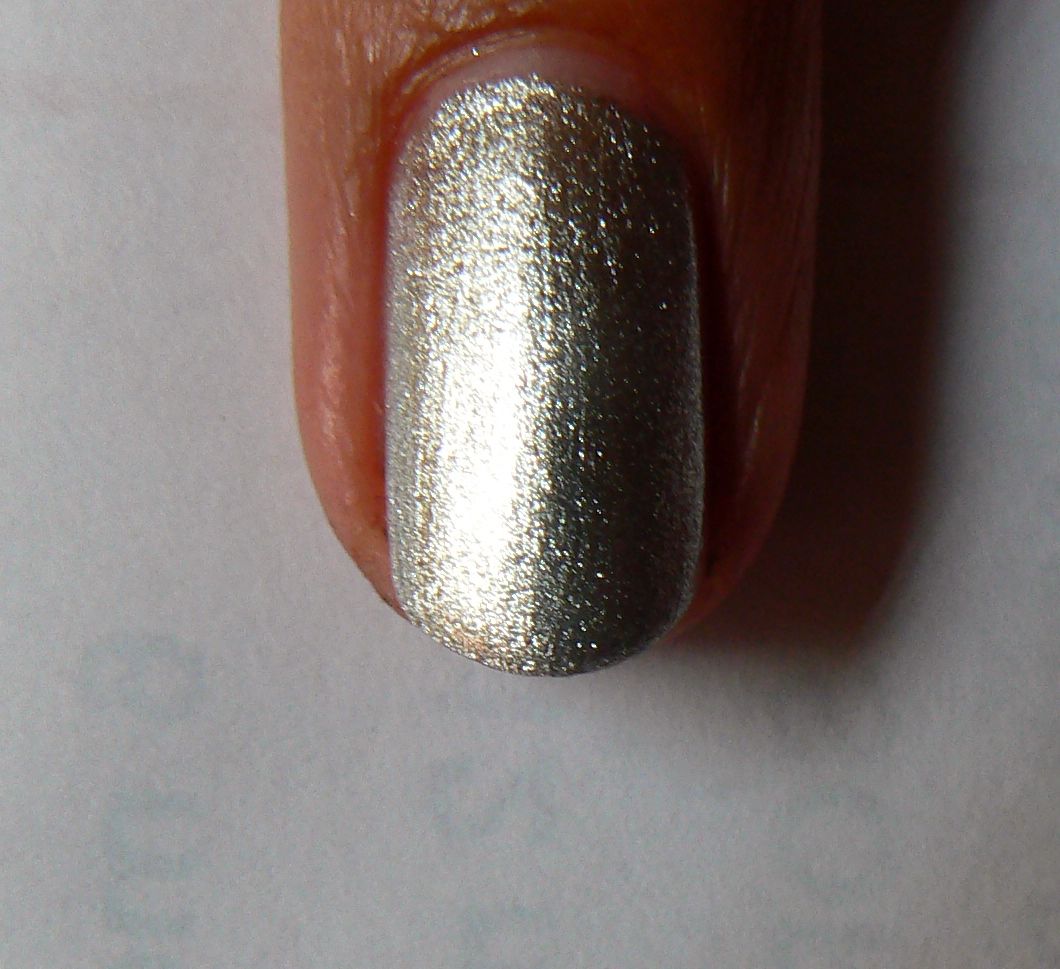
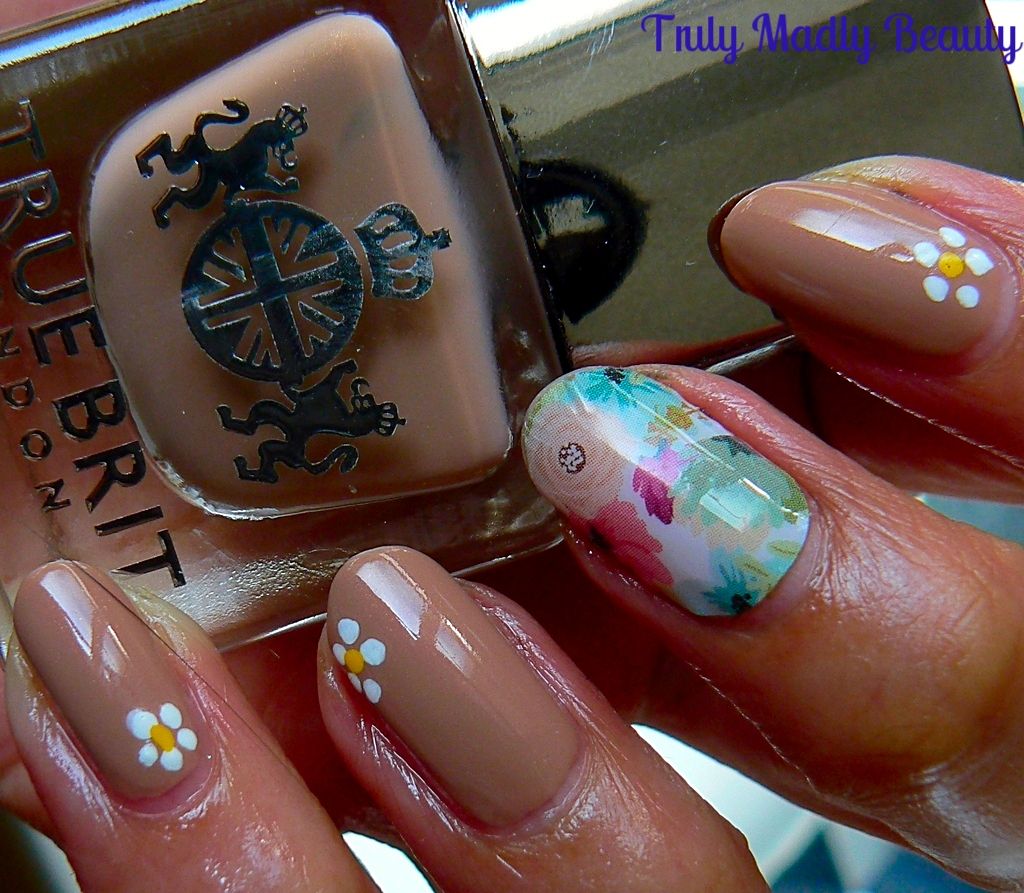
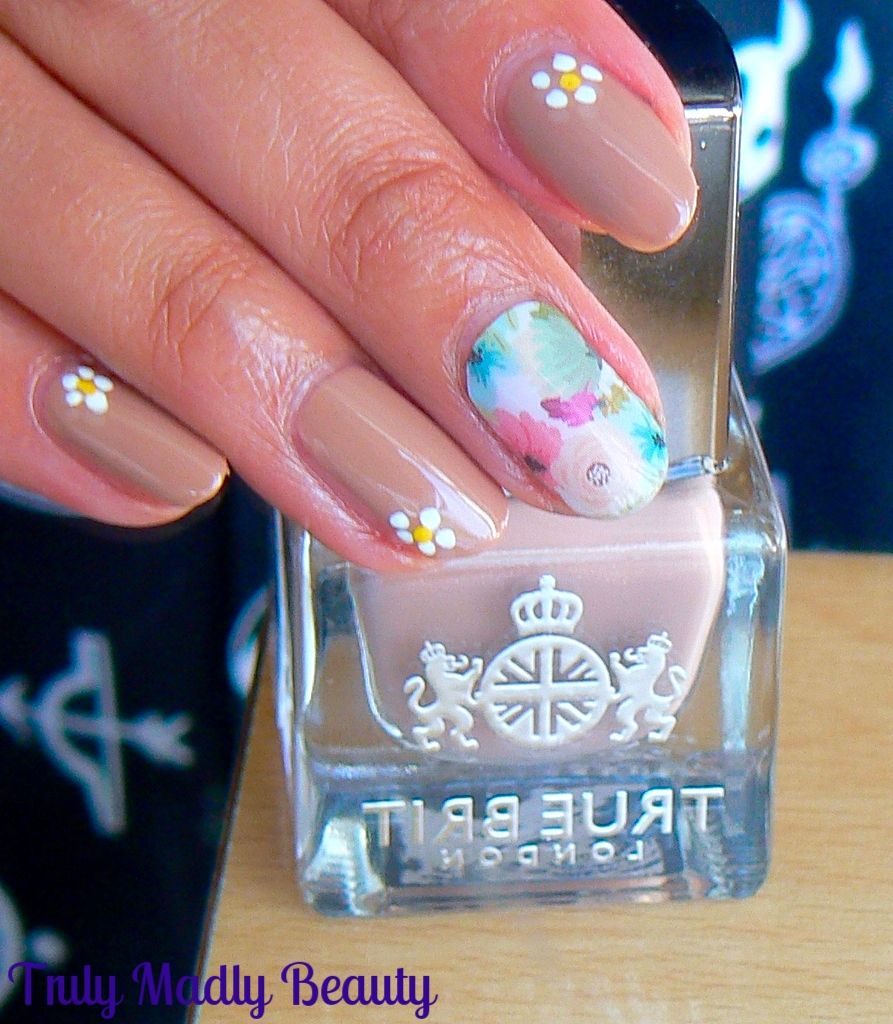
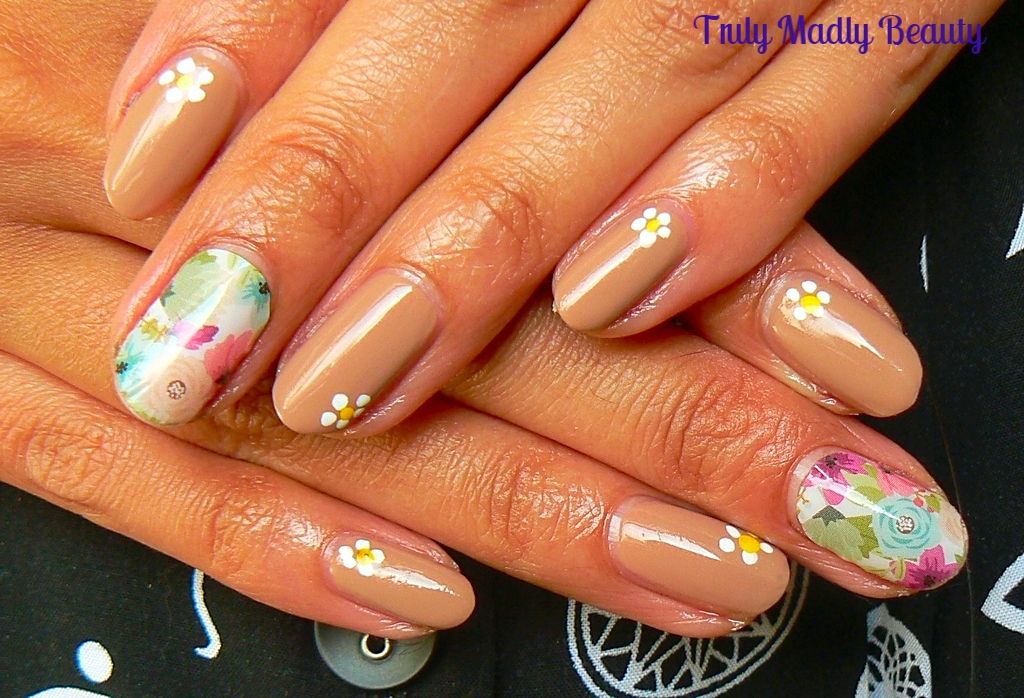
The
Summer House* is a luscious creamy caramel beige nude that I think is
just perfect for my skin tone & one of those shades that would
suit all, I'm in love with it!
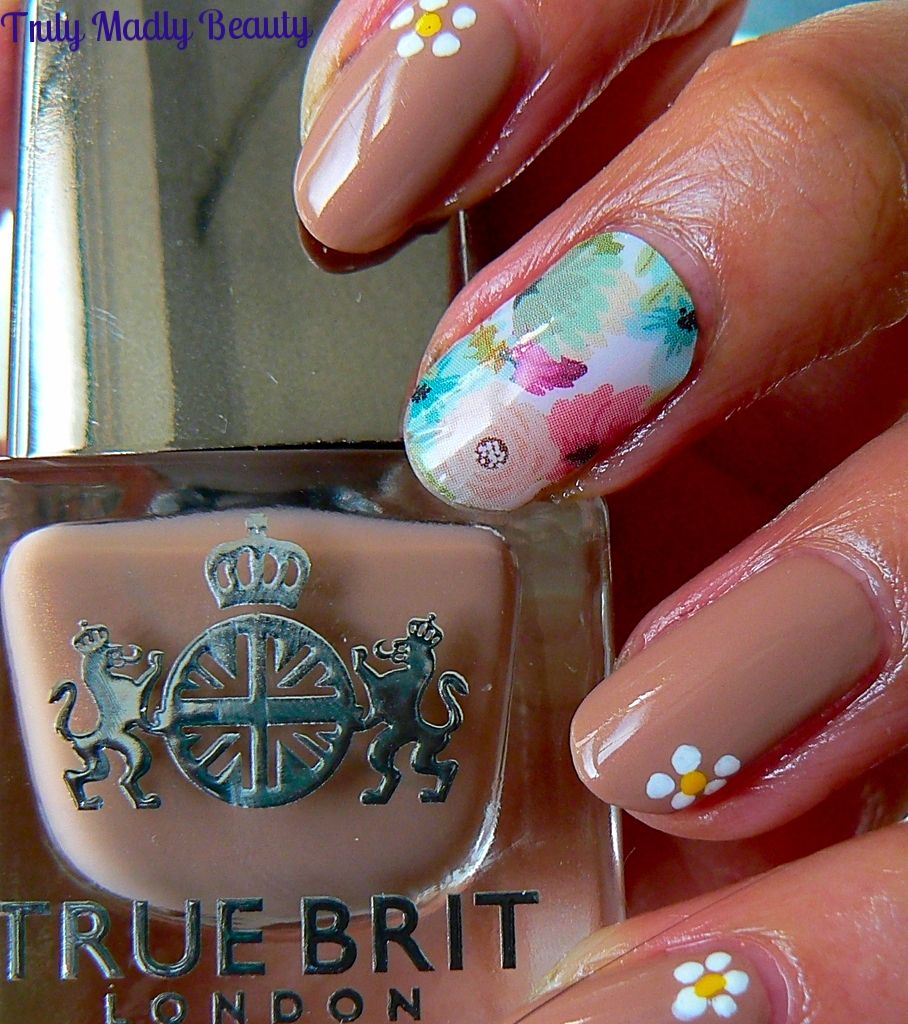
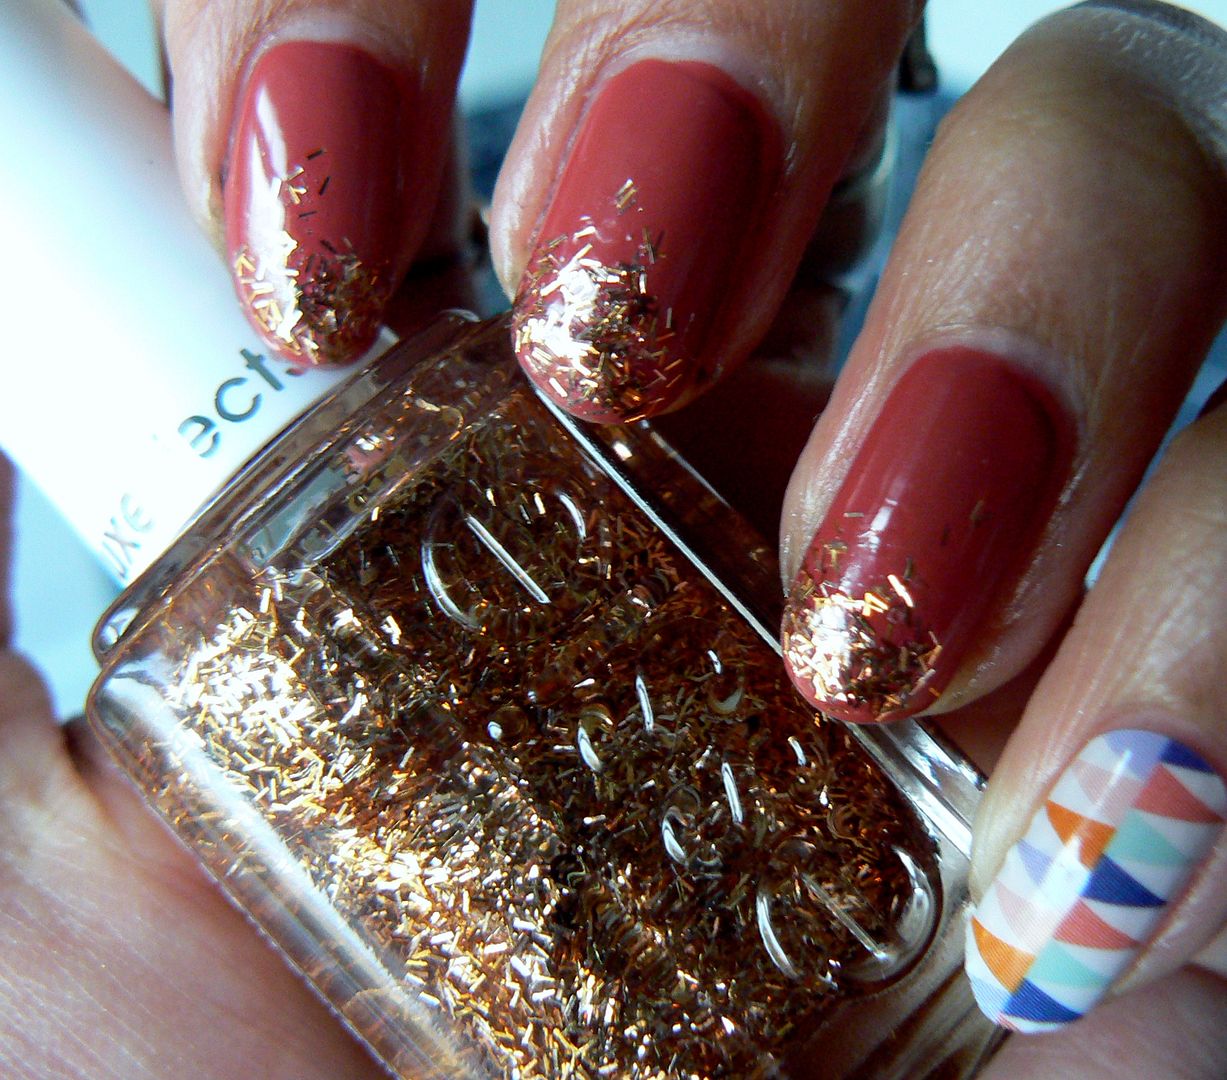
What
makes this nude polish rather unique in particular is the addition of
a pretty pearlescent golden shimmer running through it that also
turns pink toned in certain lighting giving an almost rose gold glow,
subtle yet so pretty!
This
was two coats which applied beautifully, the formulation being
slightly thinner than some of the previous shades I've tried.
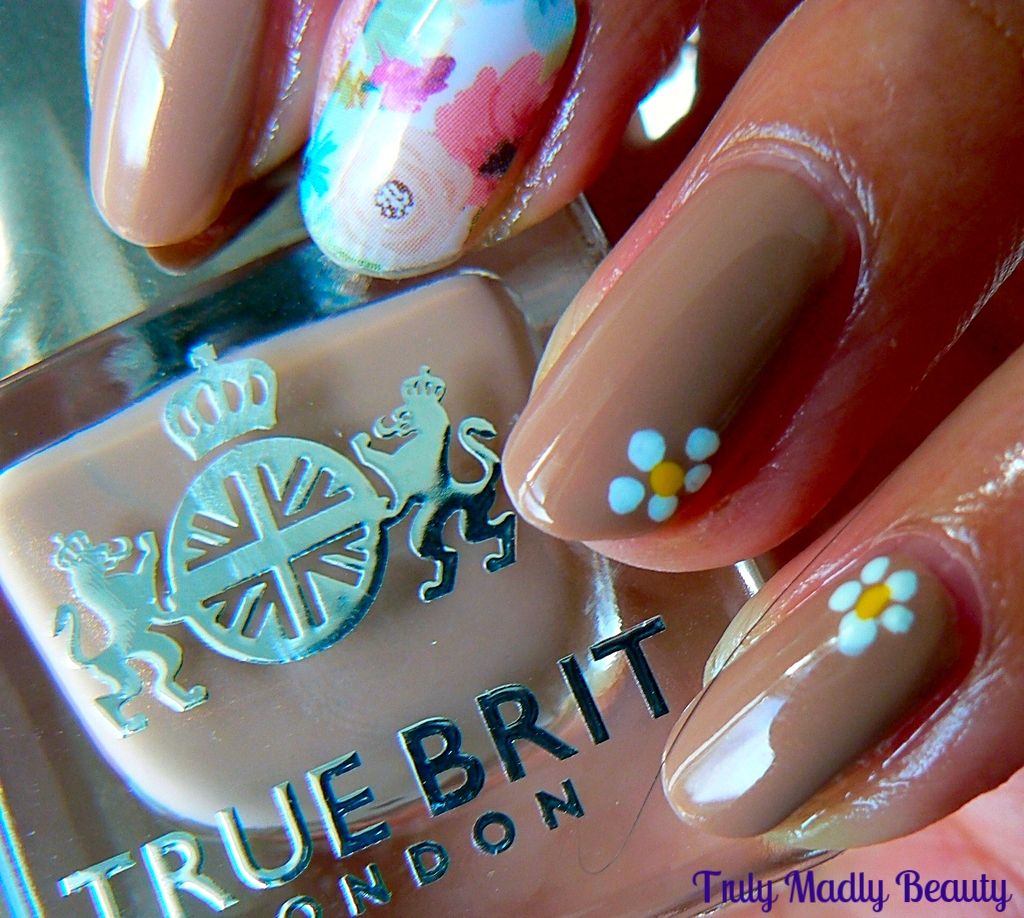
For
an added touch I added a delicate wee daisy to each nail using just a
dotting tool with some white & yellow polish. You can use a bobby
pin too, just apply a tiny yellow dot & surround it with 5 white
dots...simples!
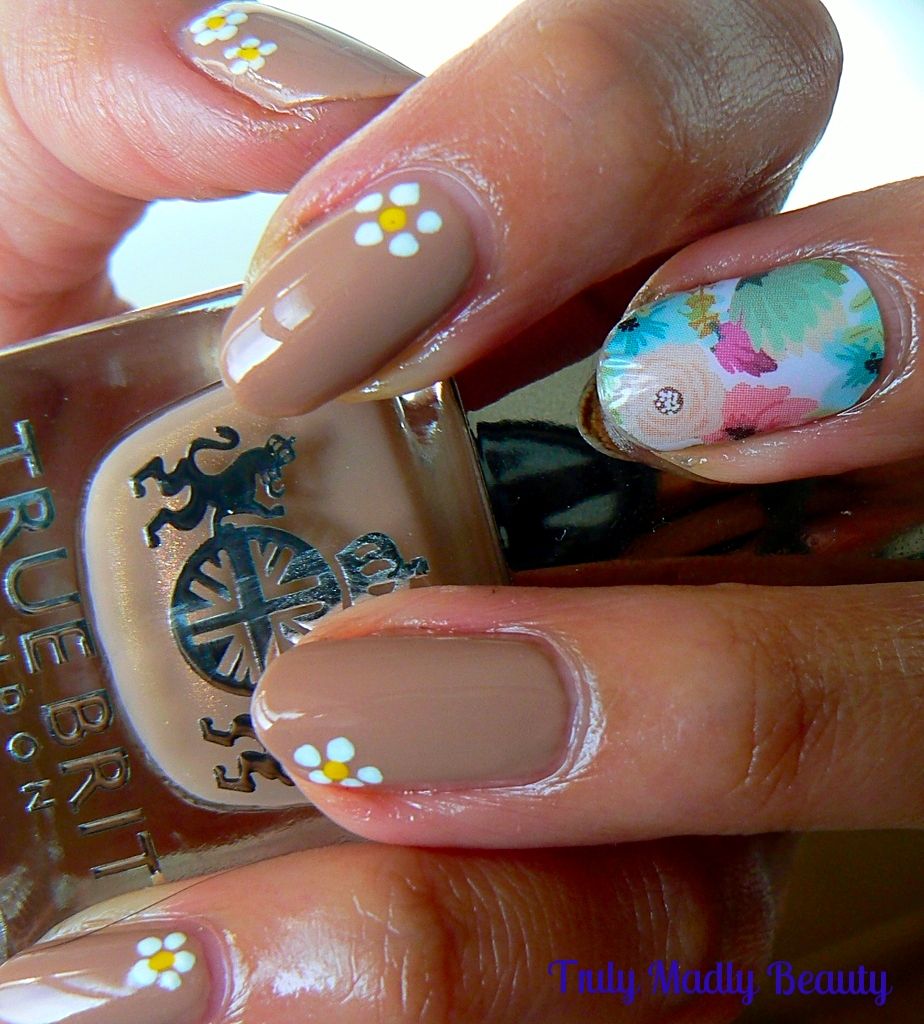
Going
with the Summer theme I've added a pretty Jamberry accent using the
Sweet Surprise nail wrap which is a gorgeous floral design. You can
read all about these fabulous nail wraps that can last up to two
weeks & come in over 300 designs HERE & purchase your own
wraps to jazz up your manicures via my website HERE.
So
yup I think its obvious that I have a lot of love for this shade &
can guarantee that it will get much usage! True Brit London nail
polishes can be found online for just £12.50 where you can also get
10% off your order using my code TRULY10.
Thanks
as always for reading!
Lotsa
love to ya!

Disclaimer
- * products featured were sent to me for my consideration. I am not
affiliated with the brand nor paid for this post, this review has
been as always my 100% honest opinion! :)