
Hello
there lovely readers!
Hope
you're all well! Things have been a tad hectic of late, hence the
lack of posts, but I'm currently settling into a new job, which is
going really well I'm thankful to say, SO glad I made the change, but
I'm happy to get back a bit of normality with the blogging &
another marble mani tutorial for you beauts today.
I
hope you're not getting tired of these as I'm still very much
obsessed with dry marbling & I love sharing how easy they are to
do with you. You can catch some of my previous designs HERE and HEREas well as an actual marble stone effect look I did recently HERE.
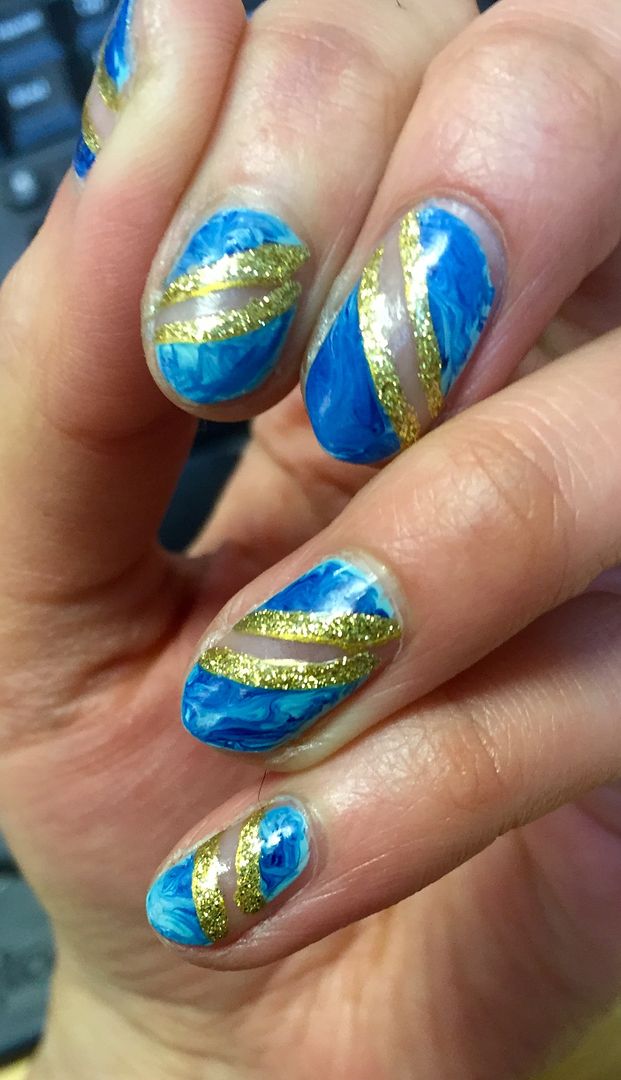
I've mixed things up a tad with this manicure incorporating a little
bit of negative space action too!

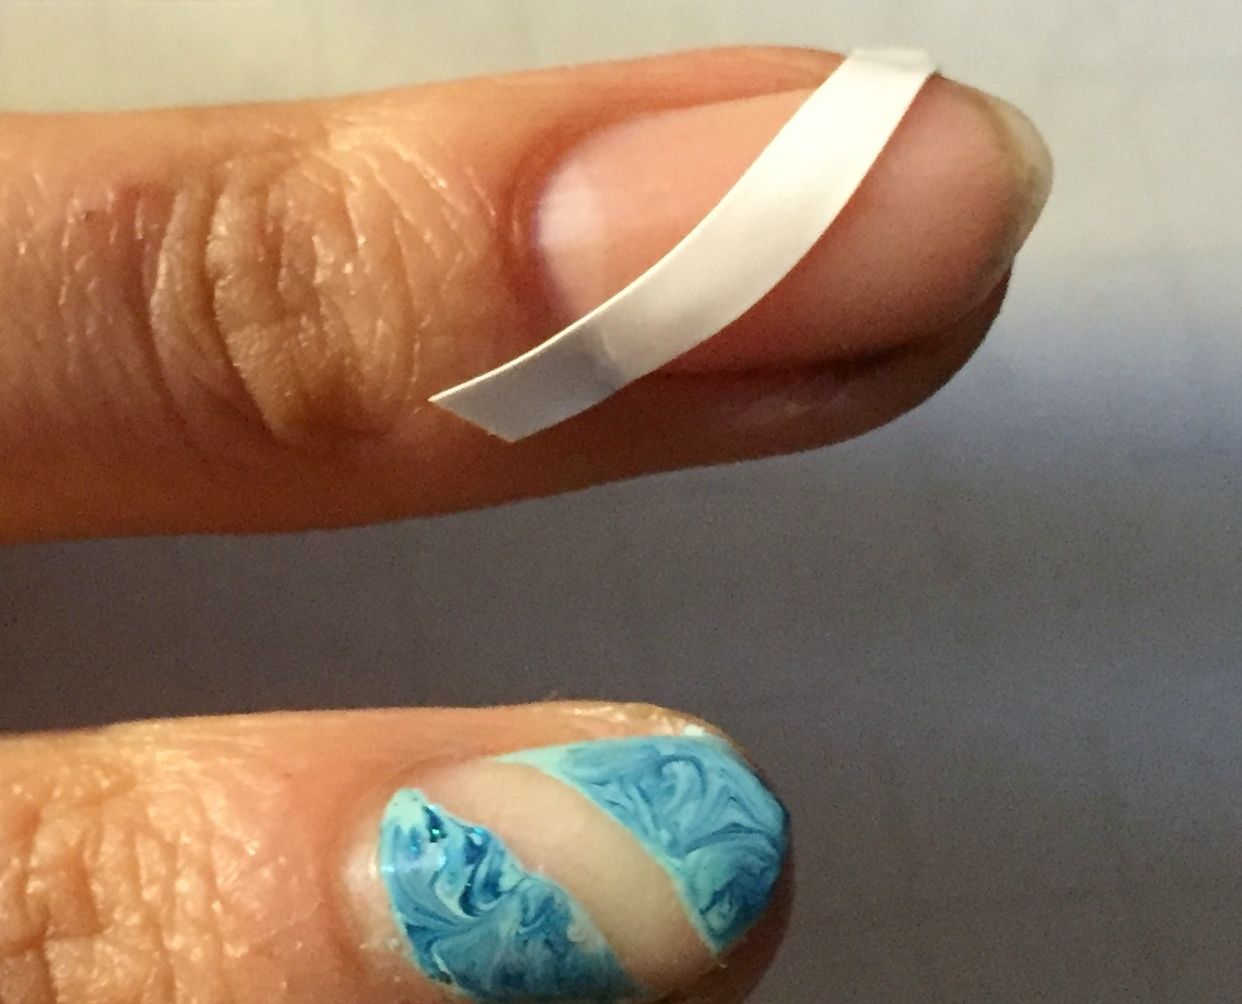
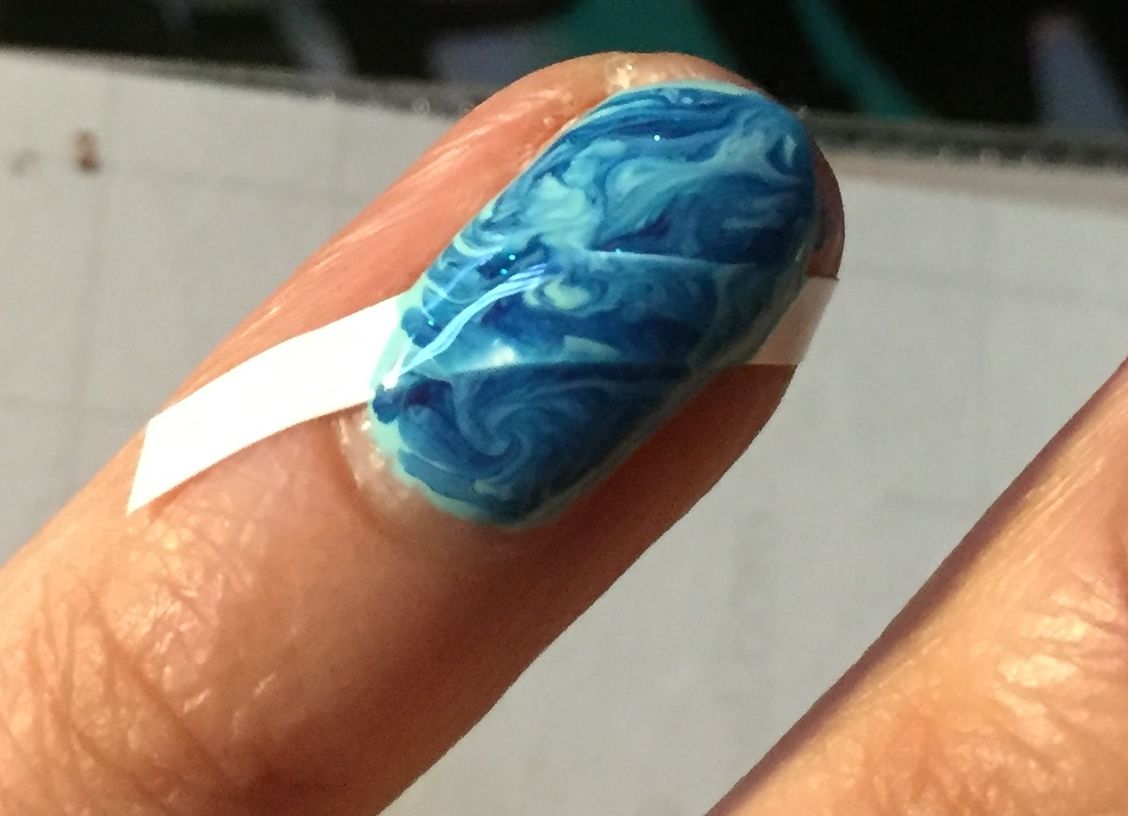
All
you need to create the negative space through the centre of the mani
is some french mani guides, I purchased a bunch of these super
cheaply off of ebay. Starting with a bare nail, position your mani guide across the nail at whichever angle you like until you are happy.
Then
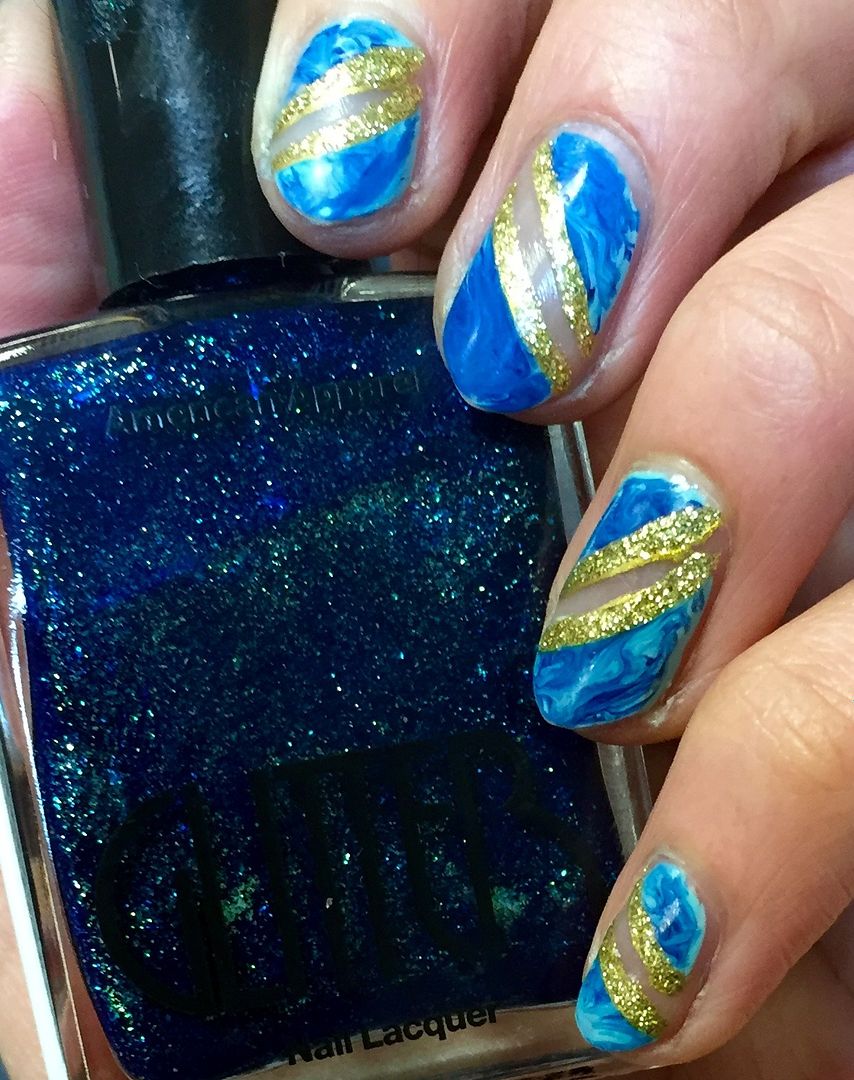
apply your polish shades, for this mani I've used this yummy Wet n
Wild creme I Need A Refresh Mint & American Apparel Eclipse which
is a veritable DISCO of a polish with its vibrant turquoise shade
filled to the max with multi tone holo glitters!
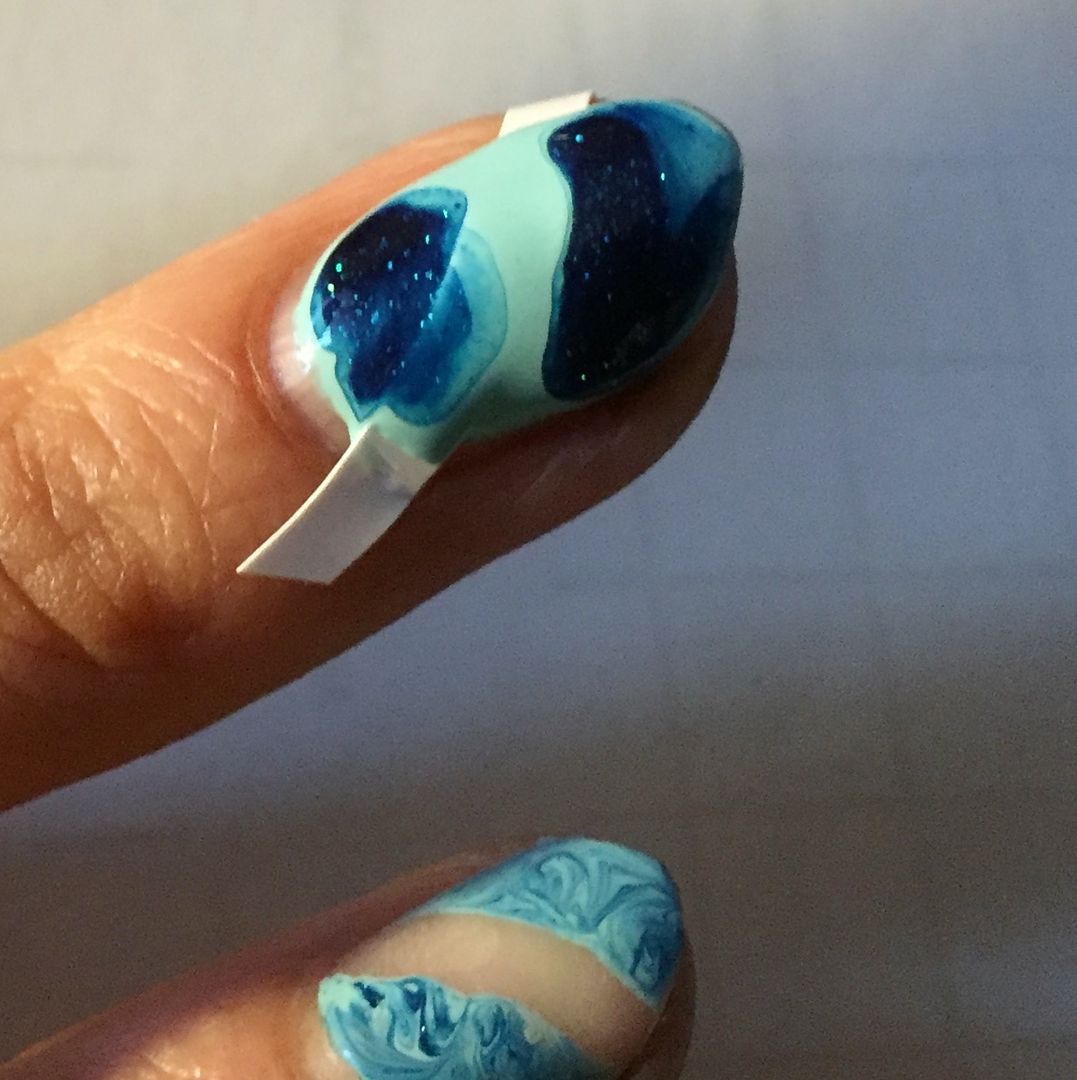
I
applied one coat of the Wet n Wild polish first, then immediately
dotted on a drop or two of the American Apparel.
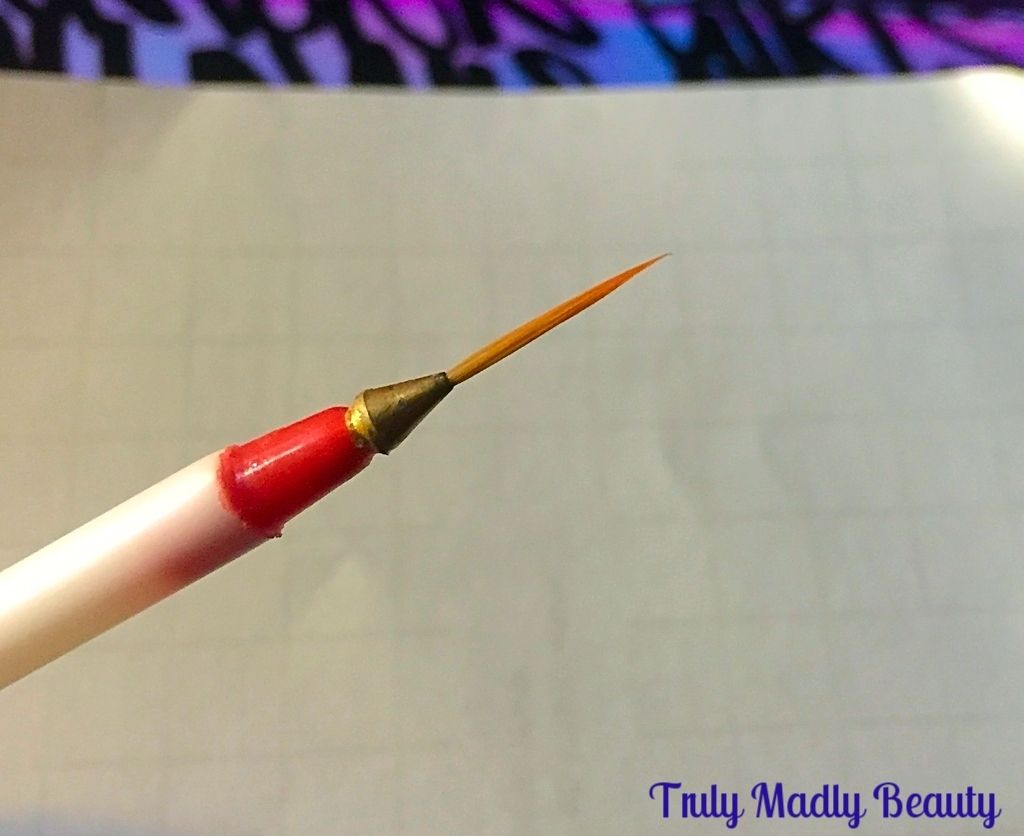
Grabbing
your tool of choice, here I've used my trusty nail art brush again as
this works best for me, swirl the two colours together to create a
marble effect you are happy with.
A
couple of tips I've learnt along the way, more polish is definitely
NOT better necessarily! I've had many nails which ended up a big
puddle of polish mess from being a tad too heavy handed.
Another
tip is to use a light touch, hence why I find the brush better for
marbling, as with a toothpick I'd find myself going through all the
polish layers directly to the nail bed. But everybody is different,
use whatever you're comfortable with!
You
then need to remove your mani guide whilst the polish is till wet.
Clean up any smudges with a brush & acetone.

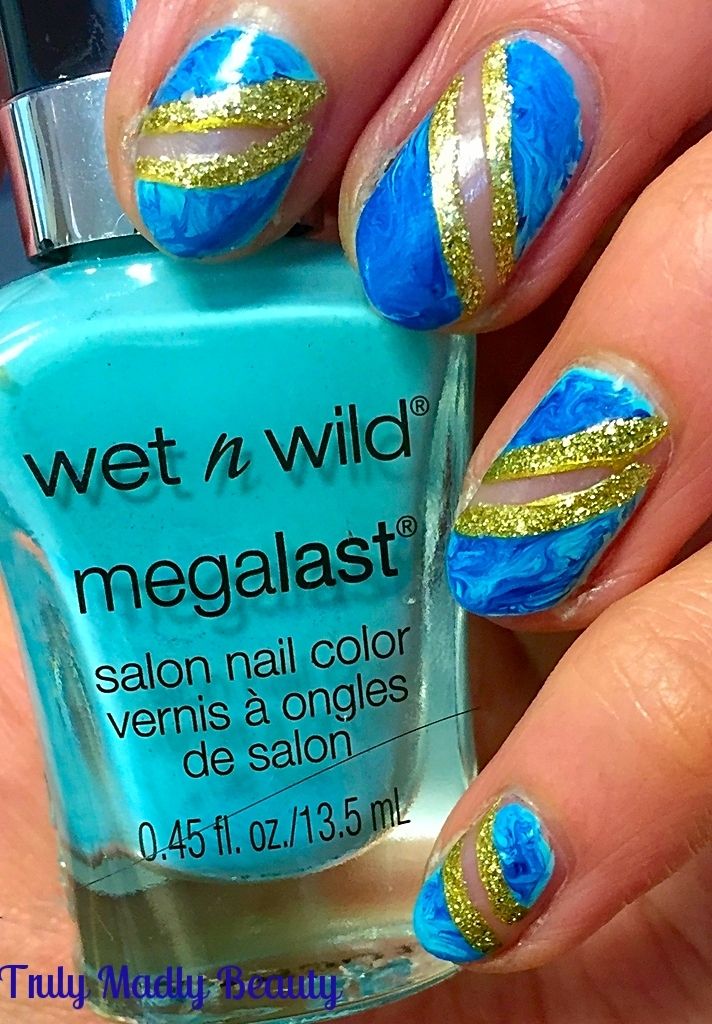
Then
using a fine nail art brush & some pretty gold glitter, simply
apply your sparkle along the curved outer edge of your negative
space.
Finish
with topcoat & you're done! Thanks for reading lovelies! Let me know if you give dry marbling a go, I'd love to see!
Lotsa love to ya!

I wish I was good at nails! Love the marble look
ReplyDeletewww.Barely There Beauty.com | British Beauty & Lifestyle blog
xx
Aww thank you Jennifer! Honestly anyone can do it, just play around & have fun with it! :) xoxo
Delete