12.31.2015

NOTD - Distressed Foil Fireworks Nails for New Years!

Hello there my lovely readers!

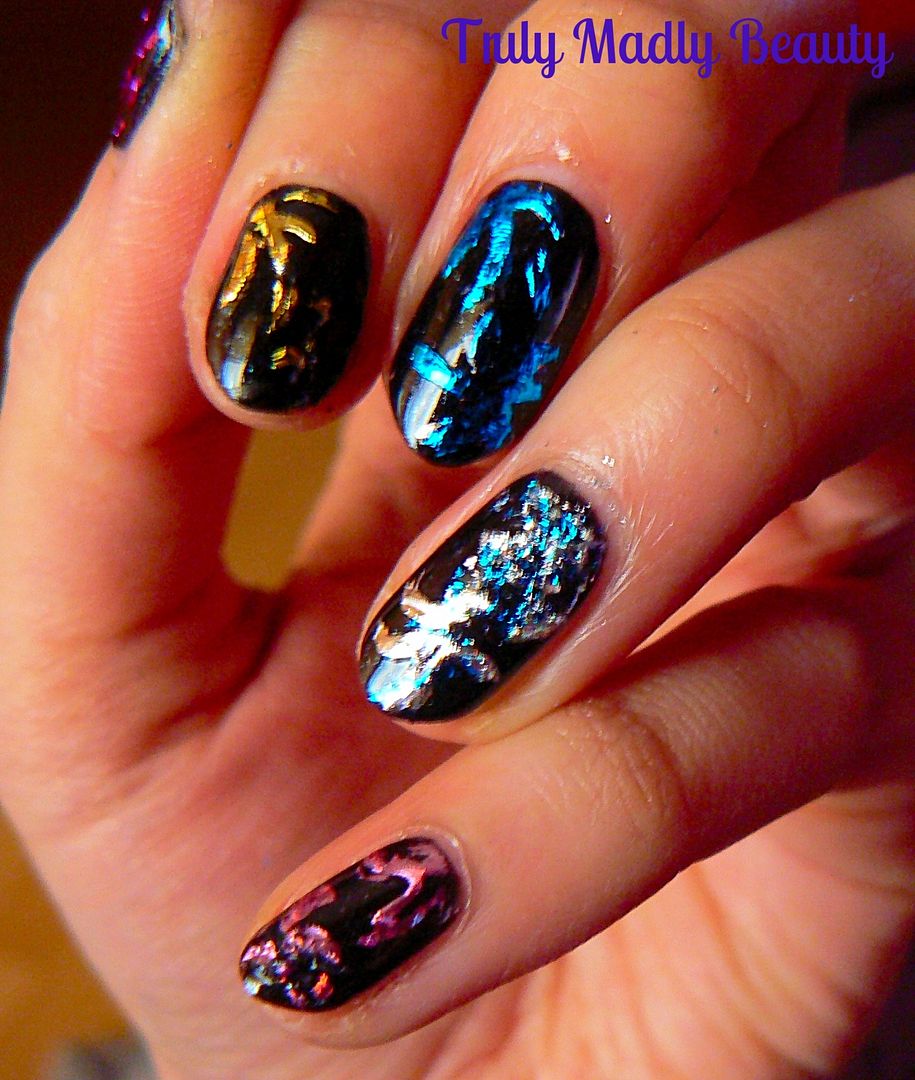
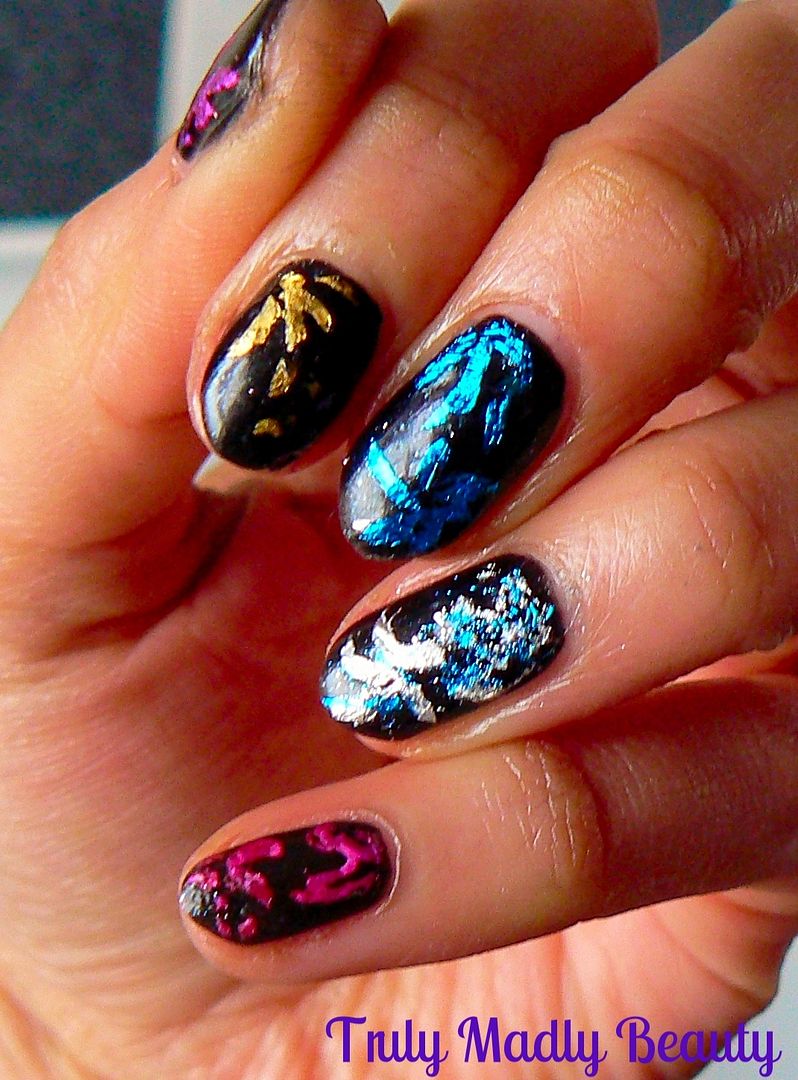
So New Years Eve has creeped up on us already! I'd originally planned on keeping it a quiet one this year however last minute spur of the moment plans have been thrown together & I'm looking forward to getting my glad rags on & seeing 2016 in with good food & friends! As usual I couldn't resist rustling up some nail art to go with the celebrations, so decided to go for  some 'distressed' foil nails.


Now this mani didn't turn out how I wanted, hence the strategically used word 'distressed' haha! Believe me I have MANY mani fails! This is the first time I've used the transfer of nail foil with glue technique, however I'm rolling with it anyhoos as its a concept I love & will be practicing more of for sure! I was inspired by the amazing Lucys Stash who used this technique HERE. The idea is basically applying glue to certain parts of the nail where you want the foil to be, then using special mylar nail foils, transfer on to the nail!


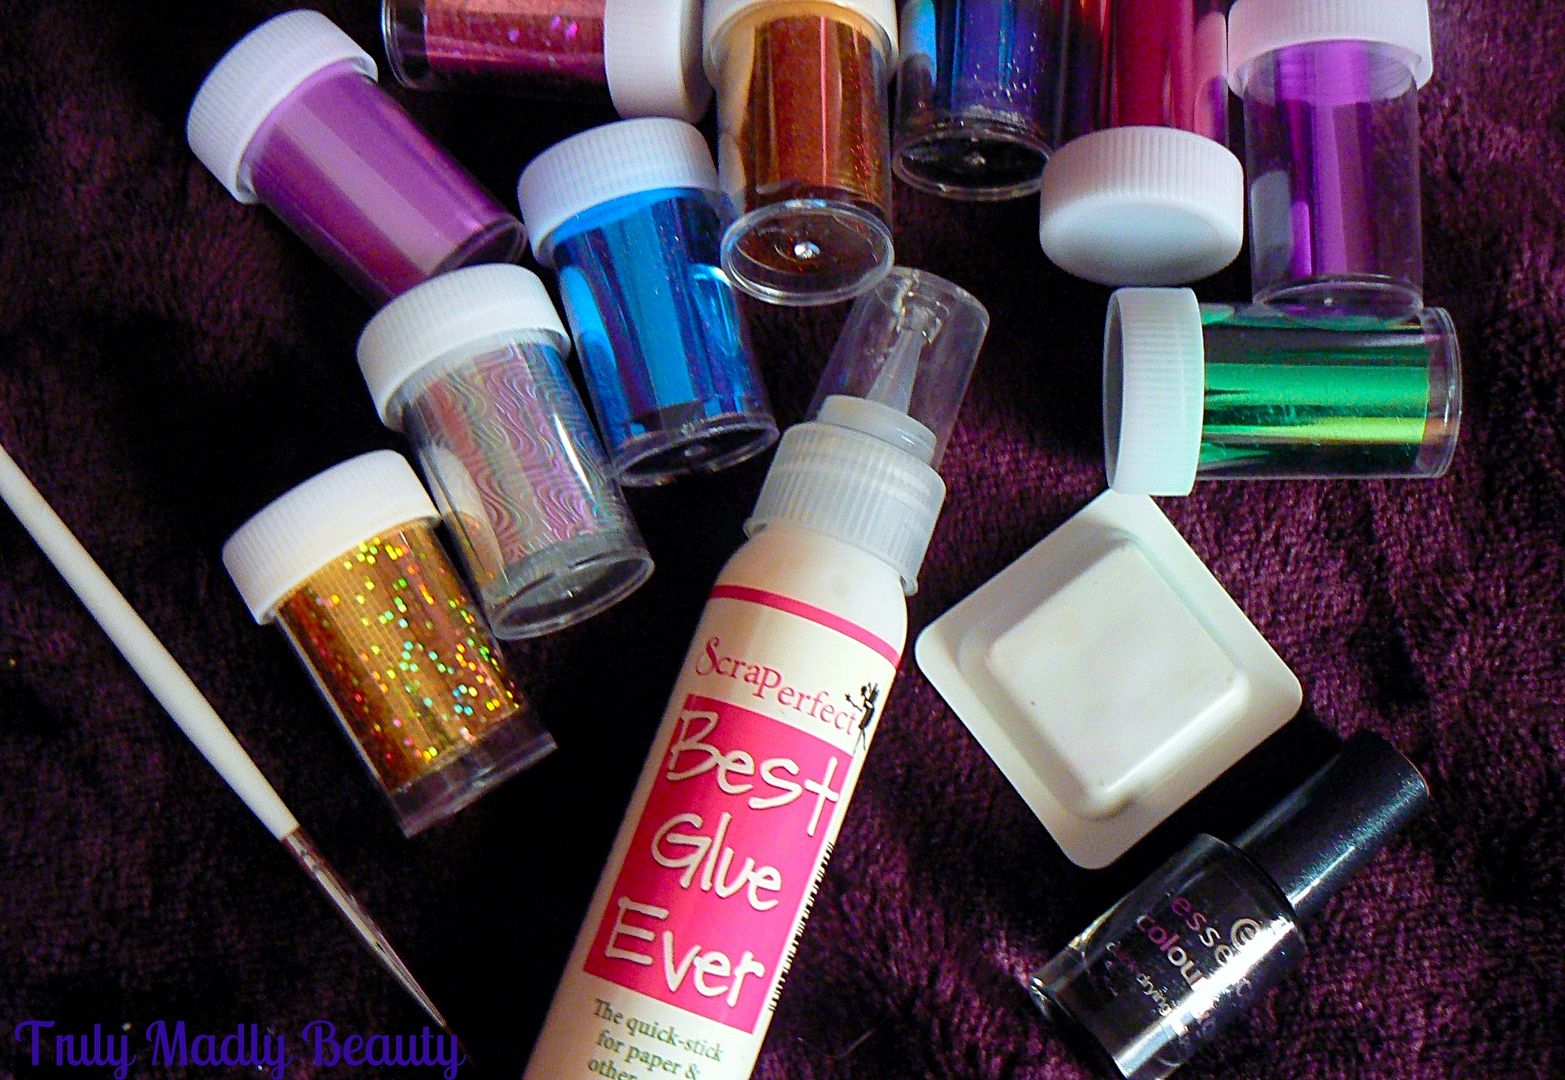
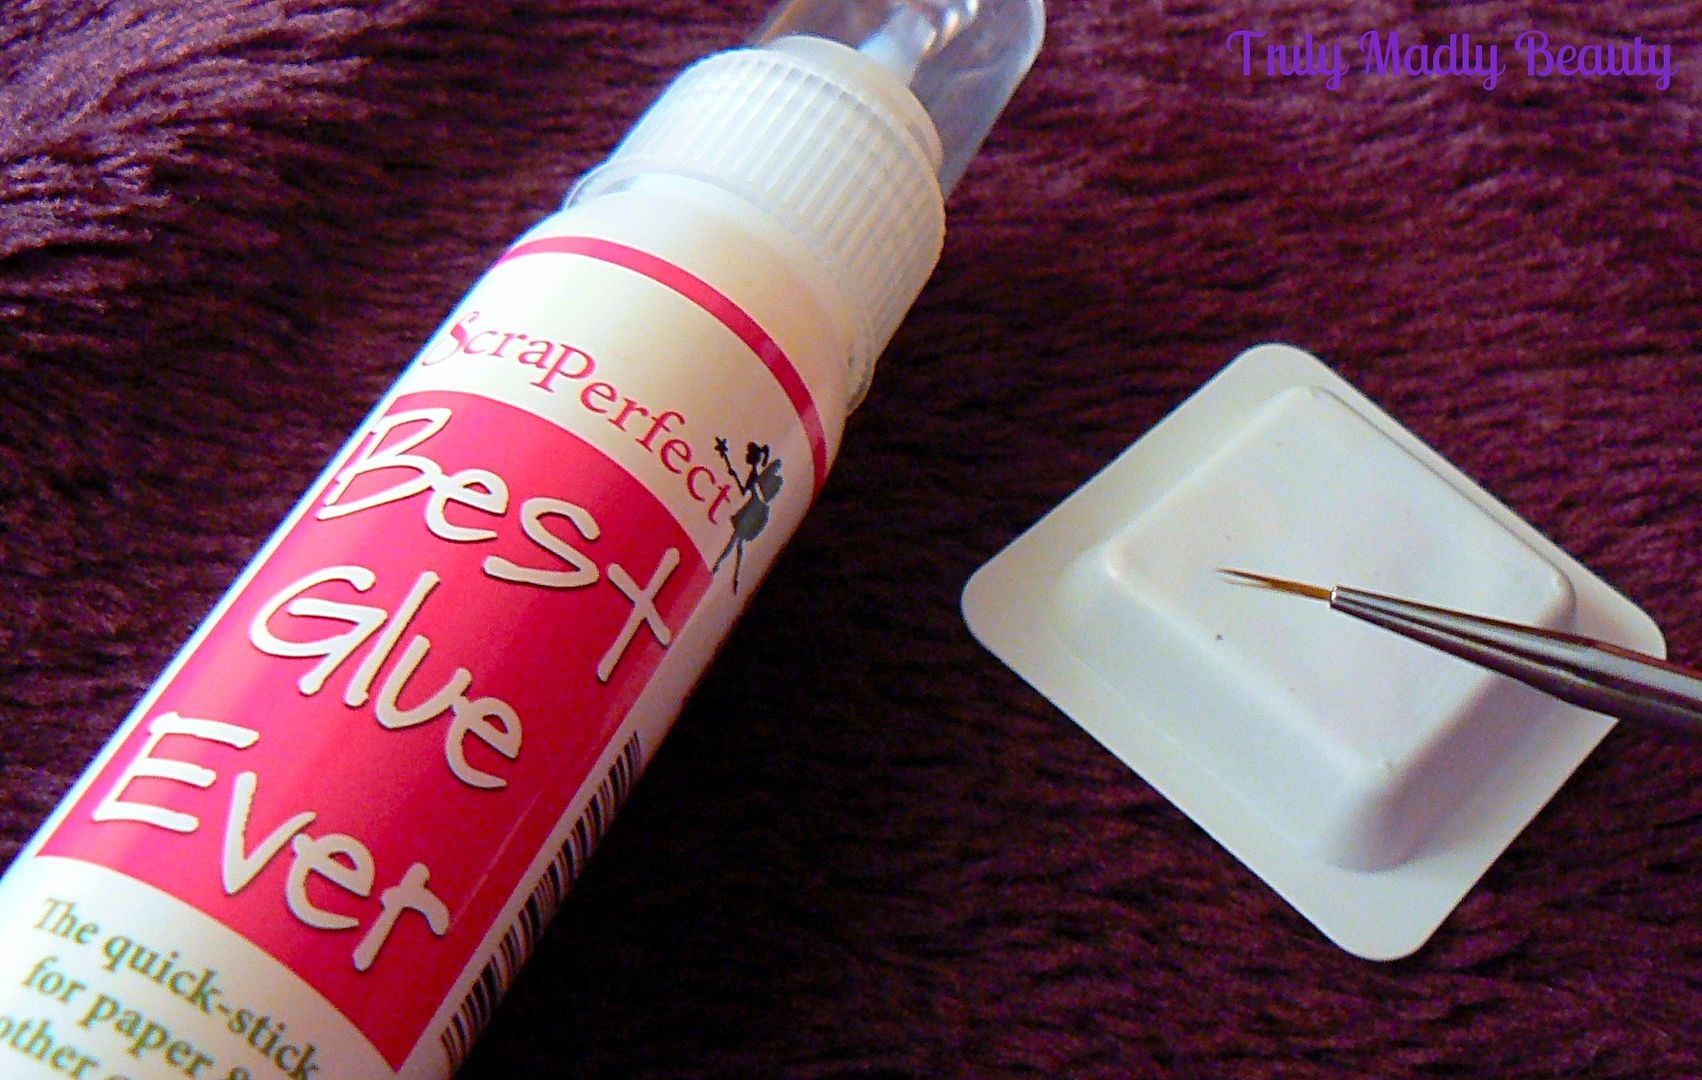
The glue used is one that was recommended by Lucy, Best Glue Ever. I purchased mine from Amazon a while back but I just googled it & apparently there is a shortage due to the raw materials used to manufacture being unavailable! There's a bottle on Amazon going for £40! Mad! However the makers, ScraPerfect are hoping to have stock available again early 2016. I picked up the nail foils from Ebay yonks ago but I believe you can also get them from Born Pretty Store who also sell special nail foil glue too just for this purpose which will make a perfect alternative to the Best Glue Ever. (get 10% off using my code TRUW10)


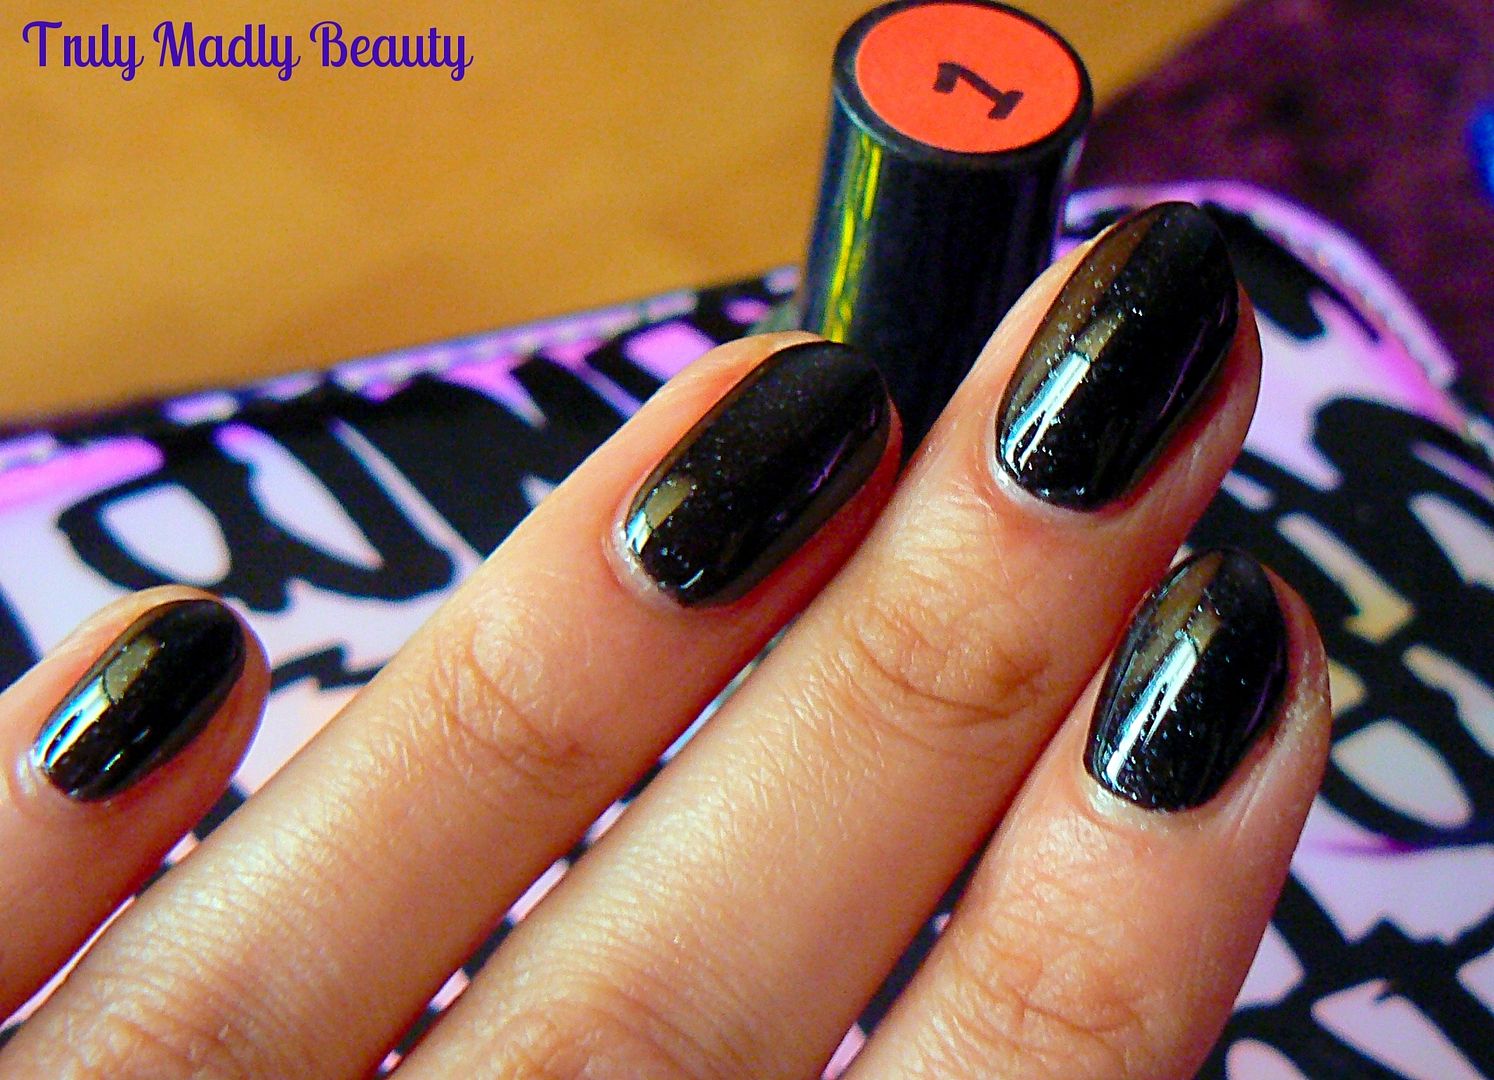
To get the best finish with this technique its better to use a dark base so that the foils can really dazzle on top, here I've applied two coats of Essence Galactic Black which is a black with silver macro glitter.


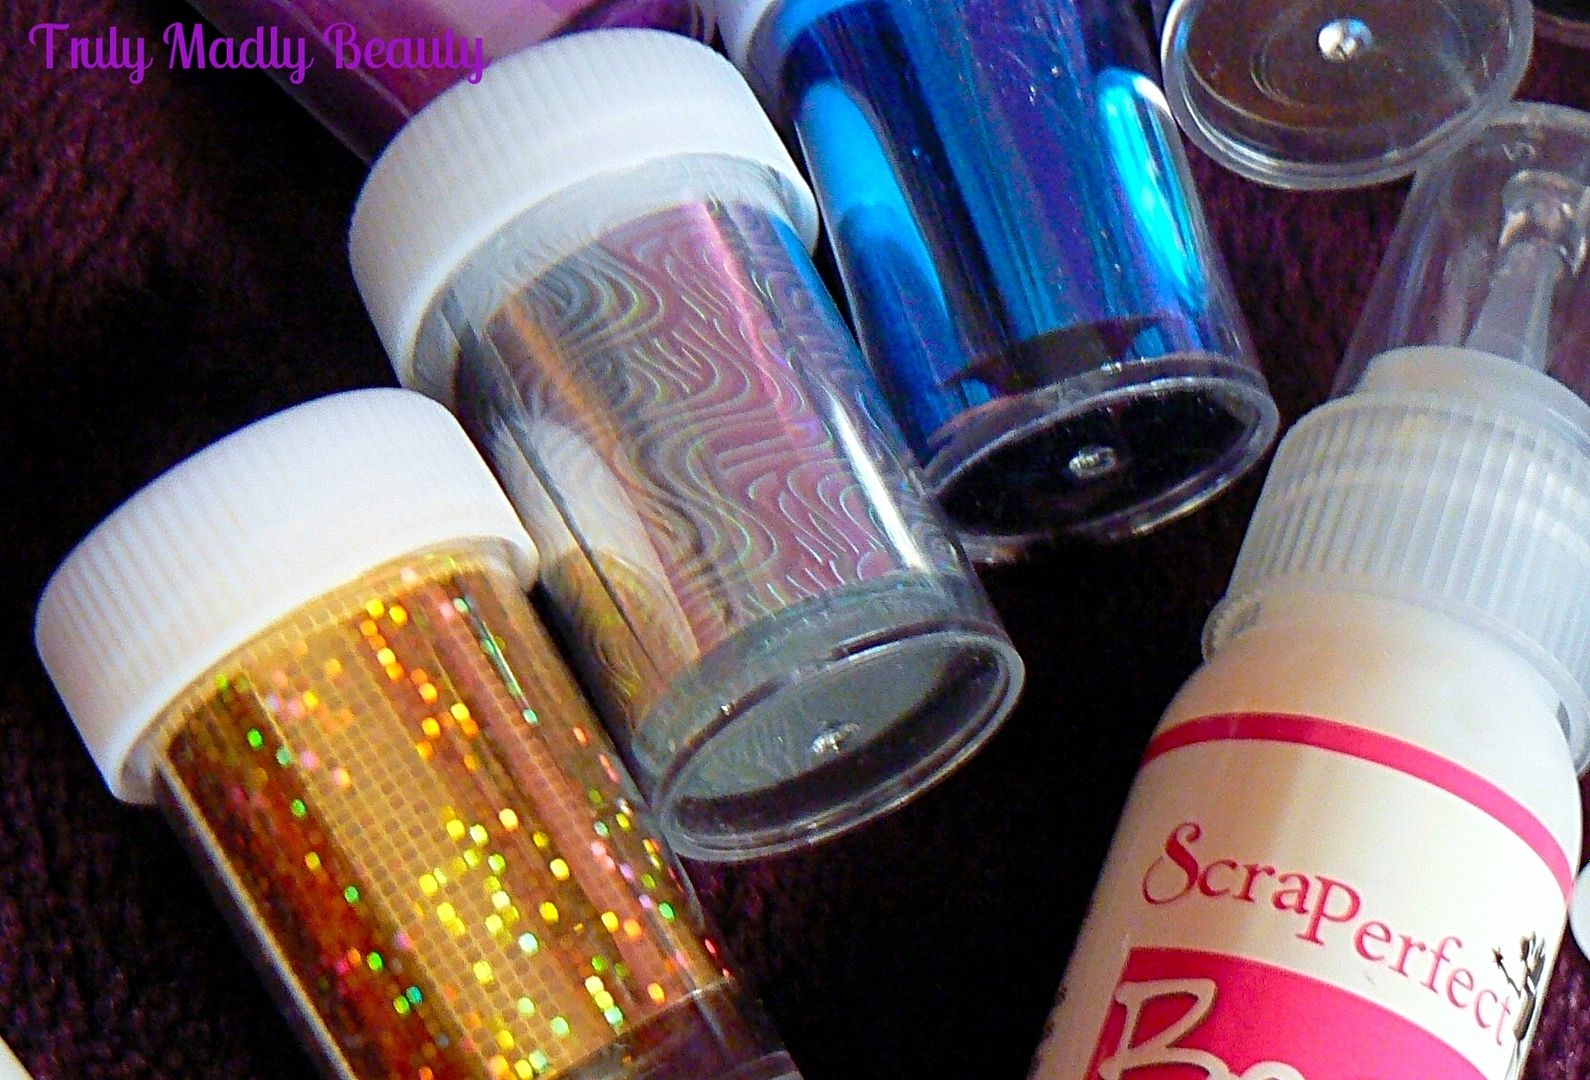
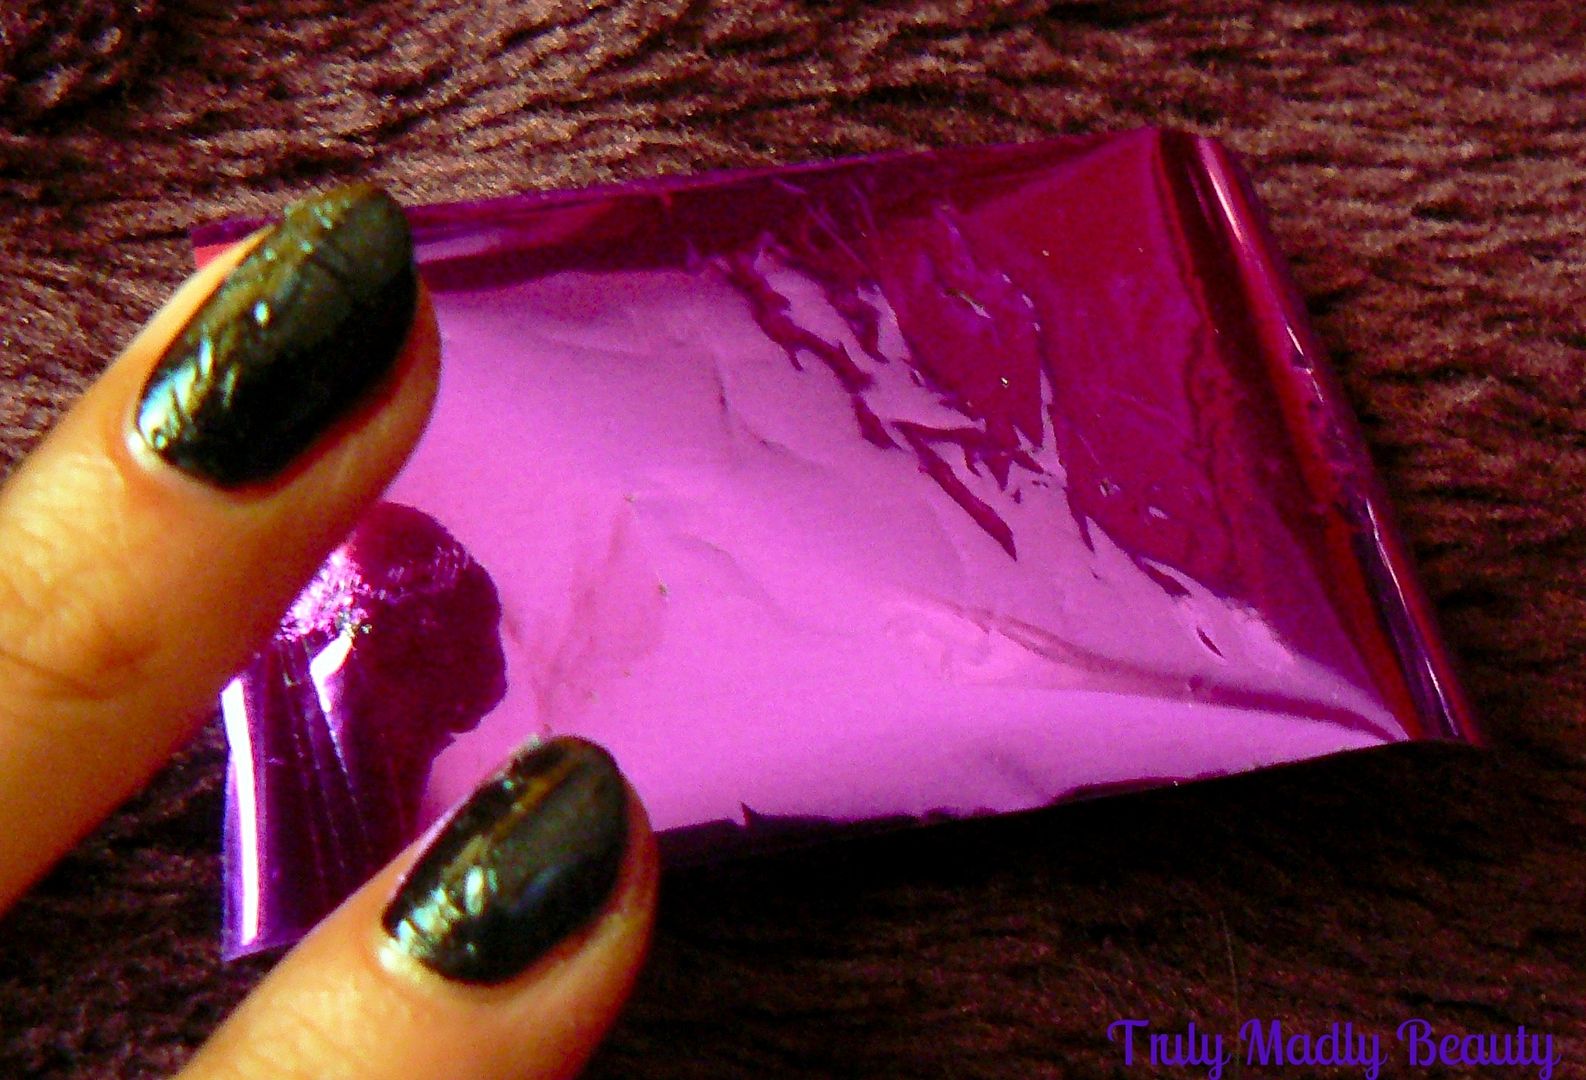
I wanted to have a different colour foil firework on each nail so I cut up a square piece from 5 different foils ready for me to use.


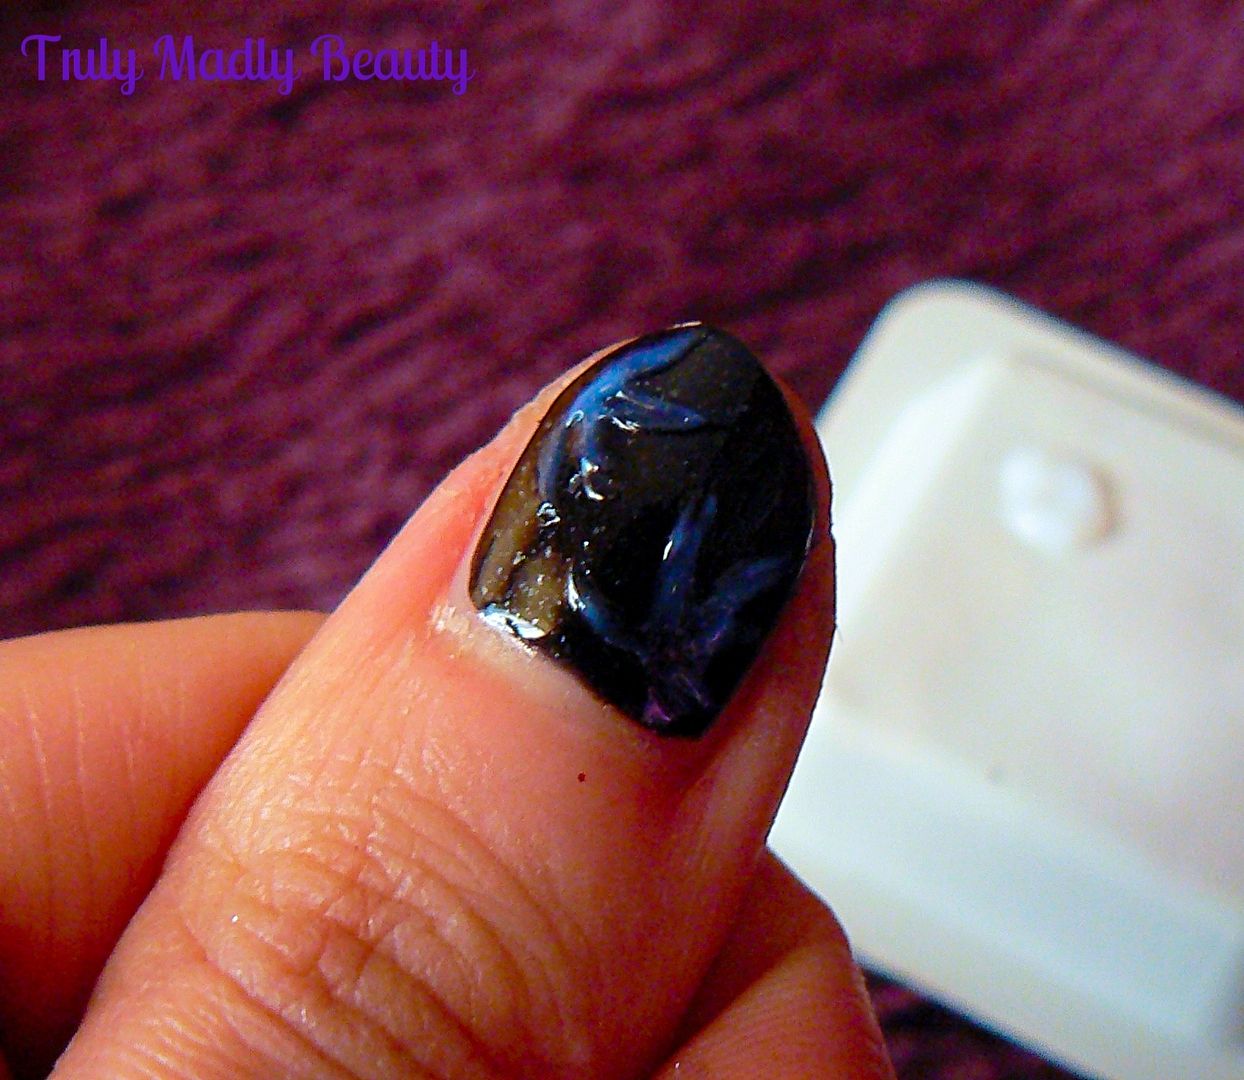
Using a thin brush & a piece of plastic/paper/whatever you like to dispense your glue on, dip your brush into a bit of glue & then apply on to the nail in the areas you want the foil. I went for a sort of firework type of pattern, needless to say it came out successfully on only some nails more so than others....O_O


Wait for the glue to COMPLETELY dry, this will be easy to tell as the glue will dry clear, though this is probably where things went a bit tits up for moi as I was just too impatient!


Then grab your piece of foil, the mylar foil has two sides, matte on one side & the coloured foil on the other. Its the matte side you need to dab on the nail. Using light tapping motions, its easier if you wrap the piece of foil around you finger when doing this, dab the foil on to the nail until it has transferred on to the glue.


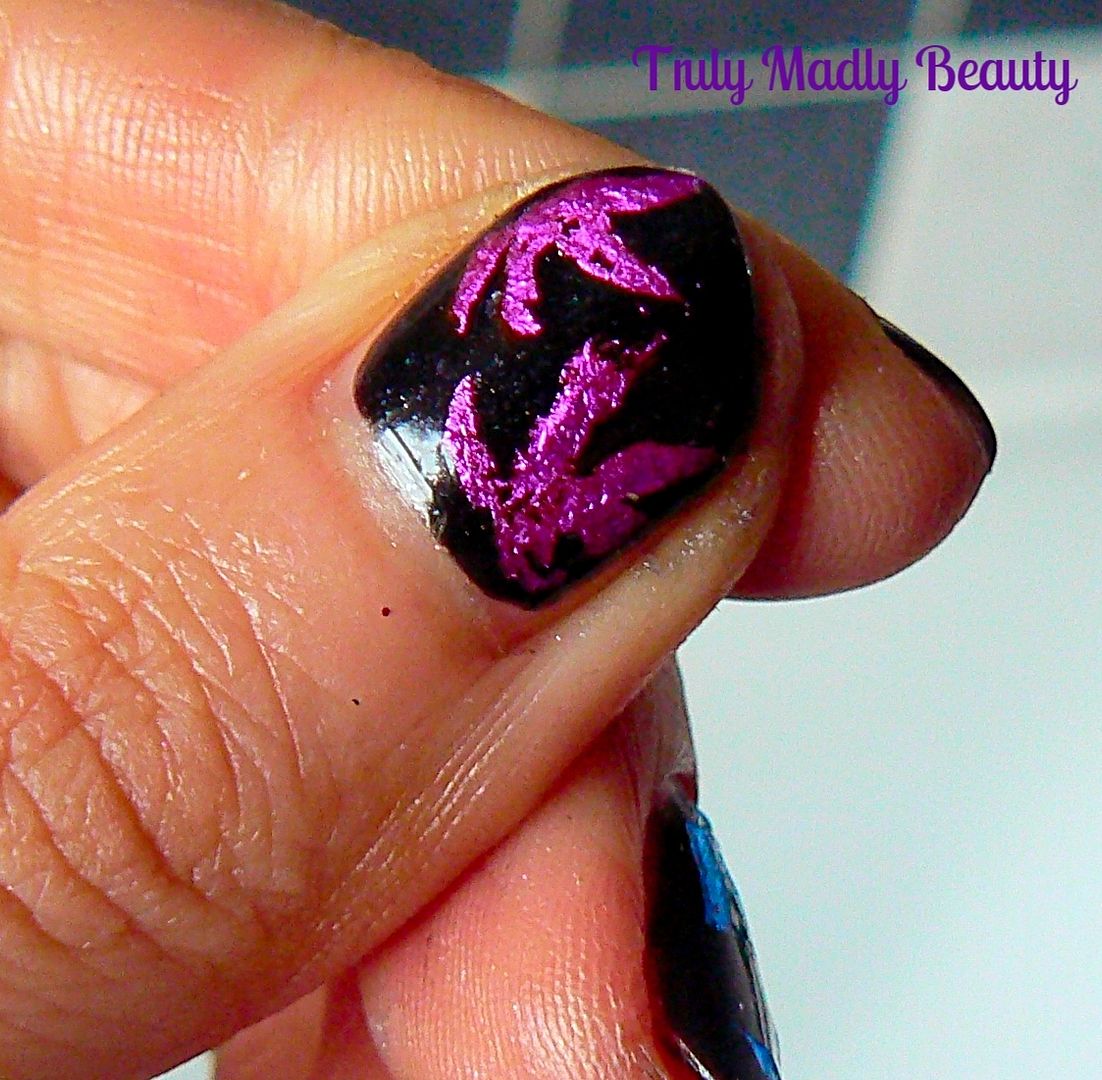
Do this on every nail using your different colours until you've done all ten, I decided to mix it up with both blue & silver on the ring finger. I'm really happy with how my thumb came out, the others...not so much ha! But you get the idea of it.


Finish it all with a nice thick coat of glossy topcoat! As you can see I still need a helluva lot more practice & playing around with this, think I may give Lucy's Flame Effect nails a whirl with the foil just on the tips!

Thanks for reading lovelies & wishing you all a Happy New Year! See you in 2016!

Lotsa love to ya!


12.28.2015

Afternoon Tea Adventures - The Mad Hatters Afternoon Tea at The Sanderson

Hello there lovely readers!

Did you all have a lovely Christmas? Normally I'm not fussed with getting time off but this year I managed to nab a few extra days & I won't lie, these past 6 days of doing nowt but rest, eat, relax & repeat have been bliss. However one must slowly come out of hibernation & join the real world at some point! Thankfully this week will be a short two day affair not to mention I'll finally be watching the new Star Wars film on Wednesday! Getting back into the swing of things on here too now with my next afternoon tea review! So far I've written about my Claridges experience which you can read HERE. Today I'll be sharing with you one for any Alice in Wonderland fans out there...

The Mad Hatters Afternoon Tea is one I'm sure many of my fellow afternoon tea addicts have heard of. This wonderfully themed experience is held at The Sanderson Hotel & I was finally able to try this much raved afternoon tea for a friends birthday & even though this was last year (please note changes may have been made since then!) I thought I'd still share the experience as part of my afternoon tea series.

Source: Google images


12.23.2015

Festive Nails - Candy Cane Dotticure!

Hello there my lovely readers!

Christmas week has finally creeped up on us most speedily as it inevitably always does! Gosh this year really has flown by but I'm looking forward to 2016, I have many plans I hope to see carried out so here's to exciting new adventures!

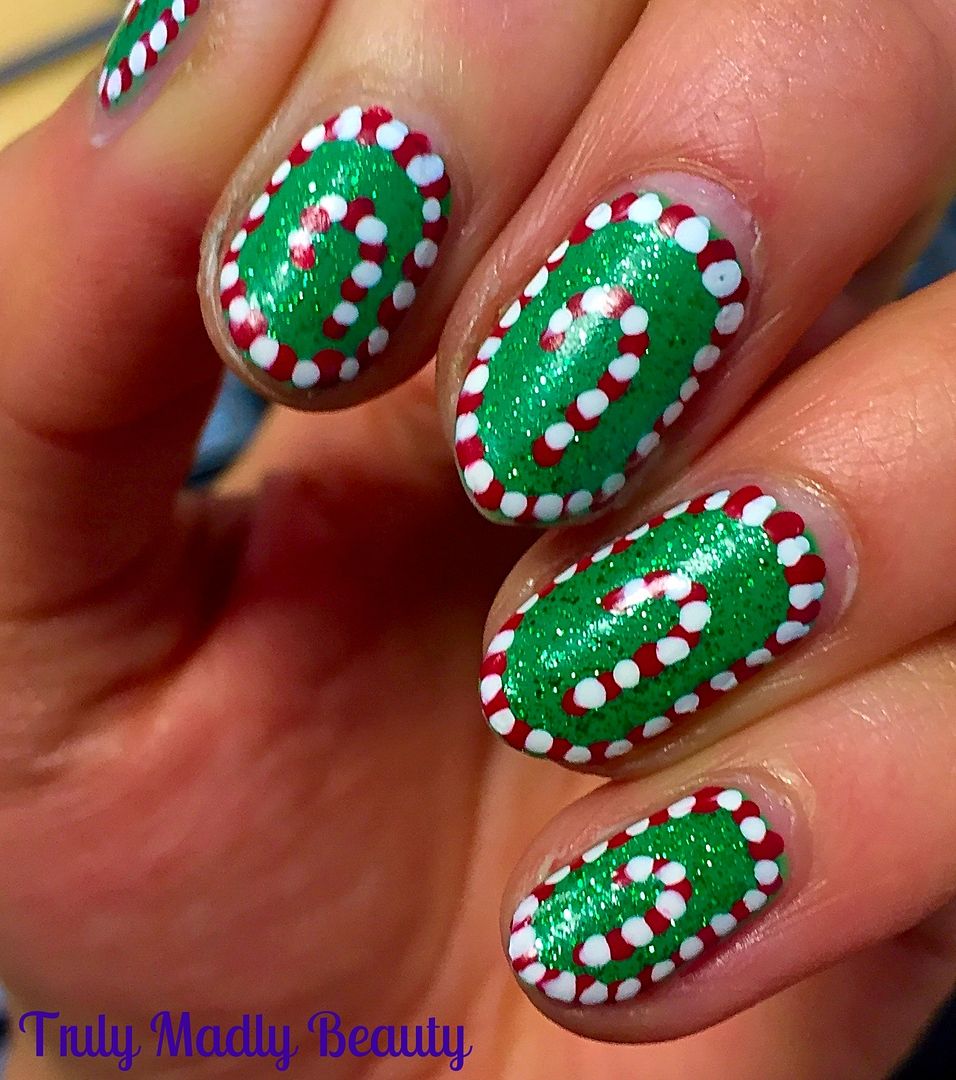
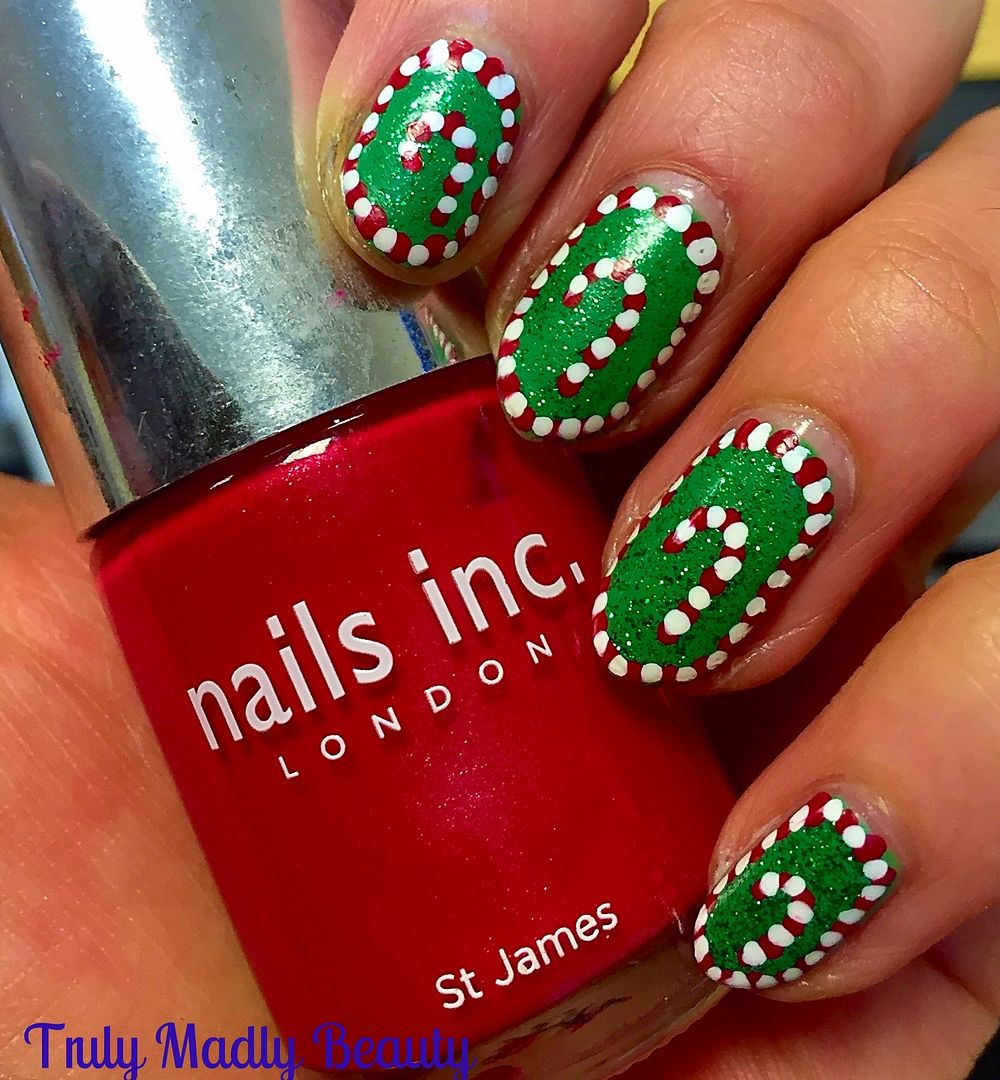
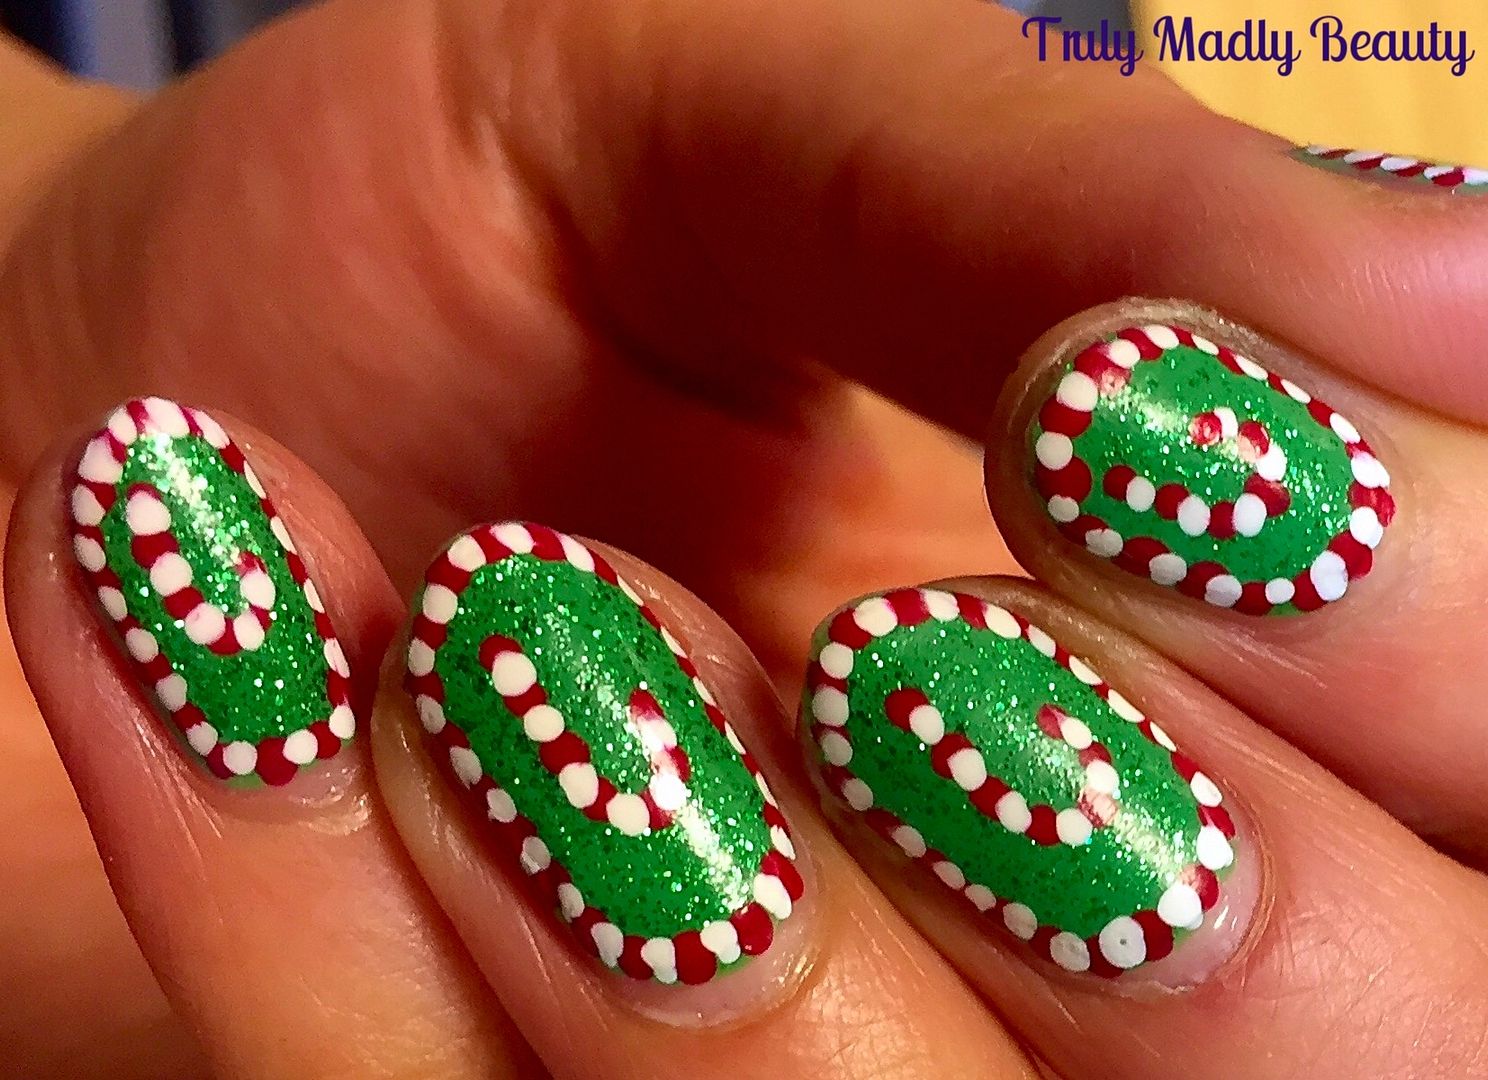
Squeezing in one last festive mani of the year for you today & I think this is my favourite one out of the bunch! This year I've managed to roll out a few which I hope you've enjoyed & helped get in to the Xmas spirit with some Christmas Presents, Festive Baubles, Sparkly Holly & Christmas Trees! For my final festive mani I went down the dotticure road & created some Candy Cane nails!


I'd forgotten how much I LOVE dotticures, so fun yet easy to do & with such pretty results as you can totally have fun with it! This brought back to mind the Aboriginal style dotticure HERE I did a while back...I will definitely be having more fun experimentation with dotticures next year! ;)


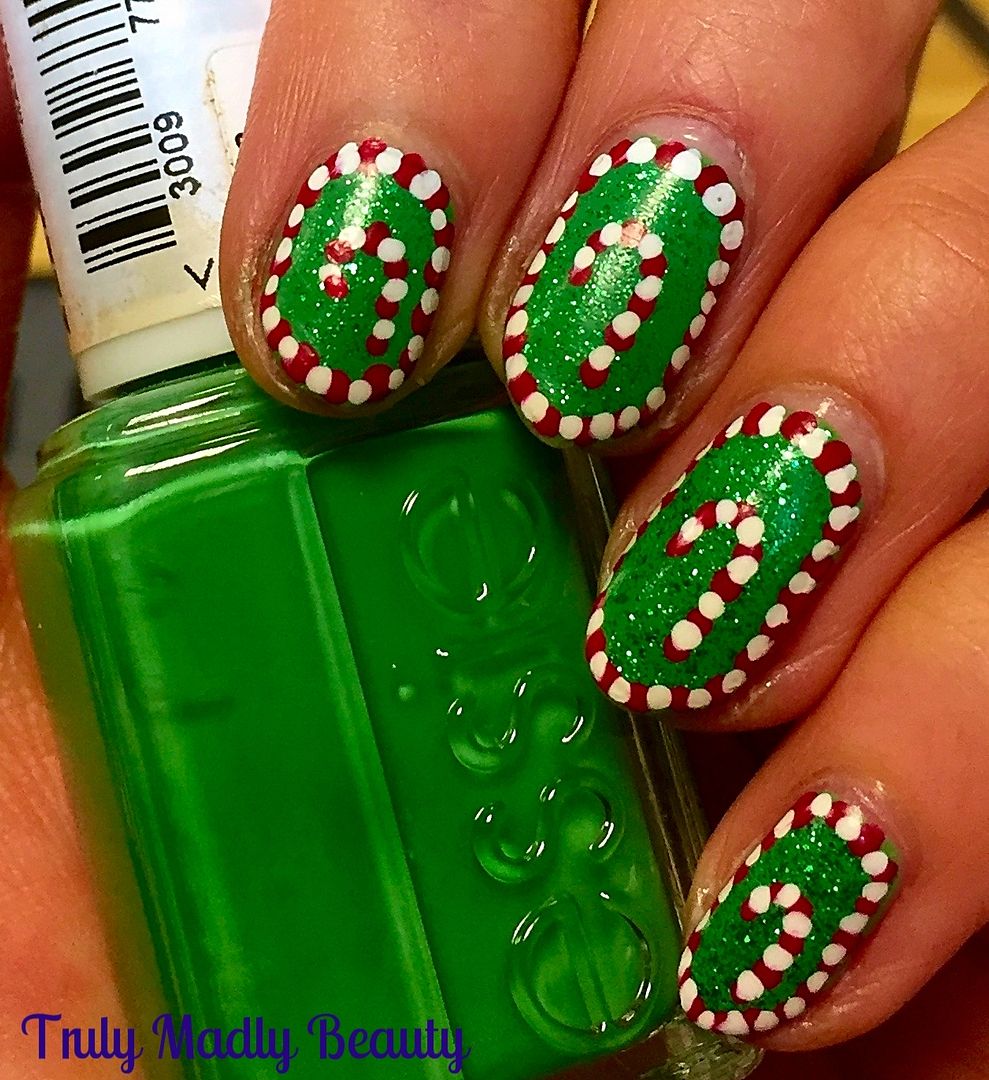
Going with the festive colours of green, red & white I started things off with a nice bright green base that wouldn't drown out the design. Here I've gone for one coat of Essie's Mojito Madness.


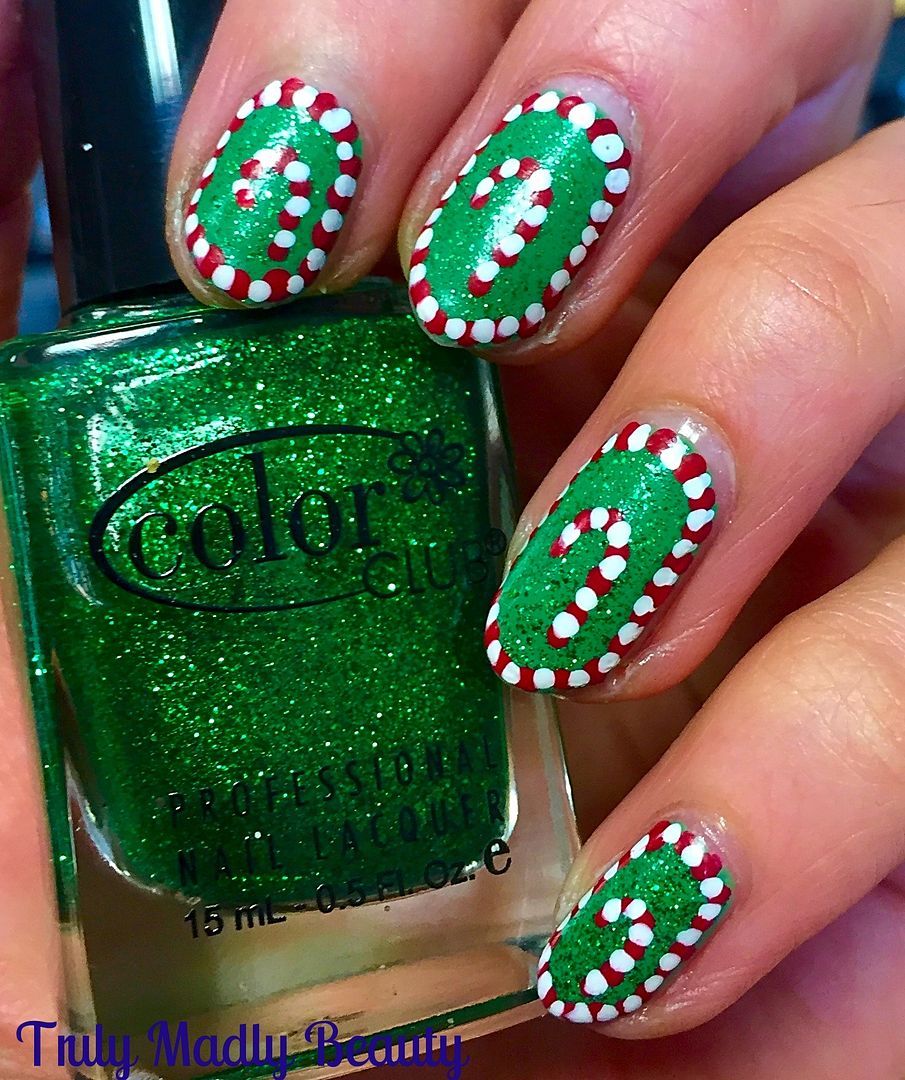
To jazz up the green I then added one coat of Colour Club green glitter because...well..you know...SPARKLES

Then for the dotticure design I started by applying the dots along the edge of the nails first to create a border, 


Rather than switching tools repeatedly apply one colour at a time, so I first added on my red dots using Nails Inc St James & a fine dotting tool, making sure to leave a wee gap in between each dot for where the white will be added.


For the white I used my Models Own nail art pen, the nib is really handy (when its not blocked that is!) as it distributes the perfect amount of polish for a neat dot without polish flooding out, causing a huge mess & a mini seizure, as is the case with a lot of nail art pens! Apply the white dots in between your red.

Then for the final bit, dot on your candy cane in the centre of the nail using the same concept that is done with the border.


Leave the polish to dry for a good five minutes before finishing with topcoat as, depending on how thick your dots are, the polish may drag which you really don't want after all that effort.

And that's it! Easy peasy :) I hope you liked the Christmas nail art this year dolls! Did you go festive on your nails? Thanks for reading & have a wonderful Xmas!

Lotsa love to ya!

12.21.2015

Magical Sweet Treats from Fairy Tale Gourmet!

Hi there my lovely readers,

I'm excited to be sharing today's post with you as it contains a combination of two of my favorite things in life (other than nail polish)....sweet treats & fairy tale magic! Allow me to introduce you to the wonders of Fairy Tale Gourmet, an online confectioners I stumbled across on my Twitter travels & upon finding, have discovered a whole new world of magical sweet delights.

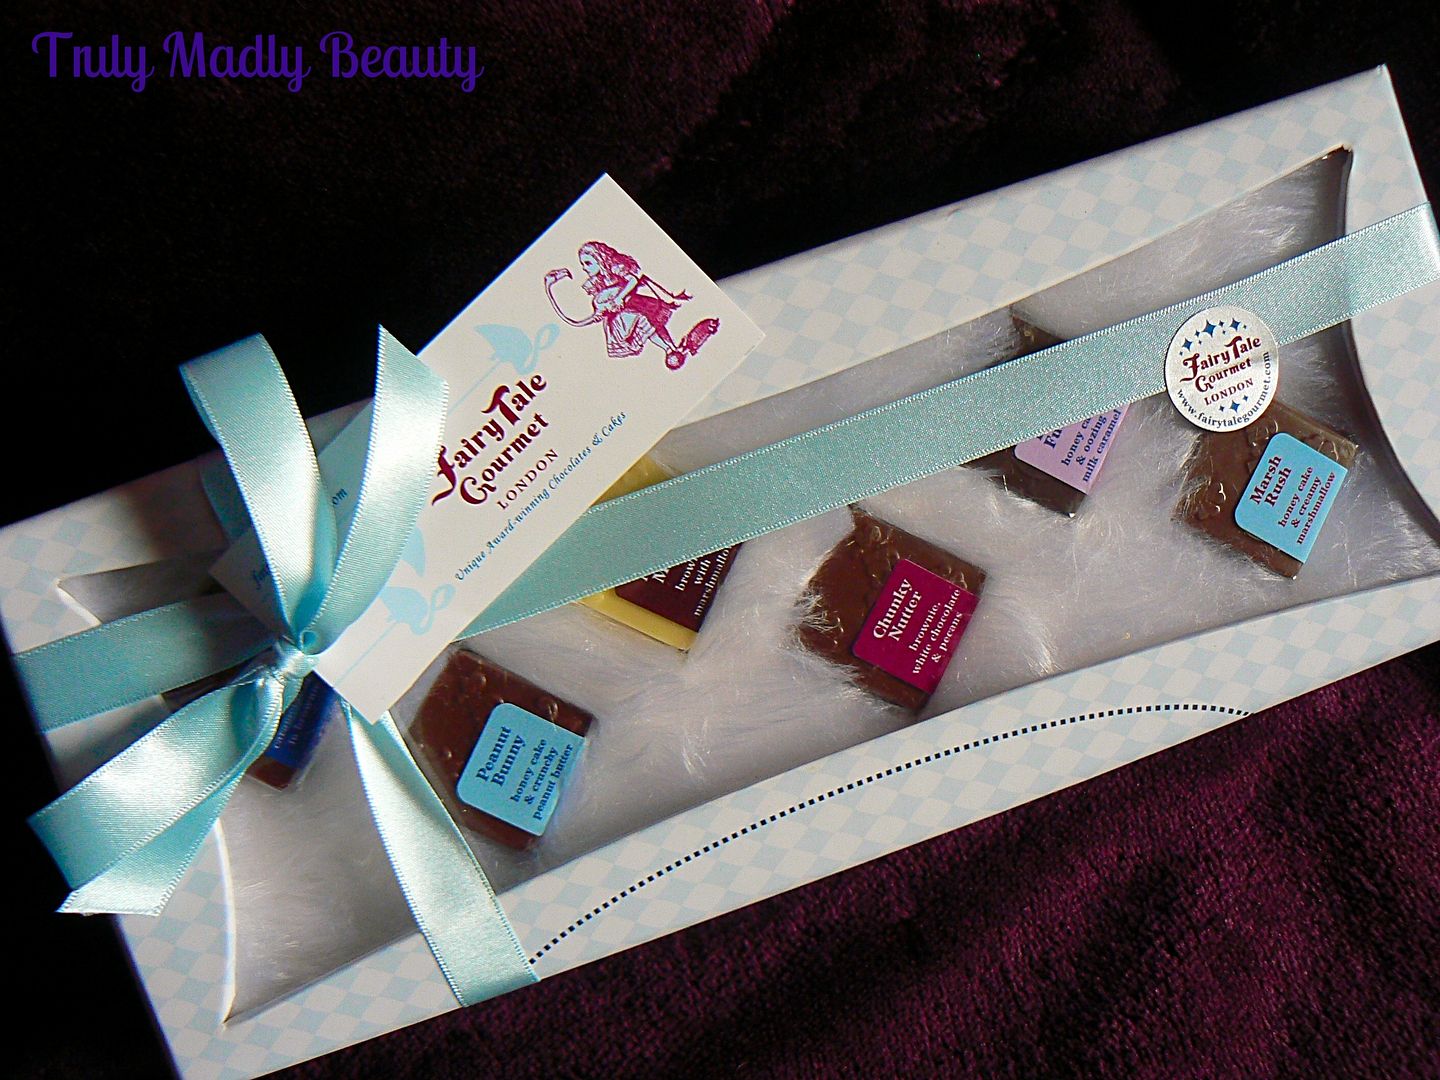
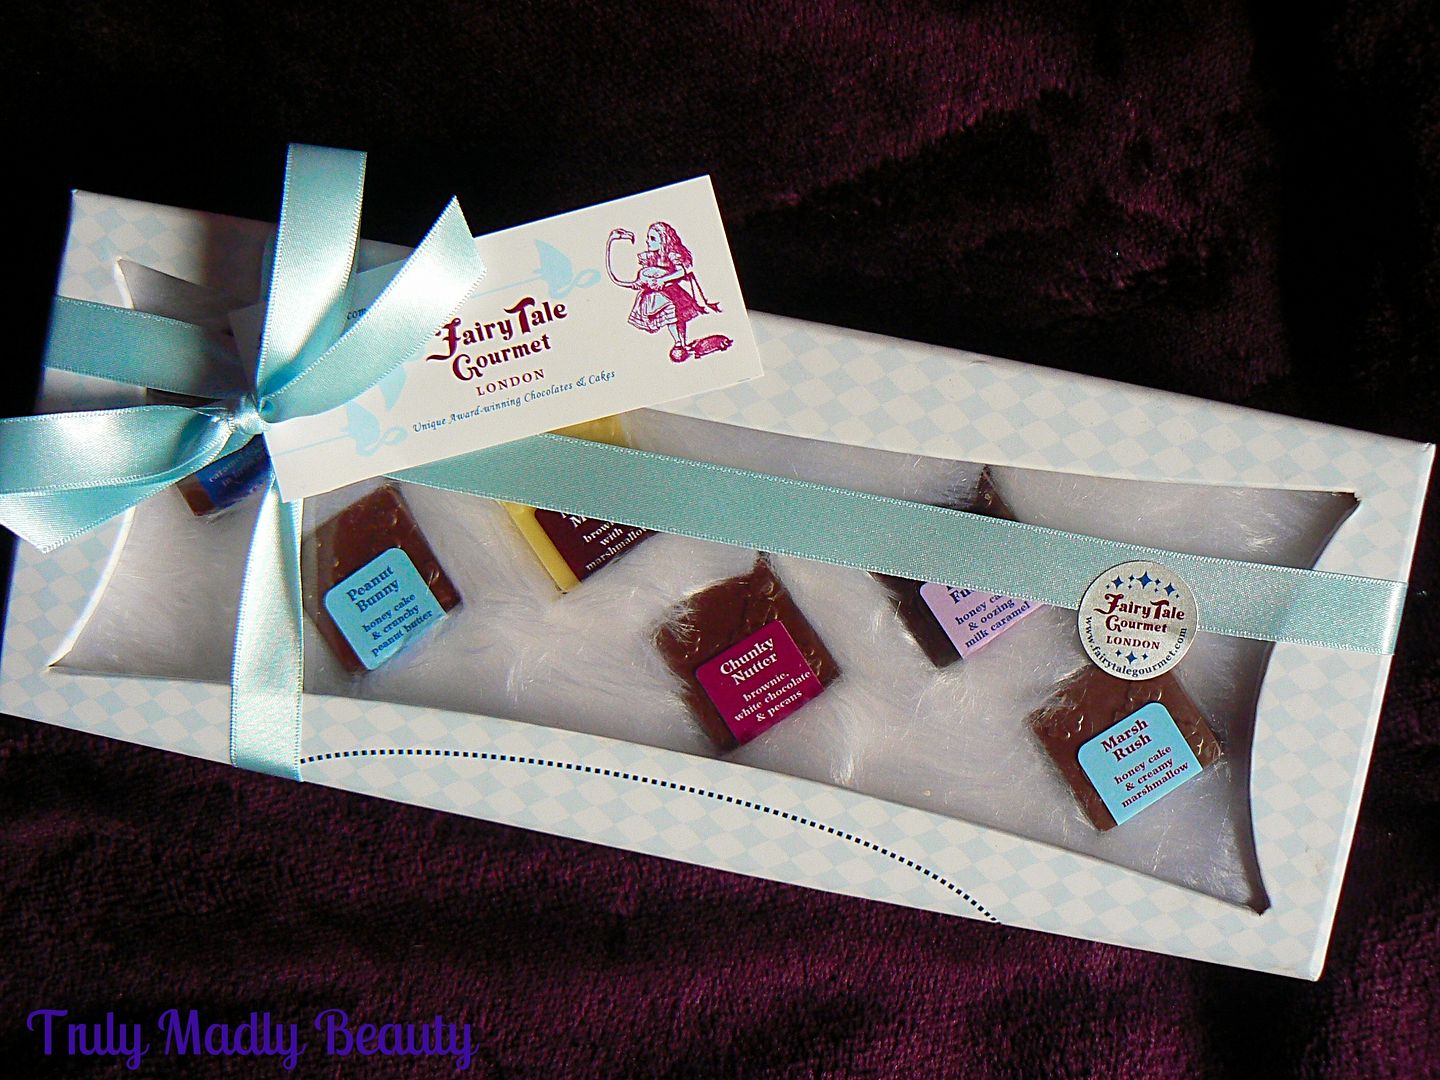
Fairy Tale Gourmet is a London based company & masters in creating mouth watering confectionery using classic fairy tale themes as inspiration, Snow White, Goldilocks & Alice in Wonderland to name a few. One dessert that they are famed for in particular is their award winning cake filled chocolates...that's right...CAKE...inside CHOCOLATE...I was sold before even browsing the wares. However once I did indeed do that, I literally went in to real life heart eye emoji mode. Wonderfully, luck was on my side & I was fortunate to actually win one of their twitter competitions, the prize being the Tiny Pieces White Rabbit Gift box containing 12 'Tiny Pieces of Wonderland' cake filled chocolates, which I could not wait to try!


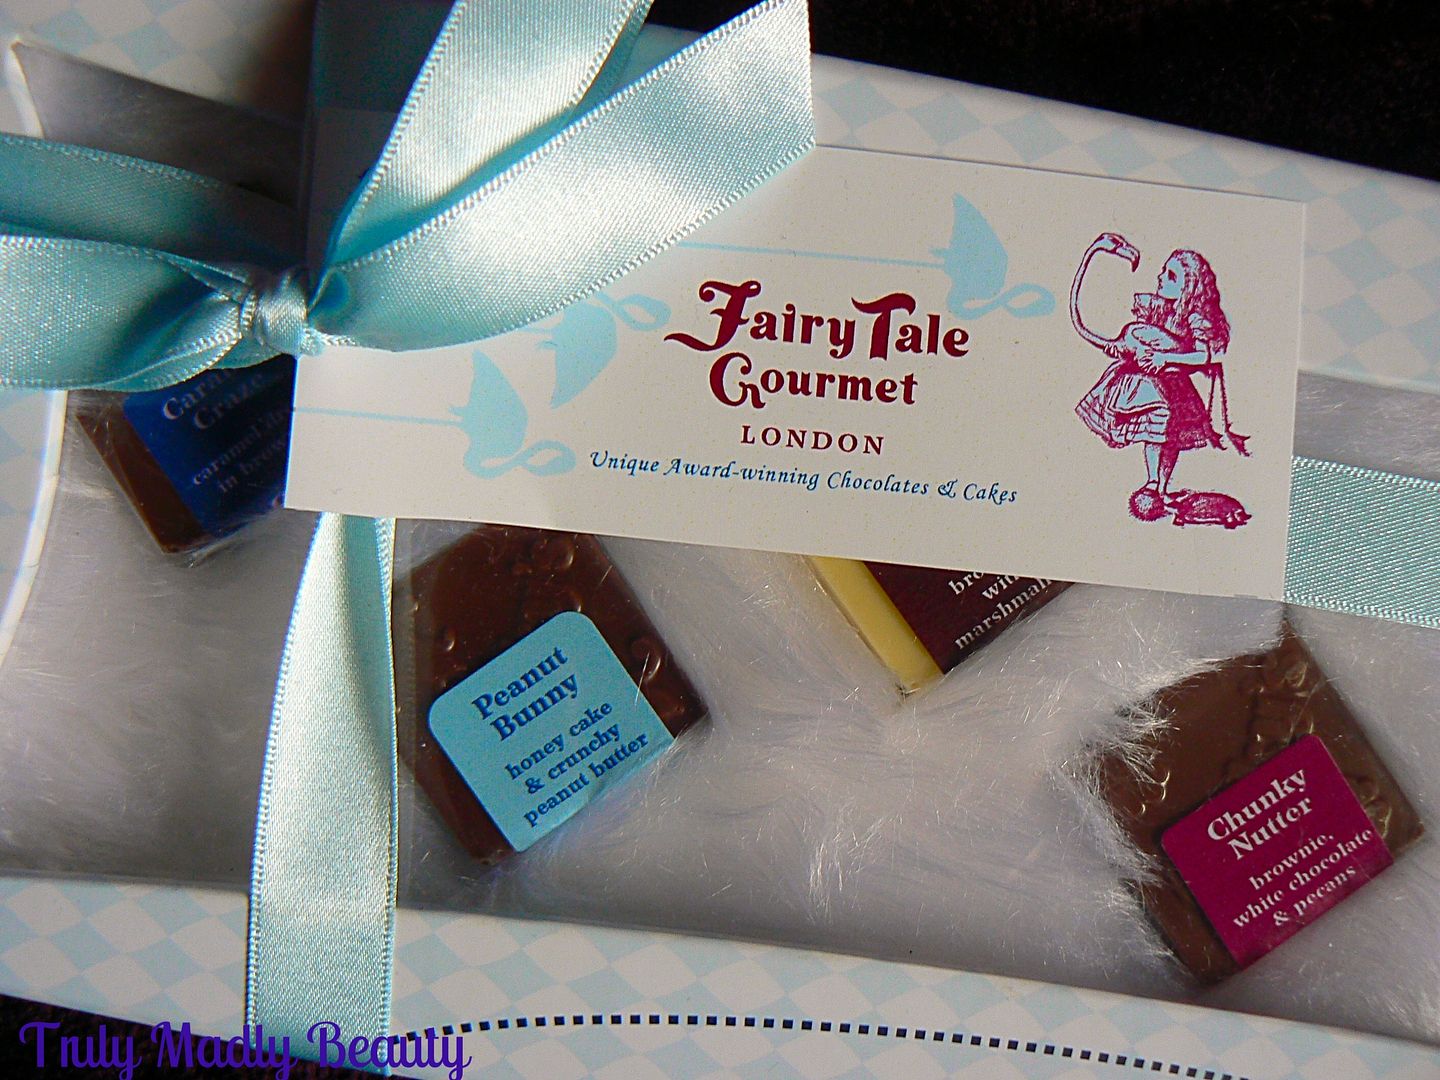
The White Rabbit gift box arrived securely packaged in bubble wrap to protect the treasures within, but not for long, so eager was I to get to the treats inside! Once unwrapped you'll find a pretty ribbon-ed gift box (miss kitty was happy!) lined with a sumptuous white faux fur lining, giving the gift a truly luxurious feel & nestled within the bed of soft fur are 12 of your individually wrapped cake filled chocolates.

The decadent chocolate encased cakes come in a mixed selection of white, milk & dark Belgian chocolate, however you can opt to go for just one type if you're not a fan of all three. Moving on to the individual pieces, boy are you in for a treat, these specially created desserts with fun flavored fillings each sounding as mouth watering as the last, you won't know where to start!


It was a difficult task to be sure but for the sake of research I made my way through the 'Tiny Pieces of Wonderland' sampling each of the different flavours & I have to confess...there was not ONE I did not like. I don't know about you, but when consuming chocolate desserts/confectionery you can often find them to be overly sweet & after indulging in a few, immediately wish you could turn back time & rid yourself of that sickly 'overdone it' feeling. Not the case with these at all. A very good or very bad thing depending on how you look at it! ;)


The chocolate coating is the perfect thickness to bite into, cracking & melting on the tongue delightfully before revealing the scrumptious filling of moist sponge. Depending on the flavour you will either find a deliciously rich chocolate brownie sponge within or my personal favourite, the delicately sweet honey cake.

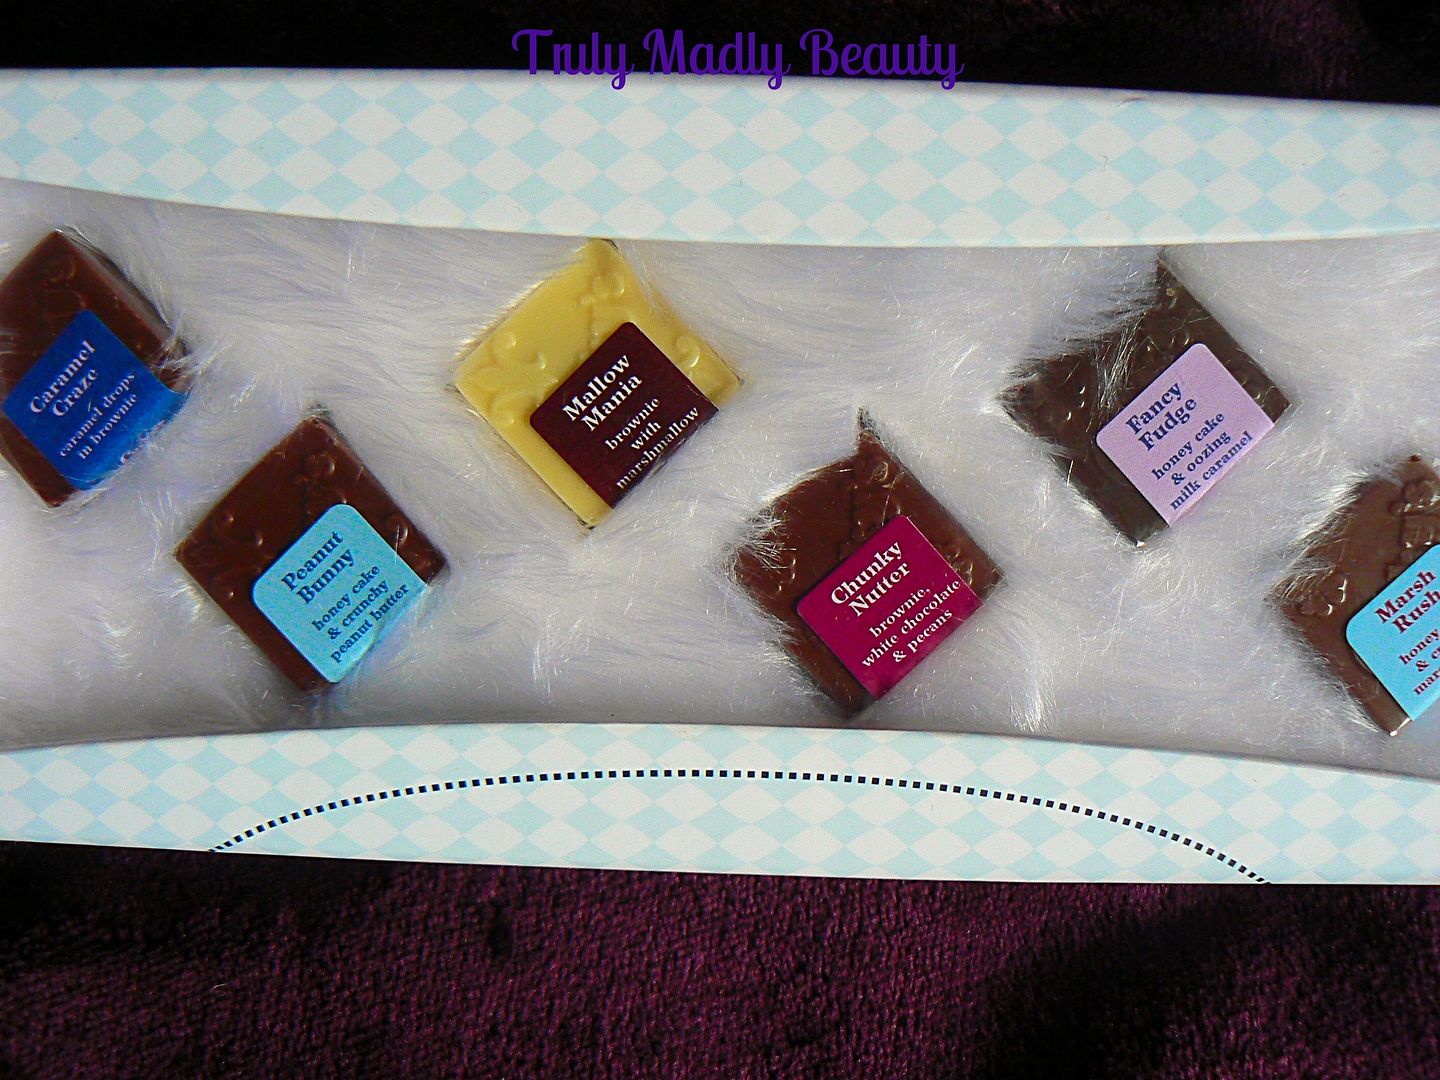
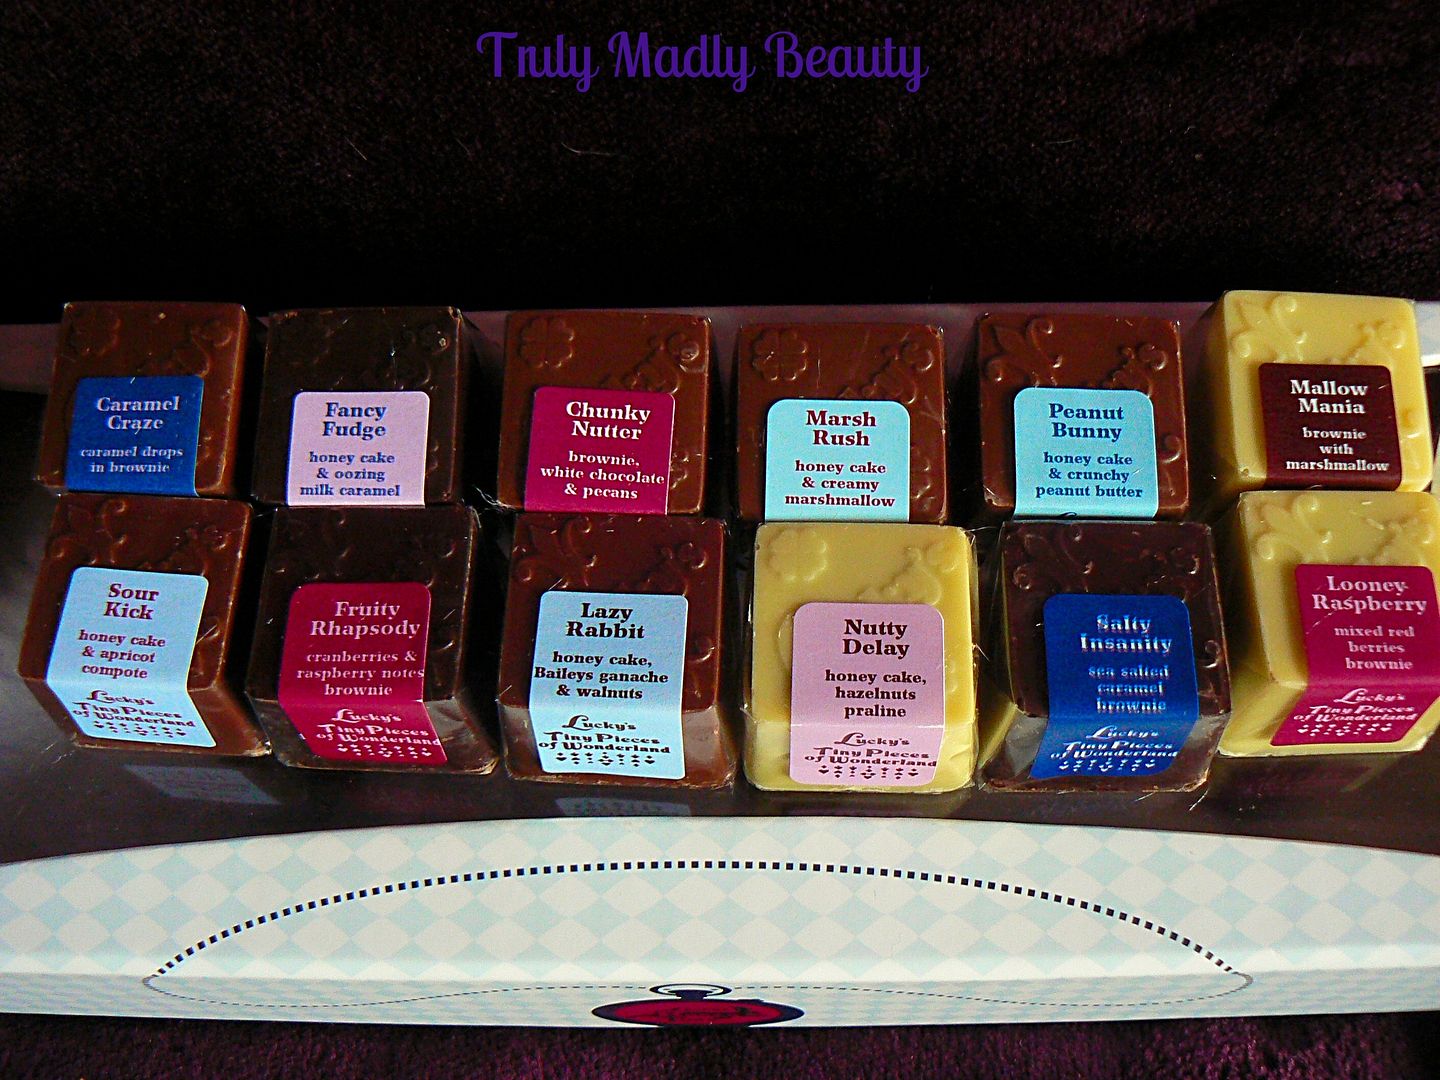
Each Tiny Piece of Wonderland is unique in flavour, you are bound to find something to your taste or if you're like me then just completely adore them all! Here's a wee rundown of the treats you will come across within this giftbox:


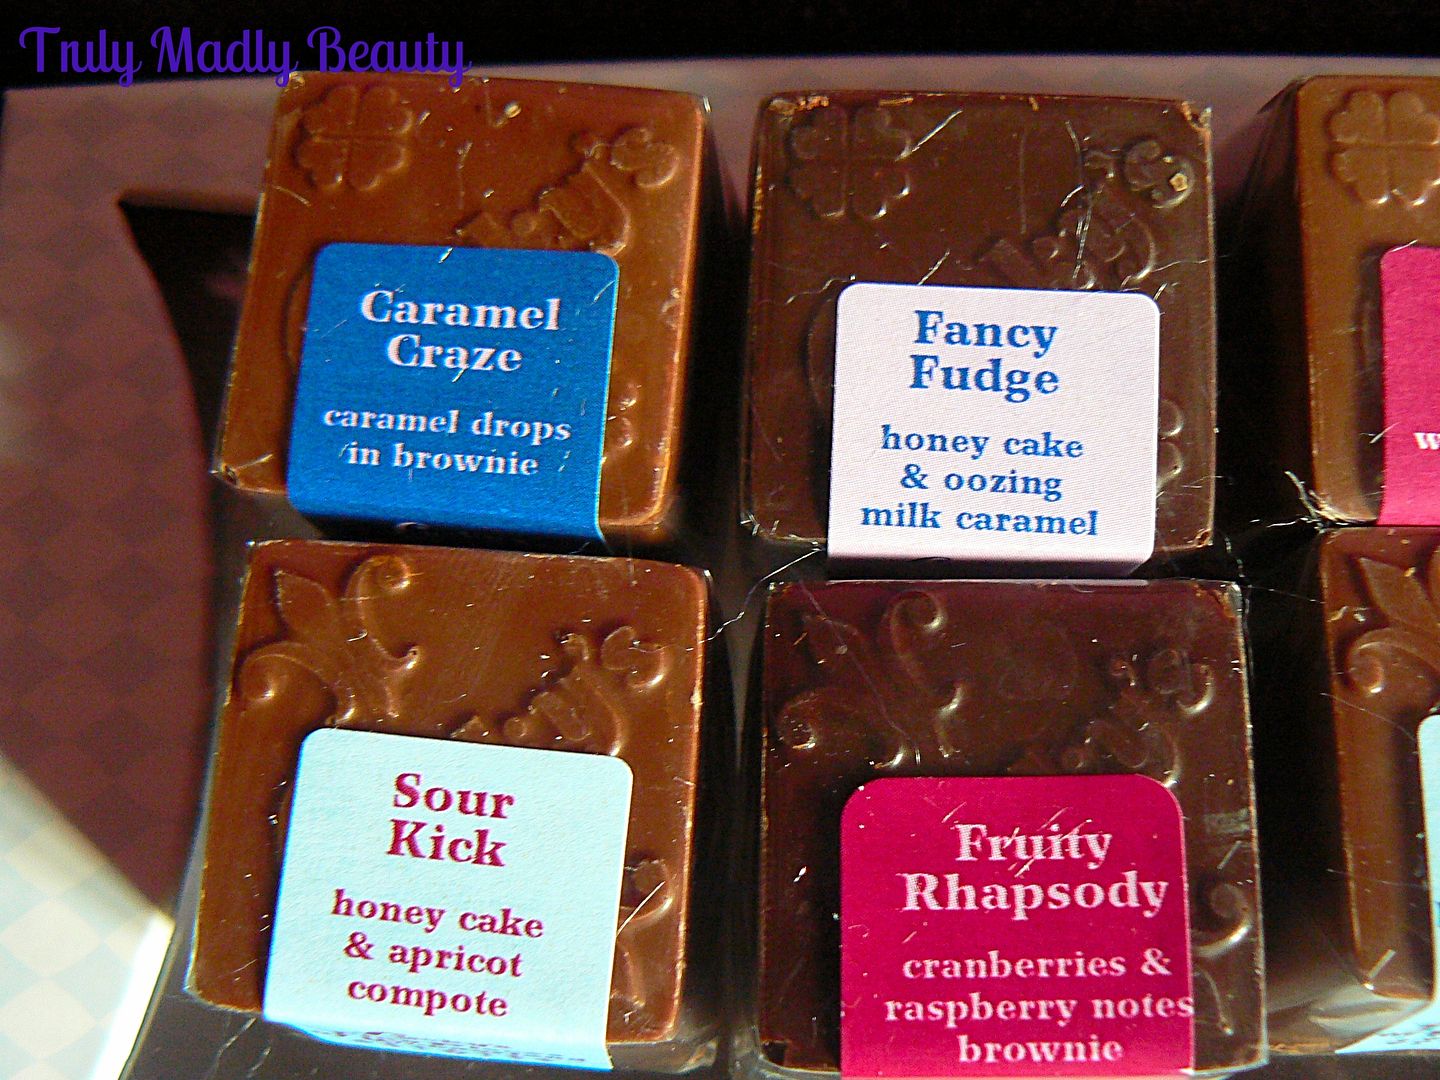
Caramel Craze - Milk chocolate coating & caramel studded brownie
Fancy Fudge - Dark chocolate coating, sweet honey cake & oozing caramel
Fruity Rhapsody - Dark chocolate coating and raspberry brownie
Sour Kick - Milk chocolate coating, honey cake & apricot compote (oh my god SO GOOD!)


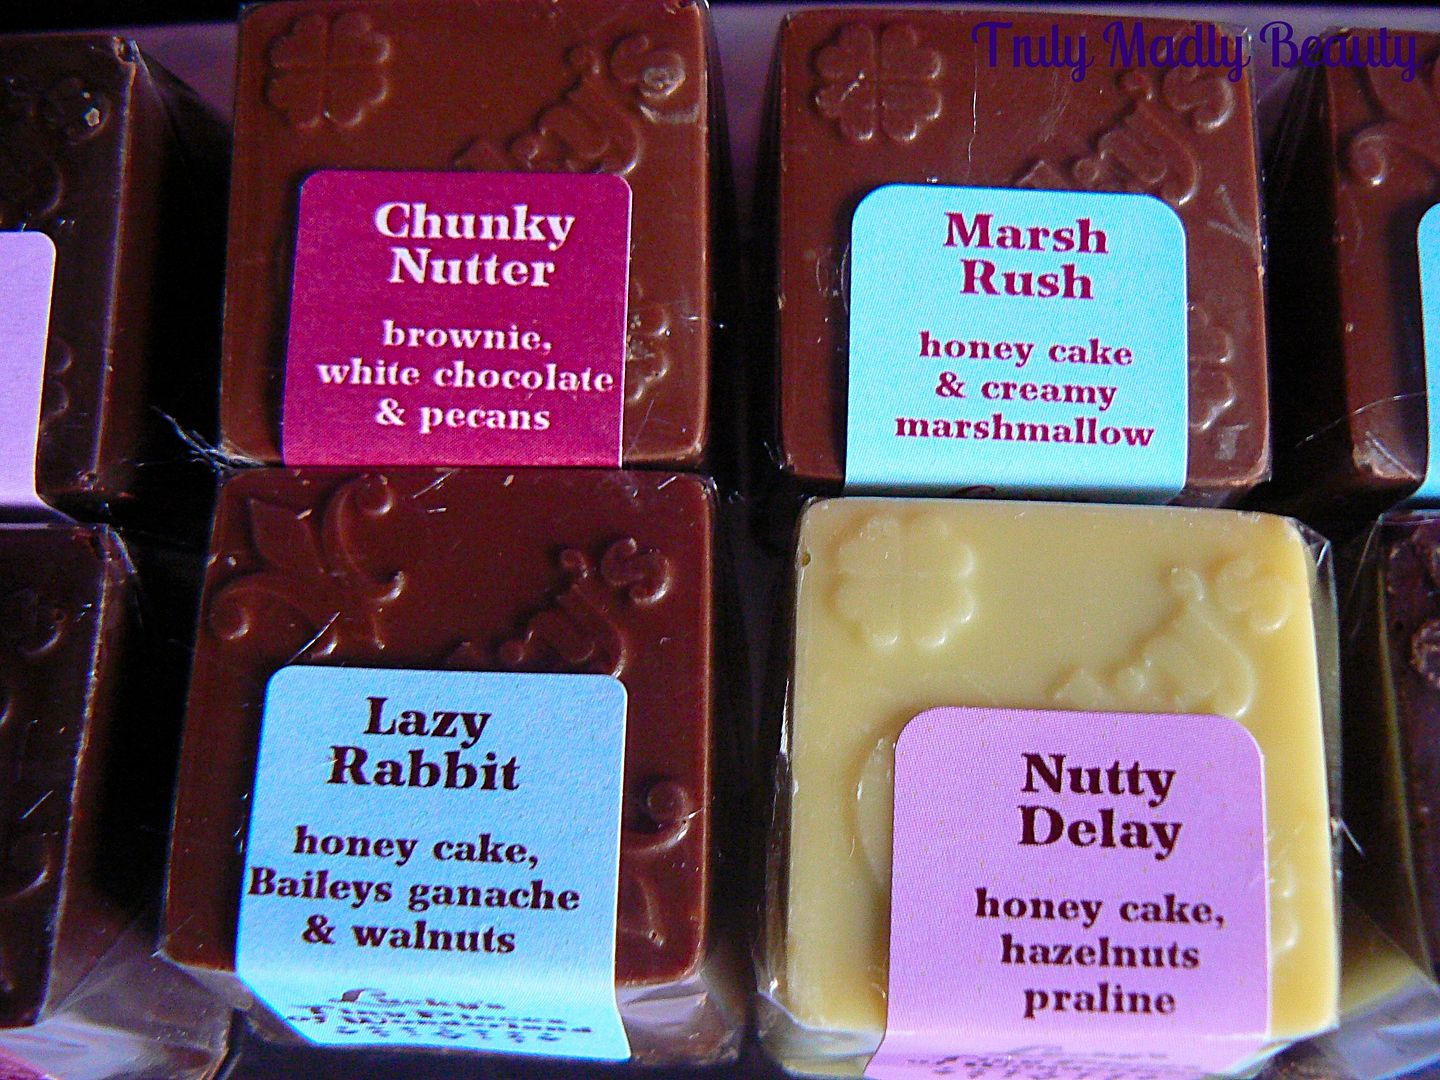
Chunky Nutter - Milk chocolate coating & brownie with white choc chunks & pecans
Marsh Rush - Milk chocolate coating, honey cake & creamy marshmallow (another favourite!)
Lazy Rabbit - Milk chocolate coating, honey cake & Baileys ganache with walnuts
Nutty Delay - White chocolate coating, honey cake, praline & hazelnuts


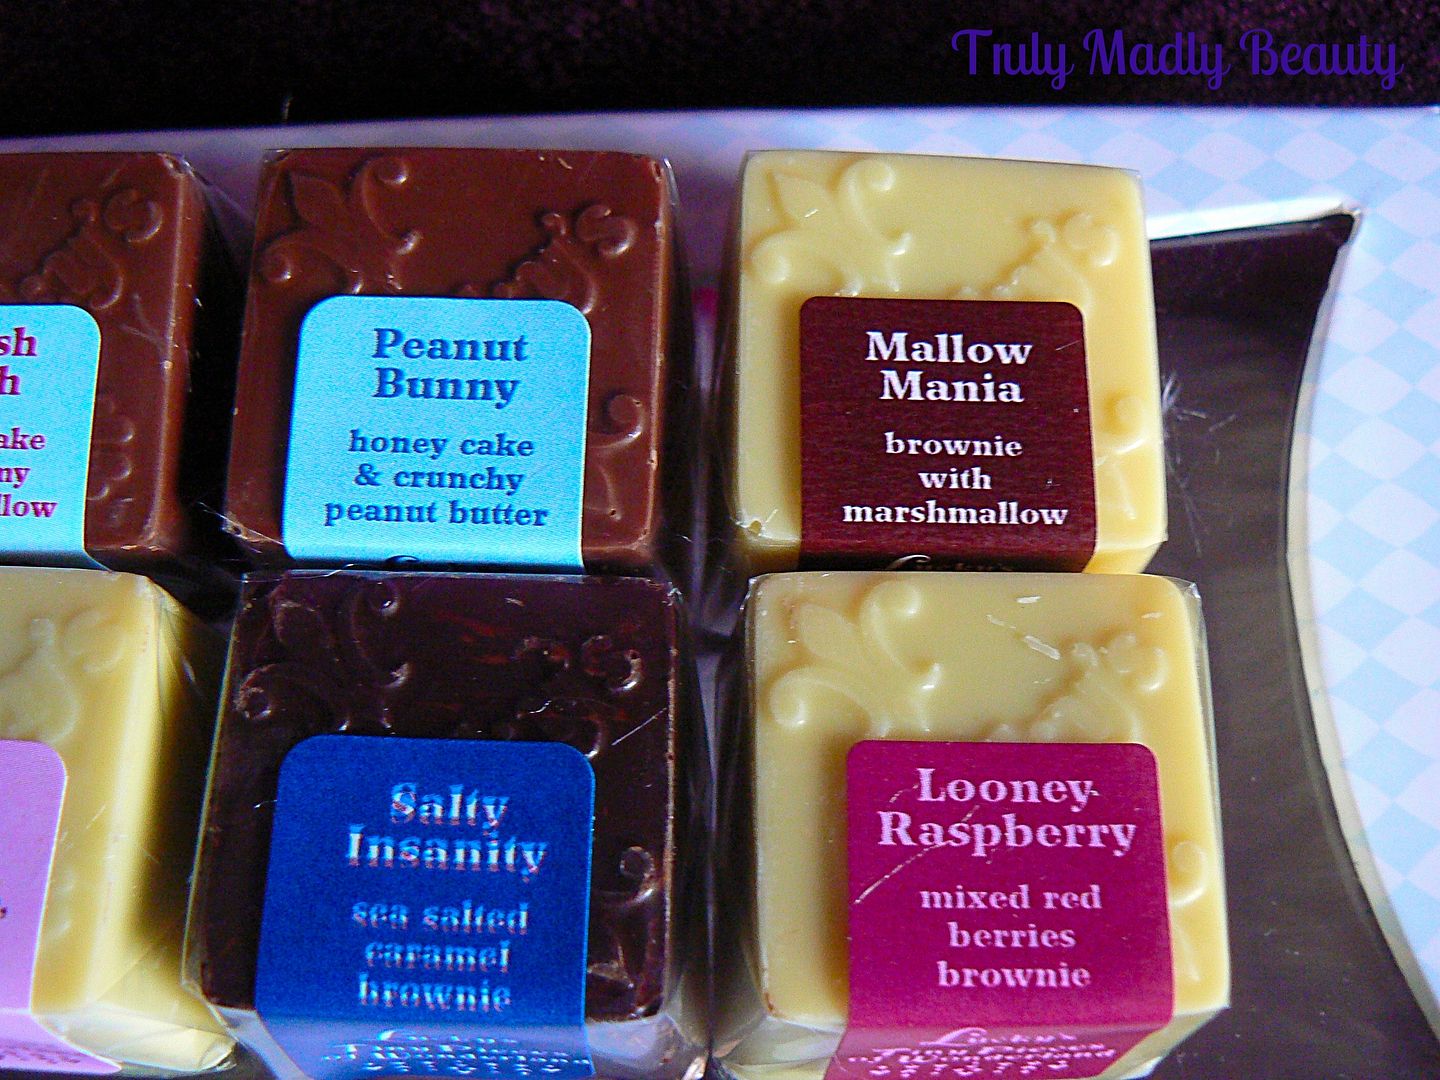
Peanut Bunny - Milk chocolate coating, honey cake & crunchy peanut butter
Mallow Mania - White chocolate coating & marshmallow brownie
Looney Rasberry - White chocolate coating & red berries brownie
Salty Insanity - Dark chocolate coating & sea salted caramel brownie

*passes tissue to attend the inevitable drooling*...Pretty beautiful sounding selection am I right? It was hard but I managed to sample all of the delights, each one such a heavenly experience on the tastebuds. My personal favourites were the Marsh Rush containing smooth sweet marshmallow & the Sour Kick, with its lovely combination of sweet honey cake & tangy compote...AMAZING.


The Tiny Pieces White Rabbit gift box is priced £34.95 with all the treats freshly made on order. All of the range is suitable for vegetarians but a few will contain traces of nuts so do be aware. The whole concept of Fairy Tale Gourmet is just magical to me, indulging & satisfying both my love of fairy-tales & sweet goodness with its quirky uniqueness & supreme quality. You know your sampling something special.


I think these would make such a wonderful gift for someone this Xmas or any occasion, I know I would be over the moon to be on the receiving end! Go have a gander of their website & see what other magical delights they have to offer, you won't regret it! 

Thanks as always for reading!

Lotsa love to ya!


*Disclaimer - please note as mentioned I won the gift box in a competition & was under NO obligation to blog about it, I have only chosen to do so to spread the awesomeness!*


12.18.2015

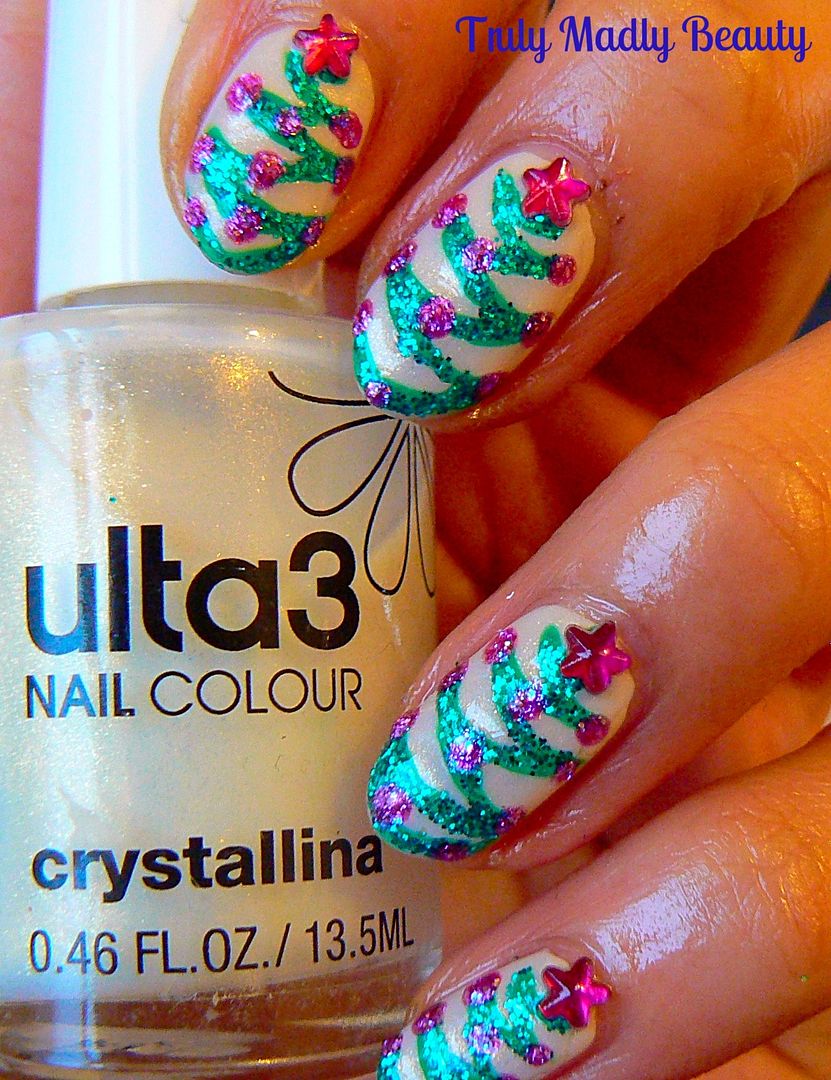
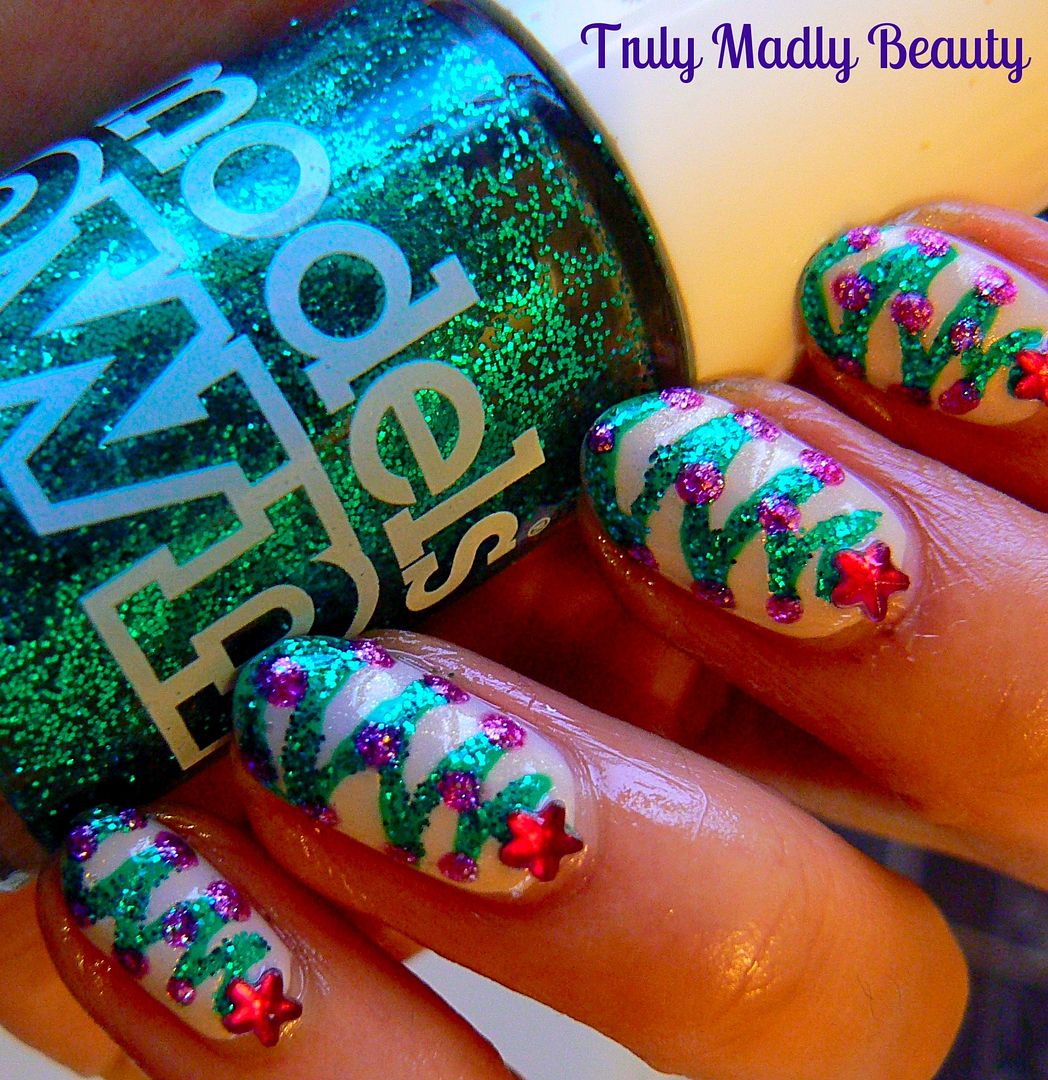
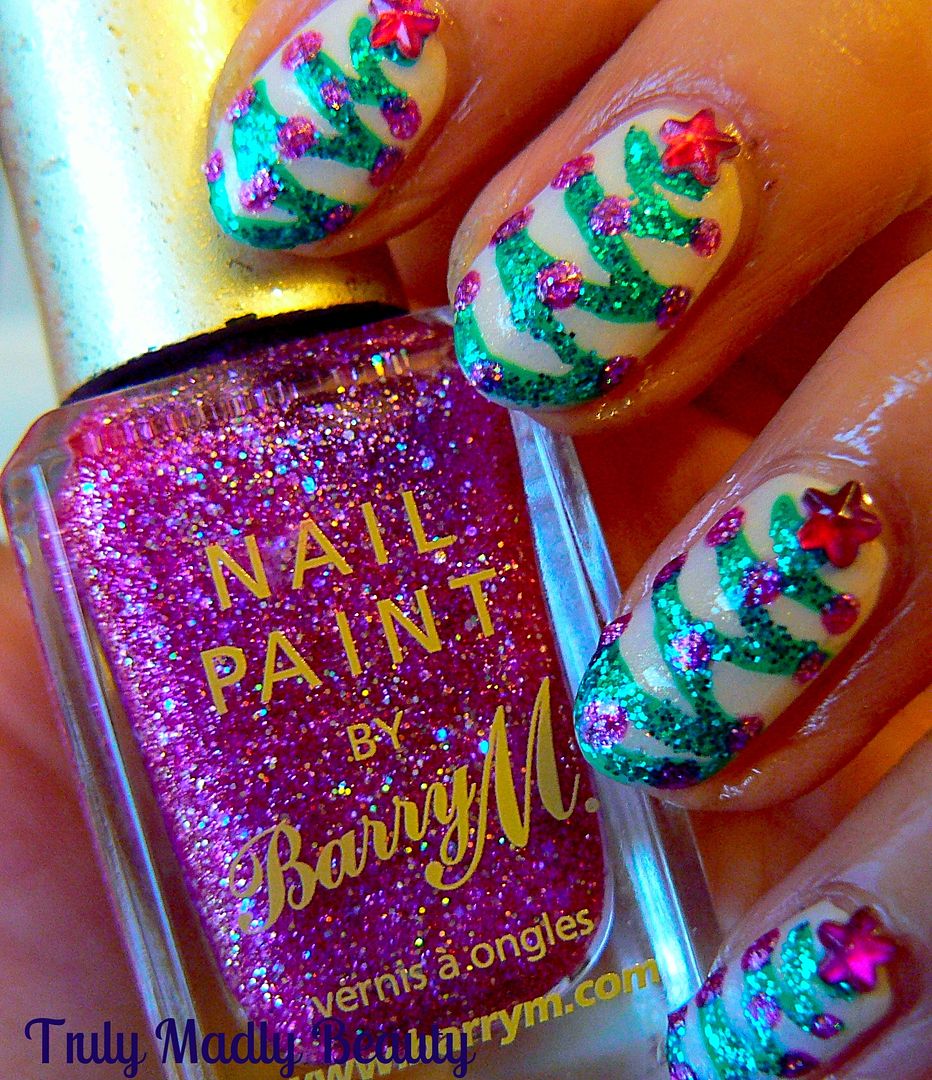
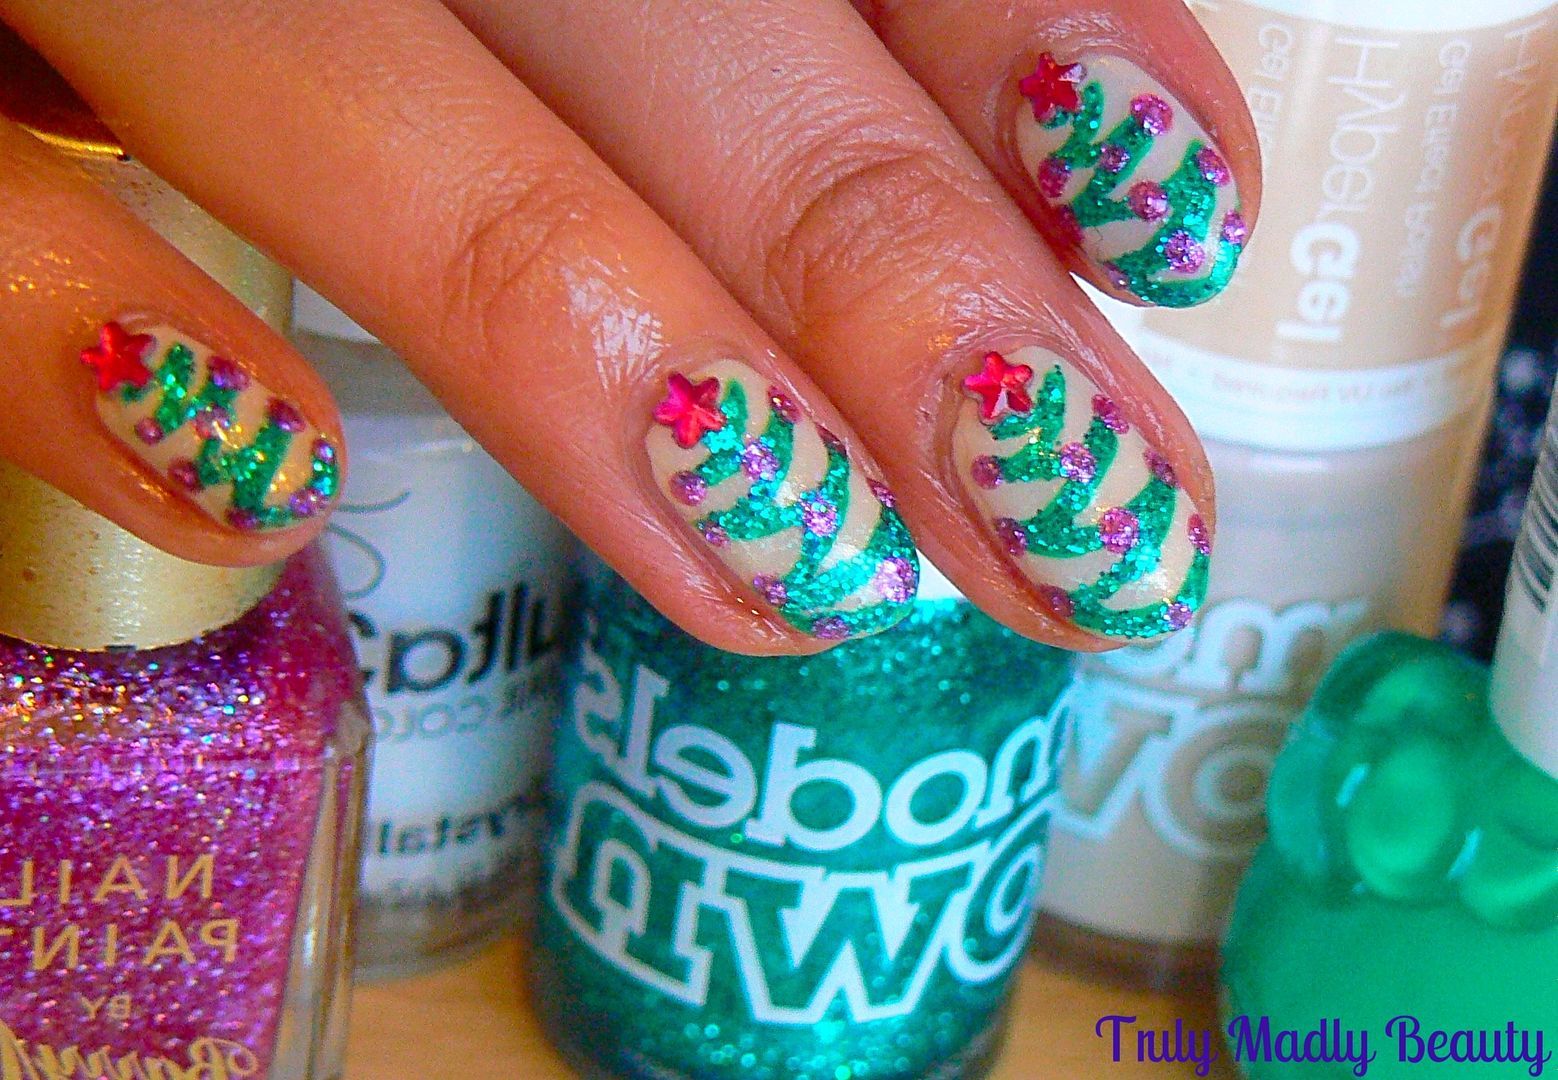
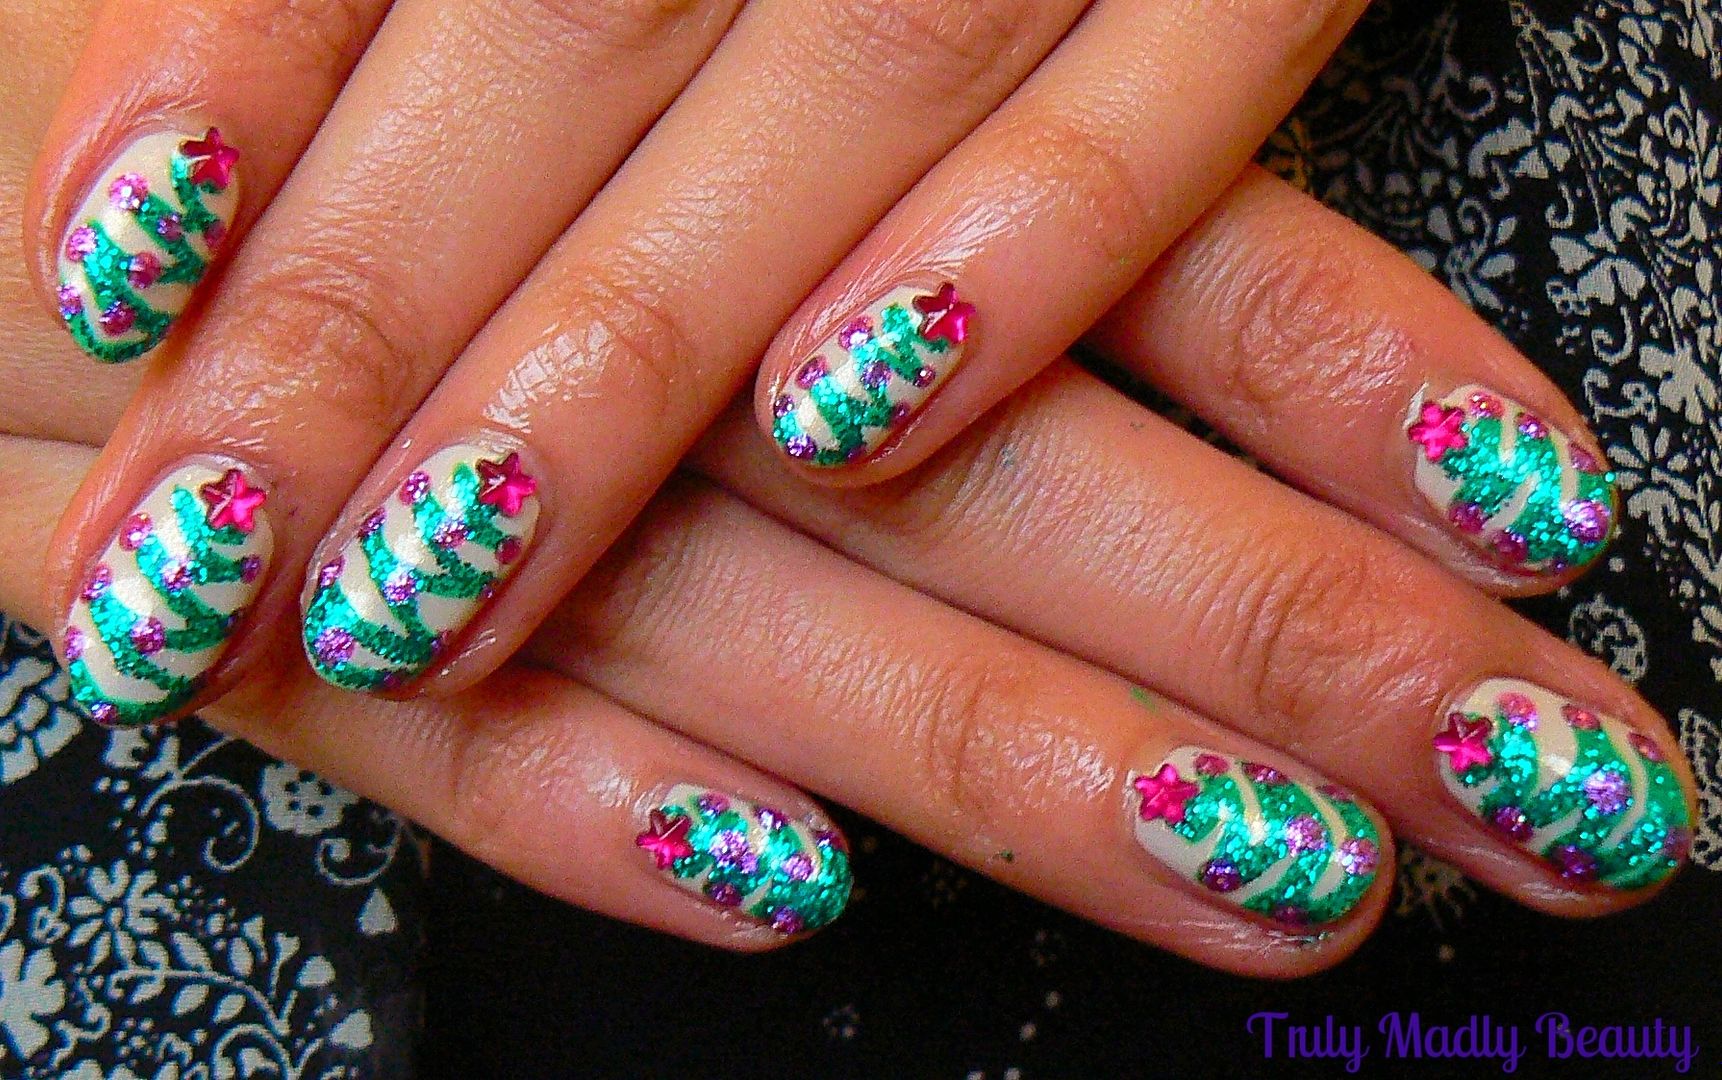
Festive Nails - Xmas Trees!

Hello there my lovely readers!

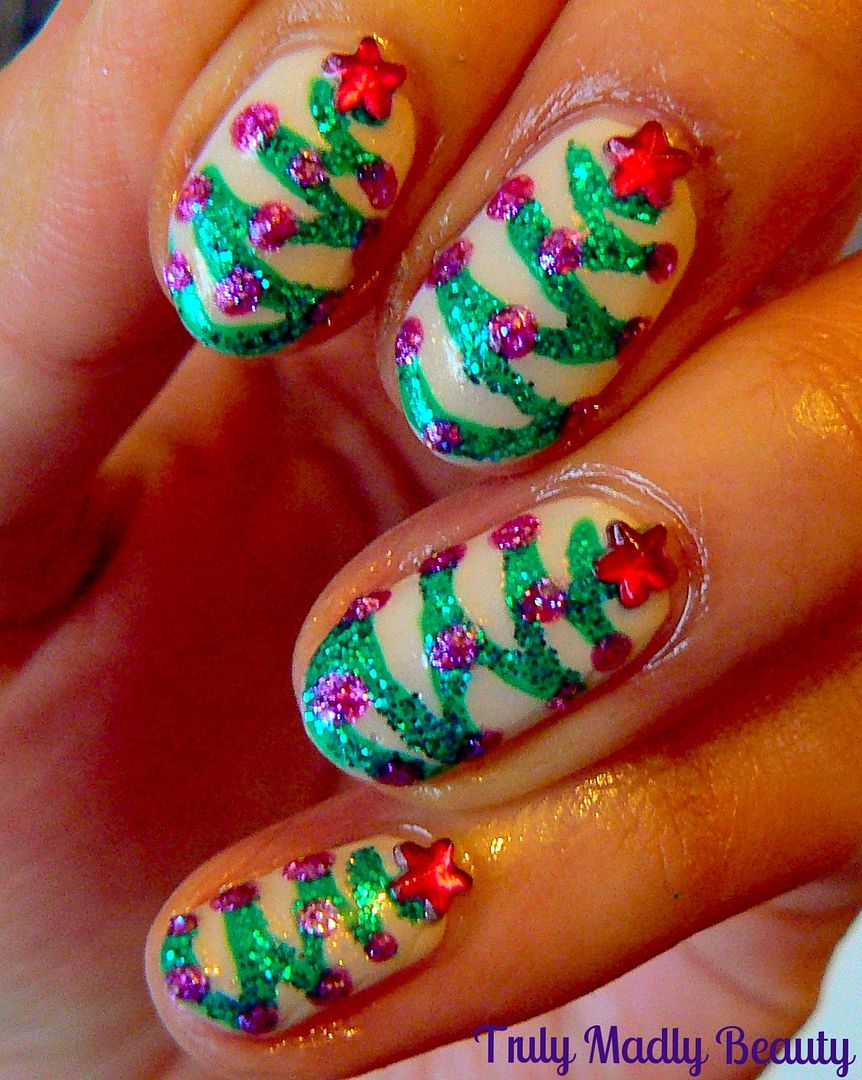
You can't really get more festive than with Christmas Tree's eh & its a design which I like to do on my nails every year. You can check out my last two HERE and HERE. I try & change up the design a wee bit each time & go for something new which is what I have done again this year & I think this may actually be my favourite! So without further ado, here's Festive mani number 4...Christmas Trees!


What I love about this design is that its great if you're a bit uneasy with doing complex nail art as the design is nice, simple & relatively straightforward to create!

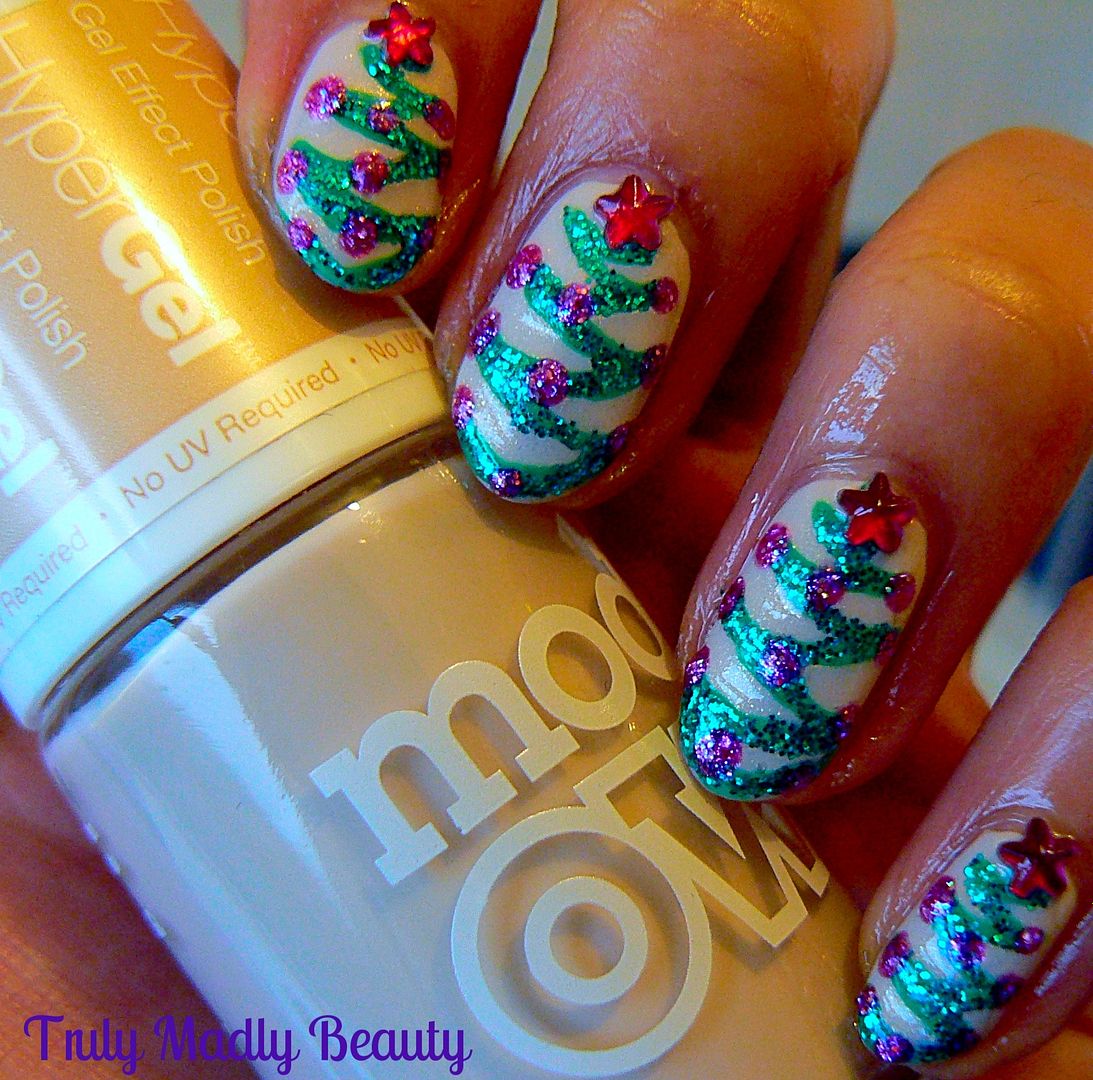
I wanted my trees to stand out as...well..we know I've made the mistake of using too dark a base before...AHEM O_O *flashbacks to HERE...erases from memory* So for my base this time I opted for Models Own Hypergel in Naked Glow, a really lovely nude beige which I applied just one coat of.


The reason why I did only one coat of the nude is because I wanted to add another coat of this delightful opalescent shimmer polish Crystallina by Ulta3, which gives the base a subtle yet oh so pretty golden luminescence that makes one feel rather fairy-esque.


Now for the trees, to create these I reached for my Pure Color 10 brush which is probably my best nail art purchase this year! Love this brush so much as it has super fine bristles, great for details. I dipped my brush in to some green polish which came courtesy of this absolutely darn ADORABLE Hello Kitty nail polish that I found in TK Maxx & which I may have entirely picked up purely for the bottle...o_O


Starting from the top of the nail by the cuticle, start your tree with a little curved line at an angle for the top point, then gradually zig zag your way down the nail, adding more curved lines, making each line slightly wider than the one above before finishing the bottom of the tree by the nail tip.


To add more definition to the trees & because really there is no need to justify glitter at Xmas is there, I went over the the trees with Models Own Emerald City glitter.


You can't have a tree without some bauble action so for these I reached for this lovely bright pink sparkler Socialite by Barry M. Such a lovely festive shade, I'm tempted to do a pedi with this! To add the baubles I just used a small dotting tool & dotted the polish on to the pointed edges & down the centre of the tree.


Finally every tree needs its topper, here I went for a lovely bright pink star to crown my trees with.


Finish it all with a nice slick of topcoat & your done! Hope you liked this variation on a Christmas Tree manicure lovelies! Thanks for stopping by!

Lots of love to ya!


12.14.2015

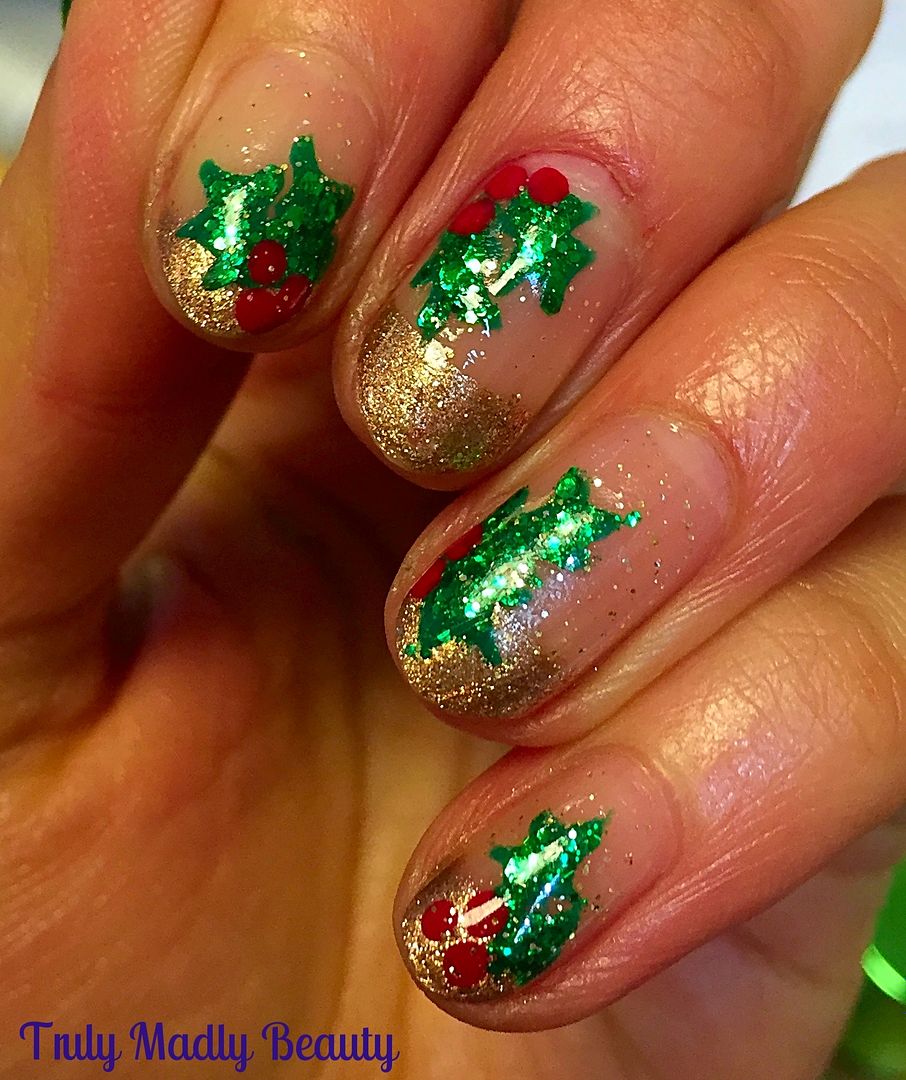
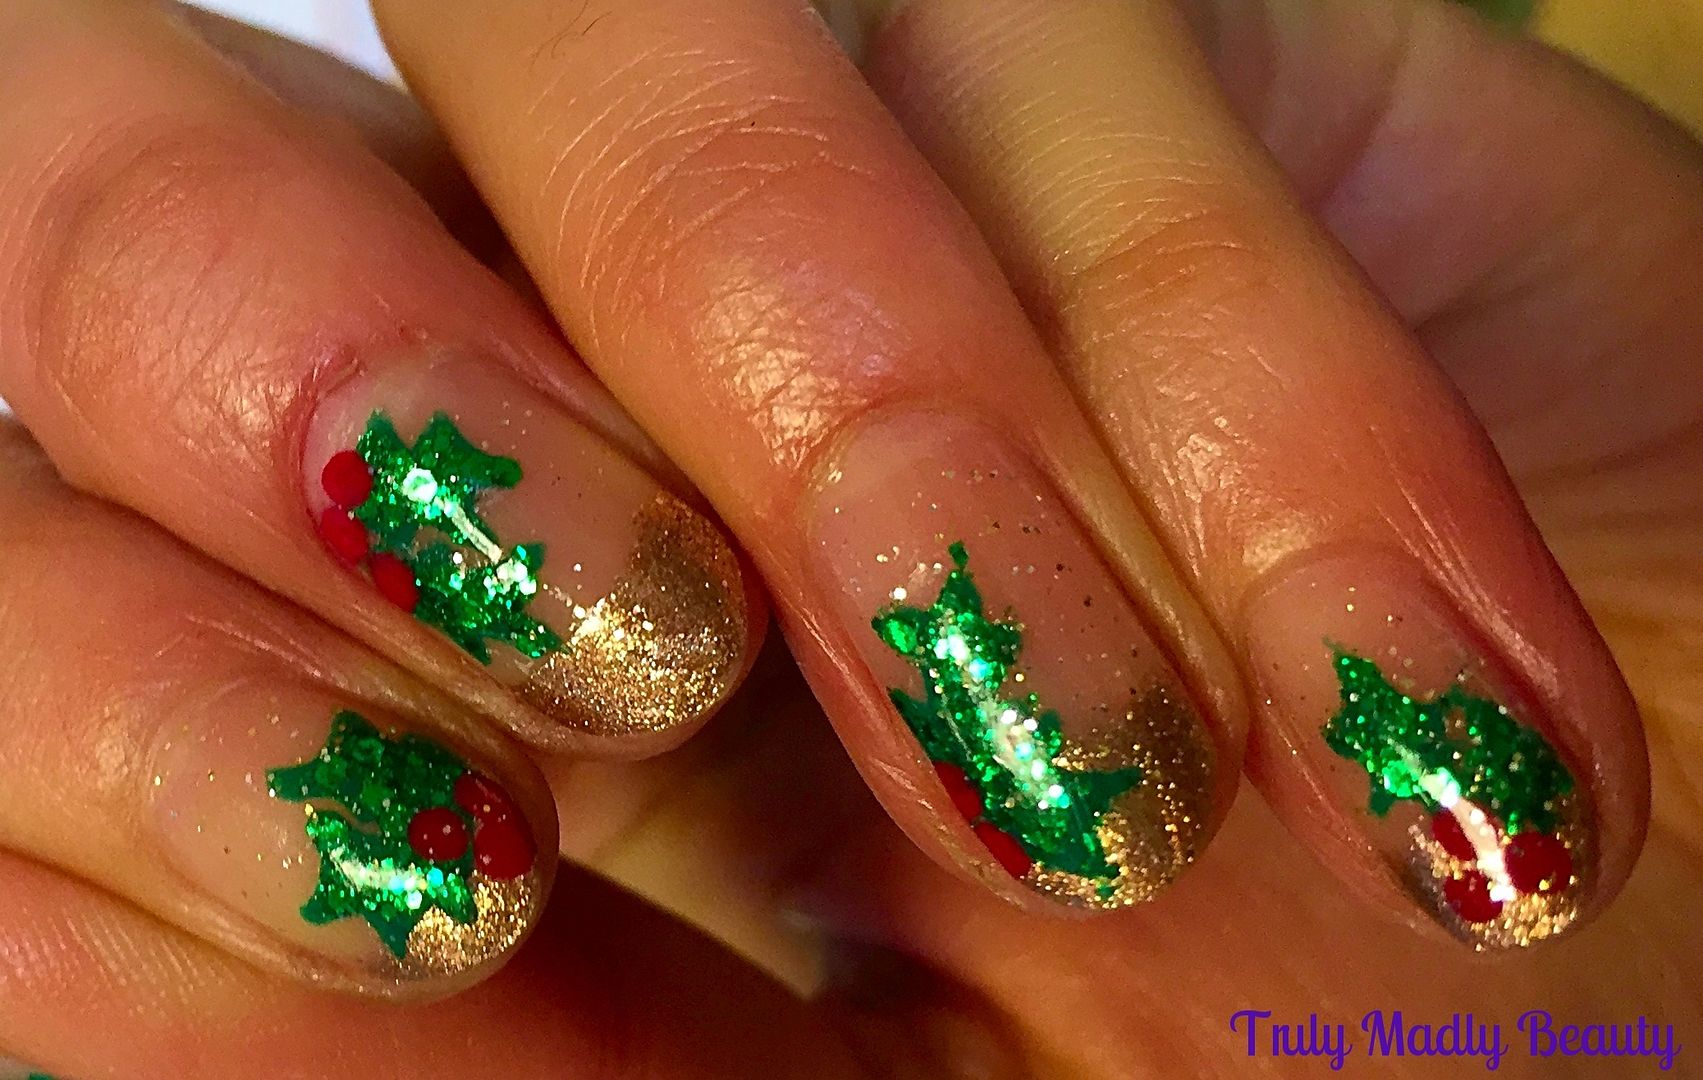
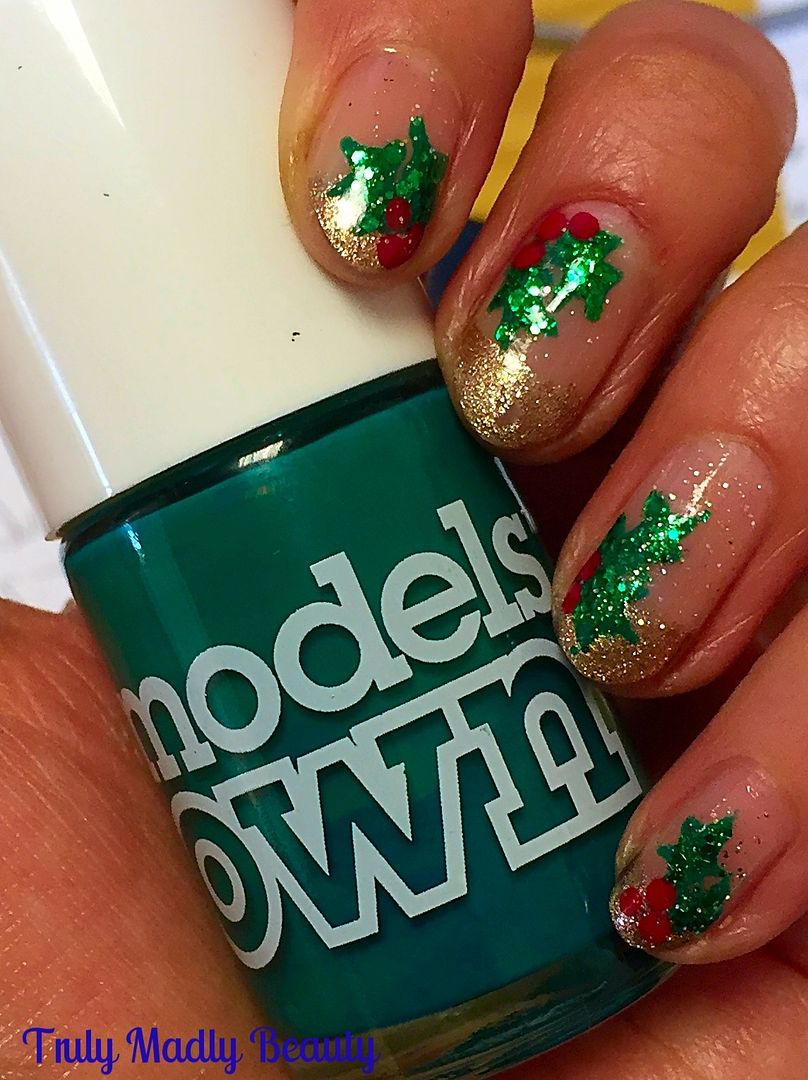
Festive Nails - Sparkly Holly & Gold Tips!

Hello lovely readers!

Continuing on with the festive manicures I thought I'd simplify things a tad (after the stress of the previous manicure can you blame me?!) Plus I wanted to show that you don't necessarily have to go all out glitter seizure for Xmas, even though that's always nice. If you prefer something a bit more low key yet still super festive then why not go for these gold french tips with sparkly holly? 


And they couldn't be easier to do :) Start with a bare base, whenever I do french tips I always skip base coat/polish as I'll be using stick on mani guides, plus I'm just super lazy & not patient enough waiting for it to dry! Bad Aysh. But of course if you can apply a protective base coat or pale nude colour then definitely do so!


As mentioned I use french manicure guides to do the tips, which I pick up super cheaply off ebay or you can also use hole punch reinforcers as they work just as well! After sticking the guides in place apply your gold polish of choice across the tips. Here I've used the divine True Brit London Heirloom, a truly lovely royal rose tinted gold.


Then slowly peel away & remove the guides whilst the polish is still wet, this is important as you can risk dragging the polish off completely if left to dry. Don't worry if the smile line on your french tips is still a bit wonky, simply use a wee angled brush dipped in some acetone to clean up any messy areas for a nice clean curve. 


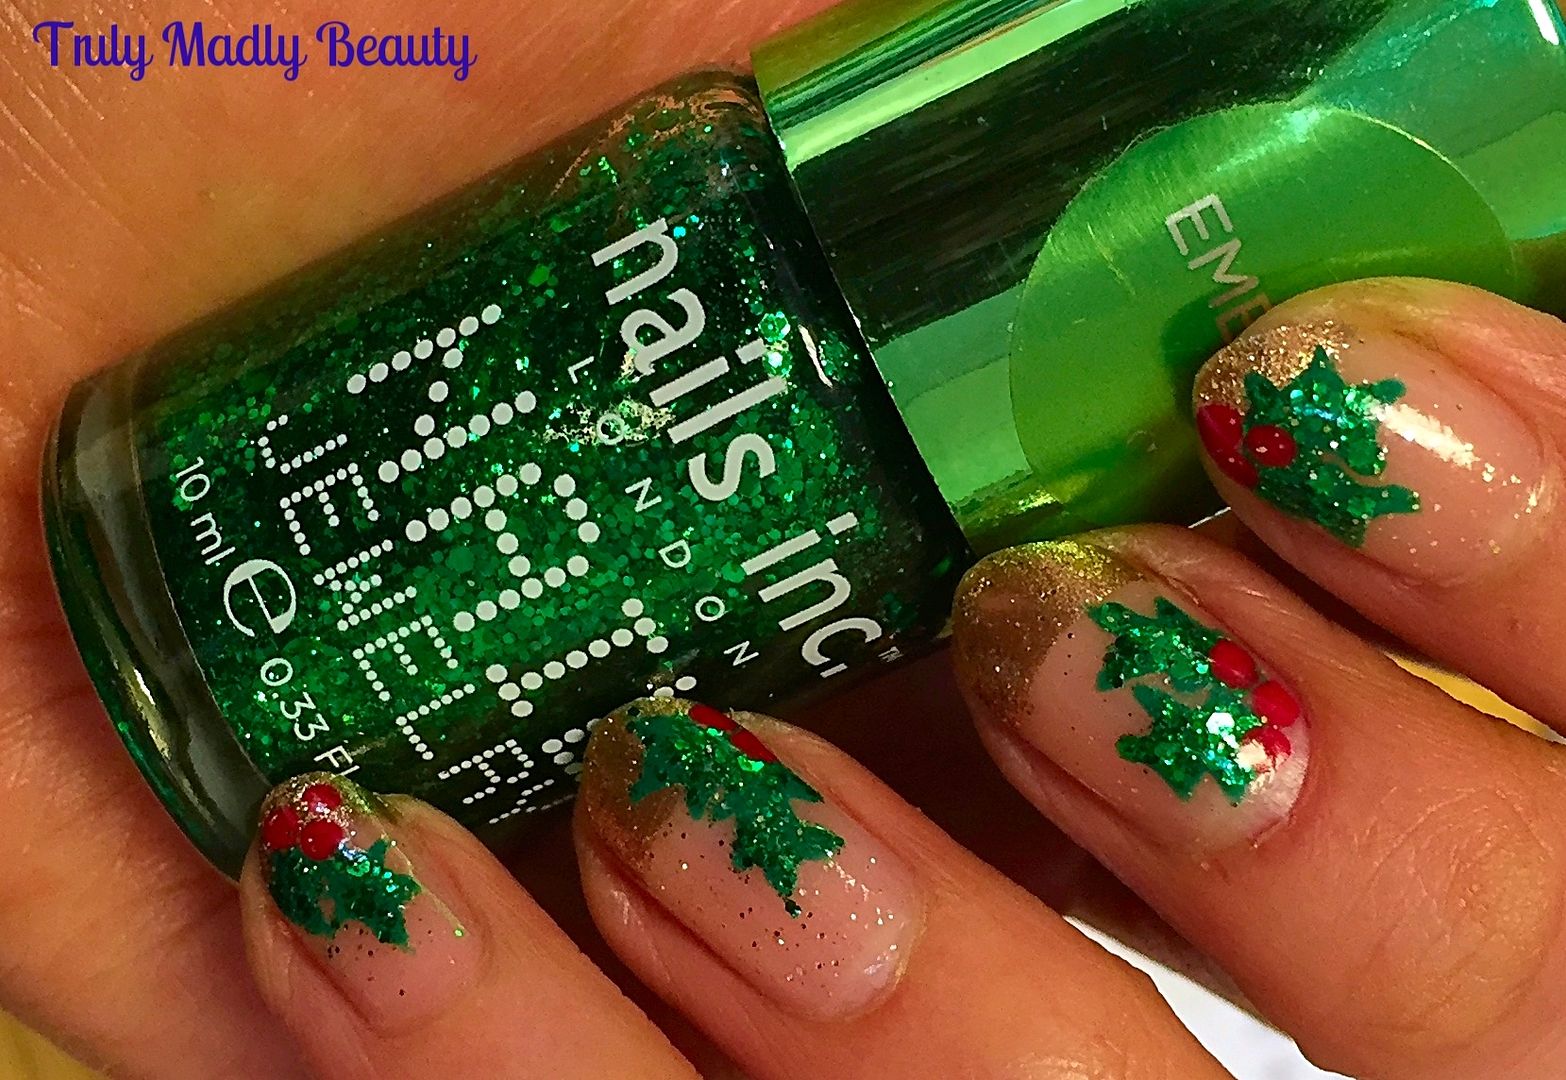
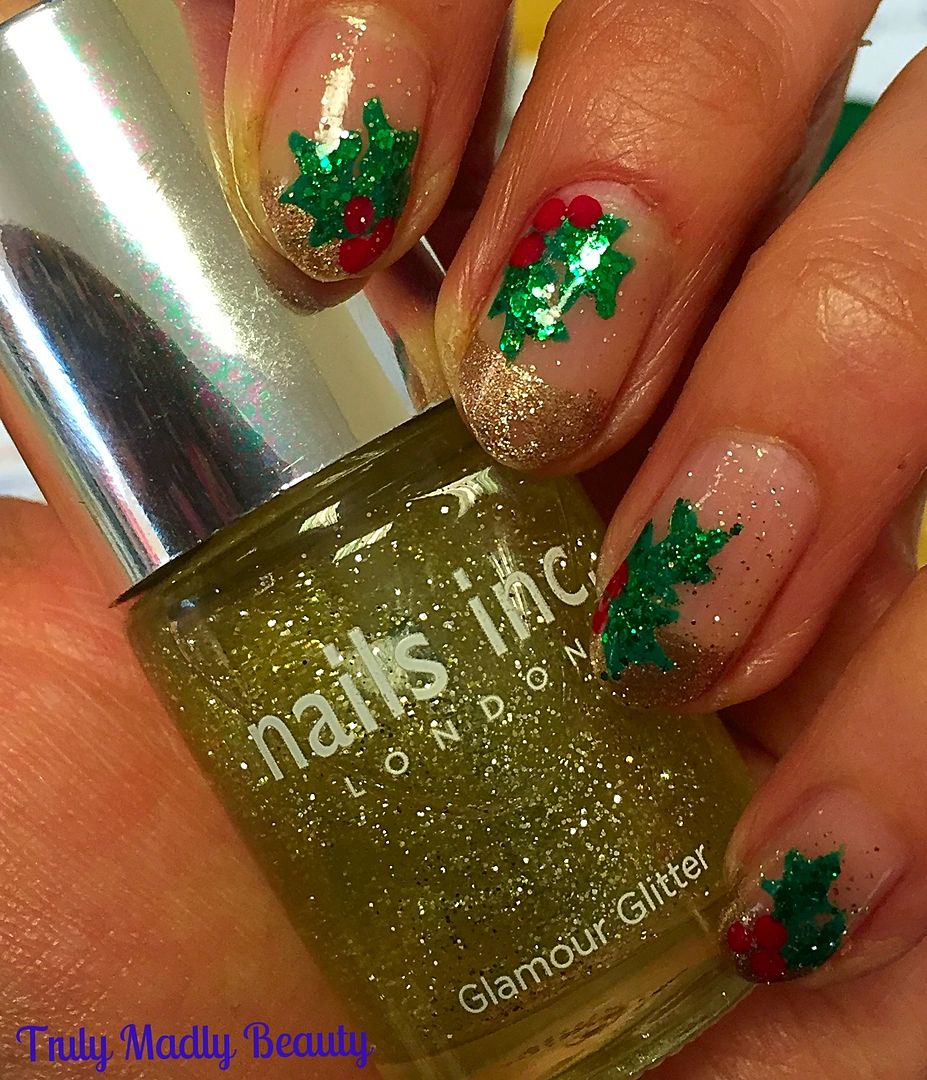
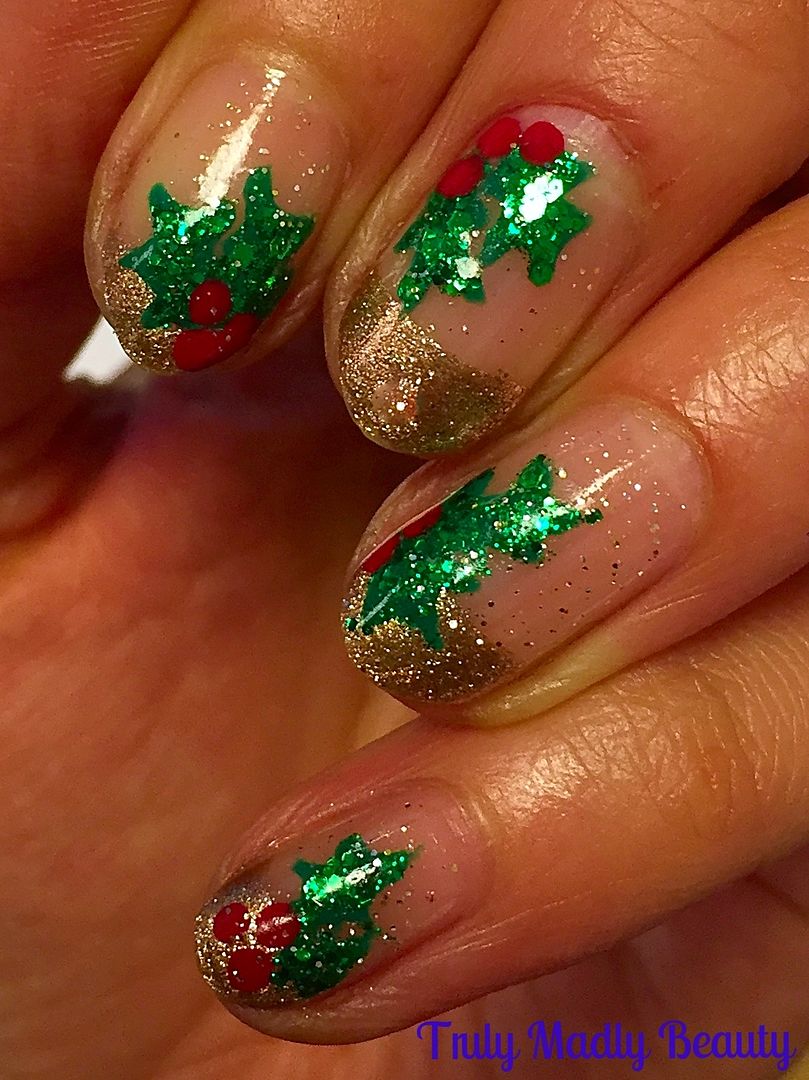
Next for our holly nail art, I used my Pure Color 10 nail art brush to freehand the leaves first using Models Own Green Tea. Instead of keeping it the same I decided to place my holly in different areas on each nail. Drawing the leaves is quite straightforward, almost like drawing small Xmas trees, I start with drawing a straight line before adding zig zag pointed edges either side & filling in.


Of course at this point I simply had to go in with SOME glitter, here I've used Nails Inc Piccadilly Arcade, a gorgeous emerald green sparkler that I just dabbed on top of the leaves to really bring the green to life. For the berries just use a random red polish & a dotting tool & place three red dots by your leaves, feel free to add a bit of red glitter on top if you want more sparkle!


For a final touch I applied a thin coat of Nails Inc Glamour Glitter over the whole nail, a very pretty pale gold macro glitter topper, its delicate sparkle jazzes up the manicure nicely.


Finish with topcoat for that glossy finish & you're done! Hope you liked this slightly more subtle yet no less festive manicure lovelies! Thanks for reading!

Lotsa love to ya!

12.13.2015

Happy Feet - Winter Foot Pampering!

Hello there my lovely readers,

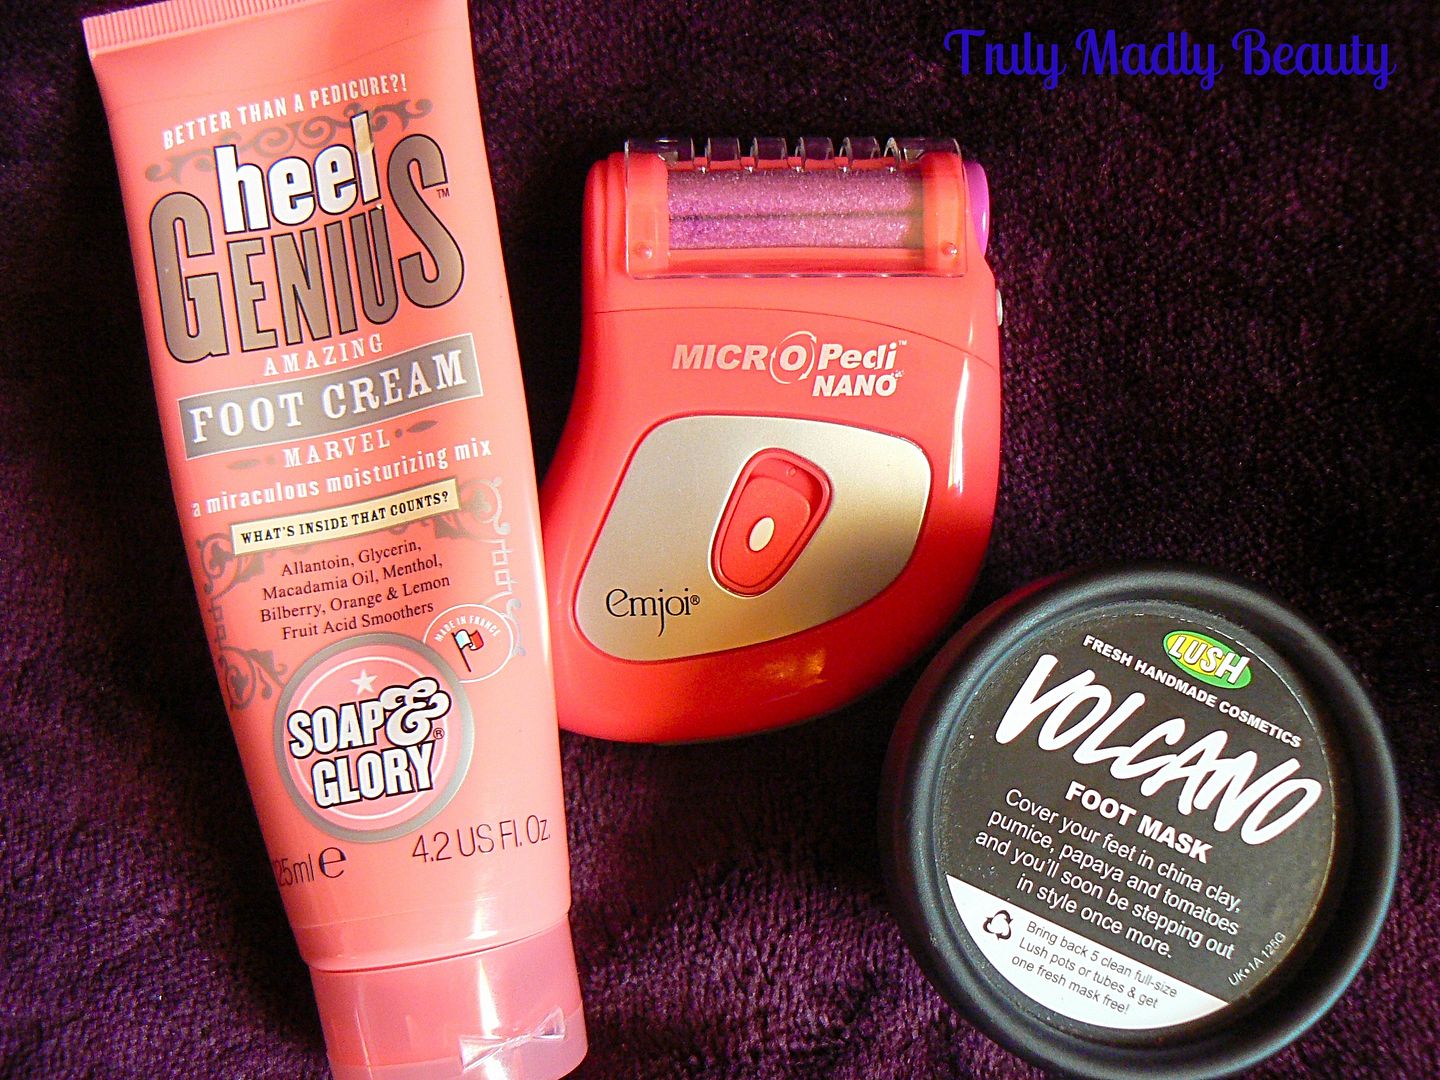
Now, the tootsies are a topic that no one likes to get in to too much detail about, however just because we now find ourselves in the season of wrapping up the layers, doesn't mean we should start neglecting our little feet, we do owe them a lot after all, getting us from a-z everyday, often suffering at the hands of high heel torture ;) Every now & again I like to treat myself to a wee foot pamper session to keep them in as tip top condition as possible, with the help of these few essential products that have become firm favorites of mine.


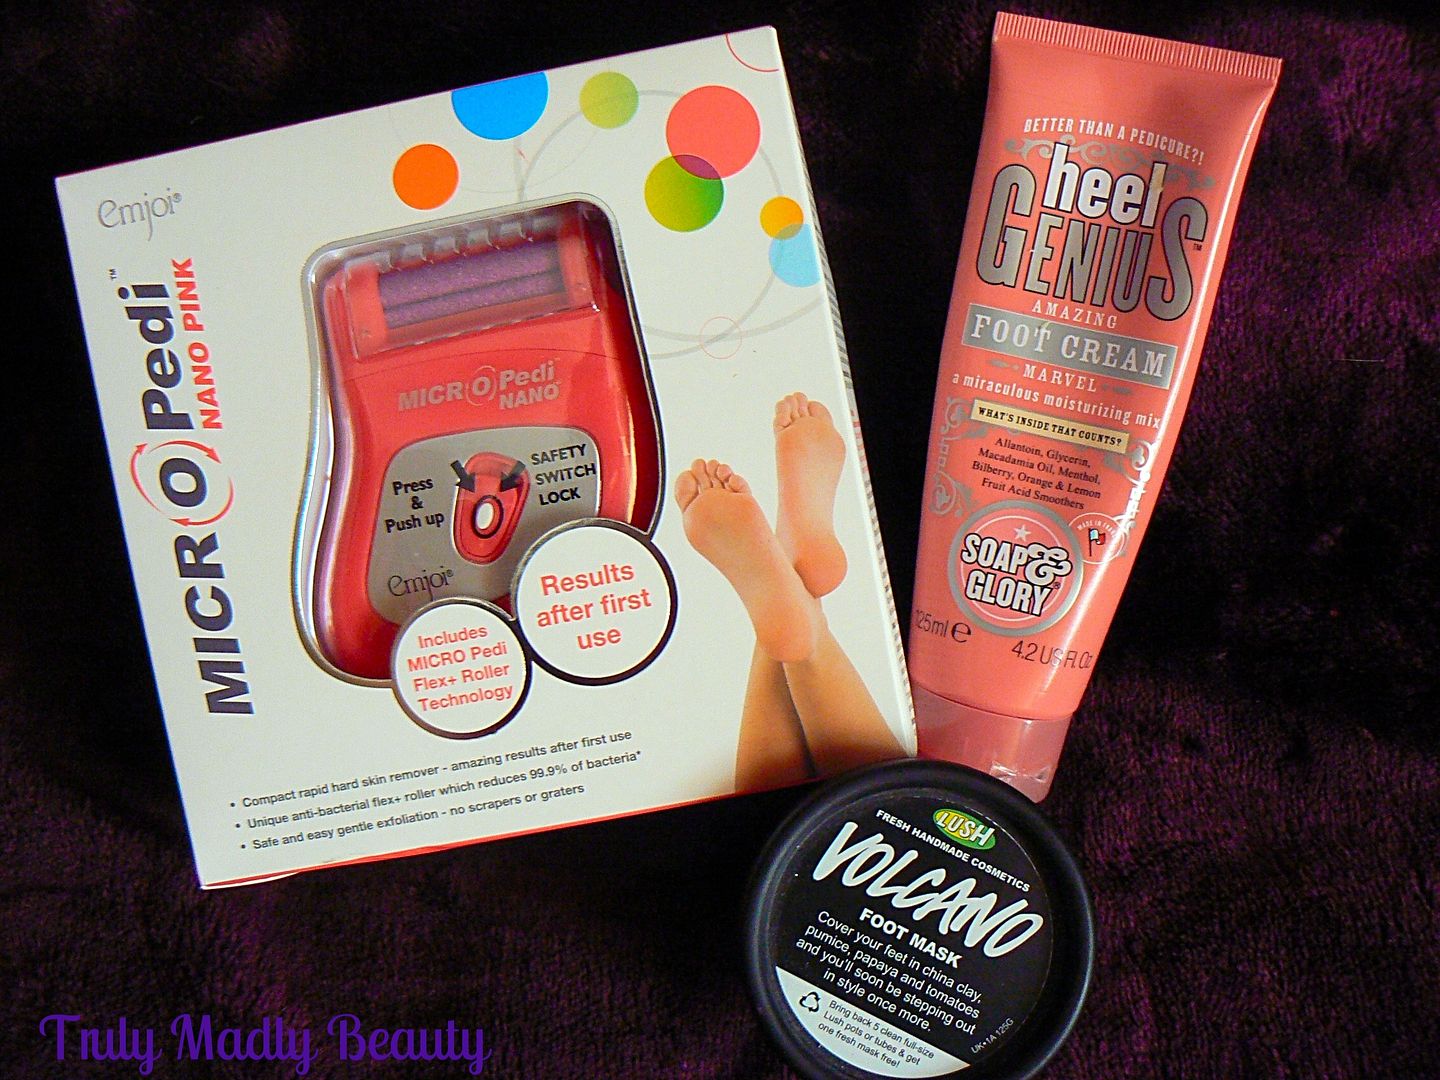
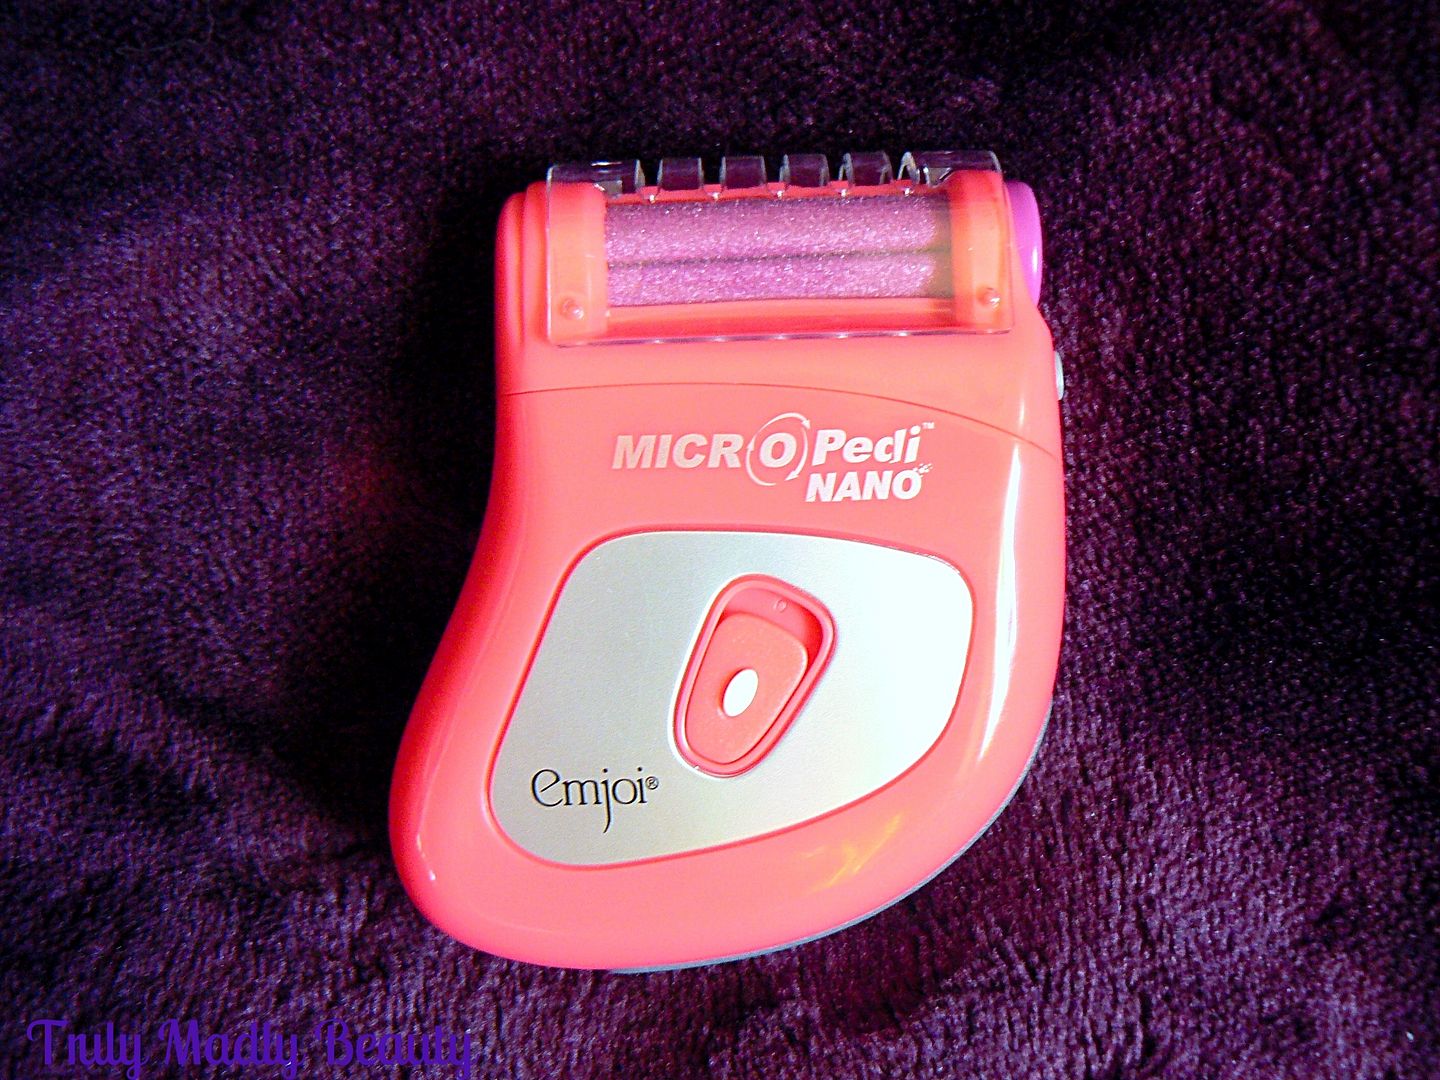
First up we have the *Emjoi Micro Pedi Nano foot exfoliating device. You may be familiar with this range available in Boots, of which I am already a fan of. I've tried & tested the MicroNail Electronic Buffer & been very impressed with the results of beautifully buffed shiny nails. Emjoi also offer a range of electronic foot exfoliaters, including this new addition which not only comes in a range of cheerfully bright colours but is also travel sized for your convenience!

The Emjoi Micro Pedi Nano (RRP £29.95) is battery operated (2xAA) & works by gently removing hard rough skin with the use of the unique anti-bacterial Flex + roller technology that contours around the foot enabling you to gently yet effectively exfoliate those hard to reach places.


Thanks to its compact size, you can easily pop the Micro Pedi Nano in your travel bag without taking up too much space & it is so easy to use, in the space of minutes you are left with smooth soft skin. I've used this quite a few times, noticing a visible difference & the little Nano has been perfect to prep the feet for the next stage of my foot pamper routine, bringing me on to my next product...LUSH Volcano Foot Mask!


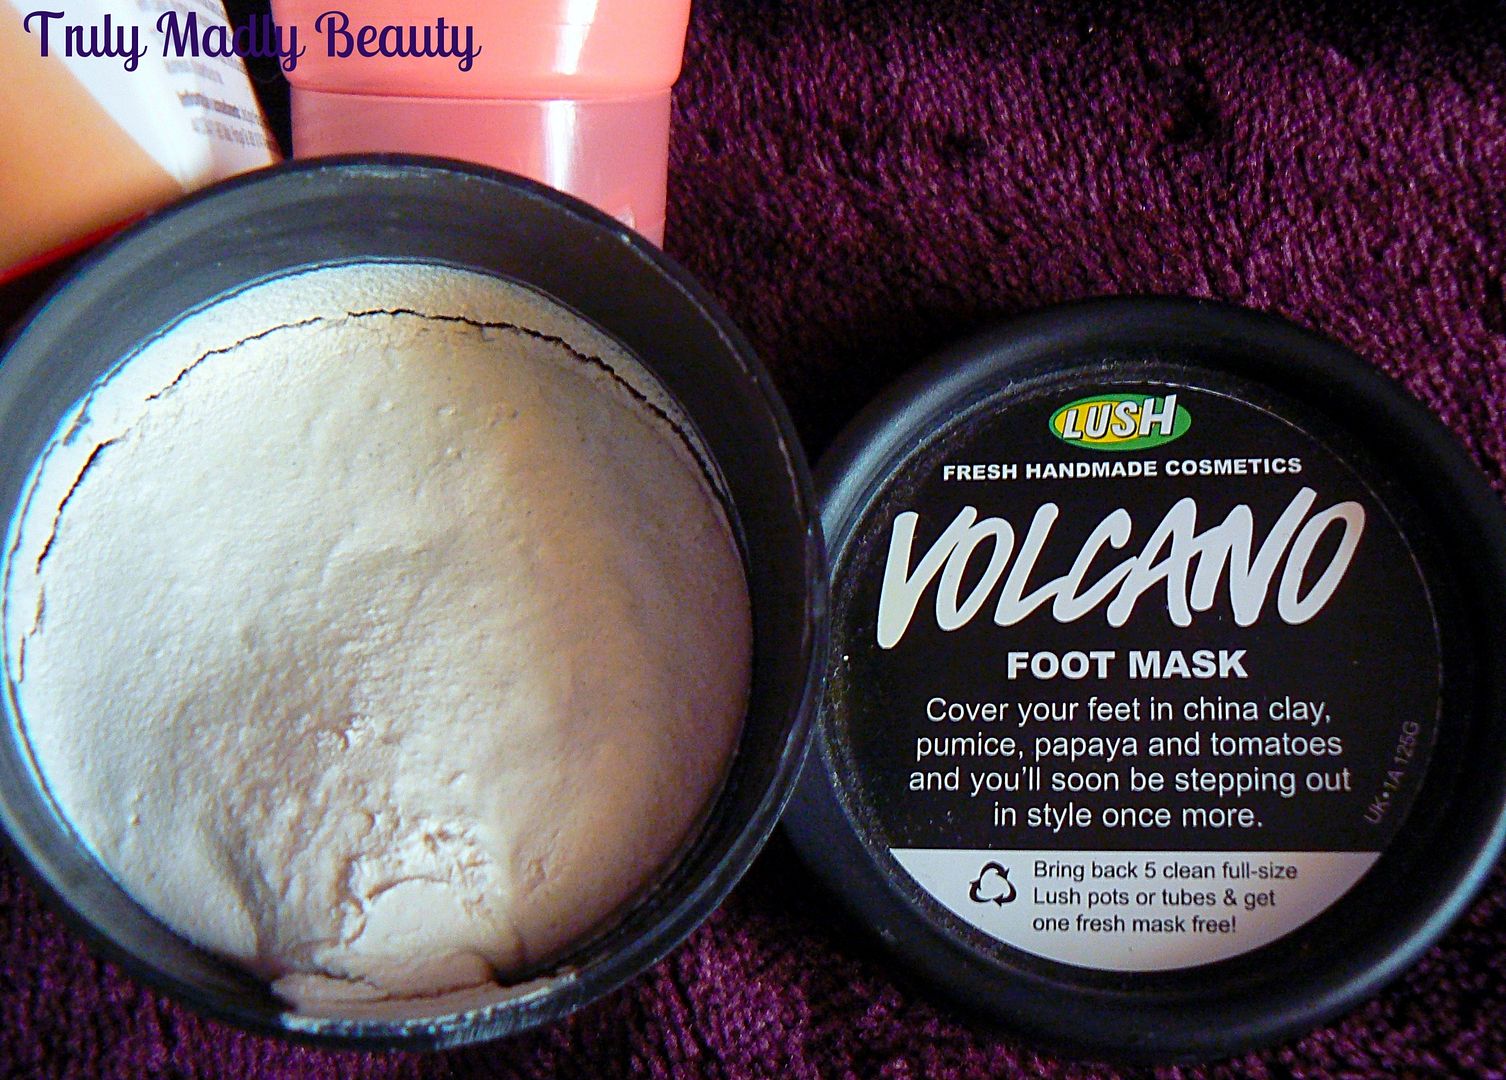
I picked this up on one of my LUSH sprees, after reading many positive reviews & being very curious to try it myself. Containing an intriguing mix of ingredients from kaolin & pumice to tomatoes & papaya, Volcano (RRP £6.75) is an invigorating foot mask that also doubles as an exfoliater. The scent of the mask is quite pungent & spicy but not in an unpleasant way at all.

To use the mask apply generously to the feet, I would do this in the bath as it can get quite messy! Whilst applying be sure to rub the thick paste in well activating the exfoliation. Then whack a couple of plastic bags over your feet, I use sandwich bags which are the ideal size, & leave the mask to work its magic for about 20 minutes. During this time you'll feel a slight tingly sensation but not uncomfortable, it just means the mask is working! Once ready, remove the bags & rinse off the mask well using the shower head, a bit of rub rub rub action will be required too. Once completely clean you are left with noticeably smooth & soft tootsies ready for the final stage of my foot pamper session...moisturisation!


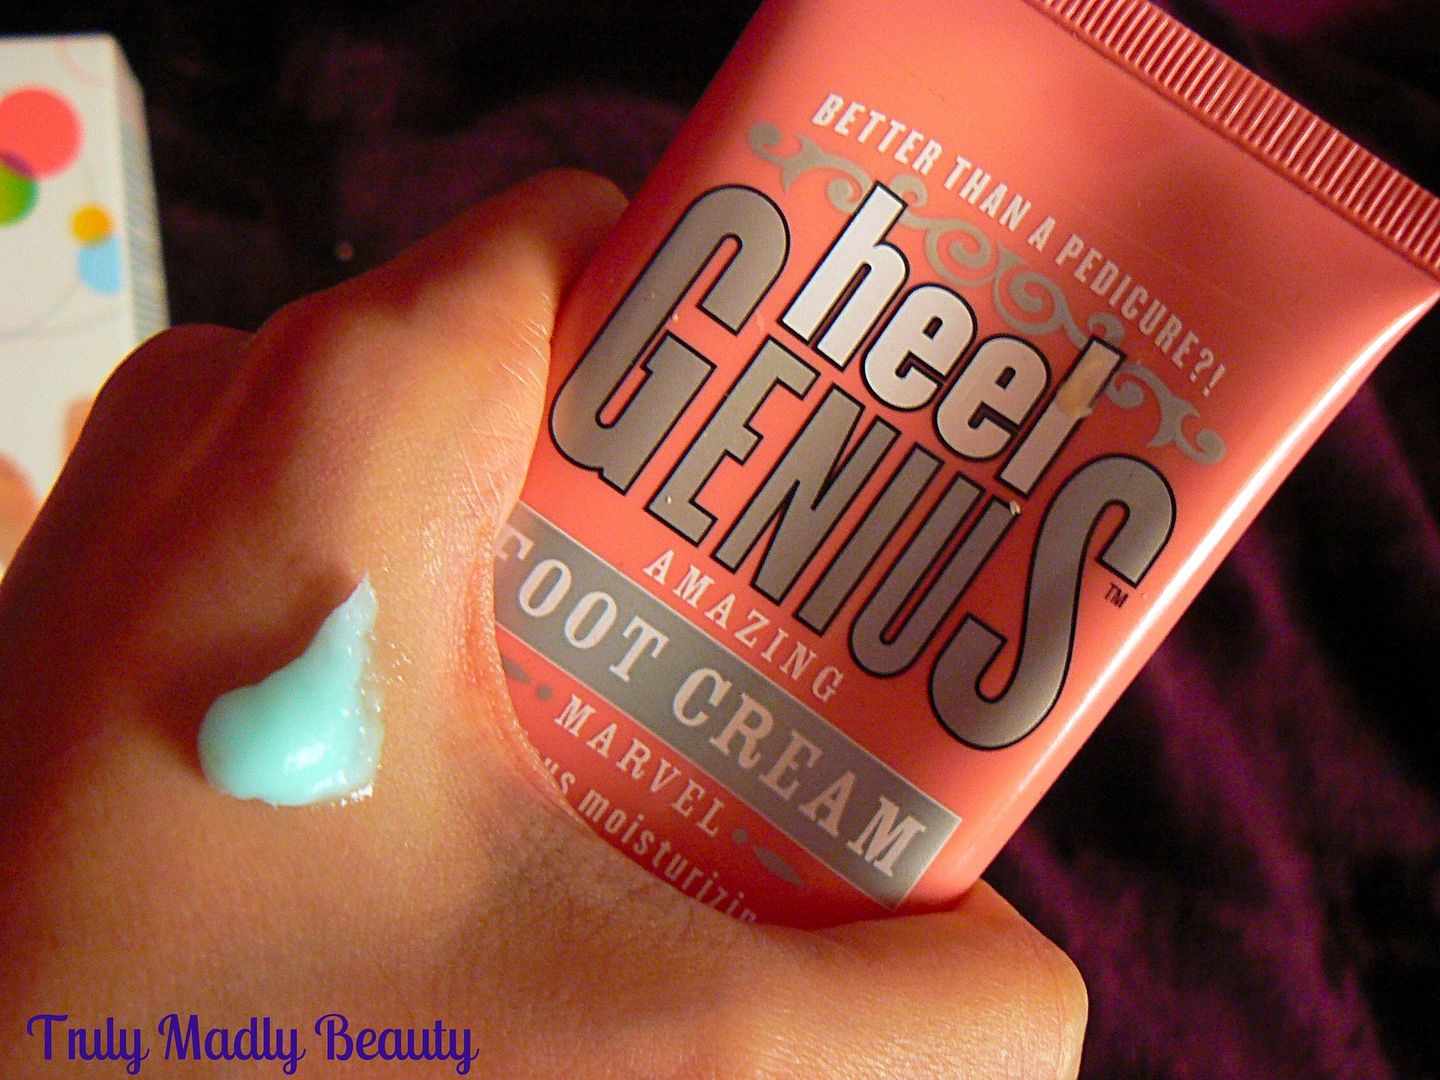
For this I reach for Soap & Glory's Heel Genius (RRP £5.50) which has become a Holy Grail product for me...this stuff is INCREDIBLE & blows all other foot creams out the water. Heel Genius Amazing Foot Cream really deserves that title, a thick blue gel like formula, it contains magic making ingredients such as allantoin, glycerin, macadamia oil, menthol & bilberry & provides such intense hydration to the skin without the weight of a heavy cream. I apply this straight after the foot mask & immediately whack on a pair of of socks, which I keep on overnight, letting the cream soak in, really reaping the full benefits. 


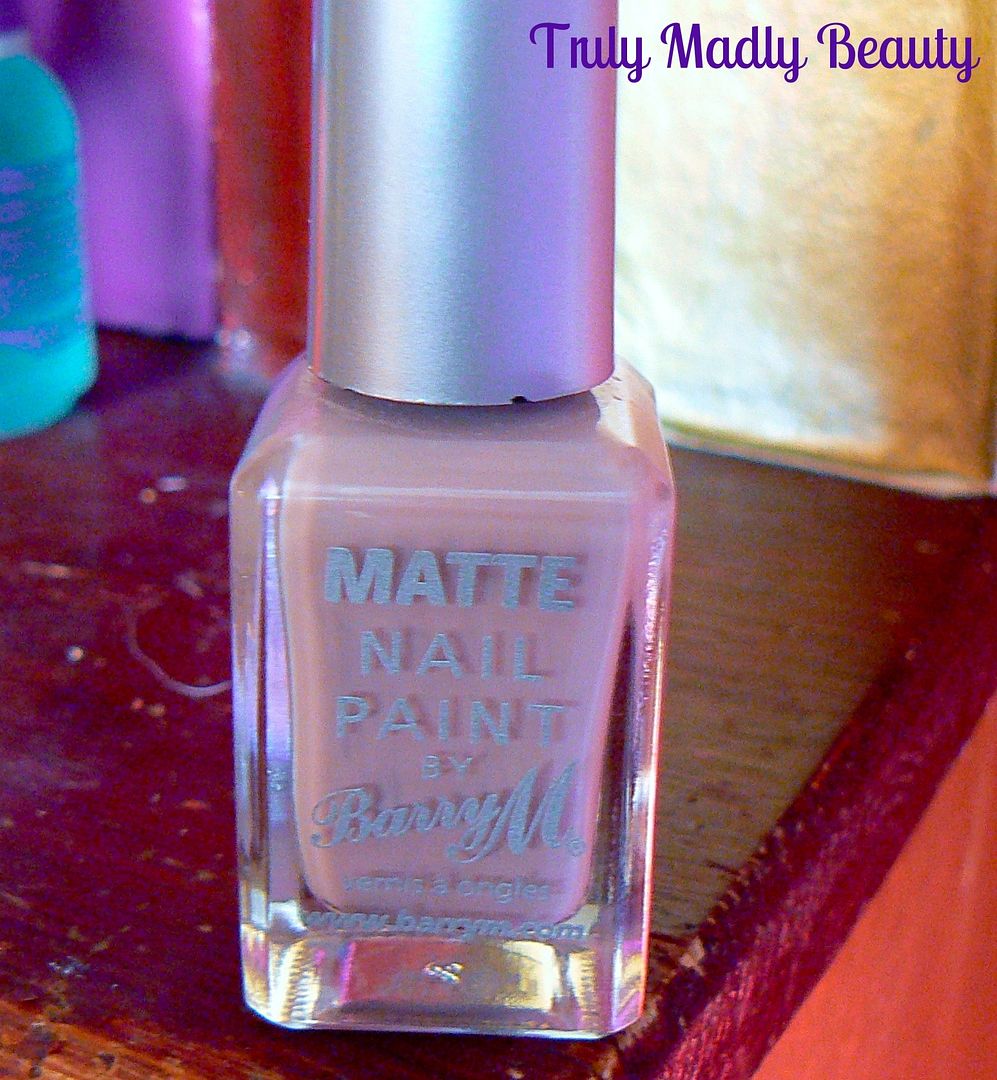
Come morning you'll have smooth soft feet fit to rival a goddess ready for some pretty polish to complete your foot pampering! Me being me I can't finish this post without suggesting a polish to you my lovelies, currently I'm LOVING wearing Barry M Vanilla Matte on the toes, an odd pick perhaps but this is such a lovely lilac tinted nude, so pretty, especially when topped with a glossy top coat! Highly recommend!


And that sums up my winter foot care pampering, happy feet all the way! Have you tried any of these products? Thank for reading!

Lotsa love to ya!

Disclaimer - * products featured were sent to me for my consideration. I am not affiliated with the brand nor paid for this post, this review has been as always my 100% honest opinion! :)