12.22.2016

Festive NOTD - Candy Cane French Tips!

Hello there my lovely readers!

All ready for the Xmas weekend? I'm literally counting down the hours, for the first time since I left school (all those aeons ago in ye old ancient times) I'll be embracing a full festive break from next week up until the new year as my work shuts downs during this period. To be honest I've never been too fussed with working right up until & straight after Xmas but I'm actually looking forward to the treat of complete hibernation time haha!

I've managed to roll out a few festive mani's this year starting with an obligatory Red Sparkle, the annual favourite that is Christmas Trees & my most popular one to date after the most lovely response on social media for The Christmas Puddings from a few days ago. Today I've decided to show you how you can Christmas up a standard French manicure with some Candy Cane tips!


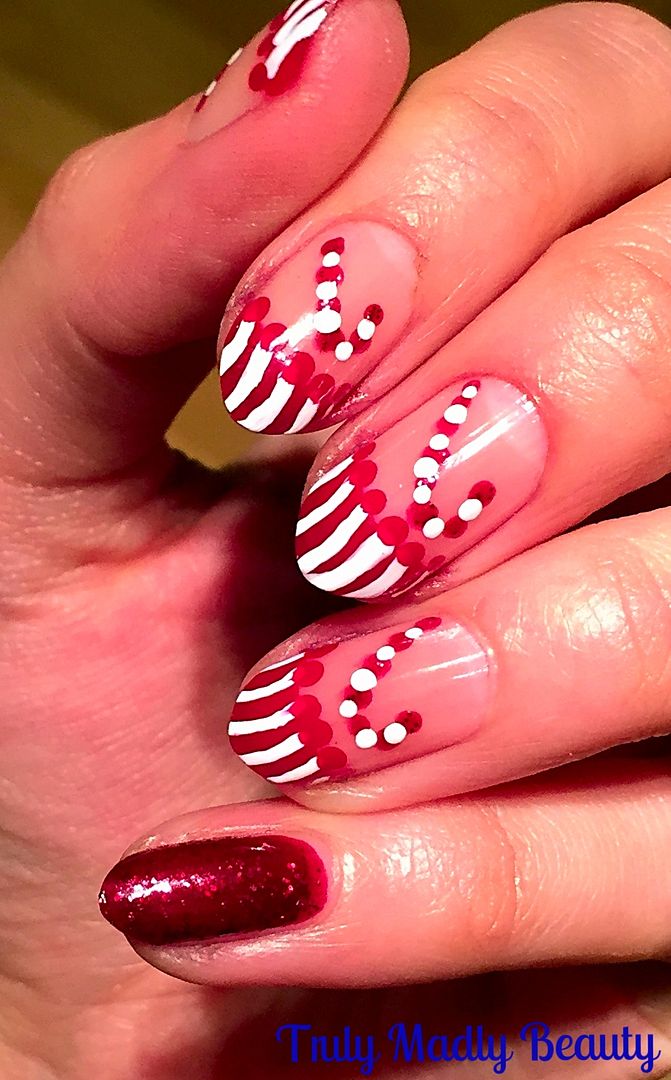
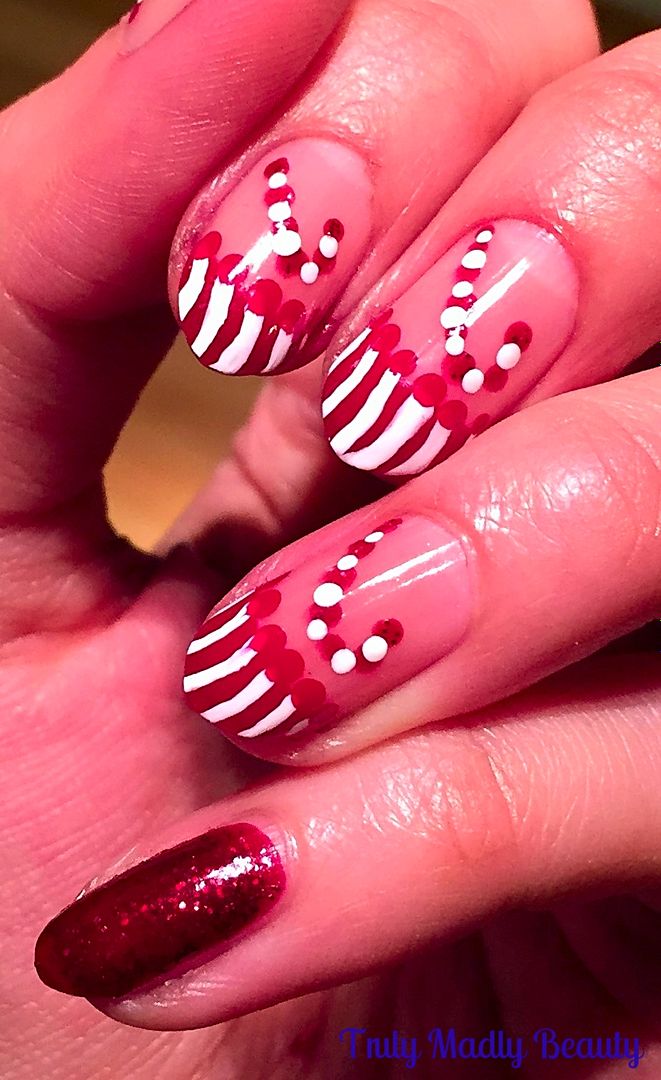
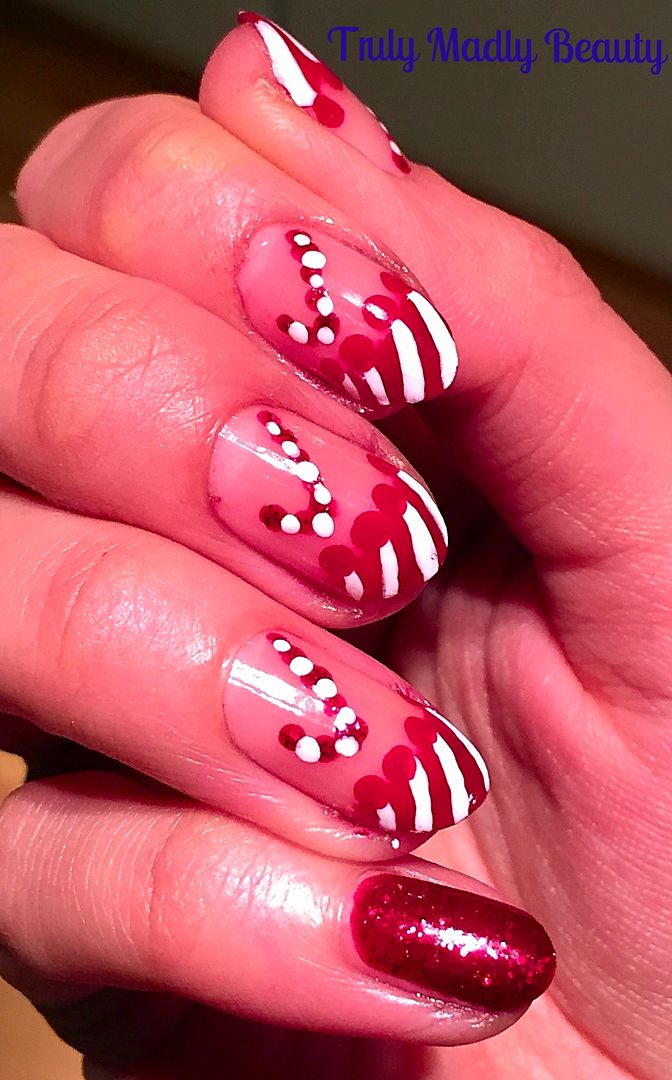
If you want to feel festive on your nails but don't want to go all out seizure inducing sparkle then this is the perfect alternative! All you need is some red, white & sparkle to transform your french mani into something suitable for the season :)


To help create a neat smile line on my tips I use french manicure guides which you can pick up super cheaply off of Ebay or Born Pretty Store. If you don't have these then hole punch reinforcers work just as good!


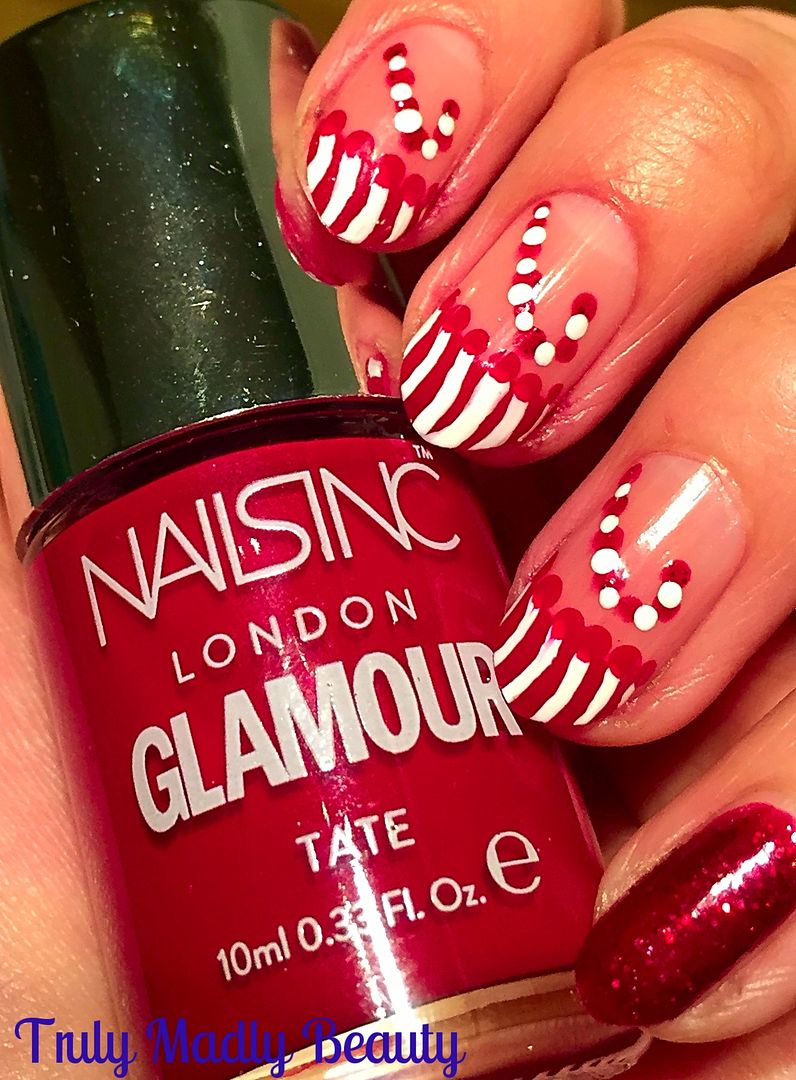
Using these & my red polish of choice, on this occasion a lovely deep red by Nails Inc called Tate, which was one of those fab magazine freebies they do on occasion, I painted on my red tips to all my nails bar my pinkie.


Next to create your candy cane stripes just grab a nail art pen in white, the Barry M ones are really good, or of course a fine nail art brush & white polish & apply a row of curved lines along your red tip. Of course you can also do this vice versa! Starting with white tips instead & adding red stripes...whatever you fancy :)


You can then neaten up your smile line if there is some smudging with a brush & acetone or you can do what i did & add an additional detail of red dots along the smile line to sneakily cover up any white that gone over...hehe ;) 


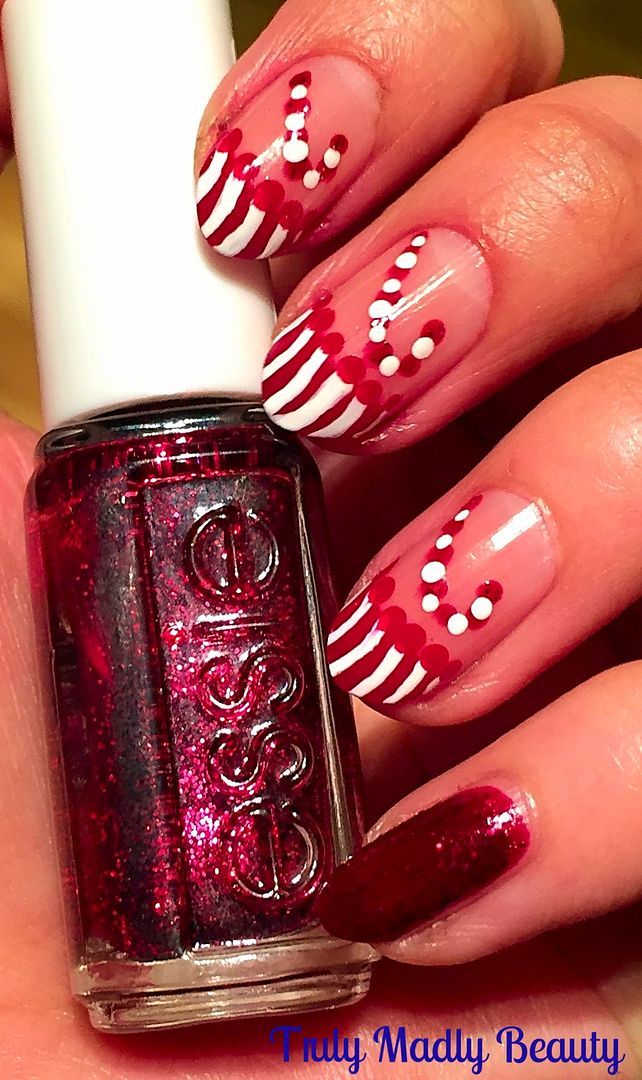
My pinkie was feeling a tad neglected so I rectified this by applying two coats of the gorgeous Essie Leading Lady, you can't beat a satisfying red sparkle can you & this is the most beautiful shade of wine red. Screams Christmas vibes!


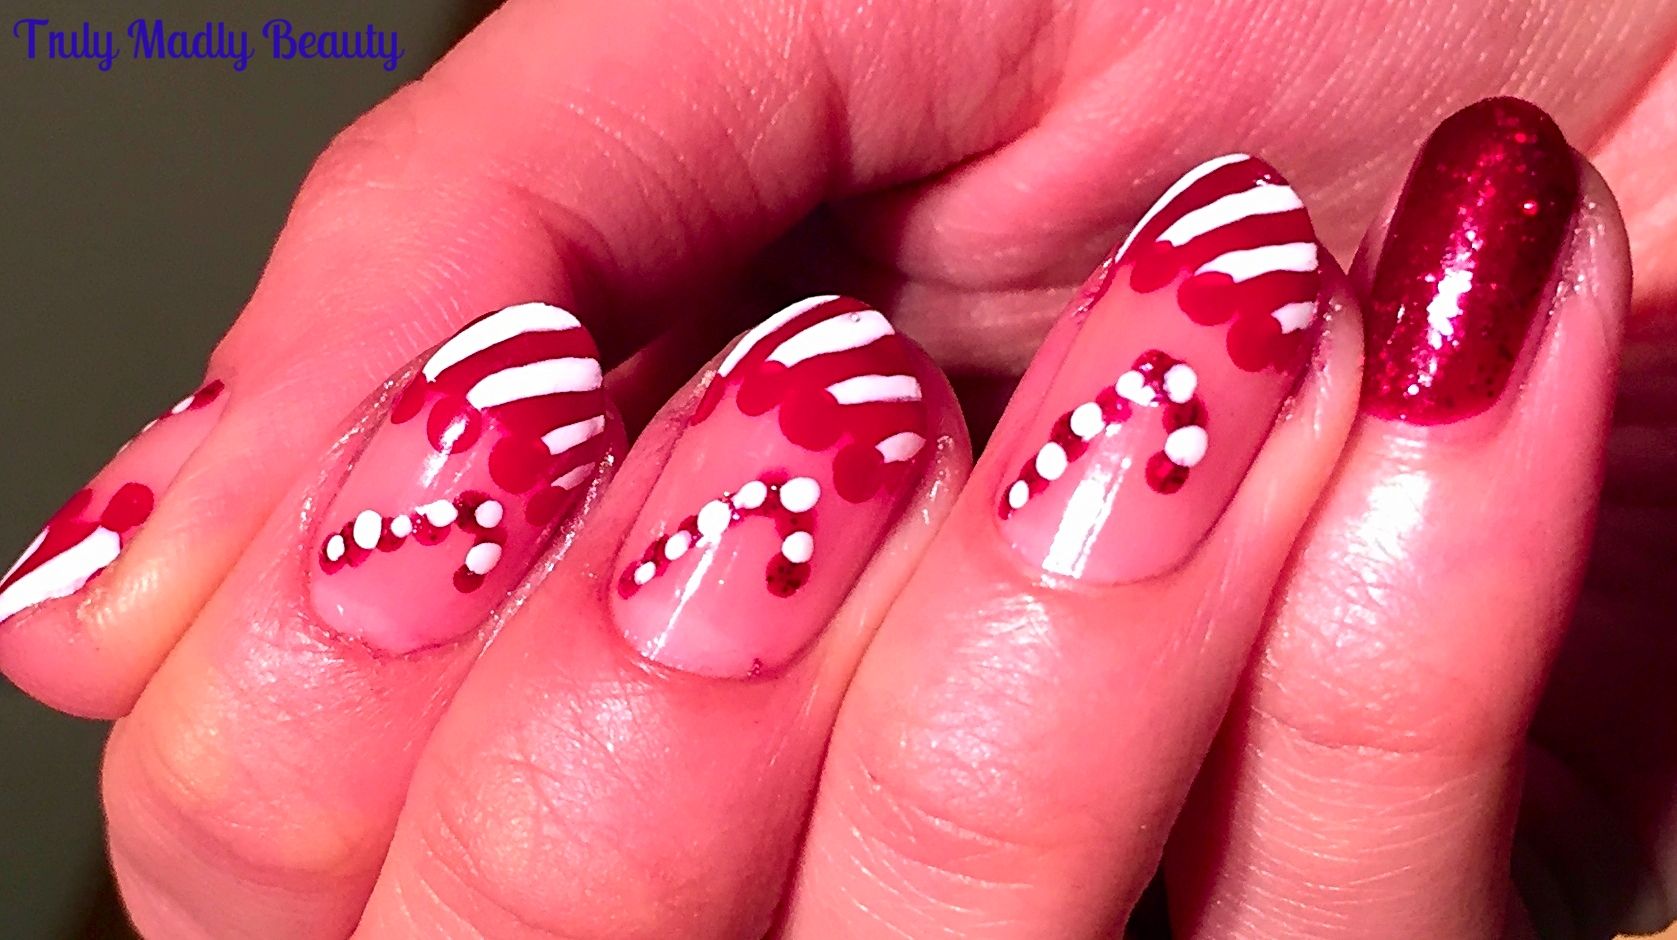
Then for the candy canes, I just grabbed my dotting tool & using some more white & the red Essie glitter, applied some dots in the shape of a candy cane alternating the red & white.


Finish it all with topcoat of course. In a most odd turn of events my dears you are actually getting a rare shot of my right hand here! By some strange sorcery I actually ended up preferring how the right one came out using my non dominant hand...weird O_o

Hope you liked this festive take on a French manicure beauts! If I don't get a chance to blog before the big day, wishing you all the most merriest of Christmas's however you spend it. Thanks as always for reading!

Lotsa love to ya!


12.19.2016

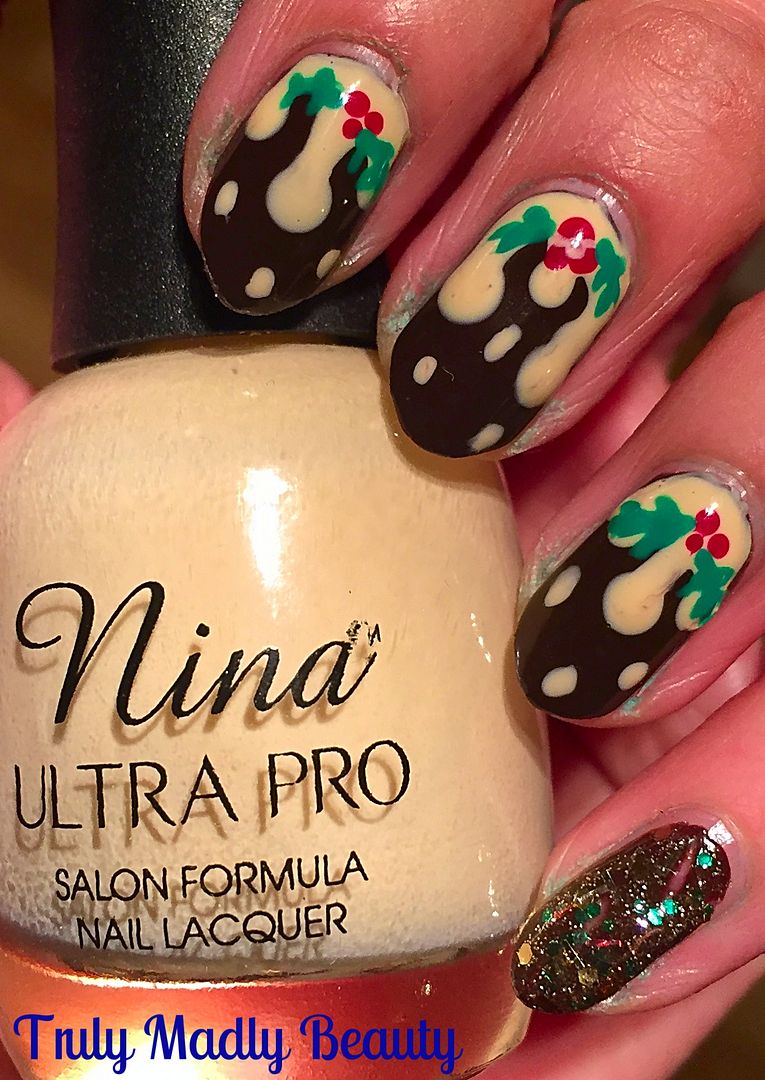
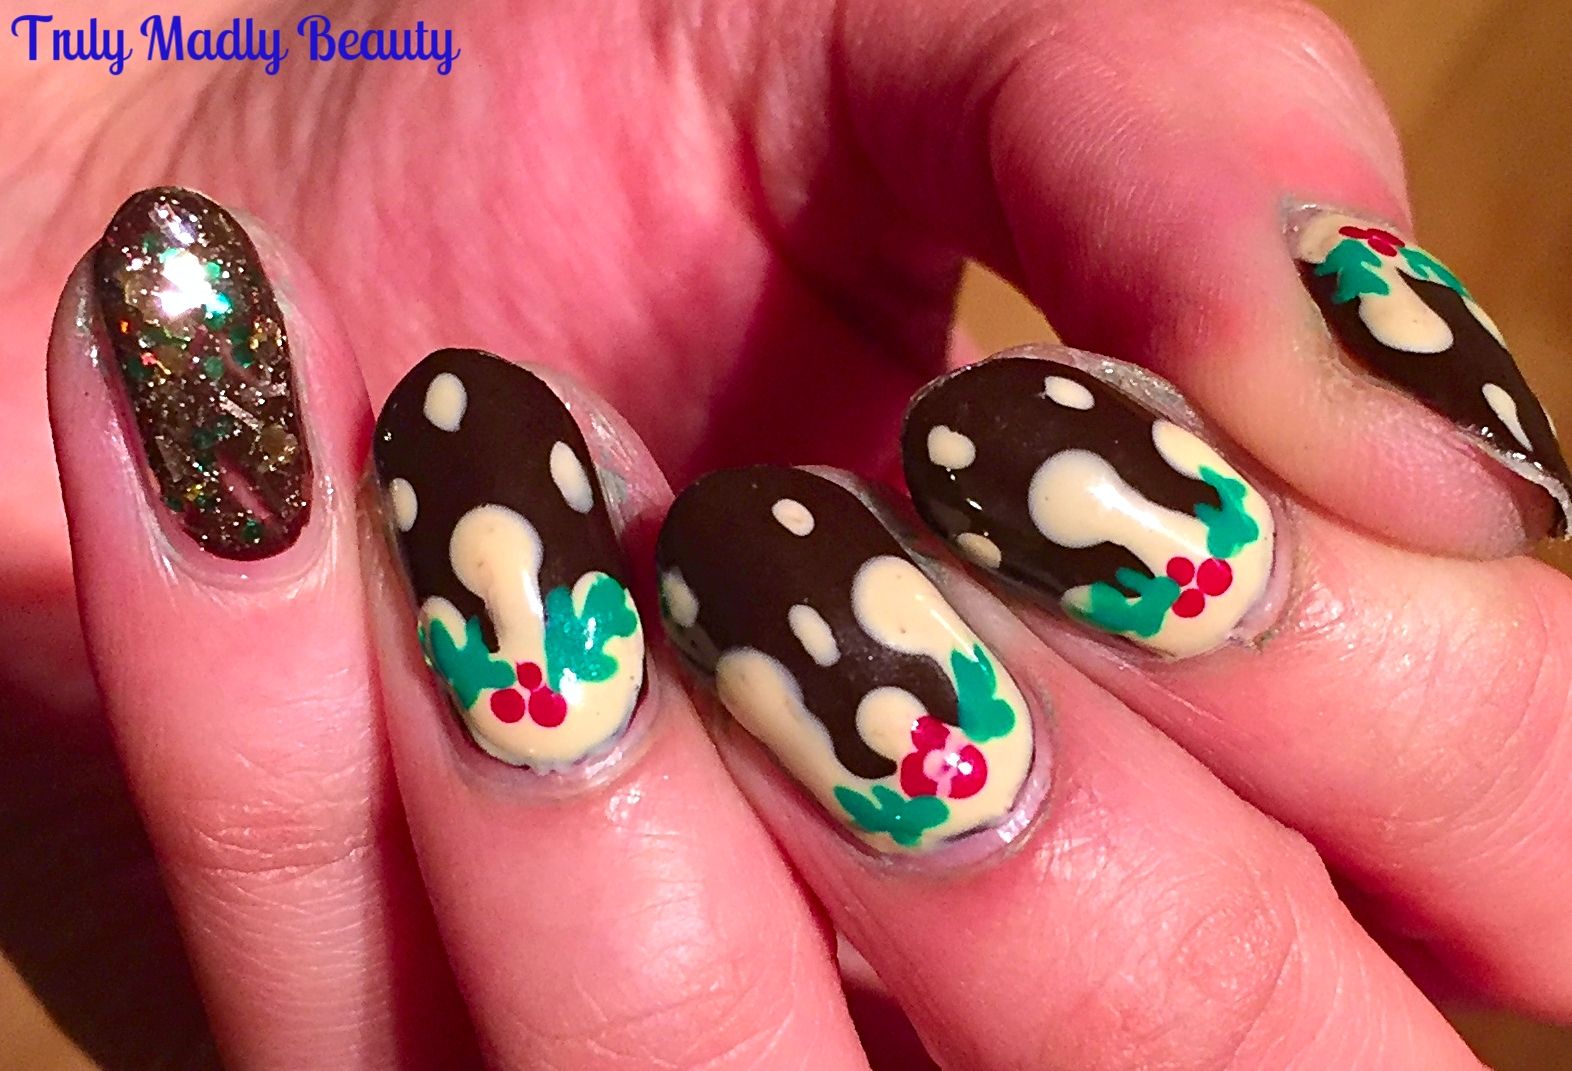
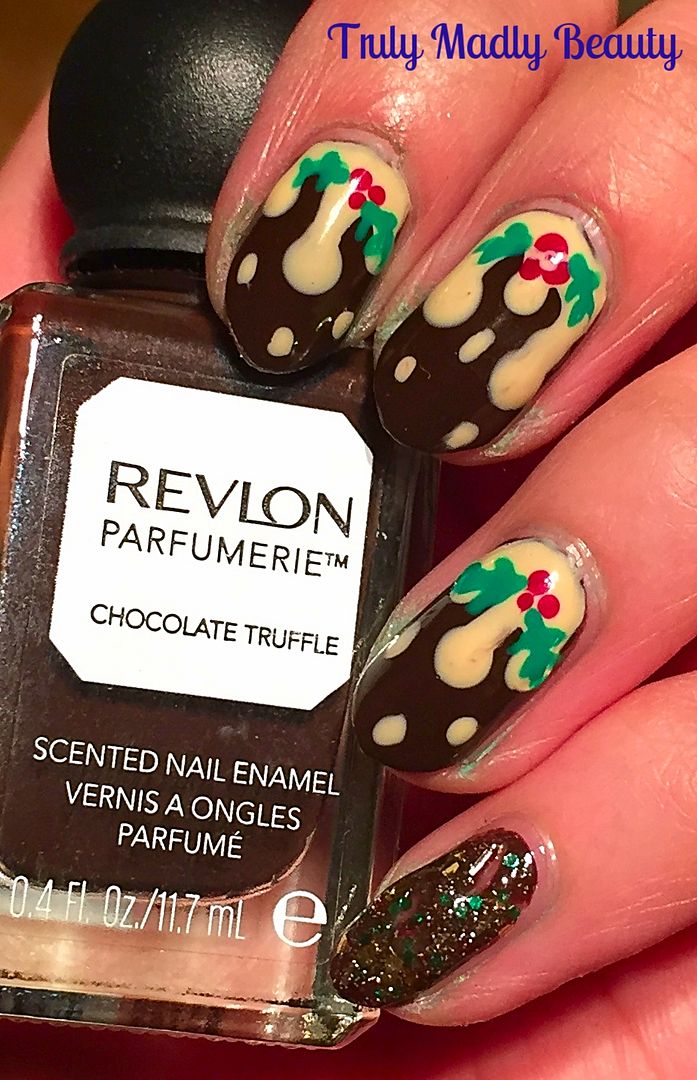
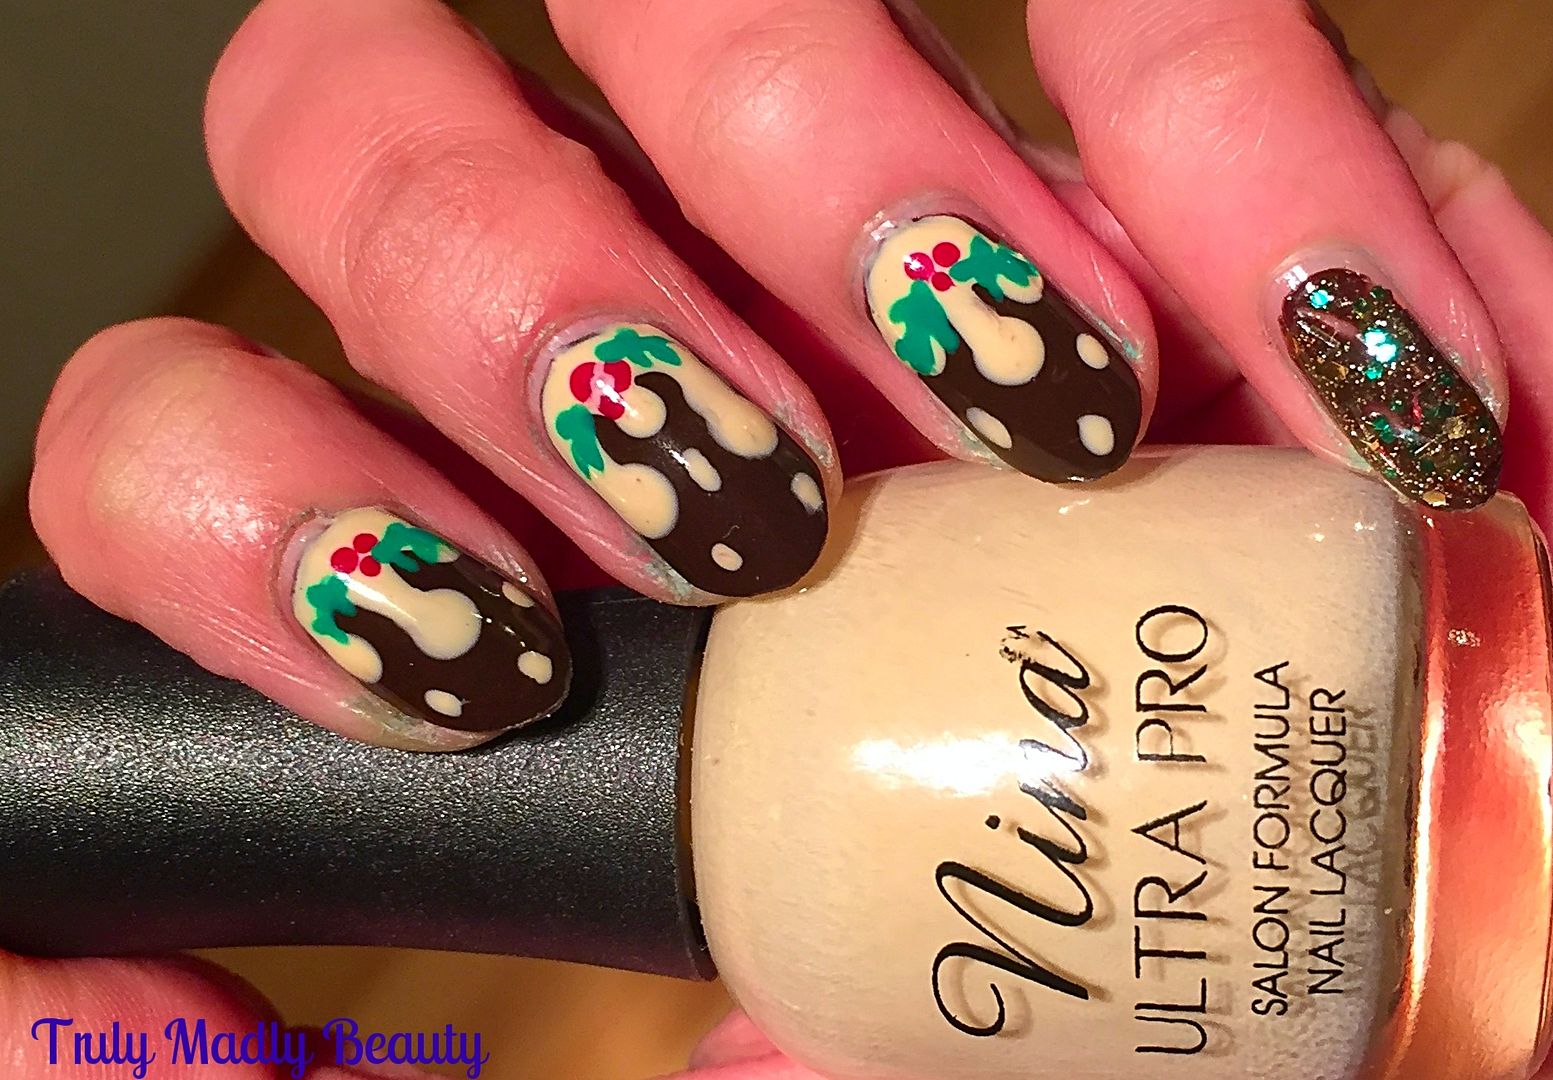
Festive NOTD - Christmas Puddings with Dripping Brandy Butter!

Hello there my lovely readers!

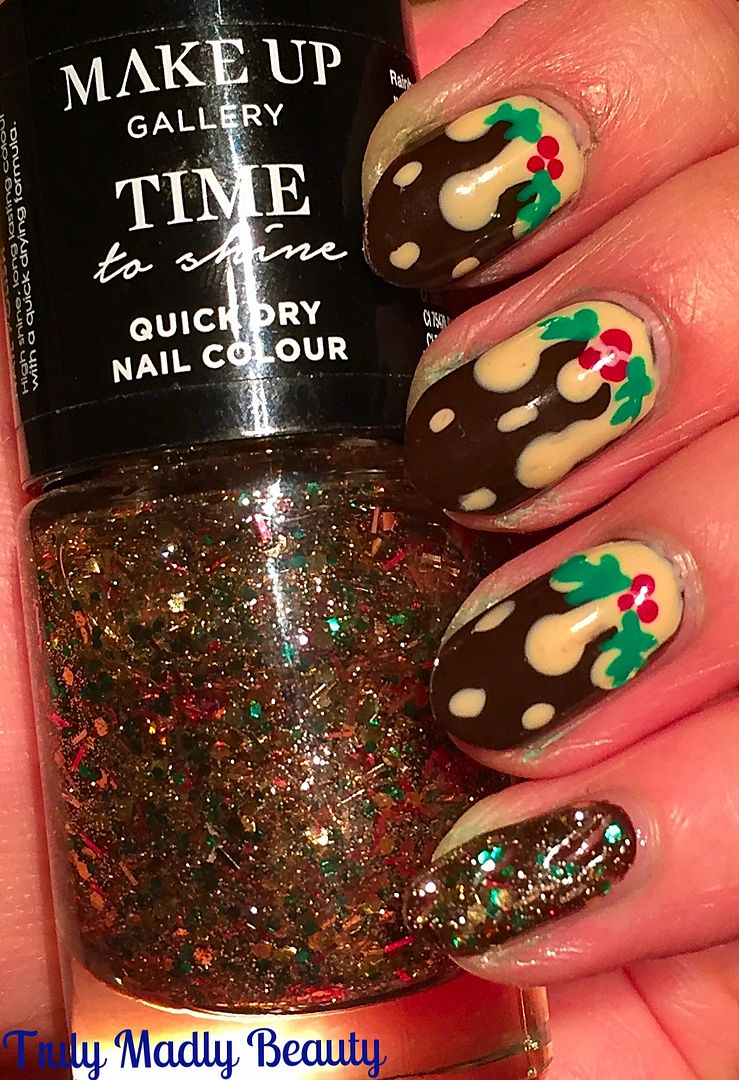
If there is one thing I'm as passionate about just as much if not more as I am for nail art...its food. Combine the two & yours truly is bonny wee bunny. Which brings us on to today's festive manicure my dears...Christmas Puddings!


Now I must confess... I'm not the biggest fan of the old Christmas pud, (SSSHHH!) but that doesn't mean I can't enjoy them on my nails eh? And for this design I actually used a scented polish so my mani smelt super sweet scrumdiddlyumptous too!


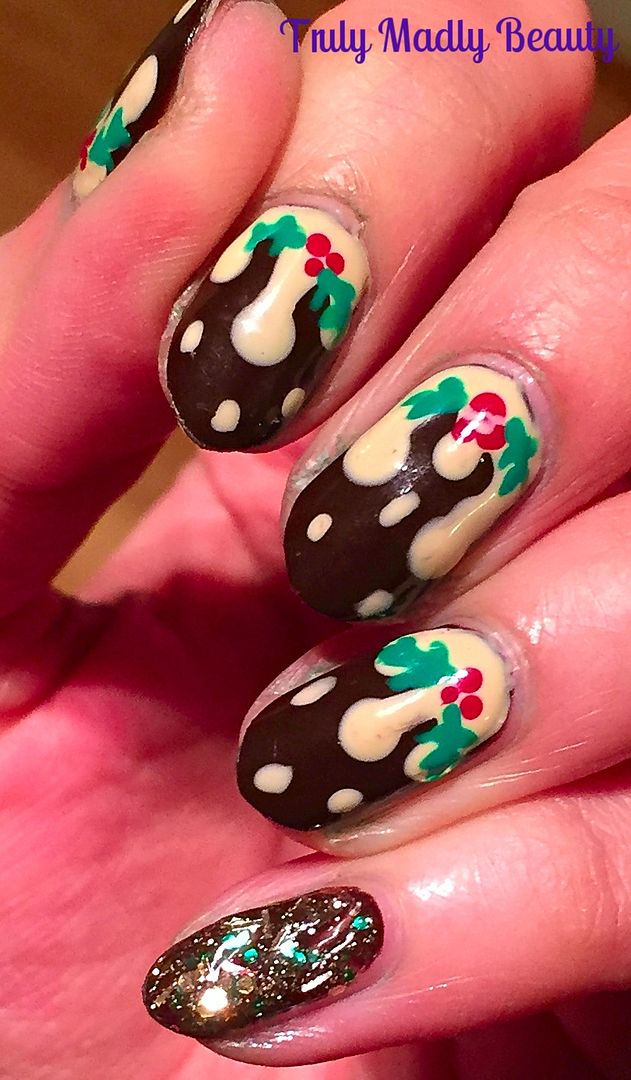
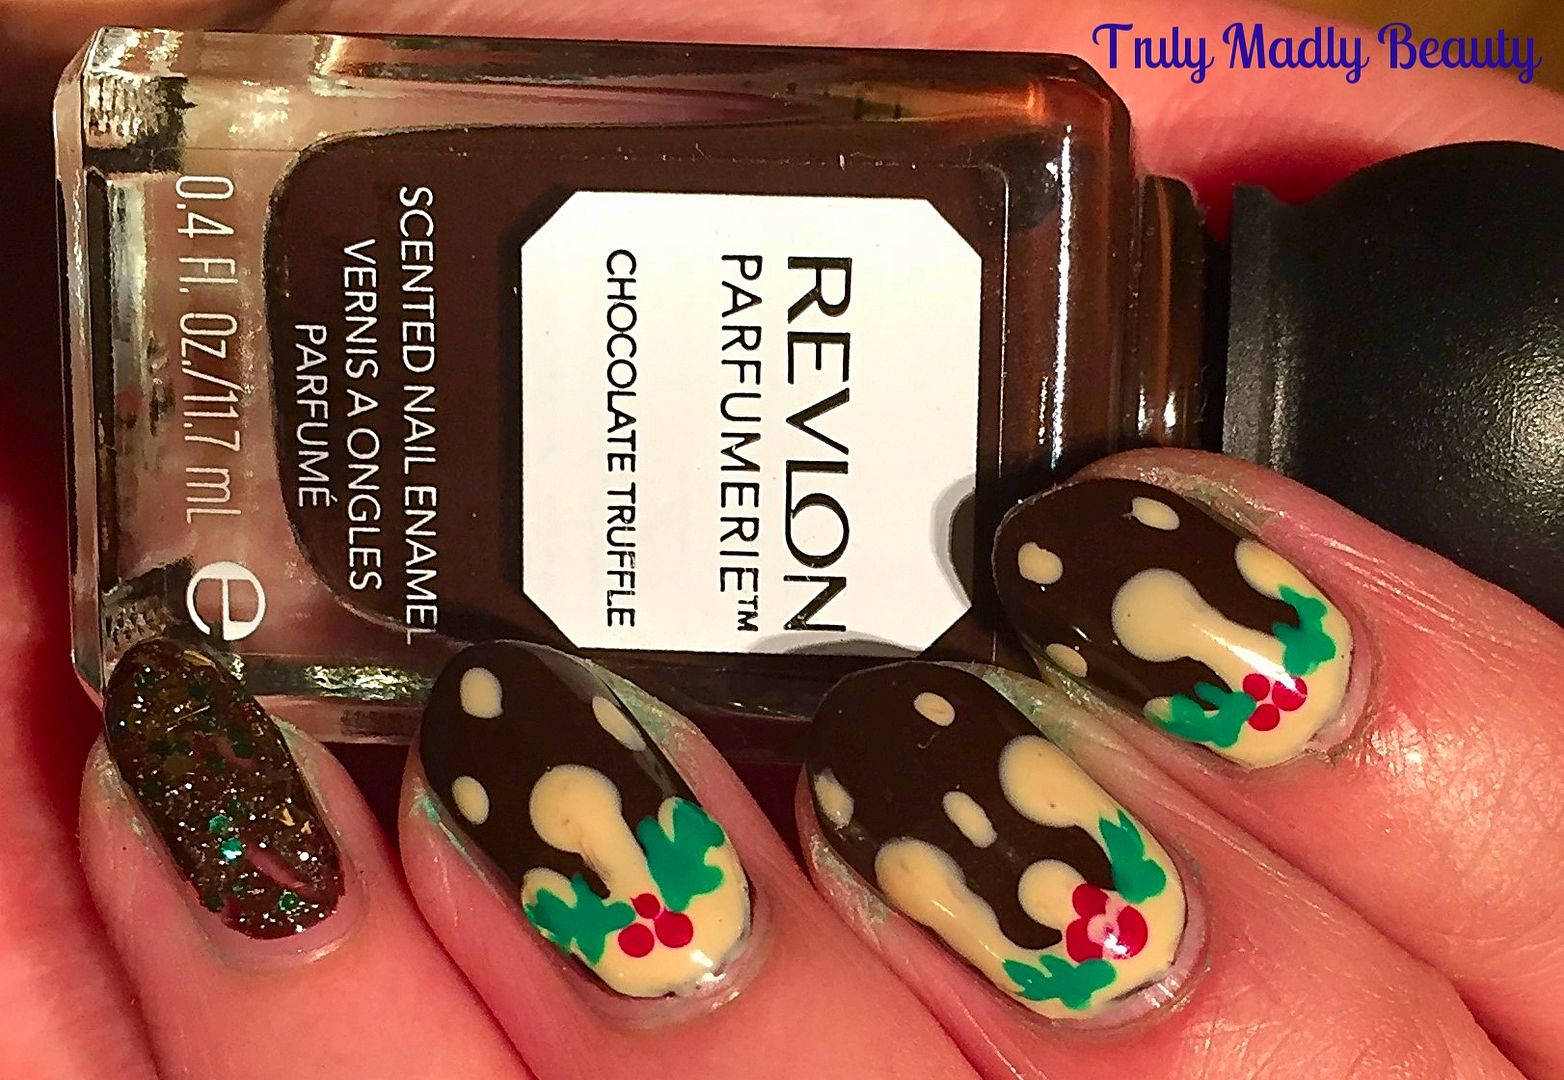
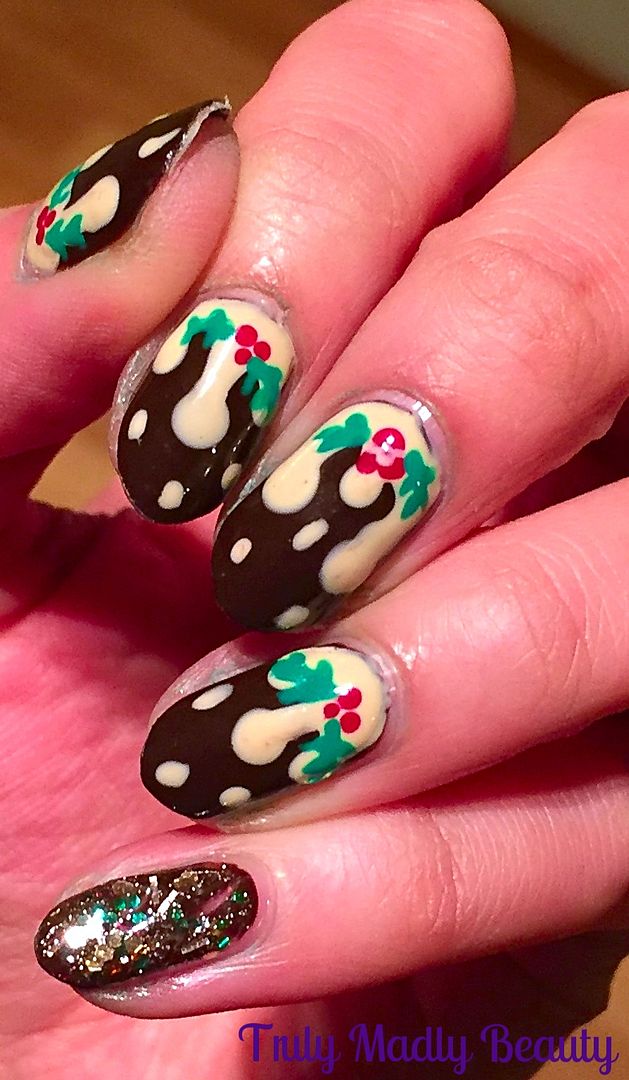
To create your Christmas pudding nails you need to start with a dark brown base. As mentioned, for this I used one of my Revlon Parfumerie scented polishes in Chocolate Truffle which smells like...yup chocolate! Apply two coats for a nice opaque finish.


Now for the brandy butter! As you can see for this part you just need to create some drip nail art. I've done this a few times on here with various different looks, you may recall on Halloween? I've done a step by step tutorial on how to create drips on your nails HERE.


I spent a while debating on which end to create my drips, I'm usually a fan of applying them on my tips, if you cast your eyes to the left of this page you can see I've done so on my Mint Choc Chip manicure. However this time I was feeling the mood for the cuticle end...I know, I'm such a rebel.


For my brandy butter drips I've used gorgeous Nina Ultra Pro polish in Rum & Reggae, which is a lovely beige cream shade. I found this delightful  brand in Sally's.


Next our puddings need some decoration in the form of a sprig of holly. To create these I just used a fine nail art brush & applied three fine dots using the nearest red polish I had to hand, then using the same brush & this time some green polish, free-handed a couple of spiky leaves either side.


As you can see I decided to rock some glitter on my little finger as an accent & for this I used a polish I picked up in Poundland called Rainbow Sparkle! Filled with gold, green & red glitters of various shapes & sizes, you really can't get more festive! A couple of coats of this on top of the brown created some satisfying sparkles. Not bad at all for a pound.


Finish it all with a nice thick coat of topcoat & you have your Christmas Pudding Nails good enough to eat! You can see all of my previous Christmas Nail Art ideas HERE. Thanks for reading!


Lotsa love to ya!

12.14.2016

Festive NOTD - Swirly Chrome Christmas Trees!

Hello there my lovely readers!

Gosh can you believe that it'll be Xmas next week already?! How in the hoohaa did that happen? This month has had me all over the shop floor thus I haven't been able to get my nail art on as much as I would have liked for the festive season, bad nail blogger! But I can rectify that now as I finally managed to grab some free time to have a play! Better late than never eh?

Every year I like to rustle up some Christmas Tree nails, as they are my absolute favourite for the festive period, each time mixing up the design slightly. You can check out my previous Christmas Tree nail art designs HERE, HERE and HERE.


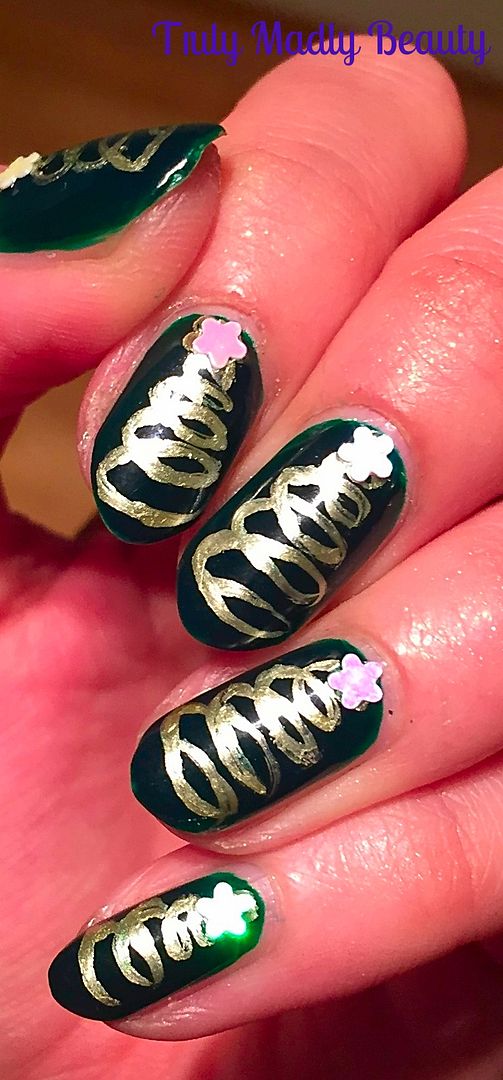
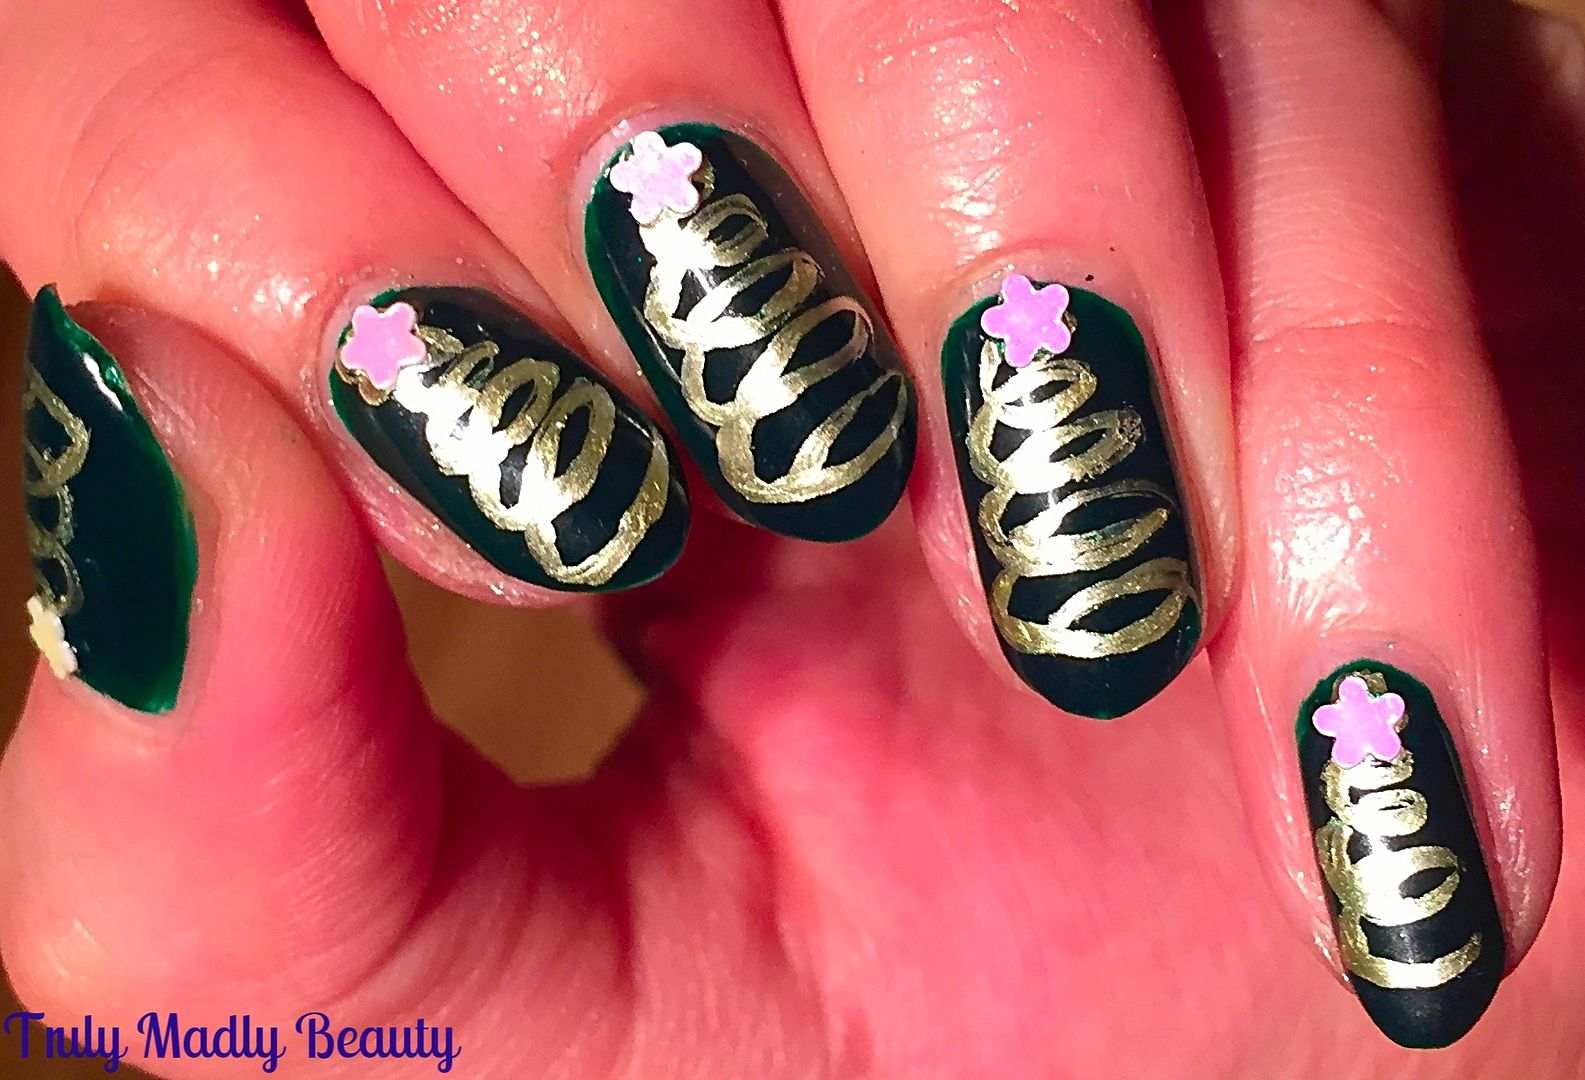
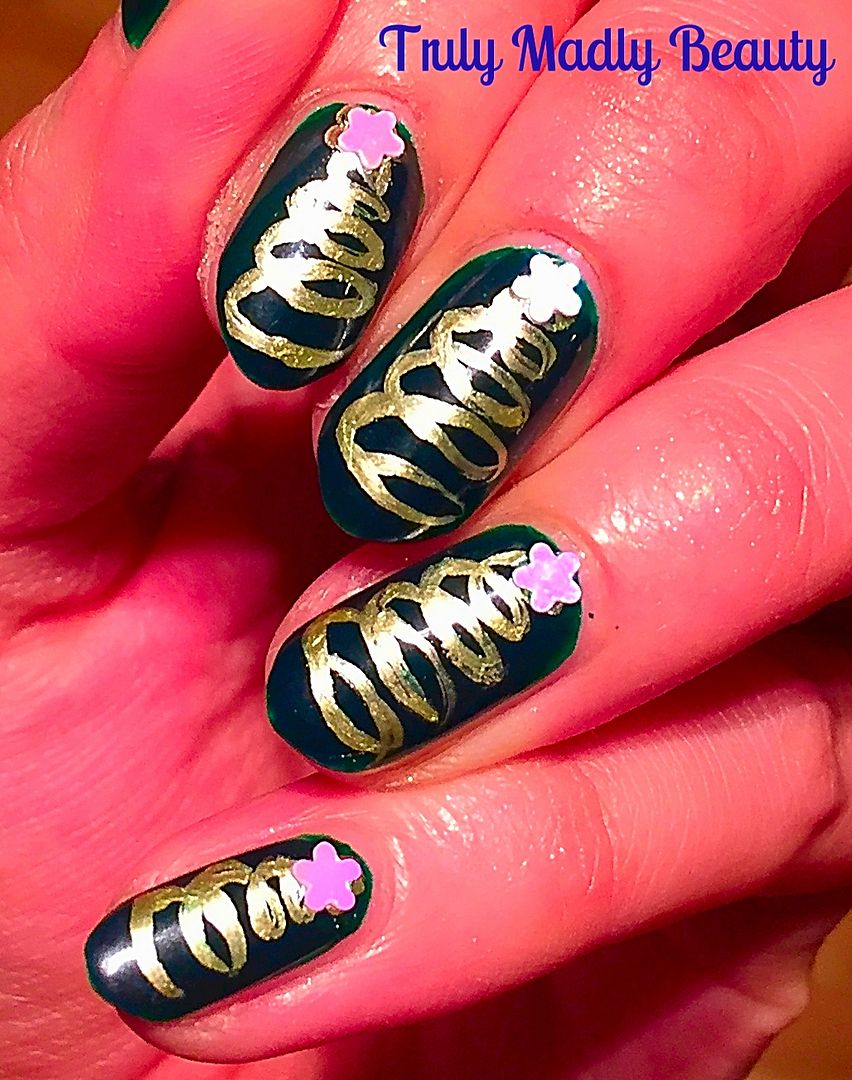
That's what I love about them, the fact that you can have fun playing around creating different styles and designs. This year I decided to go down a more arty route & created these golden swirl Christmas Trees.


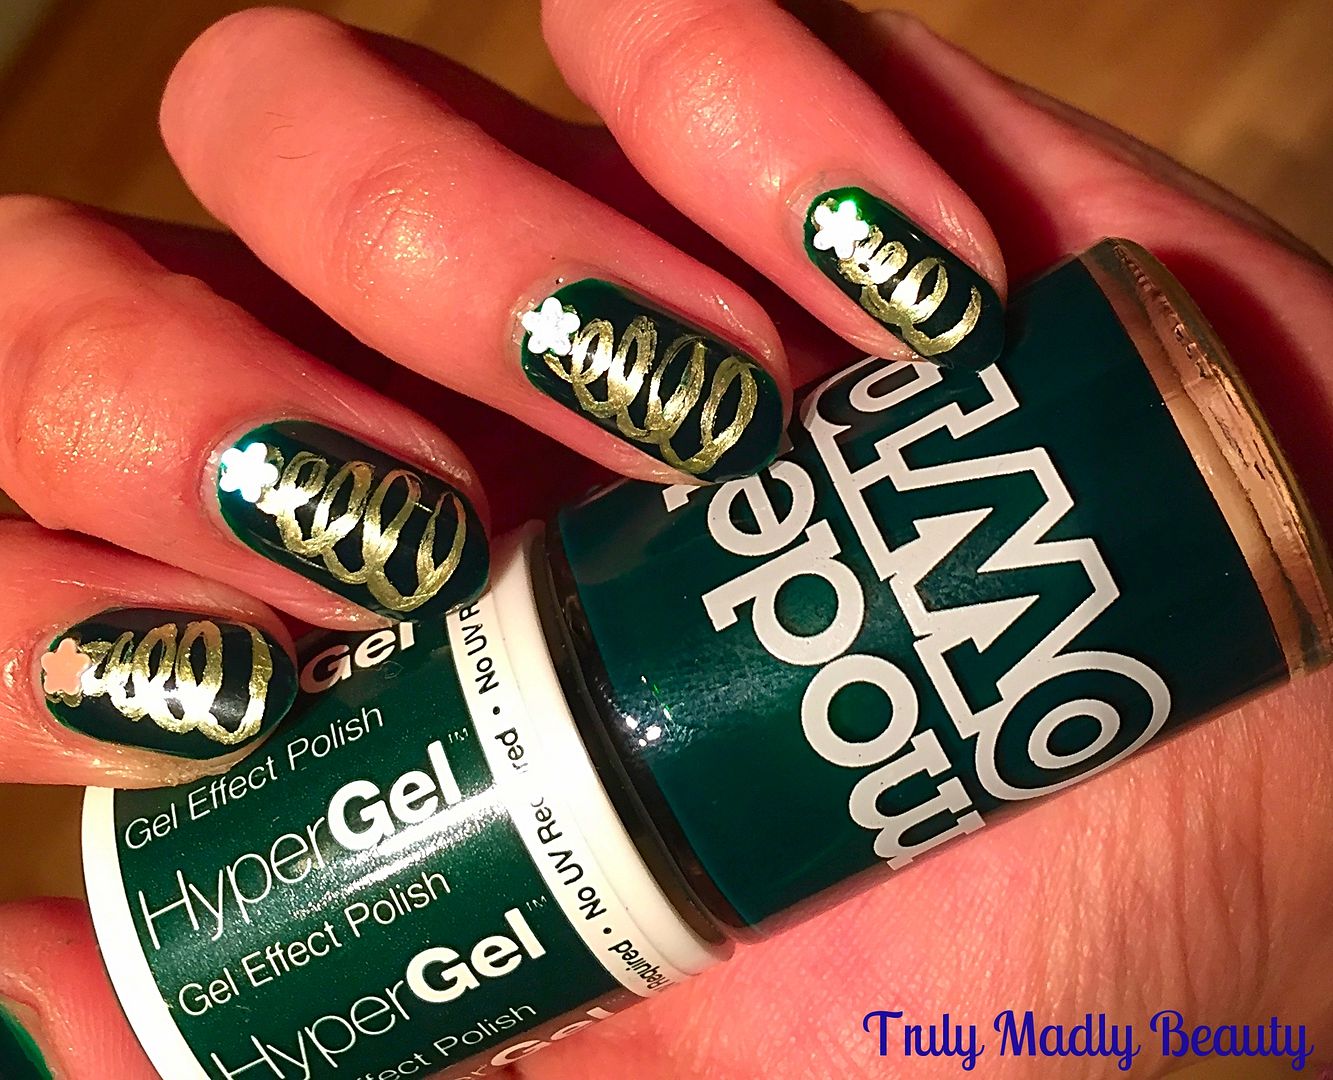
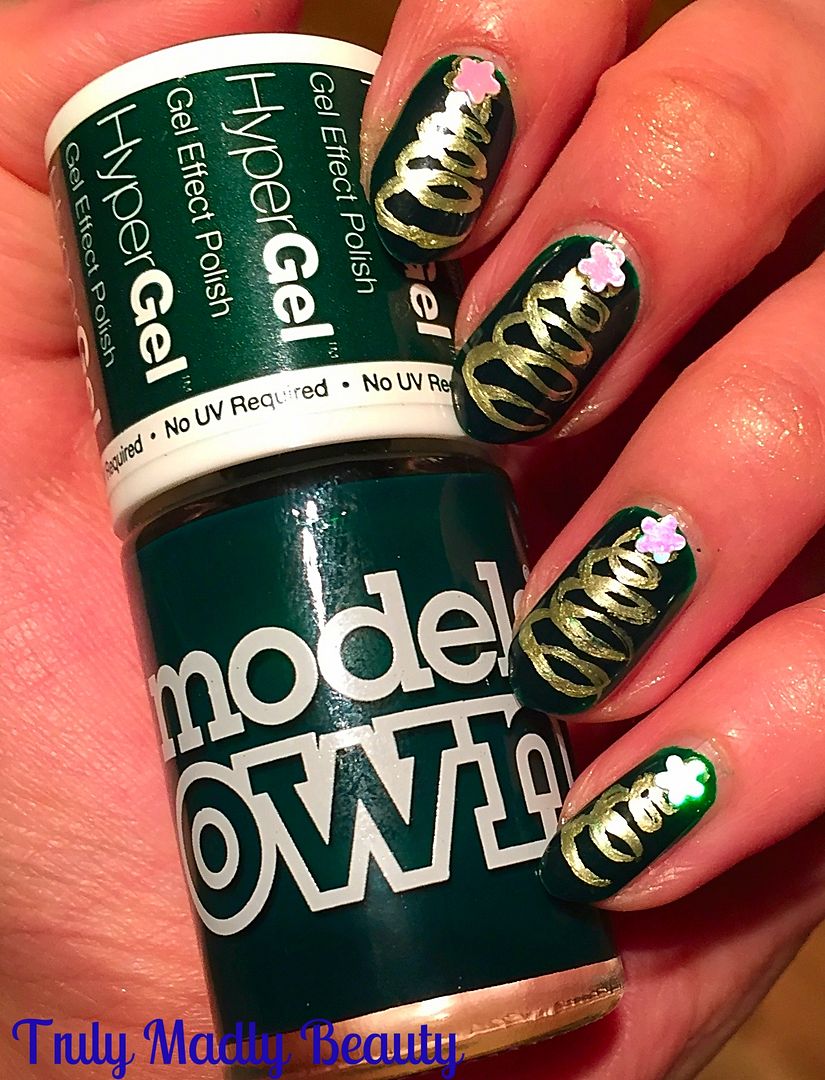
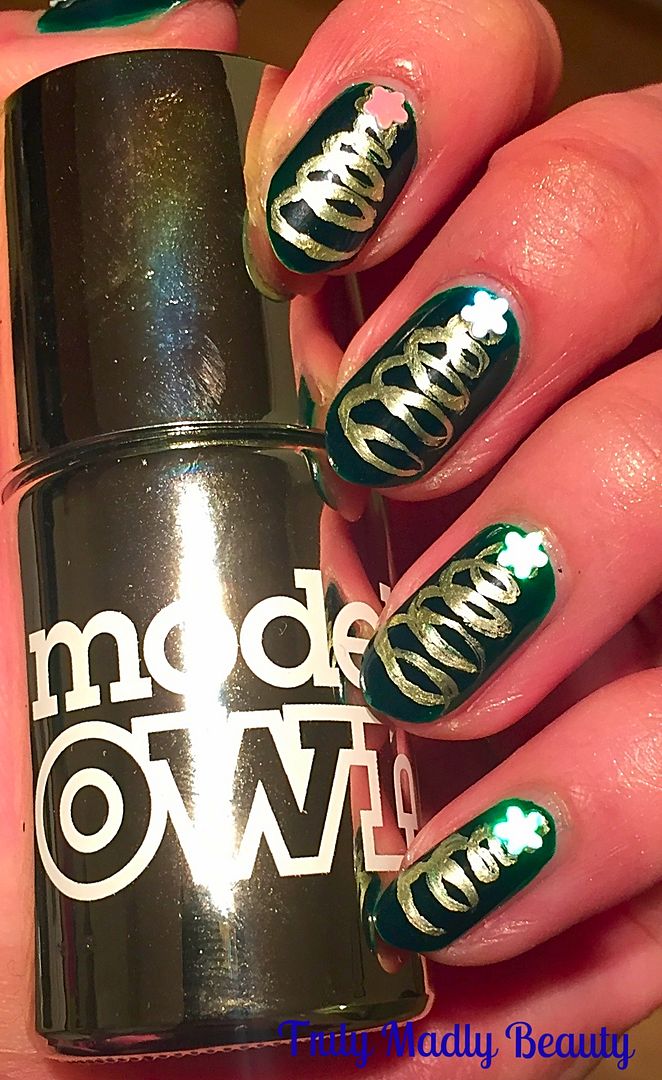
Instead of painting green trees I went for a lovely deep dark green for my base & Models Own HyperGel in Ebony Green was perfect for this.

This is two coats of the gorgeous green goodness, isn't it just divine? I'd forgotten how much I adore this Gothic green!


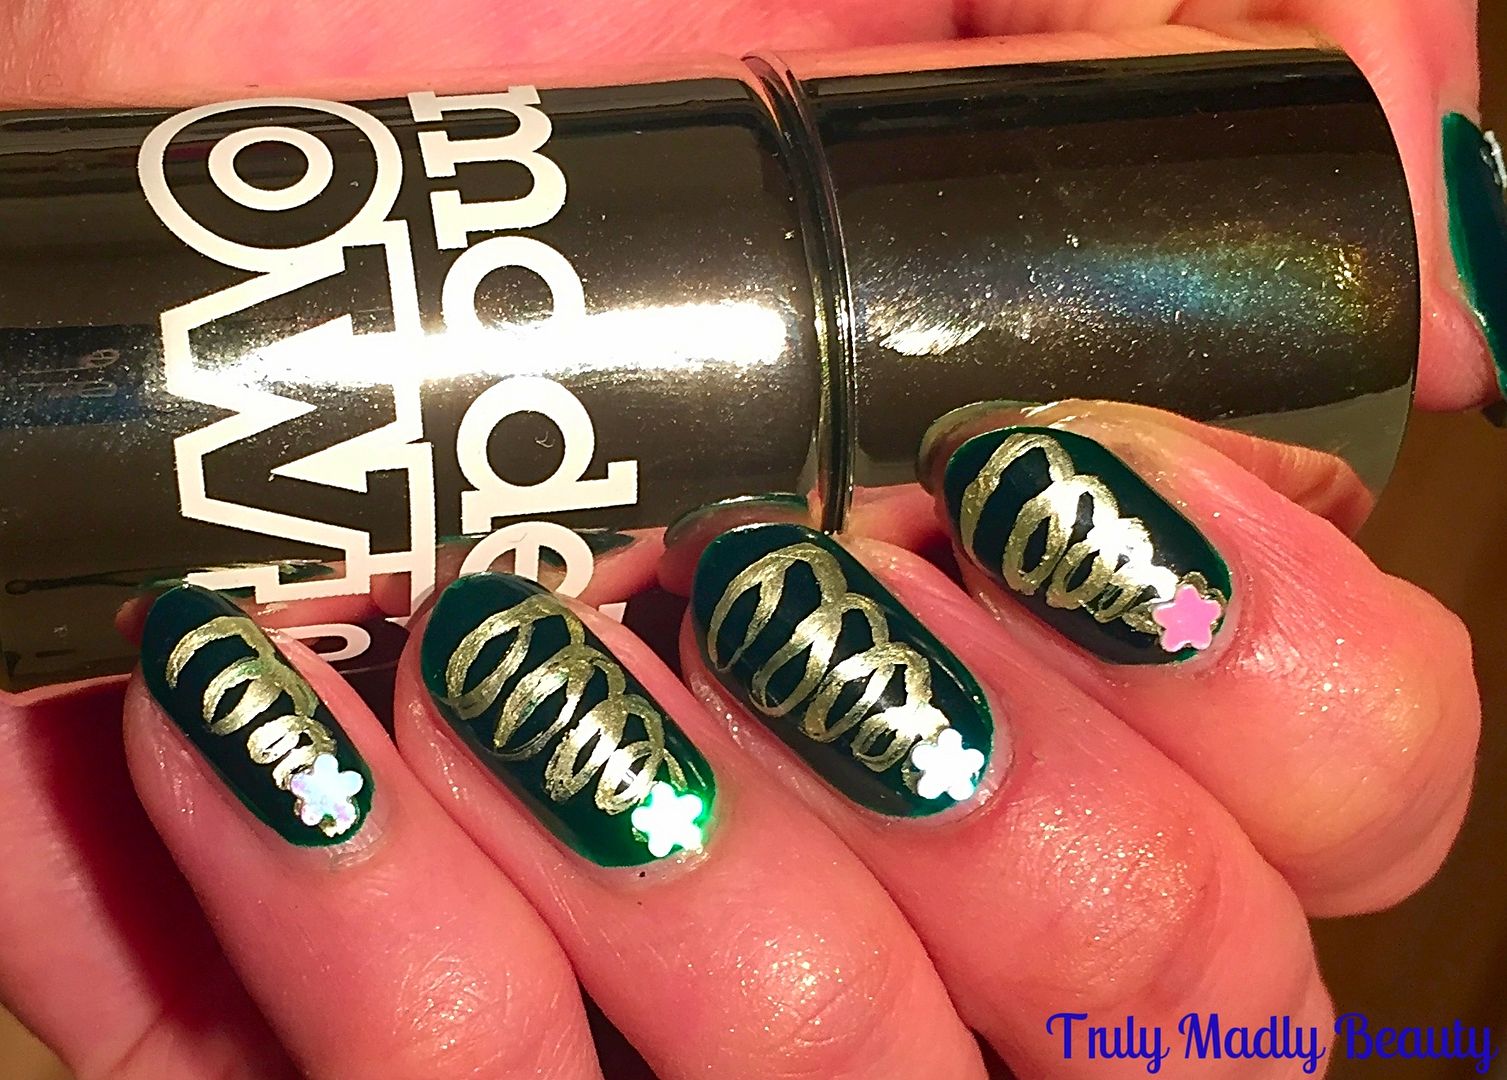
Then for my Xmas trees I found myself reaching for Models Own again, this time Chrome Olive from the Colour Chrome collection. I was originally going to use a gold polish but I'm so glad I changed my mind as the metallic formula really pops against the dark base!


To create the trees I grabbed my extra small Nailbees nail art brush & with the Chrome Olive polish, free handed the swirls, starting with a tiny swirl for the top of the tree, slowly making my way down the nail, gradually making the loops bigger as I went.


A little tip is to rest your elbow on a surface when doing this, this helps steady your hand a great deal, enabling you to create your swirls without a shaky hand!


Of course every tree needs a star, so to finish I simply added a little star shaped holographic sequin at the top of my trees. Finish with topcoat & you're done!


Thanks for reading my lovelies, keep posted as I hope to squeeze in a couple more designs this year. But do have a peek at some of previous designs HERE for some festive inspiration.


Lotsa love to ya!


12.06.2016

Festive NOTD - The Obligatory Glitter Red Mani!

Hello there my lovely readers!

I think its safe to say we are officially in the festive season now which means ALL the Xmas nails! Unusually I've actually been hitting a bit of a blank when it comes to thinking up ideas this year, not sure whats going on there. Perhaps inspiration just a missed the bus & is a wee bit delayed...I'm sure it'll arrive in due time filled with apologies for such tardiness!

In the meantime however, to me nothing screams Xmas nails more than a really good red glitter manicure. 


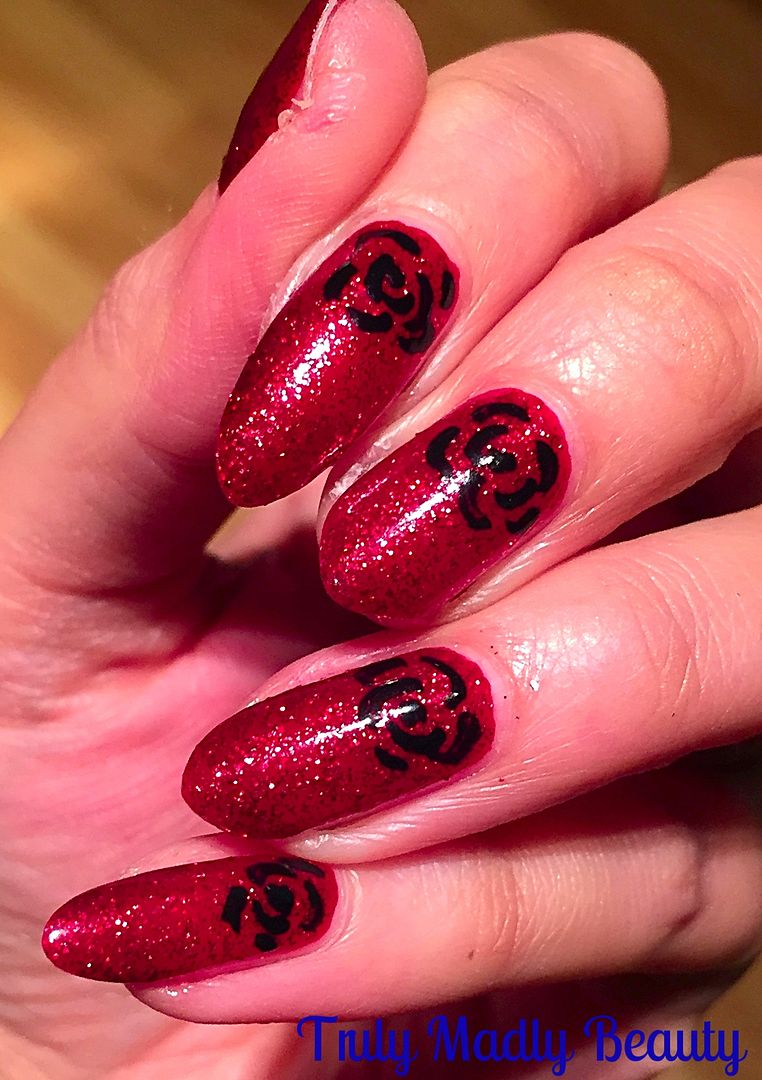
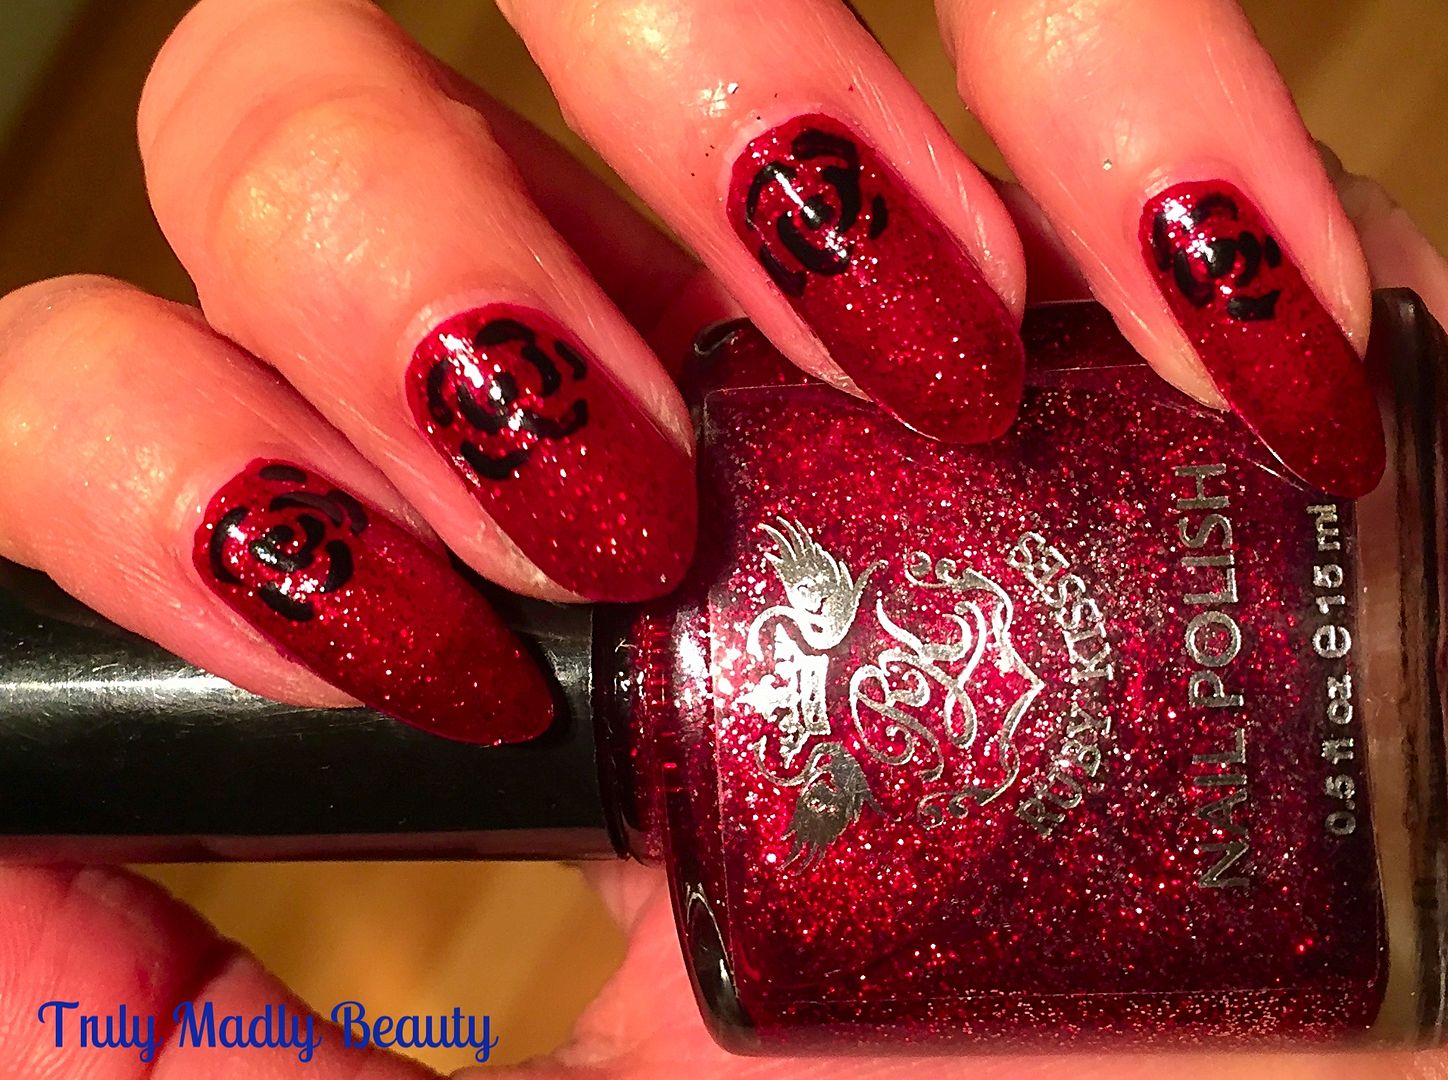
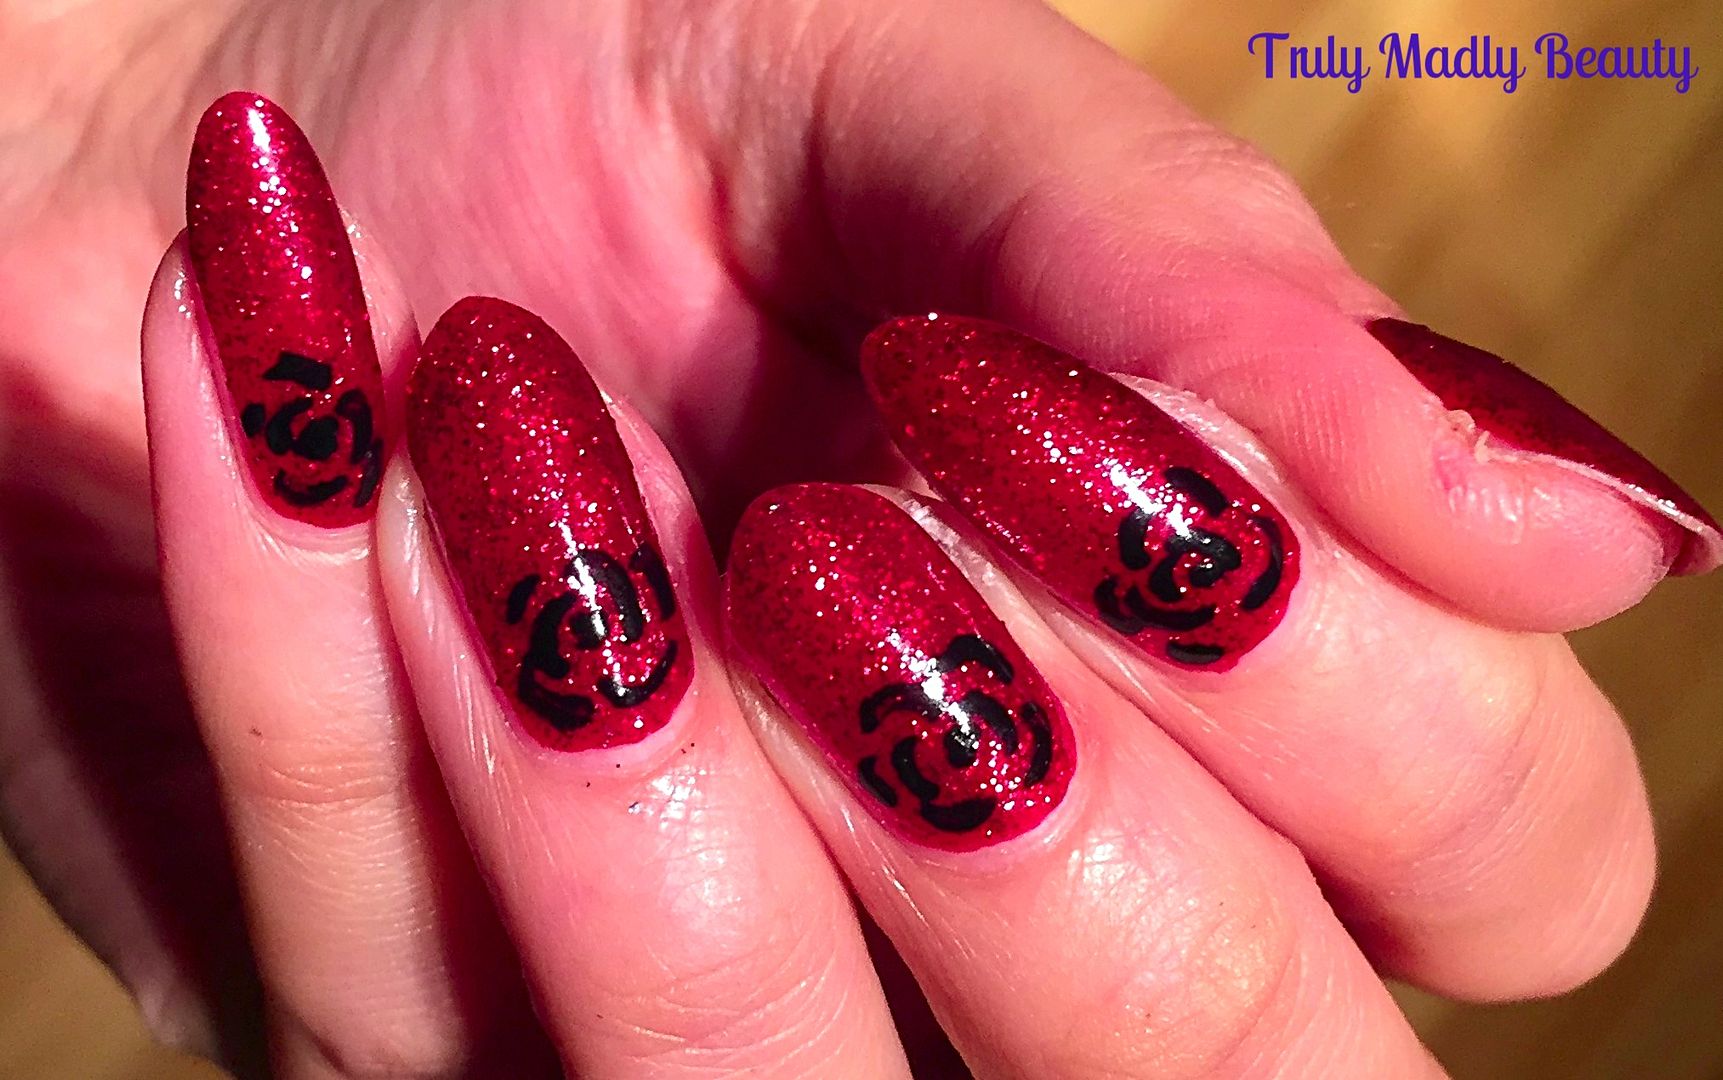
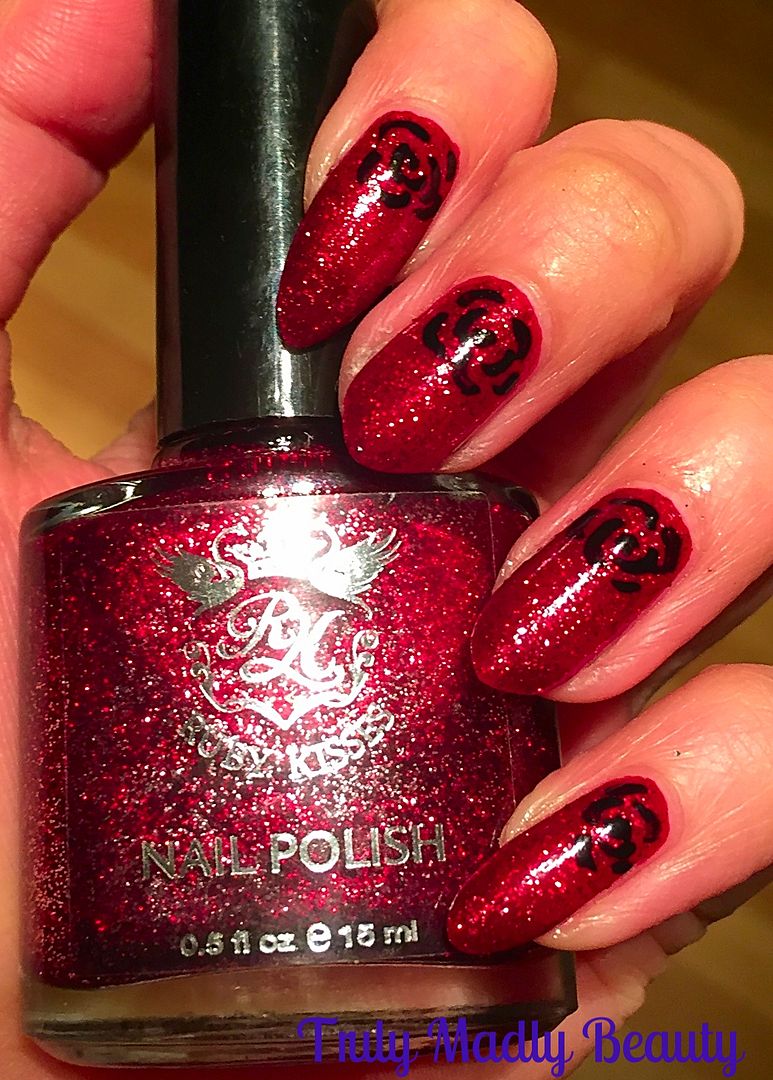
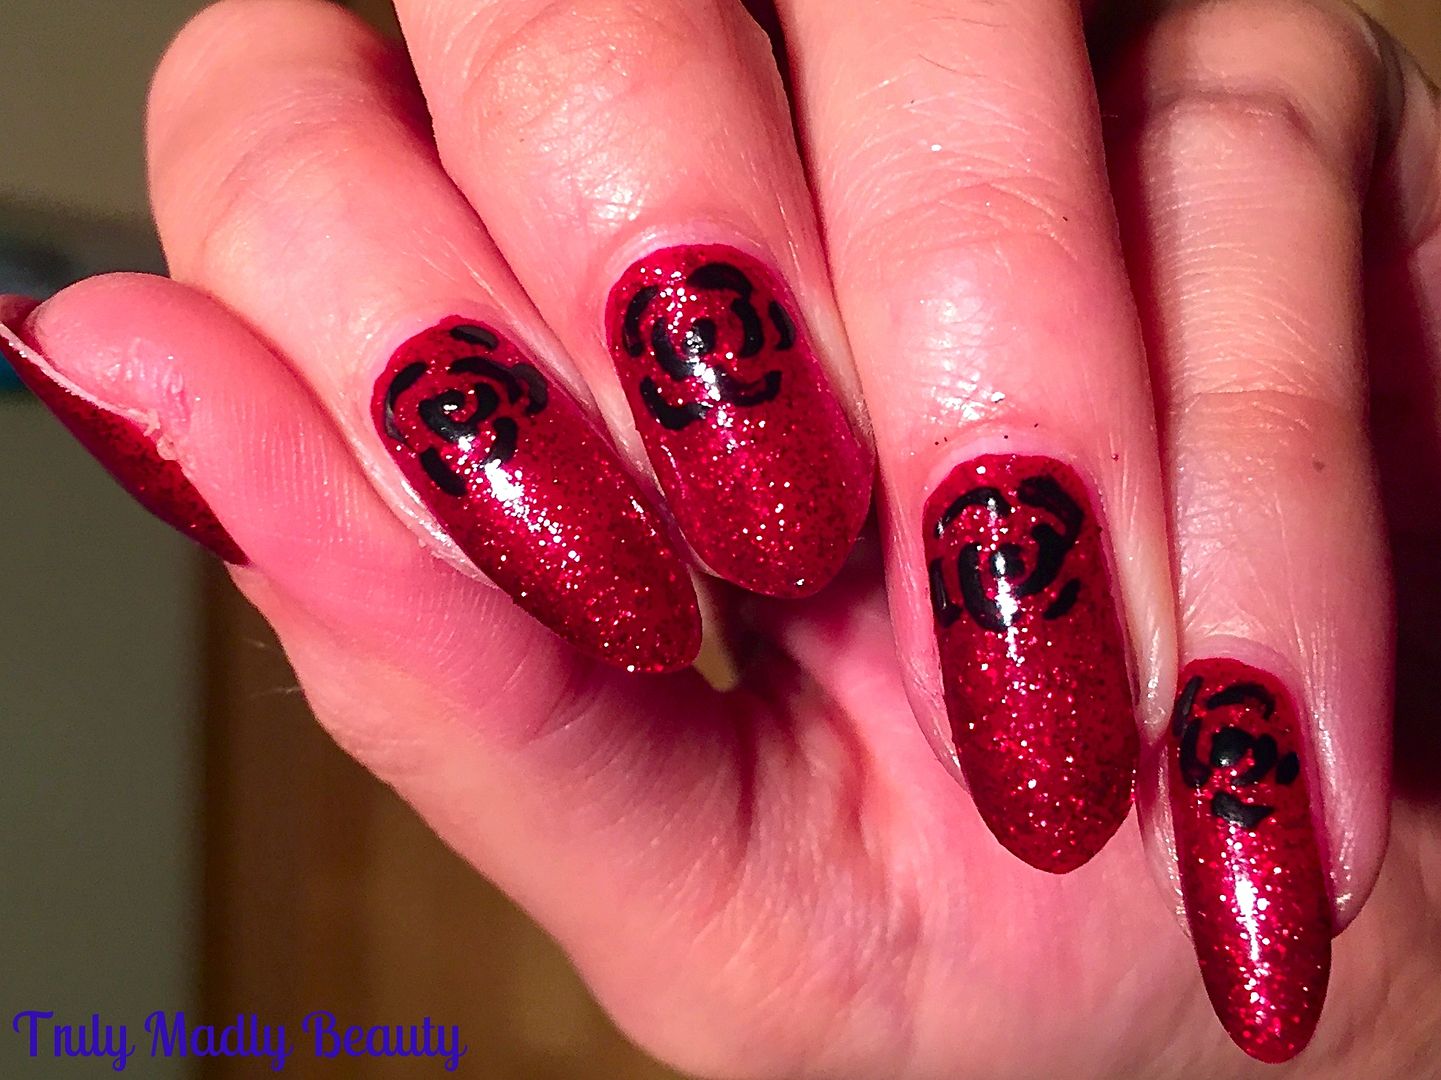
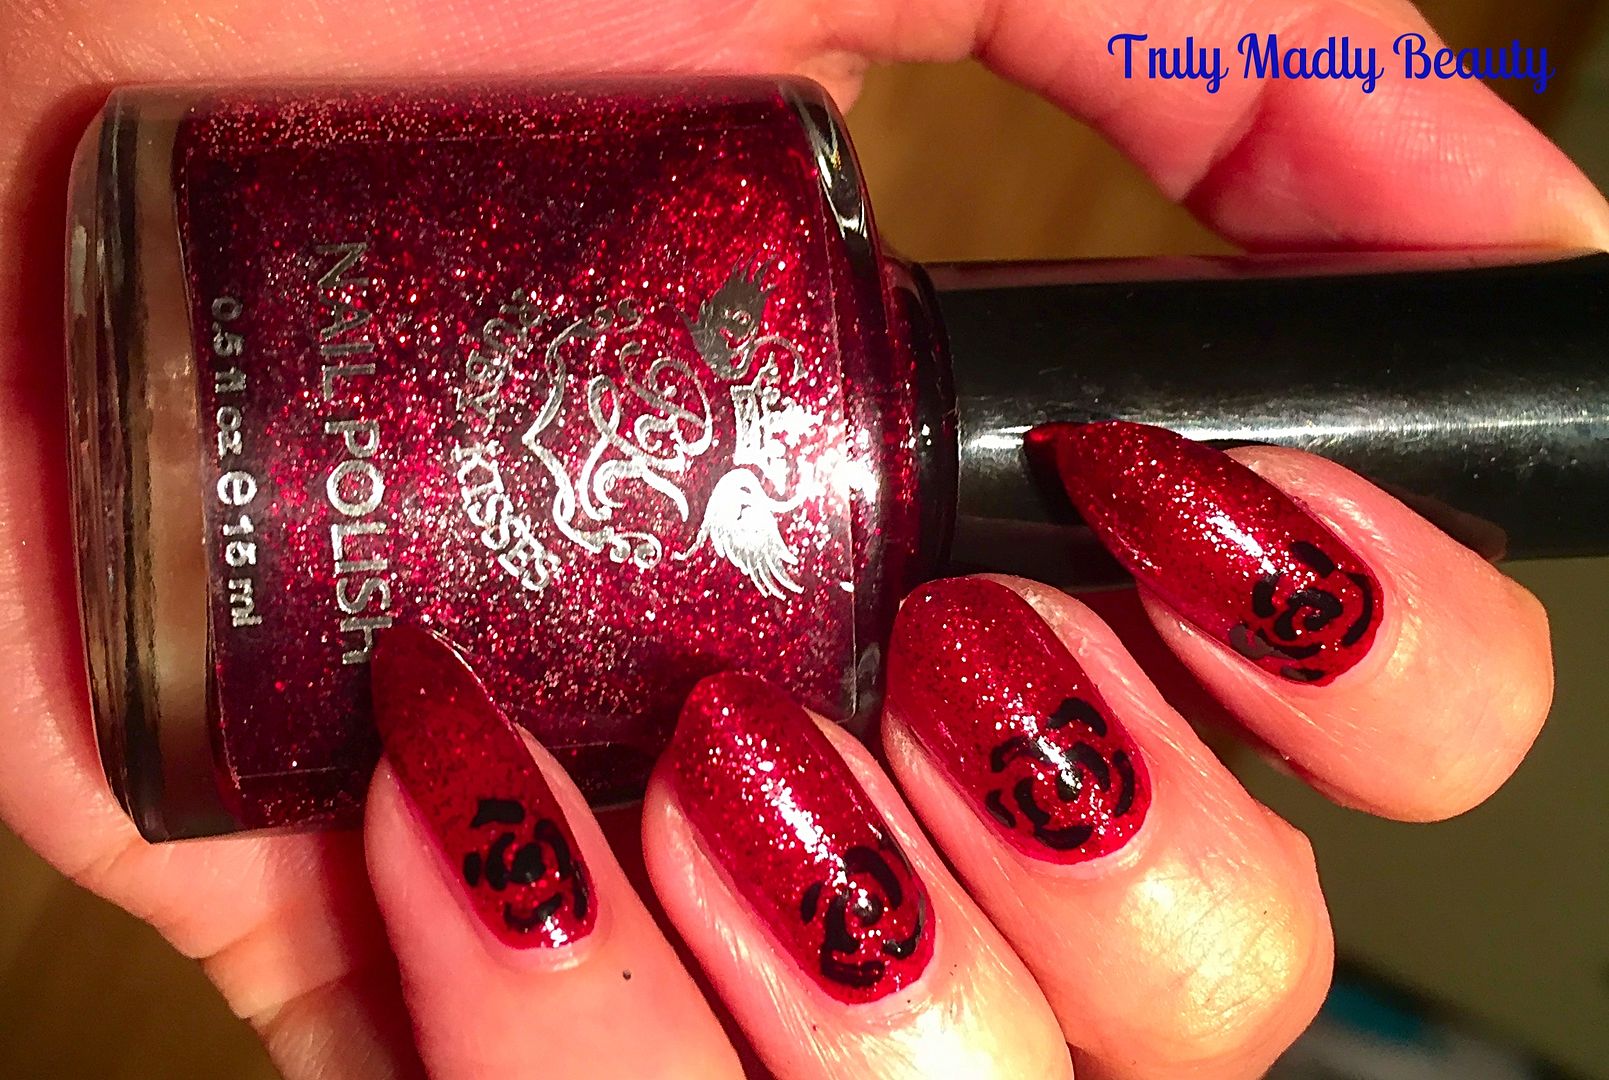
Sparkles...check. Rich red shade perfect for this time of year...check. Glossy finish...check! Ungh, SO satisfying! So to start things off simply, here are my glitter red nails for this Xmas using a lovely polish I picked up in a random chemist whilst in NYC earlier this year.


The brand is Ruby Kisses & actually goes by the name Ruby Slippers...which another rather well known brand has a similar version of also. But dare I say it...having the OPI in my possession also...I actually prefer this one!


Not only is it super sparkly, but the formula is gorgeous, giving full coverage in two coats & leaves an almost gel like finish. Its thick but NOT gloopy...WIN. I love the actual shade of the red also, the OPI version is a tad darker in tone than this one.


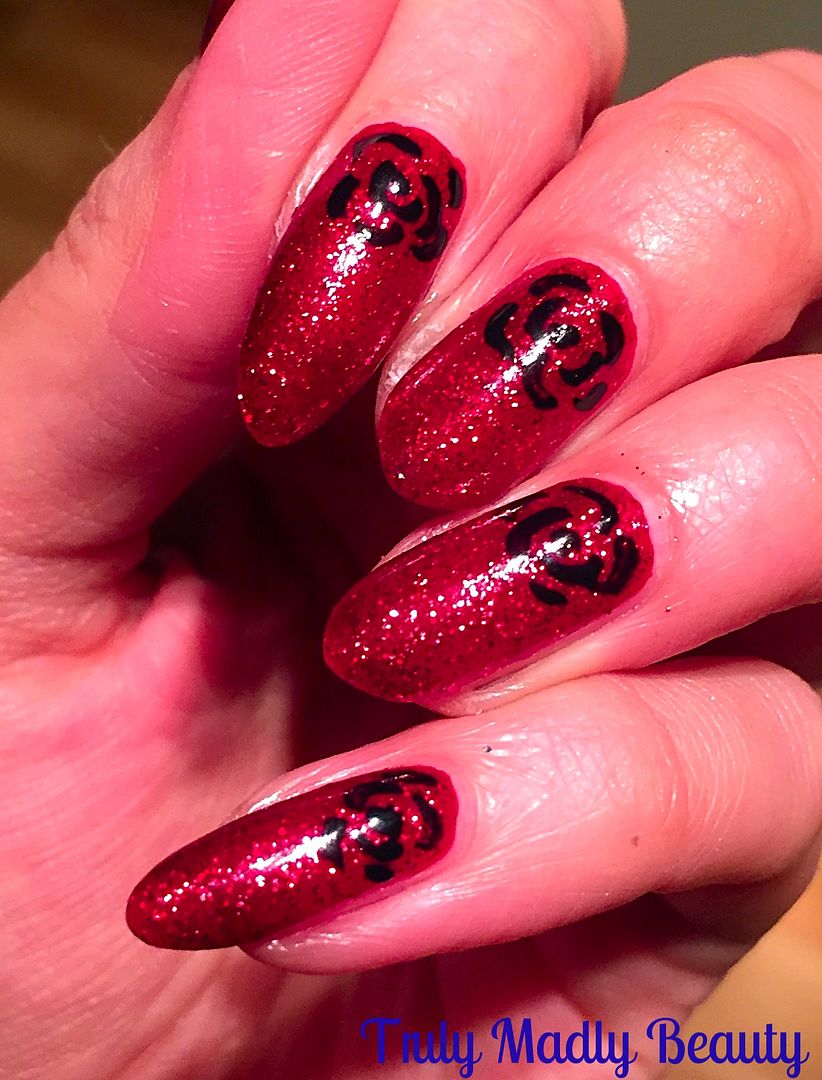
To add a bit of extra Gothic oomph if you will, though that red sparkly goodness is pleasing enough by its onesie, I added a little black rose to each nail. Though you can festive this up even more & use gold or green polish to give the look of wreaths!


There are so many different ways & techniques you can use to create roses. These ones are super easy to do, all you need is your nail art brush & some black polish. Starting with a dot in the middle, just add little curved swirls around it to create the petals, going outwards until you are happy. A really easy way to create some rustic roses.


Even though the finish was glossy I still out of habit finish with a topcoat to help the mani dry quicker, smooth out any grittiness from the glitter  & to add even more shine. 


ALSO FYI dolls I'm currently in mourning the loss of my talons...moment of silence please... Because I'm such a clumsy klutz I knocked a few nails resulting in me having to file them all down to nubbins! Time to reach for the MicroCell Nail Repair again...so the next few festive manis will be seen in noticeably shorter nails...but that never stops me! So stay tuned my merry little elves!

Lotsa love to ya!


11.23.2016

Getting Lippy - Winter Lip Hydration with Korres & Burts Bees

Hello there my lovely readers,

Harsh weather brings with it skin in desperate need of hydration & requires us to enforce a bit more TLC to our skin & lips. For me this is pretty much a year round problem, especially dry lips. Its been a bane of my existence for a long time & also the reason why I rarely venture in to that world of lippies that is so daunting to me! Mostly a fan of tinted balms, what I look for in a good product is a light wash of colour with smooth moisturizing properties without stickiness. Two such brands who have delivered on this for me are Korres & Burts Bees with their range of lip butters & shimmers...


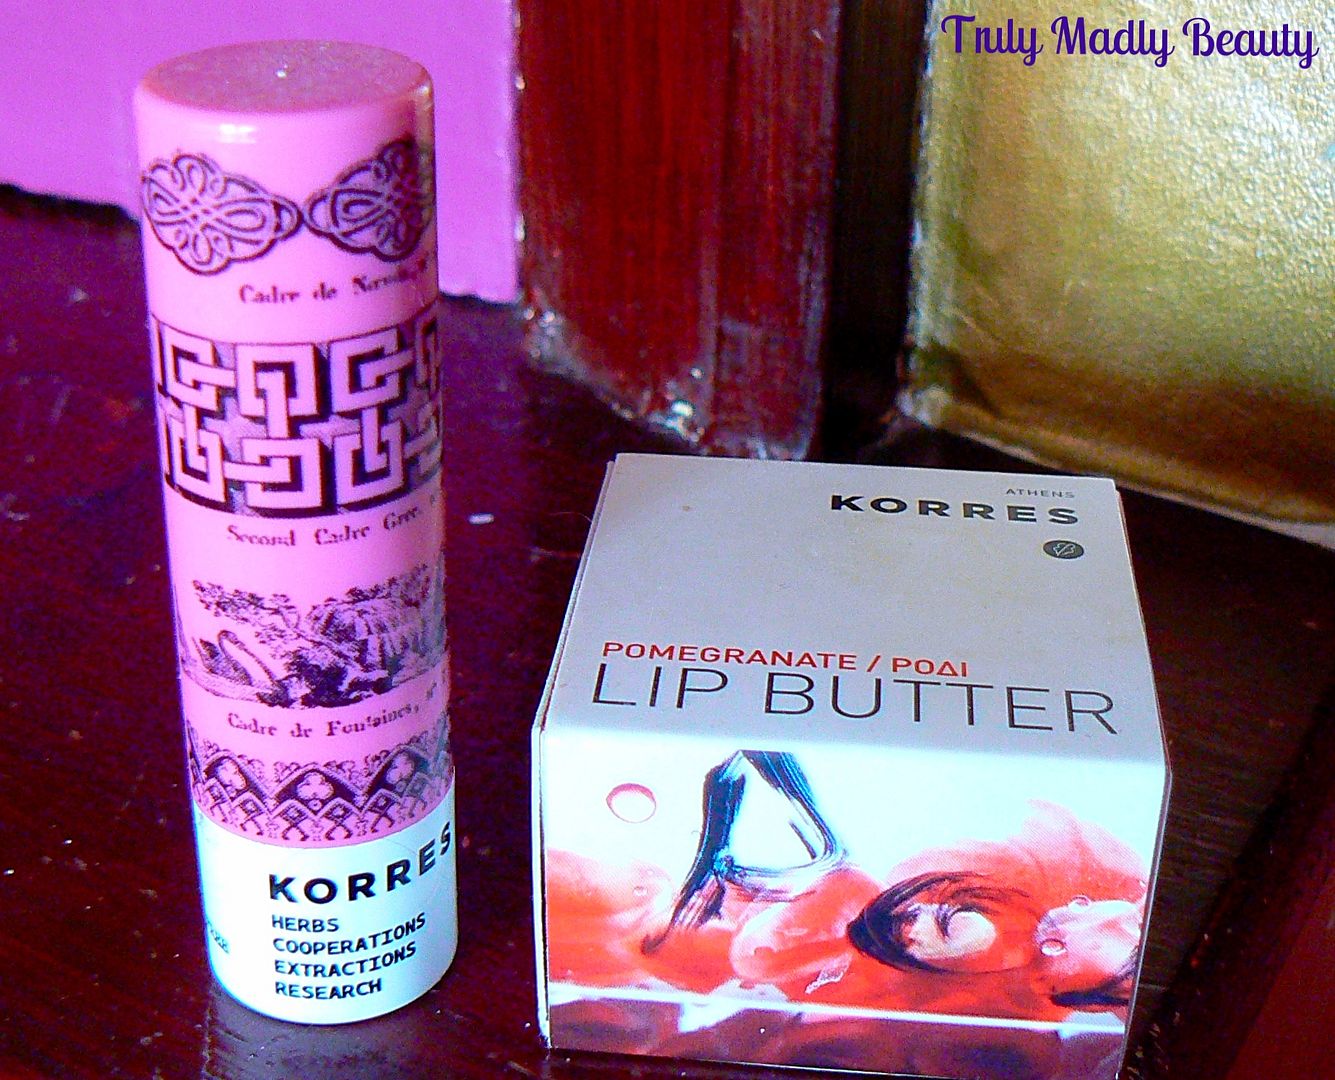
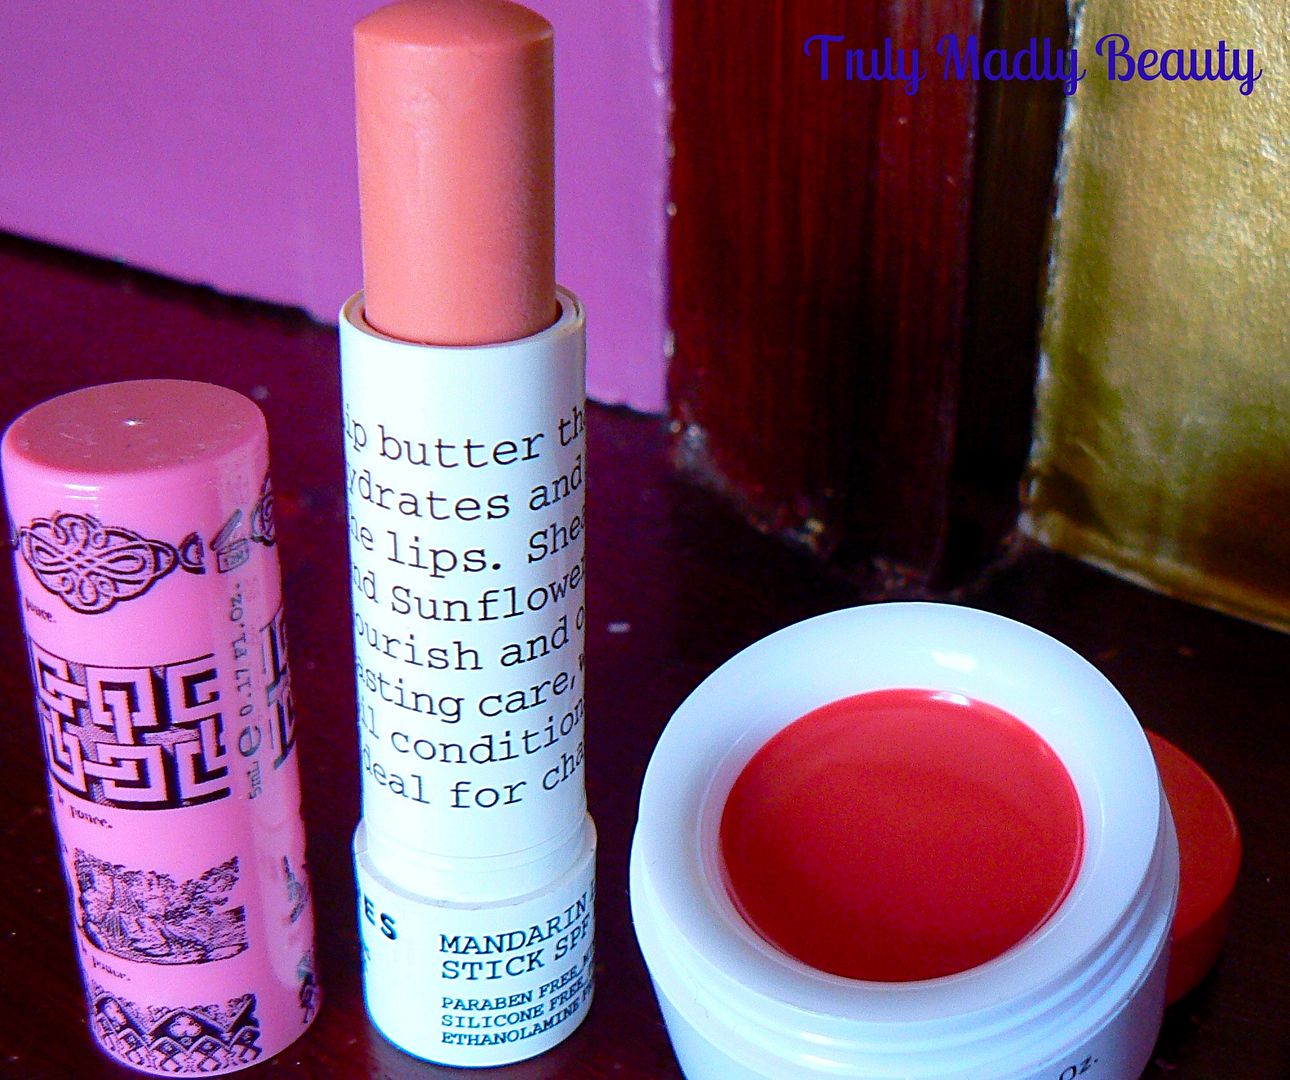
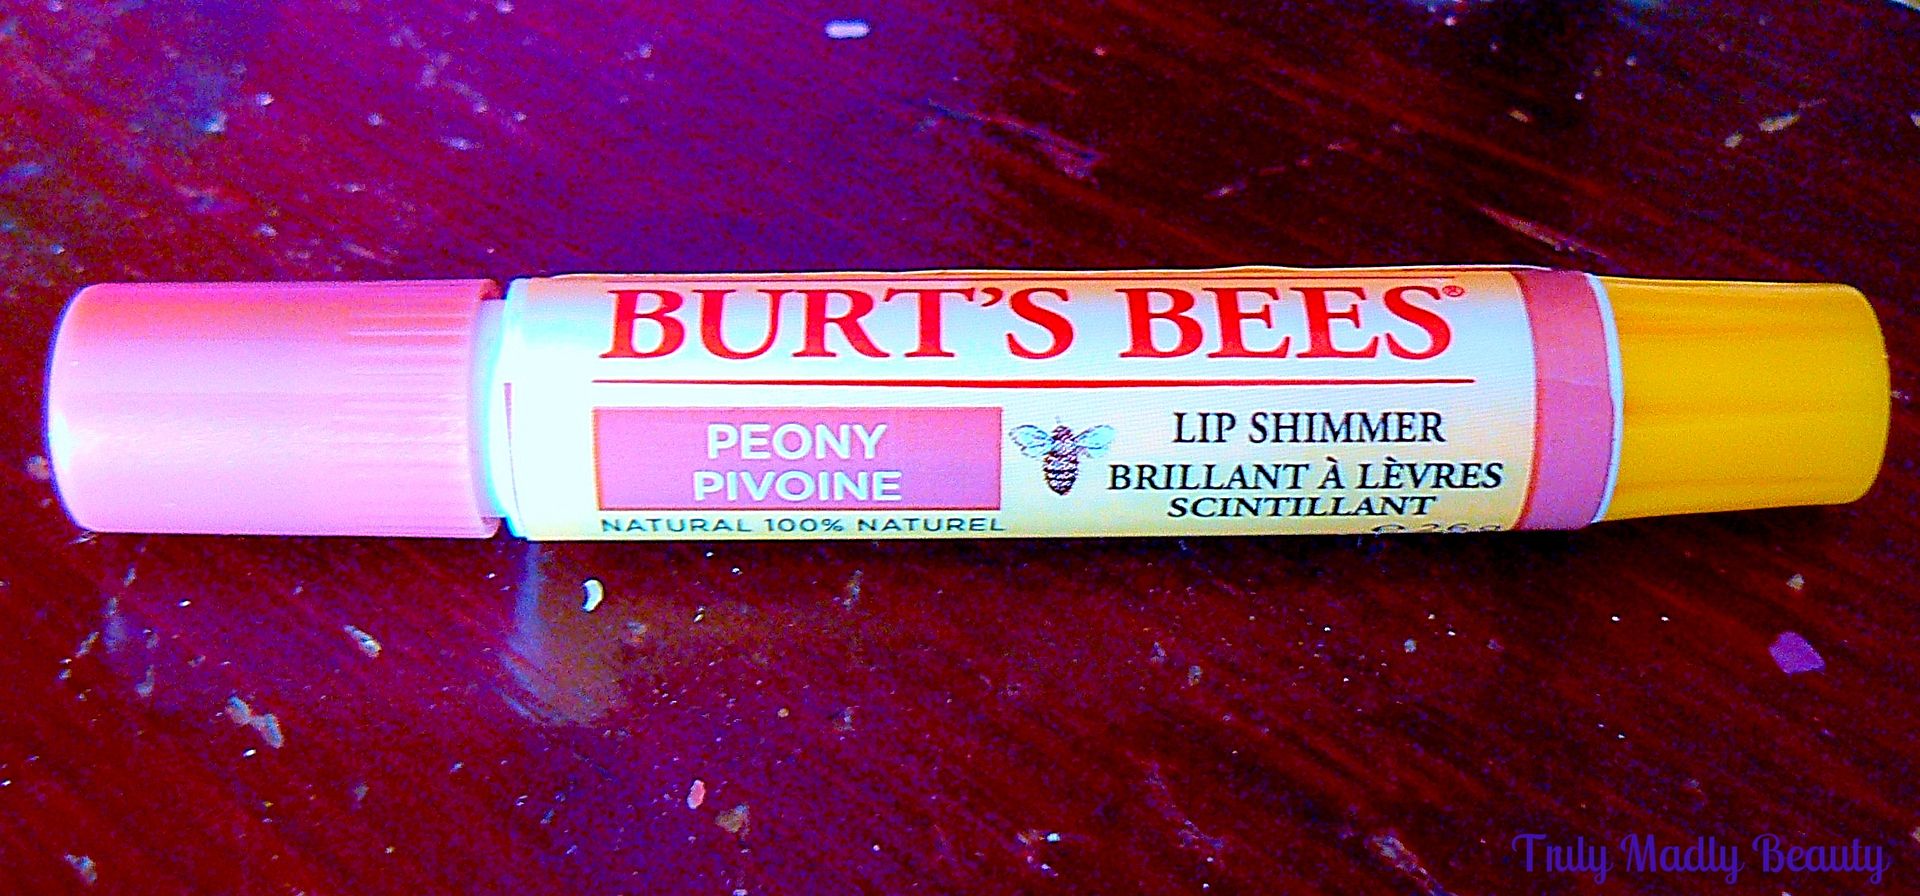
Starting with Korres, I've heard nothing but praise when it comes to their products so was keen to investigate for myself. When passing through my local Lloyds chemist I saw that they'd introduced a wide range of skincare & beauty products, including both Korres & Burts Bees. I noticed that there were two variations of Korres lip butter available, the well known pot form as well as a more convenient stick, so went for one of each as well as nabbing a Burts Bees Lip Shimmer in the shade Peony.


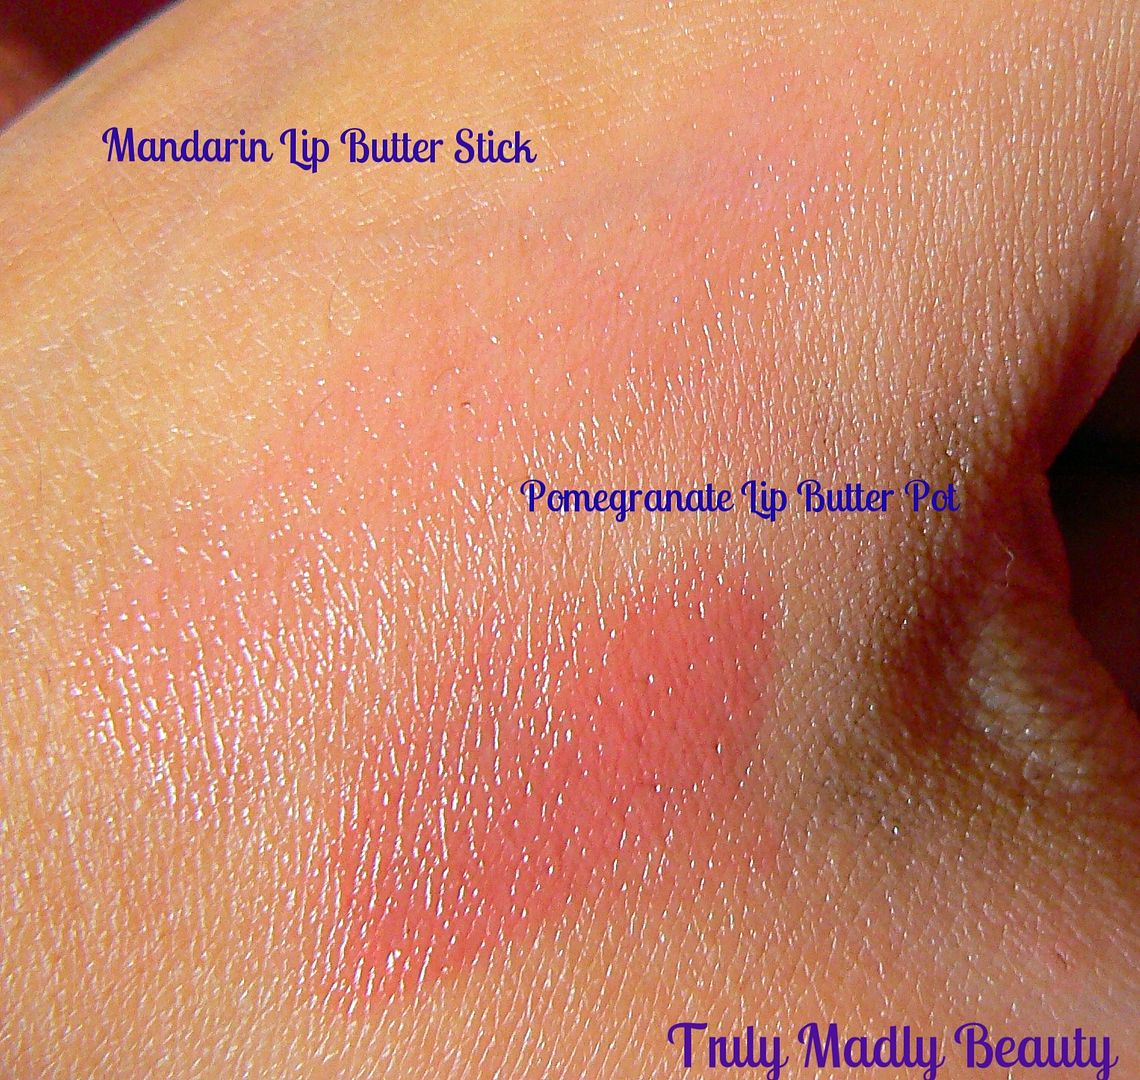
The Korres Lip Butter pot (RRP £8) I opted for was Pomegranate which has a lovely red tint & contains Shea Butter, well known for its moisturising properties including soothing chapped irritated skin. The butter is almost jelly like in formula & glides smoothly on to the lips without feeling too heavy. The shade is more pigmented in the pot however you still get a really lovely delicate wash of colour across the lips. I love the feel of this after application & keep the pot by my bedside applying as often as I can remember, however I know many are put off using balms/butters in pots, which is why I love that Korres also have the stick option as well.


Not only more compact & travel friendly, the Korres Mandarin LipButter stick (RRP £8) also contains SPF15 giving it major score points as well as including lush ingredients of Mandarin Oil, Sunflower Wax & the Shea Butter. The shade I have is Pink which again gives a lovely delicate rose tint to the lips as well as moisturizing. I found this slightly more creamier in consistency to the jelly like pot butter but equally lovely on the lips & I love using this as a base for the rare occasions when I DO wear lipstick as it glides on so smoothly over the top.


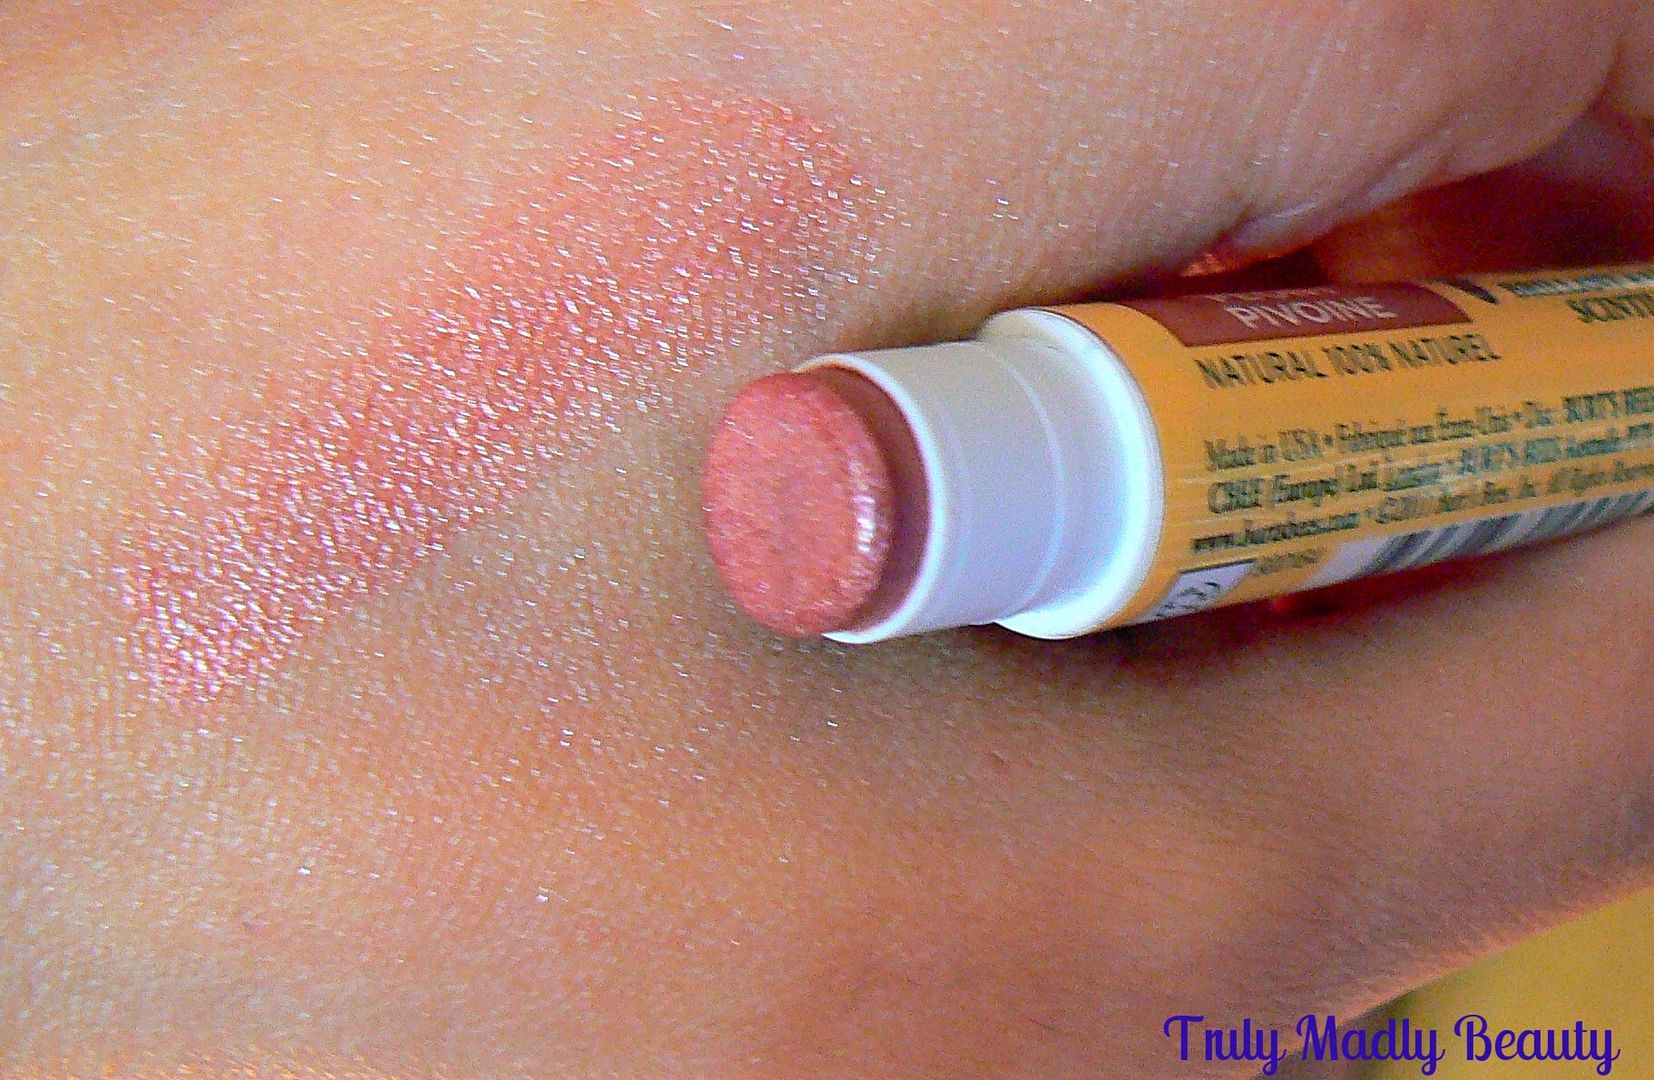
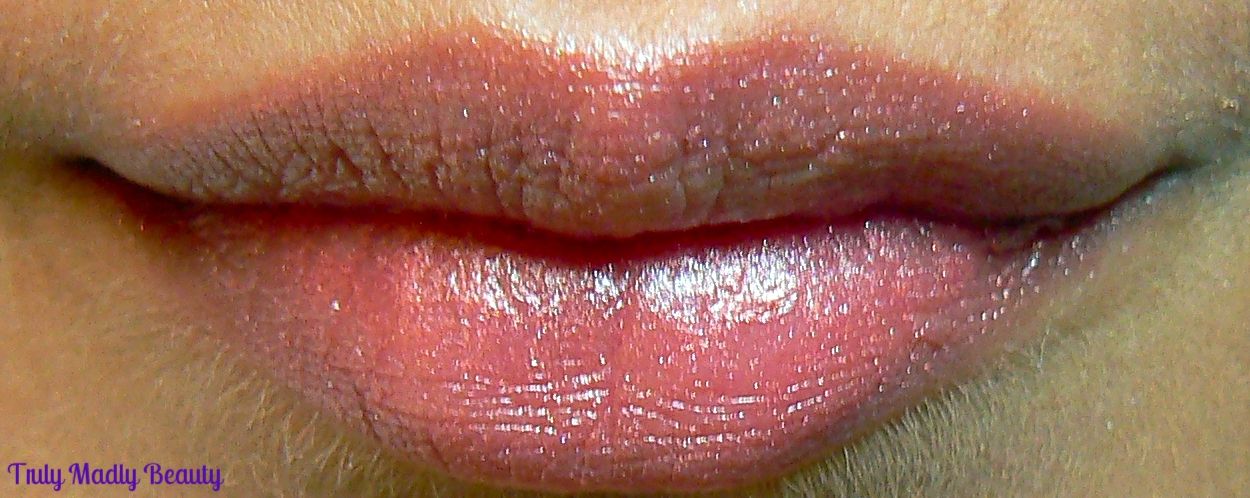
Now we have a touch of glam factor if you like with the Burts Bees LipShimmers (RRP £5.99). These moisturizing balms are divine, delivering a wash of subtle colour to the lips but with a touch of shimmer in the form of macroglitters & come in a nice selection of shades to choose from ranging from plums & reds to warmer nudes & browns.

Thankfully the macroglitter is very fine preventing the balm from looking like a discoball or feeling gritty on the lips, which wouldn't be pleasant at all. The shade I have here is Peony which is a lovely warm brown toned nude.


The lip shimmers contain Vitamin E, Beeswax, Sunflower & Coconut oils making them incredibly nourishing & have a subtle peppermint flavour which feels nice & refreshing on the lips. I love that the tube is also nicely compact & slender, making it ideal for popping into your bag or pocket when on the go.


Overall I am utterly converted to these lovely lip hydration offerings from Korres & Burts Bees, they are a joy to wear & my lips are certainly happier & in better condition. The Mandarin Lip Butter stick is also available in a colourless version if tint is not your thing, I'm keen to try a few more of the Lip Butter pots too, Jasmine and Wild Rose look dreamy as well picking up a few more adventurous shades of the Burts Bees Lip Shimmers!

You can find both Korres & Burts Bees in selected Lloyds Pharmacies as well as online via FeelUnique or LookFantastic to name a few.. its worth having a hunt around as prices vary on different sites. Thanks as always for reading!

Lotsa love to ya!


11.18.2016

NOTD - Toothless the Dragon Nails!

Hello there lovely readers!

A spot of fun randomness with today's nail art....I love finding inspiration in all things, especially one of my greatest joys...animated movies! 

Browsing through Netflix the other day I came across one of my favourites & I'm sure a film that is for many others too...How To Train Your Dragon. I've yet to find anyone of any age who DOESN'T love this movie & I think we know its mostly down to the bloomin adorable Toothless.

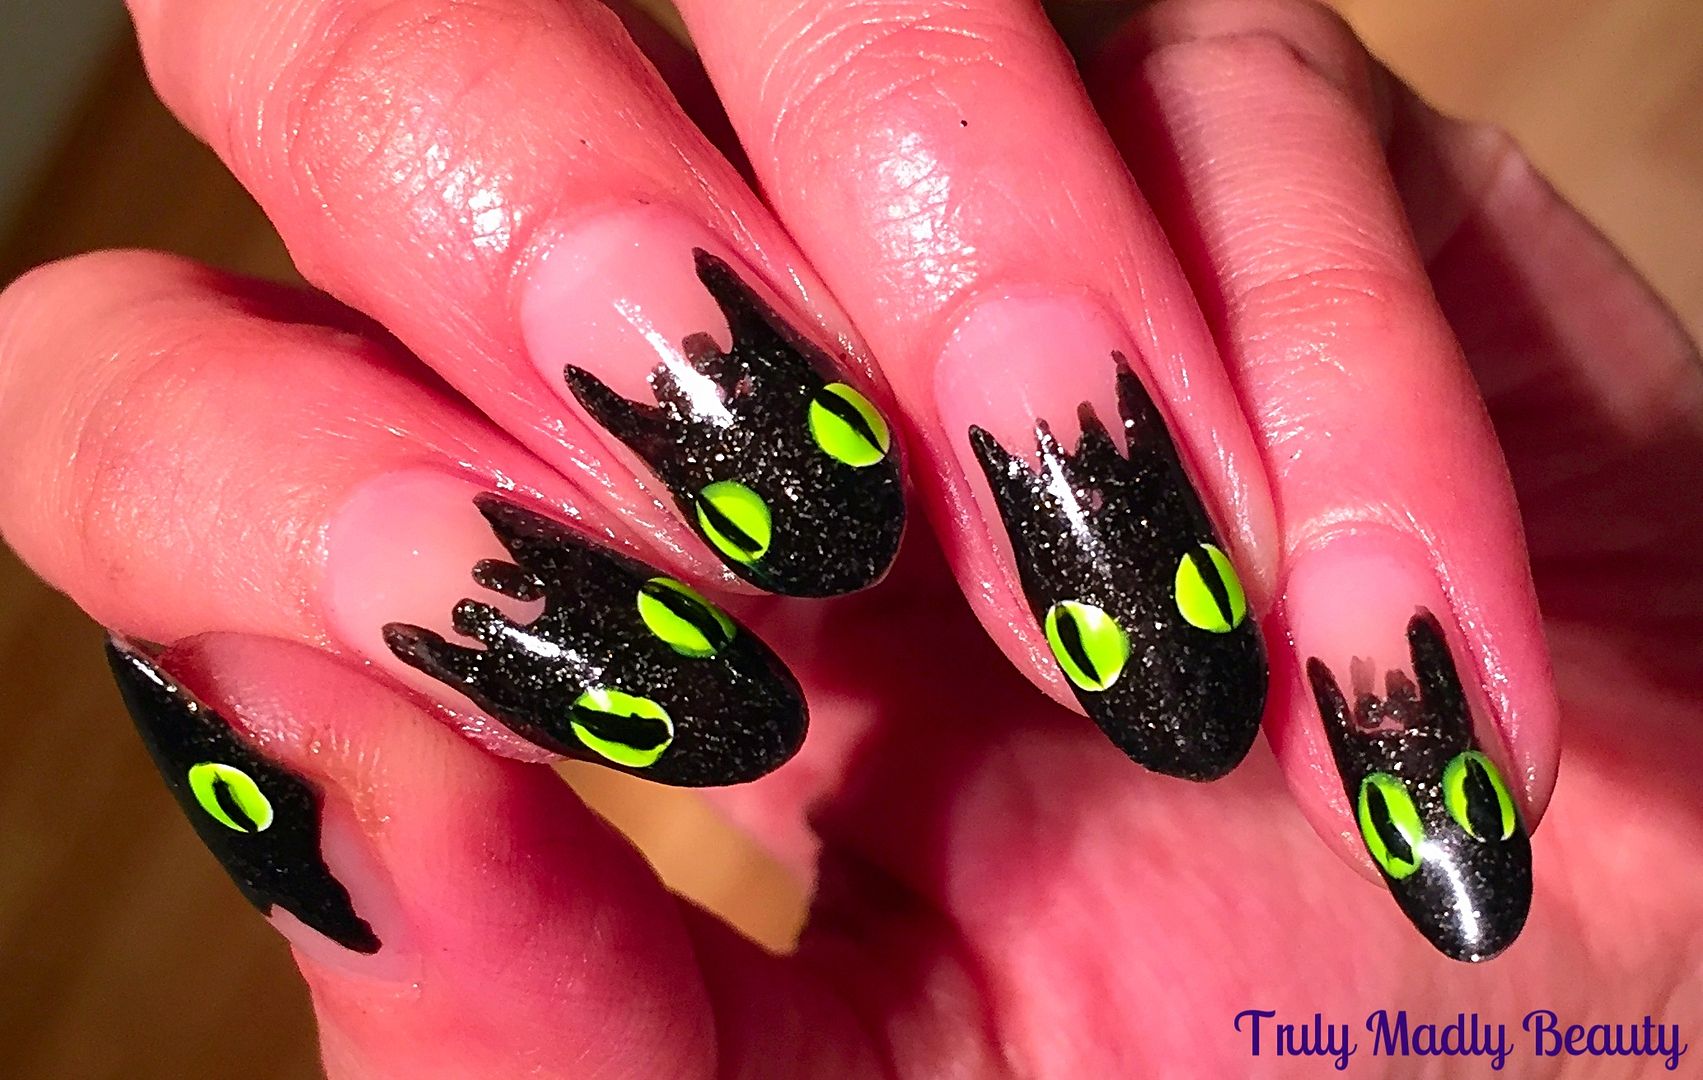
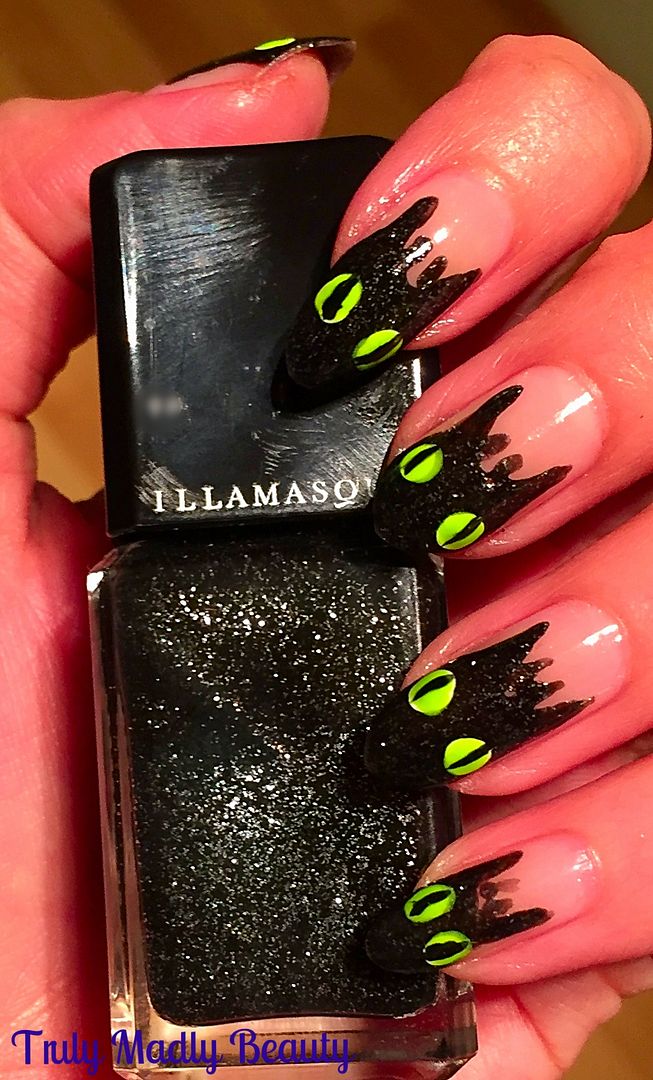
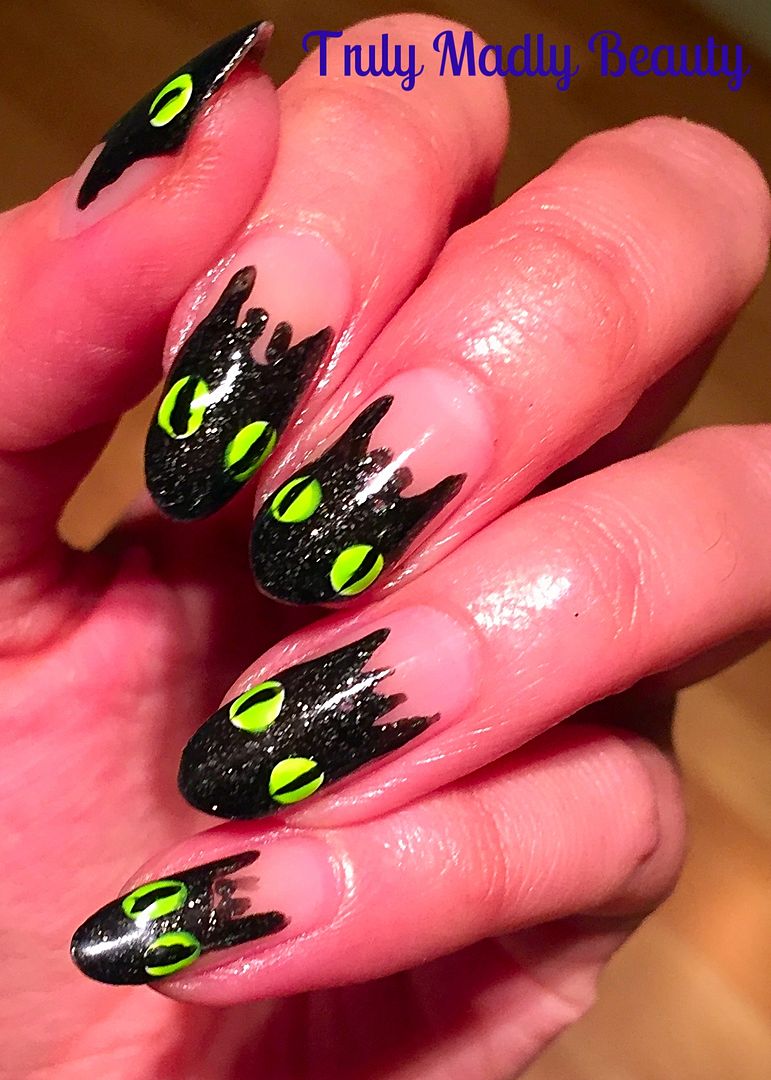
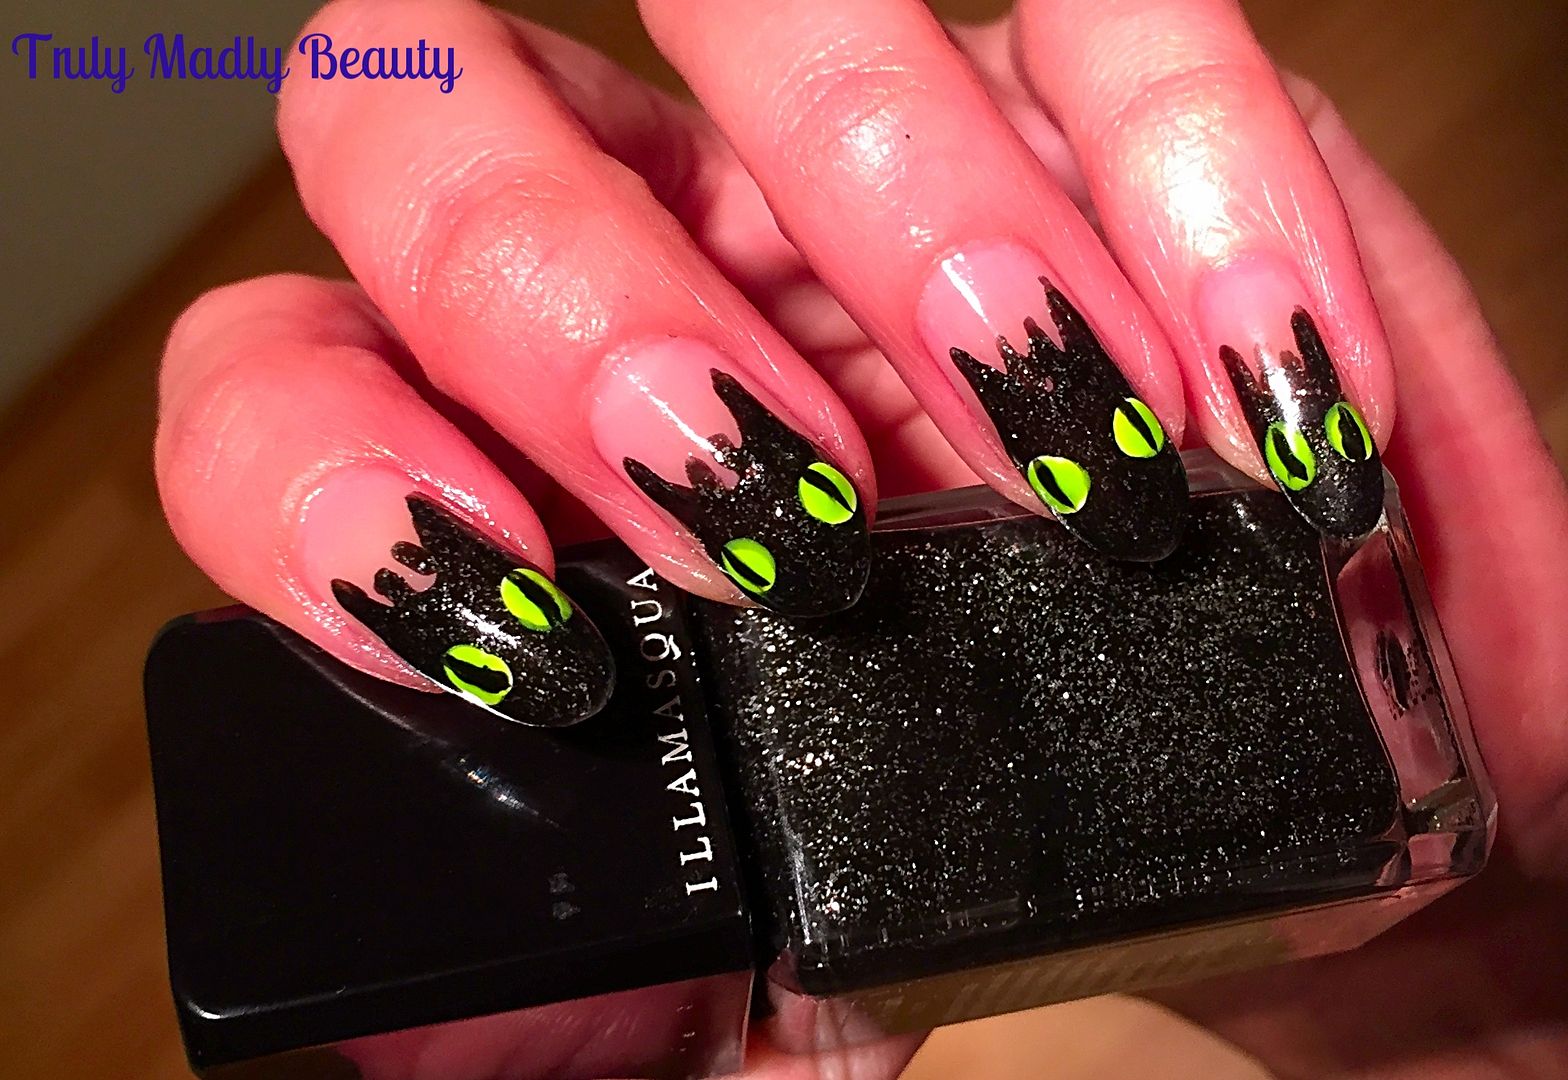
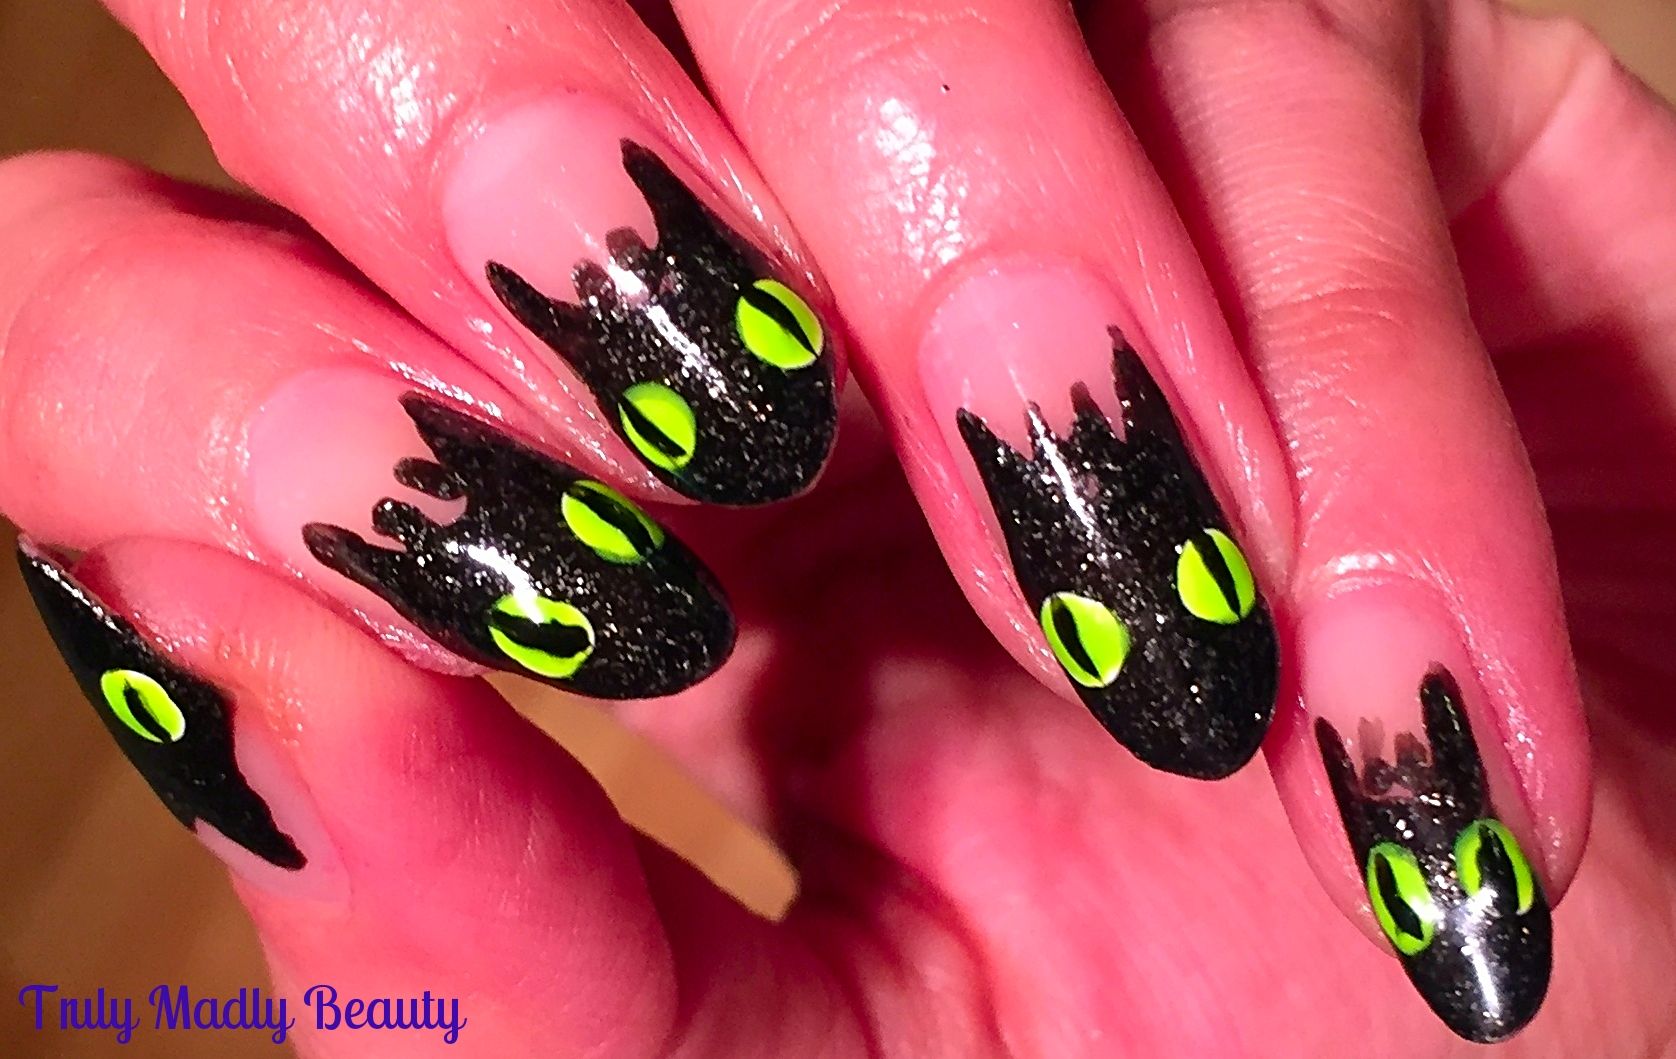
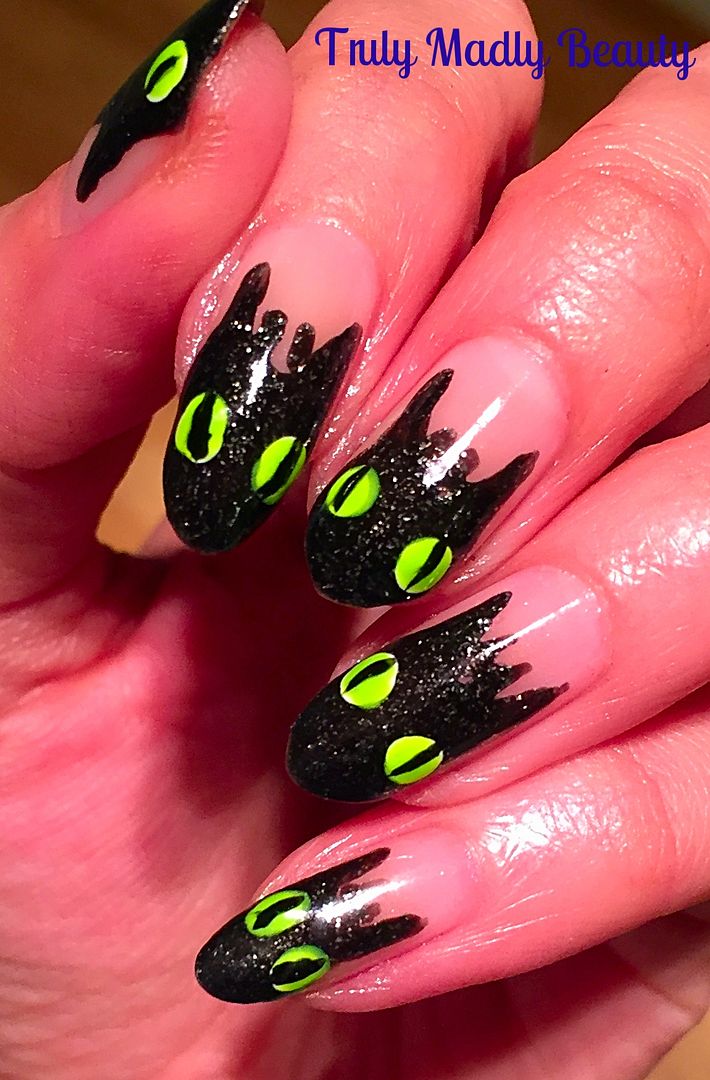
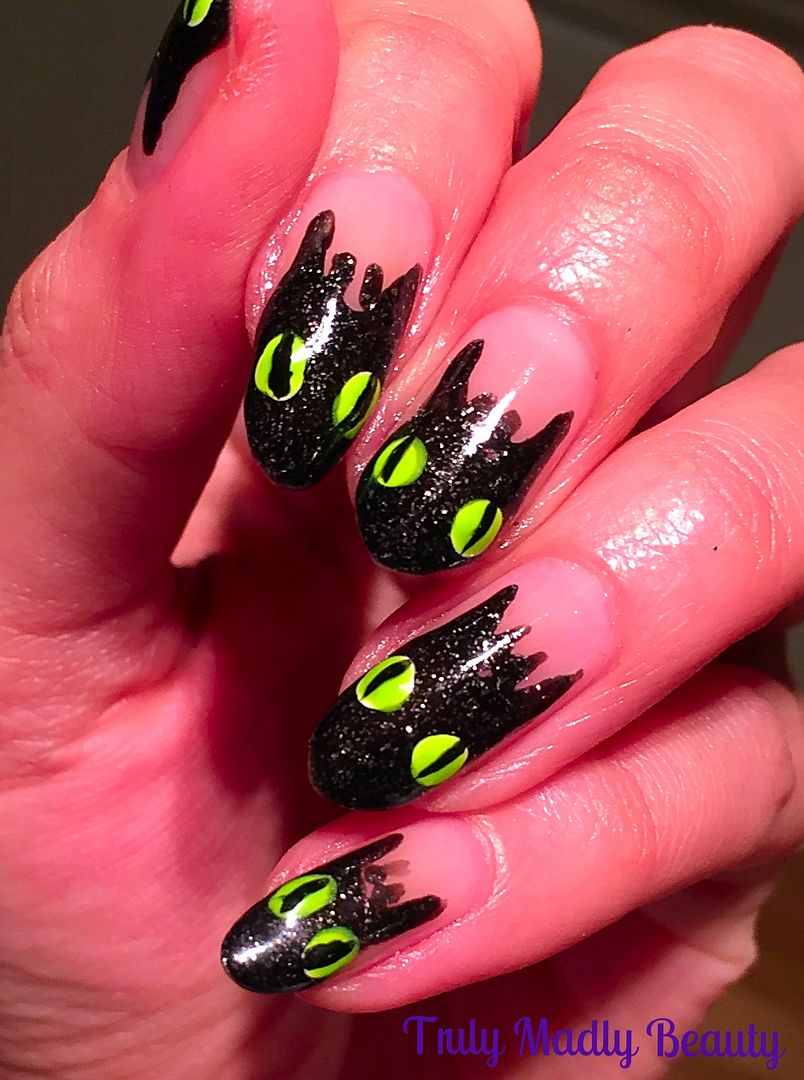
I was in the mood for something dark yet fun so I decided to use the lovely Toothless as my inspiration and created this Toothless Dragon Tips design!


Haha different non? But I'm chuffed with how they came out, I certainly did my work colleagues heads in the next day asking them WHO they thought it was on my nails...& 99% of them got it right! Currently NOT talking to the 1% who thought it was the rabbit ghost from Watership Down.... AHEM. O_O


Anyhoos for my Toothless nails a suitable black was required & rather than use a plain black polish I reached for this pretty by Illamasqua called Creator which is filled with teeny silver microglitters giving it a fun edge & I felt would actually add to the effect of the dragon like scaly skin.


Using my black polish & a fine nail art brush I freehanded my Toothless faces to each nail. To do this start by drawing on a U shape about 3/4 of the way on the centre of the nail.


Then continuing on from the bottom curve of your U shape, draw 2 lines either side, downwards to the tips, curving out slightly to create the face, before filling in.


Add on 2 little spikes in middle of the U for his horns & then for the eyes I simply dotted on two white dots, before going over with a neon green (this makes the neon pop)


Final step is adding on 2 thin dragon pupils on to your eyes with a spot of black polish & a fine brush before finishing with topcoat...Hello Toothless!


Hope you liked, now thinking of other animated characters I can bring to life on my nails....Thanks as always for stopping by darklings! 

Lotsa love to ya!


11.15.2016

Afternoon Tea Adventures - The Keepers House London

Hello there lovely readers!
So I've been a busy bee lately & by busy I of course mean eating ALL THE CAKE at some rather delightful afternoons teas...a VERY important task I'm sure you'll agree, which also means I have more reviews coming your way! I take my cake eating & tea sampling very seriously...its a hard job but I guess someone has to do it...

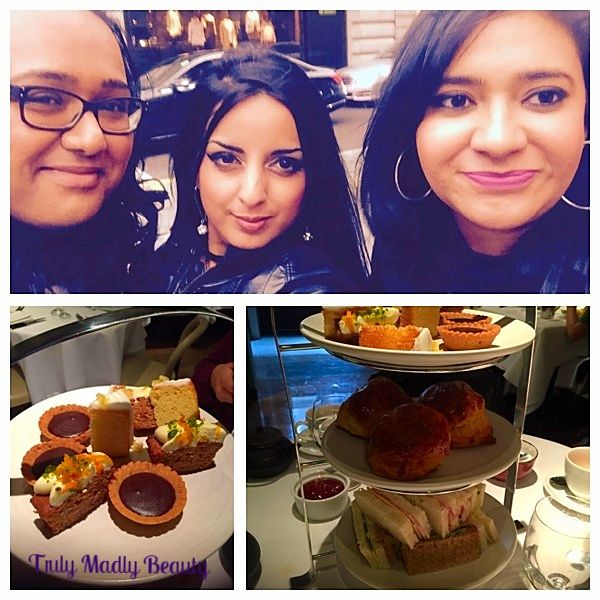
Today I'll be writing about the afternoon tea at The Keepers House Restaurant which is situated near Piccadilly Circus inside the Burlington Royal Academy of Arts. I was meeting my chums Ram & Saf for a good catch up sesh in the city so I suggested going for an afternoon tea as I always do & this one came up on my latest perusal of the afternoontea.co.uk website...having never tried & also loving the central location I decided to book it for our 3 way date.