11.23.2016

Getting Lippy - Winter Lip Hydration with Korres & Burts Bees

Hello there my lovely readers,

Harsh weather brings with it skin in desperate need of hydration & requires us to enforce a bit more TLC to our skin & lips. For me this is pretty much a year round problem, especially dry lips. Its been a bane of my existence for a long time & also the reason why I rarely venture in to that world of lippies that is so daunting to me! Mostly a fan of tinted balms, what I look for in a good product is a light wash of colour with smooth moisturizing properties without stickiness. Two such brands who have delivered on this for me are Korres & Burts Bees with their range of lip butters & shimmers...


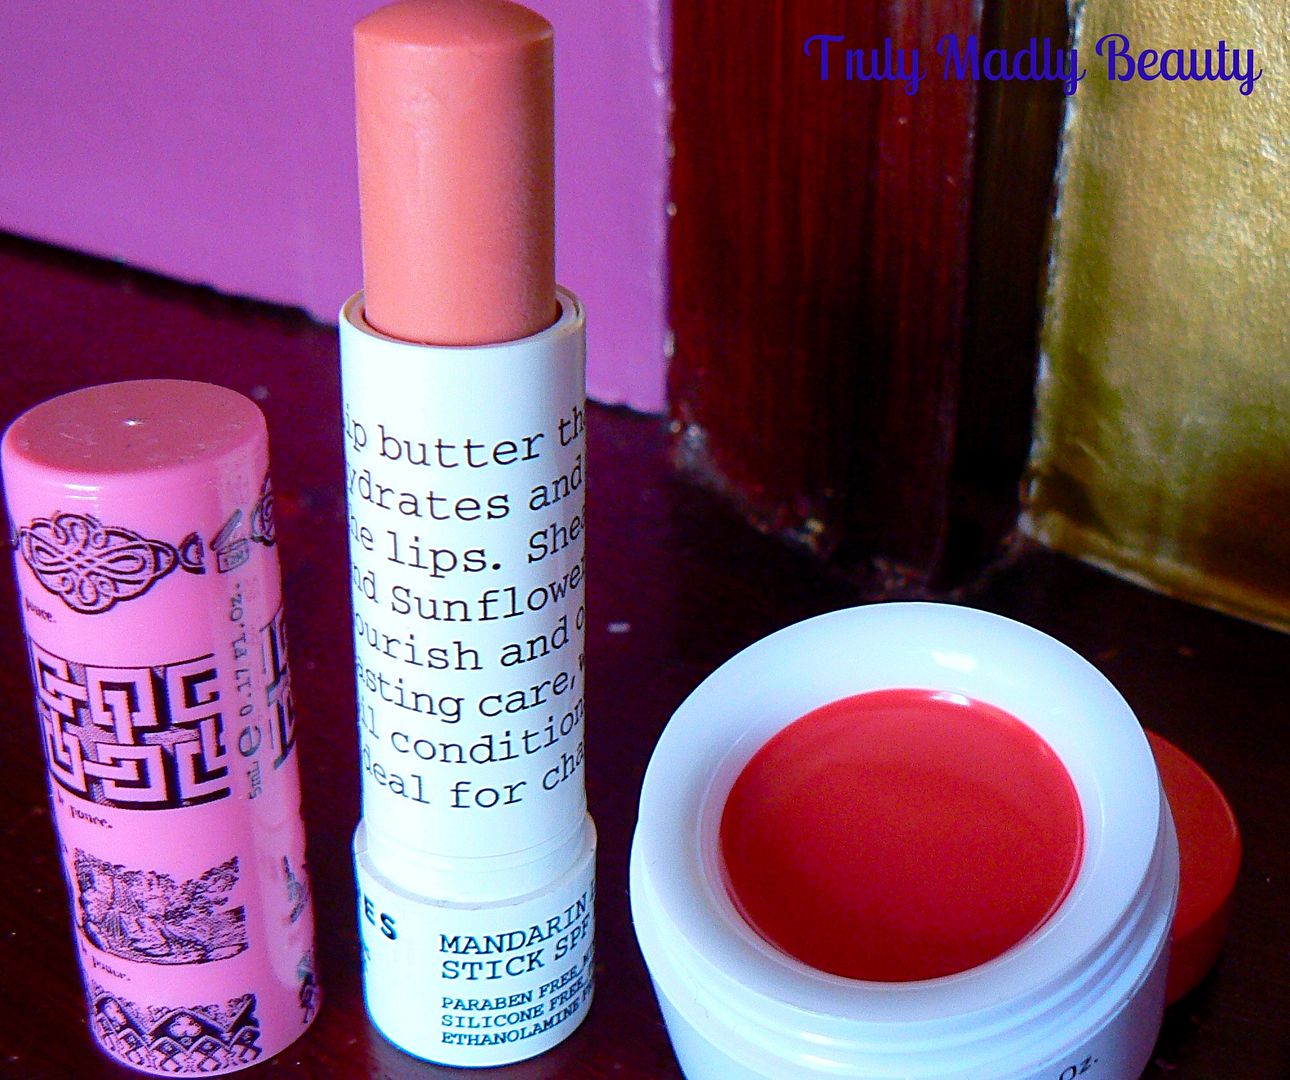
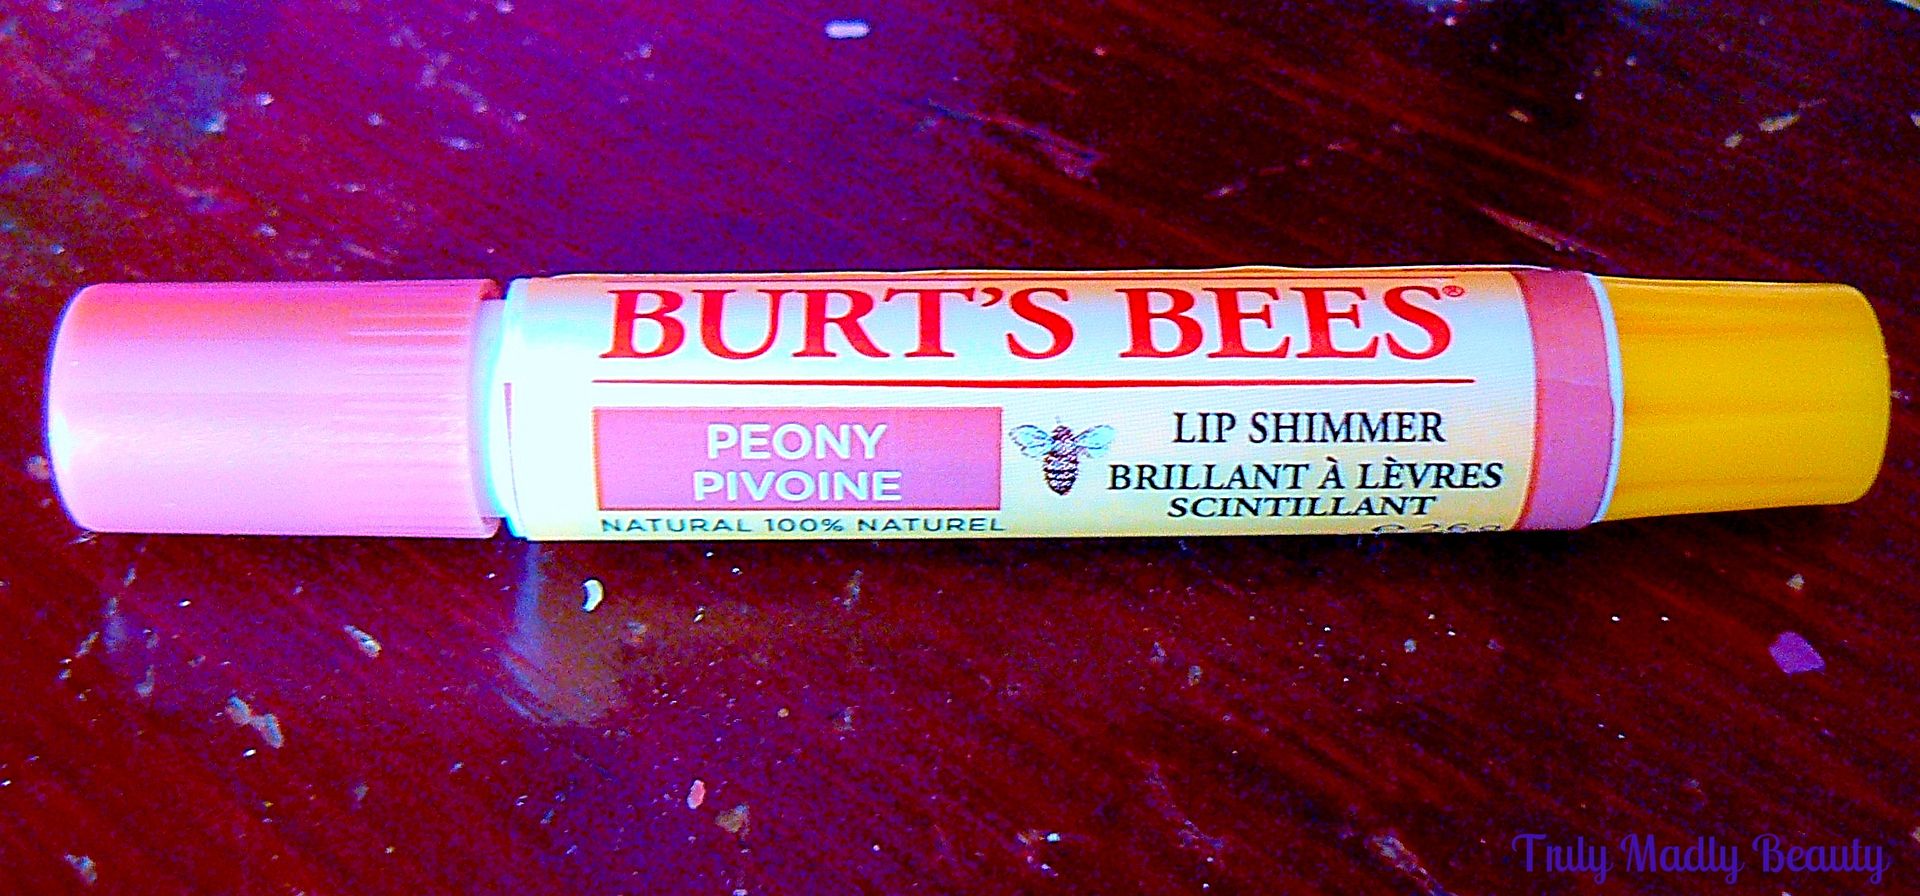
Starting with Korres, I've heard nothing but praise when it comes to their products so was keen to investigate for myself. When passing through my local Lloyds chemist I saw that they'd introduced a wide range of skincare & beauty products, including both Korres & Burts Bees. I noticed that there were two variations of Korres lip butter available, the well known pot form as well as a more convenient stick, so went for one of each as well as nabbing a Burts Bees Lip Shimmer in the shade Peony.


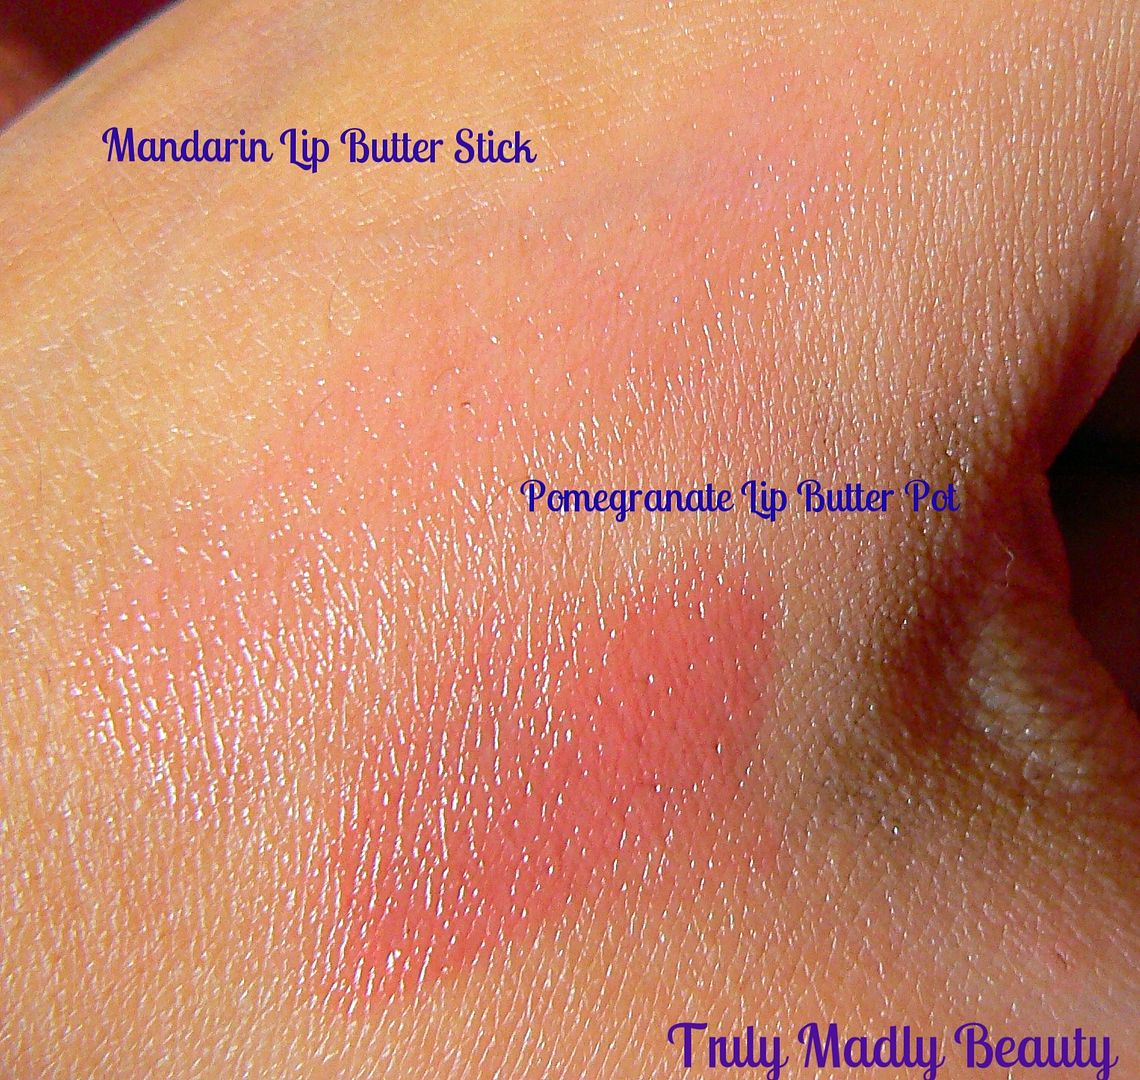
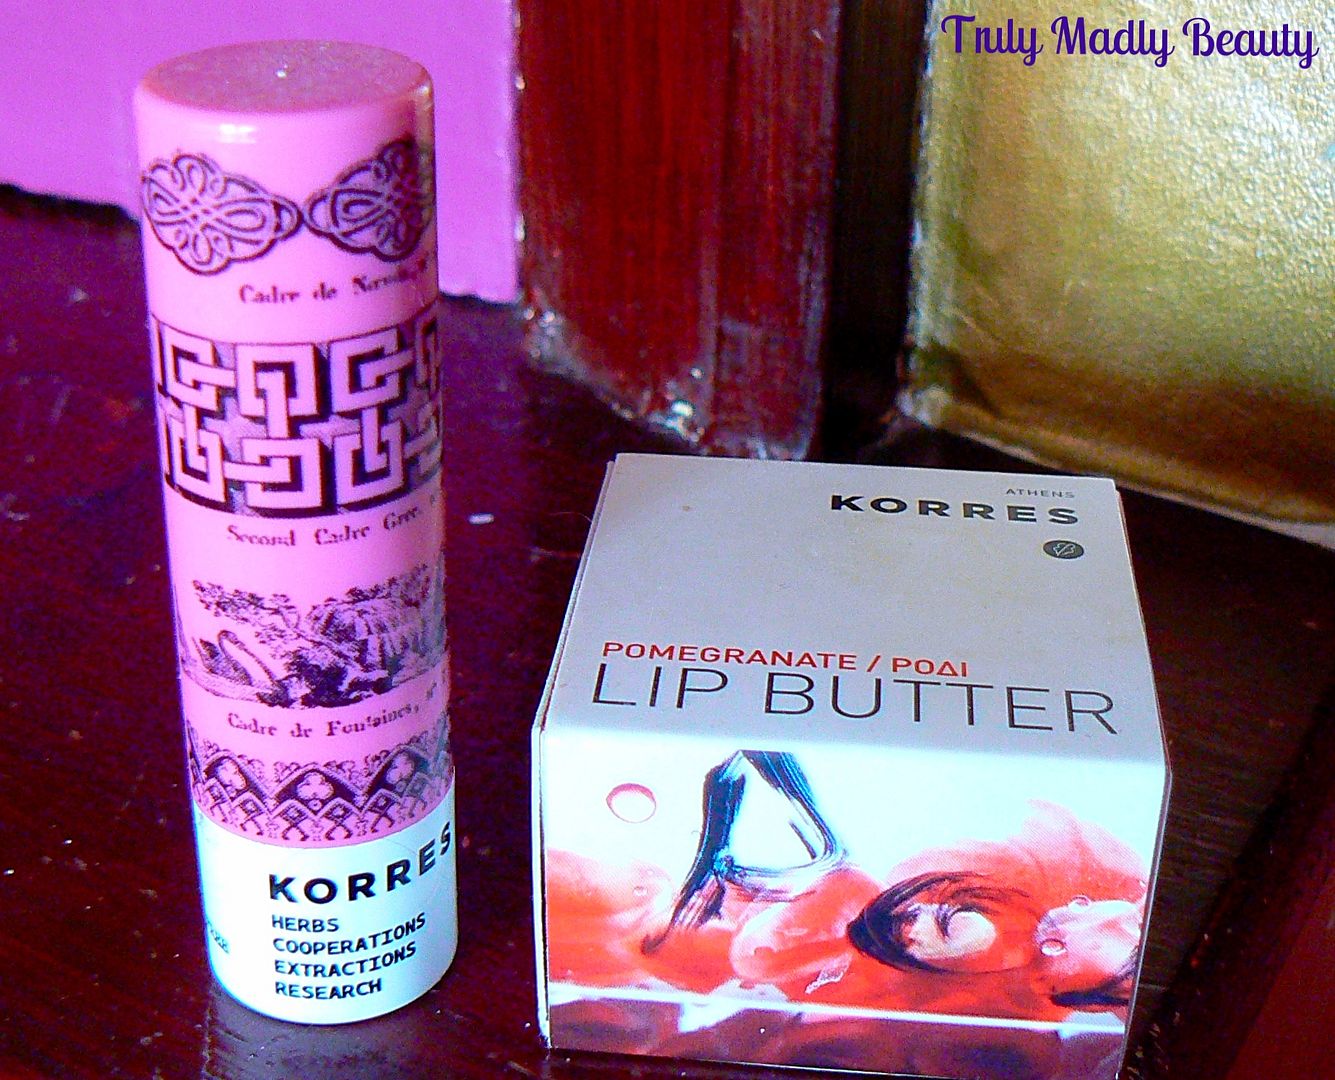
The Korres Lip Butter pot (RRP £8) I opted for was Pomegranate which has a lovely red tint & contains Shea Butter, well known for its moisturising properties including soothing chapped irritated skin. The butter is almost jelly like in formula & glides smoothly on to the lips without feeling too heavy. The shade is more pigmented in the pot however you still get a really lovely delicate wash of colour across the lips. I love the feel of this after application & keep the pot by my bedside applying as often as I can remember, however I know many are put off using balms/butters in pots, which is why I love that Korres also have the stick option as well.


Not only more compact & travel friendly, the Korres Mandarin LipButter stick (RRP £8) also contains SPF15 giving it major score points as well as including lush ingredients of Mandarin Oil, Sunflower Wax & the Shea Butter. The shade I have is Pink which again gives a lovely delicate rose tint to the lips as well as moisturizing. I found this slightly more creamier in consistency to the jelly like pot butter but equally lovely on the lips & I love using this as a base for the rare occasions when I DO wear lipstick as it glides on so smoothly over the top.


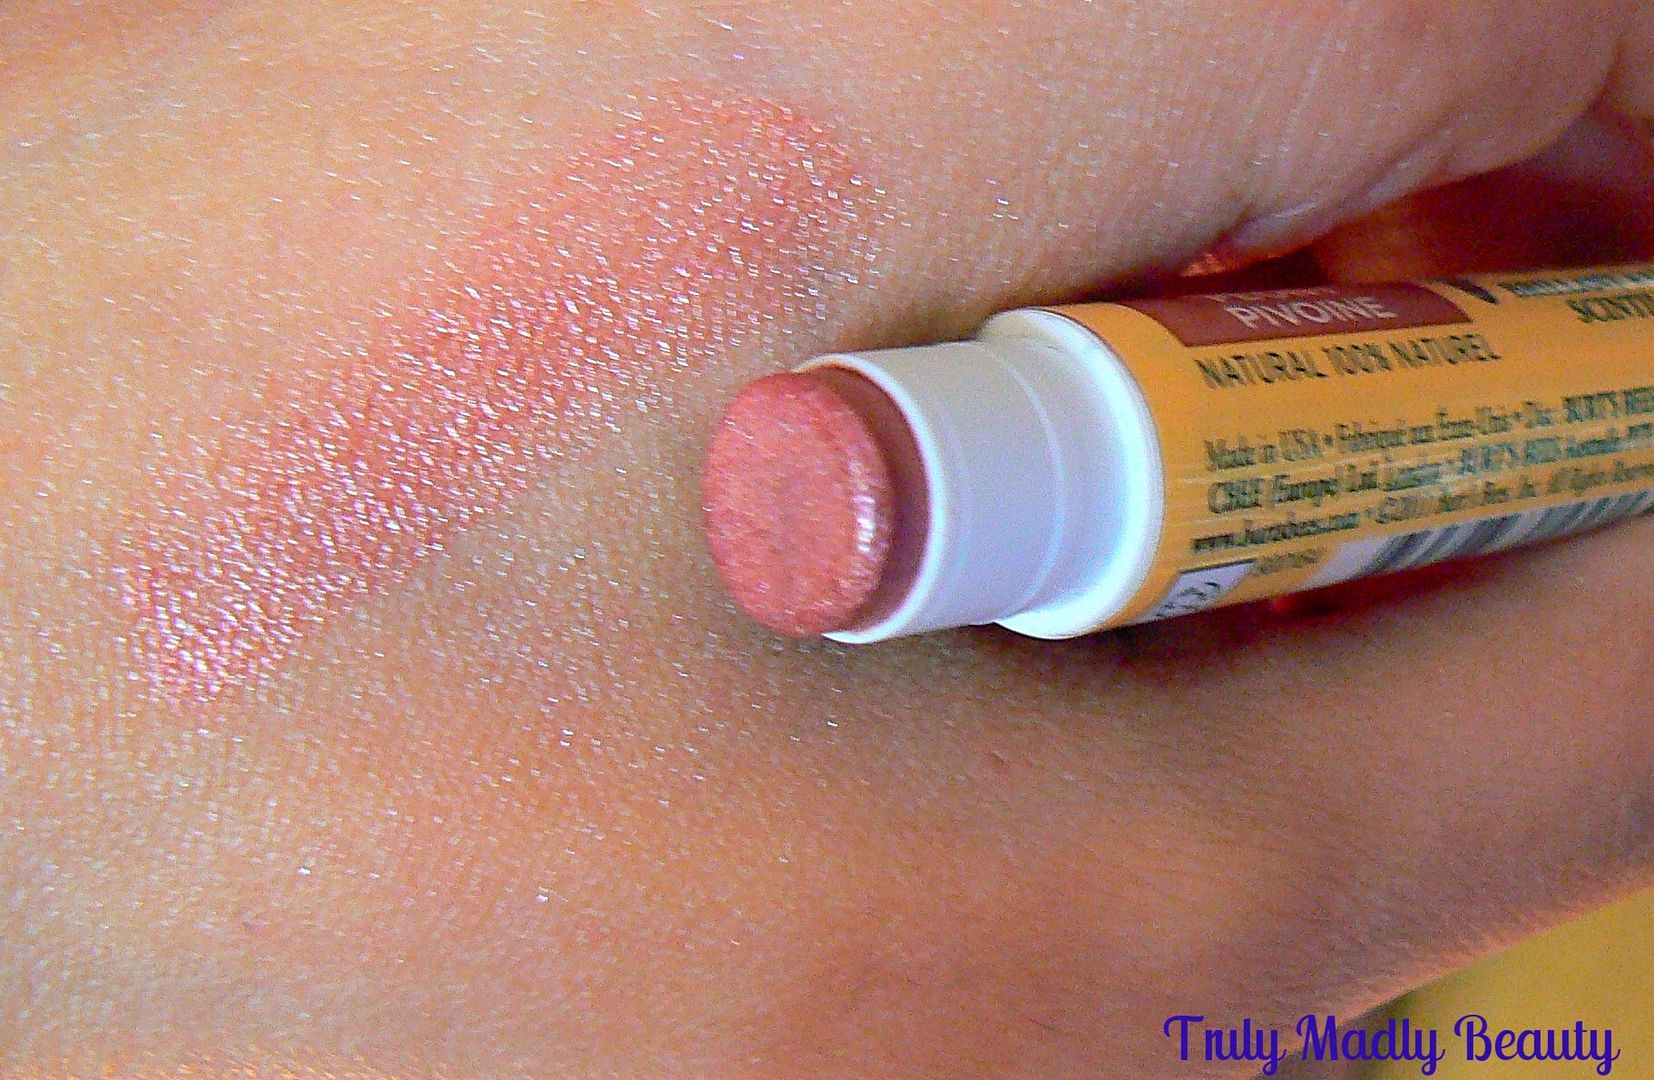
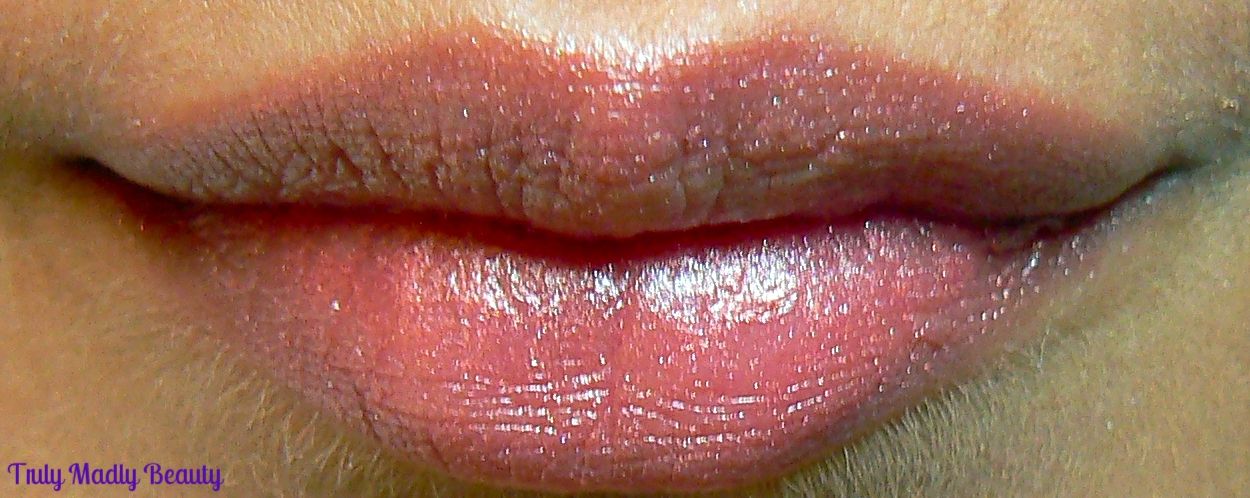
Now we have a touch of glam factor if you like with the Burts Bees LipShimmers (RRP £5.99). These moisturizing balms are divine, delivering a wash of subtle colour to the lips but with a touch of shimmer in the form of macroglitters & come in a nice selection of shades to choose from ranging from plums & reds to warmer nudes & browns.

Thankfully the macroglitter is very fine preventing the balm from looking like a discoball or feeling gritty on the lips, which wouldn't be pleasant at all. The shade I have here is Peony which is a lovely warm brown toned nude.


The lip shimmers contain Vitamin E, Beeswax, Sunflower & Coconut oils making them incredibly nourishing & have a subtle peppermint flavour which feels nice & refreshing on the lips. I love that the tube is also nicely compact & slender, making it ideal for popping into your bag or pocket when on the go.


Overall I am utterly converted to these lovely lip hydration offerings from Korres & Burts Bees, they are a joy to wear & my lips are certainly happier & in better condition. The Mandarin Lip Butter stick is also available in a colourless version if tint is not your thing, I'm keen to try a few more of the Lip Butter pots too, Jasmine and Wild Rose look dreamy as well picking up a few more adventurous shades of the Burts Bees Lip Shimmers!

You can find both Korres & Burts Bees in selected Lloyds Pharmacies as well as online via FeelUnique or LookFantastic to name a few.. its worth having a hunt around as prices vary on different sites. Thanks as always for reading!

Lotsa love to ya!


11.18.2016

NOTD - Toothless the Dragon Nails!

Hello there lovely readers!

A spot of fun randomness with today's nail art....I love finding inspiration in all things, especially one of my greatest joys...animated movies! 

Browsing through Netflix the other day I came across one of my favourites & I'm sure a film that is for many others too...How To Train Your Dragon. I've yet to find anyone of any age who DOESN'T love this movie & I think we know its mostly down to the bloomin adorable Toothless.

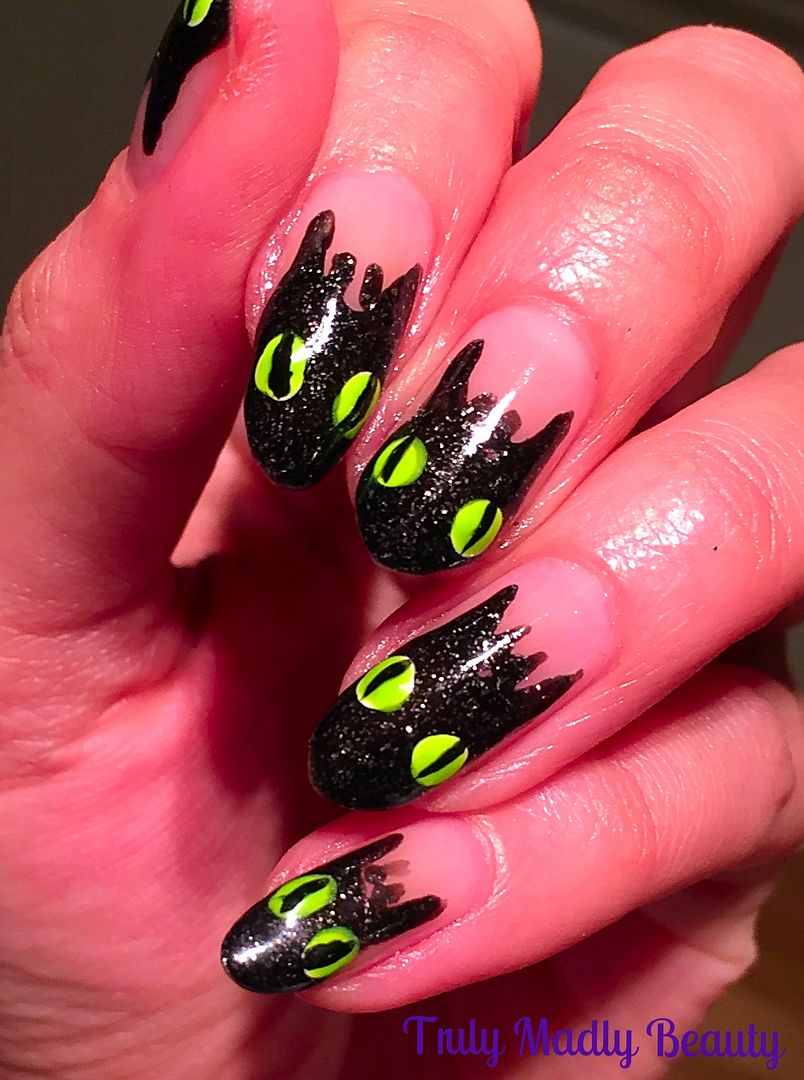
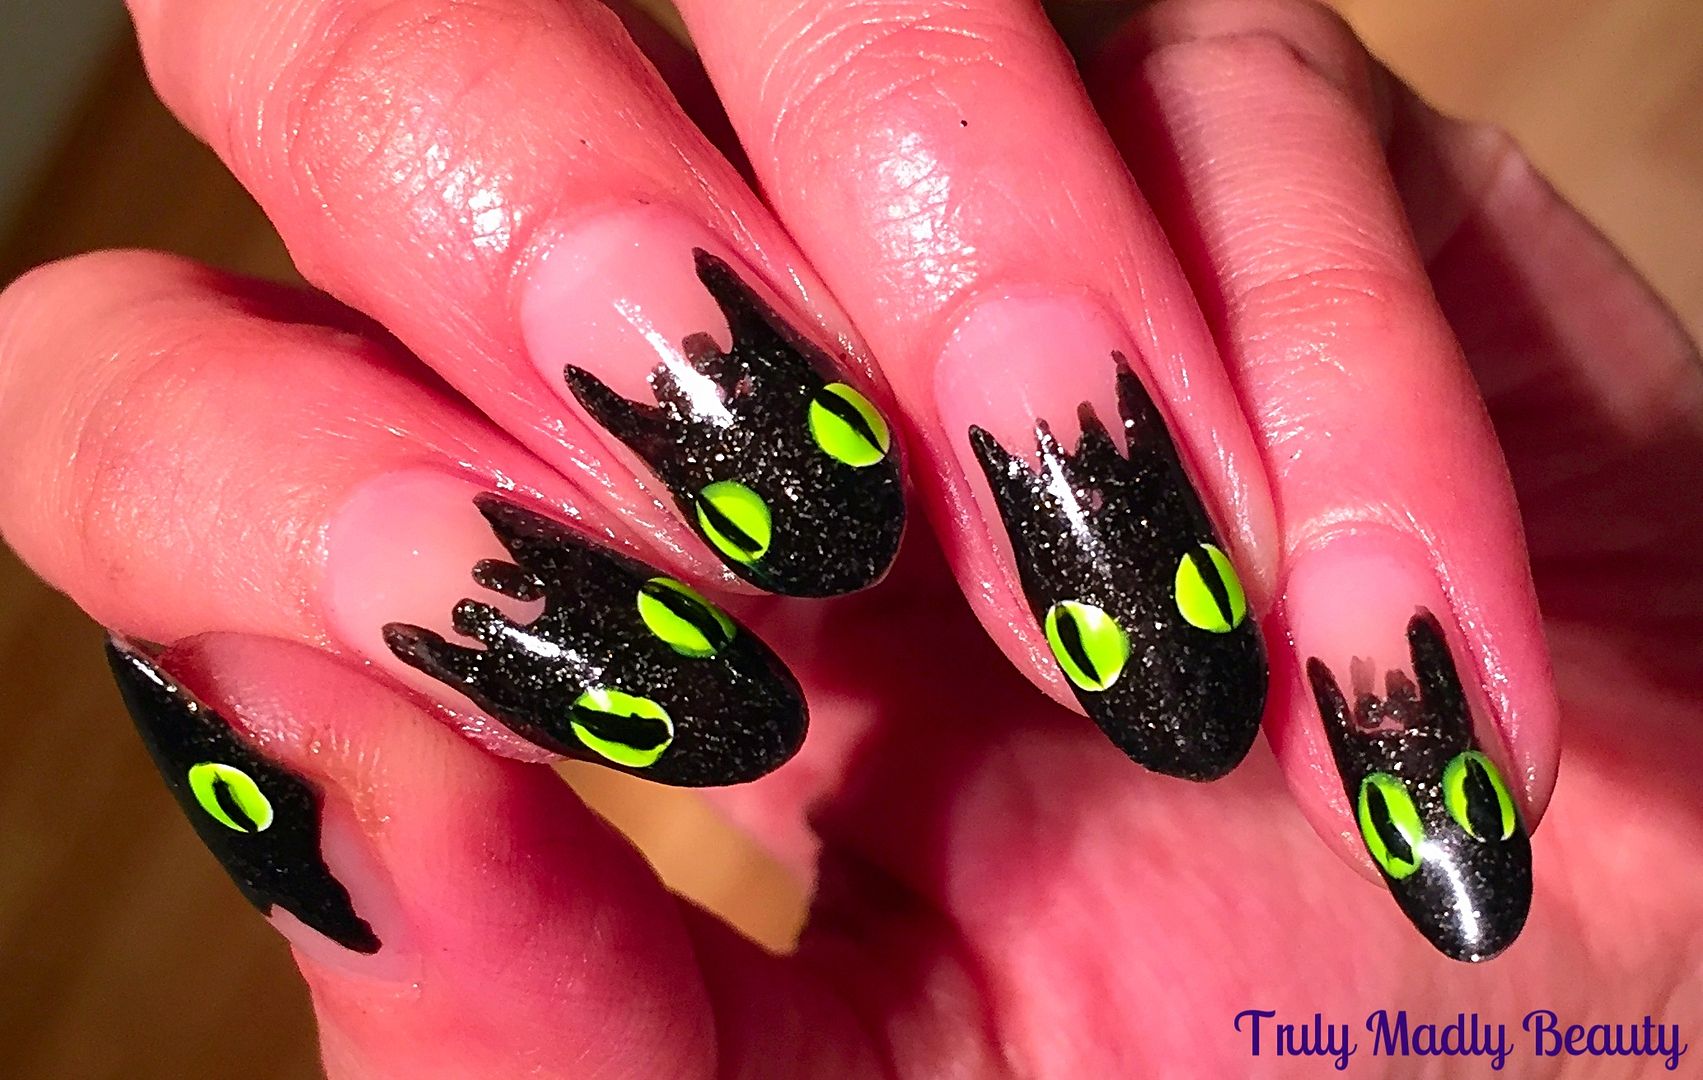
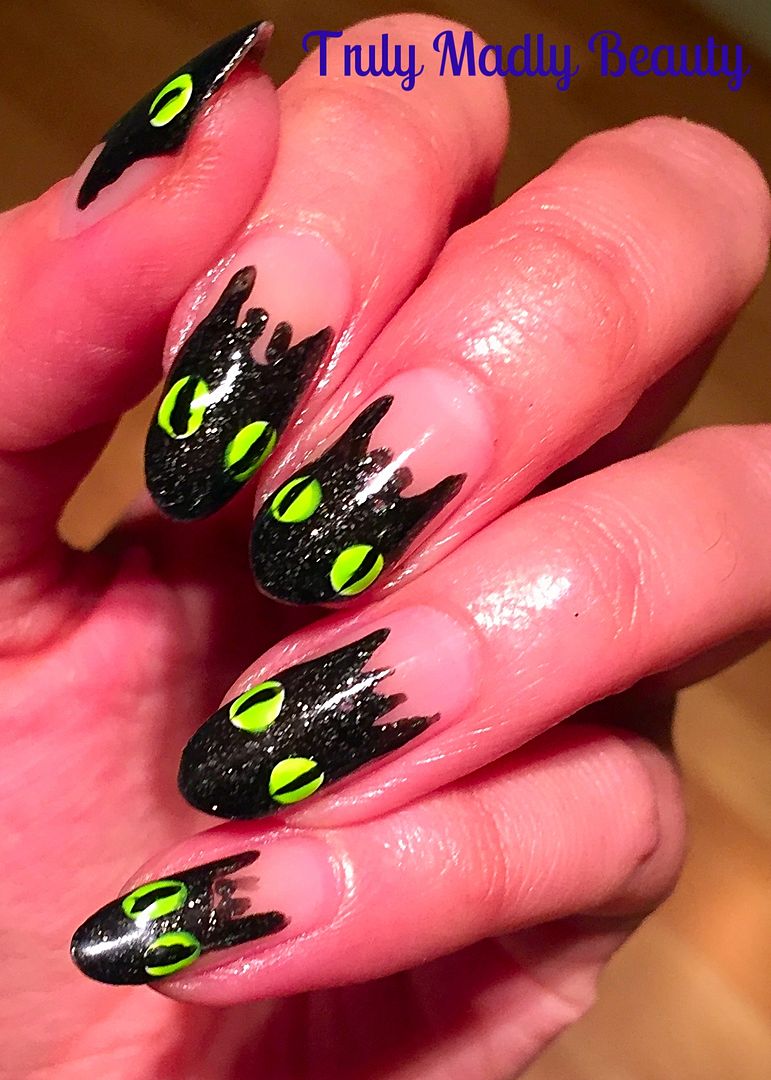
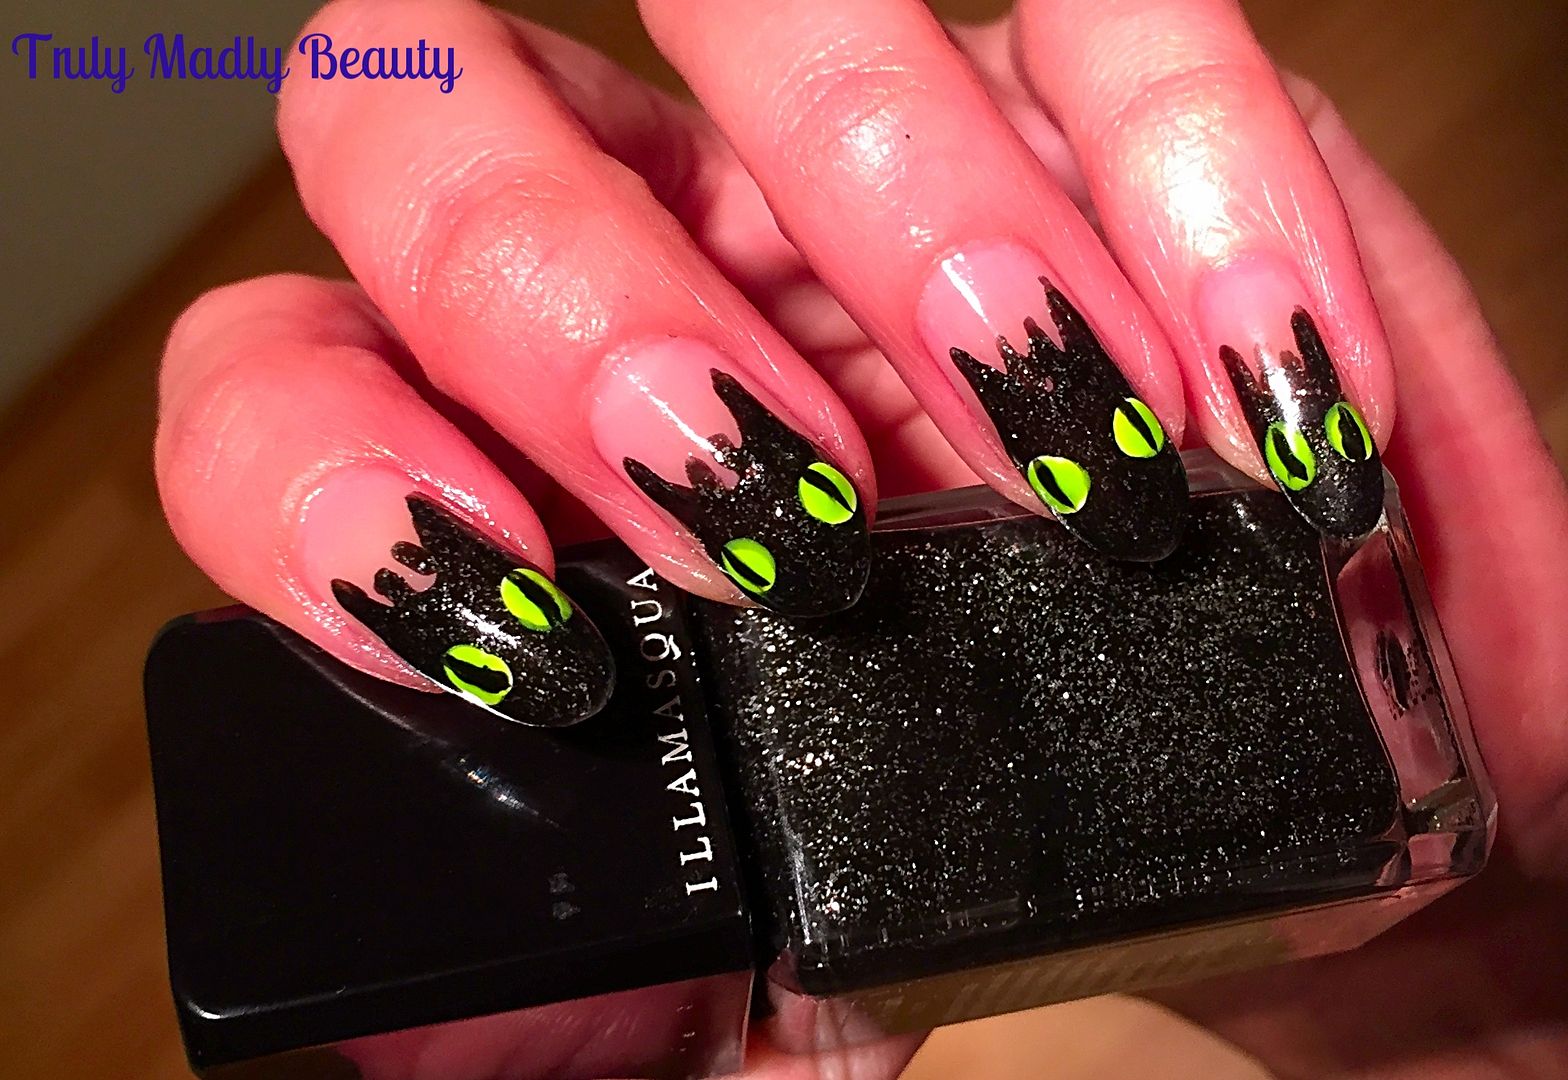
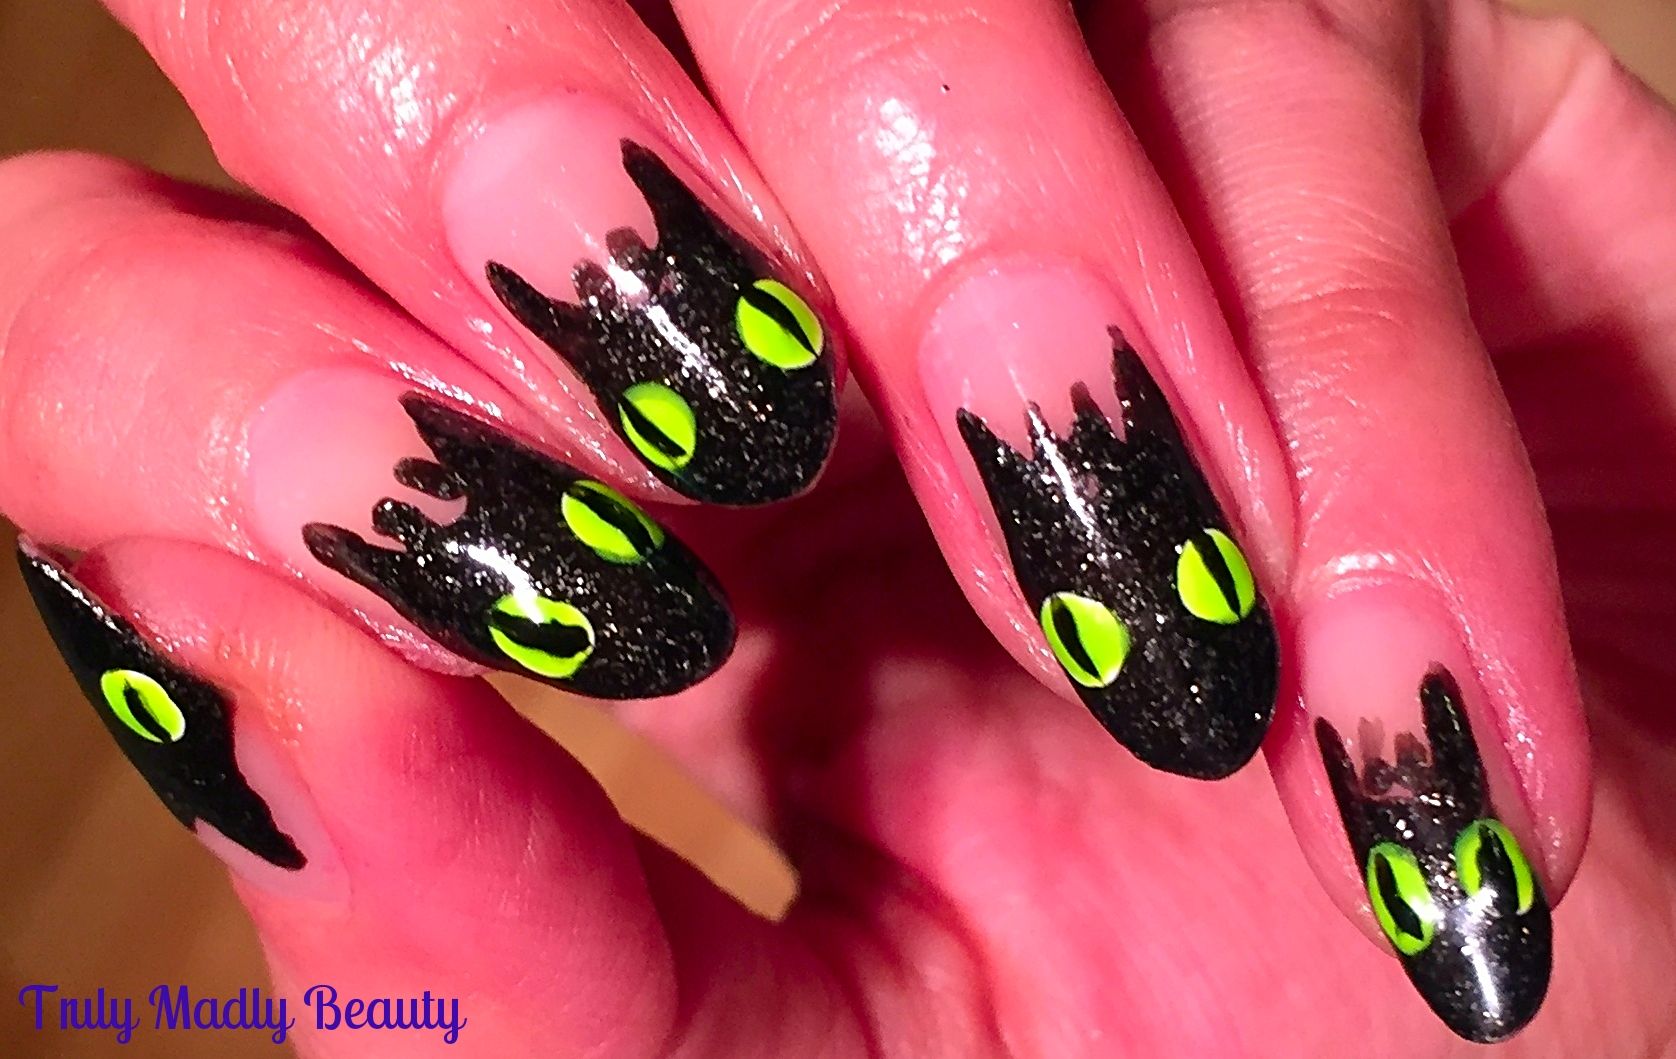
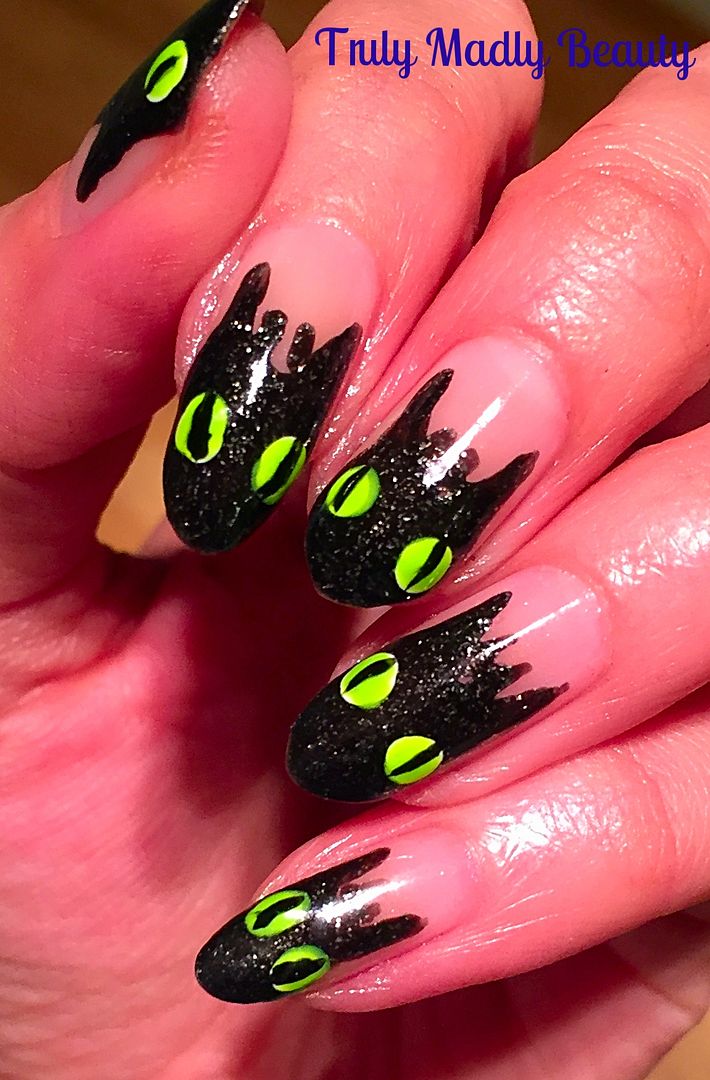
I was in the mood for something dark yet fun so I decided to use the lovely Toothless as my inspiration and created this Toothless Dragon Tips design!


Haha different non? But I'm chuffed with how they came out, I certainly did my work colleagues heads in the next day asking them WHO they thought it was on my nails...& 99% of them got it right! Currently NOT talking to the 1% who thought it was the rabbit ghost from Watership Down.... AHEM. O_O


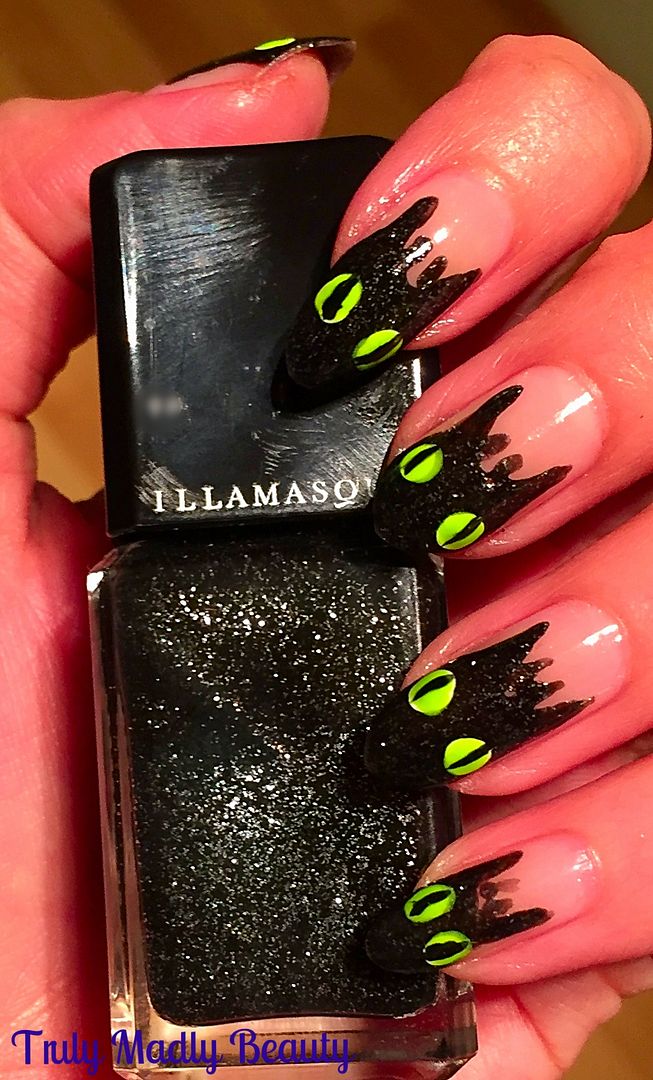
Anyhoos for my Toothless nails a suitable black was required & rather than use a plain black polish I reached for this pretty by Illamasqua called Creator which is filled with teeny silver microglitters giving it a fun edge & I felt would actually add to the effect of the dragon like scaly skin.


Using my black polish & a fine nail art brush I freehanded my Toothless faces to each nail. To do this start by drawing on a U shape about 3/4 of the way on the centre of the nail.


Then continuing on from the bottom curve of your U shape, draw 2 lines either side, downwards to the tips, curving out slightly to create the face, before filling in.


Add on 2 little spikes in middle of the U for his horns & then for the eyes I simply dotted on two white dots, before going over with a neon green (this makes the neon pop)


Final step is adding on 2 thin dragon pupils on to your eyes with a spot of black polish & a fine brush before finishing with topcoat...Hello Toothless!


Hope you liked, now thinking of other animated characters I can bring to life on my nails....Thanks as always for stopping by darklings! 

Lotsa love to ya!


11.15.2016

Afternoon Tea Adventures - The Keepers House London

Hello there lovely readers!

So I've been a busy bee lately & by busy I of course mean eating ALL THE CAKE at some rather delightful afternoons teas...a VERY important task I'm sure you'll agree, which also means I have more reviews coming your way! I take my cake eating & tea sampling very seriously...its a hard job but I guess someone has to do it...

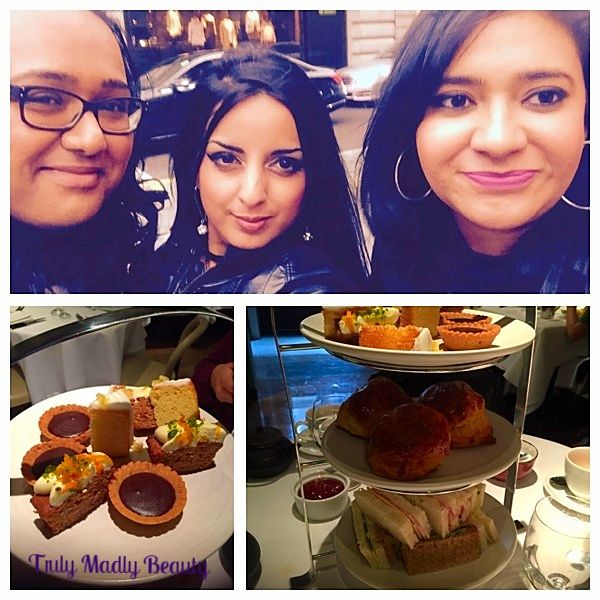
Today I'll be writing about the afternoon tea at The Keepers House Restaurant which is situated near Piccadilly Circus inside the Burlington Royal Academy of Arts. I was meeting my chums Ram & Saf for a good catch up sesh in the city so I suggested going for an afternoon tea as I always do & this one came up on my latest perusal of the afternoontea.co.uk website...having never tried & also loving the central location I decided to book it for our 3 way date.


11.07.2016

NOTD - Bronze and Lace Nail Tutorial

Hello lovely readers!

Squeezing in a last Autumnal manicure for you beauties today! One of the things I've repeatedly told myself can definitely be considered one of the positives of moving has been that I've had to select only a few of my polish drawers from my stash to take with me...This naturally grieved me greatly at first, but it does mean that I'm getting usage out of many polishes that I would probably normally skim over in favour of my other more well know brands. See? Positive mental attitude FTW


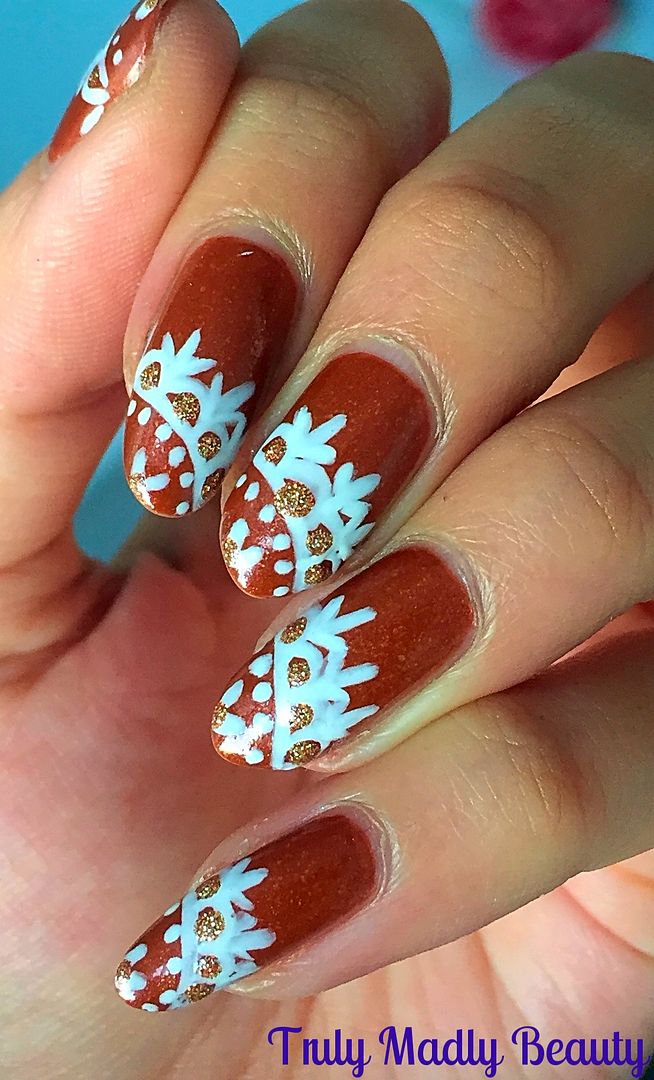
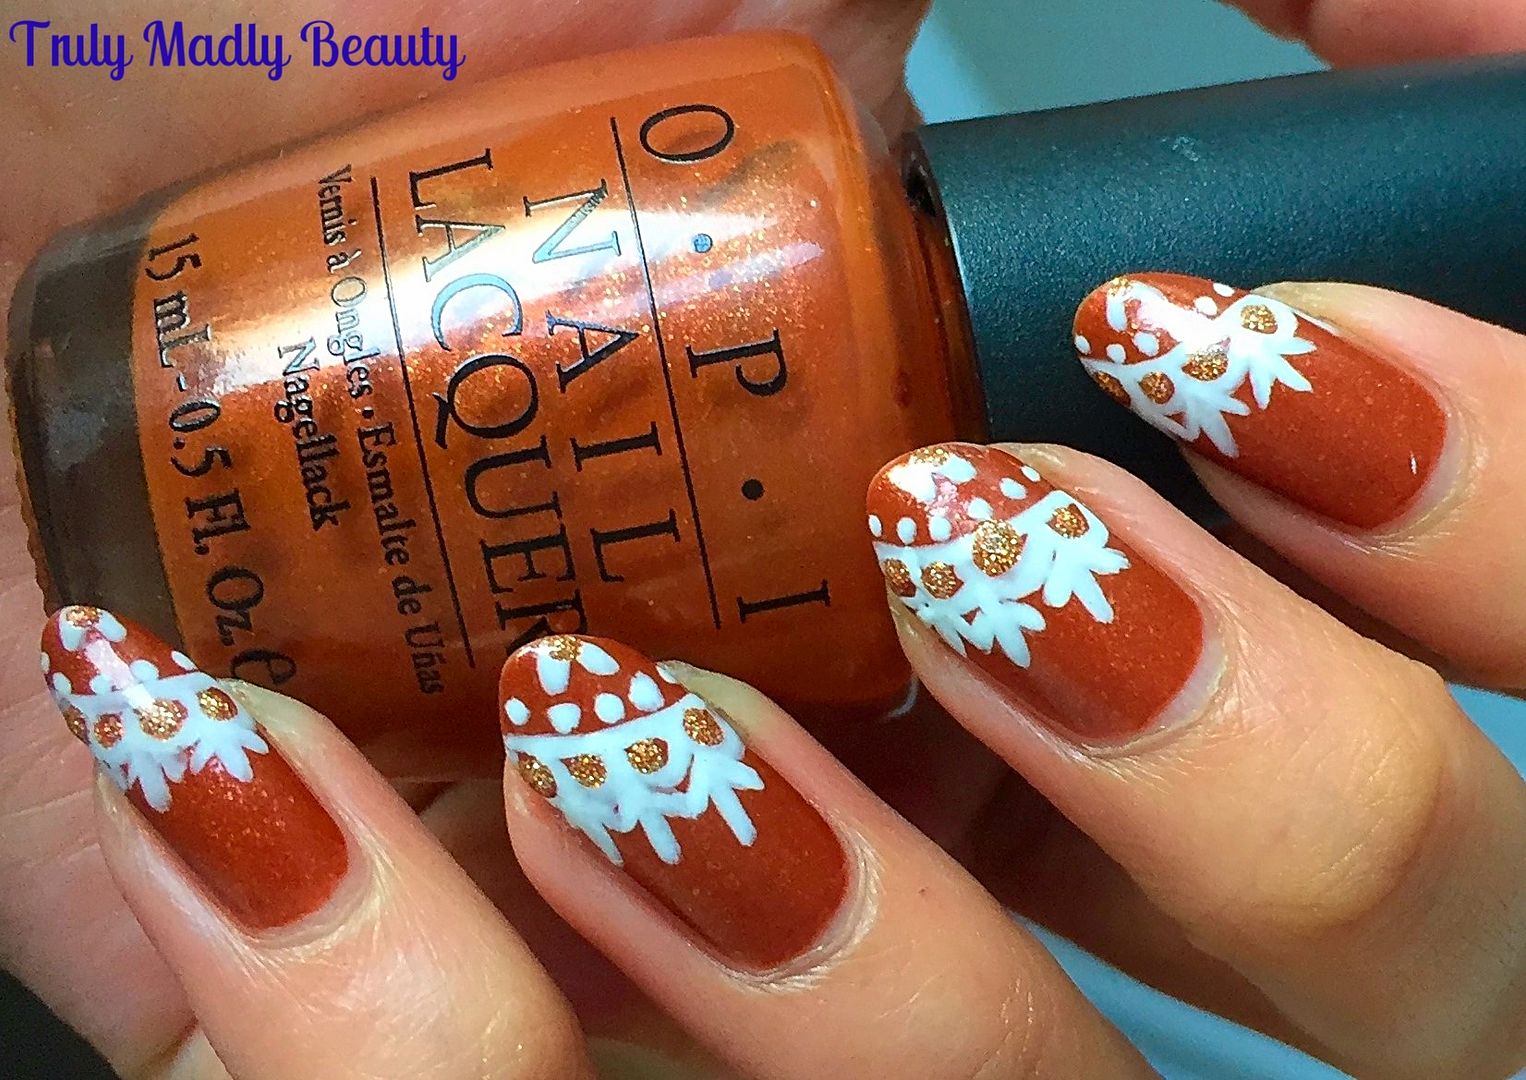
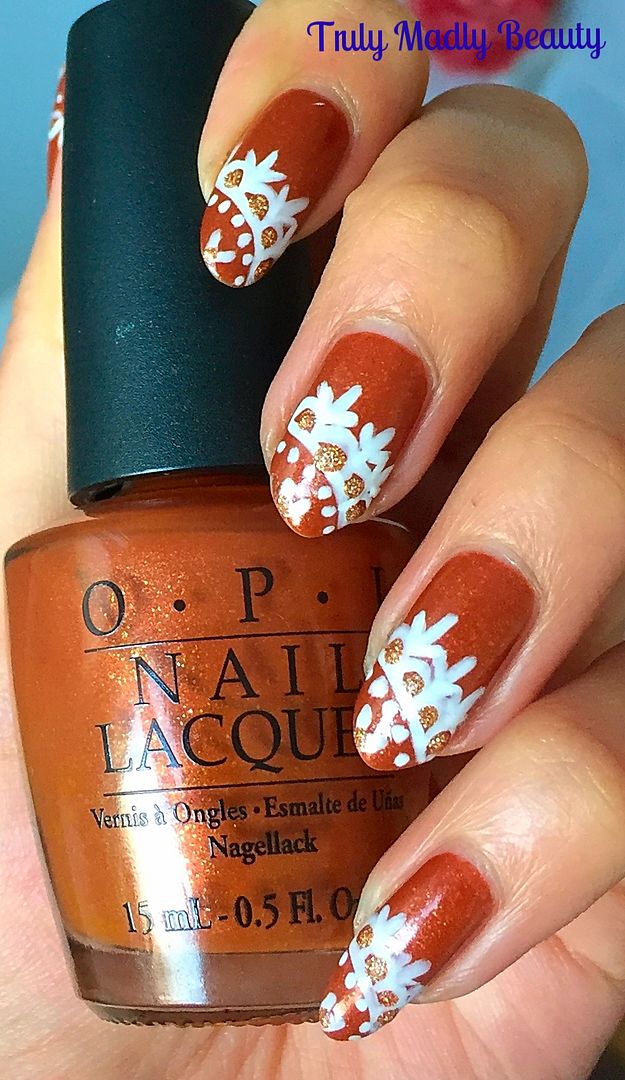
This also includes finding myself reaching for shades that I would not normally choose, including this offering from OPI which I have for you today & goes by the name of Bronzed To Perfection

Normally, a shade such as this would not particularly grab me, but with its burnt orange brown tones it seemed the perfect colour to dig out for the season & I confess it has most certainly grown on me greatly.


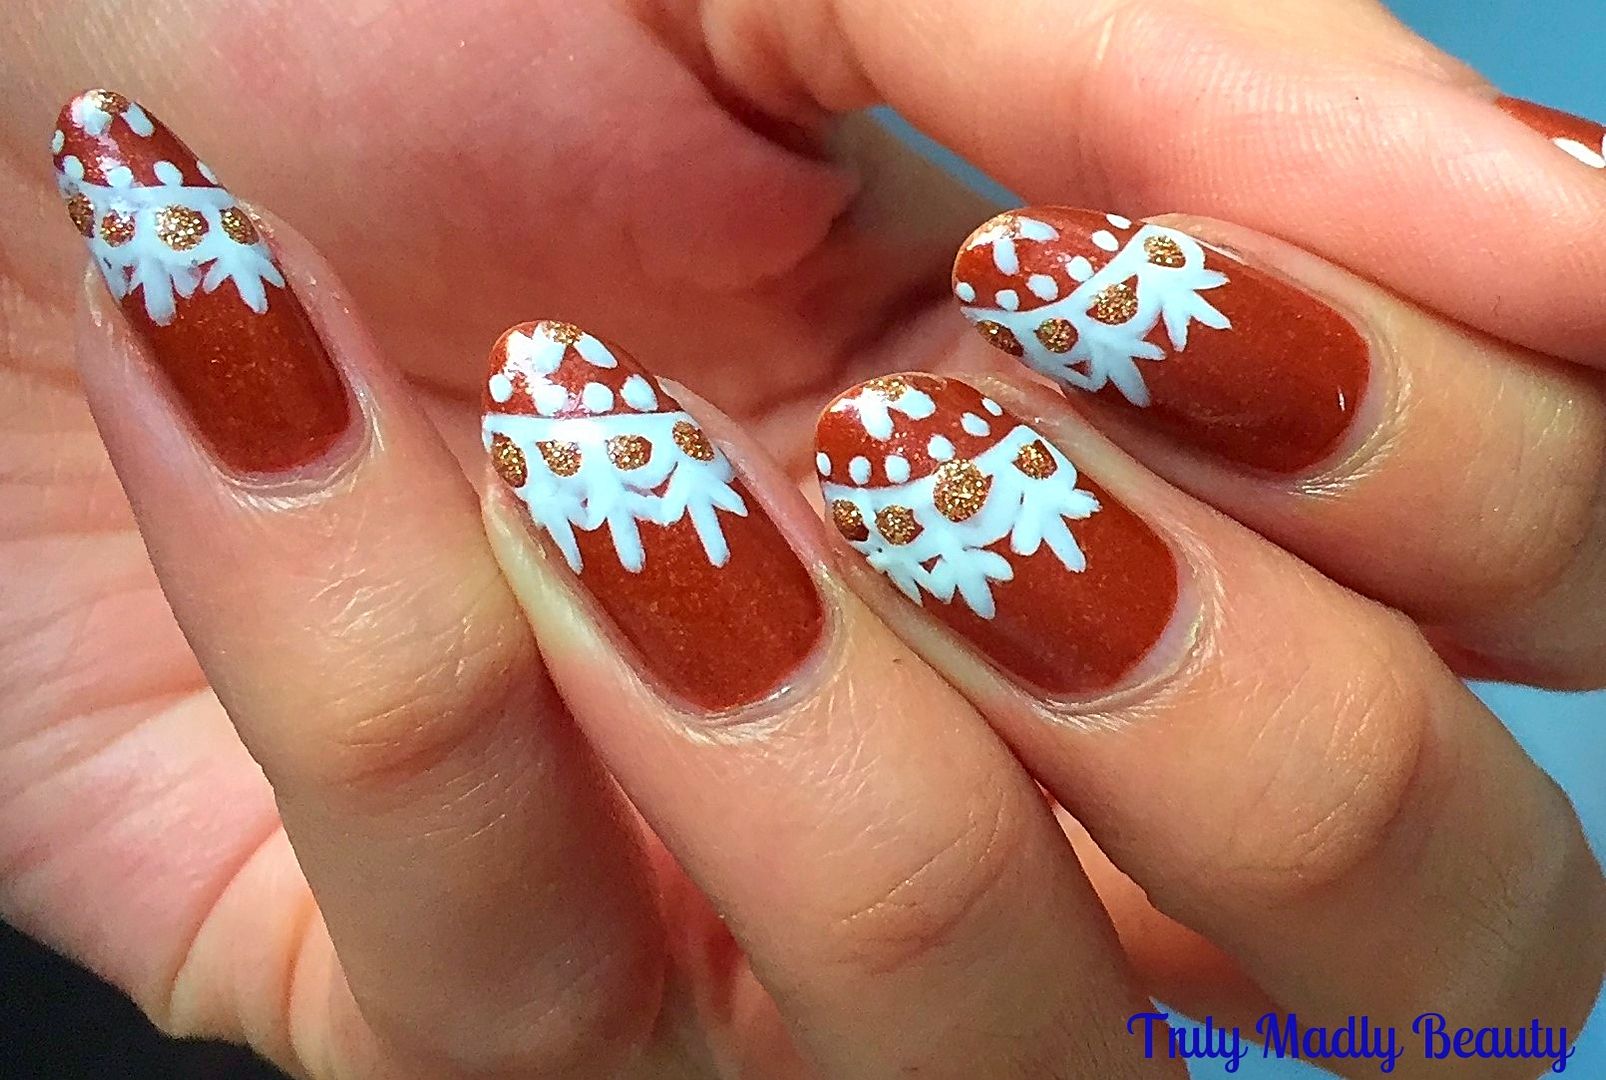
A beautifully warm, caramel brown with coppery shimmer touches Bronzed To Perfection definitely screams Autumn vibes. As pretty as it is by its onesie I decided to jazz it up a tad with some lace nail art touches.


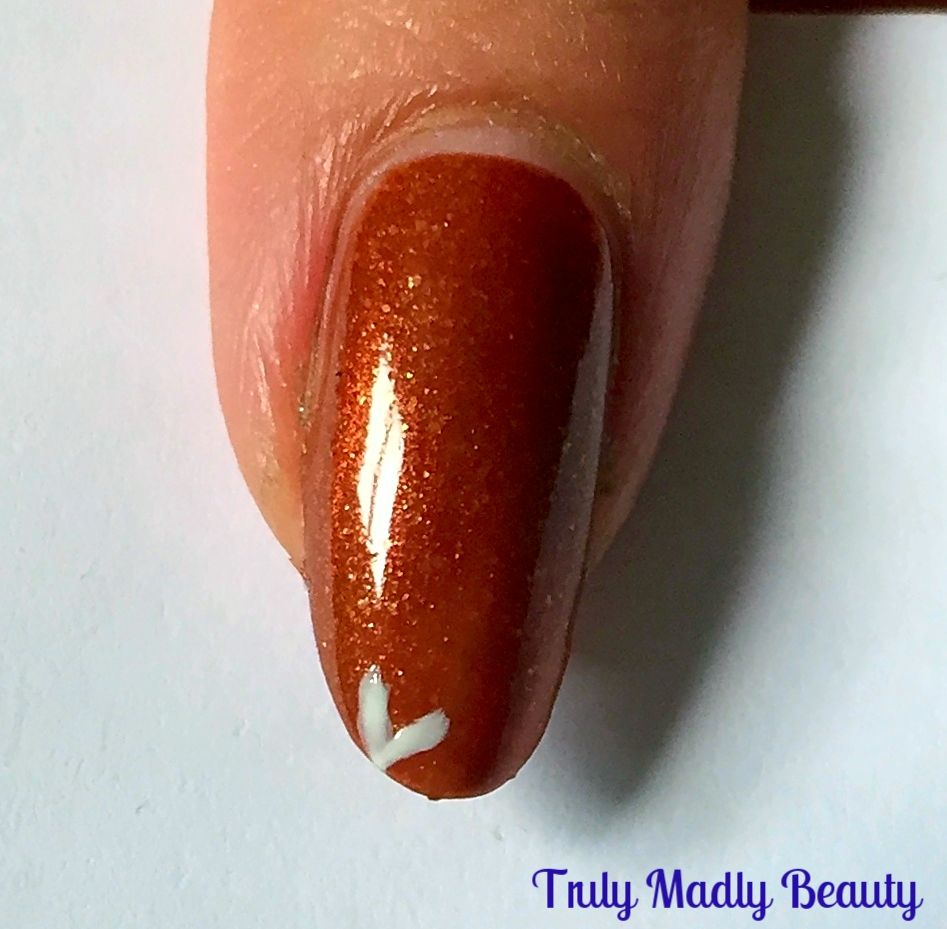
To recreate this lace pattern is super simple and its become one of my favourite quick nail art designs to do, just read on to see how you can create this design as well in a quick step by step pictorial I've put together for you....

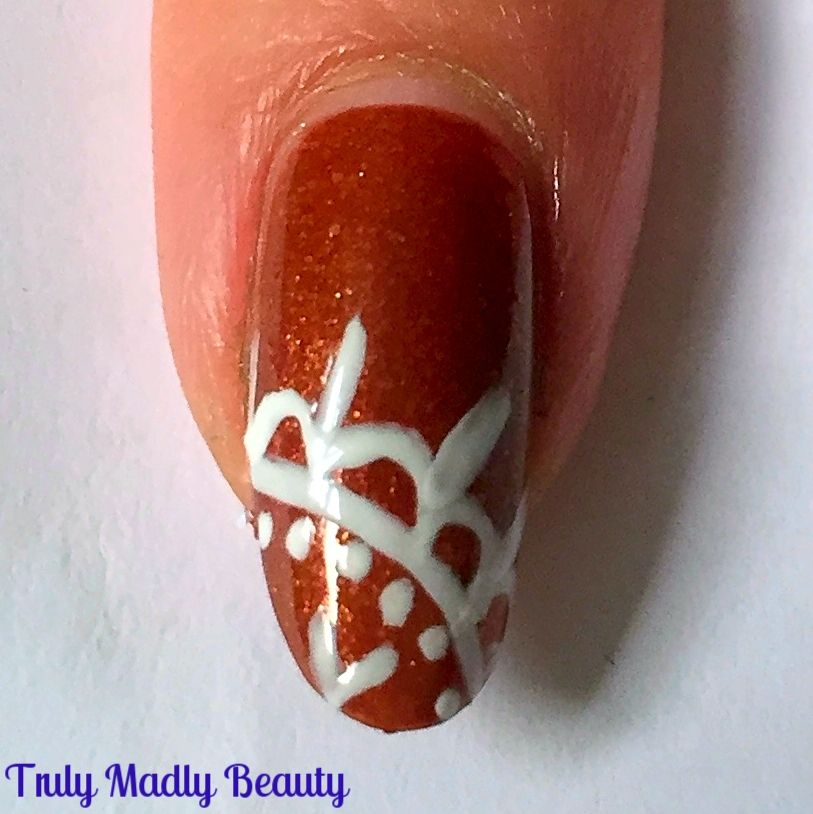
After your base colour has dried, grab your nail art brush & some white polish and begin by applying a tiny V on the side of the tip like so...


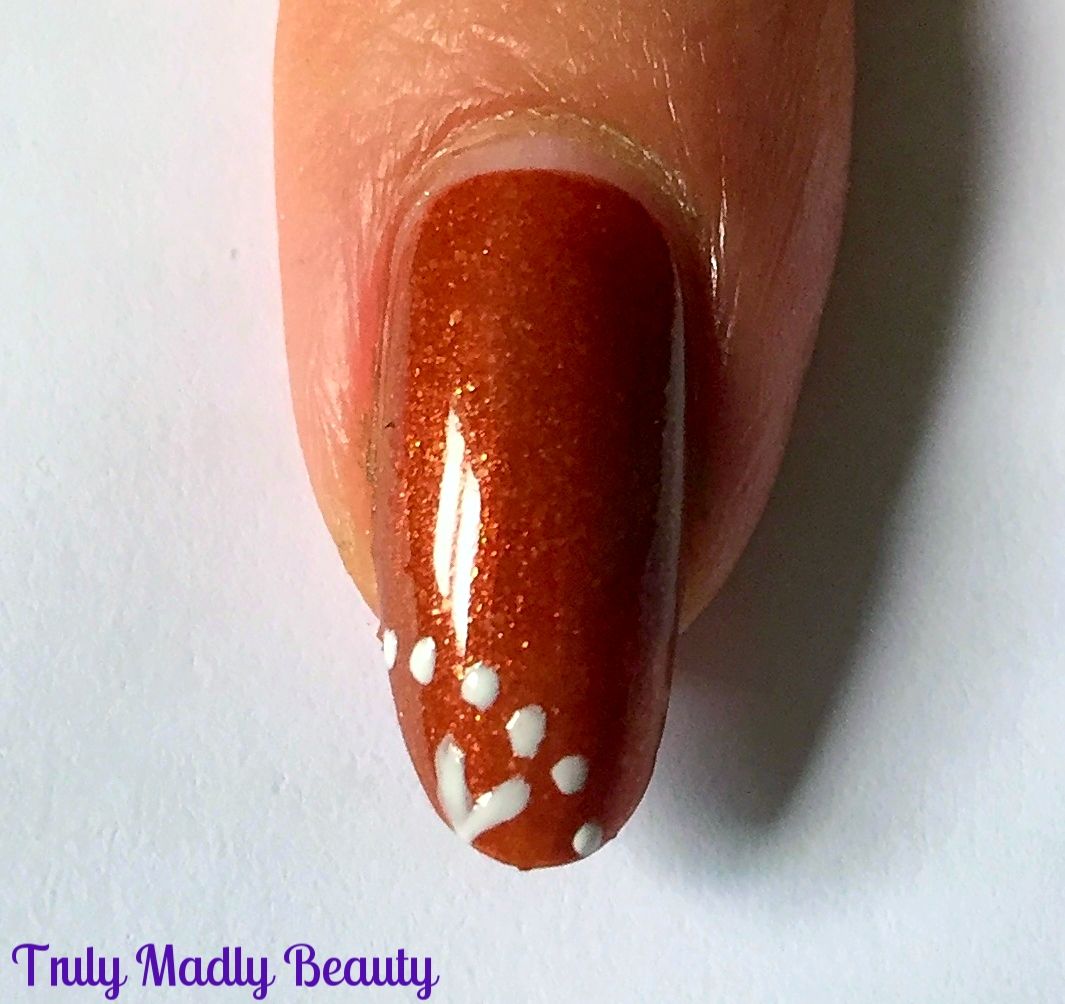
Next, using a wee dotting tool, apply a curved row of white dots around your V.


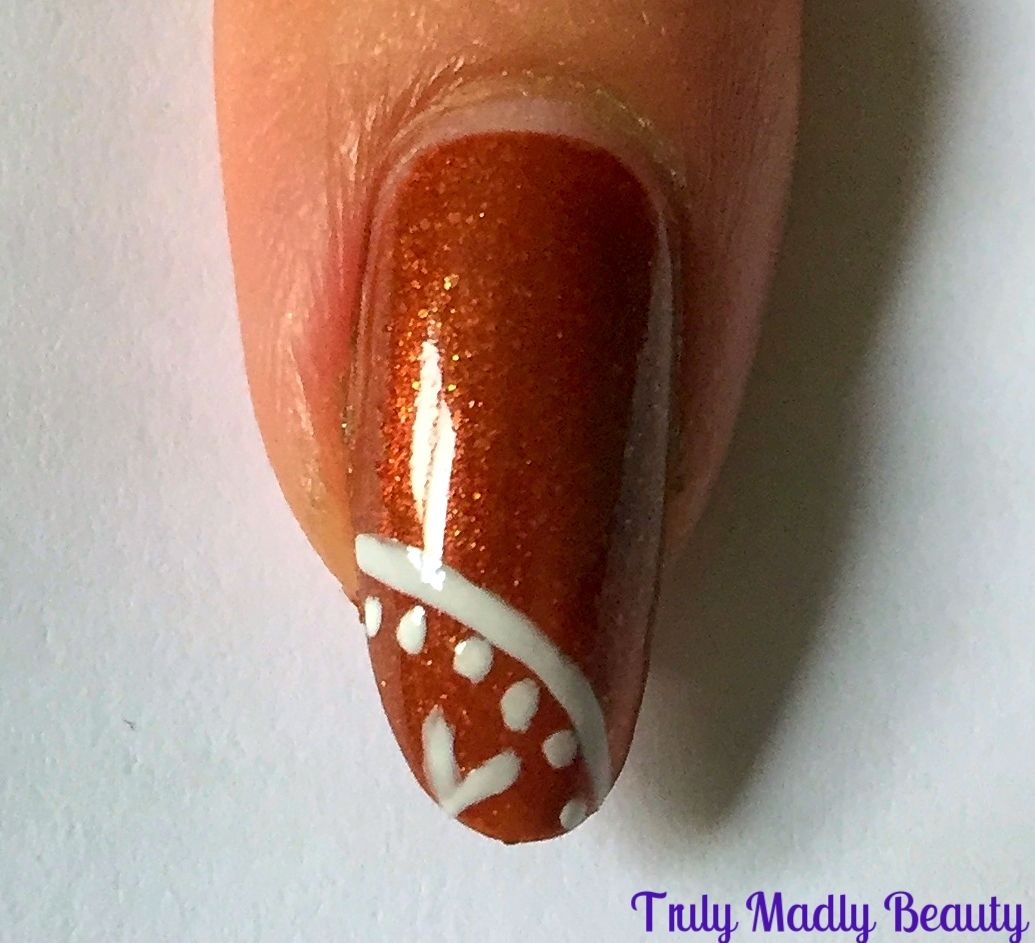
Then grabbing your brush again, apply a curved line just above your dots.


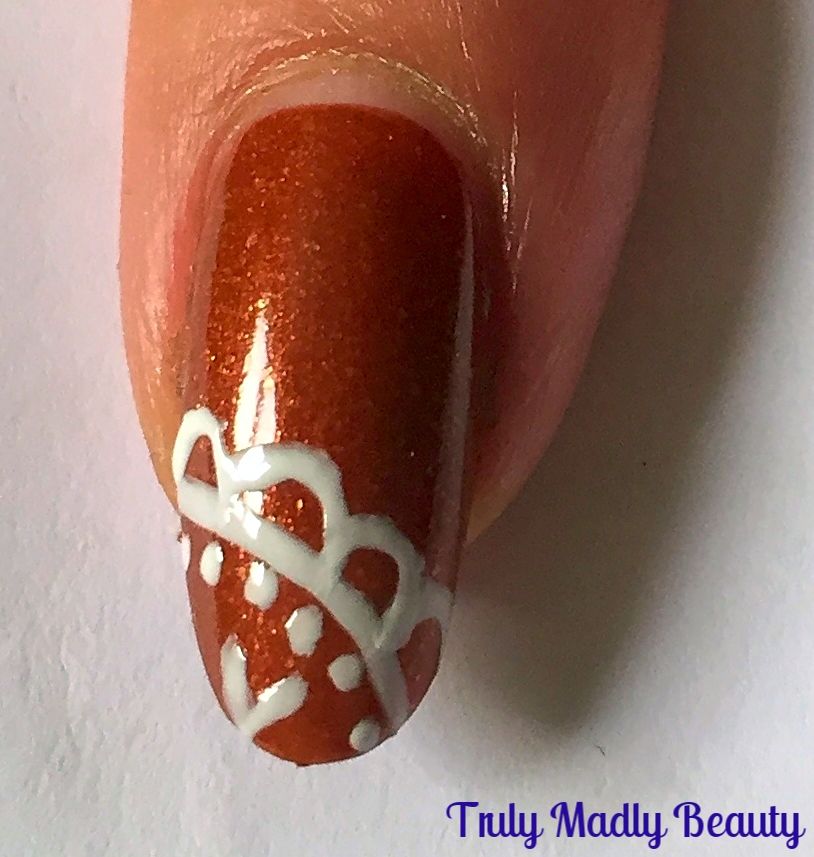
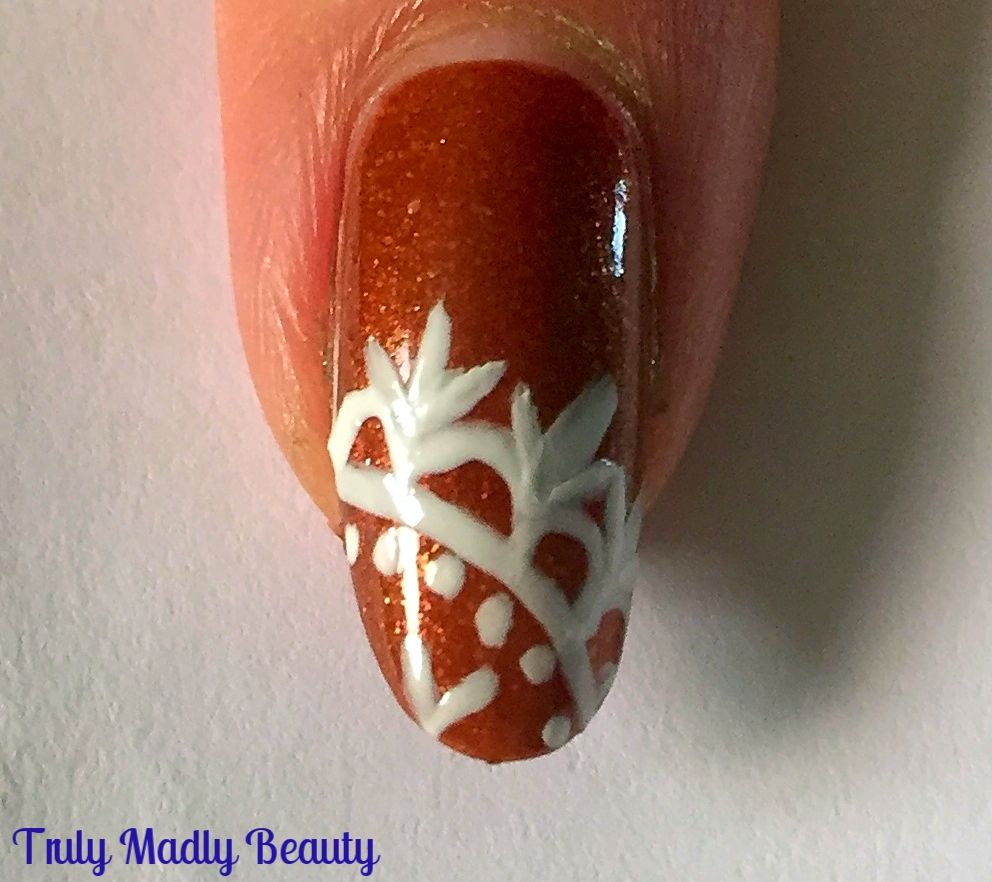
For the next part of the design, again with your fine brush & polish, apply a row of small semi-circles along the top of your curved line...


See the pretty lace design slowly coming together? Next step is to apply a straight line in between each of your little curves as shown....


Then finally to finish your lace pattern, add on two little lines either side of the straight line.


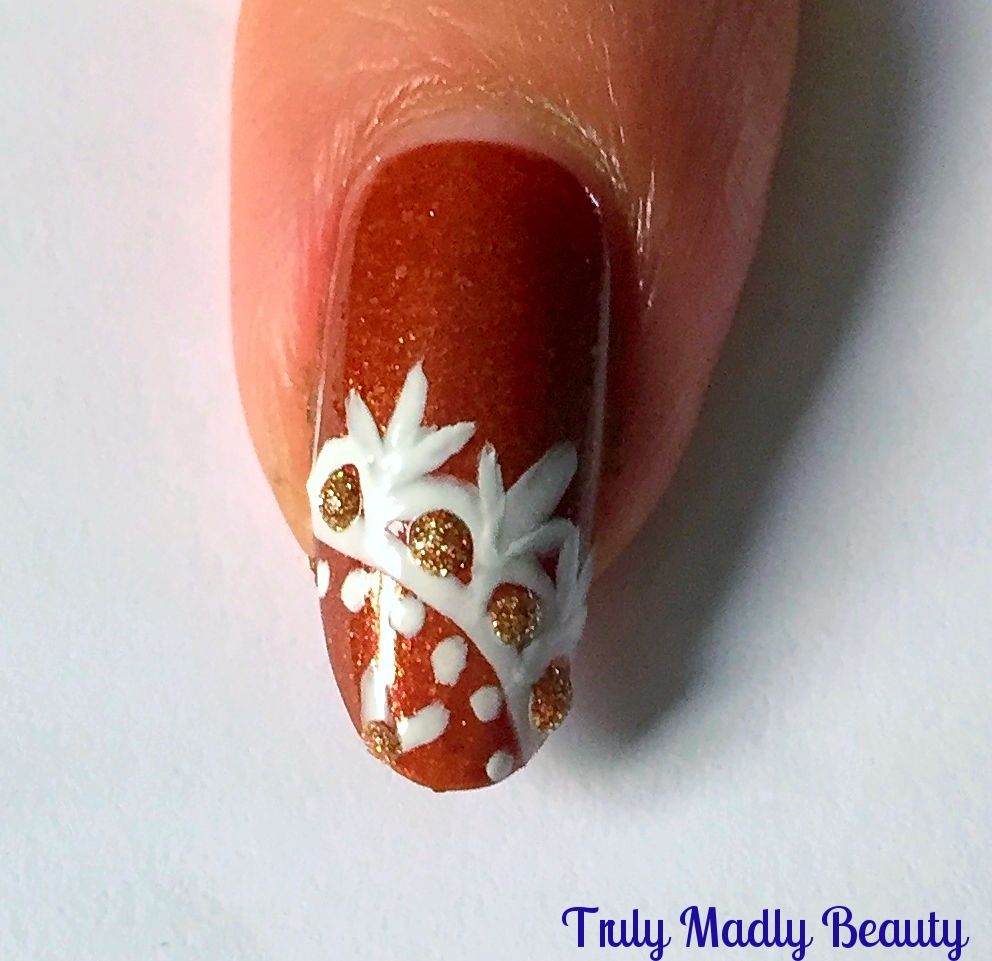
This is an additional step you can skim over but I naturally couldn't resist adding a touch of golden glitter in between the gaps.


Finish with top coat and thats it! Easy peasy right?! I love doing lace details to jazz up my block colour mani's :) Do give it a go!


Thanks as always for stopping by beauts!

Lotsa love to ya!


11.03.2016

Autumn/Fall Inspired Diva Nails & Tutorial!

Hello there lovely readers!

Halloween took precedence when it came to my nail art over the past few weeks but now that has passed *sobs* I can now embrace Autumn in all its glory with some Autumnal nails! There's still time non? Better late than never...I'm definitely an Autumn baby & adore this time of year with its abundance of burgundy tones, blankets, bubble baths, burning candles...ungh I LOVE IT!


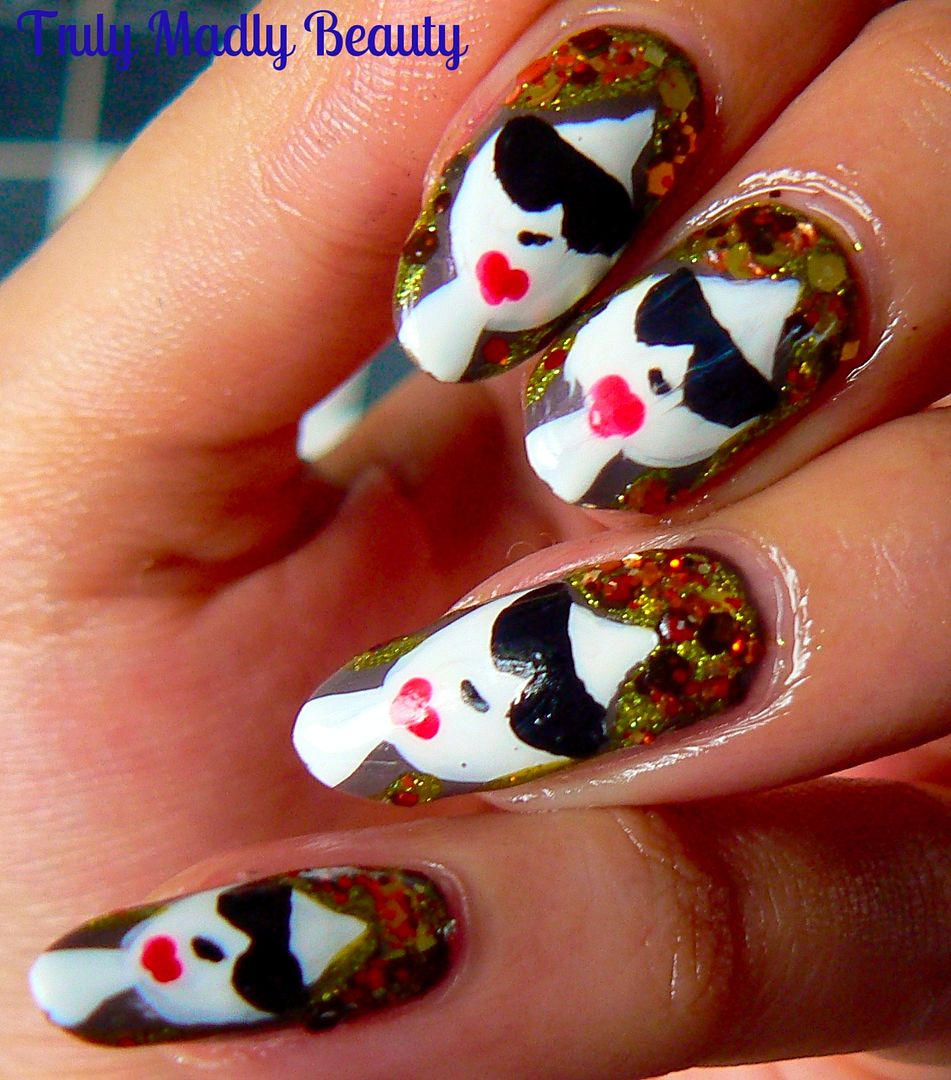
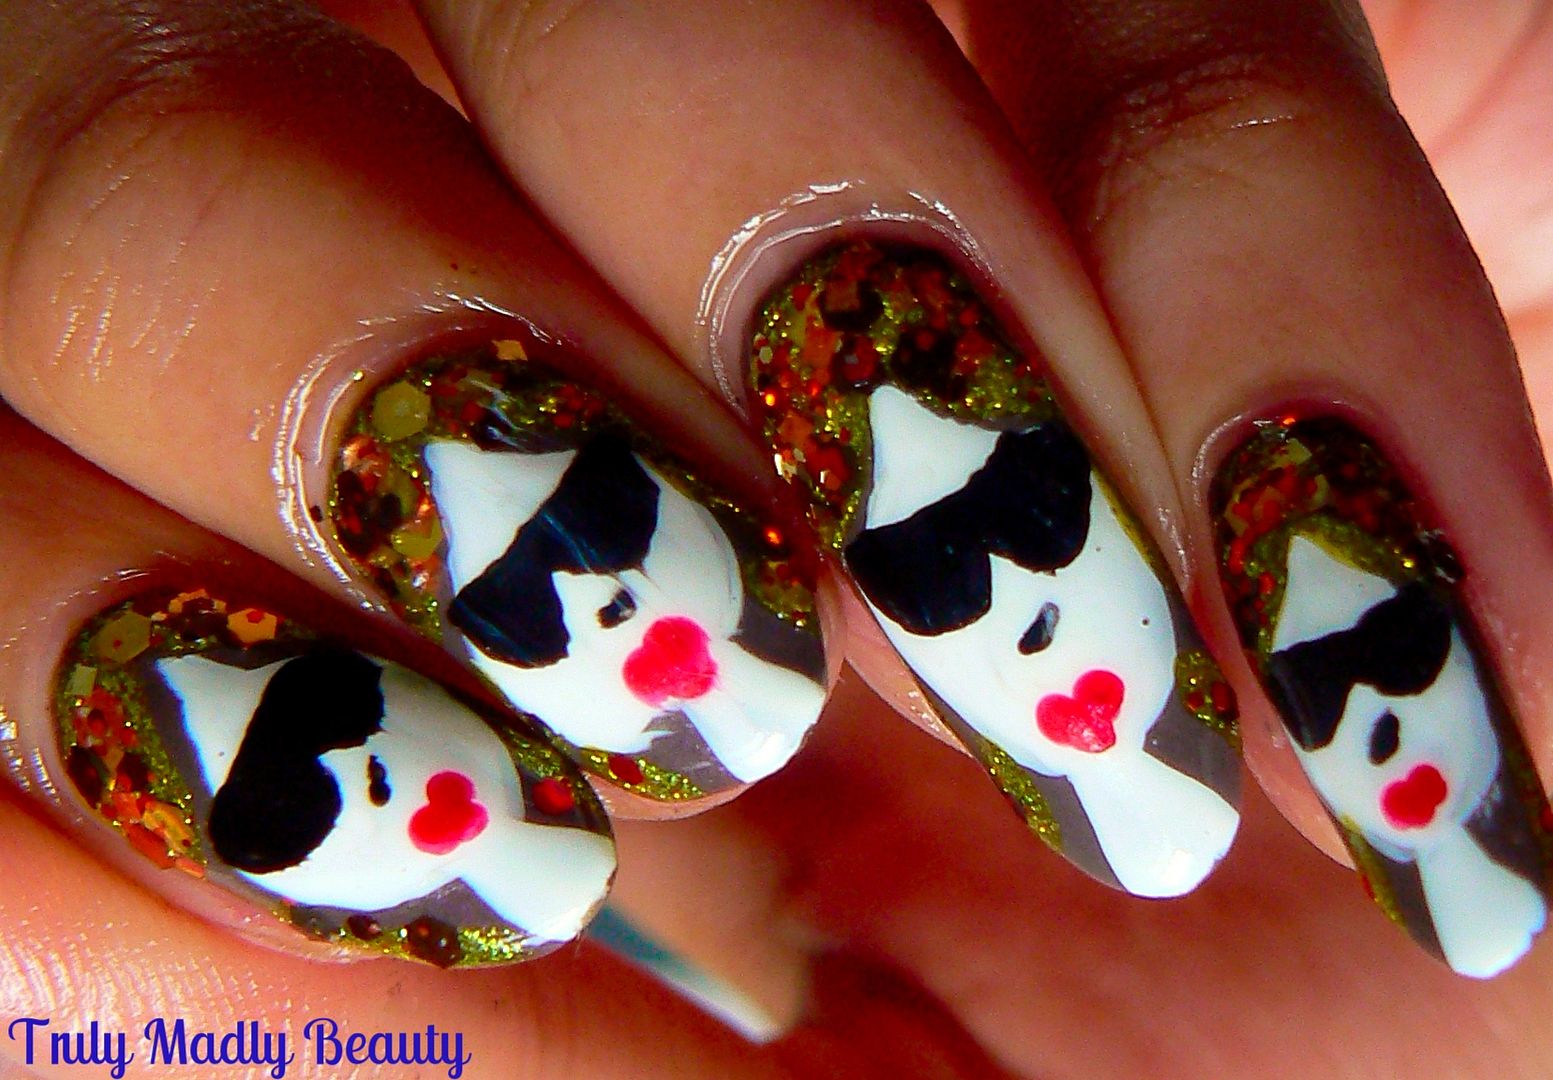
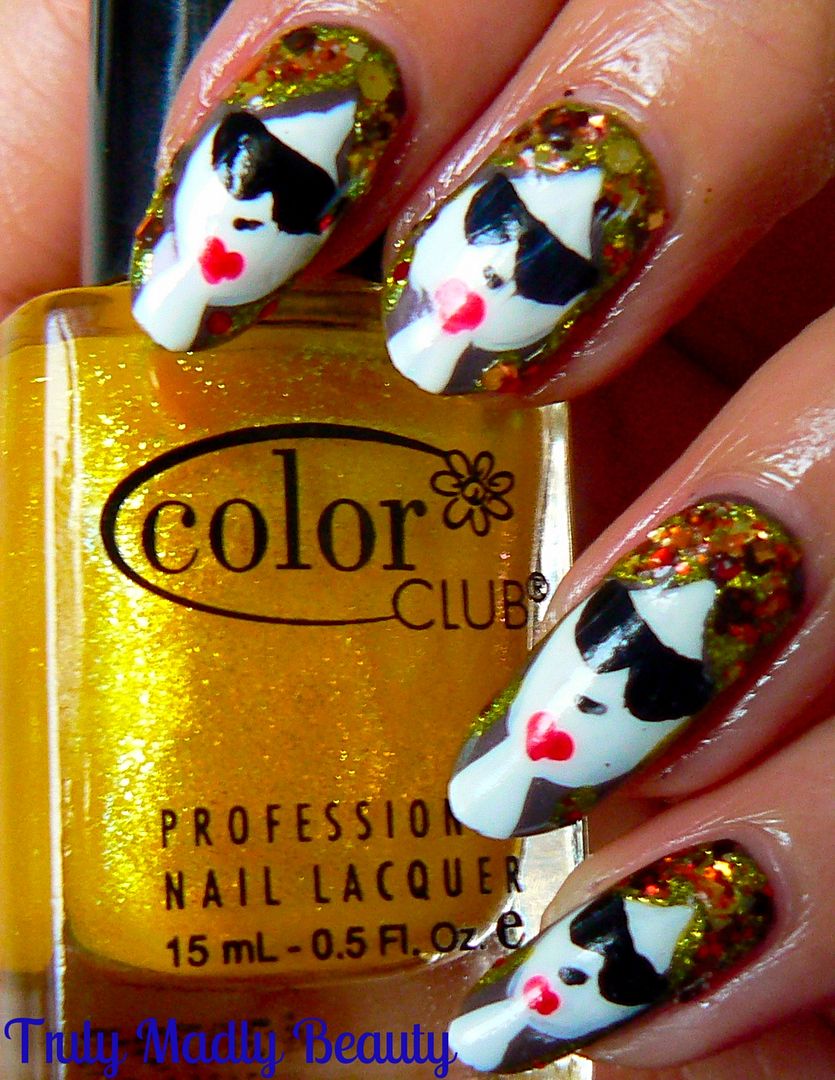
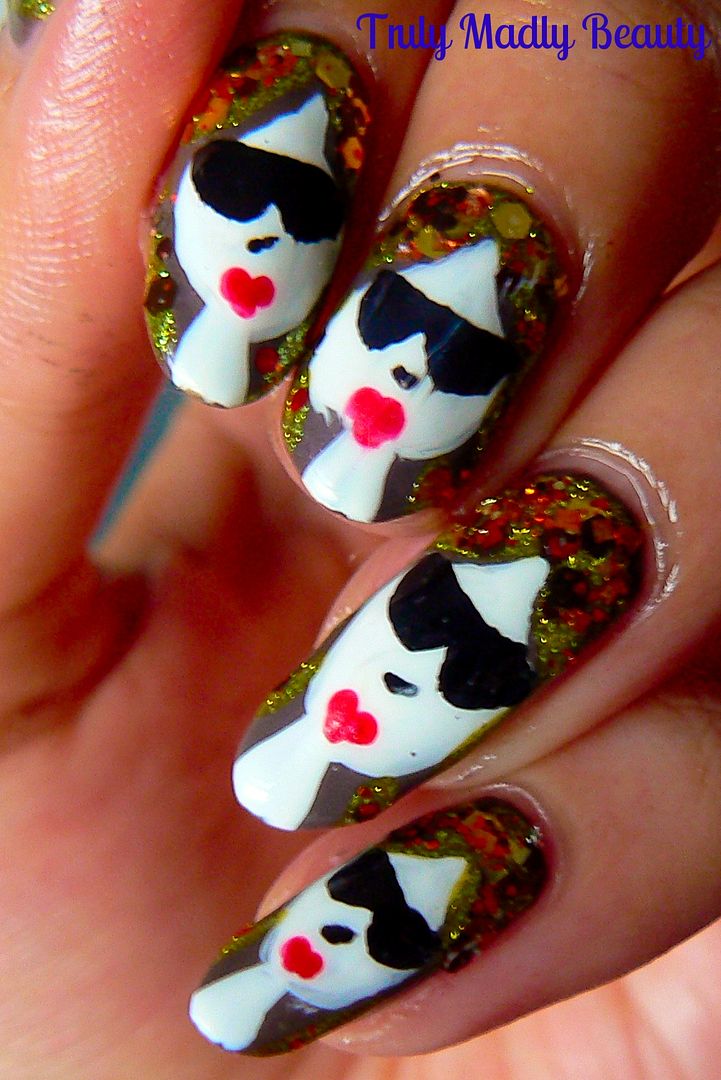
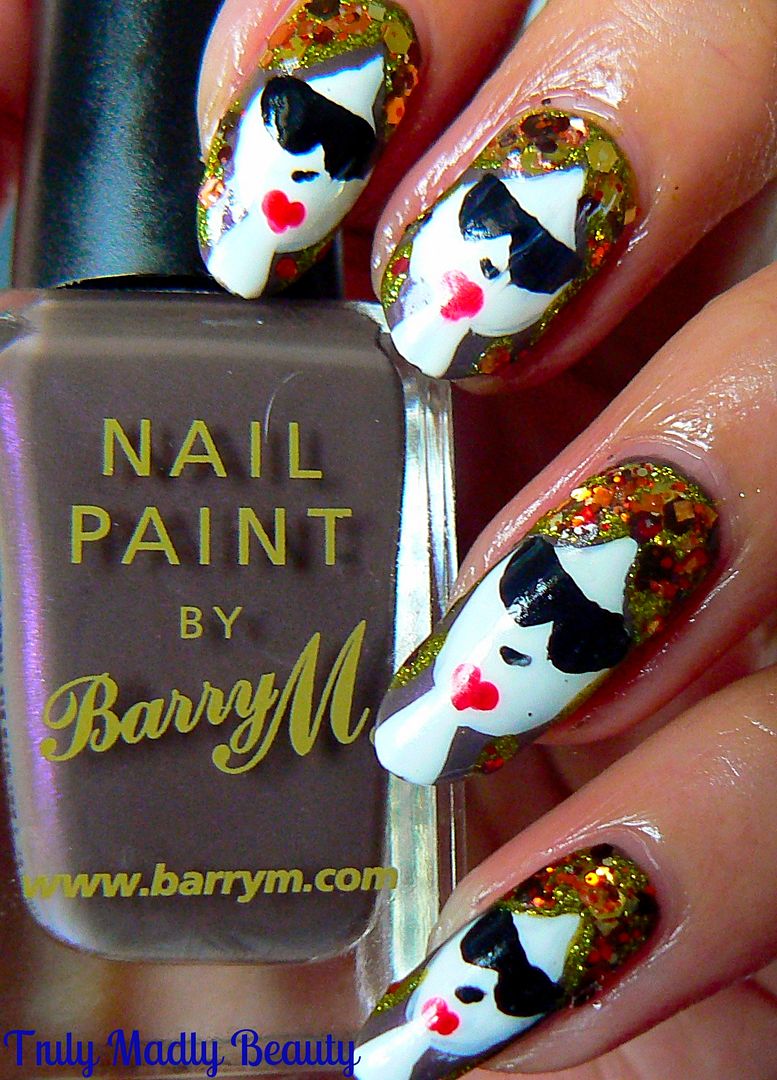
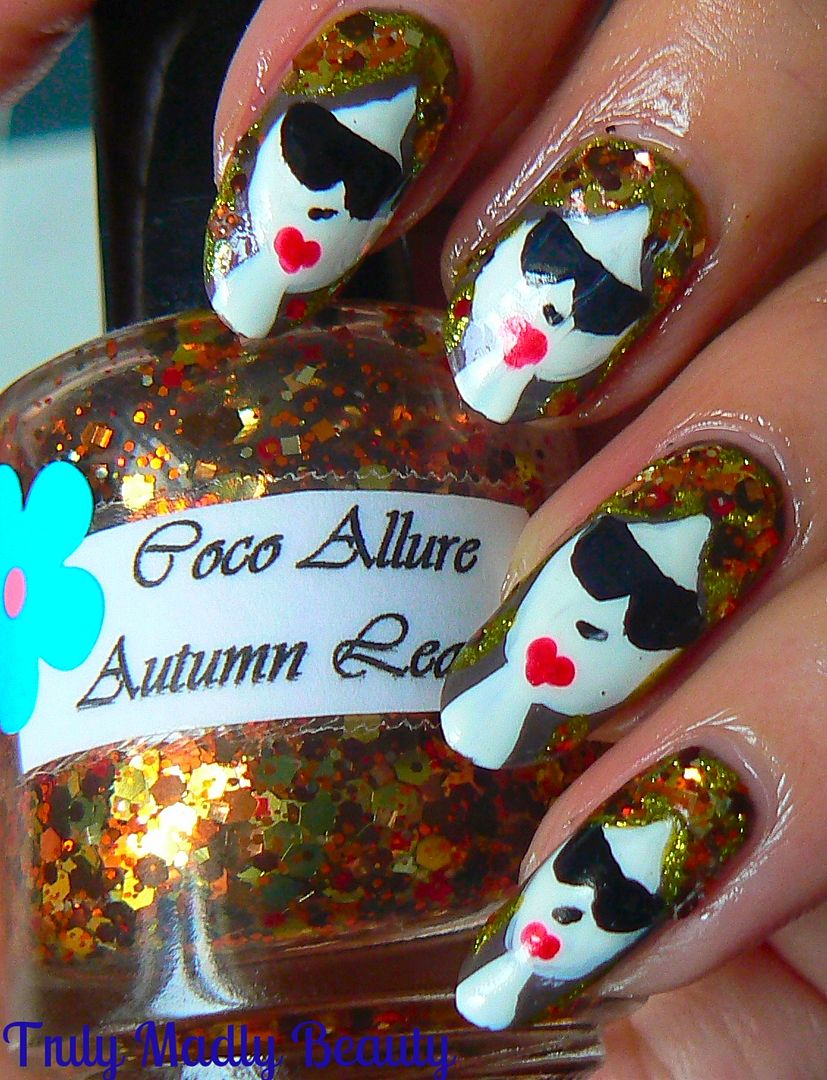
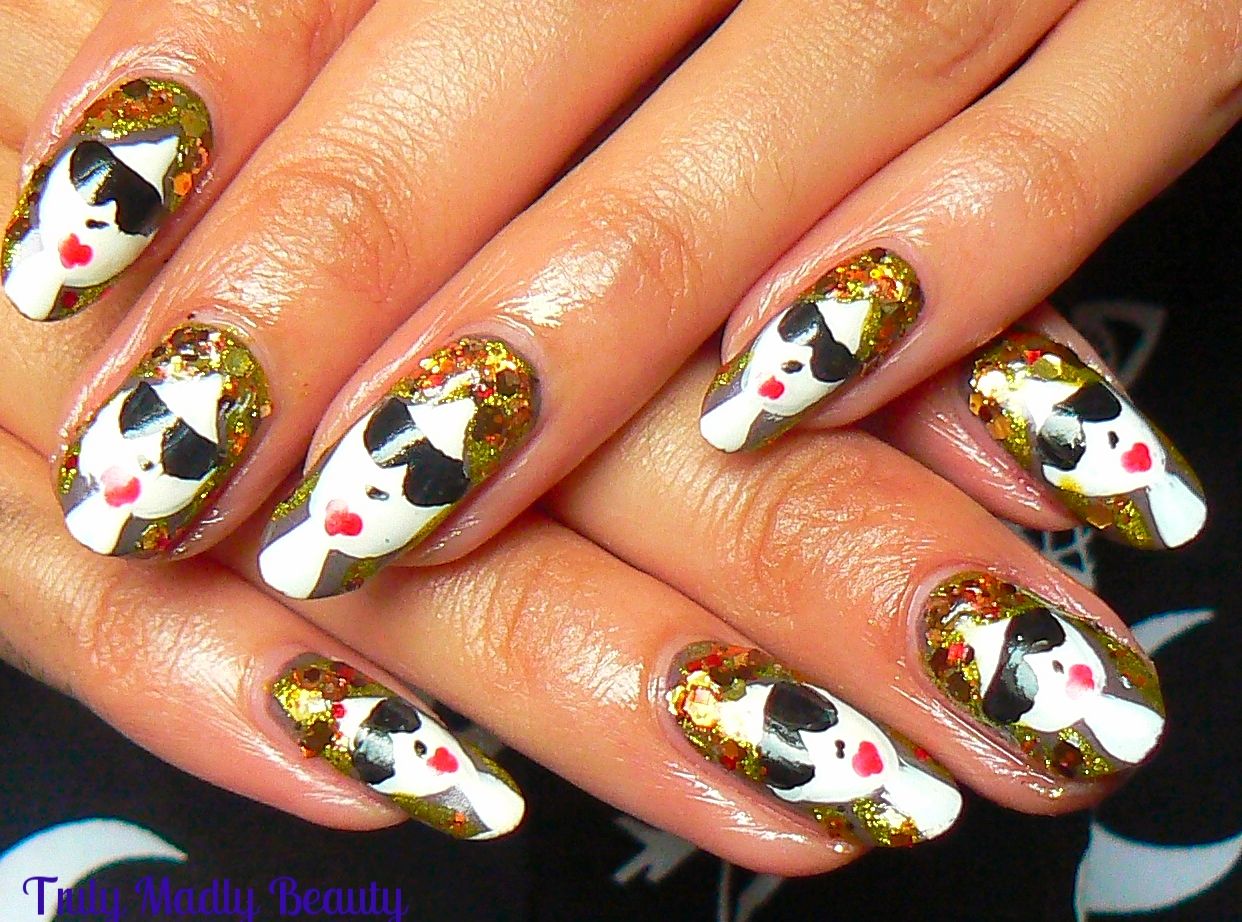
Naturally my favourite way of expressing myself is through my nails so I got to thinking & created this Autumn vibed design featuring a pouting painted diva with vibrant flowing hair reminiscent of burnt Autumnal leaves!


I was inspired by a Robin Moses Tutorial on YouTube, her nail art designs are wonderful, in her design she created the one lady accent nail & incorporated her flowing Autumn/Fall leaved hair over the remaining nails. I loved the look so much I decided to do an individual painted lady on every nail!


To re-create this design is easier than it seems & I've done a step by step pictorial for you to show how you I did mine...


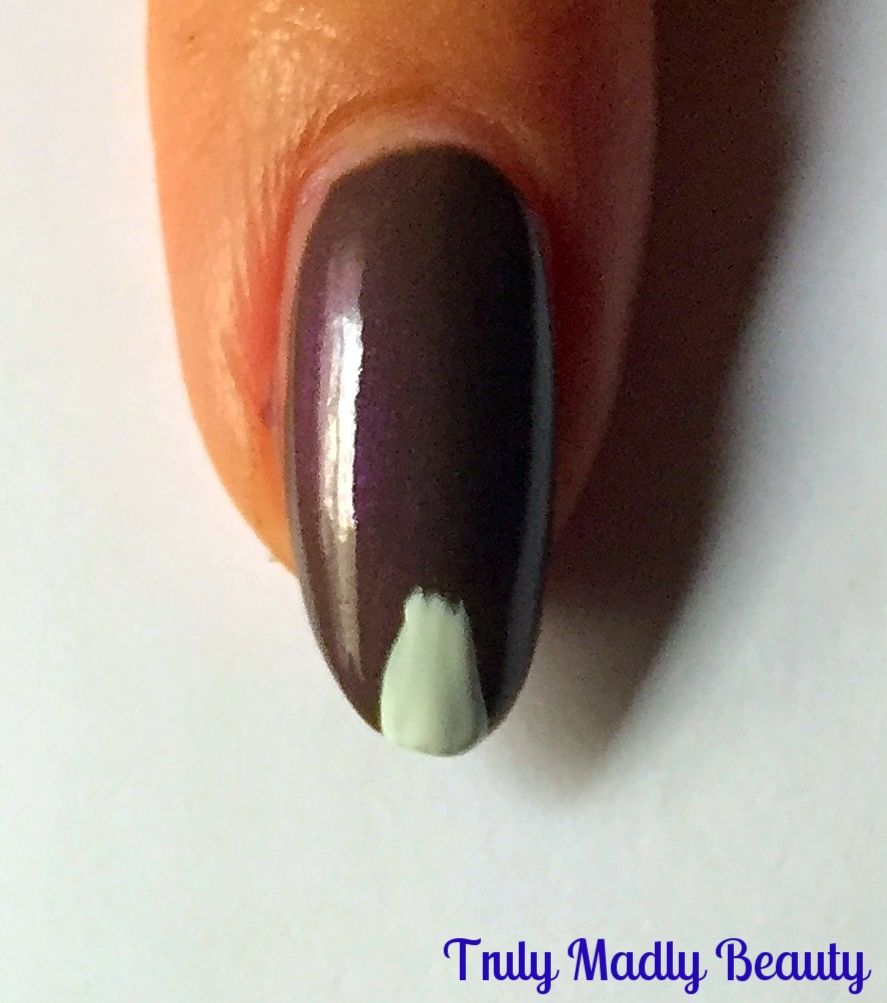
Begin with your base colour, wanting to keep with the Autumn tones I reached for Barry M Dusky Mauve. Remember when everyone went doolally over this shade due to its high dupe level of Chanel's Paradoxal? Here I've applied 2 coats of this lovely purple griege shade.


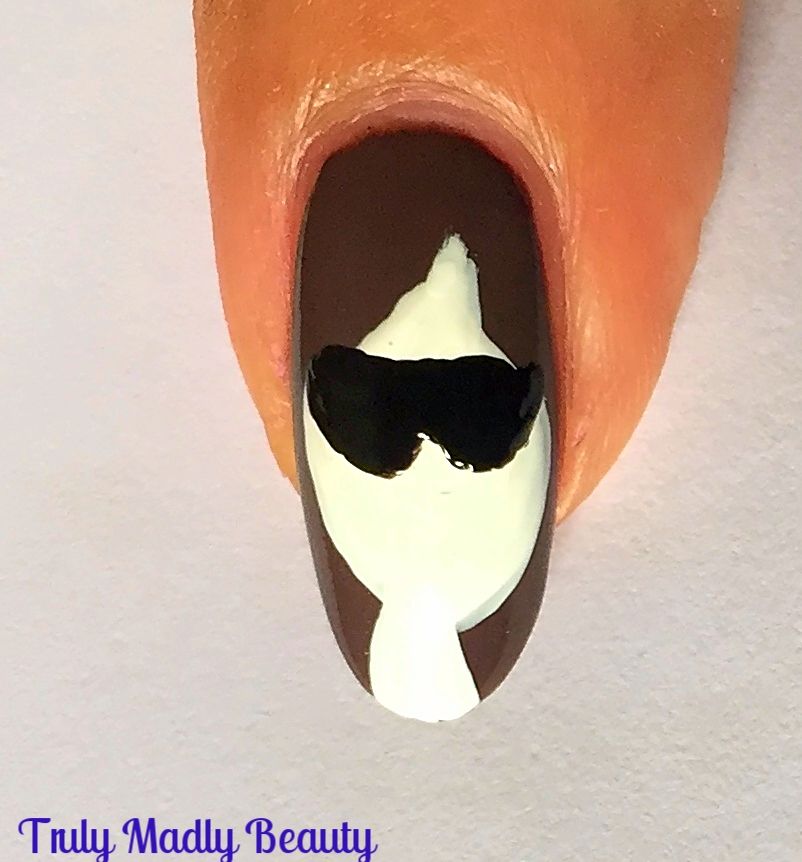
Now to begin creating our shaded divas, start with applying her slender neck starting at the tip of the nail, using white polish & a nail art brush.


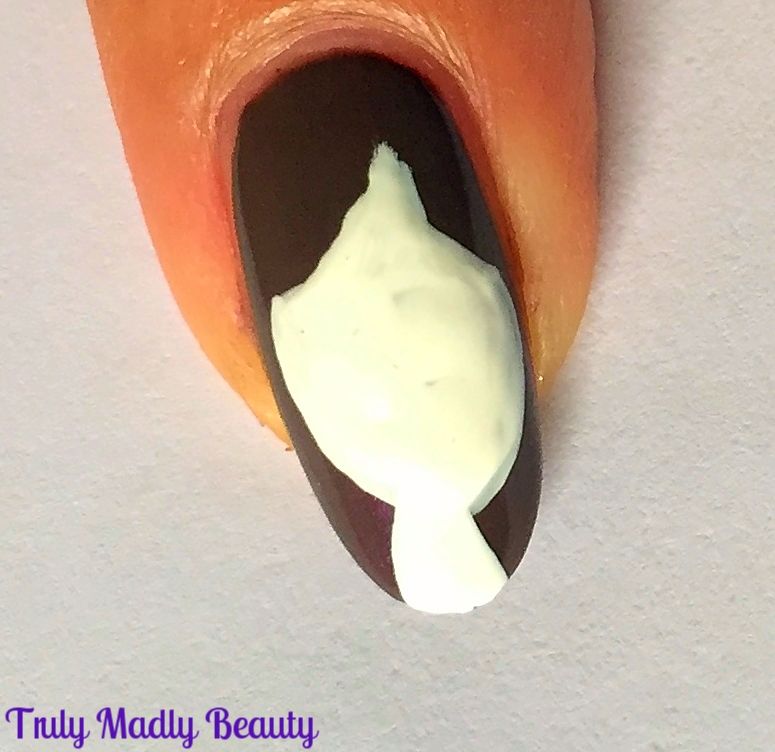
Now to create the face, using your thin nail art brush & white polish, start about 3/4 of the way up your nail where you want the forehead to be & draw a curved triangle with the top point angled slightly to the right, to give the appearance of bangs/fringe, then continuing on from the two bottom points of your triangle,curve a round oval like shape down to the neck before filling in.


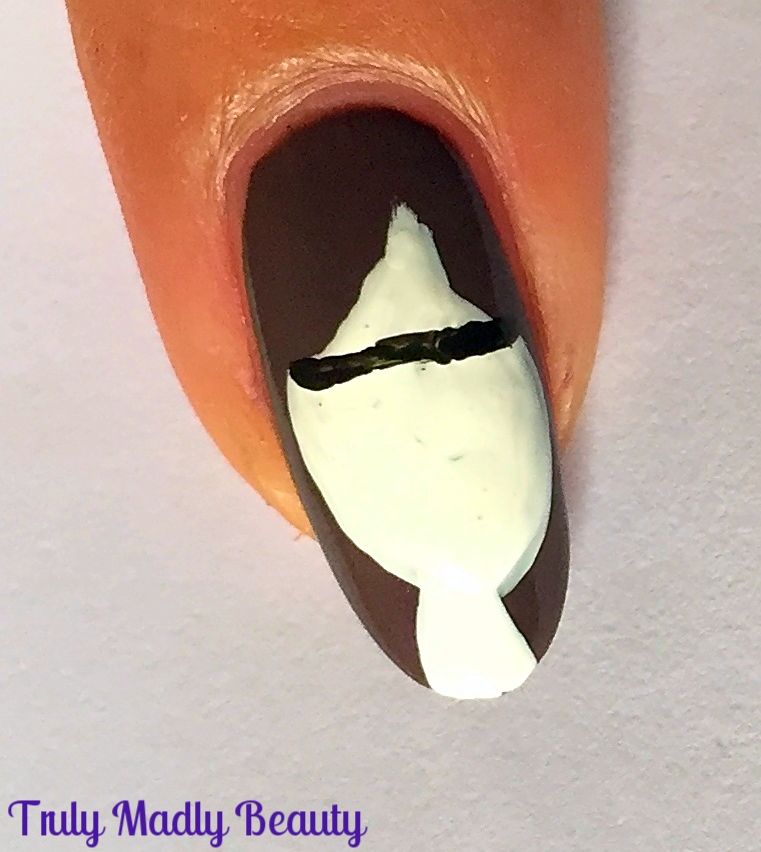
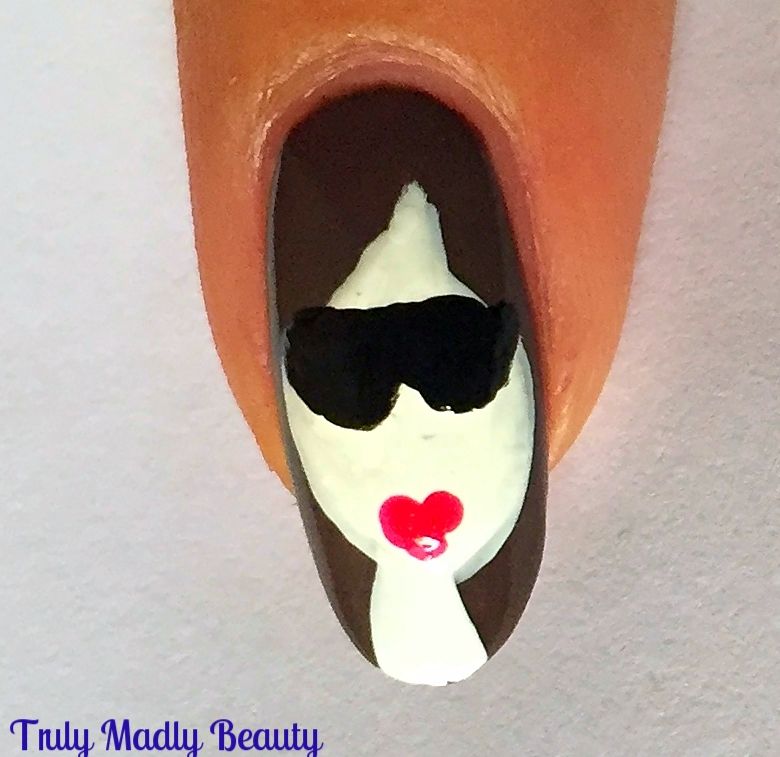
Next step is to add on our ladies sophisticated sunnies! Because even though its Autumn, shades can be rocked ALL YEAR ROUND. To do these simply start by adding a thin horizontal black line just underneath the fringe/bangs.


Then with the same black, underneath your line add two semi circle-esque shapes to create lenses.


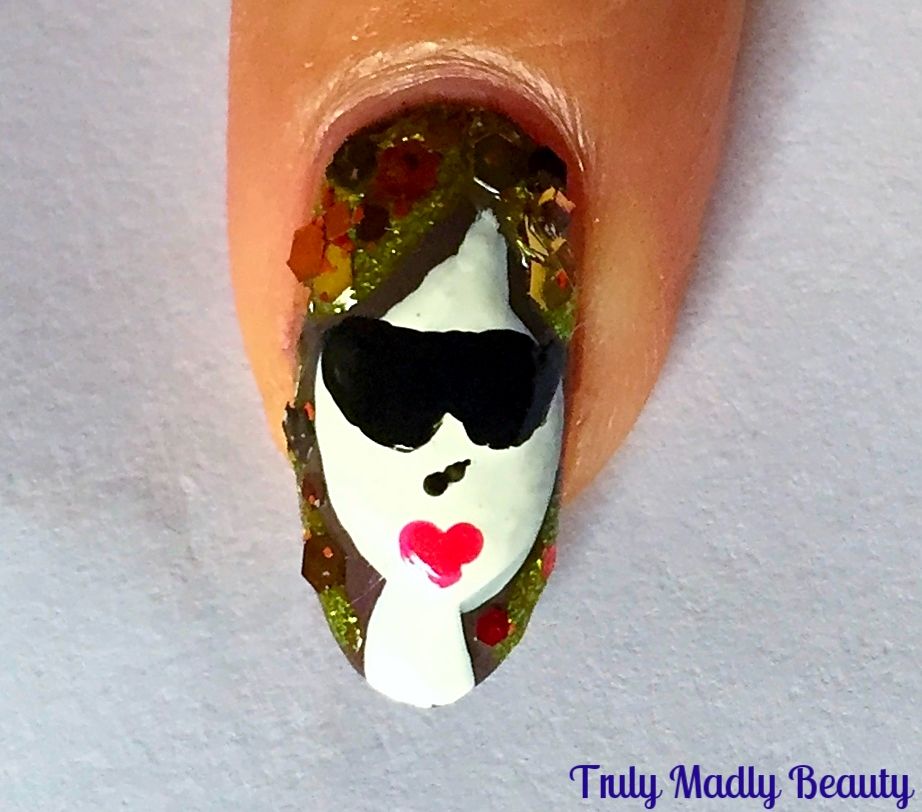
Now for our diva's pout, grab a pink or red polish & a dotting tool or a bobby pin & place two dots of red with one dot underneath, almost creating a heart like shape for the lips.


Final detail to the face is a tiny angled line for the nose before you can go to town with all the Autumn colours for her hair! I decided to use a shimmer yellow polish by Color Club to add on some strands in the brown, because its ALL about the balayage babes, before using the aptly named Autumn Leaves glitter polish by indie brand Coco Allure which I picked up from Etsy donkeys ago!


As the glitter in this polish is quite large I poured out a bit of the polish on to a piece of paper first & then used a toothpick to pick up the pieces of glitter which come in shades of burnt orange, reds, coppers & gold & just placed on to the hair.


Finish it all with a nice thick coat of topcoat & your done! Thank you Robin Moses as always for the inspo, a really fun & interesting way to wear Autumn/Fall nails! Hope you like them too!


Thanks as always for reading! 

Lotsa love to ya!


11.01.2016

Klenspop 4 Color Red Circle Lens Review

Hello there my lovely readers!

Currently sat snuggled up surrounded by soothing scented candles burning away with a pot of tea & supply of sweet foodstuffs...BLISS & the perfect environment to get my blog on. FYI head over to your nearest B&M beauts ASAP to drool over their divine scented candle range...so impressive & better still such BARGAINS! Managed to snap up some of the leftover Halloween specials including delicious Vanilla Pumpkin...yummo.


I'm sure you're used to by now of my fondness for switching up my eye colour on occasion, in particular with my favourite lens brand Klenspop. Well I have another pretty lens to share with you today, something a little bit different this time with the Bunny 4 Colour Red* lenses


Like the lilac lenses from my previous post HERE, I was super excited to try out a shade of lens I'd also never ventured towards before, but fret not, if the idea of red lenses immediately brings to mind "newborn vampire out of twilight" vibes, which I confess it did with me & there's nothing wrong with that as I think they look incredible, I couldn't have been more wrong about these which are in fact rather natural in look!


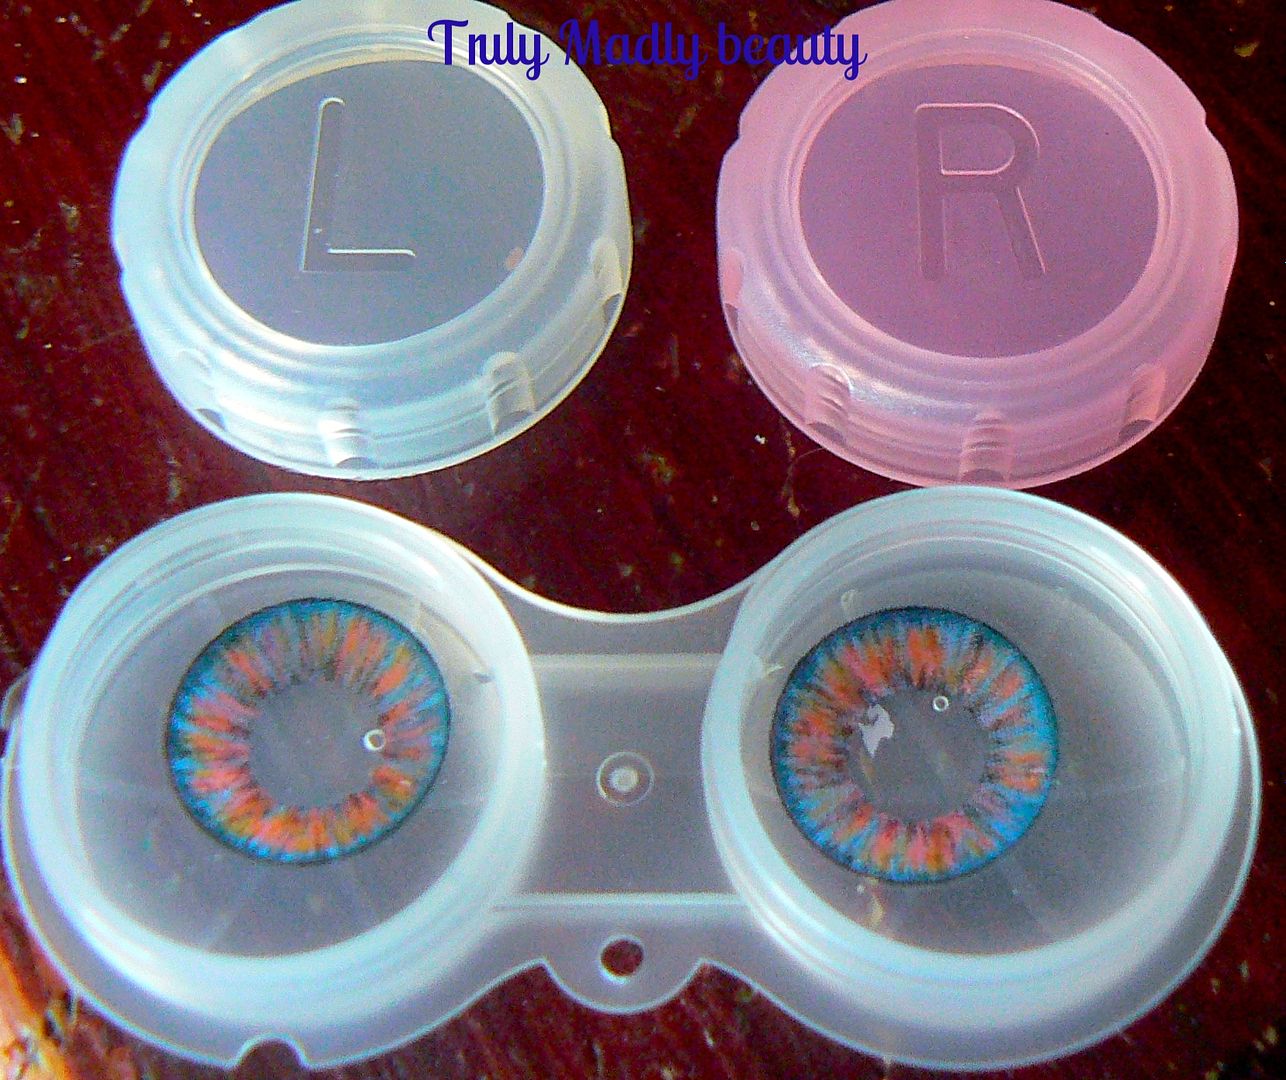
As usual your Klenspop lenses will arrive securely packaged in plenty of bubble wrap, in which you'll find your your lenses stored in the usual pretty packaging along with your wee tweezers and storage case.


As you can see from first look, far from being one block colour, the Bunny 4 Colour red lenses are an intriguing mixture of not just pale red, but also includes shots of blue, grey & brown thrown in to give a really unique look

Here's a wee breakdown on the lens details for you:

Diameter: 14.5mm
Graphic Diameter: 14.2mm
Basic Curve: 8.8mm
Using Period: 6 months
Water Content: 38%
Manufacturer: Lenspop

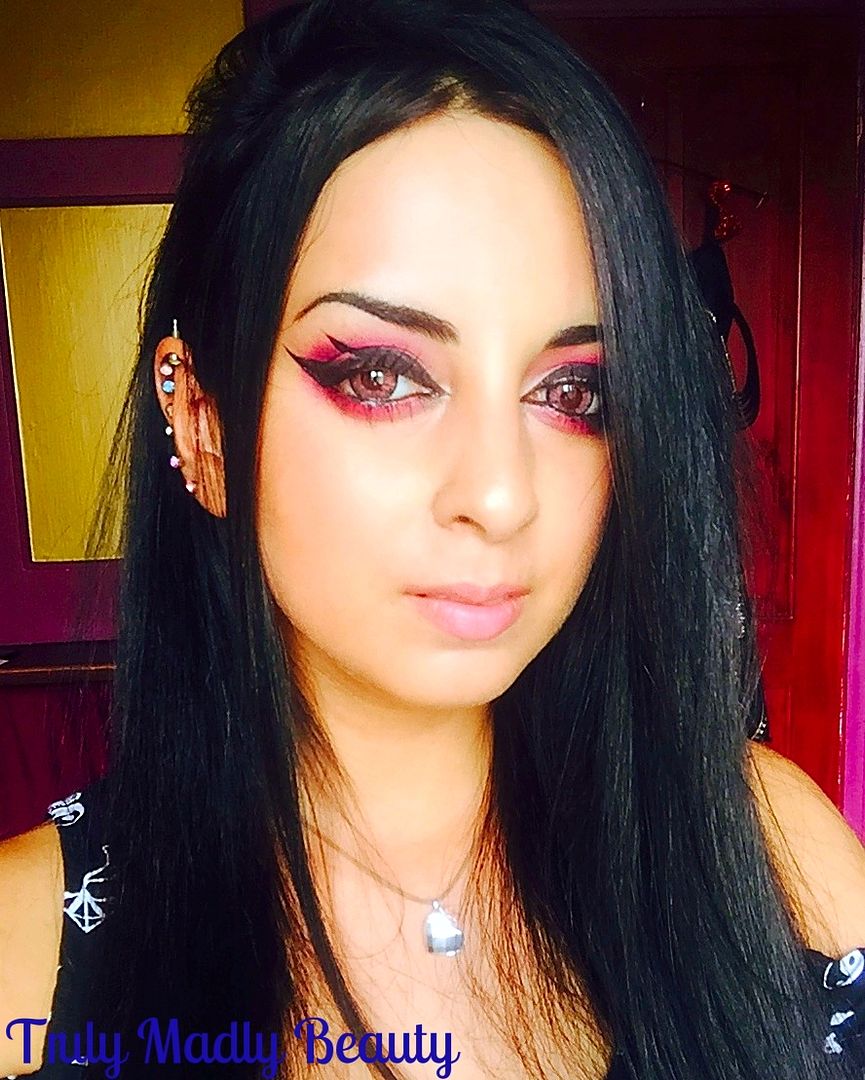
Now on to the pics! Here's a quick before pic of me with my natural eye colour, I decided to throw together an Amy Lee vibe red eyeshadow look to go with the lenses that completely had me reminiscing back to my teen years...


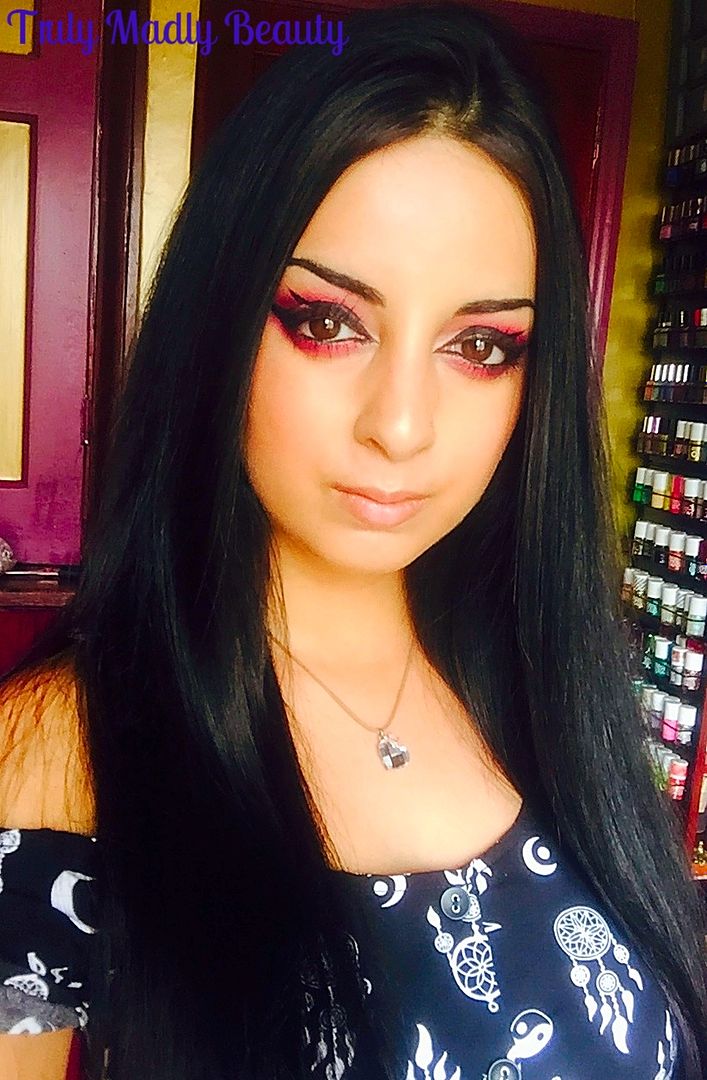
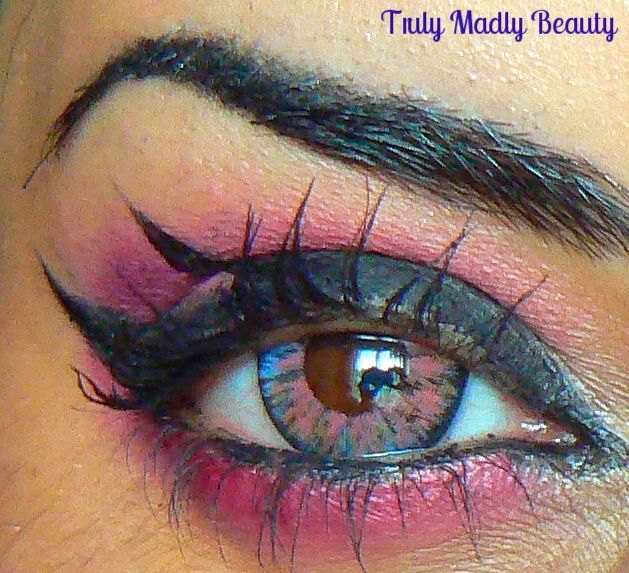
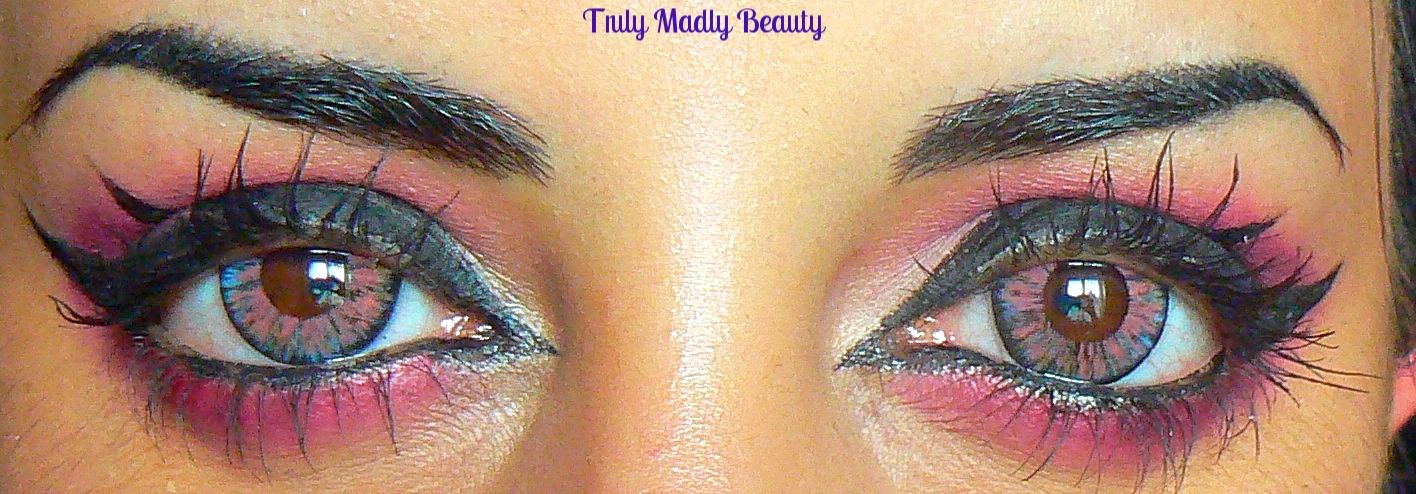
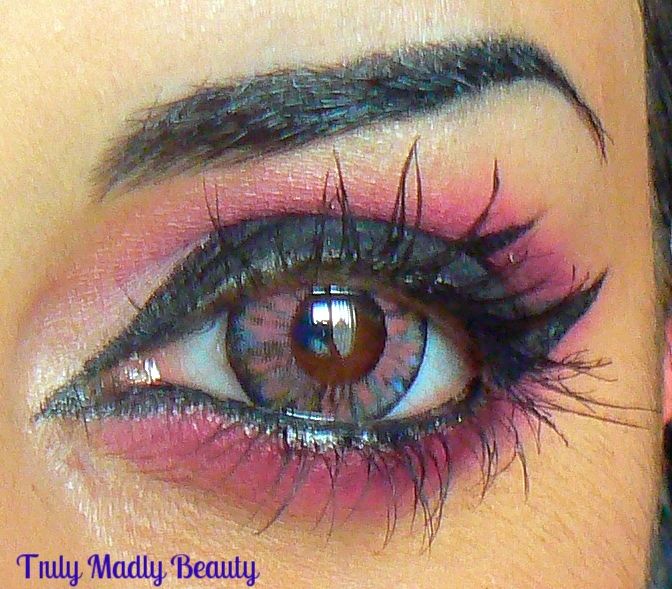
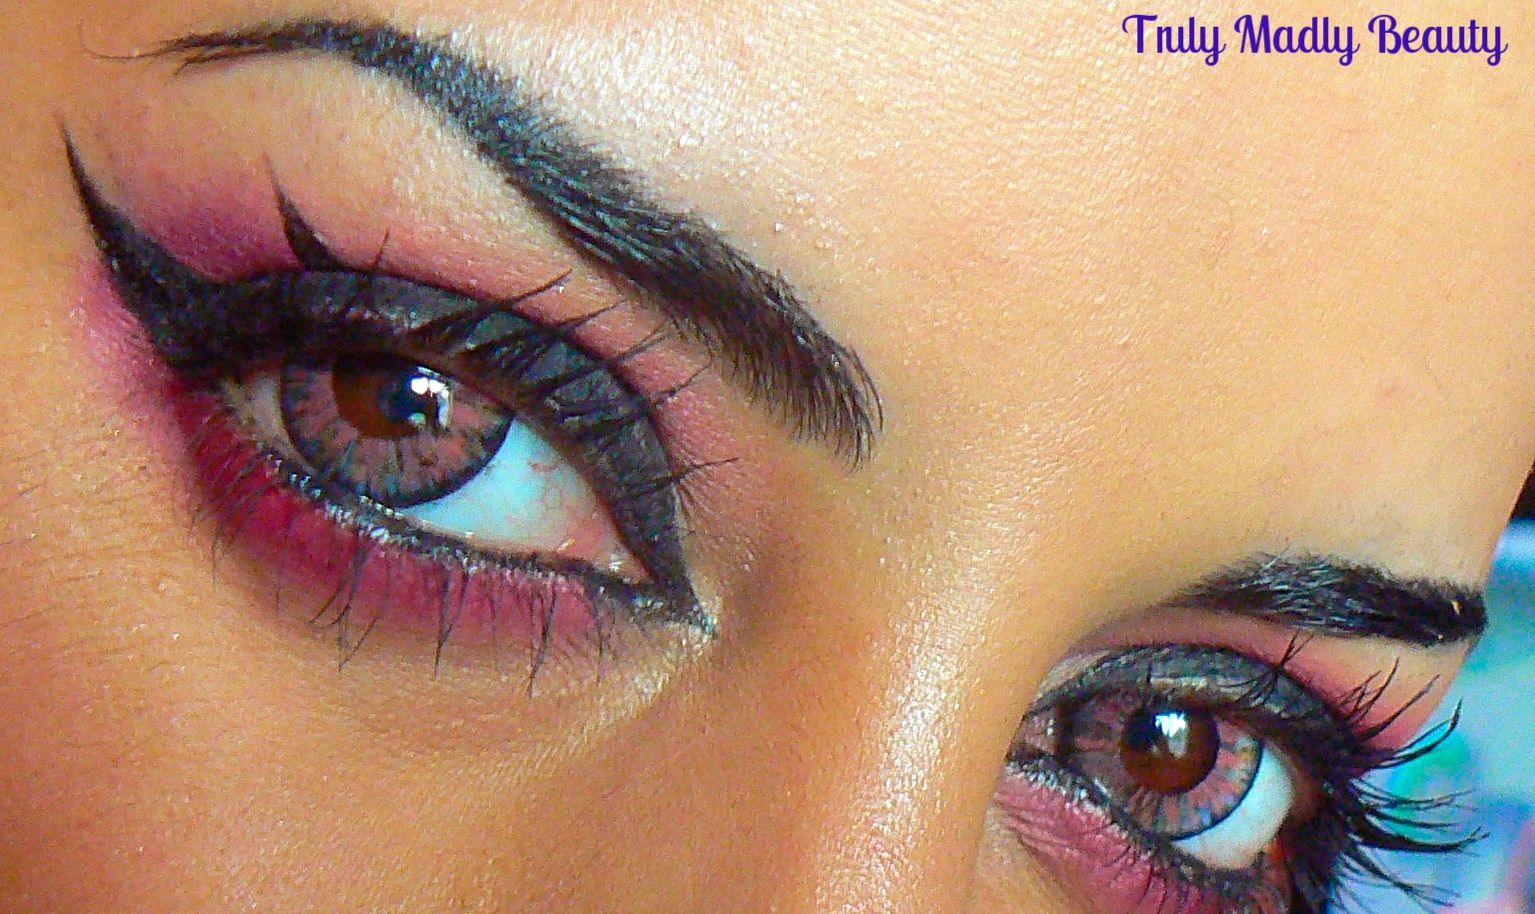
And here we have the Bunny 4 Colour red lenses in...


What do you think? I was so pleasantly surprised with how different yet natural the finish of these are, I absolutely love them!


The added touches of grey/blue/brown really tones down the look yet still makes the finish really eye catching. Because the red is so soft toned it almost gives a pretty pink like finish which I heart.  


Happy to report these are non irratable as Klenspop lenses always are & I can comfortably wear these for the whole day with the added help of MesmerEyez Milk Eye Drops which are by far the BEST eye drops I have ever used to help prevent eyes from drying when wearing lenses.


The Bunny 4 Colour Red lenses also enlarge the eyes slightly, but not a huge amount so the finish is still quite natural. However one thing I did notice with these is that one of the lenses kept shifting positions due to my dry eyes making my eyes look a tad odd haha! But that was rectified with a bit of moisture from the eye drops. ;)


Another hit with these babies! You can find these and many more on the Klenspop website where they are not only reasonably priced but fab quality too. You can check out my other Klenspop reviews HERE.

Thanks as always for reading!

Lotsa love to ya!


Disclaimer - * products featured were sent to me for my consideration. I am not affiliated with the brand nor paid for this post, this review has been as always my 100% honest opinion! :)