11.29.2015

Afternoon Tea Adventures - Claridges

Hello there lovely readers!

I'm sure it's no surprise when I tell you that I am a HUGE fan of afternoon tea. One of my favorite pastimes, there is nothing I enjoy more than an afternoon spent relaxing in loved ones company, sipping tea out of dainty cups & nibbling on delicious treats. Its such a decadent & quintessentially British tradition that I just adore. I've been fortunate to have experienced quite a few afternoon teas being the avid fan that I am, so I thought it would be nice to do a mini series on my blog & share with you the different ones I've tried in case you were considering doing one too! :)

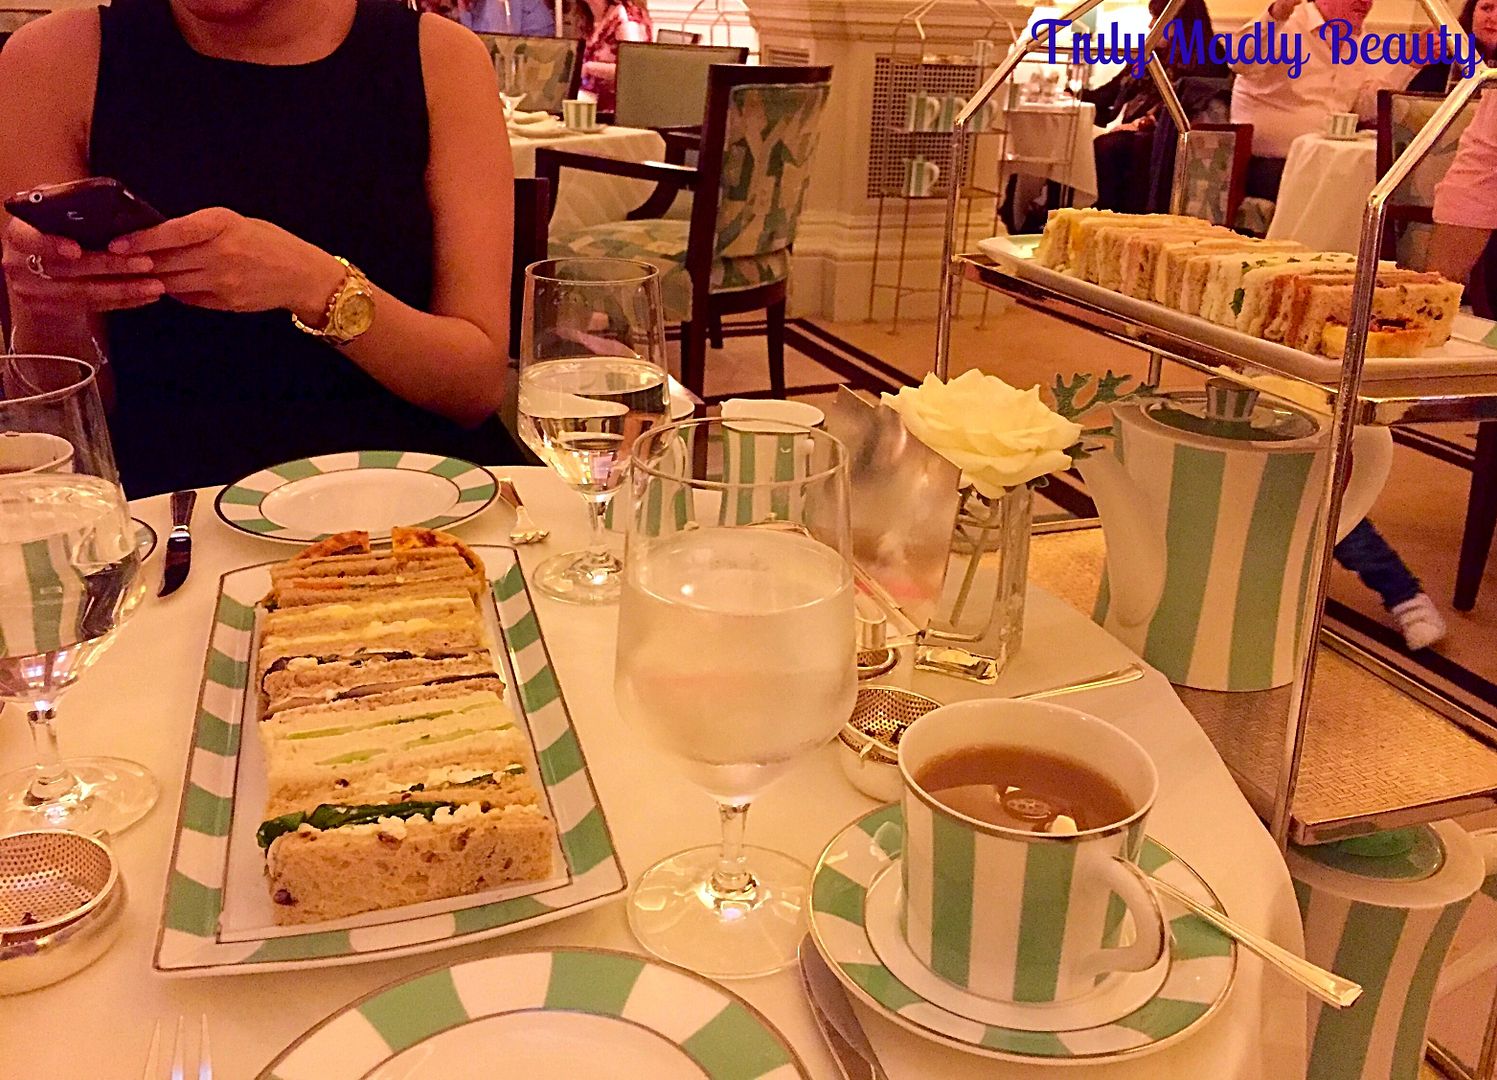
Starting things off with one I recently attended, the Claridges Afternoon Tea in Mayfair. I even have a bucket list which includes some of the well known famous afternoon teas & Claridges was one that was present so I was very excited at finally ticking it off my list. Reservations have to be made up to 90 days in advance, thankfully my friend is very good at organising & managed to get us booked in for the 5pm slot.

We arrived a little bit early so first paid a visit to the ladies room were we checked in our coats & freshened up a tad whilst of course squeezing in a few cheeky selfies haha! Suitably refreshed we then made our way to the dining room where we were shown to our table by the attendant. The ambiance in the room is just beautiful with dimmed lighting & musicians in one section playing beautiful background music creating a dreamy relaxed atmosphere.


11.24.2015

Klenspop Ruby Queen Grey Coloured Contact Lens Review

Hi there lovely readers!

It's no secret that when it comes to makeup, I like to focus on the eyes. One of my favorite ways of mixing things up a tad is by wearing coloured contact lenses to really make the eyes stand out. In the past I've indulged in blues, greens, hazels from various brands including Acuvue & MesmerEyez, which have all worked well for me as daily & monthly disposables. I was offered the opportunity to try out some circle lenses by the brand Klenspop, an online Korean retailer of circle lenses, I've always been intrigued by them, having heard lots of things so I was looking forward to seeing how they would compare to ones I'd already tried.


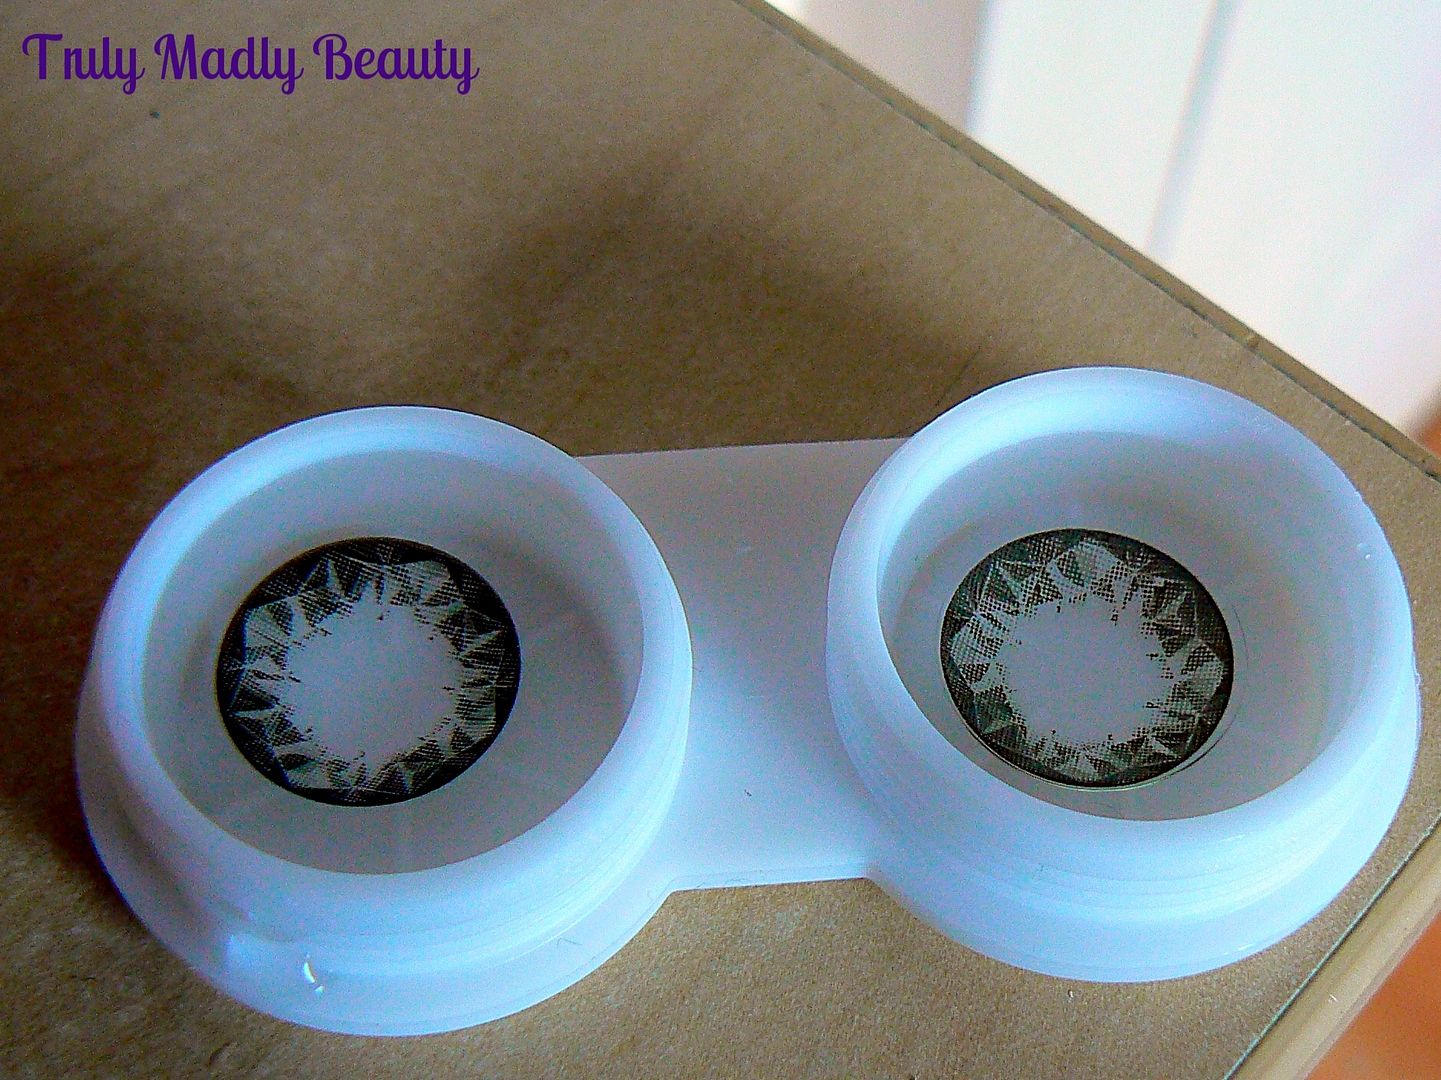
I was sent a pair of the *Ruby Queen Grey Circle Lens, on first look I knew these would be interesting with their intriguing diamond like effect on the design. I was impressed with how fast they got to me, shipping was very quick & the lenses themselves came very well sealed in cardboard & bubble wrap. Now to be honest with you I have NO clue about all the various lens sizes, diameters, all that business, but in case it does interest you here's a wee breakdown:

Diameter: 14.0mm
Graphic diameter: 13.8mm
Basic Curve: 8.6mm
Using period: 6 months
Water content: 38%
Manufacturer: Neo Vison


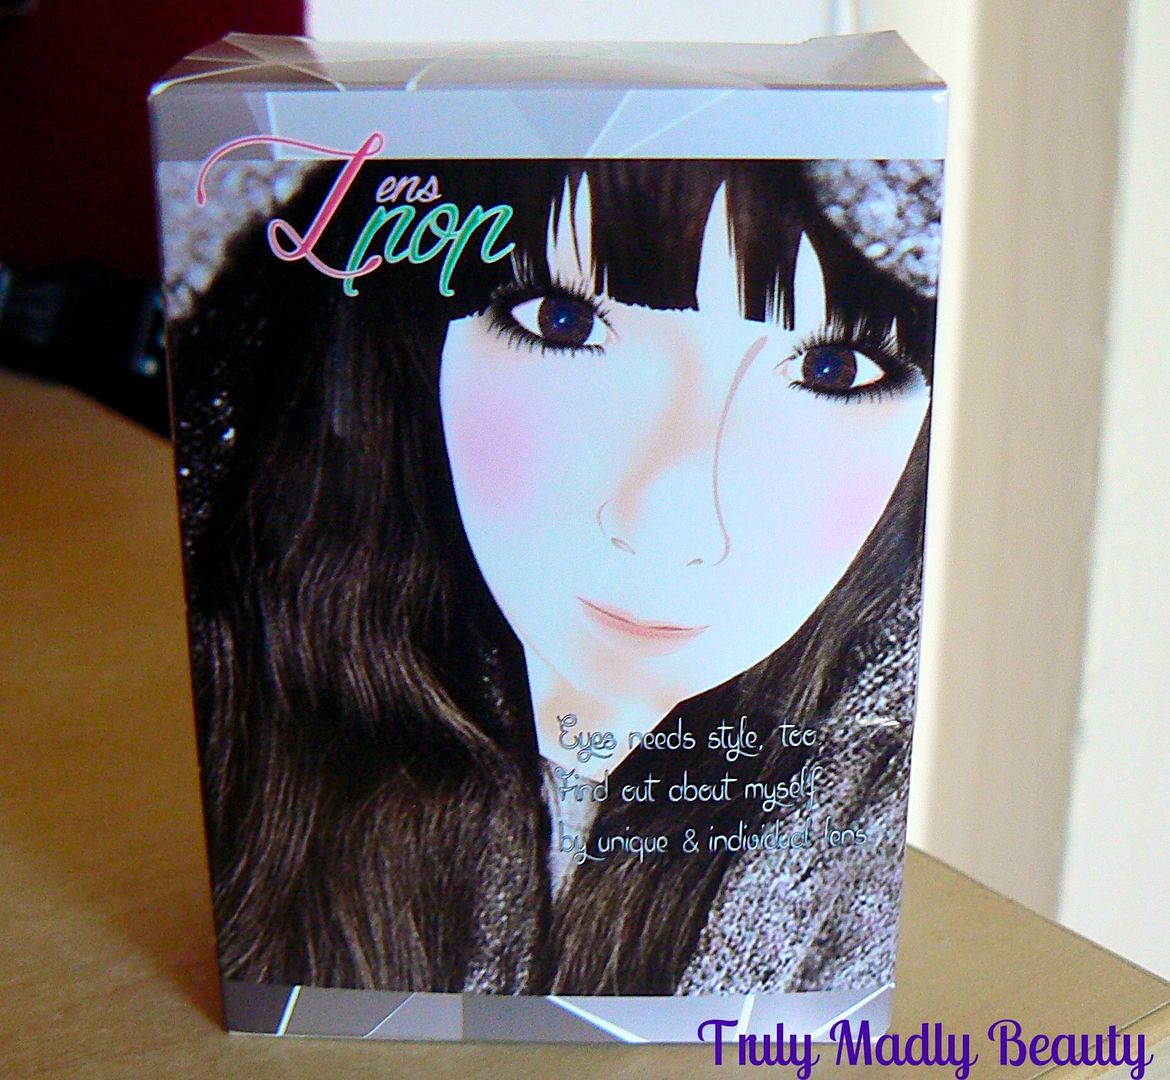
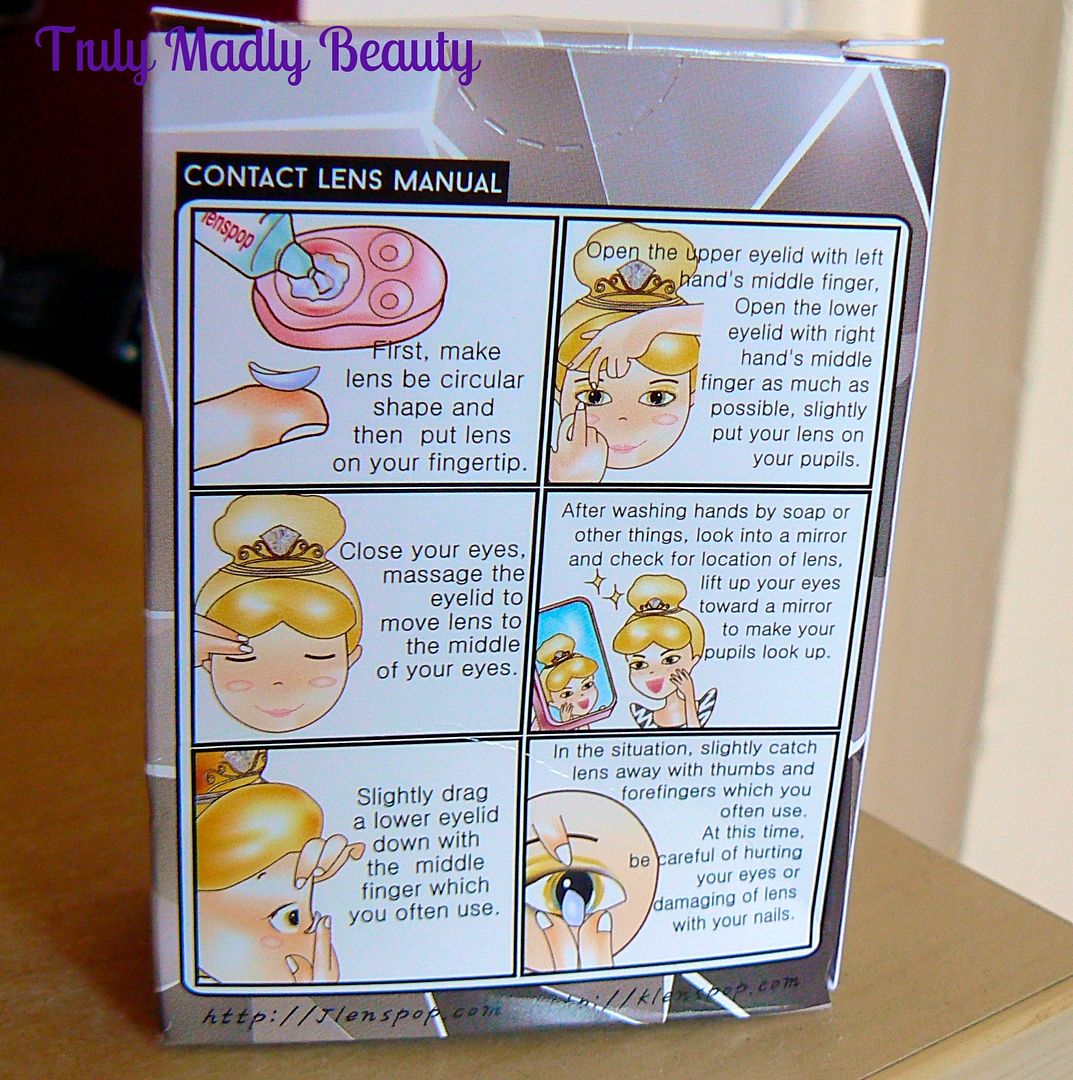
The lenses come stored within glass bottles in adorably illustrated box packaging, with instructions on the back that are pretty self explanatory to follow. You also receive a lens case to keep your lenses in as well as a wee pair of tweezers to remove the lenses safely. 


Now I don't know if it was me being a complete dunce (probably) but I struggled with opening the glass bottles these lenses come in, they are sealed securely which is understandable & I managed to totally hash it up but with the help of a pair of scissors (safely!) I eventually pried the bottles open! O_o I used the tweezers to pick the lenses out of the bottles & placed into the lens case with some of the solution they came in. 


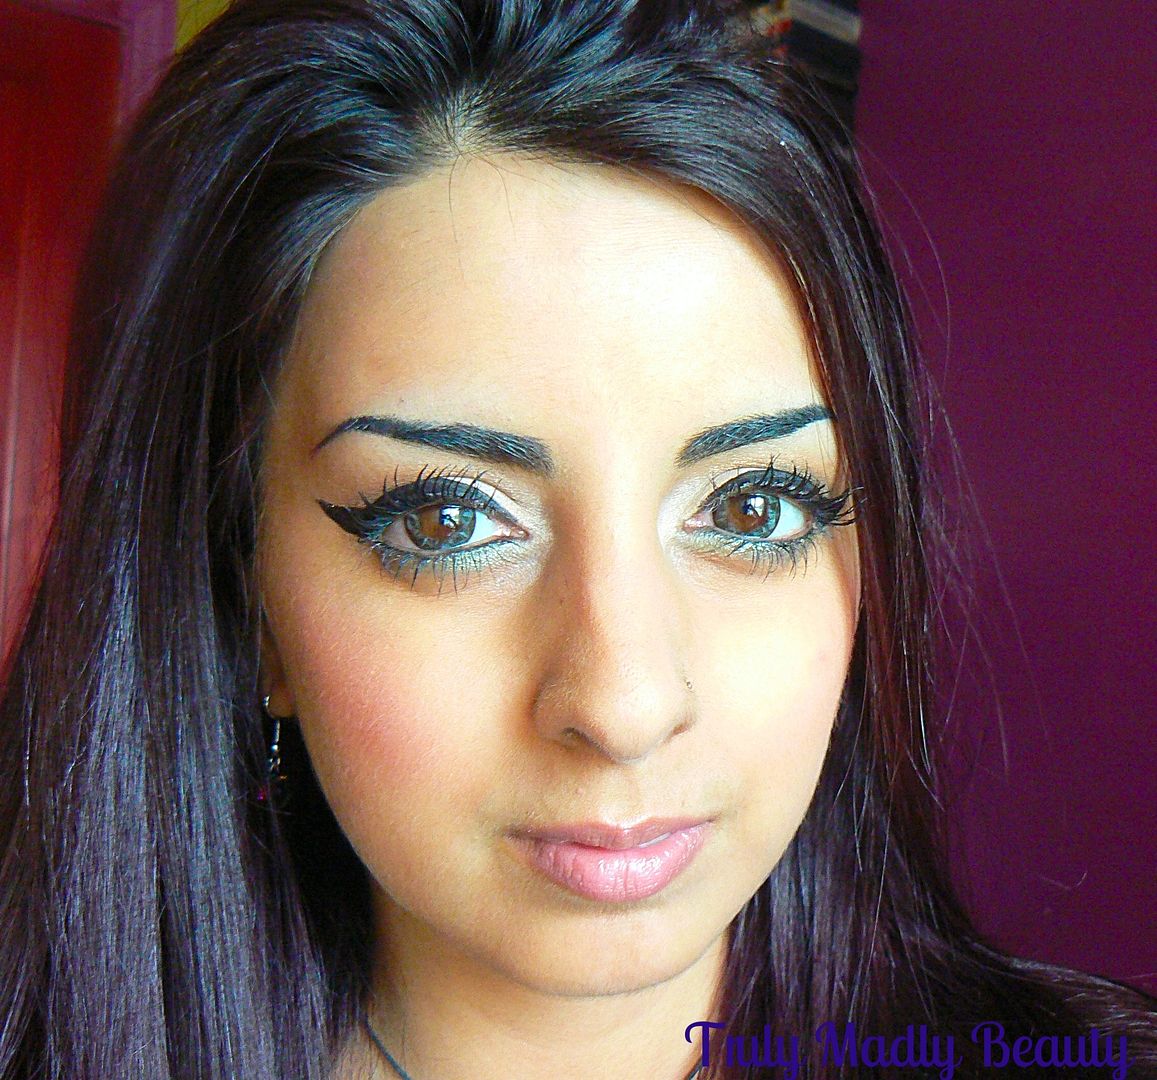
Of course the truth is in the testing! To give you an idea of the difference here is a before mugshot of moi with my natural brown eyes...


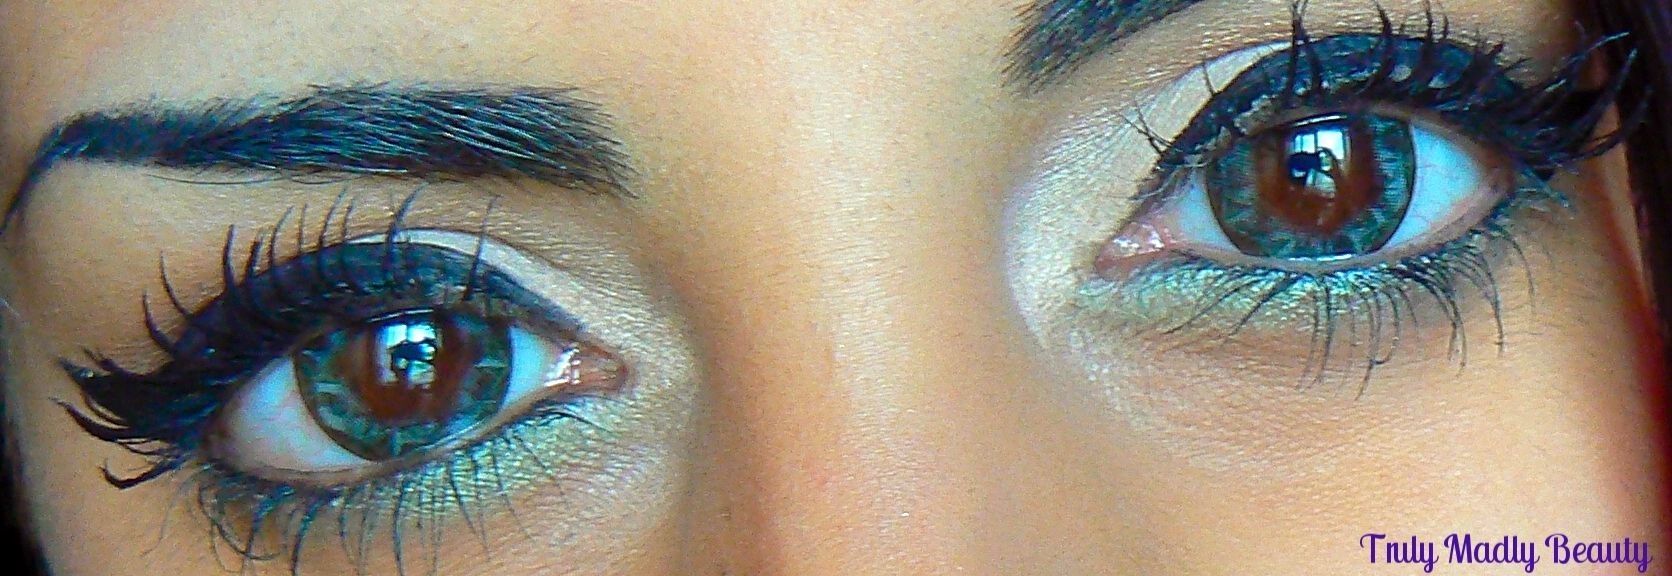
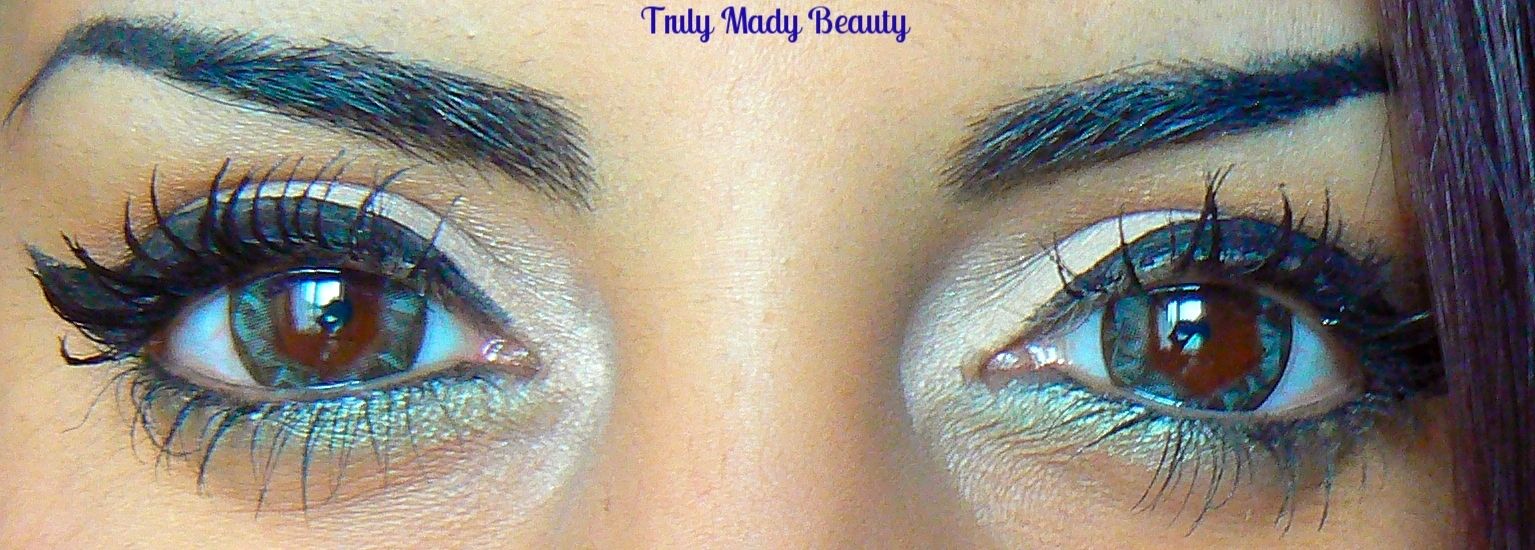
And here we have with the Ruby Queen Grey Circle Lens in...


Verdict? LOVE. I especially love how the circle lens really gives the appearance of wider awake & noticeably larger eyes. The grey shade is absolutely lovely, the diamond effect gives a really interesting twist whilst still keeping the shade pretty natural looking which is great. 


Of course the main test is easy wear-ability & these felt extremely comfortable whilst on. I suffer from dry eyes, so with contacts you can imagine this is an absolute nightmare! However regular application of eye drops will keep the dryness at bay & I find I can get maximum wear of about four to six hours from these.


I've only ever used daily disposable or monthly lenses, this particular brand as well as many other Korean brand lenses state that they last up to 6 months, some even a year! I'm not sure how I'd feel myself using the same lenses for such a long period of time so will most probably get 3 months usage before discarding. 


Overall though I'm extremely impressed & will definitely be purchasing lenses from Klenspop in the future, I already have my eye on some violet ones! Not only are they comfortable & look great but they are also very reasonable with lenses starting at around $13. Shipping is quick & costs $5.50 so convert that & all together you're looking at just over a tenner. The fact that Paypal is a payment method option is another tick in the box for me, plus you can also enter in prescription details when ordering if you require them for your lenses.

Thanks as always for reading lovelies!

Lotsa love to ya!

Disclaimer - * products featured were sent to me for my consideration. I am not affiliated with the brand nor paid for this post, this review has been as always my 100% honest opinion! :)


11.19.2015

Polish & Poise - Adore Me Lingerie Inspired Nails!

Hello there lovely readers,

I do enjoy finding nail-spiration in all kinds of places, fashion, food, media, you name it. Lately I've loved creating nail art inspired by fashion, such as this Colour Block mani that was inspired by a beautifully printed dress. Another avenue I've found myself going down is lingerie. Think about it, all the pretty lace detail & jewel tones are perfect for nail art inspo! Just the simple task of wearing a pretty set underneath your winter layers can make you feel as good as when having a freshly painted manicure, so why not match both for extra brownie feel good points? When I came across lingerie brand Adore Me I became inspired to participate in their fun Polish n Poise project by creating some lacquered looks inspired by a few of their pretty pieces, I couldn't resist the challenge!

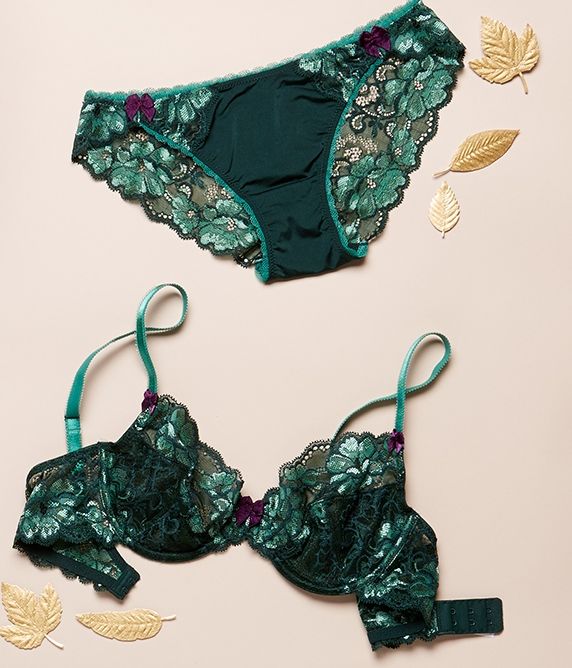
Adore Me is a New York based online lingerie company with a vast selection of pretty pieces to tempt. From dark vampy to angelic pastel sets there's something for everyone. This time of year, the warm tones especially draw me in & this gorgeous emerald two piece Wilhemina set caught my eye with its gorgeous jewel green lace & bow details.


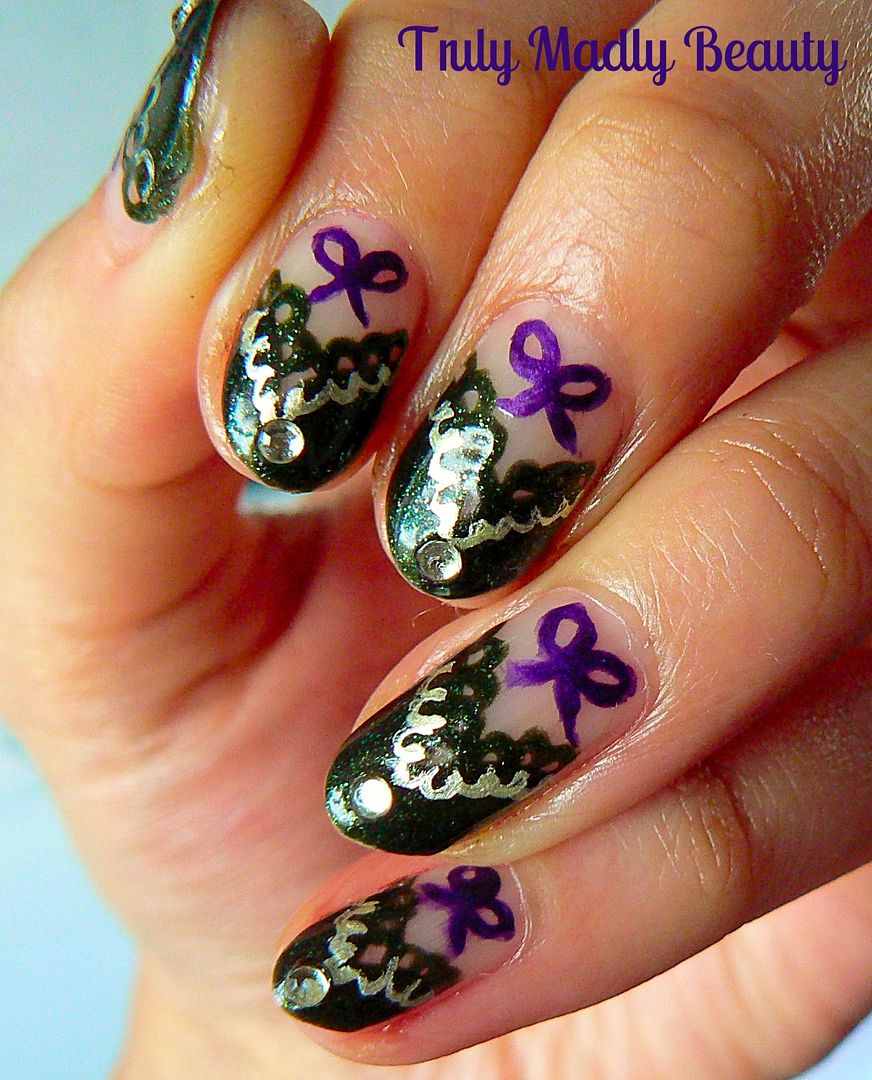
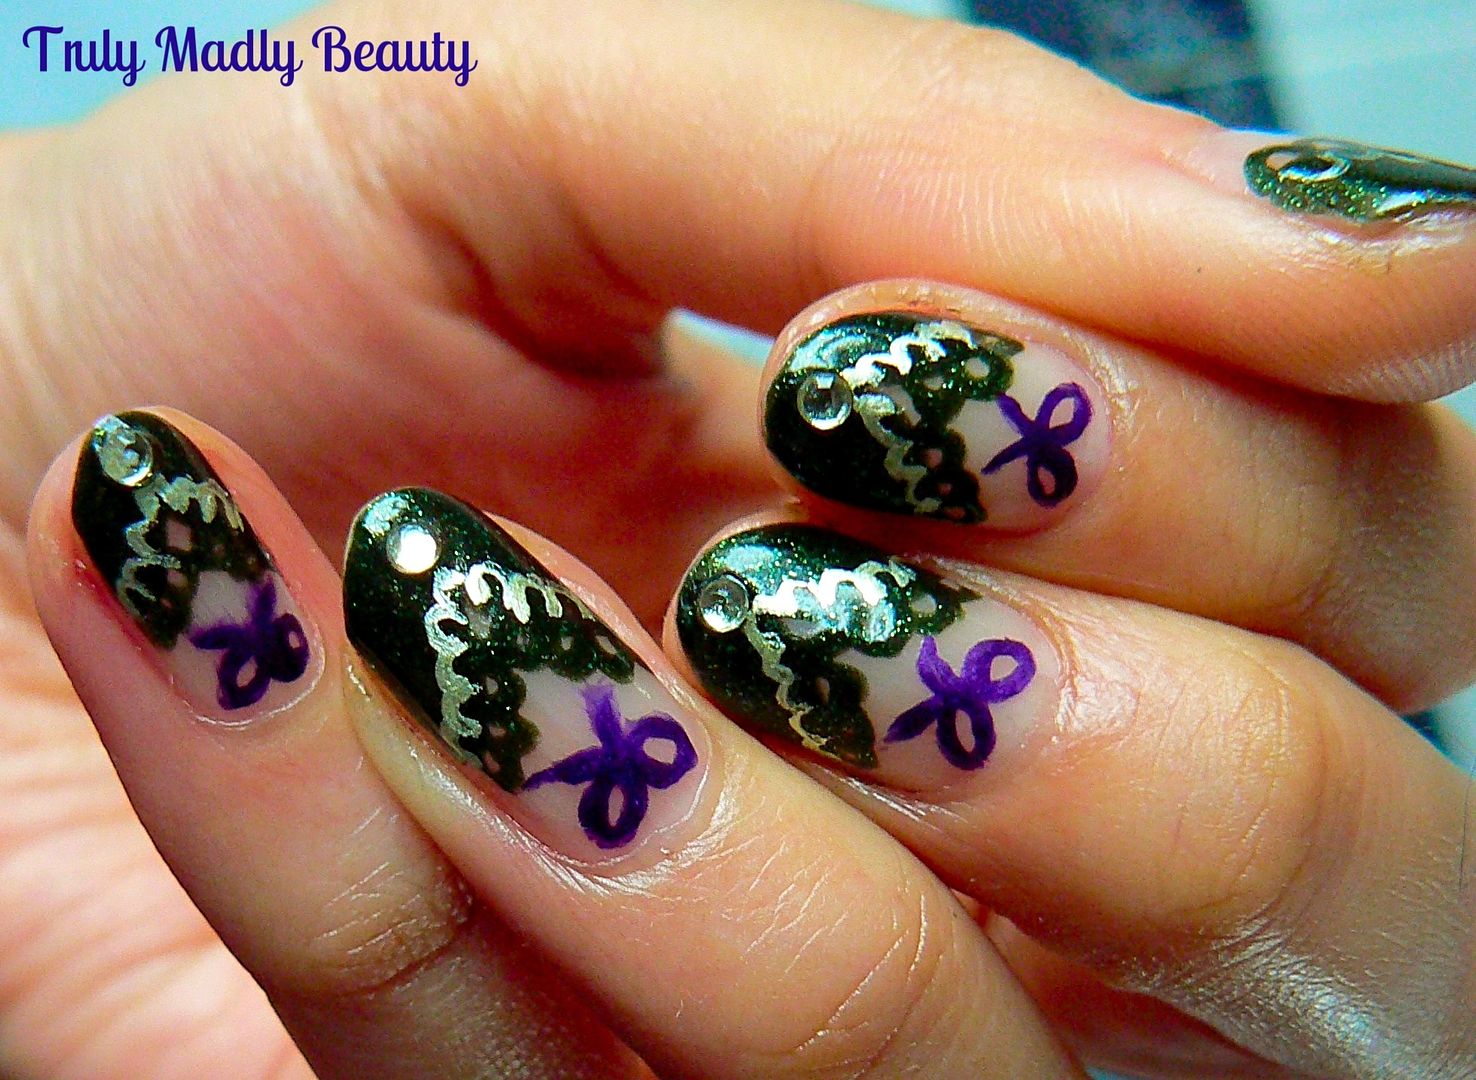
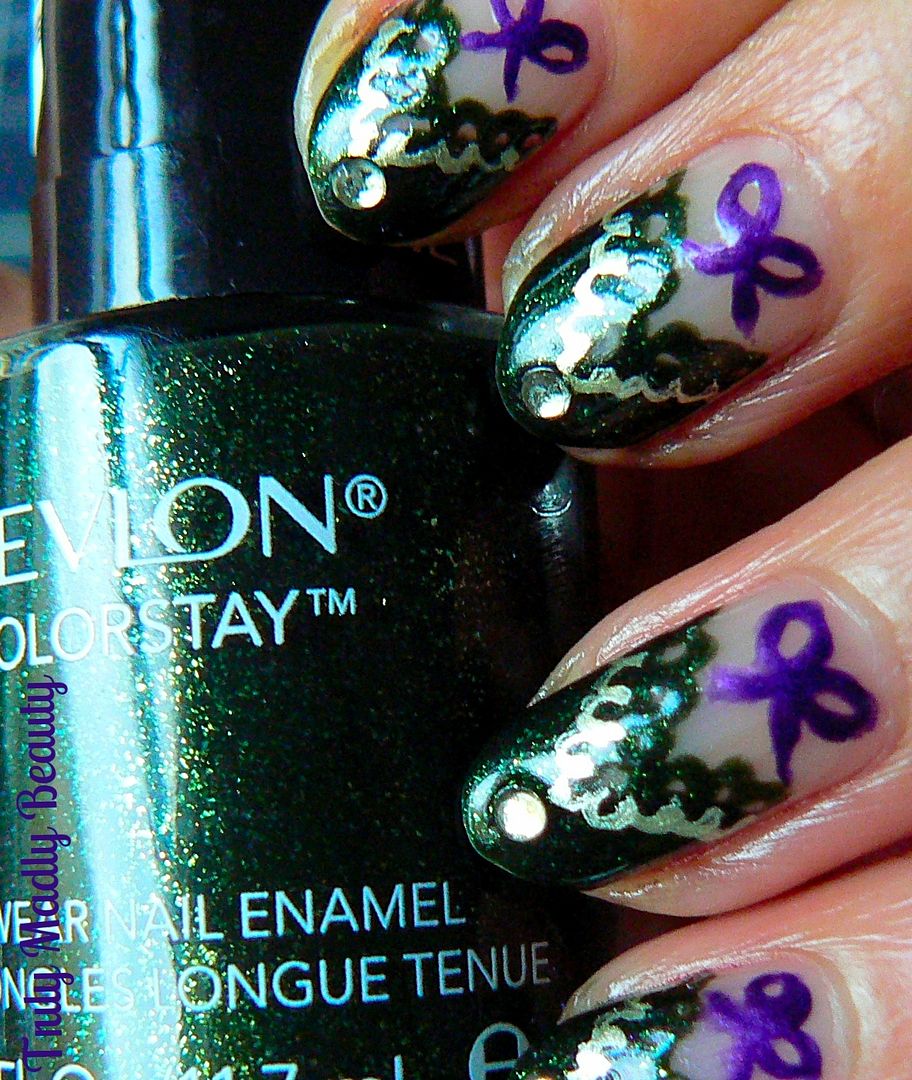
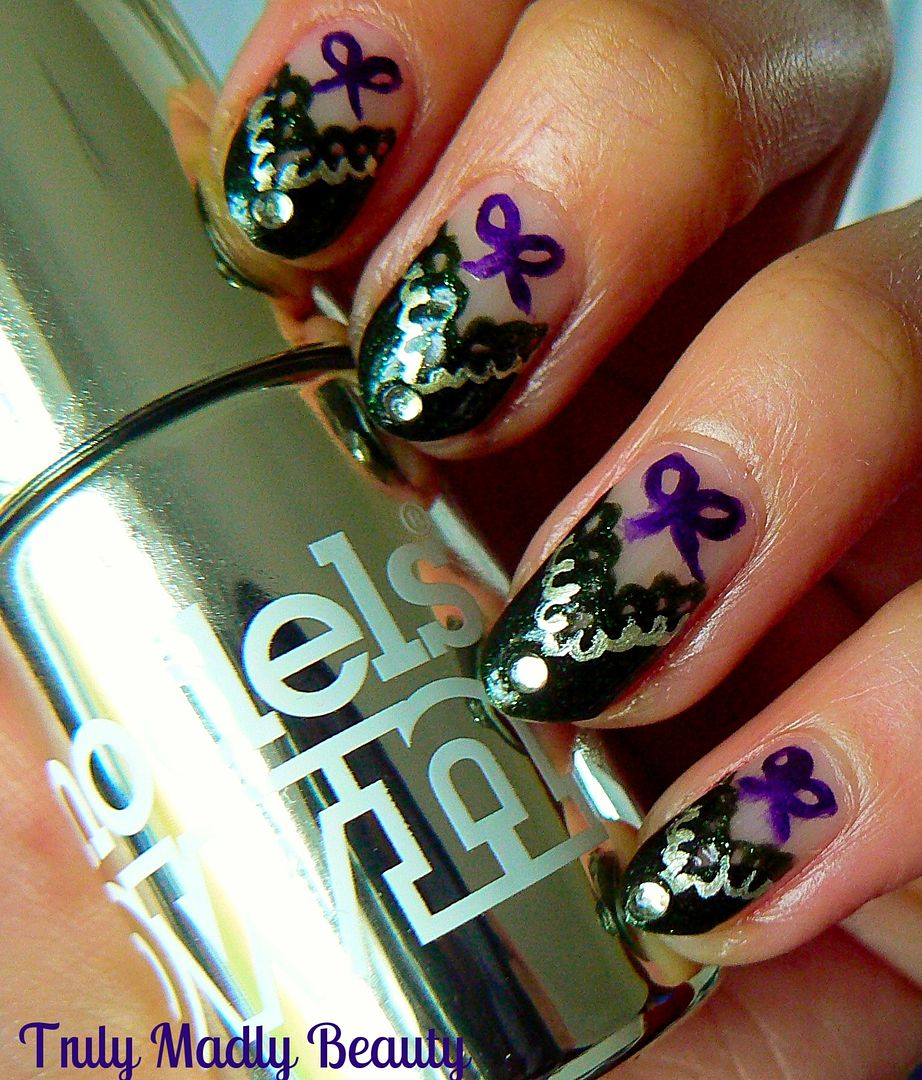
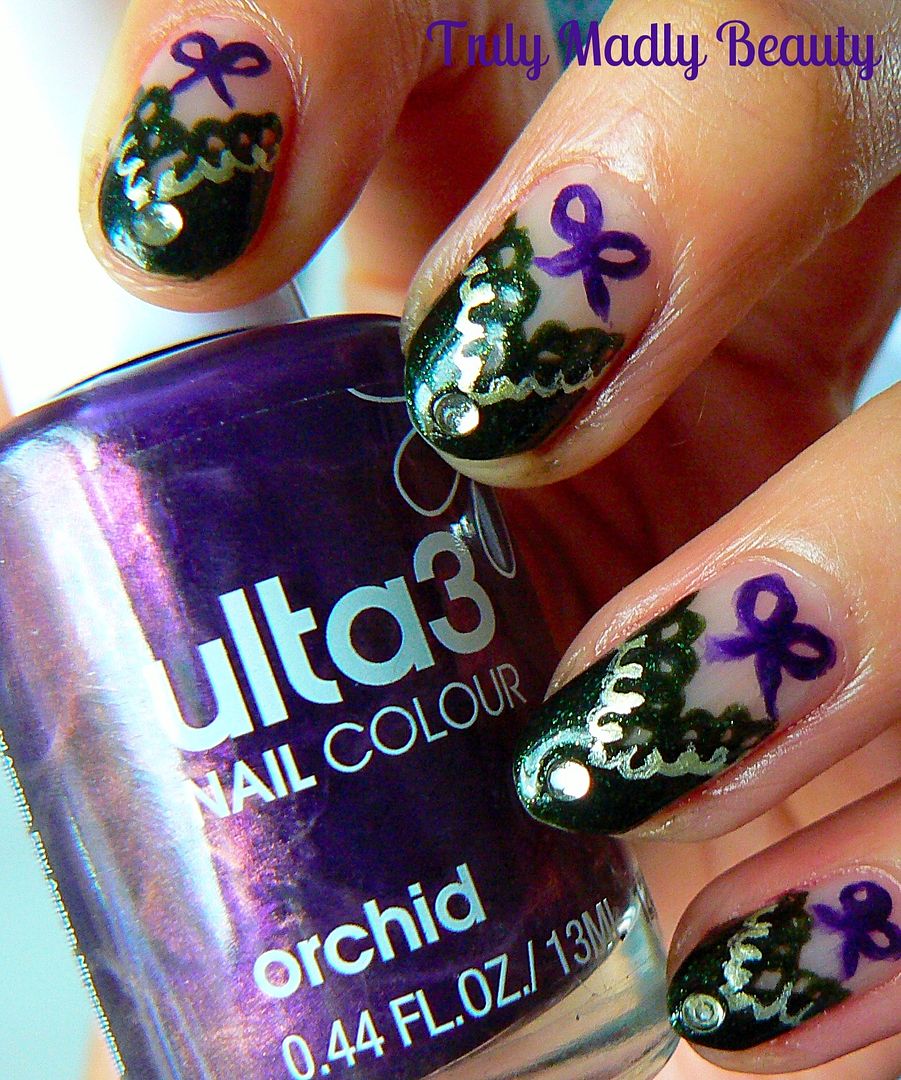
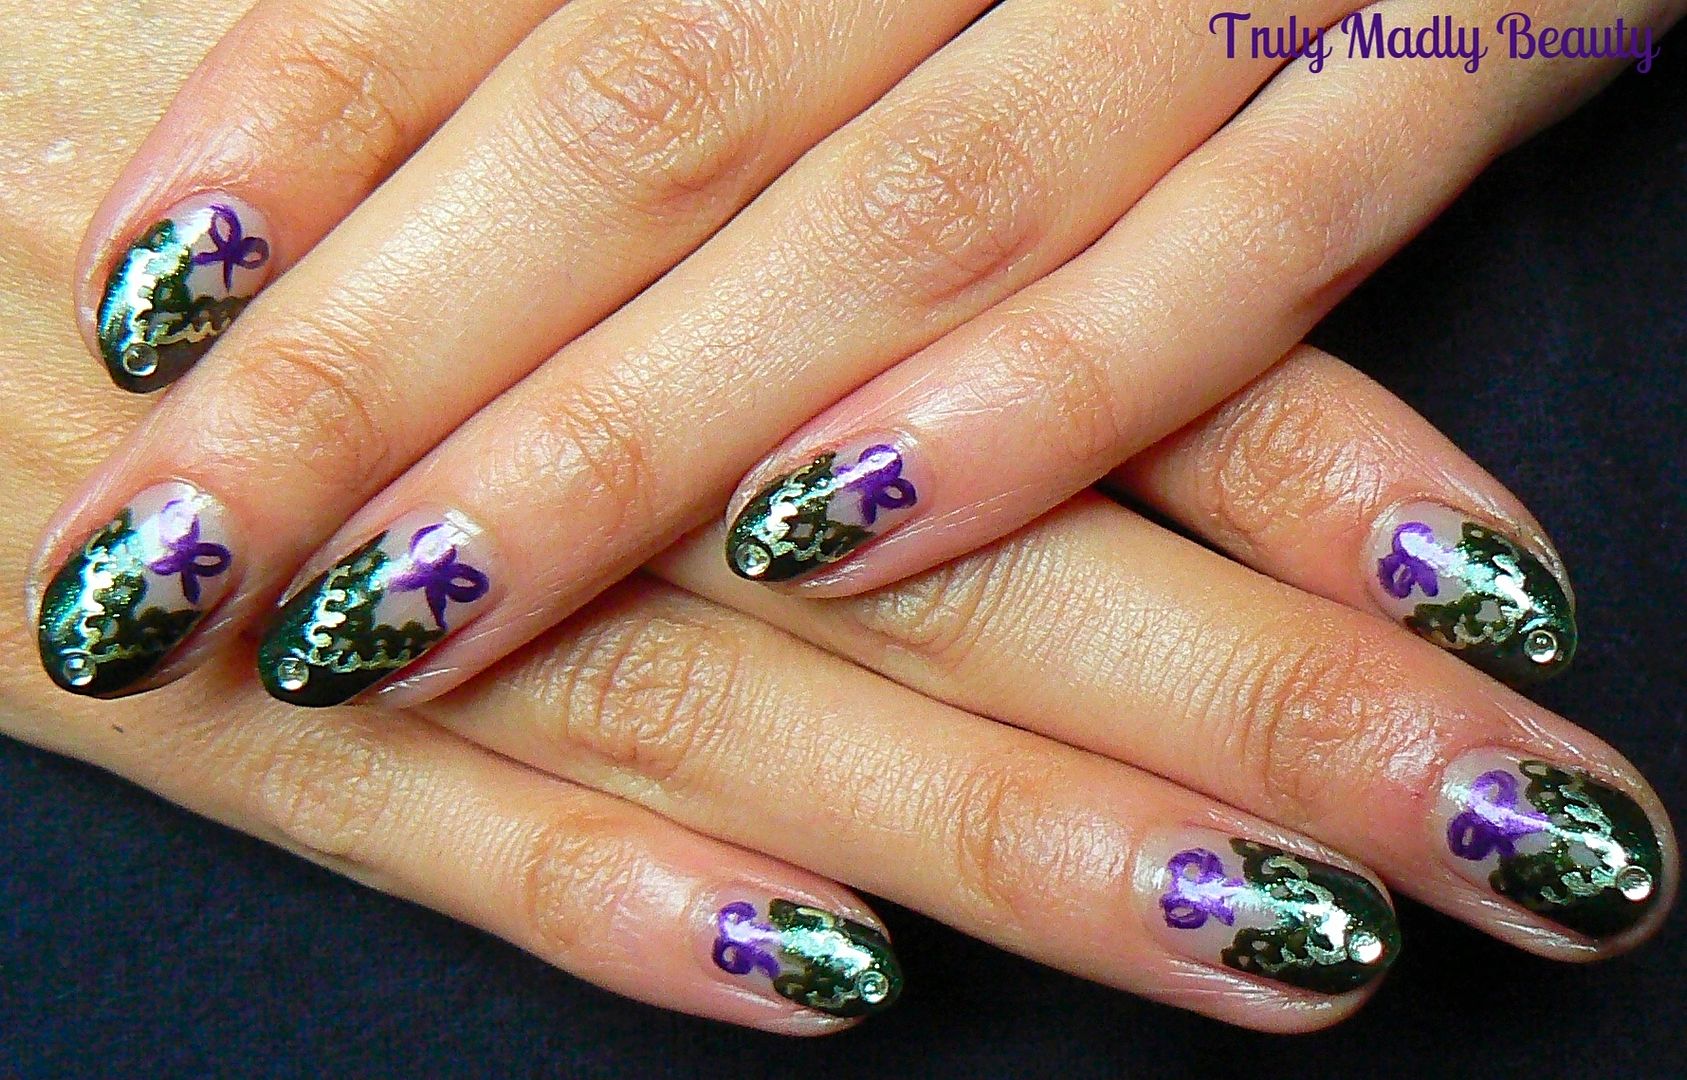
And here is the nail look I've created inspired by this lovely piece...


To create the design start off with your green, I'd been eyeing up the gorgeous Revlon Rain-forest polish for a while now so was happy to finally give it a whirl! Rain-forest is a delightfully deep green shade with pretty glitter particles suspended in the formula making it shimmer so nicely! Perfick for this time of year.


First step is to apply Rainforest as a V shaped tip to each nail. This is so easy to do & can be done using the brush with the polish, apply one stroke at a diagonal halfway across the tip before doing the same on the other side of the nail creating the V shape.


To start with the lace detail, grab a fine nail art brush & your green again & simply apply a row of small round circles along the top edge of your V.


For added detail do the same on the opposite inside edge using a lighter shade, here I used Models Own Chrome polish in Olive which is a beautiful green tinted gold that really stands out. Again using a fine nail art brush apply your row of circles mirroring the dark green.


Next to add on your little bows, again grabbing a fine nail art brush & a dark purple, I've used Ulta3 Orchid, simply freehand your bows by drawing on two loops with a couple of curved lines underneath for the ribbon strands.


For a final touch of bling I added a pale green rhinestone to the center of the tips before sealing it all with topcoat.


Thanks as always for reading, I hope you liked the lingerie inspired nails my lovelies! I've seen a few other sets that have got me itching to create some more nail art to accompany them! Why not try rocking your nails to match your lingerie next time?

Lotsa love to ya! 


11.14.2015

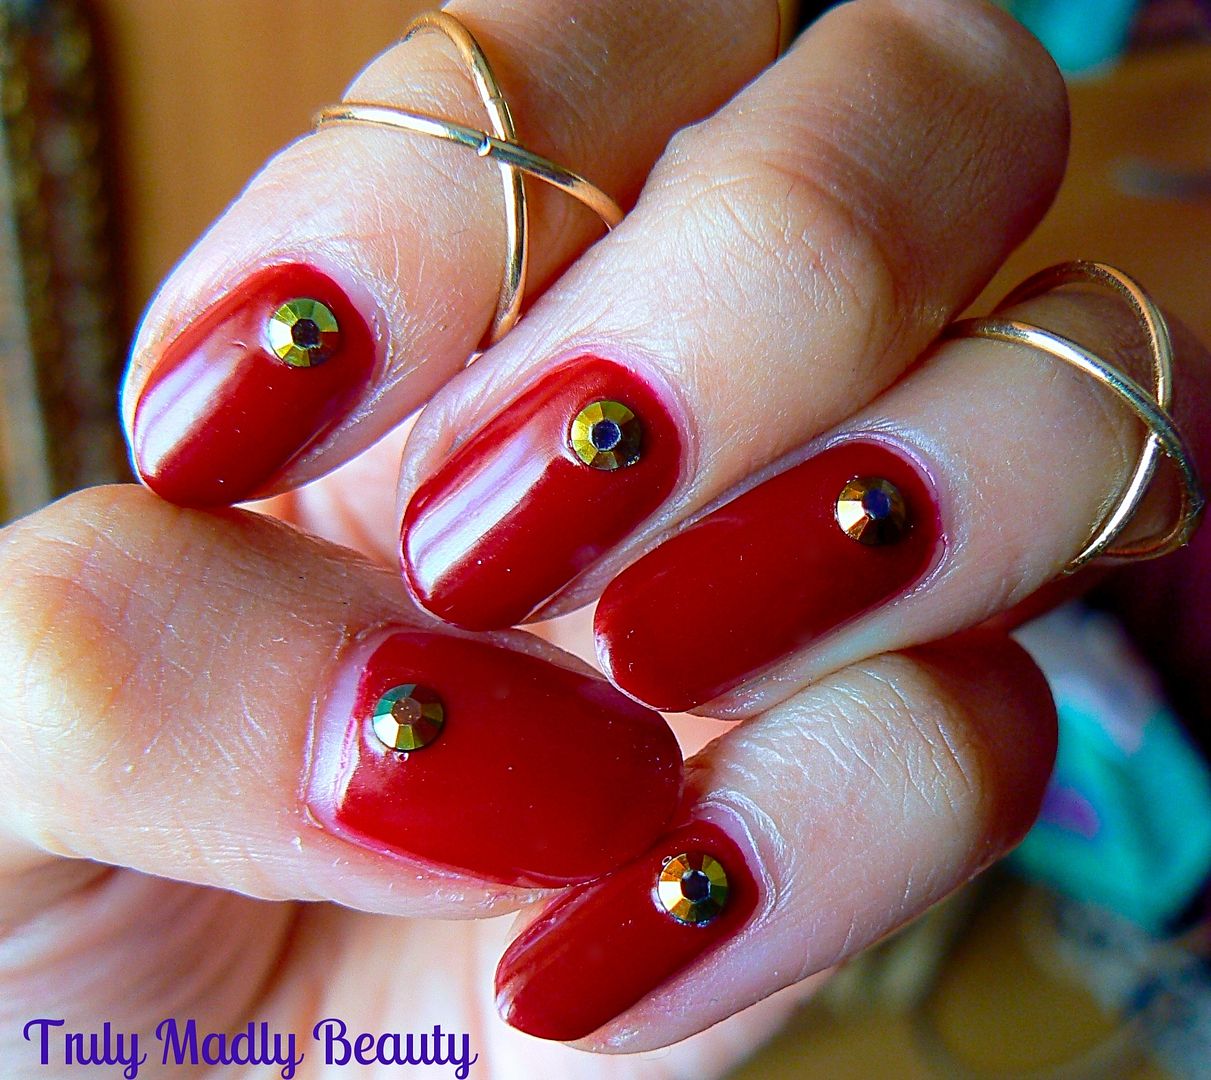
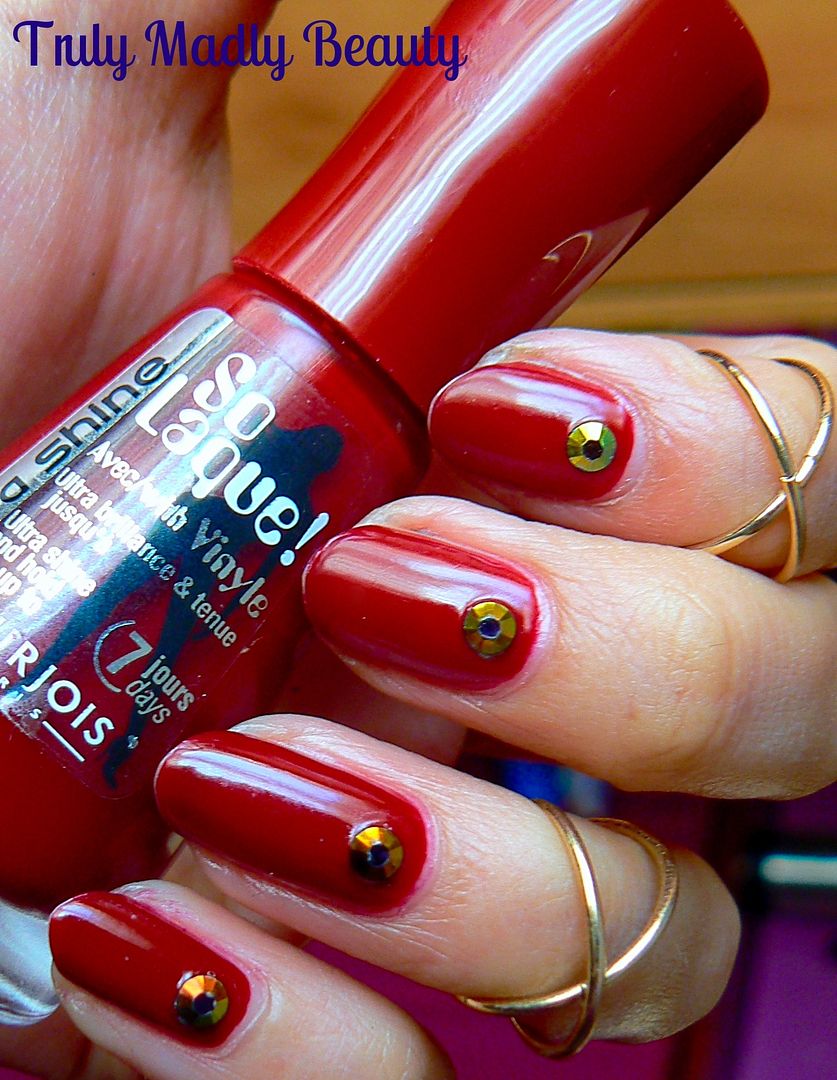
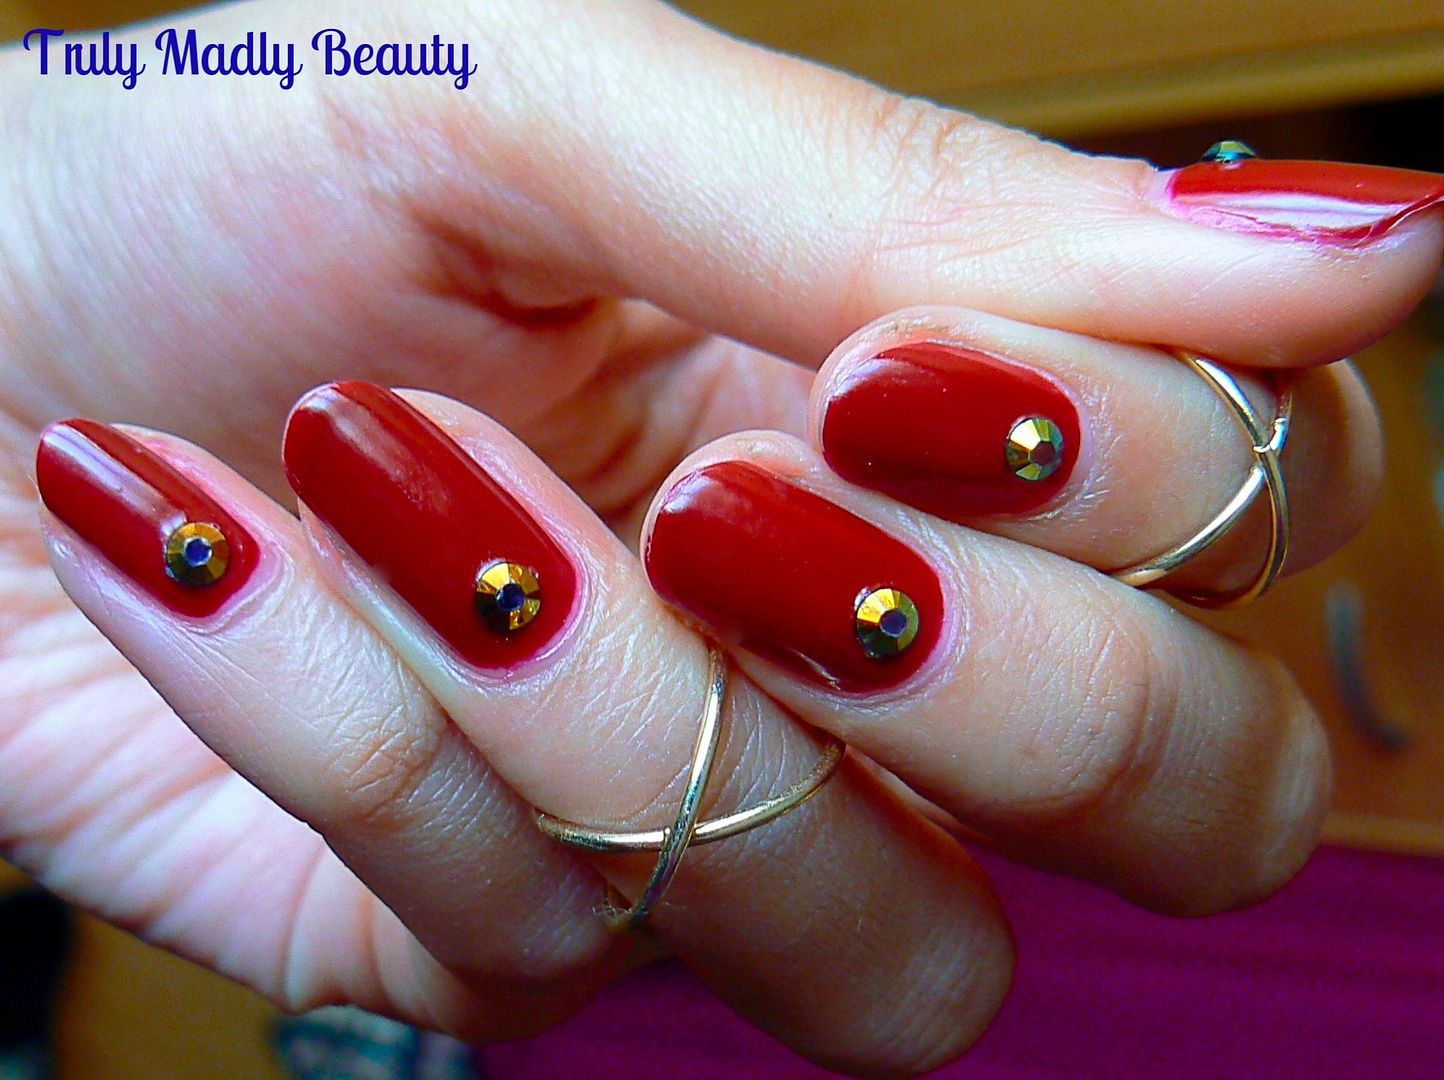
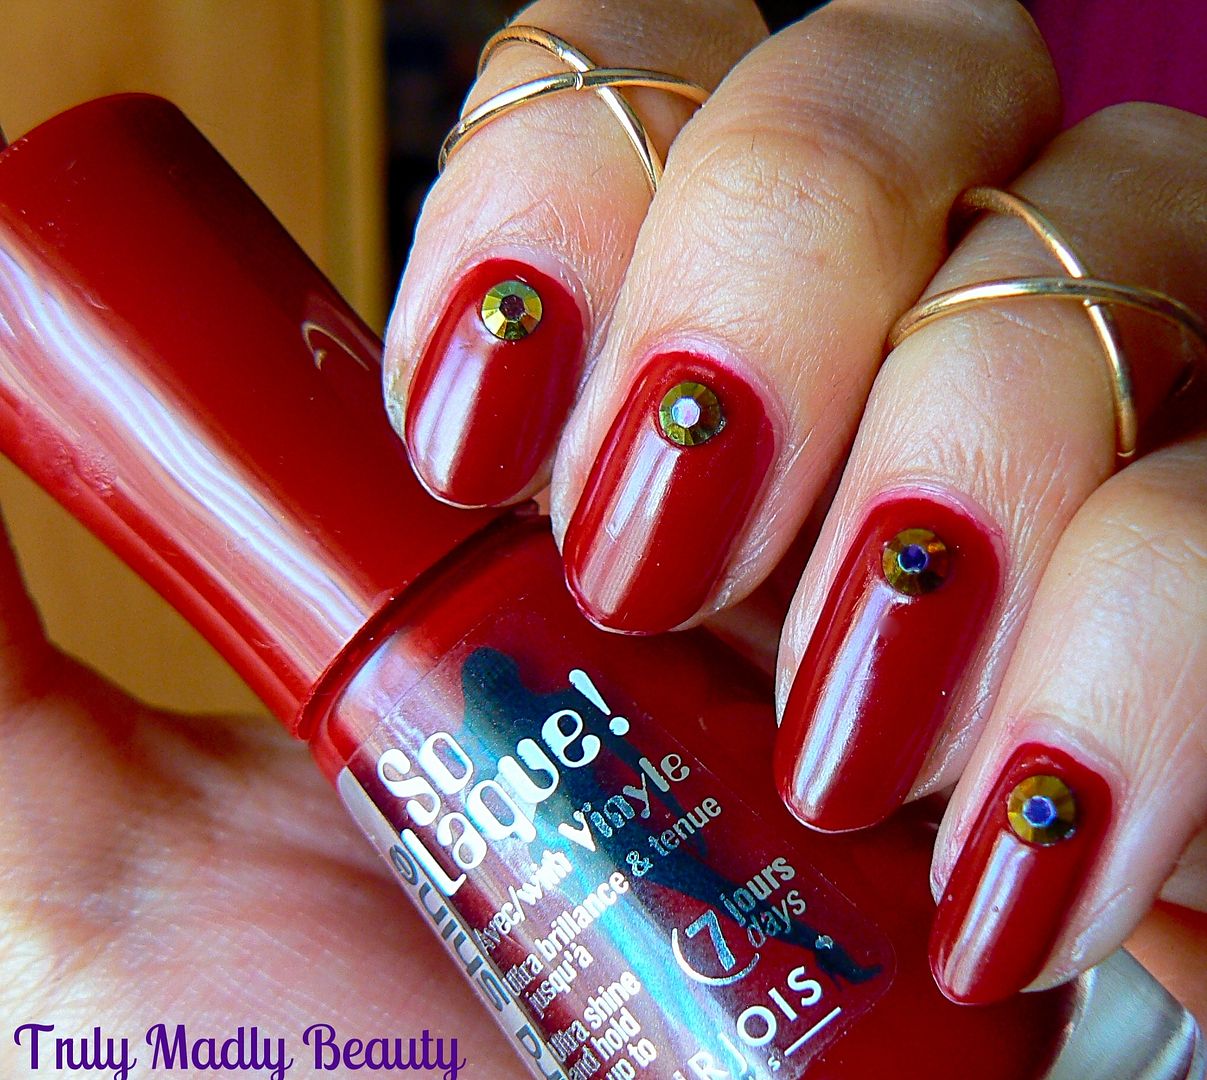
NOTD - Burgundy Beauty with Bourjois Rouge Diva!

Hey there lovely readers,

Burgundy is one of those shades that most definitely falls into the perfect tone category for the Autumn/Winter months & certainly gets a lot of love at this time of year especially! A warm & flattering shade which suits everyone, every girl needs at least one burgundy polish in her stash.

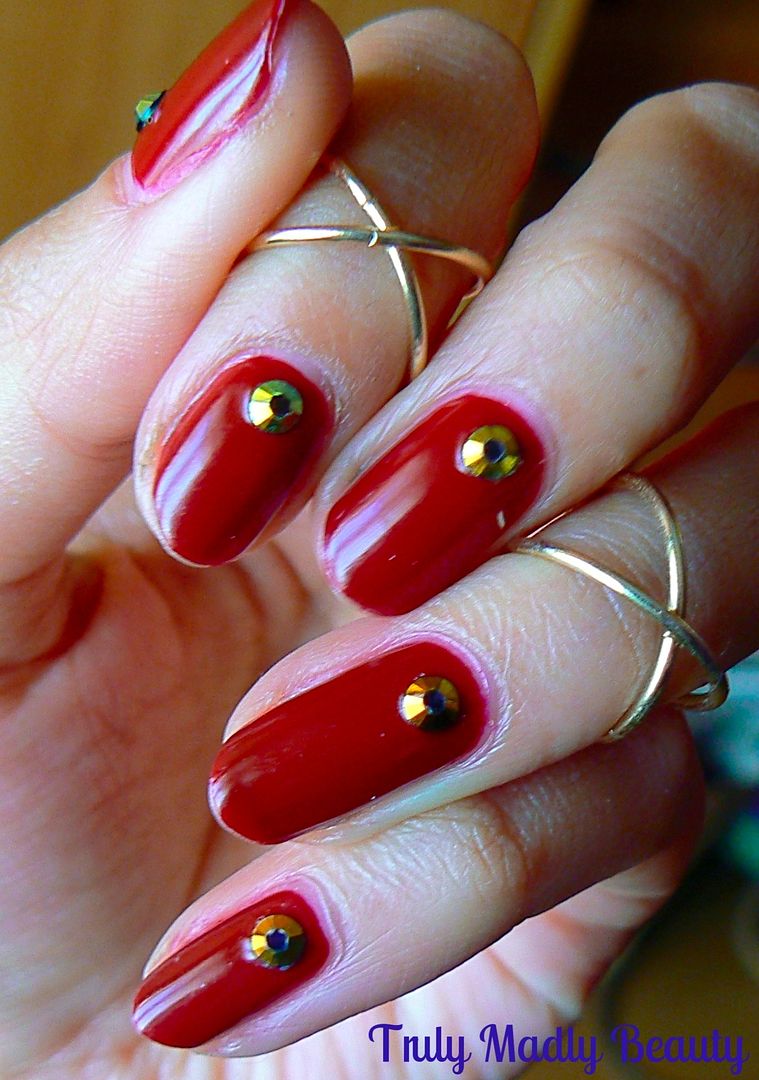
I wanted share with you one of my favourite Burgundy red polishes which I find myself reaching for time & again as it meets all my needs, everything from the colour to the formula is just perfection & is courtesy of good old high street brand Bourjois!


This little pretty goes by the name Rouge Diva & is from Bourjois So Laque Ultra Shine Range which retails for around £5.99.


I don't know why I don't own more of these babies in my collection as the formula is fantastic. Rouge Diva is a lovely rich marsala red & applies like a dream.


The formula is smooth & enriched with twice as much vinyl giving it that thick glossy almost gel like finish. It could even pass as a one coater but of course I always go for my obligatory two, creature of habit is me!


Rouge Diva is lovely enough all by its onesie but I couldn't resist jazzing it up a tad as is my way with the addition of these pretty blue/black rhinestones available from Born Pretty Store. You can use my code TRUW10 to get 10% off of your order ;) The midi rings are Topshop, I do love me some finger bling I do :)

Thanks for reading my lovelies, do you have any favourite burgundy polishes?

Lotsa love to ya!
 

11.08.2015

What I Wore - Seventies Suede & Scallop Edges ft Luxemme

Hey there lovely readers,

Happy Sunday! Are you having a good weekend? Currently recuperating from a recently returned break to the lovely city of Edinburgh. I've always wanted to visit & it definitely met expectations & then some! At just under an hours plane ride away its guaranteed to be a place I see myself returning to again! :)

Thought I'd mix things up a tad with something a bit different on the blogaroony today, I was delighted to be contacted by new fashion brand Luxemme recently for the opportunity to do a wee collaboration with them, after swooning completely over the range online I couldn't say no!

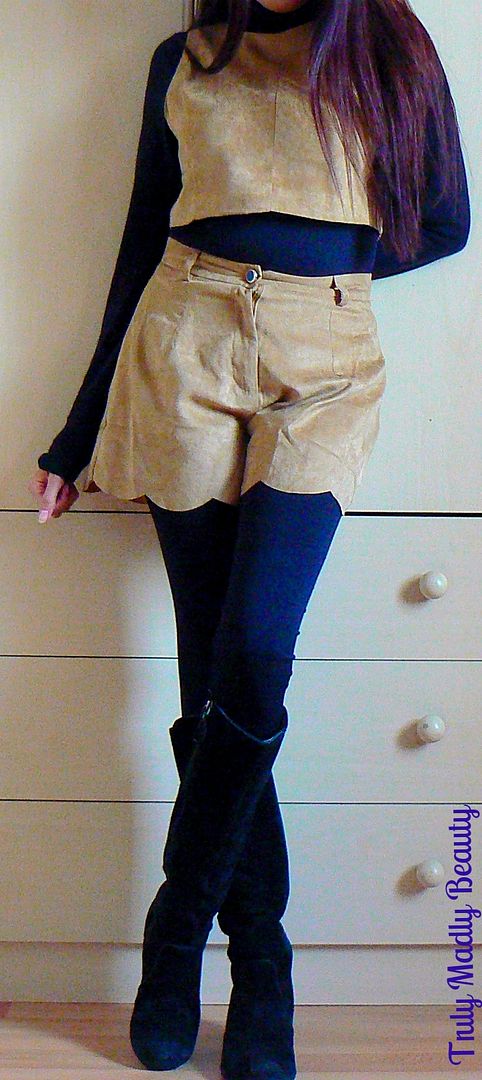
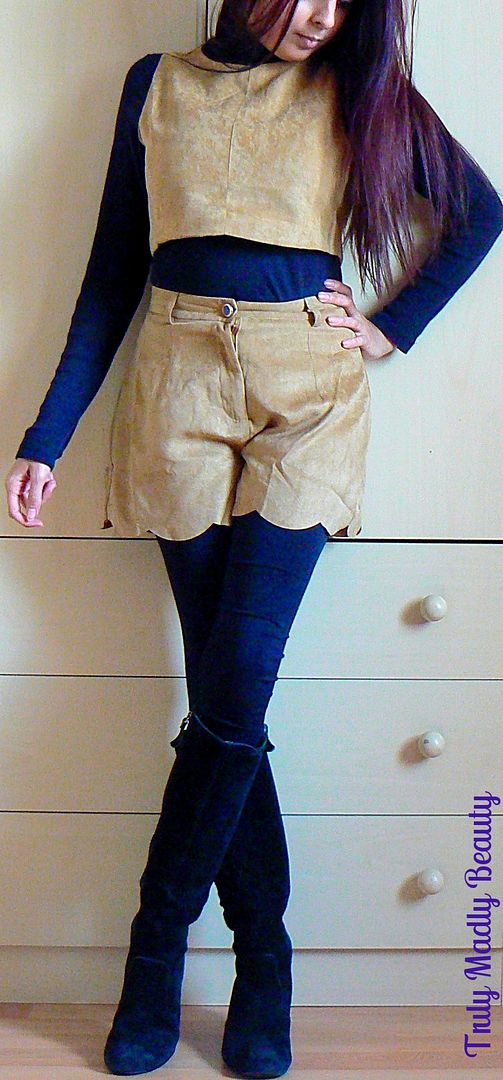
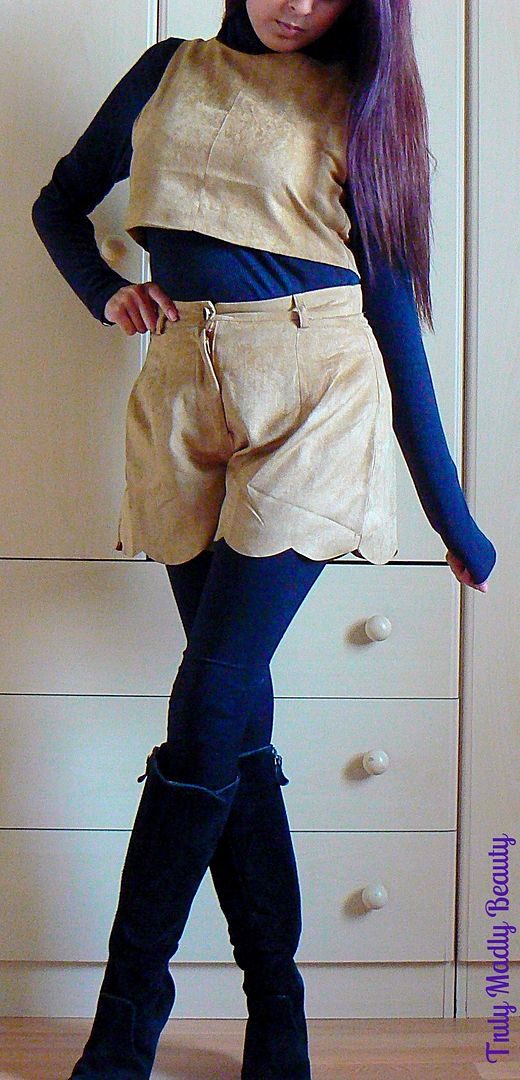
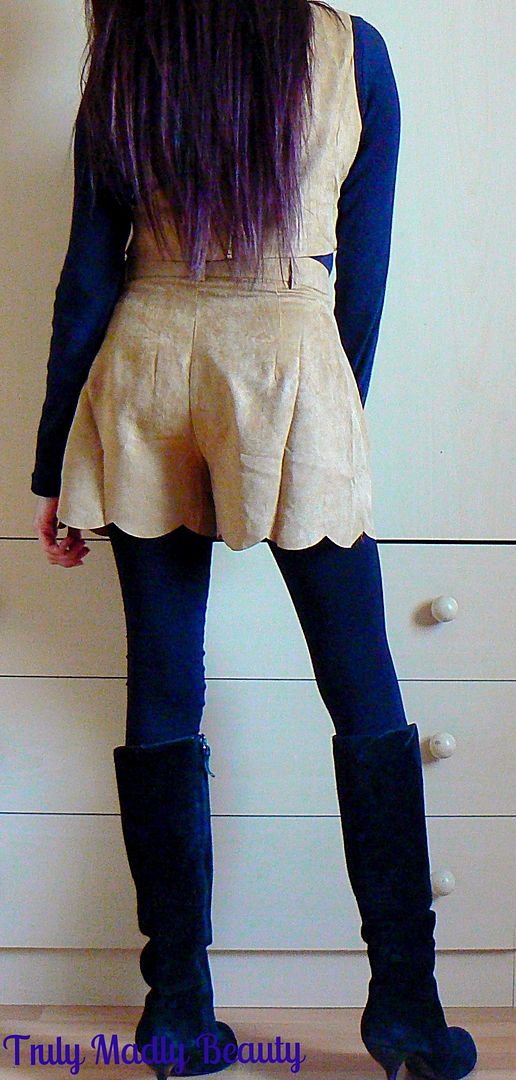
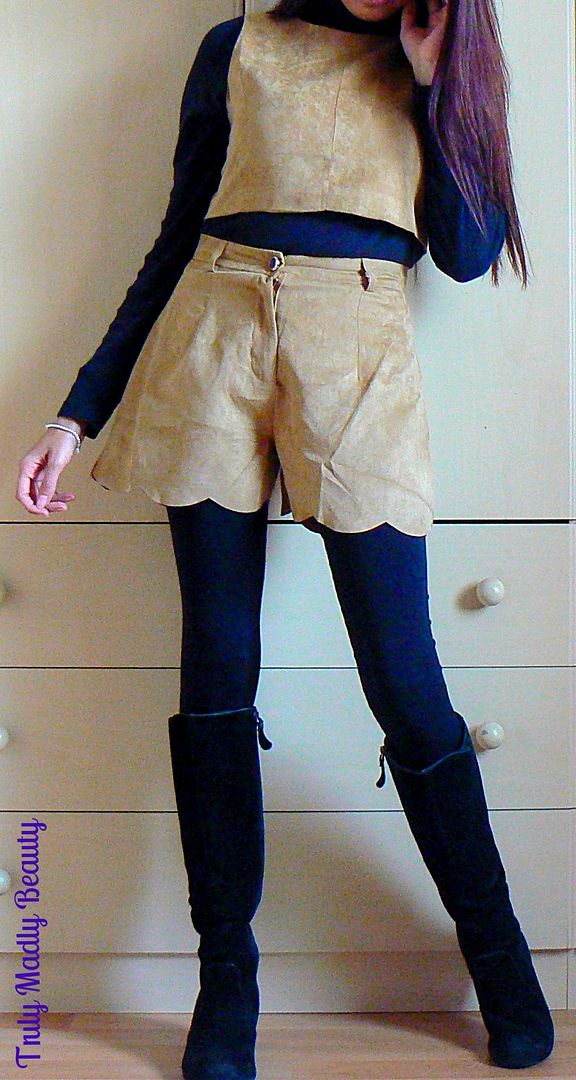
Luxemme is a new luxury fashion brand whose range of pieces embodies sophisticated Parisian chic with cool clean cut Manchester street style. After having a browse at some of the gorgeous pieces on offer I decided to opt for the Charisse Suede Crop Scallop Two Piece Co-ord & style it in a way ideal for the now much colder months with the help of some Parisian vibed black layering action....

I confess, going for a co-ord was WAY out of my comfort zone, for ages I've been drooling over the trend of two piece outfits consisting of crop tops, paired with either shorts or midi skirts. However I've always been self conscious about baring my midriff as, to be quite blunt & TMI here, I suffer from bloatedness & will never possess a washboard stomach! No joke but by the end of the day I often have the appearance of one who is expecting a wee bundle of joy! Even when it comes to swimsuits I always go for one pieces instead of bikinis O_O However one of the reasons why I love Autumn...LAYERS! Thus I decided to style my suede two piece with a polo neck, leggings, some knee high booties & voila, a two piece co-ord outfit styled in a way I can wear, hurrah!


It was with much eagerness in which I opened up the package containing my first two piece, the combination of camel suede & scalloped edges had me excited with its interesting mix of seventies retro & safari like vibes!


I'm not going to lie to you, I may have spent a short time simply rubbing that smooth suede against the cheek, I couldn't help myself. I can confirm it IS very soft...*tumbleweed* AHEM! Moving on I decided to keep with the seventies vibe & dug out my favourite Clarks suede knee high boots & a black polo neck with leggings to complete the look.


The outfit was so comfortable to wear & I am utterly in love with this two piece. I hope you liked the Autumn/Winter friendly styling of the co-ord lovelies! I'm already eyeing up more of their delightful range, especially the playsuits! The Luxemme range can be found online & you can even get 10% off your order using my code trulymadlybeauty :)

Thanks for reading!

Lotsa love to ya!


11.03.2015

NOTD - Champagne & Burgundy Glitter Gradient

Hi there lovely readers!

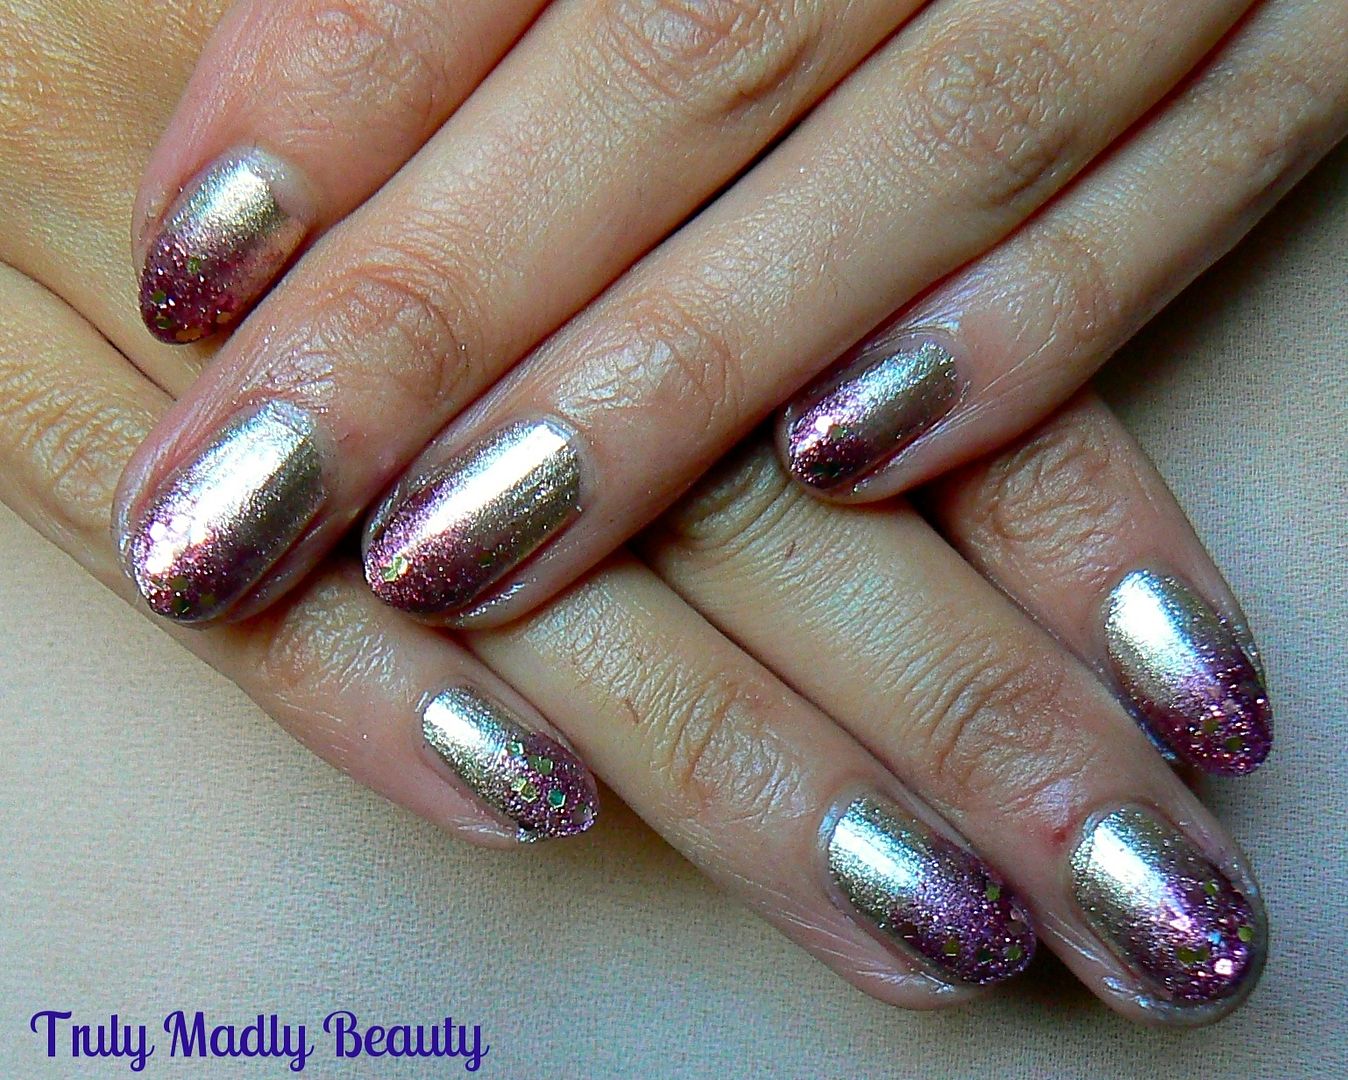
Now that Halloween is done & dusted for the year *sobs!*, before one can get stuck in with full on festive nail art fun, we still have a month to go where I can try to squeeze in as many autumnal vibed manis as possible :) This time of year the burnt golds, bronzes & burgundy's become especially lush & its definitely those tones I reach for most often.


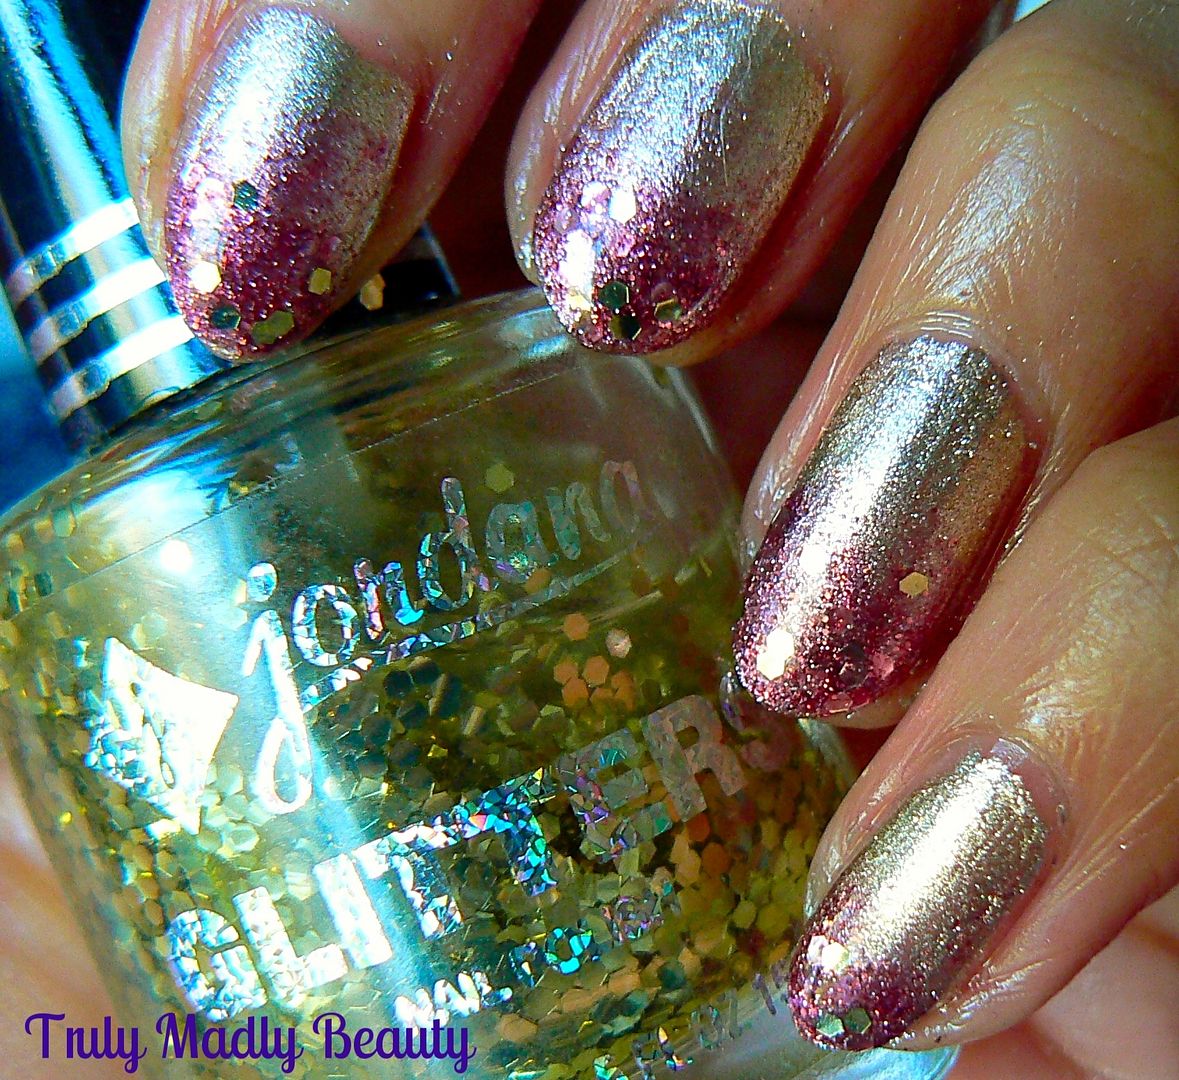
This quick manicure I have for you today is what I actually wore for my best friends wedding & went perfectly with the beautiful burgundy bridesmaid gowns she kindly bestowed us with. Foils are so dreamy & I do have a soft spot for the golden-y metallics


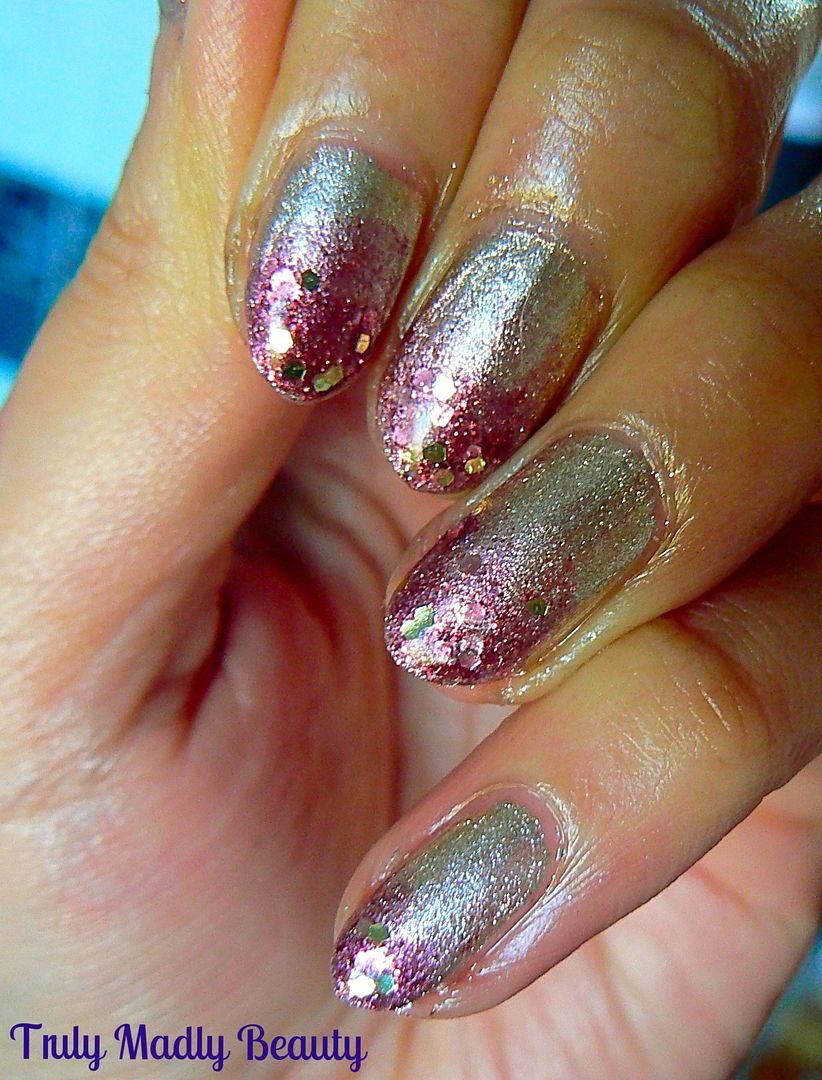
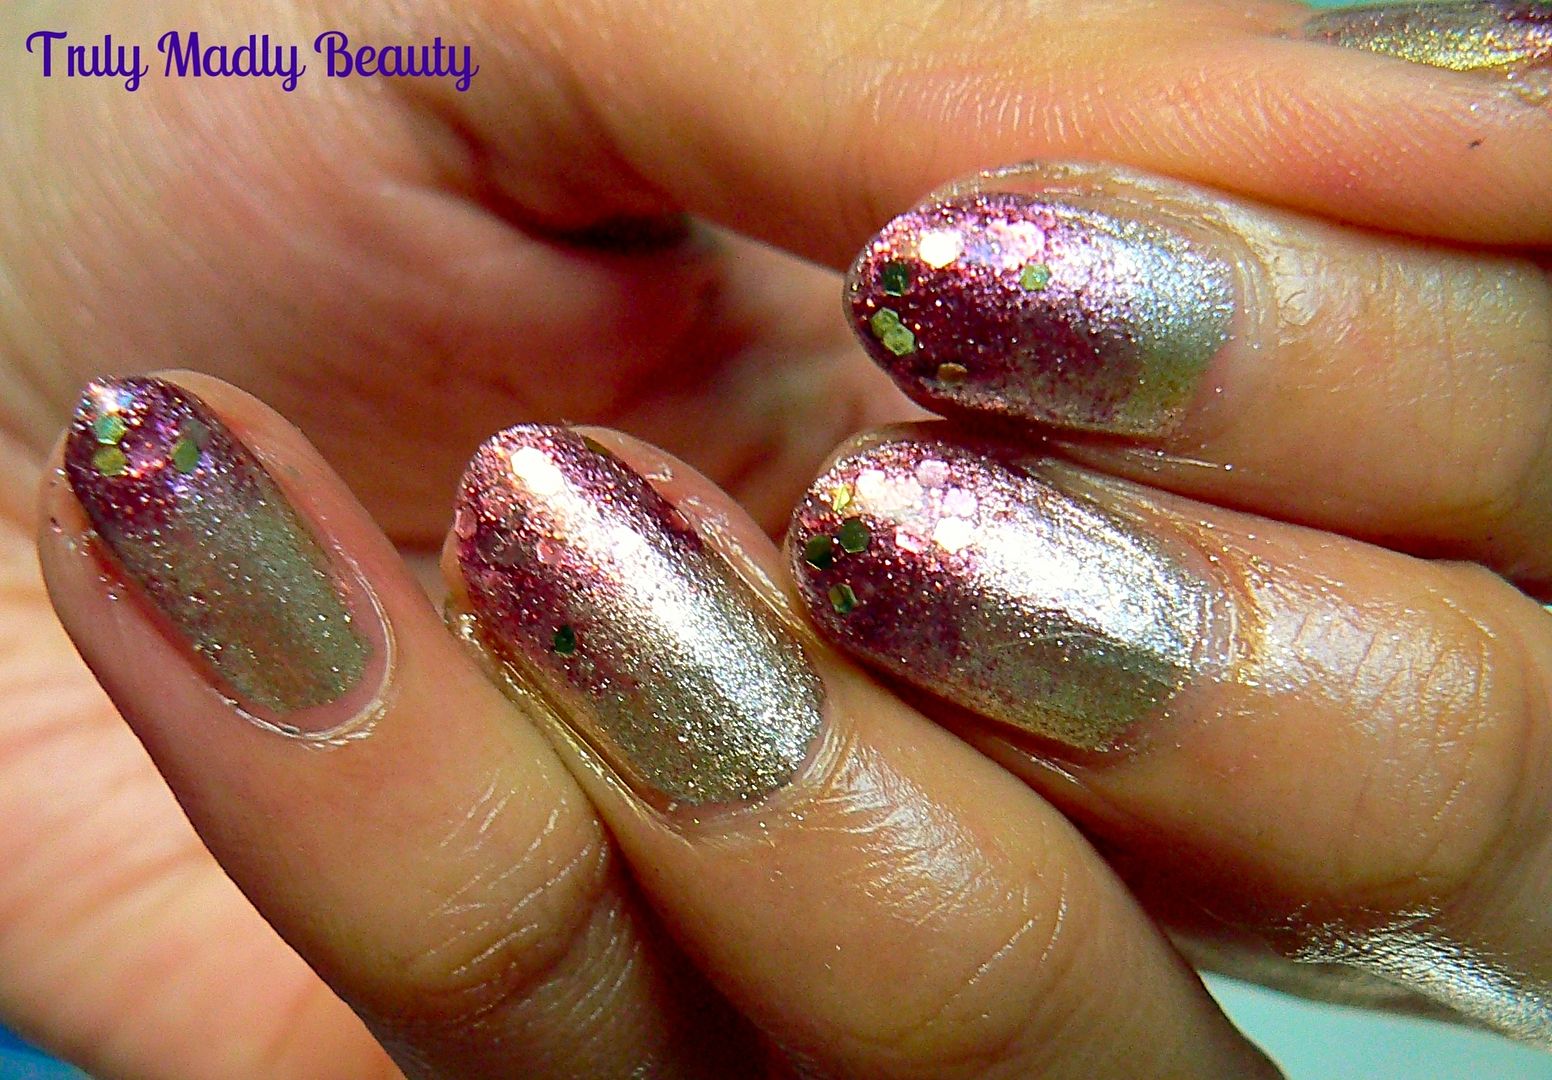
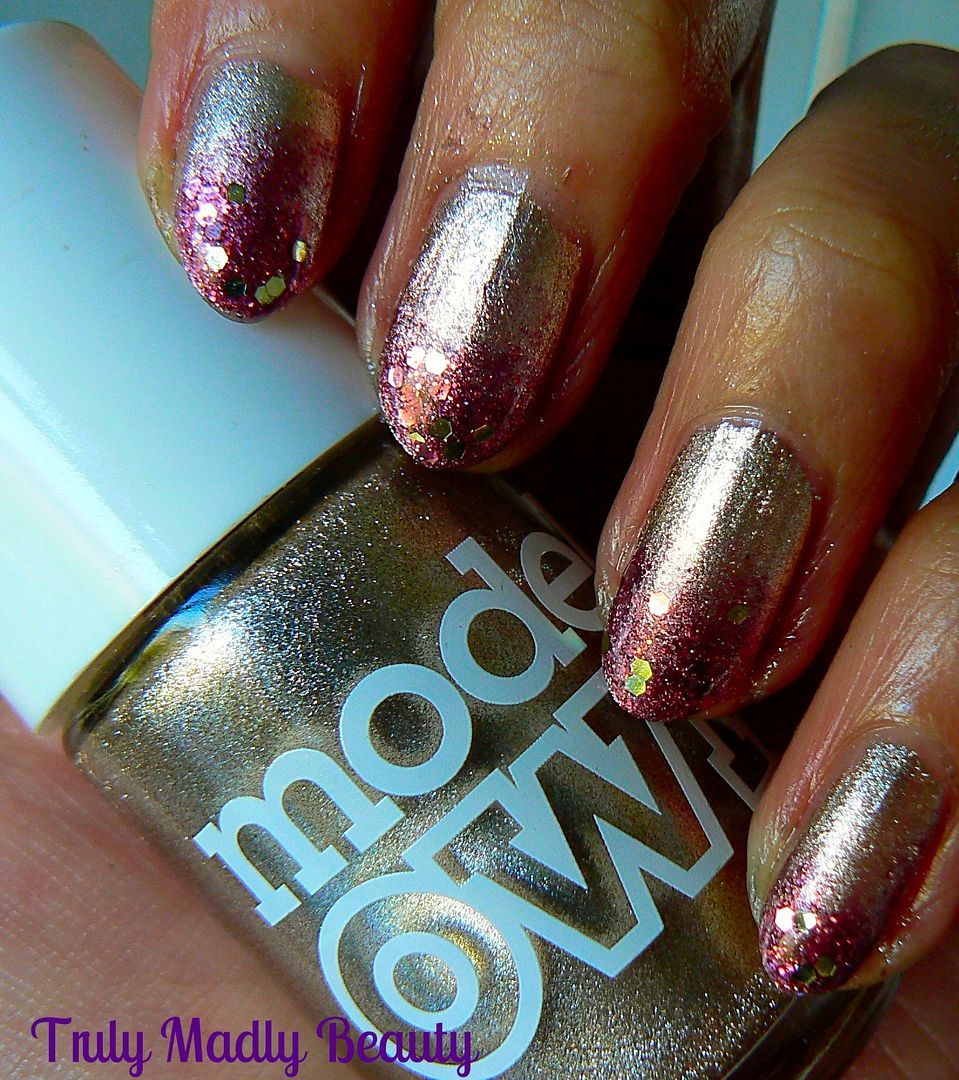
Here we have an oldie but a goodie of mine, good old Models Own Champagne, a truly lush pale golden foil that I always find myself coming back to, I especially love wearing this on the tootsies as a pedi.


Another fab thing about foils is they dry super fast! Great if you want to do some nail art on top. This was two coats applied. 


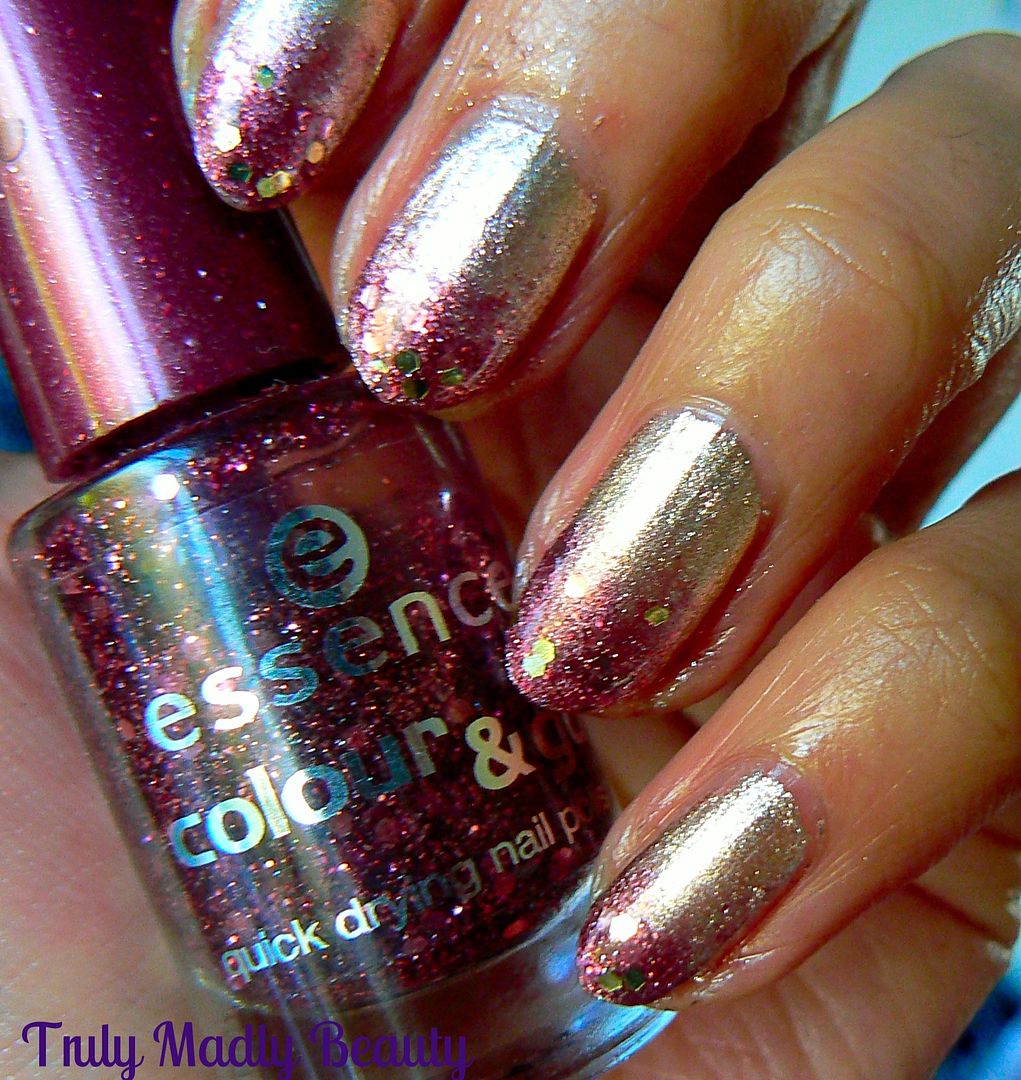
As our bridesamids dresses were burgundy I wanted to incorporate some of that warm tone into the mani so opted for a subtle glitter gradient using Essence Time For Romance which is a lovely deep pink/maroon polish with small and large hexagonal glitters within, a really pretty polish!


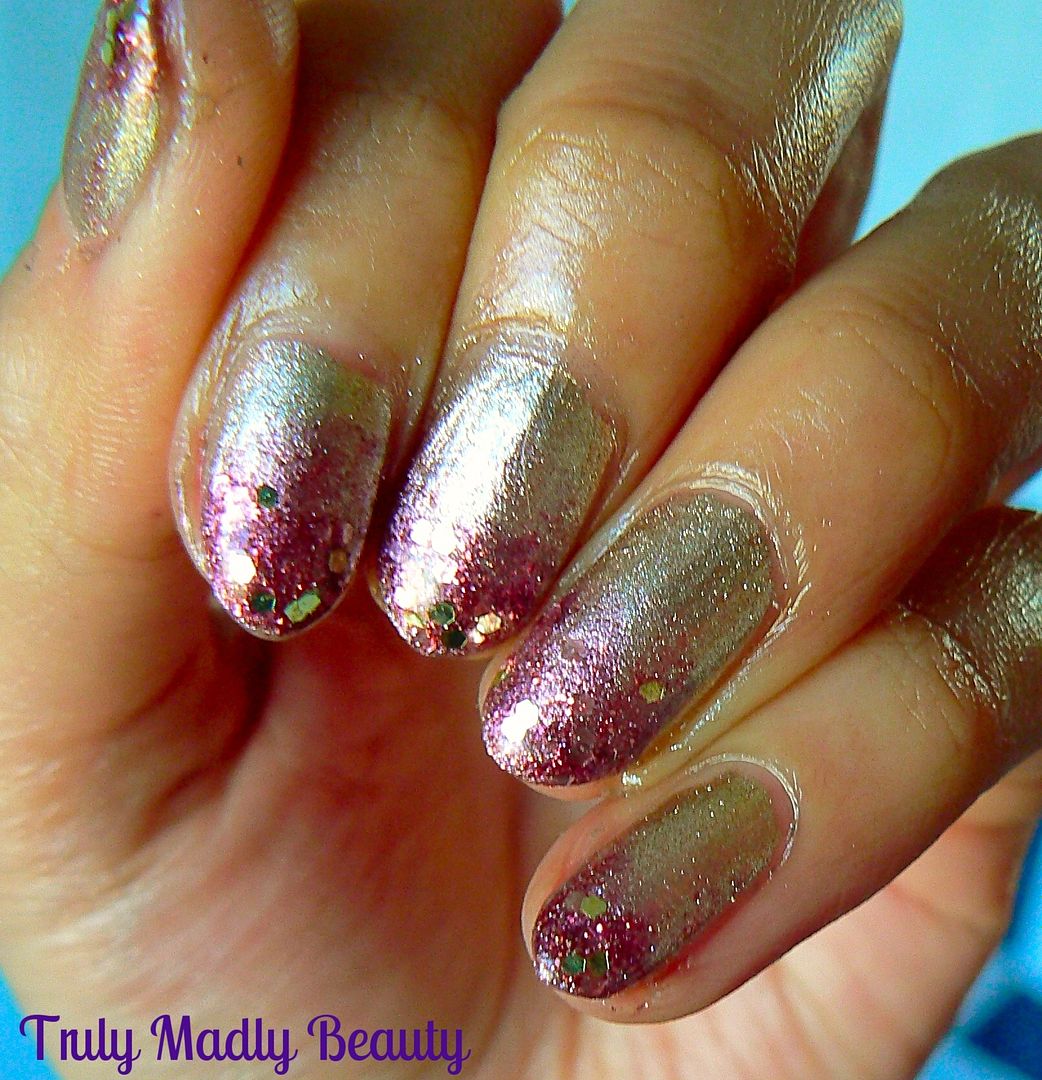
To do the gradient, apply the polish to a piece of sponge, I use a bit of make up sponge, & gently dab onto the tips, taking the gradient down to about three quarters of the nail to give the slight fading effect. 


Do this a few times on each nail until your happy & for a final touch I like to add a bit of extra glitter onto the tips, here I've used a bit of Jordana Funky Gold Town.


Finish with topcoat & that's it :) Thanks for reading, I hope you liked the mani dolls, till next time!

Lotsa love to ya!